
10 Personalized Polymer Clay Gifts That Look Professionally Made
Looking for high-end DIY inspiration? Explore 10 beginner-friendly polymer clay projects that look like they came straight from a designer store. Grab the full supply list and step-by-step guide to start crafting beautiful, personalized gifts today.
4/4/20268 min read
10 Personalized Polymer Clay Gifts That Look Professionally Made
Polymer clay is an incredibly versatile medium that allows crafters of all skill levels to create stunning, durable pieces. When it comes to gifting, taking the time to personalize an item adds a special touch that store-bought goods simply cannot match. With the right techniques, you can elevate simple clay into sophisticated, high-end gifts.
Here are ten personalized polymer clay gift ideas that look like they came straight from a boutique, complete with the materials you need and step-by-step instructions.
Essential Ingredients & Supplies
Before starting these projects, you will need a basic toolkit. Think of these as your core "ingredients" for polymer clay crafting:
Polymer Clay: High-quality brands like Sculpey Premo, Fimo, or Cernit (various colors, translucent, and granite effects).
Rolling Tool: An acrylic rolling pin or a dedicated pasta machine for conditioning and flattening clay.
Cutting Tools: A flexible tissue blade and a craft knife (X-Acto knife) for precise cuts.
Baking Surface: A ceramic tile or a baking sheet lined with parchment paper.
Oven: A standard home oven or a dedicated toaster oven (always follow the temperature guidelines on your clay packaging).
Finishing Supplies: Wet/dry sandpaper (ranging from 400 to 2000 grit), clear polymer clay varnish, liquid gold leaf, and mica powders.
Adhesives & Hardware: Two-part epoxy resin or strong jewelry glue, jump rings, earring posts, and keychain rings.
1. Monogrammed Marbled Coaster
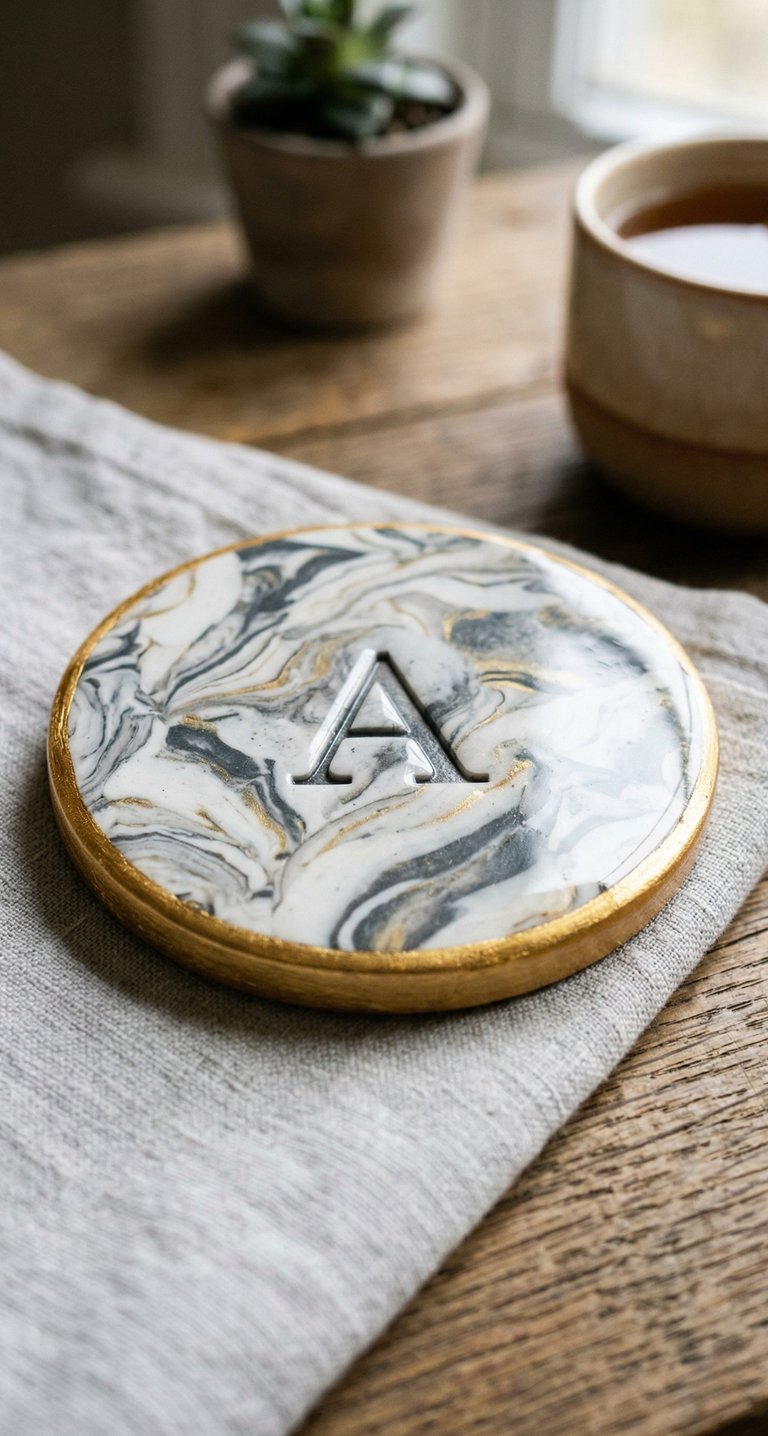

Marbling is a surprisingly simple technique that yields sophisticated results.
The Personal Touch: Stamp the recipient's initial into the center before baking.
Pro-Tip: Paint the edges with liquid gold leaf and seal the coasters with a clear, heat-resistant resin or varnish for a glossy, ceramic-like finish.
How-To:
Condition (knead) 2-3 contrasting colors of clay (e.g., white, black, and a tiny bit of gold).
Roll each color into a long snake. Twist the snakes together, fold them in half, and roll them out again. Repeat until you like the marbled pattern.
Roll the mixed clay into a flat slab about 1/4-inch thick.
Use a large circular cookie cutter to cut out the coaster shape.
Press an alphabet stamp into the center to create the monogram.
Bake according to package directions, let cool, and paint the outer rim with liquid gold leaf.
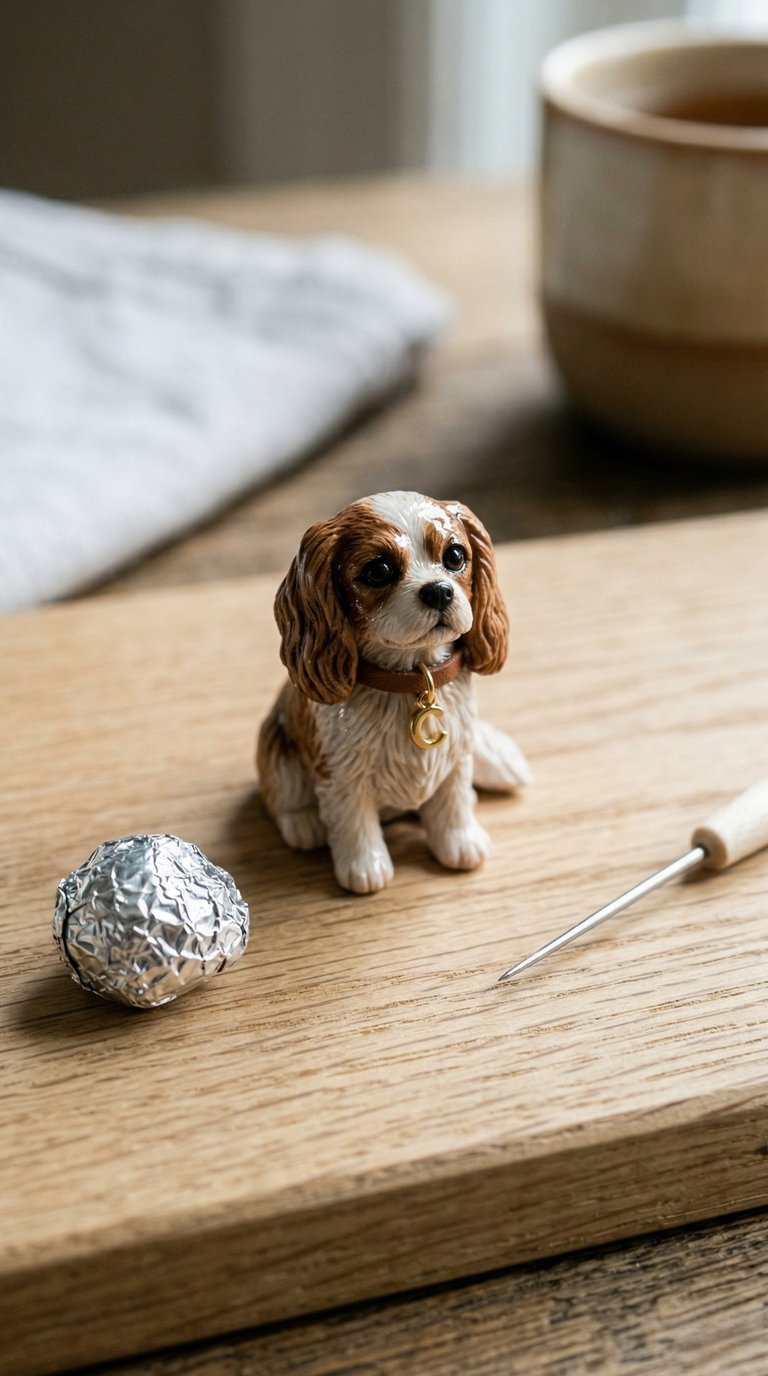
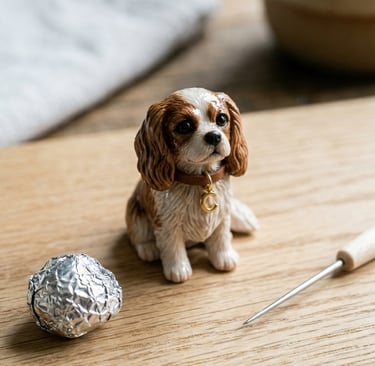
2. Custom Pet Miniatures
For the animal lover in your life, a tiny sculpture of their beloved pet is a heartwarming gift.
The Personal Touch: Replicate their pet's exact collar or add a tiny favorite toy to the base.
Pro-Tip: Use a needle tool to create fur texture and paint the eyes with a dab of gloss varnish to bring the miniature to life.
How-To:
Crumple a small piece of aluminum foil into the basic shape of the pet to act as a supportive inner core (armature).
Cover the foil core with base-colored polymer clay, smoothing out the seams.
Add smaller pieces of clay for the snout, ears, legs, and tail. Blend the seams using your fingers or a silicone shaping tool.
Use a needle tool or toothpick to drag fine lines into the clay to mimic fur.
Add tiny details like eyes, nose, and a custom collar. Bake and let cool.
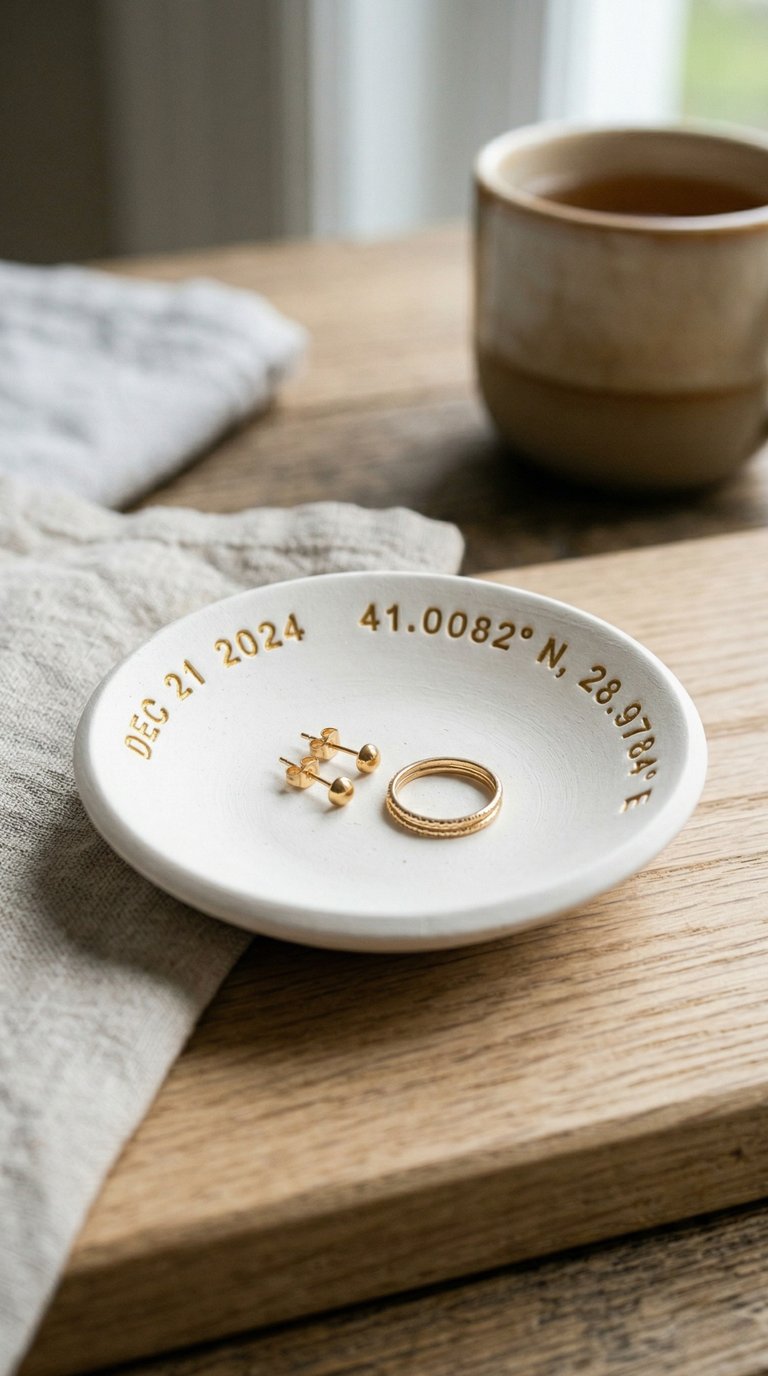
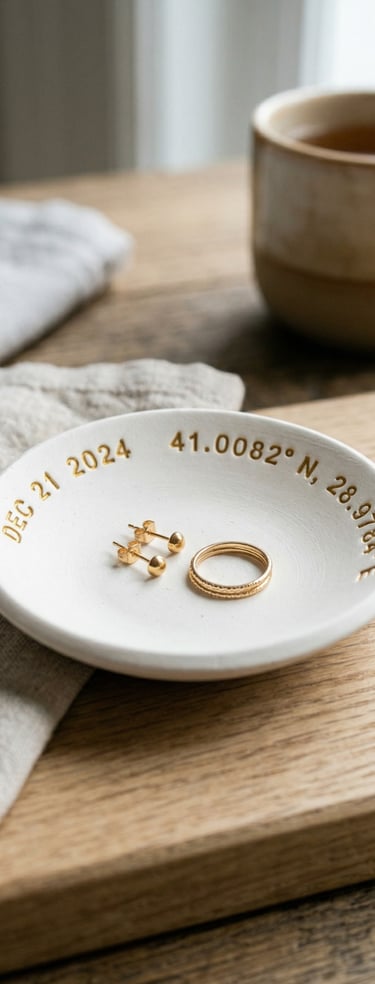
3. Stamped Jewelry Dishes
A catch-all dish for rings and earrings is both practical and beautiful.
The Personal Touch: Use alphabet stamps to press an important date, coordinates, or a short, meaningful quote along the rim.
Pro-Tip: Dust the stamped indentations with mica powder before baking to make the text pop against the matte clay background.
How-To:
Roll out a smooth slab of clay about 1/8-inch thick.
Cut it into a circle using a bowl as a template, or cut an organic, freeform shape with a craft knife.
Gently press small letter stamps along the inner rim to spell out your message. Use a small brush to sweep mica powder into the indented letters.
Drape the flat clay over the back of an oven-safe glass or ceramic bowl so it takes on a curved shape.
Bake the clay right on the bowl. Once cool, it will pop right off.
4. Faux Terrazzo Planters
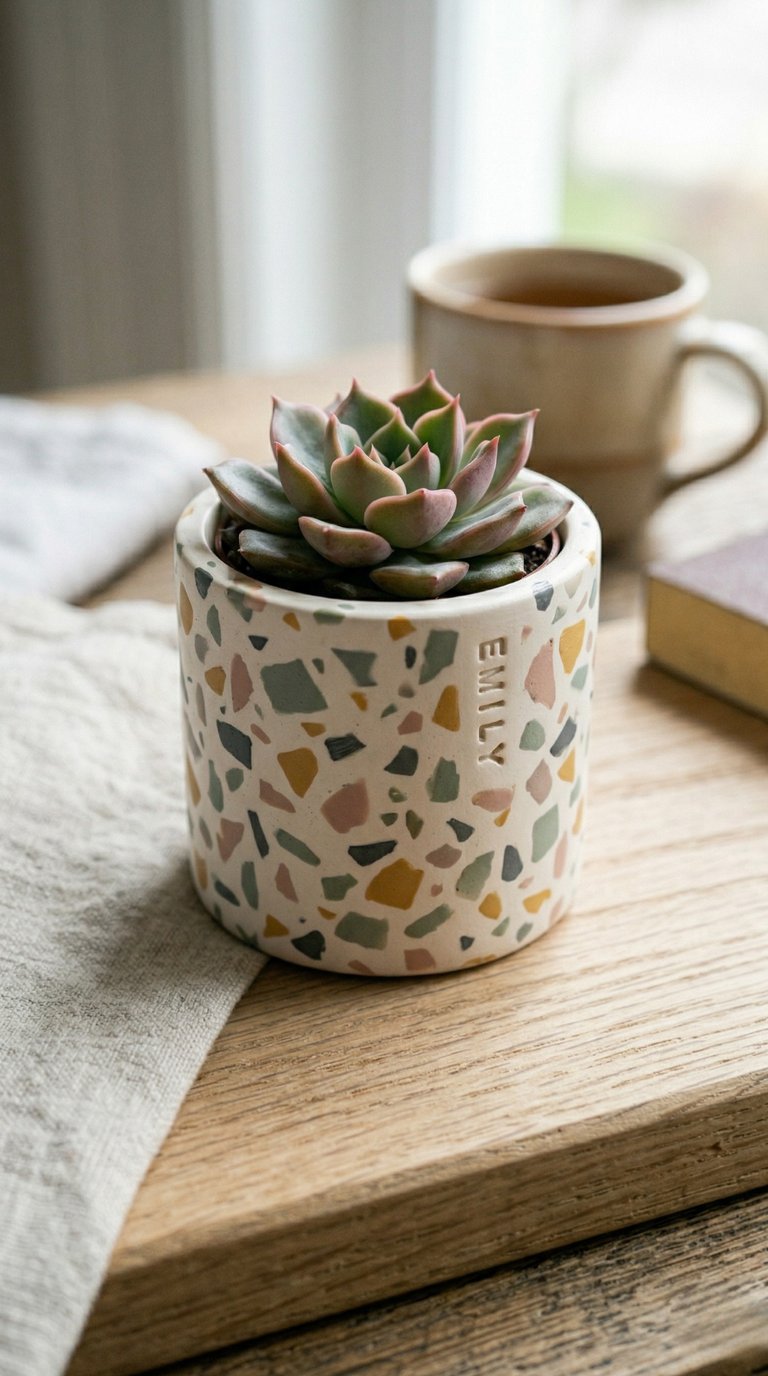
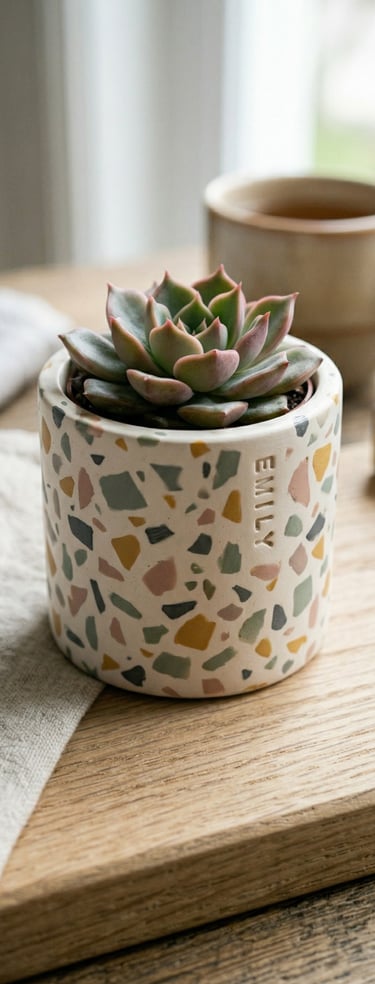
Terrazzo is a major interior design trend, and it’s incredibly easy to mimic.
The Personal Touch: Tailor the terrazzo color palette to match the recipient's home decor.
Pro-Tip: After wrapping the slab around an oven-safe glass or tin to form the planter, sand the baked piece with progressively finer sandpaper to achieve that authentic, smooth terrazzo look.
How-To:
Bake thin sheets of your chosen accent colors. Once cool, chop them into tiny, irregular chips using a craft knife.
Condition a large amount of a neutral base color (like white or cream) and roll it into a thick slab.
Sprinkle the baked chips over the raw slab and use your rolling pin to press them firmly into the surface.
Wrap the terrazzo slab around a clean, empty tin can or oven-safe glass jar. Smooth the vertical seam.
Bake the planter. Once completely cool, wet-sand the surface starting with 400-grit sandpaper and moving up to 1000-grit to reveal the crisp edges of the chips.
5. Architectural Bookends
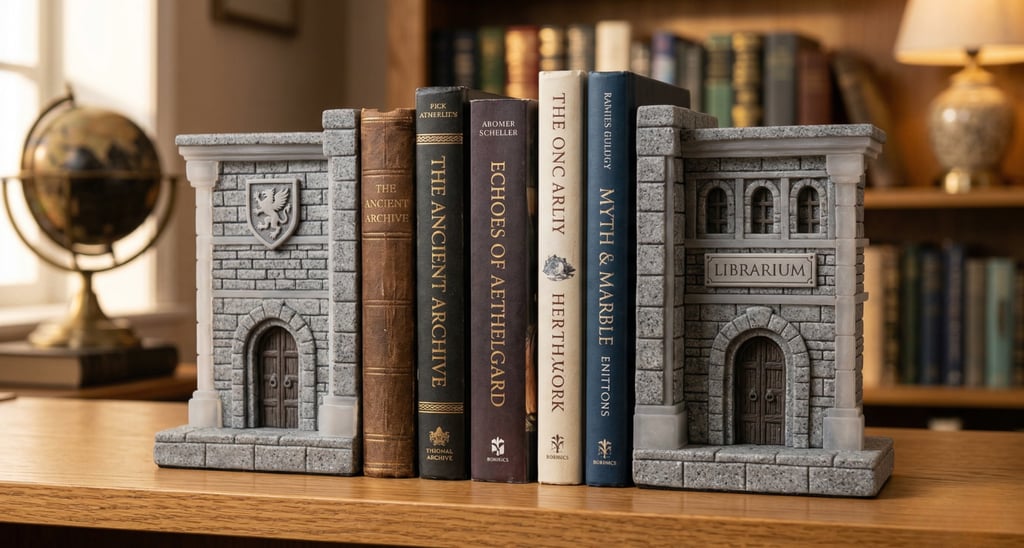
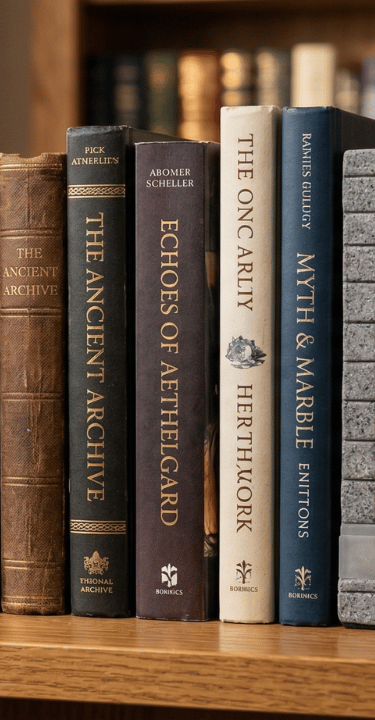
For the avid reader, heavy-duty bookends are a fantastic gift.
The Personal Touch: Sculpt the bookends to look like the skyline of their favorite city or the facade of their favorite fictional building.
Pro-Tip: Use a mix of translucent clay and granite-effect clay to make the structures look like genuine carved stone.
How-To:
Find a heavy, oven-safe core, such as a block of scrap wood or a small metal tin filled with sand and taped shut.
Roll out sheets of granite-effect clay and wrap them entirely around your base, smoothing the edges.
Cut out architectural shapes (windows, columns, rooftops) from additional clay and press them onto the front face of the bookend.
Use a craft knife to carve brick or stone textures into the surface.
Bake the entire piece. (Note: Thicker clay or covered wood may require slightly longer baking times).
6. Personalized Leather-Look Keychains
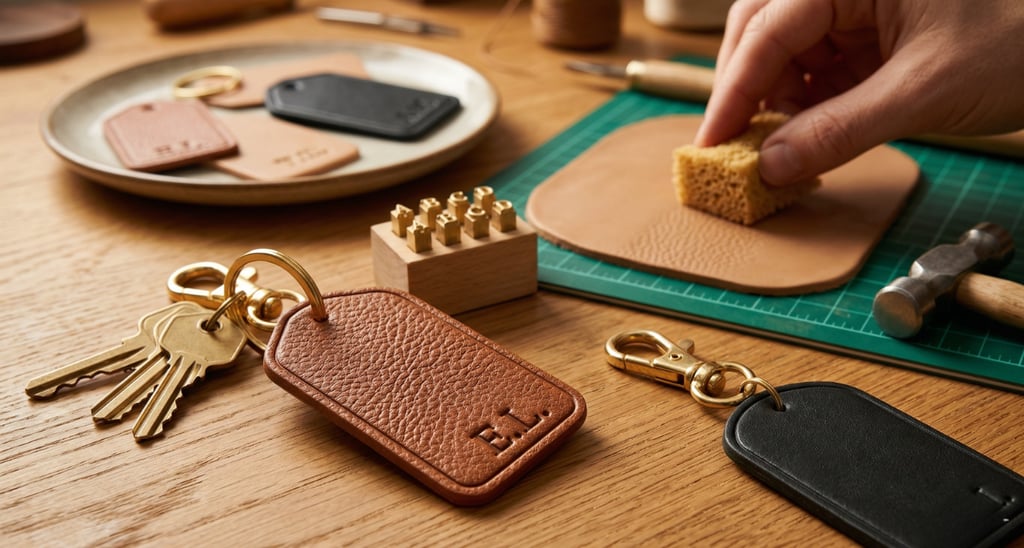
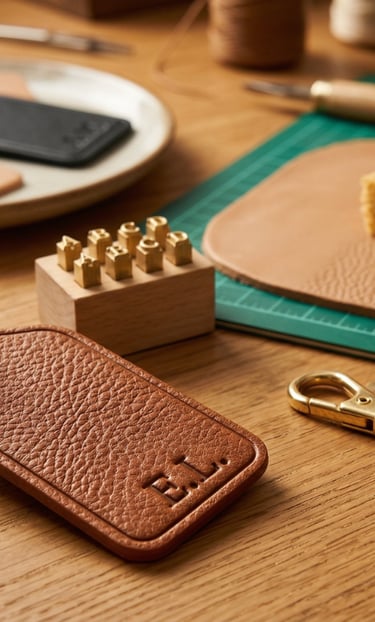
With the right texture, polymer clay can easily pass for high-quality leather.
The Personal Touch: Blind-emboss their initials into the "leather" and attach it to premium gold or brass hardware.
Pro-Tip: Press a piece of real leather or a textured sponge into the raw clay to give it an authentic, grainy surface before baking.
How-To:
Condition brown, tan, or black clay and roll it out into a slab.
Firmly press a textured sponge or a piece of heavy fabric/leather onto the raw clay to imprint a leather-like grain.
Cut the slab into a classic luggage-tag shape or a sleek rectangle.
Use a needle tool or a small skewer to poke a hole at the top for the keychain ring.
Press letter stamps firmly into the bottom corner for initials. Bake, cool, and attach the metal keychain ring.
7. Minimalist Arch Earrings
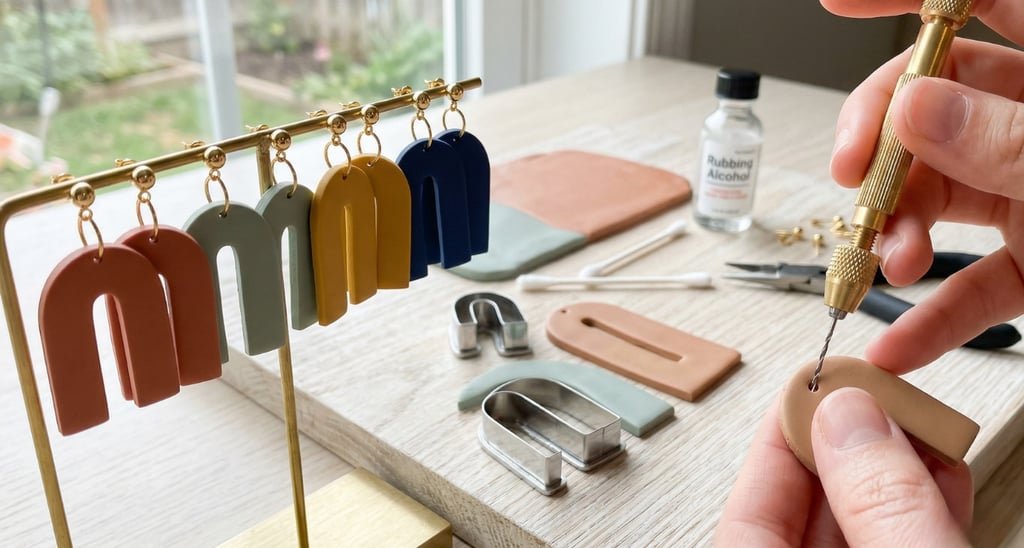
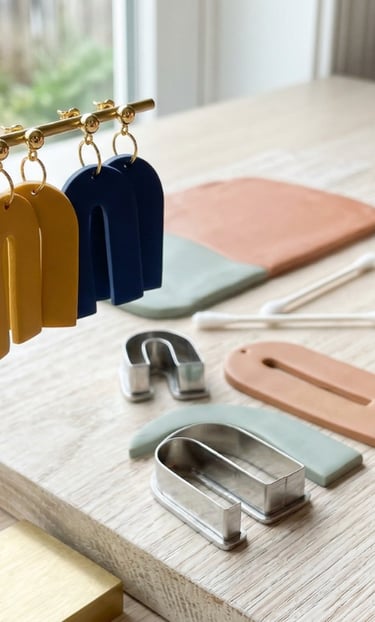
Polymer clay jewelry is everywhere, but the secret to professional-looking earrings lies in the finishing.
The Personal Touch: Mix a custom color that perfectly matches their favorite outfit or eye color.
Pro-Tip: Ensure perfectly smooth edges by lightly wiping the raw clay with a cotton swab dipped in rubbing alcohol, and drill the holes for the jump rings after baking for a cleaner finish.
How-To:
Roll out a slab of custom-mixed color to a uniform 1/8-inch thickness.
Use arch-shaped clay cutters (or a craft knife and a paper template) to cut out the earring shapes.
Dip a cotton swab in rubbing alcohol and gently run it along the cut edges to smooth away any ragged clay bits.
Bake the pieces.
Once cool, use a hand drill (pin vise) to drill small holes at the top of the arches. Attach jump rings and earring posts using jewelry pliers.
8. Sculpted Mug Huggers
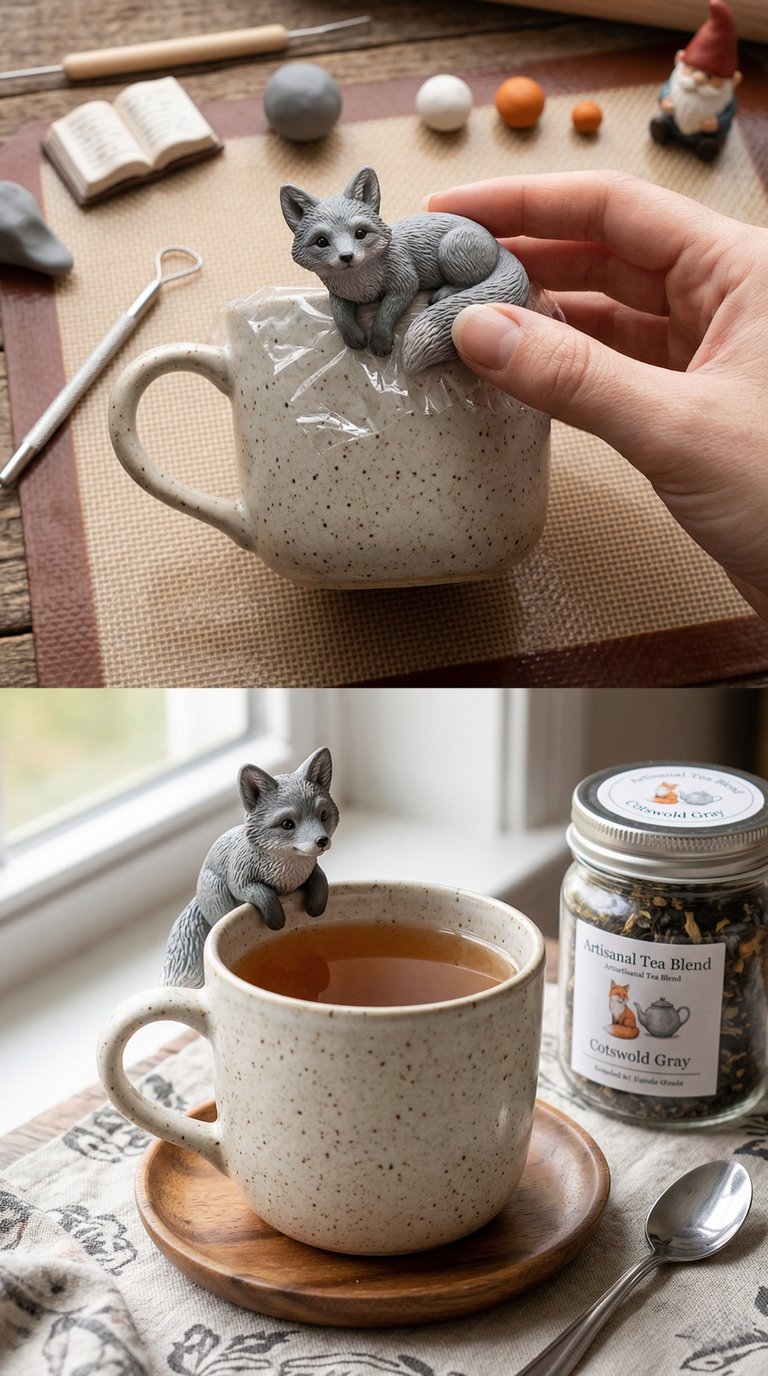
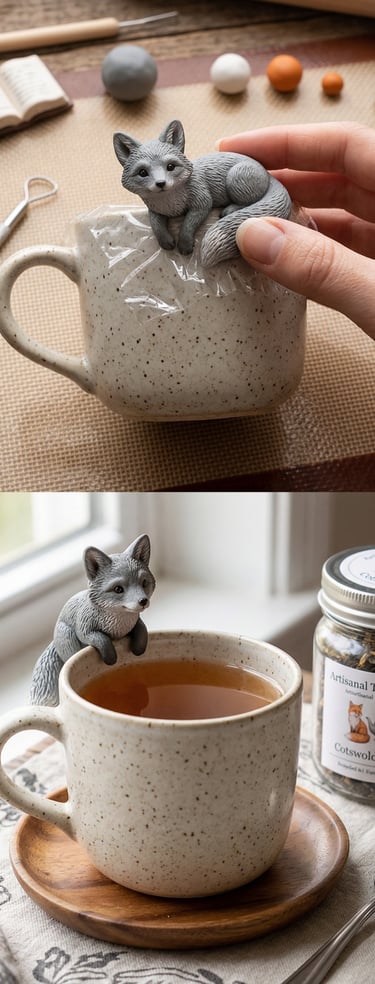
A mug hugger is a small, sculpted piece designed to sit on the rim of a tea or coffee mug.
The Personal Touch: Sculpt a miniature version of their favorite animal, a tiny book, or a little gnome.
Pro-Tip: Before baking, gently press the raw sculpture against the rim of the specific mug you plan to gift to ensure the groove fits perfectly.
How-To:
Sculpt your miniature figure out of polymer clay. Keep it relatively small so it isn't too top-heavy.
Take the exact mug you are gifting. Place a small piece of plastic wrap over the rim.
Carefully push the bottom or arms of your raw sculpture over the plastic-wrapped rim to create a custom-fit notch.
Carefully lift the sculpture off the mug, ensuring it keeps its shape, and place it on your baking tile.
Bake, cool, and pair with the mug and some artisanal tea or coffee.
9. Custom Wax Seal Stamps
Wax seals are making a massive comeback for letters and wedding invitations.
The Personal Touch: Carve their family crest, a botanical motif, or an intertwined monogram into the stamp face.
Pro-Tip: Remember to carve the design in reverse! Bake the clay until it is rock solid so it can withstand being pressed into hot wax.
How-To:
Roll a thick cylinder of clay to act as the handle.
Flatten one end completely by pressing it against a glass surface to create the stamp head.
Using a fine needle tool or a linoleum carving tool, carefully carve your design into the flat surface. Important: Letters must be carved backward to stamp correctly!
Bake the stamp for slightly longer than usual (without burning) to ensure it is incredibly hard and durable.
Gift alongside a few sticks of sealing wax.
10. Elegant Hair Barrettes
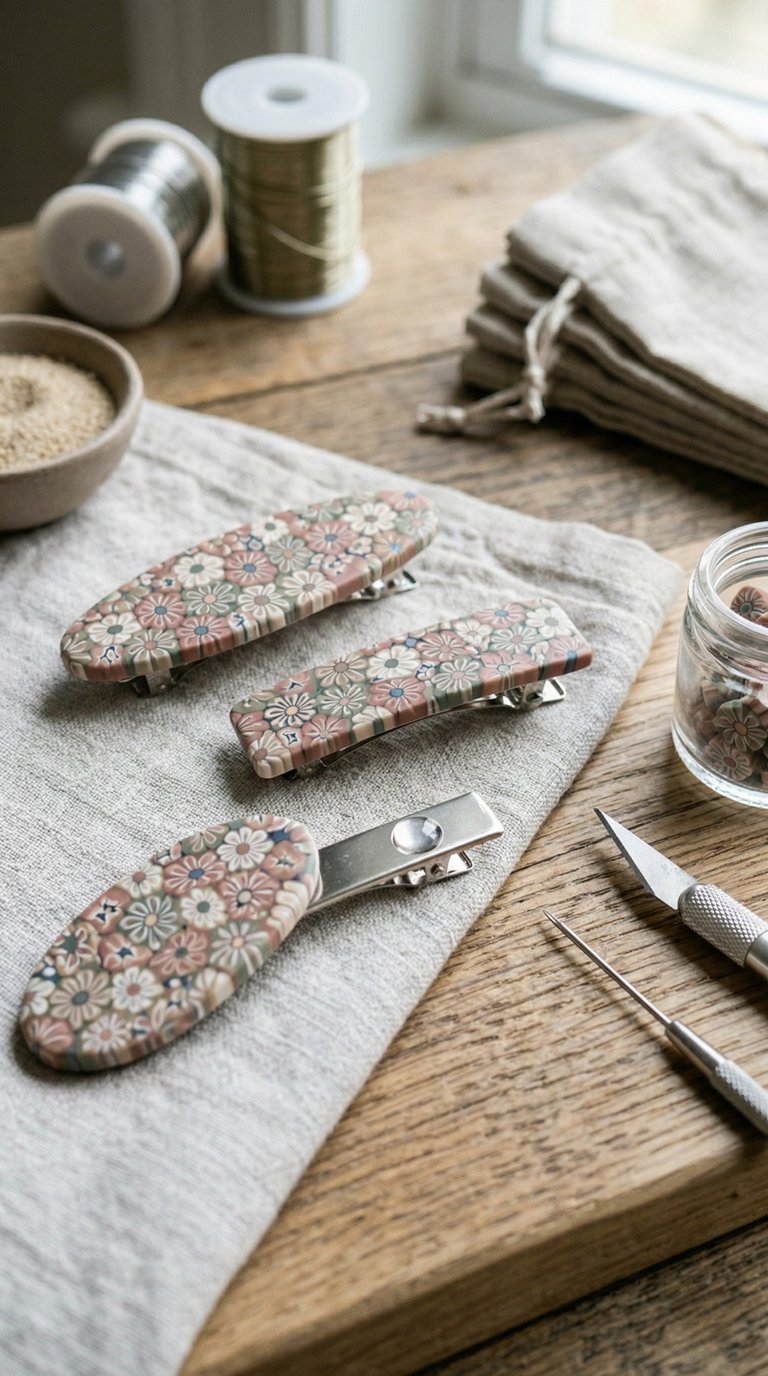
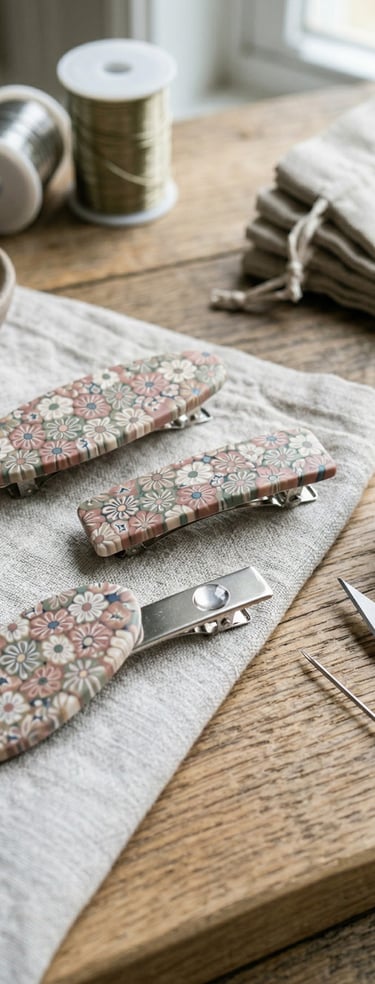
Upgrade plain metal hair clips by securely attaching a decorative polymer clay slab.
The Personal Touch: Use the "cane" making technique to slice tiny, repetitive flower patterns in their favorite colors.
Pro-Tip: Use a strong two-part epoxy to glue the baked clay to the metal barrette. Standard superglue can become brittle and snap off over time.
How-To:
Create a decorative slab. You can use solid colors, marbled clay, or arrange tiny, pre-made clay slices (canes) into a floral pattern and roll them flat.
Cut the slab into a long oval or rectangle that is slightly larger than your blank metal barrette.
Drape the clay over a slightly curved surface (like an oven-safe bottle) to match the natural curve of a head, and bake.
Once cool, lightly sand the back of the baked clay to give the glue something to grip.
Mix a small amount of two-part epoxy, apply it to the metal clip, and press the clay piece firmly on top. Let it cure completely before gifting.