
Aesthetic DIY Mother’s Day Gifts: 12 Personalized Ideas She’ll Actually Keep
Make this Mother’s Day unforgettable with a gift that feels as special as she is. Ready to create something she’ll actually want to display? Let’s dive into the ultimate guide to elevated handmade gifting.
Simple Craft Daily
4/7/20266 min read
12 DIY Mother’s Day Gifts That Look Anything But Homemade
Forget the glitter glue and construction paper. This year, the goal is to create something that feels curated, sophisticated, and intentional. Mother’s Day in the US is all about honoring the "aesthetic" mom—the one who loves a clean mantle, a well-stocked garden, or a spa-like bathroom.
These 12 DIY ideas focus on high-quality materials and professional finishes, ensuring these gifts earn a permanent spot in her home.
1. Pressed Wildflower Floating Frames
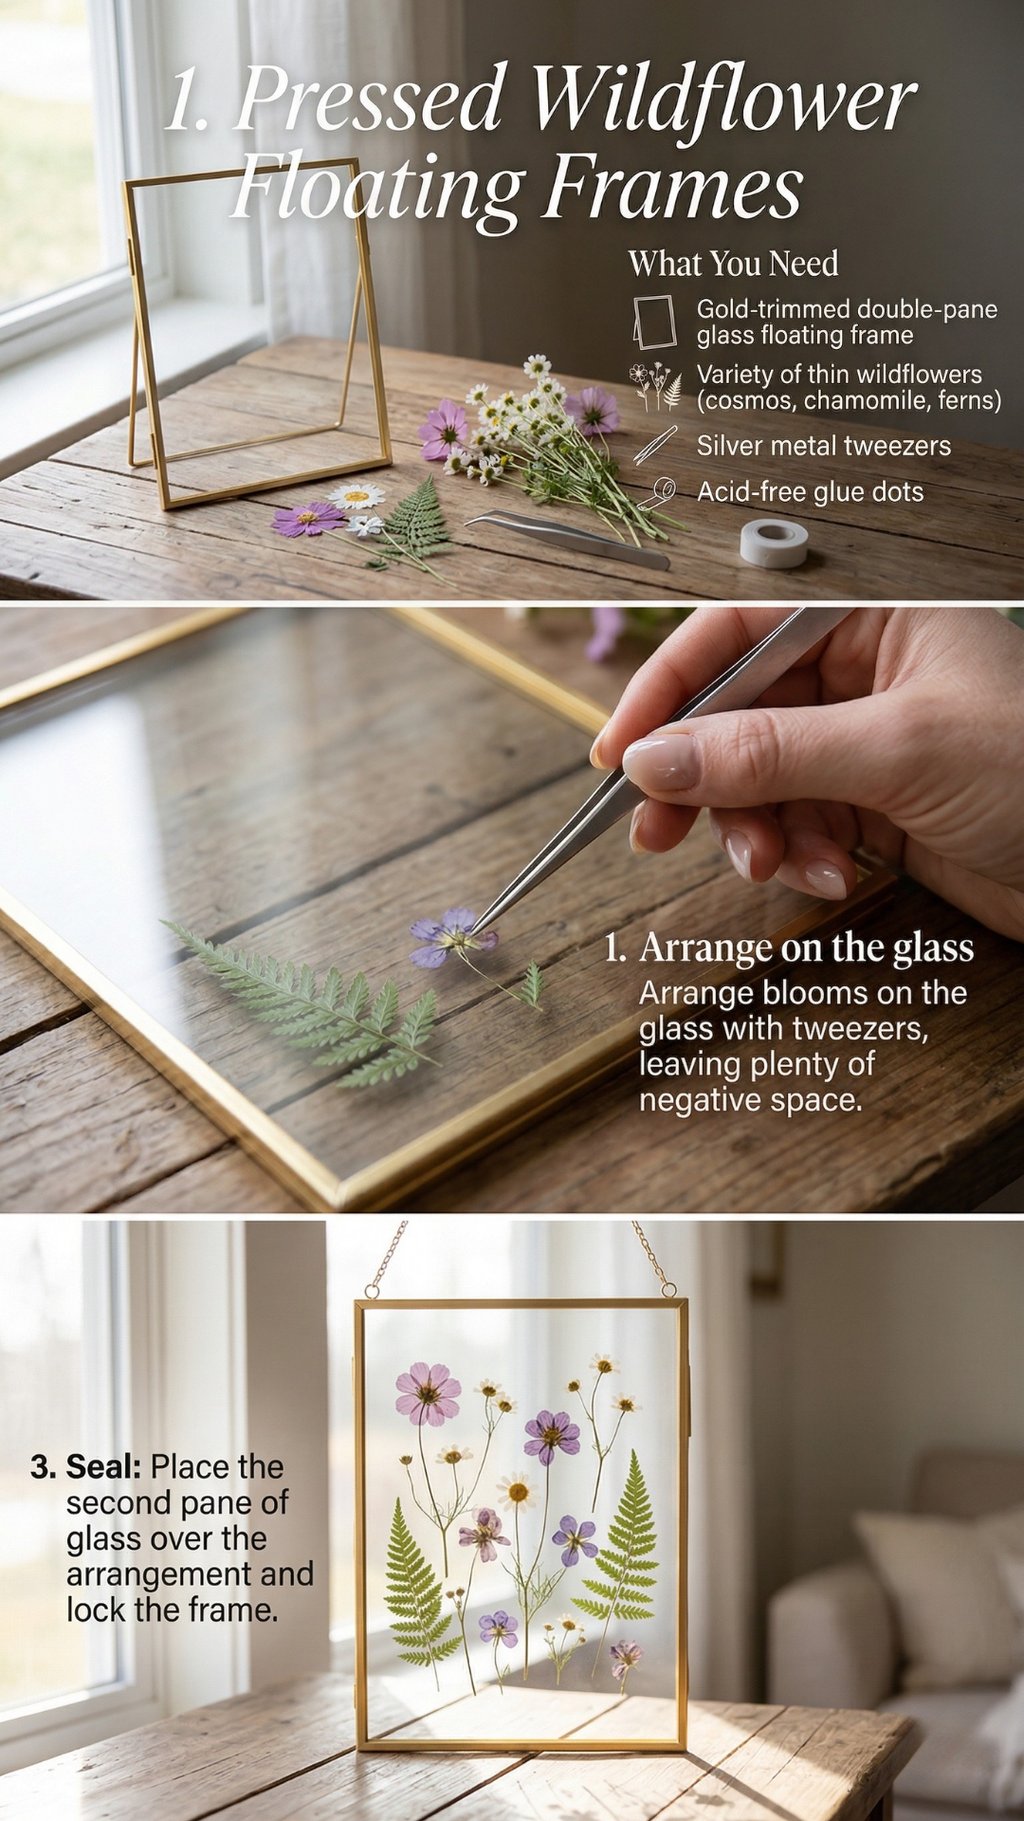
Unlike traditional bouquets that fade in a week, a floating frame preserves the beauty of spring indefinitely. It’s a piece of botanical art that feels both vintage and modern.
What You Need
Double-pane glass floating frame (gold or wood finish)
Selection of thin wildflowers or ferns
Tweezers
Acid-free glue dots (optional)
How to Make It
Press the flowers: Place flowers between parchment paper inside a heavy book for 7–10 days until completely flat.
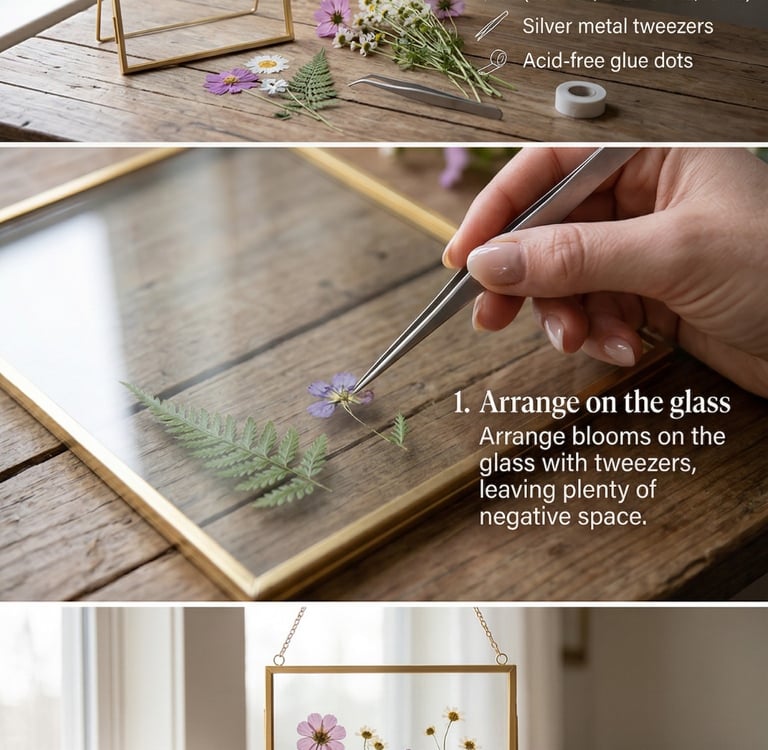
Arrange: Open the floating frame and use tweezers to arrange the blooms on the glass. Leave plenty of "negative space" around the edges for that airy look.
Seal: Carefully place the second pane of glass over the arrangement and lock the frame.
2. Hand-Poured Lavender & Oat Soy Candles
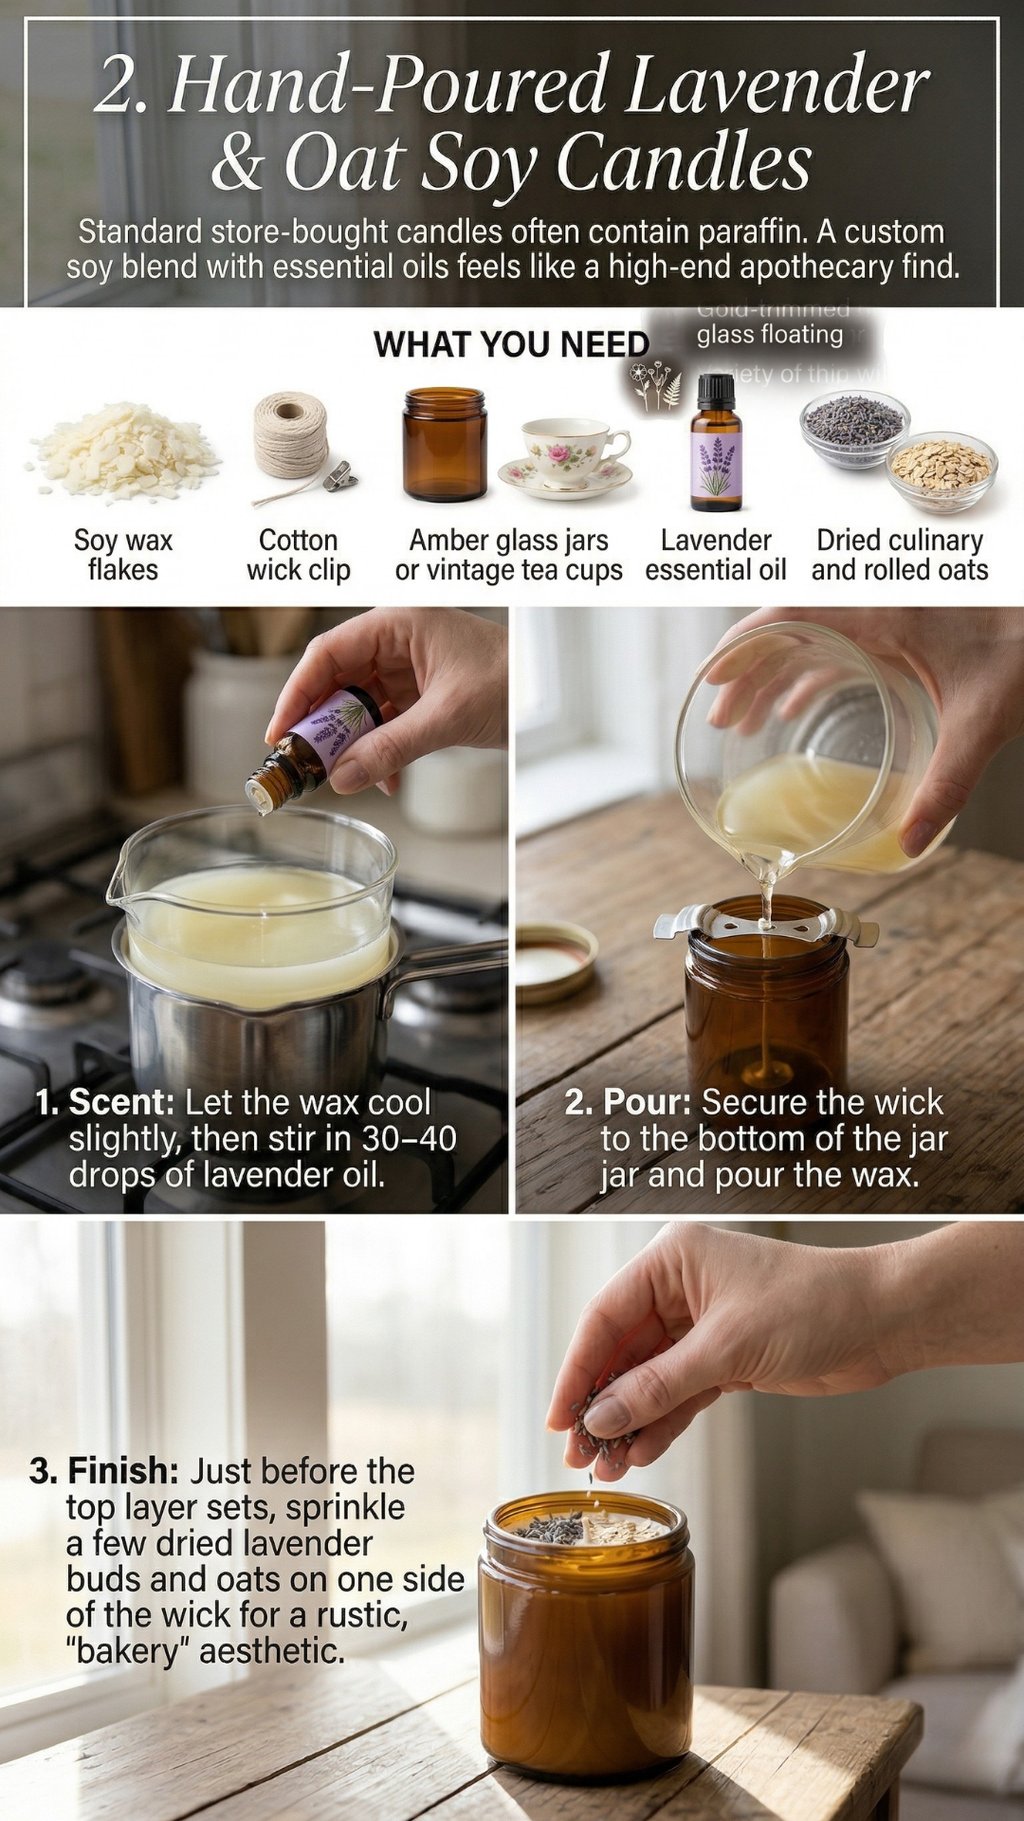
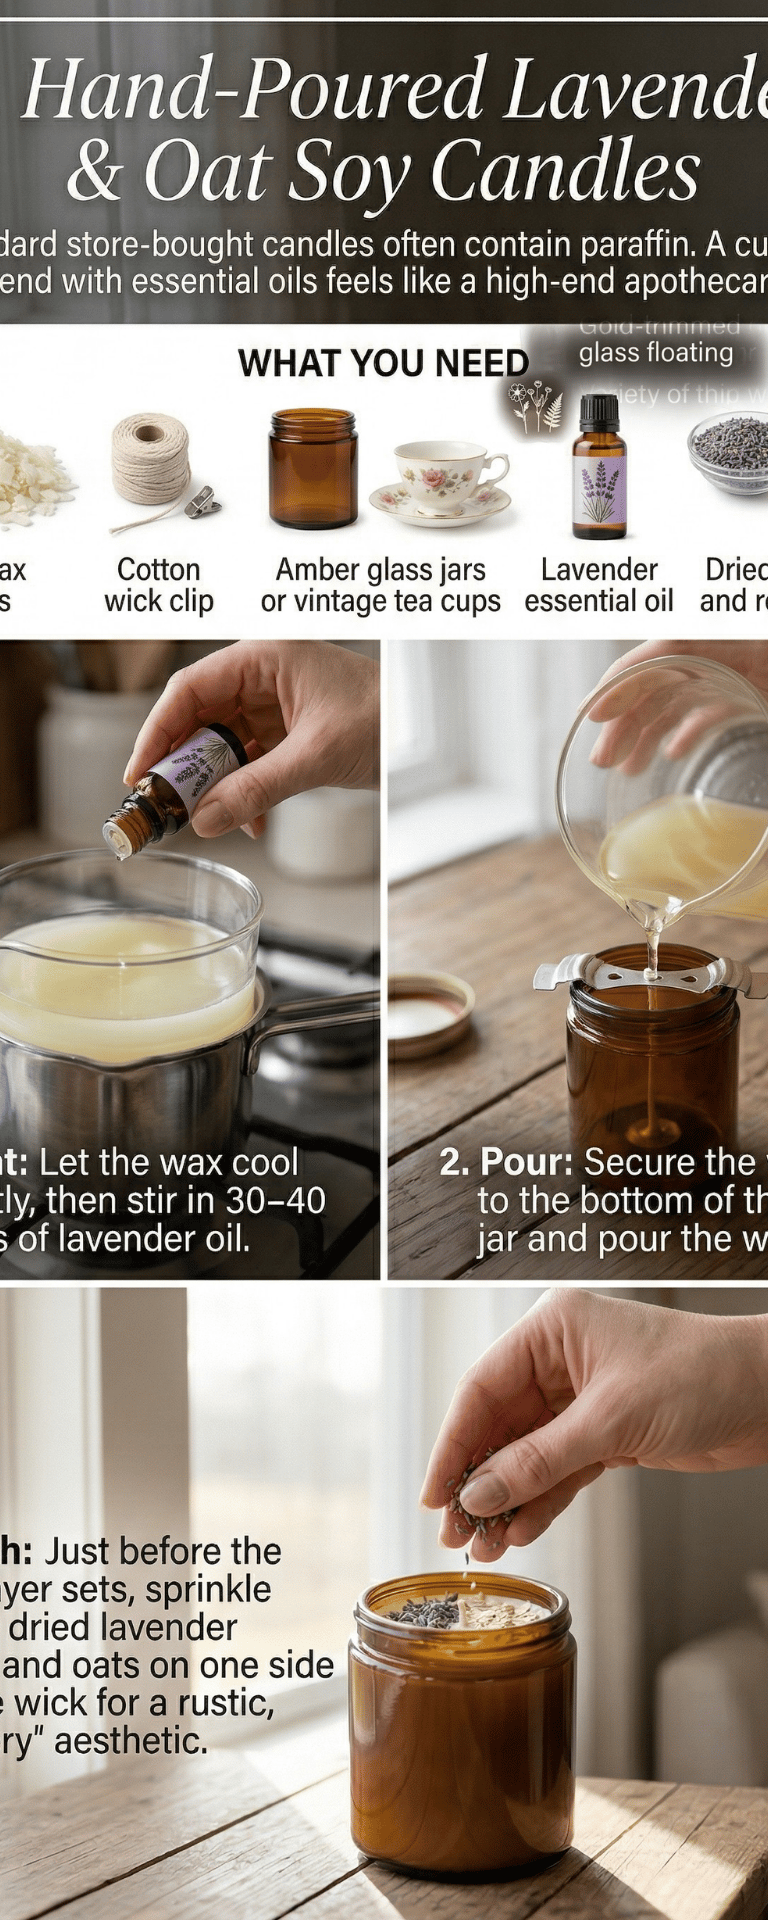
Standard store-bought candles often contain paraffin. A custom soy blend with essential oils feels like a high-end apothecary find.
What You Need
Soy wax flakes
Cotton wicks
Amber glass jars or vintage tea cups
Lavender essential oil
Dried culinary lavender and rolled oats (for topping)
How to Make It
Melt: Melt the soy wax in a double boiler until clear.
Scent: Let the wax cool slightly, then stir in 30–40 drops of lavender oil.
Pour: Secure the wick to the bottom of the jar and pour the wax.
Finish: Just before the top layer sets, sprinkle a few dried lavender buds and oats on one side of the wick for a rustic, "bakery" aesthetic.
3. Gold-Leaf Terrazzo Coasters
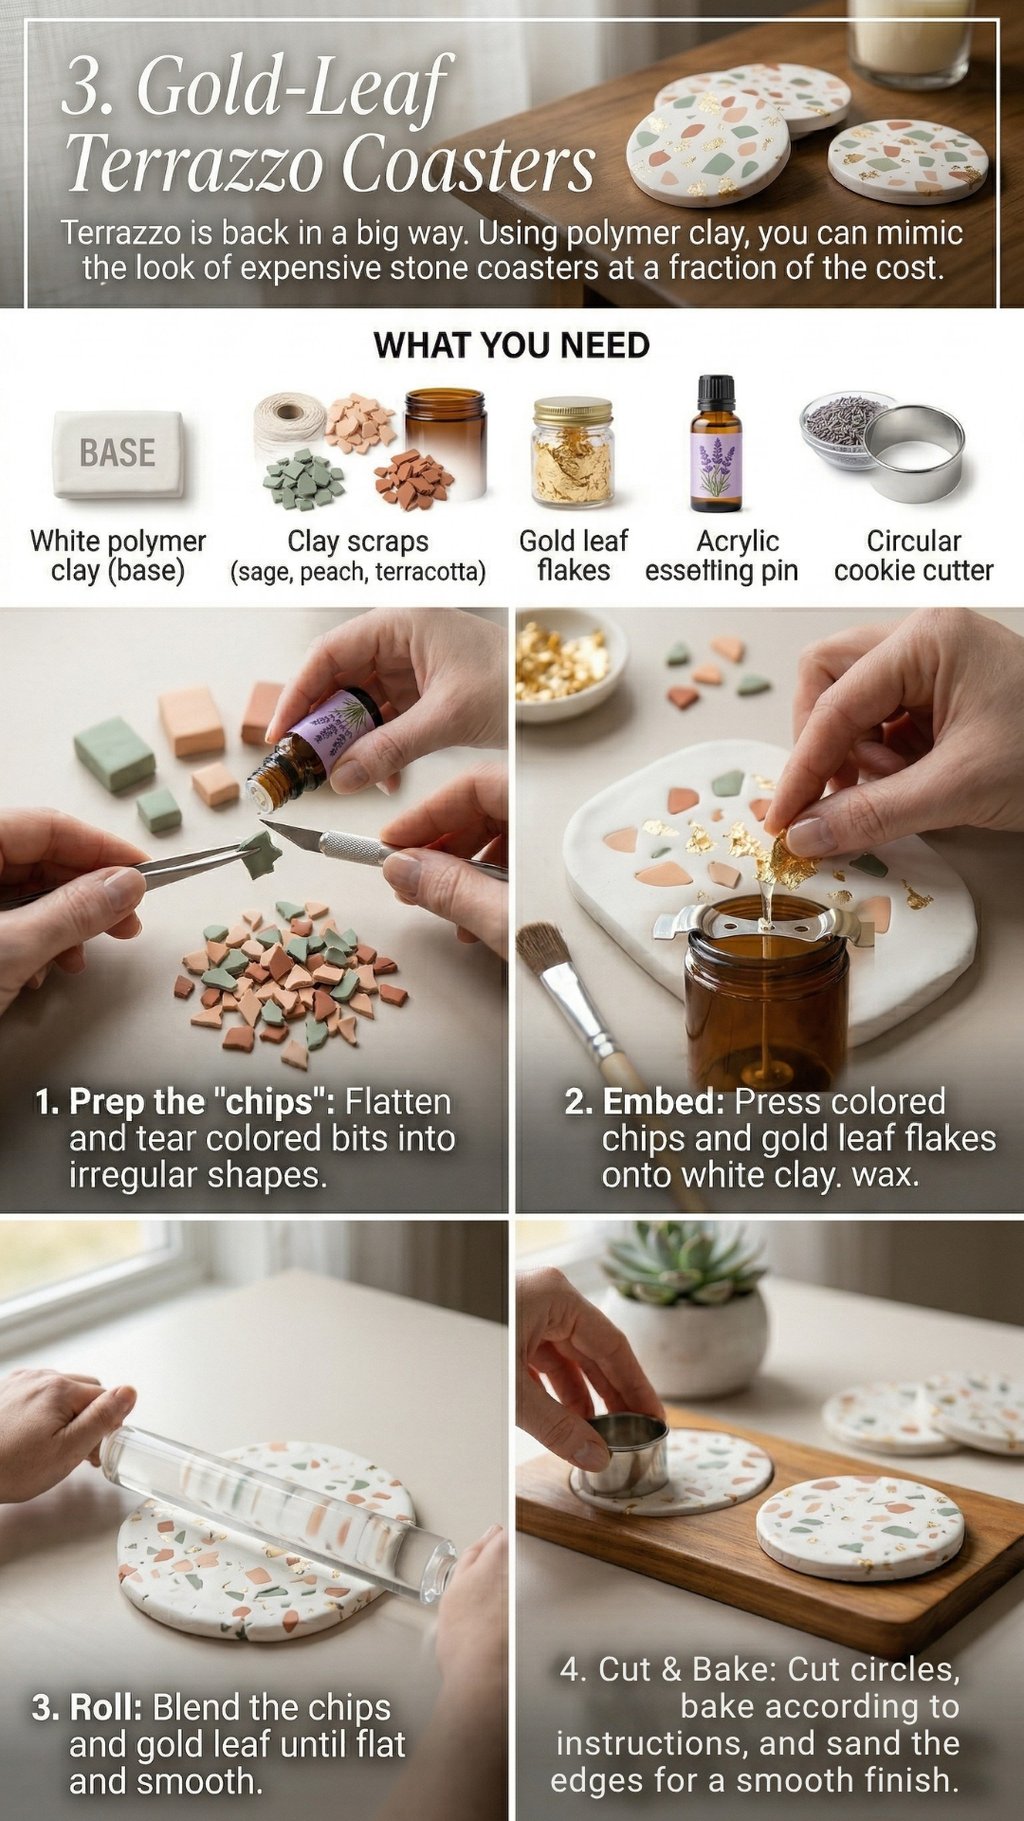
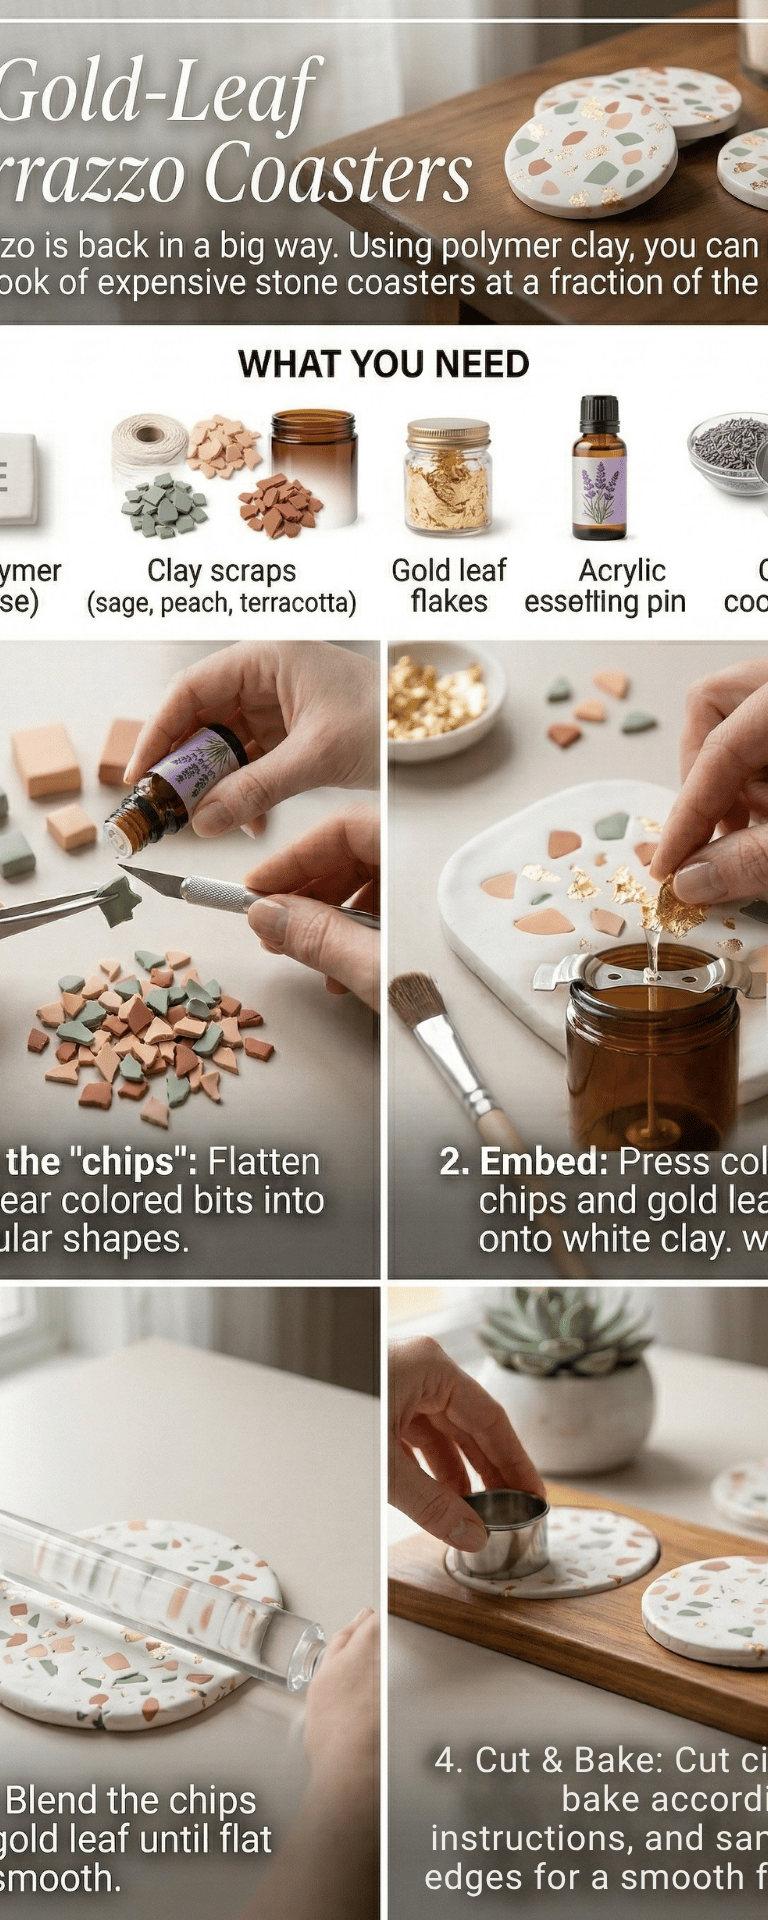
Terrazzo is back in a big way. Using polymer clay, you can mimic the look of expensive stone coasters at a fraction of the cost.
What You Need
White polymer clay (base)
Scraps of clay in sage, peach, and terracotta
Gold leaf flakes
Acrylic rolling pin
Circular cookie cutter
How to Make It
Prep the "chips": Flatten small bits of the colored clay and tear them into irregular, tiny shapes.
Embed: Press the colored chips and gold leaf flakes onto a thick slab of white clay.
Roll: Roll the surface flat until the chips are blended into the white base.
Cut & Bake: Cut circles, bake according to clay instructions, and sand the edges for a smooth finish.
4. Aged Terracotta Herb Garden

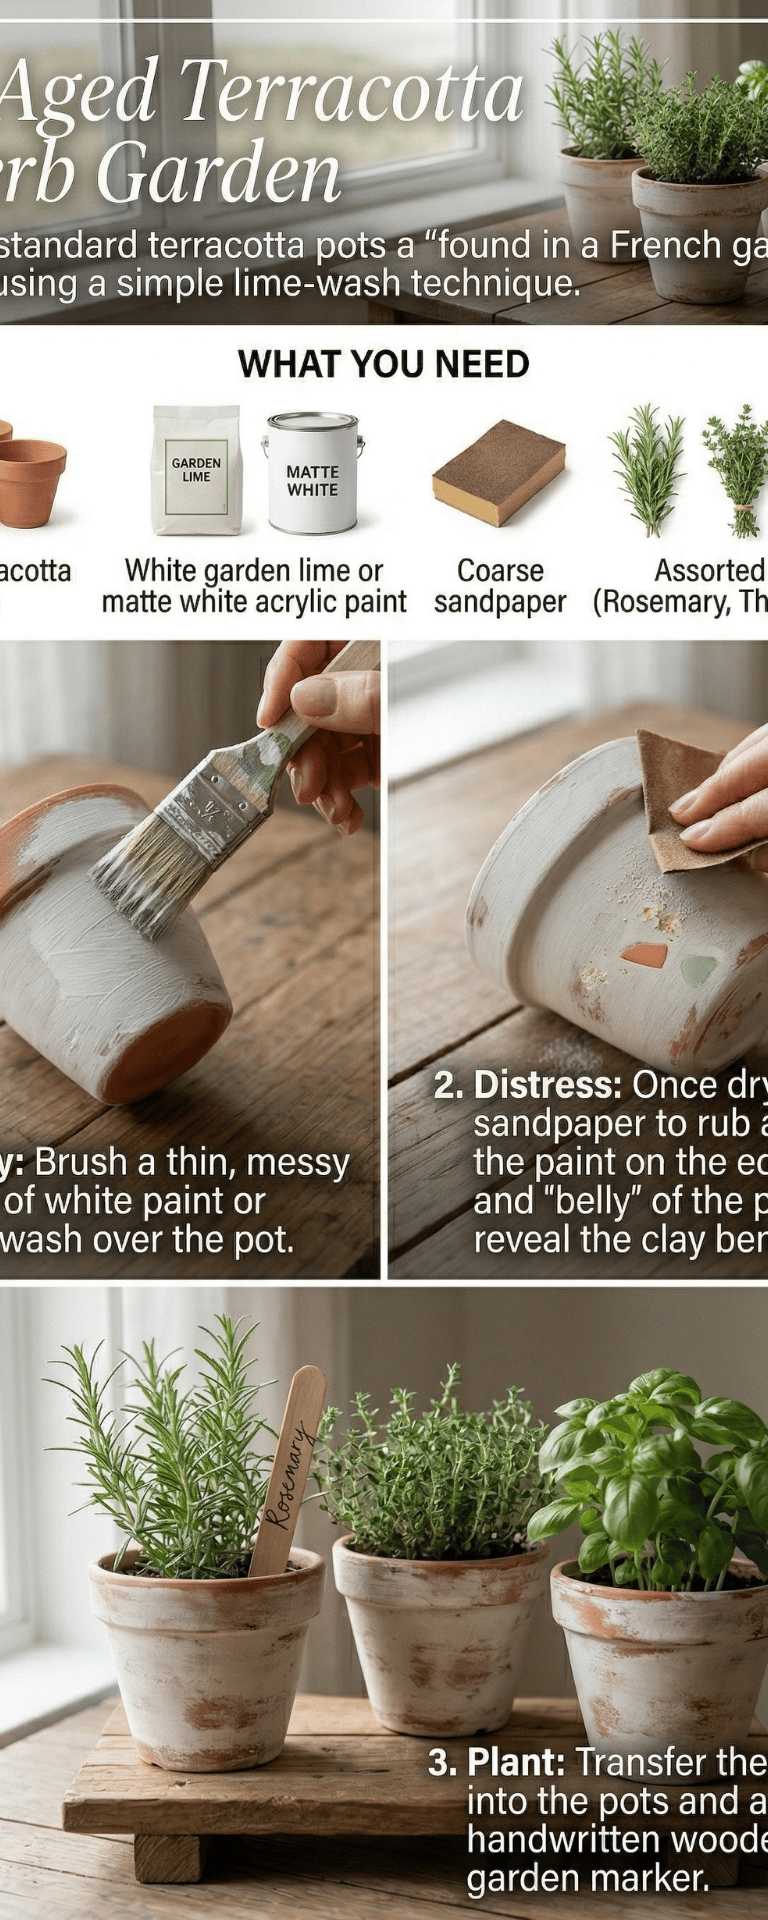
Give standard terracotta pots a "found in a French garden" look using a simple lime-wash technique.
What You Need
Small terracotta pots
White garden lime or matte white acrylic paint
Coarse sandpaper
Assorted herbs (Rosemary, Thyme, Basil)
How to Make It
Apply: Brush a thin, messy layer of white paint or lime-wash over the pot.
Distress: Once dry, use sandpaper to rub away the paint on the edges and "belly" of the pot to reveal the clay beneath.
Plant: Transfer the herbs into the pots and add a handwritten wooden garden marker.
5. Eucalyptus & Pink Himalayan Salt "Tub Tea"
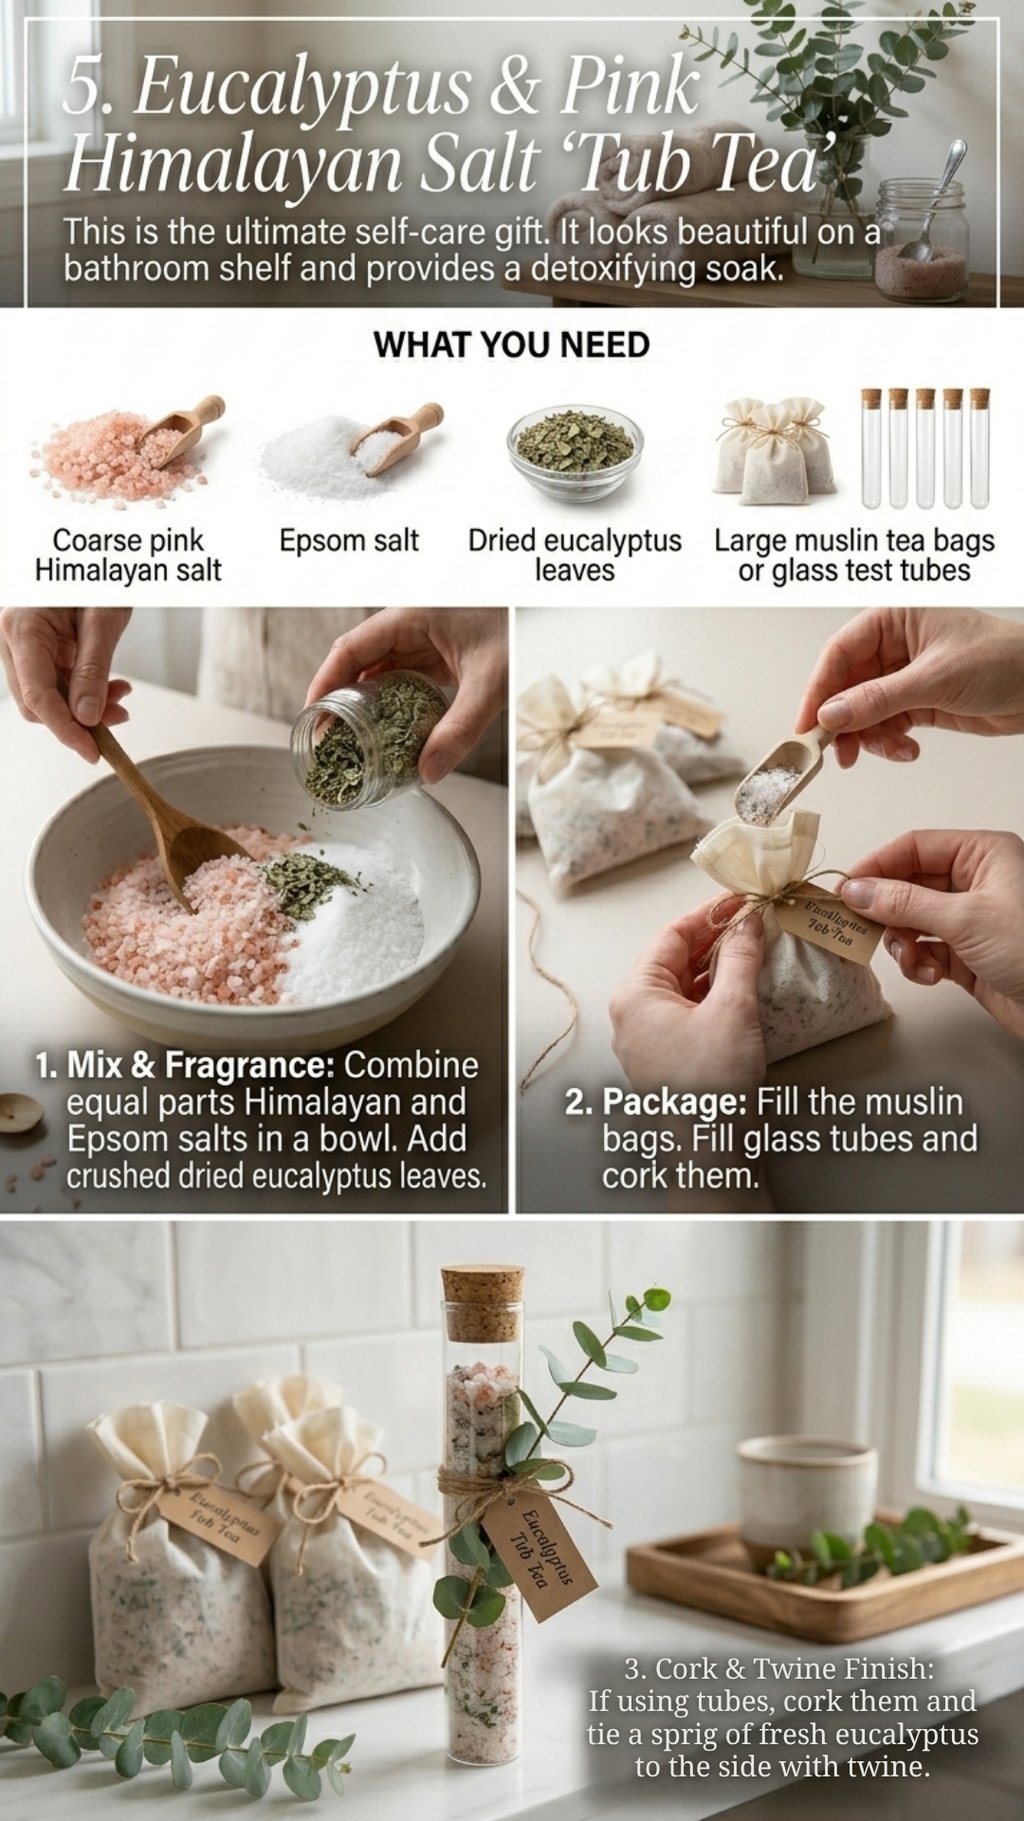
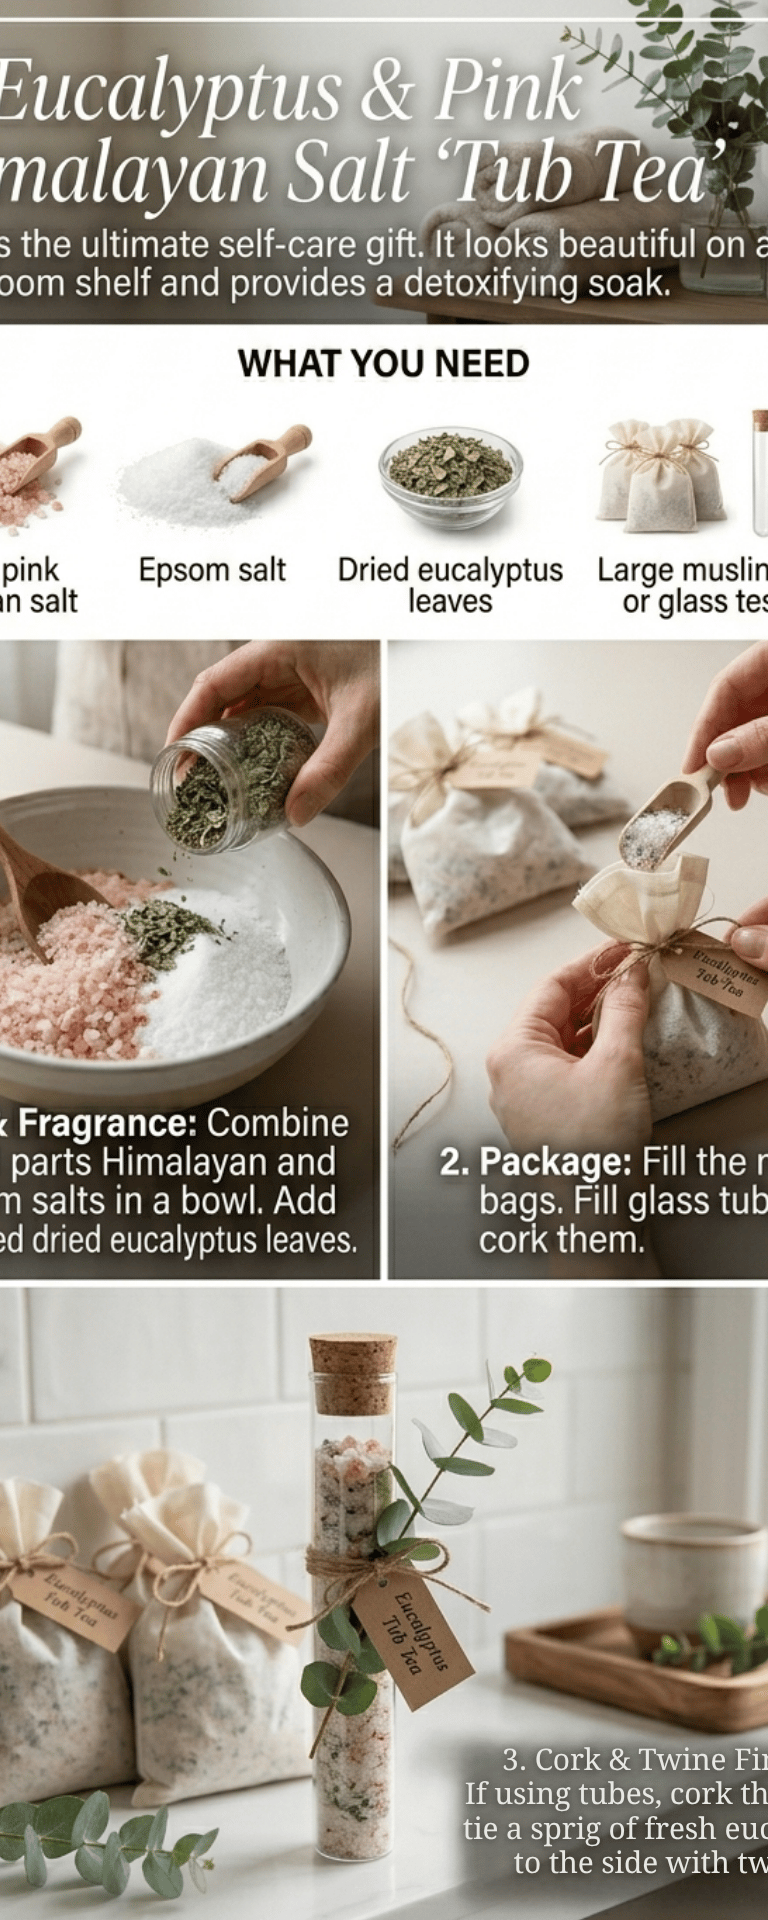
This is the ultimate self-care gift. It looks beautiful on a bathroom shelf and provides a detoxifying soak.
What You Need
Coarse pink Himalayan salt
Epsom salt
Dried eucalyptus leaves
Large muslin tea bags or glass test tubes
How to Make It
Mix: Combine equal parts Himalayan and Epsom salts in a bowl.
Fragrance: Add crushed dried eucalyptus leaves.
Package: Fill the muslin bags or glass tubes. If using tubes, cork them and tie a sprig of fresh eucalyptus to the side with twine.
6. Scalloped Edge Linen Napkins
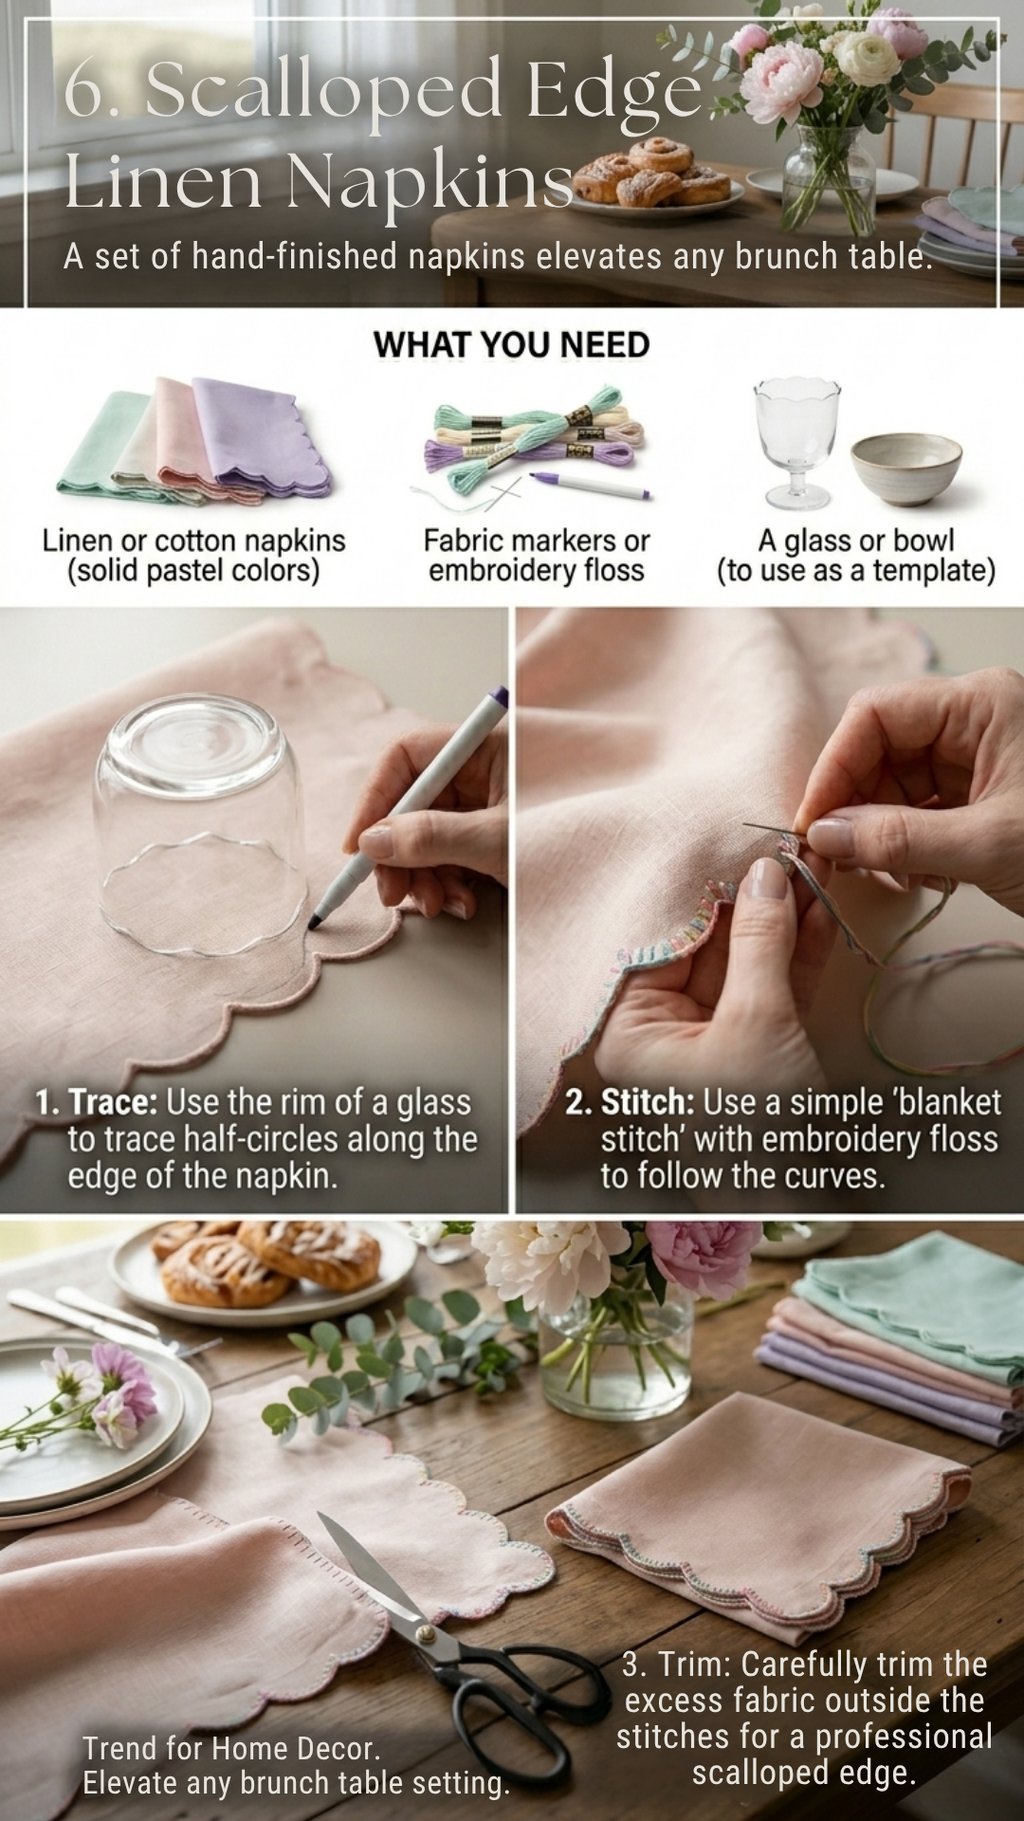
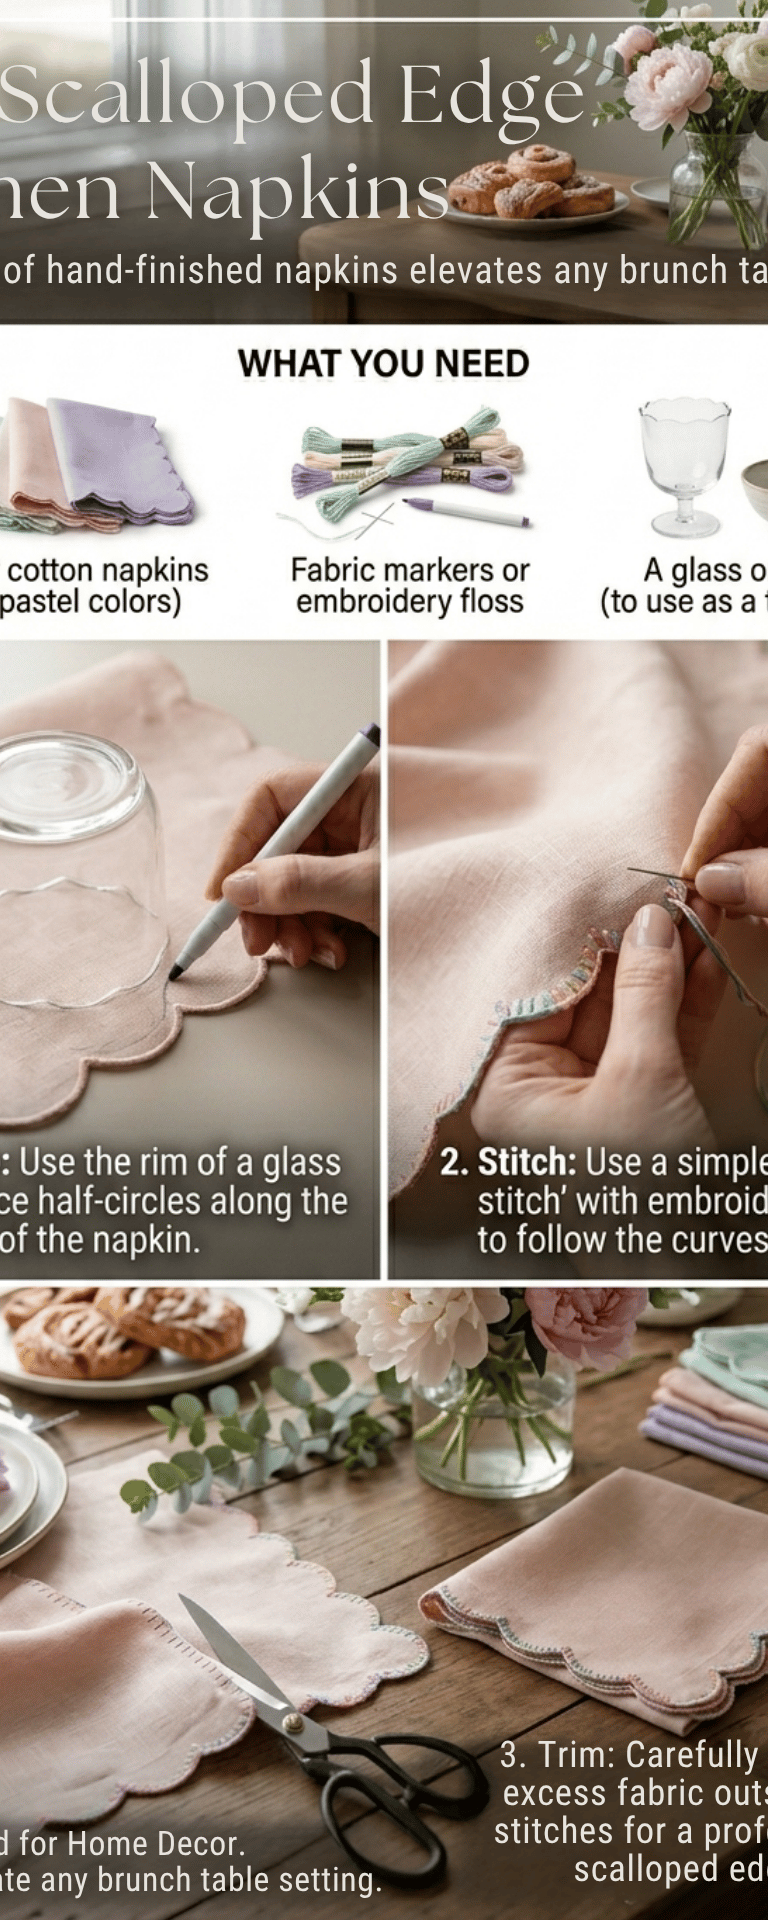
Scalloped details are a major trend in US home decor. A set of hand-finished napkins elevates any brunch table.
What You Need
Linen or cotton napkins (solid pastel colors)
Fabric markers or embroidery floss
A glass or bowl (to use as a template)
How to Make It
Trace: Use the rim of a glass to trace half-circles along the edge of the napkin.
Stitch: Use a simple "blanket stitch" or "satin stitch" with embroidery floss to follow the curves.
Trim: Carefully trim the excess fabric outside the stitches for a professional scalloped edge.
7. Personalized Culinary Vanilla Bean Honey

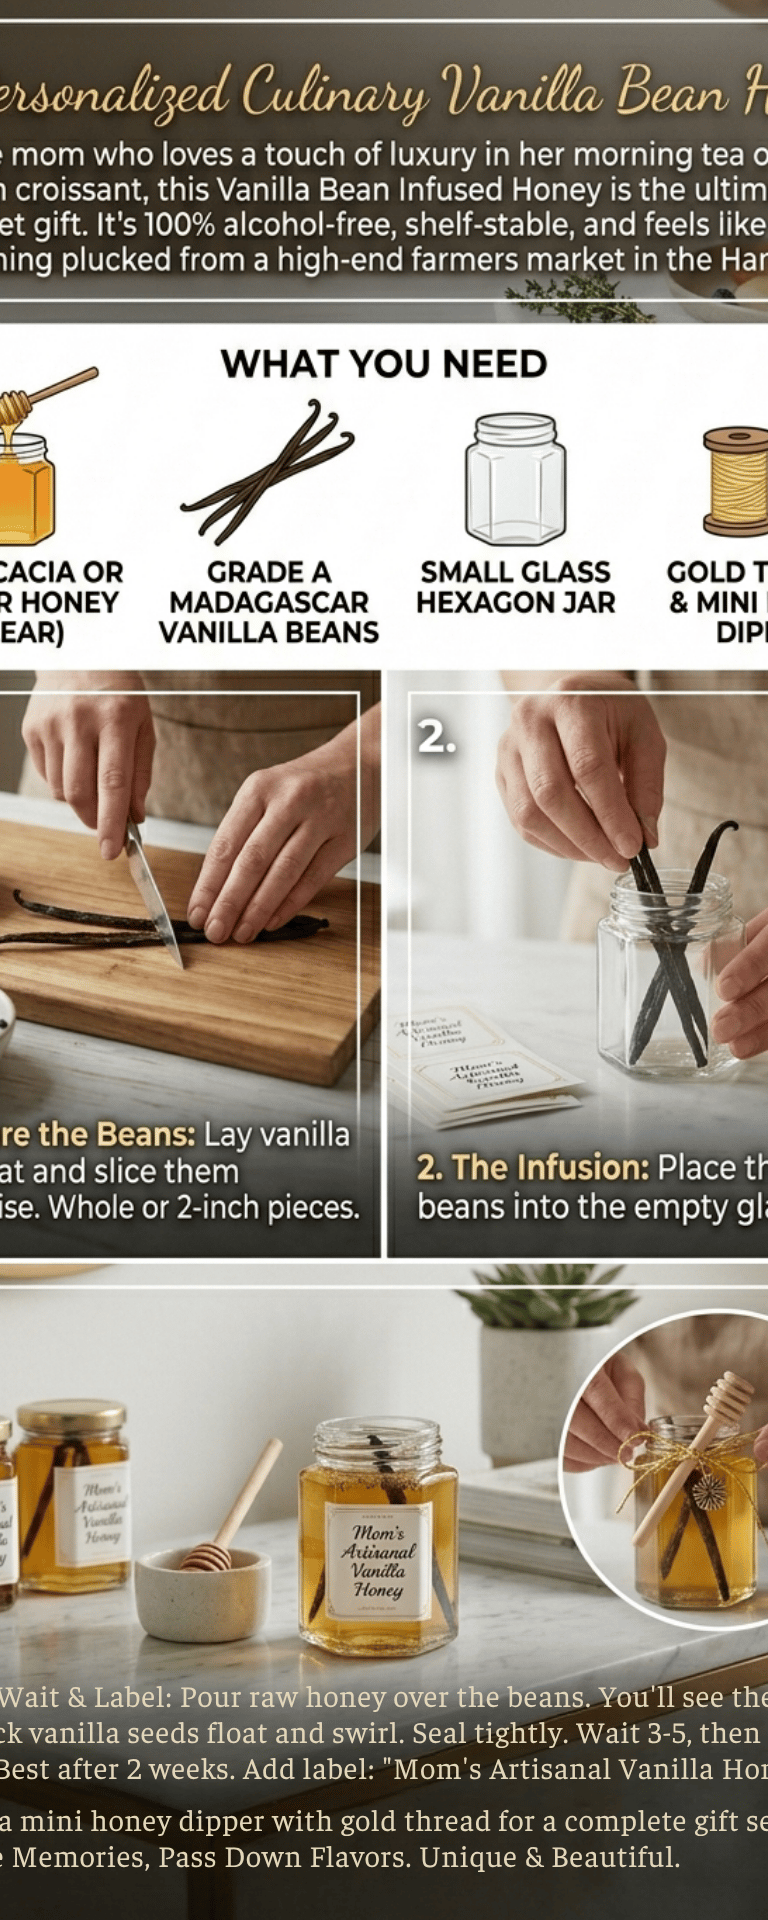
For the mom who loves a touch of luxury in her morning tea or over a warm croissant, this Vanilla Bean Infused Honey is the ultimate gourmet gift. It’s 100% alcohol-free, shelf-stable, and feels like something plucked from a high-end farmers market in the Hamptons.
What You Need
8 oz high-quality Raw Clover or Acacia Honey (clearer honeys show off the bean best)
2 Grade A Madagascar Vanilla Beans
Small glass hexagon jar or a classic "Muth" jar
Gold thread and a mini wooden honey dipper
How to Make It
Prepare the Beans: Lay the vanilla beans flat and slice them lengthwise. You can leave them whole or cut them into 2-inch pieces to fit your jar.
The Infusion: Place the split beans into the empty glass jar.
Pour: Slowly pour the raw honey over the beans. You’ll see the tiny black vanilla seeds (the "caviar") begin to float and swirl—this is what makes it look professional.
Seal & Wait: Seal the jar tightly. Let it sit in a sunny windowsill for 3–5 days to help the honey thin out and absorb the vanilla oils, then move it to a cool, dark pantry.
Label: Add a label that says "Mom’s Artisanal Vanilla Honey." It’s best after about 2 weeks of infusion.
Tip: Tie a mini wooden honey dipper to the neck of the jar with gold thread. It turns a simple jar of honey into a complete, thoughtful gift set.
8. Marbleized Clay Ring Dishes
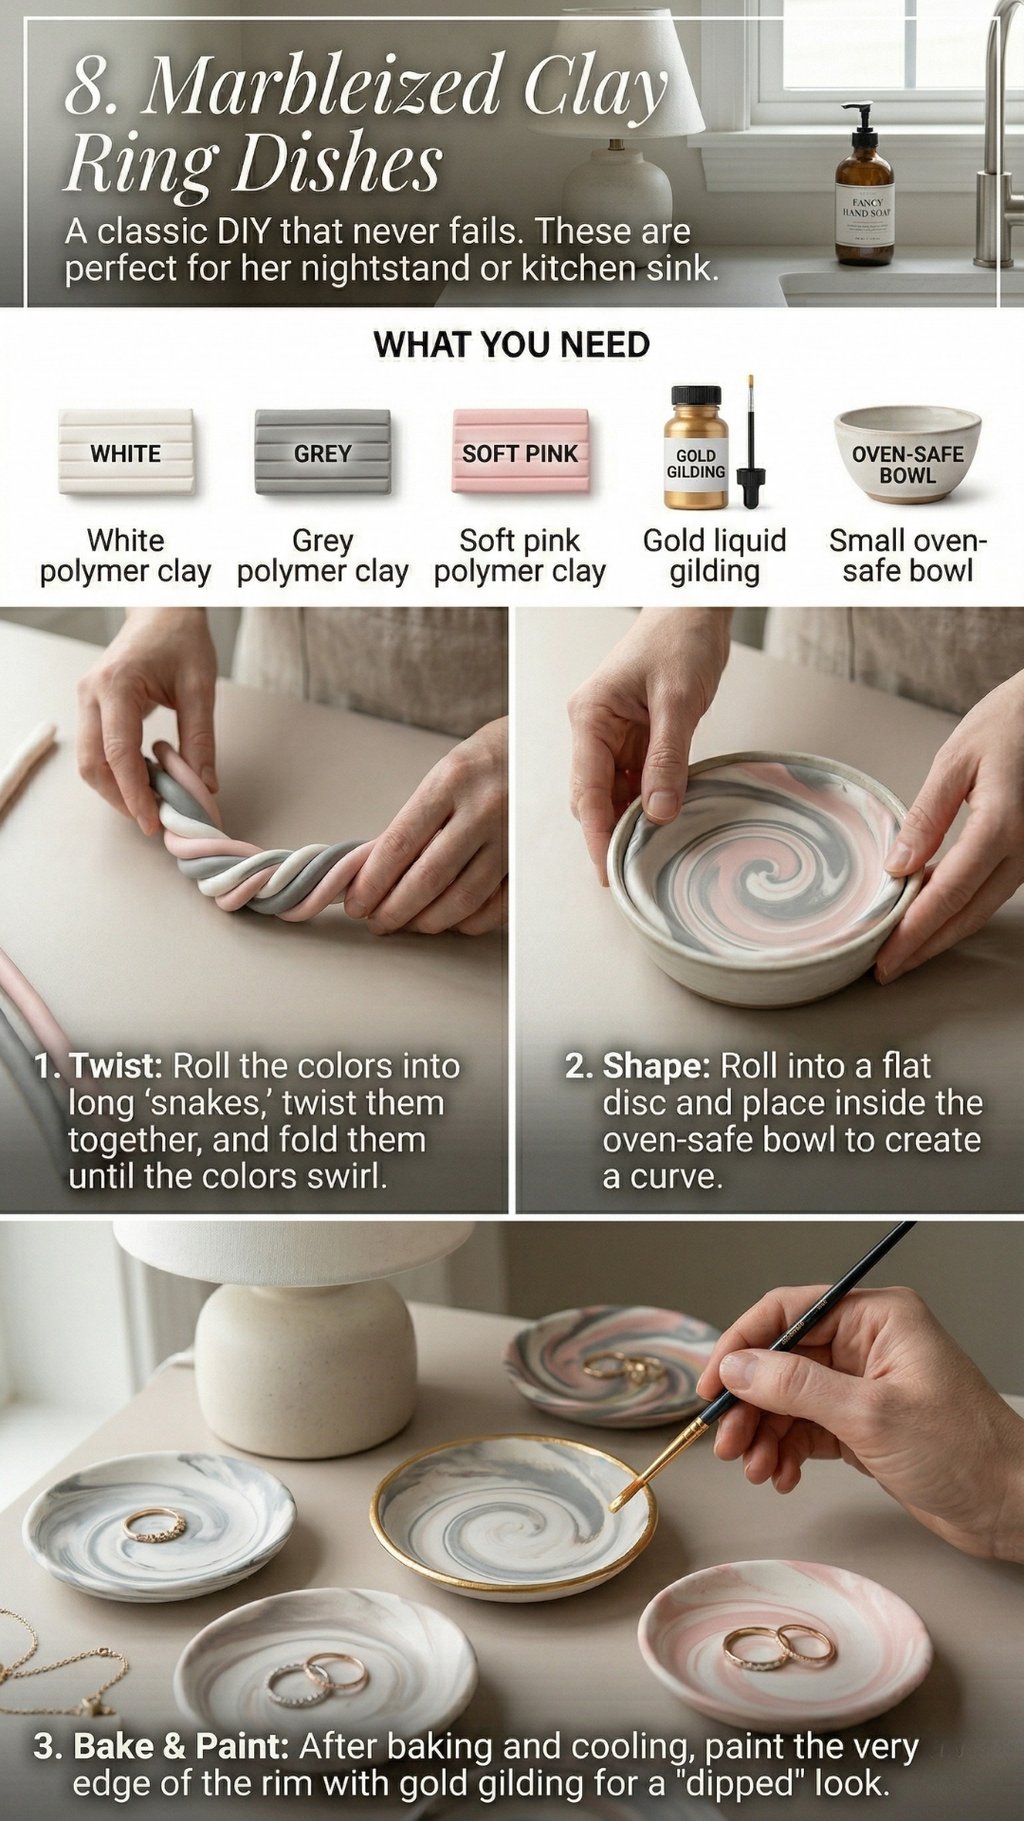
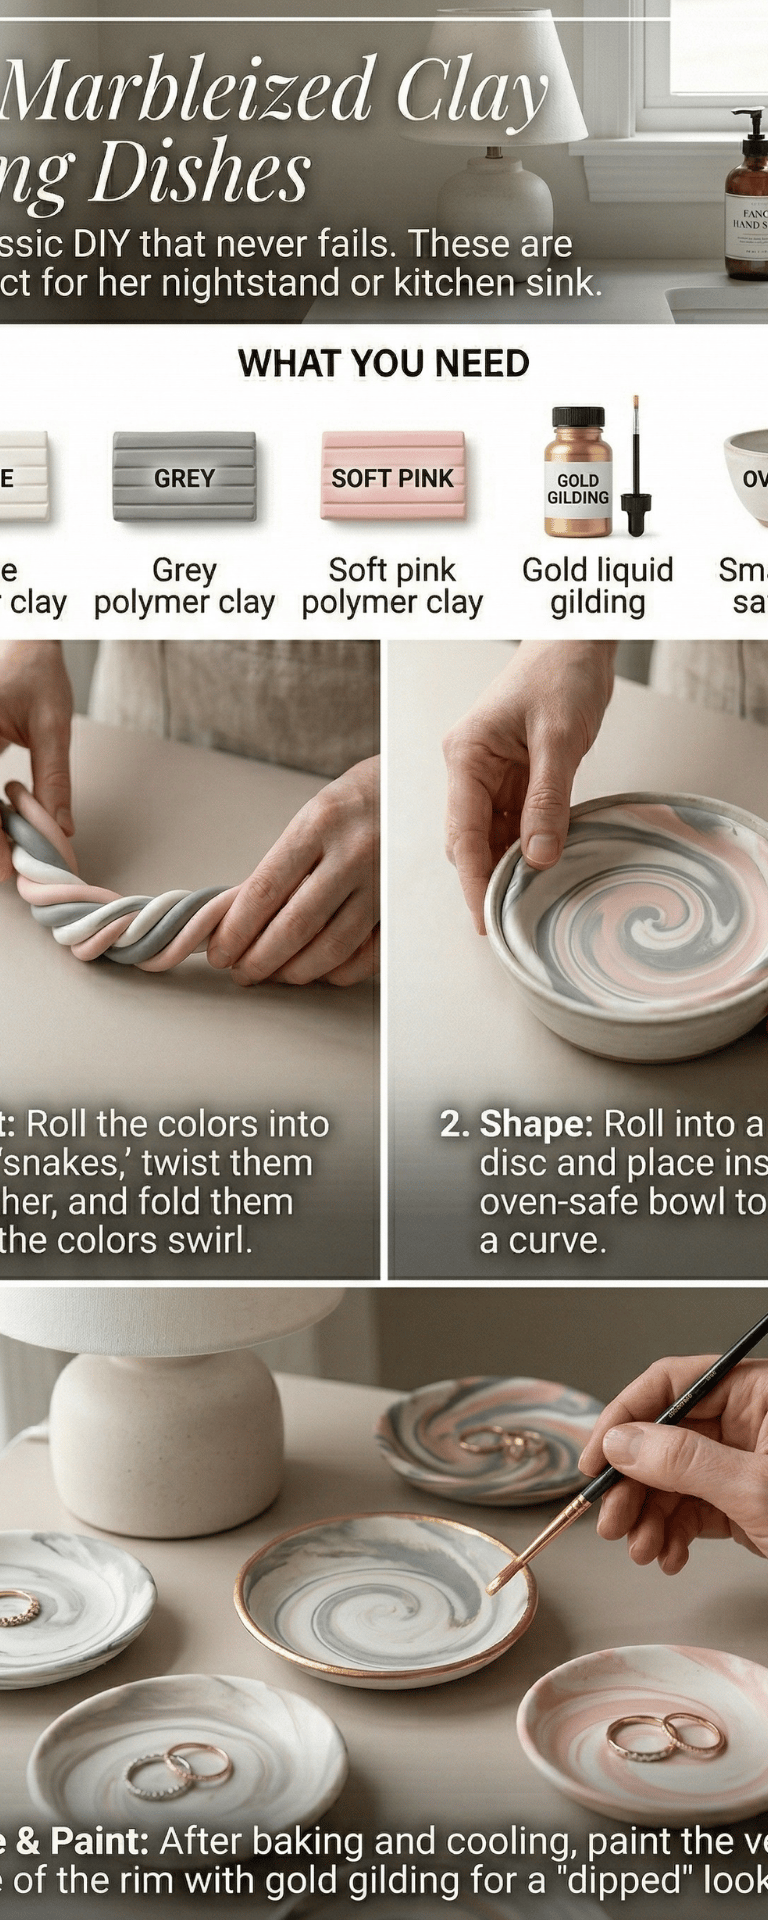
A classic DIY that never fails. These are perfect for her nightstand or kitchen sink.
What You Need
White, grey, and soft pink polymer clay
Gold liquid gilding
Small oven-safe bowl
How to Make It
Twist: Roll the colors into long "snakes," twist them together, and fold them until the colors swirl.
Shape: Roll into a flat disc and place inside the oven-safe bowl to create a curve.
Bake & Paint: After baking and cooling, paint the very edge of the rim with gold gilding for a "dipped" look.
9. Birth Month Flower Embroidery
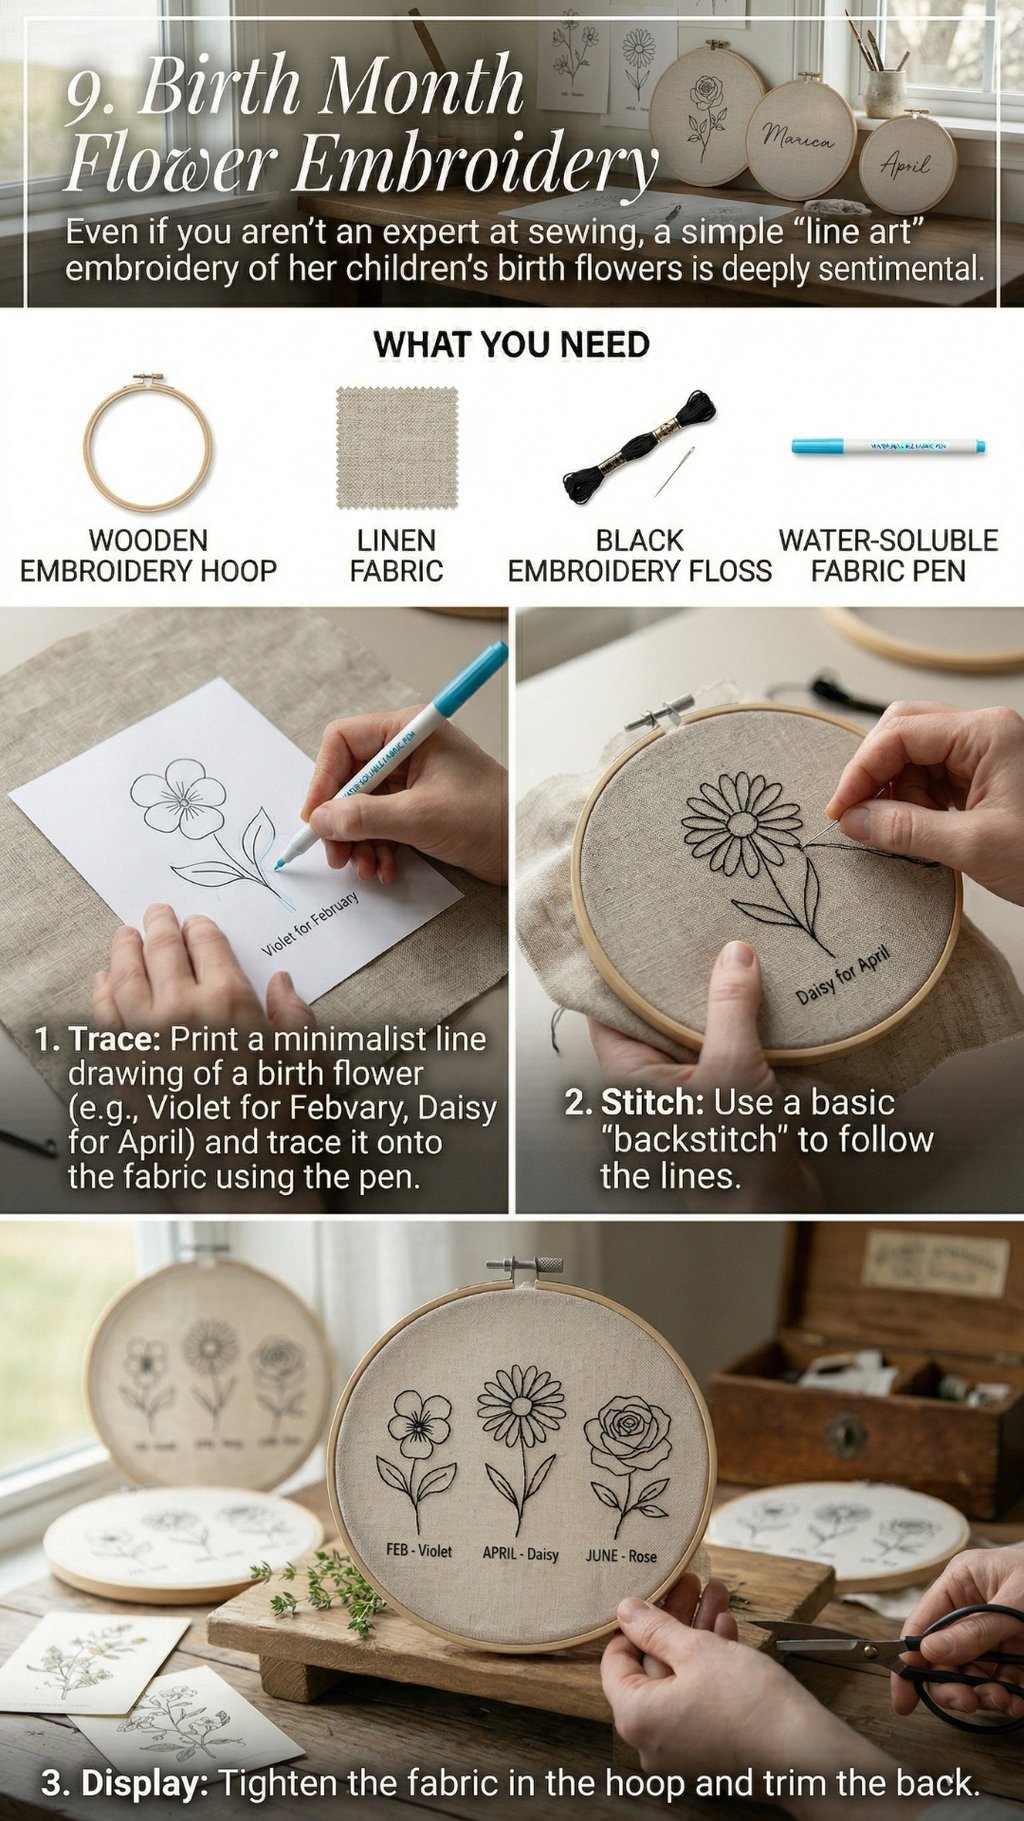
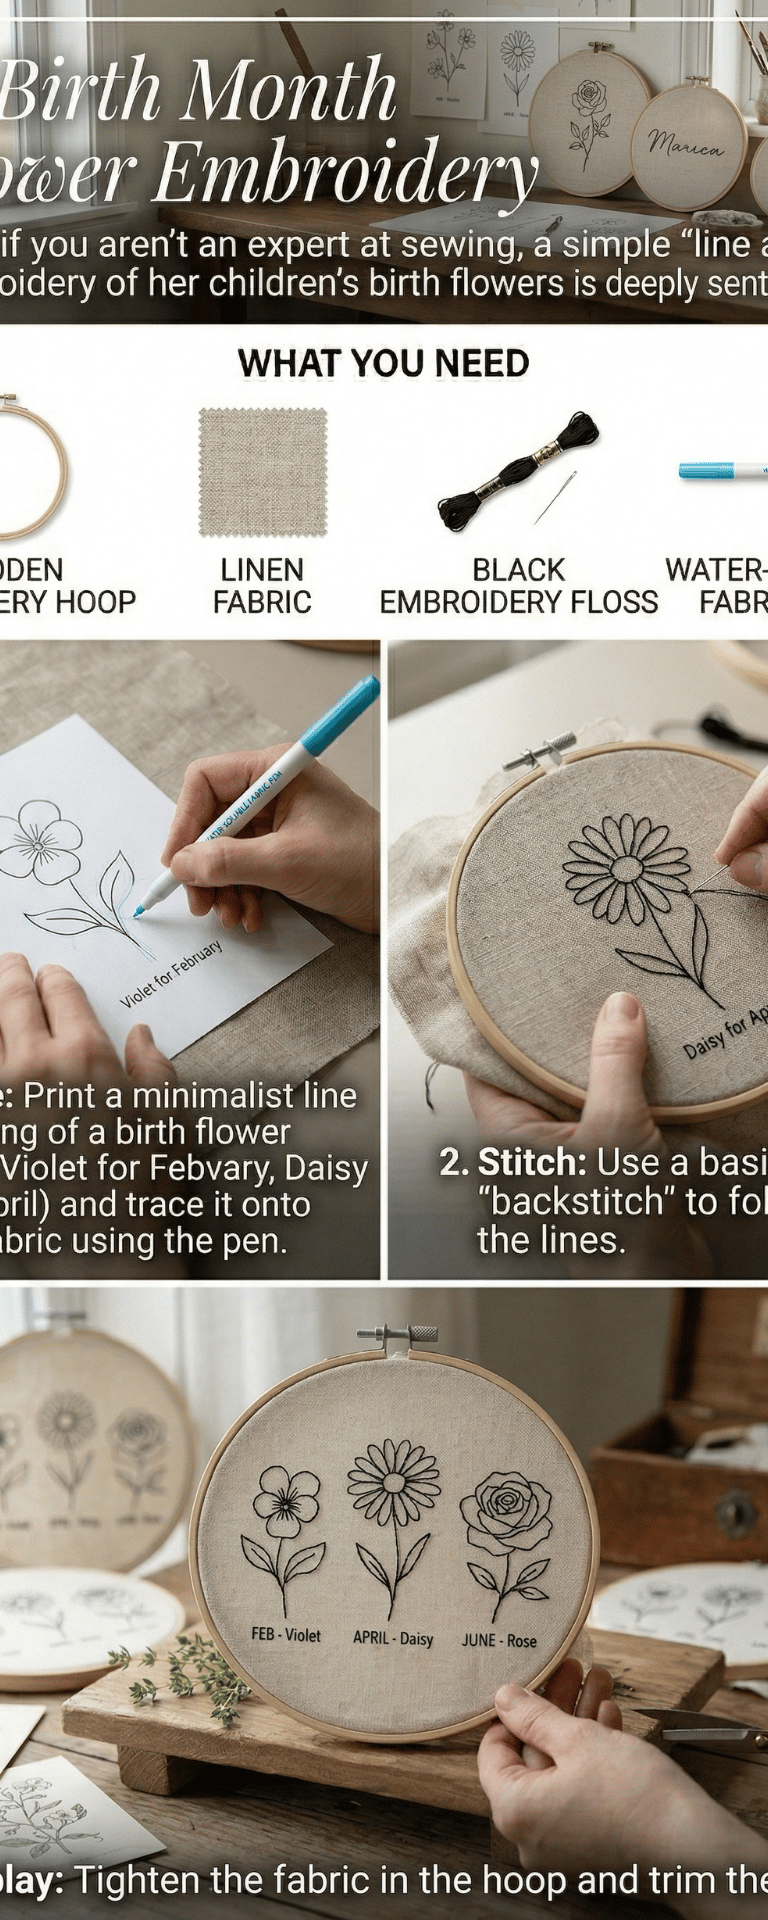
Even if you aren't an expert at sewing, a simple "line art" embroidery of her children's birth flowers is deeply sentimental.
What You Need
Wooden embroidery hoop
Linen fabric
Black embroidery floss
Water-soluble fabric pen
How to Make It
Trace: Print a minimalist line drawing of a birth flower (e.g., Violet for February, Daisy for April) and trace it onto the fabric using the pen.
Stitch: Use a basic "backstitch" to follow the lines.
Display: Tighten the fabric in the hoop and trim the back.
10. Leather-Wrapped Photo Keychain
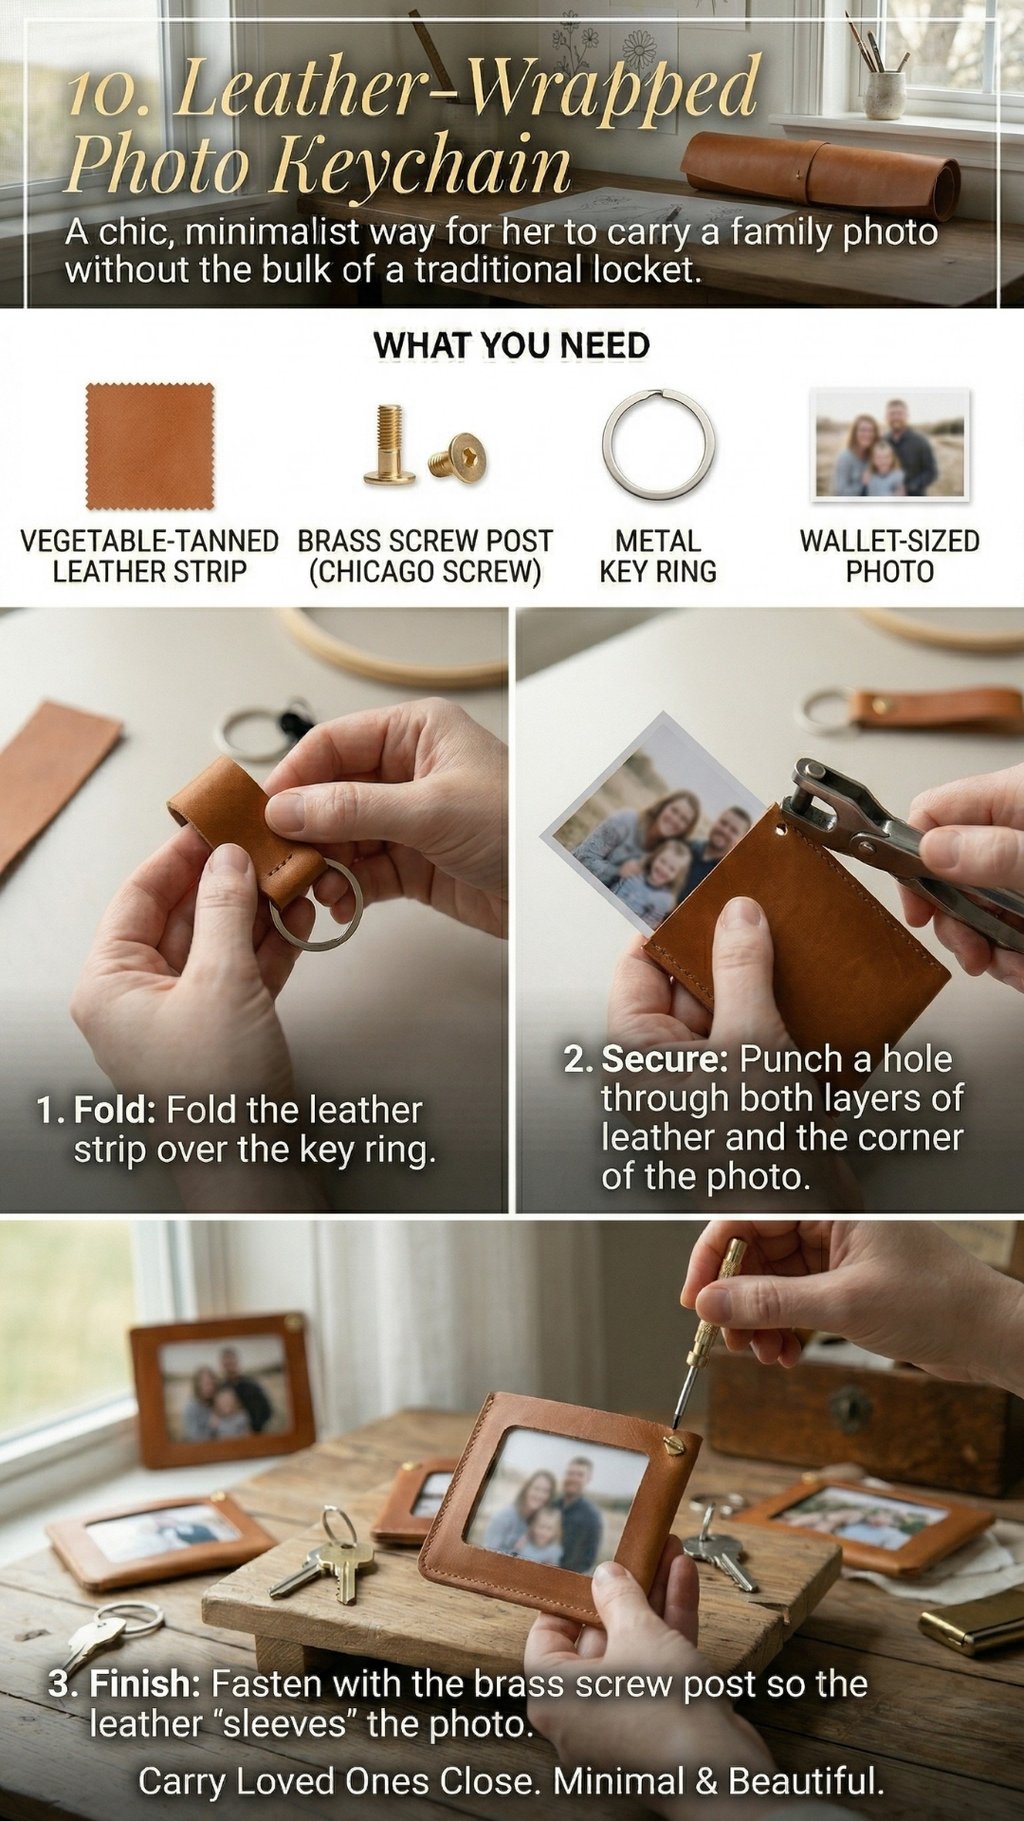
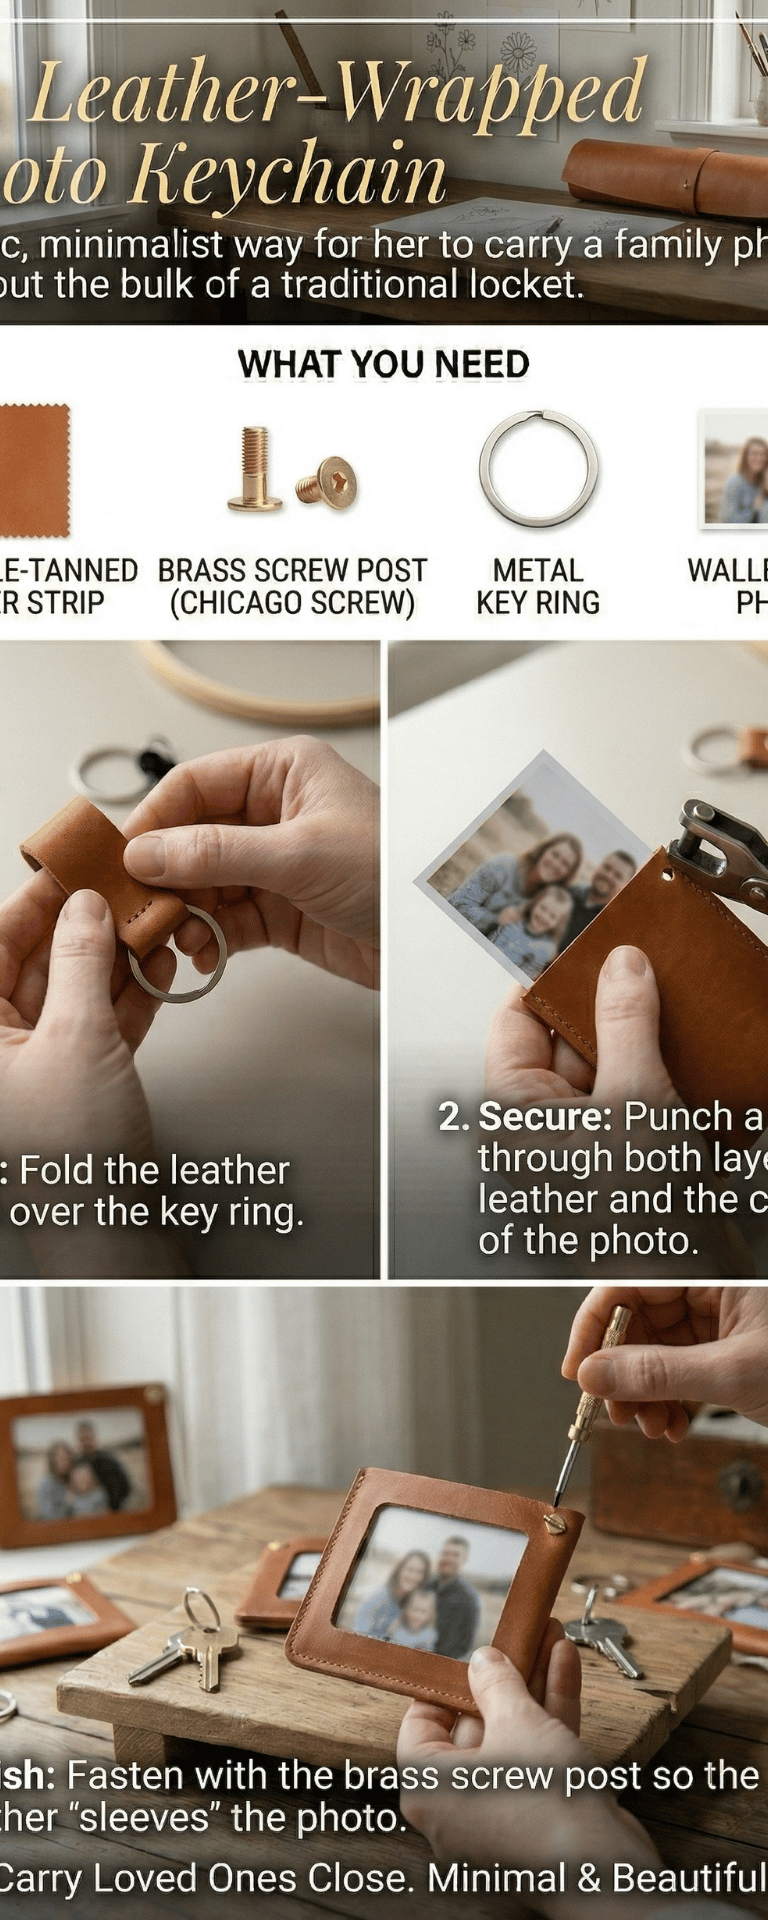
A stylish, minimalist way for her to carry a family photo without the bulk of a traditional locket.
What You Need
Small strip of vegetable-tanned leather
Brass screw post (Chicago screw)
Metal key ring
Wallet-sized photo
How to Make It
Fold: Fold the leather strip over the key ring.
Secure: Punch a hole through both layers of leather and the corner of the photo.
Finish: Fasten with the brass screw post so the leather "sleeves" the photo.
11. Hand-Painted Watercolor Recipe Cards
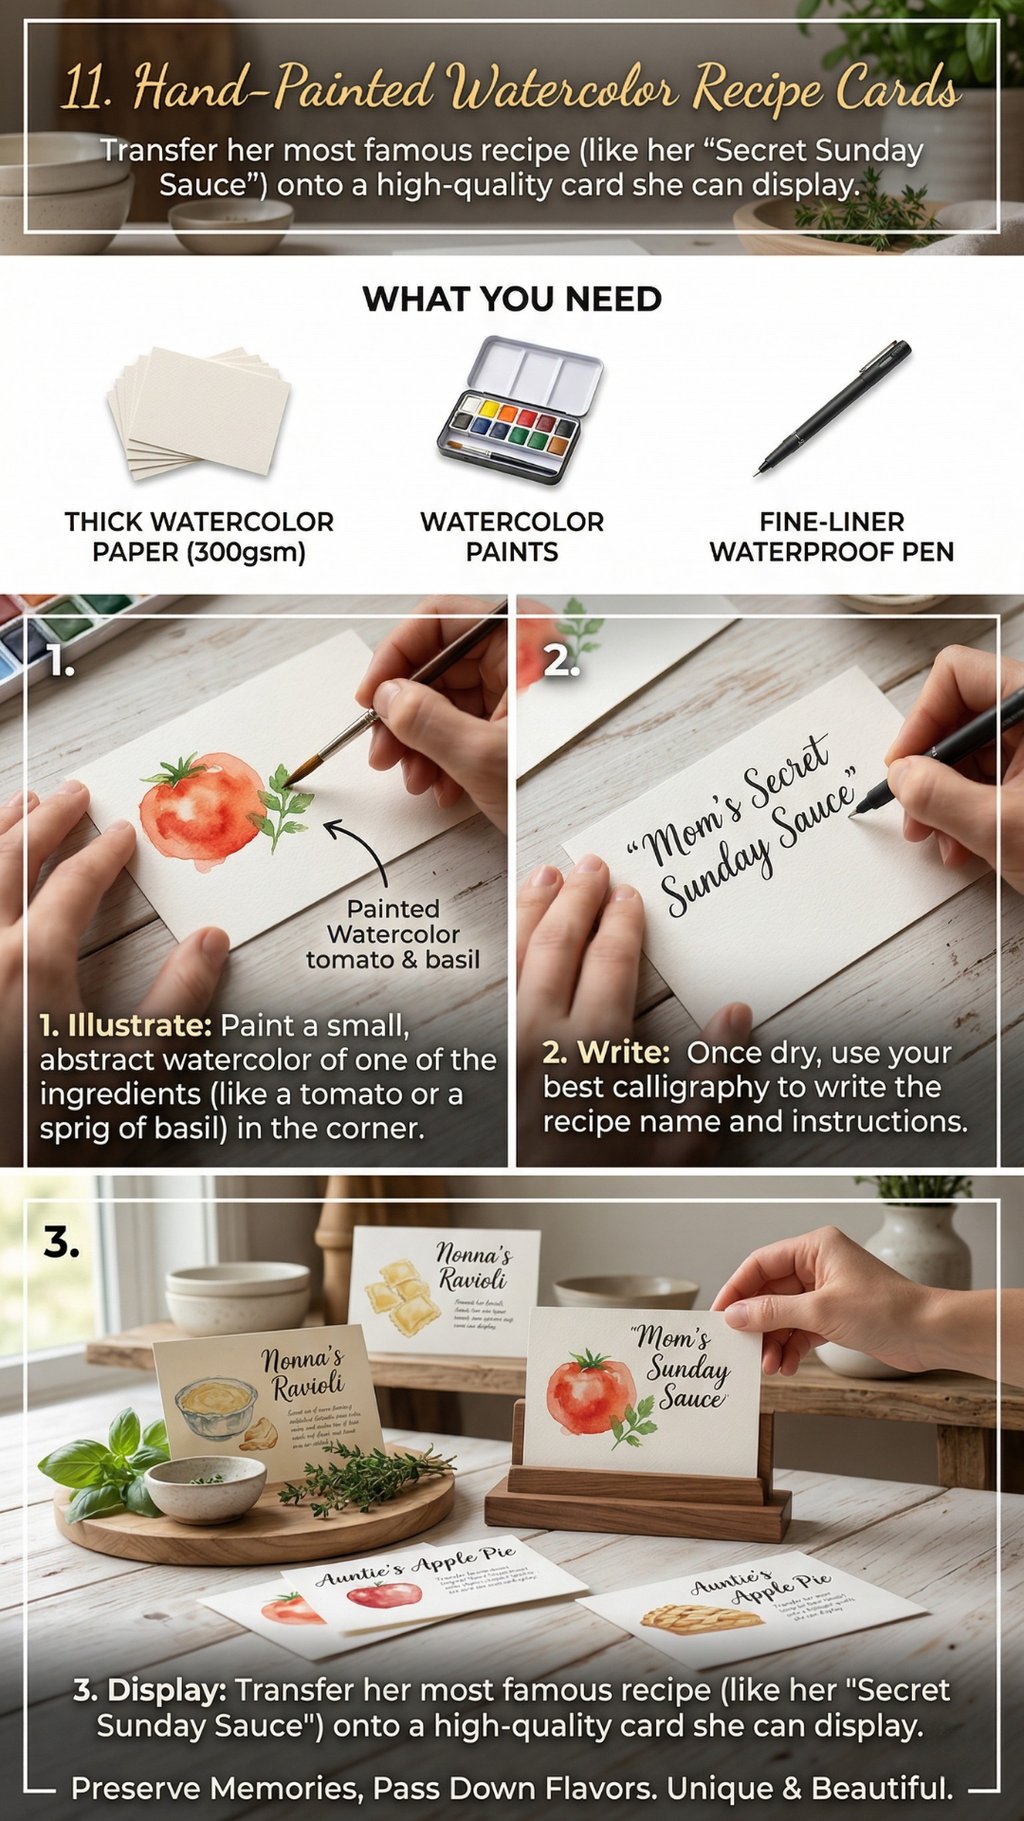
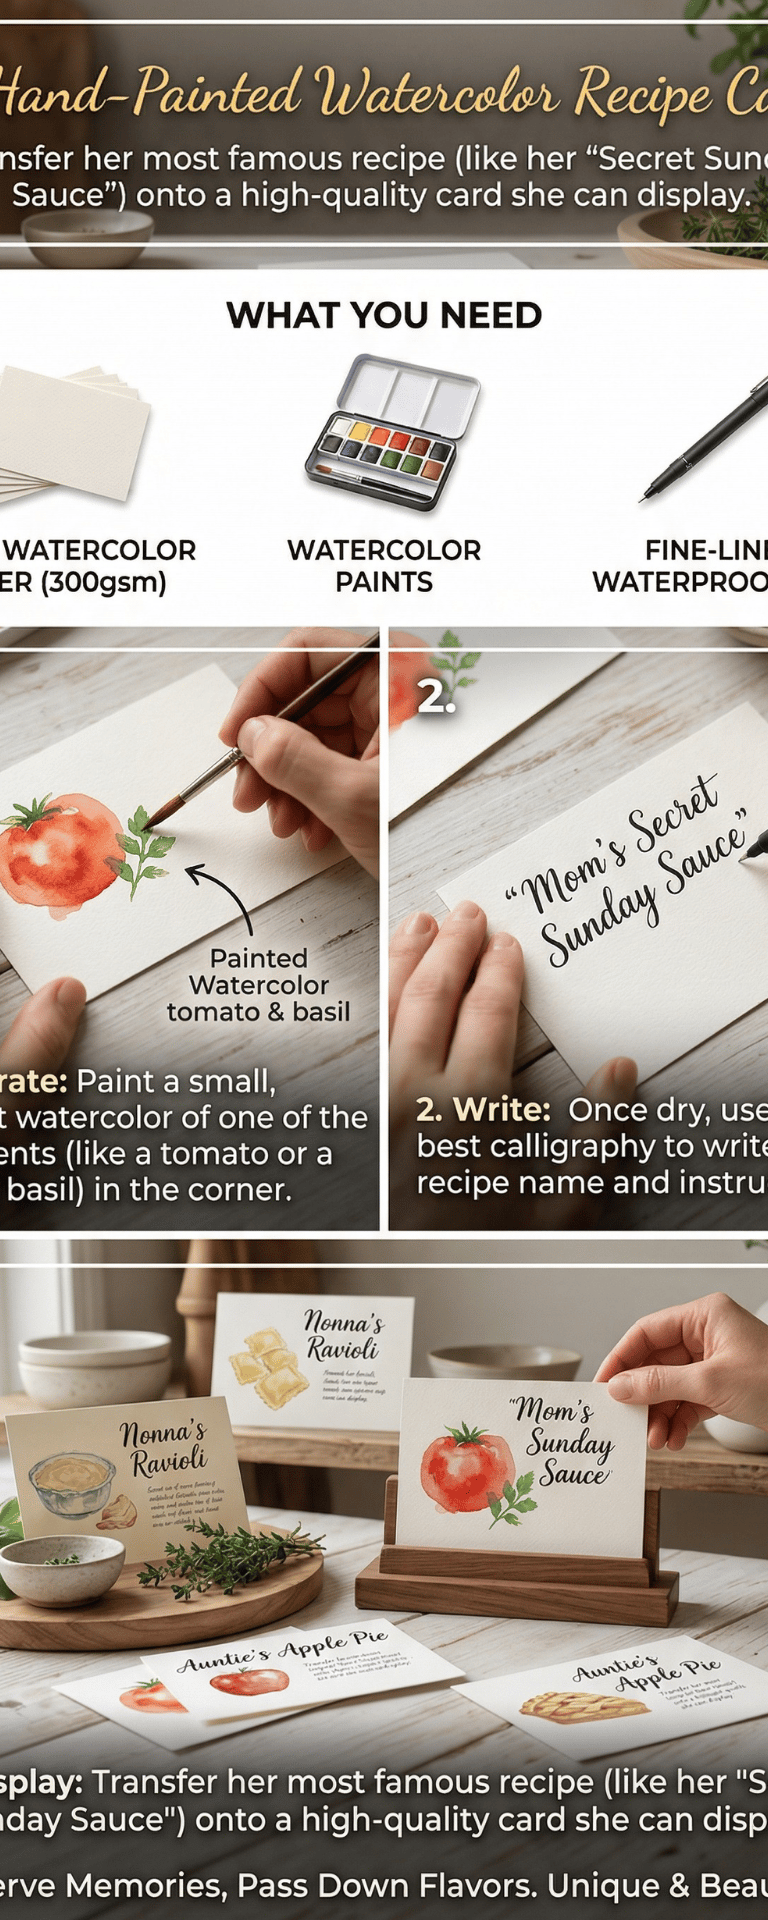
Transfer her most famous recipe (like her "Secret Sunday Sauce") onto a high-quality card she can display.
What You Need
Thick watercolor paper (300gsm)
Watercolor paints
Fine-liner waterproof pen
How to Make It
Illustrate: Paint a small, abstract watercolor of one of the ingredients (like a tomato or a sprig of basil) in the corner.
Write: Once dry, use your best calligraphy to write the recipe name and instructions.
12. Apothecary Reed Diffuser

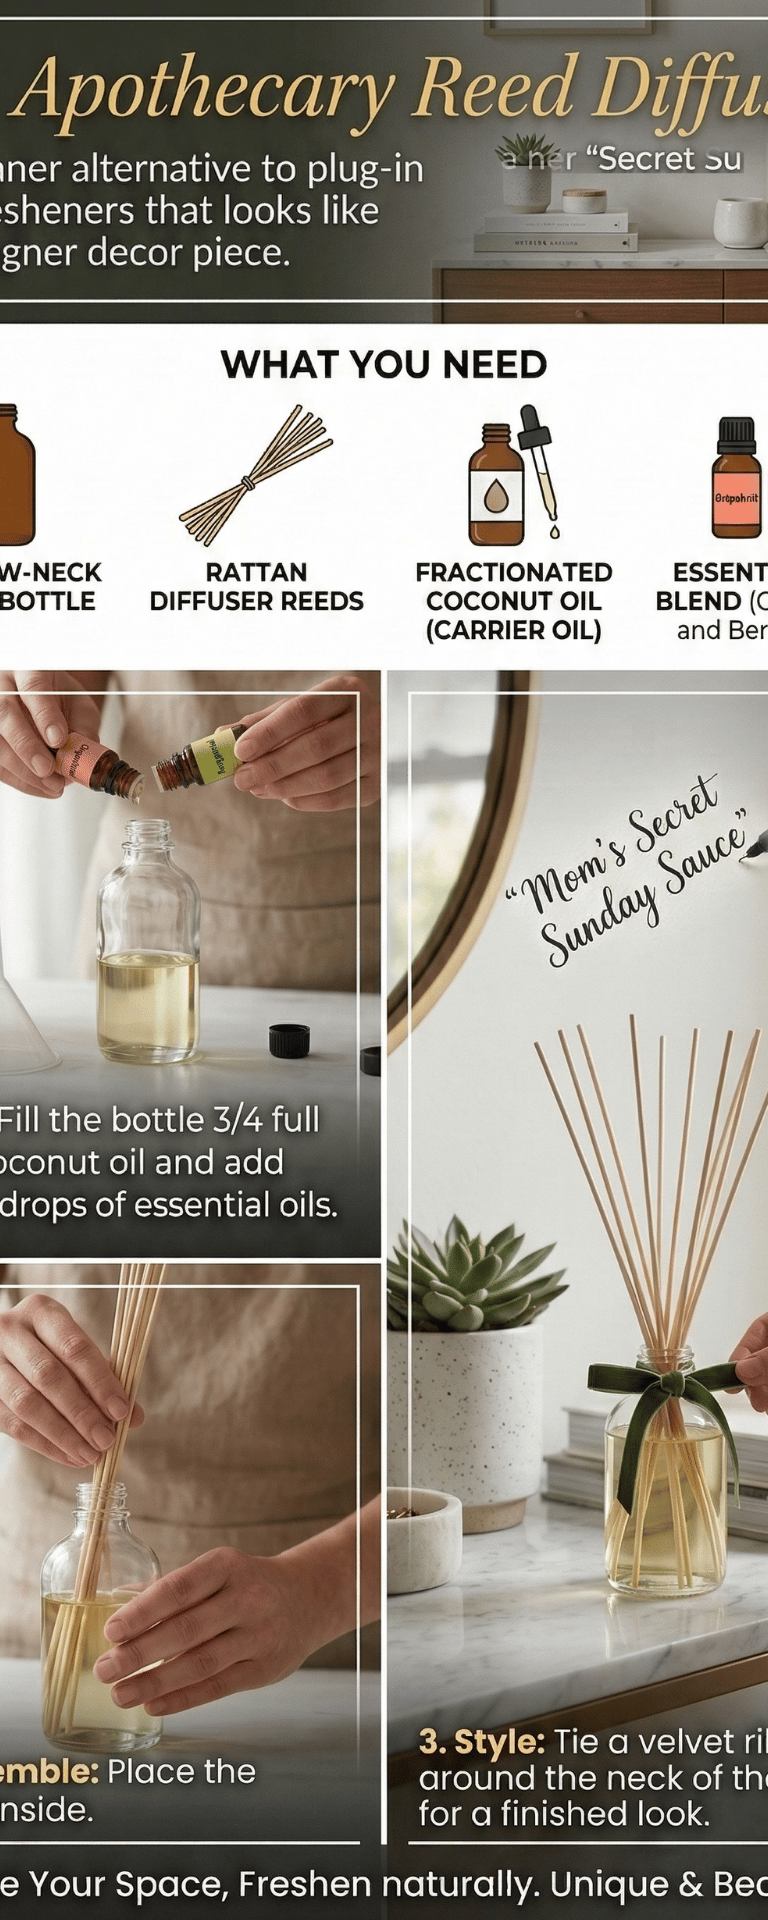
A cleaner alternative to plug-in air fresheners that looks like a designer decor piece.
What You Need
Narrow-neck glass bottle
Rattan diffuser reeds
Fractionated coconut oil (carrier oil)
Essential oil blend (Grapefruit and Bergamot is a fan favorite)
How to Make It
Mix: Fill the bottle 3/4 full with coconut oil and add 20–30 drops of essential oils.
Assemble: Place the reeds inside.
Style: Tie a velvet ribbon around the neck of the bottle for a finished look.