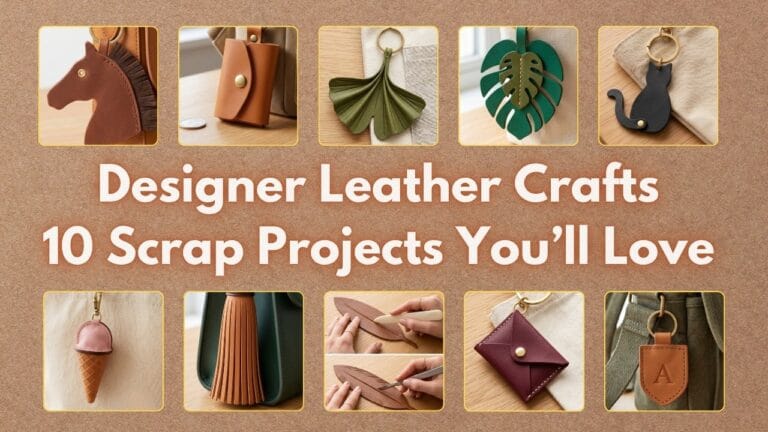
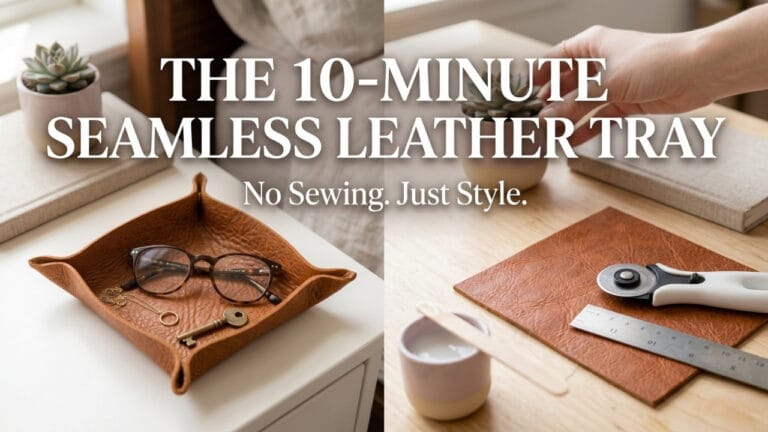
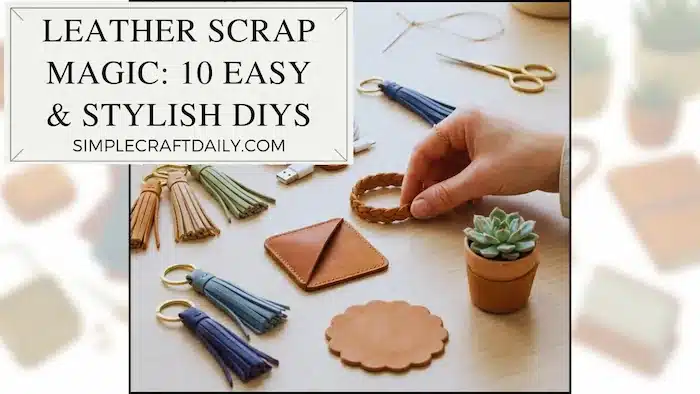
Do you have leftover materials in your craft room? First, please do not throw them away. Instead, you can create stunning scrap leather projects easily. Because leather is a durable, premium material, it looks better as it ages. Therefore, it is absolutely worth preserving. Today, we gathered fifteen fresh and brilliant ideas for you. Plus, they are very simple for total beginners. As a result, you will turn trash into treasure perfectly. Indeed, your daily life will get a touch of luxury.
This blog post contains affiliate links. As an Amazon Associate, I earn from qualifying purchases. The content on some of these projects may be enhanced with structural craft inspirations.
Key Facts:
- Technique: Scrap Leather Projects
- Difficulty: Beginner-friendly
- Makes: 15 project ideas
Detailed Supplies for Scrap Leather Projects
| Supply | Spec / Size | Used For |
|---|---|---|
| Premium Scrap Leather | Versatile, high-grade leather pieces in mixed sizes and rich earth… | |
| Leather Lacing Cord | Round leather cord for necklaces, planters, and lacing projects,… | |
| Heavy-Duty Leather Scissors | Snaps cleanly through thick hide without dulling or warping cut lines | |
| Rotary Cutter | Glides smoothly along acrylic rulers to produce perfectly straight… | |
| Rotary Hole Puncher | Easily punches multiple hole sizes required for installing snaps,… | |
| Brass Rivets & Snaps Starter Kit | Provides strong mechanical joints and quick closures for cuffs, bags,… |
You need a few specific tools to start your journey. Fortunately, they are very affordable and easy to find online. Gather these essential items for your scrap leather projects, and you will create professional accessories in minutes.
A few foundational tools and raw materials are used across multiple setups in this guide, marked with a (used throughout) tag below.
🧶 Core Materials
High-quality natural remnants form the durable base for every beginner-friendly accessory.
- Premium Scrap Leather (used throughout) — Versatile, high-grade leather pieces in mixed sizes and rich earth tones. | [Check Premium Scrap Leather on Amazon]
- Leather Lacing Cord (used throughout) — Round leather cord for necklaces, planters, and lacing projects, distinct from flat scrap pieces. | [Check Leather Lacing Cord on Amazon]
✂️ Cutting & Punching Tools
Precision blades and heavy-duty punches ensure crisp, clean edges without fraying your leather.
- Heavy-Duty Leather Scissors (used throughout) — Snaps cleanly through thick hide without dulling or warping cut lines. | [Check Leather Scissors on Amazon]
- Rotary Cutter — Glides smoothly along acrylic rulers to produce perfectly straight leather strips. | [View Rotary Cutters on Amazon]
- Rotary Hole Puncher — Easily punches multiple hole sizes required for installing snaps, rivets, and lacing. | [Check Punch Tools on Amazon]
🔩 Hardware & Adhesives
Reliable metal fasteners and bonding agents keep your fold-over designs secure without sewing.
- Brass Rivets & Snaps Starter Kit — Provides strong mechanical joints and quick closures for cuffs, bags, and napkin rings. | [View Hardware Kits on Amazon]
- Sam Browne Studs (Brass) — Classical post-and-ball screw fasteners that add a sleek vintage closure to envelope wallets. | [Check Sam Browne Studs on Amazon]
- Leather Glue Adhesive — Bonds raw leather seams instantly before hardware setting or edge burnishing. | [Check Leather Glue on Amazon]
- Natural Beeswax — Smooths rough cut edges and seals exposed leather fibers for a polished finish. | [Check Beeswax on Amazon]
- Raw Brass Earring Hooks — Hypoallergenic metallic hooks designed for lightweight leather statement jewelry. | [Check Earring Hooks on Amazon]
- Raw Brass Tube Components — Hollow metal tube beads that slide cleanly onto leather cord for modern necklace designs. | [Check Raw Brass Tubes on Amazon]
🧵 Specialty & Project Supplies
Specialized stamping, stitching, and embellishing tools to personalize your handcrafted leather pieces.
- Metal Letter Stamping Kit — Imprints clear, permanent alphabet letters directly into leather for personalized plant tags. | [Check Metal Stamps on Amazon]
- Natural Wooden Beads — Decorative accents used for cinch ties on vase wraps and bohemian tassels. | [Check Wooden Beads on Amazon]
- Leather Sewing Kit — Heavy-duty waxed thread and sharp glover needles built to glide through punched holes. | [View Sewing Kits on Amazon]
- Wooden Dowel Hooks — Sturdy timber backing pegs for creating wrapped leather wall storage systems. | [Check Dowel Hooks on Amazon]
- Small Metal Washers — Compact steel weights designed to sit inside stitched leather page weights. | [Check Metal Washers on Amazon]
- Small Wooden Sticks — Thin wooden dowel sticks used as plant tag stakes. | [Check Wooden Craft Sticks on Amazon]
Choose Your Leather Starter Kit
Not sure which tools to buy individually? Skip the guesswork and grab a complete kit sized to your experience level. Each set below bundles the essentials so you can start your first project today.
🟢 Beginner — Just Getting Started
Perfect if this is your first time working with leather. This compact kit covers the core basics — cutting, punching, and stitching — without overwhelming you with tools you won’t use yet.


🟡 Intermediate — Ready to Level Up
Already comfortable with the basics from this guide? This set adds stamping patterns, a wider range of punches, and rivet hardware, so you can take on more detailed, decorative projects.

🔴 Advanced — Built to Last
For the dedicated hobbyist ready to invest in heavier-duty tools. This boxed set keeps everything organized and includes the full range of cutting, punching, and carving tools you’ll need for bigger, more demanding projects.

How to Make a Minimalist Leather Hair Cuff: Scrap Leather Projects
Do you want to try our favorite idea? Here, we explain how to make the beautiful hair cuff step by step. Because the process is so simple, you can finish it in ten minutes.
- Cut the Leather: First, cut a rectangle piece of thick scrap leather. Cut an exact 1.5-inch by 4-inch (3.8 cm x 10 cm) strip for standard hair volume.
- Punch the Holes: Next, use your rotary leather punch with a 1/8-inch (3 mm) hole punch wheel. Make one centered hole exactly 3/8 inch (1 cm) inward from each end of your rectangle.
- Attach the Snap: Afterward, push the post of a 1/2-inch (12 mm) raw brass snap fastener through each punched hole and lock it using setting pliers. Consequently, the leather cuff can easily open and close.
- Wrap It Up: Finally, tie your hair with a regular elastic band. Then, simply wrap the leather cuff around the elastic and snap it shut.
Core Leathercraft Techniques
You’ve just made the hair cuff — the simplest project in this guide. But the other 14 ideas lean on a handful of additional techniques. Learn these seven once, and every remaining project becomes a simple combination of skills you already have.
1. Hardware Setting (rivets, snaps, Sam Browne studs)
- Punch a hole through both layers of leather where the hardware will sit.
- For rivets: Push the rivet post through from the back, place the cap on top, and press firmly with rivet pliers (or tap gently with a mallet) until it locks flat.
- For snaps: Insert the socket half through one layer and the stud half through the other, then press each together with snap pliers until you hear a click.
- For Sam Browne studs: Push the stud’s threaded post through the hole from the back, then twist the flat cap onto the front until snug — no tools required.
Used in: Hair Cuff, Napkin Rings, Envelope Wallet, Geometric Earrings.
2. Hand Stitching (running stitch)
- Punch a straight line of evenly spaced holes (about ¼ inch apart) along the edge you want to sew.
- Thread waxed thread through a leather needle, doubling it for extra strength if desired.
- Pass the needle up through the first hole, then down through the next, moving in one direction only — this creates the simple running stitch.
- When you reach the end, loop back through the last two holes once and trim the thread close to the leather.
Used in: Pen Sleeve, Page Weights.
3. Punching & Lacing (corset-style)
- Punch two parallel rows of holes along the edges you want to join, spacing each hole about ½ inch apart and directly across from its partner on the opposite row.
- Starting at the top, thread a thin leather cord through the first two opposite holes from the inside out.
- Cross the cord diagonally to the next hole down, in and out, alternating sides — just like lacing a shoe or corset.
- Continue down the full row, then tie the two loose ends in a secure double knot at the bottom.
Used in: Coffee/Mug Sleeve.
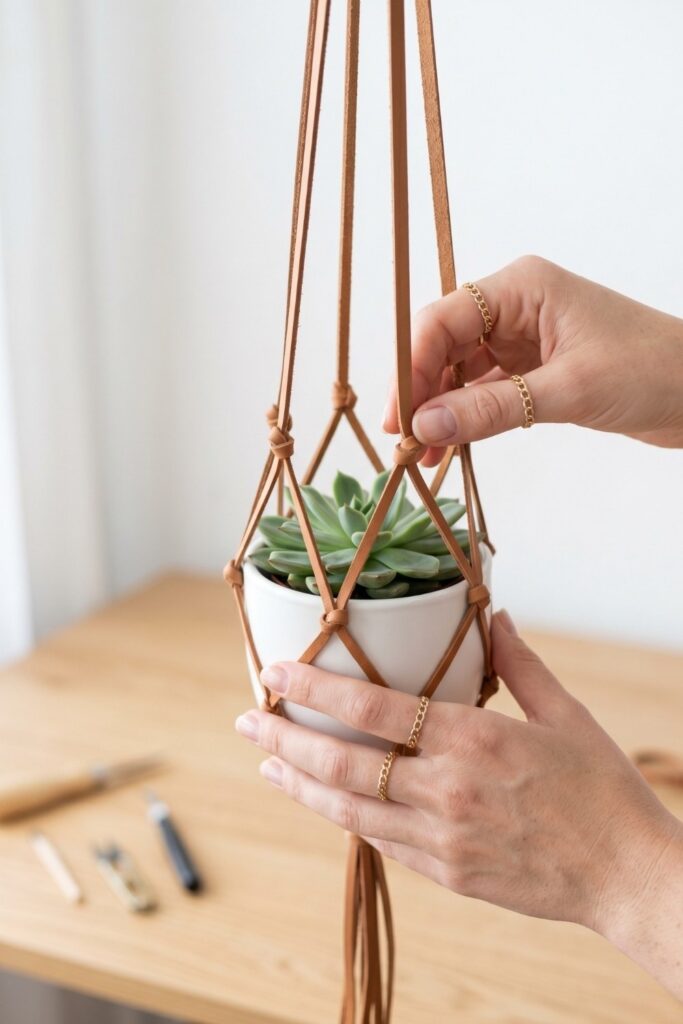
4. Knotting (macramé-style)
- Cut several long, even strips of leather cord — the exact number depends on the size of your net or wrap.
- Gather the strips at one end and secure them together with a single overhand knot to anchor the group.
- Divide the strips into pairs and tie a second row of overhand knots a few inches below the first, offsetting each knot so it sits between two knots from the row above — this is what creates the net pattern.
- Repeat the offset-knot rows until the net is the size you need, then gather all strands at the bottom and finish with one final anchor knot.
Used in: Hanging Planter (full net), Zipper Pulls and Necklace (single anchor knot only).
5. Metal Stamping
- Place your leather strip on a hard, flat surface (never a soft or uneven one — it blurs the imprint).
- Position the metal letter stamp exactly where you want the mark, holding it perfectly perpendicular to the leather.
- Strike the top of the stamp firmly with a mallet in one confident hit — multiple light taps cause a blurry, doubled imprint.
- Move to the next letter, using the edge of the previous imprint as a spacing guide.
Used in: Stamped Plant Tags.
6. Rolling & Wrapping
- Apply a thin, even layer of leather glue to the back of your strip before you start rolling or wrapping.
- Starting at one end, roll or wrap the leather around your base (a dowel for hooks, or around itself for a cone) under firm, even tension — looseness here shows later as wrinkles.
- Overlap each pass slightly over the previous one so no gaps or bare wood/surface show through.
- Hold the final end firmly in place for 30–60 seconds until the glue grabs, then let it cure fully before handling.
Used in: Wall Hooks, Leather Ring Cones.
7. Weaving (basket-style)
- Cut an even number of thin leather strips for your “warp” (the stationary strips) and lay them side by side, edges touching.
- Take one “weft” strip (the moving strip) and weave it over the first warp strip, under the second, over the third, and so on across the row.
- Push the weft strip snugly against the top edge, then take a second weft strip and weave it in the opposite pattern (under, over, under) to lock the first row in place.
- Continue alternating the over-under pattern row by row until the coaster reaches your desired size, then trim and glue the loose ends flat on the underside.
Used in: Woven Square Coasters.
15 Brilliant Scrap Leather Projects
Additionally, these projects offer a sustainable and stylish aesthetic. Here, we have fifteen unique ideas to try right now.
1. Minimalist Leather Hair Cuff
Supplies Needed: Premium Scrap Leather (1.5″ x 4″ strip), Brass Snap Fastener Set (1/2″ snap), Rotary Leather Punch Pliers (1/8″ punch wheel), Heavy-Duty Leather Scissors.
This is our absolute favorite project to start with. First, cut an exact 1.5-inch by 4-inch (3.8 cm x 10 cm) leather strip. Next, punch a 1/8-inch (3 mm) hole centered 3/8 inch from each end and install a 1/2-inch brass snap. Because you only need a single snap, you can complete this piece in under ten minutes. Indeed, it adds a perfect boho touch to your daily hairstyle.
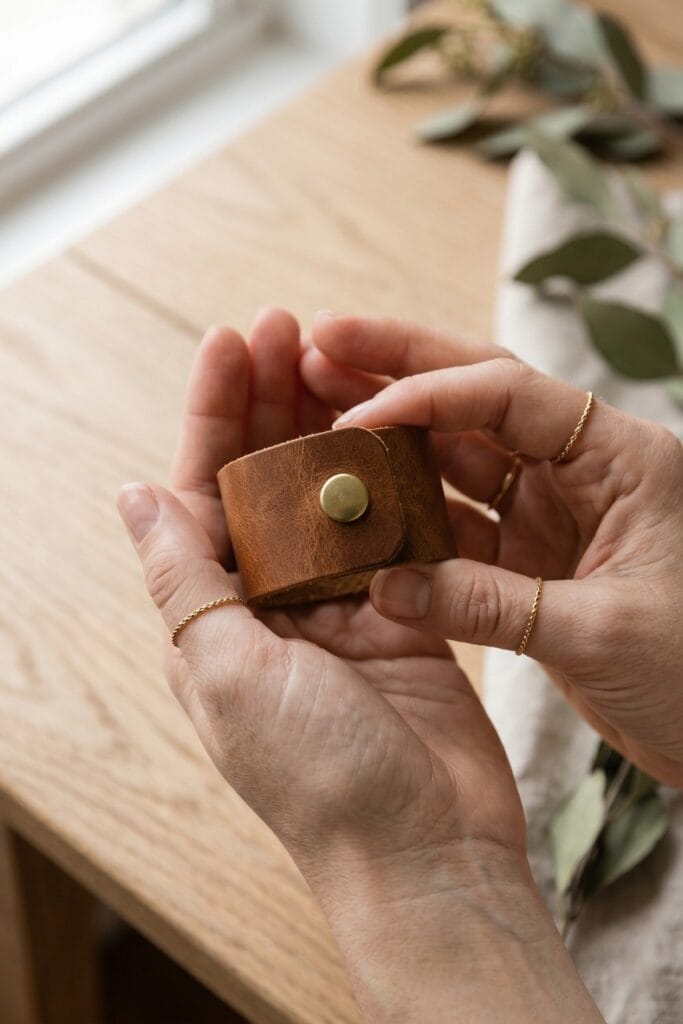
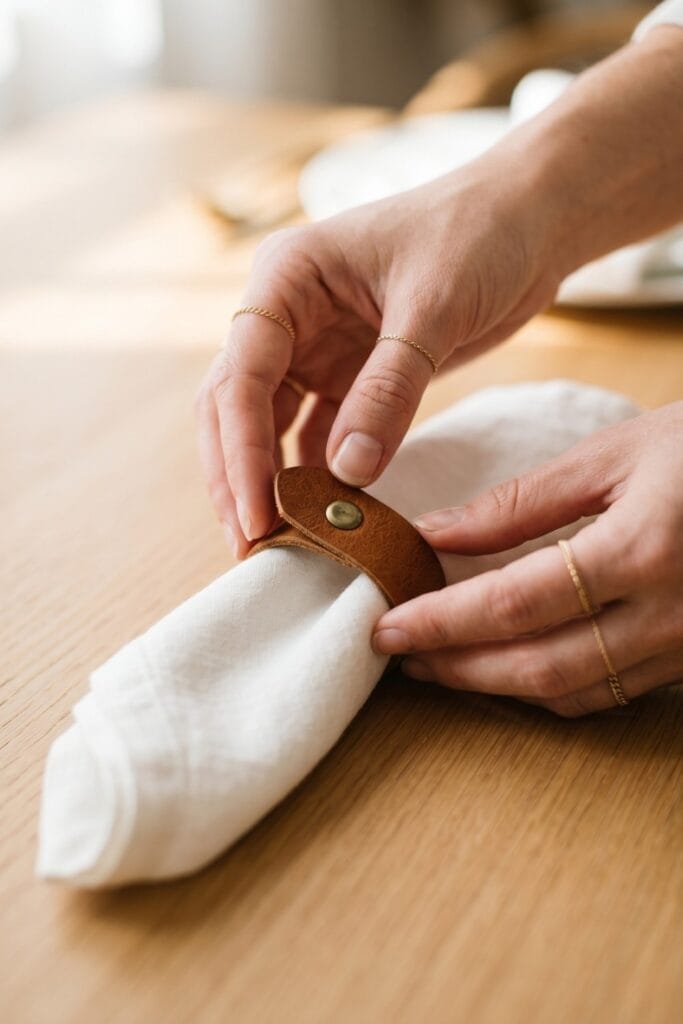
2. Brass and Boho Napkin Rings
Supplies Needed: Premium Scrap Leather (1″ x 6″ strips), Solid Brass Rivets (1/4″ post length), Rotary Leather Punch Pliers (1/8″ punch wheel), Heavy-Duty Leather Scissors.
Upgrade your dinner table easily. First, cut thin leather strips measuring 1 inch by 6 inches (2.5 cm x 15 cm). Next, overlap the ends by 1/2 inch, punch a 1/8-inch hole through both layers, and join them with a single 1/4-inch brass rivet. Because the design is simple, it looks very high-end. Thus, your dining aesthetic becomes truly artisan.
3. No-Sew Envelope Wallet: Scrap Leather Projects
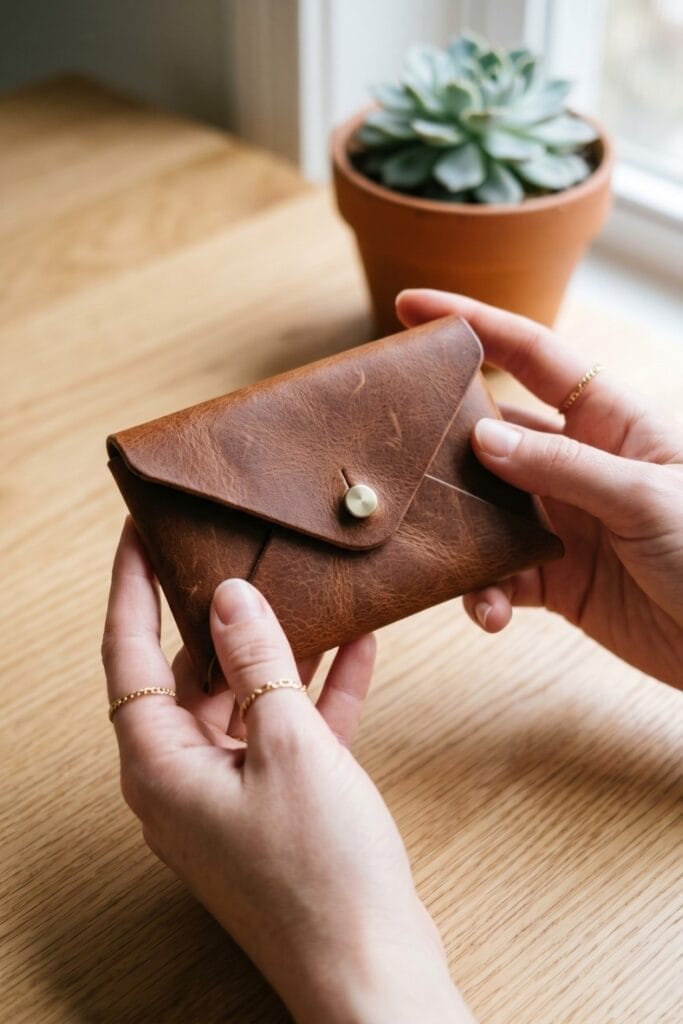
Supplies Needed: Premium Scrap Leather (4″ x 8″ piece), Sam Browne Stud (3/8″ brass head), Rotary Leather Punch Pliers (1/8″ punch wheel), Heavy-Duty Leather Scissors.
Make a minimalist wallet without sewing. First, cut a 4-inch by 8-inch (10 cm x 20 cm) leather piece and fold the bottom 3 inches up to form the main pocket. Next, punch a 1/8-inch hole through the center of the top flap and install a 3/8-inch metal Sam Browne stud to secure it. Therefore, you get a chic, stitch-free cardholder quickly.
4. Leather-Wrapped Wooden Wall Hooks
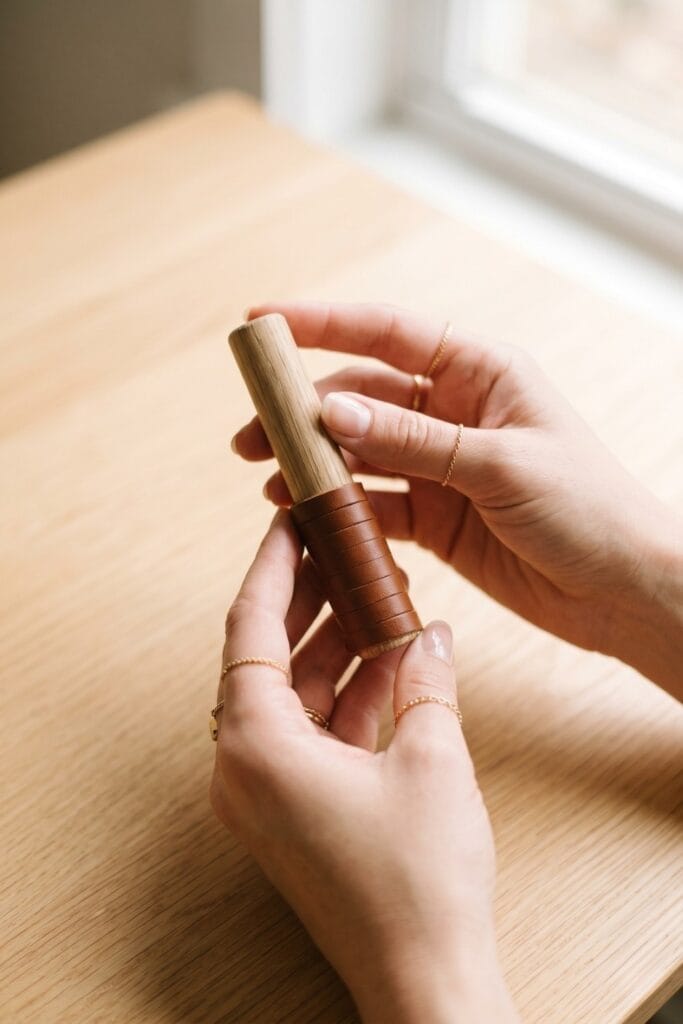
Supplies Needed: Premium Scrap Leather (0.75″ x 6″ strips), Wooden Dowel Hooks (1″ diameter), Leather Glue Adhesive, Heavy-Duty Leather Scissors.
Enhance your entryway decor. First, get simple wooden dowel hooks that are 1 inch in diameter. Then, cut 3/4-inch wide by 6-inch long (2 cm x 15 cm) leather strips, apply leather glue to the back, and tightly wrap them around the wooden base. As a result, you create luxurious, modern wall storage. Plus, it takes only ten minutes.
5. Geometric Statement Earrings (Scrap Leather Projects)
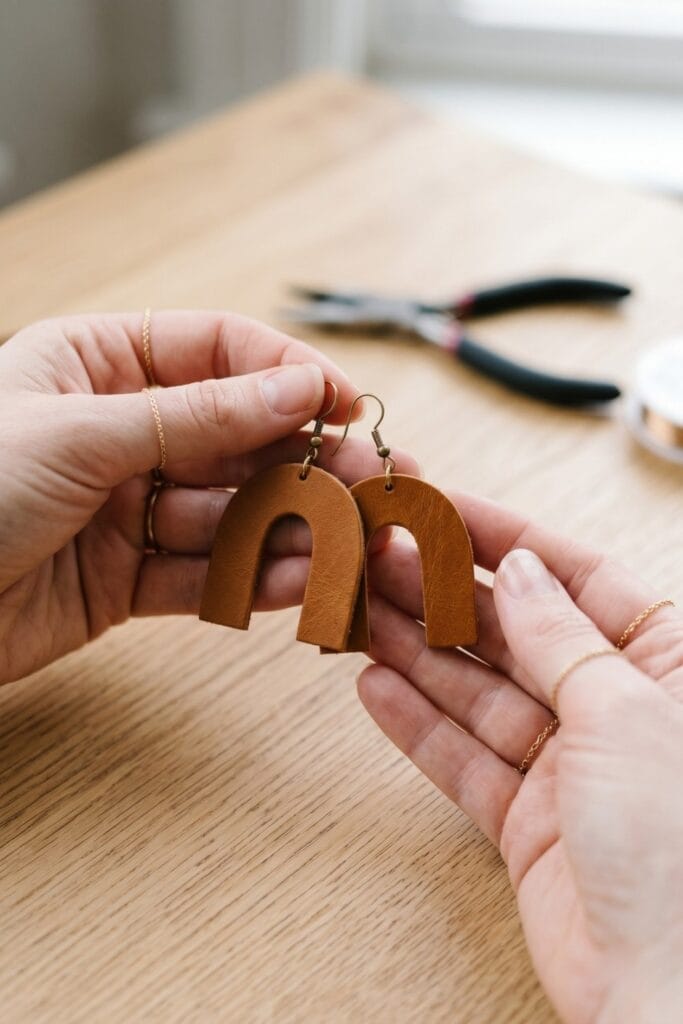
Supplies Needed: Premium Scrap Leather (1″ x 1.5″ scraps), Raw Brass Earring Hooks (20-gauge wire), Rotary Leather Punch Pliers (1/16″ punch wheel), Heavy-Duty Leather Scissors.
Create bold and lightweight jewelry. First, cut matching 1-inch by 1.5-inch (2.5 cm x 3.8 cm) leather arch shapes. Next, punch a tiny 1/16-inch hole centered at the top of each arch. Finally, attach raw brass earring hooks securely through the tiny holes. Consequently, you have stunning statement pieces.
6. Stamped Botanical Plant Tags
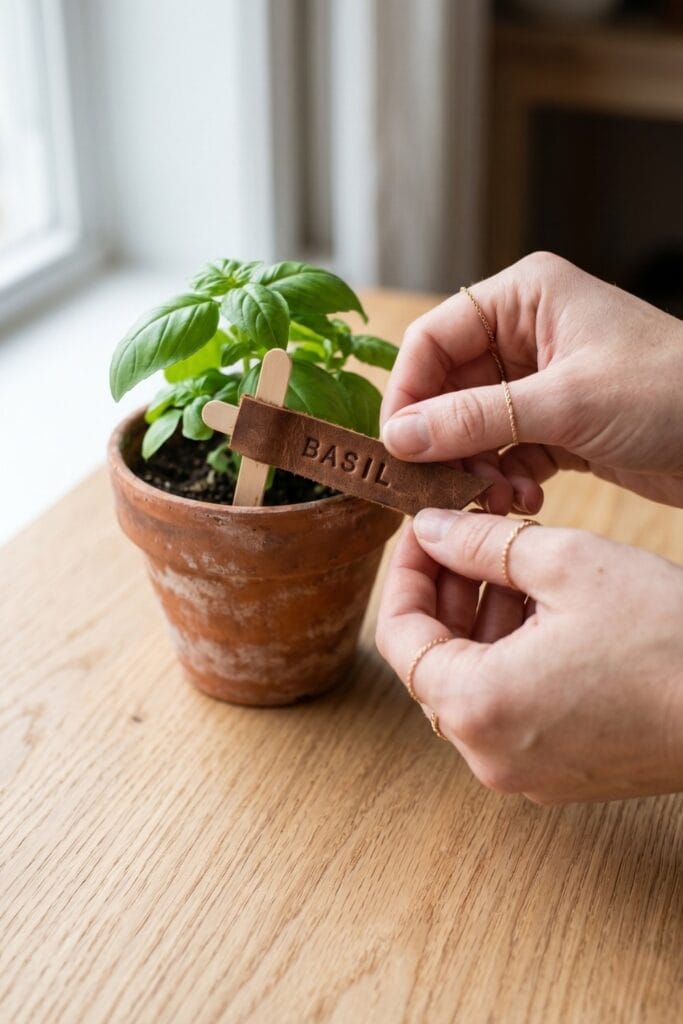
Supplies Needed: Premium Scrap Leather (0.75″ x 3″ strips), Metal Letter Stamping Kit (1/4″ letters), Leather Glue Adhesive, Small Wooden Sticks (12″ long x 0.25″ wide), Heavy-Duty Leather Scissors.
Organize your indoor garden beautifully. First, cut 0.75-inch by 3-inch (2 cm x 7.5 cm) leather strips. Next, use 1/4-inch metal stamps to firmly imprint plant names like “Basil” into the center. Then, apply leather glue and wrap the tag around a 12-inch wooden stick. Therefore, your pots gain a fantastic rustic charm.
7. Minimalist Single Pen Sleeve
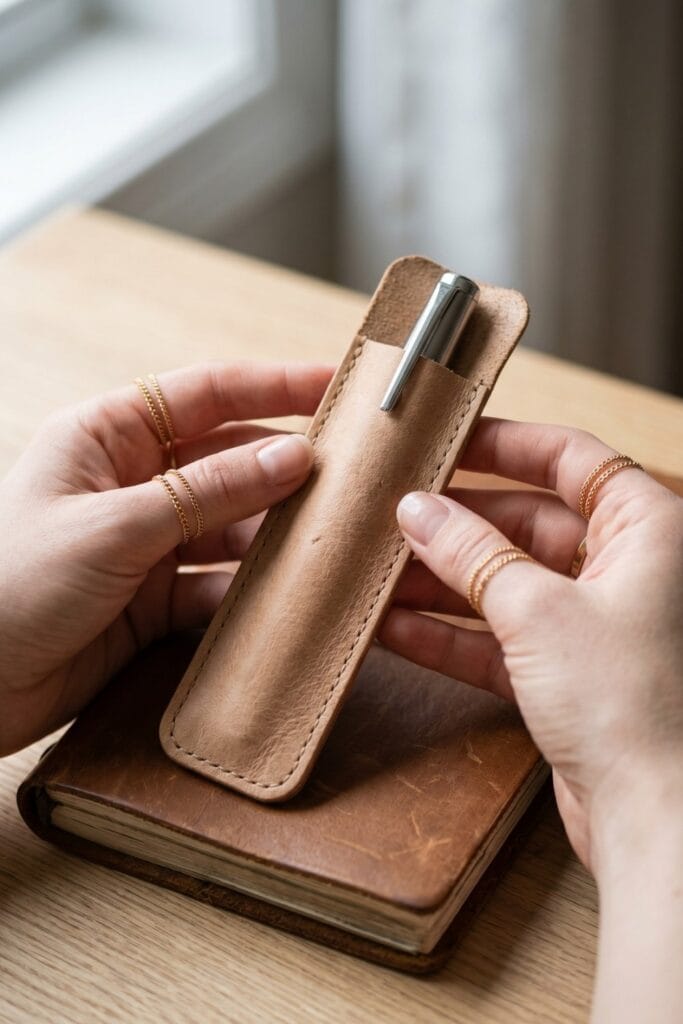
Supplies Needed: Premium Scrap Leather (1.75″ x 12″ strip), Waxed Thread & Sewing Needles (0.8 mm thread), Rotary Leather Punch Pliers (1/16″ punch wheel), Heavy-Duty Leather Scissors.
Protect your favorite fountain pen. First, cut a 1.75-inch by 12-inch (4.5 cm x 30 cm) soft leather strip and fold it in half lengthwise. Next, punch a row of tiny holes 1/8 inch inward along the open side and sew the edge with a simple running stitch. Thus, you create an elegant and slim pen pocket. Moreover, it fits perfectly in any journal.
8. Artisan Leather Ring Cones: Scrap Leather Projects
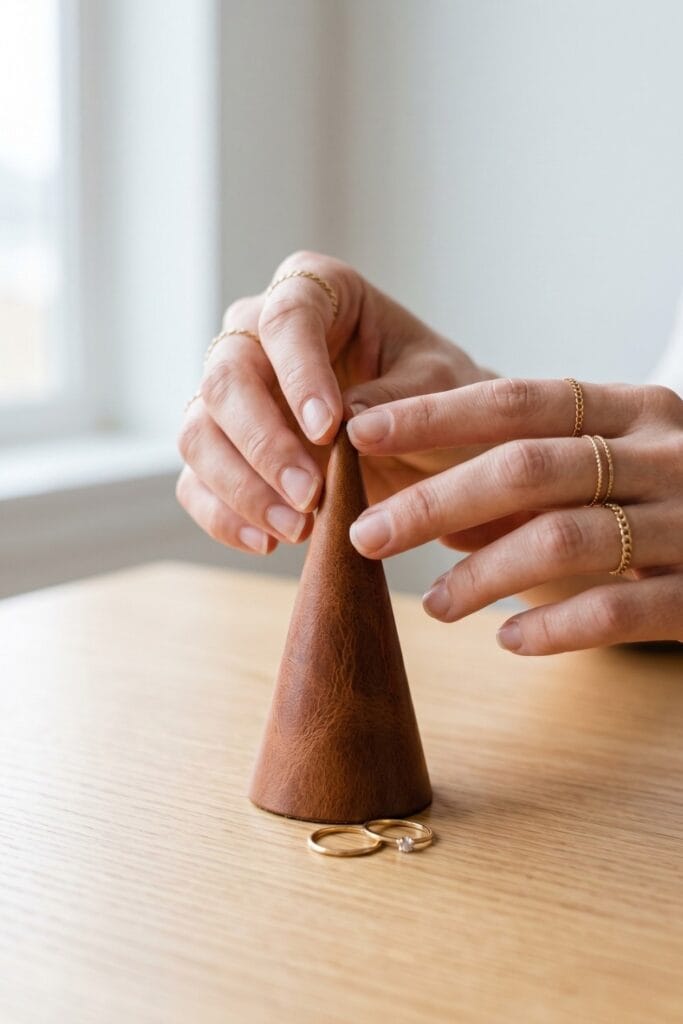
Supplies Needed: Premium Scrap Leather (3″ radius semi-circle), Leather Glue Adhesive, Heavy-Duty Leather Scissors.
Display your jewelry gracefully. First, cut a 3-inch radius (7.5 cm) semi-circle from stiff leather. Then, roll it tightly into a sharp cone shape with a 1-inch base diameter. Next, apply leather glue along the back seam and hold firmly for 30 seconds. As a result, you get a chic stand for your rings.
9. Woven Square Coasters: Scrap Leather Projects
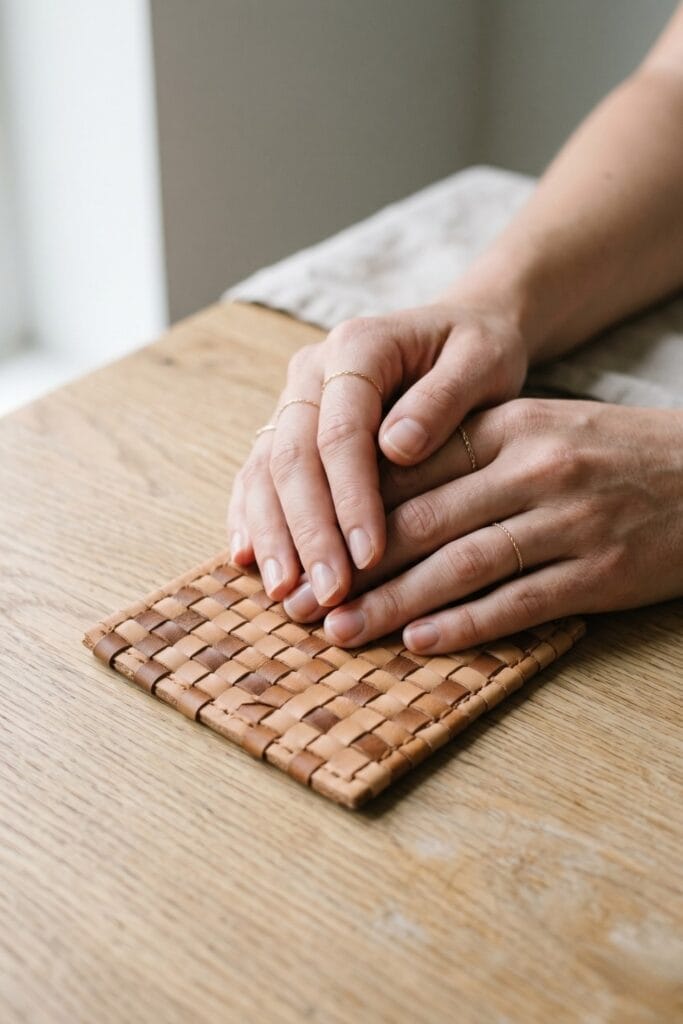
Supplies Needed: Premium Scrap Leather (0.5″ x 4″ strips, 8-10 count), Leather Glue Adhesive, Heavy-Duty Leather Scissors.
Create a highly textured table accessory. First, cut 8 to 10 thin leather strips measuring 0.5 inches by 4 inches (1.2 cm x 10 cm). Next, weave them together tightly in a 4-inch by 4-inch square basket pattern and glue the loose end tabs underneath. Consequently, you produce beautiful, woven square coasters. Indeed, they protect your oak table perfectly.
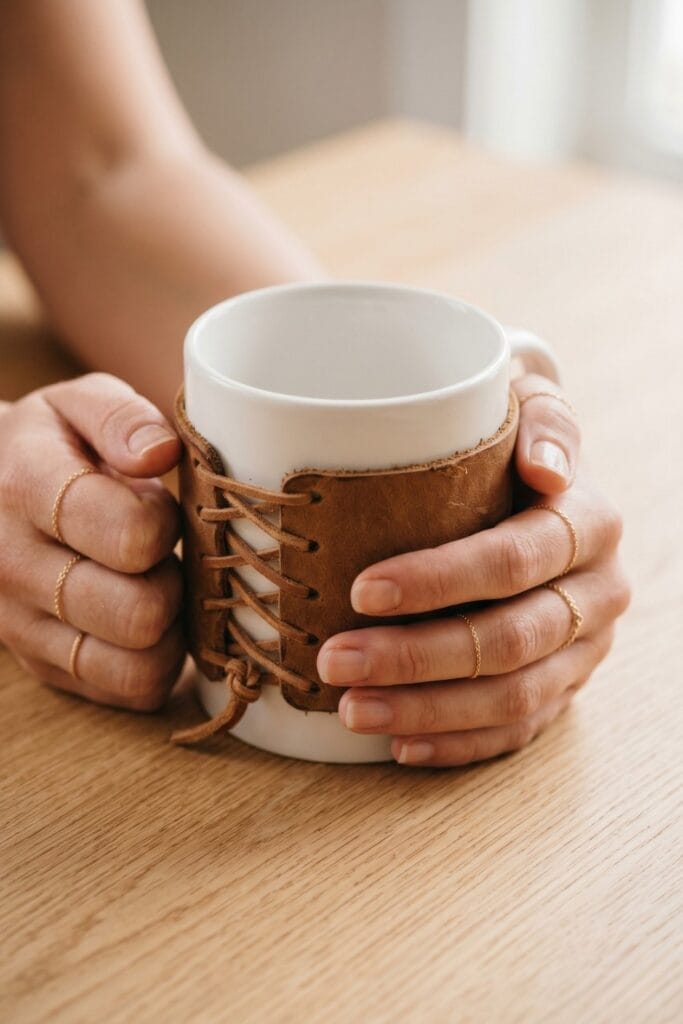
10. Coffee or Mug Sleeve
Supplies Needed: Premium Scrap Leather (2.5″ x 10″ curved strip), Leather Lacing Cord (1/8″ wide), Rotary Leather Punch Pliers (1/8″ punch wheel), Heavy-Duty Leather Scissors.
Keep your morning coffee warm safely. First, cut a curved leather band measuring 2.5 inches wide by 10 inches long (6.5 cm x 25 cm). Next, punch paired 1/8-inch holes spaced 1/2 inch apart along both short ends and lace them up corset-style with a thin leather cord. Therefore, it looks like a stylish, rustic corset.
11. Leather Page Weights
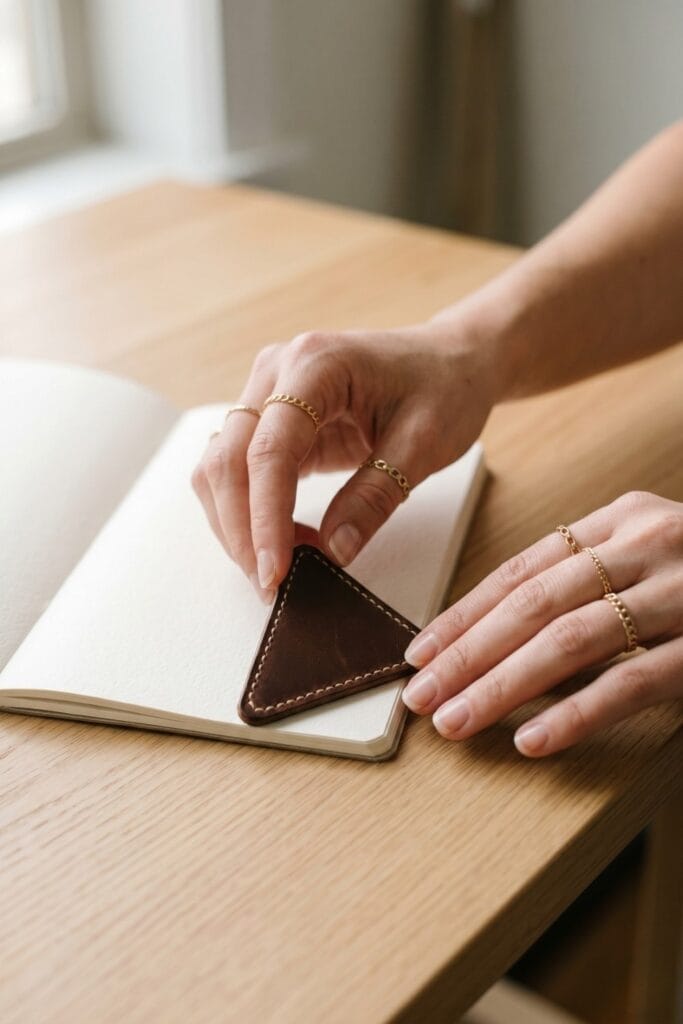
Supplies Needed: Premium Scrap Leather (2″ x 2″ triangles), Small Metal Washers (1″ diameter), Waxed Thread & Sewing Needles, Rotary Leather Punch Pliers, Heavy-Duty Leather Scissors.
Keep your books open easily. First, cut two matching 2-inch by 2-inch (5 cm x 5 cm) leather triangles. Next, place a heavy 1-inch metal washer between them for weight. Then, punch perimeter holes and sew the edges tightly with waxed thread. Thus, you can hold your journal pages flat beautifully.
12. Minimalist Zipper Pulls
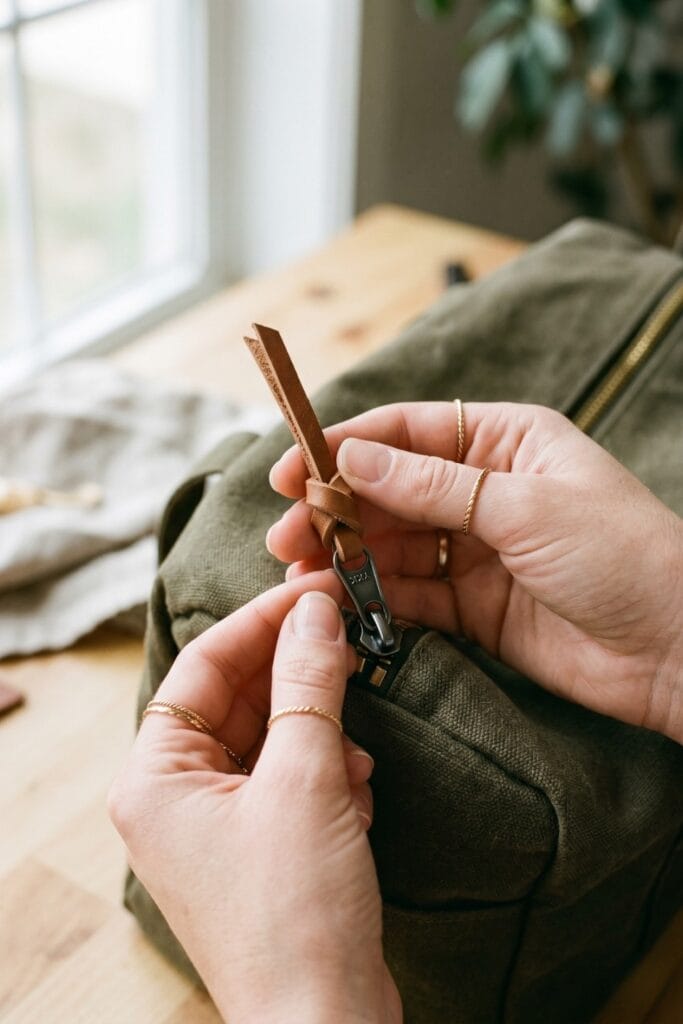
Supplies Needed: Premium Scrap Leather (1/8″ x 6″ narrow strips), Heavy-Duty Leather Scissors.
Upgrade your bags or jackets quickly. First, cut a very narrow leather strip measuring 1/8 inch wide by 6 inches long (3 mm x 15 cm). Next, thread it through an old metal zipper hole. Finally, tie a simple overhand knot near the base. As a result, your item instantly looks more expensive.
13. Raw Brass and Leather Necklace
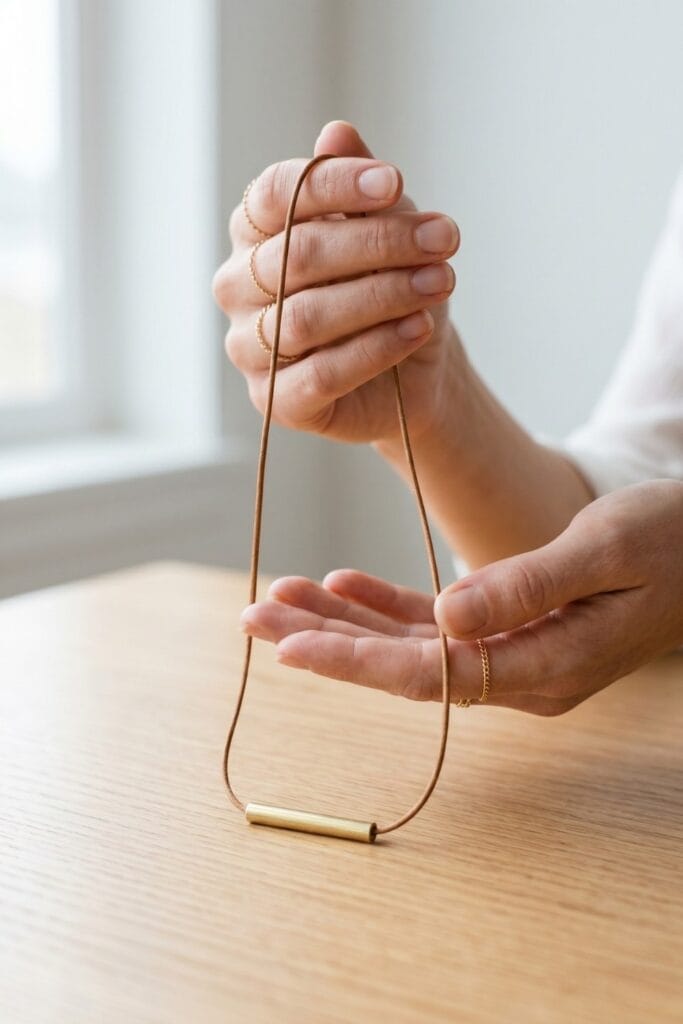
Supplies Needed: Premium Scrap Leather Cord (2 mm thick x 30″ long), Raw Brass Tube Components (1.5″ long x 1/4″ diameter), Heavy-Duty Leather Scissors.
Make modern jewelry in seconds. First, cut a 30-inch long, 2 mm thick round leather cord. Next, slide a single 1.5-inch raw brass metal tube onto the center of the cord. Because of its simplicity, the design is striking. Plus, it pairs perfectly with minimalist outfits.
14. Minimalist Hanging Planter
Supplies Needed: Premium Scrap Leather Cords (1/8″ wide x 4 ft long, 4 strands), Heavy-Duty Leather Scissors.
Display small succulents beautifully. First, cut 4 strands of 1/8-inch leather cord, each 4 feet (120 cm) long. Next, tie paired offset overhand knots spaced 2 inches apart to create a net that cradles a 4-inch pot. Consequently, you create a modern alternative to macrame. Indeed, it adds a wonderful aesthetic to any room.
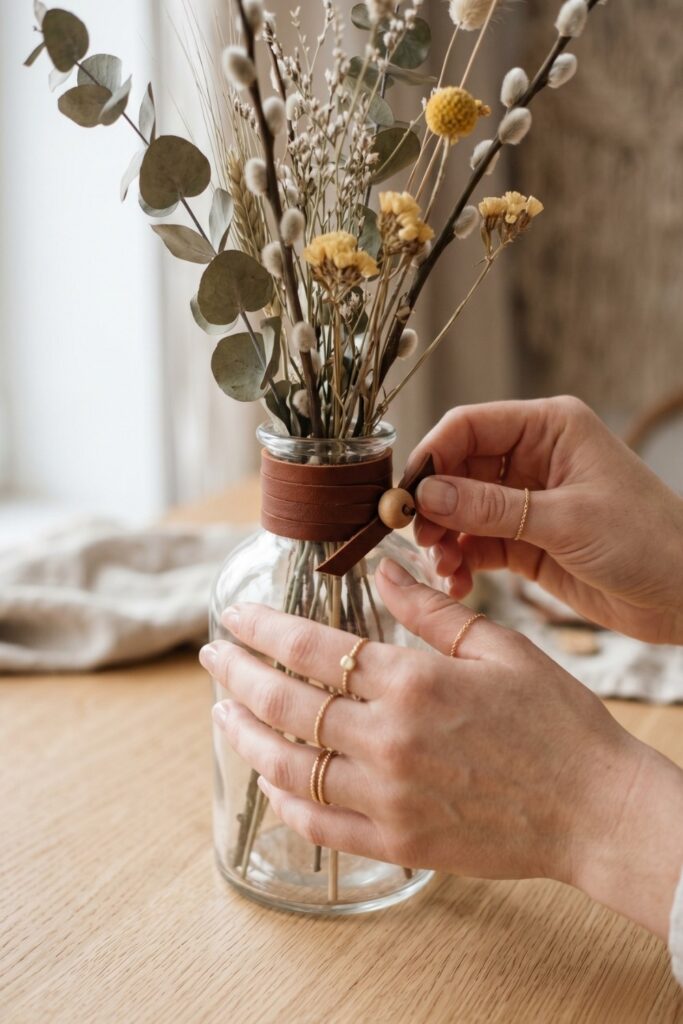
15. Glass Vase Neck Wraps
Supplies Needed: Premium Scrap Leather (0.5″ x 8″ strip), Wooden Craft Beads (1/2″ hole), Leather Glue Adhesive, Heavy-Duty Leather Scissors.
Decorate plain glass bottles perfectly. First, cut a 0.5-inch by 8-inch (1.2 cm x 20 cm) leather strip and wrap it tightly around a 2-inch diameter vase neck. Then, thread both ends through a 1/2-inch wooden bead and secure it with a drop of glue underneath. Therefore, ordinary glass turns into a beautiful boho centerpiece.
Final Thoughts
Using leftover materials is incredibly rewarding. Therefore, try these beautiful scrap leather projects this weekend. Also, if you want more inspiration, please check our 10 Stunning and Easy Ways to Use Your Leather Scraps post. So, which artisan project will you create first? Please, leave a comment below!
Quick Reference: All Supplies at a Glance
Decided on your favorite scrap leather project? Before you clear your workbench, here is a quick reference checklist of all essential tools and hardware mentioned in this guide—all conveniently available on Amazon.
🧶 Core Materials
High-quality natural remnants form the durable base for every beginner-friendly accessory.
- Premium Scrap Leather (used throughout) — [Check Price on Amazon]
- Leather Lacing Cord (used throughout) — [Check Price on Amazon]
✂️ Cutting & Punching Tools
Precision blades and heavy-duty punches ensure crisp, clean edges without fraying your leather.
- Heavy-Duty Leather Scissors (used throughout) — [Check Price on Amazon]
- Rotary Cutter — [View Rotary Cutters on Amazon]
- Rotary Hole Puncher — [Check Punch Tools on Amazon]
🔩 Hardware & Adhesives
Reliable metal fasteners and bonding agents keep your fold-over designs secure without sewing.
- Brass Rivets & Snaps Starter Kit — [View Price on Amazon]
- Sam Browne Studs (Brass) — [Check Price on Amazon]
- Leather Glue Adhesive — [Check Price on Amazon]
- Natural Beeswax — [Check Price on Amazon]
- Raw Brass Earring Hooks — [Check Price on Amazon]
- Raw Brass Tube Components — [Check Price on Amazon]
🧵 Specialty & Project Supplies
Specialized stamping, stitching, and embellishing tools to personalize your handcrafted leather pieces.
- Metal Letter Stamping Kit — [Check Price on Amazon]
- Natural Wooden Beads — [Check Price on Amazon]
- Leather Sewing Kit — [Check Price on Amazon]
- Wooden Dowel Hooks — [Check Price on Amazon]
- Small Metal Washers — [Check Price on Amazon]
- Small Wooden Sticks — [Check Price on Amazon]
🛡️ Important Crafting Safety Notes:
Crafting with leather is deeply rewarding, but handling heavy-duty tools requires extra attention. Please prioritize safety to ensure a relaxed, accident-free crafting session. Remember, you are responsible for your own safety and tool handling. For more details, please review our Terms and Conditions.
- Blade & Cutting Safety: Always use a self-healing cutting mat when working with rotary cutters or heavy-duty leather scissors. Cut away from your body at all times and keep your non-dominant hand clear of the blade path. Close safety guards on rotary blades immediately after each cut.
- Punching & Stamping Stability: When using rotary hole punches, leather awls, or metal letter stamps with a mallet, always work on a sturdy, level, non-slip workbench to prevent tools from slipping under impact.
- Adhesive Ventilation: Apply leather glue in a well-ventilated room to prevent inhaling chemical fumes. Avoid direct skin contact and wash hands thoroughly after setting seams.
- Needle Handling: Leather needles are thick and sharp enough to pierce dense hides. Use thimbles or small pliers when pulling waxed thread through tight punched holes to avoid finger strain or punctures.
- Small Hardware Hazards: Brass rivets, snaps, Sam Browne studs, washers, and wooden beads pose choking hazards. Keep all tiny hardware stored securely in organized trays, far out of reach of young children and pets.
Keep your workspace organized, clear loose scraps regularly, and enjoy bringing your scrap leather creations to life safely!