

Actually, do you have a bag of leftover leather bits sitting in your craft room? If so, you are in the right place to find the best leather scrap DIY ideas. Nevertheless, you shouldn’t let them go to waste. Since leather is a durable, premium material that looks better as it ages, it is worth preserving. Consequently, whether you are a seasoned crafter or a total beginner, these projects are perfect for turning ‘trash’ into treasure. Furthermore, here are 10 simple and chic leather projects you can finish in under 30 minutes.
This blog post contains affiliate links. As an Amazon Associate, I earn from qualifying purchases. The content on some of these projects may be enhanced with structural craft inspirations.
Key Facts:
- Technique: Leathercraft
- Total time: 30 minutes
- Difficulty: Easy
- Makes: 10 project ideas
Essential Tools for Your Leather Scrap DIY Ideas
| Supply | Spec / Size | Used For |
|---|---|---|
| Leather Scraps | offcuts and remnants in mixed sizes are all you need to start | |
| Sharp Scissors | for clean, precise cuts on every project | |
| Embroidery Scissors | small enough for controlled scalloped edges | |
| Leather Punch or Awl | creates clean holes for snaps, lacing, and hardware | |
| Snap Setter Tool | locks metal snap halves together permanently | |
| Mallet & Anvil (or Bench Block) | gives the setter tool a solid surface to strike against |
Before you start turning your leather scraps into treasure, gather a few basic tools and supplies. Fortunately, most of these items are affordable, reusable across every project below, and easy to find online.
Sharp scissors, a leather punch or awl, and high-quality leather glue will handle most cutting, hole-making, and assembly tasks. Keeping a few metal snaps and some waxed thread on hand will also help you create durable, professional-looking accessories with ease.
A few foundational tools and materials are used throughout multiple projects in this guide, marked with a (used throughout) tag below.
🧩 Base Material
Leather scraps in different sizes, colors, and textures are the foundation of every project in this guide. Even small offcuts can be transformed into stylish, practical, and creative pieces.
- Leather Scraps (used throughout) — offcuts and remnants in mixed sizes are all you need to start | [Check Price on Amazon]
✂️ Cutting & Punching Tools
Sharp scissors, embroidery scissors, a leather punch (or a sharp awl), a snap setter tool, and a mallet and anvil cover nearly every cut, hole, and fastener in this guide.
- Sharp Scissors (used throughout) — for clean, precise cuts on every project | [Check Price on Amazon]
- Embroidery Scissors — small enough for controlled scalloped edges | [View Price on Amazon]
- Leather Punch or Awl (used throughout) — creates clean holes for snaps, lacing, and hardware | [Check Price on Amazon]
- Snap Setter Tool — locks metal snap halves together permanently | [View Price on Amazon]
- Mallet & Anvil (or Bench Block) — gives the setter tool a solid surface to strike against | [Check Price on Amazon]
🔩 Hardware & Fasteners
Metal snaps, a decorative bolt and nut, a metal keyring, jump rings, and a small metal stud handle the structural and decorative closures across several projects.
- Metal Snap Fasteners — a secure, reusable closure for the cable organizer | [View Price on Amazon]
- Decorative Bolt & Nut Set — turns a leather loop into a designer drawer pull | [Check Price on Amazon]
- Metal Keyring — the base for your tassel keychain | [View Price on Amazon]
- Jump Rings — connects your leather charm to the jewelry hook | [View Price on Amazon]
- Small Metal Stud — a sleek fastener for the braided wristband | [Check Price on Amazon]
- Jewelry Hooks or Earring Wires — completes the diffuser jewelry design | [Check Price on Amazon]
🧵 Adhesives, Thread & Finishes
High-quality leather glue, waxed thread with a thick needle, and natural beeswax give every project a durable, professional finish.
- Leather Glue — bonds layers cleanly without stiffening the material | [View Price on Amazon]
- Waxed Thread & Needle — glides through pre-punched holes for even stitches | [Check Price on Amazon]
- Natural Beeswax — buffs raw edges into a smooth, polished sheen | [Check Price on Amazon]
🪵 Cords & Project Extras
A few specialty items — a wooden dowel, elastic cord, thin lacing cord, and a simple stencil — are used in specific projects like the cat teaser, plant wraps, and diffuser jewelry.
- Wooden Dowel — the anchor point for your suede cat teaser | [Check Price on Amazon]
- Elastic Cord — gives the cat teaser its bouncy movement | [View Price on Amazon]
- Thin Lacing Cord — laces your leather sleeve snugly around a plant pot | [Check Price on Amazon]
- Simple Shape Stencil — traces clean leaves, circles, and coaster shapes | [View Price on Amazon]
- Pet-Safe Essential Oil Set — a cat-safe option for diffuser jewelry | [Check Price on Amazon]
- Small Succulent Pots — the base for your mini plant wrap | [Check Price on Amazon]
Core Techniques for Leather Scrap DIY Ideas
1. Setting a Metal Snap Fastener
- Punch a clean hole for the snap with a leather punch or awl.
- Position the metal snap halves on the leather.
- Lock the halves together with a dedicated snap setter, striking without crushing the metal hardware.
Turning flat leather into a functional organizer requires a mechanical closure. Using a dedicated setter ensures the snap halves lock together permanently without crushing the metal hardware.
- Quick Steps: First, punch a hole matching the size of your snap post. Next, insert the cap through the smooth side of the leather and place the socket over the post from the underside. Then, place the project onto your anvil base, insert the setter tool into the post, and strike it firmly with a mallet until the metal flares and locks down tightly. Repeat the process for the stud and eyelet components on the opposite end.
- Used in: The Simple Cable Organizer (#1).
2. Edge Gluing & Straight Stitching
Laminating two leather layers before stitching prevents the material from shifting under the needle, ensuring your final seam line remains perfectly uniform.
- Quick Steps: First, apply a paper-thin, even coat of leather glue along the designated seam allowance. Next, press the two matching pieces together and let the adhesive cure for 2–3 minutes until tacky. Then, trace a light guide line along the edge and use a thick needle loaded with waxed thread to pass in and out through your pre-punched alignment holes, pulling each straight stitch snug as you progress.
- Used in: The Geometric Corner Bookmarks (#2).
3. Creating and Rolling Leather Fringe
Fringing transforms flat scrap dimensions into dynamic, multi-layered visual assets with organic movement.
- Quick Steps: First, use a straight edge ruler to mark a boundary line where your fringe cuts must stop. Next, use sharp scissors to slice thin, evenly spaced parallel vertical strips upward from the bottom rim to your marked boundary line. Then, apply a thin layer of leather glue to the uncut top border band and roll the leather tightly around your central anchor core or loop, holding firm pressure for 60 seconds until the bond sets.
- Used in: The Boho Tassel Keychains (#4).
4. Edge Polishing with Beeswax
Raw, fuzzy leather cuts look unrefined. Buffing natural wax into the open fibers seals the edge, adding a high-end designer sheen.
- Quick Steps: First, trim away any loose micro-fibers along your cut edge using sharp embroidery scissors. Next, rub a solid block of natural beeswax firmly along the raw edge until a thin, visible layer coats the fibers. Then, take a clean cotton cloth or bone folder and friction-buff the waxed edge rapidly back and forth for 30 seconds until the heat melts the wax, leaving a smooth, dark, polished finish.
- Used in: The Scalloped Leather Coasters (#7).
5. Vertical Lacing & Binding
Lacing provides a structural way to wrap and secure leather sleeves around three-dimensional objects without using metal hardware or permanent glue.
- Quick Steps: First, punch an identical number of evenly spaced alignment holes vertically along both short edges of your leather wrap. Next, center the leather sheet around your object until the punched seams meet. Then, anchor your thin lacing cord at the bottom hole using a secure knot, and weave the cord back and forth through the matching pairs like a shoelace, pulling tight at each level to create an adjustable structural jacket.
- Used in: The Mini Succulent Plant Wraps (#9).
6. Three-Strand Leather Braiding
Slitting a single scrap strip into sub-strands allows you to introduce classic western textile texture into wearable wristwear.
- Quick Steps: First, measure your strap width and cut two identical longitudinal slits down the length to establish three equal strands, keeping the top base completely uncut. Next, secure the solid top anchor to your workbench. Then, cross the right strand over the center strand, then cross the left strand over the new center strand, repeating this alternating rhythmic sequence tightly down to the tail before punching your final lock hole.
- Used in: The Braided Leather Wristbands (#10).
Discovering Creative Leather Scrap DIY Ideas
To start your journey, you need to understand that these leather scrap DIY ideas are not just about saving material; they are about adding a touch of luxury to your daily life.
1. Simple Cable Organizer
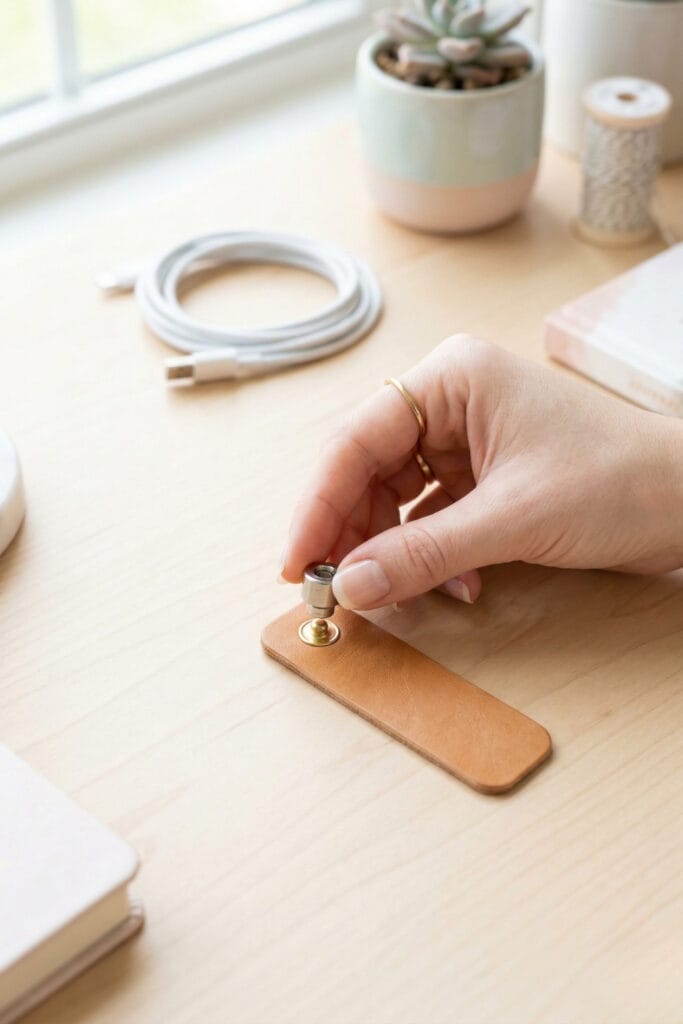
Supplies Needed: Leather Scraps, Metal Snap Fasteners, Leather Punch or Awl, Snap Setter Tool, Mallet & Anvil, Sharp Scissors.
- Start by cutting a leather strip roughly 1×3 inches in size.
- Afterward, trim the corners into a rounded shape for a professional look.
- Next, use a leather punch or a sharp awl to make a hole about 1/4 inch from each end.
- Then, install a metal snap fastener through the holes using a setter tool, striking it firmly with a mallet against your anvil (see Technique 1: Setting a Metal Snap Fastener above for the full breakdown).
- Finally, simply wrap the leather around your folded cable and snap it shut to stay organized.
2. Geometric Corner Bookmarks
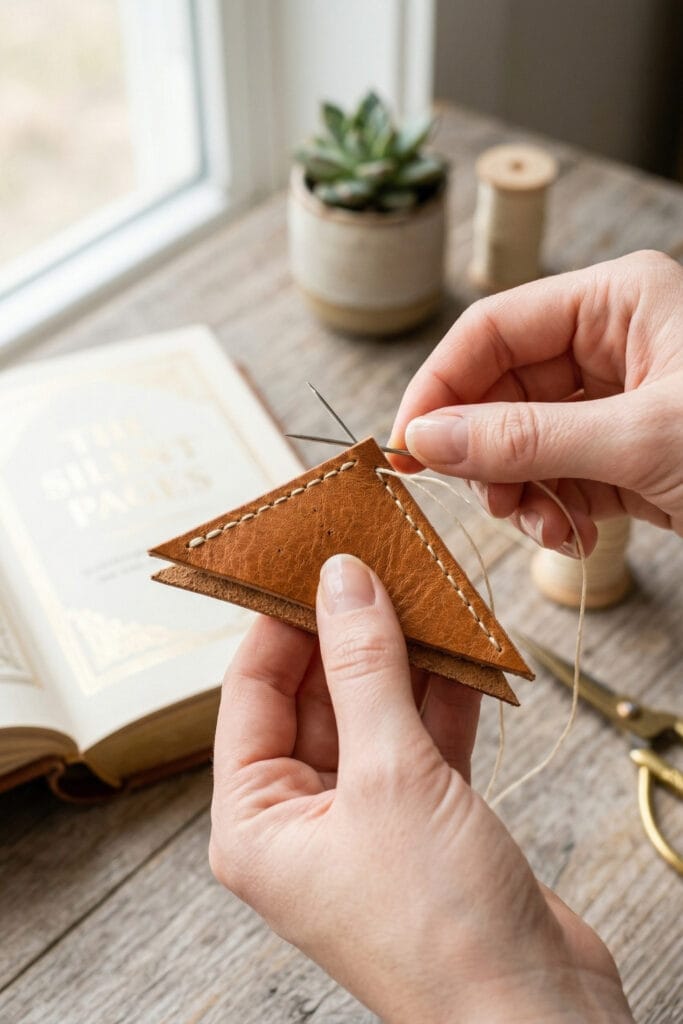
Supplies Needed: Leather Scraps, Leather Glue, Waxed Thread & Needle, Sharp Scissors.
- First of all, cut two identical right-angled triangles where 2×2 inches is a good size.
- Subsequently, place them perfectly on top of each other and use a tiny bit of leather glue on the edges. Let the glue set for about 2–3 minutes until tacky — this holds the layers in place while you sew, without making the leather too stiff to stitch through (see Technique 2: Edge Gluing & Straight Stitching above).
- Next, using a thick needle and waxed thread, sew a simple straight stitch along the two shorter sides.
- Consequently, leave the long side open so you can easily slide it onto the corner of your page.
3. Modern Leather Drawer Pulls
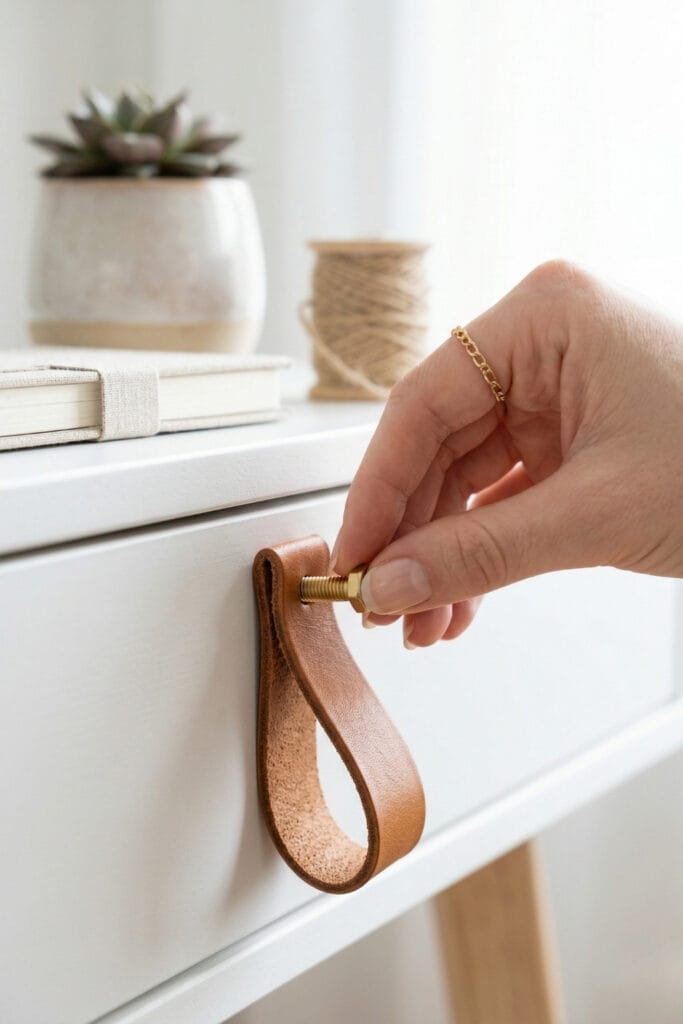
Supplies Needed: Leather Scraps, Decorative Bolt & Nut Set, Leather Punch or Awl, Sharp Scissors.
- Grab a sturdy strip of leather and cut it to about 1×5 inches.
- Followingthis, fold the strip in half so the ends meet and punch a single hole through both layers.
- Then, insert a decorative bolt through the leather loop and through the hole in your drawer.
- Therefore, tighten the nut from the inside of the drawer to secure your new designer handle.
4. Boho Tassel Keychains: Trendy Leather Scrap DIY Ideas
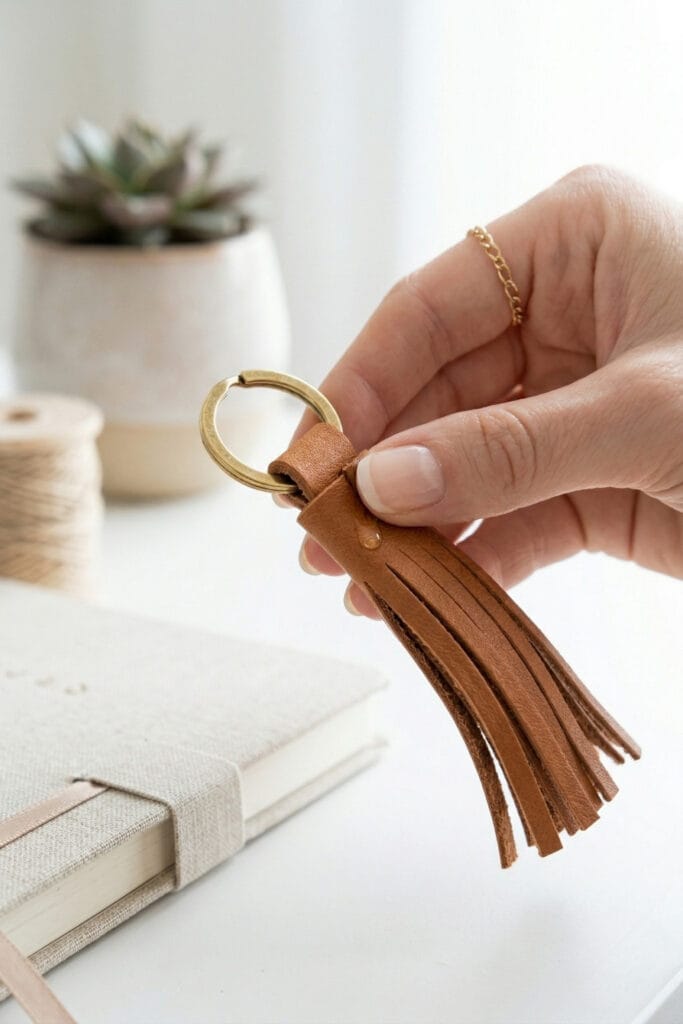
Supplies Needed: Leather Scraps, Metal Keyring, Leather Glue, Sharp Scissors.
- Cut a 3×4 inch rectangle and use sharp scissors to cut thin fringe lines (see Technique 3: Creating and Rolling Leather Fringe above).
- In addition, remember to stop cutting about 1/2 inch from the top edge.
- Afterward, cut a very thin strip of leather and fold it into a small loop through a metal keyring.
- Next, apply glue to the uncut part of your fringed rectangle and roll the leather tightly.
- Finally, secure the end with glue and hold for a minute until it sets properly.
5. Durable Suede Cat Teaser
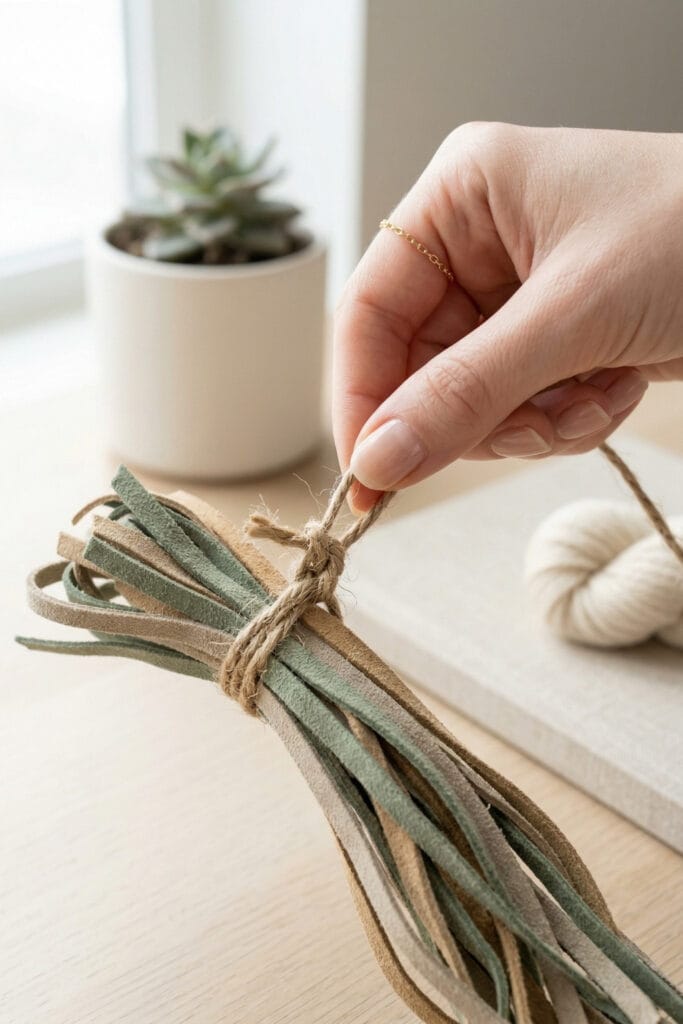
Supplies Needed: Leather Scraps (Suede), Elastic Cord, Wooden Dowel, Leather Glue, Sharp Scissors.
- Cut 5 to 7 very thin, long strips of suede or soft leather about 10 inches each.
- Next, bundle the strips together and tie them tightly to a long piece of elastic cord.
- Furthermore, attach the other end of the cord to a wooden dowel using a drop of Leather Glue — choose an extra-strength or heavy-duty formula for this bond, since it needs to hold up to active play.
- In the end, ensure all knots are tight so your cat can play safely. (Please check our pet safety note at the end of this post regarding non-toxic glue and essential oil contamination before workspace play.)
6. Essential Oil Diffuser Jewelry
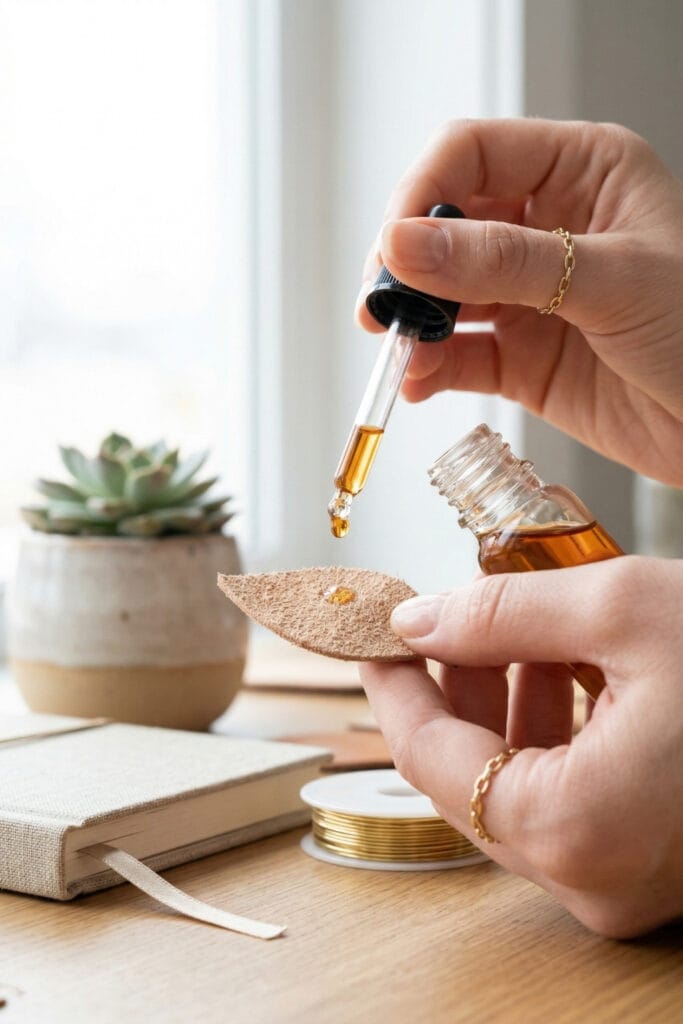
Supplies Needed: Leather Scraps, Simple Shape Stencil, Jump Rings, Jewelry Hooks or Earring Wires, Pet-Safe Essential Oil Set, Leather Punch or Awl, Sharp Scissors.
- Use a stencil to trace a small shape like a leaf or circle on the leather and cut it out.
- After this, punch a tiny hole at the top to insert a jump ring and attach it to a hook.
- Additionally, rub a drop of your favorite essential oil into the fuzzy back side of the leather.
- As a result, the leather will naturally absorb the oil and slowly release the scent all day. If you have cats at home, please check our pet safety note near the end of this post before choosing an oil.
7. Scalloped Leather Coasters: Premium Leather Scrap DIY Ideas
This project is a standout among our leather scrap DIY ideas because it looks high-end but is remarkably easy to create.
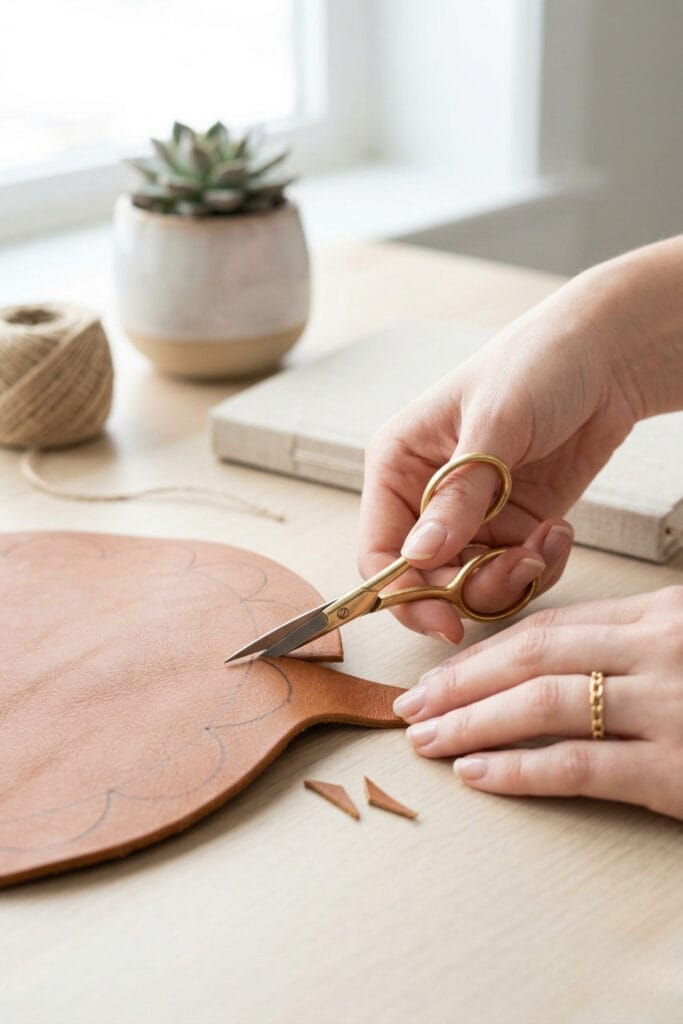
Supplies Needed: Leather Scraps, Natural Beeswax, Simple Shape Stencil, Embroidery Scissors, Sharp Scissors.
- Start by tracing a 3.5-inch circle on a thick piece of scrap leather and cutting it out.
- Secondly, use a small coin to trace half-circles all the way around the perimeter.
- Following that, carefully trim along your marks with sharp embroidery scissors.
- As a final touch, rub a little beeswax on the edges to give the coaster a premium look (see Technique 4: Edge Polishing with Beeswax above). Buff the edges gently with a soft cloth for about 30 seconds — this warms the wax slightly and gives the leather a smooth, polished sheen.ooth, polished sheen.
8. Loop Curtain Tie-backs
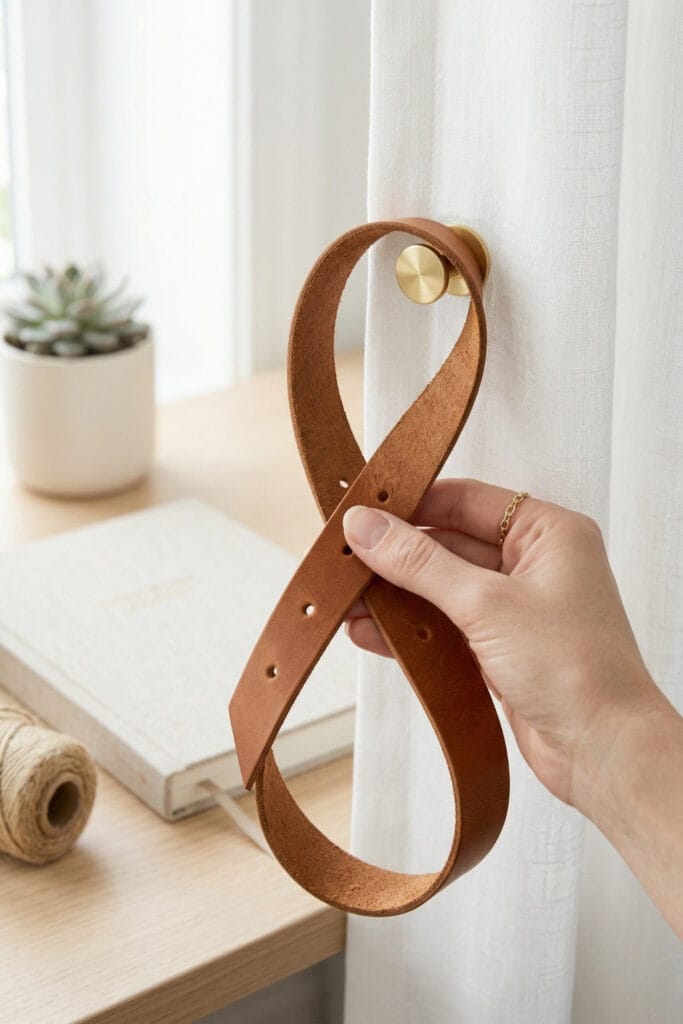
Supplies Needed: Leather Scraps, Leather Punch or Awl, Sharp Scissors.
- Cut two long leather strips, approximately 1×12 inches, to begin this project.
- Then, fold each strip into a large loop so the ends overlap by about an inch.
- Next, punch a hole through both ends and position the loop around your curtain.
- In conclusion, adjust the drape of the leather to give your curtains a modern aesthetic.tic.
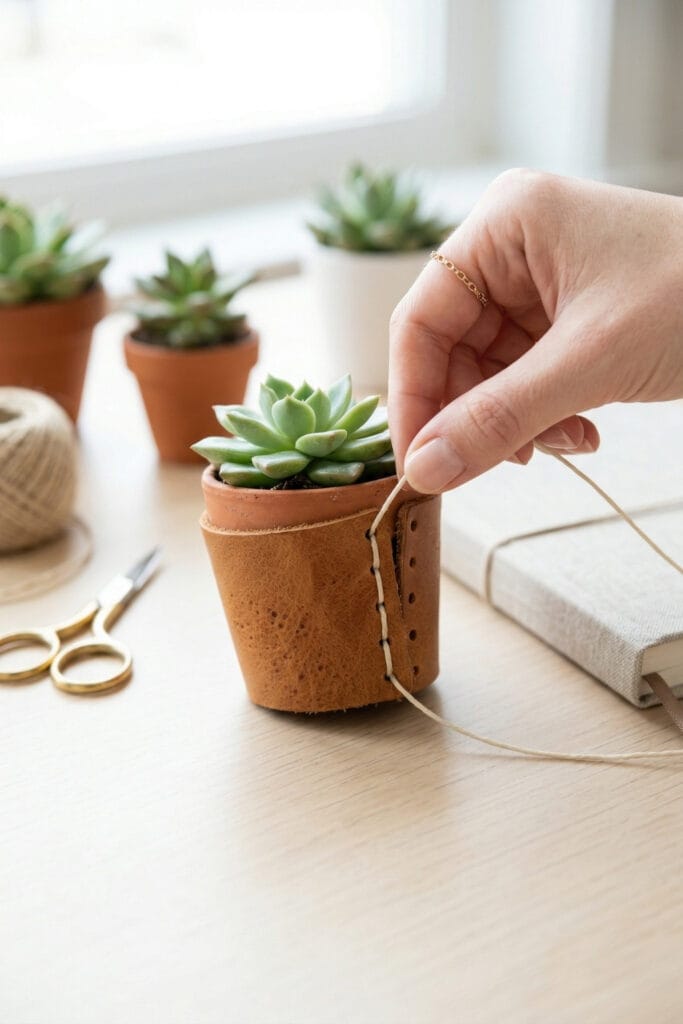
9. Mini Succulent Plant Wraps
Supplies Needed: Leather Scraps, Thin Lacing Cord, Small Succulent Pots, Leather Punch or Awl, Sharp Scissors.
- Measure the height and circumference of your pot, then cut a leather rectangle to size.
- Subsequently, punch 3 small holes vertically on both of the shorter ends of your rectangle.
- Moreover, wrap the leather around the pot and use a thin cord to lace up the holes (see Technique 5: Vertical Lacing & Binding above).
- Thus, you will create a removable sleeve that adds a luxury touch to your shelf.ur shelf.
10. Braided Leather Wristbands: Wearable Leather Scrap DIY Ideas
Supplies Needed: Leather Scraps, Small Metal Stud, Leather Punch or Awl, Sharp Scissors.
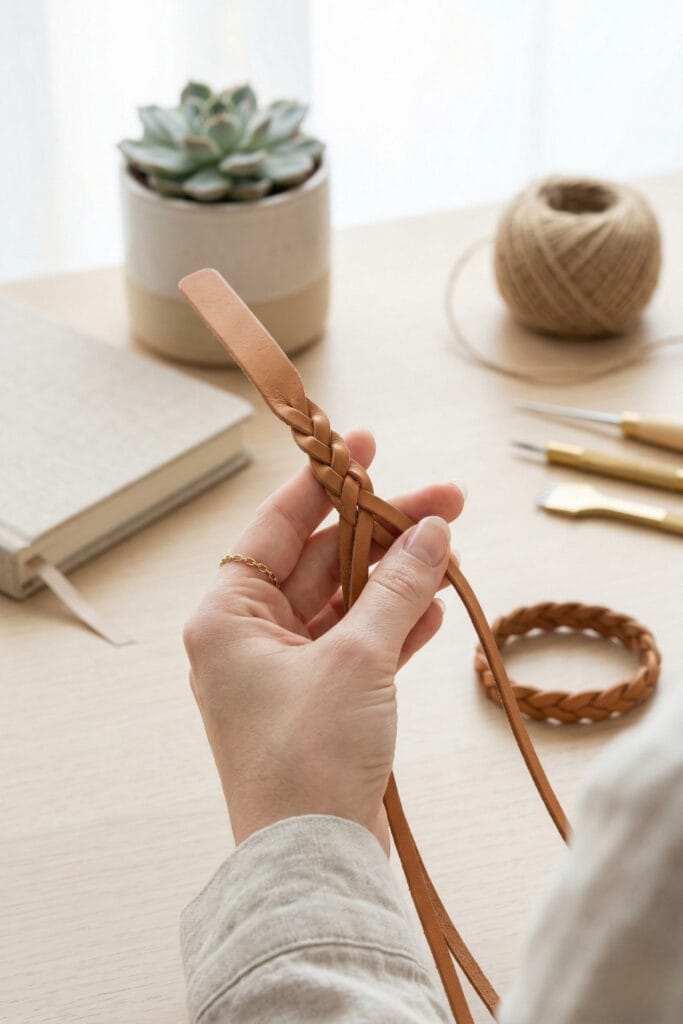
- Begin by cutting a leather strip 0.5 inches wide and about 8 inches long.
- Following this, cut two slits down the length to create three strands, leaving the top 1 inch uncut.
- Next, braid the three strands tightly (see Technique 6: Three-Strand Leather Braiding above) and punch a hole through the braid.
- Lastly, use a small metal stud or a simple knot to fasten the wristband securely around your arm.
Why We Love These Leather Scrap DIY Ideas
Ultimately, these leather scrap DIY ideas offer a sustainable and stylish way to express your creativity. We love them because they perfectly combine sustainability with a luxury minimalist aesthetic. Since leather is a premium material that actually looks better as it ages, even the smallest leftovers can be turned into a timeless treasure. Overall, using these leather scrap DIY ideas is a sustainable way to add a touch of luxury to your daily life.
Using leftover materials is incredibly rewarding, so try these beautiful scrap leather projects this weekend. Also, if you want more inspiration, please check our 15 Brilliant Leather scrap DIY ideas post. So, which artisan project will you create first? Please, leave a comment below!
Quick Reference: All Supplies at a Glance
Decided which project to try first? Before you clear your workbench, here’s a quick checklist of every tool and material mentioned in this guide:
A few foundational tools and materials are used throughout multiple projects in this guide, marked with a (used throughout) tag below.
🧩 Base Material
- Leather Scraps (used throughout)| [Check Price on Amazon]
✂️ Cutting & Punching Tools
- Sharp Scissors (used throughout) | [Check Price on Amazon]
- Embroidery Scissors | [View Price on Amazon]
- Leather Punch or Awl (used throughout)| [Check Price on Amazon]
- Snap Setter Tool | [View Price on Amazon]
- Mallet & Anvil (or Bench Block) | [Check Price on Amazon]
🔩 Hardware & Fasteners
- Metal Snap Fasteners | [View Price on Amazon]
- Decorative Bolt & Nut Set | [Check Price on Amazon]
- Metal Keyring | [View Price on Amazon]
- Jump Rings | [View Price on Amazon]
- Small Metal Stud | [Check Price on Amazon]
- Jewelry Hooks or Earring Wires | [Check Price on Amazon]
🧵 Adhesives, Thread & Finishes
- Leather Glue | [View Price on Amazon]
- Waxed Thread & Needle | [Check Price on Amazon]
- Natural Beeswax | [Check Price on Amazon]
🪵 Cords & Project Extras
- Wooden Dowel | [Check Price on Amazon]
- Elastic Cord | [View Price on Amazon]
- Thin Lacing Cord | [Check Price on Amazon]
- Simple Shape Stencil | [View Price on Amazon]
- Pet-Safe Essential Oil Set | [Check Price on Amazon]
- Small Succulent Pots | [Check Price on Amazon]
Important Crafting Note:
Please craft safely! Remember that you are responsible for your own safety and tool handling. For more details, please read our Terms and Conditions.
Making DIY projects is a very relaxing and fun activity. However, safety is always our priority. Therefore, please be careful when using sharp scissors or leather awls. Because some tools are sharp, always cut away from your body. When setting snaps with a mallet, keep your fingers clear of the striking area and work on a stable, flat surface. Finally, keep your workspace clean to enjoy a peaceful crafting session!
A note on Essential Oils and Pets: If you have cats, please use caution with the Essential Oil Diffuser Jewelry project. Many common essential oils — including tea tree, citrus, lavender, and eucalyptus — are toxic to cats, even through skin contact or inhalation. Keep any oil-infused leather pieces stored well away from your cat, and never use them near the Suede Cat Teaser or other pet toys.
A note on small hardware: Several projects use small metal components like jump rings, keyring loops, and metal studs. Keep these pieces away from young children and pets during and after crafting, as they can pose a choking hazard.
This was clearly produced by AI, and poorly done. Few of the projects in the Pinterest post were actually showcased here. Very disappointing.