Store-bought designer candle stands often come with ridiculous price tags. Luckily, you can make gorgeous DIY candle holders at home with basic materials. In this guide, we gathered modern, sculptural projects you can pull off this weekend. We focus on fire-safe metal cups paired with tactile textures like raw clay, wood, and plaster. The steps are simple, so you can just put on some music, relax, and make something durable for your dining table or mantle.
This post contains affiliate links. As an Amazon Associate, I earn from qualifying purchases. If you buy through these links, I may earn a commission at no additional cost to you.
Essential Supplies for DIY Candle Holders
To make safe and sturdy DIY candle holders, you only need a handful of solid supplies. Most of these are inexpensive and easy to order online. Here is what you should grab before you get started.
A few foundational tools and structural supplies are used throughout multiple projects in this guide, marked with a (used throughout) tag below.
🕯️ Base Materials & Casting
Heavy casting mixes and solid wood provide the base weight you need to keep tall taper candles from tipping over.
- White Air-Dry Sculpting Clay (used throughout) — dense, pliable clay that dries to an organic stone-like finish |
[Check White Air-Dry Sculpting Clay on Amazon] - Fine Casting Plaster — cures quickly into smooth, ultra-crisp architectural lines | [See Price on Amazon]
- Unfinished Hardwood Blocks — solid oak or beech cubes ready for drilling and staining | [View Unfinished Hardwood Blocks on Amazon]
🔩 Fire-Safe Hardware & Inserts
Metal inserts are non-negotiable here. They catch melted wax and keep burning wicks away from dry wood or clay.
- Brass Metal Candle Cups (7/8 inch) (used throughout) — standard taper-size inserts that prevent hot wax from contacting combustible surfaces | [Check Brass Metal Candle Cups on Amazon]
- Industrial Copper Pipe Fittings (3/4 inch) — rigid copper couplings that hold standard taper candles with modern industrial warmth |
[See Details on Amazon] - Heavy Gauge Solid Brass Wire (12-Gauge) — rigid enough to hold geometric spirals while supporting candle weight |
[View Options on Amazon]
🎨 Finishes & Adhesives
A good clear sealer keeps colored wax drips from soaking into your clay, and epoxy locks your metal inserts in place permanently.
- Two-Part High-Strength Epoxy — bonds metal inserts permanently into stone, wood, or cured clay | [Check Price on Amazon]
- Matte Acrylic Craft Varnish — seals clay and plaster without leaving an artificial plastic gloss |
[See Matte Acrylic Craft Varnish on Amazon] - Metallic Antique Gilding Wax — adds burnished metallic shimmer to carved edges and grooves | [View Price on Amazon]
✂️ Shaping & Workshop Tools
A few basic carving tools and a boring bit make it easy to cut clean holes that fit standard candles snugly.
- 7/8-Inch Spade Drill Bit (used throughout) — bores clean, flat-bottomed sockets perfectly sized for standard brass candle cups |
[Check 7/8-Inch Spade Drill Bit on Amazon] - Clay Ribbon Carving Tools — carves crisp fluted grooves and clean geometric bevels into damp clay | [See Options on Amazon]
- Silicone Fluted Column Mold — heat-resistant reusable mold for casting sharp fluted plaster pillars |
[View Silicone Fluted Column Mold on Amazon]
🍃 Collected & Household Items
You probably already have these sitting in your kitchen or recycling bin, so no need to buy them new.
- Clean Cardboard Mailing Tubes (Household) — cut into cylinders for casting smooth plaster columns
- Fine 220-Grit Sandpaper (Household) — buffs rough plaster and clay edges flush
- Felt Surface Protector Pads (Household) — applied under heavy stands to prevent scratching furniture
How to Make Safe DIY Candle Holders (Base Technique)
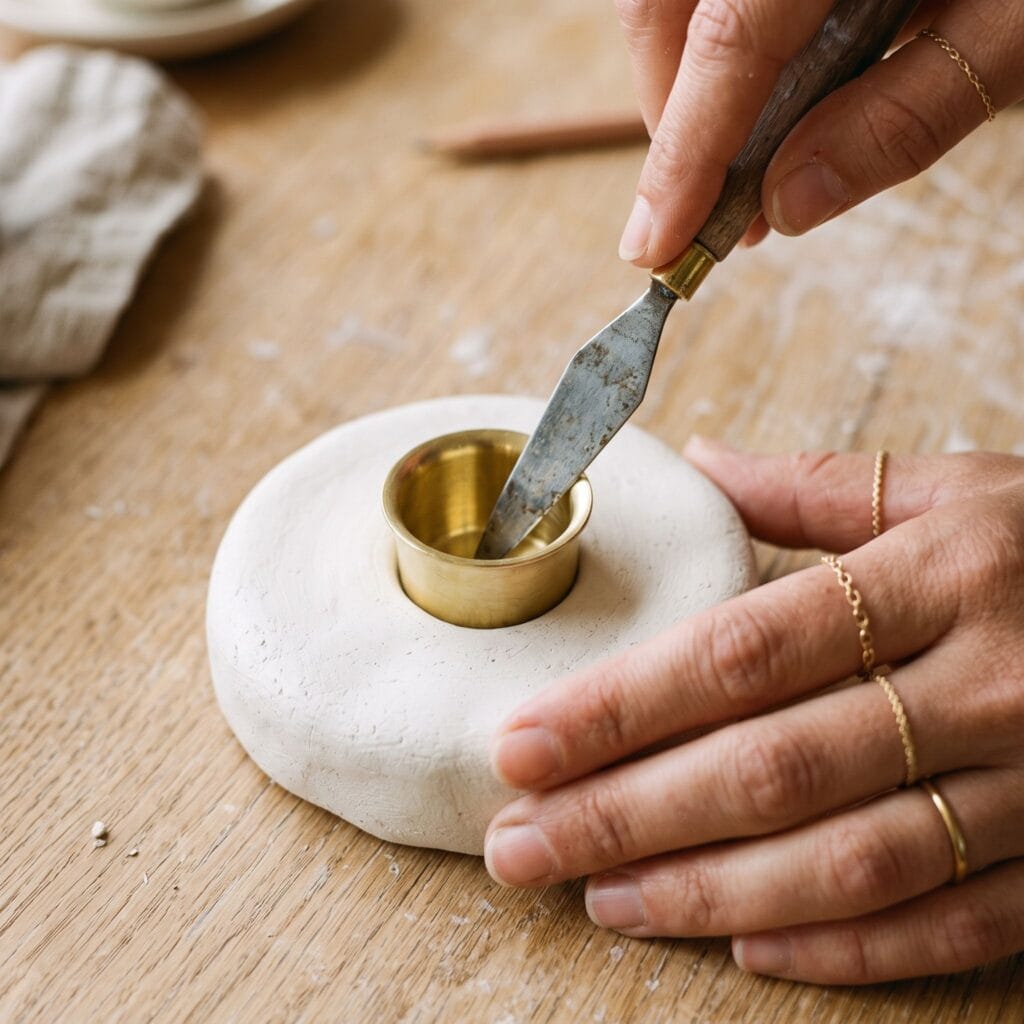
Never stick a candle straight into raw clay or plain wood. That is asking for a fire hazard once the candle burns down. Every stand in this post uses a standard 7/8-inch metal cup insert. Learn this quick seating trick once, and you can build any of the twelve designs without worrying about safety.
What you’ll need: 1 brass candle cup (7/8-inch diameter), base material (clay or wood block), two-part epoxy, scrap cardboard, small craft stick
- Make the socket. If you are working with wet clay, press your brass cup about 3/4 inch (2 cm) into the center, then gently pull it out to leave a clean well. If you are using wood, drill a 3/4-inch deep hole with your 7/8-inch spade bit.
- Let it dry completely. Give your clay a full 48 hours to dry out. Clay shrinks a bit as water evaporates, so test your brass cup in the hole once it is dry. If it feels too tight, spin a scrap of sandpaper inside the hole to loosen it up.
- Mix the epoxy. Squeeze out equal blobs of resin and hardener onto scrap cardboard and stir them together for about a minute.
- Glue the cup in place. Smear a thin layer of mixed epoxy around the outside of the brass cup and press it firmly into your socket until the rim sits flush with the top.
- Check the level. Crouch down to eye level and make sure the cup is standing straight up before the glue sets. Give it about 15 minutes to bond solid before you pop a candle inside.
Pro-Tip: Do not skip the glue and just push candles into a loose cup. Locking the insert down with epoxy keeps the whole thing steady when you pull out old wicks or scrape off dried wax.
Once you have this basic step down, pick your favorite look from the twelve ideas below and start building.
12 Elegant Ideas: Modern DIY Candle Holders
These projects lean into clean, tactile shapes that look great on any shelf. Here are twelve fun DIY candle holders you can tackle this weekend.
Essential Materials & Tools
✨ Consumable Raw Materials
- White Air-Dry Sculpting Clay (used throughout) — dense, pliable clay that dries to an organic stone-like finish | Check White Air-Dry Sculpting Clay (used throughout) on Amazon
- Fine Casting Plaster — Fine Casting Plaster — cures quickly into smooth, ultra-crisp architectural lines | Check Price on Amazon
- Unfinished Hardwood Blocks — Unfinished Hardwood Blocks — solid oak or beech cubes ready for drilling and staining | View Unfinished Hardwood Blocks on Amazon
- Brass Metal Candle Cups (7/8 inch) (used throughout) — Brass Metal Candle Cups (7/8 inch) (used throughout) — standard taper-size inserts that prevent hot wax from contacting combustible surfaces | Find Brass Metal Candle Cups (7/8-Inch Spade Drill Bit (used throughout) inch) (used throughout) on Amazon
- Industrial Copper Pipe Fittings (3/4 inch) — Industrial Copper Pipe Fittings (3/4 inch) — rigid copper couplings that hold standard taper candles with modern industrial warmth | See Price on Amazon
- Heavy Gauge Solid Brass Wire (12-Gauge) — rigid enough to hold geometric spirals while supporting candle weight | See Heavy Gauge Solid Brass Wire (12-Gauge) on Amazon
- Two-Part High-Strength Epoxy — bonds metal inserts permanently into stone, wood, or cured clay | Explore Two-Part High-Strength Epoxy on Amazon
- Matte Acrylic Craft Varnish — Matte Acrylic Craft Varnish — seals clay and plaster without leaving an artificial plastic gloss | View on Amazon
- Metallic Antique Gilding Wax — Metallic Antique Gilding Wax — adds burnished metallic shimmer to carved edges and grooves | Find on Amazon
- 7/8-Inch Spade Drill Bit (used throughout) — bores clean, flat-bottomed sockets perfectly sized for standard brass candle cups | Check 7/8-Inch Spade Drill Bit (used throughout) on Amazon
- Clay Ribbon Carving Tools — Clay Ribbon Carving Tools — carves crisp fluted grooves and clean geometric bevels into damp clay | Check Price on Amazon
- Silicone Fluted Column Mold — Silicone Fluted Column Mold — heat-resistant reusable mold for casting sharp fluted plaster pillars | View Silicone Fluted Column Mold on Amazon
- White Air-Dry Sculpting Clay — Dense, pliable clay that dries to an organic stone-like finish for hand-formed, fluted, pinched, and sculptural bases. | Find White Air-Dry Sculpting Clay on Amazon
- Brass Metal Candle Cups (7/8 Inch) — Standard taper-size metal inserts catch wax and keep flame and heat away from wood, clay, and plaster bases. | See Price on Amazon
- Heavy Gauge Solid Brass Wire (12-Gauge) — Stiff, shape-holding brass wire is suitable for bending geometric spiral and looped taper-holder forms. | See Heavy Gauge Solid Brass Wire (12-Gauge) on Amazon
- Two-Part High-Strength Epoxy — Permanently bonds metal candle cups and fittings into cured clay, wood, plaster, and other rigid bases. | Explore Two-Part High-Strength Epoxy on Amazon
- 7/8-Inch Spade Drill Bit — Bores clean, flat-bottomed sockets sized for standard 7/8-inch brass taper candle cups. | View on Amazon
- Natural Terracotta Air-Dry Clay — Provides the warm earthen color needed for stacked donut-ring forms without requiring a kiln. | Find on Amazon
📦 Beginner Project Kits & Coordinated Bundles
For beginners or makers starting from scratch, these coordinated bundles and all-in-one project packs bring together the core supplies in one convenient order.
- Air-Dry Clay Sculpting Kit with Tools and Guide — A coordinated beginner bundle with clay, shaping tools, and project guidance gives first-time makers an approachable way to practice sculptural holder forms. | Check Air-Dry Clay Sculpting Kit with Tools and Guide on Amazon
⚡ Studio Tools & Workshop Equipment
- Benchtop Drill Press with Adjustable Depth Stop — Keeps 7/8-inch cup sockets square, consistently deep, and centered in hardwood or thick cured plaster bases. | Check Price on Amazon
- Variable-Speed Rotary Tool Kit with Flexible Shaft — A versatile studio tool for refining drilled sockets, smoothing cured plaster, detailing wood, and polishing copper or brass accents. | View Variable-Speed Rotary Tool Kit with Flexible Shaft on Amazon
- Daylight LED Magnifying Desk Lamp — Bright shadow-reducing illumination helps makers inspect cup alignment, smooth fine surface flaws, and apply precise gilding details. | Find Daylight LED Magnifying Desk Lamp on Amazon
1. Fluted Clay DIY Candle Holders
Supplies Needed: White Air-Dry Sculpting Clay, Brass Metal Candle Cups (7/8 inch), Clay Ribbon Carving Tools, Two-Part High-Strength Epoxy, Matte Acrylic Craft Varnish.
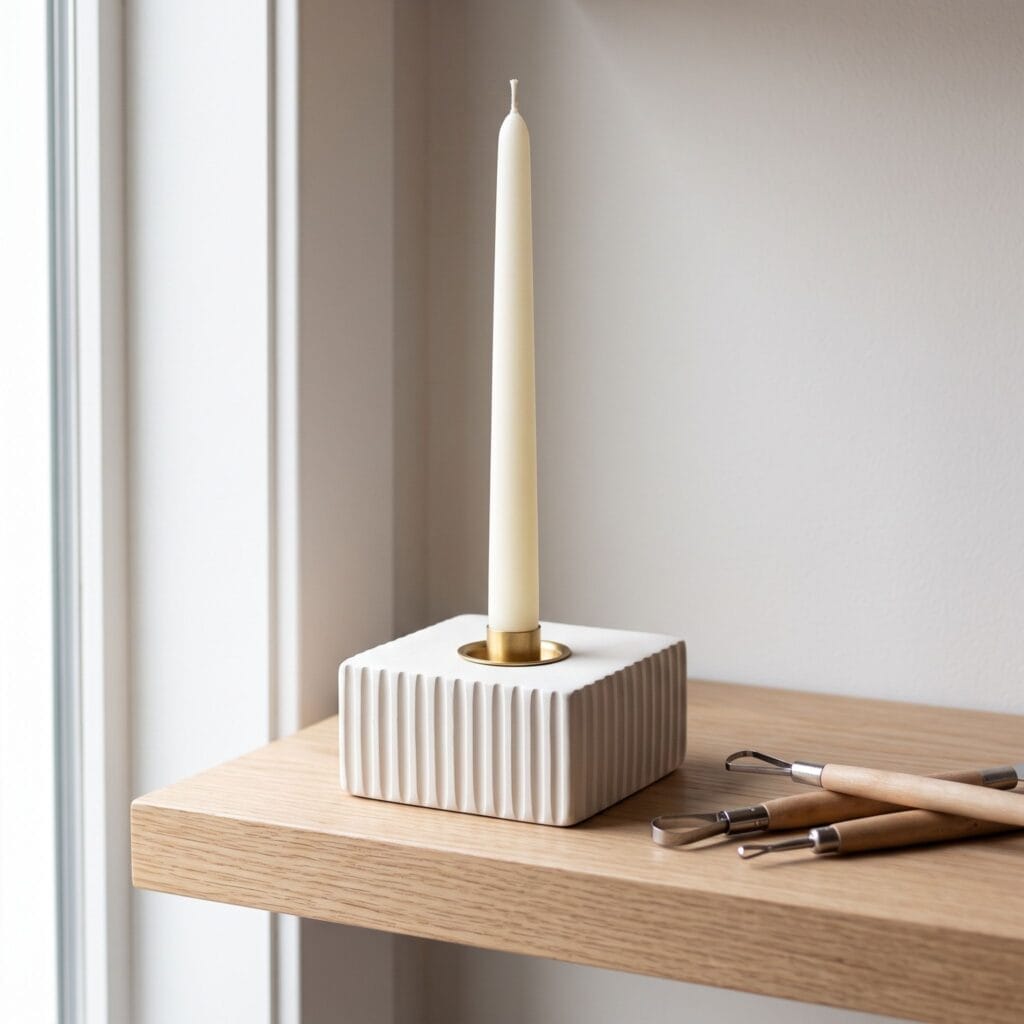
Get that classic Greek column look without carving real stone. Roll about a pound of air-dry clay into a thick 3-inch cylinder. Take a U-shaped ribbon tool and carve straight vertical grooves all the way around the outside. Form your top hole using Step 1 from the Base Technique above. Let it cure for two full days, brush on some matte varnish, and epoxy your brass cup in place. You end up with crisp, architectural DIY candle holders that look like heavy boutique finds.
2. Minimalist Hardwood DIY Candle Holders
Supplies Needed: Unfinished Hardwood Blocks, 7/8-Inch Spade Drill Bit, Brass Metal Candle Cups (7/8 inch), Two-Part High-Strength Epoxy, Felt Surface Protector Pads.
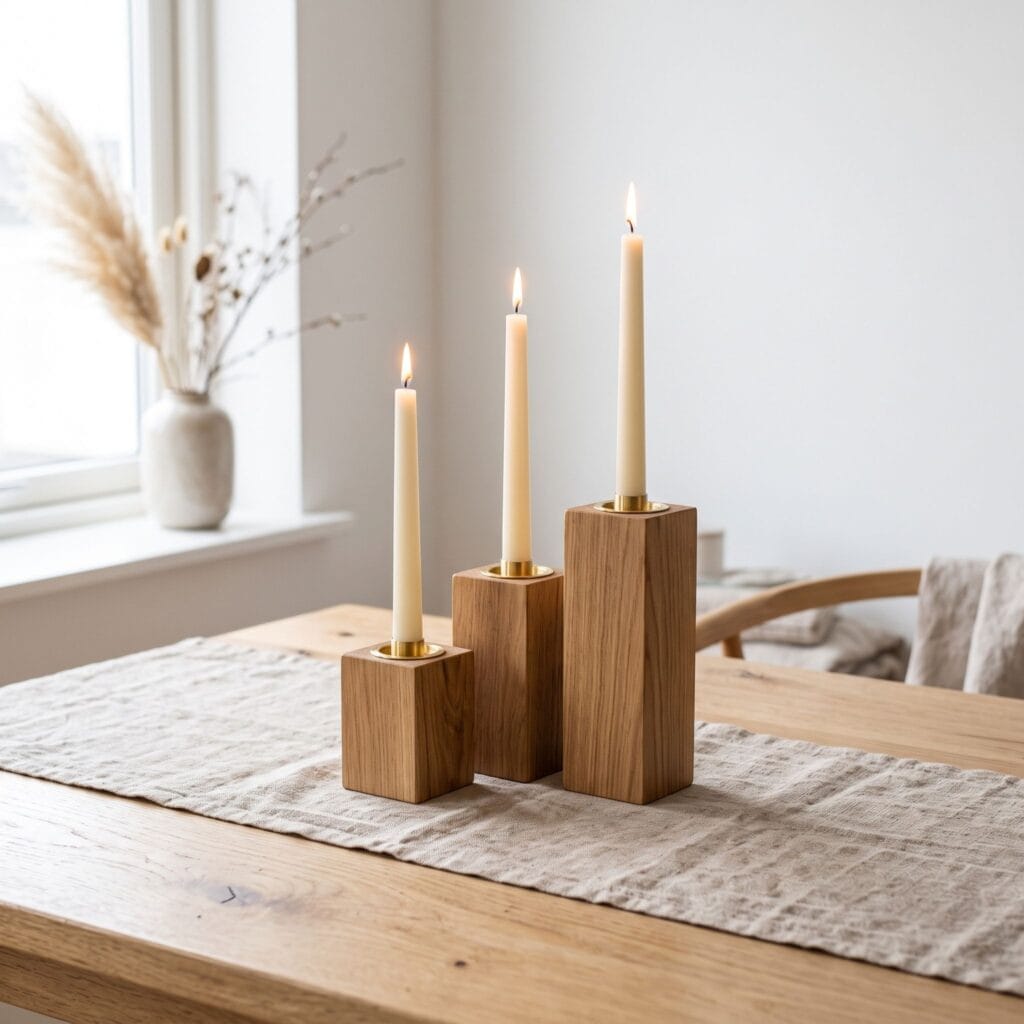
If you like clean Scandinavian wood decor, this project is for you. Cut three hardwood blocks to staggered heights like 3, 5, and 7 inches. Drill a hole into the top of each block with your spade bit and follow Step 4 of the Base Technique to lock in the brass cups. Stick felt pads underneath so they do not scratch your table. Grouping these three blocks together gives your dining room an effortless, warm setup. (Clamp your wood blocks down tight before drilling to keep your hands safe — see our safety note below.)
3. Cast Plaster Column Stand
Supplies Needed: Fine Casting Plaster, Silicone Fluted Column Mold, Brass Metal Candle Cups (7/8 inch), Two-Part High-Strength Epoxy, Fine 220-Grit Sandpaper.
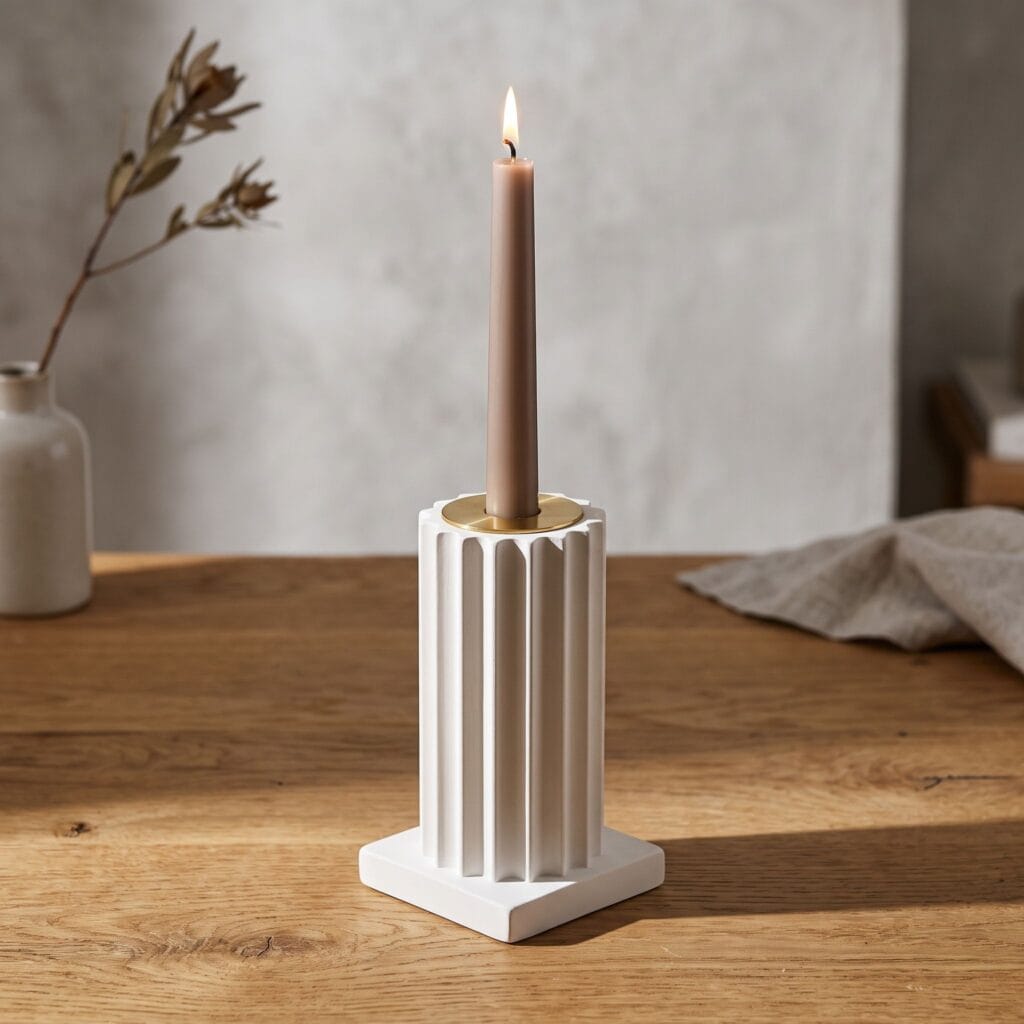
Pouring casting plaster is surprisingly fast and gives you ultra-smooth edges. Mix a cup of plaster with half a cup of cold water until smooth, then pour it into your silicone column mold. Tap the sides to knock loose any air bubbles so you do not get pinholes. Pop it out after an hour, sand the bottom flat, and glue the brass cup into the top using our Base Technique. The finished stand has a solid, heavy weight that feels like real marble.
4. Stacked Terracotta Donut Rings
Supplies Needed: White Air-Dry Sculpting Clay, Brass Metal Candle Cups (7/8 inch), Two-Part High-Strength Epoxy, Matte Acrylic Craft Varnish.
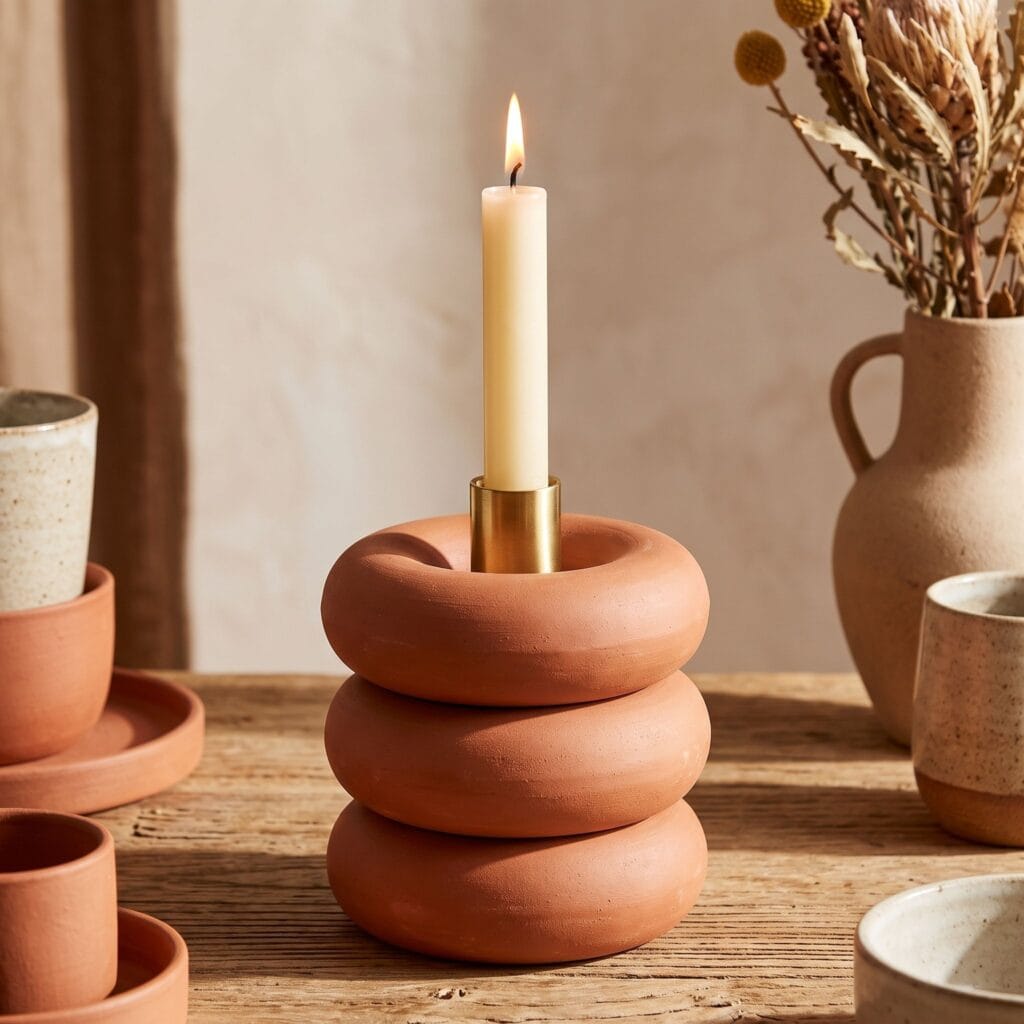
This design brings playful geometric curves to your bookshelf. Roll clay into three thick coils, loop them into 4-inch rings, and stack them on top of each other, smoothing the inner seams together for support. Press your brass cup into the top ring using the Base Technique. Once dry, wash it with warm terracotta acrylic paint and seal with matte varnish. These curvy DIY candle holders instantly brighten up a coffee table.
Benchtop Drill Press with Adjustable Depth Stop
Keeps 7/8-inch cup sockets square, consistently deep, and centered in hardwood or thick cured plaster bases.
5. Industrial Copper Pipe Candelabra
Supplies Needed: Industrial Copper Pipe Fittings (3/4 inch), Unfinished Hardwood Blocks, 7/8-Inch Spade Drill Bit, Two-Part High-Strength Epoxy.
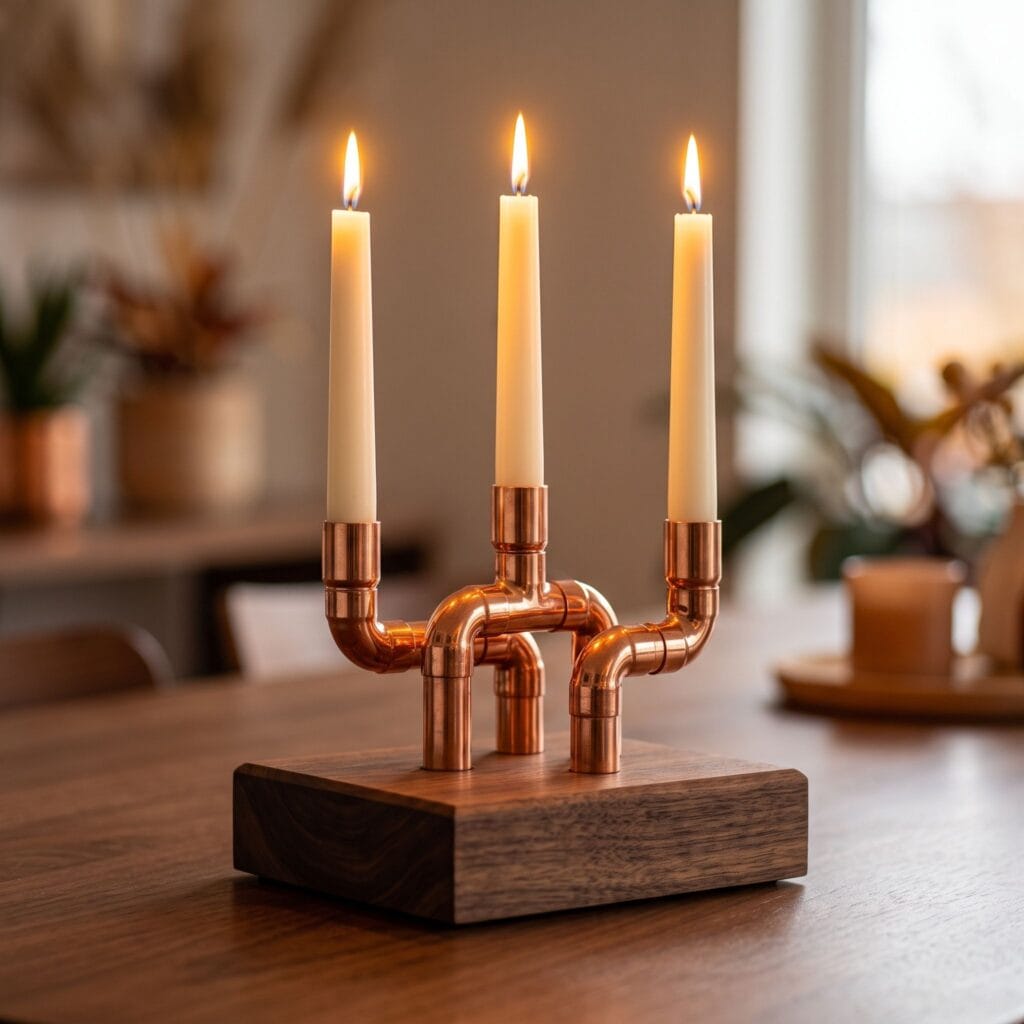
Warm copper looks fantastic against dark wood grain. Grab three 3/4-inch copper elbow and tee fittings and fit them together into a stepped shape. Drill three holes into a wooden base using your spade bit, then glue the copper ends in using the epoxy method from our Base Technique. The rose-gold tone of the metal catches the flickering candlelight in a really striking way.
6. Sculptural Curved Clay Arch
Supplies Needed: White Air-Dry Sculpting Clay, Brass Metal Candle Cups (7/8 inch), Two-Part High-Strength Epoxy, Matte Acrylic Craft Varnish.
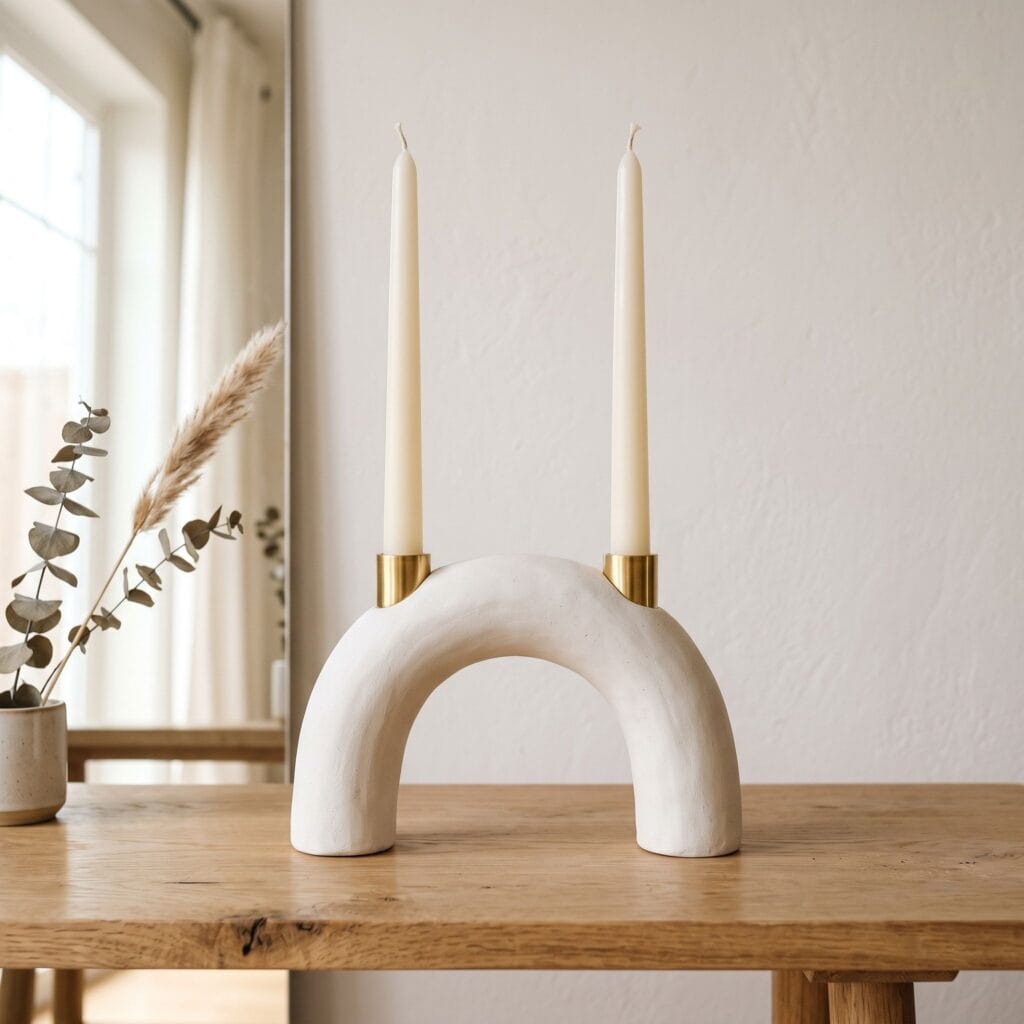
Arches are everywhere in home decor right now, and they are very easy to build yourself. Roll a thick clay snake and bend it into an upside-down U shape. Flatten both bottoms on your table so it stands up steady on its own. Press socket holes into both top curves following the Base Technique, let it dry, and glue in two brass cups. Holding two candles at once, this arch makes an eye-catching centerpiece for open shelving.
7. Antique Gilded Plaster Candlestick
Supplies Needed: Fine Casting Plaster, Clean Cardboard Mailing Tubes (Household), Metallic Antique Gilding Wax, Brass Metal Candle Cups (7/8 inch), Two-Part High-Strength Epoxy.
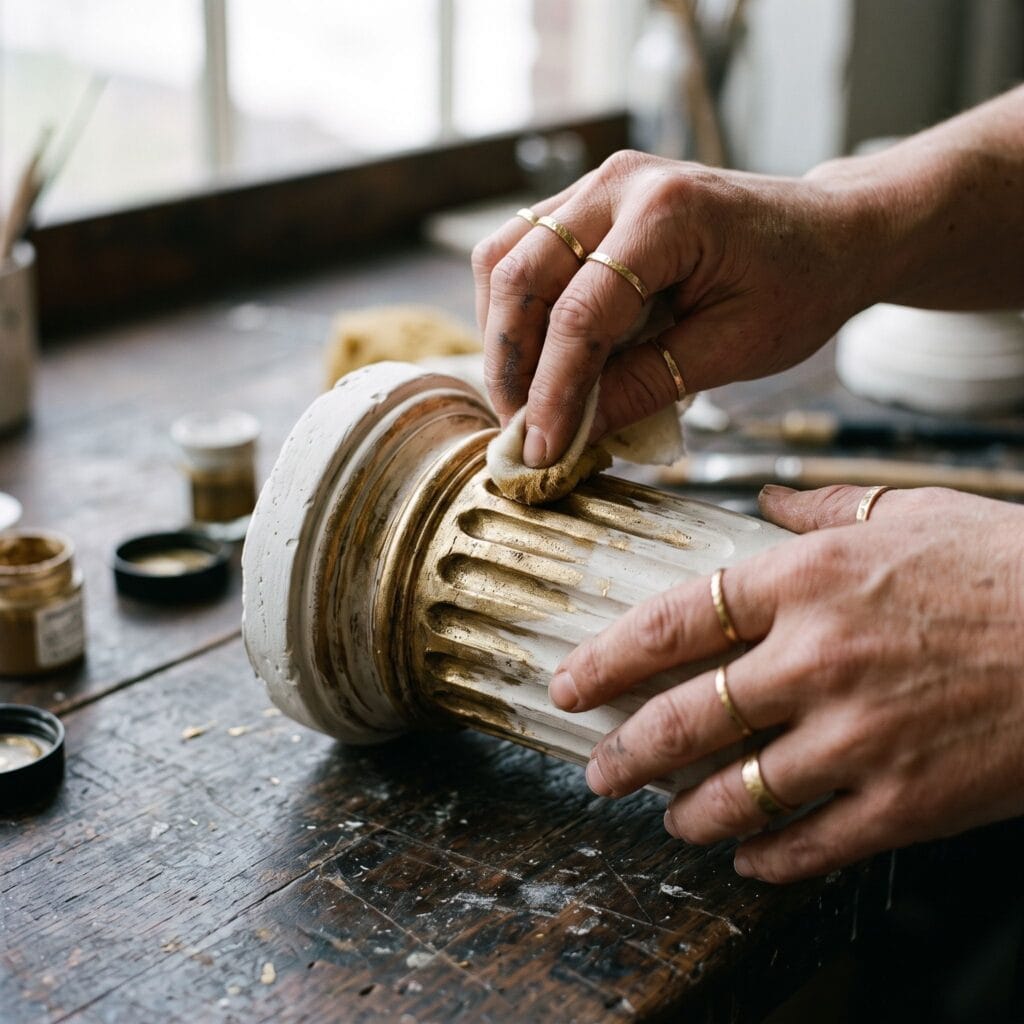
Give simple plaster a Parisian flea market vibe. Pour plaster mix into a cut cardboard mailing tube and let it sit for two hours. Peel off the cardboard, then scrape a few horizontal groove lines around the cylinder with a butter knife or craft blade. Follow the Base Technique to glue in your brass cup, then rub a dab of gilding wax over the ridges using your finger. The metallic shine catches on the textured ridges like authentic antique brass.
8. Organic Hand-Formed Pinch Pot
Supplies Needed: White Air-Dry Sculpting Clay, Brass Metal Candle Cups (7/8 inch), Two-Part High-Strength Epoxy, Matte Acrylic Craft Varnish.
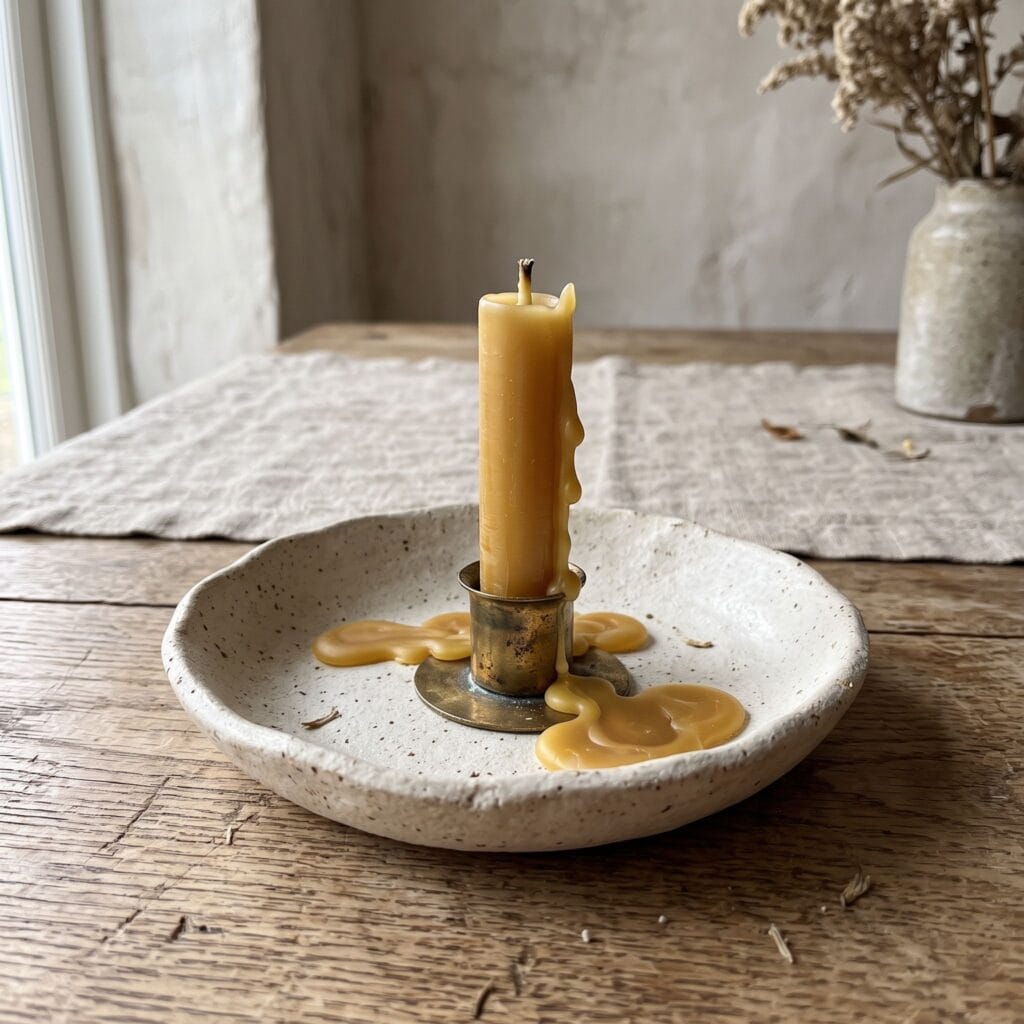
You do not need sharp angles for great decor; imperfect, handmade shapes look wonderfully cozy. Roll a fist-sized ball of clay and press your thumb down into the middle to shape a small, shallow bowl with a thick center mound. Make your socket with the brass cup following Step 1 of the Base Technique. The wide bowl rim catches every single drip of melted wax, making these relaxed DIY candle holders super practical.
9. Minimalist Brass Wire Spiral Stand
Supplies Needed: Heavy Gauge Solid Brass Wire (12-Gauge), Unfinished Hardwood Blocks, 7/8-Inch Spade Drill Bit, Two-Part High-Strength Epoxy.
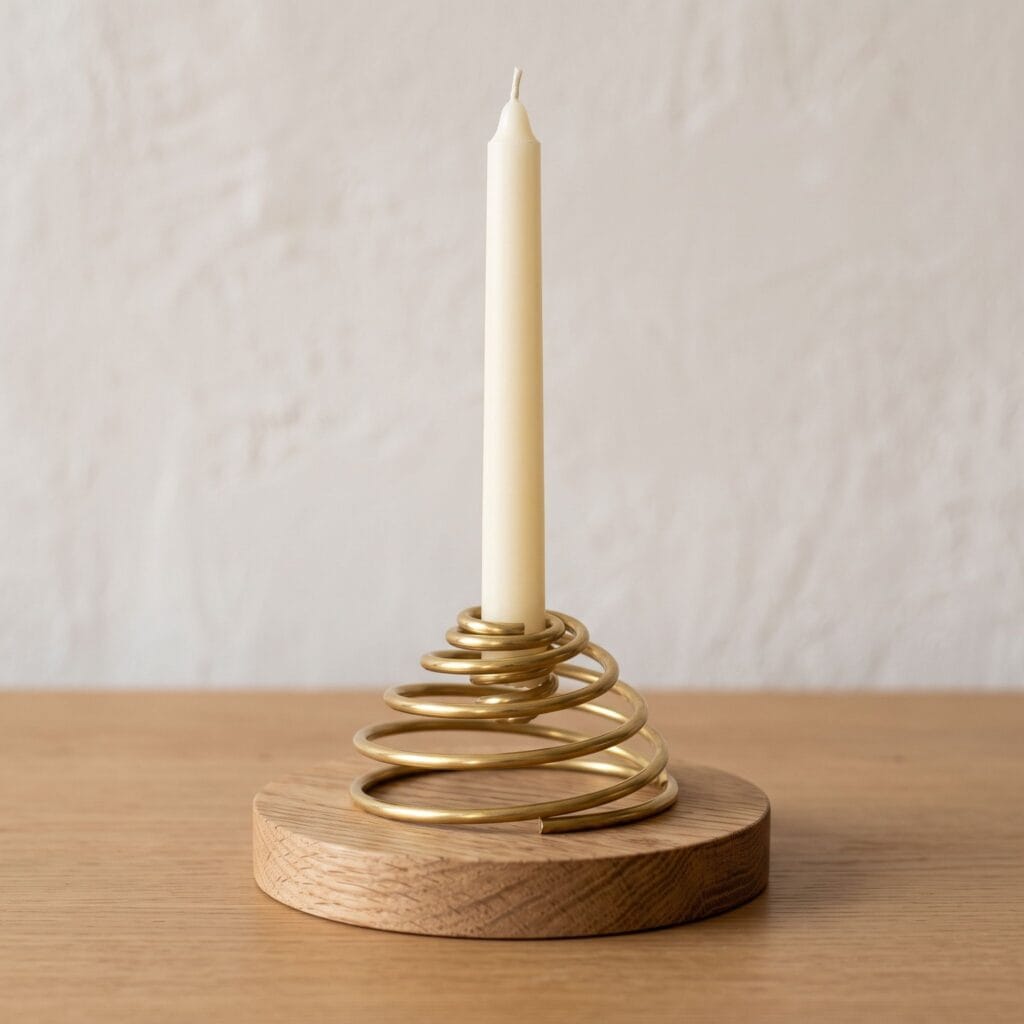
Try making an airy, floating silhouette out of rigid wire. Wrap thick 12-gauge brass wire three times around an unlit candle to form a snug socket loop, then bend the lower end into an expanding spring shape. Glue the bottom end into a drilled wood disk using epoxy from our Base Technique. The wire frame reflects the flickering light softly. (Sand or file the cut wire ends smooth so you do not poke yourself — check our safety note below.)
Variable-Speed Rotary Tool Kit with Flexible Shaft
A versatile studio tool for refining drilled sockets, smoothing cured plaster, detailing wood, and polishing copper or brass accents.
10. Layered Fluted Petal Stand
Supplies Needed: White Air-Dry Sculpting Clay, Brass Metal Candle Cups (7/8 inch), Clay Ribbon Carving Tools, Two-Part High-Strength Epoxy.
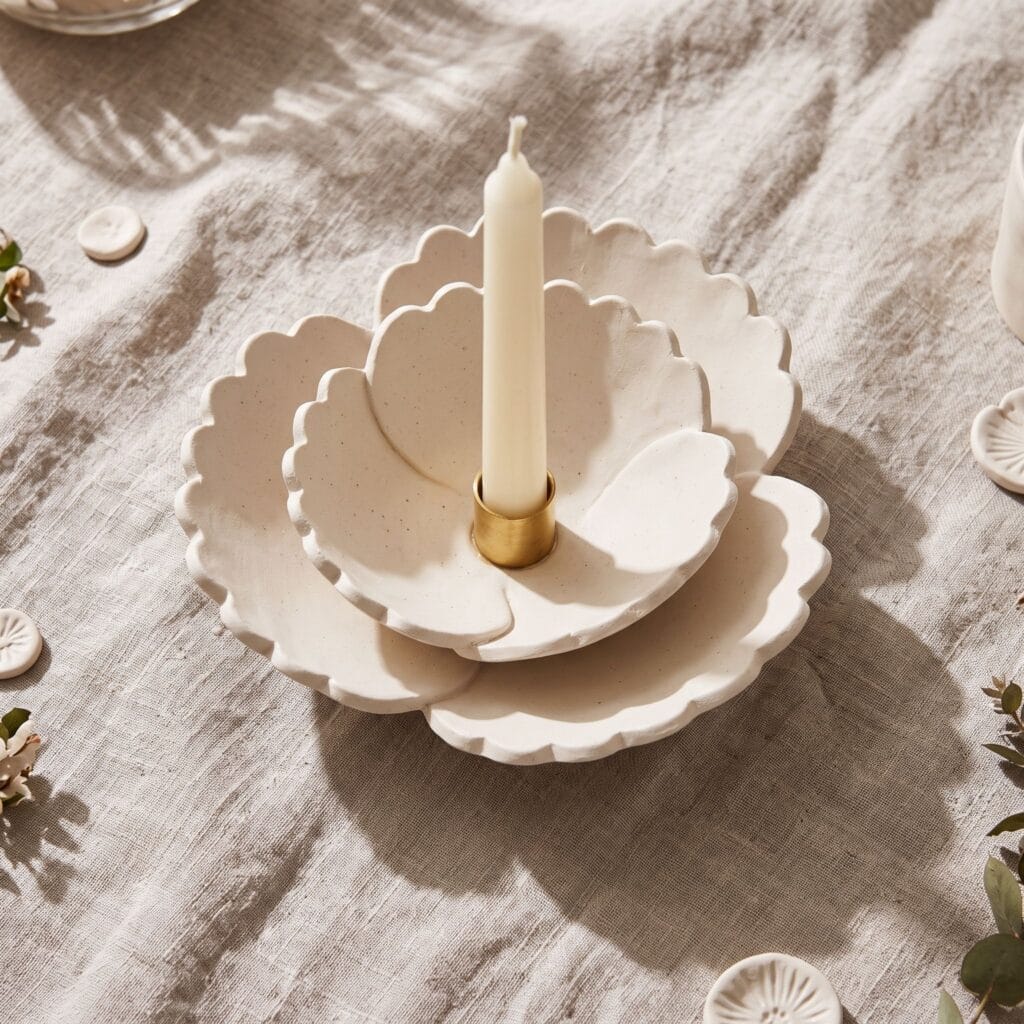
Bring soft floral shapes onto your table. Roll flat clay sheets and cut out three scalloped circles in small, medium, and large sizes. Stack them together and push the centers down into a gentle bowl shape. Finish with the Base Technique to glue the brass cup into the center of the petals. The layered edges throw dramatic floral shadows across the table once the wick is lit.
11. Faceted Geometric Beech Pillar
Supplies Needed: Unfinished Hardwood Blocks, 7/8-Inch Spade Drill Bit, Brass Metal Candle Cups (7/8 inch), Fine 220-Grit Sandpaper, Two-Part High-Strength Epoxy.
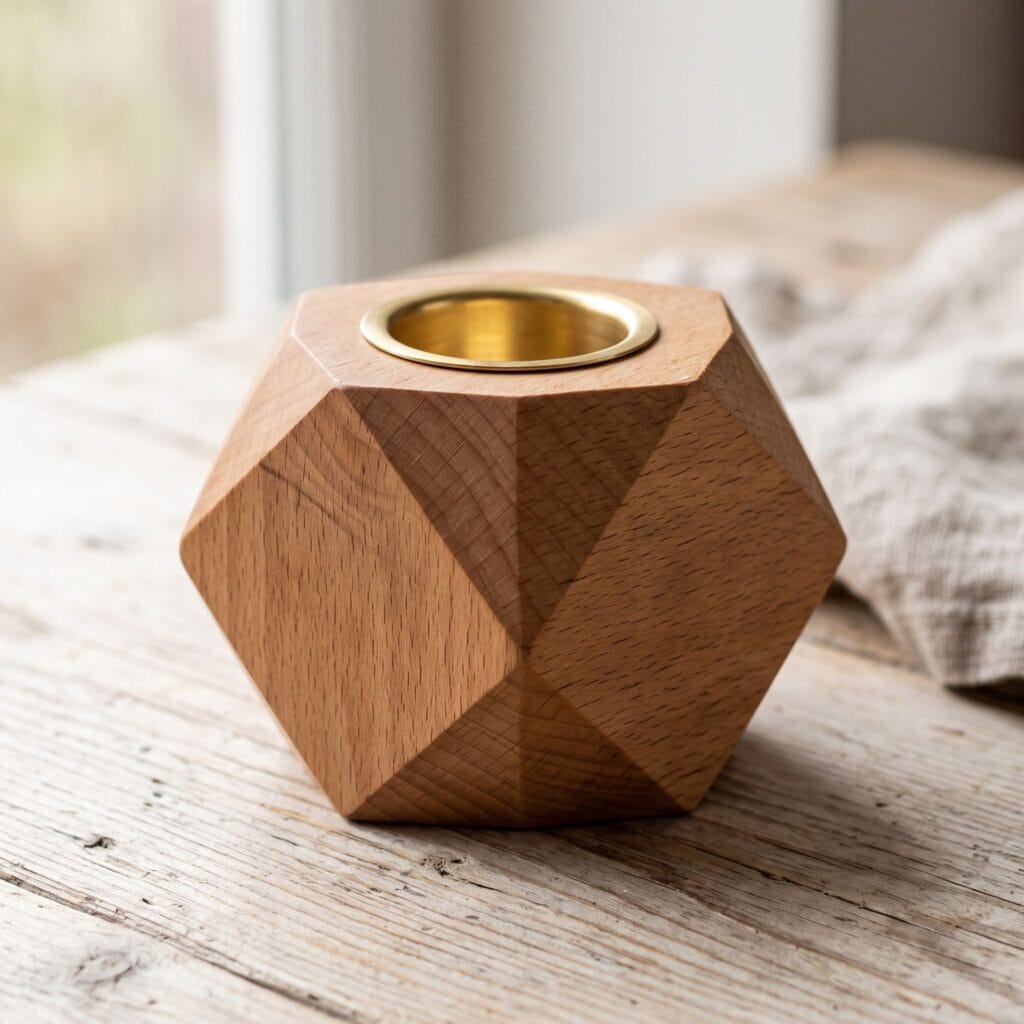
Turn a plain square block of wood into a faceted sculpture. Sand down the four corner edges of an unfinished wooden block until you get an eight-sided column. Drill your center hole, mount the brass cup with the Base Technique, and wipe on a little natural mineral oil to pull out the natural wood pattern. The angled flat edges catch shadows from the candle flame nicely.
12. Monolithic Cast Multi-Taper Catcher
Supplies Needed: Fine Casting Plaster, Brass Metal Candle Cups (7/8 inch), Two-Part High-Strength Epoxy, Felt Surface Protector Pads.
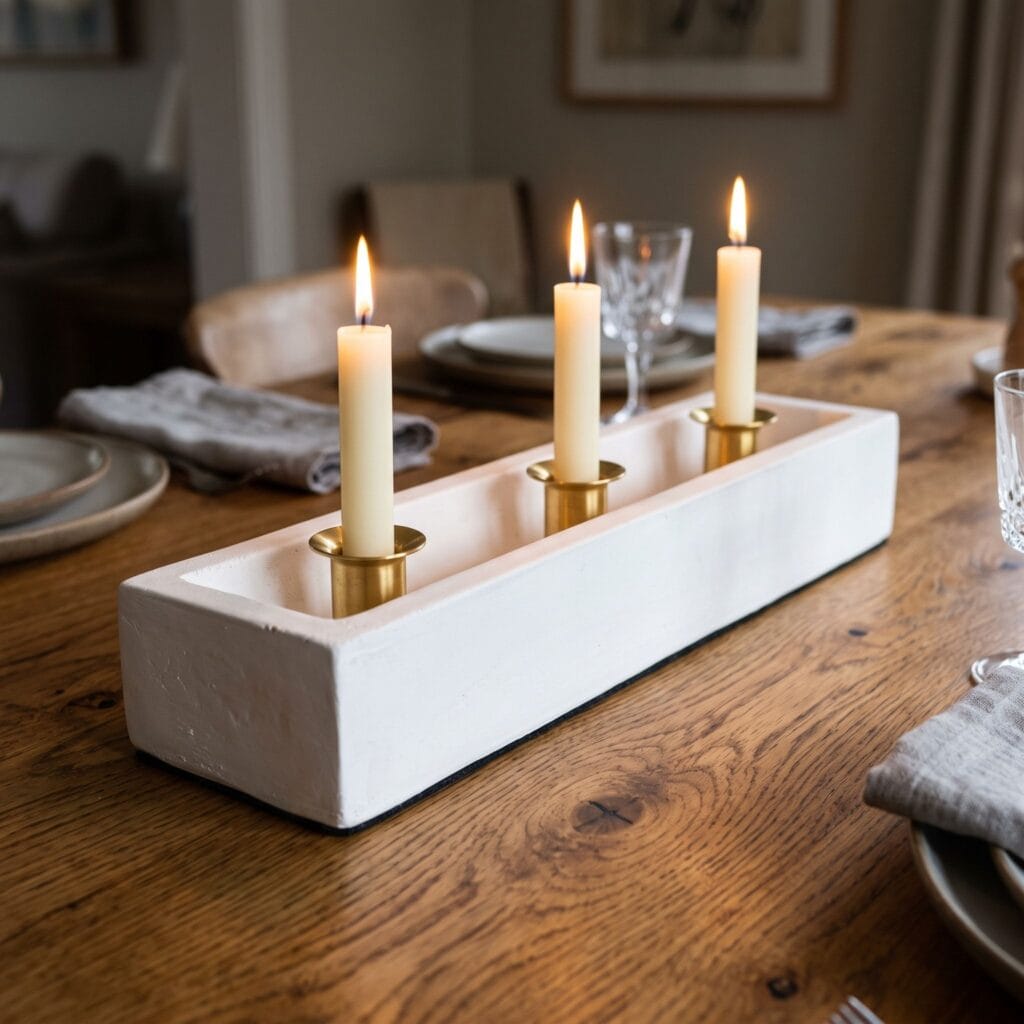
If you host dinners often, build this multi-flame centerpiece. Pour plaster into a long, shallow rectangular tray mold. As it starts setting up into a soft paste, push three brass cups along the middle spaced three inches apart, then pull them out per Step 1 of the Base Technique. Once fully dry, glue the three cups permanently into place and stick felt pads underneath. It looks like an architectural stone trough and holds three tall tapers safely.
Final Thoughts
Making your own home decor is one of the easiest ways to slow down and create something tangible with your hands. Pick one of these projects, grab some clay or timber, and test it out. Which texture are you trying first: fluted plaster or natural wood? Drop a comment below and let us know what you are building!😊
Quick Reference: All Supplies at a Glance
Here is the full supply list in one spot so you can double-check your workshop before you start crafting.
🕯️ BASE MATERIALS & CASTING
- White Air-Dry Sculpting Clay (used throughout) | [Check White Air-Dry Sculpting Clay on Amazon]
- Fine Casting Plaster | [See Price on Amazon]
- Unfinished Hardwood Blocks | [View Unfinished Hardwood Blocks on Amazon]
🔩 FIRE-SAFE HARDWARE & INSERTS
- Brass Metal Candle Cups (7/8 inch) (used throughout) | [Check Brass Metal Candle Cups on Amazon]
- Industrial Copper Pipe Fittings (3/4 inch) | [See Details on Amazon]
- Heavy Gauge Solid Brass Wire (12-Gauge) | [View Options on Amazon]
🎨 FINISHES & ADHESIVES
- Two-Part High-Strength Epoxy | [Check Price on Amazon]
- Matte Acrylic Craft Varnish | [See Matte Acrylic Craft Varnish on Amazon]
- Metallic Antique Gilding Wax | [View Price on Amazon]
✂️ SHAPING & WORKSHOP TOOLS
- 7/8-Inch Spade Drill Bit (used throughout) | [Check 7/8-Inch Spade Drill Bit on Amazon]
- Clay Ribbon Carving Tools | [See Options on Amazon]
- Silicone Fluted Column Mold | [View Silicone Fluted Column Mold on Amazon]
🍃 COLLECTED & HOUSEHOLD ITEMS
- Clean Cardboard Mailing Tubes (Household)
- Fine 220-Grit Sandpaper (Household)
- Felt Surface Protector Pads (Household)
Quick Reference: All Supplies at a Glance
For your convenience, here is a quick summary of all materials and tools used in this tutorial:
✨ Consumable Raw Materials
- White Air-Dry Sculpting Clay (used throughout) | Check White Air-Dry Sculpting Clay (used throughout) on Amazon
- Fine Casting Plaster | Check Price on Amazon
- Unfinished Hardwood Blocks | View Unfinished Hardwood Blocks on Amazon
- Brass Metal Candle Cups (7/8 inch) (used throughout) | Find Brass Metal Candle Cups (7/8-Inch Spade Drill Bit (used throughout) inch) (used throughout) on Amazon
- Industrial Copper Pipe Fittings (3/4 inch) | See Price on Amazon
- Heavy Gauge Solid Brass Wire (12-Gauge) | See Heavy Gauge Solid Brass Wire (12-Gauge) on Amazon
- Two-Part High-Strength Epoxy | Explore Two-Part High-Strength Epoxy on Amazon
- Matte Acrylic Craft Varnish | View on Amazon
- Metallic Antique Gilding Wax | Find on Amazon
- 7/8-Inch Spade Drill Bit (used throughout) | Check 7/8-Inch Spade Drill Bit (used throughout) on Amazon
- Clay Ribbon Carving Tools | Check Price on Amazon
- Silicone Fluted Column Mold | View Silicone Fluted Column Mold on Amazon
- White Air-Dry Sculpting Clay | Find White Air-Dry Sculpting Clay on Amazon
- Brass Metal Candle Cups (7/8 Inch) | See Price on Amazon
- Heavy Gauge Solid Brass Wire (12-Gauge) | See Heavy Gauge Solid Brass Wire (12-Gauge) on Amazon
- Two-Part High-Strength Epoxy | Explore Two-Part High-Strength Epoxy on Amazon
- 7/8-Inch Spade Drill Bit | View on Amazon
- Natural Terracotta Air-Dry Clay | Find on Amazon
📦 Beginner Project Kits & Coordinated Bundles
- Air-Dry Clay Sculpting Kit with Tools and Guide | Check Air-Dry Clay Sculpting Kit with Tools and Guide on Amazon
⚡ Studio Tools & Workshop Equipment
- Benchtop Drill Press with Adjustable Depth Stop | Check Price on Amazon
- Variable-Speed Rotary Tool Kit with Flexible Shaft | View Variable-Speed Rotary Tool Kit with Flexible Shaft on Amazon
- Daylight LED Magnifying Desk Lamp | Find Daylight LED Magnifying Desk Lamp on Amazon
Important Crafting Safety Notes
Crafting is a rewarding creative activity, but maintaining a safe workshop environment is essential for yourself, your family, and your pets. Please review these vital safety precautions before starting:
• Personal Protective Equipment (PPE) & Safe Handling: Always wear safety glasses or protective eyewear when cutting metal wire, clipping jump rings, trimming hard findings, or using power tools to prevent flying shards. Use heat-resistant work mats and exercise caution around high-temperature glue guns, irons, or heating tools to avoid burns. Wear disposable nitrile gloves and a particle dust mask when sanding wood or working with clays, resins, and solvent-based sealants to protect your skin and lungs.
• Room Ventilation & Fume Safety: Always craft in a well-ventilated space with open windows, cross-ventilation, or active exhaust whenever using solvent-based adhesives, instant bonders, aerosol sprays, epoxy resins, or heat-curing materials. Never inhale chemical fumes directly, and allow finished pieces to off-gas and cure completely in an airy area away from everyday living spaces.
• Child & Pet Safety (Choking & Swallowing Prevention): Small craft components—including safety eyes, split rings, clasps, jump rings, beads, bells, small magnets, unbaked clay scraps, and loose polyester fiberfill—present severe choking, intestinal obstruction, and ingestion hazards for babies, toddlers, and pets. Keep all unattached hardware, yarn cutoffs, and stuffing strictly out of reach. For handmade gifts intended for infants or young children, omit plastic washer eyes and detachable findings entirely in favor of securely stitched, double-knotted embroidered details.
• Sharp Tool Storage & Clean Work Area: Store sharp tools—such as rotary cutters, craft knives, bent-tip yarn needles, snips, scissors, and jewelry pliers—in secure, latching cases or high cabinets immediately after use. Thoroughly inspect, sweep, or vacuum your craft area and floor after finishing to ensure no dropped needles, pins, wire clippings, or small findings remain where curious pets or bare feet could step on or swallow them.
• Certified, Quality & Non-Toxic Supplies: Always choose verified non-toxic craft supplies (such as ACMI AP-certified paints and adhesives, lead-free and nickel-free jewelry findings, and skin-safe materials). Follow manufacturer label guidelines for curing durations, safe operating temperatures, and proper product disposal. Never use food preparation utensils or kitchen cookware for craft chemicals.
For more detailed guidance on safe crafting practices, liability disclosures, and website usage, please review our Terms and Conditions.
“Which of these DIY Candle Holders You Can Easily Make ideas are you excited to try first, or do you have a creative tip of your own to share? Drop a comment below—I’d love to hear your thoughts and see what you create!”