Creating custom DIY wall art decor allows you to personalize your home with high-end interior accents without spending boutique prices. By working with raw materials like joint compound, natural leather, real wood slats, and brass leaf, you can achieve tactile depth and serene modern aesthetics. Below, we share a detailed masterclass for textured plaster canvas alongside ten curated wall art projects designed to instantly upgrade your living space. If you enjoy organic interior accents, be sure to explore our collection of seashell crafts and decorations as well.
This post contains affiliate links. As an Amazon Associate, I earn from qualifying purchases. If you buy through these links, I may earn a commission at no additional cost to you.
Key Facts:
- Technique: Wall Art Decor Ideas
- Total time: 24 hours
- Makes: 10 project ideas
Essential Supplies for DIY Wall Art Decor
| Supply | Spec / Size | Used For |
|---|---|---|
| Blank Stretched Canvases (30 cm x 40 cm and 50 cm x 70 cm) | 30 cm | Heavy-duty cotton canvases provide a rigid, professional base for… |
| Heavy Floating Glass Frames (20 cm x 25 cm) | 20 cm | Dual-pane glass frames suspend pressed botanicals and paper art with… |
| Joint Compound / Matte Plaster | Premixed lightweight wall putty creates dramatic sculptural arches… | |
| Notched Scraper & Trowel Set (5 mm Tooth Depth) | 5 mm | Comb tools drag uniform geometric grooves and architectural arches… |
| White Air-Dry Clay | Smooth modeling clay used for cutting geometric disc pendants and… | |
| Flat Leather Strip Cord (2.5 cm Width) | 2.5 cm | Supple natural leather straps add warmth and tailored structural… |
Having a well-stocked studio ensures smooth crafting. These core bases, tools, and textural elements form the foundation of our modern wall art projects:
- Blank Stretched Canvases (30 cm x 40 cm and 50 cm x 70 cm) (used throughout): Heavy-duty cotton canvases provide a rigid, professional base for paint, plaster, and woven elements | Check Blank Stretched Canvases price on Amazon
- Heavy Floating Glass Frames (20 cm x 25 cm) (used throughout): Dual-pane glass frames suspend pressed botanicals and paper art with clean borderless margins | Check Heavy Floating Glass Frames price on Amazon
- Joint Compound / Matte Plaster (used throughout): Premixed lightweight wall putty creates dramatic sculptural arches and tactile canvas textures | Check Joint Compound price on Amazon
- Notched Scraper & Trowel Set (5 mm Tooth Depth) (used throughout): Comb tools drag uniform geometric grooves and architectural arches through wet plaster | Check Notched Scraper Set price on Amazon
- White Air-Dry Clay (used throughout): Smooth modeling clay used for cutting geometric disc pendants and minimalist wall hangings | Check White Air-Dry Clay price on Amazon
- Flat Leather Strip Cord (2.5 cm Width) (used throughout): Supple natural leather straps add warmth and tailored structural weave to wooden frames | Check Flat Leather Strip Cord price on Amazon
- Twisted Cotton Cord: Heavy-duty natural cotton rope provides tactile geometric texture, fringe detailing, and structural support for fiber art and wall hangings | Check Twisted Cotton Cord price on Amazon
- Balsa Wood Strips & Slats (1 cm x 1 cm): Lightweight wood strips easily cut to size for building 3D slat art panels |
Check Balsa Wood Strips price on Amazon - Black Picture Frames Set: Sleek matte black frames with crisp matting elevate lightweight fabric pieces, paper crafts, or dried botanicals into gallery-worthy focal points | Check Black Picture Frames price on Amazon
- Matte Black Acrylic Paint: High-pigment ultra-matte paint for high-contrast line art and dark backdrop panels |
Check Matte Black Acrylic Paint price on Amazon - Terracotta Liquid Fabric Dye: Rich earthy dye for creating ombre gradient fades on hanging cotton fiber cords |
Check Terracotta Liquid Fabric Dye price on Amazon - Brass Foil Sheets & Leaf Adhesive: Metallic gilding leaves that add subtle ambient shine to dark textured surfaces |
Check Brass Foil Sheets price on Amazon - Cyanotype Sunprint Paper Kit: Light-sensitive sheets that turn Prussian blue when exposed to sunlight with botanicals |
Check Cyanotype Sunprint Kit price on Amazon
Step-by-Step: Textured Plaster Canvas Masterclass
Textured plaster art is one of the most sought-after modern interior accents. This foundational project teaches you how to handle joint compound, drag continuous arches, and finish the edges for a gallery-worthy display.
Supplies Needed: Blank Stretched Canvas (40 cm x 50 cm), Joint Compound, Notched Scraper Set (5 mm depth), Putty Knife, Fine-Grit Sandpaper (220-grit), Matte Clear Sealant.
Step 1: Base Setup
Place a 40 cm x 50 cm (16 x 20 inch) stretched cotton canvas on a clean, flat work table. Lay down protective kraft paper underneath to catch excess plaster during scoring.
Step 2: Apply Joint Compound
Scoop premixed lightweight joint compound onto the center of the canvas using a wide putty knife. Spread an even 3 mm (1/8-inch) coat across the entire surface, working outward to the edges.
Step 3: Drag Architectural Arches
Hold a notched trowel with 5 mm teeth at a 45-degree angle to the canvas. Starting from the bottom left corner, drag the trowel upward and sweep across in a continuous arch pattern toward the bottom right. Keep constant pressure to create deep, smooth ridges.
Step 4: Clean the Canvas Edges
Run the flat edge of a clean putty knife along all four outer wooden borders of the canvas frame to remove excess compound and maintain sharp, square edges.
Step 5: Cure and Dry
Allow the plaster to dry undisturbed in a well-ventilated room for a full 24 hours until the gray wet compound turns completely chalk-white and hard to the touch.
Step 6: Sand and Protect
Lightly sand any rough peaks using 220-grit sandpaper. Wipe away plaster dust with a dry microfiber cloth and spray a light coat of matte clear sealant to prevent moisture absorption.
10 Modern DIY Wall Art Decor Ideas
Below are ten unique, minimal wall art ideas that emphasize natural materials, tactile contrast, and simple execution.
1. Floating Glass and Ferns
- Flatten fresh fern fronds inside a heavy book lined with parchment paper for 5 days.
- Clean two 20 cm x 25 cm glass panes thoroughly with rubbing alcohol.
- Position the dried fronds in the center of one pane.
- Place the second glass pane directly on top and latch the metal frame secure.
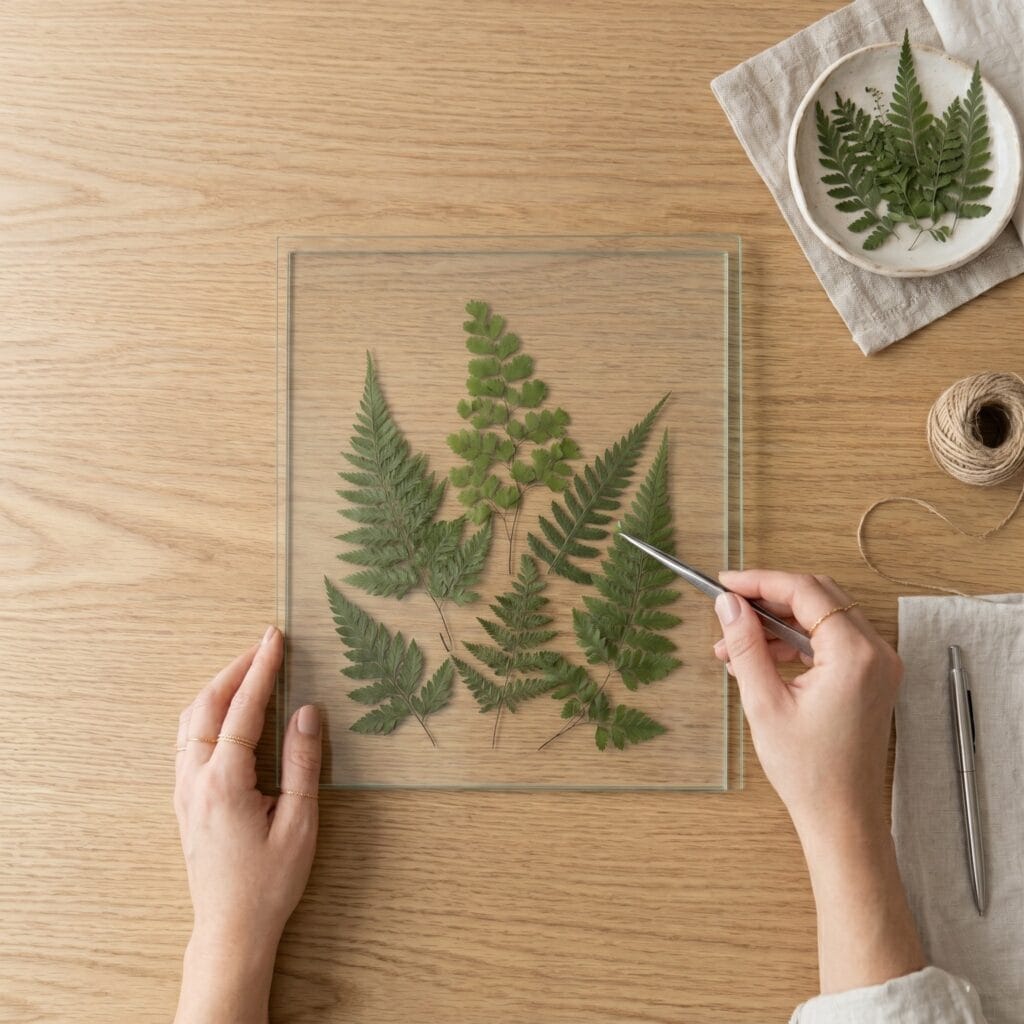
Supplies Needed: Heavy Floating Glass Frames (20 cm x 25 cm), Pressed Botanical Fern Fronds, Microfiber Cloth, Rubbing Alcohol.
The Concept: Sandwiching delicate pressed green ferns between clear glass panes creates a floating botanical accent that allows your wall color to show through the background.
Quick Steps: Flatten fresh fern fronds inside a heavy book lined with parchment paper for 5 days. Clean two 20 cm x 25 cm glass panes thoroughly with rubbing alcohol. Position the dried fronds in the center of one pane, place the second glass pane directly on top, and latch the metal frame secure.
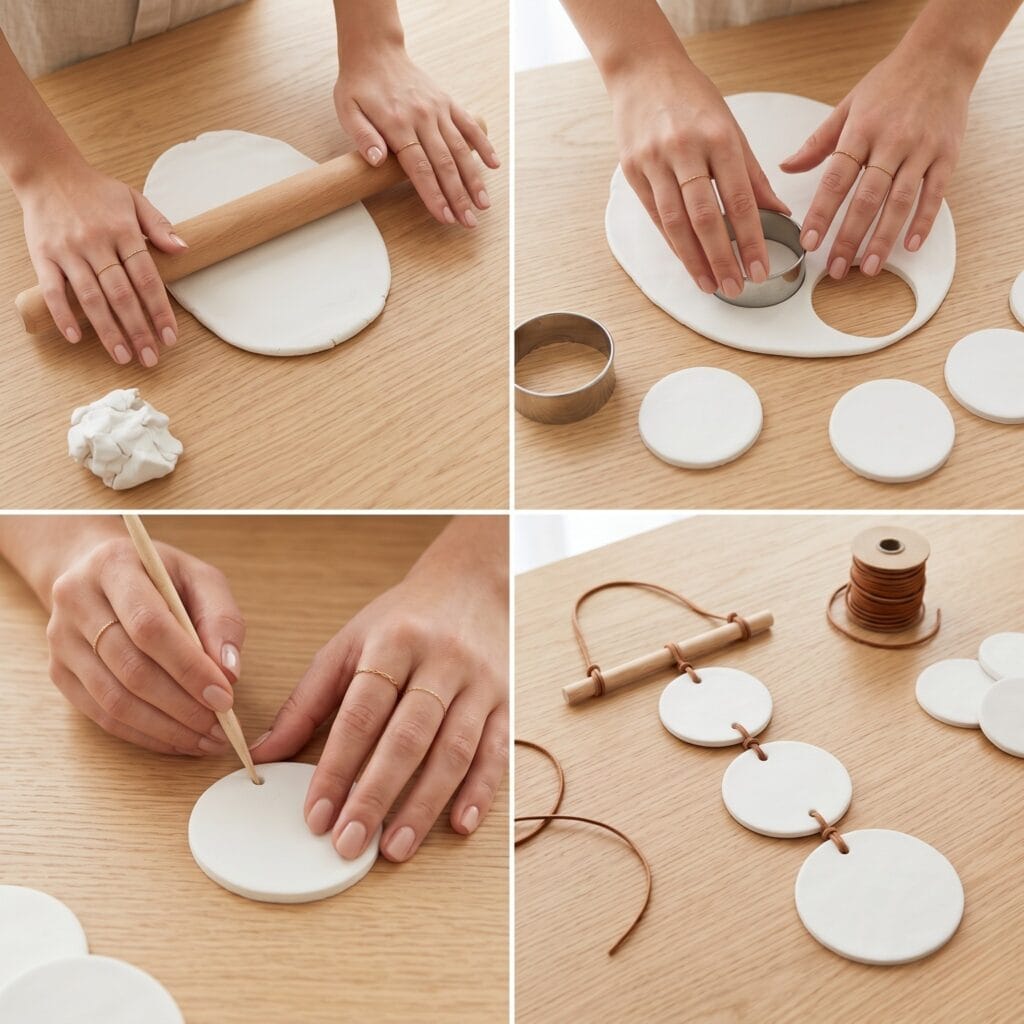
2. Matte Clay Pendants
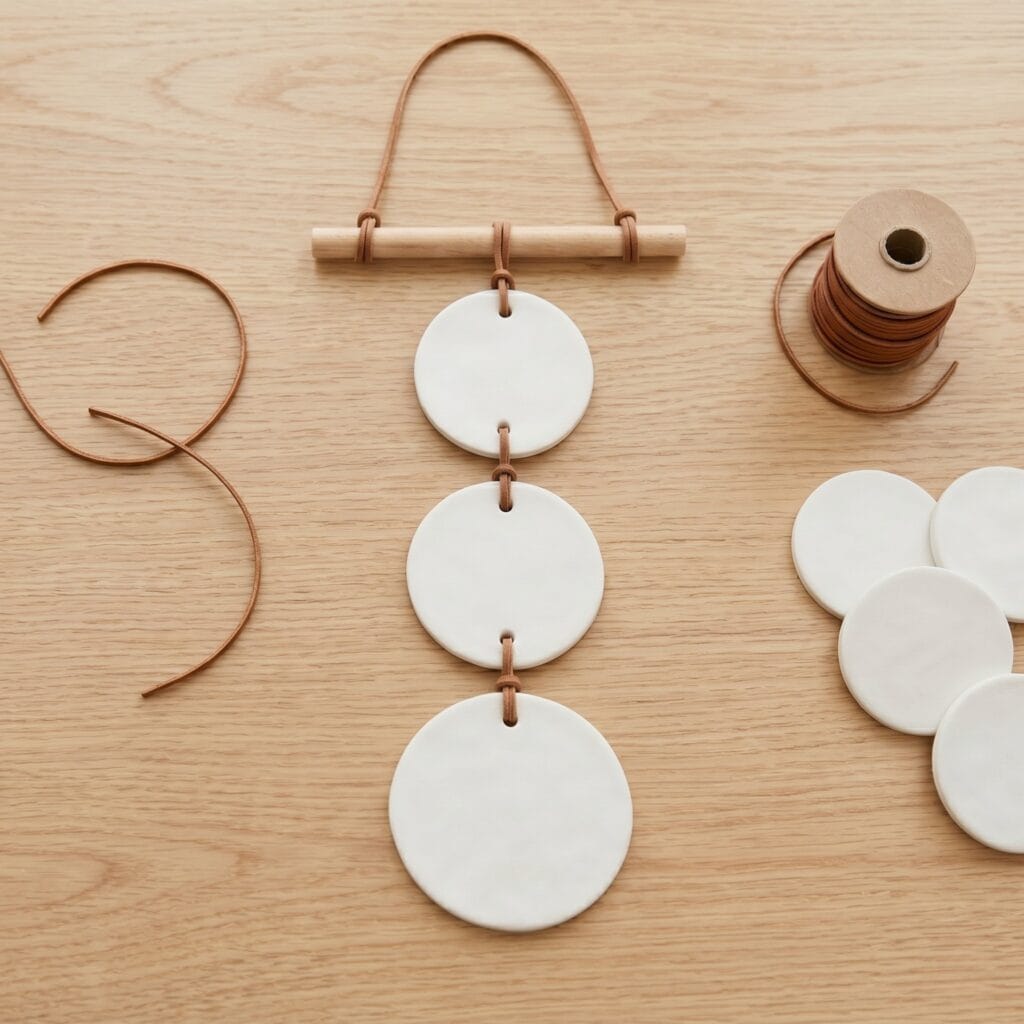
Supplies Needed: White Air-Dry Clay, Acrylic Rolling Pin, Circle Clay Cutters, Flat Leather Strip Cord, Wooden Dowel Rod (30 cm length).
The Concept: Tiered geometric clay discs hanging from a natural wooden dowel introduce gentle organic shapes and subtle movement to bedroom walls or entryways.
Quick Steps: Roll white air-dry clay to a uniform 5 mm thickness. Cut five circular discs ranging from 5 cm to 12 cm in diameter using cookie cutters. Punch a 4 mm hole near the top of each disc using a straw. Allow to dry for 48 hours, sand smooth with fine sandpaper, and tie the pieces to a 30 cm oak dowel using leather cords.
3. Woven Raw Leather Canvas
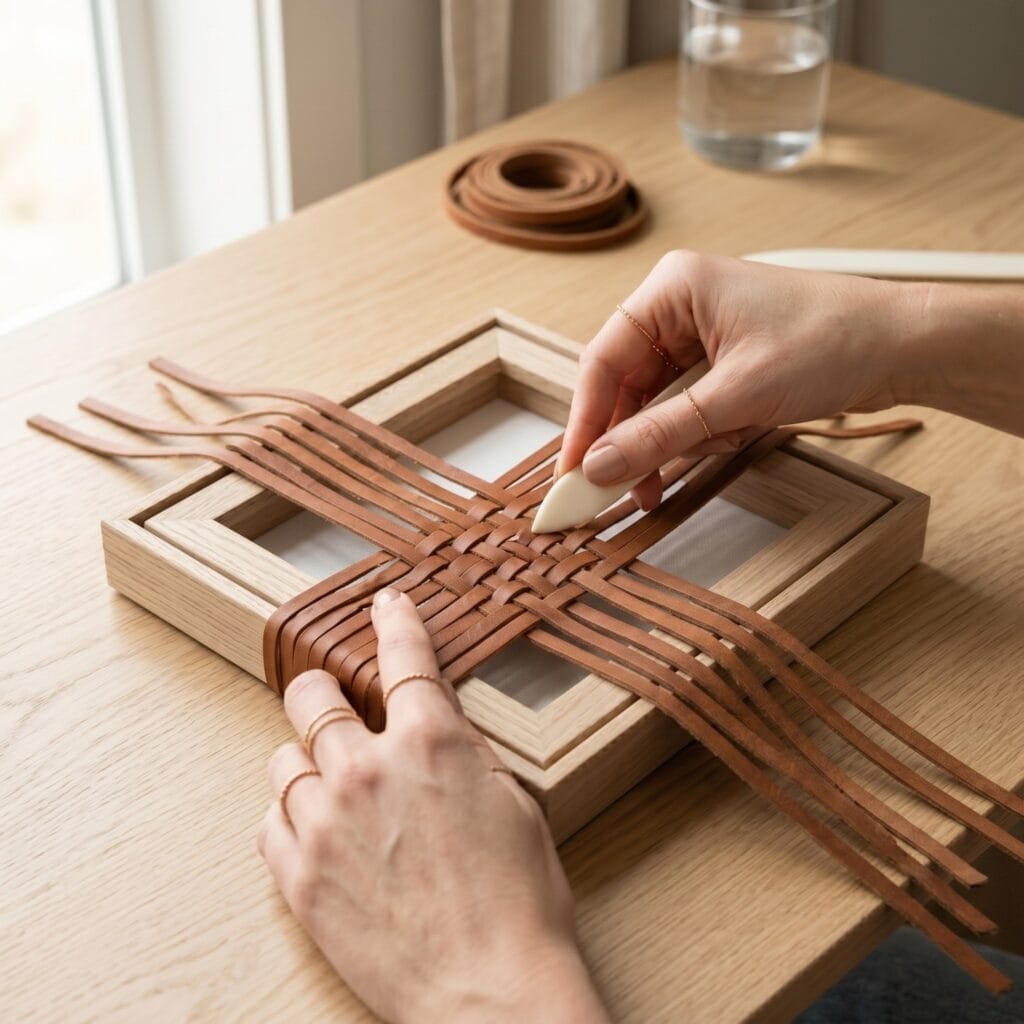
Supplies Needed: Flat Leather Strip Cord (2.5 cm width), Blank Wooden Canvas Frame (30 cm x 40 cm), Heavy-Duty Staple Gun, Fabric Shears.
The Concept: Interlocking natural leather straps over a hollow wooden canvas stretcher provides rich tactile warmth and a tailored geometric texture suitable for modern study spaces.
Quick Steps: Strip the fabric off a 30 cm x 40 cm canvas frame. Cut 2.5 cm wide leather strips to length. Staple vertical strips to the back of the wood frame, pull them tight, and weave horizontal leather strips over and under in a plain basketweave before stapling the remaining ends securely.
4. Minimalist Wooden Slat Art
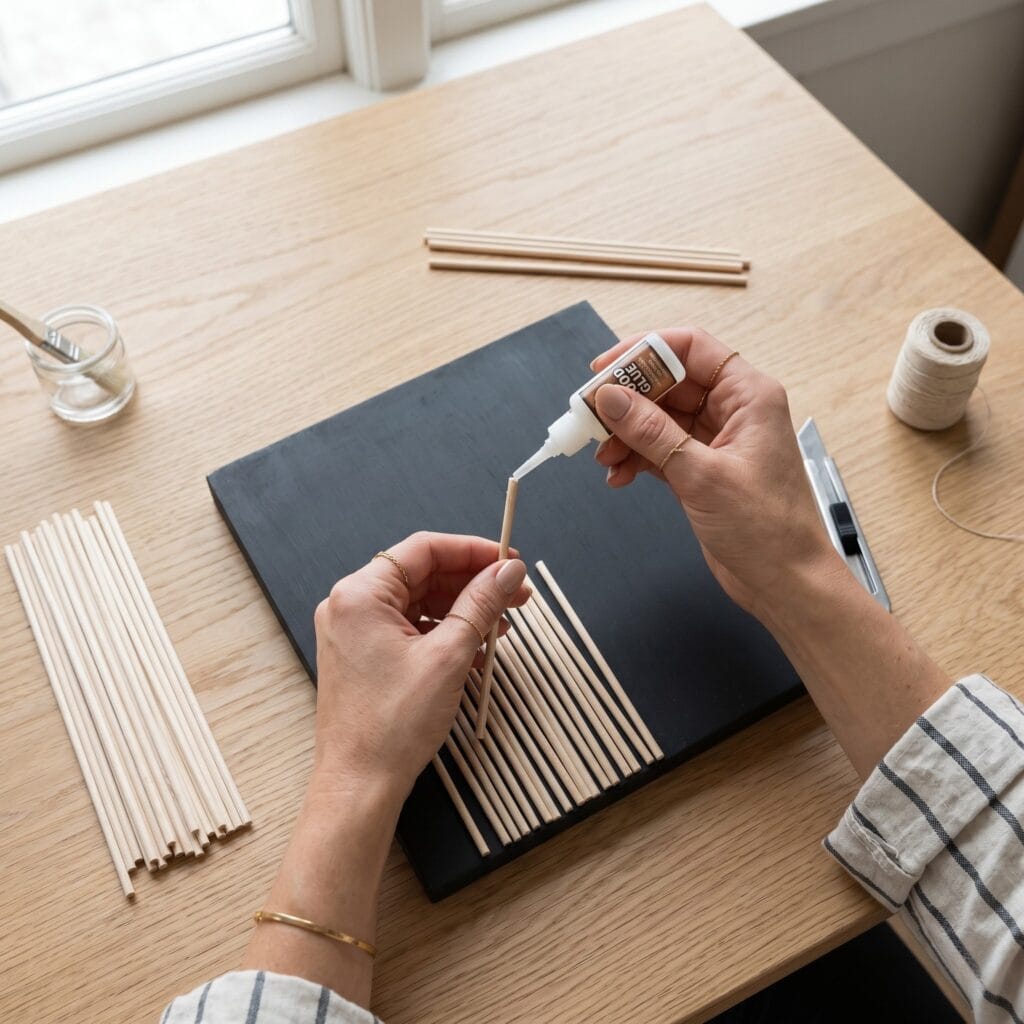
Supplies Needed: Balsa Wood Strips (1 cm x 1 cm), Plywood Backing Board (40 cm x 50 cm), Matte Black Acrylic Paint, Wood Glue, Small Hand Saw.
The Concept: Mounting raised vertical wood slats onto a dark painted backing panel creates clean architectural line shadows that shift naturally as room lighting changes throughout the day.
Quick Steps: Coat a 40 cm x 50 cm plywood board with two layers of matte black acrylic paint. Cut 1 cm square balsa wood slats to matching lengths using a hand saw. Space the wood slats 1.5 cm apart across the dark board, securing each strip firmly with wood glue.
5. Single Line Art
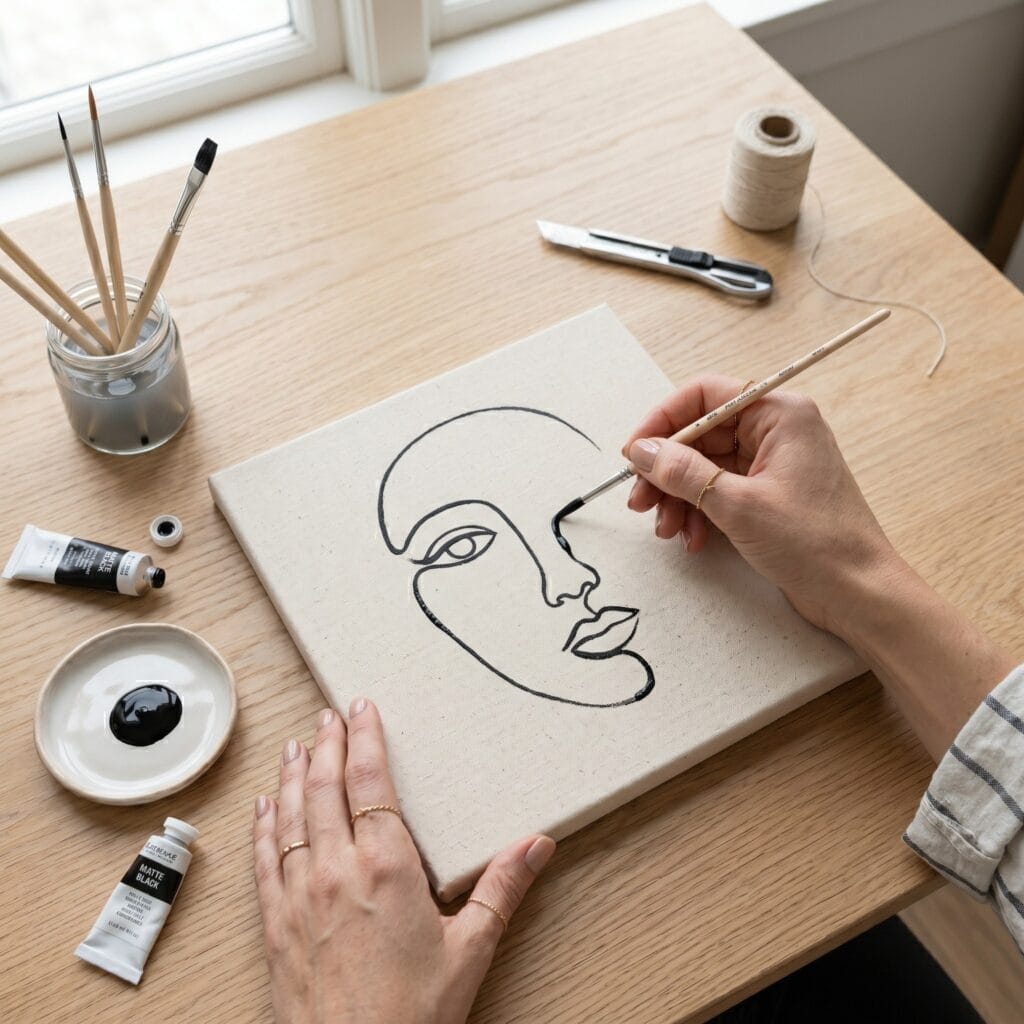
Supplies Needed: Blank Stretched Canvas (50 cm x 70 cm), Matte Black Acrylic Paint, Fine Detail Paintbrush, Graphite Pencil.
The Concept: Single line drawing captures fluid abstract human profiles with minimalist simplicity, serving as a clean focal point for gallery walls.
Quick Steps: Lightly trace a continuous face contour onto a 50 cm x 70 cm unbleached cotton canvas using a faint pencil line. Dip a fine detail brush into un-thinned matte black paint and trace the line in one smooth movement, keeping brush thickness consistent throughout.
6. Ombre Dip-Dyed Tapestry
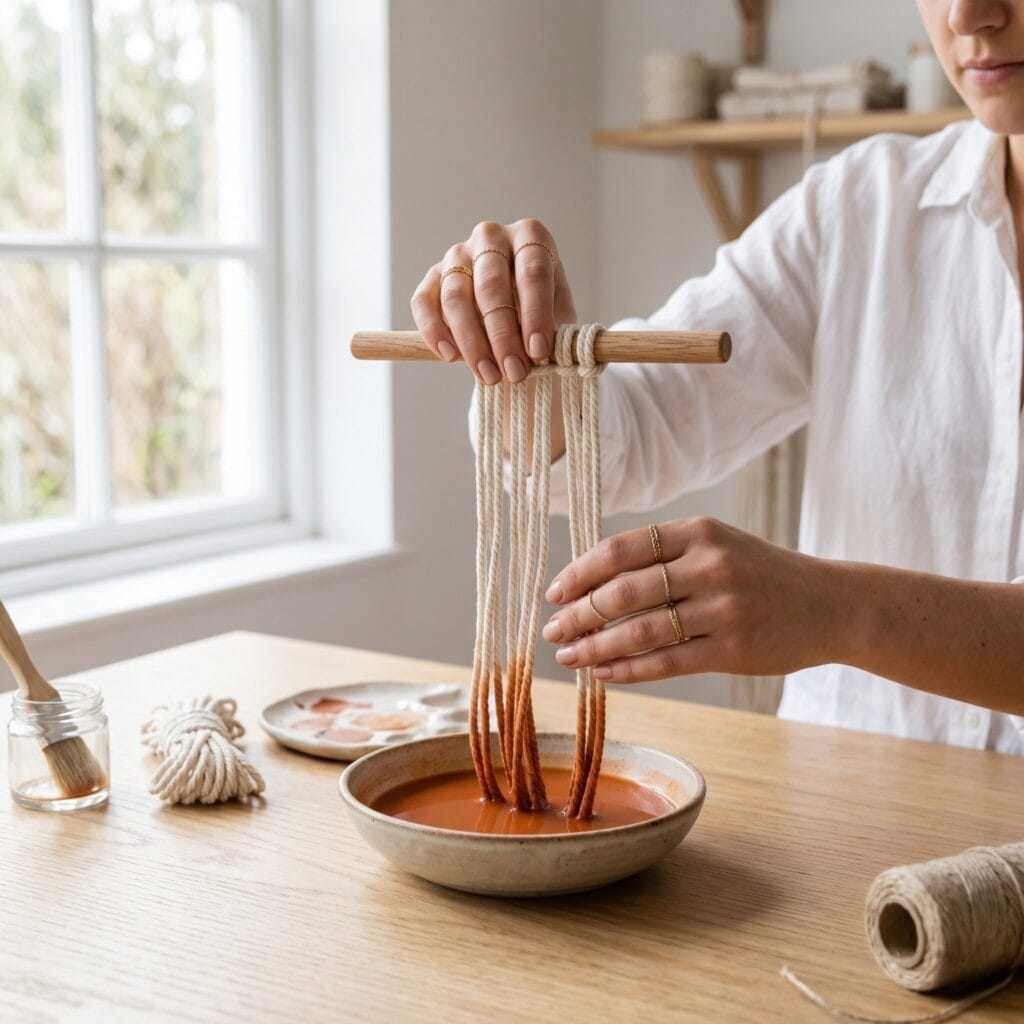
Supplies Needed: Twisted Cotton Cord (5 mm thickness), Wooden Dowel Rod (45 cm), Terracotta Liquid Fabric Dye, Stainless Steel Basin.
The Concept: Soft cotton cord fringe dipped into warm earthy dye baths creates a subtle color gradient that adds boho texture to neutral interiors.
Quick Steps: Attach twenty 1-meter lengths of cotton cord to a wooden dowel using lark’s head knots. Prepare a terracotta dye bath. Submerge the bottom 20 cm of cords for 15 minutes, then lift the bundle slightly to leave the bottom 5 cm soaking for an extra 10 minutes to form a dark, rich gradient edge.
7. Grid Vintage Book Pages
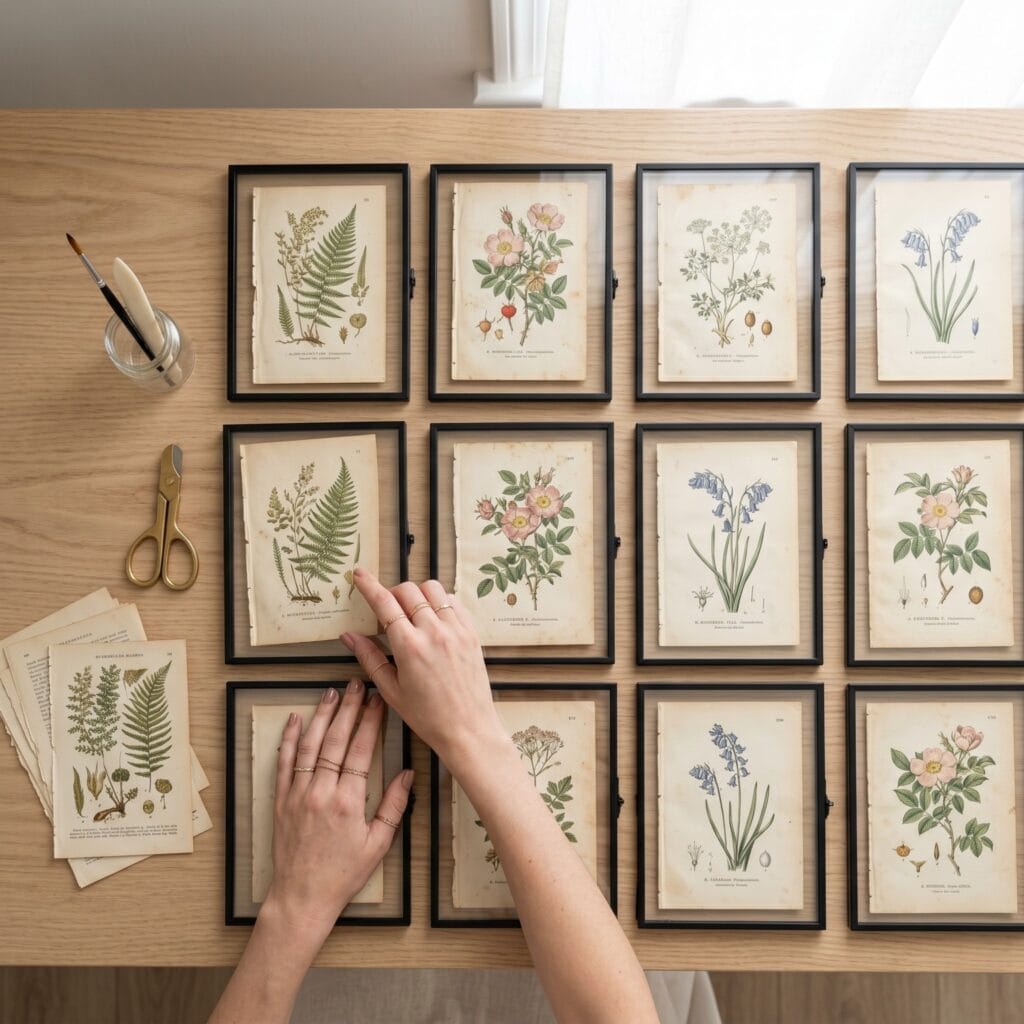
Supplies Needed: Antique Botanical Book Prints, Black Picture Frames (20 cm x 25 cm, set of 6), Acid-Free Archival Tape.
The Concept: Arranging aged botanical illustrations in a uniform gallery grid brings historic natural history prints together with clean geometric symmetry.
Quick Steps: Collect six matching botanical page prints measuring 15 cm x 20 cm. Mount each print inside a thin black frame using acid-free archival tape. Hang the finished frames on your wall in a two-row by three-column grid, maintaining exactly 5 cm spacing between every frame border.
8. Brass Foil Accent Canvas
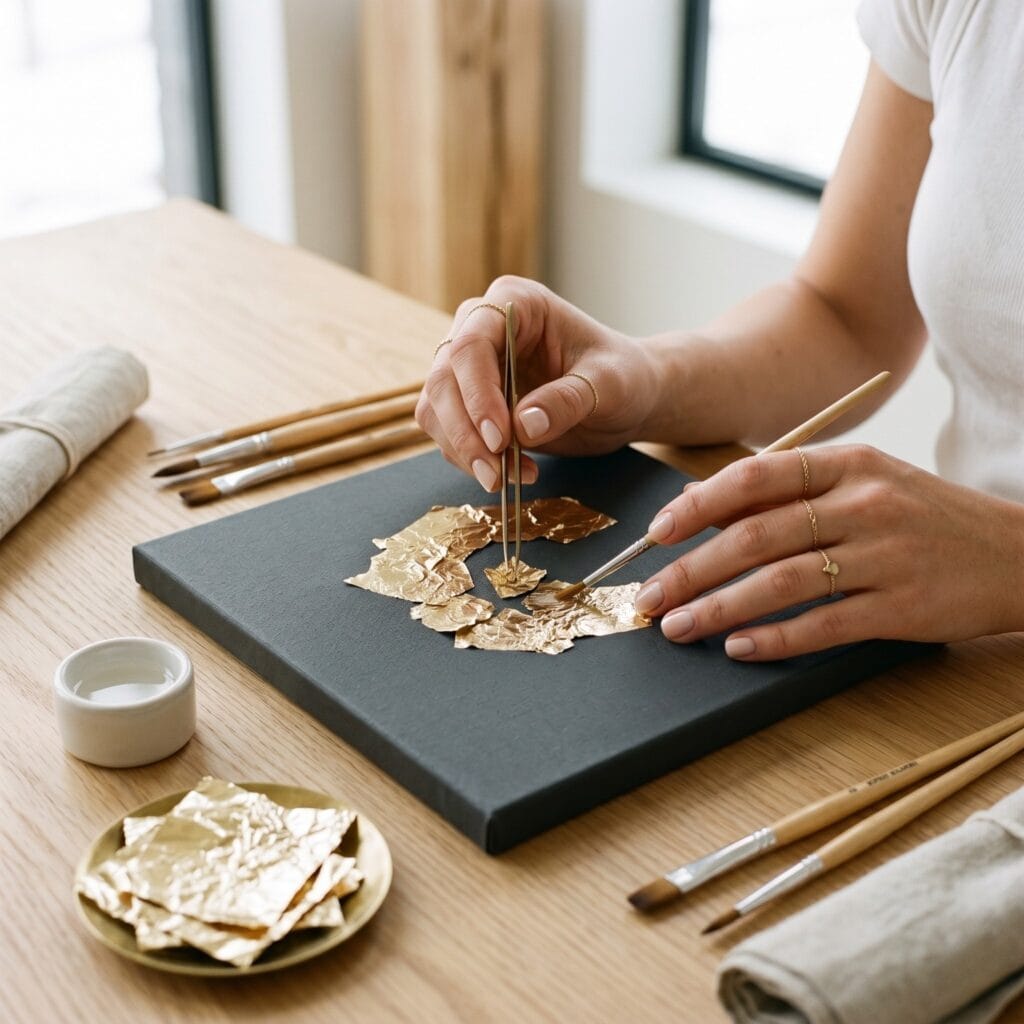
Supplies Needed: Blank Stretched Canvas (40 cm x 40 cm), Dark Charcoal Acrylic Paint, Brass Foil Sheets, Metal Leaf Adhesive, Soft Mop Brush.
The Concept: Reflective brass gilding applied over a dark matte background catches ambient light, offering an elegant contrast between rough leaf texture and smooth paint.
Quick Steps: Paint a 40 cm square canvas in dark charcoal gray matte acrylic. Apply gilding adhesive in a loose abstract pattern across the center and wait 5 minutes until tacky. Press brass foil sheets onto the tacky glue and brush away loose excess flakes with a dry soft mop brush.
9. Organic Cyanotype Sunprints
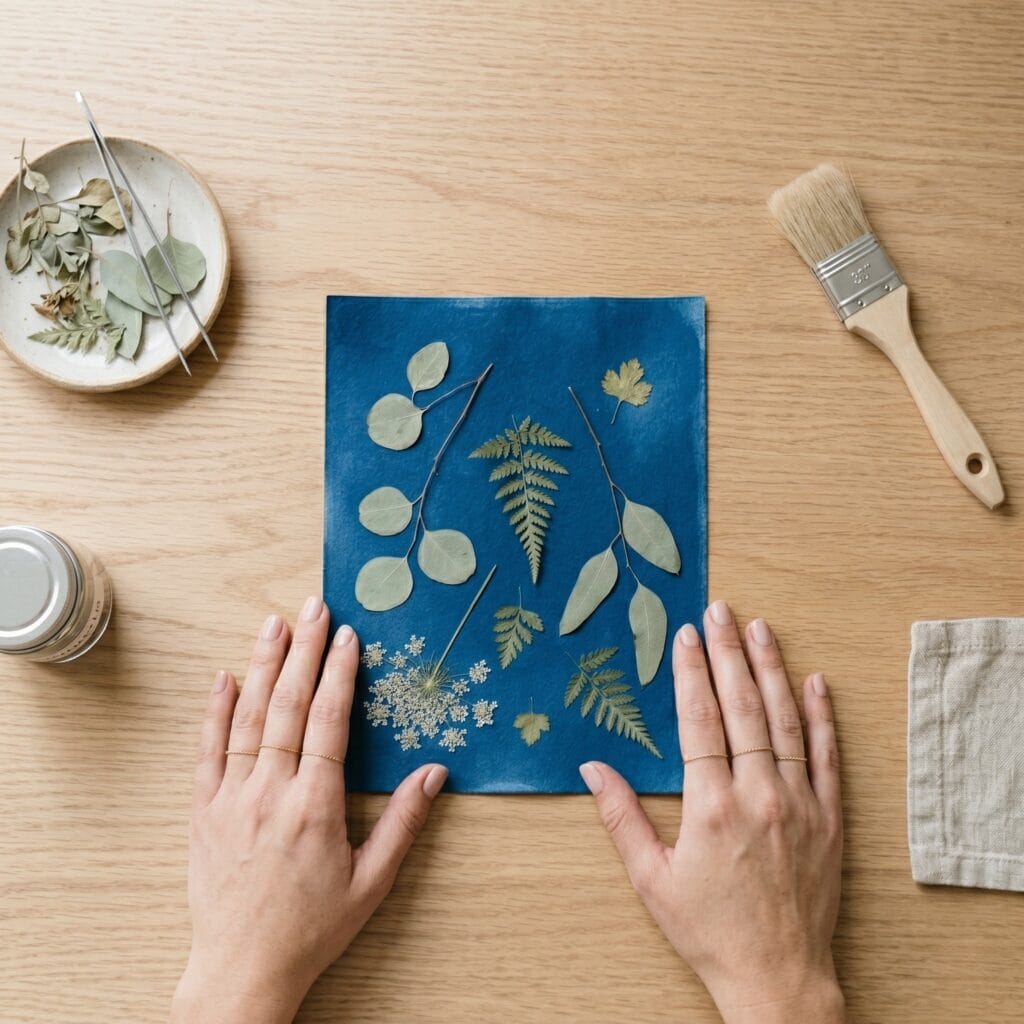
Supplies Needed: Cyanotype Sunprint Paper Kit, Pressed Leaves, Clear Acrylic Sheet, Water Tray.
The Concept: Sunlight-activated cyanotype paper captures botanical silhouettes in rich Prussian blue, producing crisp chemical prints perfect for nature lovers.
Quick Steps: In a shaded room, arrange pressed fern leaves on cyanotype paper and pin them flat under an acrylic sheet. Move the setup into direct sunlight for 3 to 5 minutes until the exposed paper turns bronze. Rinse the paper thoroughly in cold water for 5 minutes to reveal white leaf silhouettes against a deep blue background.
10. Color Block Arches
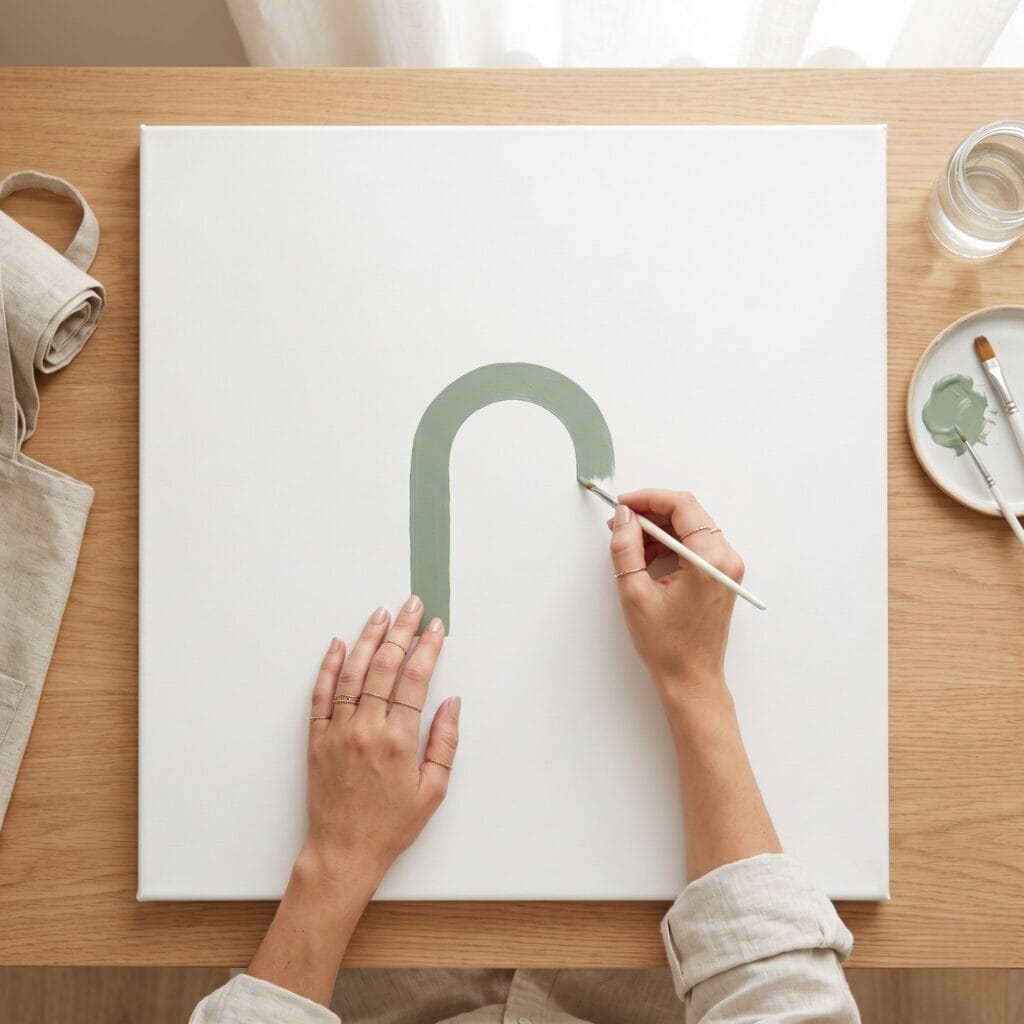
Supplies Needed: Large Stretched Canvas (60 cm x 90 cm), Matte Sage Green Acrylic Paint, Painter’s Tape, String and Pencil Compass.
The Concept: Painting a single large arch shape in soft sage green onto a white canvas anchors open wall spaces with modern geometric architectural form.
Quick Steps: Tie a pencil to string anchored at the top center of a large canvas to draw a smooth arch curve. Mask the vertical side borders with painter’s tape. Fill inside the arch outline using matte sage green acrylic paint, applying two thin coats for smooth, solid color coverage.
Quick Reference: All Supplies at a Glance
Ready to build your custom wall pieces? Here is the complete list of materials used across this guide for quick reference before gathering your studio equipment:
🖼️ Canvases, Frames & Wood Bases
- Blank Stretched Canvases (used throughout) | Check Blank Stretched Canvases price on Amazon
- Heavy Floating Glass Frames (used throughout) | Check Heavy Floating Glass Frames price on Amazon
- Balsa Wood Strips & Slats | Check Balsa Wood Strips price on Amazon
- Black Picture Frames Set | Check Black Picture Frames price on Amazon
🎨 Plaster, Paints & Paper Media
- Joint Compound / Matte Plaster (used throughout) | Check Joint Compound price on Amazon
- Matte Black Acrylic Paint | Check Matte Black Acrylic Paint price on Amazon
- Terracotta Liquid Fabric Dye | Check Terracotta Liquid Fabric Dye price on Amazon
- Brass Foil Sheets & Leaf Adhesive | Check Brass Foil Sheets price on Amazon
- Cyanotype Sunprint Paper Kit | Check Cyanotype Sunprint Kit price on Amazon
🛠️ Tools, Cords & Application Hardware
- Notched Scraper & Trowel Set (used throughout) | Check Notched Scraper Set price on Amazon
- White Air-Dry Clay (used throughout) | Check White Air-Dry Clay price on Amazon
- Flat Leather Strip Cord (used throughout) | Check Flat Leather Strip Cord price on Amazon
- Twisted Cotton Cord | Check Twisted Cotton Cord price on Amazon
Important Crafting Safety Notes
Working with wall art materials is safe when standard studio precautions are followed. Glass panes should always be inspected for micro-cracks before assembly, and cut edges should be handled carefully to prevent cuts.
Dust and Chemical Ventilation: When dry sanding joint compound or plaster canvases, always wear an N95 dust mask to avoid inhaling fine gypsum particles. Cyanotype chemicals and metallic leaf adhesives should be used in well-ventilated areas away from food contact surfaces.
Wall Mounting Safety: Heavy items like wooden slat panels, joint compound canvases, and glass frames must be anchored securely. Use appropriate wall anchors rated for the weight of your specific frame rather than standard adhesive strips.
Which of these modern DIY wall art decor projects will you make first? Let us know your favorite style in the comments below!