

Are you looking for chic room accents? First, creating custom pieces with easy clay models is a wonderful choice. It brightens your interior design. Still, many traditional clay projects look childish over time. So, we curated these ten sophisticated matte-finished concepts. Because we focus on minimalist preservation, these designs feel very fresh. Plus, selecting your own local organic earth tones is highly satisfying. As a result, your dresser tabletops will look perfectly curated. For instance, layer these organic shapes with our How to Style Beautiful Resin Art: 10 Unique Design Ideas. It creates a beautifully balanced, texture-rich setup. Let’s explore these concepts!
This post contains affiliate links. As an Amazon Associate, I earn from qualifying purchases. If you buy through these links, I may earn a commission at no additional cost to you.
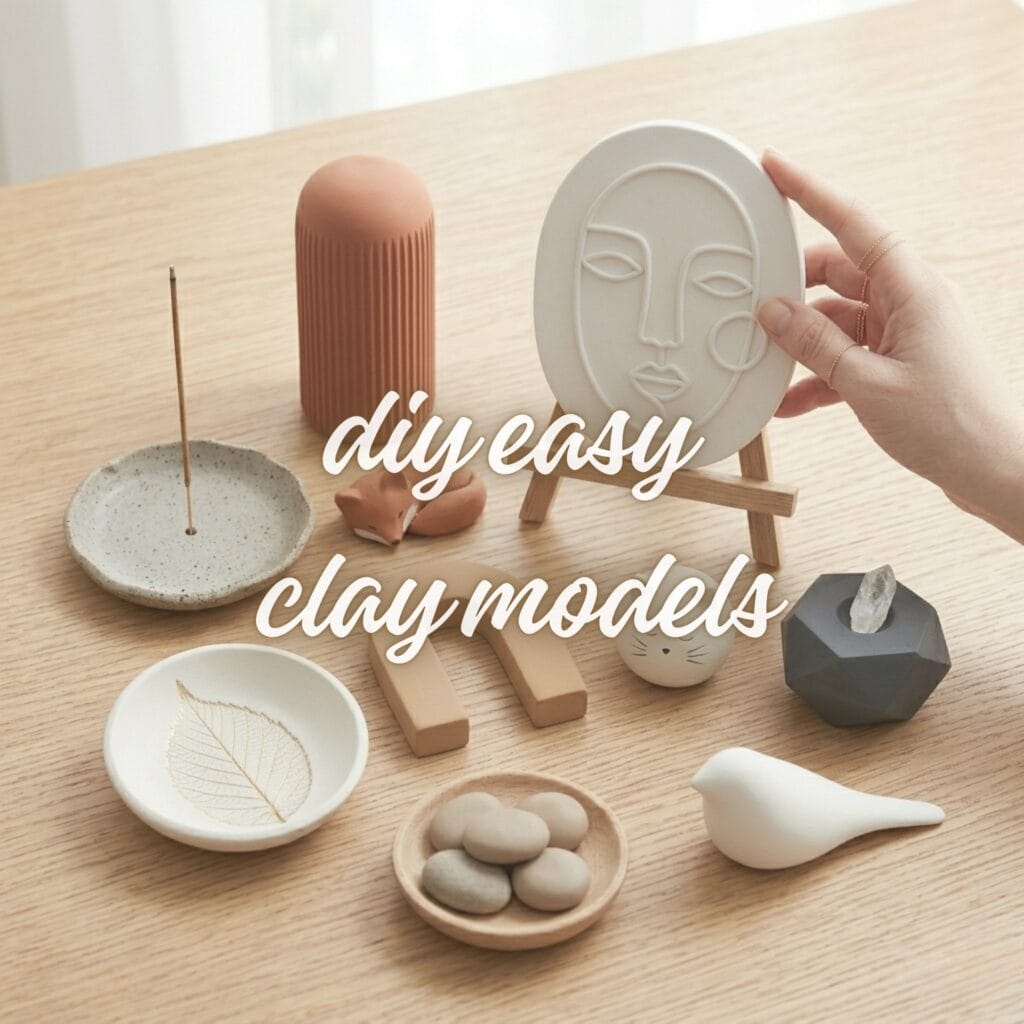
Essential Materials & Tools
Air-dry clay forms the base of nine of the ten projects here, while one design uses oven-bake polymer clay instead.
✨ Consumable Raw Materials
- Premium Air-Dry Clay (White, Terracotta, Gray Speckled, Charcoal, Beige) — a smooth, crack-free clay that sets rock-hard without a kiln | Check Premium Air-Dry Clay (White, Terracotta, Gray Speckled, Charcoal, Beige) on Amazon
- Tan Polymer Clay — used only for the Monolithic Arch Objects (Idea #6), which requires baking in a home oven | Check Price on Amazon
- Real Dried Leaf — presses a genuine botanical imprint into wet clay | View Real Dried Leaf on Amazon
🧰 Core Crafting Tools & Equipment
- Wooden Modeling Knife — carves ridges, indents, and fine surface details | View Wooden Modeling Knife on Amazon
- Sharp Craft or Clay Blade — makes clean, straight cuts for arch shapes and faceted gem holders | Find Sharp Craft or Clay Blade on Amazon
- Wooden Toothpick — pierces small, clean holes like the incense holder’s center opening | See Price on Amazon
- Small Circular Mold or Shallow Bowl — shapes the rounded base for the nesting bowl design | See Small Circular Mold or Shallow Bowl on Amazon
- Fine-Grit Sandpaper Blocks — smooths every dried piece to a flawless finish | Explore Fine-Grit Sandpaper Blocks on Amazon
- Fine Detail Paintbrush — applies small painted accents like whiskers and cheek highlights | Check Price on Amazon
- Fine Needle Tool — Scores the fox’s delicate curved sleeping-eye line and other precise incised details. | Check Fine Needle Tool on Amazon
- Clay Roller or Rolling Pin — Rolls clay to an even slab for the leaf-imprint bowls and the geometric plaques. | See Price on Amazon
- Dedicated Baking Sheet — Craft-only tray for baking the polymer arch; keep it out of the kitchen rotation. | Check Price on Amazon
- Damp Sponge — Wipes fresh fingerprints off the dove statue while the clay is still damp. | Find on Amazon
- Sanding Mask — Filters clay dust while sanding the cured column and the worry stone. | See Price on Amazon
- Silicone Craft Mat or Ceramic Tile — the nonstick work surface named in the fundamentals; keeps bases smooth while clay dries | Check Silicone Craft Mat on Amazon
- Soft Lint-Free Cloth — wipes the blade between cuts and lifts sanding dust without scratching | Check Lint-Free Cloths on Amazon
💎 Hardware, Fasteners & Finishing
- Matte Clear Sealant — water-based matte varnish compatible with both air-dry and polymer clay; decorative display only, never food-safe or heat-safe | Check Matte Clear Sealant on Amazon
- Matte Acrylic Paint (White) — covers the sleeping fox’s cheek accents | View White Paint on Amazon
- Matte Acrylic Paint (Black) — covers the geometric cat’s dark details | View Black Paint on Amazon
- Gold Metallic Paint — highlights pressed leaf veins on the botanical nesting bowl | Find on Amazon
A basic modeling knife handles most detail work, while a sharper blade delivers the clean, straight cuts that architectural designs need.
Matte paints and a clear sealant give every figure its signature soft, stone-like surface.
Natural accents press real textures directly into wet clay.
Optional Studio Upgrades
Never required to finish the projects above — convenience upgrades for makers who want them.
📦 Beginner Project Kits & Coordinated Bundles
For beginners or makers starting from scratch, these coordinated bundles and all-in-one project packs bring together the core supplies in one convenient order.
- Air-Dry Clay Kit — Convenient coordinated option with clay, basic shaping tools, and project guidance for first-time sculptors. | Check Price on Amazon
Air-Dry Clay Fundamentals
Four habits keep air-dry pieces from cracking or falling apart:
- Work on a nonstick surface. A silicone mat or a ceramic tile keeps the base from sticking and leaves a clean finish.
- Join with score-and-slip. Scratch both edges with a needle tool, dampen them, and press together — use an adhesive suited to the clay for anything already dry.
- Dry thick forms slowly. Thick walls and bases crack when they dry fast — cover them loosely and give them extra days.
- Follow the package before sanding or sealing. The manufacturer’s cure time comes first; sand and seal only once the piece is fully cured.
Core Techniques for Easy Clay Models
The Sleeping Fox masterclass above covers the basics of shaping and finishing. A couple of the variations below also lean on two additional hand-building moves. Here is how each one works:
1. Pinching for Small Details
Supplies Needed: Premium Air-Dry Clay in the color the host project uses
Quick Steps:
- First, pinch a small section of the main clay form firmly between your thumb and forefinger.
- Next, hold the pinch for a few seconds so the shape sets before releasing.
- Then, smooth the base of the pinch gently into the surrounding clay so it reads as one continuous piece.
Used in: Tiny Spherical Cat Companions (ears), Stylized Miniature Dove Statues (tail).
2. Carving Clean Straight Facets
Supplies Needed: a firm, leather-hard block of Premium Air-Dry Clay, Sharp Craft or Clay Blade, a soft cloth to wipe the blade between cuts
Quick Steps:
- First, make sure your clay block is firm but not fully dry — slightly leather-hard clay carves more cleanly than wet or fully dry clay.
- Next, hold your sharp craft blade at a shallow, consistent angle and slice in one smooth pass per facet.
- Then, wipe the blade clean between cuts to keep edges crisp.
Used in: Ribbed Desert Column Figurine, Faceted Geometric Gem Holders.
1. Sleeping Fox: Easy Clay Models Masterclass
Supplies Needed: Terracotta Air-Dry Clay, Wooden Modeling Knife, Fine Needle Tool, Fine-Grit Sandpaper Blocks, Matte White Acrylic Paint, Fine Detail Paintbrush, Matte Clear Sealant.
This project builds one complete figure from start to finish; work on a silicone mat or ceramic tile, and keep the clay you set aside in Step 1 ready for the tail and the ears.
Every step below states the shape, the join, and the finishing action for that part, so you can check your progress as you go.
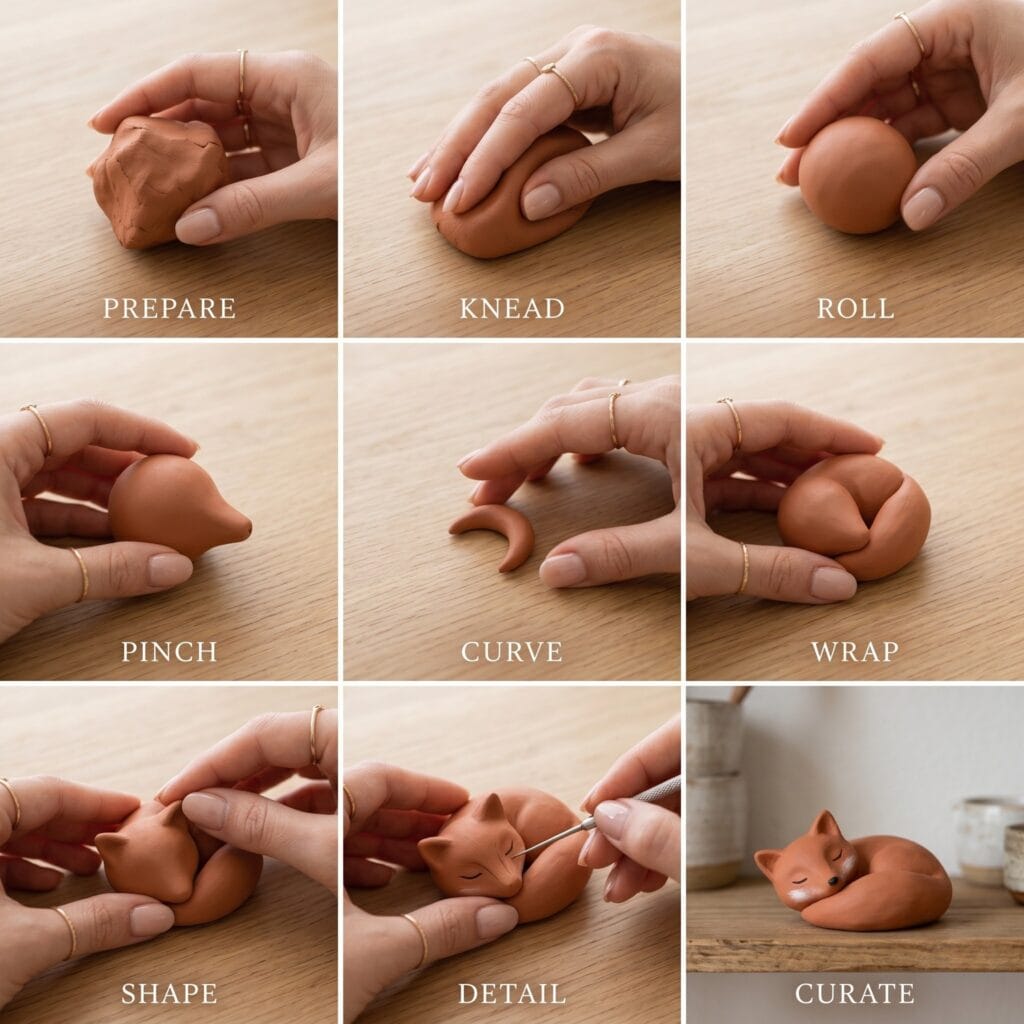
Step 1: Roll a 4 cm (approx. 50g) ball of raw terracotta air-dry clay between your palms until perfectly smooth and free of air bubbles. Before shaping, set aside a small extra piece of clay — you will roll the tail coil in Step 3 and cut two ear pieces for Step 4 from it.
Step 2: Gently elongate one side of the sphere, tapering it into a sleek 1.5 cm snout point.
Step 3: Shape a separate 1 cm thick, 8 cm long clay coil into a gentle crescent, pressing it seamlessly along the base to form the sleeping tail.
Step 4: Shape two small triangular ears from the clay you set aside, score their bases, and press them onto the head; blend the joins with the wooden modeling tool, then press a shallow 3 mm dimple into each ear for depth.
Step 5: Score a delicate 6 mm curved arc across the side using a fine needle tool to mark the sleeping eye, then let it cure per your clay package’s directions on a flat nonstick surface; the solid body dries slowly from the inside out, so sand only after it is cured through.
Step 6: Lightly buff the dry surface using 220-grit fine sandpaper, then brush two thin coats of matte white acrylic paint exclusively across the cheek contours.
Step 7: Apply a protective layer of clear matte sealant across the entire piece to lock in the velvety finish and raw terracotta tones.
9 More Clever Variations for Easy Clay Models
Additionally, these sleek sculptures rely on clean contours. Here are nine more inspiring concepts to add to your easy clay models mood board.
Similarly, if you enjoy mixing natural textures with modern storage, check out our popular How to Make a Beautiful DIY Earring Holder: 10 Epic Ideas.
2. Geometric Abstract Face Plaques
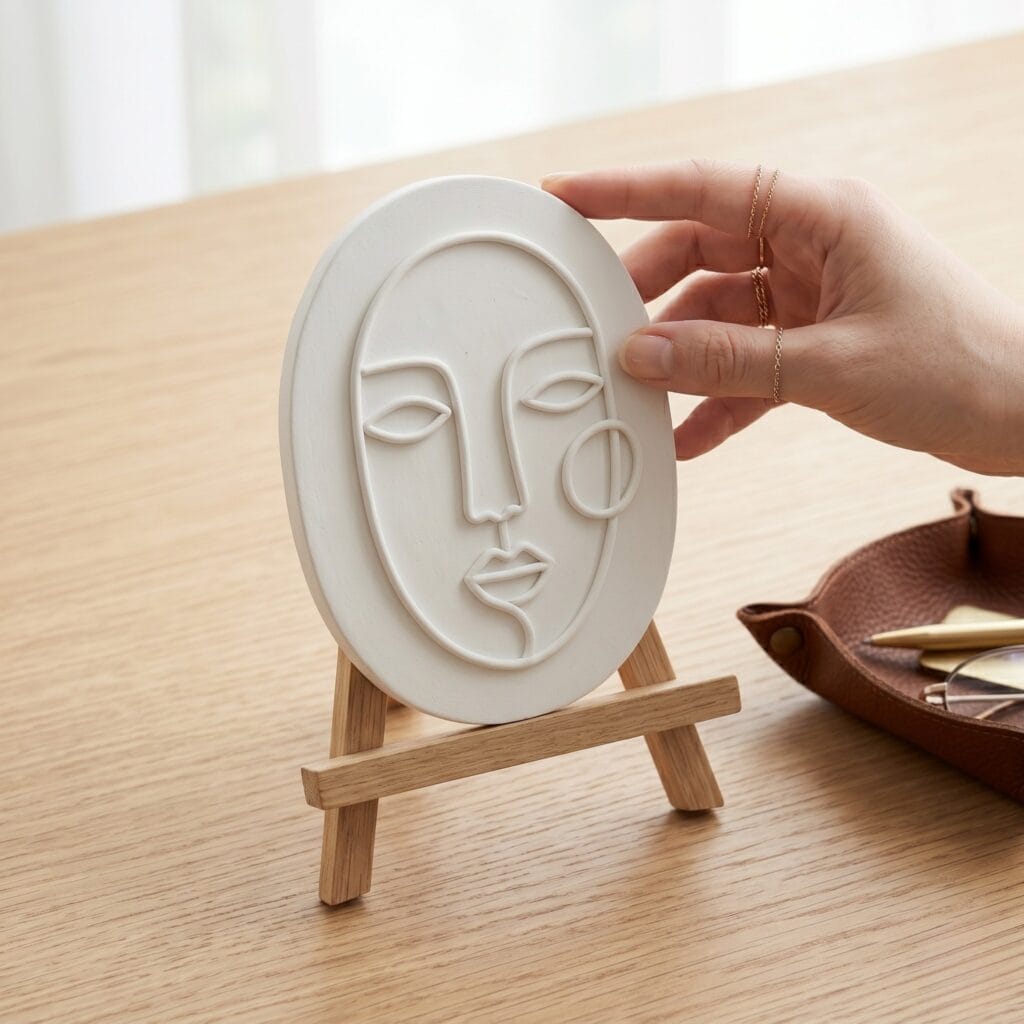
Supplies Needed: White Air-Dry Clay, Rolling Pin (or Clay Roller), Fine-Grit Sandpaper Blocks, Matte Clear Sealant.
Work the raised geometric lines while the clay is leather-firm so the pattern stays crisp, and keep the slab an even thickness so the plaque dries flat without cupping.
Quick Steps:
- Roll white air-dry clay into an even 6 mm thick slab and trim it into a 10 cm x 15 cm oval base.
- Roll 3 mm thin clay strands between your fingers and gently position them onto the slab to map out continuous abstract facial contours.
- Lightly press each strand down using a damp finger to fuse the pieces seamlessly before letting the plaque cure flat per the clay package’s directions — fully cured through, not just surface-dry.
Finishing Note: Once the plaque is cured through, stand it upright on a wooden easel next to your Stunning No-Sew Leather Valet Tray.
3. Ribbed Desert Column Figurine
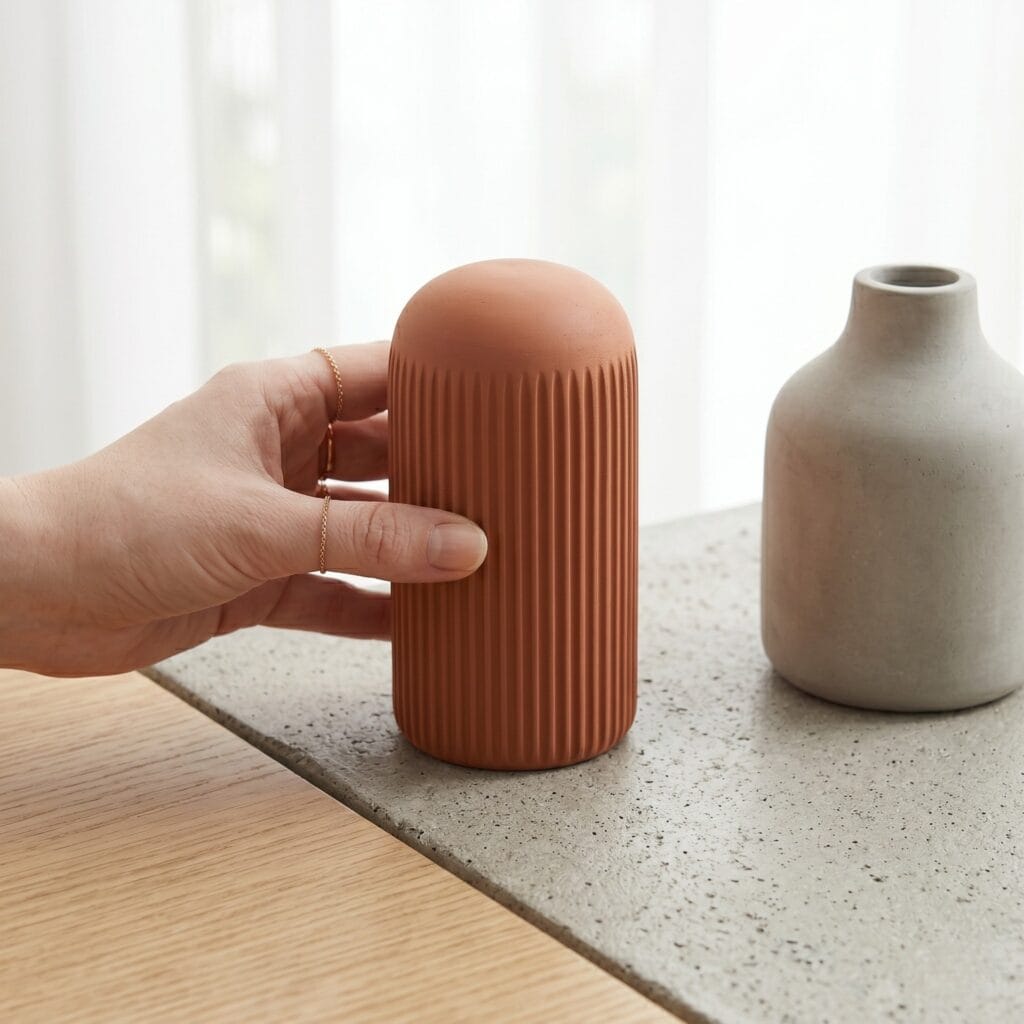
Supplies Needed: Terracotta Air-Dry Clay, Wooden Modeling Knife, Fine-Grit Sandpaper Blocks, Matte Clear Sealant.
Keep the walls an even thickness as you build upward so the tall figurine dries slowly and evenly; a thicker base takes longer to cure than the tip.
Quick Steps:
- Roll terracotta clay into a solid 12 cm tall, 4 cm wide cylinder with a flat base and domed top.
- Using the edge of a wooden modeling knife, slice clean 3 mm deep vertical channels evenly spaced 6 mm apart around the entire circumference.
- Allow the sculpture to harden fully, then lightly smooth the outer ridge edges with a 220-grit sanding block.
Finishing Note: Once the ridges pass a cure check, set this model on your entry bench alongside a vase; for a mixed-stone display, see our textured 12 Epic DIY Cement Crafts to balance stone surfaces.
4. Minimalist Speckled Incense Holders: Easy Clay Models Layout
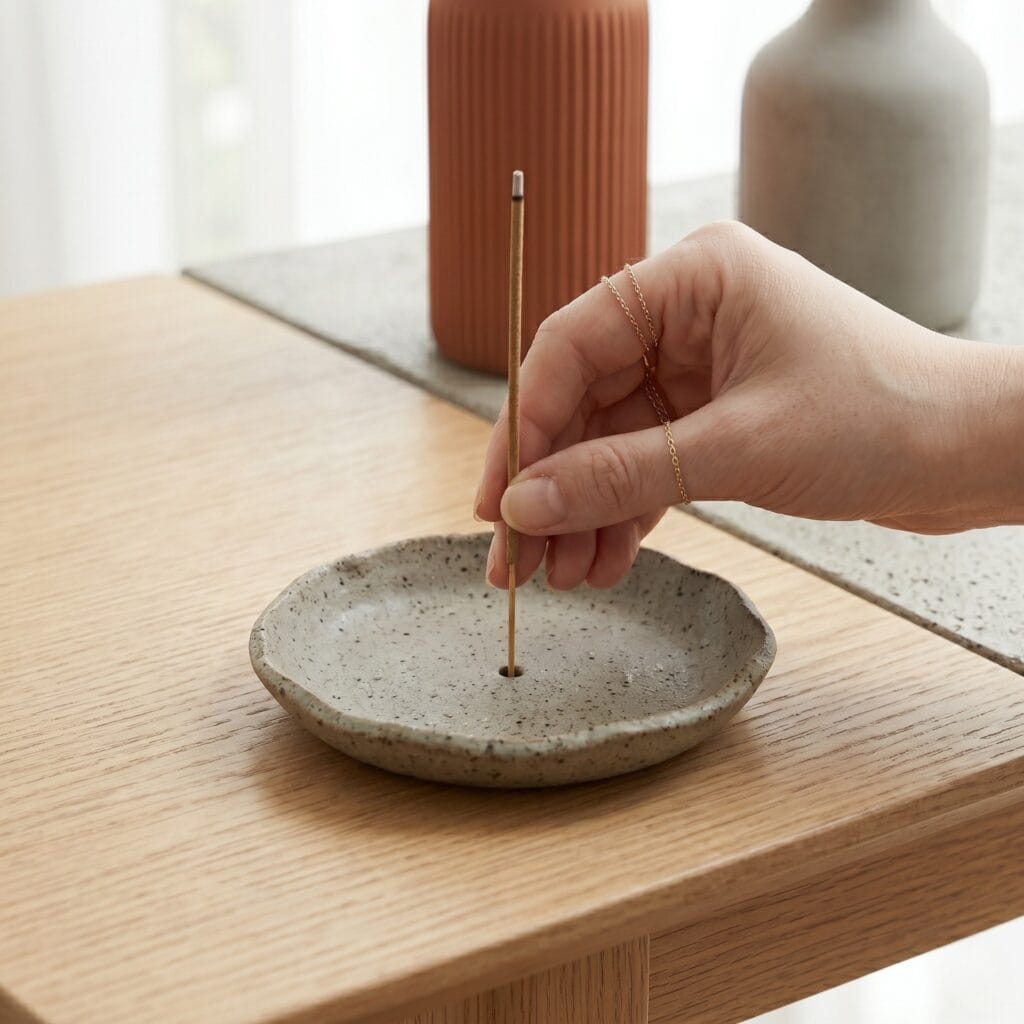
Supplies Needed: Gray Speckled Air-Dry Clay, Wooden Toothpick, Fine-Grit Sandpaper Blocks, Matte Clear Sealant.
Work on a silicone mat or ceramic tile so the shallow dish keeps its shape when you lift it, and keep the base an even thickness so it sits stable on a flat surface.
Quick Steps:
- Press a 60g portion of gray speckled air-dry clay into a shallow 8 cm wide dish with a slightly raised 1 cm rim.
- Insert a wooden toothpick into the exact center at a 45-degree angle to create a precise 3 mm hole for incense sticks. Before the clay stiffens, check the fit: a standard incense stick should stand upright at a slight lean without wobbling — ease the hole once more with the toothpick if it grips too tightly.
- Once fully dry, sand the outer rim smooth using fine-grit sandpaper to highlight the natural granite-like specks.
Safety Note: Use this holder only as an ash-catching dish — make sure the stick stands securely in its hole. Burn incense only on a heat-safe, nonflammable surface, never leave it burning unattended, and stop using the dish if the clay cracks.
Finishing Note: Once the dish is cured, rest it inside a ceramic tray for ash safety; it pairs wonderfully with ideas from our DIY Garden Decor: 10 Easy Ways inspiration guide.
5. Hollow Botanical Nesting Bowls
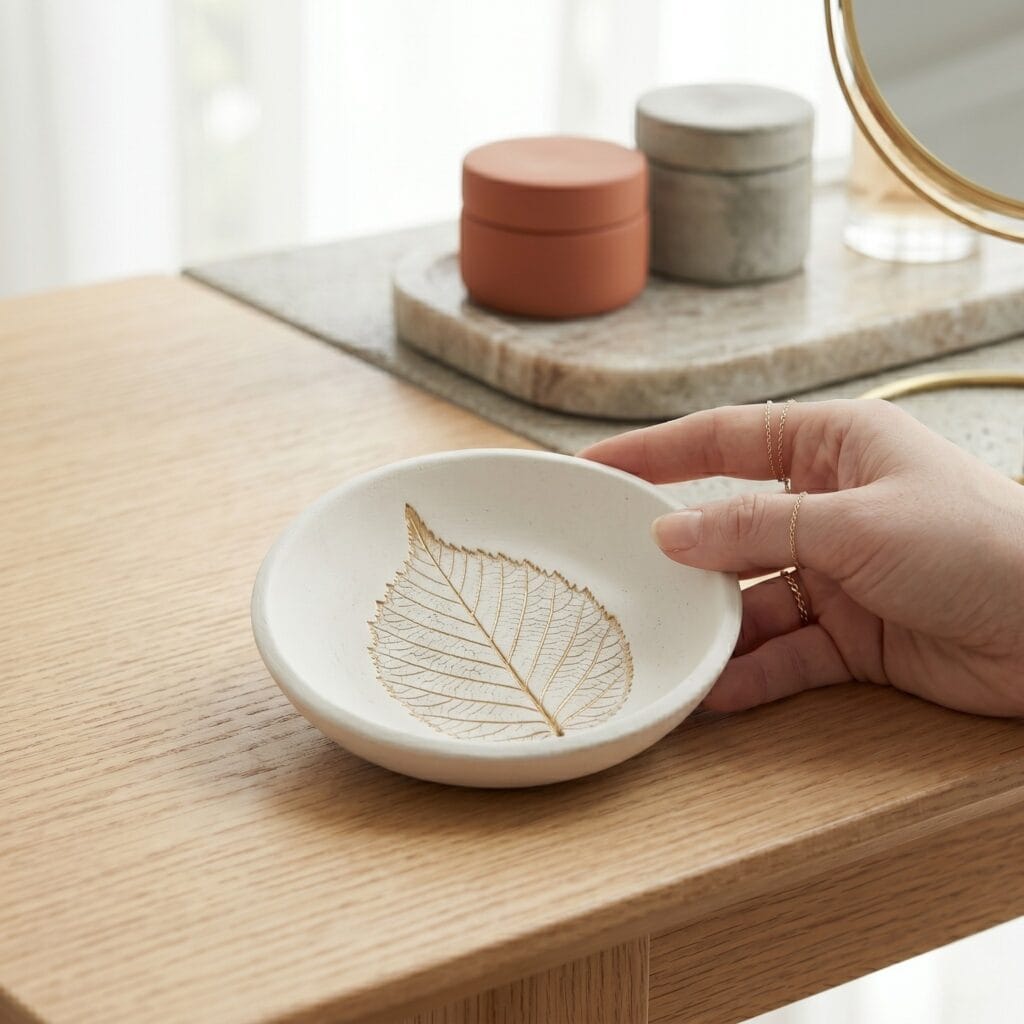
Supplies Needed: White Air-Dry Clay, Small Circular Mold or Shallow Bowl, Clay Roller or Rolling Pin, Real Dried Leaf, Gold Metallic Paint, Fine Detail Paintbrush, Matte Clear Sealant.
Roll every disc to the same thickness so the bowls nest without wobbling, and support each rim on a crumpled paper ring while drying so it keeps a smooth curve.
Quick Steps:
- Press a 5 mm thick white clay disc into a 10 cm shallow circular mold to form a smooth bowl curve, then repeat with two smaller discs (about 8 cm and 6 cm) so the finished pieces stack as a nesting set.
- Place a fresh, vein-heavy dried leaf face down in the center and roll over it firmly with a clay roller to imprint the organic pattern 1.5 mm deep.
- Peel away the leaf, let the dish cure per the clay package until it is hard through, and only then detail the inner leaf grooves using a fine detail brush dipped in metallic gold paint.
Finishing Note: Paint the stamped leaf veins with a stroke of gold metallic paint only after the dish is fully cured, so the brush never presses into a soft surface.
6. Sculptural Monolithic Arch Objects
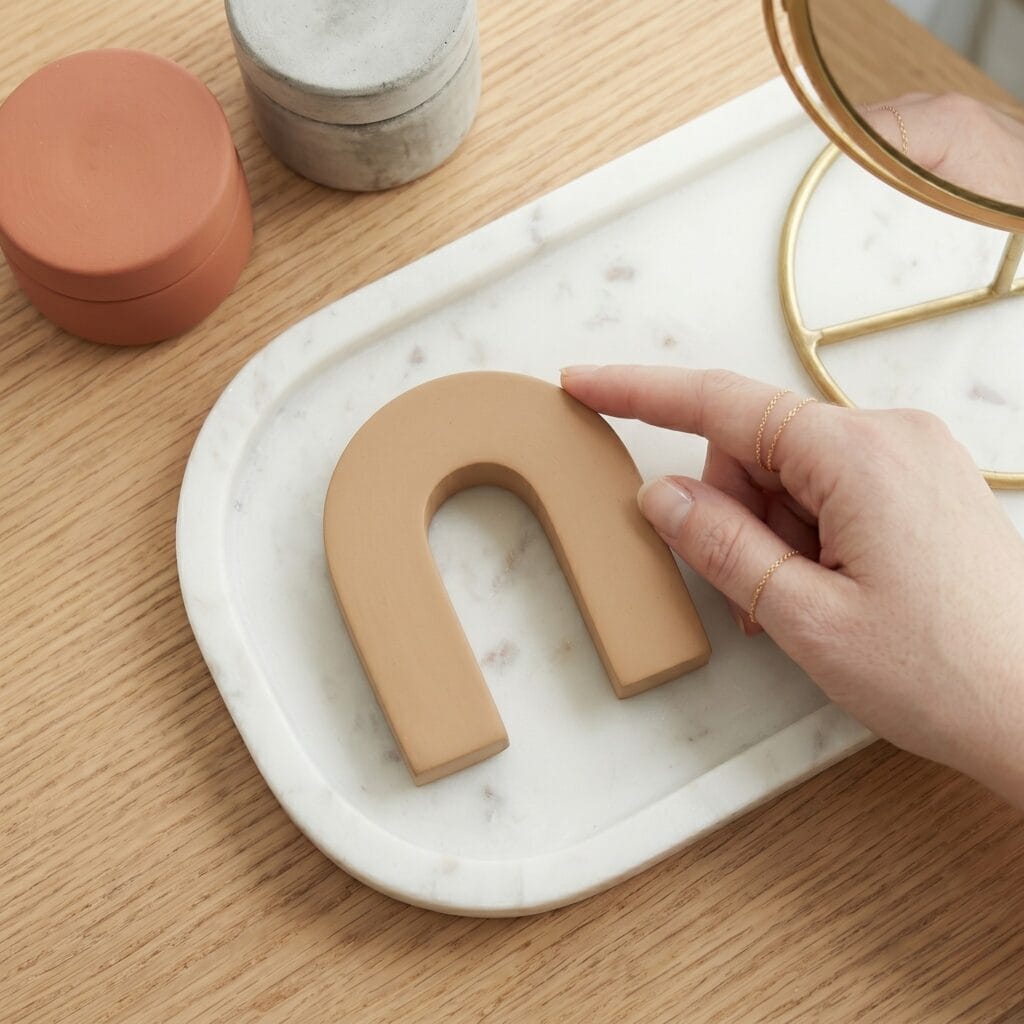
Supplies Needed: Tan Polymer Clay, Sharp Craft or Clay Blade, Dedicated Baking Sheet (for oven baking), Fine-Grit Sandpaper Blocks, Matte Clear Sealant.
Shape the arch legs to matching thickness so both sides dry at the same rate, and dry the piece on its side so the curve keeps its shape.
Quick Steps:
- Roll tan polymer clay into a dense 10 mm thick slab measuring roughly 12 cm x 8 cm.
- Using a sharp clay tissue blade, slice out a crisp 5 cm x 4 cm inner horseshoe arch in one fluid cutting motion.
- Bake the arch on a dedicated, craft-only tray, following the temperature and time printed on your specific clay package — polymer brands differ, so the package is the only reliable guide.
- Let the arch cool completely on the tray before sealing it with a matte clear finish.
Finishing Note: Dry the arch on its side until the surface is hard to the touch, then display it on a white marble tray.
7. Tiny Spherical Cat Companions: Easy Clay Models Project
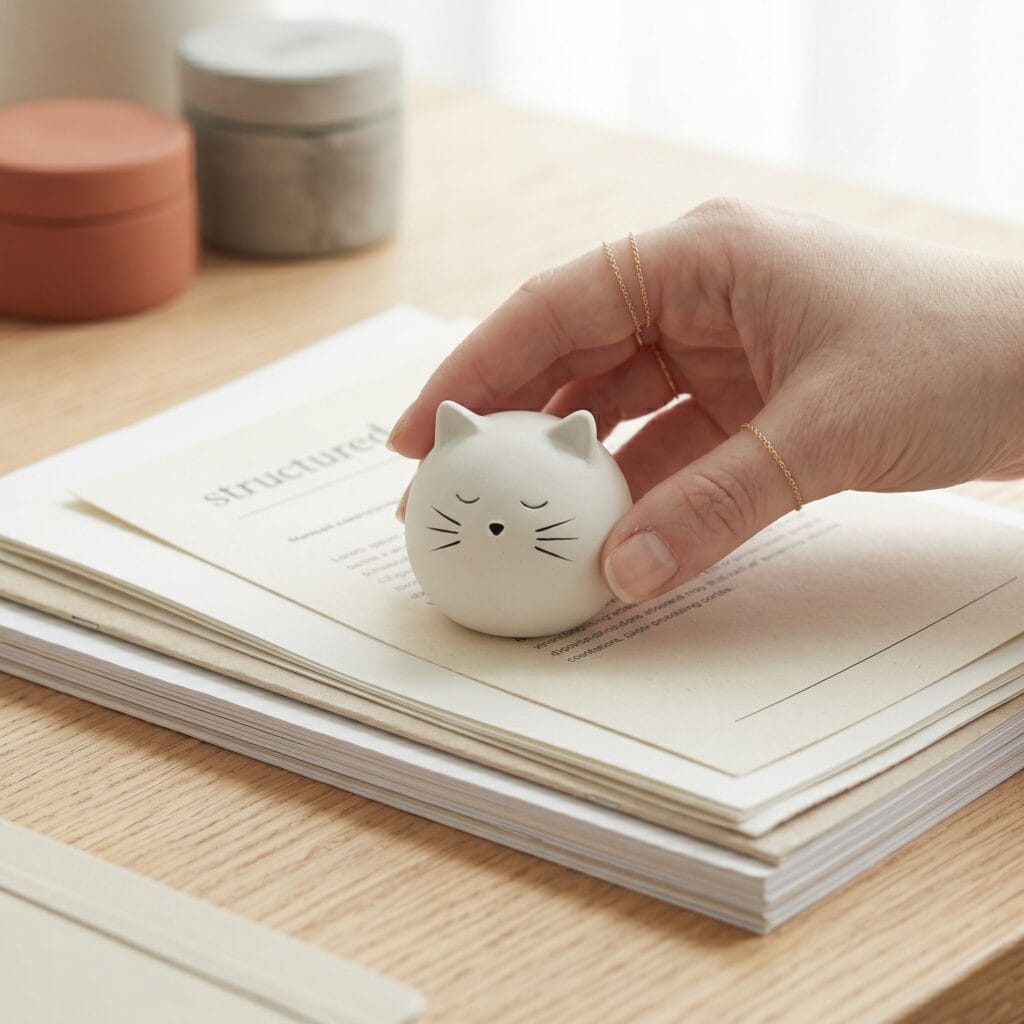
Supplies Needed: White Air-Dry Clay, Fine-Grit Sandpaper Blocks, Matte Black Acrylic Paint, Fine Detail Paintbrush, Matte Clear Sealant.
Shape both spheres from one batch of clay so they match, and check the base is fully hard before display — solid forms cure from the outside in.
Quick Steps:
- Form a 3.5 cm solid sphere from white air-dry clay, flattening the bottom slightly against your work table for stability.
- Pinch two distinct 6 mm pointed triangular ear shapes directly out of the top ridge using your thumb and index finger.
- Once cured, detail tiny 0.5 mm whisker lines and minimalist closed eyes using a fine detail brush and matte black paint.
Finishing Note: Once the sphere base is fully hard to the touch, use this little cat figure to hold down loose documents on a raw oak desk.
8. Faceted Geometric Gem Holders
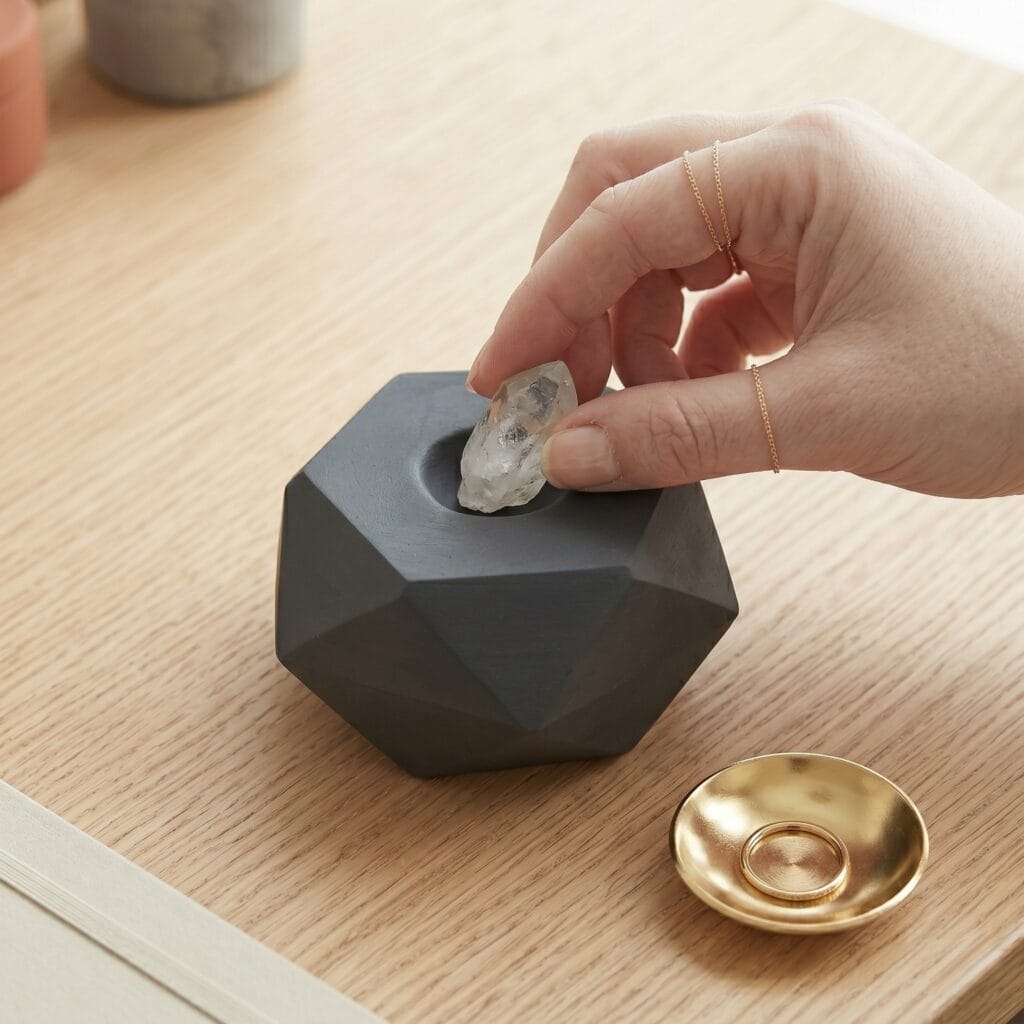
Supplies Needed: Charcoal Air-Dry Clay, Sharp Craft or Clay Blade, Fine-Grit Sandpaper Blocks, Matte Clear Sealant.
Keep every facet cut to the same depth so light catches the edges evenly, and sand in one direction only after the core is fully cured.
Quick Steps: Mold charcoal clay into a solid 5 cm cube, pressing a shallow 2 cm central dish at the top to cradle rings or crystals. Hold a sharp craft blade at a steady 30-degree angle and slice off 8 to 12 asymmetrical flat facets, executing each cut in a single smooth pass without sawing back and forth. Let the piece cure fully per the clay package — solid forms cure slowly from the outside in — then lightly sand the flat planes to sharpen the geometric edges.
Finishing Note: After the facets are sanded in one direction and wiped clean, rest these stone-like models next to simple gold ring dishes.
9. Pocket Pebble Worry Stones: Easy Clay Models Concept
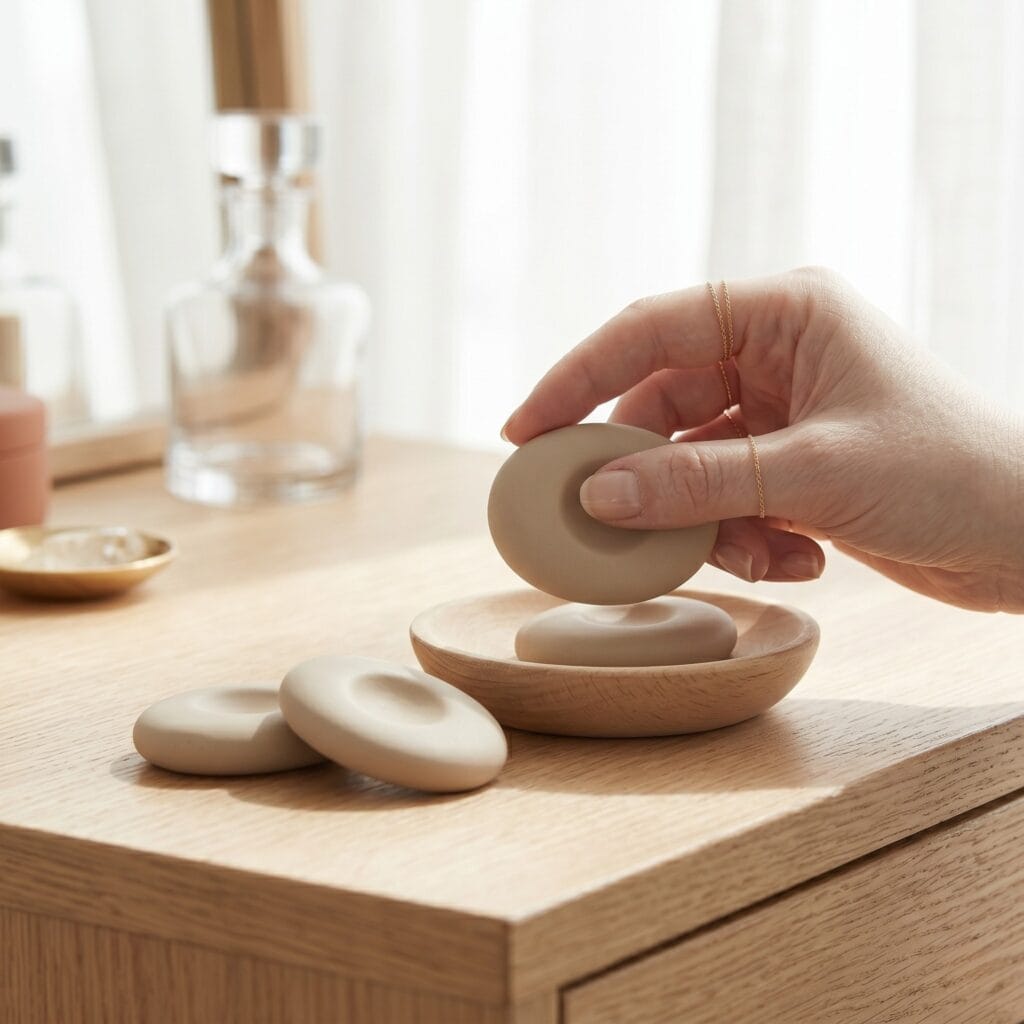
Supplies Needed: Beige Air-Dry Clay, Fine-Grit Sandpaper Blocks, Matte Clear Sealant.
Press the thumb indent before the surface skins over so it stays smooth, and dry the pebble with the indent facing up so no moisture traps underneath.
Quick Steps:
- Roll beige air-dry clay into a smooth 4 cm x 3 cm oval pebble, keeping the total thickness around 8 mm.
- Press your thumb firmly into the upper third of the pebble at a slight angle to leave an ergonomic 3 mm deep thumbprint groove.
- Allow it to set completely before lightly sanding the edges for a satin-soft hand feel.
Finishing Note: Cure the worry stones with the thumb indent facing up, then cluster them inside a shallow wooden dish.
10. Stylized Miniature Dove Statues
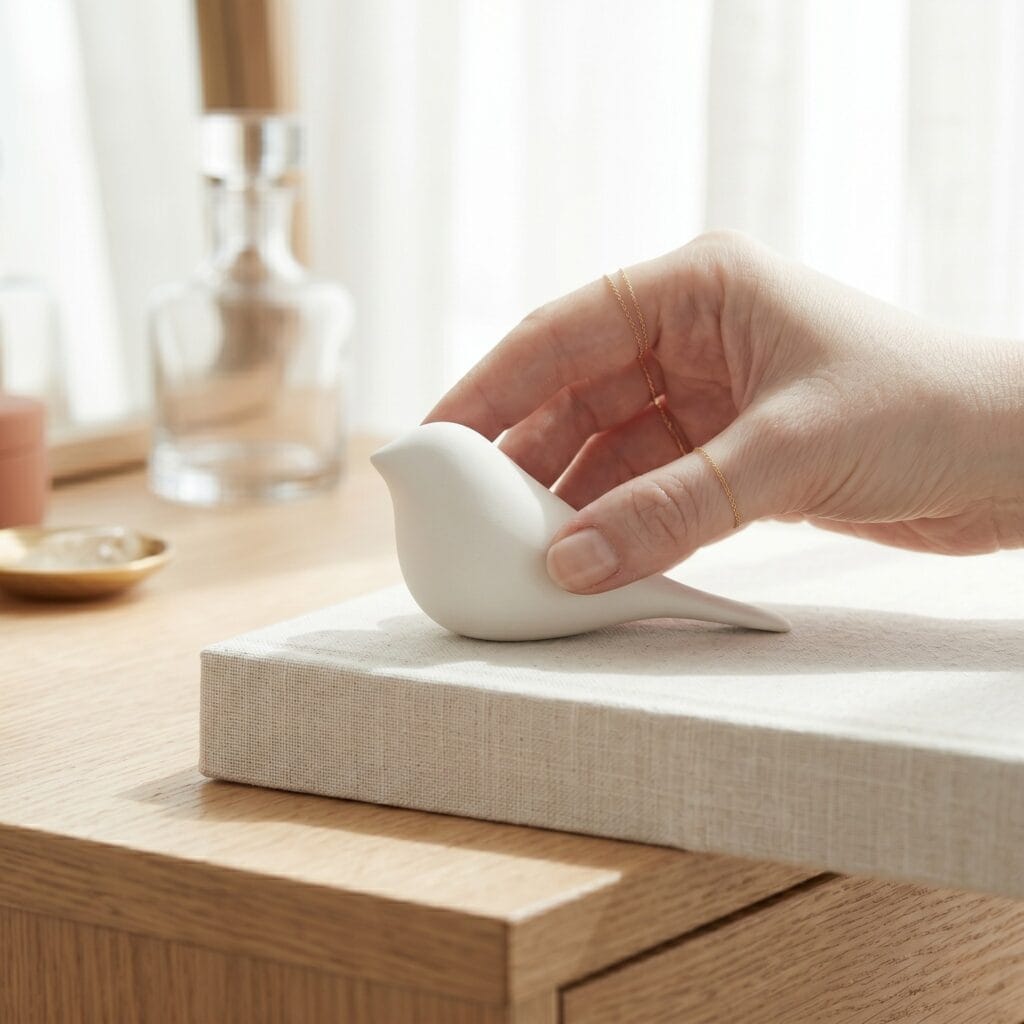
Supplies Needed: White Air-Dry Clay, Fine-Grit Sandpaper Blocks, Damp Sponge, Matte Clear Sealant.
Smooth the wing joins with a damp fingertip while the clay is still soft, and dry the dove lying flat so the thin tail does not stress the body.
Quick Steps:
- Sculpt a smooth 6 cm long teardrop form out of white air-dry clay to represent the bird’s body.
- Pinch and pull the narrow tapered end upward into a sleek, 1.5 cm fan-shaped tail accent.
- Smooth away surface fingerprints using a damp sponge, let the piece cure through per the clay package, and seal only after full cure with a coat of protective matte varnish.
Finishing Note: Once the varnish has off-gassed, display this piece on a linen fabric card or shelf riser — for more warm-weather makes see our Summer Craft Ideas curation.
Practical Finishing Workflow: Cure Checks, Sanding, and Sealing
Joining. Press parts together while the clay is still workable: score both edges with the needle tool, dampen them lightly, and press the seam until a thin bead of clay squeezes out; smooth that bead away so the join disappears as the piece dries.
Drying position and cure checks. Dry each piece in the position its shape allows — flat discs flat, the arch on its side, hollow forms upright — on a silicone mat or ceramic tile so the base stays smooth. A piece is cured only when the center feels room-temperature and dry: press a thumbnail into an inconspicuous spot; no dent and no coolness means it is ready for the next step.
Sanding sequence. Never sand soft, uncured clay — it fuzzes instead of smoothing. Once fully cured, sand in one direction with the fine 220-grit blocks, wipe with a damp cloth between passes, and finish with a light buffing pass before removing the dust with a clean damp cloth.
Sealing. Seal with a water-based matte varnish compatible with the clay you used; apply two thin coats with the detail brush, letting each coat dry per the package directions, in a ventilated room with a window open. Let sealed pieces off-gas in open air before display, keep the incense holder’s stick hole unsealed, and treat every sealed piece as decorative display only — sealed clay is not food-safe and not heat-safe.
Easy Clay Models FAQ
How do I know when air-dry clay is fully cured?
The piece is cured only when the center feels room-temperature and dry — press a thumbnail into an inconspicuous spot to check. Thick forms need extra days, so cover them loosely and let them dry slowly.
Why is my air-dry clay cracking?
It is drying too fast. Work on a nonstick surface like a silicone mat or ceramic tile, dry thick walls and bases slowly under a loose cover, and join pieces with score-and-slip while the clay is still workable.
Can I sand or seal before the clay is dry?
No — never sand soft, uncured clay, because it fuzzes instead of smoothing. Follow the package cure time first, then sand in one direction with fine 220-grit blocks and wipe with a damp cloth between passes.
Do all ten models use the same clay?
Nine of the ten projects use air-dry clay; only the Monolithic Arch Objects need oven-bake polymer clay, which must be baked in a home oven.
Quick Reference: All Supplies at a Glance
For your convenience, here is a quick summary of all materials and tools used in this tutorial:
✨ Consumable Raw Materials
- Premium Air-Dry Clay (White, Terracotta, Gray Speckled, Charcoal, Beige) | Check Premium Air-Dry Clay (White, Terracotta, Gray Speckled, Charcoal, Beige) on Amazon
- Tan Polymer Clay | Check Price on Amazon
- Real Dried Leaf | View Real Dried Leaf on Amazon
🧰 Core Crafting Tools & Equipment
- Wooden Modeling Knife | View Wooden Modeling Knife on Amazon
- Sharp Craft or Clay Blade | Find Sharp Craft or Clay Blade on Amazon
- Wooden Toothpick | See Price on Amazon
- Small Circular Mold or Shallow Bowl | See Small Circular Mold or Shallow Bowl on Amazon
- Fine-Grit Sandpaper Blocks | Explore Fine-Grit Sandpaper Blocks on Amazon
- Fine Detail Paintbrush | Check Price on Amazon
- Fine Needle Tool | Check Fine Needle Tool on Amazon
- Clay Roller or Rolling Pin | See Price on Amazon
- Dedicated Baking Sheet | Check Price on Amazon
- Damp Sponge | Find on Amazon
- Sanding Mask | See Price on Amazon
- Silicone Craft Mat or Ceramic Tile | Check Silicone Craft Mat on Amazon
- Soft Lint-Free Cloth | Check Lint-Free Cloths on Amazon
💎 Hardware, Fasteners & Finishing
- Matte Clear Sealant | Check Matte Clear Sealant on Amazon
- Matte Acrylic Paint (White) | View White Paint on Amazon
- Matte Acrylic Paint (Black) | View Black Paint on Amazon
- Gold Metallic Paint | Find on Amazon
Important Crafting Safety Notes
Clay work is low-risk, but five details deserve attention every session: sharp blades, oven baking, sanding dust, varnish fumes, and burning incense. Let the clay and varnish package labels set your cure and bake times — they outrank any clock. Please review these before you start:
• Sharp Blades & Cutting: Clay blades and craft knives cut quickly through firm clay — keep the fingers of your holding hand behind the cutting edge, cut away from your body on a silicone mat or ceramic tile, and return blades to their sheaths or a latching case right after use.
• Polymer-Clay Baking: The arch objects bake on the dedicated craft-only baking sheet — never on food pans or kitchenware. Bake in a ventilated room at the temperature the clay package states, keep the tray away from open flames, and let the pieces cool before handling.
• Dry-Sanding Dust: Sand only after full cure and always with your sanding mask on; prefer a damp surface, wipe dust with a wet cloth instead of sweeping it into the air, and wash your hands before eating or touching your face.
• Varnish Ventilation: Apply the water-based matte varnish in a well-ventilated room with a window open, and let sealed pieces off-gas completely in open air before display; never seal a piece that is still curing.
• Incense, Labels & Non-Toxic Supplies: Burn incense only in the finished holder on a heat-safe, nonflammable surface, never leave it burning unattended, and stop using a dish if the clay cracks. Choose verified non-toxic paints and varnishes (ACMI AP-certified is a good baseline) and never use food utensils or cookware for craft materials.
For more detailed guidance on safe crafting practices, liability disclosures, and website usage, please review our Terms and Conditions.
“Which of these Easy Clay Models: 10 Beautiful Ideas to Style Your Home ideas are you excited to try first, or do you have a creative tip of your own to share? Drop a comment below—I’d love to hear your thoughts and see what you create!”


