

Flat seasonal decor disappears the moment you set it down. These diy fall mason jars bring painted color, soft light, and layered natural texture to a mantel, kitchen counter, or covered porch without relying on flimsy store-bought accents.
Every idea begins with a washed, fully dry, chip-free 16 oz jar, then builds through paint, paper, foliage, or dry fillers. If you enjoyed our 20 cozy DIY fall decorations and upcycled glass jar craft ideas, pair them with these jars for a collected seasonal display; allow paint and decoupage to cure fully, and use battery-powered LEDs only.
Affiliate Disclosure: This post contains affiliate links. As an Amazon Associate, I earn from qualifying purchases. If you buy through these links, I may earn a commission at no additional cost to you.
Essential Materials for DIY Fall Mason Jars
Choose matching 16 oz wide-mouth jars when you want a cohesive grouping, or mix a few shapes for a looser collected look. Terracotta, cream, mustard, black, amber, and deep green create a grounded autumn palette; meanwhile, reusable studio tools make repeated painting and paper-cutting much cleaner.
🎨 Paint, Paper, and Seasonal Fillers
- 16 oz Wide-Mouth Clear Glass Mason Jars with Lids — Thick, wide-mouth glass is easy to paint, fill, wrap, and light with LEDs. Use only clean jars without chips or cracks. | [Check Price on Amazon]
- Matte Chalk Finish Paint in Cream, Terracotta, Mustard, and Black — Opaque chalk paint gives pumpkin, ghost, cat, and distressed jar finishes a soft low-sheen surface. | [See Chalk Finish Paint on Amazon]
- Acrylic Craft Paint Set in Autumn Colors — Use acrylics for thin plaid lines, faces, lettering, berry details, and small leaf accents over a dry base coat. | [View Acrylic Craft Paint on Amazon]
- Autumn Leaf Paper Napkins for Decoupage — Thin printed napkins conform around curved glass and provide a more durable indoor leaf look than fragile real leaves. | [Find Autumn Leaf Napkins on Amazon]
- Assorted Faux Maple Leaves and Mini Berry Picks — Flexible stems tuck into vase openings, collars, and centerpieces without adding heavy strain to the jar. | [Check Faux Maple Leaves on Amazon]
- Mini Artificial Pumpkins and Pinecones — Lightweight dry fillers build a full shelf display without moisture against the glass or painted surface. | [See Price on Amazon]
🧰 Application Tools and Protective Finishes
- Water-Based Matte Decoupage Sealer — This clear sealer bonds napkin layers to glass and leaves a quiet matte surface after full curing. | [View Decoupage Sealer on Amazon]
- Glossy Water-Resistant Acrylic Varnish — Apply this only over fully dry paint or decoupage to reduce scuffs and light moisture marks. | [Check Price on Amazon]
- Natural Jute Twine, 2 mm — A manageable twine thickness wraps jar necks neatly and forms secure small bows. |
[Find Jute Twine on Amazon] - Fine-Grit Sanding Sponges, 220 Grit — Flexible 220-grit sponges lightly reveal raised lettering after chalk paint has dried completely. | [See Sanding Sponges on Amazon]
- Detail Paintbrushes and Foam Pouncers — Foam pouncers lay down thin even coats, while detail brushes handle faces, lettering, and narrow painted bands. | [View Detail Brushes on Amazon]
- Low-Temperature Mini Hot Glue Gun and Clear Glue Sticks — Use small glue dots for lightweight embellishments only; hot glue is not a structural adhesive. | [Check Hot Glue Gun on Amazon]
✨ Lighting, Kits, and Studio Upgrades
- Warm White LED Fairy Lights with Battery Packs — Cool-running battery lights give decorated jars a safe amber glow without an open flame. | [See LED Fairy Lights on Amazon]
- Fall Mason Jar Decorating Starter Kit — A convenient option for beginners who need a coordinated first set of painting and decorating basics. | [Find Fall Mason Jar Starter Kit on Amazon]
- Daylight LED Magnifying Craft Lamp with Desk Clamp — A clamped daylight lamp helps you see crisp lettering, paper edges, and painted facial details. | [View Craft Lamp on Amazon]
- Large Self-Healing Rotary Cutting Mat Set with Rotary Cutter and Acrylic Ruler — This reusable workstation protects the table while you cut measured napkin panels and burlap strips. | [Check Cutting Mat Set on Amazon]
- Heavy-Duty Three-Tier Rolling Craft Cart with Wooden Top — A rolling cart keeps paints, jars, lights, and dry embellishments together between seasonal projects. | [See Rolling Craft Cart on Amazon]
Painted jars look especially balanced beneath handmade wall art, so consider pairing them with these DIY fall canvas painting ideas. Then set the jars on a tray, use odd-numbered groupings, and vary the height with books, risers, or a shallow wood crate.
15 DIY Fall Mason Jar Decorating Ideas
Work on one jar at a time so paint, sealer, and glue have space to dry without dust or fingerprints. First, wash each jar with warm soapy water, rinse it well, and dry it upside down for at least 1 hour before you begin.
1. DIY Fall Mason Jar Pumpkin Luminary
Supplies Needed: 1 16 oz mason jar, orange chalk paint, black acrylic paint, foam pouncer, 30 cm 2 mm jute twine, 1.5 m warm white LED fairy-light strand with battery pack, clear acrylic varnish.
- Wash and fully dry the jar. Use the foam pouncer to apply one thin orange chalk-paint coat to the exterior, then let it dry for 1 hour.
- Apply a second thin orange coat and let it dry for 24 hours. Next, paint two triangles, two small eyes, and a curved smile with black acrylic paint.
- Allow the face to dry for 1 hour, then brush on a thin coat of clear acrylic varnish. Let the varnish cure undisturbed for 24 hours.
- Finally, wrap 30 cm of jute twine twice around the neck and tie a small bow. Coil the 1.5 m LED strand inside the jar, leaving the battery pack outside for easy access.
This diy fall mason jar pumpkin gives a mantel a warm glow without placing heat near paint, twine, or varnish.
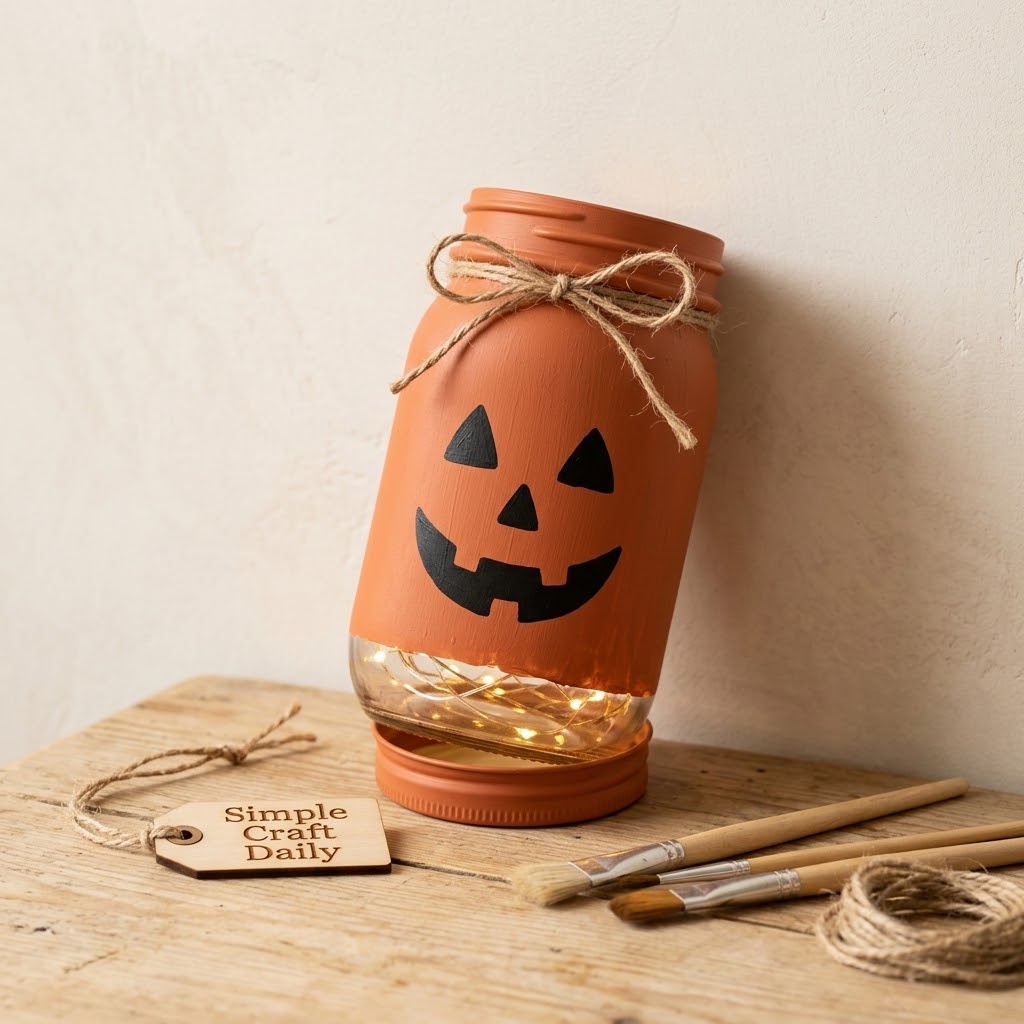
2. Decoupaged Maple Leaf DIY Fall Mason Jars
Supplies Needed: 1 16 oz mason jar, autumn leaf paper napkins, matte decoupage sealer, soft detail brush, warm white LED fairy lights with battery pack.
- Separate the printed top layer from the napkin. Cut four panels measuring 8 cm by 12 cm, then lay them around the clean, dry jar to plan the overlap.
- Brush a thin layer of matte decoupage sealer onto one section of the jar. Place the first panel over it and brush from the center outward with a barely damp detail brush.
- Next, repeat with the remaining panels, overlapping each edge by 5 mm. Let the first coat dry for 2 hours before brushing on a second thin sealer coat.
- Allow the jar to cure for 24 hours before adding a loose coil of LED lights. Keep the battery pack outside the jar.
These diy fall mason jars look like pressed leaves when lit from within, yet napkin decoupage withstands indoor styling far better than real dry leaves.
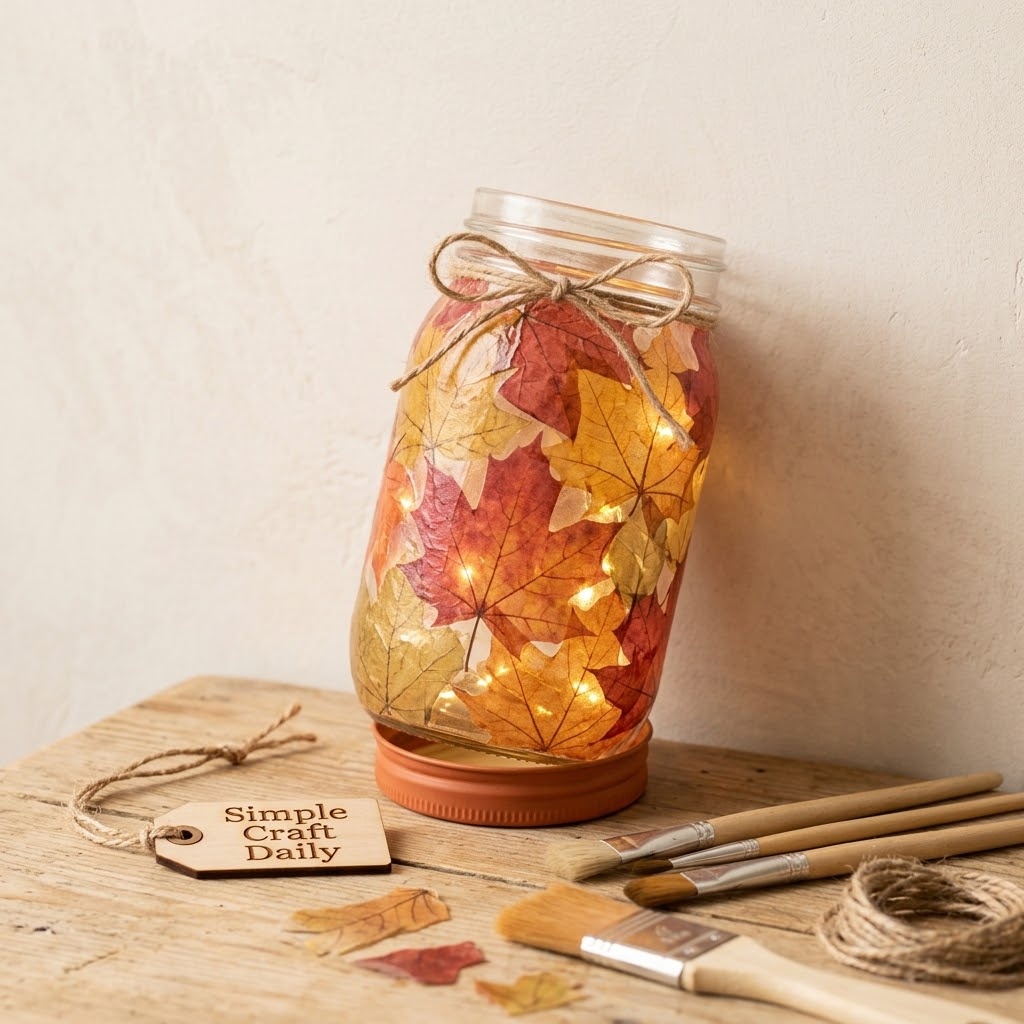
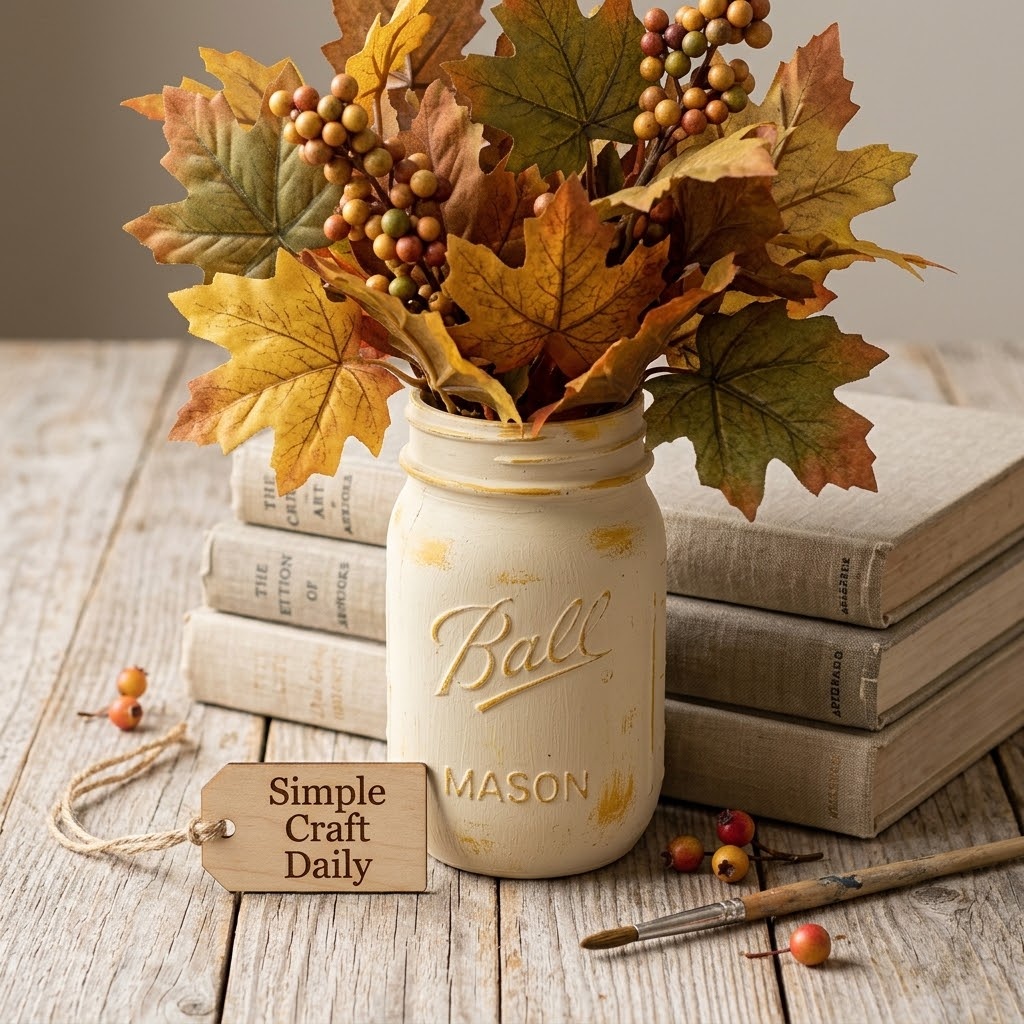
3. DIY Fall Mason Jar Cream-and-Gold Harvest Vase
Supplies Needed: 1 mason jar, cream acrylic paint, mustard acrylic paint, paintbrush, faux maple leaves, mini berry picks, acrylic varnish.
- Paint only the exterior of the clean dry jar with two thin cream acrylic coats. Let each coat dry for 1 hour.
- Load a dry brush with a small amount of mustard paint, wipe most paint onto scrap paper, then sweep lightly across raised lettering and the shoulder of the jar.
- Subsequently, allow the paint to dry for 24 hours. Brush on one thin varnish coat and let it cure for 24 hours.
- Place dry faux maple leaves and mini berry picks inside the opening. Do not add water, because moisture can reach the unpainted interior edge and shorten the life of the finish.
Use this diy fall mason jar harvest vase in a group of three, with the foliage cut to 20 cm, 28 cm, and 35 cm for an easy stepped arrangement.
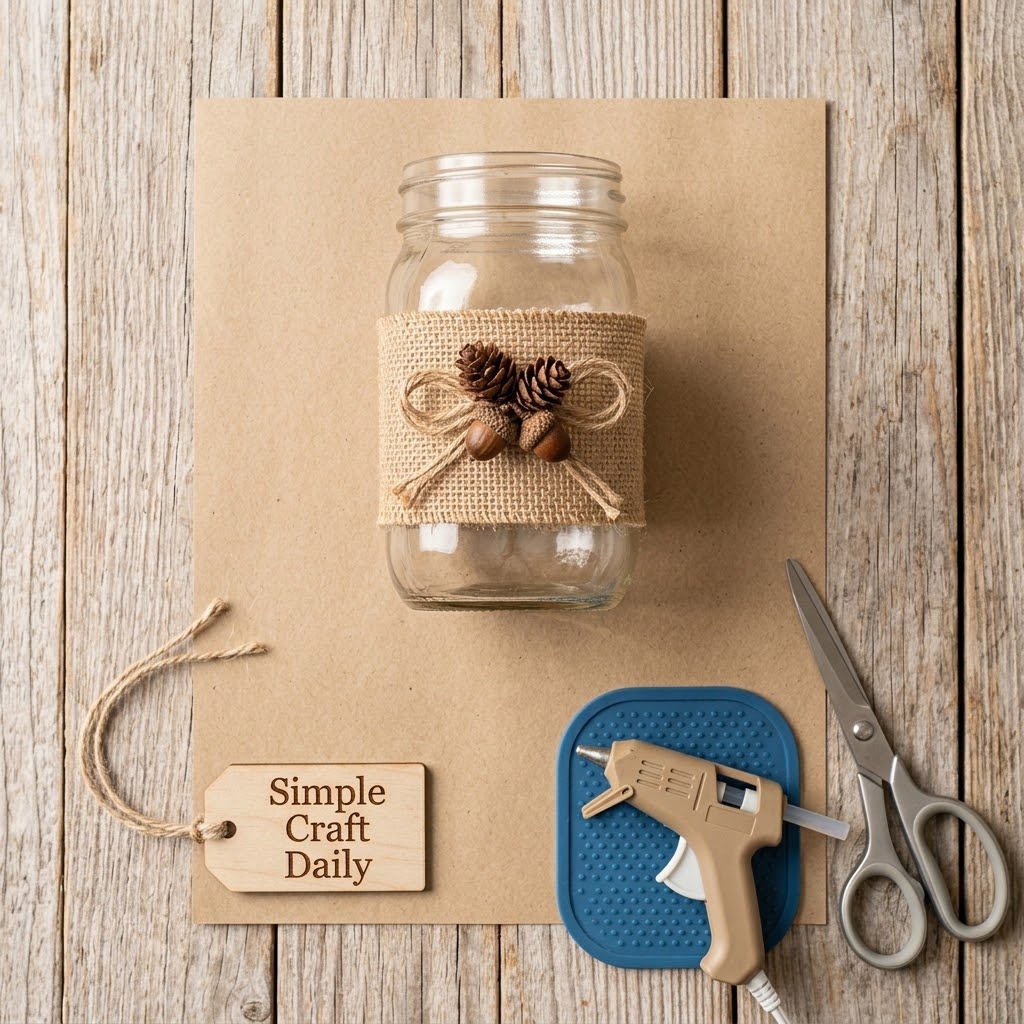
4. DIY Fall Mason Jar Rustic Burlap and Twine Acorn Jar
Supplies Needed: 1 mason jar, 7 cm by 29 cm burlap strip, 2 mm jute twine, mini pinecones or acorns, low-temperature hot glue gun and clear glue sticks.
- Cut a burlap strip measuring 7 cm by 29 cm. Wrap it around the middle of a clean, dry unpainted jar and overlap the ends by 1 cm.
- Apply three small low-temperature glue dots under the overlap. Press the seam with a silicone finger protector or the flat side of a craft tool for 20 seconds.
- Then wrap 45 cm of jute around the burlap band and tie it at the front. Add one mini pinecone or acorn cluster with two small glue dots.
- Let the glue cool for 10 minutes before lifting the jar. Use it as a dry vase or shelf accent rather than a water-filled container.
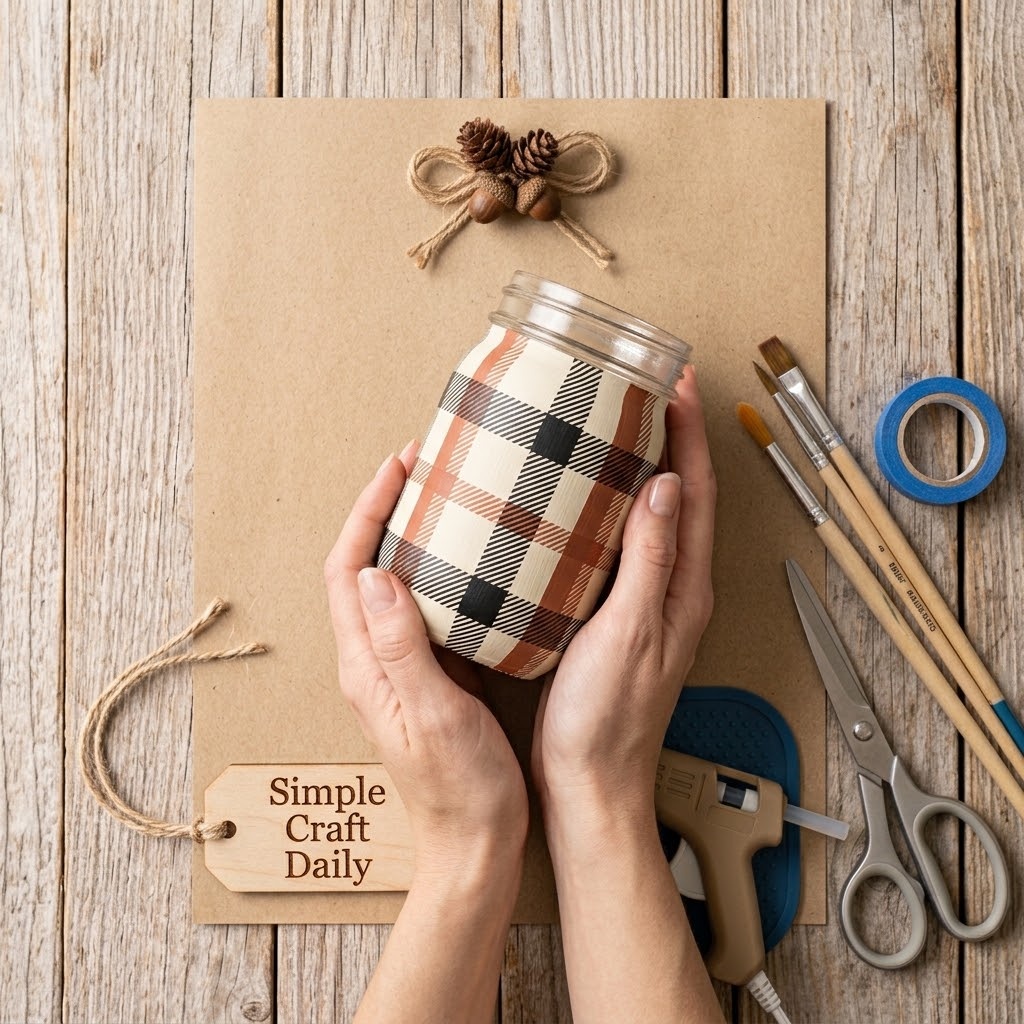
5. DIY Fall Mason Jars with Plaid Painted Bands
Supplies Needed: 1 mason jar, cream acrylic paint, black acrylic paint, terracotta acrylic paint, low-tack painter’s tape, detail brush, acrylic varnish.
- Mark the middle third of the dry jar with two horizontal tape lines, leaving a 7 cm-tall band between them. Add vertical tape strips at 2 cm intervals.
- Paint the exposed spaces with thin cream and terracotta stripes. Let each color dry for 45 minutes before adding black lines with the detail brush.
- Next, remove the tape while the last paint layer is slightly tacky, about 10 to 15 minutes after painting. Pull each strip slowly back over itself.
- Allow the plaid to dry for 24 hours, then apply one thin varnish coat. Cure the varnish for 24 hours before styling.
These diy fall mason jars bring a clean graphic pattern to a table while the clear upper and lower glass keeps the design from feeling heavy.
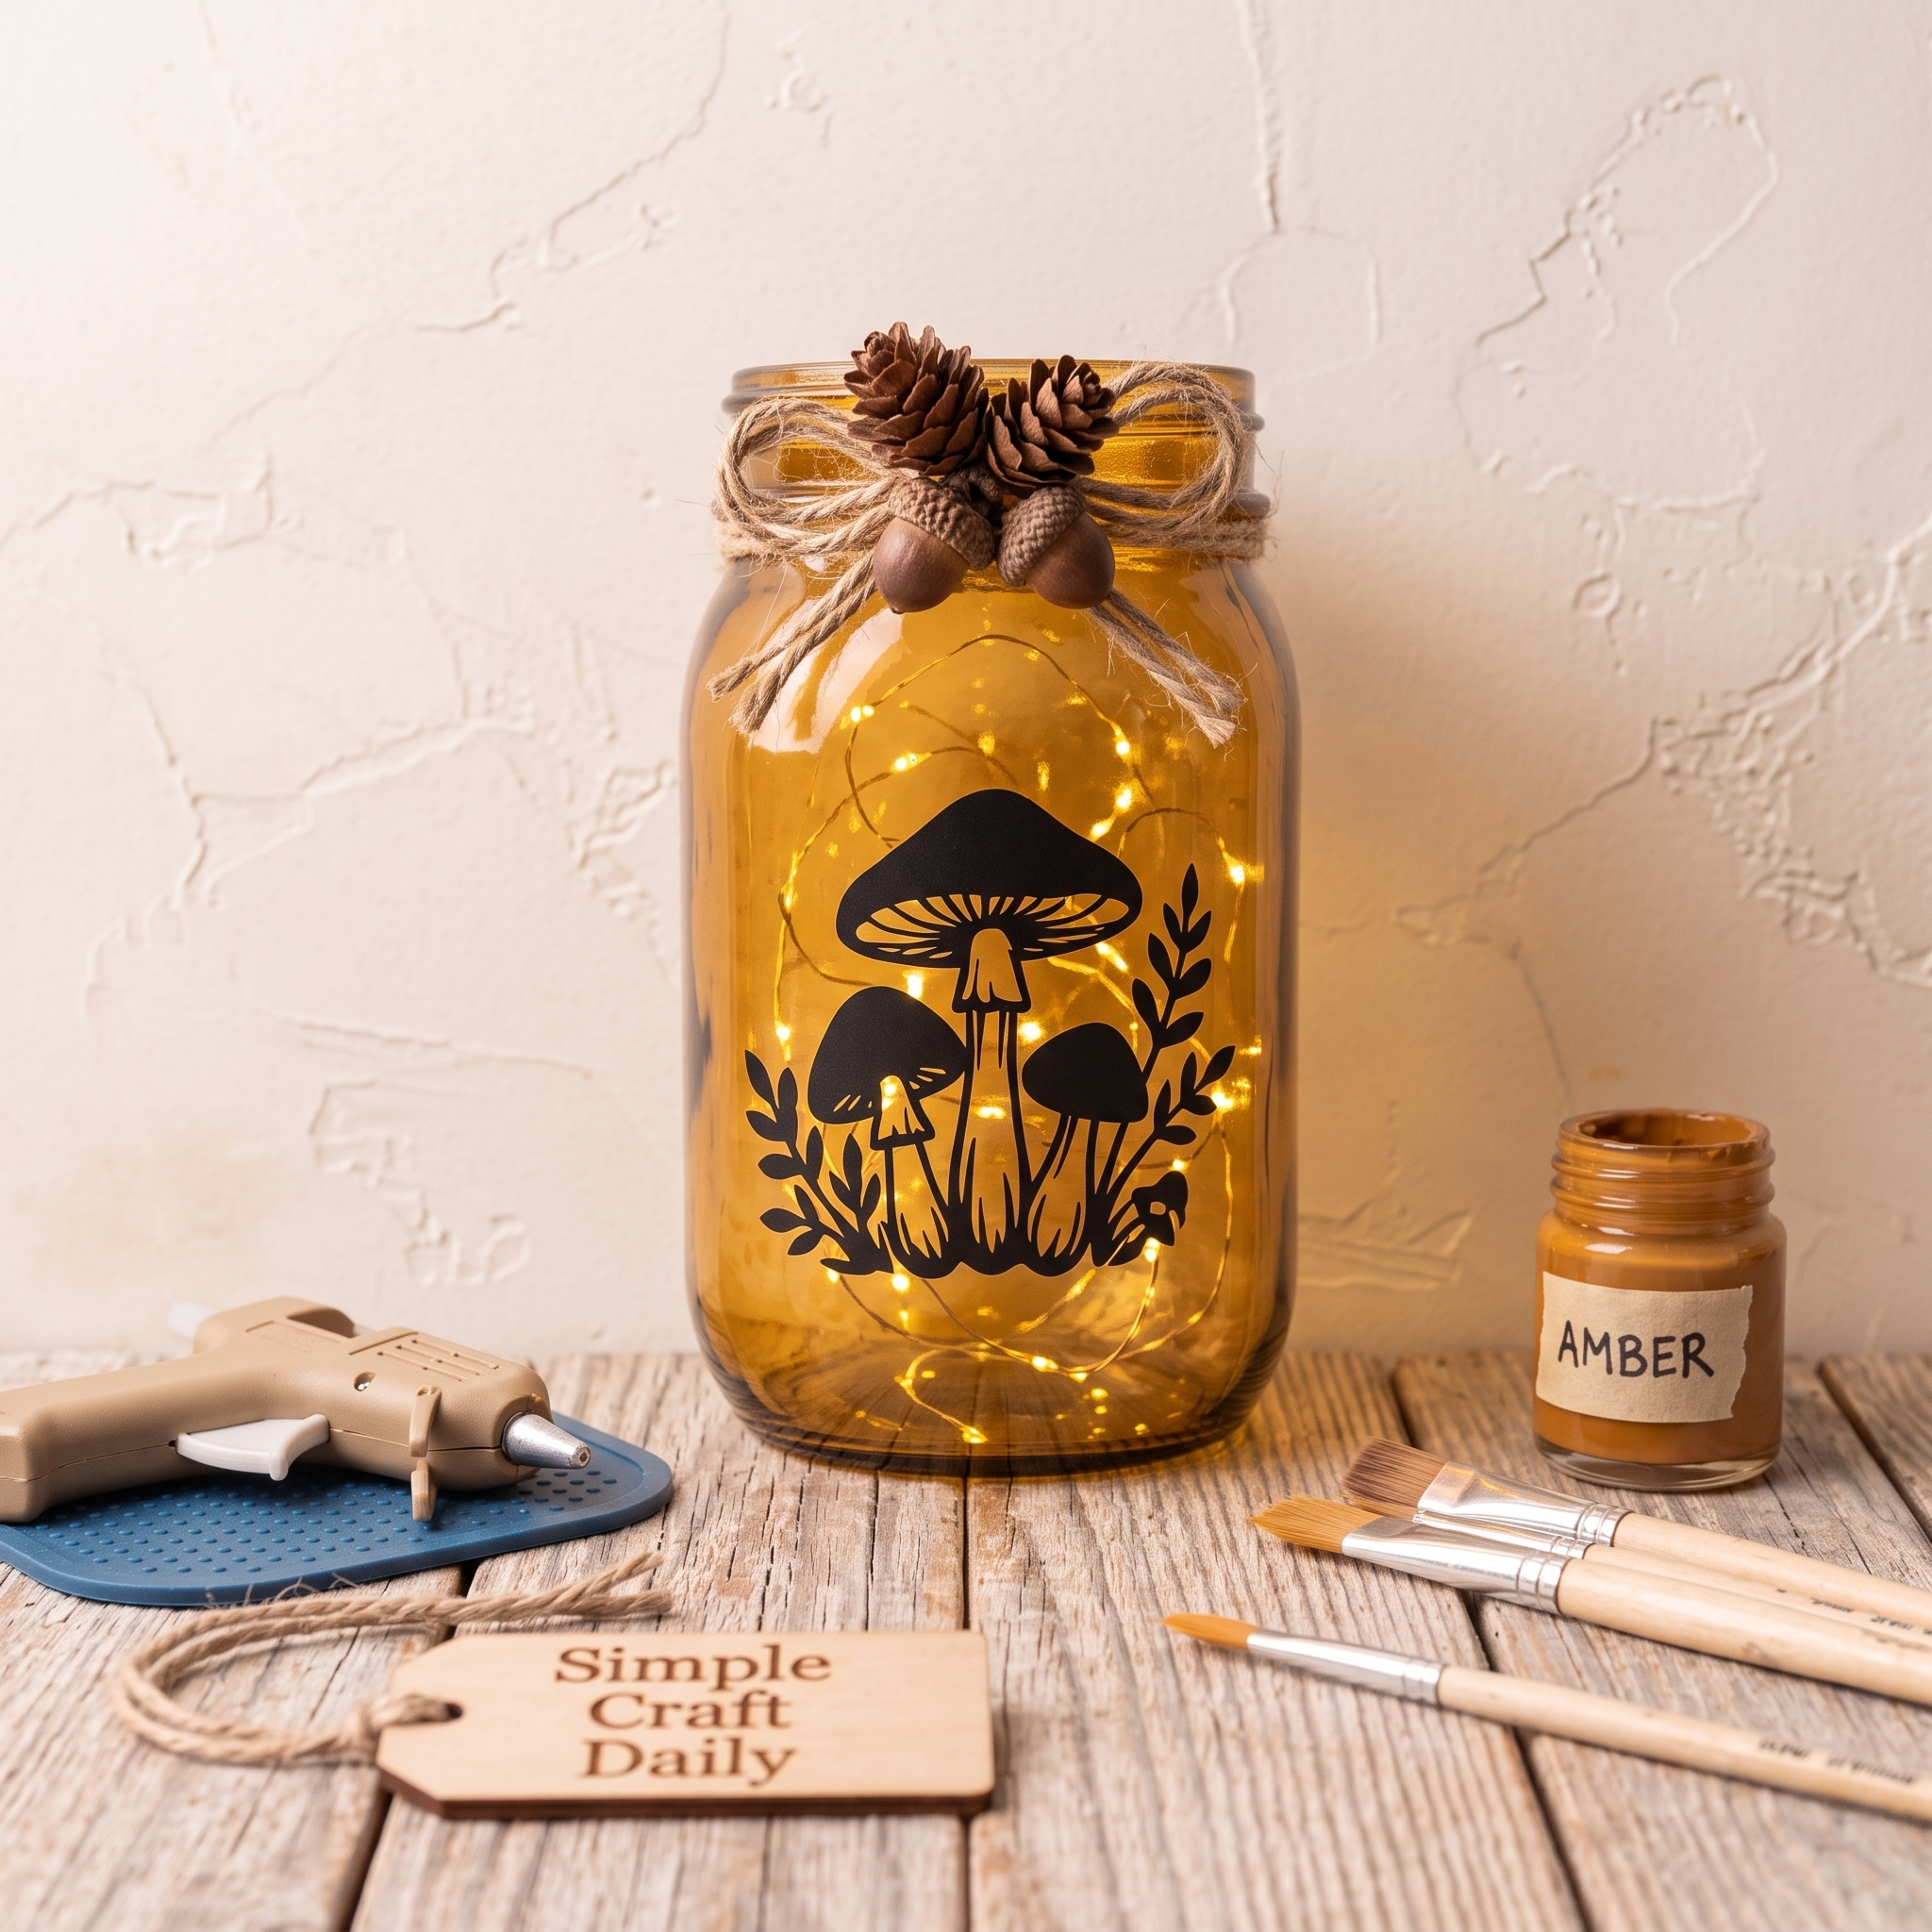
6. DIY Fall Mason Jar Woodland Mushroom Silhouette Lantern
Supplies Needed: 1 mason jar, amber acrylic paint, black acrylic paint, foam pouncer, detail brush, LED fairy lights with battery pack, jute twine.
- Mix 1 teaspoon of amber acrylic paint with 1 teaspoon of water on a palette. Pounce the diluted color lightly onto the outside of the jar for a transparent amber wash.
- Let the wash dry for 1 hour. Then paint small black mushroom stems, caps, grass, and a few dots around the lower 4 cm of the jar.
- Allow the silhouettes to dry for 1 hour, then tie 35 cm of jute around the neck. Do not cover the painted lower scene.
- Coil the LED strand inside and keep the battery pack outside the jar, tucked behind the display. Use the lantern only with cool-running battery LEDs.
A woodland lantern gives diy fall mason jars a deep amber glow that works well beside pinecones and dark green leaves.
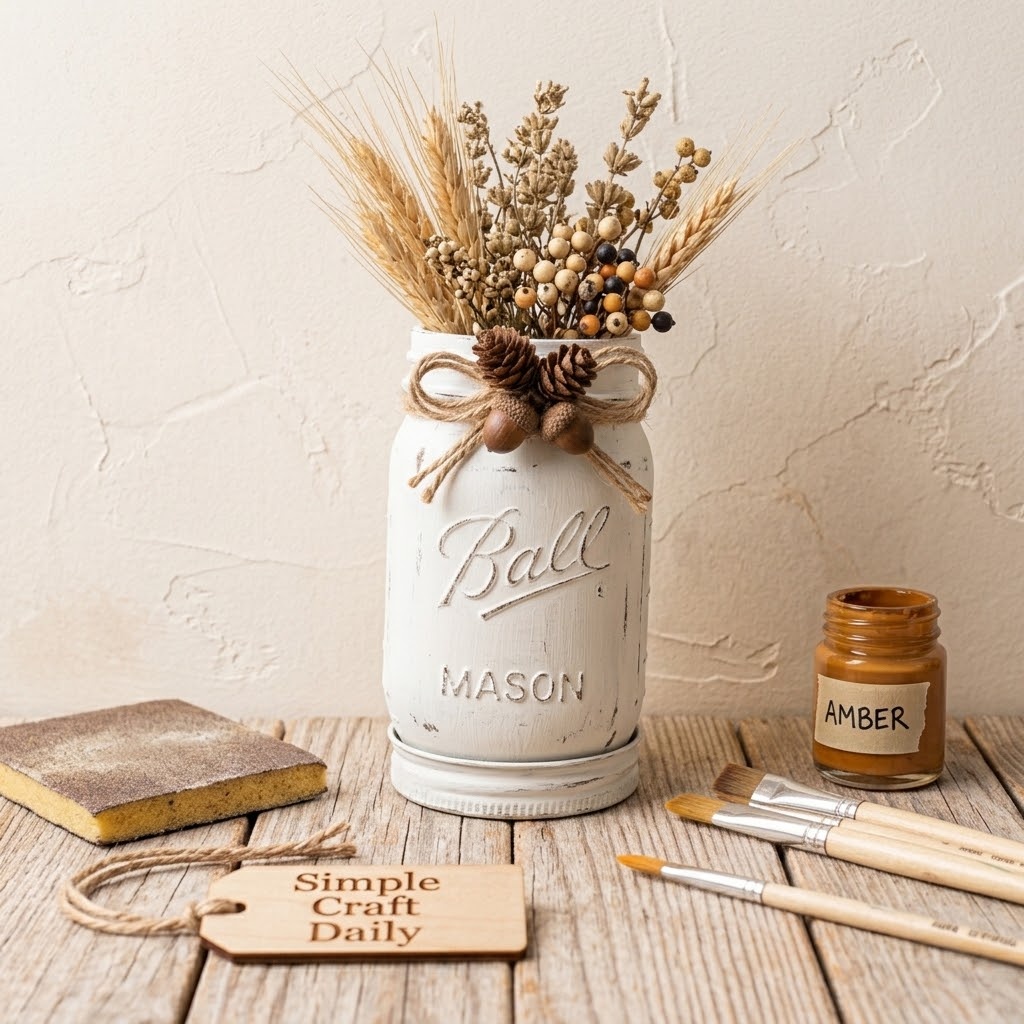
7. Distressed White DIY Fall Mason Jar Herb Vase
Supplies Needed: 1 mason jar, white chalk paint, foam pouncer, 220-grit sanding sponge, dried wheat or faux stems, clear acrylic varnish.
- Pounce two thin white chalk-paint coats over the exterior of a clean dry jar. Let the first coat dry for 1 hour and the second coat dry for 24 hours.
- Use very gentle pressure with a dry 220-grit sanding sponge over raised lettering and the shoulder. Keep sanding dust outside the jar interior.
- After this step, wipe the outside with a dry microfiber cloth. Apply a thin clear varnish coat, then allow it to cure for 24 hours.
- Fill the opening with dried wheat or faux stems. Keep all stems dry so the painted finish stays intact.
The pale distressed surface gives this diy fall mason jar a relaxed farmhouse finish that suits a kitchen shelf or entry table.
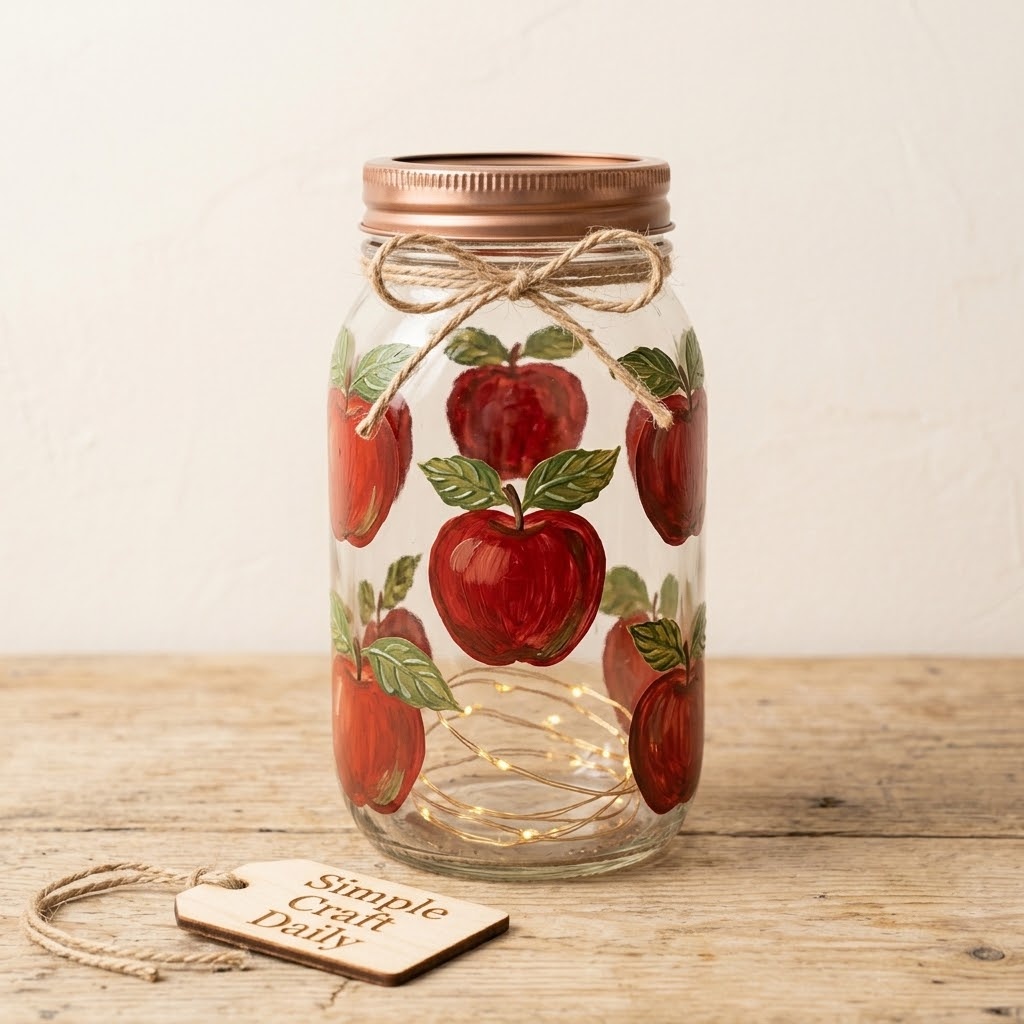
8. DIY Fall Mason Jar Cinnamon Apple Kitchen Counter Jar
Supplies Needed: 1 mason jar, red acrylic paint, green acrylic paint, cream acrylic paint, detail brushes, jute twine, mini faux apples or wood beads, acrylic varnish.
- Paint a 6 cm by 8 cm cream label field on the exterior of the dry jar. Let it dry for 1 hour.
- Paint three red apple circles inside the label field, then add small green leaves and brown stems with a detail brush. Let the details dry for 1 hour.
- Allow the painted jar to dry for 24 hours before applying a thin varnish coat. Consequently, cure it for another 24 hours before adding the filler.
- Tie 30 cm of jute around the neck and fill the jar with mini faux apples or wood beads. This is decorative only; do not use a crafted jar for food storage.
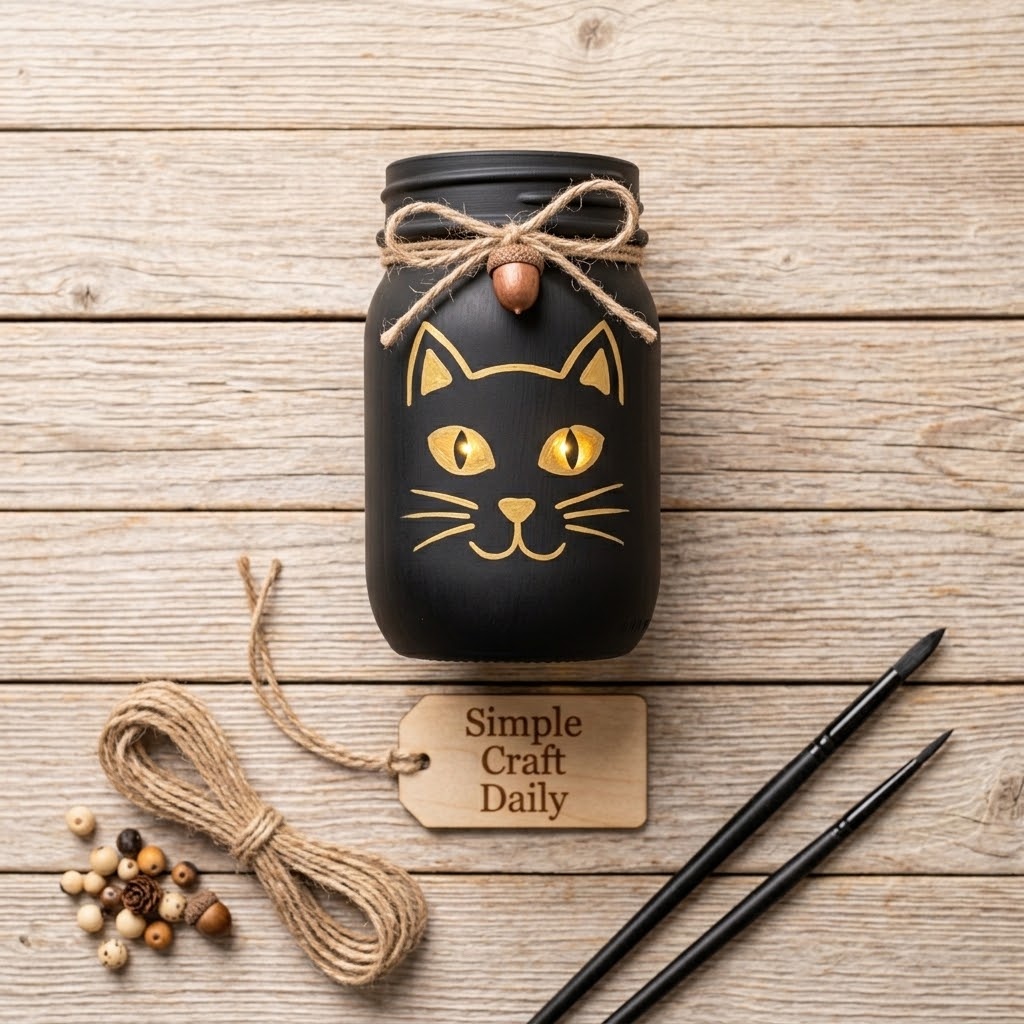
9. Black Cat Halloween Mason Jar Lantern
Supplies Needed: 1 mason jar, black acrylic paint, yellow acrylic paint, detail brush, black cardstock, scissors, low-temperature hot glue gun and clear glue sticks, jute twine, warm white LED fairy lights with battery pack.
- Paint two thin black coats over the exterior of a clean dry jar. Let each coat dry for 1 hour.
- Paint two yellow almond-shaped eyes about 3 cm apart. After 30 minutes, add narrow black pupils inside the yellow paint.
- Next, use the lid band as a removable accent: cut two black cardstock ears and secure them to the outside of the band with small glue dots. Do not cut or modify the glass.
- Tie jute beneath the threads and coil warm LED lights inside. Keep the battery pack dry and outside the jar.
10. DIY Fall Mason Jars with Copper Leaf Collars
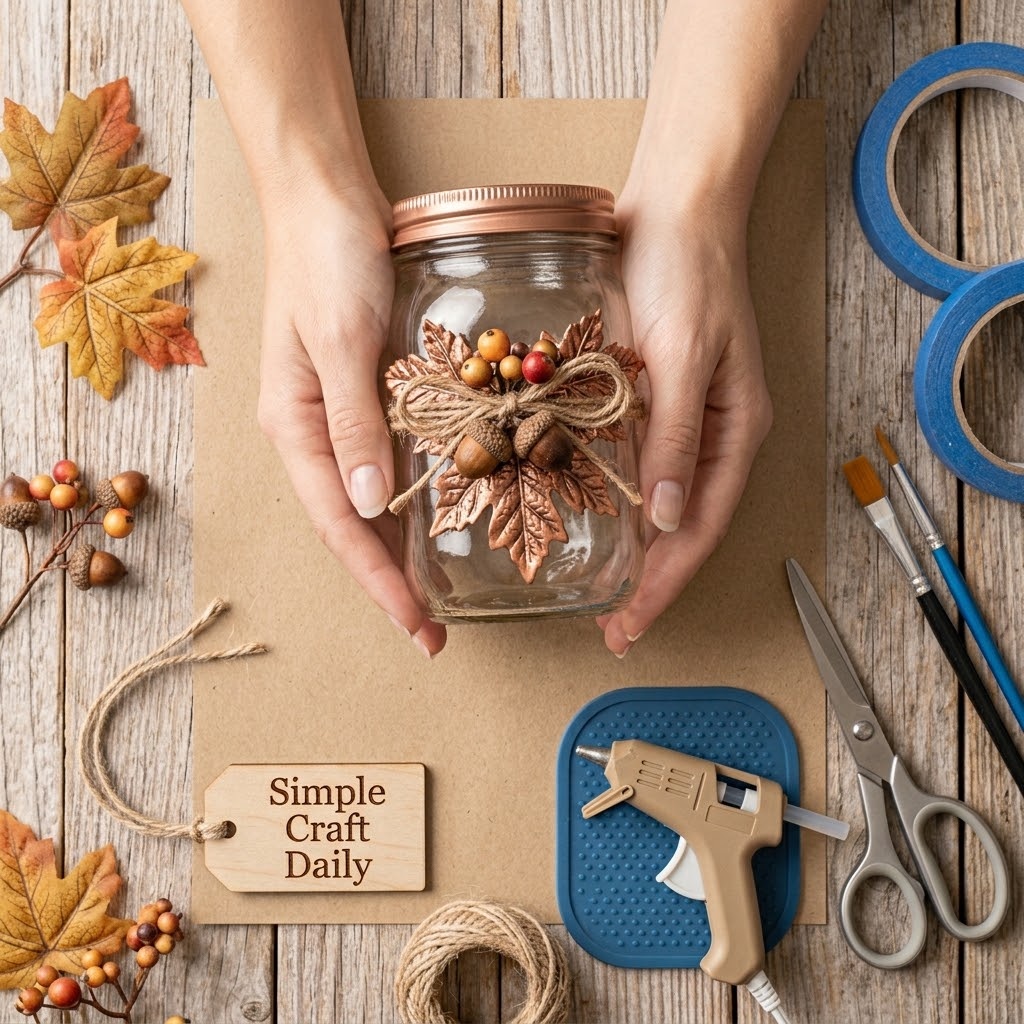
Supplies Needed: 1 mason jar, faux maple leaves, mini berry picks, copper acrylic paint, jute twine, low-temperature hot glue gun and clear glue sticks.
- Paint the front surfaces of three faux maple leaves with a thin copper acrylic coat. Let them dry flat for 1 hour.
- Cut 50 cm of jute twine. Arrange the leaves and two mini berry picks along the twine, leaving 12 cm of bare twine at both ends.
- Use two small glue dots to secure the leaf stems to the twine, rather than directly to a painted jar. Let the glue cool for 10 minutes.
- Finally, tie the finished collar beneath the jar threads. The removable collar makes dusting and cleaning much easier.
These diy fall mason jars can stay clear for a lighter display, or hold a separate dry cluster of wheat stems or faux foliage.
11. Layered Mini Pumpkin Shelf Jar
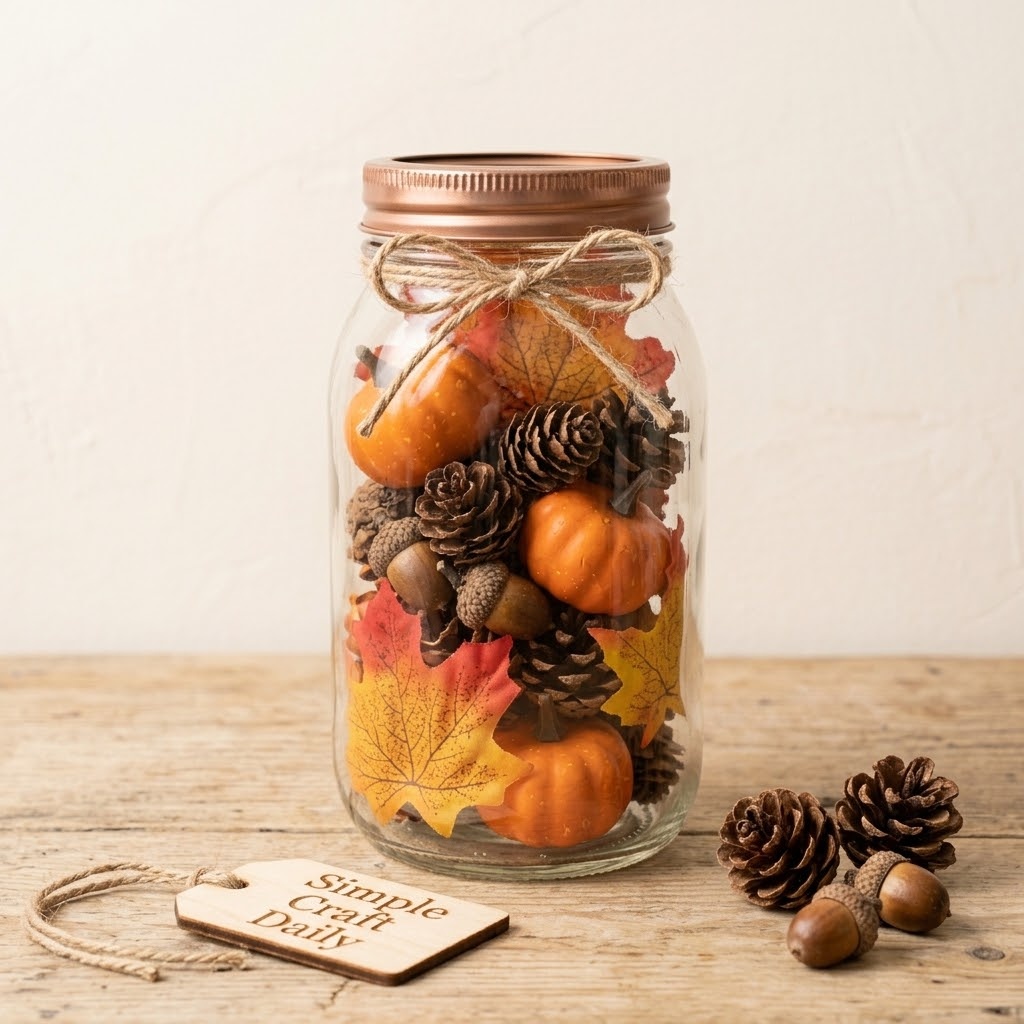
Supplies Needed: 1 mason jar, mini artificial pumpkins, pinecones, faux maple leaves, jute twine.
- Wash and dry the jar fully. Add the largest mini artificial pumpkin first, positioning it against the front glass.
- Place two small pinecones beside and behind the pumpkin. Then tuck folded faux maple leaves into visible gaps, keeping all materials dry.
- Turn the jar slowly and adjust the layers until each side has some visible color and texture. Avoid packing the fillers so tightly that the jar looks crowded.
- Tie a 35 cm jute bow around the neck. Place the jar on a shelf, tray, or shallow crate away from direct sunlight.
12. Ghost Glow DIY Fall Mason Jar
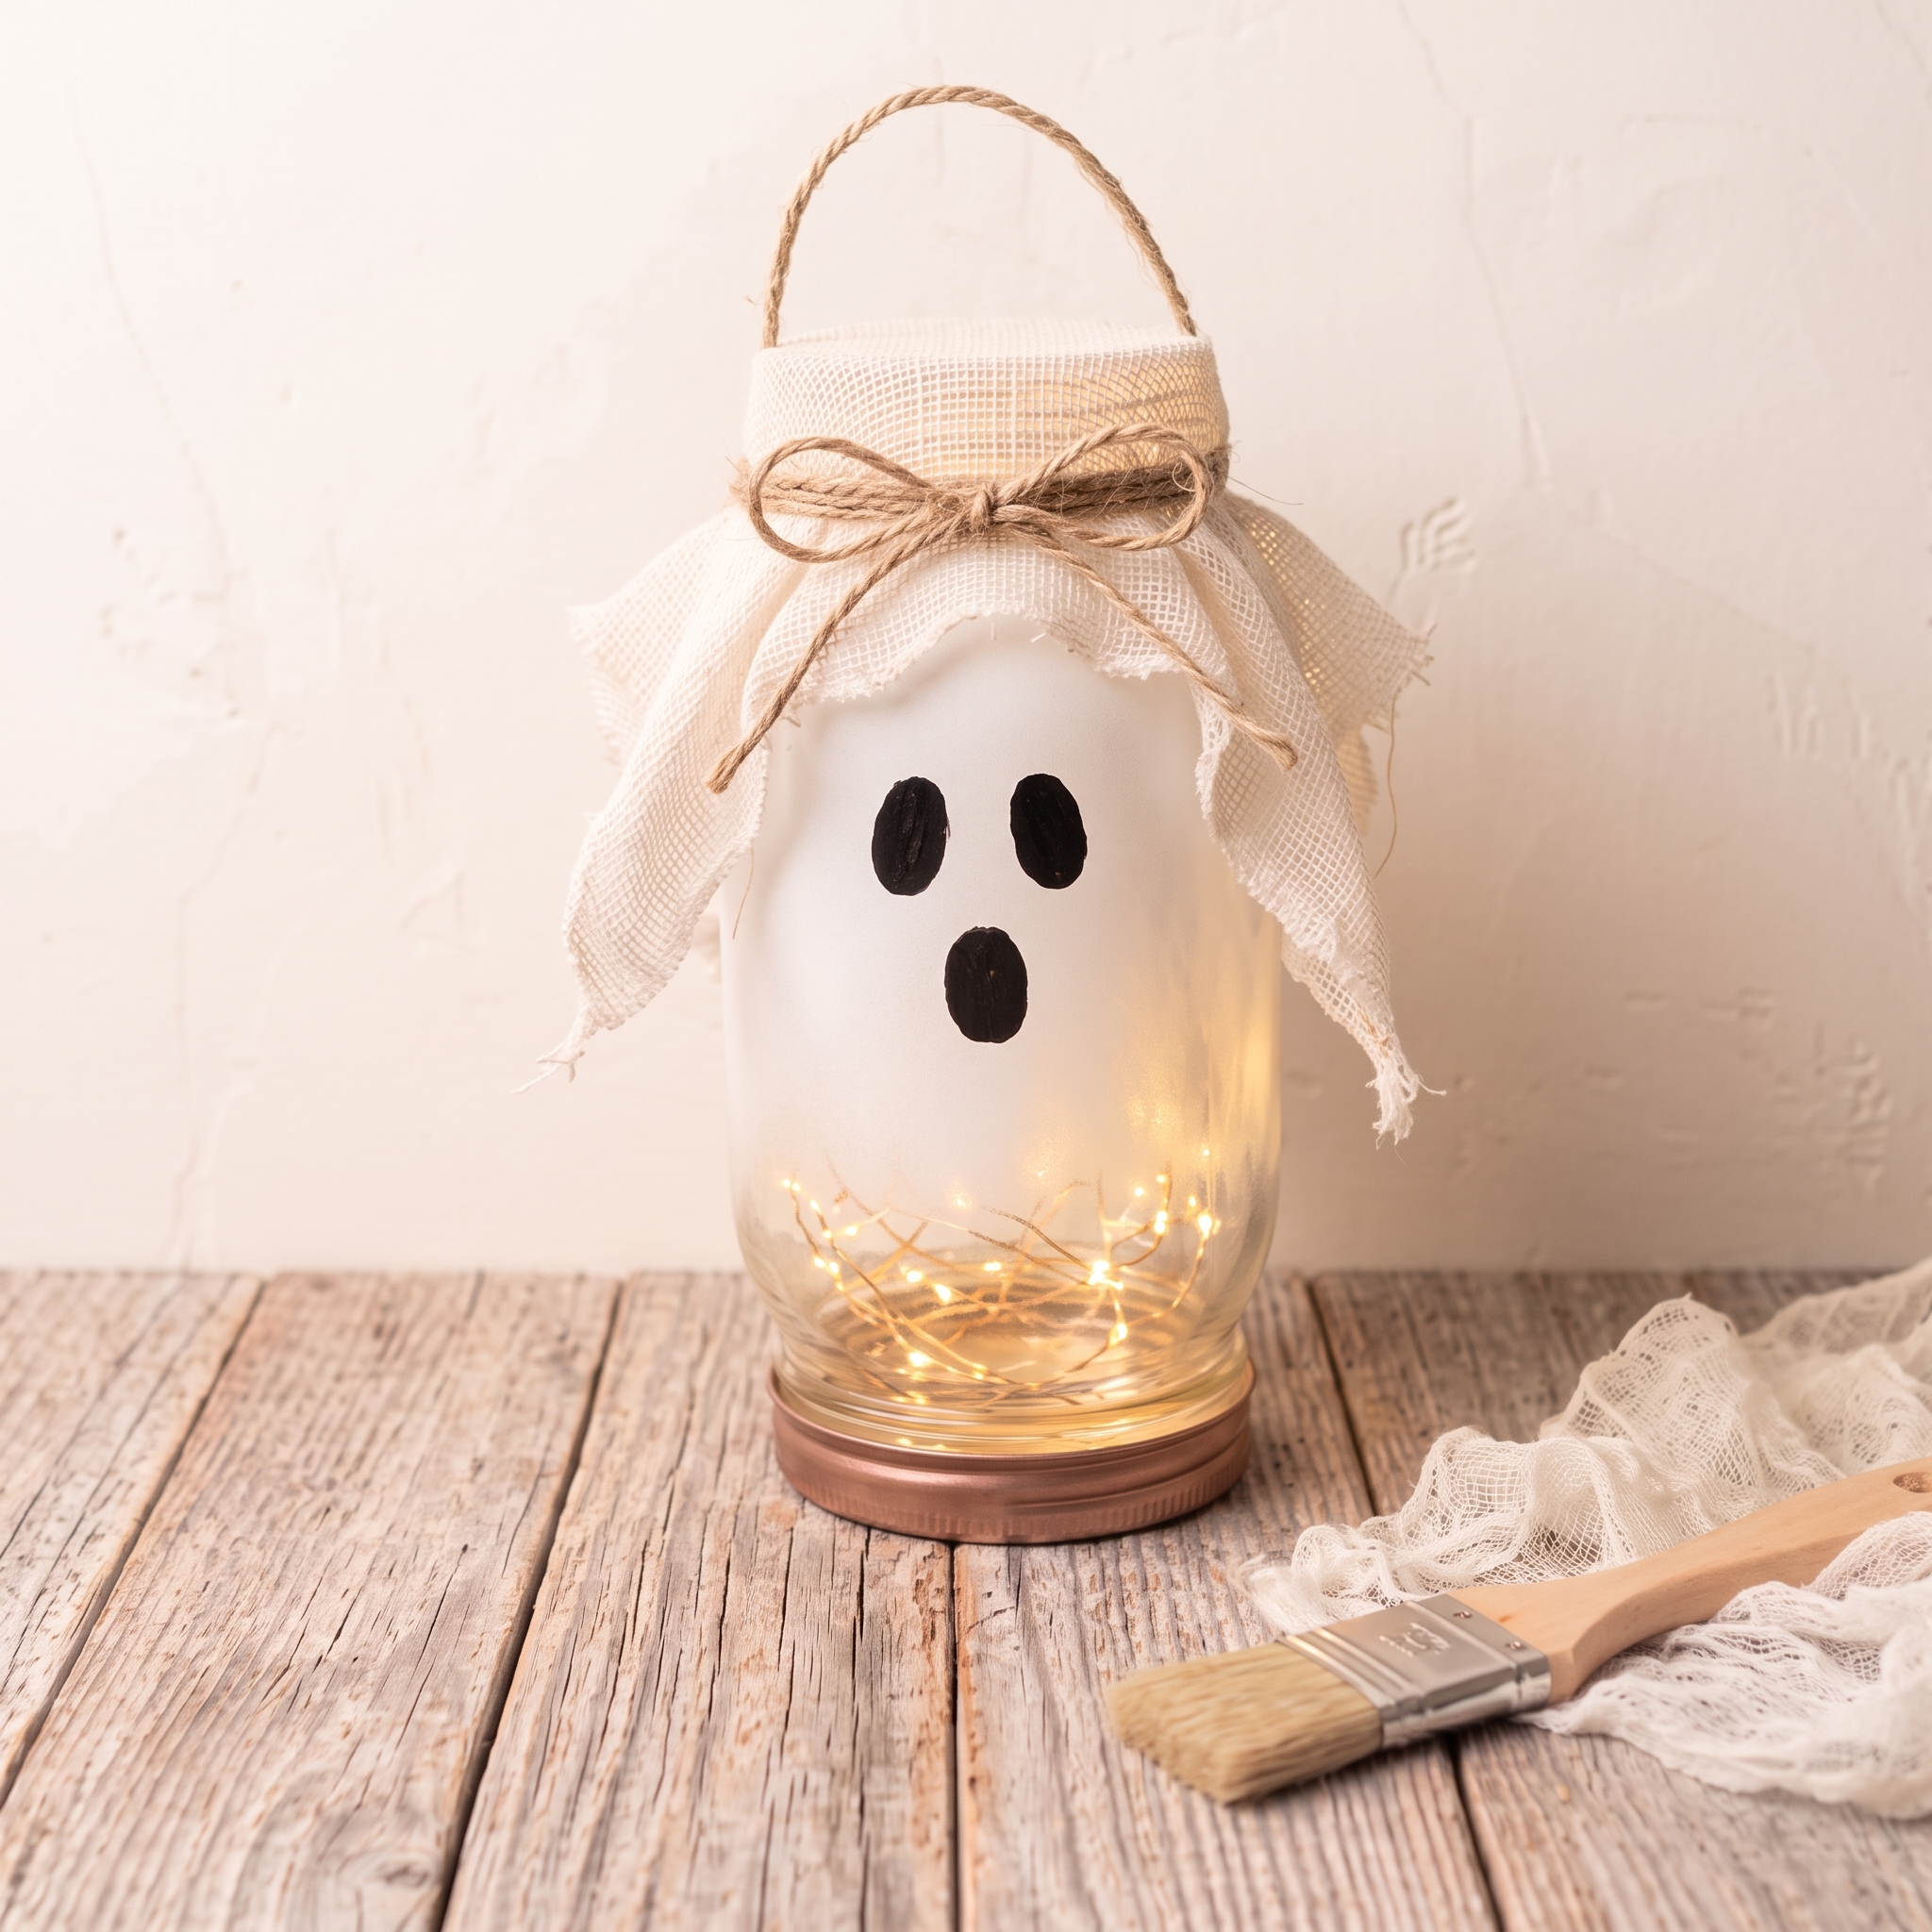
Supplies Needed: 1 mason jar, white acrylic paint, black acrylic paint, cheesecloth, jute twine, warm white LED lights with battery pack.
- Paint the exterior with two thin white acrylic coats, letting each coat dry for 1 hour. Leave the bottom unpainted if you want more LED light to show through.
- Paint two black oval eyes and one small oval mouth. Let the face dry for 1 hour before handling the jar.
- Then cut one cheesecloth square measuring 30 cm by 30 cm. Drape it around the outside of the opening, then secure it with 40 cm of jute twine.
- Keep the cheesecloth outside the jar and away from the LED strand. Coil warm white LEDs inside, with the battery pack outside and accessible.
This diy fall mason jar ghost looks especially sweet in a pair, with one tall jar and one short jar placed on a porch table.
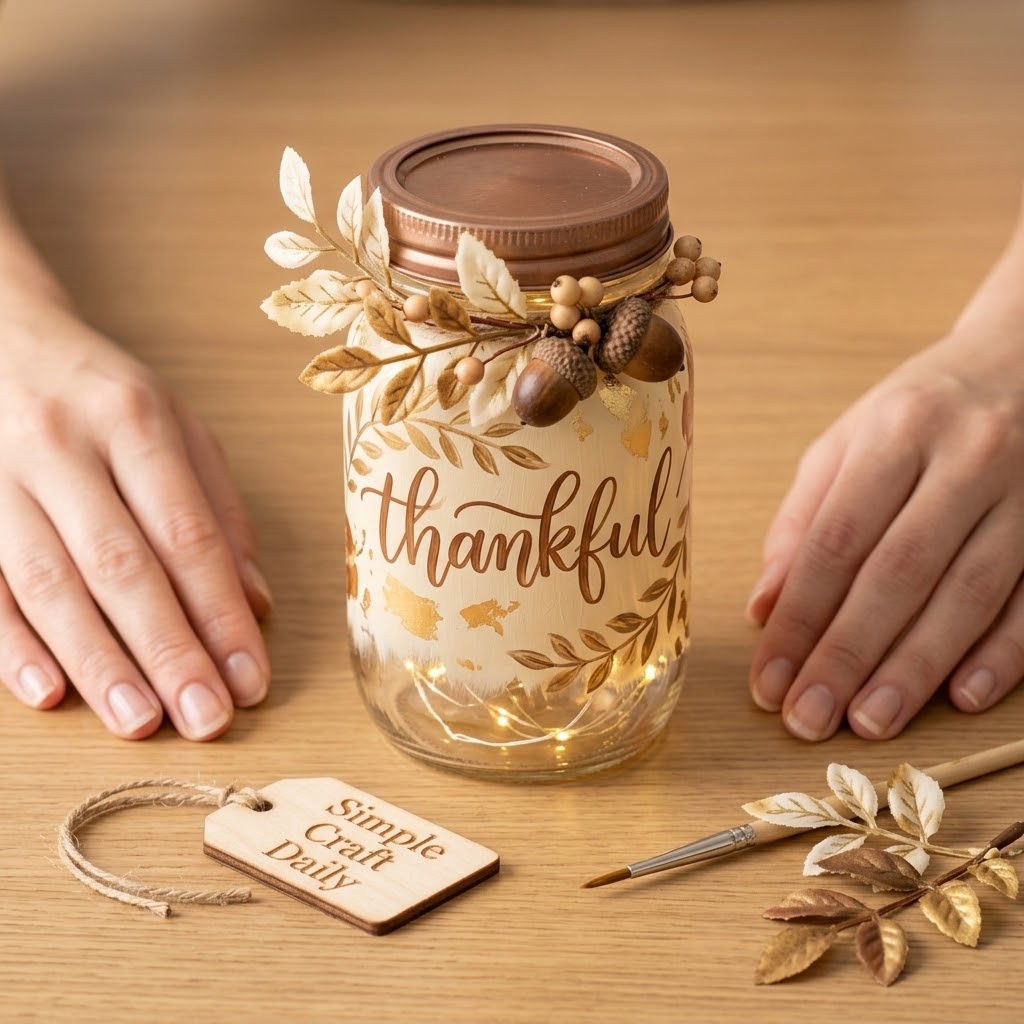
13. Hand-Lettered Thankful Jar
Supplies Needed: 1 mason jar, cream acrylic paint, brown acrylic paint, gold acrylic paint, removable chalk pencil, fine detail brush, faux leaves, acrylic varnish.
- Paint a cream rectangle measuring about 7 cm by 9 cm on the jar exterior. Let it dry for 1 hour.
- If desired, sketch “thankful” lightly with a removable chalk pencil. Paint the word in brown with a fine detail brush, then add a narrow gold underline.
- Let the lettering dry for 24 hours. Subsequently, apply varnish only after the paint is completely dry, then let the varnish cure for 24 hours.
- Place faux leaves inside the opening or around the base of the jar. Keep the interior dry to protect the exterior decorative finish.
14. Amber Berry Light Jar Centerpiece
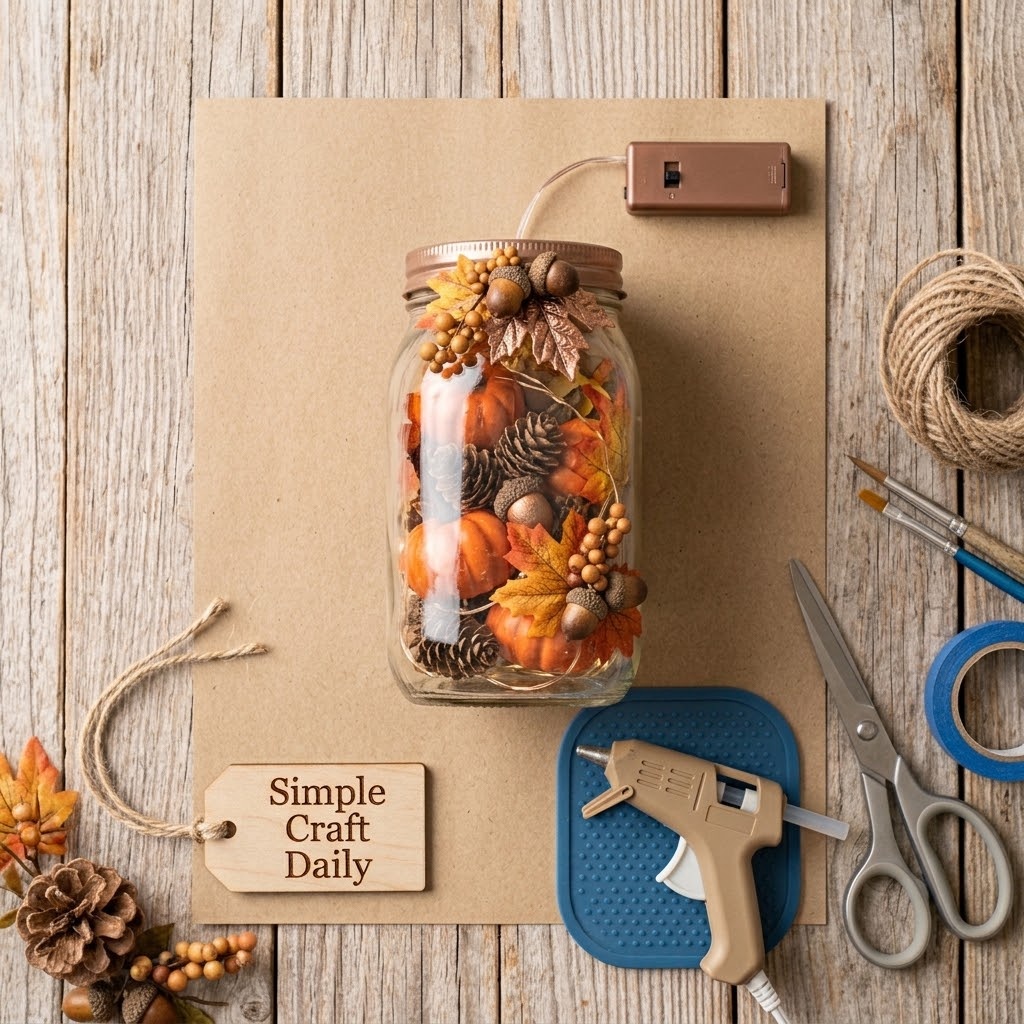
Supplies Needed: 1 mason jar, mini berry picks, faux leaves, warm LED fairy lights with battery pack, jute twine.
- Test the LED strand before arranging anything. Coil half the lit strand into the bottom of the clean dry jar.
- Add one mini berry pick and two small faux leaves around the inside edge, keeping the light wire visible through the center.
- Next, place the remaining light coil loosely on top of the foliage. Do not bury the battery pack under filler or place it inside the jar.
- Tie a 40 cm jute bow around the neck and position the battery pack behind the jar. Switch it off before moving the centerpiece.
15. DIY Fall Mason Jars with a Sunflower Lid Topper
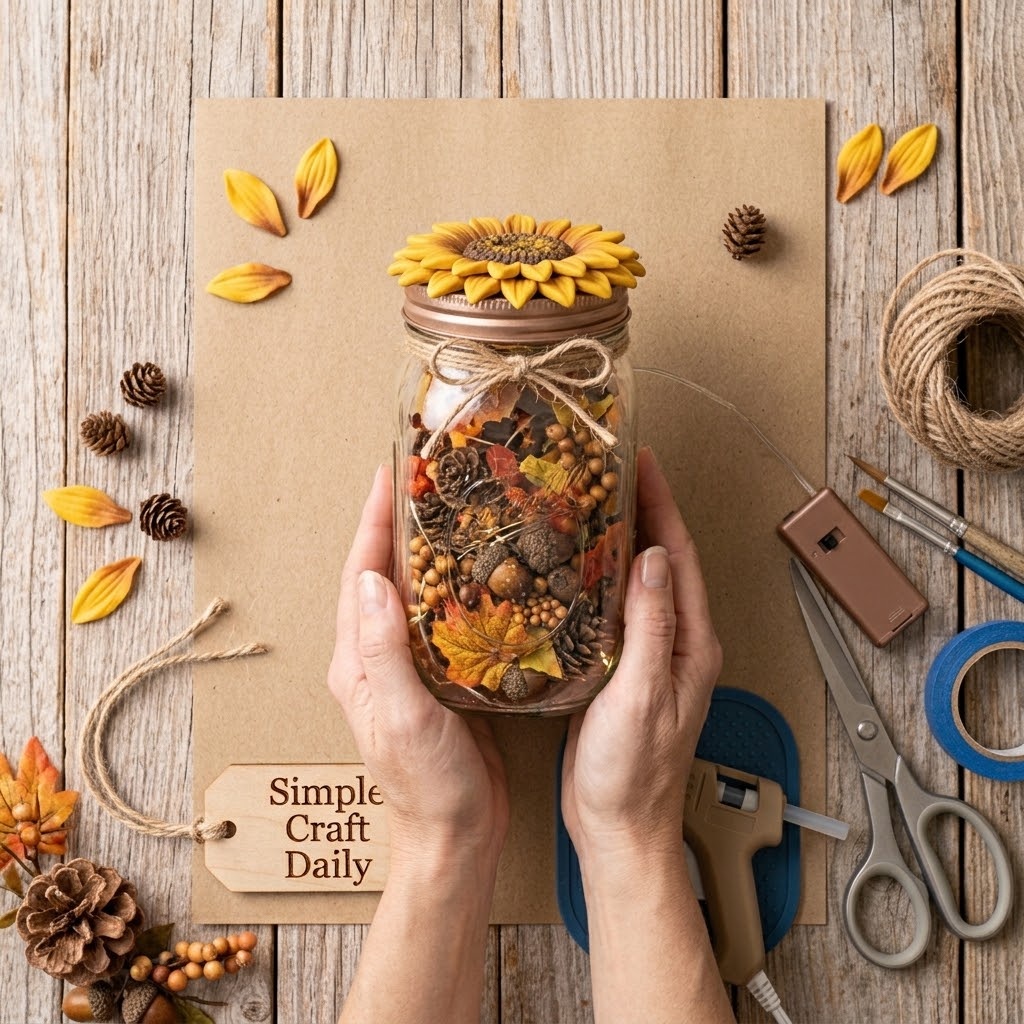
Supplies Needed: 1 mason jar with lid, faux sunflower, faux leaves, jute twine, low-temperature hot glue gun and clear glue sticks, mini pinecones.
- Remove the metal lid from the jar and place it flat on a protected work surface. Trim the faux sunflower stem to 2 cm long.
- Apply a small low-temperature glue dot to the center of the lid and press the sunflower stem into it for 20 seconds. Add two faux leaves and one mini pinecone with separate small glue dots.
- Let the glue cool fully for 10 minutes. Keep all embellishments on the removable lid only, so the jar remains easy to wash and fill with dry stems.
- Finally, close the jar gently, then tie 35 cm of jute around the neck. Add dry foliage nearby or use the finished jar as a table accent.
For a matching handmade place-setting detail, add a small clay tag from these easy air dry clay crafts once it has cured completely.
DIY Fall Mason Jars: Troubleshooting and Care
Keep finished jars indoors or on a covered porch, dust them with a dry cloth, and hand-wipe only when needed. Before you refresh a finish, make sure the surface is clean, dry, and free from loose paint or old glue.
Why Is My Paint Peeling from a Mason Jar?
Paint usually peels because the glass still carries oil, label residue, or moisture. First, wash the jar, rinse it well, and dry it upside down for at least 1 hour; then apply thin coats rather than one thick coat. Allow your diy fall mason jars to dry for the full stated time before varnishing, wrapping, or filling. Keep water away from the interior rim, and do not expect a decorative painted finish to be dishwasher-safe.
Can I Put Real Candles in DIY Fall Mason Jars?
Use cool-running battery LEDs only. Twine, paper napkins, hot glue, faux foliage, paint, and varnish can all create fire risks near an open flame. Therefore, keep battery packs accessible and dry, especially when a jar is placed on a covered porch. If you want to make actual candles, use our separate easy DIY candle making guide rather than adapting these decorated jars for flames.
How Long Should DIY Fall Mason Jar Decoupage and Varnish Cure?
Allow 2 hours between thin decoupage sealer coats, then allow at least 24 hours of undisturbed curing before you add lights, fillers, twine, or a lid. Painted jars also need at least 24 hours before varnish. However, humidity, thick paint, and cool rooms can extend those times, so follow the product label when it calls for a longer cure window.
Can DIY Fall Mason Jars Be Used Outdoors?
Use diy fall mason jars outdoors only in a protected, dry porch area. Rain and condensation can soften paper, weaken paint adhesion, stain jute, and loosen hot-glued trim. Consequently, bring jars inside during wet weather and use battery LEDs rather than flame lighting. For a coordinated outdoor display, hang a weather-appropriate accent nearby, such as one of these sea glass chime ideas.
Quick Reference: DIY Fall Mason Jars Supplies at a Glance
For your convenience, here is a quick summary of all materials and tools used in this tutorial:
🎨 Paint, Paper, and Seasonal Fillers
- 16 oz Wide-Mouth Clear Glass Mason Jars with Lids | [Check Price on Amazon]
- Matte Chalk Finish Paint in Cream, Terracotta, Mustard, and Black | [See Chalk Finish Paint on Amazon]
- Acrylic Craft Paint Set in Autumn Colors | [View Acrylic Craft Paint on Amazon]
- Autumn Leaf Paper Napkins for Decoupage | [Find Autumn Leaf Napkins on Amazon]
- Assorted Faux Maple Leaves and Mini Berry Picks | [Check Faux Maple Leaves on Amazon]
- Mini Artificial Pumpkins and Pinecones | [See Price on Amazon]
🧰 Application Tools and Protective Finishes
- Water-Based Matte Decoupage Sealer | [View Decoupage Sealer on Amazon]
- Glossy Water-Resistant Acrylic Varnish | [Check Price on Amazon]
- Natural Jute Twine, 2 mm | [Find Jute Twine on Amazon]
- Fine-Grit Sanding Sponges, 220 Grit | [See Sanding Sponges on Amazon]
- Detail Paintbrushes and Foam Pouncers | [View Detail Brushes on Amazon]
- Low-Temperature Mini Hot Glue Gun and Clear Glue Sticks | [Check Hot Glue Gun on Amazon]
✨ Lighting, Kits, and Studio Upgrades
- Warm White LED Fairy Lights with Battery Packs | [See LED Fairy Lights on Amazon]
- Fall Mason Jar Decorating Starter Kit | [Find Fall Mason Jar Starter Kit on Amazon]
- Daylight LED Magnifying Craft Lamp with Desk Clamp | [View Craft Lamp on Amazon]
- Large Self-Healing Rotary Cutting Mat Set with Rotary Cutter and Acrylic Ruler | [Check Cutting Mat Set on Amazon]
- Heavy-Duty Three-Tier Rolling Craft Cart with Wooden Top | [See Rolling Craft Cart on Amazon]
Important Crafting Safety Notes
Crafting is a rewarding creative activity, but maintaining a safe workshop environment is essential for yourself, your family, and your pets. Please review these safety precautions before starting:
• Personal Protective Equipment (PPE) & Safe Handling: Wear safety glasses when trimming wire stems, clipping floral picks, or cutting materials with a rotary cutter. Use heat-resistant protection and gloves when handling a hot glue gun. Wear nitrile gloves and a particle mask when sanding paint or working with varnish, sealers, and other chemical finishes.
• Room Ventilation & Fume Safety: Work near an open window with cross-ventilation or active exhaust when using paint, varnish, decoupage sealer, or adhesives. In addition, allow jars to dry and off-gas fully in an airy space away from everyday living areas.
• Child & Pet Safety (Choking & Swallowing Prevention): Mini pumpkins, pinecones, berry picks, batteries, loose LEDs, beads, twine cutoffs, and small decorative pieces present choking or ingestion hazards. Keep materials and finished jars out of reach of children and pets. Never allow a child or pet to handle a jar containing loose batteries or small fillers.
• Sharp Tool Storage & Clean Work Area: Store rotary cutters, craft knives, snips, scissors, needles, and pliers in secure latching cases or high cabinets after use. Then sweep or vacuum the workspace and floor after each project to collect wire clippings, pins, and small dropped materials.
• Certified, Quality & Non-Toxic Supplies: Choose ACMI AP-certified non-toxic paints and adhesives where possible, and follow every manufacturer instruction for cure times, temperatures, battery use, and disposal. Use lead-free and nickel-free hardware when applicable. Never reuse kitchen utensils for paint, sealer, varnish, or craft chemicals.
For more detailed guidance on safe crafting practices, liability disclosures, and website usage, please review our Terms and Conditions.
“Which DIY fall mason jar will you make first? Drop a comment below with your favorite color palette or seasonal styling idea—I’d love to see what you create!”


[…] feels balanced in your hand. If you enjoy seasonal table crafts, pair this project with our charming DIY fall mason jar ideas for a relaxing weekend crafting […]