

Flimsy clay projects crack, warp, and look unfinished. These projects rely on even slabs, patient drying, and soft sanding so each piece feels intentional on a shelf, desk, or gift table.
Start with a few dependable tools, then make the collection your own with paint, texture, and restrained metallic detail. If you enjoy seasonal makes, our 20 cozy DIY fall decorations offer warm color ideas, while these easy decorative clay magnets pair beautifully with the daisy project below.
Affiliate Disclosure: This post contains affiliate links. As an Amazon Associate, I earn from qualifying purchases. If you buy through these links, I may earn a commission at no additional cost to you.
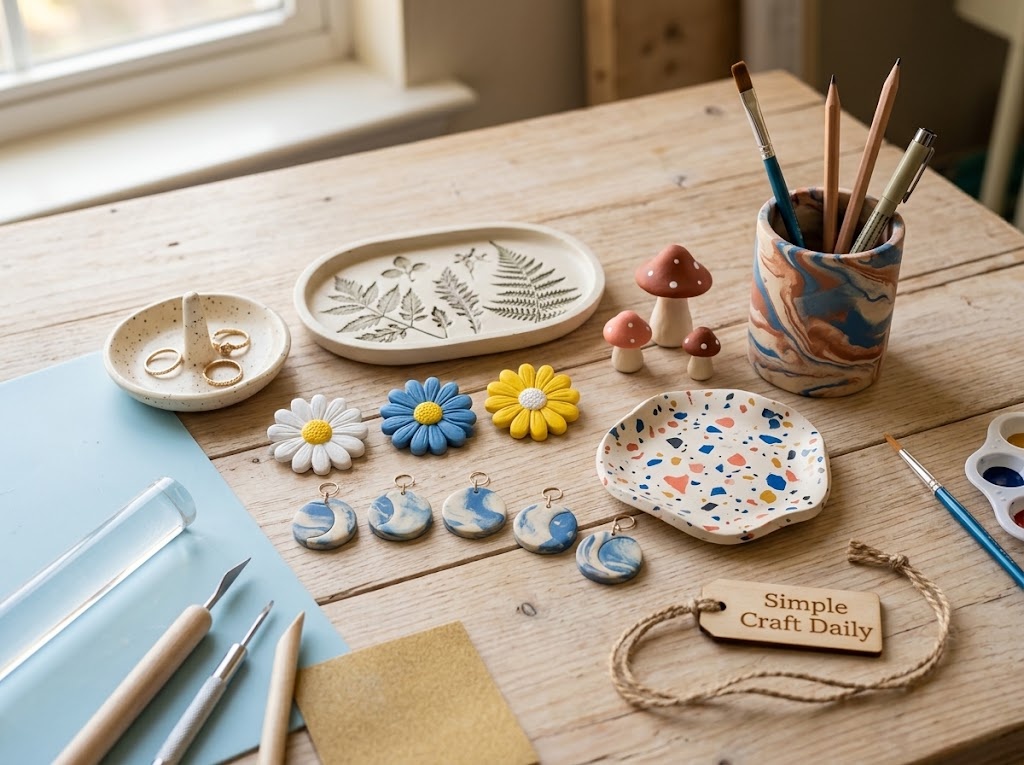
Essential Materials & Tools
🧰 Core Tools & Everyday Supplies
- White Non-Toxic Air Dry Clay — Fine-grain white clay rolls into smooth slabs, takes impressed texture cleanly, and provides an opaque base for painted details | Check White Non-Toxic Air Dry Clay on Amazon
- Clay Cutters and Craft Knife — Steel shape cutters and a sharp craft knife cut the clean circles, tags, and tile squares every cutting step calls for — the reliable method for rolled slabs. | Check Clay Cutters and Craft Knife on Amazon
- Clay Sculpting Tool Set with Wooden Handles — Loop tools, pointed tools, and smoothers shape rims, score joins, carve letters, and refine small details | Explore Clay Sculpting Tool Set with Wooden Handles on Amazon
- Acrylic Clay Roller with Thickness Guide Rings — Guide rings keep slabs consistently near 6 mm or 8 mm, which helps flat pieces dry evenly | View on Amazon
- Nonstick Silicone Craft Mat — The nonporous mat protects the table and releases damp clay with less pulling and distortion | Find on Amazon
- Plain Paper and Unprinted Cardboard — Plain paper barriers separate clay from shaping forms and help flat pieces release moisture at a more even pace. | View on Amazon
- Fine-Grit Sandpaper Assortment — Sheets in 220-, 320-, and 400-grit smooth dry rims and cut edges without digging deep scratches into the clay | Find Fine-Grit Sandpaper Assortment on Amazon
- ACMI AP-Certified Acrylic Paint Set — Opaque acrylic colors cover fully dry clay evenly and allow clean color blocking, dots, lettering, and small illustrations | Check Price on Amazon
- Small Detail Paint Brushes — Fine round and liner brushes place speckles, borders, leaf veins, and lettering without flooding carved grooves | Check Small Detail Paint Brushes on Amazon
- Smooth Plastic Bowls and Cups — Rounded bowls, cylinders, and sleeves support damp clay while it reaches leather-hard firmness. | Check Smooth Plastic Bowls and Cups on Amazon
- Water-Based Gloss and Matte Acrylic Varnish — Use gloss for bright polished surfaces and matte for a quiet chalky finish after paint has dried | View Water-Based Gloss and Matte Acrylic Varnish on Amazon
- Pencil — Marks grids, templates, and cut lines before you cut — Project 5’s 3-by-3 grid starts with a pencil line. | Check Pencil on Amazon
- Particle Dust Mask — Sanding air dry clay releases fine dust — the safety block requires a particle mask for every sanding session. | Check Particle Dust Mask on Amazon
✨ Project Add-Ons & Decorative Details
- Clean Dry Leaves — Fully dry pressed leaves make crisp botanical impressions without transferring extra moisture into the clay. | Explore Clean Dry Leaves on Amazon
- Gold Leaf Foil Flakes with Foil Adhesive — Small imitation-metal flakes and compatible adhesive add a controlled reflective accent to ornaments, trays, and wall pieces | See Price on Amazon
- Neodymium Disc Magnets 10 x 2 mm — Compact magnets suit small clay florals and should be bonded only to fully dry, sealed clay | Check Price on Amazon
- Jute Twine — Use this lightweight finishing set for ornaments, tags, and small hanging wall pieces after the clay has cured | View Jute Twine on Amazon
- Small Brass Screw Eyes — Twist these into snug pilot holes you press with a pointed tool while the clay is still soft — they hang moon-phase discs, ornaments, and tags. | Check Small Brass Screw Eyes on Amazon
- Self-Adhesive Felt Pads — Small pads protect tabletops beneath finished coasters and trays | See Self-Adhesive Felt Pads on Amazon
- Incense Sticks — Standard bamboo-core incense sticks fit a finished arched clay holder when used on a heat-safe surface. | Find on Amazon
- Two-Part Clear Epoxy Adhesive — A structural adhesive bonds cured clay to metal magnets and lightweight hook hardware. | Check Price on Amazon
- Small Metal Wall Hooks — Small hooks add gentle display function to cured decorative cloud plaques intended for ribbons, notes, and empty lanyards. | View Small Metal Wall Hooks on Amazon
- Battery-Operated Tea Lights — Flameless tea lights safely illuminate clay sleeves and small decorative house displays without exposing clay to a real flame. | Find Battery-Operated Tea Lights on Amazon
- Small Glass Bud Vase Inserts — Glass liners hold water safely inside decorative clay bud vase covers. | See Price on Amazon
- Wooden Skewers — Pressed into the base while the clay is still soft so Project 7 strawberry picks can sit in planters. | Check Wooden Skewers on Amazon
Optional Studio Upgrades
Never required to finish the projects above — convenience upgrades for makers who want them.
📦 Beginner Project Kits & Coordinated Bundles
For beginners or makers starting from scratch, these coordinated bundles and all-in-one project packs bring together the core supplies in one convenient order.
- Air Dry Clay Craft Kit — An optional coordinated project kit provides clay, basic shaping tools, paints, and instructions in one convenient pack. | See Air Dry Clay Craft Kit on Amazon
🏆 Studio Upgrades for Regular Makers
- Heavy-Duty Clay Slab Roller Machine — An optional long-term studio tool for repeating consistently thick trays, coasters, tiles, and ornaments | Find Heavy-Duty Clay Slab Roller Machine on Amazon
- Daylight LED Magnifying Craft Lamp — Clear daylight and magnification help when carving fine marks, sanding a rim, or painting tiny details | See Price on Amazon
- Three-Tier Rolling Craft Cart with Worktop — A rolling cart keeps clay, brushes, tools, and drying pieces organized without crowding the work surface | See Three-Tier Rolling Craft Cart with Worktop on Amazon
Heavy-Duty Clay Slab Roller Machine
A durable slab roller produces consistently thick clay sheets for repeated trays, coasters, tiles, ornaments, and wall pieces.
I earn a commission if you make a purchase, at no additional cost to you.
Three-Tier Rolling Craft Cart with Worktop
A mobile worktop cart organizes clay, tools, brushes, paint, and drying pieces without crowding the main workspace.
I earn a commission if you make a purchase, at no additional cost to you.
How to Prevent Cracks and Warping
Begin every batch by kneading the clay for 1 to 2 minutes until it feels uniform and free of dry crumbs. Next, roll slabs on the silicone mat with guide rings so the thickness stays even from edge to edge. A 6 mm slab is a reliable starting point for most flat pieces.
Dry flat pieces on a breathable sheet of plain paper or unprinted cardboard, not on a sealed plastic tray. After 12 to 24 hours, gently flip coasters, ornaments, and tiles so the underside releases moisture at a similar pace. Most brands need 24 to 72 hours, depending on humidity and thickness.
Sand only when the clay feels dry and room-temperature cool throughout. If you want more vessel-shaped projects after this collection, browse these air dry clay pottery ideas for more hand-built inspiration. Before starting the project list, you may also enjoy these easy clay models to style your home.
20 Easy Air Dry Clay Crafts for Home and Gifts
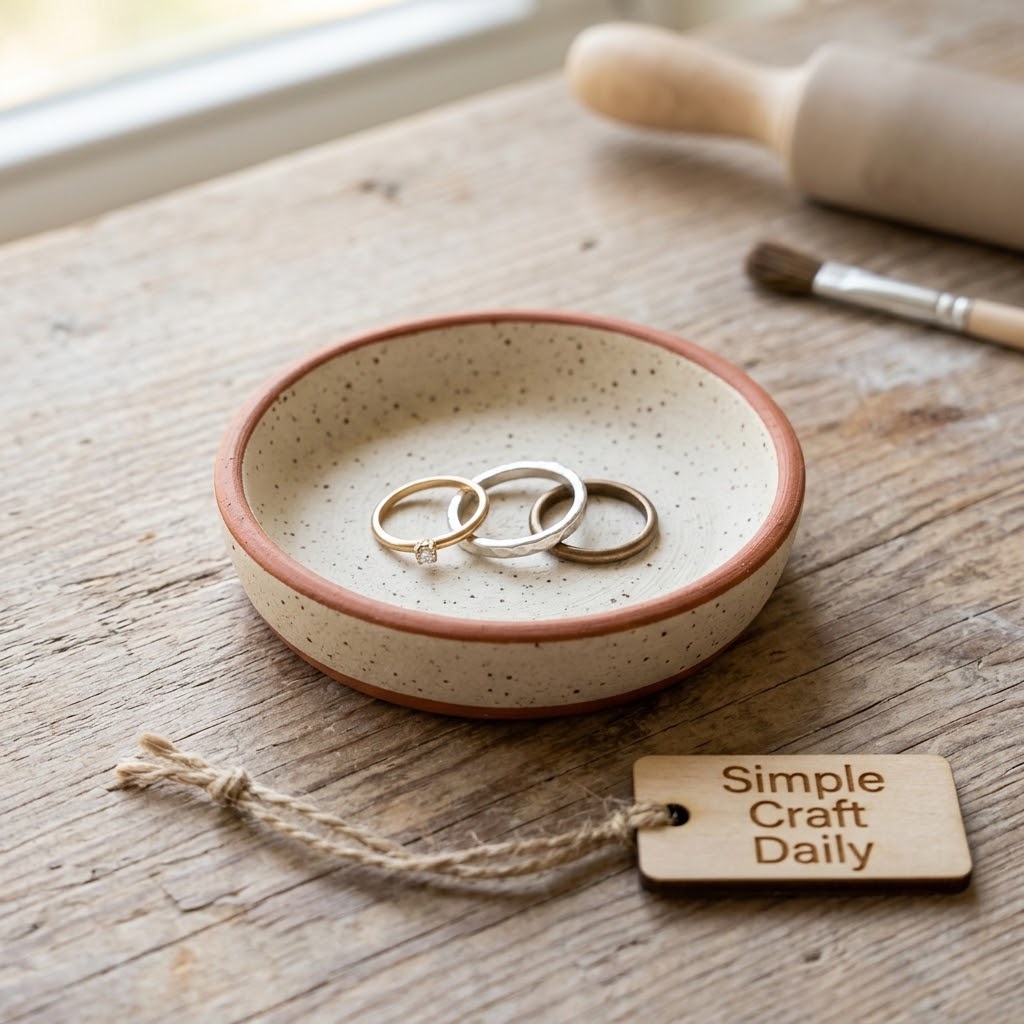
1. Speckled Ring Dish
Supplies Needed: White Non-Toxic Air Dry Clay, Nonstick Silicone Craft Mat, Acrylic Clay Roller with Thickness Guide Rings, Clay Sculpting Tool Set with Wooden Handles, Smooth Plastic Bowls and Cups, ACMI AP-Certified Acrylic Paint Set, Water-Based Gloss and Matte Acrylic Varnish, Small Detail Paint Brushes.
Quick Steps:
- First, roll a 6 mm slab, then cut a 10 cm circle with a craft knife.
- Smooth the edge with a damp fingertip and press the center gently to create a shallow bowl.
- Lift the rim about 1 cm with the tool.
- Rest the dish upside down over a smooth curved shaping form only until leather-hard, usually 3 to 6 hours.
- Then remove the form and dry the dish flat for 24 to 72 hours.
- Paint tiny speckles with a detail brush after full drying, let them dry for 1 hour, and apply two thin gloss-varnish coats 1 hour apart.
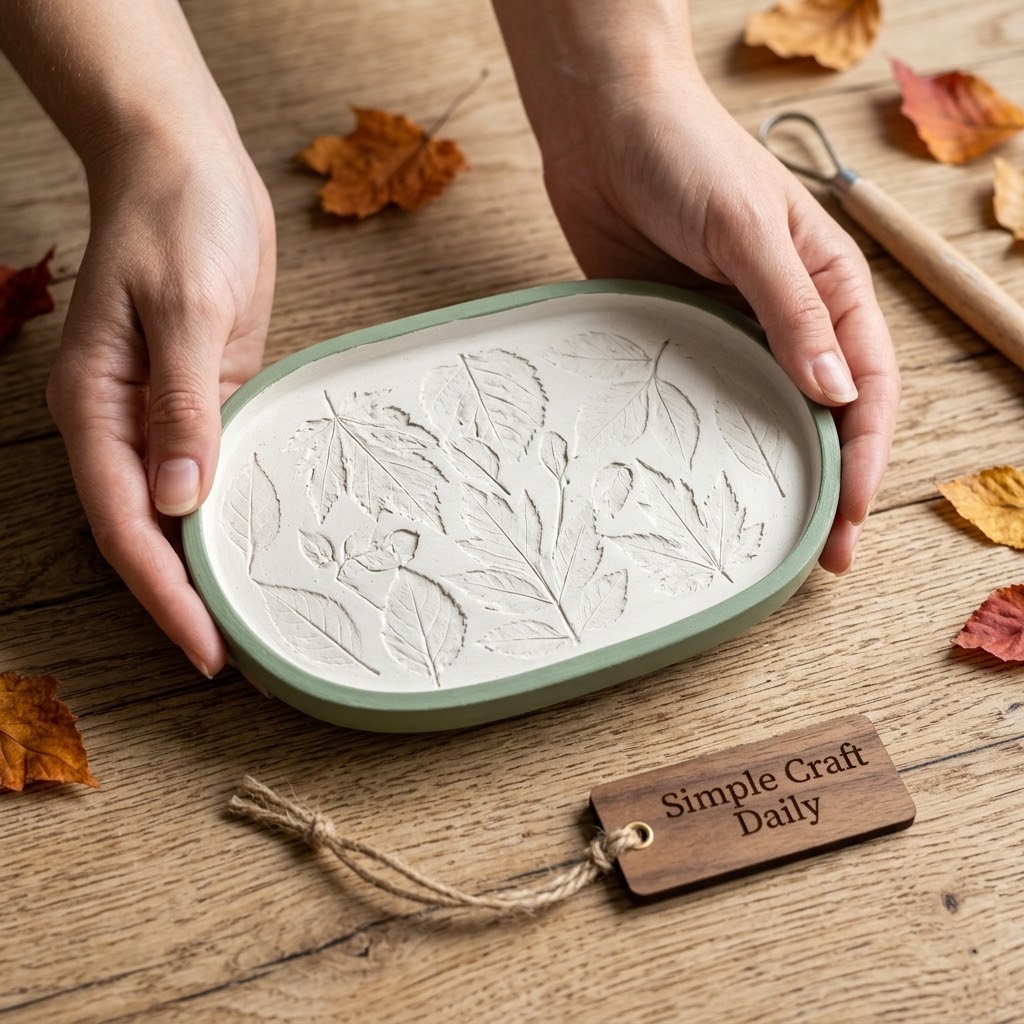
2. Pressed Botanical Trinket Tray
Supplies Needed: White Non-Toxic Air Dry Clay, Acrylic Clay Roller with Thickness Guide Rings, Clay Sculpting Tool Set with Wooden Handles, Clean Dry Leaves, Fine-Grit Sandpaper Assortment, Water-Based Gloss and Matte Acrylic Varnish, Plain Paper and Unprinted Cardboard.
Quick Steps:
- First, roll a 6 mm slab and cut an oval about 15 cm long with a craft knife.
- Lay clean, dry leaves on the clay and roll once with light pressure to transfer the veins.
- Remove every leaf before drying so moisture cannot stain or stick to the surface.
- Next, use a smoother from the sculpting set to lift a shallow 8 mm edge around the oval.
- Dry the tray flat on a paper barrier for 24 to 72 hours, sanding only after it is fully dry.
- Finish with two thin matte-varnish coats, allowing 1 hour between coats.
- Keep this tray for jewelry, keys, or paper clips rather than food.
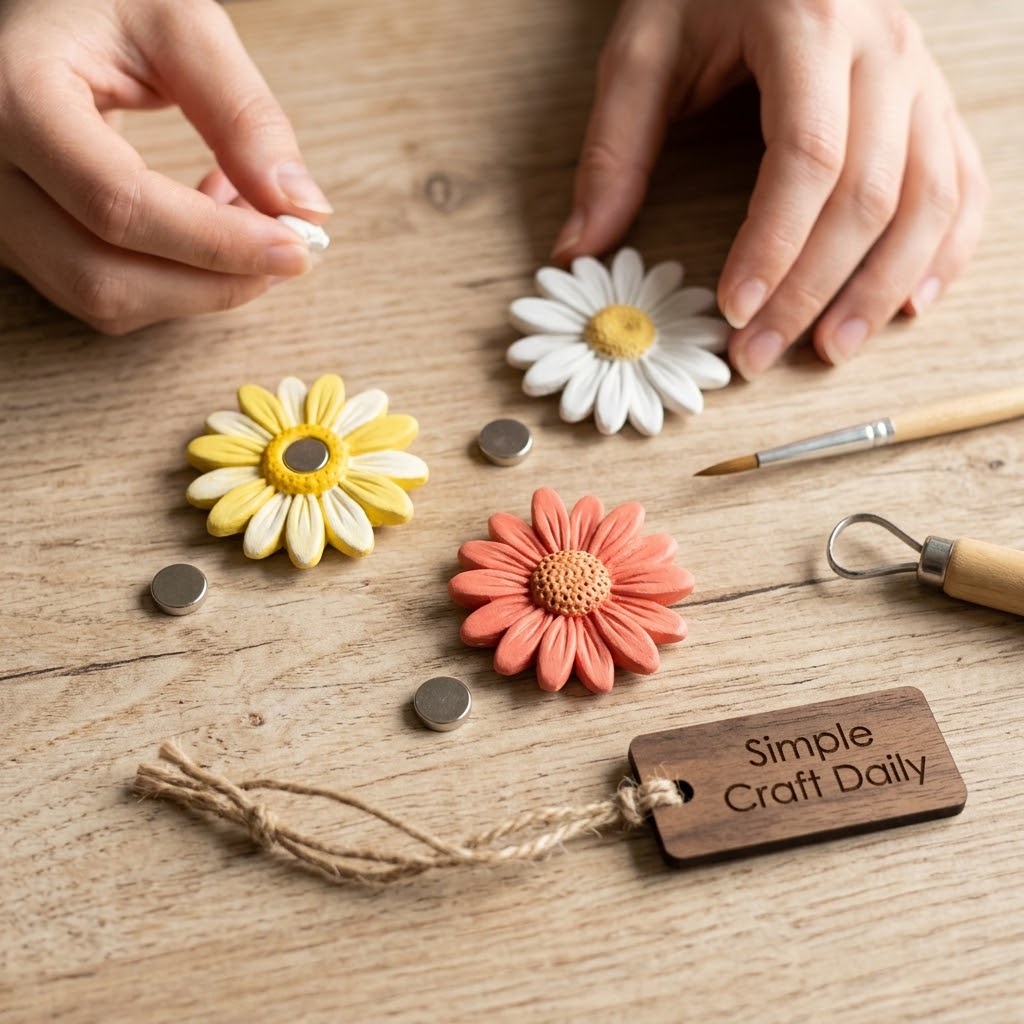
3. Daisy Fridge Magnets
Supplies Needed: White Non-Toxic Air Dry Clay, Nonstick Silicone Craft Mat, Clay Sculpting Tool Set with Wooden Handles, ACMI AP-Certified Acrylic Paint Set, Small Detail Paint Brushes, Water-Based Gloss and Matte Acrylic Varnish, Neodymium Disc Magnets 10 x 2 mm, Two-Part Clear Epoxy Adhesive.
Quick Steps:
- First, shape eight narrow petals and one center disc for each 4 cm daisy.
- Press the petals around the center on the silicone mat, then blend the seams lightly with a wooden sculpting tool.
- Keep the flower about 5 mm thick so it dries evenly.
- Dry each flower flat for 24 to 72 hours.
- Next, paint the petals and center, then allow the paint to dry for 1 hour.
- Apply varnish if desired and allow it to cure for the time stated on its label.
- Mix a pea-sized amount of two-part epoxy, bond one 10 x 2 mm magnet to the back, and cure the epoxy undisturbed for 24 hours.
- See our related easy decorative clay magnets for more small-format ideas.
4. Arched Incense Holder
Supplies Needed: White Non-Toxic Air Dry Clay, Clay Sculpting Tool Set with Wooden Handles, Fine-Grit Sandpaper Assortment, Water-Based Gloss and Matte Acrylic Varnish, Incense Sticks.
Quick Steps:
- First, roll and cut a 12 cm long, 6 mm thick oval with a craft knife.
- Use a rounded sculpting tool to press a shallow channel from one end toward the center; this shallow channel cradles an incense stick so it stays level.
- Then pierce a centered hole at one end with the pointed tool while the clay is still soft.
- Next, raise the long edges slightly to form a soft arch, then dry the holder flat for 24 to 72 hours.
- Sand the hole and channel with 320-grit paper.
- Apply two thin matte-varnish coats and allow the varnish to cure as directed before resting an unlit incense stick in the channel.
- Hang the finished holder from the end hole or stand it on a shelf to keep incense sticks sorted between uses.
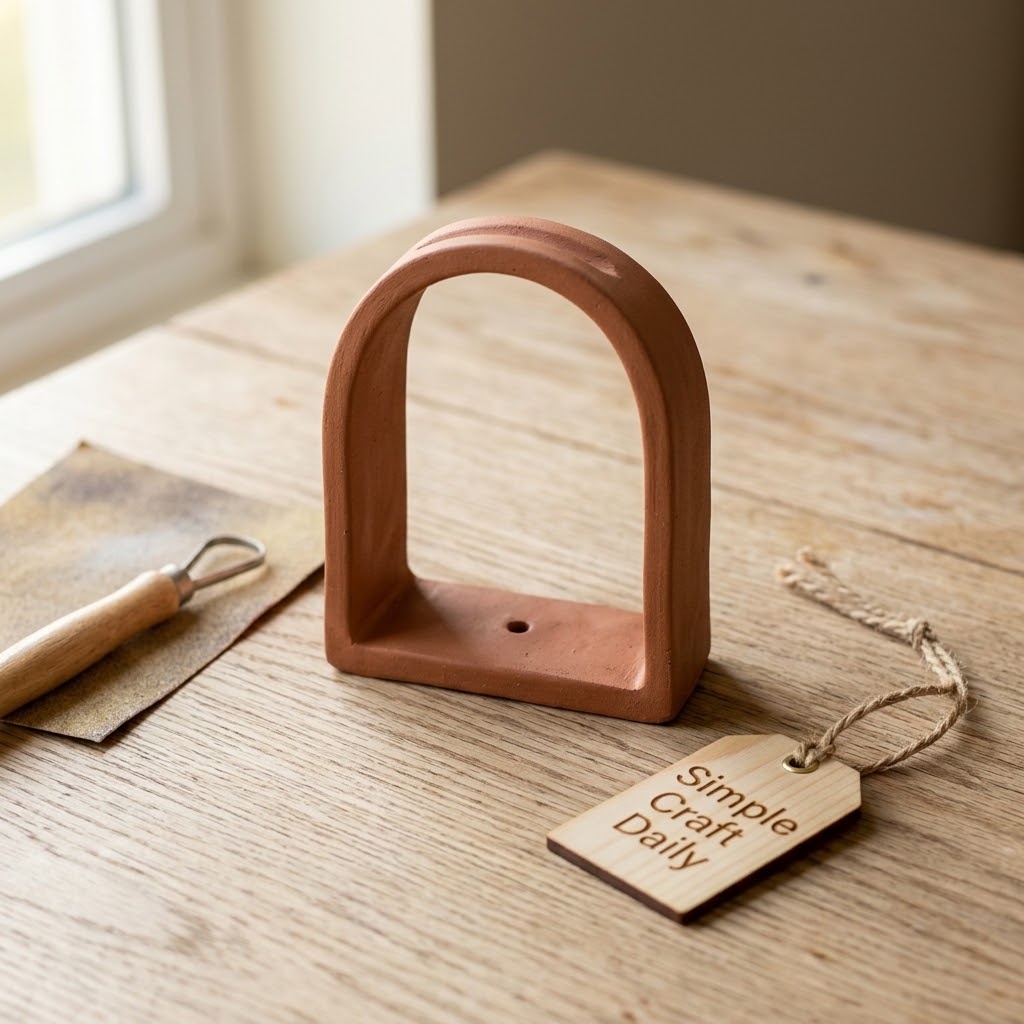
5. Checkerboard Coasters
Supplies Needed: White Non-Toxic Air Dry Clay, Acrylic Clay Roller with Thickness Guide Rings, Clay Sculpting Tool Set with Wooden Handles, Plain Paper and Unprinted Cardboard, ACMI AP-Certified Acrylic Paint Set, Small Detail Paint Brushes, Water-Based Gloss and Matte Acrylic Varnish, Fine-Grit Sandpaper Assortment, Self-Adhesive Felt Pads, Pencil.
Quick Steps:
- First, roll a 6 mm slab and cut four 9 cm squares with a craft knife.
- Smooth each edge with a damp finger, then leave the coasters flat on paper.
- After 12 to 24 hours, turn each one over carefully to help both faces dry at the same rate.
- When fully dry, sand the edges with 320-grit paper.
- Next, pencil a 3-by-3 grid, then paint alternating squares with two colors using a detail brush.
- Let the paint dry for 1 hour before brushing on two thin varnish coats.
- Allow the final coat to cure according to the label, then add felt pads to the underside.
- These coasters work best beneath cool or lightly warm drinkware, not sweating glasses.
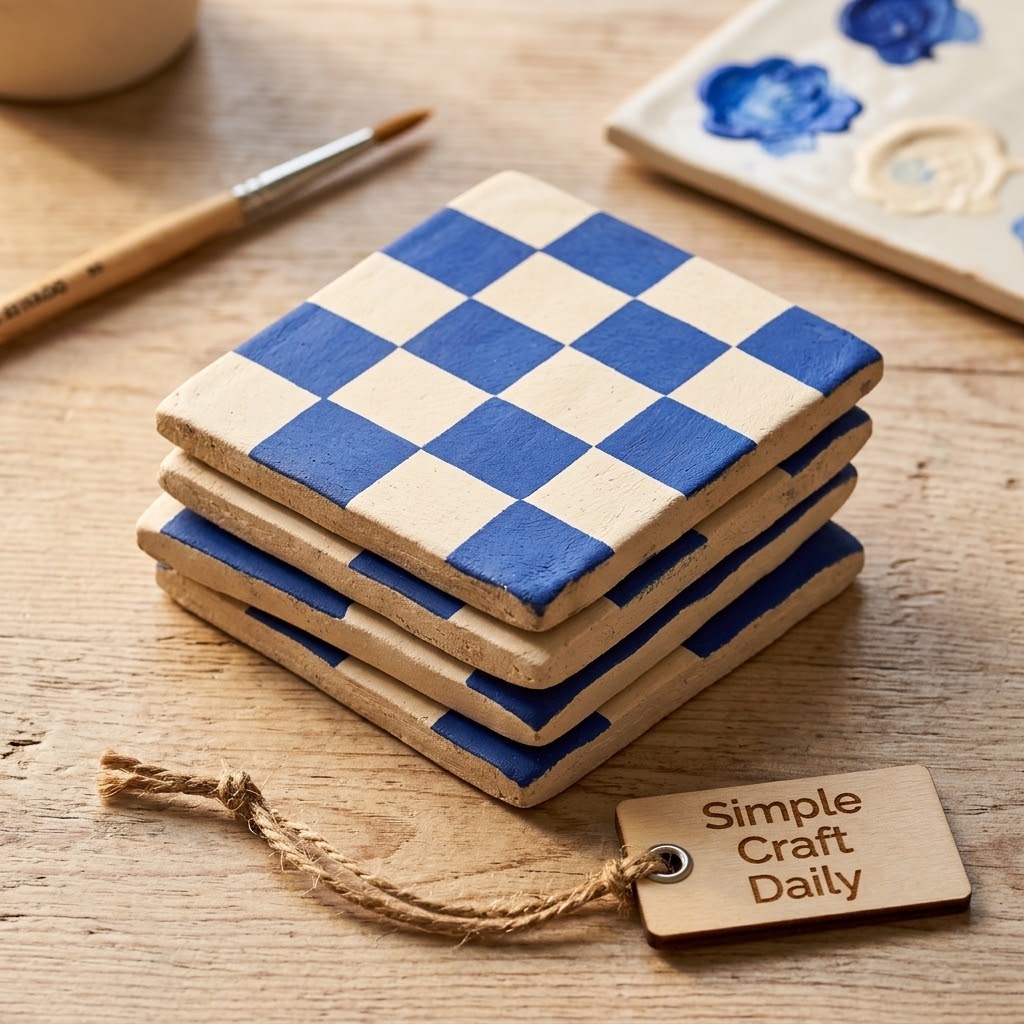
6. Moon Phase Wall Hanging
Supplies Needed: White Non-Toxic Air Dry Clay, Acrylic Clay Roller with Thickness Guide Rings, Clay Sculpting Tool Set with Wooden Handles, Jute Twine and Small Brass Screw Eyes, ACMI AP-Certified Acrylic Paint Set, Small Detail Paint Brushes.
Quick Steps:
- First, roll clay to 5 to 6 mm thick and cut five discs about 5 cm wide with a clay cutter.
- Leave one full moon round, trim two into crescents with a craft knife, and cut two into half-moon shapes with a craft knife.
- Pierce two 3 mm holes near the top of each disc while the clay remains soft, and press a snug pilot hole beside each one if you will fit screw eyes.
- Twist small brass screw eyes into those snug pilot holes while the clay is still soft if you prefer hardware; otherwise leave the holes open for jute after drying.
- Dry every piece flat for 24 to 72 hours, then paint the moon phases with the acrylic paint set.
- After the paint is dry, thread jute directly through the dried holes, then tie each connection with double knots and leave 3 cm between discs.
- Hang only lightweight pieces from a secure wall hook.
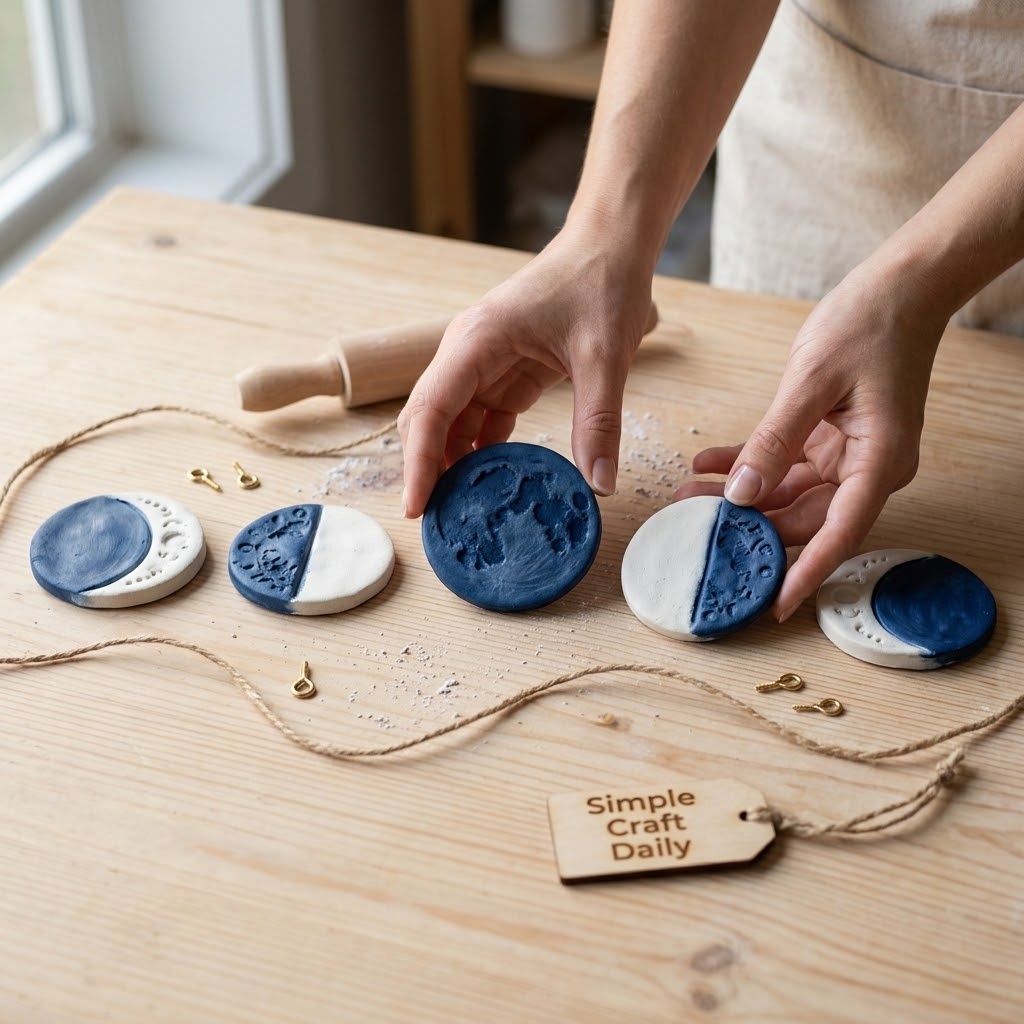
7. Strawberry Planter Picks
Supplies Needed: White Non-Toxic Air Dry Clay, Clay Sculpting Tool Set with Wooden Handles, ACMI AP-Certified Acrylic Paint Set, Small Detail Paint Brushes, Water-Based Gloss and Matte Acrylic Varnish, Wooden Skewers.
Quick Steps:
- First, shape a 3 cm strawberry body with a short tapered clay stem, then press tiny seed dimples with a pointed sculpting tool.
- Flatten a small green leaf cap and score the underside.
- Brush a few drops of water onto the strawberry top, press on the leaf cap, and blend the seam.
- Press a wooden skewer into the base while the clay is still soft.
- Lay the pieces on their sides (skewer in place) to dry for 24 to 72 hours.
- Next, paint the berry red, seeds yellow, and leaves green.
- After 1 hour of paint drying time, apply two gloss-varnish coats and allow the final coat to cure fully.
- Place finished picks only in indoor decorative planters.
- Do not push these picks into edible garden soil or use them around food crops.
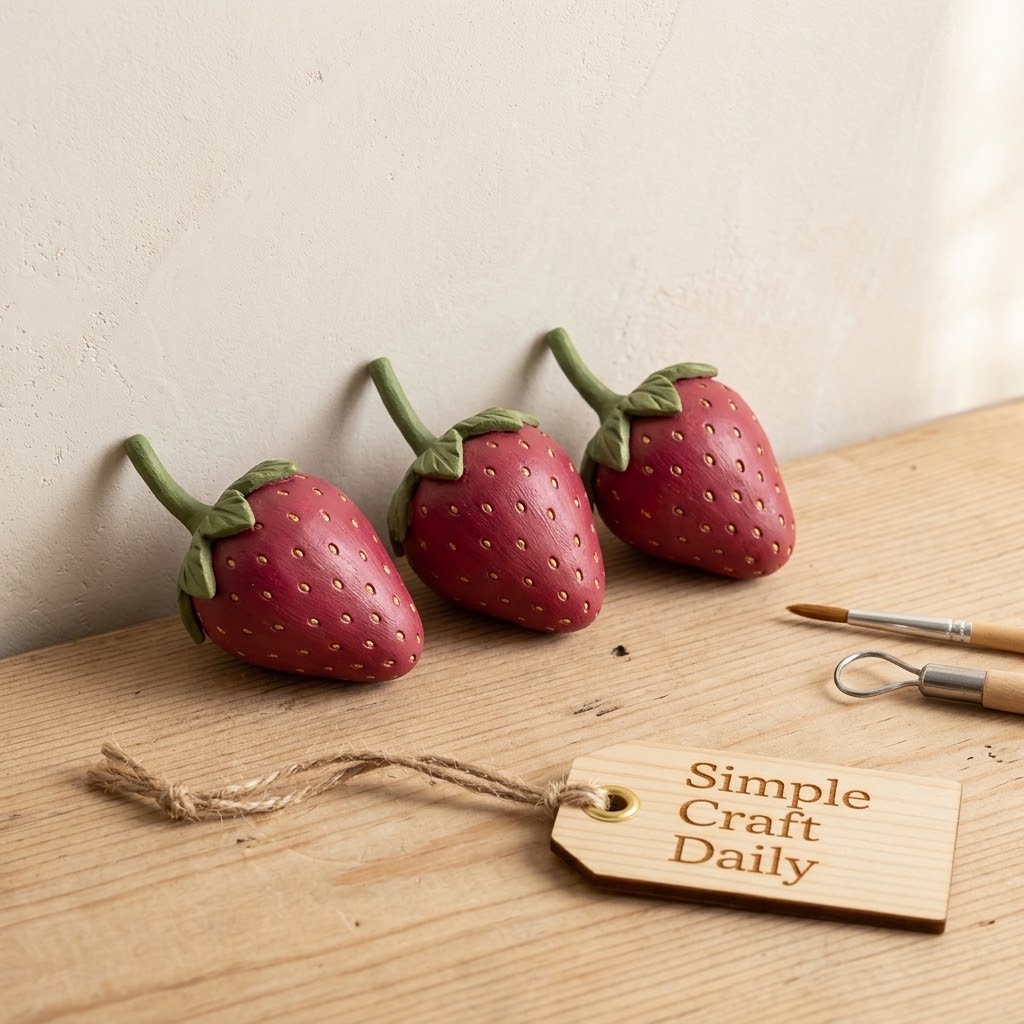
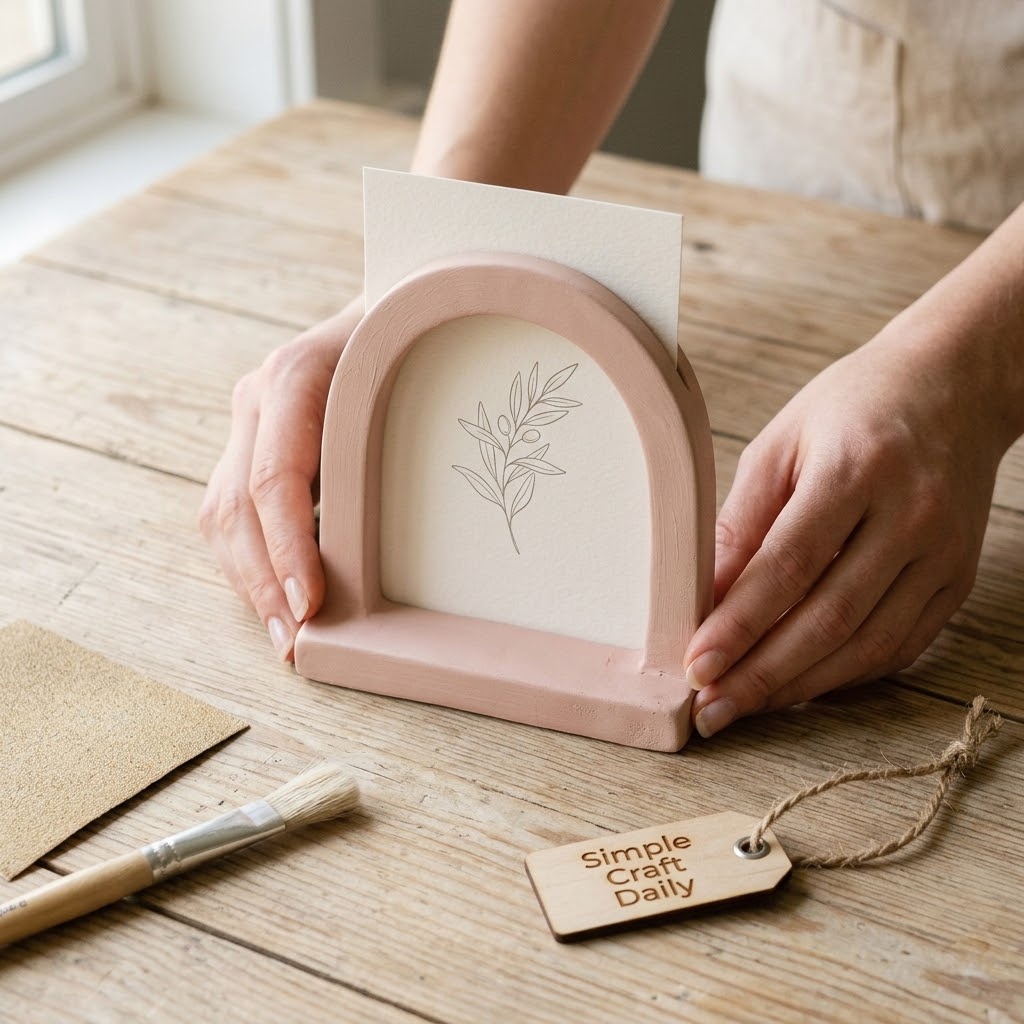
8. Minimalist Arch Photo Holder
Supplies Needed: White Non-Toxic Air Dry Clay, Clay Sculpting Tool Set with Wooden Handles, Fine-Grit Sandpaper Assortment, ACMI AP-Certified Acrylic Paint Set, Small Detail Paint Brushes, Water-Based Gloss and Matte Acrylic Varnish.
Quick Steps:
- First, form a broad arch base at least 8 cm wide, 2 cm deep, and 2 cm tall.
- Press the edge of a sculpting tool across the top to create a shallow groove about 3 mm deep.
- Test the groove with a lightweight paper photo or place card while the clay is soft, then remove the paper.
- Dry the piece flat for the first 12 hours.
- After that stage, stand it upright only if the broad base holds it securely without leaning.
- Allow a further 24 to 72 hours for complete drying.
- Subsequently, sand the groove and base, paint the arch, and apply two matte-varnish coats after the paint dries.
- Use it for paper items only, since heavy framed photos can tip the holder.
9. Monogram Gift Tags
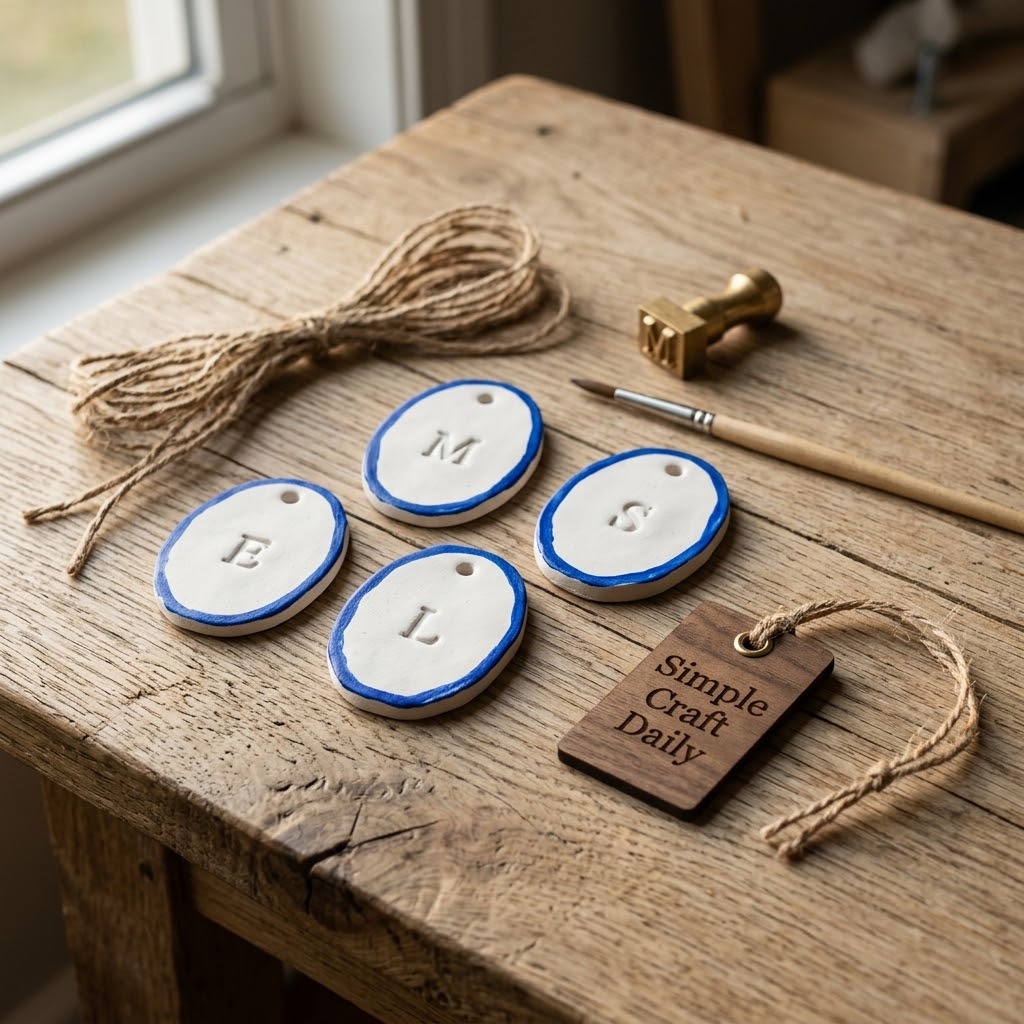
Supplies Needed: White Non-Toxic Air Dry Clay, Acrylic Clay Roller with Thickness Guide Rings, Clay Sculpting Tool Set with Wooden Handles, Jute Twine and Small Brass Screw Eyes, ACMI AP-Certified Acrylic Paint Set, Small Detail Paint Brushes, Water-Based Gloss and Matte Acrylic Varnish.
Quick Steps:
- First, roll clay to 6 mm thick and cut tag shapes about 7 cm long with a craft knife.
- Use a pointed tool to carve or stamp an initial, then pierce one 4 mm hanging hole near the top.
- Smooth the hole edge so the jute will not fray against rough clay.
- Dry the tags flat for 24 to 72 hours.
- Next, paint a narrow border and the monogram, then let the paint dry for 1 hour before sealing.
- Once the sealer has cured, thread jute through each hole and tie a double knot.
- These tags add a handmade finish to wrapped gifts; for more present-making ideas, see these personalized clay gift ideas.
10. Terrazzo Jewelry Dish
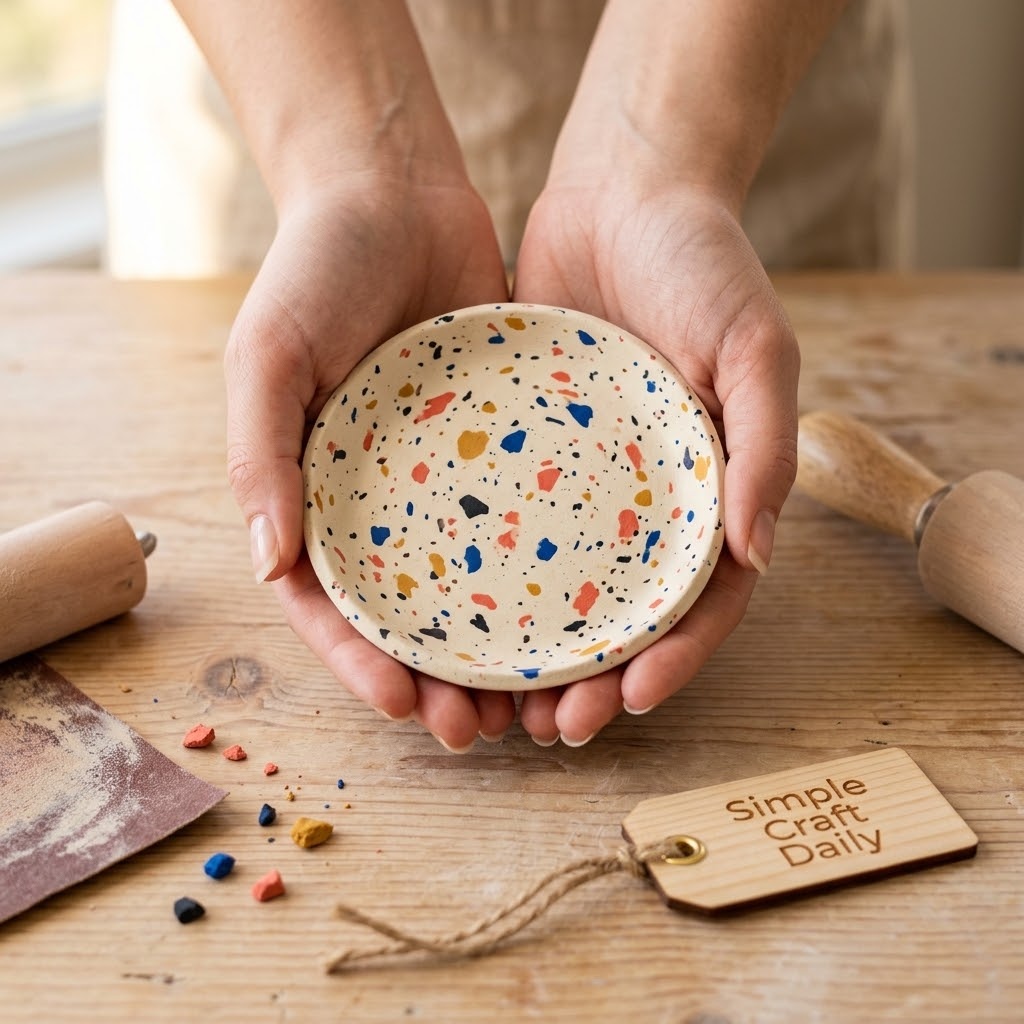
Supplies Needed: White Non-Toxic Air Dry Clay, ACMI AP-Certified Acrylic Paint Set, Small Detail Paint Brushes, Acrylic Clay Roller with Thickness Guide Rings, Clay Sculpting Tool Set with Wooden Handles, Fine-Grit Sandpaper Assortment, Water-Based Gloss and Matte Acrylic Varnish.
Quick Steps:
- First, paint a few pea-sized scraps of clay in three colors and let them dry completely for 24 to 72 hours.
- Break the dry scraps into crumbs about 2 to 5 mm wide.
- Knead a small handful of these dry fragments into fresh white clay, using only enough pressure to distribute them without crushing the flecks.
- Next, roll the terrazzo clay to 6 mm thick, cut a 12 cm circle with a clay cutter, and lift the rim about 1 cm.
- Dry the dish flat for 24 to 72 hours.
- Then sand the surface very lightly with 400-grit paper to reveal crisp colored flecks.
- Brush away dust and add two thin gloss-varnish coats.
- The dry-clay fragments give these dishes a true terrazzo look that wet paint swirls cannot match.
11. Mushroom Miniatures
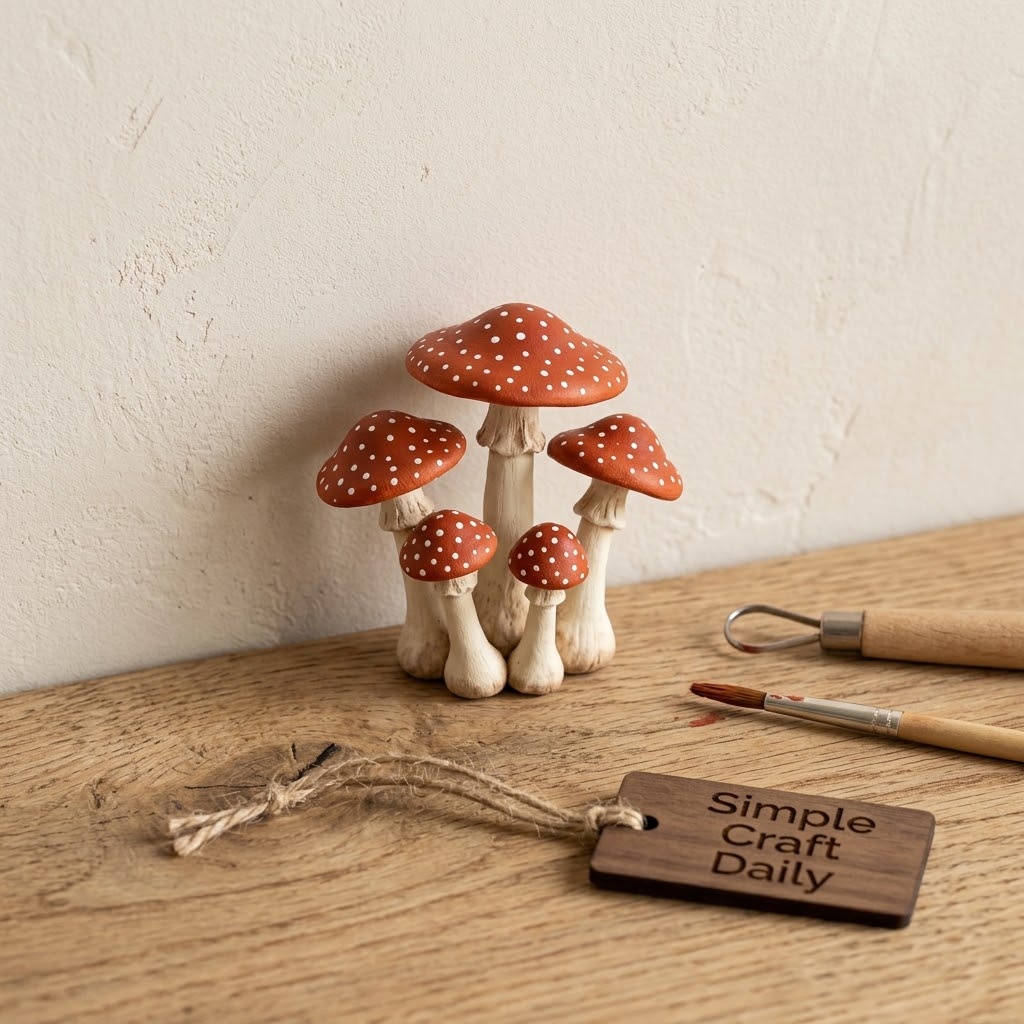
Supplies Needed: White Non-Toxic Air Dry Clay, Clay Sculpting Tool Set with Wooden Handles, ACMI AP-Certified Acrylic Paint Set, Small Detail Paint Brushes, Water-Based Gloss and Matte Acrylic Varnish.
Quick Steps:
- First, shape a short stem with a broad base and a separate rounded cap about 3 cm wide.
- Scratch crosshatch marks into both joining surfaces with the pointed sculpting tool.
- Make clay slip by mixing a pea-sized pinch of the same clay with a few drops of water until it becomes a thick paste.
- Brush slip over the scored areas, press the cap onto the stem, and blend the seam with a smoother.
- Next, dry the mushrooms upright on their broad stem bases for 24 to 72 hours.
- Paint the caps, add small dots with a detail brush, and let the paint dry for 1 hour before adding matte varnish.
- Keep each figurine indoors, where its small form stays dry and protected.
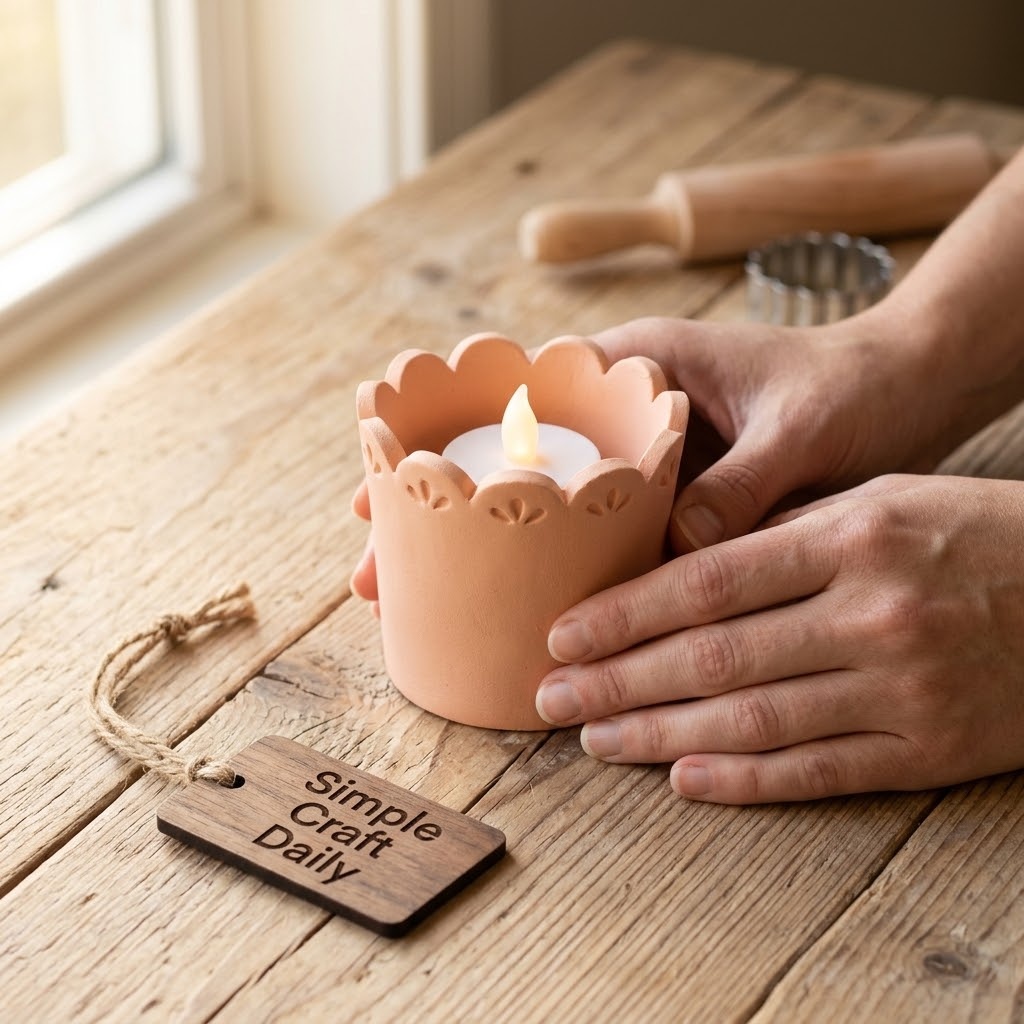
12. Scalloped Tea Light Holder
Supplies Needed: White Non-Toxic Air Dry Clay, Acrylic Clay Roller with Thickness Guide Rings, Clay Sculpting Tool Set with Wooden Handles, Smooth Plastic Bowls and Cups, ACMI AP-Certified Acrylic Paint Set, Small Detail Paint Brushes, Water-Based Gloss and Matte Acrylic Varnish, Battery-Operated Tea Lights.
Quick Steps:
- First, roll a 6 mm slab and cut a 3 cm tall strip with a craft knife, long enough to wrap around a removable smooth-sided form.
- Shape small scallops along one edge with a rounded sculpting tool.
- Score both short ends, add clay slip, and press them together around the form.
- Let the sleeve sit around the form until leather-hard, usually 3 to 6 hours.
- Then remove the form and dry the sleeve for 24 to 72 hours.
- Paint and seal after complete drying.
- Use this holder with a battery-operated tea light only.
- Air dry clay is not kiln-fired, heat-rated, or suitable for open flames, hot wax, or real candles.
13. Leaf-Imprint Ornaments
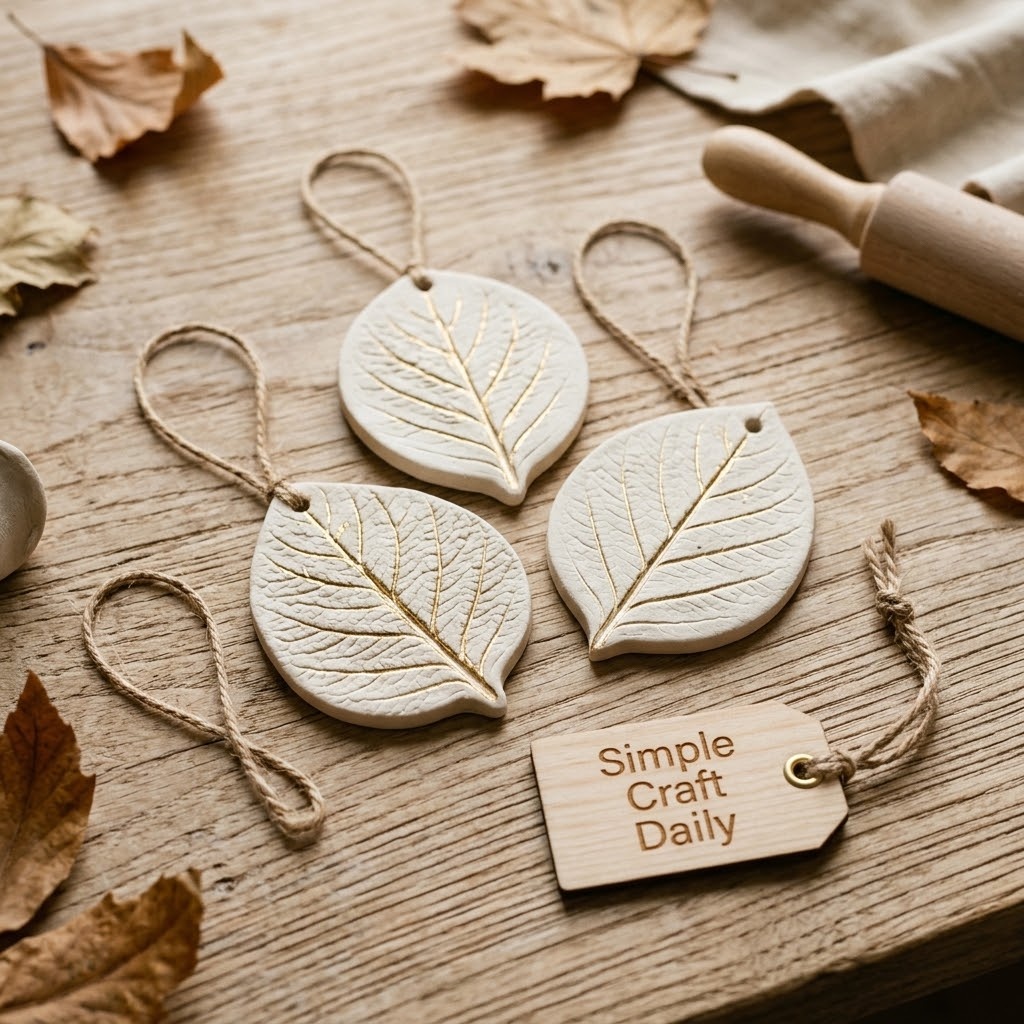
Supplies Needed: White Non-Toxic Air Dry Clay, Acrylic Clay Roller with Thickness Guide Rings, Clay Sculpting Tool Set with Wooden Handles, Clean Dry Leaves, Gold Leaf Foil Flakes with Foil Adhesive, Jute Twine and Small Brass Screw Eyes, Water-Based Gloss and Matte Acrylic Varnish, Plain Paper and Unprinted Cardboard.
Quick Steps:
- First, roll clay near 6 mm thick, press a clean dry leaf into the surface, and cut around it with a craft knife.
- Remove the leaf, then pierce a 4 mm hanging hole.
- Dry the ornaments flat on paper for 24 to 72 hours and turn them once after the first 12 to 24 hours.
- After drying, seal the ornaments with a thin varnish coat and allow it to cure as directed.
- Next, apply foil adhesive to a narrow dry area, wait for the tack time specified on the adhesive label, and press on small gold-foil flakes.
- Apply a protective topcoat if the adhesive maker permits it.
- Finally, thread jute through the hole or add a small brass screw eye.
- These ornaments look especially good on wrapped gifts or seasonal branches.
14. Cloud Wall Hooks
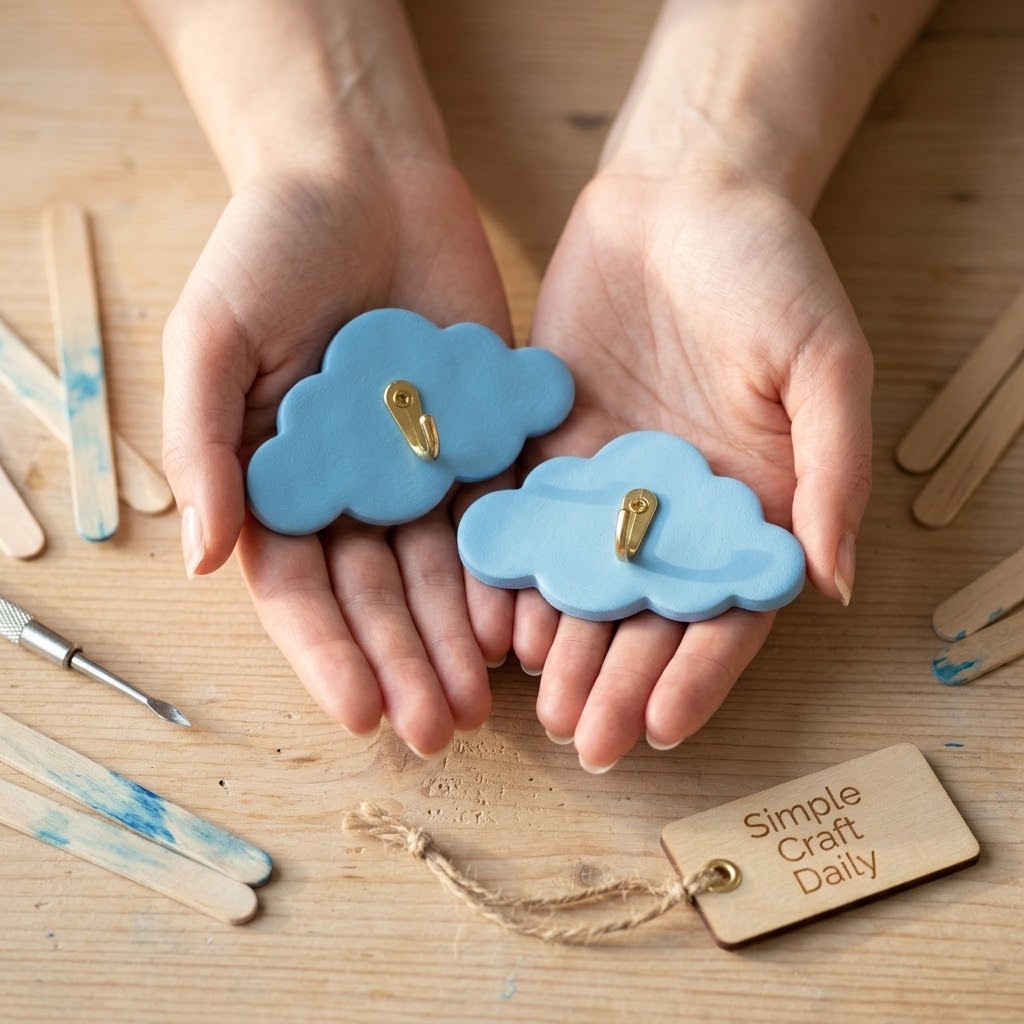
Supplies Needed: White Non-Toxic Air Dry Clay, Acrylic Clay Roller with Thickness Guide Rings, Clay Sculpting Tool Set with Wooden Handles, Two-Part Clear Epoxy Adhesive, Small Metal Wall Hooks, ACMI AP-Certified Acrylic Paint Set, Small Detail Paint Brushes, Water-Based Gloss and Matte Acrylic Varnish.
Quick Steps:
- First, roll a 6 mm slab and cut cloud shapes about 10 cm wide with a craft knife.
- Use a sculpting tool to make a shallow recessed area on the back where lightweight adhesive hook hardware will sit later.
- Keep the plaque flat while drying for 24 to 72 hours.
- Paint the front, let the paint dry for 1 hour, and seal it if desired.
- Once both clay and sealer are fully cured, mix the two-part epoxy and apply a small amount inside the recessed back area.
- Next, press lightweight hook hardware into the epoxy and allow 24 hours of undisturbed cure time.
- These are decorative hooks for very light items such as a note, ribbon, or empty lanyard; do not hang heavy bags, coats, or breakable objects.
15. Marbled Pen Cup
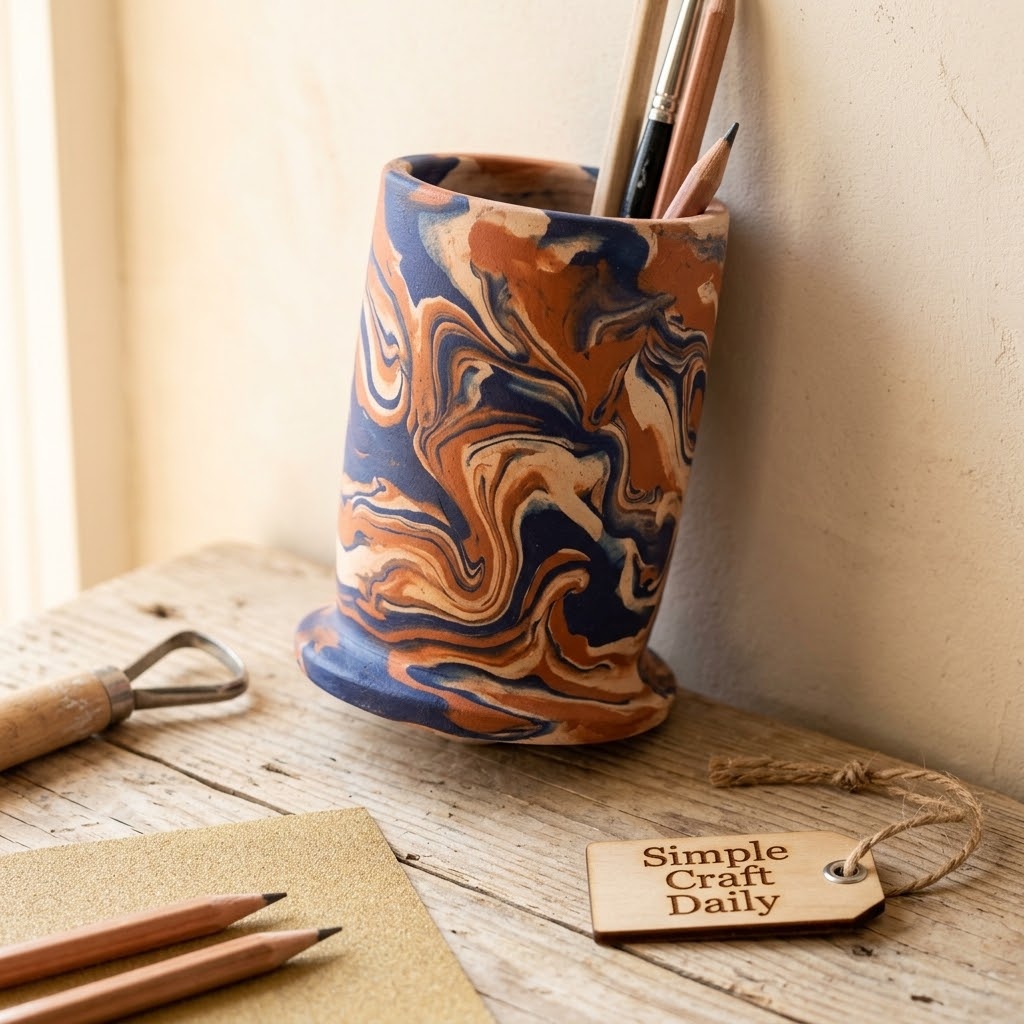
Supplies Needed: White Non-Toxic Air Dry Clay, ACMI AP-Certified Acrylic Paint Set, Clay Sculpting Tool Set with Wooden Handles, Smooth Plastic Bowls and Cups, Fine-Grit Sandpaper Assortment, Water-Based Gloss and Matte Acrylic Varnish, Small Detail Paint Brushes.
Quick Steps:
- First, mix a tiny amount of acrylic paint into two small clay portions, leaving most of the clay white.
- Twist the colored and white portions together only three or four times to keep visible marbling.
- Roll thick coils about 12 mm wide and stack them around a removable smooth-sided form.
- Press each coil into the one below it, then smooth exterior seams with a sculpting tool.
- Keep the walls between 6 and 8 mm thick.
- Leave the cup around the form until it can support itself, then remove the form and dry slowly for 24 to 72 hours.
- Subsequently, sand rough spots with 400-grit paper and apply matte varnish.
- Use this pen cup for dry desk supplies only.
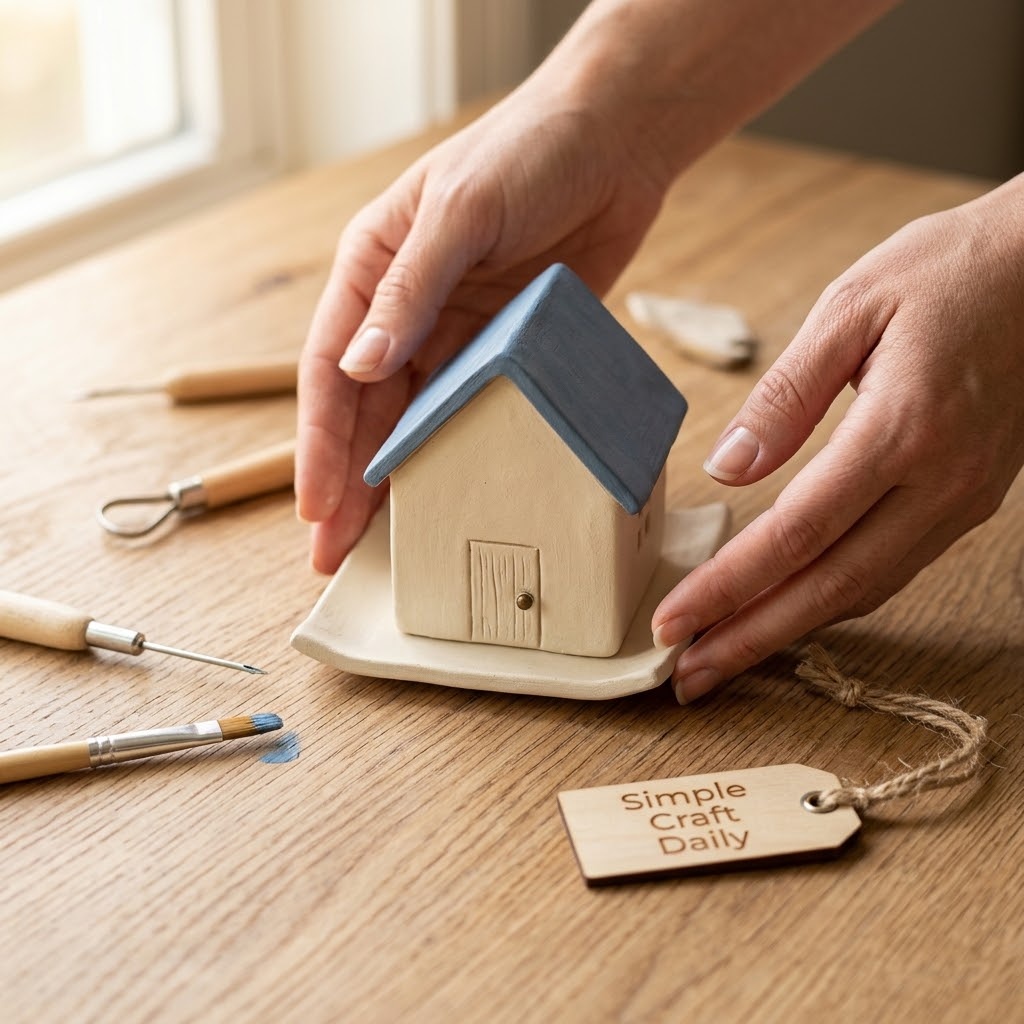
16. Tiny House Unlit Incense Cone Storage Dish
Supplies Needed: White Non-Toxic Air Dry Clay, Clay Sculpting Tool Set with Wooden Handles, ACMI AP-Certified Acrylic Paint Set, Small Detail Paint Brushes, Water-Based Gloss and Matte Acrylic Varnish, Battery-Operated Tea Lights.
Quick Steps:
- First, cut a small rectangular base about 8 cm by 6 cm with a craft knife.
- Form four low walls and a pitched roof from separate clay pieces.
- Score every joining edge with a pointed tool, brush on clay slip, and press the walls and roof together.
- Carve a tiny door and two windows before the clay firms up.
- Dry the house on its base for 24 to 72 hours, then paint the details and apply matte varnish.
- This is a decorative dish for storing unlit incense cones or displaying a battery-operated tea light beside it.
- Do not burn incense cones on or inside air dry clay.
- Heat can weaken the clay and creates an unnecessary fire risk.
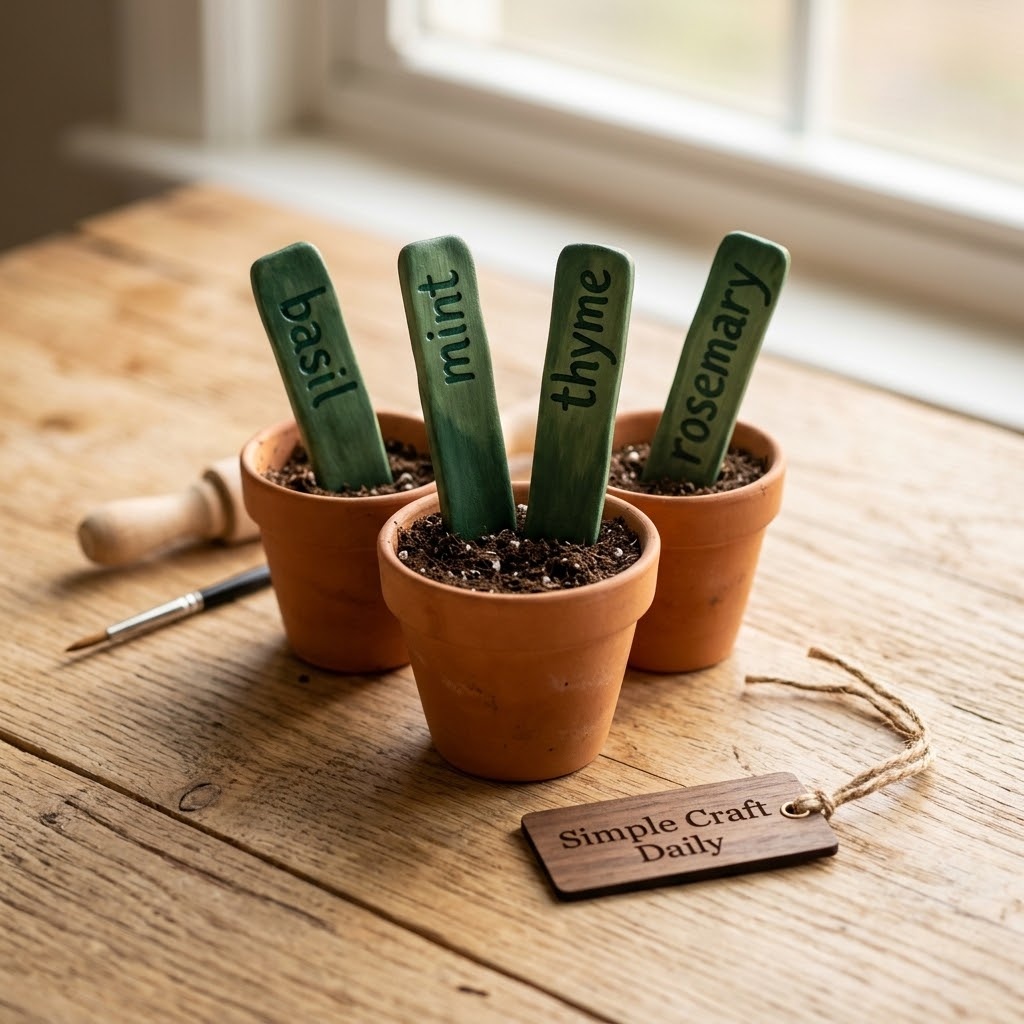
17. Painted Herb Markers
Supplies Needed: White Non-Toxic Air Dry Clay, Acrylic Clay Roller with Thickness Guide Rings, Clay Sculpting Tool Set with Wooden Handles, ACMI AP-Certified Acrylic Paint Set, Small Detail Paint Brushes, Water-Based Gloss and Matte Acrylic Varnish, Plain Paper and Unprinted Cardboard.
Quick Steps:
- First, roll clay to 6 mm thick and cut markers measuring 3 cm by 12 cm with a craft knife.
- Round the top corners, taper the lower end slightly, and carve herb names such as basil, mint, or thyme with a pointed tool.
- Dry the markers flat on a paper barrier for 24 to 72 hours, turning them once after the first 12 to 24 hours.
- Next, paint the carved letters with a detail brush after the clay has dried.
- Let the paint dry for 1 hour, then seal both sides and every edge with two thin coats of water-based varnish.
- Allow the final coat to cure fully before placing markers in indoor decorative pots.
- These markers tolerate light room humidity, but they should not sit in wet outdoor soil.
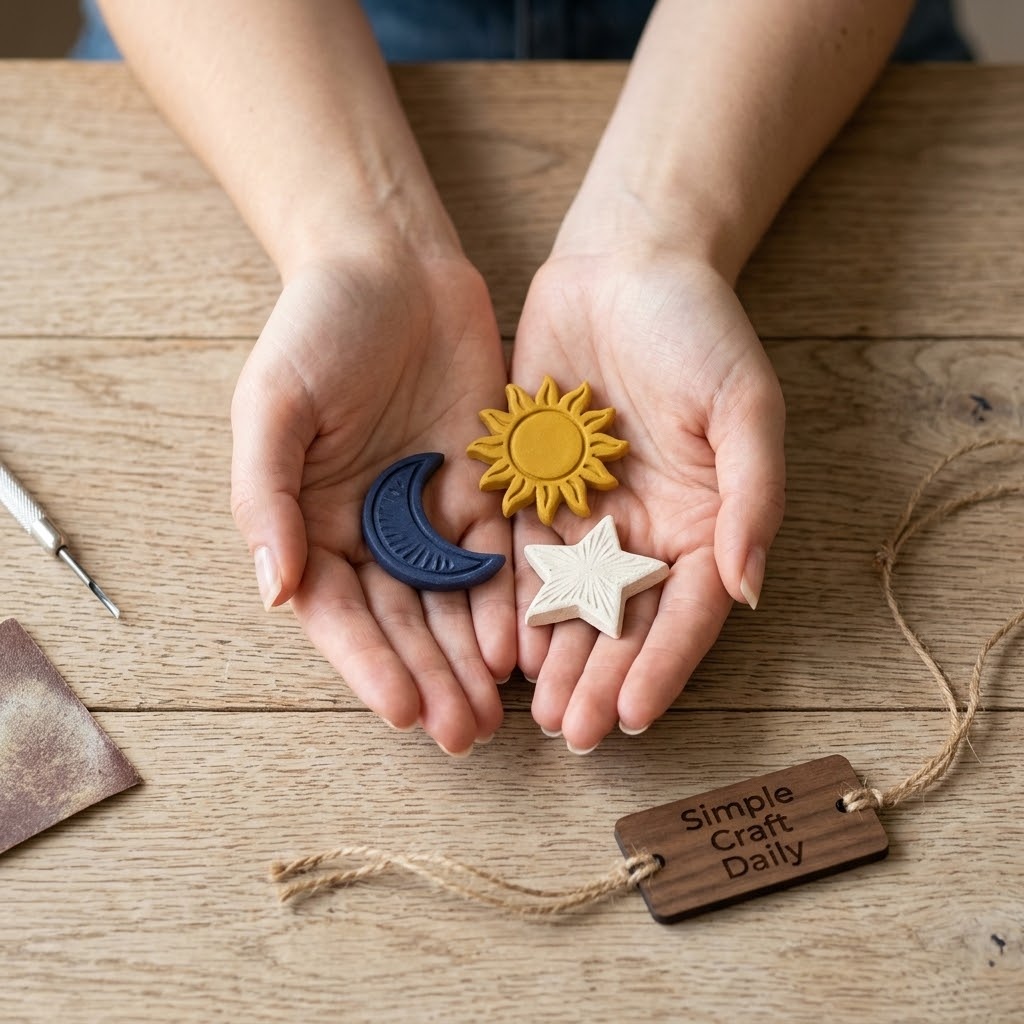
18. Celestial Pocket Tokens
Supplies Needed: White Non-Toxic Air Dry Clay, Clay Sculpting Tool Set with Wooden Handles, Plain Paper and Unprinted Cardboard, Fine-Grit Sandpaper Assortment, ACMI AP-Certified Acrylic Paint Set, Small Detail Paint Brushes, Water-Based Gloss and Matte Acrylic Varnish.
Quick Steps:
- First, roll clay to 6 mm thick and cut moon, sun, and star shapes about 5 cm wide along hand-cut plain-paper templates with a craft knife.
- Carve a short word such as “rest,” “brave,” or “home” with a pointed sculpting tool.
- Keep carved lines shallow so the token remains sturdy.
- Dry flat for 24 to 72 hours.
- Once fully dry, sand the perimeter gently with 400-grit paper to retain sharp carving.
- Next, paint only the recessed letters or add a wash of diluted acrylic paint, then wipe the raised surface with a barely damp cloth.
- After the paint dries for 1 hour, apply a gloss-varnish coat for a smooth pocket-friendly finish.
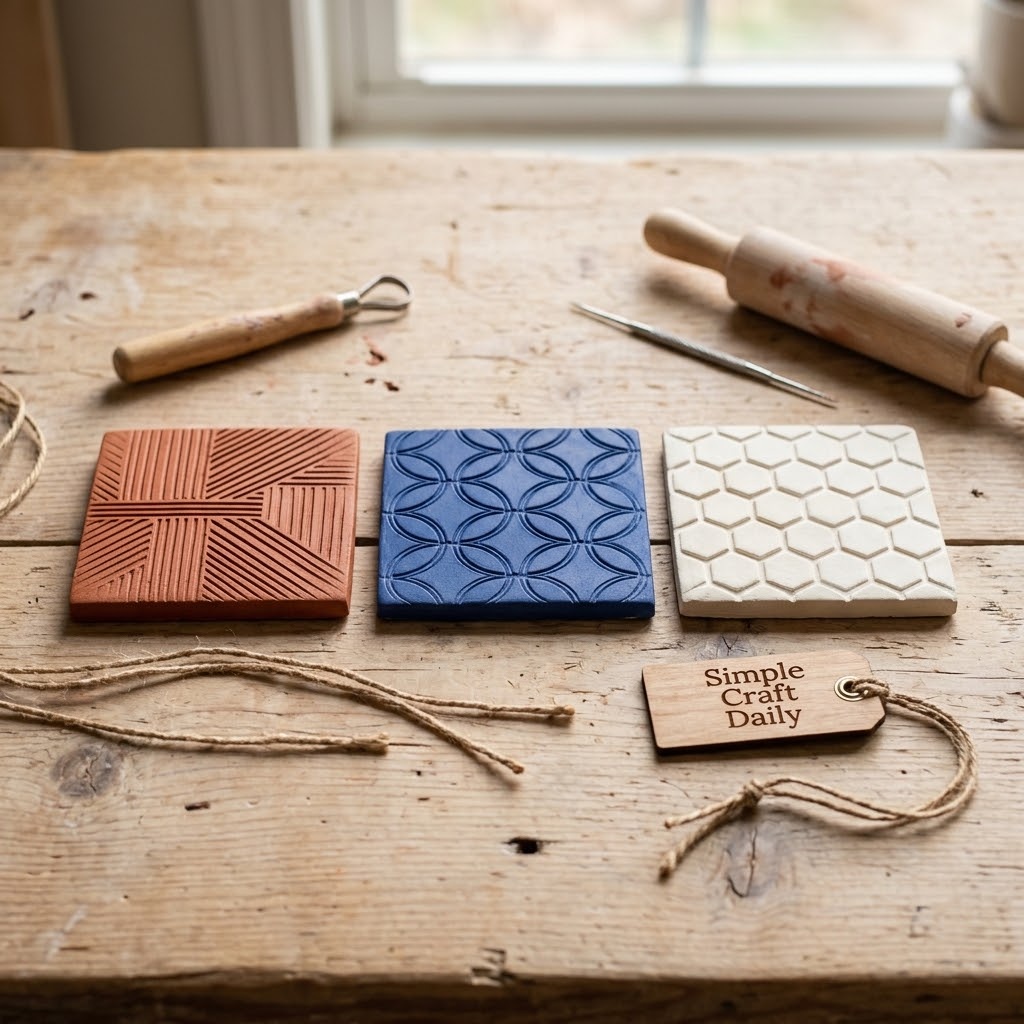
19. Textured Wall Tiles
Supplies Needed: White Non-Toxic Air Dry Clay, Acrylic Clay Roller with Thickness Guide Rings, Clay Sculpting Tool Set with Wooden Handles, Plain Paper and Unprinted Cardboard, ACMI AP-Certified Acrylic Paint Set, Small Detail Paint Brushes, Water-Based Gloss and Matte Acrylic Varnish, Jute Twine and Small Brass Screw Eyes.
Quick Steps:
- First, roll a 6 mm slab and cut three 10 cm squares with a craft knife.
- Use sculpting tools to press different geometric patterns into each tile: lines, dots, shallow arcs, or small checker marks.
- Pierce two 3 mm holes near the top edge of every tile while the clay remains soft.
- Dry the tiles flat between breathable sheets of plain paper and flip them once after 12 to 24 hours.
- After 24 to 72 hours of drying, paint the textures and allow the paint to dry for 1 hour.
- Then seal the tiles, let the sealer cure fully, and thread jute through the holes or add small brass screw eyes.
- Mount only after every finish layer has cured, and use secure wall hardware rated for the display location.
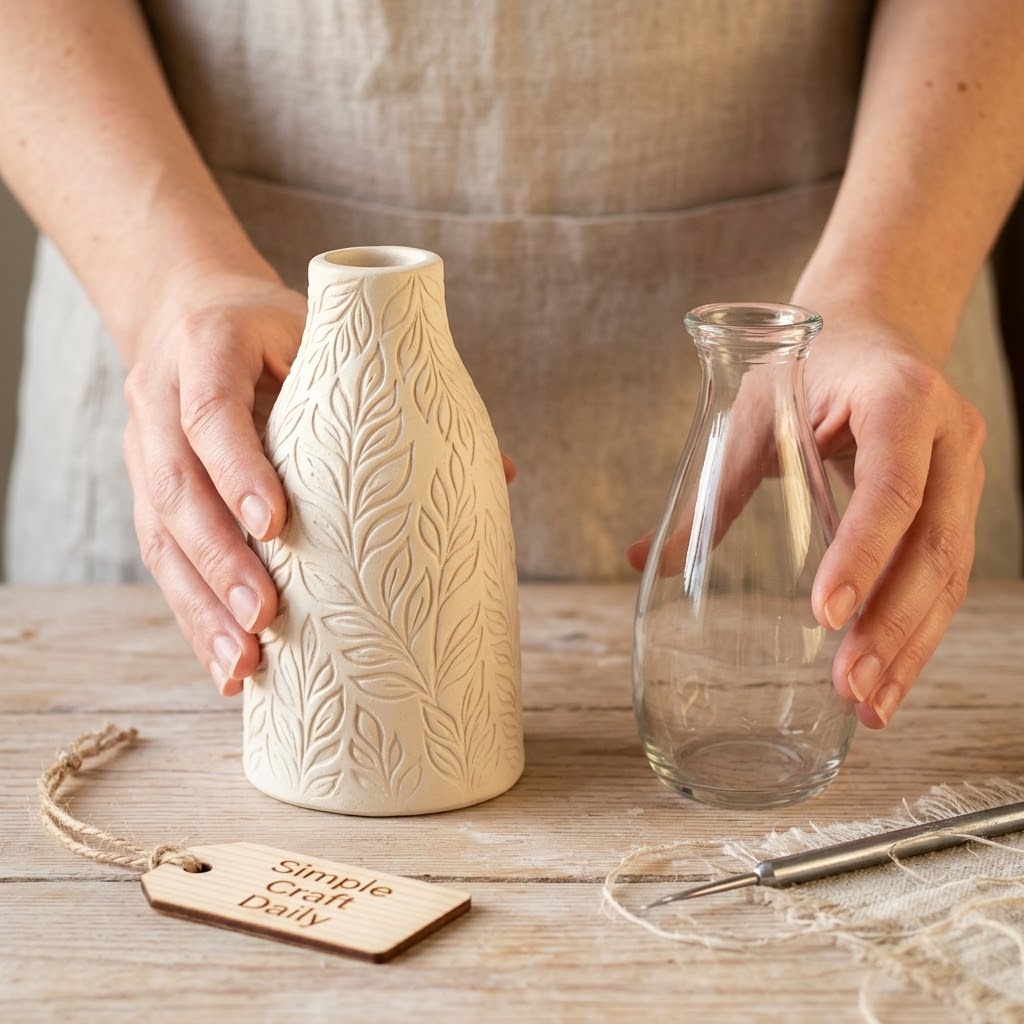
20. Hand-Built Bud Vase Cover
Supplies Needed: White Non-Toxic Air Dry Clay, Clay Sculpting Tool Set with Wooden Handles, Small Glass Bud Vase Inserts, Plain Paper and Unprinted Cardboard, Fine-Grit Sandpaper Assortment, ACMI AP-Certified Acrylic Paint Set, Small Detail Paint Brushes, Water-Based Gloss and Matte Acrylic Varnish.
Quick Steps:
- First, choose a removable glass bud vase and wrap it in a smooth paper barrier so clay does not stick.
- Roll or coil clay around the protected glass, keeping the sleeve about 6 to 8 mm thick.
- Smooth the outside seams with a sculpting tool and keep the top edge below the glass rim.
- Allow the sleeve to firm for 3 to 6 hours, then carefully remove the glass insert.
- Next, dry the clay sleeve alone for 24 to 72 hours.
- Sand the base and rim, paint the exterior, and seal it with two thin varnish coats.
- Return the glass insert only after the clay and varnish are fully dry.
- The clay cover is decorative and must never directly hold water.
Easy Air Dry Clay Crafts FAQ
How long do easy air dry clay crafts need to dry?
Most easy air dry clay crafts dry within 24 to 72 hours, although a thick cup, layered figurine, or humid room can extend that window. A piece is ready to sand when it feels uniformly dry and no longer cool in the center. Do not use a household oven unless the clay manufacturer explicitly permits oven drying for that exact product.
Why are my air dry clay ideas for beginners cracking?
Cracks usually come from uneven thickness, fast drying, or weak joins. Keep slabs near 6 mm thick and turn flat pieces once during drying. For attached parts, score both surfaces with crosshatch marks, brush on clay slip made from clay and a few drops of water, then press and smooth the join. Consequently, the score-and-slip method gives the damp pieces a stronger mechanical bond as they dry.
Can I make easy air dry clay crafts waterproof?
Water-based acrylic varnish adds light moisture resistance, yet it does not make air dry clay waterproof, dishwasher-safe, or food-safe. Use a glass insert for bud vases and a removable liner for decorative planters. Instead, wipe sealed pieces with a dry or barely damp cloth rather than soaking them.
Can air dry clay hold a real candle flame?
No. Air dry clay is not kiln-fired or heat-rated, so real flames, hot wax, and burning incense can create heat and fire hazards. Use battery-operated tea lights for clay candle-holder shapes, and keep decorative clay well away from heaters, stovetops, and open flames.
Important Crafting Safety Notes
Crafting is a rewarding creative activity, but maintaining a safe workshop environment is essential for yourself, your family, and your pets. Please review these vital safety precautions before starting:
• Personal Protective Equipment (PPE) & Safe Handling: Always wear a particle dust mask when sanding air dry clay, and damp-wipe finished pieces instead of blowing dust into the air. Cut rolled slabs with the craft knife or clay cutters from the supply list — always cut away from your fingers on the silicone mat, and put blades back in a latching case right after use.
• Room Ventilation & Fume Safety: Mix and apply the two-part epoxy strictly according to its label, in a ventilated room with an open window, and let pieces off-gas in an airy spot away from living areas before display. Follow the varnish label for drying times, recoat gaps, and disposal.
• Child & Pet Safety (Choking & Swallowing Prevention): Small neodymium magnets, brass screw eyes, adhesive hooks, and tiny clay scraps are choking and ingestion hazards for babies, toddlers, and pets — swallowed magnets can be life-threatening. Keep all small hardware and clay offcuts out of reach, and leave magnet-backed pieces out of nursery and playroom gifts.
• Sharp Tool Storage & Clean Work Area: Store the craft knife, clay cutters, and any scissors in a latching case or high cabinet immediately after use. Sweep or vacuum the work surface and floor when you finish so no blade or clay shard is left where bare feet or pets could step on it.
• Certified, Quality & Non-Toxic Supplies: Choose verified non-toxic supplies such as the ACMI AP-certified acrylic paint listed above, and follow every product label for curing and disposal. Air dry clay is not heat-rated: never set real flames, hot wax, or burning incense on or inside these pieces — battery-operated tea lights only.
For more detailed guidance on safe crafting practices, liability disclosures, and website usage, please review our Terms and Conditions.
“Which of these Air Dry Clay Crafts You Will Love ideas are you excited to try first, or do you have a creative tip of your own to share? Drop a comment below—I’d love to hear your thoughts and see what you create!”


