

Polymer clay is a highly versatile medium that allows crafters of all skill levels to create stunning, durable pieces. Taking the time to personalize an item adds a bespoke touch that mass-produced goods simply cannot match. With proper conditioning, precise cutting, and the right finishing techniques, you can elevate simple raw clay into sophisticated, high-end gifts. Below, we have curated ten personalized polymer clay gifts that look like they came straight from a boutique.
This post contains affiliate links. As an Amazon Associate, I earn from qualifying purchases. If you buy through these links, I may earn a commission at no additional cost to you.
Key Facts:
- Technique: Personalized Polymer Clay Gifts
- Extra baking time: 20 minutes
- Makes: 10 project ideas
Essential Supplies for Personalized Polymer Clay Gifts
| Supply | Spec / Size | Used For |
|---|---|---|
| Premium Polymer Clay (White, Terracotta, Granite, Black, Beige) | High-quality brands like Sculpey Premo or Fimo hold fine details and… | |
| Acrylic Rolling Pin or Clay Roller | 3 mm | Essential for conditioning clay and rolling perfectly even 3 mm… |
| Flexible Tissue Blade & Craft Knife | Makes clean, straight cuts without dragging or squishing the raw clay | |
| Ceramic Baking Tile | Baking directly on a ceramic tile prevents the shiny spots that metal… | |
| Fine-Grit Sandpaper Blocks (400-600 Grit) | Smooths cured polymer clay to a flawless, satin-soft boutique finish | |
| Matte Clear Sealant | Protects painted accents and raw clay textures without adding… |
Before starting these projects, you will need a reliable toolkit. These core supplies ensure your clay bakes evenly and finishes with a professional texture.
- Premium Polymer Clay (White, Terracotta, Granite, Black, Beige) (used throughout): High-quality brands like Sculpey Premo or Fimo hold fine details and resist cracking after baking |
Check Premium Polymer Clay price on Amazon - Acrylic Rolling Pin or Clay Roller (used throughout): Essential for conditioning clay and rolling perfectly even 3 mm (1/8-inch) slabs | Check Acrylic Rolling Pin price on Amazon
- Flexible Tissue Blade & Craft Knife (used throughout): Makes clean, straight cuts without dragging or squishing the raw clay |
Check Flexible Tissue Blade price on Amazon - Ceramic Baking Tile (used throughout): Baking directly on a ceramic tile prevents the shiny spots that metal baking sheets cause |
Check Ceramic Baking Tile price on Amazon - Fine-Grit Sandpaper Blocks (400-600 Grit) (used throughout): Smooths cured polymer clay to a flawless, satin-soft boutique finish | Check Fine-Grit Sandpaper Blocks price on Amazon
- Matte Clear Sealant (used throughout): Protects painted accents and raw clay textures without adding unwanted gloss |
Check Matte Clear Sealant price on Amazon - Alphabet & Number Metal Stamps: Used for stamping monograms, custom dates, and coordinates into raw clay |
Check Metal Stamps price on Amazon - Liquid Gold Leaf Paint: Elevates marble edges and botanical details with a high-end metallic finish |
Check Liquid Gold Leaf price on Amazon - Gloss Varnish: Adds a realistic wet shine to pet miniature eyes and cured resin-like surfaces |
Check Gloss Varnish price on Amazon - Fine Detail Paintbrush: Applies small painted accents like whiskers and gold leaf borders |
Check Fine Detail Paintbrush price on Amazon - Two-Part Epoxy Resin: The only industrial adhesive strong enough to permanently bond baked clay to metal hair clips |
Check Two-Part Epoxy price on Amazon - Gold-Plated Earring Jump Rings & Posts: Premium nickel-free hardware for assembling minimal arch earrings |
Check Earring Hardware price on Amazon - Manual Pin Vise Hand Drill: Drills clean, precise holes into baked clay for jewelry jump rings |
Check Manual Pin Vise price on Amazon - Brass Keyring Hardware: Sturdy split rings for leather-look clay keychains |
Check Brass Keyring Hardware price on Amazon
10 Personalized Polymer Clay Gift Ideas
1. Monogrammed Marbled Coasters
- Condition 20g each of three contrasting clay colors.
- Roll each into a 10 cm snake, twist them together, and fold repeatedly until a natural marbled pattern forms.
- Roll the mixed clay into a flat 6 mm (1/4-inch) slab and cut it using a 10 cm circular cookie cutter.
- Press a brass alphabet stamp firmly into the center.
- Bake according to package directions.
- Cool, paint the outer rim with liquid gold leaf and seal the top surface with gloss varnish to protect against condensation.
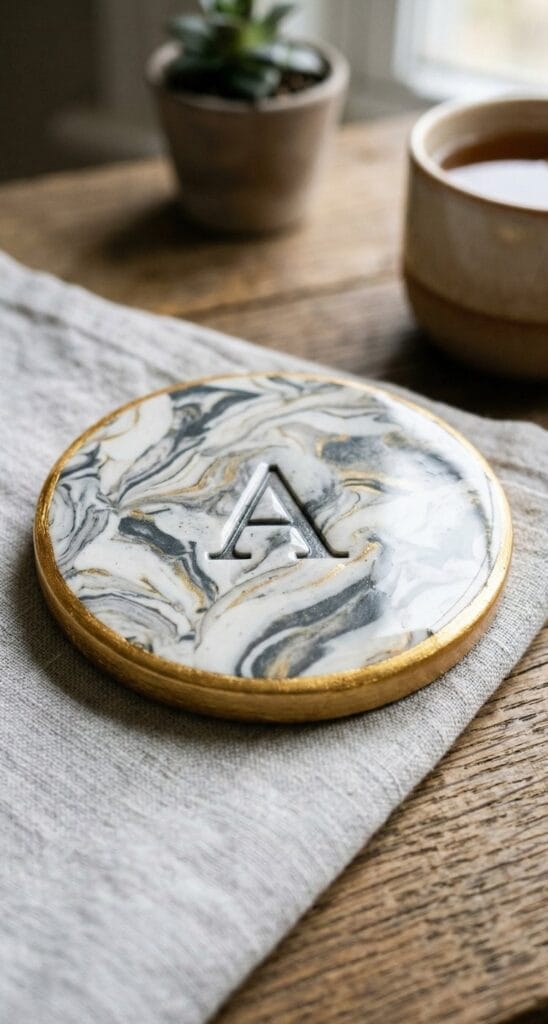
Supplies Needed: Premium Polymer Clay, Acrylic Rolling Pin, Ceramic Baking Tile, Alphabet & Number Metal Stamps, Liquid Gold Leaf Paint, Fine Detail Paintbrush, Gloss Varnish.
The Concept: Marbling is a simple technique that yields sophisticated, stone-like results. Adding a custom alphabet stamp turns a standard coaster into the ultimate personalized gift.
Quick Steps: Condition 20g each of three contrasting clay colors. Roll each into a 10 cm snake, twist them together, and fold repeatedly until a natural marbled pattern forms. Roll the mixed clay into a flat 6 mm (1/4-inch) slab and cut it using a 10 cm circular cookie cutter. Press a brass alphabet stamp firmly into the center. Bake according to package directions. Once cool, paint the outer rim with liquid gold leaf and seal the top surface with gloss varnish to protect against condensation.
2. Custom Pet Miniatures
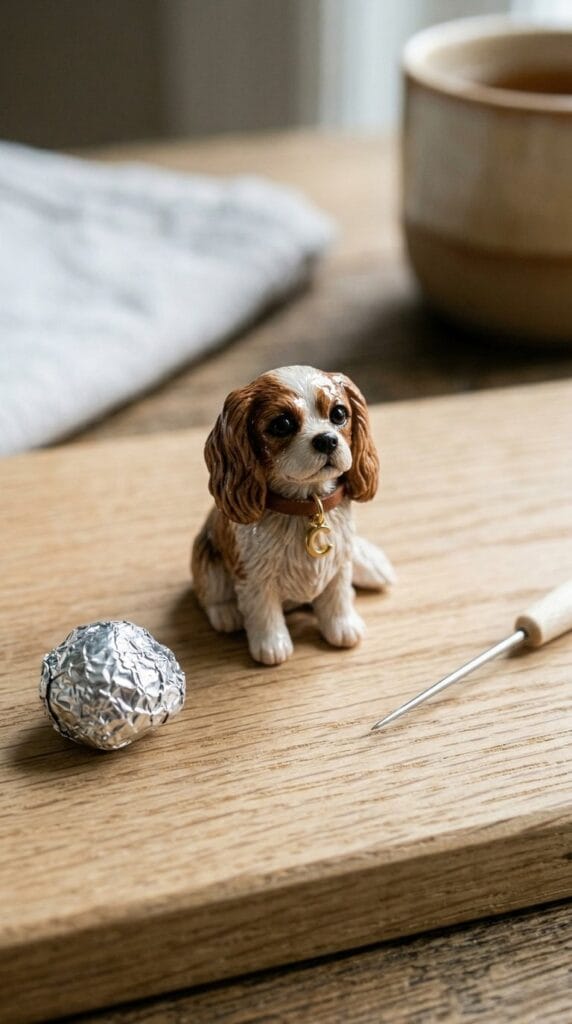
Supplies Needed: Premium Polymer Clay, Ceramic Baking Tile, Fine-Grit Sandpaper Blocks, Gloss Varnish, Fine Detail Paintbrush. (Additional: Aluminum foil core, needle tool).
The Concept: For the animal lover in your life, a tiny 4 cm sculpture of their beloved pet is an unforgettable keepsake. Tailor the piece by replicating their pet’s exact collar or adding a miniature version of their favorite toy to the base.
Quick Steps: Crumple a small piece of aluminum foil into an oval to act as a supportive core. This prevents thick clay sections from cracking in the oven. Cover the foil core with a 3 mm layer of base-colored clay. Attach smaller rolled shapes for the snout, legs, and ears. Drag a fine needle tool across the surface to carve realistic fur textures. Add tiny details like the nose and collar, bake, and finish by dabbing a drop of gloss varnish directly onto the eyes for a lifelike shine.
3. Stamped Jewelry Dishes
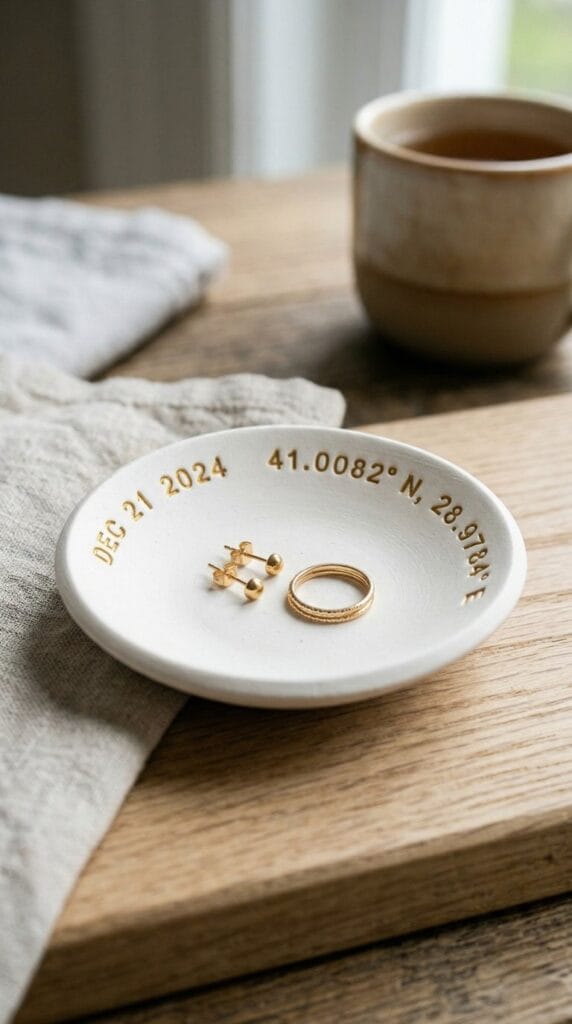
Supplies Needed: Premium Polymer Clay, Acrylic Rolling Pin, Flexible Tissue Blade, Ceramic Baking Tile, Alphabet & Number Metal Stamps. (Additional: Oven-safe glass bowl, optional mica powder).
The Concept: A catch-all dish for rings and earrings is highly practical. Dusting stamped indentations with mica powder before baking makes custom text pop beautifully against a matte clay background.
Quick Steps: Roll out a smooth slab of white or speckled clay to exactly 3 mm (1/8-inch) thick. Cut a perfect 12 cm circle using a craft blade. Press small metal letter stamps around the inner rim to spell out an important date, coordinates, or a meaningful quote. Drape the clay circle gently over the inverted back of an oven-safe glass bowl to take on a concave shape. Bake the clay directly on the bowl to set the curve permanently.
4. Faux Terrazzo Planters
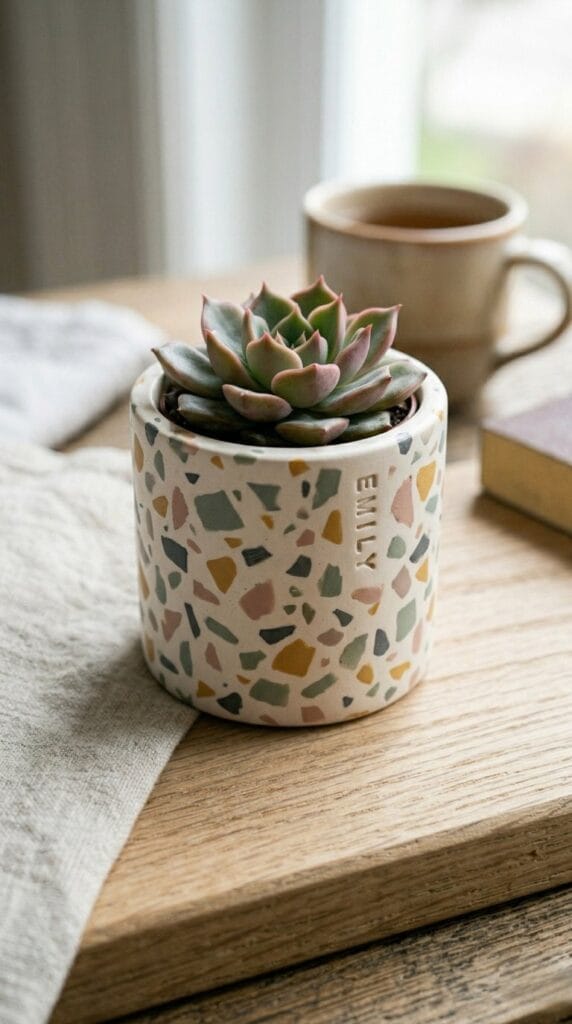
Supplies Needed: Premium Polymer Clay, Acrylic Rolling Pin, Flexible Tissue Blade, Ceramic Baking Tile, Fine-Grit Sandpaper Blocks. (Additional: Straight-sided oven-safe jar).
The Concept: Terrazzo is a major interior design trend that translates perfectly to polymer clay. You can tailor the embedded color palette to match the recipient’s specific home decor.
Quick Steps: Roll and bake paper-thin sheets of your chosen accent colors. Once cooled, chop these baked sheets into tiny, irregular chips using a craft knife. Condition 150g of a neutral base color (like cream or pale gray) and roll it into a 5 mm thick slab. Sprinkle the baked chips over the raw slab and press them flat into the surface with an acrylic roller. Wrap the terrazzo slab around a straight-sided, oven-safe glass jar, smooth the vertical seam with your fingers, and bake. Sand the cooled piece with 600-grit sandpaper for a flawless stone finish.
5. Architectural Bookends
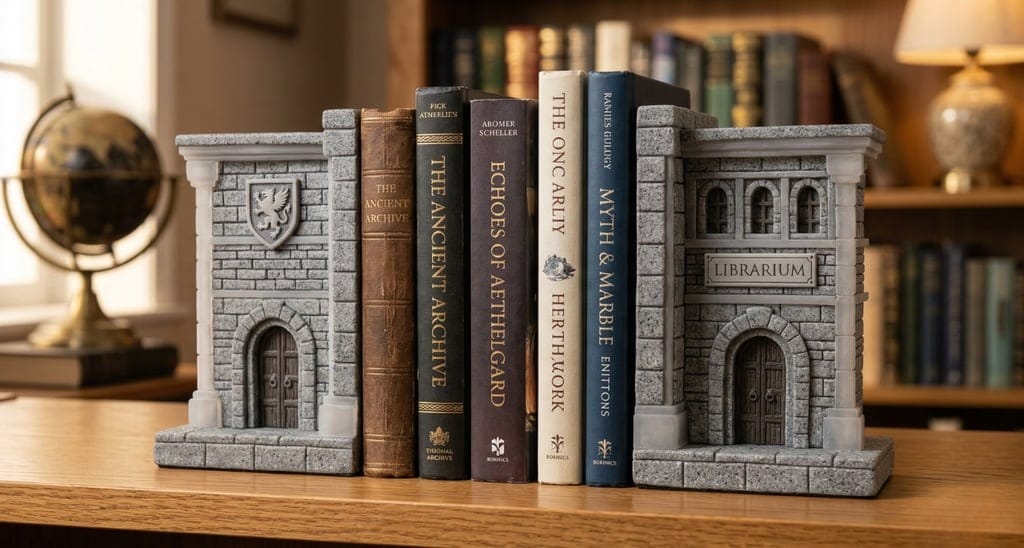
Supplies Needed: Premium Polymer Clay (Granite and Translucent), Acrylic Rolling Pin, Flexible Tissue Blade, Ceramic Baking Tile. (Additional: Solid wooden block or sand-filled tin for the heavy core).
The Concept: For the avid reader, heavy-duty bookends sculpted to look like their favorite city skyline or a fictional building make incredible personalized polymer clay gifts. Mixing translucent clay with granite-effect clay creates an authentic carved-stone aesthetic.
Quick Steps: Source a heavy, oven-safe core, such as a 10 cm x 15 cm solid wooden block or a sand-filled metal tin. Roll out your granite-effect clay to a 6 mm thickness and wrap it entirely around the heavy base, smoothing the corners. Cut out architectural details like windows and arches from thinner clay slabs and press them onto the front face. Carve brick textures into the surface using a dull craft knife. Bake the entire piece at 130°C (275°F), allowing an extra 20 minutes of baking time to account for the core’s thickness.
6. Leather-Look Keychains
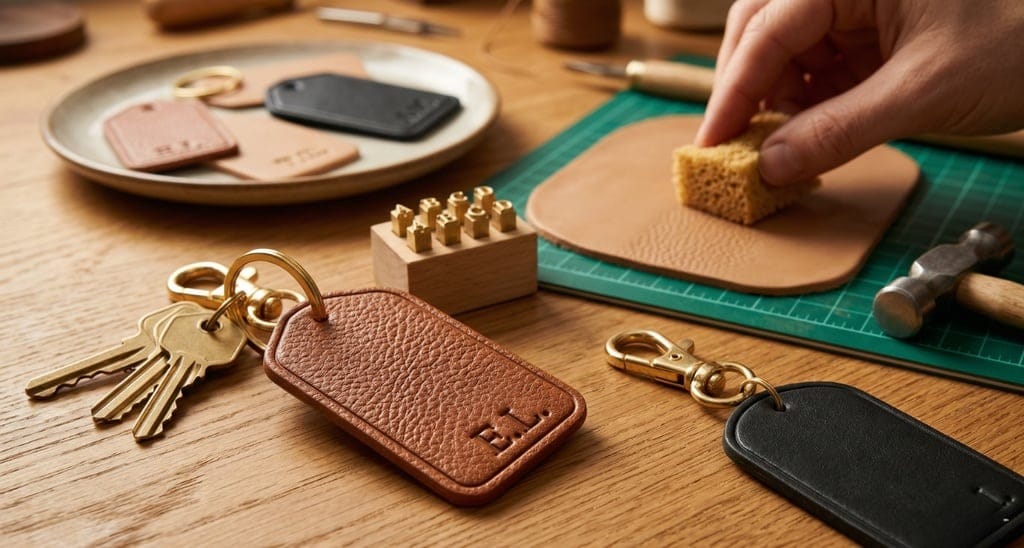
Supplies Needed: Premium Polymer Clay, Acrylic Rolling Pin, Alphabet & Number Metal Stamps, Ceramic Baking Tile, Brass Keyring Hardware. (Additional: Scrap leather or coarse sponge for texturing).
The Concept: With the right texture application, polymer clay easily passes for high-quality, full-grain leather. Blind-embossing initials and attaching premium brass hardware makes this a highly requested, functional gift. If you enjoy replicating natural textures, you should also explore our guide on leather scrap DIY ideas.
Quick Steps: Condition rich brown, tan, or black clay and roll it out into a 3 mm slab. Press a piece of scrap leather or a coarse sponge firmly into the raw clay to imprint a grainy texture. Cut the slab into a classic 3 cm x 8 cm luggage-tag shape. Poke a 4 mm hole at the top for the keychain ring. Press letter stamps firmly into the bottom corner. Bake, cool, and thread a brass keyring through the hole.
7. Minimalist Arch Earrings
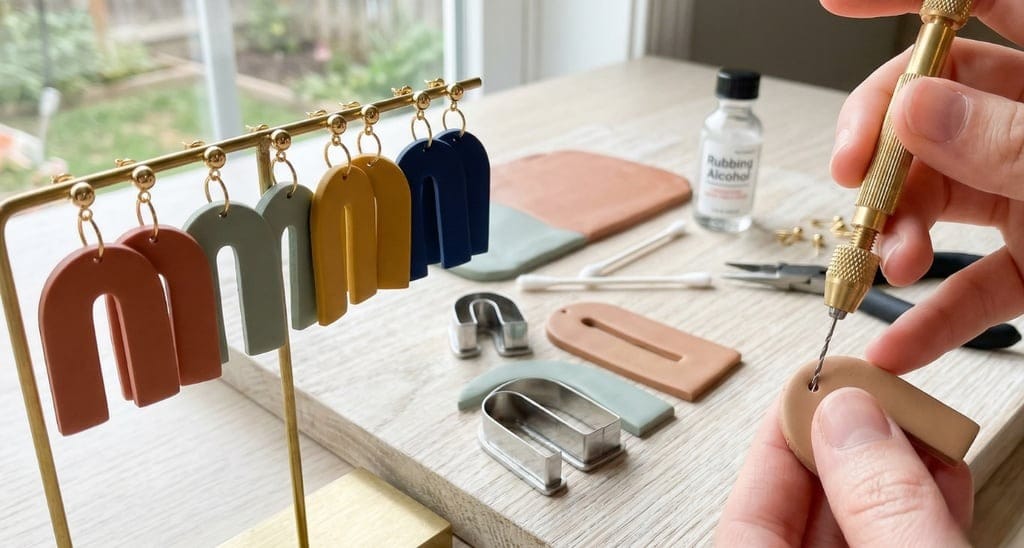
Supplies Needed: Premium Polymer Clay, Acrylic Rolling Pin, Ceramic Baking Tile, Manual Pin Vise Hand Drill, Gold-Plated Earring Jump Rings & Posts. (Additional: Arch-shaped clay cutters, rubbing alcohol, cotton swabs).
The Concept: The secret to professional boutique jewelry lies in the finishing. Mixing custom color palettes and ensuring perfectly beveled edges separates handmade art from amateur crafts.
Quick Steps: Roll out your custom-mixed color to a strict 3 mm (1/8-inch) thickness. Use arch-shaped metal clay cutters to punch out the pieces. Dip a cotton swab in rubbing alcohol and gently run it along the cut borders to melt away any ragged clay bits. Bake the arches on a ceramic tile. Once completely cool, use a manual pin vise hand drill to create tiny holes at the top. Drilling after baking prevents the holes from distorting. Connect the pieces to gold-plated earring posts using jump rings and jewelry pliers.
8. Sculpted Mug Huggers
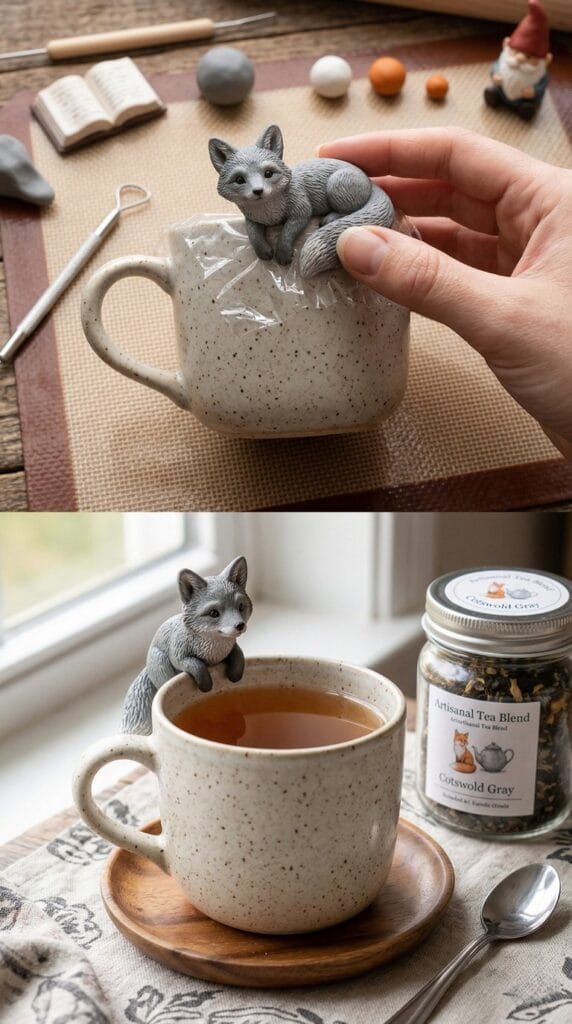
Supplies Needed: Premium Polymer Clay, Ceramic Baking Tile, Matte Clear Sealant. (Additional: The specific gift mug, plastic wrap).
The Concept: A mug hugger is a miniature sculpture designed with a custom groove to sit securely on the rim of a teacup. Sculpting their favorite animal or a tiny book makes morning coffee feel incredibly special.
Quick Steps: Sculpt your 3 cm figure out of polymer clay, keeping it bottom-heavy so it balances easily. Cover the rim of the specific ceramic mug you plan to gift with a small piece of plastic wrap. Carefully push the bottom of your raw clay sculpture down onto the wrapped rim, forcing the clay to form a perfect, custom-fit notch. Carefully lift the sculpture off the mug, remove the plastic, and place the clay on your baking tile. Bake, cool, and gift the figure nested inside the mug.
9. Custom Wax Seal Stamps
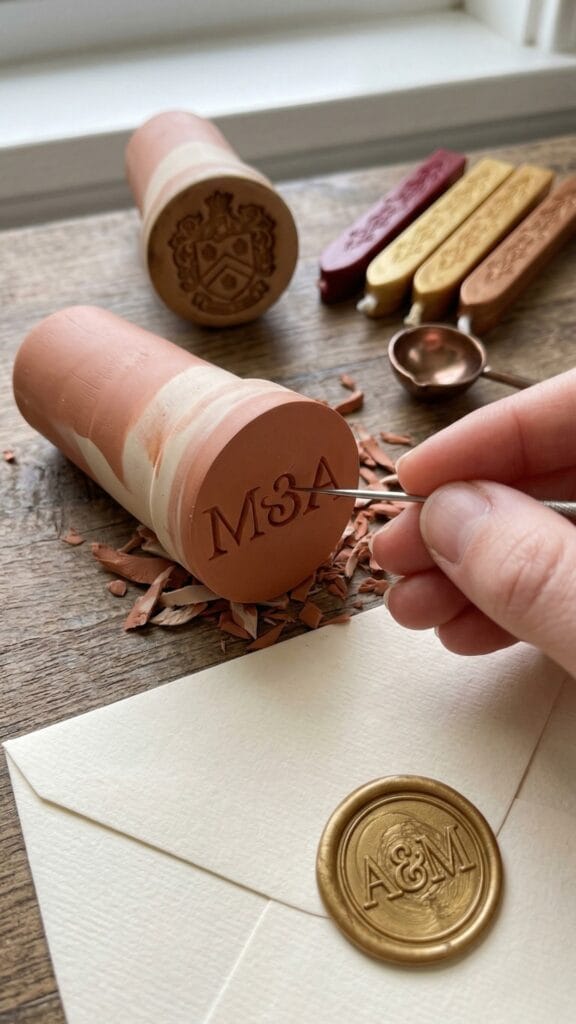
Supplies Needed: Premium Polymer Clay, Flexible Tissue Blade, Ceramic Baking Tile. (Additional: Fine needle tool or linoleum carving tool).
The Concept: Wax seals add old-world elegance to letters and invitations. Carving a family crest, a botanical motif, or an intertwined monogram turns a block of clay into a premium stationery tool.
Quick Steps: Roll a thick, 6 cm long cylinder of clay to act as the stamp handle. Press one end completely flat against a glass surface to form the stamp face. Using a fine needle tool or a linoleum carving tool, carve your design 2 mm deep into the flat surface. Important: Always carve text backwards so it reads correctly when stamped into wax. Bake the stamp at 130°C for 45 minutes to ensure maximum hardness, allowing it to withstand the pressure of stamping into hot wax.
10. Elegant Hair Barrettes
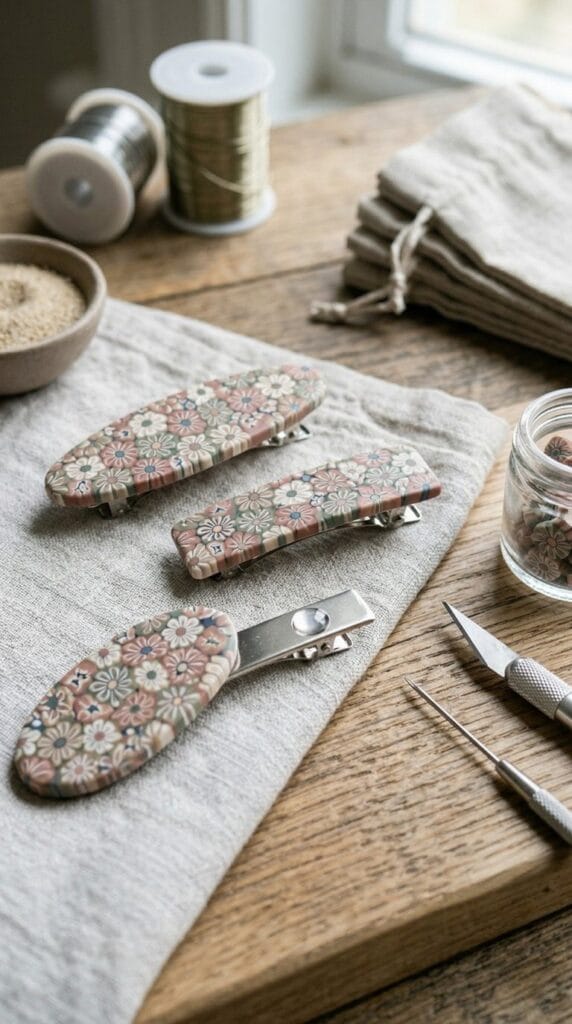
Supplies Needed: Premium Polymer Clay, Acrylic Rolling Pin, Flexible Tissue Blade, Ceramic Baking Tile, Two-Part Epoxy Resin. (Additional: Blank metal hair barrettes).
The Concept: Upgrade plain metal hair clips by attaching a custom-patterned clay slab. Using the cane technique to slice repetitive geometric or floral patterns creates a striking, boutique-style hair accessory.
Quick Steps: Arrange tiny, pre-made clay cane slices into a floral pattern on a base color and roll them completely flat with an acrylic pin to create a patterned slab. Cut the slab into a 2 cm x 8 cm rectangle. Drape the raw clay gently over an oven-safe glass bottle to give it a slight curve that matches the natural shape of a head, then bake. Once cooled, lightly sand the back of the clay. Mix a small amount of two-part epoxy resin, apply it to a blank metal barrette, and clamp the clay on top until fully cured.
Quick Reference: All Supplies at a Glance
Ready to start shaping your custom gifts? Here is the complete list of materials used across this guide for quick reference before you gather your studio equipment:
🏺 Clay & Base Materials
- Premium Polymer Clay (White, Terracotta, Granite, Black, Beige) (used throughout) | Check Premium Polymer Clay price on Amazon
- Ceramic Baking Tile (used throughout) | Check Ceramic Baking Tile price on Amazon
🔪 Shaping, Cutting & Sanding Tools
- Acrylic Rolling Pin or Clay Roller (used throughout) | Check Acrylic Rolling Pin price on Amazon
- Flexible Tissue Blade & Craft Knife (used throughout) | Check Flexible Tissue Blade price on Amazon
- Fine-Grit Sandpaper Blocks (400-600 Grit) (used throughout) | Check Fine-Grit Sandpaper Blocks price on Amazon
- Manual Pin Vise Hand Drill | Check Manual Pin Vise price on Amazon
- Alphabet & Number Metal Stamps | Check Metal Stamps price on Amazon
🎨 Paints, Sealants & Adhesives
- Matte Clear Sealant (used throughout) | Check Matte Clear Sealant price on Amazon
- Liquid Gold Leaf Paint | Check Liquid Gold Leaf price on Amazon
- Gloss Varnish | Check Gloss Varnish price on Amazon
- Fine Detail Paintbrush | Check Fine Detail Paintbrush price on Amazon
- Two-Part Epoxy Resin | Check Two-Part Epoxy price on Amazon
🛠️ Jewelry & Hardware Accessories
- Gold-Plated Earring Jump Rings & Posts | Check Earring Hardware price on Amazon
- Brass Keyring Hardware | Check Brass Keyring Hardware price on Amazon
Important Crafting & Baking Safety Notes:
Working with polymer clay is incredibly safe when proper studio guidelines are followed. Always dedicate specific tools like rolling pins and tissue blades strictly for clay work. Never use them for food preparation later.
Oven Safety and Fumes: Always bake polymer clay in a well-ventilated area according to the specific manufacturer’s temperature guidelines, which usually fall between 110°C to 130°C (230°F to 275°F). Use an oven thermometer to ensure accuracy. If polymer clay burns, it releases irritating fumes. Never bake clay directly on surfaces you plan to eat off of later. Use a dedicated ceramic tile or parchment paper.
Small Parts Warning: Projects like pet miniatures, mug huggers, and jewelry dishes often involve tiny, hardened clay components. Keep unfinished projects, raw clay scraps, and small baked items completely out of reach of young children and domestic pets to prevent choking hazards or ingestion.
Which project are you making first? Drop a comment below and share your favorite color choices!



[…] Dry the tags flat for 24 to 72 hours. Next, paint a narrow border and the monogram, then let the paint dry for 1 hour before sealing. Once the sealer has cured, thread jute through each hole and tie a double knot. These easy air dry clay crafts add a handmade finish to wrapped gifts; for more present-making ideas, see these personalized clay gift ideas. […]