

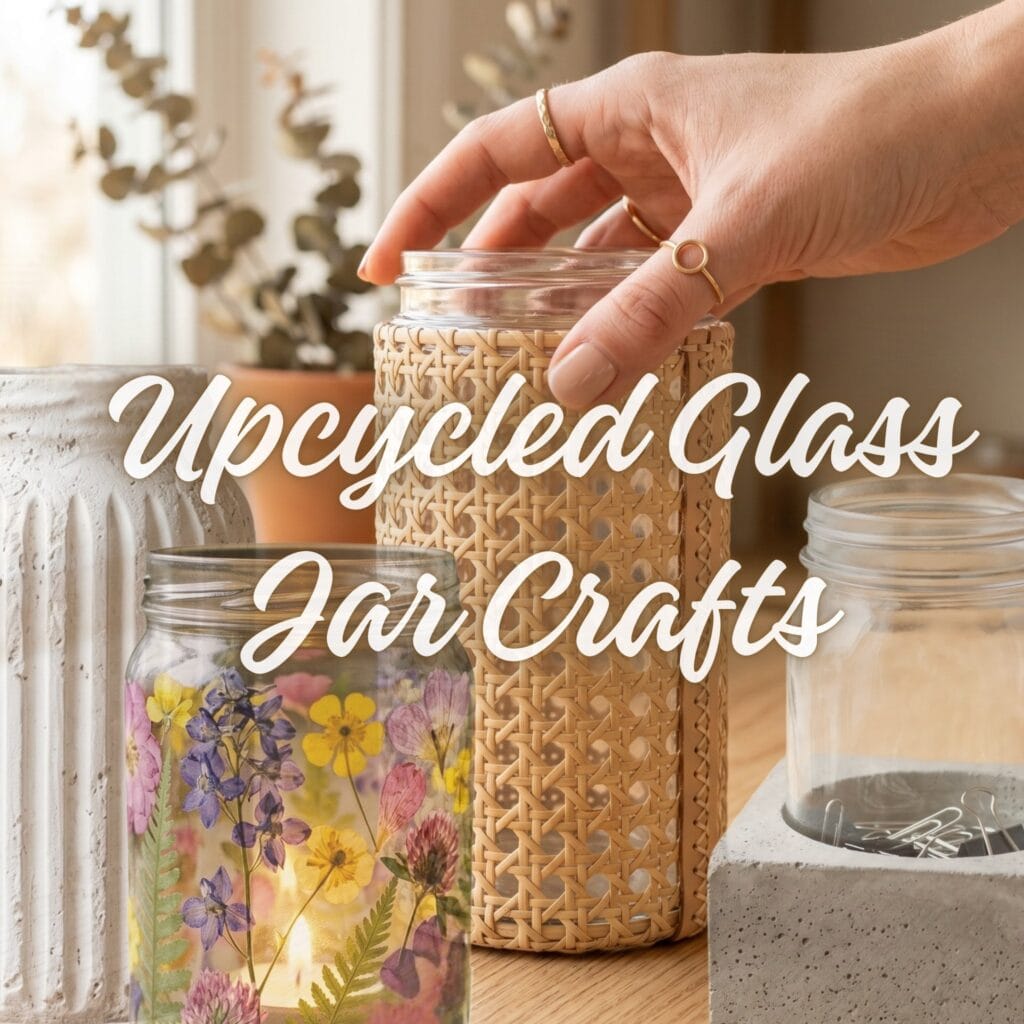
Saving empty kitchen glassware from the recycling bin is a mindful habit. Specifically, transforming those shapes through upcycled glass jar crafts is a practical alternative to buying decor. It turns basic industrial packaging into lasting display pieces. You can style intricate, natural vases. With upcycled glass jar crafts, you do not need expensive glassblowing tools.
Affiliate Disclosure: This post contains affiliate links. As an Amazon Associate, I earn from qualifying purchases. If you buy through these links, I may earn a commission at no additional cost to you.
Building structural glass centerpieces is a modern weekend ritual. Here, we gather the shared prep for all ten projects — clean jars, rubbing alcohol, and PPE — then group the rest by type; every project below also carries its own supply list with quantities and cure times. Then, we will explore 10 sculptural design concepts for your workspace.
Pro-Tip: Instead of washing your jars with standard dish soap, wipe the outer glass surface with rubbing alcohol. In fact, this vital cleaning step removes invisible oils instantly.
Essential Materials & Tools
All supplies for the ten projects, grouped by type — each project heading repeats exactly what that project needs, so nobody has to buy the full list. Examples assume a standard jar about 8 cm across and 10–12 cm tall (roughly 25 cm around); scale quantities to your jar’s size, and add household clean water for mixing and soaking.
✨ Consumable Raw Materials
- Cleaned Clear Glass Jars — A range of smooth-sided jars provides reusable bases for plaster, decoupage, concrete, cord, cane, clay, and frosted finishes. | Check Cleaned Clear Glass Jars on Amazon
- Rubbing Alcohol — Removes label residue, dust, and invisible oils so primers, paints, and adhesives bond reliably to glass. | Check Price on Amazon
- Fine-Grit Sandpaper — Flattens plaster drips, concrete edges, and clay seams after drying, so paint and sealer sit evenly. | Check Fine-Grit Sandpaper on Amazon
- Coarse Lime Plaster — Builds the tactile, pitted stone surface needed for the travertine amphora treatment. | View Coarse Lime Plaster on Amazon
- White Casting Cement — A fine casting mix makes a smooth, substantial pedestal base for anchoring a wide-mouth jar. | Explore White Casting Cement on Amazon
- Vegetable Tanned Leather Sheets — A firm, unfinished leather is suitable for cutting a tailored sleeve that conforms cleanly around a narrow jar. | Find Vegetable Tanned Leather Sheets on Amazon
- Waxed Cotton Thread — Strong waxed thread glides through punched leather and holds a crisp decorative hand-sewn seam. | See Price on Amazon
- Pressed Wildflower Petals — Flat, fully dried botanicals create delicate translucent layers on a glass luminary. | See Pressed Wildflower Petals on Amazon
- Cotton Macrame Cord — Soft twisted cotton produces the dimensional spiral texture needed for a wrapped carafe. | View on Amazon
- Pre-Woven Rattan Cane Webbing — Open woven cane instantly adds an organic, high-end texture to a plain cylindrical glass vase. | Check Pre-Woven Rattan Cane Webbing on Amazon
- Natural Air-Dry Clay — Forms lightweight bas-relief leaves, coils, and ornamental details without requiring a kiln. | Check Price on Amazon
- Terracotta Acrylic Paint — Unifies the clay relief and jar surface with an earthy fired-terracotta appearance. | View Terracotta Acrylic Paint on Amazon
- Natural Jute Twine — Creates a warm, layered fiber surface for a tactile solitary vase finish. | Find Natural Jute Twine on Amazon
- Matte Decoupage Medium — Adheres fragile petals to glass and provides a clear protective finish without excessive shine. | See Matte Decoupage Medium on Amazon
- Gloss Decoupage Medium — The wet adhesive layer for the salt finish; its gloss base keeps the crystals readable through the seal coat. | Check Gloss Decoupage Medium on Amazon
- Fine Sea Salt — Sprinkled over the wet gloss coat to scatter light like frosted sea glass — decorative only, so keep the finished jar dry. | Check Fine Sea Salt on Amazon
- Flameless LED Tealights — Provides a reusable warm glow for decorated glass luminaries without exposing paperlike petals or adhesive to an open flame. | Explore Flameless LED Tealights on Amazon
- Painter’s Tape — Low-tack strips lay the clean vertical channels for the fluted ridges and peel away without residue once cured. | Check Painter’s Tape on Amazon
- Clear UV Resin — Gels hard and clear on demand under UV light, building the raised flutes without heat or long drying times. | Check Clear UV Resin on Amazon
🧰 Core Crafting Tools & Equipment
- Stainless Steel Palette Knife Set — Lets makers spread thick plaster smoothly and shape controlled sculptural texture around a jar. | See Stainless Steel Palette Knife Set on Amazon
- Clay Texture Comb Set — Creates evenly spaced vertical grooves in wet plaster for the fluted travertine effect. | Explore Clay Texture Comb Set on Amazon
- Leather Stitching Punch Set — Produces consistent stitch holes along leather sleeve edges for a polished saddle-stitched seam. | View on Amazon
- Leather Hand Sewing Needle Set — Blunt harness-style needles make it easier to stitch through pre-punched holes without damaging the leather. | Find on Amazon
- Soft Synthetic Detail Brush Set — Soft bristles gently smooth petals and glue layers without tearing delicate dried flowers. | Check Soft Synthetic Detail Brush Set on Amazon
- Silicone Casting Mold Set — Flexible molds release cured concrete cleanly and offer stable shapes for small jar pedestals. | Check Price on Amazon
- Clay Sculpting Tool Set — Provides loop tools, shaping tools, and texture tips for defining raised terracotta-style ornament. | Find Clay Sculpting Tool Set on Amazon
- UV Resin Curing Lamp — Holds an even UV field over each taped section so the resin sets in minutes instead of waiting on daylight. | Check UV Resin Curing Lamp on Amazon
- Safety Glasses — Eye protection for cutting and scoring glass, trimming cured resin, and peeling tape — wear them whenever a project creates chips or dust. | Check Safety Glasses on Amazon
- Nitrile Disposable Gloves — Keeps uncured resin, adhesive, sealer, and paint off skin — use for the resin lantern (P6), both decoupage projects (P3 and P10), concrete mixing (P4), and clay painting (P8). | Check Nitrile Disposable Gloves on Amazon
- N95 Dust Mask — For dry mixing plaster and concrete (P1 and P4) and sanding cured edges (P4 and P8) — concrete and clay dust are the main inhalation risk here. | Check N95 Dust Mask on Amazon
- Plastic Mixing Cup and Stirrer — A dedicated disposable cup and stick for plaster and concrete (P1 and P4) — keep craft mixing away from kitchenware and never reuse food utensils for cement. | Check Plastic Mixing Cup and Stirrer on Amazon
💎 Hardware, Fasteners & Finishing
- Glass Bonding Primer — Creates a grippy base coat on slick glass before mineral plaster, paint, or air-dry clay is applied. | See Price on Amazon
- Mold Release Spray — Helps the cured concrete pedestal separate from its mold with fewer chipped edges. | View on Amazon
- Clear Heavy-Duty Gel Adhesive — Its thicker, non-drip formula grips glass while securing leather panels, cotton cord, jute, and cane. | Find on Amazon
- Matte Acrylic Varnish — Protects painted clay and plaster surfaces while preserving a natural, low-sheen ceramic look. | Check Matte Acrylic Varnish on Amazon
10 Original Upcycled Glass Jar Crafts to Try This Weekend
Supplies Needed: Cleaned Clear Glass Jars, Rubbing Alcohol
Additionally, these fresh apothecary-inspired shapes move away from basic glitter mason jars. Here are ten inspiring blueprints to expand your upcycled glass jar crafts journey.
Similarly, do you love balancing sleek translucent surfaces with heavy textured stone reliefs? Check out our popular guide on Botanical Plaster Casting: 10 Stunning DIY Studio Secrets.
1. The Travertine Amphora
Supplies Needed: Cleaned Clear Glass Jars, Rubbing Alcohol, Glass Bonding Primer, Coarse Lime Plaster, Stainless Steel Palette Knife Set, Clay Texture Comb Set, Matte Acrylic Varnish
⏱ Make it: Mix the plaster to a thick cream (about 2 parts plaster to 1 part water — follow your brand’s label); one jar coat takes roughly 200 ml. It sets in 30–45 minutes and cures overnight before sealing.
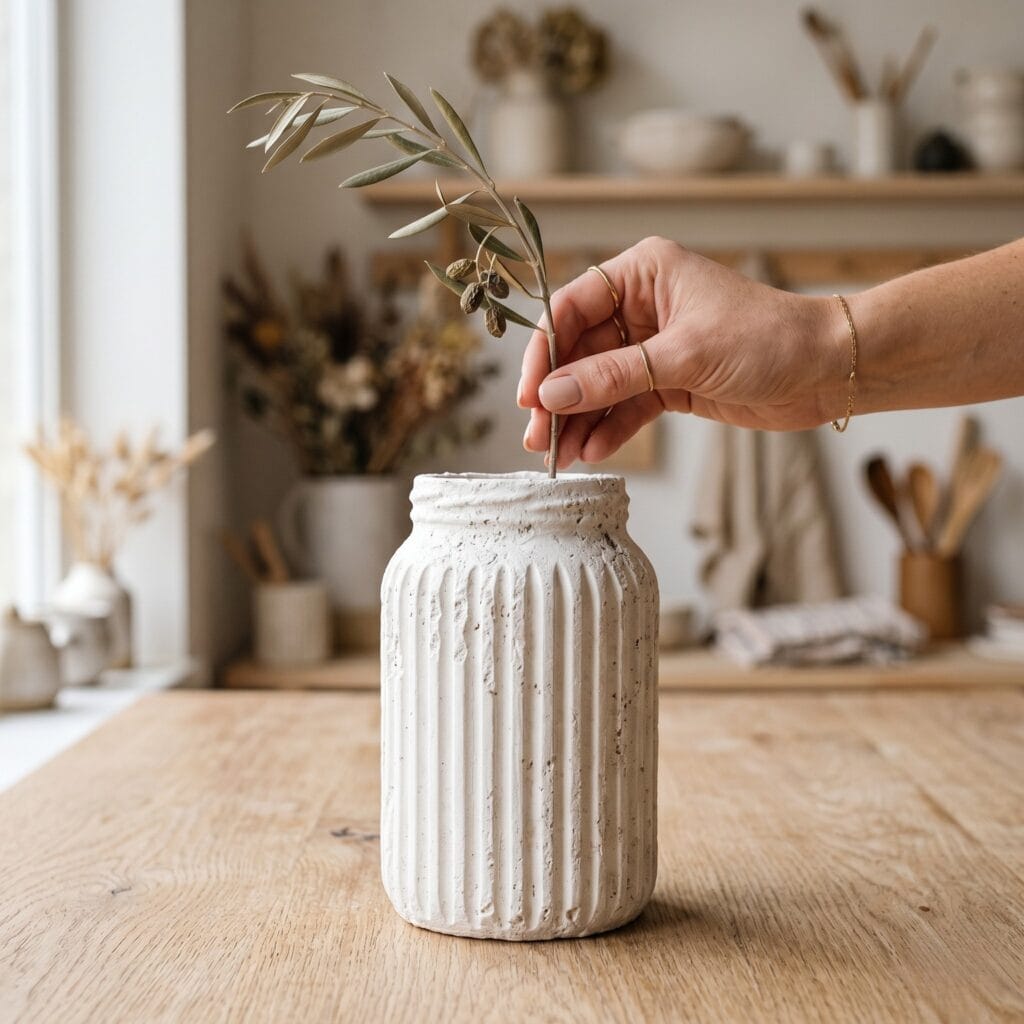
The Concept: coat an empty pasta sauce jar. Give it a heavy mineral finish. This design mimics rare ancient travertine stone. it showcases deep vertical fluted lines down the plaster walls. Quick Steps:
- brush a strong bonding primer over the clean glass cylinder.
- Next, apply a thick layer of coarse lime plaster with a palette knife.
- Then, carve uniform vertical ridges down the wet crust before it hardens.
Styling Tip: Next, let the plaster cure completely. Finally, leave the very top glass rim exposed to catch the morning sun.
2. The Leather Solitary Sleeve
Supplies Needed: Cleaned Clear Glass Jars, Vegetable Tanned Leather Sheets, Leather Stitching Punch Set, Waxed Cotton Thread, Leather Hand Sewing Needle Set, Clear Heavy-Duty Gel Adhesive
⏱ Make it: One A4-sized sheet of vegetable-tanned leather (about 20 × 30 cm) wraps a typical jar with a 2 cm seam; saddle stitching takes about 20 minutes and needs no drying time.
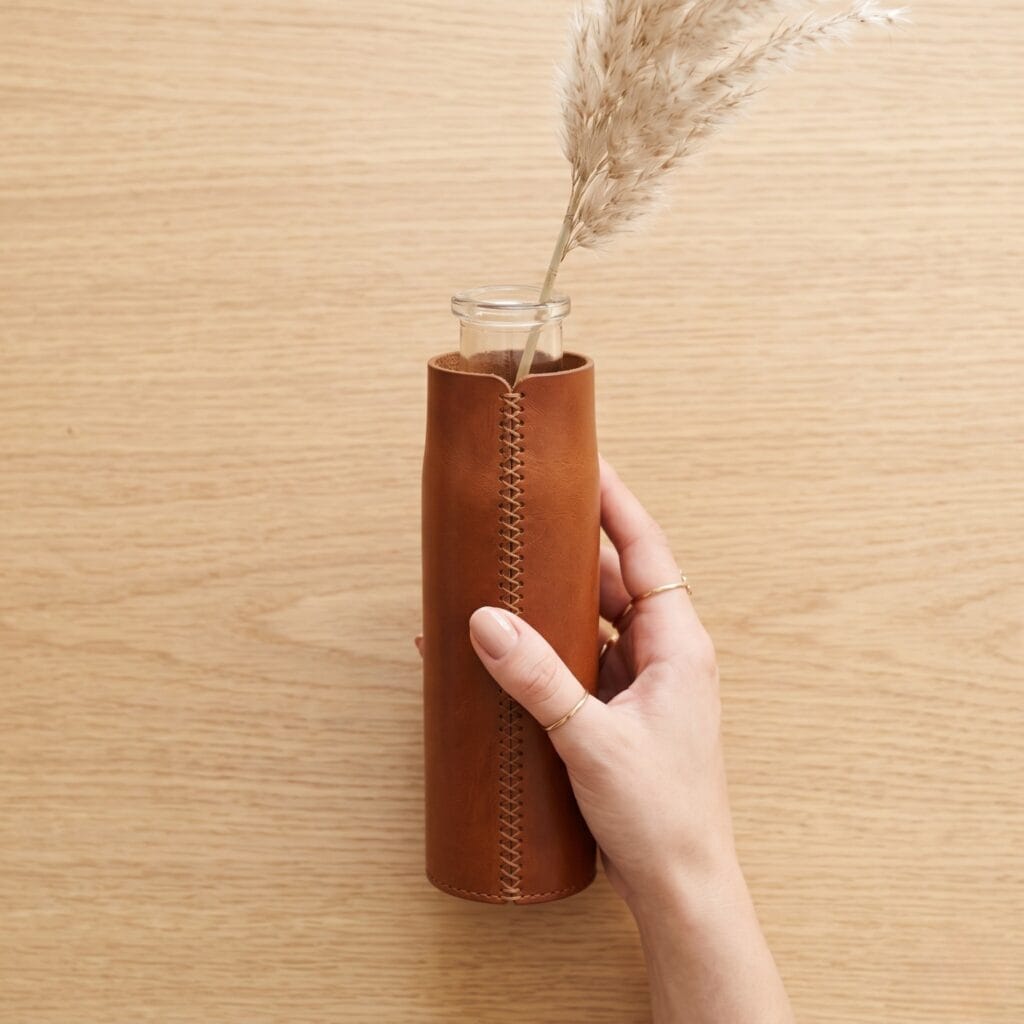
The Concept: Essentially, this masculine design wraps a narrow glass bottle in rich vegetable-tanned leather. it highlights a tight, hand-sewn saddle stitch trailing down the back seam. As a result, the tailored contrast feels incredibly high-end. Quick Steps:
- cut a rectangle of premium tan leather sized to wrap the jar with a 2 cm seam overlap.
- Next, punch uniform stitching holes along the two opposite leather edges.
- Then, wrap the glass and thread a waxed cotton cord through the holes tightly.
Styling Tip: cut a clean vertical slit along the front panel. Meanwhile, allow a single olive branch to peek through the raw glass opening. If you enjoy working with remnants, don’t miss our guide on 15 Brilliant Scrap Leather Projects You Will Love to Try to make the most of your material stash.
3. The Pressed-Petal Luminary
Supplies Needed: Cleaned Clear Glass Jars, Rubbing Alcohol, Pressed Wildflower Petals, Matte Decoupage Medium, Soft Synthetic Detail Brush Set, Flameless LED Tealights
⏱ Make it: A small handful of petals (10–15) covers one jar; decoupage goes on in two thin coats, each touch-dry in 15–30 minutes. Dried petals fade in hard sun — display this one out of direct light.
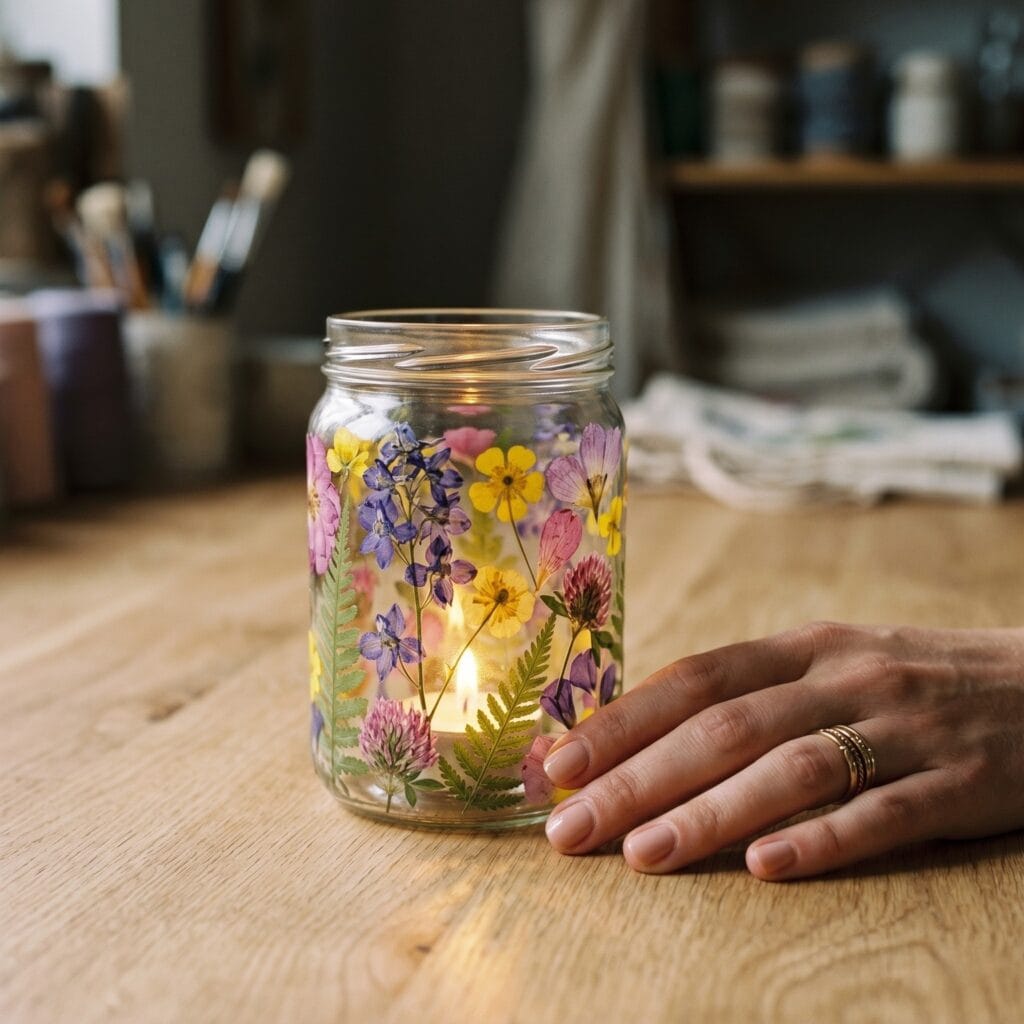
The Concept: This floral lighting project provides a completely safe, non-toxic way to create beautiful shadows. So, it reduces the need for dangerous acid creams. Naturally, this safe branch of upcycled glass jar crafts showcases the delicate anatomy of real dried flower petals. Quick Steps:
- collect delicate wildflower petals. Press them flat inside a heavy book.
- Next, paint a thin layer of matte water-based decoupage glue over the glass.
- Then, smooth the pressed petals onto a thin, even coat of decoupage medium with a soft brush.
Styling Tip: Place a flameless LED tealight inside the finished container — never a real flame: dried petals and decoupage medium are flammable, and the glass walls trap heat. Enjoy the warm organic glow dancing through the colorful veins.
4. The Cast-Concrete Pedestal
Supplies Needed: Cleaned Clear Glass Jars, White Casting Cement, Silicone Casting Mold Set, Mold Release Spray
⏱ Make it: Demold after 24 hours and let the concrete block cure 3–7 days before sanding or sealing — it keeps gaining strength as it cures.
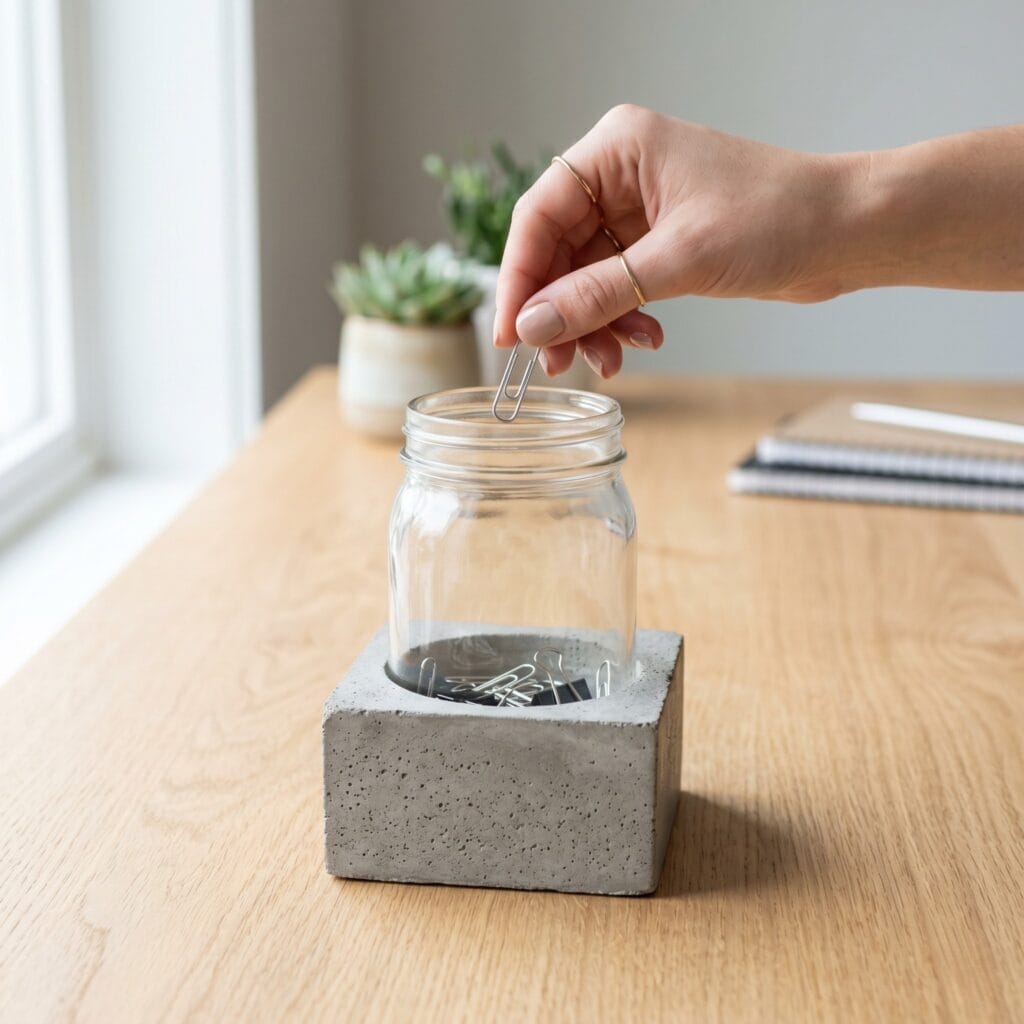
The Concept: Basically, embed the lower third of a wide-mouth jar into a solid cement block. this architectural anchoring technique creates striking brutalist weights for your desktop. Quick Steps:
- mix about 2 cups (480 ml) of fine-grain hobby concrete in a plastic mold container sitting 3 cm wider than the jar on every side — enough for a 1 cm base layer plus a 3 cm embed around the jar.
- Next, center the jar on the 1 cm base layer, leaving a finger-width gap to the mold wall, and hold it plumb while the slurry settles.
- embed only a room-temperature jar, set level and undisturbed at room temperature; if a hairline appears it usually came from uneven support, movement while the mix set, or the concrete curing unevenly against the glass — cracking rarely has a single cause.
- Then, let the concrete cure for twenty-four hours before stripping the outer mold.
Styling Tip: Sand the exposed stone base until it feels smooth to the touch (outside or behind a dust mask — concrete dust is harsh). Afterward, use the clear glass top to store your silver paperclips neatly.
5. The Twisted Cotton Cord Carafe
Supplies Needed: Cleaned Clear Glass Jars, Rubbing Alcohol, Cotton Macrame Cord, Clear Heavy-Duty Gel Adhesive
⏱ Make it: About 4 m of cotton cord wraps a 15 cm jar; the gel adhesive tacks in about 10 minutes and cures in 24 hours. Treat the result as a decorative vessel unless every material it touches — cord coating and adhesive alike — is rated water-safe.
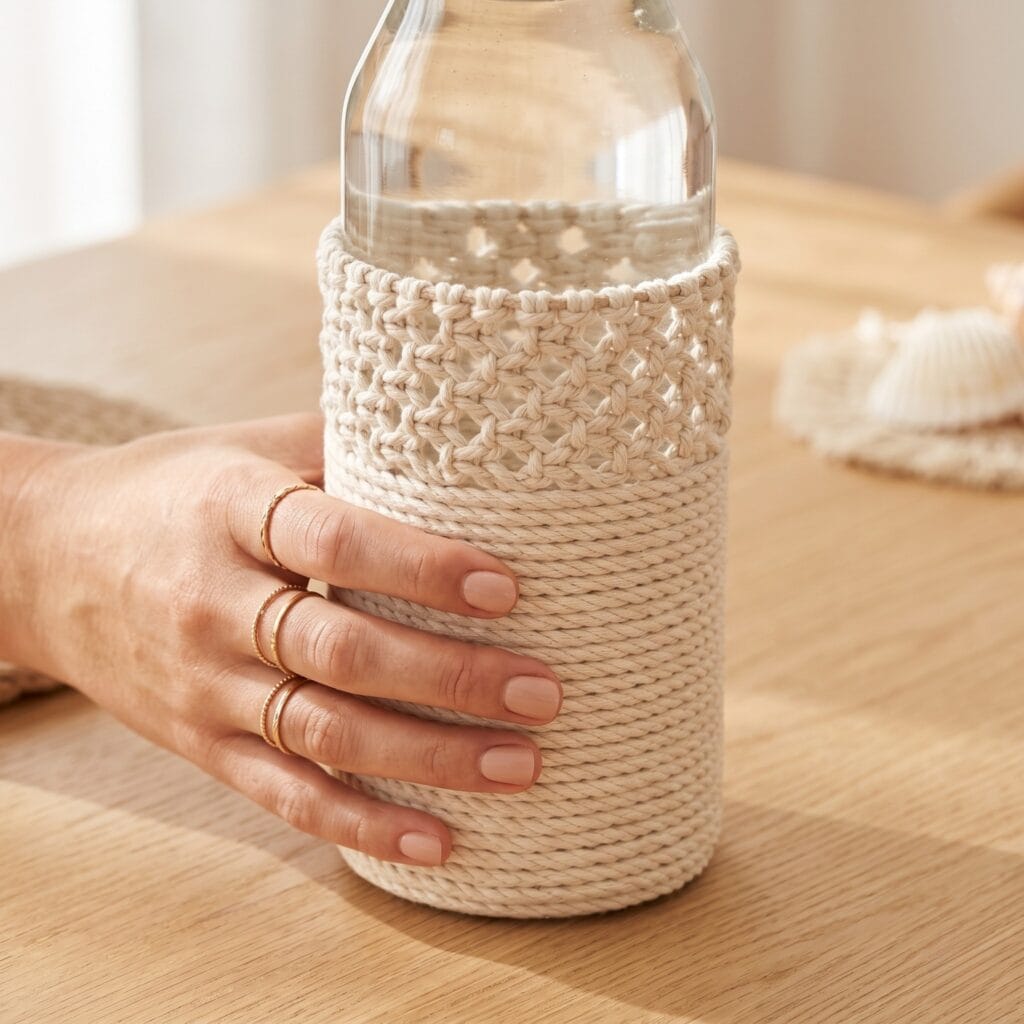
The Concept: Design an organic water carafe using pure, unpainted cotton ropes. Thus, this safe method adds incredible tactile grip without using chemical sprays. Quick Steps:
- apply a line of clear gel glue around the base of a tall bottle.
- Next, coil a 4mm cotton cord upward around the lower body frame.
- Then, tie simple square macrame knots across the center belt section to create a mesh.
Styling Tip: So, leave the top half of the carafe completely clear. Meanwhile, use the woven cotton base to protect your wooden dining tables from water rings.
6. The Fluted Reeded-Glass Lantern
Supplies Needed: Cleaned Clear Glass Jars, Rubbing Alcohol, Painter’s Tape, Clear UV Resin, UV Resin Curing Lamp, Flameless LED Tealights
⏱ Make it: Thin taped lines cure under the UV lamp in about 2–10 minutes per section (follow your resin’s label); keep each bead about as thick as the tape (roughly 1 mm), since thick lines stay tacky underneath, and a bead that still dents under a fingernail or smells of resin needs more lamp time — the finished lantern then rests 24 hours before use.
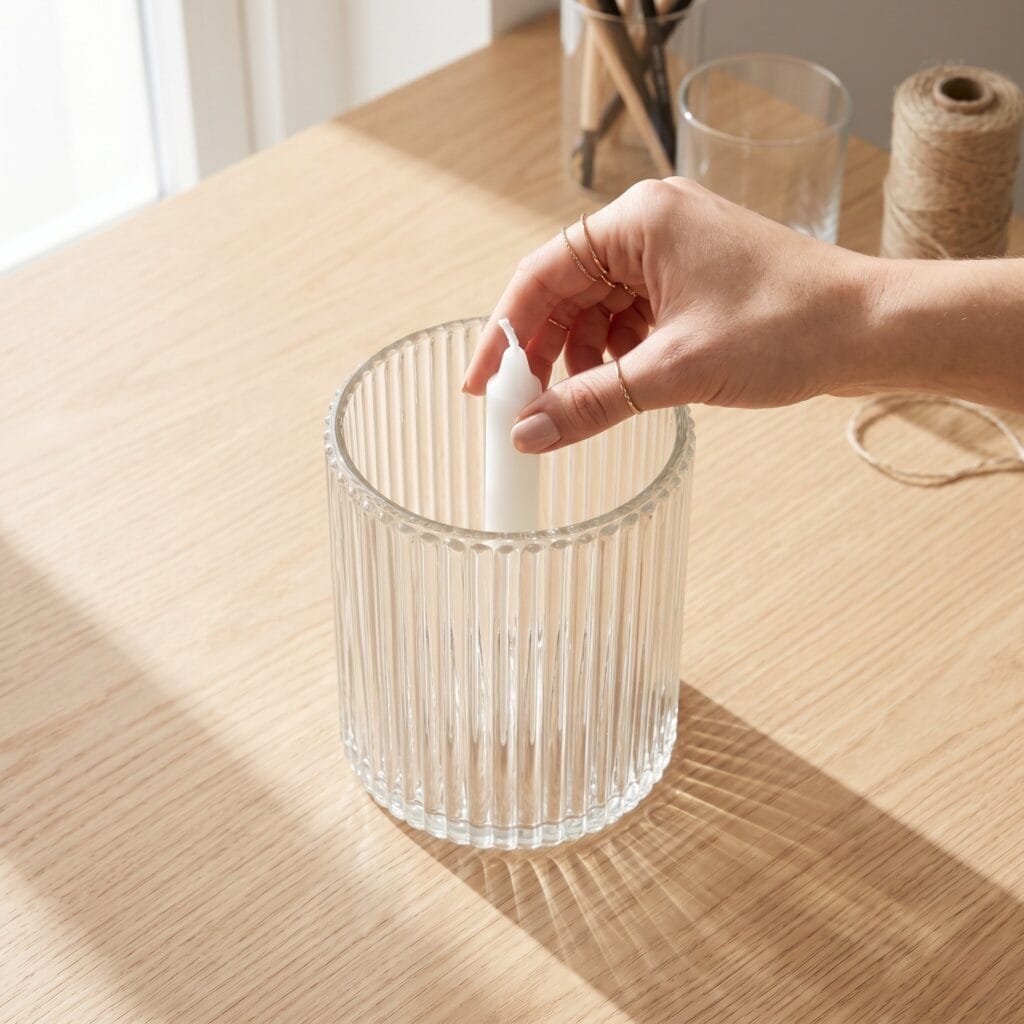
The Concept: The industrial charm of fluted architectural glass translates beautifully into a modern candle holder. True, this design uses thick clear gel strips to mimic real reeded textures. It creates a bold look, much like our structured Clay Mask Ideas: 10 Genius DIY Secrets for Beautiful Walls. Quick Steps:
- align vertical strips of painter’s tape down a clean round jar.
- Next, squeeze neat lines of thick, clear UV resin into the open glass tracks.
- Then, cure the resin with a studio lamp and peel the tape away cleanly.
- work with gloves on and a window open — UV resin is a skin and eye irritant, and it must be fully cured before the lantern is handled or lit.
Styling Tip: place this linear lantern on your vanity mirror shelf. By doing this, the light beams split across your room in perfect parallel tracks.
7. The Woven Rattan Cane Vase
Supplies Needed: Cleaned Clear Glass Jars, Pre-Woven Rattan Cane Webbing, Clear Heavy-Duty Gel Adhesive
⏱ Make it: Soak the cane in warm water until pliable (about 10 minutes), wrap, then let the seam dry into shape for a couple of hours; one A4 panel (about 20 × 30 cm) covers a typical jar.
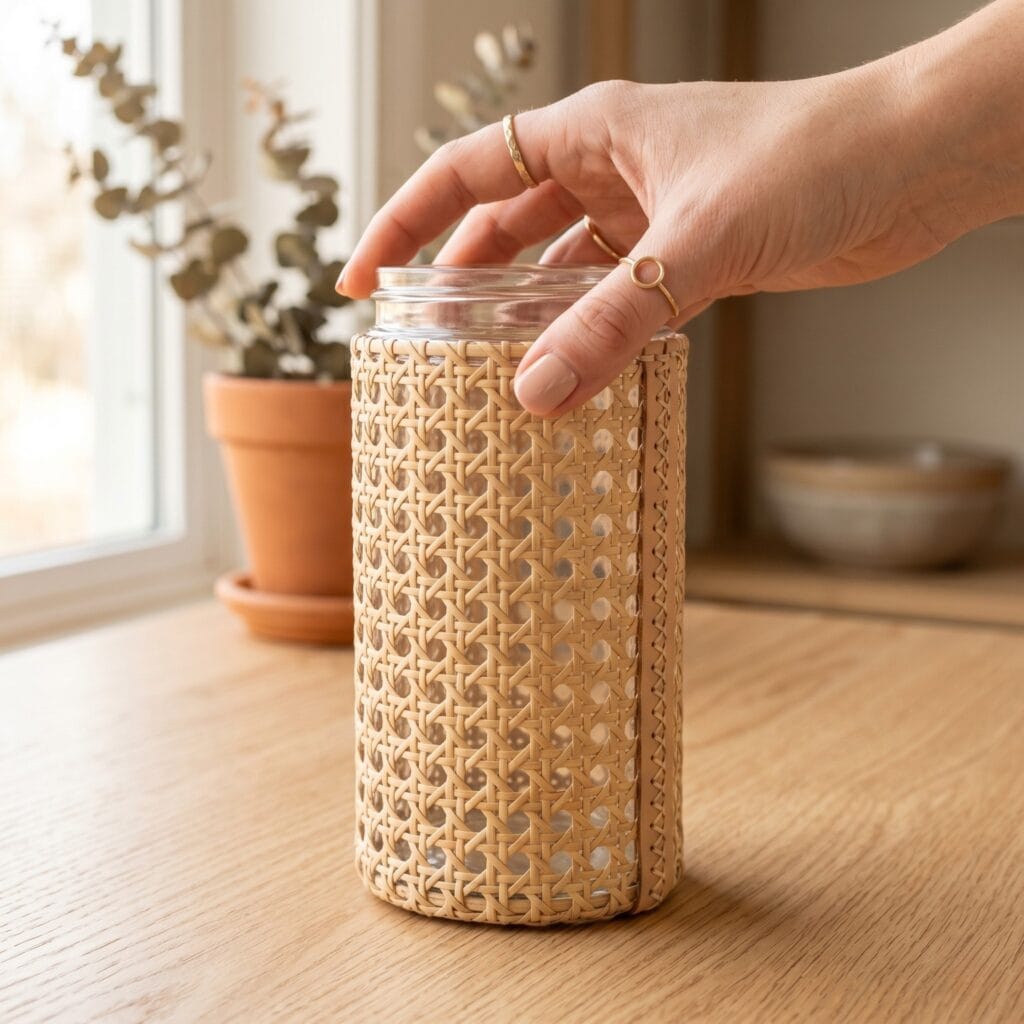
The Concept: This texture-rich recipe pairs trendy cane webbing with clear cylinder jars. Thus, it forms a gorgeous companion piece for popular American farmhouse furniture. Quick Steps:
- soak a small roll of pre-woven cane webbing in warm water.
- Next, wrap the soft rattan sheet around a straight-walled glass jar template.
- Then, secure the overlapping back edge with a hidden seam of Clear Heavy-Duty Gel Adhesive — the shared clear adhesive, which stays flexible once cured.
Styling Tip: For example, display this wicker column vase in bright, airy rooms. In addition, fill it with dried pampas grass to match the warm beige tones.
8. The Bas-Relief Terracotta Urn
Supplies Needed: Cleaned Clear Glass Jars, Rubbing Alcohol, Glass Bonding Primer, Natural Air-Dry Clay, Clay Sculpting Tool Set, Terracotta Acrylic Paint, Matte Acrylic Varnish
⏱ Make it: About 250 g of air-dry clay covers one jar; the shell dries 24–48 hours — longer at the base — before painting and sealing.
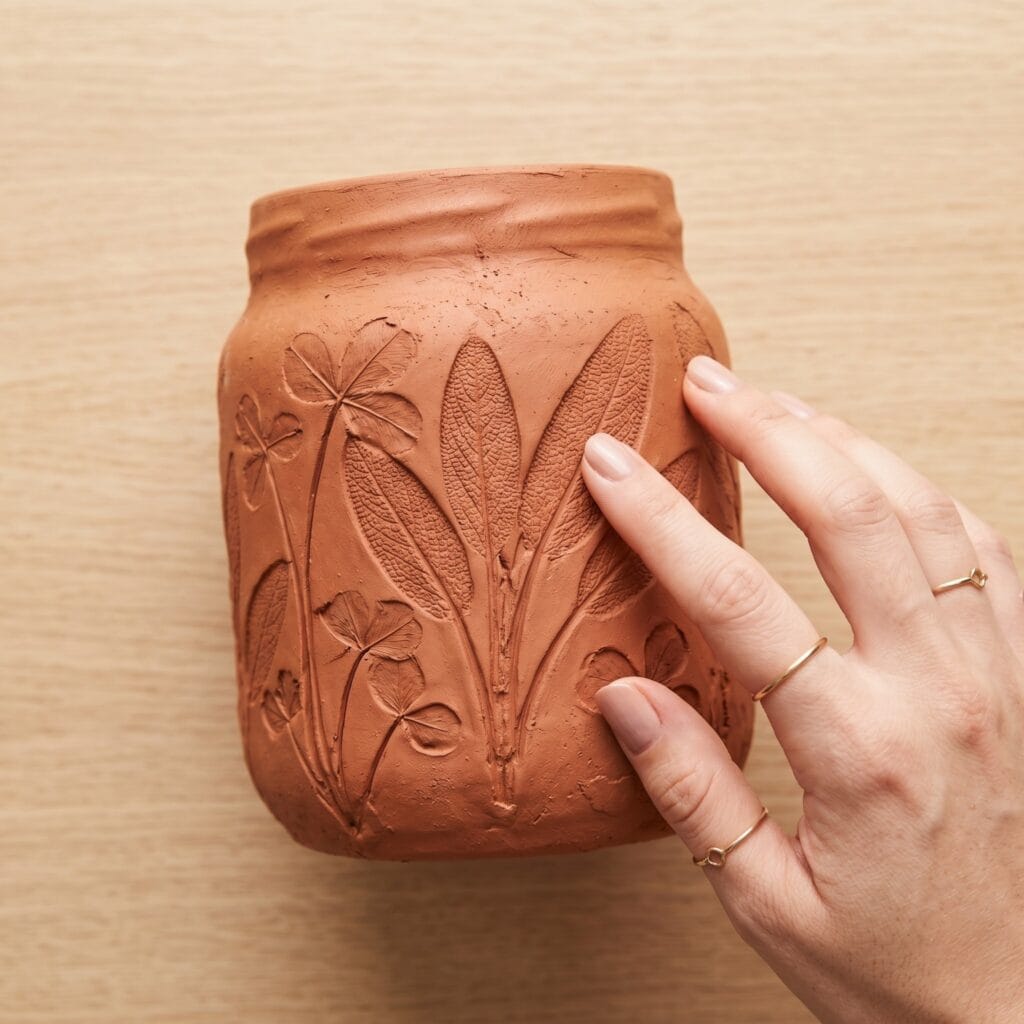
The Concept: Enjoy an earthenware approach where rich terracotta clay hides the recycled glass body. So, it builds an immediate Mediterranean pottery aesthetic on your patio tables. Quick Steps:
- wrap a thin, even layer of terracotta air-dry clay over your jar.
- Next, press fresh sage leaves into the wet clay shell to leave deep veins.
- Then, peel the leaves back carefully and hand-sand the edges after drying, outside or wearing a dust mask.
Styling Tip: Next, brush a matte protective sealer over the finished terracotta pot. As a consequence, keep bouquet water inside the original glass liner — the matte sealer guards the clay shell, not a waterproof lining. It pairs nicely with our other Air Dry Clay Pottery: 10 Stunning Secrets for Your Decor designs.
9. The Jute-Wrapped Twine Solitary Vase
Supplies Needed: Cleaned Clear Glass Jars, Natural Jute Twine, Clear Heavy-Duty Gel Adhesive
⏱ Make it: Roughly 6 m of jute twine wraps one jar; the adhesive tacks in 5–10 minutes as you wrap and cures within a few hours.
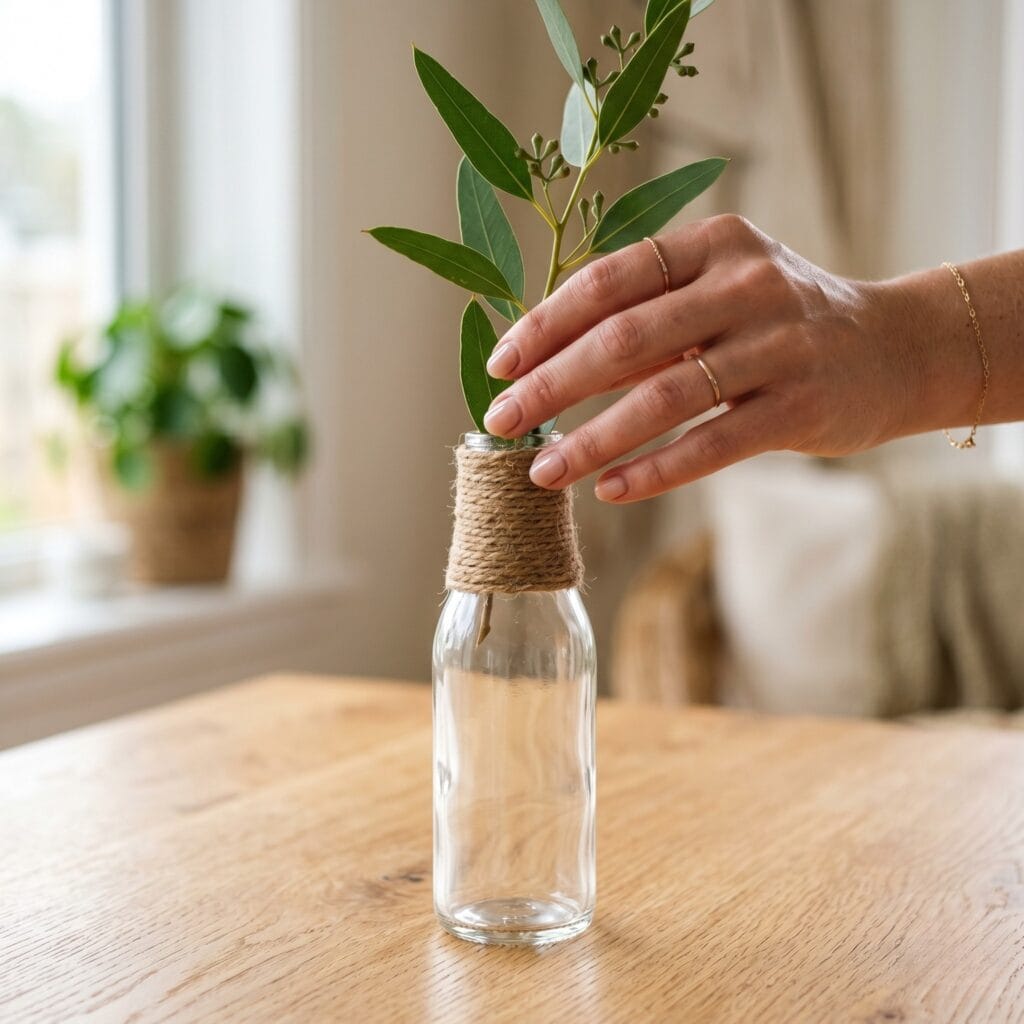
The Concept: Style a coastal-inspired solitary vase using raw organic fibers. Mainly, this easy layout relies on simple wrapping techniques around the jar mouth. It builds a beautiful rustic accent instantly.
Quick Steps:
- clean a narrow upcycled glass bottle thoroughly with rubbing alcohol.
- Next, apply a pea-sized bead (about 2 mm) of clear adhesive near the top rim track.
- Then, wrap natural jute twine tightly around the neck twenty times before cutting.
Styling Tip: Fill the clear base with fresh water. Then, drop a single green eucalyptus branch inside to contrast with the rough brown rope fibers.
10. The Frosted Sea-Glass Salt Jar
Supplies Needed: Cleaned Clear Glass Jars, Rubbing Alcohol, Gloss Decoupage Medium, Fine Sea Salt, Soft Synthetic Detail Brush Set
⏱ Make it: 2–3 tablespoons of fine sea salt scatter over the jar’s wet gloss coat; the coat touch-dries in 15–30 minutes. The salt finish is decorative and moisture-sensitive — wipe the jar clean instead of washing it.
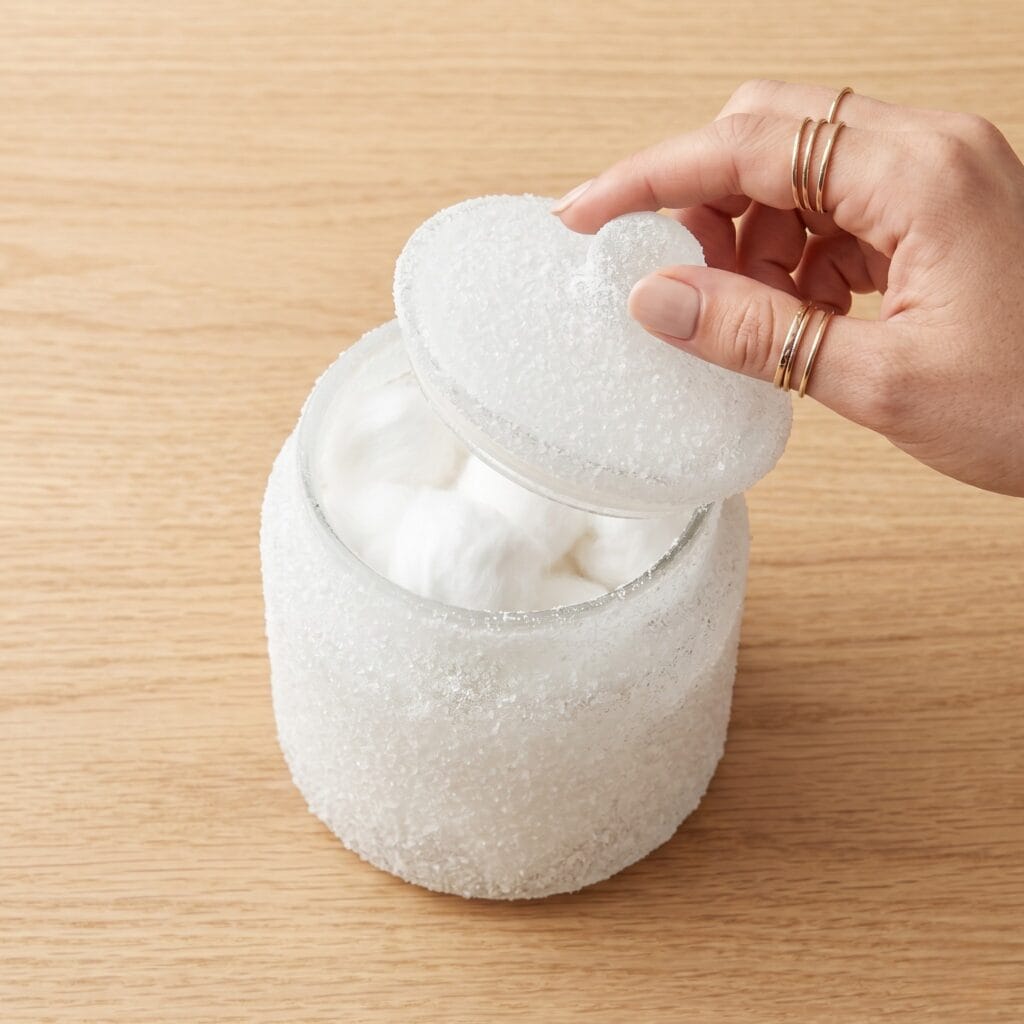
The Concept: Design a translucent storage jar featuring a faux frozen texture. Next, mixing basic sea salt with clear craft glue feels incredibly rewarding. It mimics real frosted sea-glass flawlessly without using dangerous chemical creams. Quick Steps:
- brush a thin layer of water-based gloss mod podge outside your jar.
- Next, roll the wet sticky glass over a tray of fine white sea salt crystals.
- Then, let the textured salt crust dry completely for two hours.
Styling Tip: Keep this frosted container on a bedroom shelf or dry desk — the salt finish is humidity-shy, so it stays out of bathrooms and sinks. Specifically, it acts as a stunning boho holder for organic cotton cotton balls.
Elevate Your Space with Upcycled Glass Jar Crafts Curation
Curating your own organic glass accessories is a deeply satisfying project. Using these fresh jar-craft ideas will instantly elevate your interior design narrative.
spend an afternoon cleaning local glass jars. Match them to the mood of your gallery room. In the end, your finished jar-craft vessels will feel like intentional extensions of your home style.
So, which sculptural look are you inspired to style first? Please, share your design layout ideas in the comments section below!
Important Crafting Safety Notes
Crafting is a rewarding creative activity, but maintaining a safe workshop environment is essential for yourself, your family, and your pets. Please review these vital safety precautions before starting:
• Eye & Skin Protection: Wear safety glasses when scoring or cutting glass, trimming cured resin, or peeling tape, and always cut away from your body. Wear nitrile gloves when working with UV resin, adhesives, dyes, or sealers, and wash up after handling any craft chemical.
• Dust, Cement & Ventilation: Dry concrete, plaster, and clay dust are the biggest inhalation risk here: mix cement and sand finished pieces outdoors or in a well-ventilated room with a dust mask on. Cure UV resin only in an open-window space, never breathe aerosol spray or sealer fumes directly, and let every coated piece dry away from living and pet spaces.
• Heat, Flame & Glass Safety: These jars are decorative vessels, never open-flame holders — dried petals, decoupage medium, jute, and cane all ignite, so use flameless LED lights only. Avoid thermal shock too: never pour boiling water into a cool jar, and let glued or cast pieces cure fully before handling.
• Child & Pet Safety: Cut glass edges, twine offcuts, loose salt, and small hardware are choking and cut hazards for babies, toddlers, and pets. Keep scraps in a closed bin while you work, store finished jars where tails and hands cannot knock them over, and check for chips before gifting a jar.
• Sharp Tool Storage & Clean Workspace: Keep craft knives, scissors, glass cutters, and punch pliers in a latching case or high cabinet after use. Sweep or vacuum the work area at the end of every session so no glass shards, dried glue drips, or dropped needles remain where pets or bare feet can find them.
For more detailed guidance on safe crafting practices, liability disclosures, and website usage, please review our Terms and Conditions.
Upcycled Glass Jar Crafts FAQ
How do I prep a jar before decorating?
Clean the jar and wipe it with rubbing alcohol to remove label residue, dust, and invisible oils, so primers, paints, and adhesives bond reliably to the smooth glass.
How long does plaster take to set on a jar?
Mix plaster to a thick cream — about 2 parts plaster to 1 part water, following your brand’s label. One jar coat takes roughly 200 ml, sets in 30–45 minutes, and cures overnight before sealing.
What size jar works for these projects?
The examples assume a standard jar about 8 cm across and 10–12 cm tall (roughly 25 cm around). Scale quantities to your jar’s size — each project heading repeats exactly what that project needs.
Do I need supplies for all ten projects?
No — each project heading lists only its own supplies, so you buy only what the design you pick actually needs.
“Which of these Upcycled Glass Jar Crafts: 10 Stunning DIY Studio Secrets are you excited to try first, or do you have a creative tip of your own to share? Drop a comment below—I’d love to hear your thoughts and see what you create!”



[…] When the paint is dry, brush tiny sections of gilding size onto the exterior and wait for the label-directed tack time. Press on a few gold-leaf fragments, then seal the outside with matte acrylic varnish. Allow the varnish to dry for the manufacturer-stated time before adding LED tea lights. For more glass projects, browse these upcycled glass jar craft ideas. […]
[…] through paint, paper, foliage, or dry fillers. If you enjoyed our 20 cozy DIY fall decorations and upcycled glass jar craft ideas, pair them with these jars for a collected seasonal display; allow paint and decoupage to cure […]