

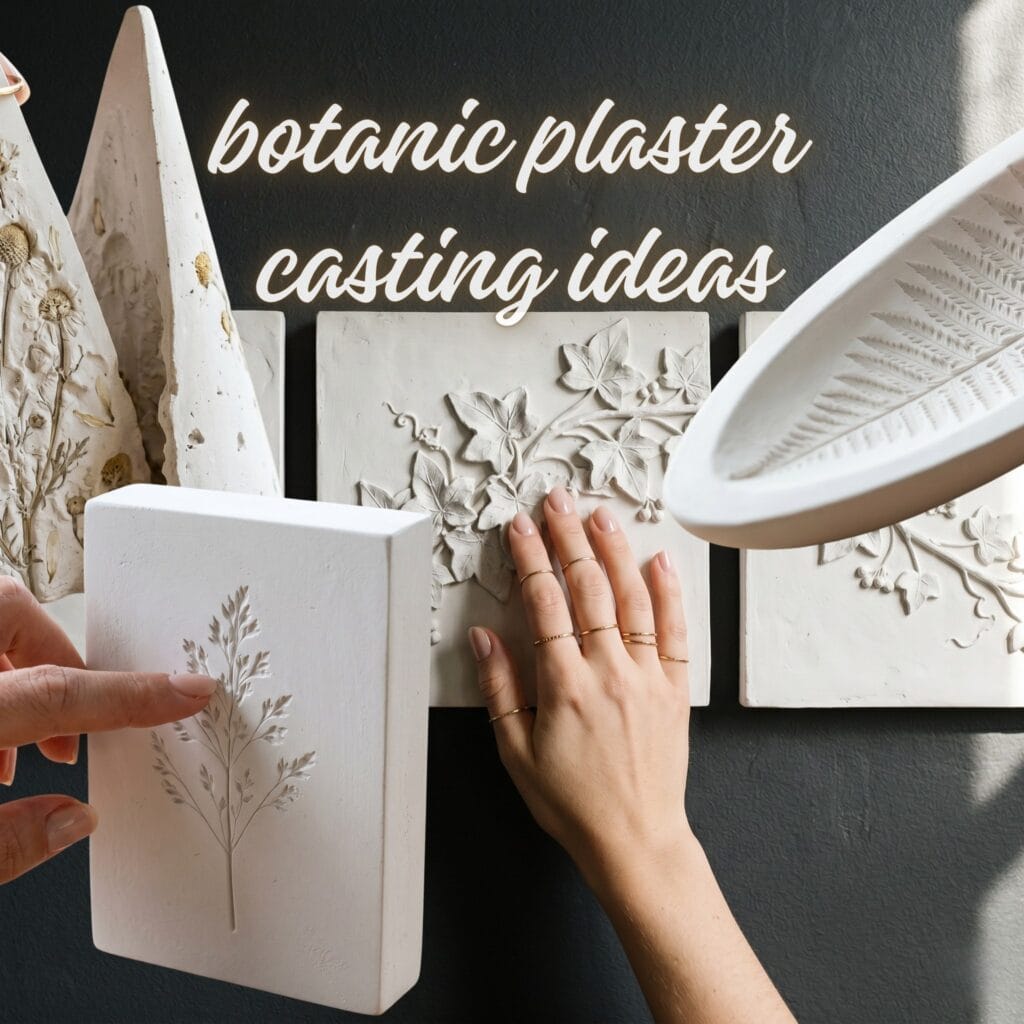
Pressing spring flora into clay is a therapeutic way to capture the changing seasons. Botanical plaster casting lets you freeze those delicate organic shapes in stone forever, preserving the intricate veins of wild ferns and petals without expensive studio equipment. Building high-relief plaster fragments makes for a peaceful weekend ritual. Below, you will find the essential raw materials to get started, followed by core techniques and 10 original sculptural design concepts for your workspace.
This post contains affiliate links. As an Amazon Associate, I earn from qualifying purchases. If you buy through these links, I may earn a commission at no additional cost to you.
Key Facts:
- Technique: Botanical Plaster Casting
- Set time: 30–45 minutes
- Difficulty: Easy
- Makes: 10 project ideas
Essential Supplies for Botanical Plaster Casting
| Supply | Spec / Size | Used For |
|---|---|---|
| 🧪 Pottery Plaster No. 1 (Gypsum) | A fine alpha gypsum strictly required for pouring thin, detailed casts | |
| 🧱 Oil-Based Plasticine Clay | A non-drying impression bed that never absorbs moisture | |
| ⭕ Flexible Plastic Casting Rings | Assorted sizes | Reusable molds for round and cylindrical designs |
| 🖼️ Square Wood Casting Frames | Forms the segmented triptych tiles cleanly | |
| 🧽 Natural Silk Sponge | Gently dampens the clay surface and wipes away debris | |
| 🔩 Threaded Brass Insert or Double-Ended Hanger Bolt | Hardware for hanging the finished piece |
A few foundational materials are used throughout nearly every project in this guide, marked with a (used throughout) tag below.
PLASTER & MOLDING CLAY
Because micro-textures need a smooth matrix, high-grade mediums prevent unwanted air bubbles, which is the main rule of successful botanical plaster casting.
- 🧪 Pottery Plaster No. 1 (Gypsum) (used throughout): A fine alpha gypsum strictly required for pouring thin, delicate tiles without pitting. | Check Price for Pottery Plaster on Amazon
- 🧱 Oil-Based Plasticine Clay (used throughout): A non-drying impression bed that never absorbs moisture from damp leaves. |
View Plasticine Clay on Amazon
MOLDS & CASTING FORMS
Different shapes across this guide call for different mold types. Most can be improvised from cardboard, but a few reusable options save time.
- ⭕ Flexible Plastic Casting Rings (Assorted Sizes): Reusable molds for round and cylindrical designs. | Find Casting Rings on Amazon
- 🖼️ Square Wood Casting Frames: Form the segmented triptych tiles cleanly. | Explore Wood Casting Frames on Amazon
📦 Cardboard (Household): Easily builds custom one-off mold jackets, like the split-cone shape.
HARDWARE & PREP TOOLS
A handful of specialty tools handle drilling, embedding, and finishing across specific projects.
- 🧽 Natural Silk Sponge (used throughout): Gently dampens the clay surface and wipes away debris before pouring. |
Check Availability for Silk Sponges on Amazon - 🔩 Threaded Brass Insert or Double-Ended Hanger Bolt: The correct hardware for turning a cast piece into a functional, boltable drawer pull. | Find Threaded Inserts on Amazon
- 🕸️ Plaster Mesh or Cheesecloth (Optional): Reinforces thin pours like the bookmark against accidental cracking. |
View Plaster Mesh on Amazon - 🪛 Small Hand Drill or Drill Bit: Pierces a clean hanging hole through cured plaster without cracking. | View Hand Drills on Amazon
- 🧵 Organic Silk Twine: Threads through drilled holes for hanging pieces like the bookmark. | Check Price for Silk Twine on Amazon
- 🪨 Fine-Grit Sandpaper: Smooths and polishes cured plaster surfaces to a flawless finish. | Find Sandpaper on Amazon
- 🎨 Acrylic Brayer or Roller: Presses botanicals flat and evenly into the clay bed. | Explore Clay Rollers on Amazon
🧻 Petroleum Jelly or Liquid Dish Soap (Household): An essential mold release agent for porous natural molds like tree bark.
NATURAL BOTANICALS
Fresh, foraged flora works beautifully and costs nothing. If you do not have access to a particular plant, a dried botanical bundle is a great substitute.
- 🌿 Fresh or Dried Botanicals (chamomile, wild grass, ferns, lavender, ivy, clover, wheat stalks, oak twigs, cedar bark): The natural texture source for every impression in this guide. | Explore Dried Botanicals on Amazon
OPTIONAL FINISHING
- 💧 Essential Oil (e.g. Bergamot): A few drops absorb into the porous cured plaster for a natural room diffuser. |
Check Price for Essential Oils on Amazon
Core Techniques for Botanical Plaster Casting
Nearly every design in this guide shares the same core process. Learn these three techniques once, and every idea below becomes a simple variation.
1. Mixing & Pouring Plaster
First, use a starting reference of roughly 2 parts plaster powder to 1 part room-temperature water by volume (or about 70g water to 100g plaster by weight for Pottery Plaster No. 1), then fine-tune by sifting plaster into the water gradually until small islands of dry plaster stop sinking below the surface. This confirms you have reached the right consistency without needing an exact scale. Next, let the mix sit undisturbed for two minutes so trapped air bubbles can rise and escape naturally. Then, stir gently and thoroughly with a flat stick, avoiding vigorous whisking, which reintroduces air. Pour the mix slowly and steadily into your prepared mold or impression. Finally, let the plaster set for 30 to 45 minutes before demolding, but note this is only enough time to safely remove it from the mold. Wait a full 24 to 48 hours for the plaster to cure completely before sanding, drilling, sealing, or adding essential oil. It will feel warm to the touch partway through curing, which is a normal chemical reaction, but avoid touching the piece directly during this window (see our safety note below).
Used in: all 10 designs in this guide.
2. Pressing Botanicals into a Clay Impression Bed
First, make sure your plasticine clay bed is smooth and slightly soft, rolled to a uniform thickness of at least 1.5 to 2 cm (1/2 to 3/4 inch), which provides enough depth to keep thicker stems or twigs from punching straight through to your worktable. Dampen the surface with your silk sponge if it feels stiff. Next, lay your fresh botanical flat against the clay, vein-side down for the deepest detail, and roll over it firmly with an acrylic brayer or your fingers to transfer every fine line. Then, carefully peel the botanical away in one slow motion, checking that the impression stayed crisp and didn’t smudge. Once the impression is ready, proceed directly to Technique 1 to pour your plaster.
Used in: Ideas #1 through #8 and #10 in this guide.
3. Embedding Hardware in Wet Plaster
First, mix and pour your plaster as usual, following Technique 1. Next, while the plaster is still fully liquid, press a threaded brass insert or a double-ended hanger bolt (not a standard wood screw, which has no matching thread for a nut on the other side) straight down into the back of the pour, leaving the exposed threaded end above the surface. This is what lets you bolt the finished piece onto furniture from the inside of a drawer later. Then, hold it steady and centered for 20 to 30 seconds until the plaster firms up enough to grip it on its own, and let the piece finish curing undisturbed. For extra strength around the embedded hardware, lay a small strip of plaster mesh or gauze into the pour before it sets.
Used in: The Sculptural Twig Drawer Pull Set.
10 Original Plaster Casting Concepts to Try This Weekend
These fresh shapes move away from standard flat frames, providing inspired blueprints to expand your botanical plaster casting journey.
Do you love balancing heavy stone textures with modern organic shapes? Check out our guide on Air Dry Clay Pottery: 10 Stunning Secrets for Your Decor.
1. The Fragmented Herbarium Ring Cone
Supplies Needed: 🧱 Oil-Based Plasticine Clay, 🧪 Pottery Plaster No. 1, 📦 Cardboard (for split-cone mold jacket), 🌿 Fresh Wild Chamomile. (See Techniques 1 and 2 above.)
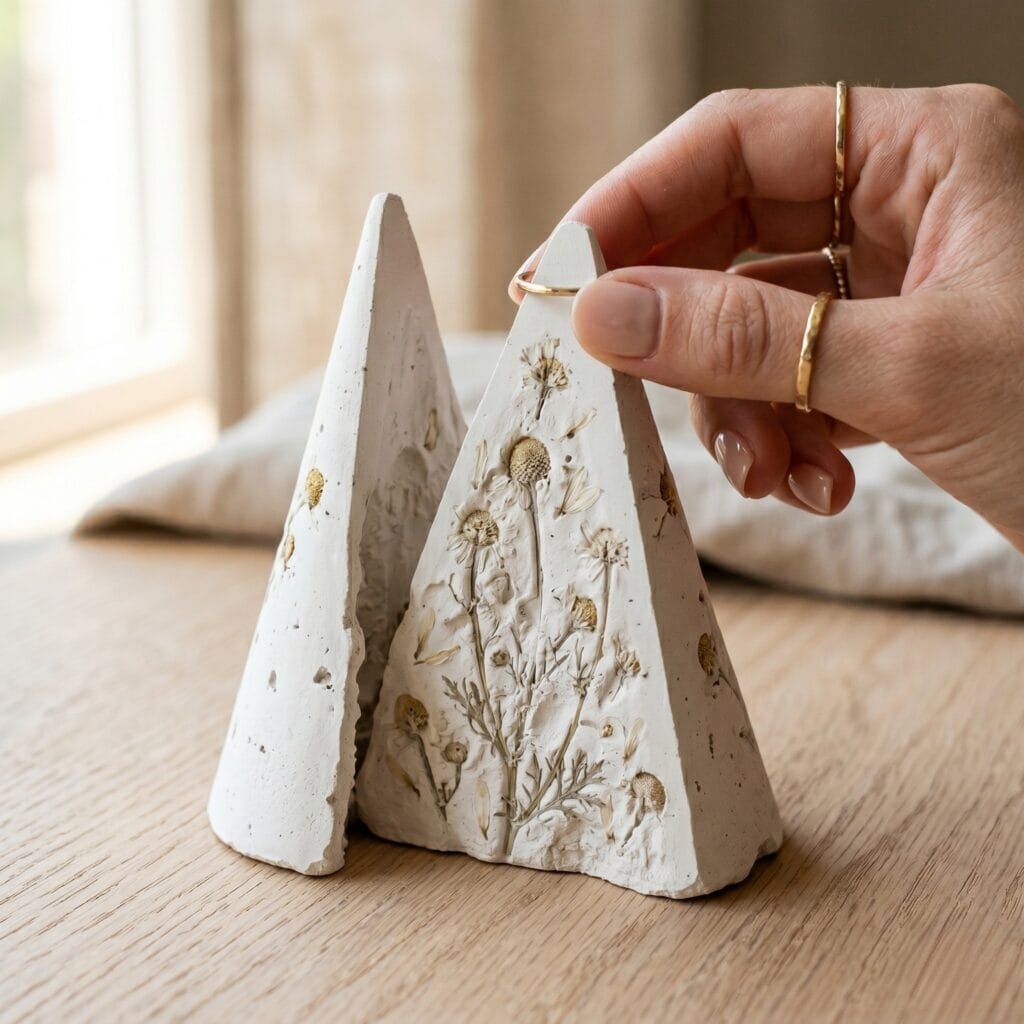
The Concept: Cast an asymmetrical jewelry cone split down the center to expose a flat inner display section. It showcases tiny wildflower shadows on a smooth white incline.
Quick Steps:
- Build a classic cone base out of your plasticine clay bed and press tiny wild chamomile heads flat into one vertical side wall.
- Carefully wrap a custom cardboard jacket around the shaped clay cone to form the outer mold jacket.
- Pour your gypsum mix into the split-cone jacket and leave to set.
Styling Tip: Let the plaster cure completely, then rest it on a raw oak vanity board right beside your delicate metal rings.
2. The Minimalist Intaglio Sprig Block
Supplies Needed: 🧱 Oil-Based Plasticine Clay, 🧪 Pottery Plaster No. 1, ⭕ Flexible Plastic Casting Ring, 🌿 Fresh Wild Grass Sprig. (See Techniques 1 and 2 above.)
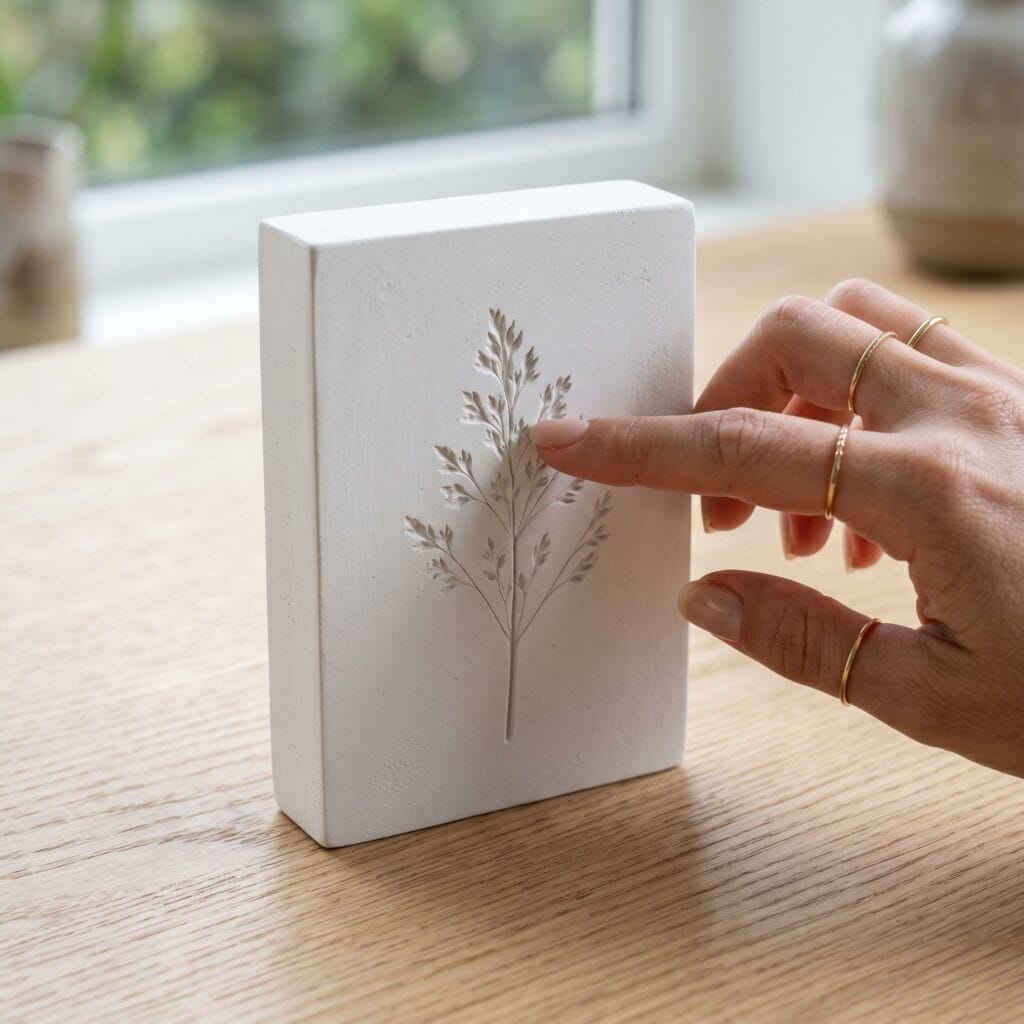
The Concept: This sharp rectangular plaque offers a clean architectural profile, creating a crisp high-relief (bas-relief) impression where delicate wild grass details rise naturally from the smooth plaster surface.
Quick Steps:
- Build a square clay molding bed.
- Press a single grass sprig deep inside.
- Surround the pressed impression with a flexible plastic casting ring. Pour your fine plaster mix inside to fully cover the design.
Styling Tip: Place this solid block on open shelves and keep the surrounding display space minimal to draw the eye instantly.
3. The Sculptural Twig Drawer Pull Set
Supplies Needed: 🧱 Oil-Based Plasticine Clay, 🧪 Pottery Plaster No. 1, 🔩 Threaded Brass Insert or Hanger Bolt, 🌿 Textured Oak Twigs. (See Techniques 1, 2, and 3 above.)
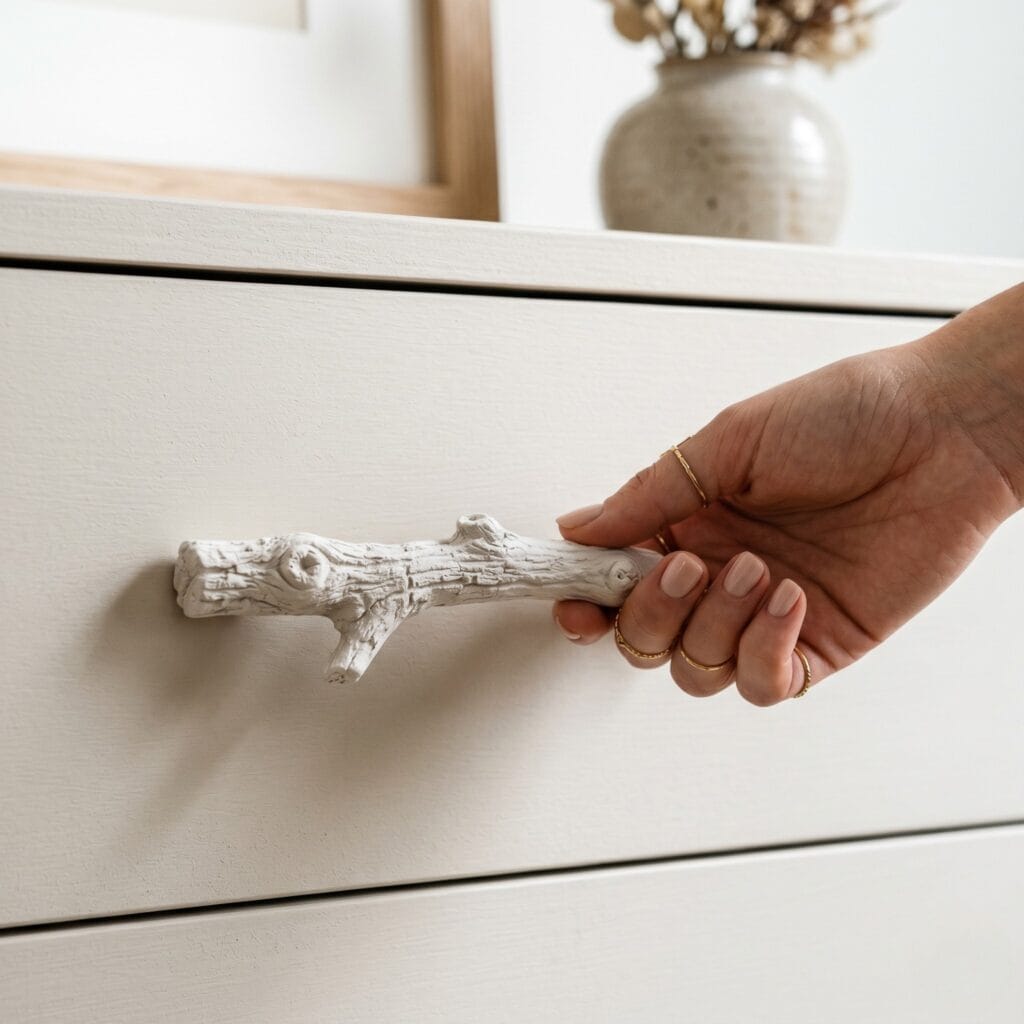
The Concept: Functional, highly textured hardware accents for rustic furniture that bring the natural knots of real wood branches directly to your fingertips.
Quick Steps:
- Gather thick, textured oak twigs featuring natural bumps.
- Press the twigs horizontally into a flat clay tray to build negative molds.
- Embed a threaded brass insert or hanger bolt face-down into the wet plaster back and let it harden (see Technique 3 above for why a standard screw won’t work here).
Styling Tip: Mount these branch pulls onto a matte linen dresser drawer to pair beautifully with neutral home textiles.
4. The Bas-Relief Botanical Bookmark Palette
Supplies Needed: 🧱 Oil-Based Plasticine Clay, 🧪 Pottery Plaster No. 1, 🌿 Fresh Dill Fronds, 🪛 Small Hand Drill, 🧵 Organic Silk Twine, 🕸️ Plaster Mesh (Optional). (See Techniques 1 and 2 above.)
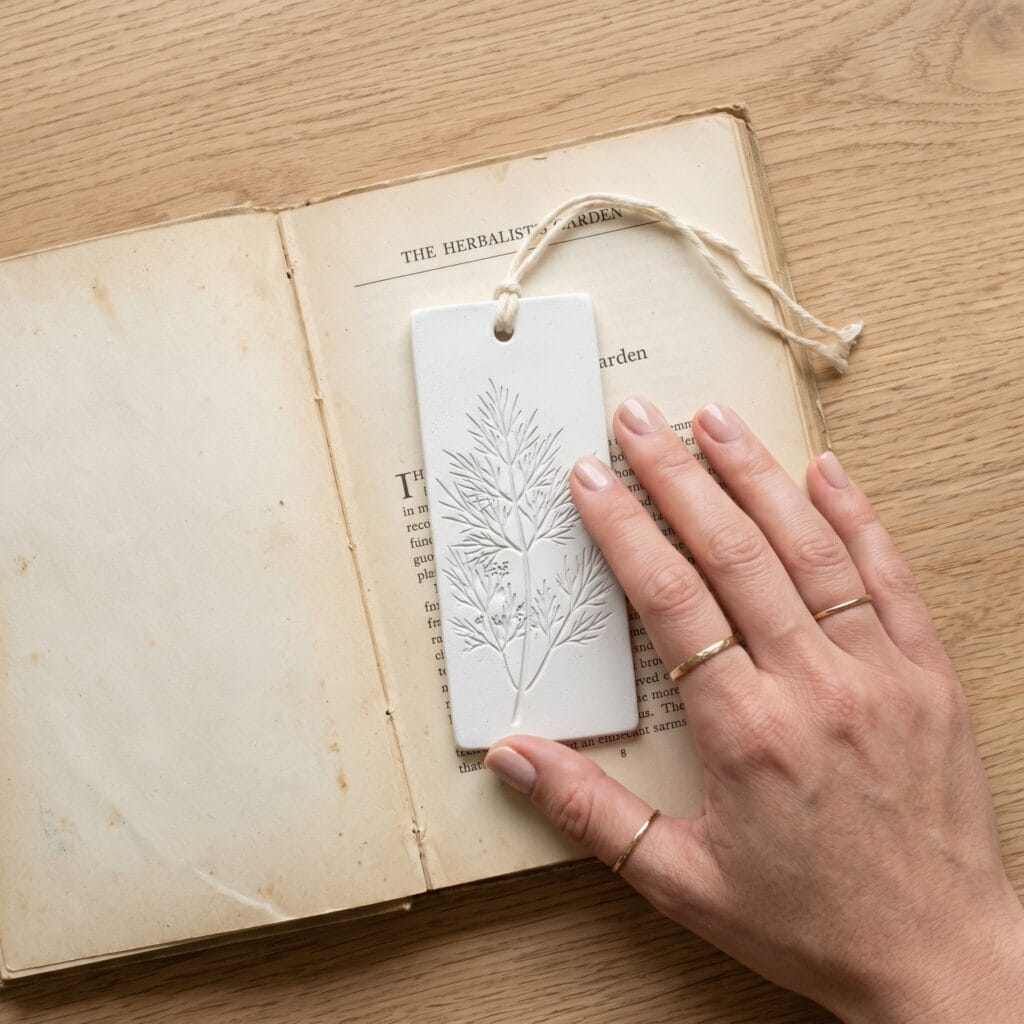
The Concept: An ultra-thin, plate-like plaque that acts as a functional reading divider, showcasing the fine low-relief fronds of fresh dill leaves.
Quick Steps:
- Roll your molding clay perfectly flat, then aim for a finished plaster thickness of at least 6 to 8 millimeters, as thinner pours are too fragile for a bookmark handled repeatedly.
- Place delicate dill fronds over the clay surface and roll gently to imprint the veins. Lay an optional strip of plaster mesh or cheesecloth into the pour before it sets for extra reinforcement.
- Pour a layer of fine mixed plaster over the pattern. Once fully cured after 24 to 48 hours, drill a tiny hole at the top tip and tie a raw strand of organic silk twine through the opening.
Styling Tip: Display the completed bookmark rested inside a vintage hardbound book or on a wood desk tray.
5. The Angled Cylinder Botanical Weight
Supplies Needed: 🧱 Oil-Based Plasticine Clay, 🧪 Pottery Plaster No. 1, 🌿 Dried Wild Oat Stems. (See Techniques 1 and 2 above.)
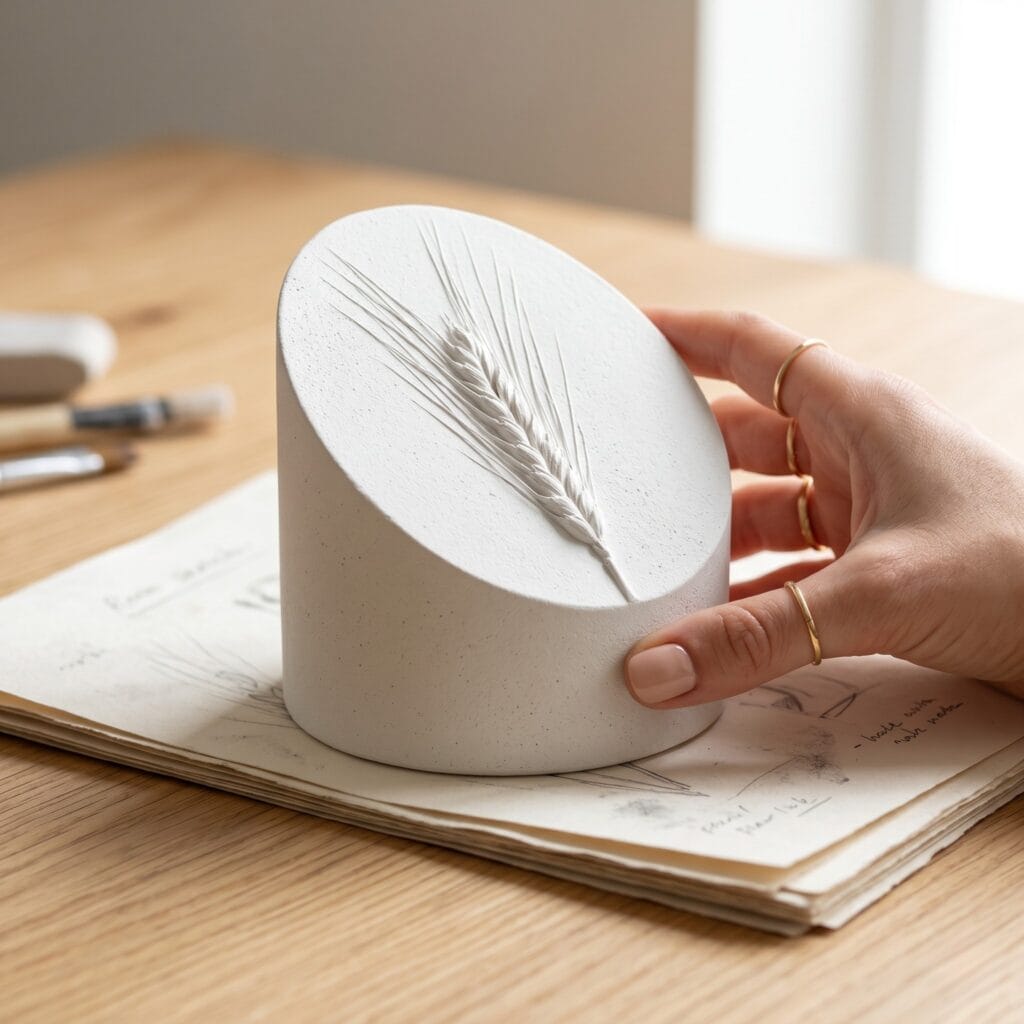
The Concept: A heavy cylindrical desk weight featuring a sharp slanted top edge that serves as a display stage for wild oat stems.
Quick Steps:
- Mold a clay cylinder with a 45-degree slanted top.
- Press a single dried wheat stalk into the slanted clay face.
- Pour your fine plaster into this custom mold.
Styling Tip: Use this angled plaster block on your desk to keep loose sketches secure. For more wall layout projects, see our structured Clay Mask Ideas: 10 Genius DIY Secrets for Beautiful Walls.
6. The Textured Fern-Frond Incense Boat
Supplies Needed: 🧱 Oil-Based Plasticine Clay, 🧪 Pottery Plaster No. 1, 🌿 Fresh Fern Frond, 🪛 Small Hand Drill. (See Techniques 1 and 2 above.)
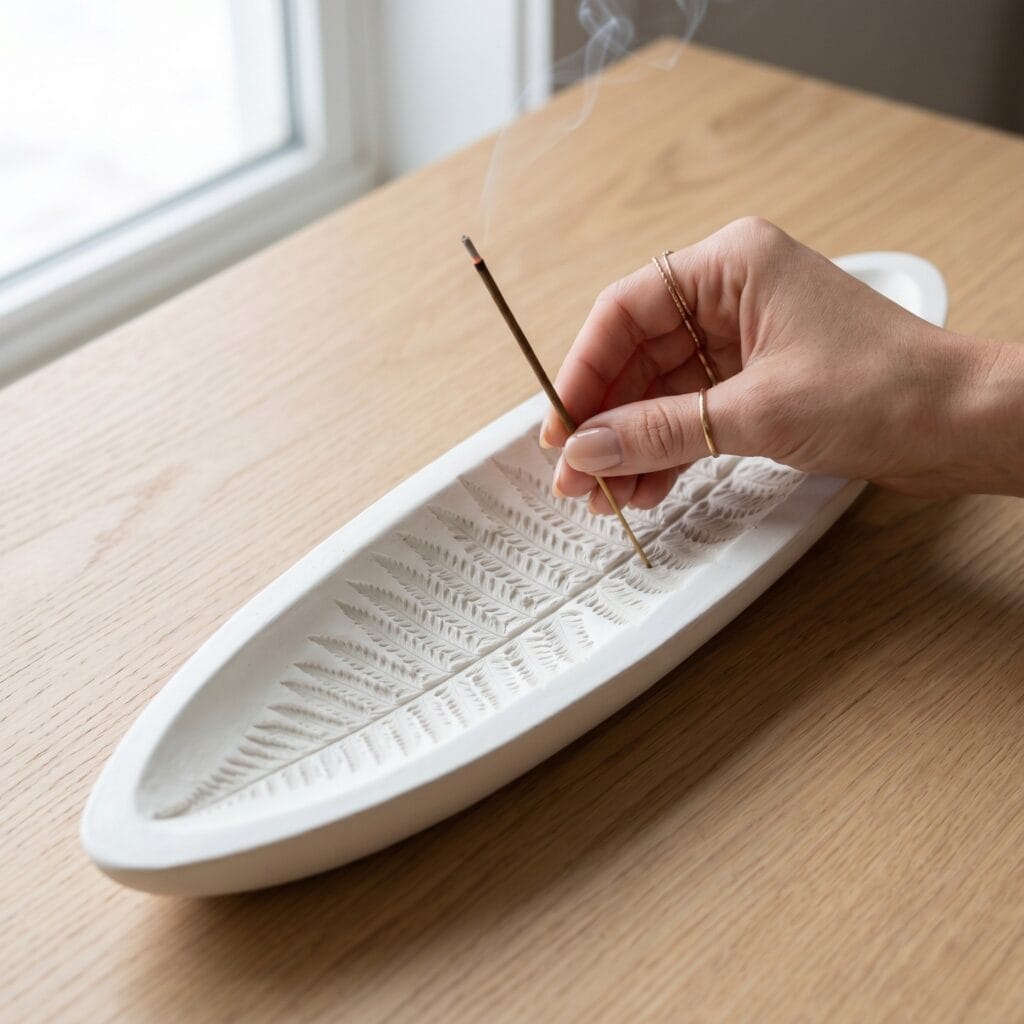
The Concept: The natural curve of a giant fern frond translates into an elongated ash catcher, using deep leaf vein lines as functional paths to collect falling ash.
Quick Steps:
- Lay a fresh, thick fern branch face-down over a long wedge of soft plasticine, then curl the short ends of the clay block upward to form a hollow canoe silhouette.
- While the clay is still soft, angle a toothpick or skewer into one end to mark where the incense stick will sit, then remove it before pouring.
- Cast your liquid gypsum mixture directly into the curved organic valley. Once cured, drill a small angled hole at the marked point using your hand drill, sized to snugly hold a standard incense stick.
Styling Tip: Use this boat during evening meditation rituals to keep tabletop surfaces completely clean.
7. The Pressed Lavender Diffuser Stone
Supplies Needed: 🧱 Oil-Based Plasticine Clay, 🧪 Pottery Plaster No. 1, 🌿 Fresh Lavender Stems, 💧 Essential Oil (Optional). (See Techniques 1 and 2 above.)
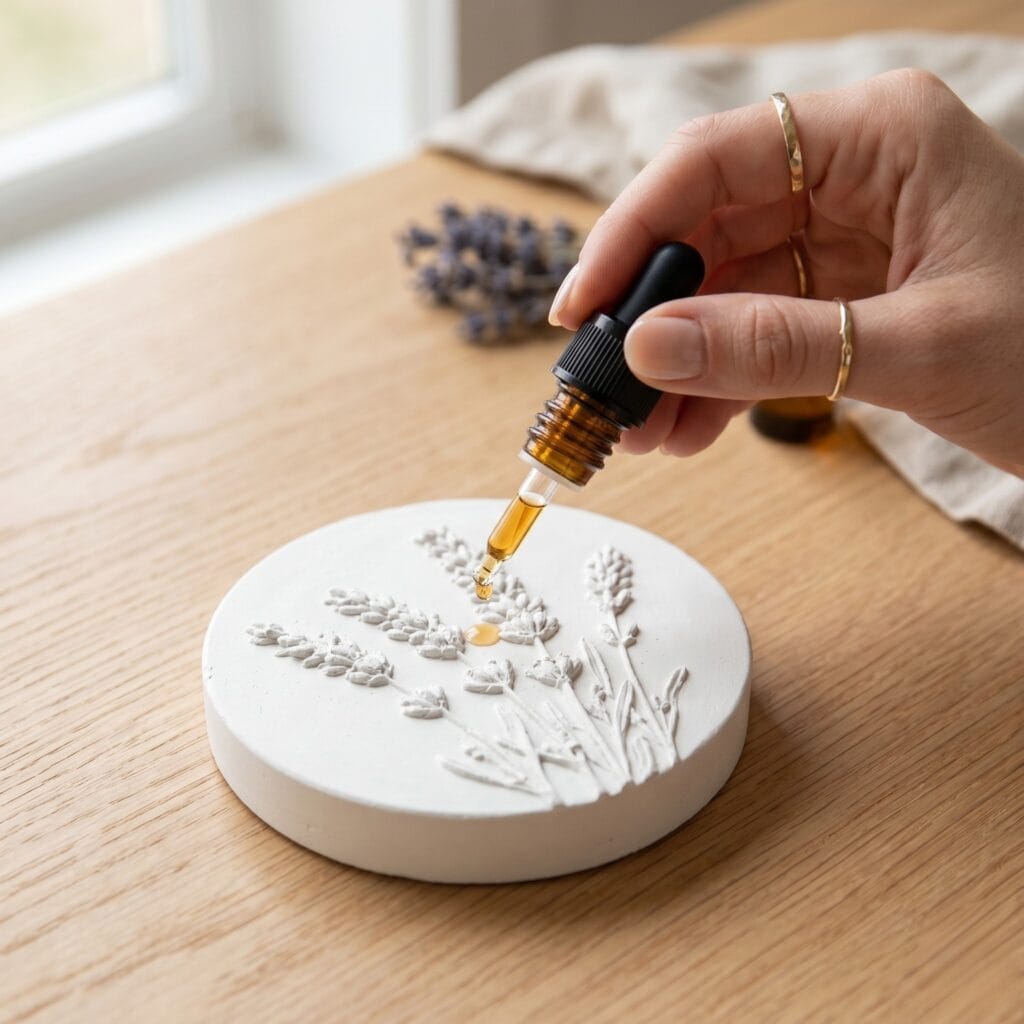
The Concept: A thick plaster disc that acts as a natural room scent diffuser, allowing the porous mineral to absorb essential oils while displaying raw lavender sprigs.
Quick Steps:
- Roll a thick, perfectly round clay base.
- Press fresh lavender stems deeply into the soft surface.
- Pour your plaster mix over the floral matrix.
Styling Tip: Place this raw stone on your bathroom vanity and add three drops of bergamot oil directly onto the plaster after it has fully cured for 24 to 48 hours.
8. Segmented Triptych Botanical Plaster Tiles
Supplies Needed: 🧱 Oil-Based Plasticine Clay, 🧪 Pottery Plaster No. 1, 🖼️ Square Wood Casting Frames (x3), 🌿 Wild Ivy Branch. (See Techniques 1 and 2 above.)
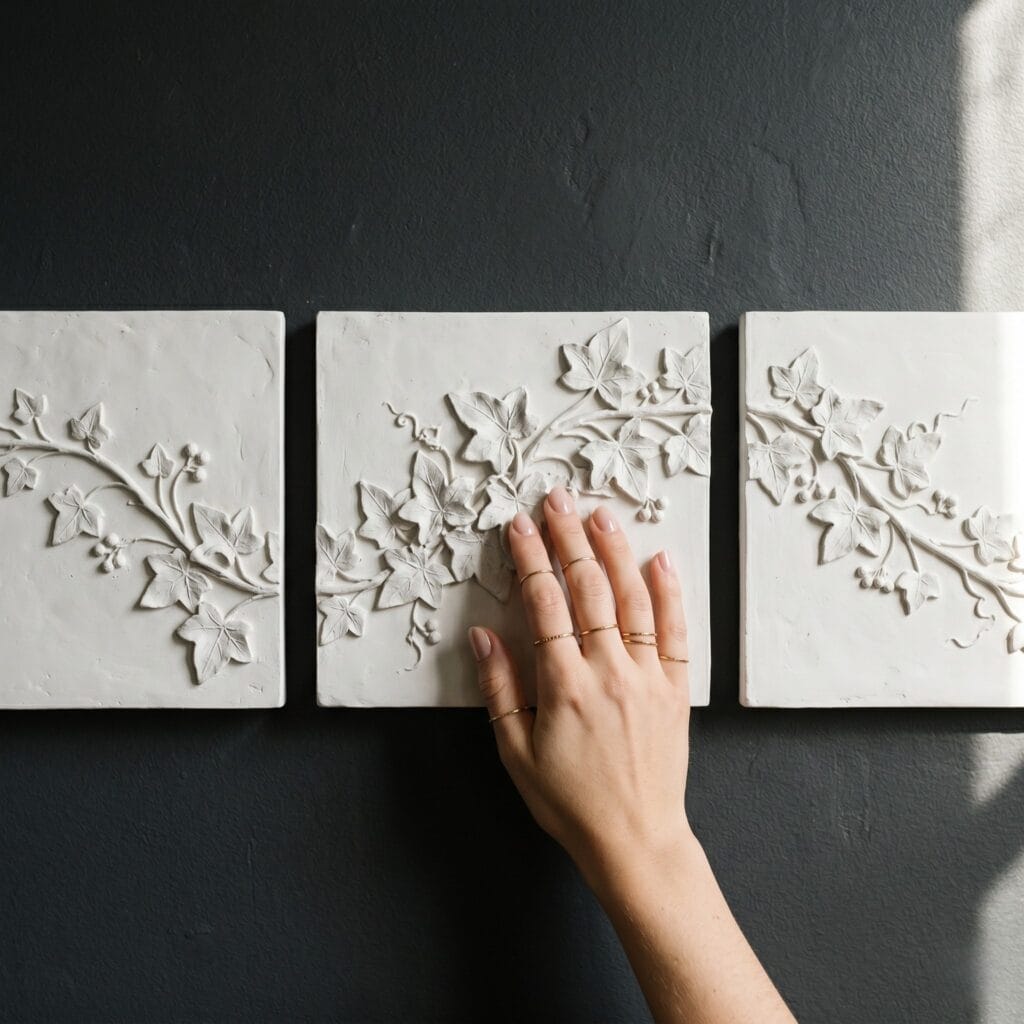
The Concept: A multi-panel approach where a single climbing ivy vine runs across three separate tiles, forming a continuous narrative for large walls.
Quick Steps:
- Line up three square wood casting frames side-by-side over a single sheet of clay.
- Lay a long, unbroken wild ivy branch across all three open frames simultaneously.
- Pour your pottery plaster mix into each frame compartment to isolate the segments.
Styling Tip: Mount the dried trio on a dark accent wall with a 1-inch gap between tiles so the botanical lines flow across the panels.
9. The Cast Bark Mineral Display Plinth
Supplies Needed: 🧪 Pottery Plaster No. 1, ⭕ Round Casting Container, 🌿 Cedar Bark Strip, 🧻 Petroleum Jelly or Liquid Dish Soap, 🪨 Fine-Grit Sandpaper. (See Technique 1 above.)
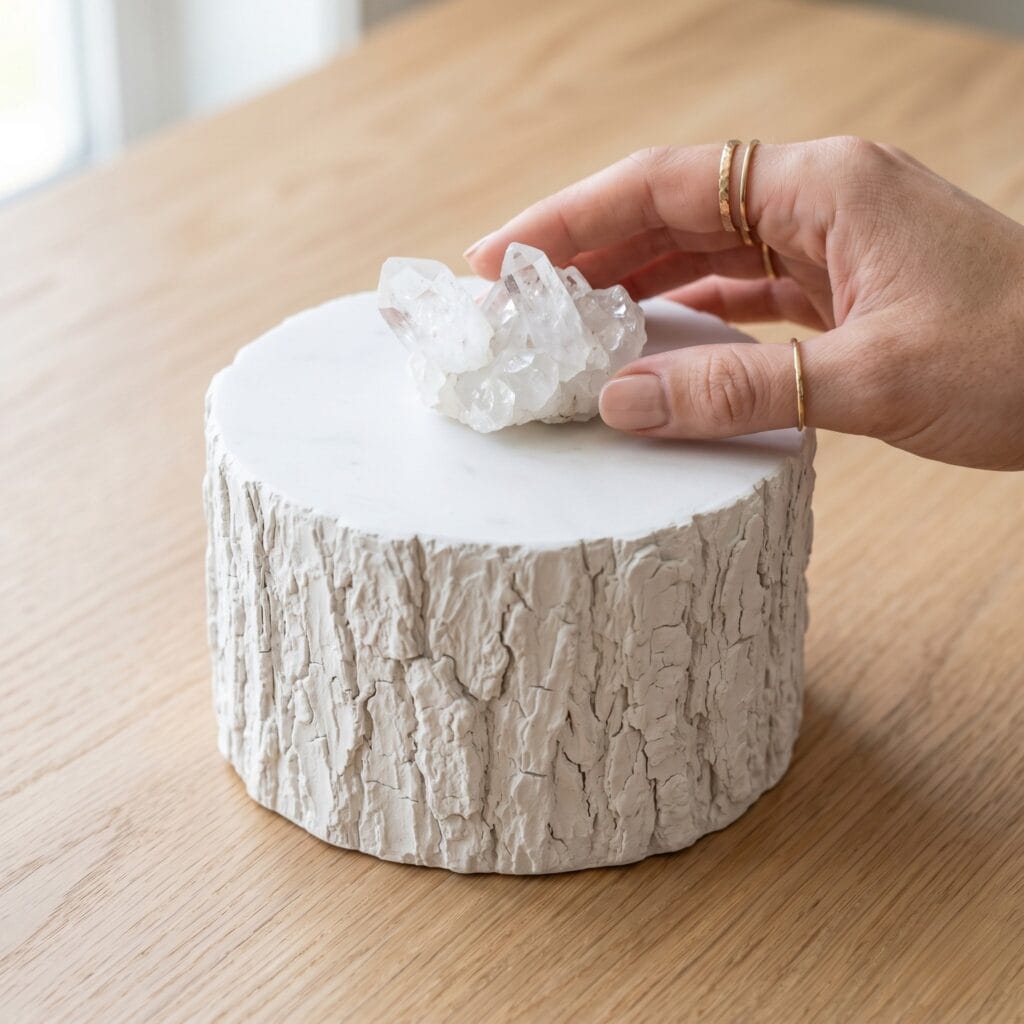
The Concept: Thick cylindrical pedestals displaying deep cracks of mature tree bark around the rim, leaving the top face flat to showcase raw mineral clusters.
Quick Steps:
- Strip a flexible piece of highly textured cedar bark to use as an outer casting collar and line the inside of a round container with the bark strip.
- Apply a thin coat of petroleum jelly or liquid dish soap to the inner bark surface as a release agent, as bark is porous and plaster will lock into its texture without one.
- Fill the cylinder with heavy plaster and let it set until cool to the touch.
Styling Tip: Sand the top flat circular surface until smooth, then place your favorite raw quartz crystal on top.
10. The Pressed Clover Palette Tray
Supplies Needed: 🧱 Oil-Based Plasticine Clay, 🧪 Pottery Plaster No. 1, 🌿 Fresh Meadow Clovers, 🎨 Acrylic Brayer. (See Techniques 1 and 2 above.)
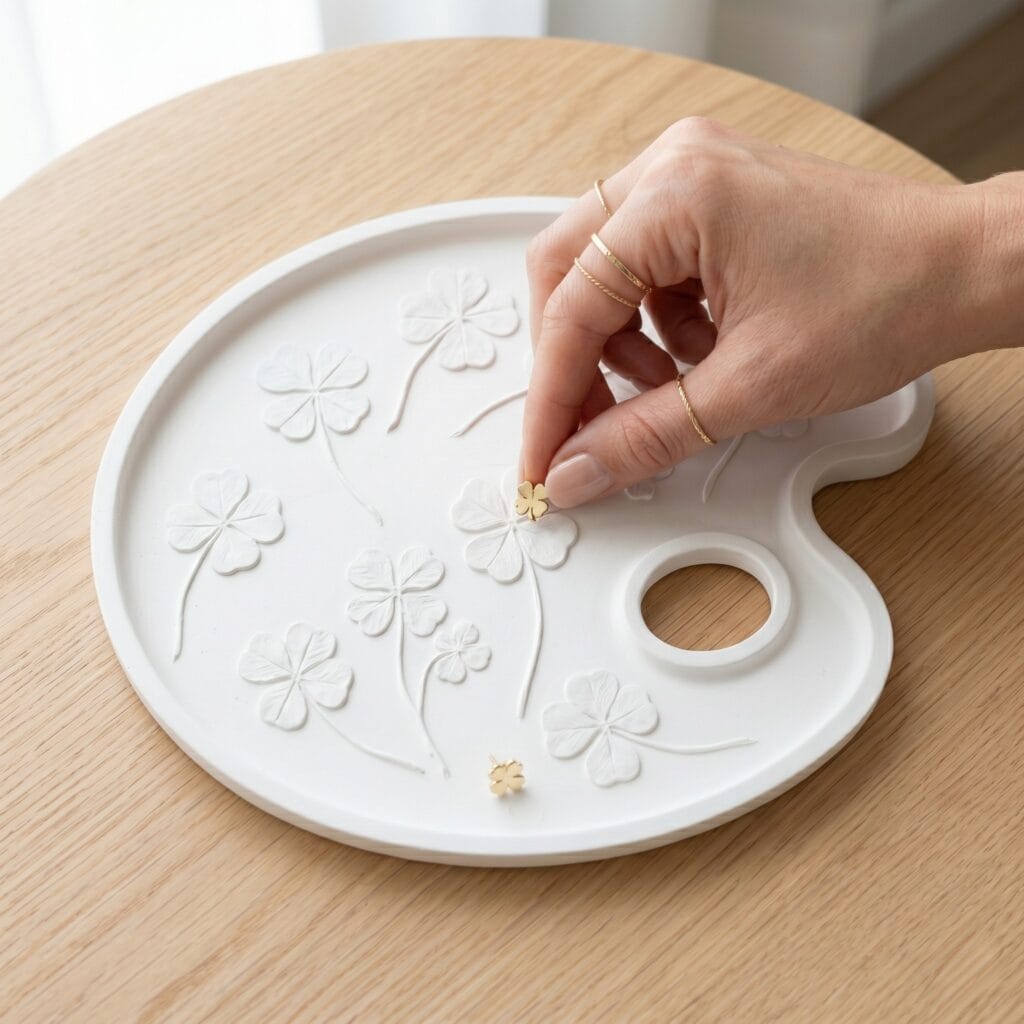
The Concept: A shallow artist’s palette tray featuring a smooth thumbhole cutout and raised clover leaf silhouettes across the white mineral bed.
Quick Steps:
- Cut an artist palette shape out of a flat 1-inch clay slab.
- Scatter fresh meadow clovers over the surface and press them flat with an acrylic brayer.
- Cast your fine plaster mix over the design, ensuring the thumb ring stays open.
Styling Tip: Use this organic palette tray to curate loose everyday jewelry near your bedroom mirror.
QUICK REFERENCE: ALL SUPPLIES AT A GLANCE
Ready to start your first casting project? Here is everything from this guide in one place before you shop.
PLASTER & MOLDING CLAY
- 🧪 Pottery Plaster No. 1 (Gypsum) | Check Price for Pottery Plaster on Amazon
- 🧱 Oil-Based Plasticine Clay | View Plasticine Clay on Amazon
MOLDS & CASTING FORMS
- ⭕ Flexible Plastic Casting Rings (Assorted Sizes) | Find Casting Rings on Amazon
- 🖼️ Square Wood Casting Frames | Explore Wood Casting Frames on Amazon
📦 Cardboard (Household)
HARDWARE & PREP TOOLS
- 🧽 Natural Silk Sponge | Check Availability for Silk Sponges on Amazon
- 🔩 Threaded Brass Insert or Double-Ended Hanger Bolt | Find Threaded Inserts on Amazon
- 🕸️ Plaster Mesh or Cheesecloth (Optional) | View Plaster Mesh on Amazon
- 🪛 Small Hand Drill or Drill Bit | View Hand Drills on Amazon
- 🧵 Organic Silk Twine | Check Price for Silk Twine on Amazon
- 🪨 Fine-Grit Sandpaper | Find Sandpaper on Amazon
- 🎨 Acrylic Brayer or Roller | Explore Clay Rollers on Amazon
🧻 Petroleum Jelly or Liquid Dish Soap (Household)
NATURAL BOTANICALS
- 🌿 Fresh or Dried Botanicals | Explore Dried Botanicals on Amazon
OPTIONAL FINISHING
- 💧 Essential Oil (e.g. Bergamot) | Check Price for Essential Oils on Amazon
Important Crafting Safety Note:
Working with fine mineral powders is a great creative outlet. Still, safety must guide your studio practice. So, use a clean workspace away from family cooking zones. Because mixing dry plaster creates fine micro-dust, always wear a lightweight particle mask during preparation, and consider safety glasses when sifting or pouring. Finally, never pour wet leftover plaster down your studio plumbing drains. Let excess plaster cure fully in a disposable container, then discard it as solid waste.
A note on curing heat: Setting plaster generates real heat through a natural chemical reaction, and thick pours (like the cylindrical weights and diffuser stones in this guide) can get noticeably warm partway through curing. Avoid pressing your bare hands directly against a piece while it’s setting, and let every project cool completely before handling or demolding.
A note on skin contact: Wet plaster can dry out or mildly irritate skin with repeated or prolonged contact. Consider wearing gloves during mixing and pouring, and wash your hands thoroughly afterward.
A note on hardware and tools: Keep drill bits and steel mounting hardware stored safely away from young children when not in use, and always drill or embed hardware on a stable, flat surface.
A note on children and pets: Keep dry plaster powder, wet plaster mix, and small finished pieces (especially the jewelry cone, palette tray, and drawer pulls) out of reach of curious children and pets. Small cast pieces can be a choking hazard, and dry plaster powder should not be inhaled or ingested.
Which sculptural look are you inspired to style first? Share your design layout ideas in the comments section below!


