

Give an everyday phone case a handmade detail with DIY resin phone grips. A custom grip can echo the colors of a favorite case, hold a pressed flower beneath a clear, glossy surface, or carry a scatter of glitter that flashes when you reach for your phone. These palm-sized resin pieces also make thoughtful handmade gifts for friends, especially when you choose colors and fillers that suit their hobbies, workspace, or everyday style. If you enjoy making compact accessories with a smooth, polished finish, you will also enjoy our guide on making handmade clay diffuser stones.
Affiliate Disclosure: This post contains affiliate links. As an Amazon Associate, I earn from qualifying purchases. If you buy through these links, I may earn a commission at no additional cost to you. For the full terms covering this site and its content, see our Terms and Conditions.
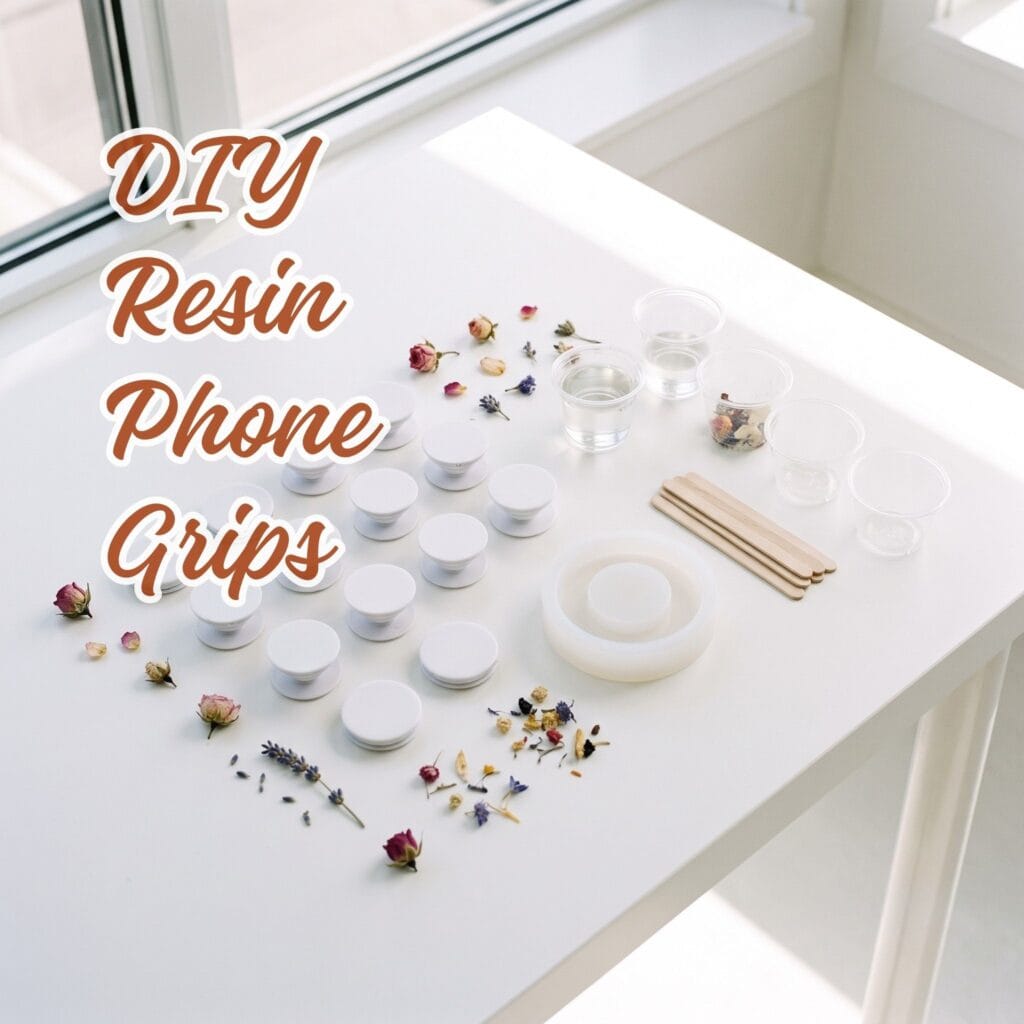
This guide walks through the supplies needed for clean, durable resin work, then covers measuring, mixing, pouring, curing, and attaching each finished piece to a phone-grip base. You will also find seven design ideas with specific color and filler combinations, from dried botanicals tucked beneath clear resin to glossy coffee beans set in warm amber tones. Clear a level work surface, keep paper towels nearby, and allow enough time for the resin and adhesive to cure fully before the grip goes onto a phone case.
Essential Materials & Tools
Epoxy resin work calls for a few dependable supplies and a tidy setup. Gather everything before opening the resin bottles so your gloves, mold, pigments, and stir sticks are within easy reach once the mixture is in the cup:
✨ Consumables & Raw Materials
- Epoxy Resin Kit — Use a standard clear art resin. Specifically, look for a bubble-free formula. | Check Epoxy Resin Kit on Amazon
- Pressed Flowers and Botanicals — Optional — tiny dried daisies, fern tips, and other fully dried botanicals for the Pressed Botanical Garden design; place them face down so the prettiest side faces outward. | View Pressed Flowers and Botanicals on Amazon
- Gold Foil Flakes — Optional — gold foil flakes tucked around the petals in the Pressed Botanical Garden design for a warm metallic accent. | View Gold Foil Flakes on Amazon
- Resin Pigment — Opaque colorant — one drop at a time: pastel turquoise for the Sea Glass design and opaque white for the Terrazzo base. | View Resin Pigment on Amazon
- Transparent Resin Dye — Translucent tint — one drop at a time: deep navy for the Night Sky design and pastel pink for the Pastel design. | View Transparent Resin Dye on Amazon
- Alcohol Ink — Optional — one white and one gold drop dragged with a toothpick for the Abstract Fluid Marble design. | View Alcohol Ink on Amazon
- Glitter and Sequins — Optional — fine holographic glitter with star sequins for the Night Sky design and chunky heart sequins for the Pastel Chunky Glitter design. | View Glitter and Sequins on Amazon
- Crushed Sea Glass — Optional — crushed sea glass for the Translucent Sea Glass design; keep pieces 1/8 inch from the mold rim. | View Crushed Sea Glass on Amazon
- Miniature Seashells — Optional — miniature shells and lightweight shell fragments for the Translucent Sea Glass design; choose small flat pieces that stay clear of the rim. | View Miniature Seashells on Amazon
- Acrylic Terrazzo Flakes — Optional — matte irregular acrylic flakes mixed into opaque white resin for the Minimalist Terrazzo design. | View Acrylic Terrazzo Flakes on Amazon
- Lint-Free Cloth — Wipes the mould clean in Step 1 — ordinary tissue leaves lint behind. | Explore Lint-Free Cloth on Amazon
- Toothpicks — Removes excess adhesive in Step 5 and draws the fluid-marble pattern. | Find on Amazon
🧰 Core Crafting Tools & Equipment
- Silicone Craft Mat — A nonstick protective work surface catches drips and peels clean after resin has cured. | See Silicone Craft Mat on Amazon
- Silicone Molds — You will need a round silicone mold for phone grips. | Check Price on Amazon
- Wax Paper — Creates a clean release surface for supporting the cured resin circle while attaching its base. | Explore Wax Paper on Amazon
- Graduated Mixing Cup — Marked cups help measure resin and hardener accurately according to the manufacturer ratio. | View on Amazon
- Digital Gram Scale — Optional — only if your resin label specifies a weight ratio instead of volume: weigh resin and hardener to the gram for a reliable cure. | View Digital Gram Scale on Amazon
- Roasted Coffee Beans — Optional — clean, fully dried roasted beans sealed with Clear Acrylic Sealer before casting, for the Minimalist Coffee Bean design. | View Roasted Coffee Beans on Amazon
- Nitrile Gloves — Worn from Step 1 on — uncured resin irritates skin even before it sets. | Find Nitrile Gloves on Amazon
- Safety Glasses — Protect your eyes while measuring, mixing and pouring resin (required by the Important Safety Note). | View Safety Glasses on Amazon
- Organic Vapor Respirator — Follow your resin’s SDS: use one only when ventilation cannot clear the vapour, with the cartridge type the SDS specifies — a dust mask never filters it. | See Price on Amazon
- Wooden Stir Sticks — Stirs resin and hardener in Step 2 without scratching the cup. | See Wooden Stir Sticks on Amazon
- Tweezers — Botanical, celestial and coffee-bean designs place inclusions with tweezers. | View on Amazon
💎 Hardware, Fasteners & Finishing
- Two-Part Epoxy Adhesive — A strong two-part adhesive creates a durable bond between the cured resin circle and the blank grip base. | Find on Amazon
- Blank Phone Grip Bases — Buy plain flat-top plastic bases with adhesive backs — the flat top is what the cured resin disc bonds to. | View Blank Phone Grip Bases on Amazon
- Isopropyl Rubbing Alcohol — Cleans the flat bonding surfaces in Step 5 so dust and skin oil cannot weaken the adhesive. | View Isopropyl Rubbing Alcohol on Amazon
- Clear Acrylic Sealer — Seals the coffee beans before casting so their oil does not cloud the resin. | Check Clear Acrylic Sealer on Amazon
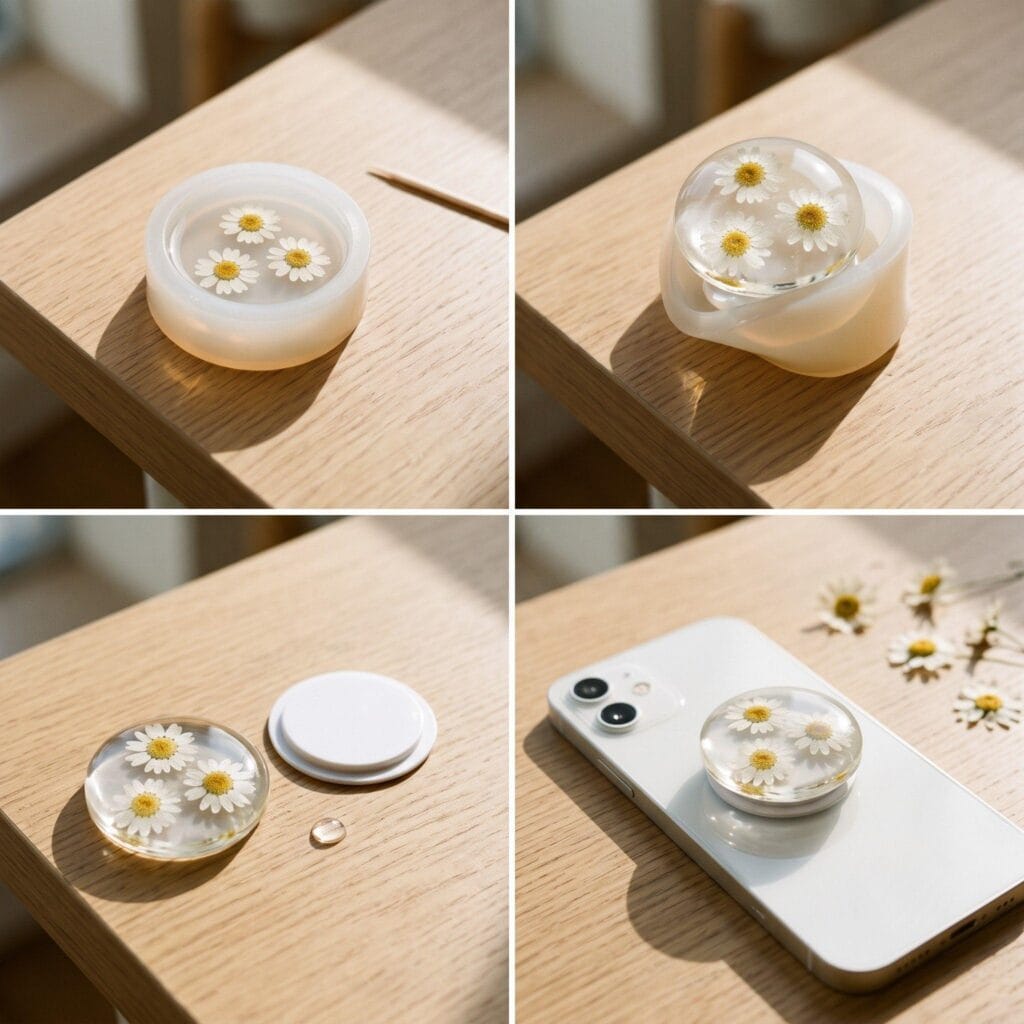
Step-by-Step Instructions for DIY Resin Phone Grips
Accurate measuring and patient mixing give a small resin piece a smooth, glassy surface instead of cloudy patches or tacky spots. Read the mixing ratio printed on your resin package before you begin. Some formulas use equal parts resin and hardener by volume, while others require a precise weight ratio. Work on a level table and choose a curing spot away from dust, pet hair, direct sun, and curious fingers.
Step 1: Prep Your Workspace
Cover the table with a silicone craft mat, wax paper, or a disposable plastic tablecloth.
- Open a window or work beneath a ventilation fan, then pull on nitrile gloves.
- Measure the flat bonding pad on the selected blank phone-grip base and choose a mold cavity slightly larger than that pad, so the cured circle seats cleanly on the base. Wipe the silicone mold with a lint-free cloth and inspect each cavity under a lamp.
- A stray fiber, crumb, or pet hair can remain visible through clear resin after it hardens, especially in a small round phone grip.
Step 2: Mix the Resin
Pour the resin and hardener into a graduated mixing cup according to the manufacturer’s ratio.
- For a one-to-one formula, measure equal amounts by volume and check the markings at eye level.
- Stir slowly with a flat wooden stir stick for the mix time printed on your resin’s label (three full minutes is the common default), scraping the sides and bottom of the cup every few turns so no unmixed material clings to the edge.
- Let it rest for the induction time your label gives (one minute is typical), then check pot life and full-cure time on the package before you start pouring — every timing here defers to the resin you actually bought.
- Many surface bubbles will rise and pop during that short rest.
Step 3: Pour Your DIY Resin Phone Grips
Arrange dry decorations in the mold before pouring when you want careful control over their placement.
- You can also tint the mixed resin in the cup with a small amount of resin pigment, resin dye, or alcohol ink.
- Pour in a thin, steady stream until the resin sits just below the rim of the circular cavity.
- Leave about 1/16 inch of space at the top.
- An overfilled mold can form a sharp, uneven edge that takes extra sanding to smooth.
Step 4: Cure and Demold
Leave the filled mold flat and undisturbed for 24 to 48 hours, or for the full cure time listed by the resin manufacturer.
- Resin that feels firm on top may still be soft underneath, and handling it too early can leave fingerprints, dents, or a slightly bent edge.
- When the piece feels hard all the way through, flex the silicone mold gently and ease out the cured circle without twisting it.
While the resin cures, you can start another quick project, such as our upcycled glass jar luminaries.
Step 5: Attach the Base
Set the cured resin circle face down on a clean scrap of wax paper.
- Wipe the flat top of the blank phone-grip base and the back of the resin circle with rubbing alcohol, so dust or skin oil cannot weaken the bond.
- Two-part epoxy is the primary adhesive: mix a small, centered dose, spread a thin layer on the base, press the base onto the back of the resin circle, check that it sits straight, and hold it in place for 30 seconds.
- Wipe away any adhesive that squeezes out around the edge with a toothpick before it sets, then follow the cure time printed on the epoxy label before attaching the grip to a phone case — and test the bond first on a spare base and resin scrap: press, twist, and pull. If it shifts, let it cure longer.
- Superglue is only a quick alternative for a lightweight test piece; the two-part epoxy gives the durable bond this project needs.
- The base’s factory adhesive back is what meets the phone case: press it onto a clean, smooth case surface, and check the base maker’s note before planning to lift and reposition it. The resin disc bonds to the base’s flat top instead of the case, so glue never touches your phone.
7 Aesthetic Ideas for DIY Resin Phone Grips
Place large or heavy inclusions on a thin first layer instead of straight into a full pour: cover the mold floor with a thin layer of resin, let it thicken to the tack stage your resin’s label describes (if it gives one), set the pieces where you want them, then top up slowly so every inclusion stays fully covered.
If something goes wrong: a surface still tacky after the stated cure time is usually under-mixed or too cool — give it more time in a warm spot; an inclusion poking through means that layer was too thin — sand it flat and seal the spot; leftover bubbles can be popped with a toothpick before the resin gels; and a disc that will not seat on the base needs both surfaces wiped with rubbing alcohol and lightly scuffed before the epoxy.
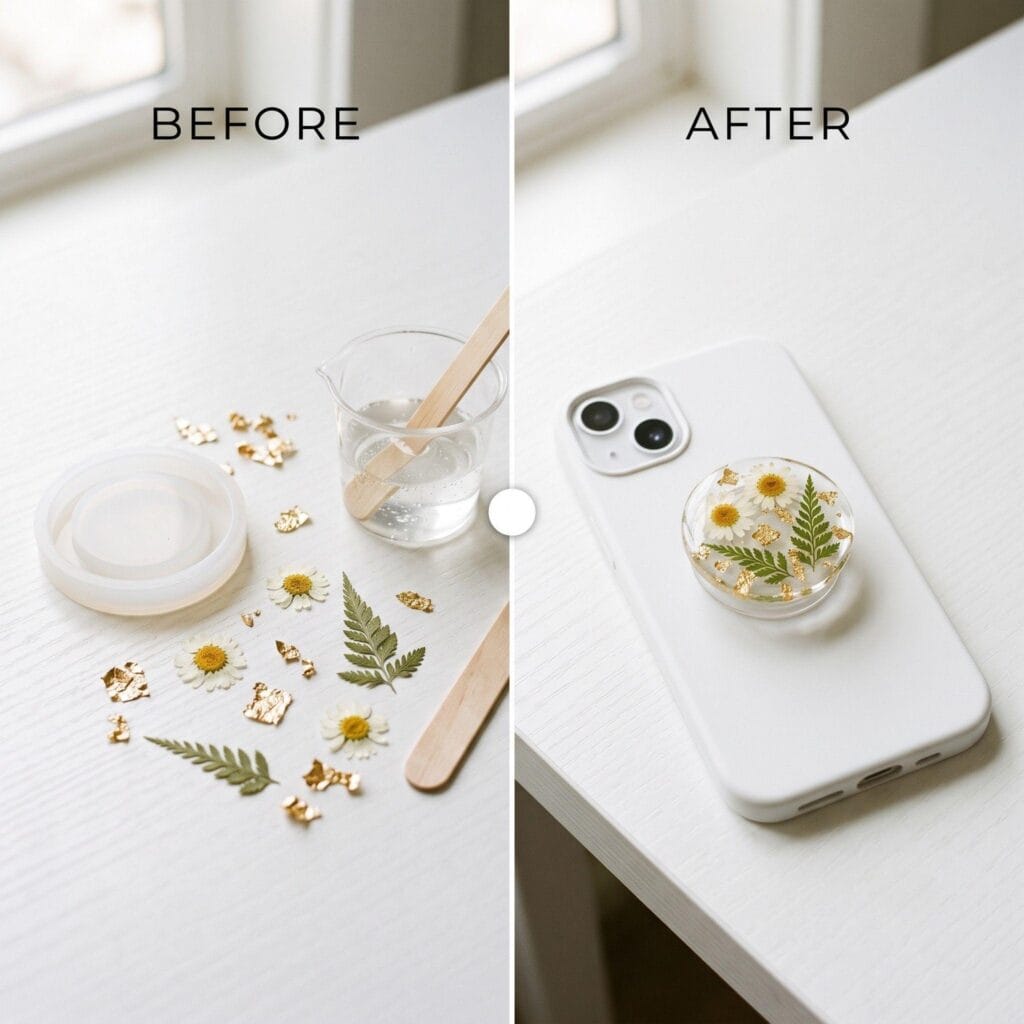
1. Pressed Botanical Garden DIY Resin Phone Grips
Place tiny dried daisies, fern tips, or other fully dried botanicals face down in the mold so their prettiest side faces outward once the grip is removed. Use tweezers to flatten petals and keep delicate leaves clear of the mold rim. Tuck a few gold foil flakes around the petals, then cover the arrangement with clear resin. The transparent surface preserves the fine veins in the leaves and gives the finished piece the quiet charm of a tiny pressed-flower paperweight.
2. Translucent Sea Glass
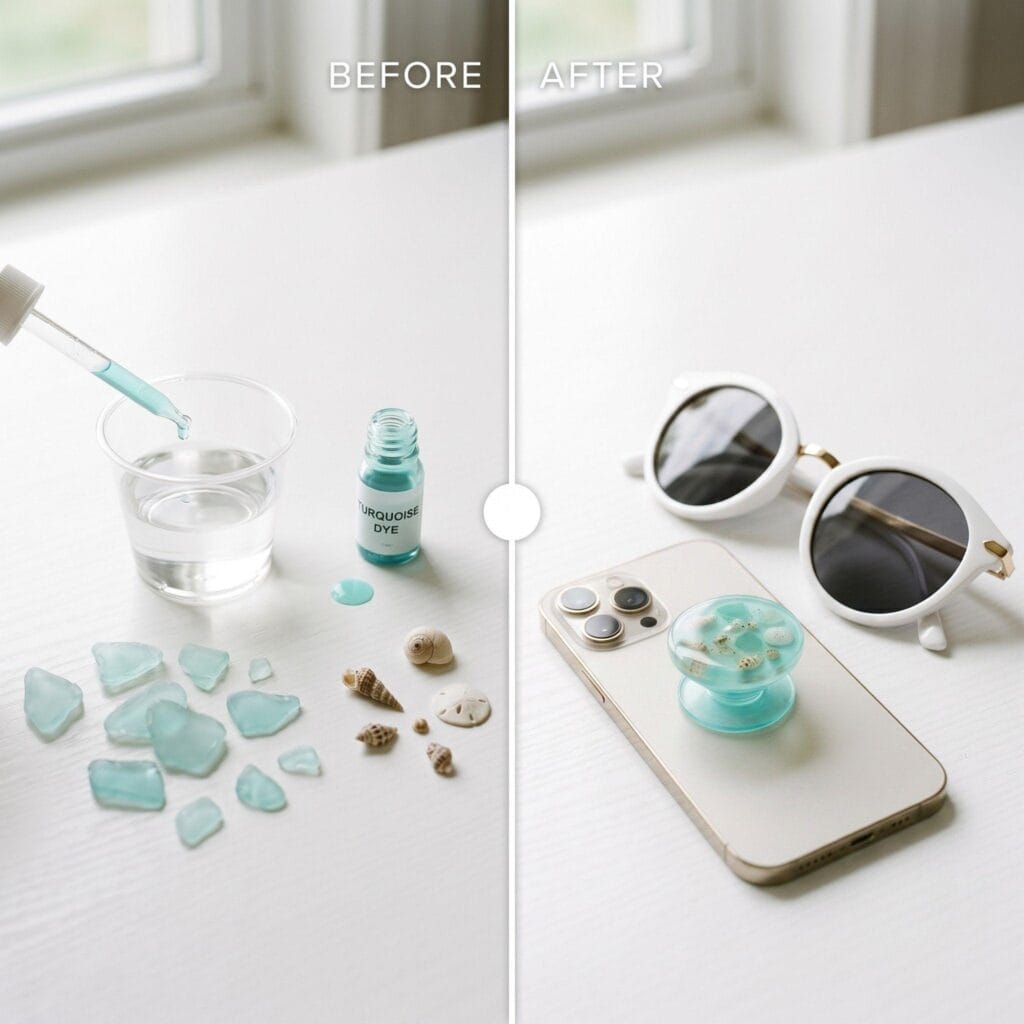
Tint the resin with one small drop of pastel turquoise pigment and stir until the color looks even from the bottom of the cup to the surface. Set a few pieces of crushed sea glass and miniature shells into the mold, keeping larger pieces at least 1/8 inch from the rim so the edge stays smooth. Choose small, lightweight shell fragments rather than thick pieces that may protrude above the resin. Pale aqua resin, frosted glass, and shell fragments give the grip the worn, collected look of a beachcombed keepsake.
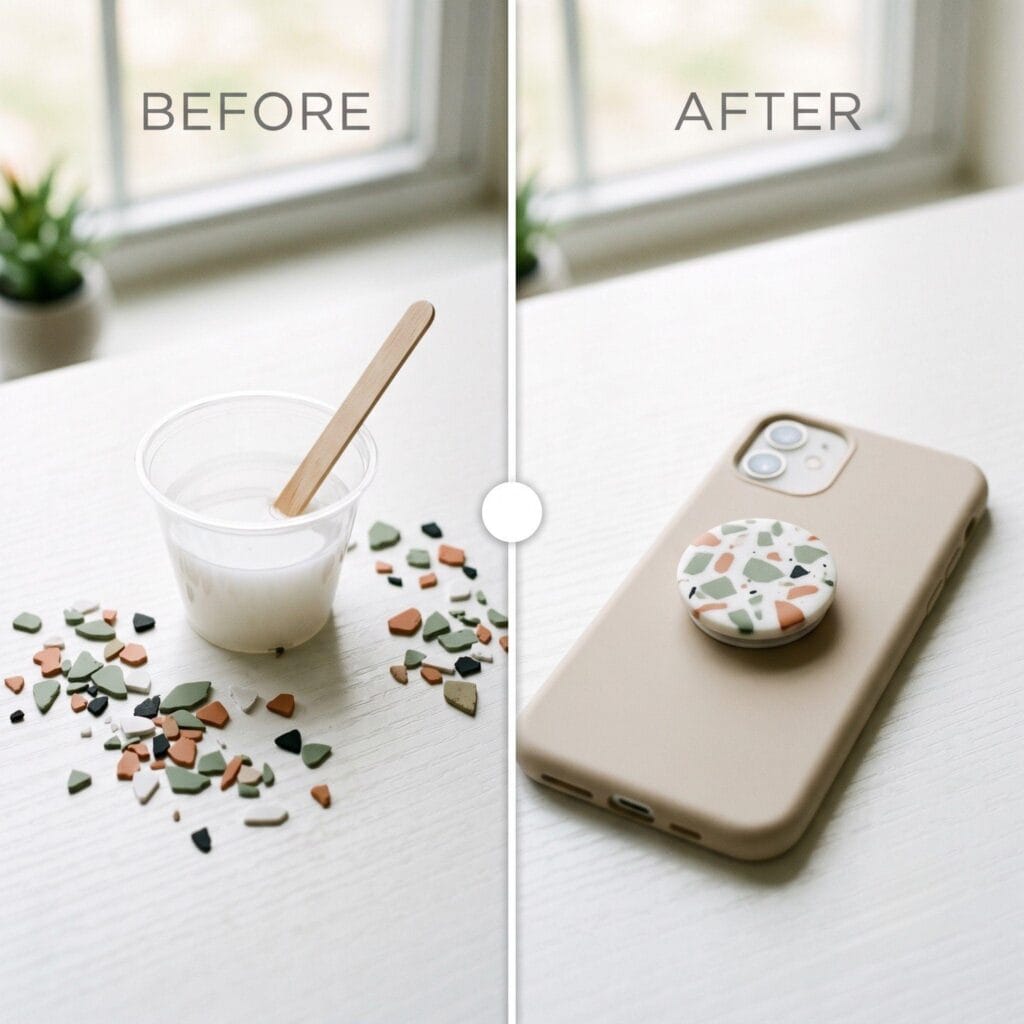
3. Minimalist Terrazzo Flakes
Mix matte, irregular acrylic flakes into opaque white resin until the flakes sit at different angles throughout the cup. Pour the mixture into the mold and tap the mold lightly against the table two or three times to settle the resin and release trapped air. The white base and scattered flakes create a crisp, speckled finish that pairs well with neutral phone cases, pale wood accessories, and clean desk setups. Keep new grips within reach on your desk by matching them with our DIY leather valet trays.
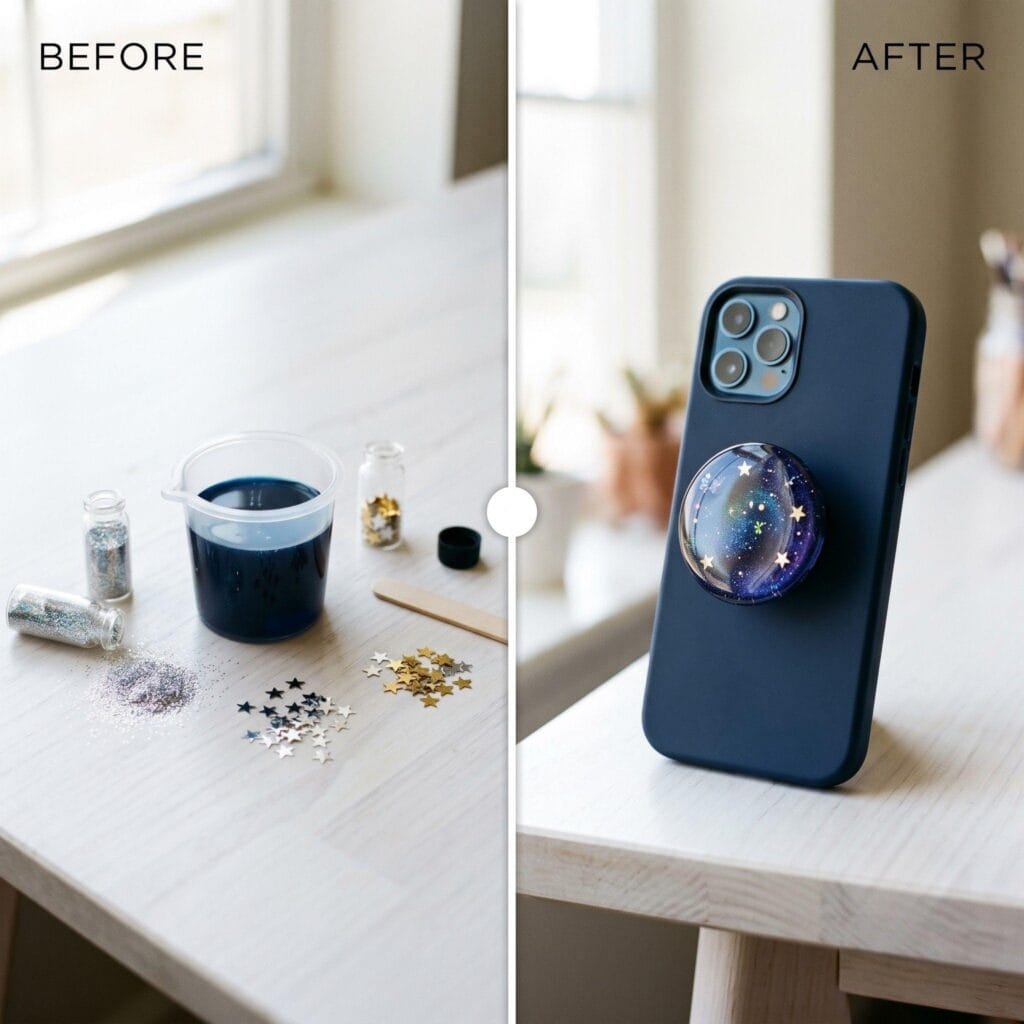
4. Celestial Night Sky
Color the resin with deep navy blue dye, then stir in fine holographic glitter. Place a few tiny star sequins in the mold before pouring, spacing them with tweezers so they do not clump in one area. Keep the sequins flat against the mold bottom for the clearest view from the front. The dark blue background makes the glitter flash silver, violet, and green under changing light, while the scattered stars give the piece a small night-sky pattern.
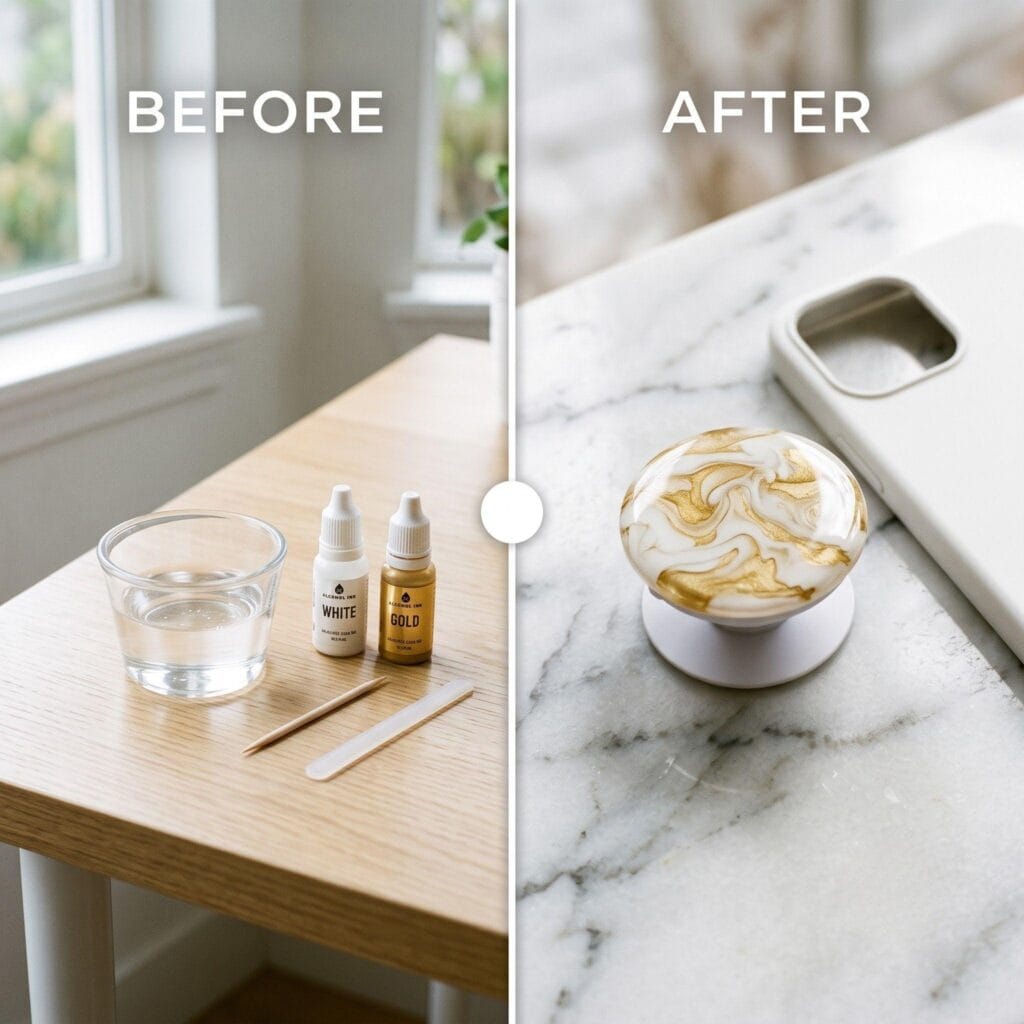
5. Abstract Fluid Marble
Pour clear resin into the mold until it is about three-quarters full. Add one drop of white alcohol ink and one smaller drop of gold alcohol ink near the center. Drag a toothpick through the ink with two or three short strokes, then stop before the colors blend into a dull gray. Add a thin final layer of clear resin if needed to bring the surface just below the mold rim. The wispy ink settles into a polished marble pattern with fine gold threads close to the surface.
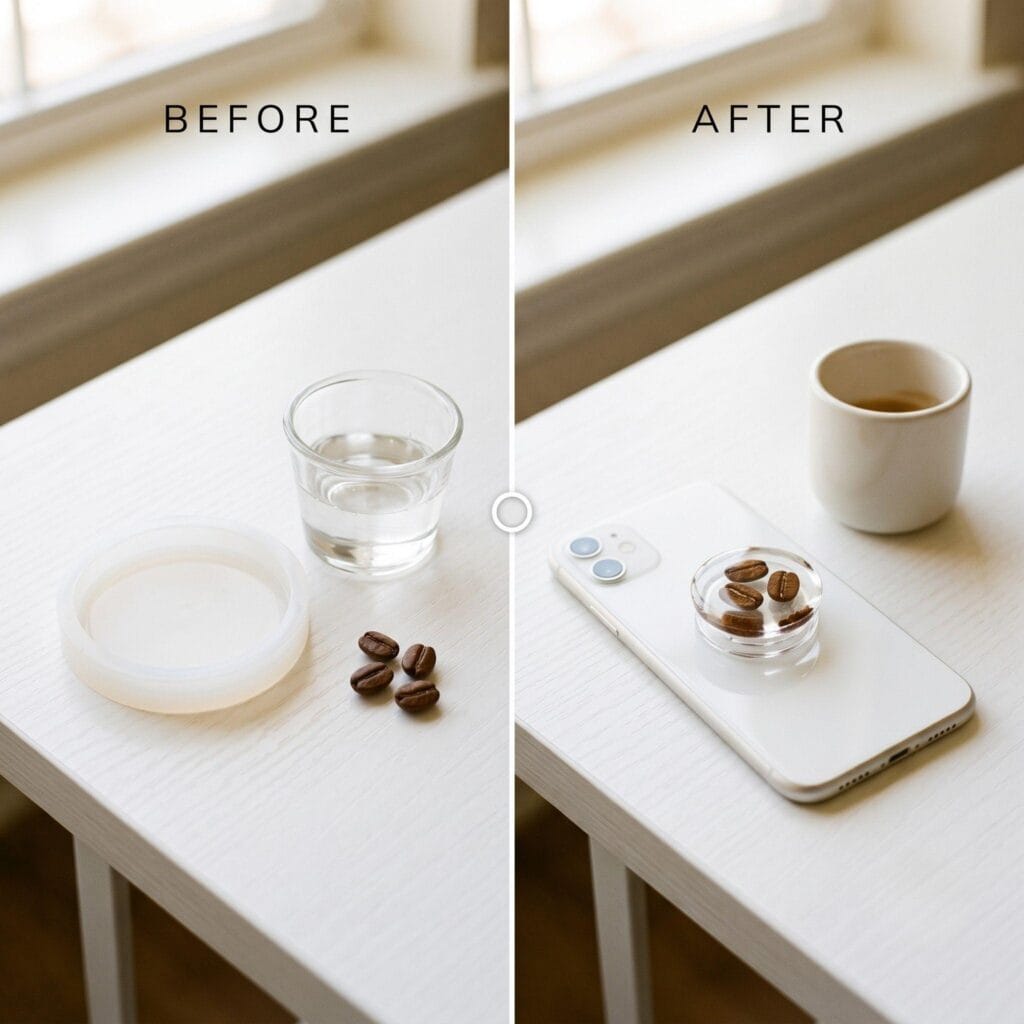
6. The Minimalist Coffee Bean DIY Resin Phone Grips
Pour clear resin into the mold and place three clean, fully dried roasted coffee beans near the center with tweezers. Turn each bean so the curved side and center groove remain visible from the front. If the beans feel oily, blot them first and brush on a thin coat of clear acrylic sealer; this helps keep oil from clouding the resin over time. The warm brown beans look especially good against a clear or lightly amber-tinted background, and their rounded shapes add texture without making the grip bulky.
7. Pastel Chunky Glitter Retro
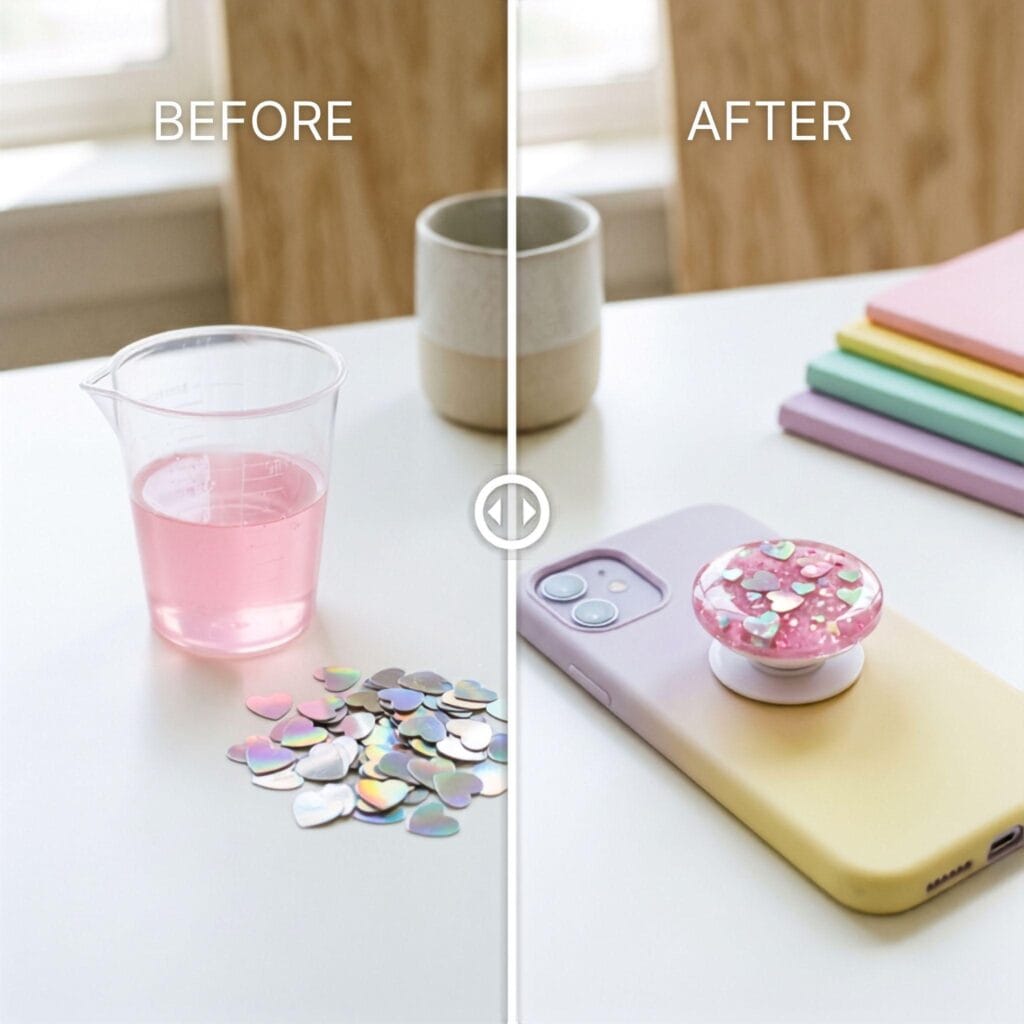
Tint the resin a translucent pastel pink, then fold in large holographic heart sequins with a slow stir stick motion. Pour slowly so the hearts spread through the resin instead of collecting at the bottom of the cup. Use a toothpick to nudge a few sequins flat against the front of the mold, with their reflective side facing outward. They will throw pink, blue, and silver flashes across the finished grip whenever the phone catches the light.
Important Safety Note for DIY Resin Phone Grips
- Ventilate. Uncured epoxy can release vapour while it cures — how much, and which PPE matters, is set by your resin’s SDS. Work in a well-ventilated room or outdoors, follow that SDS for gloves and eye protection, and if it calls for respiratory protection, use a respirator with the cartridge type it specifies and only when ventilation cannot clear the vapour. Never cure pieces in a bedroom, kitchen or closed cabinet.
- Cover your skin. Nitrile gloves from the moment you open the bottles. If liquid resin touches your skin, wash it off immediately with soap and water — and never cure resin on skin.
- Protect your eyes. Safety glasses while measuring, mixing and pouring. If resin reaches an eye, rinse with clean water for 15 minutes and get medical advice.
- Respect the heat. Resin cures exothermically. Pour in the thin layers this project calls for, and never discard mixed leftovers in a heap, a paper towel or a sealed bag — let every cup and stir stick cure solid in open air before you throw it away.
- Keep others out of the way. Uncured resin and uncured pieces stay up high, away from children and pets. Handle a demoulded piece only once it is fully cured.
- Dispose responsibly. Let cups, sticks and gloves cure hard, then bin them. Never pour resin or hardener down the drain.
DIY Resin Phone Grips FAQ
How do I mix resin so the grip cures hard?
Measure by your package’s ratio — equal parts by volume for a 1:1 formula — then stir slowly for the full mix time on the label, three minutes being the common default. Let it rest for the induction time so surface bubbles rise before you pour.
Why is my cured grip still tacky?
It is usually under-mixed or too cool — give it more time in a warm spot. If an inclusion pokes through the surface, that layer was too thin: sand it flat and seal the spot.
How do I keep heavy decorations from sinking?
Place large or heavy inclusions on a thin first layer instead of straight into a full pour: cover the mold floor, let the resin thicken to the tack stage, set the pieces where you want them, then top up slowly so everything stays covered.
Is it safe to make resin grips at home?
Work in a well-ventilated room per your resin’s SDS, wear nitrile gloves and safety glasses, and pour only thin layers because resin cures exothermically. Keep uncured pieces away from children and pets, let cups and sticks cure hard, then bin them — never pour resin down the drain.
“Which of these 7 DIY resin phone grip designs are you excited to try first, or do you have a creative tip of your own to share? Drop a comment below—I’d love to hear your thoughts and see what you create!”


