

Making DIY clay diffuser stones gives your home a gentle, natural fragrance without the sharp perfume cloud of many store-bought air fresheners. Air-dry clay turns into a lightly porous surface as it dries, so it can hold a few drops of essential oil and release the scent gradually in a small area. Keep a dish of scented stones near an entry table, beside the bed, or on a bathroom shelf for fragrance that feels close and quiet rather than overpowering.
Affiliate Disclosure: Affiliate Disclosure: This post contains affiliate links. As an Amazon Associate, I earn from qualifying purchases. If you buy through these links, I may earn a commission at no additional cost to you.
Key Facts:
- Technique: Clay Diffuser Stones
- Makes: 10 Clay Diffuser Stones
- Best for: Gifts for friends and teachers
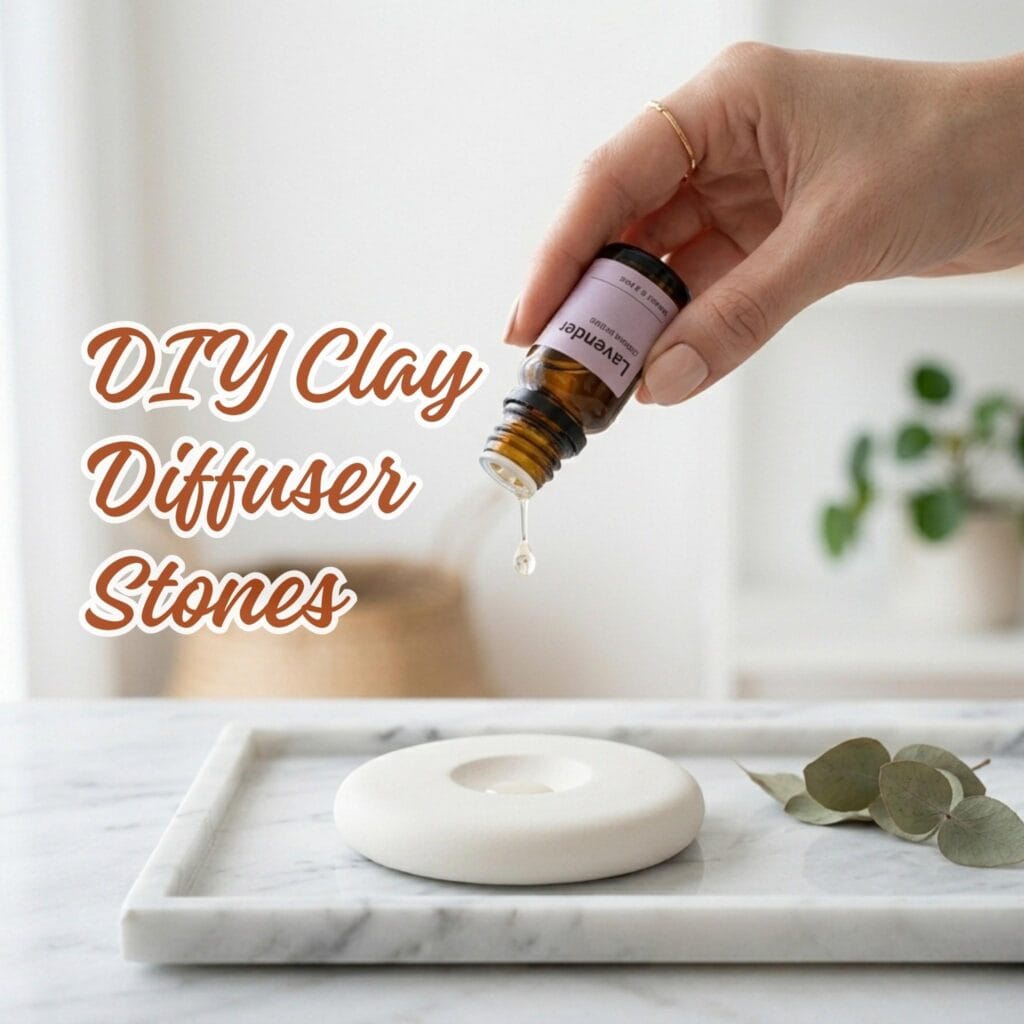
DIY clay diffuser stones are an inexpensive weekend craft that brings aromatherapy to wardrobes, bathrooms, desks, and linen drawers. Roll the clay to about 1/4 inch thick, press in a texture or shape it by hand, then let each piece dry fully on a flat surface. Once cured, the unpainted clay absorbs essential oil well. Add two or three drops at a time, then refresh the scent whenever the stone no longer smells noticeable.
Here are 10 beautiful DIY clay diffuser stones to make at home, each with a useful shape, texture, or hanging option for a different corner of the house.
Essential Materials & Tools
| Supply | Spec / Size | Used For |
|---|---|---|
| White Air-Dry Modeling Clay | No-bake, porous clay forms the absorbent base for every unscented… | |
| Muted Colored Air-Dry Clay Set | White, gray, black, and soft neutral portions can be lightly twisted… | |
| Pure Essential Oil Variety Set | A selection of oils such as lavender, eucalyptus, lemon, cedarwood,… | |
| Dried Fern and Eucalyptus Leaves | Defined leaf veins press a detailed fossil-like botanical texture… | |
| Thin Brown Leather Cord | Soft yet durable leather cording creates polished loops for wardrobe,… | |
| Natural Jute Twine | Earthy fiber twine is easy to braid and suits rustic hanging arch… |
✨ Consumable Raw Materials
- White Air-Dry Modeling Clay — No-bake, porous clay forms the absorbent base for every unscented diffuser stone after it cures fully. | Check Price on Amazon
- Muted Colored Air-Dry Clay Set — White, gray, black, and soft neutral portions can be lightly twisted together for convincing river-pebble marble veining. | See Price on Amazon
- Pure Essential Oil Variety Set — A selection of oils such as lavender, eucalyptus, lemon, cedarwood, and peppermint lets makers scent stones for different rooms and refresh them as needed. | Check Pure Essential Oil Variety Set on Amazon
- Dried Fern and Eucalyptus Leaves — Defined leaf veins press a detailed fossil-like botanical texture into soft clay without adding a nonporous coating. | See Dried Fern and Eucalyptus Leaves on Amazon
- Thin Brown Leather Cord — Soft yet durable leather cording creates polished loops for wardrobe, closet, and car-hanging designs. | View Thin Brown Leather Cord on Amazon
- Natural Jute Twine — Earthy fiber twine is easy to braid and suits rustic hanging arch diffuser stones. | Find Natural Jute Twine on Amazon
🧰 Core Crafting Tools & Equipment
- Stainless Steel Clay Cutter Shape Set — A varied cutter set provides crisp circles, squares, stars, arches, and scalloped discs with repeatable sizing. | Check Latest Price on Amazon
- Acrylic Clay Roller with Thickness Guides — Keeps clay slabs at a consistent thickness so the diffuser stones dry evenly and resist warping. | View on Amazon
- Clay Sculpting and Detail Tool Set — Needle, blade, smoothing, and ball tools help refine pebble edges, form indented centers, pierce cord holes, and shape pyramids. | Check Price on Amazon
- Rubber Brayer — Applies broad, even pressure over leaves and texture stamps without dragging or thinning the clay slab. | See Price on Amazon
- Alphabet and Pattern Clay Stamp Set — Creates clean monograms, names, borders, and subtle repeated textures for personalized gift stones. | Check Alphabet and Pattern Clay Stamp Set on Amazon
- Fine-Grit Sanding Sponge Set — Smooths dry edges and small imperfections while preserving the clay’s oil-absorbing surface. | See Fine-Grit Sanding Sponge Set on Amazon
💎 Hardware, Fasteners & Finishing
- Flat Car Vent Clip Blanks — These attach to the back of fully cured square clay pieces so they can rest securely against a car air vent. | View Flat Car Vent Clip Blanks on Amazon
- Two-Part Epoxy Adhesive — Provides a durable bond for attaching a vent-clip blank to cured clay; keep adhesive limited to the back so the front remains porous. | Find Two-Part Epoxy Adhesive on Amazon
- Small Cork Pads — Adds a gentle protective base beneath desk, bedside, and drawer stones without sealing their scented top surface. | Check Latest Price on Amazon
📦 Beginner Starter Kits & Project Bundles
- Beginner Air-Dry Clay Craft Kit with Tools and Instructions — A true all-in-one beginner bundle can provide clay, shaping tools, cutters, and guided project instructions for makers who do not yet own clay basics. | View on Amazon
⚡ Studio Tools & Workshop Equipment
- Adjustable Clay Slab Roller Machine — A tabletop roller produces exceptionally even clay sheets for making coordinated batches of circles, arches, discs, and vent pieces. | Check Price on Amazon
- Daylight LED Magnifying Desk Lamp — Bright, color-neutral illumination and magnification improve precision when stamping monograms, trimming edges, and attaching small hardware. | See Price on Amazon
- Three-Tier Rolling Craft Storage Cart — Keeps clay, cutters, oils, cords, drying boards, and finishing supplies organized in a movable dedicated craft station. | Check Three-Tier Rolling Craft Storage Cart on Amazon
✨ Consumable Raw Materials
- White Air-Dry Modeling Clay — A naturally porous, no-bake clay that absorbs essential oil after curing and provides a clean neutral base for every diffuser-stone design. | Check Price on Amazon
- Colored Air-Dry Clay Set — White, gray, black, and muted colored clay portions make it easy to twist distinct veins into faux-marble river pebble stones. | See Price on Amazon
- Pure Essential Oil Variety Set — A variety of skin-safe, undiluted fragrance oils such as lavender, lemon, eucalyptus, and cedarwood lets makers refresh stones for different rooms. | Check Pure Essential Oil Variety Set on Amazon
- Dried Fern and Eucalyptus Leaves — Leaves with defined veins create detailed fossil-like botanical impressions in soft rolled clay. | See Dried Fern and Eucalyptus Leaves on Amazon
- Thin Brown Leather Cord — Soft leather cord creates durable, attractive loops for wardrobe and closet diffuser stones. | View Thin Brown Leather Cord on Amazon
- Natural Jute Twine — Braided jute adds an earthy finish to hanging arch stones without competing with the clay texture. | Find Natural Jute Twine on Amazon
🧰 Core Crafting Tools & Equipment
- Stainless Steel Clay Cutter Shape Set — Round, oval, square, star, and scalloped cutters provide clean, repeatable shapes for the full collection. | Check Latest Price on Amazon
- Acrylic Clay Roller and Thickness Guides — Keeps slabs consistently about one-quarter inch thick so the stones dry evenly and remain sturdy. | View on Amazon
- Rubber Brayer for Clay Texture — Applies smooth, even pressure over leaves and stamps without dragging or tearing the clay slab. | Check Price on Amazon
- Alphabet and Pattern Clay Stamp Set — Makes crisp personalized initials, names, borders, and texture details for gift-ready diffuser stones. | See Price on Amazon
- Detail Craft Knife Set — Useful for trimming free-form botanical edges, refining pyramid shapes, and removing excess clay around impressions. | Check Detail Craft Knife Set on Amazon
💎 Hardware, Fasteners & Finishing
- Fine-Grit Sanding Sponge Set — Smooths dry edges and cutter marks while preserving the unsealed porous surface needed to hold essential oils. | See Fine-Grit Sanding Sponge Set on Amazon
- Brass Eyelets and Setting Tool — Reinforces holes in hanging wardrobe and jute-tied stones, helping prevent cracking around the cord opening. | View Brass Eyelets and Setting Tool on Amazon
- Small Unglazed Ceramic Saucer Set — Provides a protective tray under tabletop stones so essential oil does not contact finished wood, paint, or fabric. | Find Small Unglazed Ceramic Saucer Set on Amazon
📦 All-in-One Starter Kits
- Air-Dry Clay Aromatherapy Ornament Making Kit — A beginner-friendly all-in-one option with clay, shaping tools, cords, and oil-ready project components for making scented hanging and tabletop pieces. | Check Latest Price on Amazon
⚡ Studio Tools & Workshop Equipment
- Adjustable Clay Slab Roller Machine — Produces consistently flat clay sheets at repeatable thicknesses, improving drying results when making diffuser stones in batches. | View on Amazon
- Daylight LED Magnifying Craft Desk Lamp — Bright, color-accurate task lighting and magnification help makers refine leaf veins, stamped monograms, and smooth finishing details. | Check Price on Amazon
- Heavy-Duty Rolling Craft Storage Cart — Keeps clay, cutters, oils, sanding supplies, and drying trays organized in a mobile dedicated craft station. | See Price on Amazon
Top 10 DIY Clay Diffuser Stones for Natural Aromatherapy
1. The Minimalist Indented Circle DIY Clay Diffuser Stones
- Roll the white air-dry clay into a smooth round stone on parchment paper.
- Press your thumb into the center while the clay is still soft, then smooth the rim with a damp fingertip.
- Let the stone dry, then add a single drop of essential oil to the hollow.
- Set the stone on a small ceramic saucer to protect finished furniture from oil marks.
Supplies Needed: White Air-Dry Modeling Clay, Stainless Steel Clay Cutter Shape Set, Acrylic Clay Roller and Thickness Guides, Fine-Grit Sanding Sponge Set, Small Unglazed Ceramic Saucer Set, Pure Essential Oil Variety Set
A smooth round stone with a shallow thumbprint well has a calm, pebble-like finish and a practical place for essential oil. Press your thumb into the center while the clay is still soft, then smooth the rim with a damp fingertip. The small hollow keeps a single drop of oil from rolling over the edge, and the broad clay surface slowly carries the scent into the room. Set one on a ceramic saucer to protect painted wood or other finished furniture from oil marks.
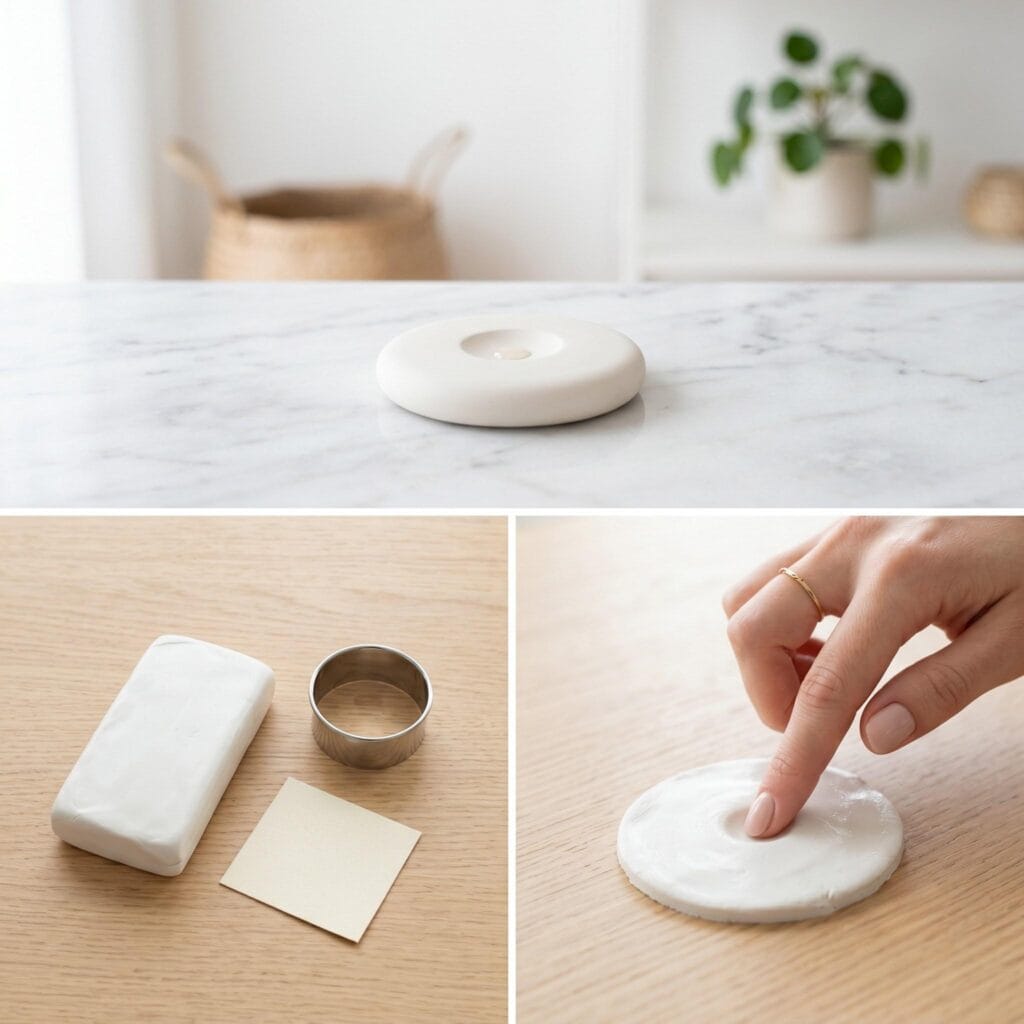
- Special Supplies: White air-dry clay, a small round cookie cutter, and fine sandpaper.
- How to Make It: First, roll out your air-dry clay to an even thickness of about a quarter-inch. Next, use the round cookie cutter to stamp out a perfect circle. Then, wet your index finger slightly and press it gently into the exact center of the circle to create a shallow, smooth dimple. Finally, let the clay dry completely for 24 hours and lightly sand the edges until they are perfectly smooth.
Pro-Tip: Always roll your clay out on a piece of parchment paper or a silicone baking mat. This prevents the wet clay from sticking to your table and distorting the shape when you try to pick it up.
2. The Botanical Pressed Leaf Stone
Supplies Needed: White Air-Dry Modeling Clay, Dried Fern and Eucalyptus Leaves, Rubber Brayer for Clay Texture, Detail Craft Knife Set, Pure Essential Oil Variety Set
Pressed leaves give plain clay a fossil-like surface with veins, stems, and softly raised edges. Lay a dry fern frond, herb sprig, or small leaf over rolled clay and press it in with a brayer or the flat side of a rolling pin. Peel the foliage away slowly so the fine details stay crisp, then cut the clay around the impression with a craft knife. A leaf-textured stone looks especially at home on a wooden bedside table, windowsill, or tray beside a potted plant.
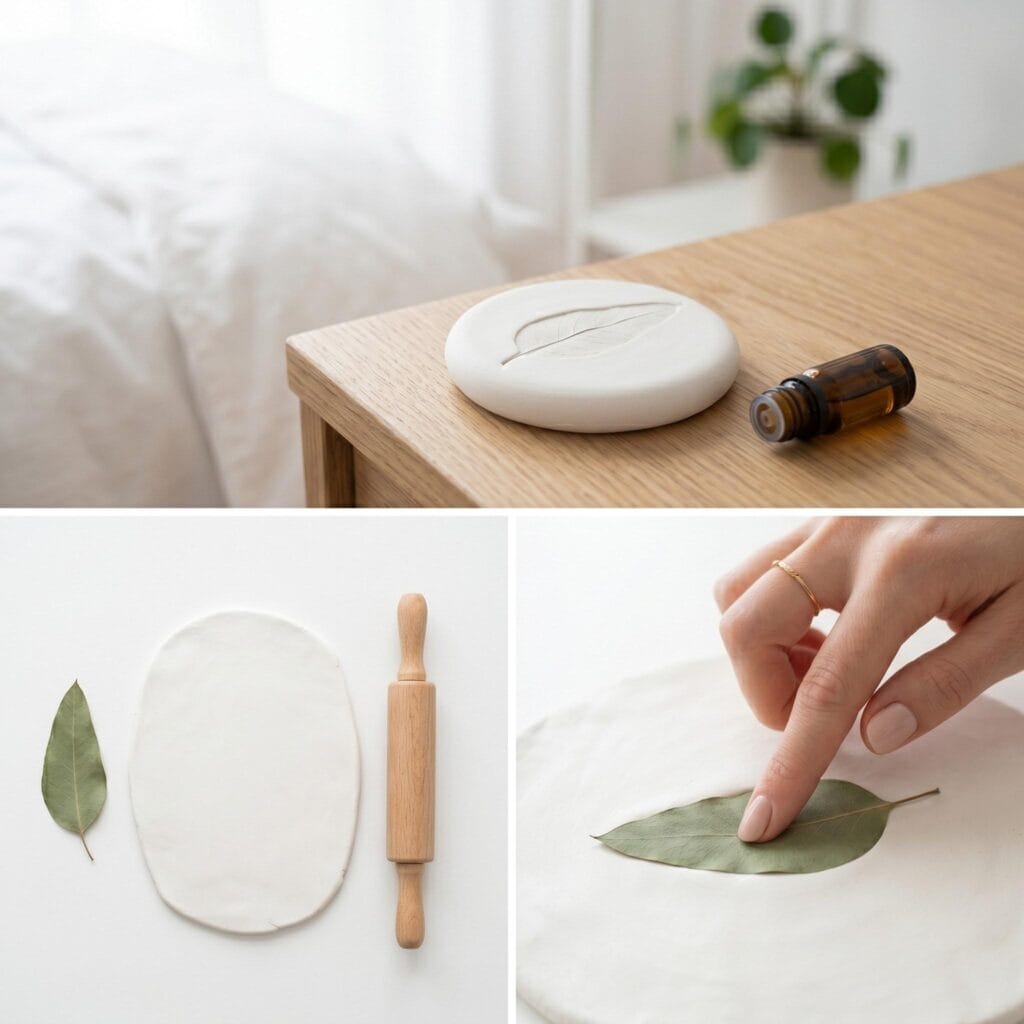
- Special Supplies: Air-dry clay, dried eucalyptus or fern leaves, a rolling pin, and a craft knife.
- How to Make It: First, roll out your clay into a smooth slab. Next, place your dried leaf flat onto the clay surface. Then, gently roll over the leaf with your rolling pin to press it firmly into the material. Afterward, carefully peel the leaf away to reveal the botanical imprint. Finally, use a craft knife to cut an organic, free-form shape around the imprint and leave it to dry.
Pro-Tip: Choose leaves that have prominent, raised veins on their undersides. These types of leaves will leave a much deeper and clearer impression in the soft clay.
3. Leather-Tied Wardrobe Freshener DIY Clay Diffuser Stones
Supplies Needed: White Air-Dry Modeling Clay, Thin Brown Leather Cord, Brass Eyelets and Setting Tool, Pure Essential Oil Variety Set
Closets and closed drawers often hold onto stale fabric smells, especially during damp weather. Thread a thin leather cord through a hole near the top of a fully dry clay stone, knot the ends, and hang it from a clothing rail or a sturdy hanger hook. Add a few drops of lavender, cedarwood, or lemon essential oil to the back of the piece, where the oil will not touch clothing. This small hanging freshener keeps scent close to your garments without taking up shelf space. If you enjoy working with leather cords, you should also check out our favorite scrap leather projects.
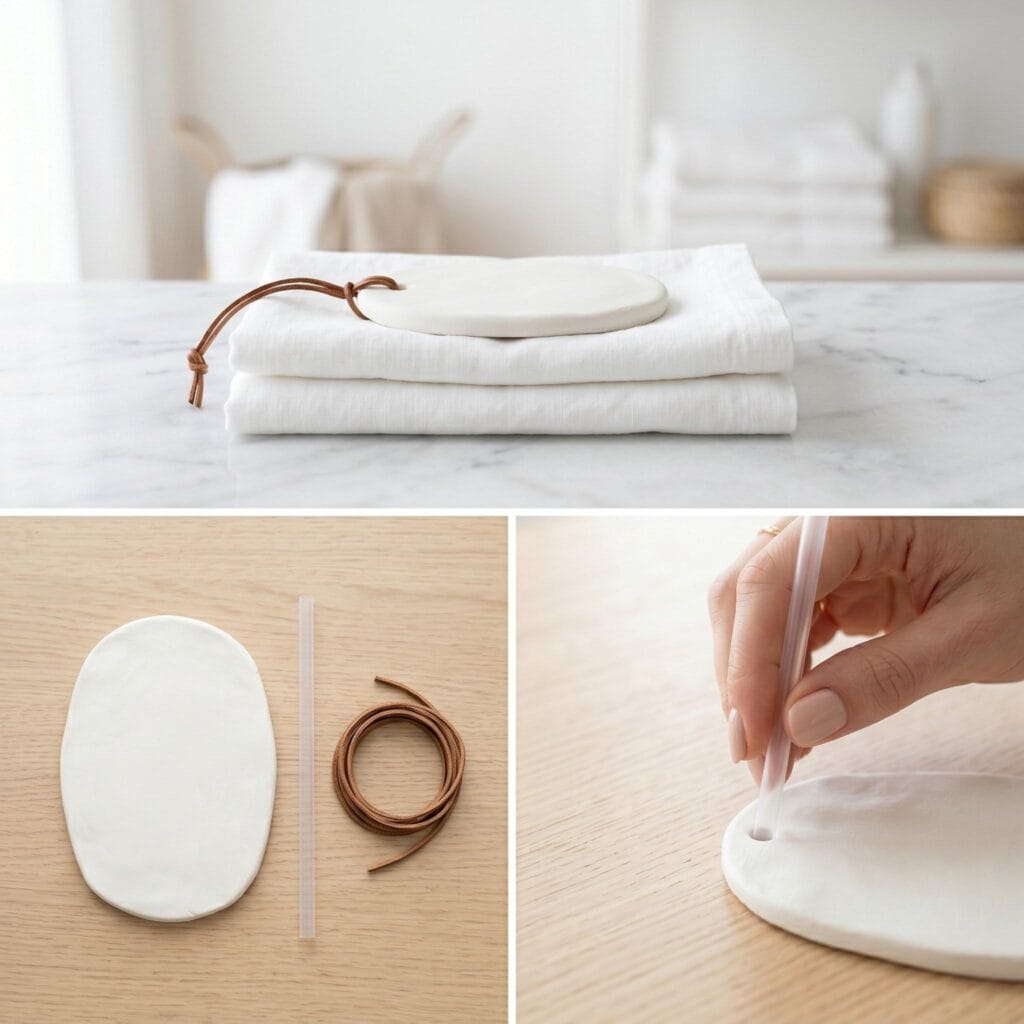
- Special Supplies: Air-dry clay, a plastic drinking straw, and a thin brown leather cord.
- How to Make It: First, roll out the clay and cut it into an elegant oval shape. Next, take the plastic drinking straw and punch a clean hole near the top edge of the oval. Then, smooth out any rough edges around the hole with a damp finger. Once the clay is completely dry and hard, cut a length of the leather cord, thread it through the hole, and tie a secure knot at the top.
Pro-Tip: Cedarwood or lavender essential oils are excellent choices for wardrobe diffusers because they naturally repel moths while keeping your clothes smelling incredibly fresh.
4. The Faux-Marble River Pebble
Supplies Needed: Colored Air-Dry Clay Set, Acrylic Clay Roller and Thickness Guides, Fine-Grit Sanding Sponge Set, Pure Essential Oil Variety Set
Marbled clay stones bring the look of polished river pebbles to a dresser, coffee table, or bathroom tray. Condition two clay colors separately, twist them together a few times, then fold and roll the bundle without over-mixing it. Stop when distinct ribbons of color remain visible through the clay. Shape the mixture into rounded ovals, smooth the seams with a little water, and leave the pieces to dry flat. Their swirled surface gives each diffuser stone the handmade character of a small boutique object. If you enjoy creating realistic stone crafts, you will absolutely love these stunning rock painting ideas.
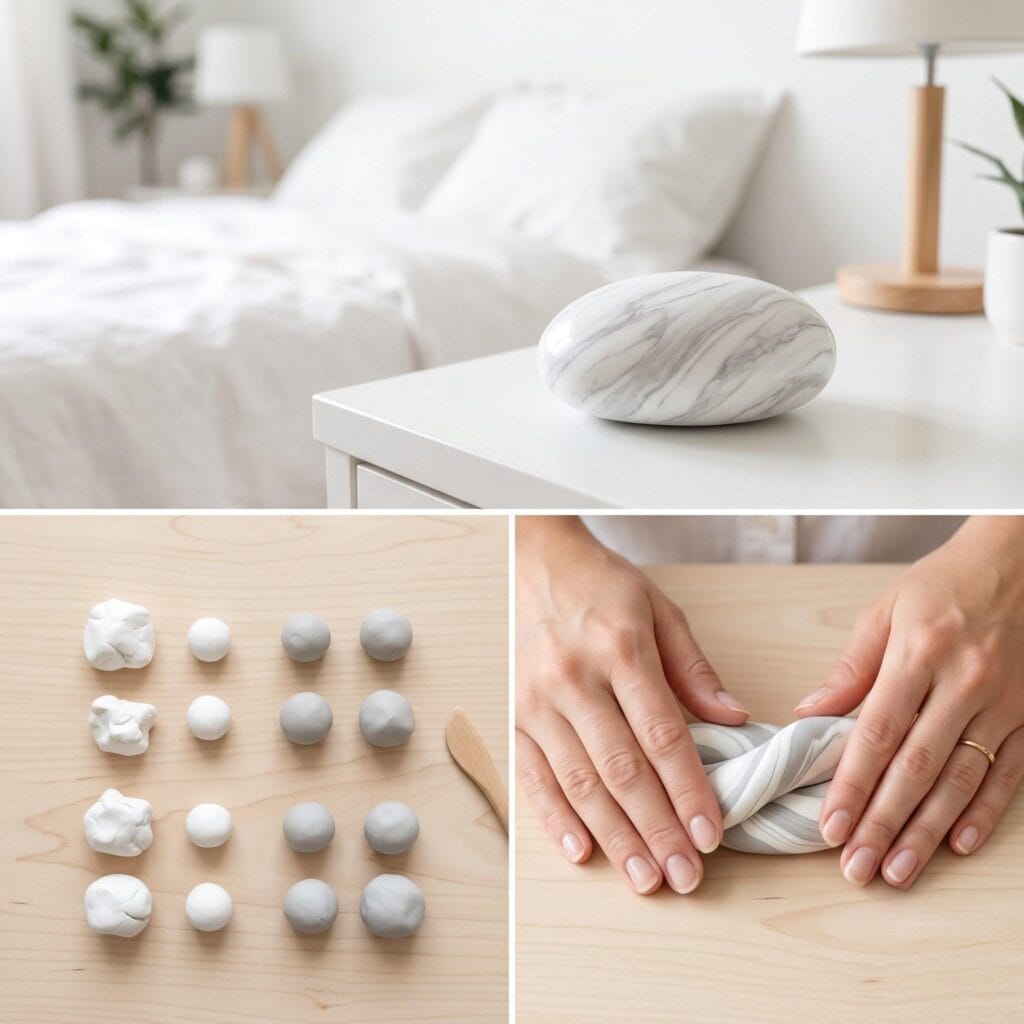
- Special Supplies: Pure white air-dry clay and light grey air-dry clay.
- How to Make It: First, take a small piece of white clay and a smaller piece of grey clay. Next, twist the two colors together gently. Then, roll the twisted clay between your palms to blend the colors, being very careful not to over-mix them into a solid color. Once you see beautiful marble streaks, flatten the ball slightly with your thumb to create an organic, smooth river pebble shape. Let it dry completely.
Pro-Tip: If you cannot find grey air-dry clay, you can easily make your own. Simply knead a tiny drop of black acrylic paint into a piece of white clay until it becomes a solid, pale grey.
5. The Square Car Vent DIY Clay Diffuser Stones
Supplies Needed: White Air-Dry Modeling Clay, Stainless Steel Clay Cutter Shape Set, Brass Eyelets and Setting Tool, Thin Brown Leather Cord, Pure Essential Oil Variety Set
Cars can collect food smells, damp coats, and the lingering scent of old takeout. A small geometric clay square clipped near an air vent gives the moving air a surface to pass over, carrying a light amount of essential oil through the cabin. Keep the piece compact, around 1 1/2 to 2 inches wide, and attach it with a small metal clip or a short loop of elastic cord. Use only one or two drops of oil at first, since a warm enclosed car can make fragrance seem much stronger. For another great vehicle crafting project, explore our DIY car charms for essential oils.
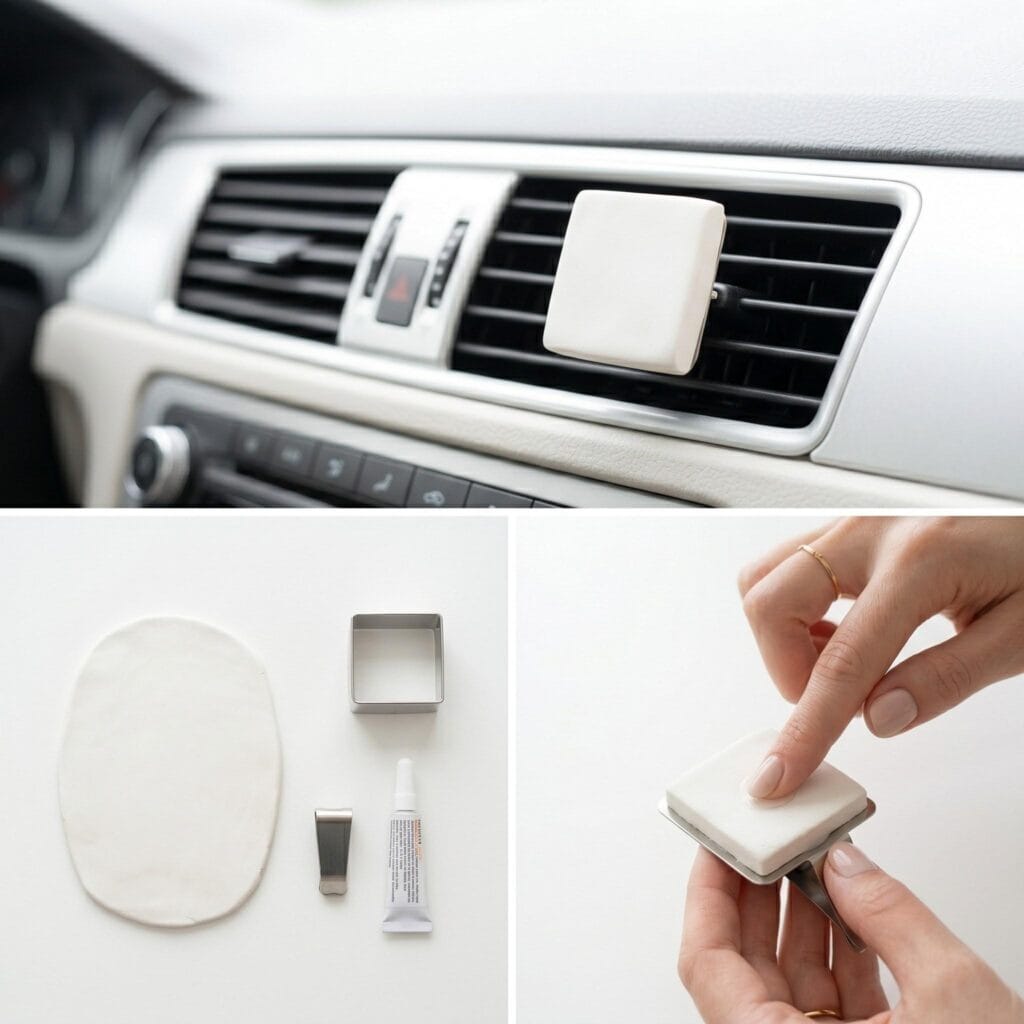
- Special Supplies: Air-dry clay, a small square cookie cutter, a metal car vent clip blank, and strong industrial craft glue.
- How to Make It: First, roll your clay out evenly and use the square cutter to create a precise, sharp-edged shape. Next, allow the square clay piece to dry until it is completely solid. Then, apply a generous amount of strong craft glue to the flat pad of the metal vent clip. Finally, press the dried clay square firmly onto the glued clip and let it cure undisturbed overnight.
Pro-Tip: Citrus oils like sweet orange or lemon are highly recommended for car diffusers because they naturally promote alertness and focus while driving.
6. The Star Bedside Stone
Supplies Needed: White Air-Dry Modeling Clay, Stainless Steel Clay Cutter Shape Set, Fine-Grit Sanding Sponge Set, Small Unglazed Ceramic Saucer Set, Pure Essential Oil Variety Set
A star-shaped diffuser makes a sweet addition to a bedside tray or reading nook. Cut the clay with a metal cookie cutter, soften the points with a damp finger, and make a shallow oil well in the center if you want to keep drops contained. Choose a scent that suits your evening routine, such as lavender, Roman chamomile, or cedarwood. The finished star adds a small handmade detail to the nightstand while scenting the space around your pillow.
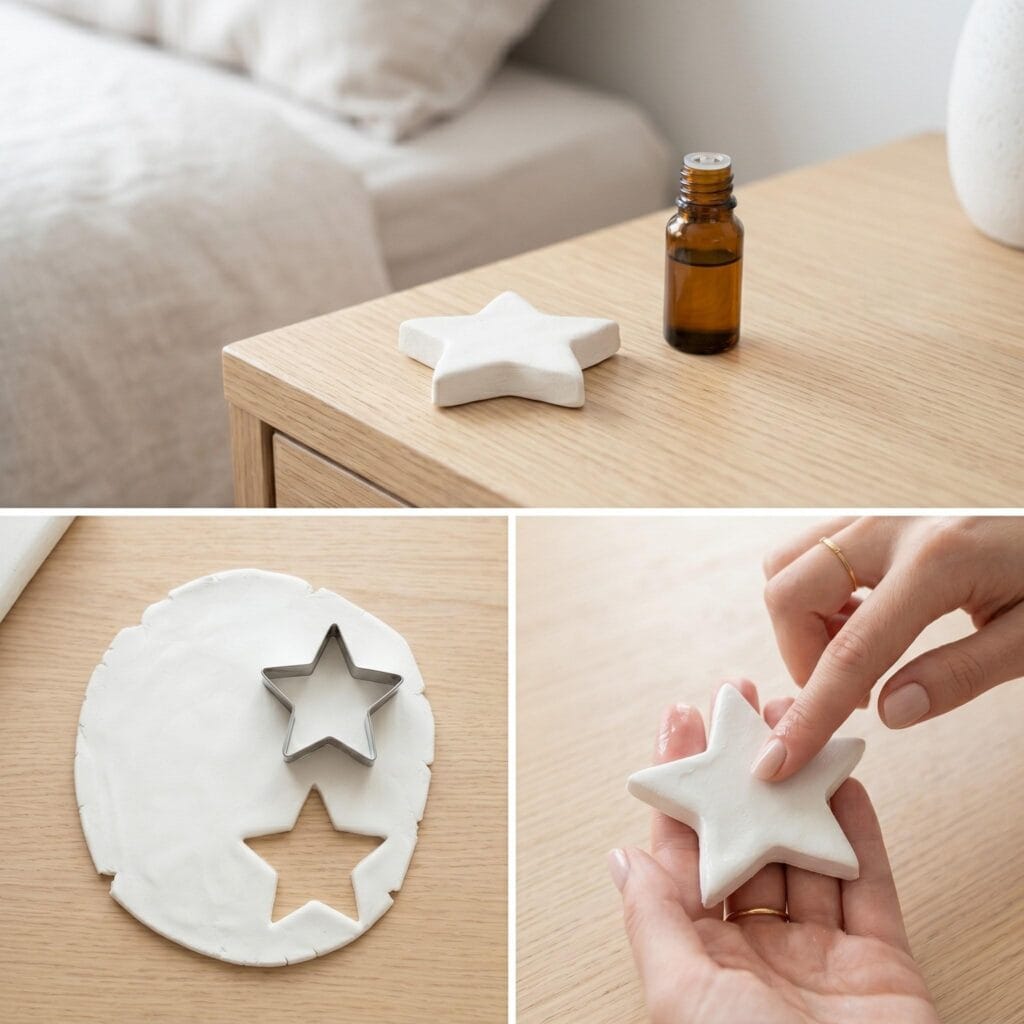
- Special Supplies: Air-dry clay and a medium-sized star-shaped cookie cutter.
- How to Make It: First, roll out a slightly thicker slab of clay to ensure the points of the star remain sturdy. Next, press the star-shaped cutter firmly into the clay and remove the excess material. Then, dip your finger in water and gently smooth out the sharp points of the star to prevent them from chipping later. Finally, set the star on a flat surface to dry thoroughly.
Pro-Tip: To keep your star completely flat as it dries, place a small piece of parchment paper over it and rest a lightweight book on top for the first few hours of the drying process.
7. Stamped Monogram Gift DIY Clay Diffuser Stones
Supplies Needed: White Air-Dry Modeling Clay, Alphabet and Pattern Clay Stamp Set, Acrylic Clay Roller and Thickness Guides, Fine-Grit Sanding Sponge Set, Pure Essential Oil Variety Set
Handmade diffuser stones make thoughtful, low-cost gifts for friends, teachers, neighbors, and housewarming hosts. Stamp an initial into the clay with alphabet punches while it is still soft, or press in a small brass charm for a neater impression. Package the finished stone with a tiny bottle of essential oil and a note explaining that two or three drops will refresh the scent. The monogram turns a simple clay piece into a gift made for one person and one home.
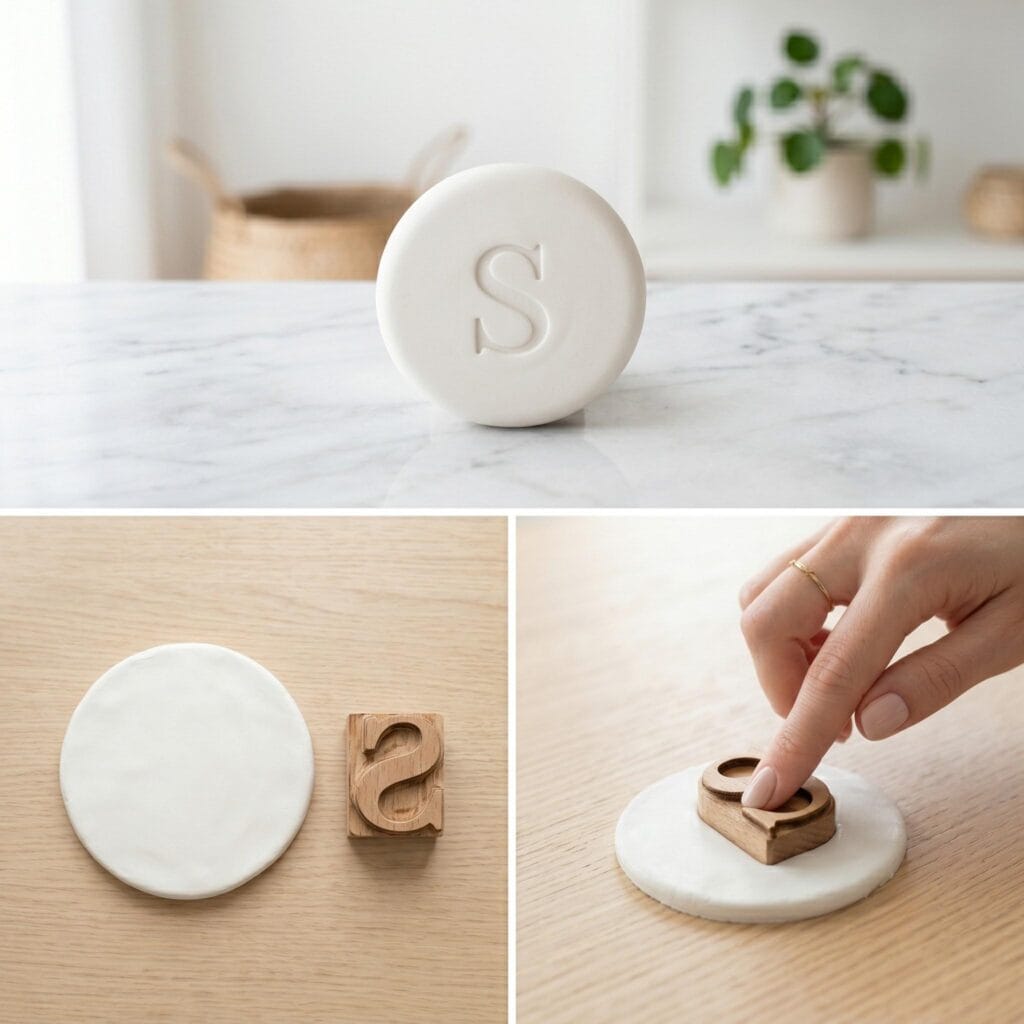
- Special Supplies: Air-dry clay, a round cutter, and a set of metal or wooden letter stamps.
- How to Make It: First, cut out a perfectly round, thick circle from your rolled clay. Next, select the desired letter from your stamp set. Then, while the clay is still very soft and wet, press the letter stamp firmly into the center of the circle. Apply even pressure so the letter impresses deeply. Afterward, carefully remove the stamp and let the personalized stone dry completely.
Pro-Tip: If your metal stamp tends to stick to the wet clay, dip the tip of the stamp lightly into a bit of cornstarch before pressing it into the clay.
8. The Flat-Topped Pyramid Desk Stone
Supplies Needed: White Air-Dry Modeling Clay, Acrylic Clay Roller and Thickness Guides, Detail Craft Knife Set, Fine-Grit Sanding Sponge Set, Pure Essential Oil Variety Set
A flat-topped pyramid gives a desk diffuser clean lines and a stable footprint. Form the shape from a small block of clay, trim the sides with a craft knife, and press the top gently against a smooth tile so it sits level. The wide base helps the piece stay put among notebooks, pens, and charging cables, while the flat top holds a drop or two of essential oil. Let it dry on a sheet of parchment paper and turn it once during the first day so each side dries evenly.
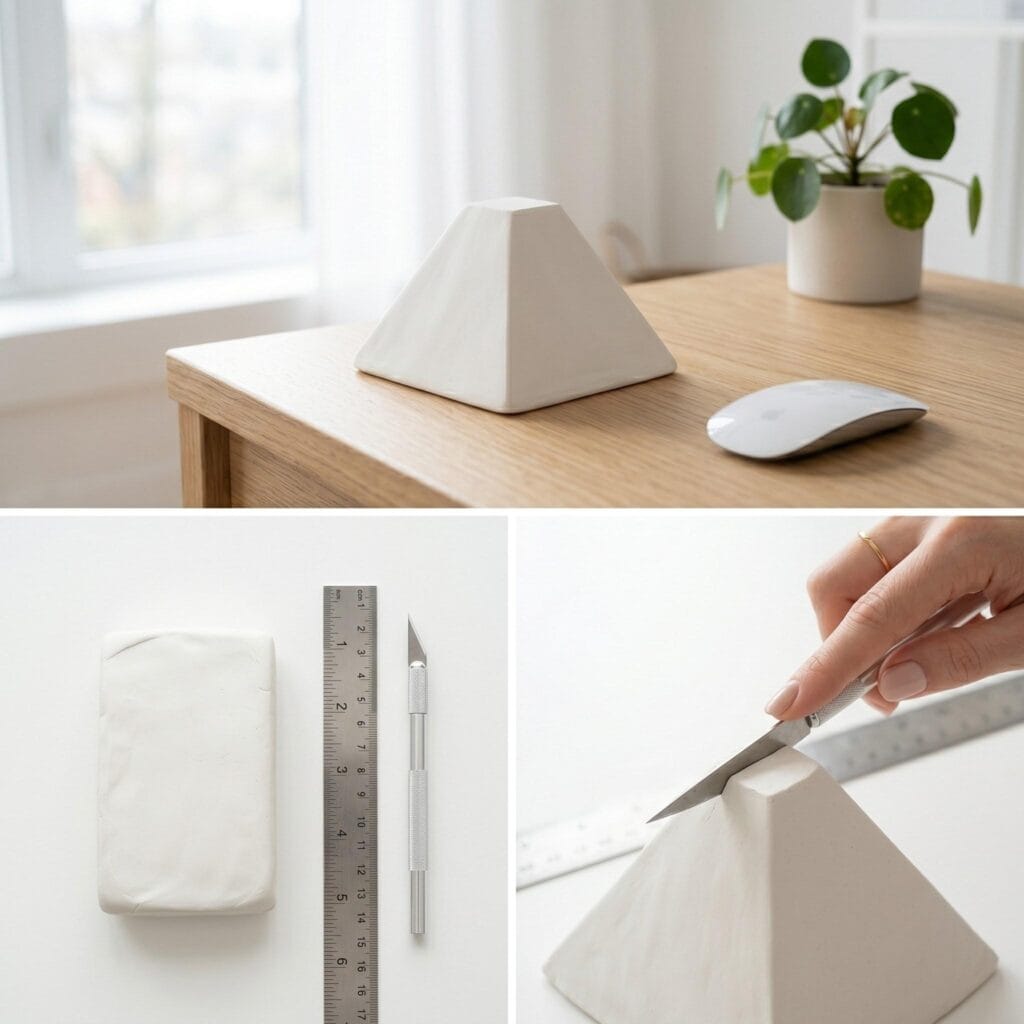
- Special Supplies: Air-dry clay, a straight-edge ruler, and a sharp craft knife.
- How to Make It: First, mold a large piece of clay into a thick, solid cube using your hands. Next, use the craft knife and ruler to slice the four sides of the cube at an upward angle, creating a pyramid shape. Then, slice the very top point of the pyramid off completely horizontally, leaving a flat, square plateau at the top. Finally, smooth all the cut edges with water and let the thick block dry for at least 48 hours.
Pro-Tip: Because this is a solid, three-dimensional block, it will take much longer to dry than flat shapes. Turn it upside down halfway through the drying time so the bottom base can be exposed to the air evenly.
9. Braided Jute Hanging Arch DIY Clay Diffuser Stones
Supplies Needed: White Air-Dry Modeling Clay, Natural Jute Twine, Brass Eyelets and Setting Tool, Stainless Steel Clay Cutter Shape Set, Pure Essential Oil Variety Set
A clay arch hung from braided jute adds warm texture to a door handle, bathroom hook, or closet knob. Cut the arch from a 1/4-inch-thick slab, pierce one hole at each upper corner with a straw or craft awl, and smooth any rough clay from the openings before drying. Once the piece has hardened, thread through a thick jute cord and tie a secure knot. Add essential oil to the lower half of the arch so it does not soak into the cord. If you have leftover twine after this project, try making our beautiful DIY jute coasters.
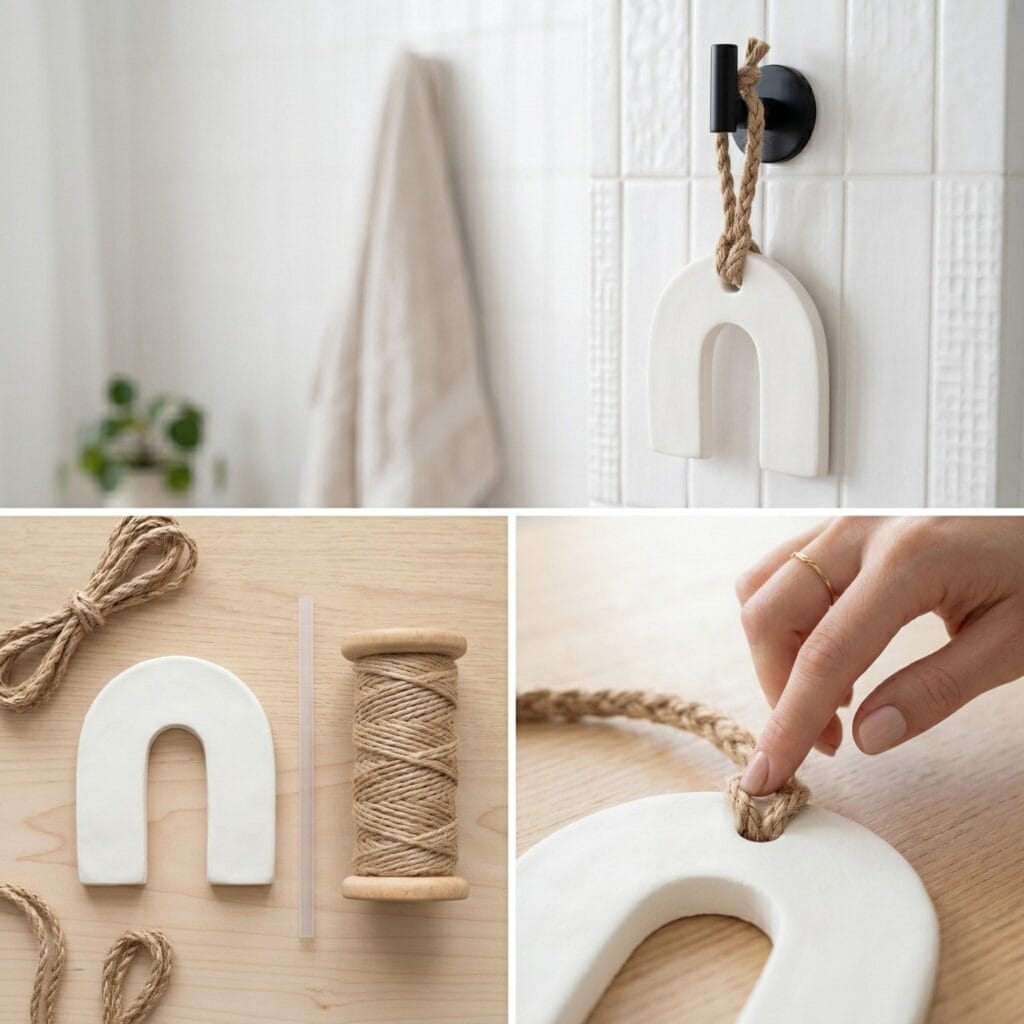
- Special Supplies: Air-dry clay, an arch-shaped cutter, a drinking straw, and thick natural jute twine.
- How to Make It: First, cut out a smooth arch shape from your rolled clay. Next, use the straw to punch two evenly spaced holes near the top curve of the arch. Let the clay dry entirely. Then, cut three long pieces of jute twine and braid them together tightly. Finally, thread the ends of the braided cord through the two holes in the clay arch and tie strong knots at the back to secure it.
Pro-Tip: If you do not have an arch-shaped cutter, you can use a standard round glass to cut a circle, and then use a ruler to cut the bottom half of the circle off in a straight line.
10. The Scalloped Drawer Disc DIY Clay Diffuser Stones
Supplies Needed: White Air-Dry Modeling Clay, Stainless Steel Clay Cutter Shape Set, Fine-Grit Sanding Sponge Set, Small Unglazed Ceramic Saucer Set, Pure Essential Oil Variety Set
A scented clay stone tucked among folded sweaters, towels, or bed linens leaves a soft fragrance behind each time the drawer opens. A flat disc with a ruffled edge works well because it rests neatly between fabric layers without creating a bulky lump. Form the edge by pinching the soft clay at even intervals, then smooth the center with your fingertip and let the disc dry completely. Place the finished stone in a small cotton pouch if you use deeply colored oils, then refresh it with a few drops whenever the drawer needs a clean scent.
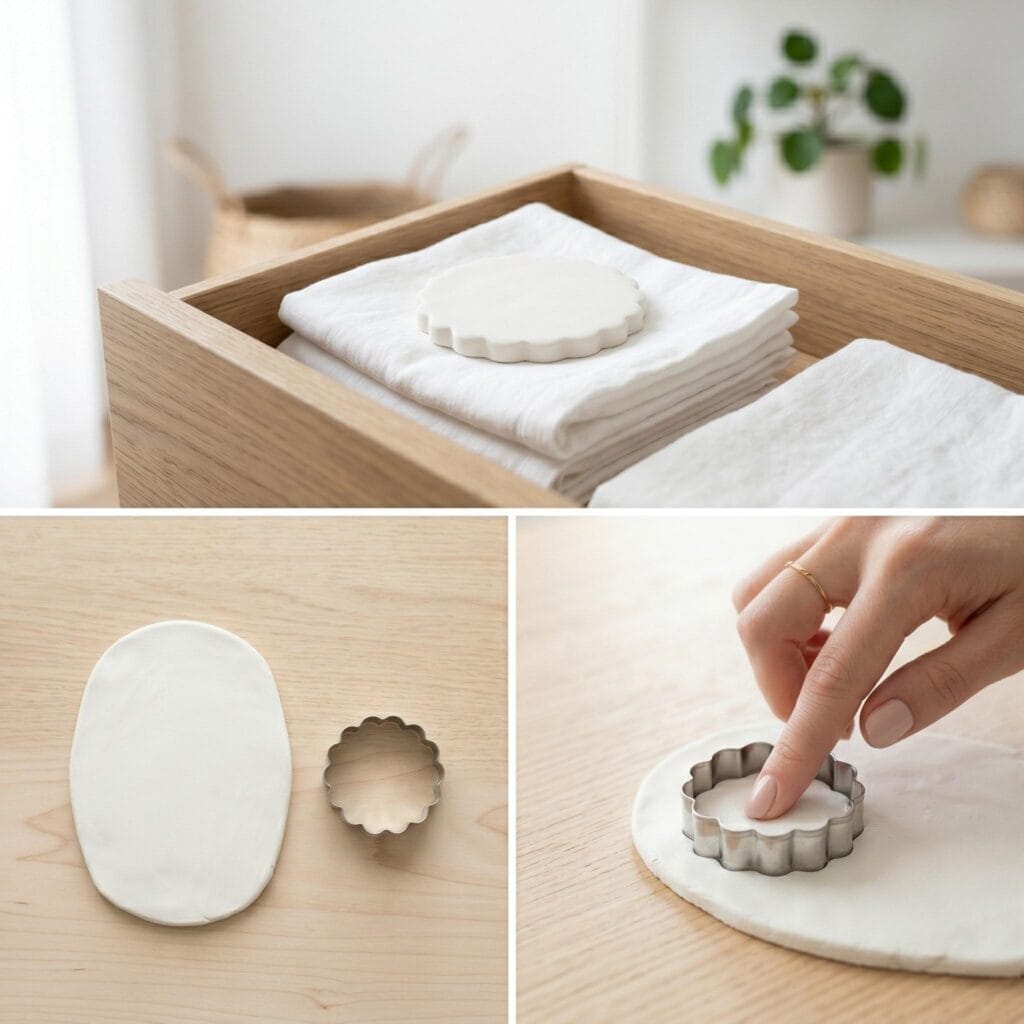
- Special Supplies: Air-dry clay and a scalloped-edge cookie cutter.
- How to Make It: First, roll your clay out into a uniform, thin slab. Next, press the scalloped cookie cutter firmly into the clay to create the wavy-edged disc. Then, carefully lift the disc and smooth the ruffled edges with a slightly damp finger. Finally, leave it flat on a drying rack so air can circulate completely around it until it is rock hard.
Pro-Tip: Place your dried scalloped disc inside a small, breathable muslin drawstring bag before putting it in your clothing drawer. This ensures the essential oils never accidentally stain your delicate fabrics.
Important Crafting Safety Note:
While making DIY clay diffuser stones is very safe, working with pure essential oils requires caution. Always wash your hands thoroughly after handling undiluted essential oils, as they can cause skin irritation. Furthermore, please remember that many essential oils are highly toxic to cats and dogs, so always keep your homemade essential oil diffusers well out of reach of your household pets.
Quick Reference: All Supplies at a Glance
For your convenience, here is a quick summary of all materials and tools used in this tutorial:
✨ Consumable Raw Materials
- White Air-Dry Modeling Clay | Check Price on Amazon
- Colored Air-Dry Clay Set | See Price on Amazon
- Pure Essential Oil Variety Set | Check Pure Essential Oil Variety Set on Amazon
- Dried Fern and Eucalyptus Leaves | See Dried Fern and Eucalyptus Leaves on Amazon
- Thin Brown Leather Cord | View Thin Brown Leather Cord on Amazon
- Natural Jute Twine | Find Natural Jute Twine on Amazon
🧰 Core Crafting Tools & Equipment
- Stainless Steel Clay Cutter Shape Set | Check Latest Price on Amazon
- Acrylic Clay Roller and Thickness Guides | View on Amazon
- Rubber Brayer for Clay Texture | Check Price on Amazon
- Alphabet and Pattern Clay Stamp Set | See Price on Amazon
- Detail Craft Knife Set | Check Detail Craft Knife Set on Amazon
💎 Hardware, Fasteners & Finishing
- Fine-Grit Sanding Sponge Set | See Fine-Grit Sanding Sponge Set on Amazon
- Brass Eyelets and Setting Tool | View Brass Eyelets and Setting Tool on Amazon
- Small Unglazed Ceramic Saucer Set | Find Small Unglazed Ceramic Saucer Set on Amazon
📦 Beginner Starter Kits & Project Bundles
- Air-Dry Clay Aromatherapy Ornament Making Kit | Check Latest Price on Amazon
⚡ Studio Tools & Workshop Equipment
- Adjustable Clay Slab Roller Machine | View on Amazon
- Daylight LED Magnifying Craft Desk Lamp | Check Price on Amazon
- Heavy-Duty Rolling Craft Storage Cart | See Price on Amazon
Important Crafting Safety Notes
Crafting is a rewarding creative activity, but maintaining a safe workshop environment is essential for yourself, your family, and your pets. Please review these vital safety precautions before starting:
• Personal Protective Equipment (PPE) & Safe Handling: Always wear safety glasses or protective eyewear when cutting metal wire, clipping jump rings, trimming hard findings, or using power tools to prevent flying shards. Use heat-resistant work mats and exercise caution around high-temperature glue guns, irons, or heating tools to avoid burns. Wear disposable nitrile gloves and a particle dust mask when sanding wood or working with clays, resins, and solvent-based sealants to protect your skin and lungs.
• Room Ventilation & Fume Safety: Always craft in a well-ventilated space with open windows, cross-ventilation, or active exhaust whenever using solvent-based adhesives, instant bonders, aerosol sprays, epoxy resins, or heat-curing materials. Never inhale chemical fumes directly, and allow finished pieces to off-gas and cure completely in an airy area away from everyday living spaces.
• Child & Pet Safety (Choking & Swallowing Prevention): Small craft components—including safety eyes, split rings, clasps, jump rings, beads, bells, small magnets, unbaked clay scraps, and loose polyester fiberfill—present severe choking, intestinal obstruction, and ingestion hazards for babies, toddlers, and pets. Keep all unattached hardware, yarn cutoffs, and stuffing strictly out of reach. For handmade gifts intended for infants or young children, omit plastic washer eyes and detachable findings entirely in favor of securely stitched, double-knotted embroidered details.
• Sharp Tool Storage & Clean Work Area: Store sharp tools—such as rotary cutters, craft knives, bent-tip yarn needles, snips, scissors, and jewelry pliers—in secure, latching cases or high cabinets immediately after use. Thoroughly inspect, sweep, or vacuum your craft area and floor after finishing to ensure no dropped needles, pins, wire clippings, or small findings remain where curious pets or bare feet could step on or swallow them.
• Certified, Quality & Non-Toxic Supplies: Always choose verified non-toxic craft supplies (such as ACMI AP-certified paints and adhesives, lead-free and nickel-free jewelry findings, and skin-safe materials). Follow manufacturer label guidelines for curing durations, safe operating temperatures, and proper product disposal. Never use food preparation utensils or kitchen cookware for craft chemicals.
For more detailed guidance on safe crafting practices, liability disclosures, and website usage, please review our Terms and Conditions.

[…] and let the cloth guide the pace rather than chasing a perfect result. If you enjoyed making our natural DIY clay diffuser stones, this is another screen-free sensory ritual with texture, scent, and a satisfying […]