

Finding a moment to pause and create something beautiful is a restorative practice for the soul. In a fast-paced world, practicing simple crafts helps us reconnect with our inner calm. Consequently, we have curated this guide to offer mindful projects that require minimal setup but deliver incredibly satisfying and aesthetic results. Furthermore, these rock painting ideas are designed to be accessible for everyone, regardless of previous artistic experience. Let’s gather our supplies and dive into this joyful, creative process!
This blog post contains affiliate links. As an Amazon Associate, I earn from qualifying purchases. The content on some of these projects may be enhanced with structural craft inspirations.
Key Facts:
- Technique: Rock Painting Ideas
- Base coat drying: 15–20 minutes
- Difficulty: Easy
- Makes: 12 project ideas
Essential Supplies for Your Rock Painting Ideas
| Supply | Spec / Size | Used For |
|---|---|---|
| Smooth River Rocks | You can collect these from nature; however, make sure to wash and dry… | |
| Acrylic Paints | A basic set of craft acrylic paints works beautifully | |
| Clear Sealer | If your stones will live in the garden, a spray sealer is highly… | |
| Graphite Pencil | A regular pencil is perfect for lightly sketching designs, letters,… | |
| Paintbrushes | You will want a medium brush for smooth base coats | |
| Acrylic Paint Pens | These are absolute game-changers for writing words and adding precise… |
Before we begin exploring these projects, let’s set up a calm and inviting workspace. First, you only need a few simple materials to get started:
A few foundational tools and surface bases are used throughout every single project in this guide, marked with a (used throughout) tag below.
🪵 Base Surfaces & Colors
- Smooth River Rocks (used throughout): You can collect these from nature; however, make sure to wash and dry them thoroughly first. Alternatively, you can find unpolished stones online.
- Acrylic Paints (used throughout): A basic set of craft acrylic paints works beautifully. Because they dry quickly, they offer vibrant and opaque coverage.
- Clear Sealer (used throughout): If your stones will live in the garden, a spray sealer is highly recommended to protect your artwork from the elements.
- Graphite Pencil (used throughout): A regular pencil is perfect for lightly sketching designs, letters, and mandala guide dots before painting — acrylic paint covers pencil marks completely, so mistakes are easy to hide. Most crafters already have one at home, so no link is needed here. If you need one, you can always check [Check Graphite Pencil on Amazon] to compare current prices and available options.
🖌️ Pens & Essential Tools
- Paintbrushes (used throughout): You will want a medium brush for smooth base coats. In addition, keep a few fine-detail brushes for the delicate lines.
- Acrylic Paint Pens (used throughout): These are absolute game-changers for writing words and adding precise outlines without the frustration of a messy brush.
🎨 Specialty & Project Supplies
- Craft Sponges & Fine-Liners: Used for blending deep-space nebulas on galaxy art and writing fine text on pastel kindness rocks.
- Embellishments & Detailers: Googly eyes for whimsical monsters, dotting tools for mandalas, and metallic gold wax for realistic faux-marble textures.
- Craft Glue & Weatherproof Adhesive: A standard craft glue holds embellishments like googly eyes securely; swap in a weatherproof adhesive for any rocks that will live outdoors. | View on Amazon
- [Check Craft Glue on Amazon]
- [Check Weatherproof Adhesive on Amazon]
- Linen Pouches: Perfect for storing interactive story stones safely and giving them as a thoughtful handmade gift.
Rock Painting Masterclass: Core Techniques
Before diving into the 12 ideas below, let’s cover everything you need to know. Master these once, and every project on this list becomes simple and stress-free.
Getting Started: Prep, Base Coats & Finishing Touches
Every single idea in this guide begins the same way, and most also end with a similar finishing step.
Prepping your rock:
Wash your stone thoroughly with soap and water to remove dirt and oils, then let it dry completely for at least a few hours — painting on a damp rock causes the acrylic to peel later.
Tips:
- Smoother rocks hold fine detail better; save the bumpy, textured ones for solid-color projects like the Pebble Monsters.
- If you’re painting outdoors in humidity, dry your rocks indoors overnight to be safe.
Applying a base coat:
Using your medium paintbrush, apply one solid, even layer of acrylic paint and let it dry fully (typically 15–20 minutes) before adding any detail. For fully opaque colors like white or pastels, apply a second thin coat once the first is dry.
Tips:
- Paint in one direction rather than scrubbing back and forth — this avoids visible brush streaks.
- This base coat step is all you need for simple color-blocked designs like the Fruit Slices and Stone Cactus — no further technique required.
Attaching embellishments (googly eyes, etc.):
Once your base coat is fully dry, add a small dot of craft glue and press the embellishment firmly in place for 10–15 seconds. Let it cure undisturbed for at least an hour before handling.
Tips:
- A toothpick is perfect for placing small dots of glue precisely without mess.
- For rocks that will live outdoors, use a weatherproof adhesive rather than standard craft glue.
Covers: Fruit Slices, Stone Cactus, Pebble Monsters, and the base layer of every other idea below.
Technique 1: Silhouette Painting
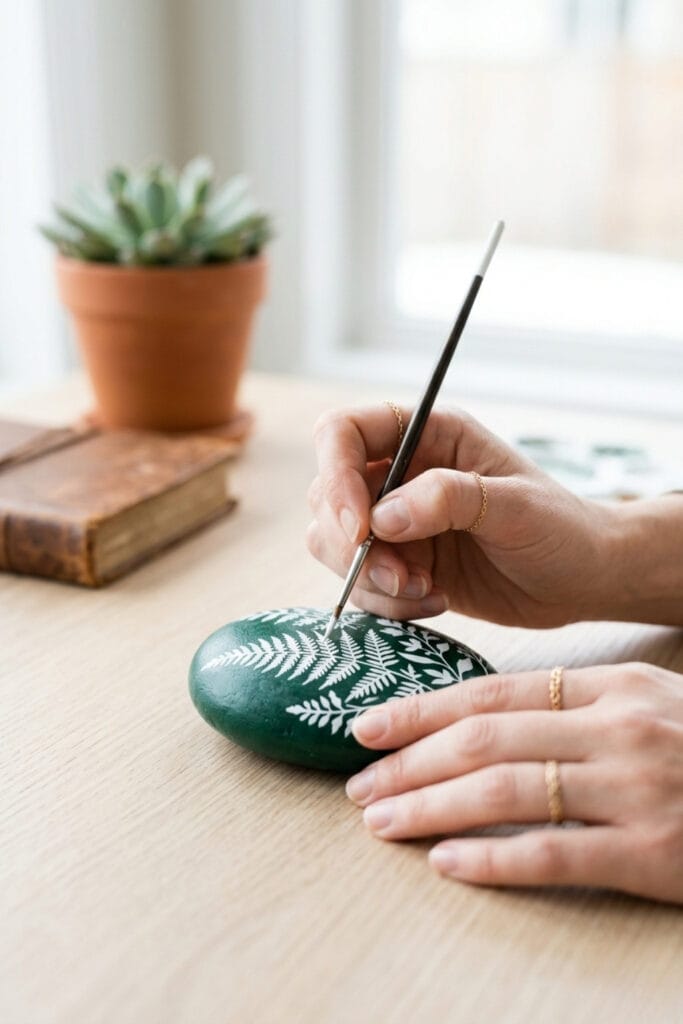
Paint a solid, dark base color first (emerald green, navy, or black work best) and let it dry completely. Then, using a fine-detail brush loaded with a light or white paint, paint your silhouette shape — leaves, branches, or an animal outline — directly on top in a single confident stroke per line.
Tips:
- Thin your paint slightly with water for smoother, more controlled fine lines.
- Sketch your design lightly with a pencil first if you’re not confident freehanding it — acrylic paint will cover pencil marks completely.
- Steady your painting hand by resting your pinky finger against the rock as an anchor point.
Used in: Elegant Botanical Silhouettes, Warm Animal Silhouettes.
Technique 2: Sponge Blending
Dip a small craft sponge lightly into one paint color and dab it onto the rock using a light, circular patting motion — never a swipe. While the first color is still wet, dip a clean section of the sponge into your second color and dab it directly next to (and slightly overlapping) the first, letting the two blend naturally at the edges.
Tips:
- Use a separate clean sponge (or a clean section) for each color to avoid muddying your palette.
- Work from your lightest color to your darkest — it’s much easier to deepen an area than to lighten it.
- For galaxy designs, add a final layer of white paint speckles by tapping a nearly-dry brush over the surface once the base blend is dry.
Used in: Galaxy Art, Miniature Mountain Landscapes.
Technique 3: Dotting & Mandala Work
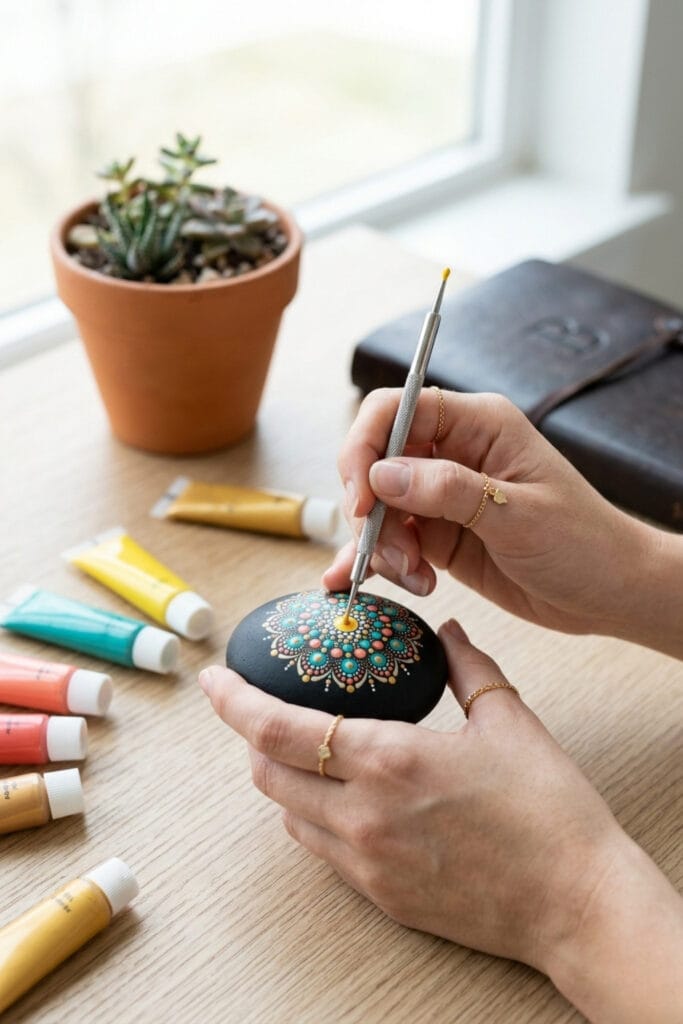
Starting at the exact center of your rock, place a single dot using your dotting tool. Working outward in concentric rings, place evenly spaced dots around that center point, keeping each ring’s dots equal in size and spacing before moving to the next ring out.
Tips:
- Use dotting tools in 2–3 different tip sizes — larger dots for inner rings, progressively smaller dots as you move outward, creates a natural, professional gradient.
- Turn the rock (not your wrist) as you work around each ring — this keeps your dot spacing far more even.
- Lightly mark a few guide dots with pencil at the 12, 3, 6, and 9 o’clock positions of each ring before filling in, so your pattern stays symmetrical.
- Let each ring dry for a few minutes before starting the next if the rings are close together, to avoid smudging.
Used in: Mandala Dots.
Technique 4: Marbling & Metallic Swirling
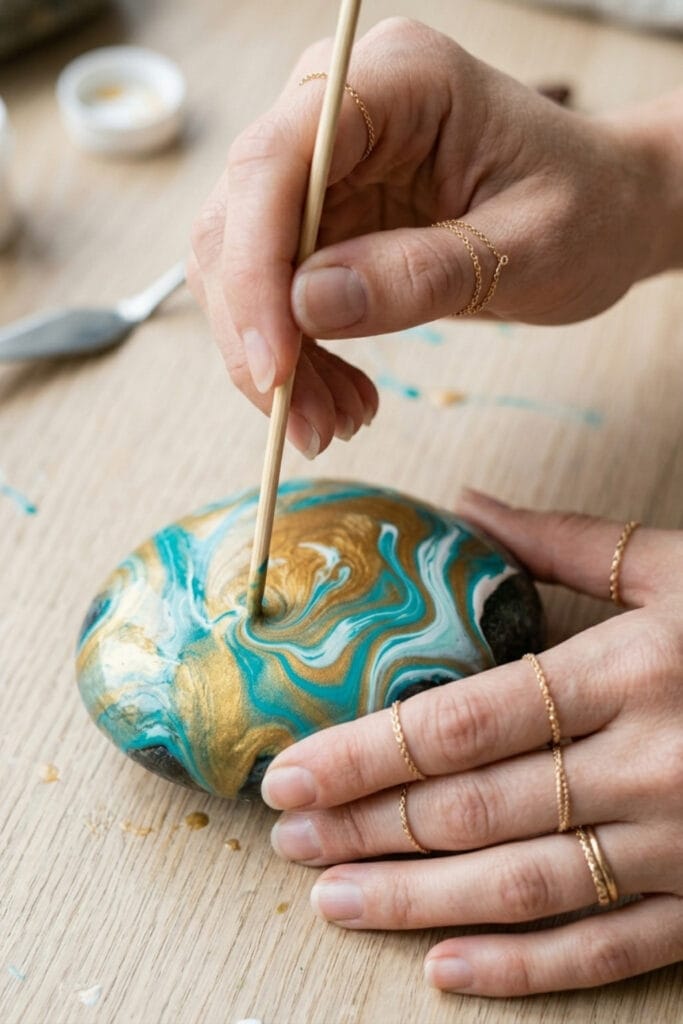
First, apply two or three complementary paint colors to your rock in loose, uneven patches — don’t blend them smooth. While the paint is still wet, drag a fine brush or toothpick through the colors in gentle, curving lines to create natural marble veining. Once fully dry, dip your finger or a dry brush lightly into metallic gold wax and trace along a few of the veins to highlight them.
Tips:
- Work quickly through the marbling step — this technique depends on the base colors still being wet enough to swirl together.
- Less is more with the gold wax: a little product on your fingertip, applied to only the raised veins, looks far more elegant than a heavy coat.
- Practice your swirl pattern on scrap paper first if you’re new to marbling — the curving, vein-like motion takes a couple of tries to feel natural.
Used in: Faux Agate and Marble Effect.
Technique 5: Fine-Line Lettering & Detail Drawing
Using an acrylic paint pen (not a brush) on a fully dry base coat, write your word or draw your continuous-line design slowly and steadily, lifting the pen as little as possible to keep lines smooth. For lettering, lightly sketch the word in pencil first to plan your spacing before going over it in pen.
Tips:
- Test your paint pen on scrap paper first and shake it well — these pens need priming and can start out patchy.
- For continuous-line designs (like the minimalist lotus), plan your route before you start — try tracing the design in the air above the rock first to build muscle memory.
- Rest your wrist on the table for stability rather than holding your hand in the air, especially for lettering.
Used in: Story Stones, Kindness Rocks, Minimalist Line Art.
Once your design is complete and fully dry (allow 24 hours for best results), don’t forget to apply your clear sealer — especially for any rocks headed outdoors. See the “How to Seal Your Rock Painting Ideas for Outdoors” section below for full details.
12 Relaxing & Creative Rock Painting Ideas
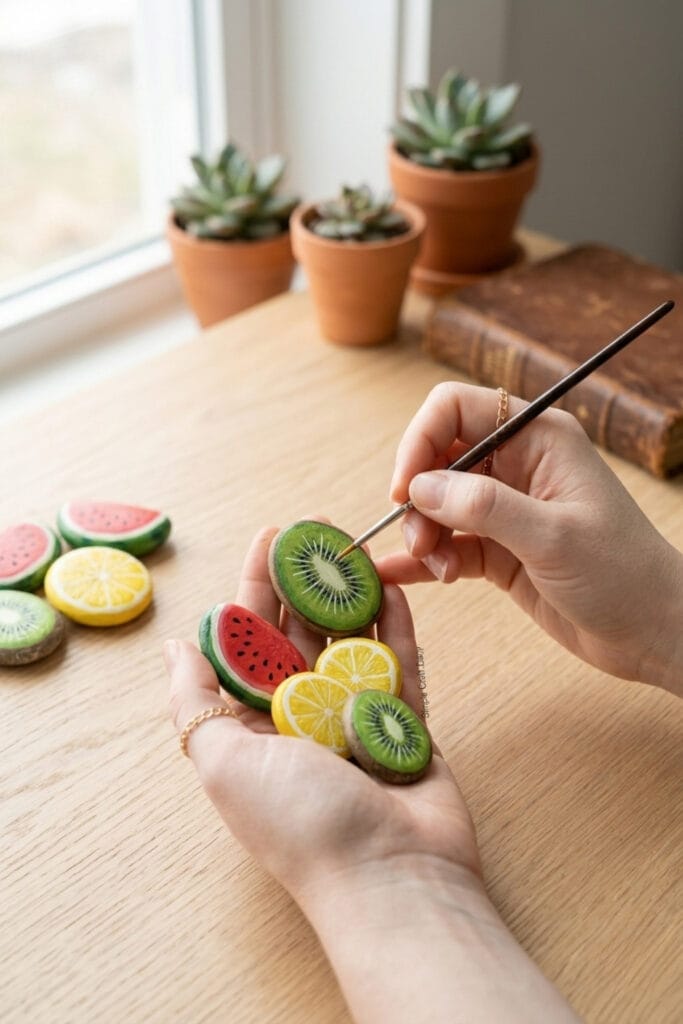
1. Vibrant Fruit Slices: Fun Rock Painting Ideas
- Paint the whole rock in your fruit’s main color — bright yellow for a lemon slice, deep pink for watermelon, orange for an orange wedge.
- Once dry, use a fine-detail brush to add the rind: a thin white ring near the edge for citrus, or a green rind for watermelon.
- Dot on the seeds with a contrasting color, black or dark brown, using the tip of your brush or a paint pen.
To begin with, let’s start with something incredibly cheerful. Transforming flat stones into vibrant fruit is one of the most cheerful rock painting ideas for beginners (see Getting Started: Base Coats above). First, paint the whole rock in your fruit’s main color — bright yellow for a lemon slice, deep pink for watermelon, orange for an orange wedge. Once dry, use a fine-detail brush to add the rind: a thin white ring near the edge for citrus, or a green rind for watermelon. Finally, dot on the seeds with a contrasting color (black or dark brown) using the tip of your brush or a paint pen. Specifically, these bright pops of color look fantastic sitting on a kitchen windowsill.
Supplies Needed: Smooth River Rocks, Acrylic Paints, Paintbrushes, Clear Sealer.
2. Stone Cactus: Everlasting Rock Painting Ideas
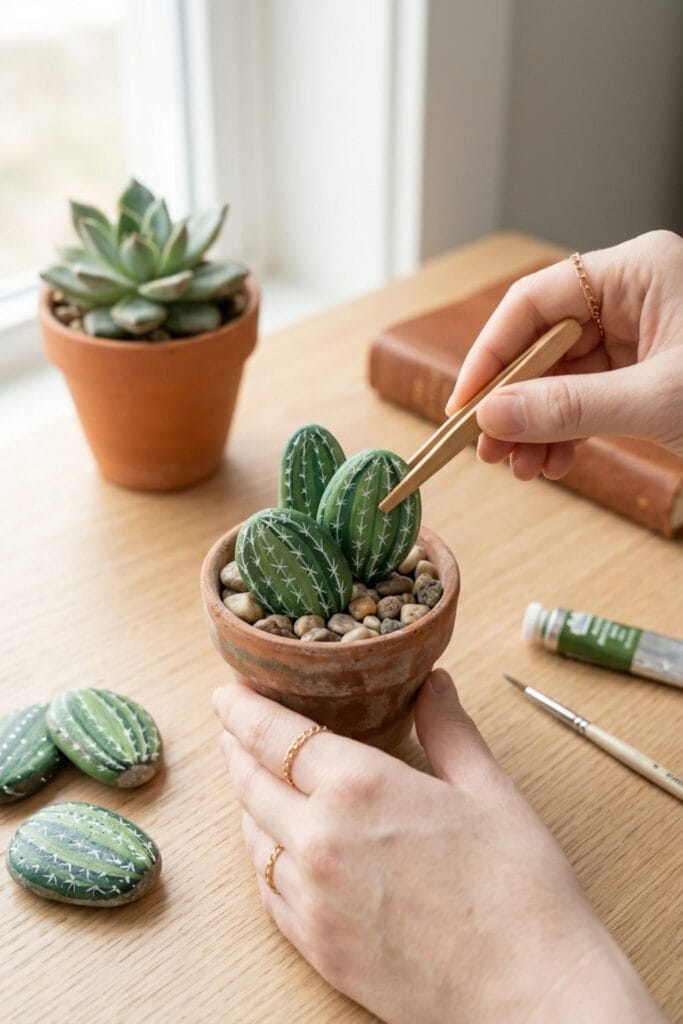
On the other hand, if you love the look of greenery but prefer a zero-maintenance approach, this idea is for you (see Getting Started: Base Coats above). First, paint your rock a solid green for the cactus body, leaving the bottom third unpainted or paint it terracotta to suggest a pot. Once dry, use a fine-detail brush to add a few vertical shading lines in a darker green for texture, then use white or cream paint pen to dot on small spines in short rows across the surface. This is a stylish piece of decor and one of our favorite rock painting ideas because it brings “everlasting” greenery into your home.
Supplies Needed: Smooth River Rocks, Acrylic Paints, Paintbrushes, Clear Sealer.
3. Galaxy Art: Magical Rock Painting Ideas
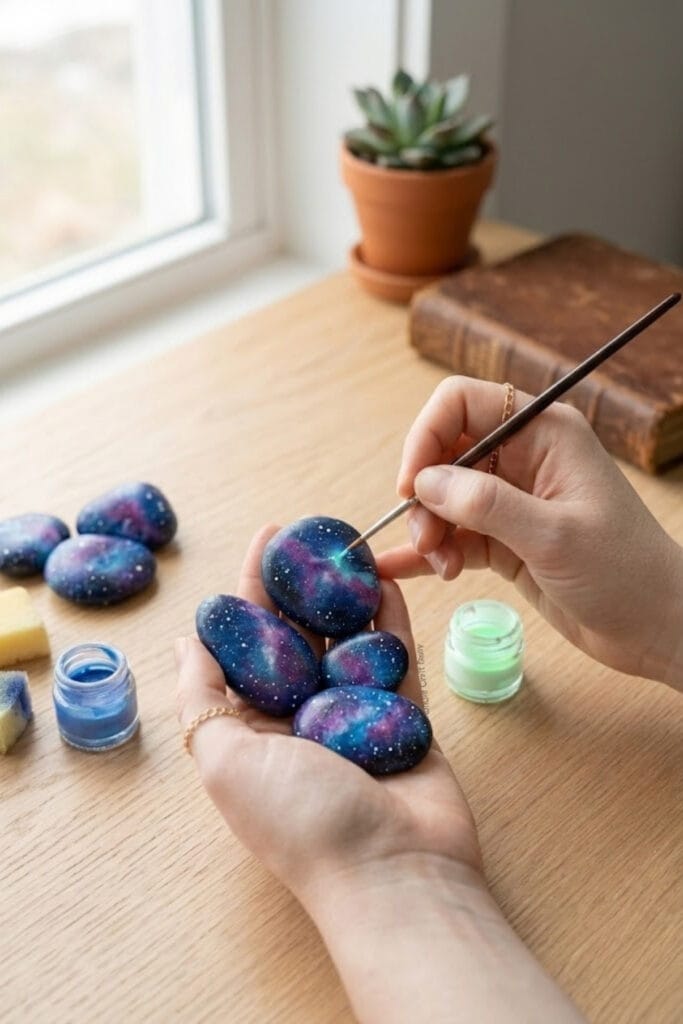
Furthermore, among all rock painting ideas, this one feels the most magical. Specifically, it brings the nebula and stars right onto your nightstand. Because you use sponges to apply the paint (see Technique 2: Sponge Blending above), you can easily mimic a realistic deep-space nebula.
Supplies Needed: Smooth River Rocks, Acrylic Paints, Craft Sponges, Paintbrushes (for star speckles), Clear Sealer.
4. Story Stones: Interactive Rock Painting Ideas
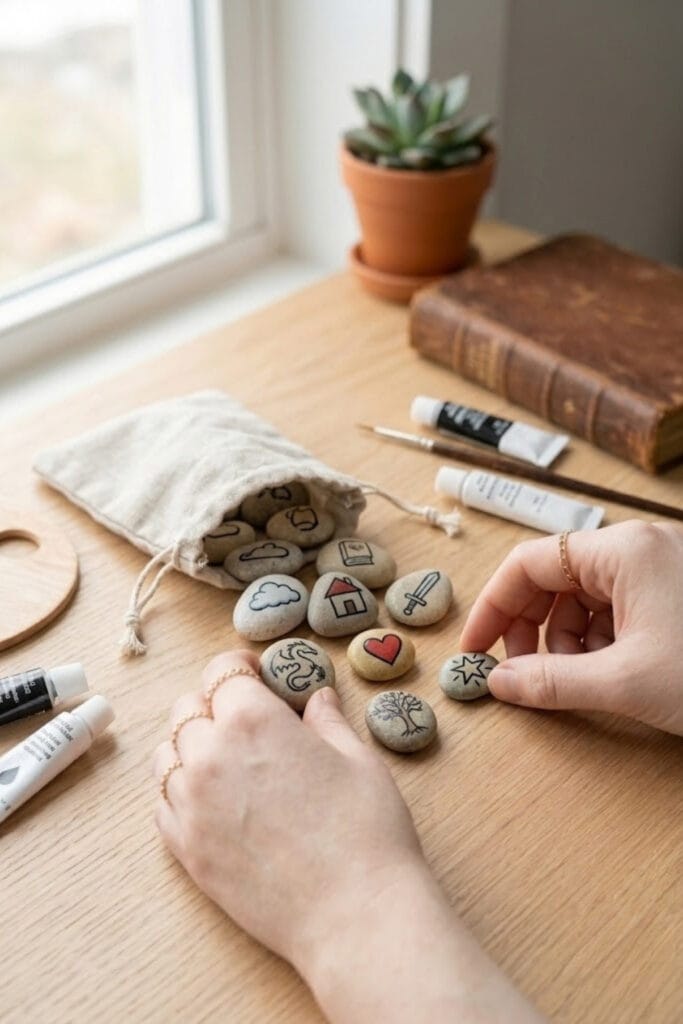
In addition, these rock painting ideas focus on simple symbols. Paint simple, recognizable symbols (a house, a cloud, a fluffy animal, a tree) on small pebbles (see Technique 5: Fine-Line Lettering & Detail Drawing above). Keep them in a linen pouch, and take turns drawing a stone to build a collaborative, imaginative story together.
Supplies Needed: Smooth River Rocks, Acrylic Paints, Paintbrushes, Acrylic Paint Pens, Fine-Liners, Linen Pouches, Clear Sealer.
5. Kindness Rocks: Inspirational Rock Painting Ideas
Sometimes, a single word can shift our entire mindset. Paint stones in soft, calming pastel hues and use a fine-liner pen to write words like “Dream,” “Calm,” “Joy,” or “Hope” (see Technique 5: Fine-Line Lettering & Detail Drawing above). You can keep these on your desk as daily reminders or leave them on neighborhood walking trails to brighten a stranger’s day.
Supplies Needed: Smooth River Rocks, Acrylic Paints, Paintbrushes, Fine-Liners, Acrylic Paint Pens, Clear Sealer.



6. Pebble Monsters: Playful Rock Painting Ideas
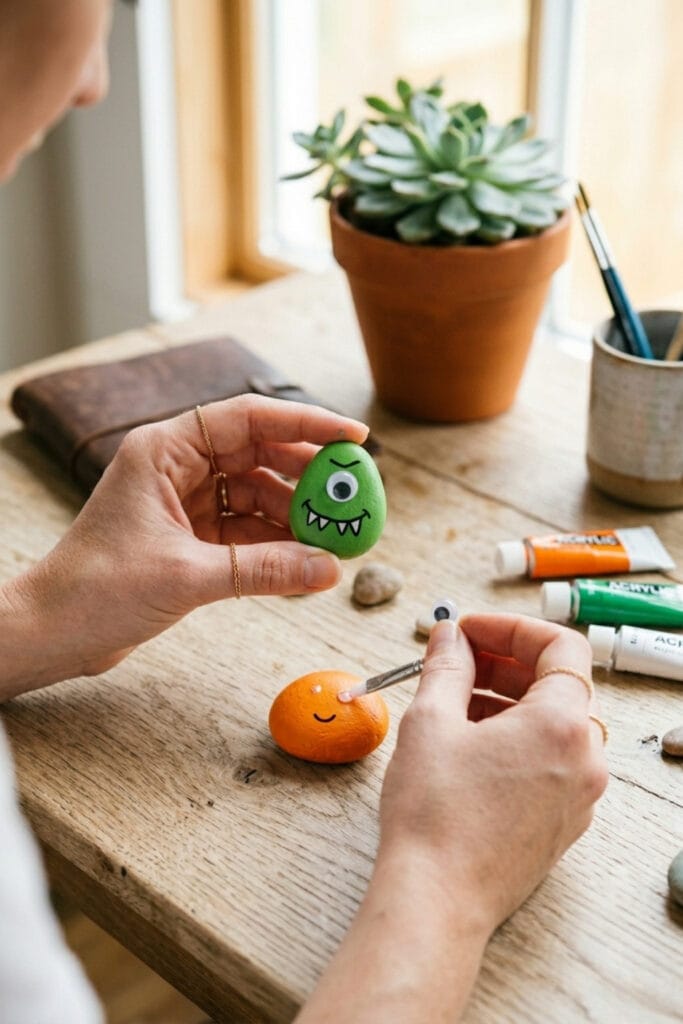
Similarly, if you want playful rock painting ideas, these monsters are a whimsical surprise. Paint stones in vibrant, solid colors (see Getting Started: Base Coats above) and add plastic googly eyes and hand-painted, silly smiles (see Getting Started: Attaching Embellishments above). These little monsters are perfect for tucking into potted plants for a fun garden accent. (Googly eyes are a small, detachable part — keep finished monsters away from young children and pets; see our safety note below.)
Supplies Needed: Smooth River Rocks, Acrylic Paints, Paintbrushes, Googly Eyes, Craft Glue (or Weatherproof Adhesive), Clear Sealer.
7. Mandala Dots: Meditative Rock Painting Ideas
Mandala designs are iconic rock painting ideas that encourage you to slow down. Starting from the center and working outward with a simple dotting tool creates a mesmerizing, rhythmic pattern (see Technique 3: Dotting & Mandala Work above). It encourages you to slow down, breathe, and focus entirely on the present moment.
Supplies Needed: Smooth River Rocks, Acrylic Paints, Dotting Tools, Pencil (for layout tracing), Clear Sealer.
8. Elegant Botanical Silhouettes
For those seeking mature and modern rock painting ideas, white fern leaves over dark backgrounds are the perfect choice. Paint your stone a deep, rich color—like emerald green or navy blue—and use a fine brush to paint delicate white fern leaves or eucalyptus branches over the top (see Technique 1: Silhouette Painting above).
Supplies Needed: Smooth River Rocks, Acrylic Paints, Fine-Detail Paintbrush, Pencil, Clear Sealer.
9. Faux Agate and Marble Effect
Moreover, you can achieve a high-end look with these rock painting ideas by swirling metallic golds. Swirl metallic gold wax over marbled acrylic bases to mimic the natural banding of agate (see Technique 4: Marbling & Metallic Swirling above). These make stunning, weighty paperweights for a home office.
Supplies Needed: Smooth River Rocks, Acrylic Paints, Toothpick or Fine Brush (for veining), Metallic Gold Wax, Clear Sealer.
10. Miniature Mountain Landscapes
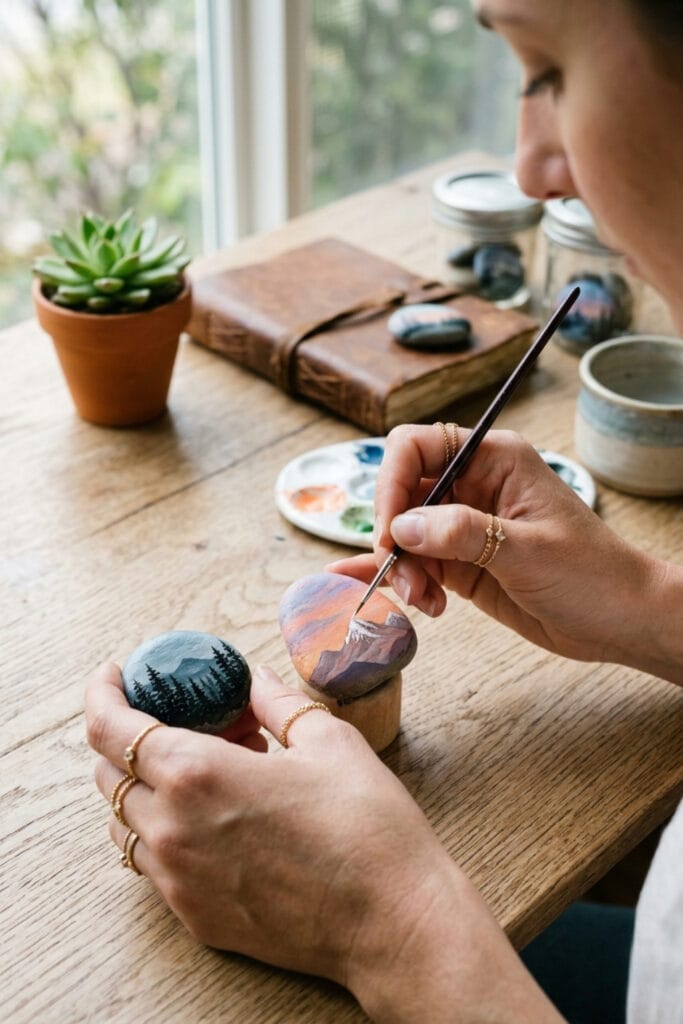
Furthermore, these rock painting ideas allow you to practice color blending on a small scale. Paint a soft, blended sunset background in warm pinks and oranges (see Technique 2: Sponge Blending above), and then add the silhouette of a tiny, snow-capped mountain or a line of pine trees (see Technique 1: Silhouette Painting above).
Supplies Needed: Smooth River Rocks, Acrylic Paints, Craft Sponges (for sunset blend), Fine-Detail Paintbrush (for silhouettes), Clear Sealer.
11. Warm Animal Silhouettes
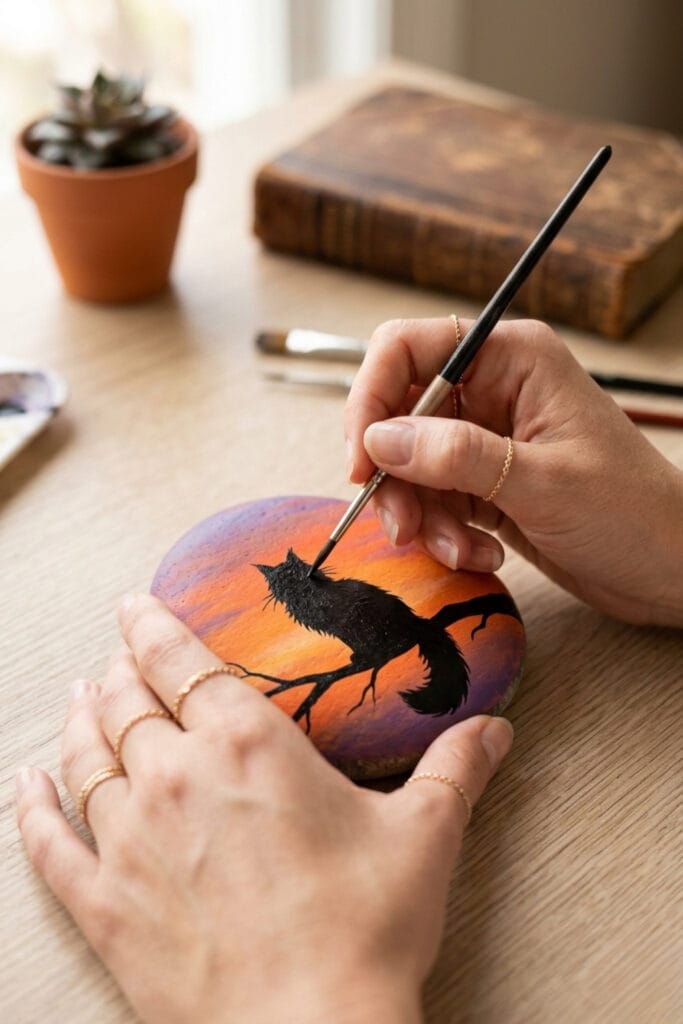
Similarly, honoring a pet with a silhouette against a twilight sky is one of the most heartfelt rock painting ideas. A majestic, fluffy cat sitting on a tree branch against a warm orange sky is a lovely way to celebrate a beloved companion (see Technique 1: Silhouette Painting above).
Supplies Needed: Smooth River Rocks, Acrylic Paints, Fine-Detail Paintbrush, Pencil, Clear Sealer.
12. Minimalist Line Art
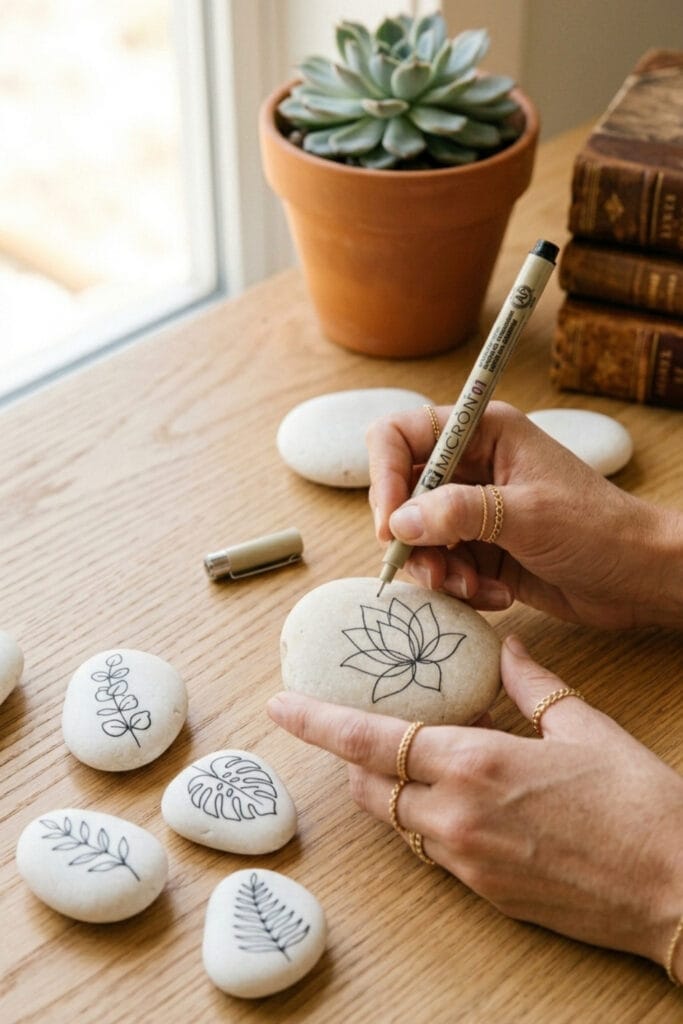
Finally, we end our list of rock painting ideas with simple, continuous-line lotus flowers (see Technique 5: Fine-Line Lettering & Detail Drawing above). Because we embrace the “less is more” philosophy, we leave the stone natural. As a result, the finished design is organic, chic, and beautifully understated.
Supplies Needed: Smooth River Rocks (left natural), Acrylic Paint Pens, Fine-Liners, Clear Sealer.
How to Seal Your Rock Painting Ideas for Outdoors
To ensure your rock painting ideas last for years, you should apply a clear sealer. Consequently, this protects your painted rocks from rain and sun. Therefore, the colors will stay as vibrant as the day you painted them.
Quick Reference: All Supplies at a Glance
🪵 Base Surfaces & Colors
- Smooth River Rocks (used throughout)
- Acrylic Paints (used throughout)
- Clear Sealer (used throughout)
🖌️ Pens & Brushes
- Paintbrushes (used throughout)
- Acrylic Paint Pens (used throughout)
🧵 Specialty & Embellishment Supplies
- Craft Sponges & Fine-Liners
- Embellishments & Detailers
- Craft Glue & Weatherproof Adhesive
- Linen Pouches
A Few Final Thoughts on Your Crafting Journey
Overall, the true beauty of exploring these rock painting ideas lies in the quiet, creative retreat they provide. Consequently, every stone becomes a unique reflection of your own “Organic Intelligence” and calm focus. Therefore, take your time, breathe, and enjoy these rock painting ideas at your own pace.
In addition, we would absolutely love to see what you create! So, share your painted stones with our community and let us know which of these 12 ideas brought you the most joy. Happy crafting from all of us at Simple Craft Daily!
Important Crafting Safety Note:
Please craft safely! Remember that you are responsible for your own safety and tool handling. For more details, please read our Terms and Conditions.
Painting DIY projects is a very relaxing and fun activity. However, safety is always our priority. Therefore, please be careful when applying spray sealers to protect your outdoor rocks; always spray in a well-ventilated outdoor area or open spaces to avoid inhaling fumes. Because acrylic paints can stain fabrics permanently, wear a craft apron and protect your table setup. Finally, small embellishments like googly eyes, dotting tools, and other tiny detailers are a choking hazard — keep finished pieces and loose supplies away from young children and pets, and make sure glued-on pieces are fully cured and secure before a rock is handled by little hands. Keep your workspace clean to enjoy a peaceful crafting session!


