

Do you want a fun and creative hobby? DIY bracelets with string turn a few strands of floss into a gift or a wearable piece of your own style, and every idea below starts from the same handful of knots. Each of the twelve designs carries a full recipe — strand counts, cut lengths, knot sequence, and a tie-on closure — so you can start with the basic chevron and work up to beaded and charm finishes.
This blog post contains affiliate links. As an Amazon Associate, I earn from qualifying purchases. The content on some of these projects may be enhanced with structural craft inspirations.
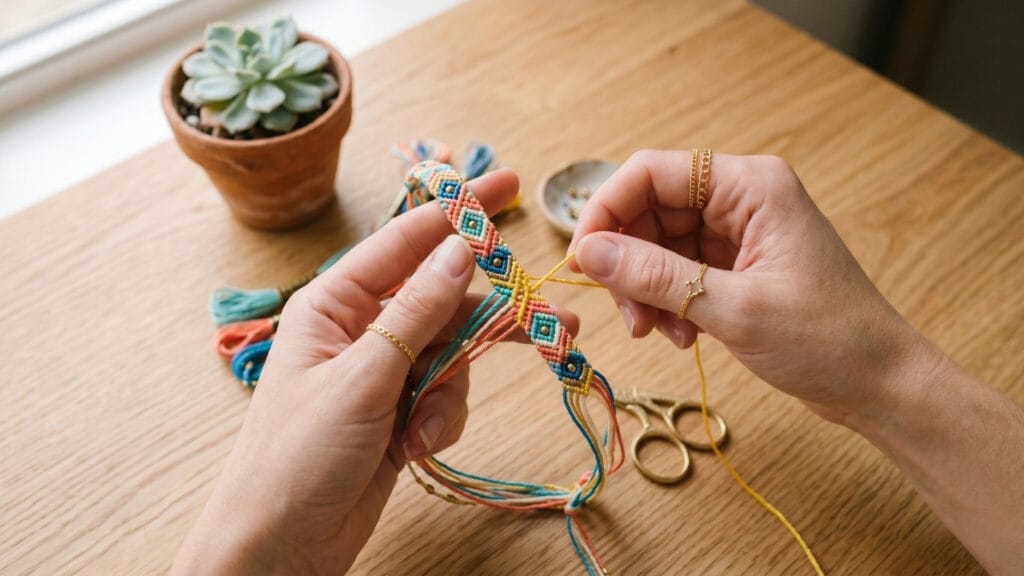
Core Techniques for DIY Bracelets with String
A handful of core knots and methods show up across these twelve designs. Master these once, and every idea below becomes easy to follow.
1. The Forward & Backward Knot (Base Knot)
Quick Steps: A full friendship-bracelet knot is TWO half-hitches in the same direction. Lay the working strand over its neighbour to form a “4”, loop it under and up through the gap, and pull snug — that is half-hitch one; repeat the identical motion on the SAME neighbour for half-hitch two. A backward knot mirrors it: strand over the top first, then under and up — twice on the same neighbour. Two half-hitches make one complete knot; a single half-hitch slides and twists the pattern. Used in: The Basic Chevron, The Spiral Staircase Technique, The Classic Candy Stripe, The Ocean Wave Pattern.
- Shape it. Lay the working strand over the adjacent strand to form a “4” (forward) or a reversed 4 (backward).
- First half-hitch. Loop the working end under and up through the gap, then pull it snug up to the top strand.
- Second half-hitch. Repeat the identical loop on the SAME neighbouring strand — two half-hitches together make one full knot.
- Switch sides to steer. Start the next knot from the other direction to keep rows even: forward-only rows drift right, backward-only rows drift left.
2. Three-Strand Braiding
Quick Steps: Tape three strands to your work surface. Cross the right strand over the center strand, then cross the left strand over the new center strand. Repeat this alternating sequence tightly down to the end, then knot to secure. Used in: The Simple Braid.
3. Threading Beads Into Knotwork
Quick Steps: Tie your pattern as usual up to the point where you want a bead. Slide a bead onto your working strand, then continue your next knot as normal so the bead sits locked in place against the previous row. Used in: The Beaded Variation.
4. The Macramé Square Knot
Quick Steps: A square knot has two halves that must start from OPPOSITE sides. First half: cross the left working strand over the two centre strands and under the right strand, then pull it through. Second half: bring the right strand over the two centre strands and up through the loop the first half just opened on the left, and pull both ends together so the knot lies flat. Alternate which side starts each full knot — repeating the same side twice produces a spiral instead of a flat square cord. Used in: The Macramé Square Knot.
- Half one (left side). Lay the left working strand OVER the two centre cords and UNDER the right strand; pull it through to the left.
- Half two (right side, new loop). Bring the right working strand OVER the two centre cords and up through the loop half one just opened on the left.
- Set it flat. Pull both working ends outward at the same time so the knot lies flat and snug against the previous knot.
- Alternate starts. Begin the next square knot from the right side; alternating sides keeps the cord flat, while the same side every time produces a spiral.
5. The Fishtail Braid
Quick Steps: Divide your strands into two groups. Take the outer strand from one group and cross it into the other group, then take the outer strand from that group and cross it back. Repeat, alternating sides, to build a flat, woven pattern. Used in: The Fishtail Braid.
6. The Twisted Rope
Quick Steps: Tape two thick cords to your surface and twist each one tightly in the same direction until it starts to kink. Bring the two twisted cords together and let them wind around each other naturally, then knot the end to lock the twist in place. Used in: The Twisted Rope.
7. The Daisy Chain Knot
Quick Steps: Fold one strand into a small loop to form a “petal.” Pass the working strand through the loop and pull snug, repeating around a center point until five or six petals form a flower shape. Knot off at the back before starting the next flower. Used in: The Delicate Daisy Chain.
8. Wrapping Floss Around a Cord Base
Quick Steps: Tape one end of your leather cord down. Wrap embroidery floss tightly and evenly around the cord in one direction, keeping each wrap snug against the last, then secure the end with a small dot of optional craft glue or simply a tight knot. Used in: The Leather and String Wrap.
9. Attaching a Tassel or Charm
Quick Steps: Open a jump ring sideways (never pull it straight apart, which weakens it) using two pairs of pliers. Slide your charm or tassel loop onto the ring, then slide the ring through the end of your finished bracelet. Close the ring by pushing the ends back together. Used in: The Tassel and Charm Finish.
Essential Materials & Tools
✨ Universal Supplies (Floss & Cord)
- Embroidery Floss (Multi-Color Pack) — the classic thread for knotted patterns | Check Embroidery Floss (Multi-Color Pack) on Amazon
- Cotton String or Crafting Cord — a slightly thicker alternative for bolder designs | Check Price on Amazon
🧰 Core Crafting Tools & Equipment
- Jewelry Pliers Set — Two pairs of pliers let makers open and close jump rings sideways without distorting them. | Check Jewelry Pliers Set on Amazon
- Sharp Scissors — for clean, fray-free cuts | Find Sharp Scissors on Amazon
- Masking Tape — pins your work to a flat surface while knotting | See Price on Amazon
- Measuring Tape or Ruler — keeps every strand the same length | See Measuring Tape or Ruler on Amazon
💎 Variation-Only Materials (Beads, Leather & Charms)
- Craft Glue — Optional: secures the wrapped floss end on the leather-cord bracelet in place of a tight knot. | Check Price on Amazon
- Leather Cord — pairs with floss for a mixed-media, artisanal look | View Leather Cord on Amazon
- Small Seed Beads — thread onto floss for the beaded variation | Explore Small Seed Beads on Amazon
- Small Gold Charms — the finishing touch for the tassel & charm design | View on Amazon
- Jump Rings — attaches charms securely to the finished bracelet | Find on Amazon
12 Creative Ideas for DIY Bracelets with String
Supplies Needed: Embroidery Floss (Multi-Color Pack), Small Gold Charms, Jump Rings, Jewelry Pliers Set, Sharp Scissors, Masking Tape, Measuring Tape or Ruler
Sizing, Tying On & Finishing
Size it before you knot a single strand: measure the wrist and add about 2 cm (1 in) of ease — for most adults that lands on the roughly 13 cm (5 in) of knotted band the chevron recipe below is written around. Keep the floss above your starting knot and the tails you leave at the end: those free ends are the tie-on closure, braided and knotted together when you wear it. For a clasp-free loop-and-knot closure, tie one end into a small fixed loop and pass a knot button on the other end through it. Trim the cut ends at an angle, and put a tiny dab of clear jewelry glue on any floss tip that starts to fray before you snip it.
Practicing these designs will build your confidence. Additionally, these projects are beginner-friendly. Here are twelve ideas to start your journey.
1. The Basic Chevron DIY Bracelets with String
Supplies Needed: Embroidery Floss, Sharp Scissors, Masking Tape, Measuring Tape. (see Technique 1: Forward & Backward Knot above)
The chevron is a classic pattern. Therefore, most beginners start here. It uses simple forward and backward knots. These knots create a V-shape.
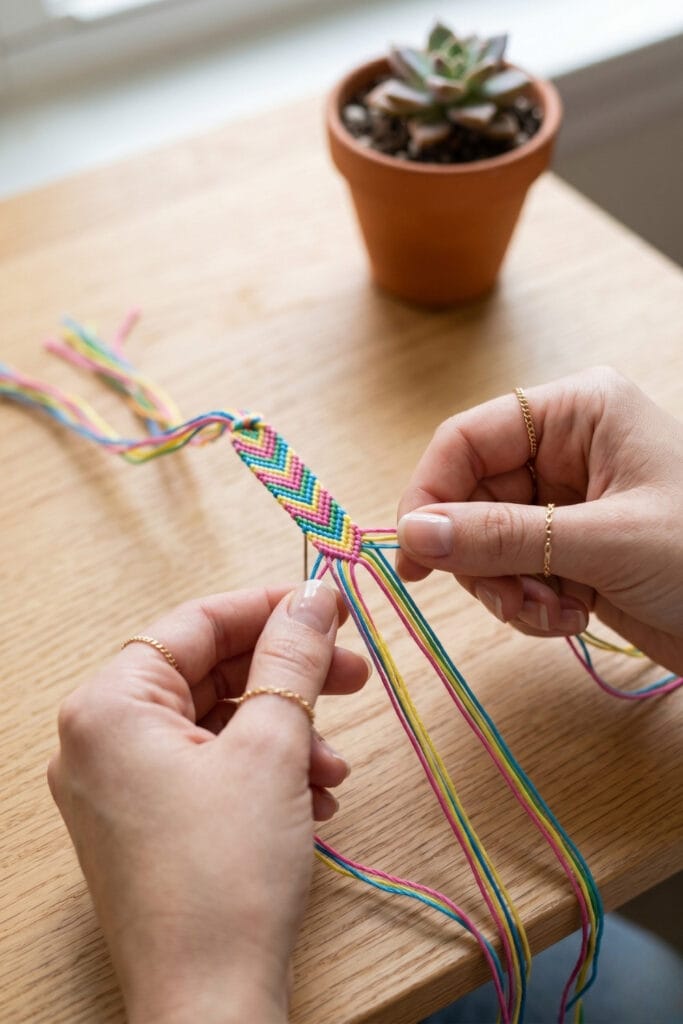
- Cut and set up. Cut 6 strands of embroidery floss at 60 cm (24 in) — two of each of three colours. Line them up colour against colour, tie an overhand knot 8 cm (3 in) from the top, and tape the knot to the table.
- Work the left half. From the left edge, tie forward knots — two half-hitches each — towards the centre: outer strand onto its neighbour, then the next, so the left side of the V points inward.
- Work the right half. From the right edge, tie backward knots towards the centre; close the V with one forward knot on the two middle strands.
- Repeat to length. Alternate left and right halves for 14–16 rows until the knotted band measures about 13 cm (5 in).
- Close it off. Untape, split the strands in two, braid 2 cm (1 in) of tail on each side, knot the braids, and tie them together when worn.
2. The Spiral Staircase Technique
Supplies Needed: Embroidery Floss, Sharp Scissors, Masking Tape. (see Technique 1 above)
Next comes the eye-catching spiral staircase. It runs on a single knot — the forward knot, always tied in the same direction — and the band twists on its own after a few rows, so a full bracelet works up fast.
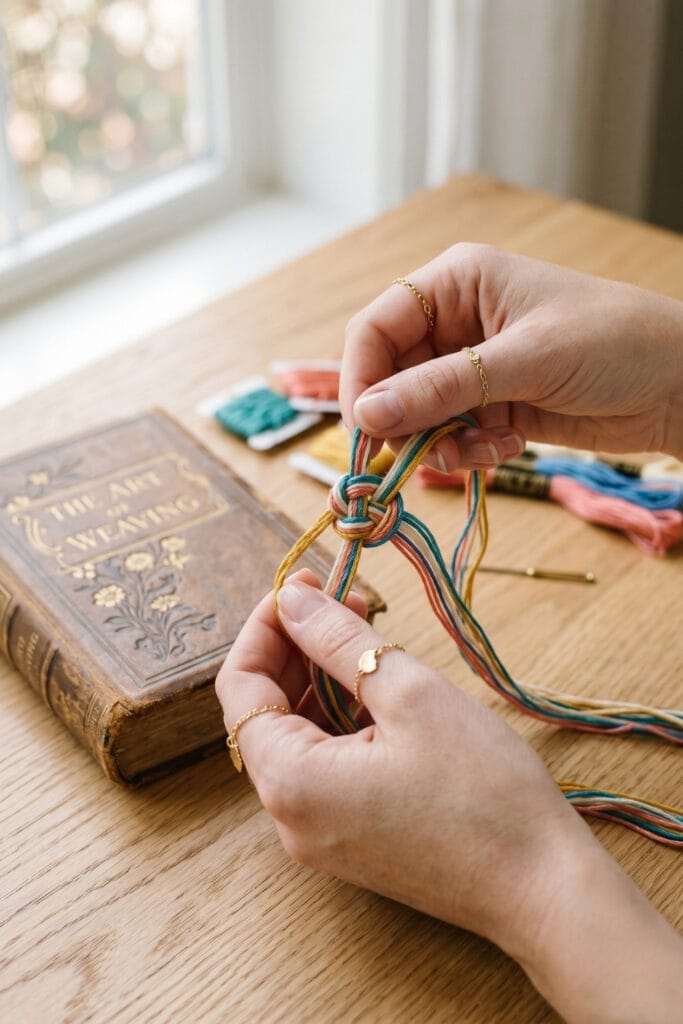
- Cut and anchor. Cut one strand at 55 cm (22 in) and use it as the template for three more (four strands in two colour pairs); knot the tops together 8 cm from the end and tape down.
- One direction only. Tie forward knots — two half-hitches — onto the next strand to the right, always moving the working strand rightward.
- Let it spin. After each knot let the work rotate; the stacked knots lean and the band spirals by itself after 8–10 knots.
- Length. Continue the same forward-knot row until the spiral measures 13 cm (5 in).
- Close. Untape, split the strands into two tails, twist each tail into a two-strand cord for 2 cm, knot, and tie when worn.
3. The Simple Braid for DIY Bracelets with String
Supplies Needed: Embroidery Floss or Cotton String, Sharp Scissors, Masking Tape. (see Technique 2: Three-Strand Braiding above)
Try a simple braid for fast results. This is the quickest way to use your threads. Most importantly, it creates beautiful wearable art.
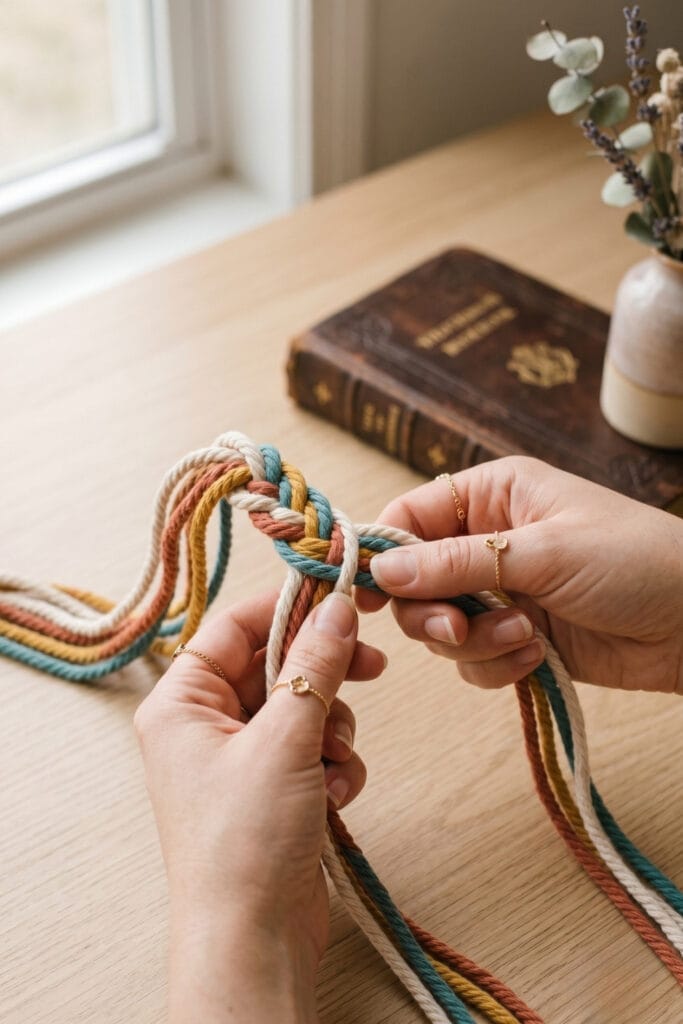
- Cut and tape. Cut three strands at 50 cm (20 in); tape the top ends together 10 cm (4 in) from the top.
- Left over middle. Cross the left strand over the middle strand so it BECOMES the new middle.
- Right over middle. Cross the right strand over the new middle; keep each pass snug but not tight so the braid stays even.
- Repeat to length. Alternate left and right about 25 times until the braid reaches 13 cm (5 in).
- Finish. Tie all three strands in an overhand knot, trim the tails to 2 cm, and tie the two braid ends together to wear.
4. The Classic Candy Stripe
Supplies Needed: Embroidery Floss, Sharp Scissors, Masking Tape. (see Technique 1 above)
This diagonal pattern is a staple for string crafts. It only requires forward knots. Therefore, you can master it in minutes.
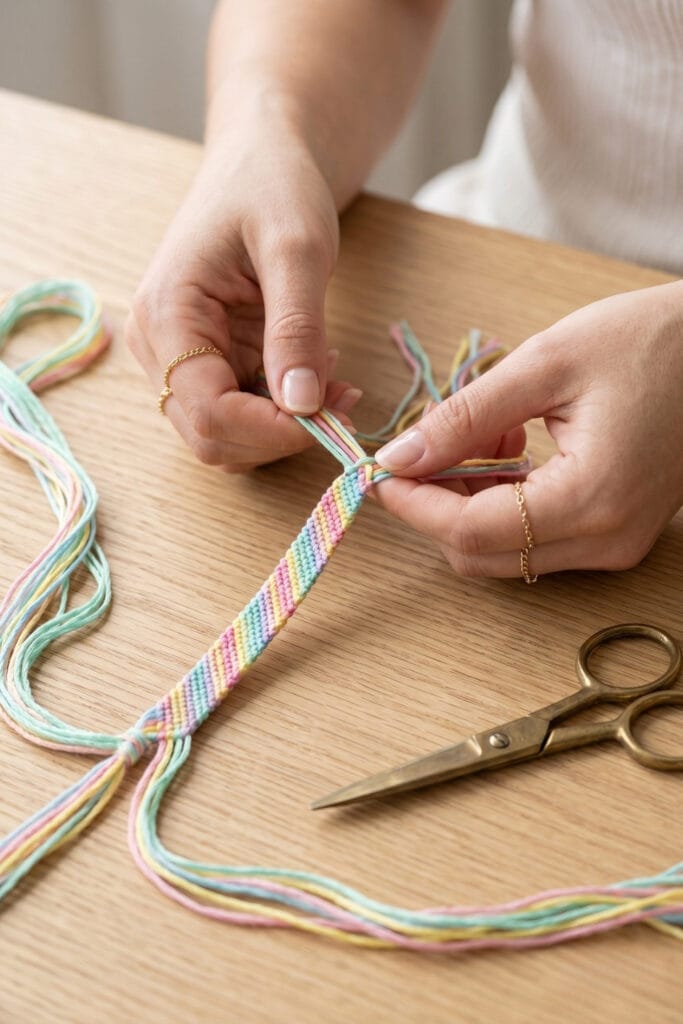
- Cut and knot. Cut five strands at 60 cm (24 in) in your stripe colours; tie a knot 8 cm (3 in) from the top and tape it down.
- One row = one colour sweep. Take the far-left strand and tie a forward knot — two half-hitches — onto every strand to its right, in order.
- Rotate. The colour you just used finishes on the far right; start the next row from the new far-left strand.
- Length. Work four or five rows per colour until the band measures 13 cm (5 in).
- Close. Braid 2 cm of tails, knot, trim, and tie together when worn.
5. The Beaded DIY Bracelets with String Variation
Supplies Needed: Embroidery Floss, Small Seed Beads, Sharp Scissors, Masking Tape. (see Technique 3: Threading Beads above)
Adding beads makes a design elegant. This style matches a minimalist look. Simply add a bead before you tie a knot.
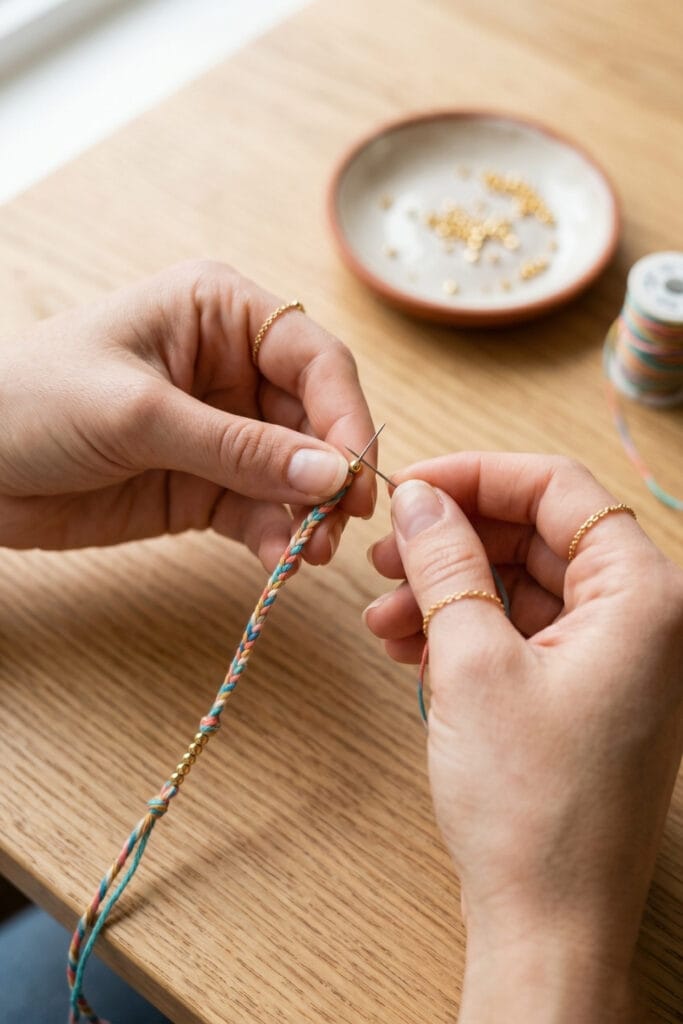
- Cut and anchor. Cut four strands at 55 cm (22 in) (use the first as a template); knot 8 cm from the top and tape down.
- Base rows. Tie two full candy-stripe rows of forward knots to start the band.
- Add a bead. Slide one seed bead onto the two centre strands, push it flush against the last row, and lock it by tying the next row’s first knot snug underneath.
- Space them out. Tie one or two plain rows, then add the next bead; repeat every 2–3 rows until the band reaches 13 cm (5 in).
- Close. Braid the tails and knot off; check every bead sits tight against its row before wearing.
6. The Macrame Square Knot
Supplies Needed: Cotton String, Sharp Scissors, Masking Tape. (see Technique 4 above)
The macrame square knot brings a chunkier texture to your wrist, and it sits well next to thinner pieces. Once the alternating left-and-right sequence is memorized, the row rhythm becomes quick.
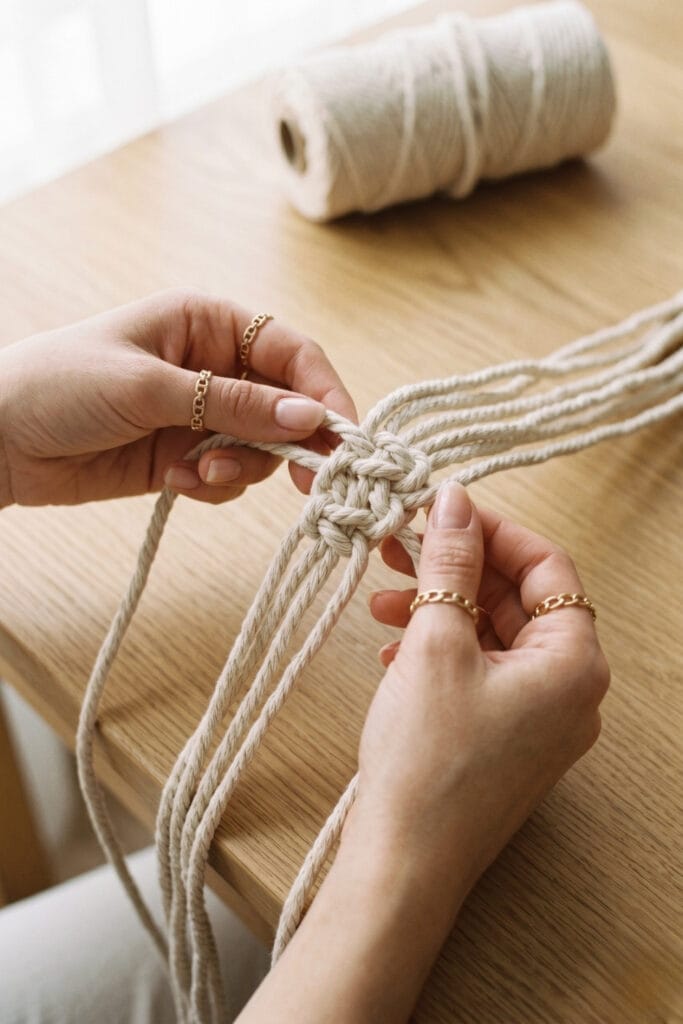
- Cut the cords. Cut two core cords at 50 cm (20 in) and one working cord at 120 cm (48 in); tape the core tops together 10 cm from the end.
- Centre the working cord. Slide the working cord under the two core cords so an equal tail hangs on each side.
- Tie square knots. Half one: left tail over the cores and under the right tail; half two: right tail over the cores and up through the loop half one opened; pull both tails together. Alternate the starting side each knot.
- Length. Tie 16–18 square knots until the knotted section measures 13 cm (5 in).
- Close. Knot the core tails together for closure, trim the working tails to 1 cm, and tie the core ends when worn.
7. The Fishtail Braid
Supplies Needed: Embroidery Floss (4+ colors), Sharp Scissors, Masking Tape. (see Technique 5 above)
Alternatively, if you want a flat and intricate look without dealing with complex knots, the fishtail is ideal. Thus, it provides a sophisticated finish with minimal effort. It looks especially striking when you use four or more contrasting colors.
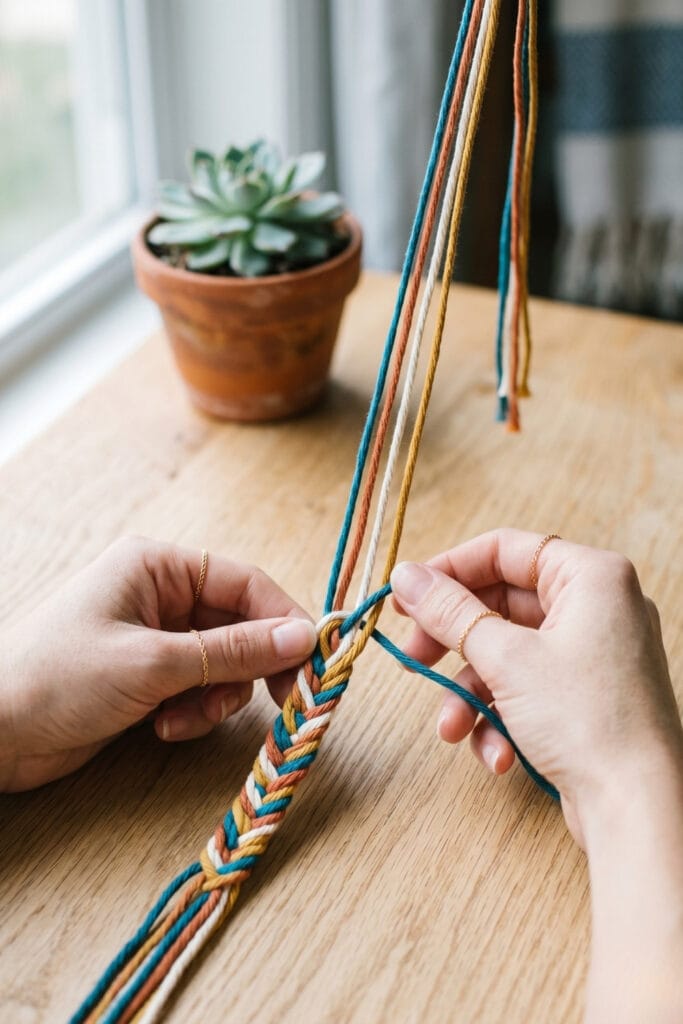
- Cut and anchor. Cut four strands at 55 cm (use the first as a template); knot the top and tape it down.
- Split into pairs. Keep the strands as two pairs — outer-left, two middle, outer-right — and lift the outer-left strand.
- Cross over. Lay the outer-left strand into the inside of the right pair, then lay the outer-right strand into the inside of the left pair; keep both sides under the same tension so the fishtail lies flat.
- Repeat to length. Alternate sides until the woven band measures 13 cm (5 in).
- Close. Braid the four tails into two pairs, knot, trim to 2 cm, and tie when worn.
8. The Twisted Rope
Supplies Needed: Cotton String or Cord, Sharp Scissors. (see Technique 6 above)
The twisted rope is the fastest method on this list: twist two thick cords tightly in the same direction, let them wrap around each other, and the two-ply cord forms in seconds.
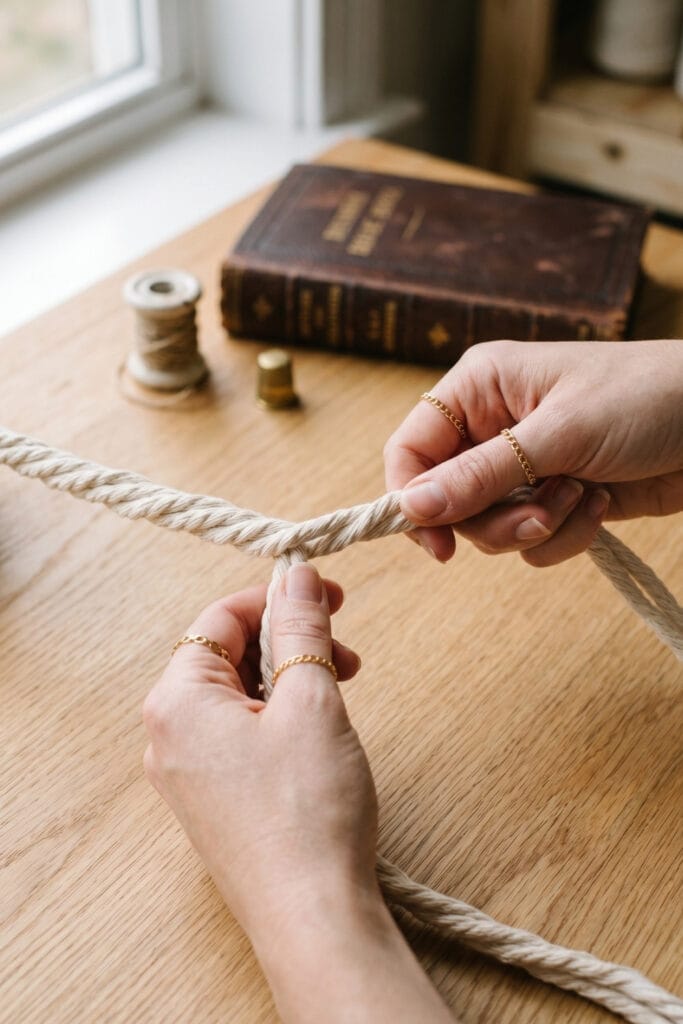
- Cut and knot. Cut two cords at 60 cm (24 in) and tie their tops together with one overhand knot.
- Twist in one direction. Holding the knotted end, twist both cords tightly the SAME way until each cord kinks the moment you slacken it — about 20 twists per cord.
- Let them ply. Bring the twisted cords together and let them wind around each other in the opposite direction; the two plies lock naturally.
- Lock the twist. Tie an overhand knot at the loose ends while holding the twist, then trim the tails to 1 cm (0.4 in).
- Close. Pass the end knot through the top loop as a button closure; if it loosens, re-twist and knot again.
9. The Delicate Daisy Chain
Supplies Needed: Embroidery Floss, Sharp Scissors, Masking Tape. (see Technique 7 above)
However, if you love a highly romantic style, the daisy chain pattern is an absolute must-try. Although it requires a bit more focus to create the tiny flower shapes, the final result is stunning. Therefore, it makes a perfect handmade gift for spring.
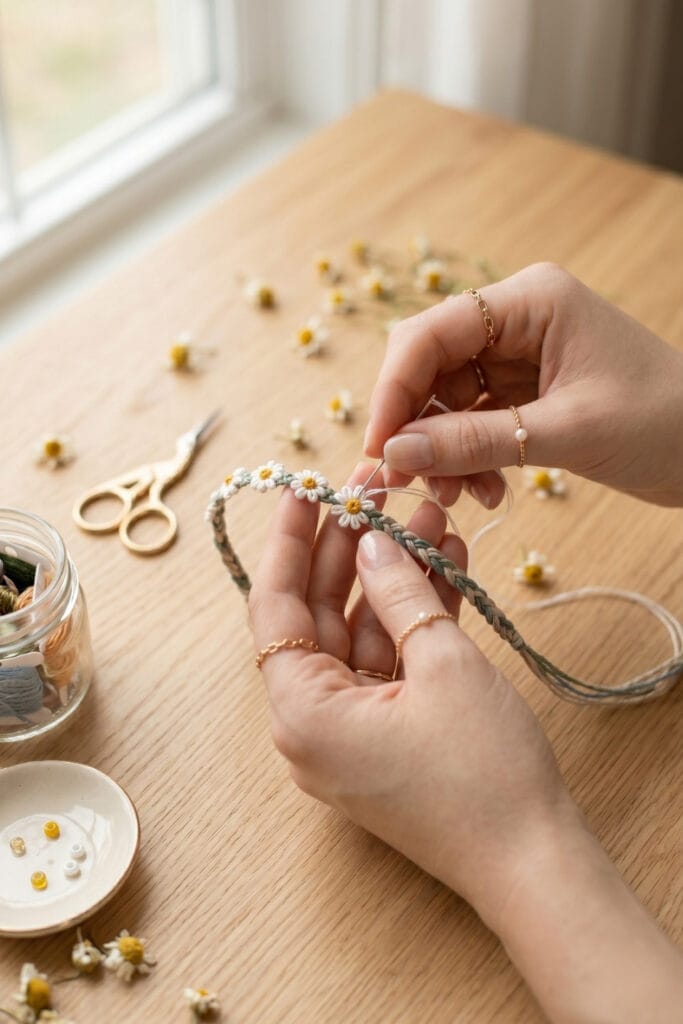
- Start a flower. Cut one strand at 70 cm (28 in); fold a 4 cm petal loop at one end and pinch its base between finger and thumb.
- Five petals. Make four more loops around the same pinch point in a circle, each loop beside the last — five loops make one flower.
- Centre it. Pass the working strand through the middle of the five loops and pull snug so the petals radiate from one centre; knot at the back to lock.
- Chain. Repeat the flower 1 cm after the previous knot; keep making flowers until only 15 cm of strand remains.
- Close. Tie the last flower’s tail to the first flower’s loop and trim the ends to 2 cm.
10. The Leather and String Wrap
Supplies Needed: Leather Cord, Embroidery Floss, Sharp Scissors, Craft Glue (optional). (see Technique 8 above)
Mixing a sturdy leather cord base with colorful embroidery floss creates a clear contrast, and the mixed-media wrap looks at home next to shop-made jewelry. It is also an easy way to use up leftover floss scraps.
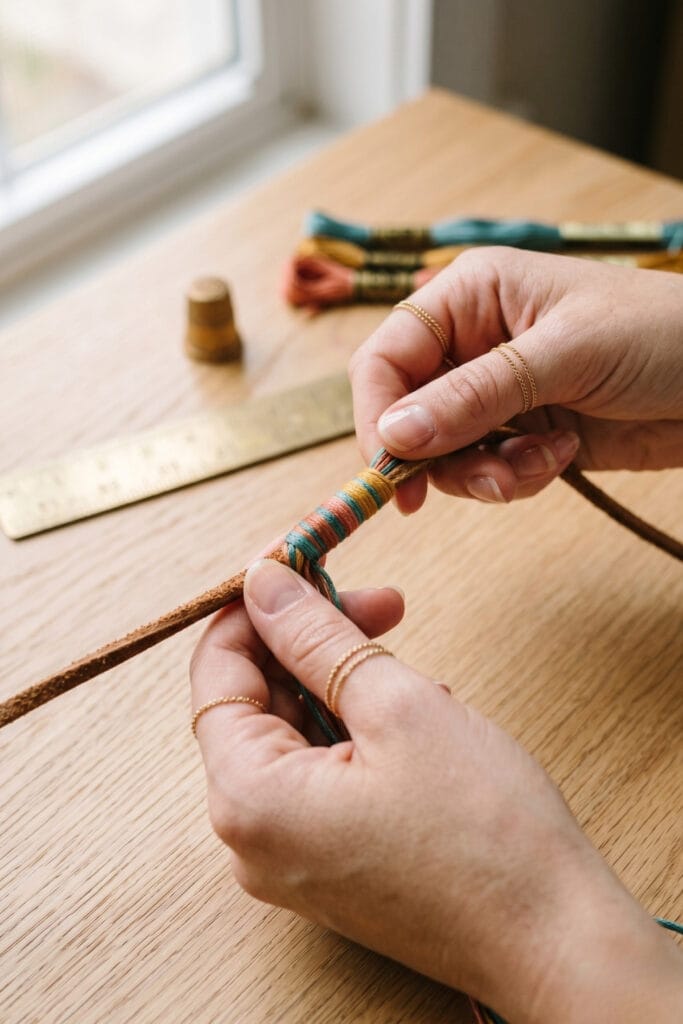
- Cut and anchor. Cut the leather cord at 55 cm (22 in) and a 60 cm length of floss; tape the leather end to the table.
- Coil the floss. Hold the floss tip against the cord and wrap floss around BOTH tightly for 2 cm (0.8 in), each coil lying flat against the last.
- Three wrap stations. Repeat the coil twice more, spaced 6 cm (2.4 in) apart, leaving leather visible between them.
- Lock the ends. Finish each wrap with a small dot of optional craft glue or a tight double knot, and tuck the floss tail under its own coil.
- Close. Tie the cord ends together (a bead knot works as a slider); run a finger along each wrap to confirm no floss is loose.
11. The Ocean Wave Pattern
Supplies Needed: Embroidery Floss (blue & white), Sharp Scissors, Masking Tape. (see Technique 1 above)
The wave pattern offers a fluid, organic look: because the knot directions alternate in blocks, the rows mimic the gentle movement of water — a popular choice for summer pieces.
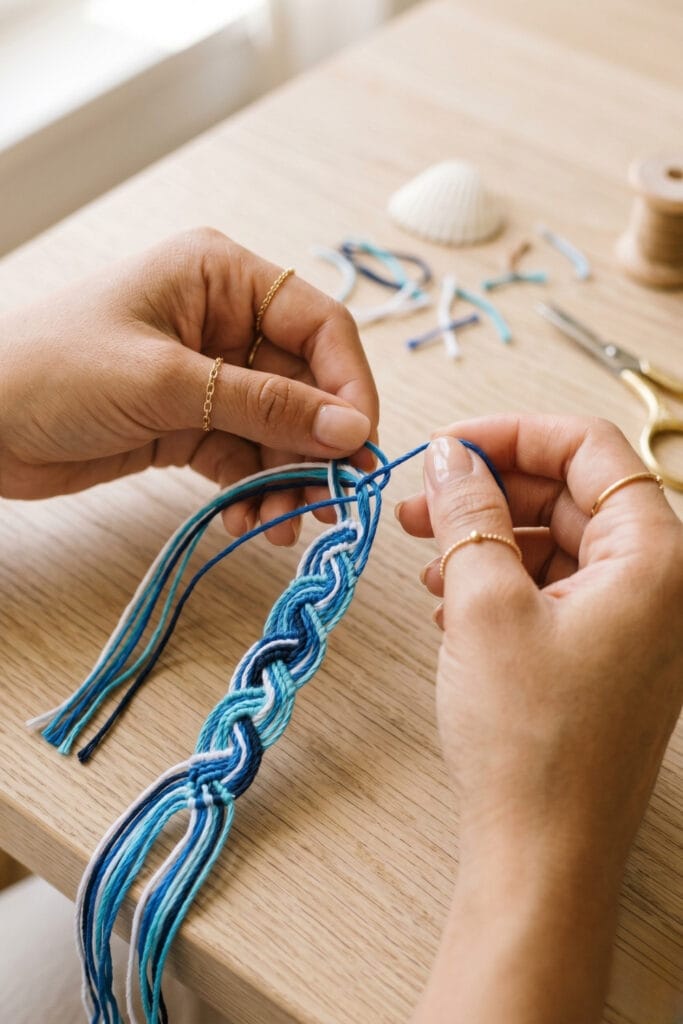
- Cut and set up. Cut six strands at 60 cm — three blue, three white, arranged alternately — knot 8 cm from the top and tape down.
- Crest rows. For three rows, tie forward knots left-to-right like the chevron; the V points downward.
- Trough rows. For the next three rows, tie backward knots right-to-left; the rows arch upward instead.
- Repeat the swell. Alternate three-row bands of forward and backward knots; the direction changes make the wave.
- Length and close. Continue to 13 cm (5 in), then braid 2 cm tails, knot, and tie when worn.
12. The Tassel and Charm Finish
Supplies Needed: Small Gold Charms, Jump Rings, Jewelry Pliers, Embroidery Floss (for the tassel), Sharp Scissors. (see Technique 9 above)
Finishing a bracelet with a miniature tassel or a tiny gold charm adds a personal touch, and a single jump ring turns it into a neat pendant-style closure. The steps below cover making the tassel and hanging it with pliers.
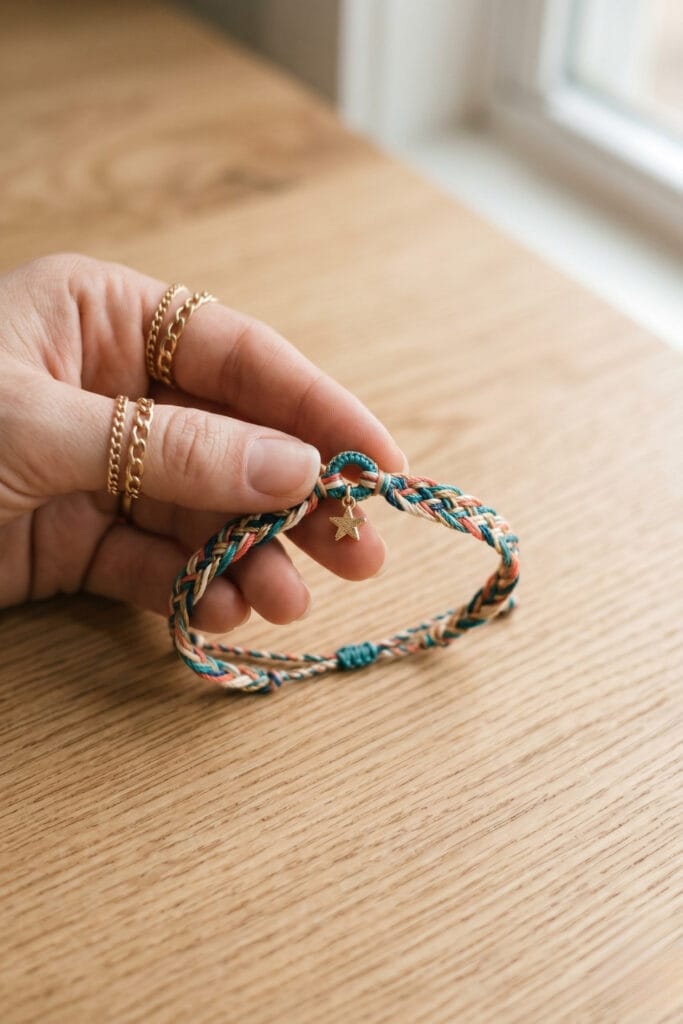
- Cut the tassel bundle. Cut six floss strands at 12 cm (4.7 in), line them up, and fold the bundle in half over one finger.
- Bind the head. Wrap a 15 cm floss tail tightly around the bundle 5 mm below the fold, six to eight times; knot it and pull the tail through the fold loop to lock.
- Fluff and trim. Cut the bottom loops open and trim the fringe straight to 2 cm (0.8 in).
- Open the jump ring sideways. Grip both sides of the ring’s split with two pairs of pliers and twist the ends APART sideways; slide on the tassel loop and the charm, then twist closed until the ends meet flush.
- Attach and finish. Open a second ring the same way to hang the tassel from the bracelet end, and check both rings sit flush before wearing.
Important Crafting Safety Notes
These bracelet projects use small parts, sharp scissors, metal findings, and optional glue, so the notes below stick to what this guide actually uses:
• Small parts & children: Beads, jump rings, and charms are choking hazards — keep them in closed containers, out of reach of young children, and count them back in when a session ends.
• Sharp scissors: Keep sharp scissors stored in a case or drawer when you take a knotting break, cut on the table edge away from your body, and hand them over handle-first.
• Jump rings & pliers: Open jump rings sideways with two pairs of pliers — never pull them straight apart — and file any sharp cut end so it cannot scratch skin or snag clothing.
• Glue, if you use it: Follow the adhesive label: work in a ventilated spot, keep it off skin and eyes, close the cap tightly, and let the dot cure fully before the bracelet is worn.
• Finished bracelets: Knot the closure tails securely and give every bracelet a gentle tug before gifting; for a bracelet worn by a young child, tie breakaway tails instead of metal findings.
For more detailed guidance on safe crafting practices, liability disclosures, and website usage, please review our Terms and Conditions.
DIY Bracelets with String FAQ
How long should I cut the strings?
Measure the wrist and add about 2 cm (1 in) of ease — for most adults the knotted band lands around 13 cm (5 in), which is what these patterns assume. Cut the floss longer than that: the loose ends above the starting knot and at the finish become the tie-on cords.
Why does my bracelet twist instead of lying flat?
Every knot is starting from the same side. Alternate forward and backward rows to keep the band flat — forward-only rows drift right, backward-only rows drift left, and one direction throughout makes the band spiral on purpose.
What counts as one friendship-bracelet knot?
One full knot is two half-hitches on the same neighboring strand: lay the working strand over its neighbor to form a 4, loop it under and up through the gap, pull snug — then repeat the identical motion on the same strand.
Which string works best for beginners?
Embroidery floss is the classic thread for knotted patterns, while cotton string or crafting cord gives a thicker, bolder design. Tape the strands to a flat surface and measure every strand to the same length before you start.
“Which of these 12 DIY bracelet ideas will you make first? Drop a comment below with your pick — and a tip of your own if you have one. I’d love to see what you create!”


