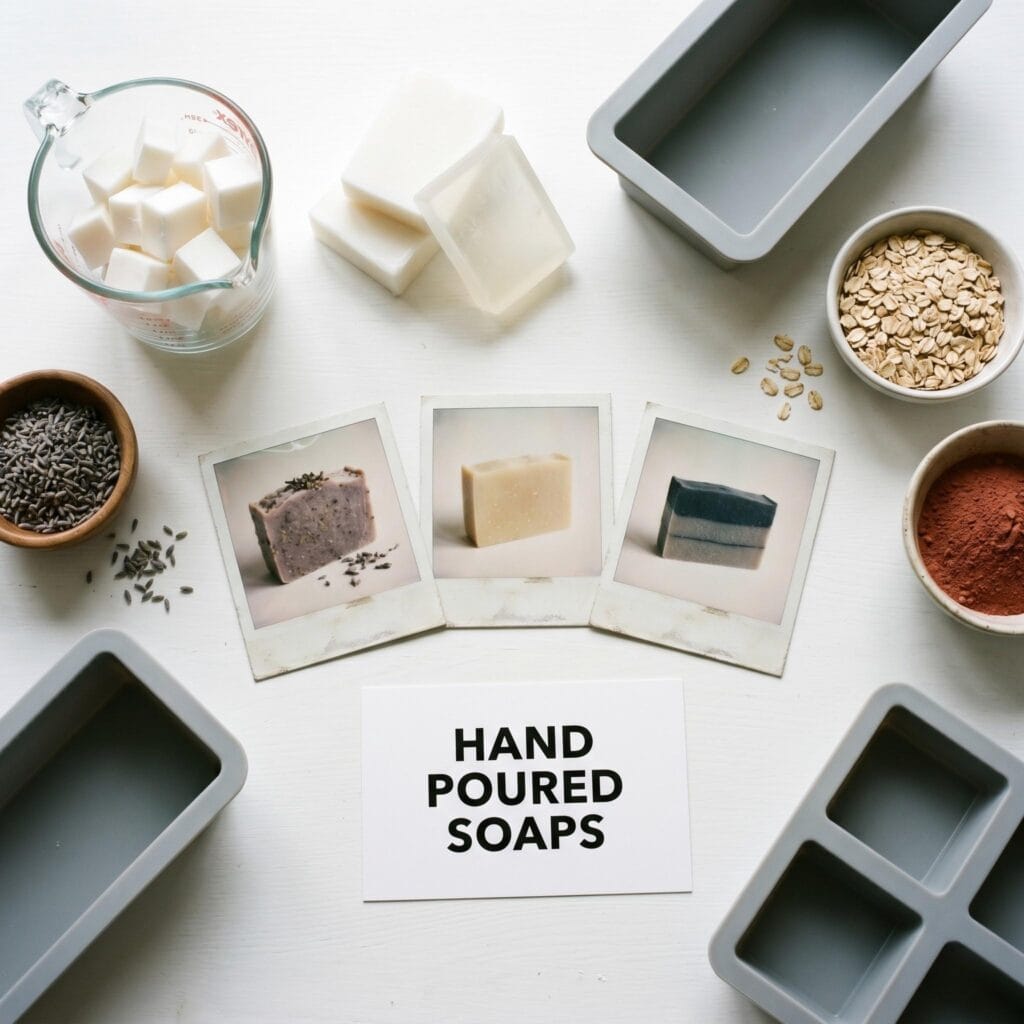
How To Make Hand Poured Soaps: 10 Beautiful Recipes
Explore these How To Make Hand Poured Soaps: 10 Beautiful Recipes with complete supply checklists, Amazon tools, and step-by-step artisan techniques for...
Making hand poured soaps is one of the most rewarding and creative crafts you can try at home. First of all, traditional soap making requires handling dangerous lye. This process can be highly intimidating for makers.
Affiliate Disclosure: Affiliate Disclosure: This post contains affiliate links. As an Amazon Associate, I earn from qualifying purchases. If you buy through these links, I may earn a commission at no additional cost to you.
Key Facts:
Technique: Soap making
Cooling time: 2–3 hours
Difficulty: Beginner-friendly
Makes: 10 Recipes
Fortunately, these custom hand poured soaps offer a completely safe alternative. They provide a highly creative project for beginners. Using easy melt and pour bases, you can craft stunning bars in just one afternoon.
Soap Making Raw Supplies
Furthermore, this method skips the long curing process entirely. Therefore, your handmade creations are ready to use almost immediately. Without a doubt, making hand poured soaps is the perfect weekend craft.
If you are ready to start melting, simply scroll down for our step-by-step guide. We also included essential troubleshooting tips. But first, let’s explore the bases and gather some inspiration.
Choosing the Right Base for Hand Poured Soaps
Before you begin melting, you must choose your soap base. Specifically, the base determines the final look and feel of your hand poured soaps.
Goat Milk: This offers a creamy, opaque, and highly moisturizing lather.
Clear Glycerin: This is perfectly transparent. Therefore, it is ideal for embedding visible flowers or seeds.
Shea Butter: This provides a rich, luxurious, and deeply hydrating skin experience.
Essential Materials & Tools
Supply
Spec / Size
Used For
Goat Milk Melt and Pour Soap Base
Creamy opaque base for lavender, oatmeal, clay, and other soft-toned…
Clear Glycerin Melt and Pour Soap Base
Transparent base that lets calendula petals, poppy seeds, and…
Shea Butter Melt and Pour Soap Base
Rich opaque base suited to rustic oatmeal, honey-inspired, and…
Skin-Safe Soap Fragrance Oil Set
Provides maker-friendly scent options such as lavender, vanilla,…
French Green Clay Powder
Adds a muted sage-green color and silky mineral look to spa-style…
Pink French Clay Powder
Creates the delicate powder-pink tone needed for romantic rose petal…
✨ Consumable Raw Materials
Goat Milk Melt and Pour Soap Base — Creamy opaque base for lavender, oatmeal, clay, and other soft-toned hand poured soap bars. | Check Price on Amazon
Clear Glycerin Melt and Pour Soap Base — Transparent base that lets calendula petals, poppy seeds, and colorful embedded details remain visible. | See Price on Amazon
Skin-Safe Soap Fragrance Oil Set — Provides maker-friendly scent options such as lavender, vanilla, citrus, cucumber, and eucalyptus-style blends. | See Skin-Safe Soap Fragrance Oil Set on Amazon
Activated Charcoal Powder — A finely milled black colorant and additive for dramatic purifying-style soap designs. | Check Latest Price on Amazon
Dried Lavender Buds — Adds a calming botanical accent to lavender goat milk bars and decorative tops. | View on Amazon
Dried Calendula Petals — Golden petals create a cheerful suspended-botanical look in transparent glycerin soap. | Check Price on Amazon
Soap Colorant Set — Concentrated liquid colorants help makers create yellow lemon, aloe green, pink, and other recipe-specific colors. | See Price on Amazon
Digital Kitchen Scale — Accurate weight measurements help makers portion soap base, colorants, and additives consistently. | View Digital Kitchen Scale on Amazon
Stainless Steel Soap Cutting Knife — A dedicated straight-edge cutter makes it easier to portion large blocks of melt and pour base into meltable cubes. | Check Latest Price on Amazon
💎 Hardware, Fasteners & Finishing
Fine Mist Isopropyl Alcohol Spray Bottles — A light mist on freshly poured soap helps pop surface bubbles and can help layers adhere. | View on Amazon
Soap Shrink Wrap Bags — Protects finished bars from moisture exposure and helps reduce glycerin dew during storage. | Check Price on Amazon
Waterproof Handmade Soap Labels — Lets makers label fragrances, ingredients, gift sets, and dates on wrapped handmade bars. | See Price on Amazon
📦 All-in-One Starter Kits
Melt and Pour Soap Making Starter Kit — An all-in-one introductory supply bundle gives beginners compatible base, molds, color, fragrance, and tools for their first batches. | Check Melt and Pour Soap Making Starter Kit on Amazon
Digital Infrared Thermometer — Quick surface temperature checks help makers avoid overheating melt and pour bases before adding fragrance or botanicals. | View Digital Infrared Thermometer on Amazon
Daylight LED Magnifying Craft Lamp — Bright adjustable task lighting makes it easier to inspect bubbles, arrange petals, and create tidy decorative finishes. | Find Daylight LED Magnifying Craft Lamp on Amazon
10 Beautiful Recipes for Hand Poured Soaps
Supplies Needed: Clear Glycerin Melt and Pour Soap Base, Skin-Safe Soap Fragrance Oil Set, Silicone Soap Mold Set, Fine Mist Isopropyl Alcohol Spray Bottles, Soap Shrink Wrap Bags
Floral and Calming Hand Poured Soaps
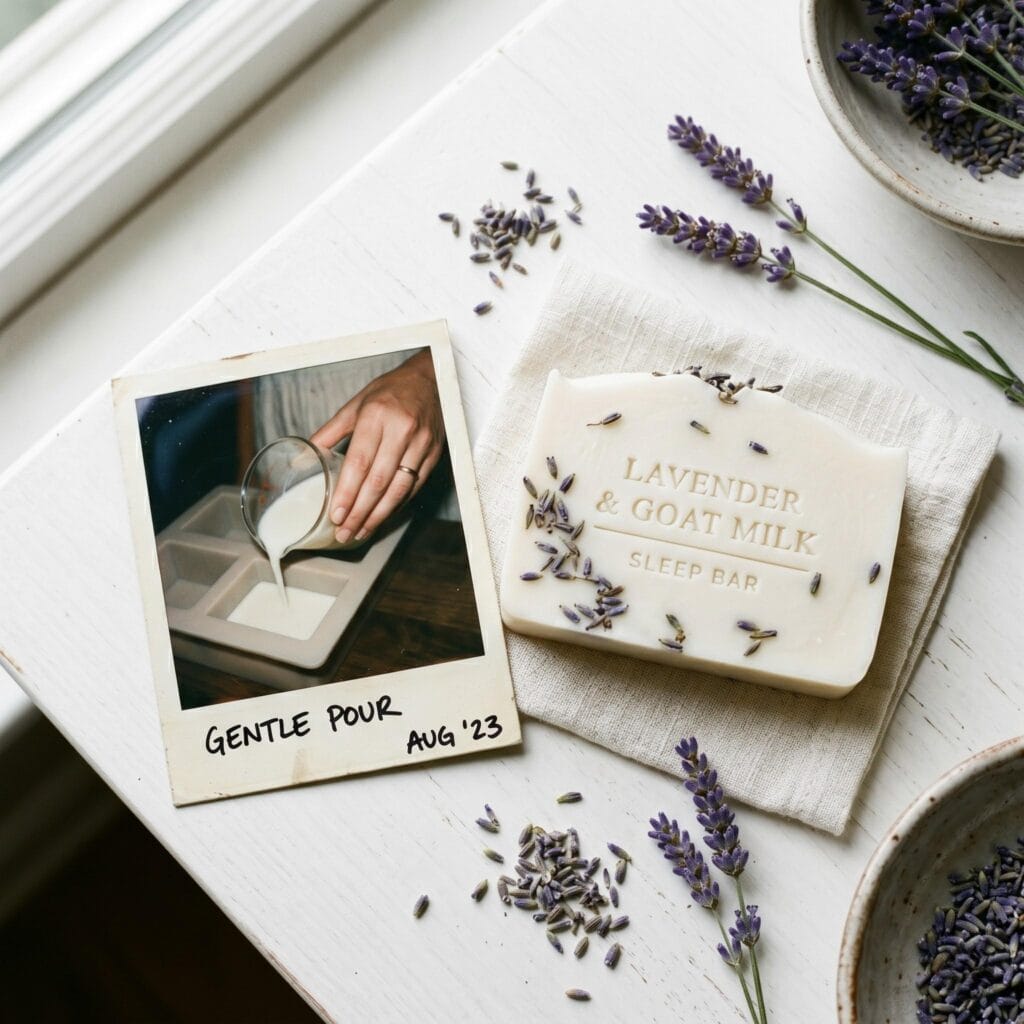
1. Lavender & Goat Milk Sleep Bar
Supplies Needed: Goat Milk Melt and Pour Soap Base, Skin-Safe Soap Fragrance Oil Set, Dried Lavender Buds, Silicone Soap Mold Set, Fine Mist Isopropyl Alcohol Spray Bottles
Chop your chosen melt-and-pour soap base into small, uniform cubes.
Place the cubes into a heat-safe glass measuring cup and heat in short 30-second bursts, stirring gently with a silicone spatula.
Once liquid, add your chosen essential oils and natural colorants, then stir gently for about one minute.
Pour the liquid soap into clean silicone molds and lightly spray the surface with rubbing alcohol to pop the bubbles.
Let the soaps cool undisturbed for roughly 2 to 3 hours, then pop them out of the molds.
This is classic and flawless. To begin with, the opaque goat milk base creates a creamy look. Subsequently, adding dried lavender buds and essential oil creates a highly soothing evening soap.
Lavender Goat Milk Soap
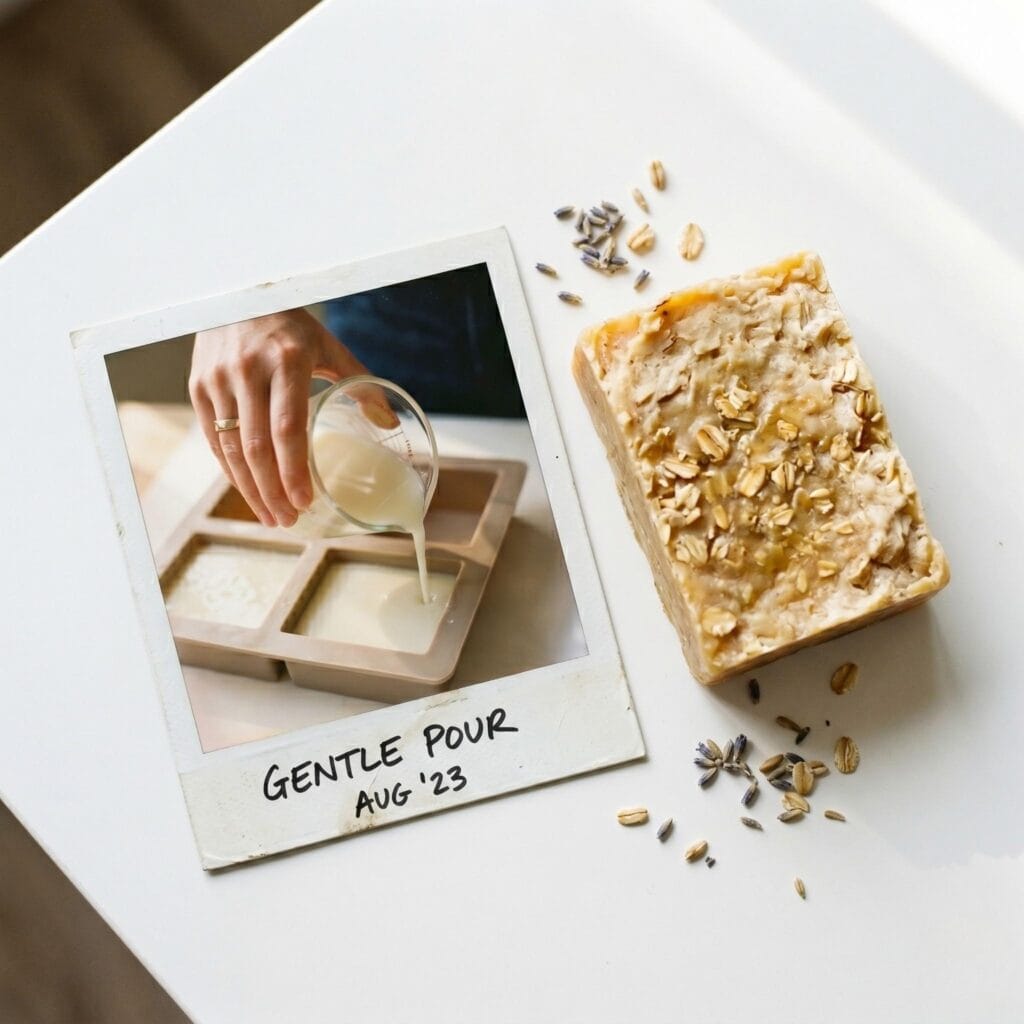
2. Honey, Oatmeal & Shea Butter Scrub
Supplies Needed: Shea Butter Melt and Pour Soap Base, Skin-Safe Soap Fragrance Oil Set, Silicone Soap Mold Set, Digital Kitchen Scale, Silicone Spatula and Stirring Spoon Set
This acts as a natural exfoliator. Specifically, real honey and lightly ground oatmeal are mixed into a shea butter base. Overall, it softens the skin while providing a beautiful rustic texture.
Honey Oatmeal Soap
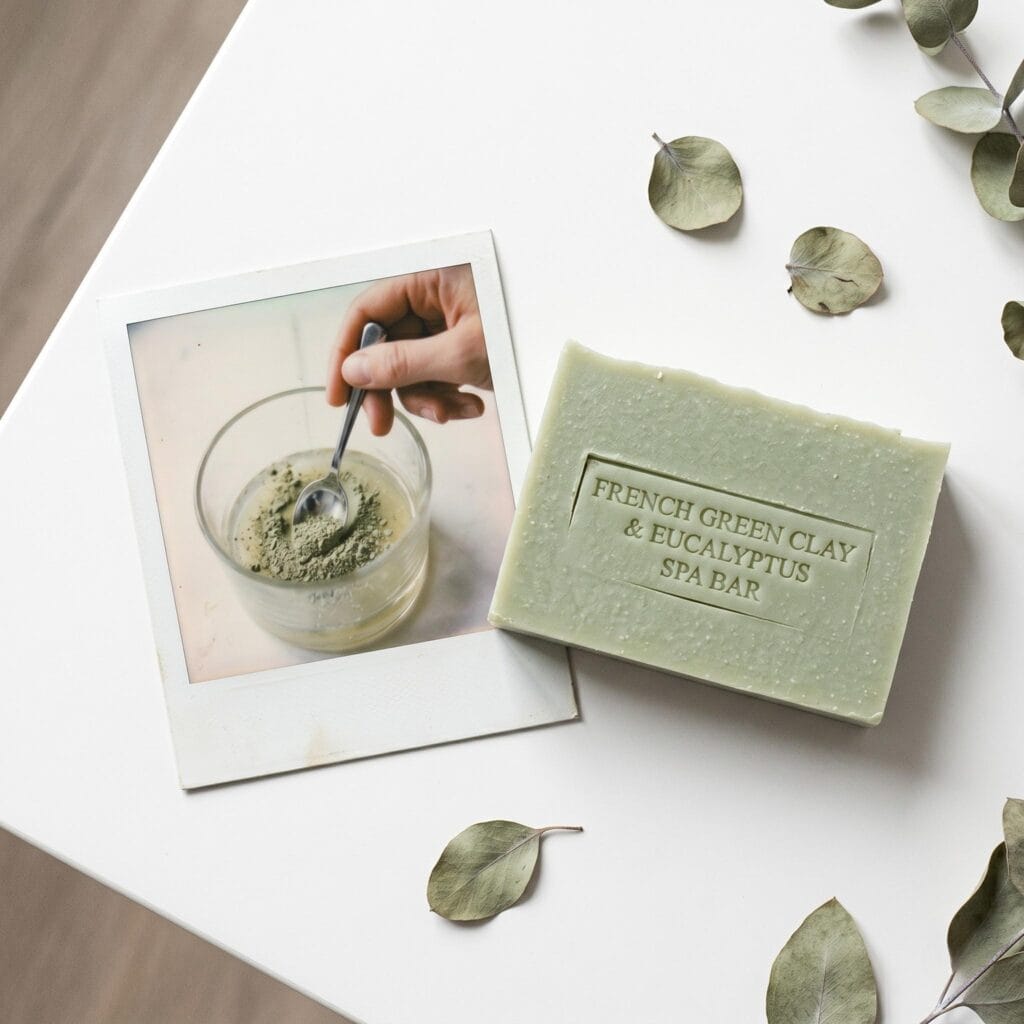
3. French Green Clay & Eucalyptus Spa Bar
Supplies Needed: Goat Milk Melt and Pour Soap Base, French Green Clay Powder, Skin-Safe Soap Fragrance Oil Set, Heat-Resistant Silicone Measuring Cups, Fine Mist Isopropyl Alcohol Spray Bottles
This provides a complete luxury spa experience. Mainly, French green clay gives the opaque base an expensive, pastel sage color. In addition, eucalyptus purifies both the skin and the mind.
French Green Clay Soap
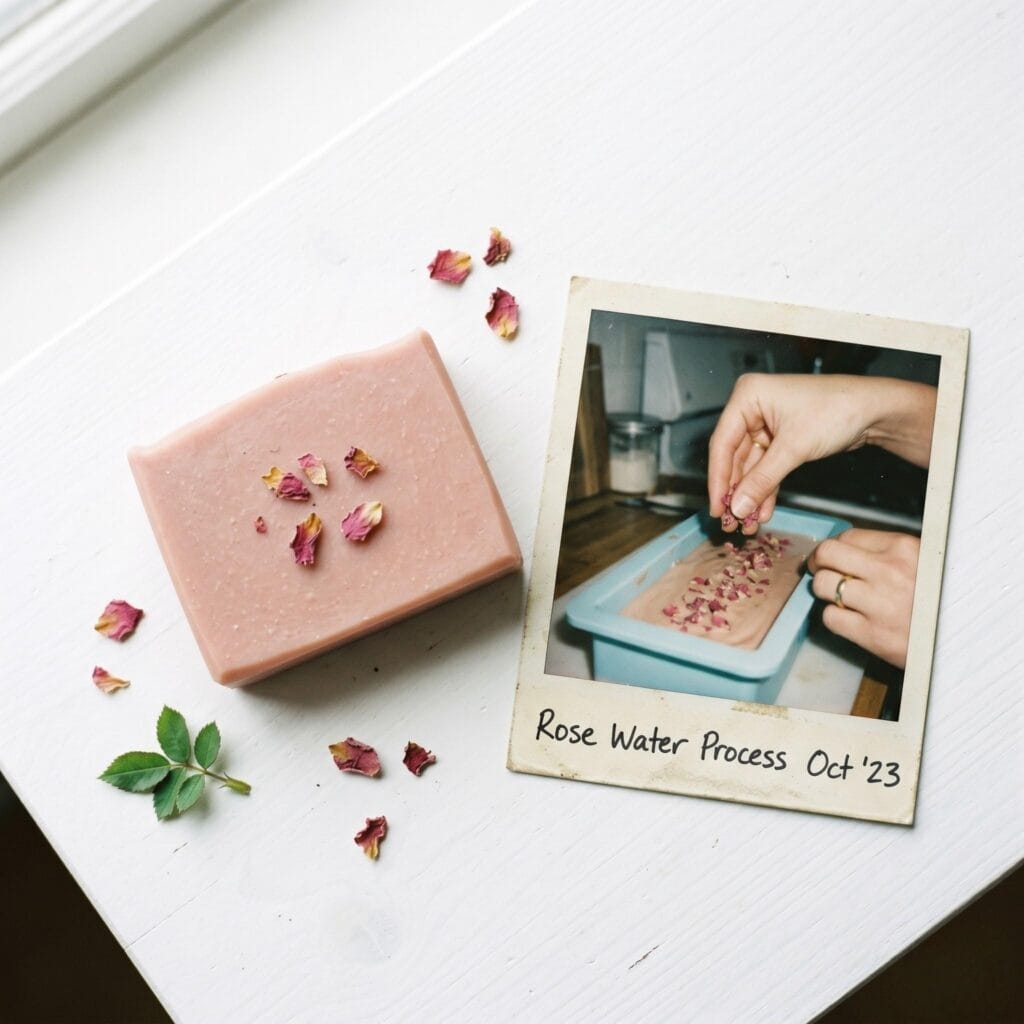
4. Rose Water & Pink Clay Facial Bar
Supplies Needed: Goat Milk Melt and Pour Soap Base, Pink French Clay Powder, Dried Calendula Petals, Silicone Soap Mold Set, Soap Colorant Set
This is ideal for highly sensitive skin. To illustrate, pink French clay gives the soap an incredibly soft, powdery pink tone.
Therefore, adding a few dried rose petals to the top creates a highly romantic aesthetic for your hand poured soaps.
Rose Water Soap Bar
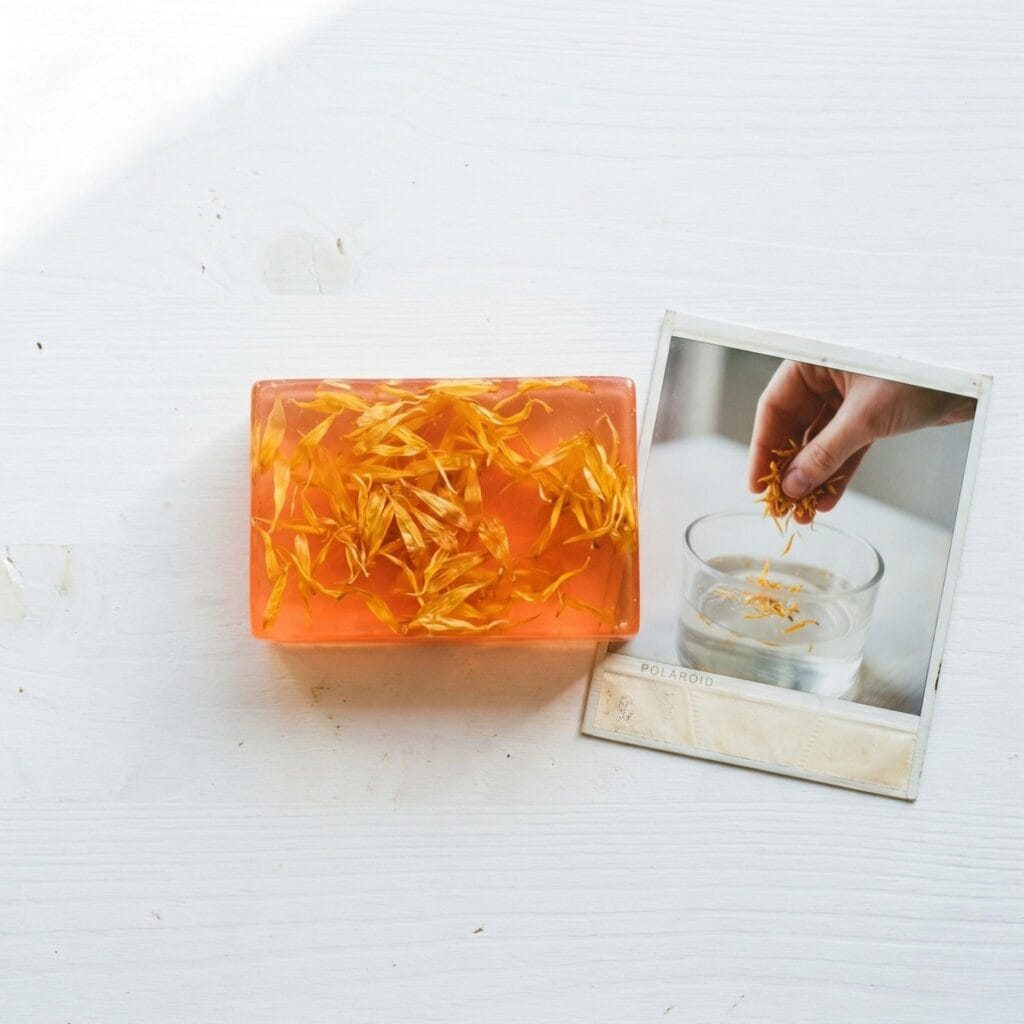
5. Sweet Orange & Calendula Clear Glycerin
Supplies Needed: Clear Glycerin Melt and Pour Soap Base, Dried Calendula Petals, Skin-Safe Soap Fragrance Oil Set, Heat-Resistant Silicone Measuring Cups, Fine Mist Isopropyl Alcohol Spray Bottles
This is visually striking and extremely cheerful. Basically, golden calendula flowers remain suspended entirely inside the transparent glycerin base. As a result, the sweet orange oil adds a bright, uplifting energy.
Before you continue: Love working with natural botanical elements? Check out our highly popular guide on DIY wax sachets for another amazing weekend home fragrance project!
Sweet Orange Soap Bar
Earthy and Refreshing Hand Poured Soaps
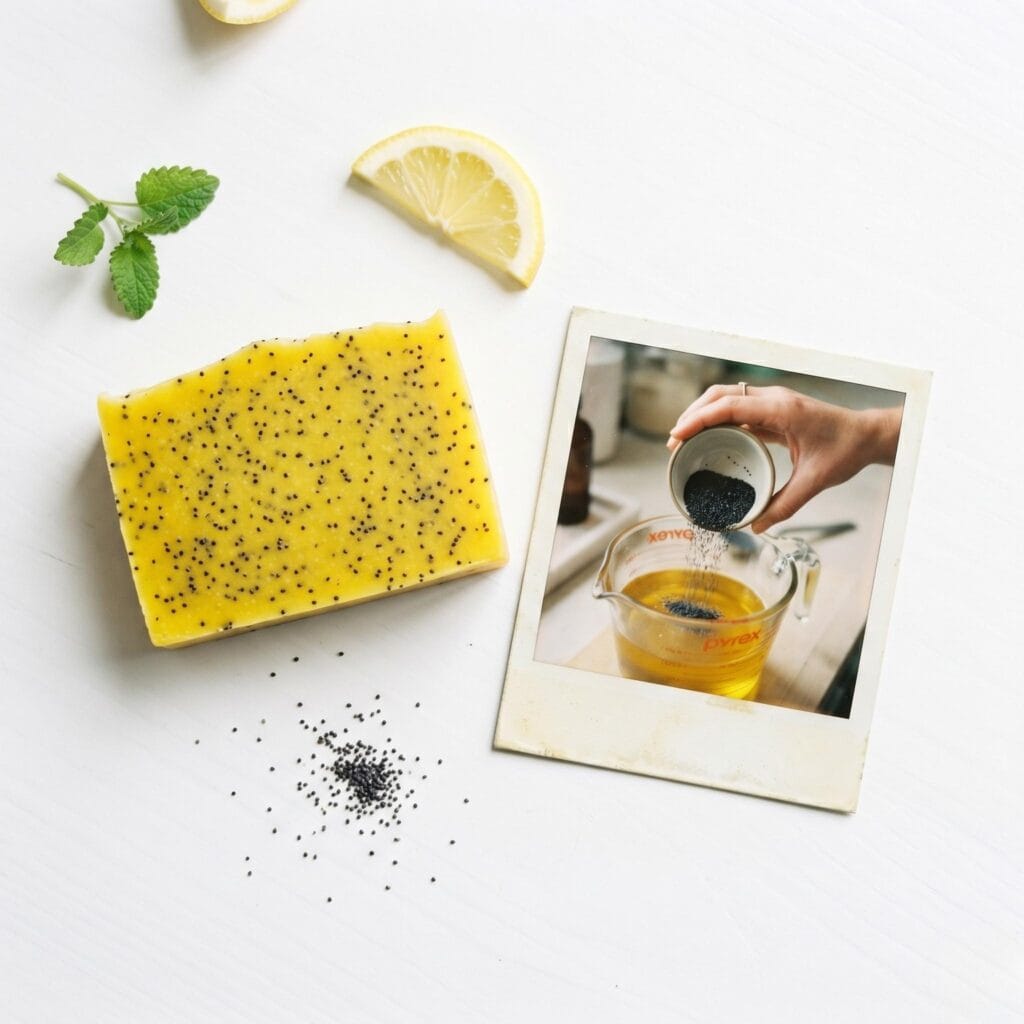
6. Lemon & Poppy Seed Exfoliator
Supplies Needed: Clear Glycerin Melt and Pour Soap Base, Soap Colorant Set, Silicone Soap Mold Set, Digital Kitchen Scale, Silicone Spatula and Stirring Spoon Set
This is an incredibly uplifting morning soap. For instance, you can use a clear glycerin base for a bright yellow look. Meanwhile, adding poppy seeds provides fantastic physical exfoliation for your body.
Lemon Poppy Seed Soap
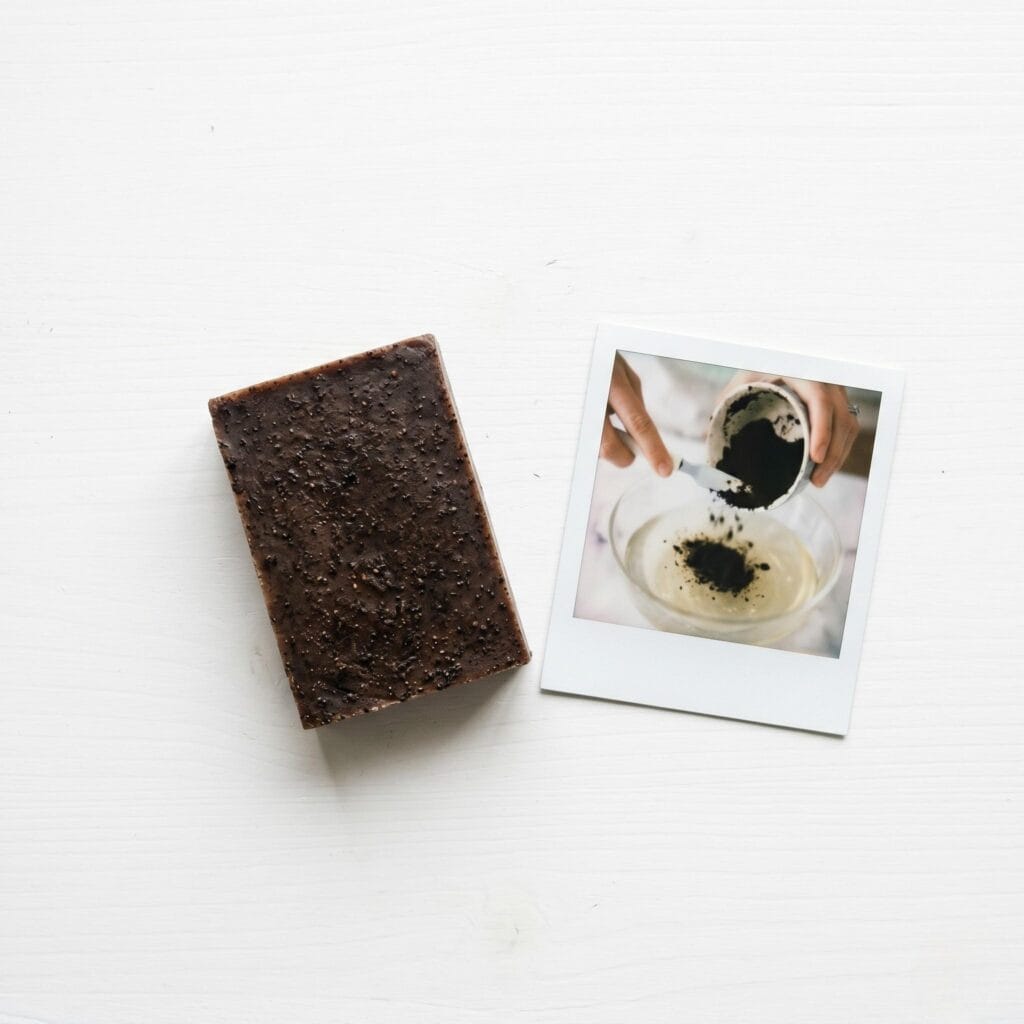
7. Coffee Grounds & Vanilla Bean Wake-Up Bar
Supplies Needed: Shea Butter Melt and Pour Soap Base, Skin-Safe Soap Fragrance Oil Set, Heat-Resistant Silicone Measuring Cups, Stainless Steel Soap Cutting Knife, Silicone Soap Mold Set
This is an excellent kitchen upcycling idea. Essentially, used coffee grounds and vanilla extract are added to a clear glycerin base. Consequently, it removes bad cooking odors and wakes you up perfectly.
Coffee Grounds Soap Bar
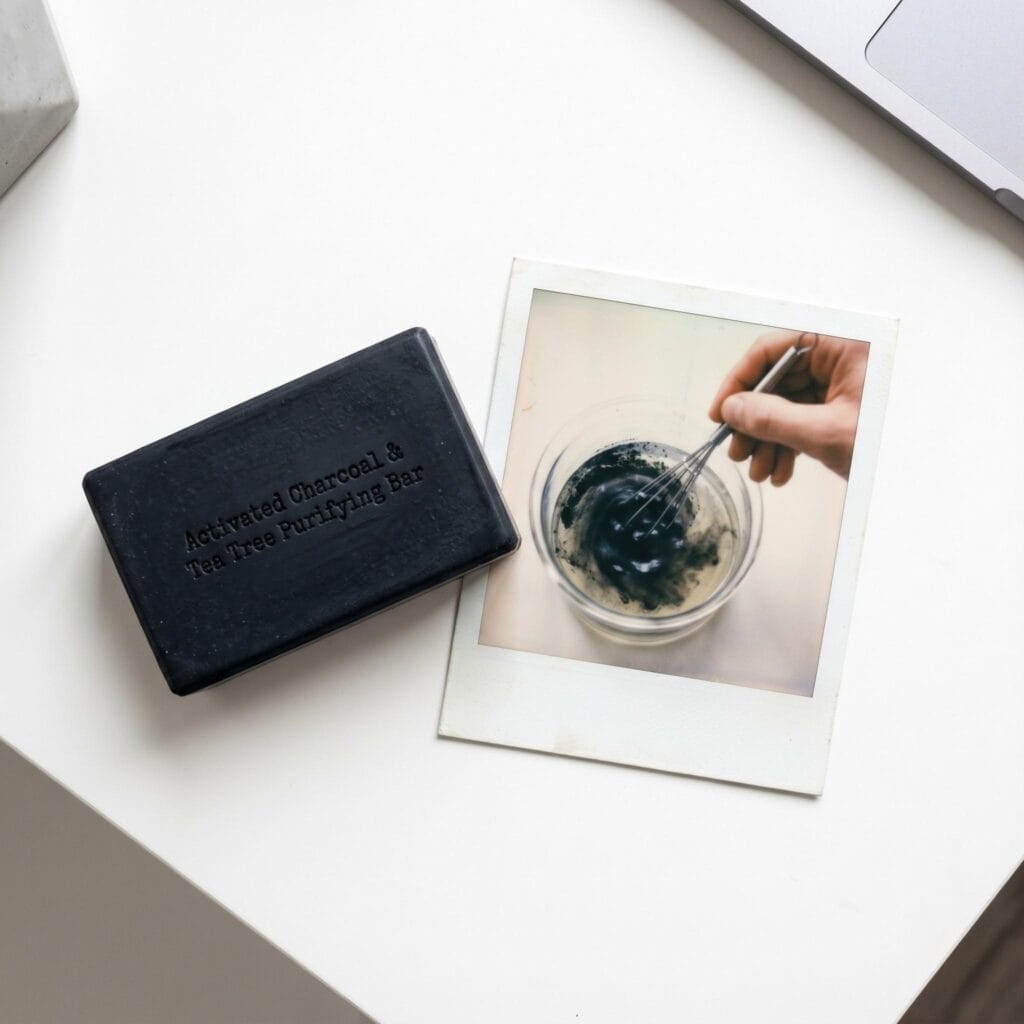
8. Activated Charcoal & Tea Tree Purifying Bar
Supplies Needed: Clear Glycerin Melt and Pour Soap Base, Activated Charcoal Powder, Skin-Safe Soap Fragrance Oil Set, Silicone Spatula and Stirring Spoon Set, Fine Mist Isopropyl Alcohol Spray Bottles
This design looks modern, minimalist, and sleek. Specifically, activated charcoal powder dyes the soap a deep matte black. Furthermore, tea tree oil creates a wonderful purifying effect for problem skin.
Activated Charcoal Soap
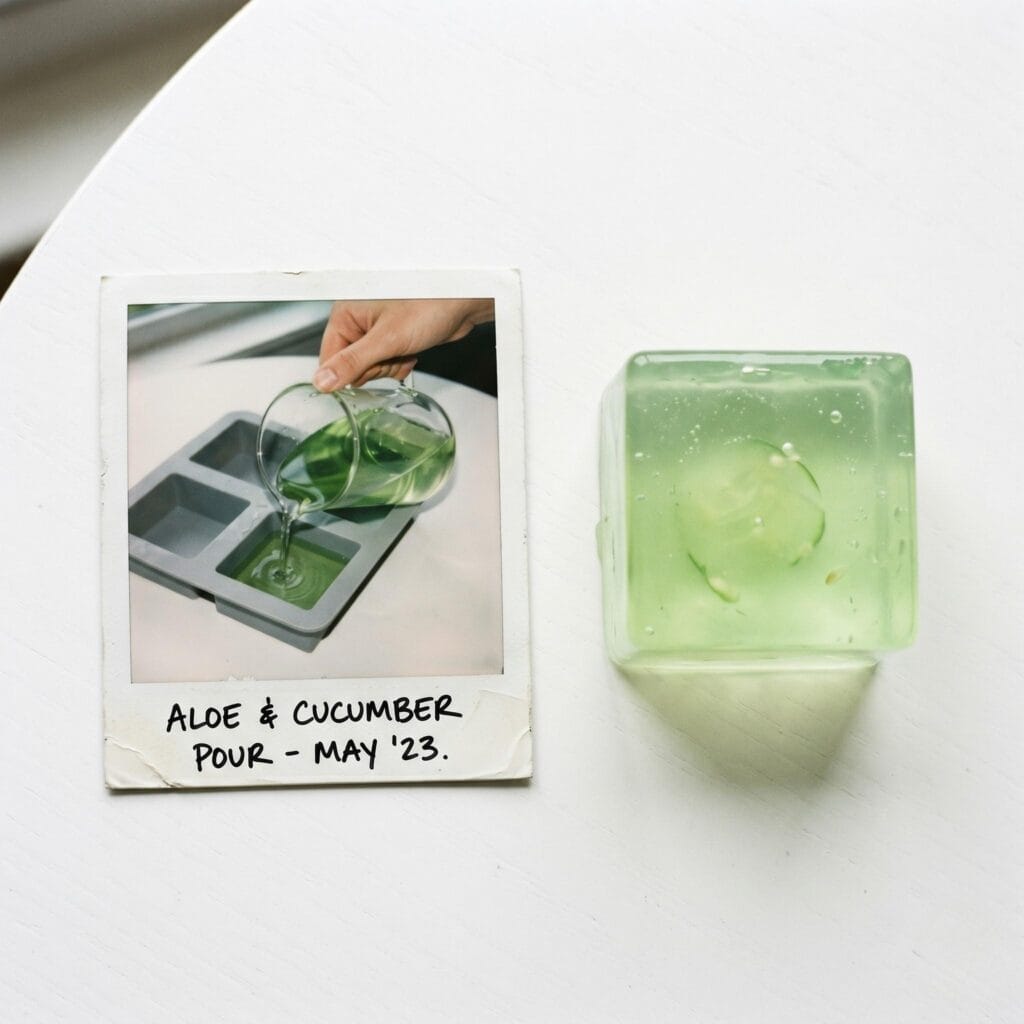
9. Aloe Vera & Cucumber Cooling Cube
Supplies Needed: Clear Glycerin Melt and Pour Soap Base, Soap Colorant Set, Silicone Soap Mold Set, Heat-Resistant Silicone Measuring Cups, Digital Kitchen Scale
This is an incredibly refreshing summer idea. To achieve this, natural cucumber extract is added to a clear aloe vera base. Thus, it creates a fantastic cooling bar for sun-exposed skin.
Aloe Vera Soap Cube
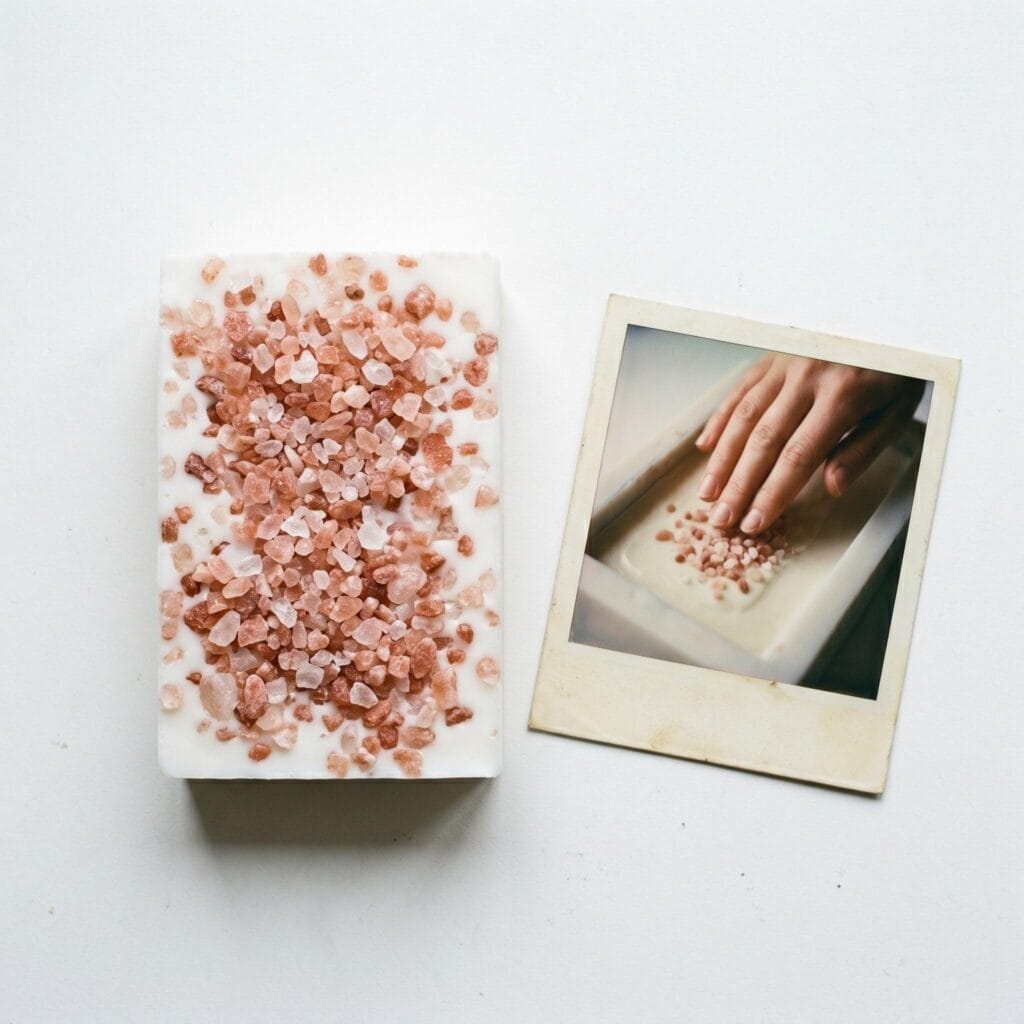
10. Peppermint & Himalayan Sea Salt Top
This offers a beautiful ocean-inspired design. Essentially, the soap is scented with crisp peppermint oil.
Afterward, pink Himalayan salt crystals are sprinkled strictly on top. This step adds a beautiful rustic detail to these hand poured soaps.
Himalayan Salt Soap
Step-by-Step Guide: How to Make Hand Poured Soaps
Now that you have chosen your recipe, it is time to melt. Above all, working with melt and pour bases requires gentle heat and patience.
Preparing and Melting Hand Poured Soaps
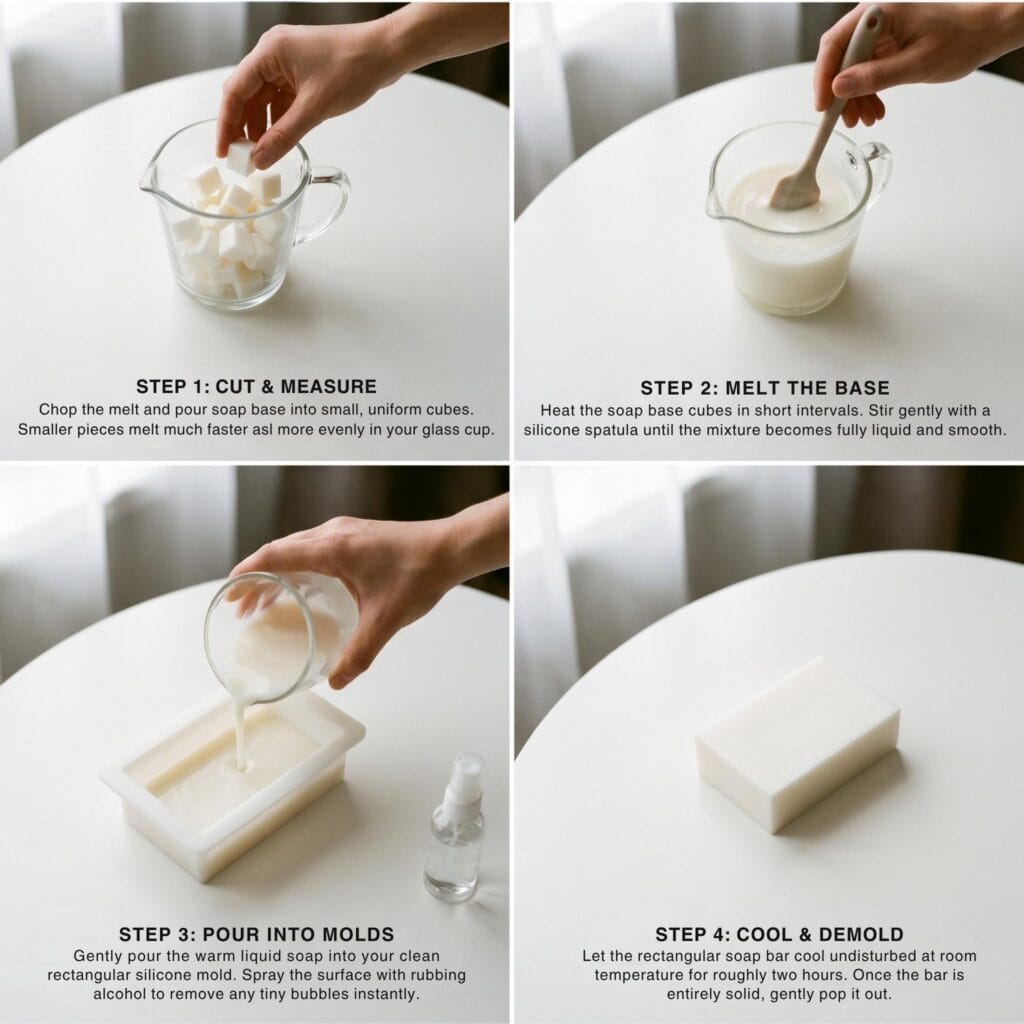
4-Step Soap Guide
Step 1: Cut and Measure the Soap Base
Chop your chosen base for hand poured soaps into small, uniform cubes. First of all, smaller cubes melt much faster and more evenly. Next, place the cubes into a heat-safe glass measuring cup.
Step 2: Melt the Soap
Place the glass cup into the microwave. Heat the soap in short 30-second bursts. After each burst, stir the soap gently with a silicone spatula.
Importantly, never let the soap boil. Boiling creates an ugly rubbery texture in the base.
Mixing and Pouring Hand Poured Soaps
Step 3: Add Color and Fragrance
Once the soap is completely liquid, remove it from the microwave. Subsequently, add your chosen essential oils and natural colorants like clay or mica powder. Afterward, stir the mixture thoroughly but very gently for about one minute.
Step 4: Pour Into Molds and Remove Bubbles
Carefully pour the liquid soap into your clean silicone molds. Immediately after pouring, you will notice tiny bubbles on the surface. Therefore, lightly spray the surface with rubbing alcohol to pop these bubbles instantly.
Step 5: Cool and Demold
Lastly, let your hand poured soaps cool undisturbed at room temperature for roughly 2 to 3 hours. Once they are entirely solid and cool to the touch, gently pop them out of the silicone molds. Most importantly, your handmade creation is now ready to use!
Troubleshooting Common Issues with Hand Poured Soaps
Even easy recipes for hand poured soaps can have minor hiccups. Here is how to fix the most common problems easily.
Why are my dried flowers turning brown?
Adding delicate botanicals like rose petals directly into hot liquid soap often burns them. Consequently, they turn brown and look unpleasant.
To avoid this entirely, only sprinkle dried flowers on the very top of the soap. Wait until it has cooled slightly in the mold before decorating.
Why is my soap sweating?
Glycerin is a natural humectant. This means it draws moisture directly from the surrounding air.
Therefore, if you live in a humid climate, little beads of water might form on your soap. To prevent this, simply wrap your finished hand poured soaps tightly in shrink wrap immediately after demolding.
Why did my heavy additives sink to the bottom?
If you add heavy exfoliants like sea salt or coffee grounds when the soap is too hot, they will sink rapidly.
Thus, wait until the melted base cools slightly. Once it thickens into a syrup-like consistency, you can safely stir heavy additives into your hand poured soaps.before stirring heavy additives into your hand poured soaps.
Important Crafting Safety Note
Always handle hot melted soap with care using heat-resistant gloves or oven mitts. Never leave melting soap unattended in a microwave or on a double boiler. Keep your workspace clear of food items, and designate specific glass measuring cups and spatulas strictly for soap making. Essential oils are highly concentrated; always follow safe skin usage rates (typically 1-3% for wash-off products) and keep them out of reach of children and pets.
Quick Reference: All Supplies at a Glance
For your convenience, here is a quick summary of all materials and tools used in this tutorial:
Crafting is a rewarding creative activity, but maintaining a safe workshop environment is essential for yourself, your family, and your pets. Please review these vital safety precautions before starting:
• Personal Protective Equipment (PPE) & Safe Handling: Always wear safety glasses or protective eyewear when cutting metal wire, clipping jump rings, trimming hard findings, or using power tools to prevent flying shards. Use heat-resistant work mats and exercise caution around high-temperature glue guns, irons, or heating tools to avoid burns. Wear disposable nitrile gloves and a particle dust mask when sanding wood or working with clays, resins, and solvent-based sealants to protect your skin and lungs.
• Room Ventilation & Fume Safety: Always craft in a well-ventilated space with open windows, cross-ventilation, or active exhaust whenever using solvent-based adhesives, instant bonders, aerosol sprays, epoxy resins, or heat-curing materials. Never inhale chemical fumes directly, and allow finished pieces to off-gas and cure completely in an airy area away from everyday living spaces.
• Child & Pet Safety (Choking & Swallowing Prevention): Small craft components—including safety eyes, split rings, clasps, jump rings, beads, bells, small magnets, unbaked clay scraps, and loose polyester fiberfill—present severe choking, intestinal obstruction, and ingestion hazards for babies, toddlers, and pets. Keep all unattached hardware, yarn cutoffs, and stuffing strictly out of reach. For handmade gifts intended for infants or young children, omit plastic washer eyes and detachable findings entirely in favor of securely stitched, double-knotted embroidered details.
• Sharp Tool Storage & Clean Work Area: Store sharp tools—such as rotary cutters, craft knives, bent-tip yarn needles, snips, scissors, and jewelry pliers—in secure, latching cases or high cabinets immediately after use. Thoroughly inspect, sweep, or vacuum your craft area and floor after finishing to ensure no dropped needles, pins, wire clippings, or small findings remain where curious pets or bare feet could step on or swallow them.
• Certified, Quality & Non-Toxic Supplies: Always choose verified non-toxic craft supplies (such as ACMI AP-certified paints and adhesives, lead-free and nickel-free jewelry findings, and skin-safe materials). Follow manufacturer label guidelines for curing durations, safe operating temperatures, and proper product disposal. Never use food preparation utensils or kitchen cookware for craft chemicals.
For more detailed guidance on safe crafting practices, liability disclosures, and website usage, please review our Terms and Conditions.