There is nothing quite like opening your linen closet and being greeted by a fresh, natural aroma. First of all, making your own DIY wax sachets is an incredibly peaceful and rewarding craft. Furthermore, unlike commercial air fresheners, these beautiful scented tablets contain no harsh chemicals. Consequently, you can safely use them to refresh your drawers, closets, and small spaces. Without a doubt, they also make stunning, thoughtful handmade gifts. If you are ready to start melting and designing right away, simply scroll down to our comprehensive step-by-step pouring tutorial, right after the supplies list below. But first, let’s look at some gorgeous design ideas.
This blog post contains affiliate links. As an Amazon Associate, I earn from qualifying purchases. The content on some of these projects may be enhanced with structural craft inspirations.
Key Facts:
- Technique: Wax sachet crafting
- Cooling time: 2–3 hours
- Makes: 10 project ideas
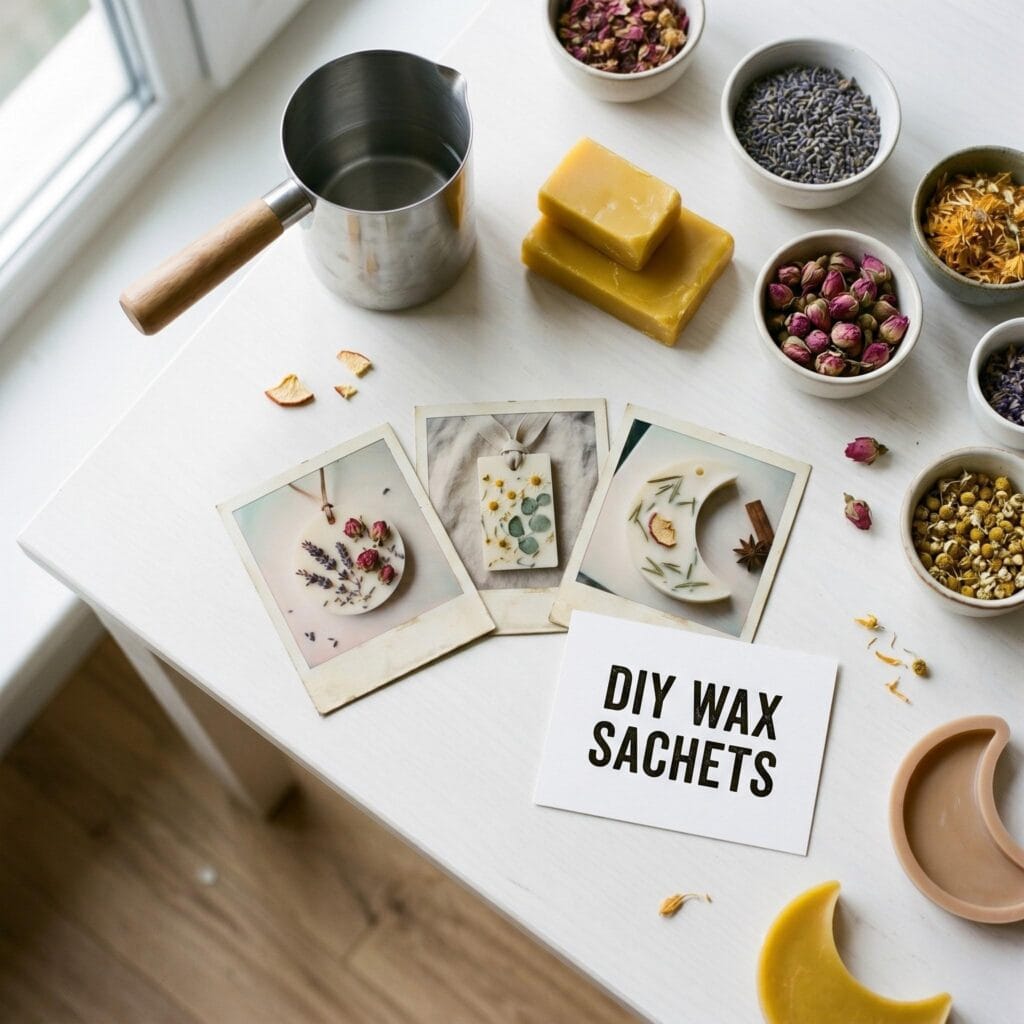
Essential Supplies for DIY Wax Sachets
| Supply | Spec / Size | Used For |
|---|---|---|
| Soy Wax Flakes | Wax base for the sachets | |
| Yellow Beeswax Pellets | Hardens the blend so tablets keep their shape | |
| Essential Oil & Fragrance Oil Set | Signature scent blended into the wax | |
| Silicone Sachet Molds | Shapes the wax tablets | |
| Double Boiler Pot Set | Safe, consistent wax melting | |
| Dried Lavender Buds | Botanical pressed onto the cooling wax |
A few foundational materials are used throughout multiple projects in this guide, marked with a (used throughout) tag below.
🕯️ Wax Base
A 1:1 blend of soy wax and beeswax gives every sachet the durability and sharp shape it needs — pure soy wax alone is too soft for this project.
- Soy Wax Flakes (used throughout) | Check Soy Wax on Amazon
- Yellow Beeswax Pellets (used throughout) | View Beeswax on Amazon
🌸 Fragrance & Scent
Essential oils or fragrance oils give each tablet its signature scent, blended into the wax right after melting.
- Essential Oil & Fragrance Oil Set (used throughout) | Check Fragrance Oils on Amazon
🌿 Dried Botanicals & Add-Ins
Each design uses its own combination of dried flowers, herbs, or fruit slices pressed onto the cooling wax surface.
- Dried Lavender Buds | Check Dried Lavender on Amazon
- Dried Amaranth Flowers | See Dried Amaranth on Amazon
- Dried Whole Rosebuds | Check Dried Rosebuds on Amazon
- Pink Peppercorns | View Pink Peppercorns on Amazon
- Dried Wildflower Mix (Marigold & Cornflower) | Check Dried Wildflowers on Amazon
- Dried Chamomile Flowers | Check Dried Chamomile on Amazon
- Rolled Oats | Check Rolled Oats on Amazon
- Dried Jasmine Buds | View Dried Jasmine on Amazon
- Loose-Leaf Green Tea | Check Loose-Leaf Green Tea on Amazon
- Dehydrated Orange Slices | See Dehydrated Orange on Amazon
- Cinnamon Sticks & Whole Star Anise | Check Cinnamon & Star Anise on Amazon
- Pressed Fern Fronds | Check Pressed Ferns on Amazon
- Dried Silver Dollar Eucalyptus | Check Dried Eucalyptus on Amazon
- Natural Tree Bark Fragments | Check Natural Bark on Amazon
- Pressed Larkspur Petals | View Pressed Larkspur on Amazon
- Dried Apple Slices | Check Dried Apple Slices on Amazon
- Dried Rosemary Needles | See Dried Rosemary on Amazon
- Pressed Viola Flowers | Check Pressed Violas on Amazon
- Dried Heather Sprigs | Check Dried Heather on Amazon
🧰 Molds & Tools
Silicone molds shape every tablet, while an eyelet and ribbon turn each one into a hangable sachet.
- Silicone Sachet Molds (used throughout) | See Silicone Molds on Amazon
- Crescent-Shaped Silicone Mold (For Idea #9) | Check Crescent Mold on Amazon
- Small Plastic Eyelets (used throughout) | Check Plastic Eyelets on Amazon
- Linen Ribbon (used throughout) | See Linen Ribbon on Amazon
- Fine-Tip Tweezers (used throughout) | View Tweezers on Amazon
🔥 Melting Essentials
A double boiler setup and a candy thermometer keep your wax at a safe, consistent melting temperature.
- Double Boiler Pot Set (used throughout) | Check Double Boiler on Amazon
- Candy/Wax Thermometer (used throughout) | View Wax Thermometer on Amazon
- Kitchen Scale (used throughout) | Check Kitchen Scale on Amazon
Step-by-Step Guide: How to Pour DIY wax sachets
Now that you have chosen your favorite botanical design, it is time to pour. Above all, working with DIY wax sachets requires careful timing so your botanicals stay perfectly on the surface.
Preparing the Wax and Molds
Step 1: Melt the Wax Blend
Weigh your wax flakes. First of all, a 1:1 mix of soy wax and yellow beeswax yields the best results. This specific blend makes the tablets durable. Next, create a double boiler. Then, heat the wax gently until it reaches 185°F (85°C).
Pro-Tip: Pure soy wax is too soft for sachets and might melt in a warm closet. Always blend it with beeswax to ensure your finished tablets retain their sharp geometric shapes.
Step 2: Add Fragrance Oils
Once the wax is completely melted, remove it from the heat source. Subsequently, add 1 tablespoon of essential oil or fragrance oil per pound of wax (roughly 6% by weight). Afterward, stir the liquid wax gently but thoroughly for a full 2 minutes to ensure the scent binds perfectly.
Pouring and Decorating Safely
Step 3: Pour Into Silicone Molds
First, place your silicone sachet molds flat on your clean workspace. Next, pour the scented wax slowly into each cavity. Then, if your molds do not have a built-in hole for the hanging ribbon, gently insert a small plastic eyelet near the top rim now.
Step 4: Arrange the Botanicals
Importantly, let the wax cool until a cloudy, semi-solid layer forms on the surface. Because placing items too early causes them to sink, patience is key. Clear evidence of this is seen when heavy elements drop to the bottom. Therefore, use tweezers to gently press your dried flowers, orange slices, or herbs onto this soft white layer.
Pro-Tip: Never push the botanicals deep into the wax. They should sit proudly on top of the semi-solid surface, allowing their natural textures and colors to remain fully visible.
Step 5: Cool, Demold, and Finish
Lastly, let the DIY wax sachets cool completely at room temperature for roughly 2 to 3 hours. Once they are solid, gently pop them out of the silicone molds. Most importantly, thread a beautiful linen ribbon through the hole, and your sachet is ready to hang!
A Quick Note on Preparing Add-Ins
A couple of designs use botanicals that need a little prep before they go on the wax.
Breaking & Crushing Hard Botanicals: For items like cinnamon sticks or bark fragments, place them inside a folded kitchen towel and gently tap with the back of a spoon or a small hammer until you have pea-sized pieces — this is easier and safer than trying to snap them by hand.
Used in: Citrus & Cinnamon Holiday Tablet, Cedarwood & Pressed Larkspur Woodlands.
Choosing Dehydrated Fruit Slices: Store-bought dehydrated orange slices work best for this guide, since homemade slices often retain too much moisture and can cause tiny air pockets in your wax as they dry further.
Used in: Citrus & Cinnamon Holiday Tablet, Rosemary & Dehydrated Apple Orchard.
10 Creative Scent and Botanical Ideas for DIY wax sachets
Floral and Calming Wax Tablets
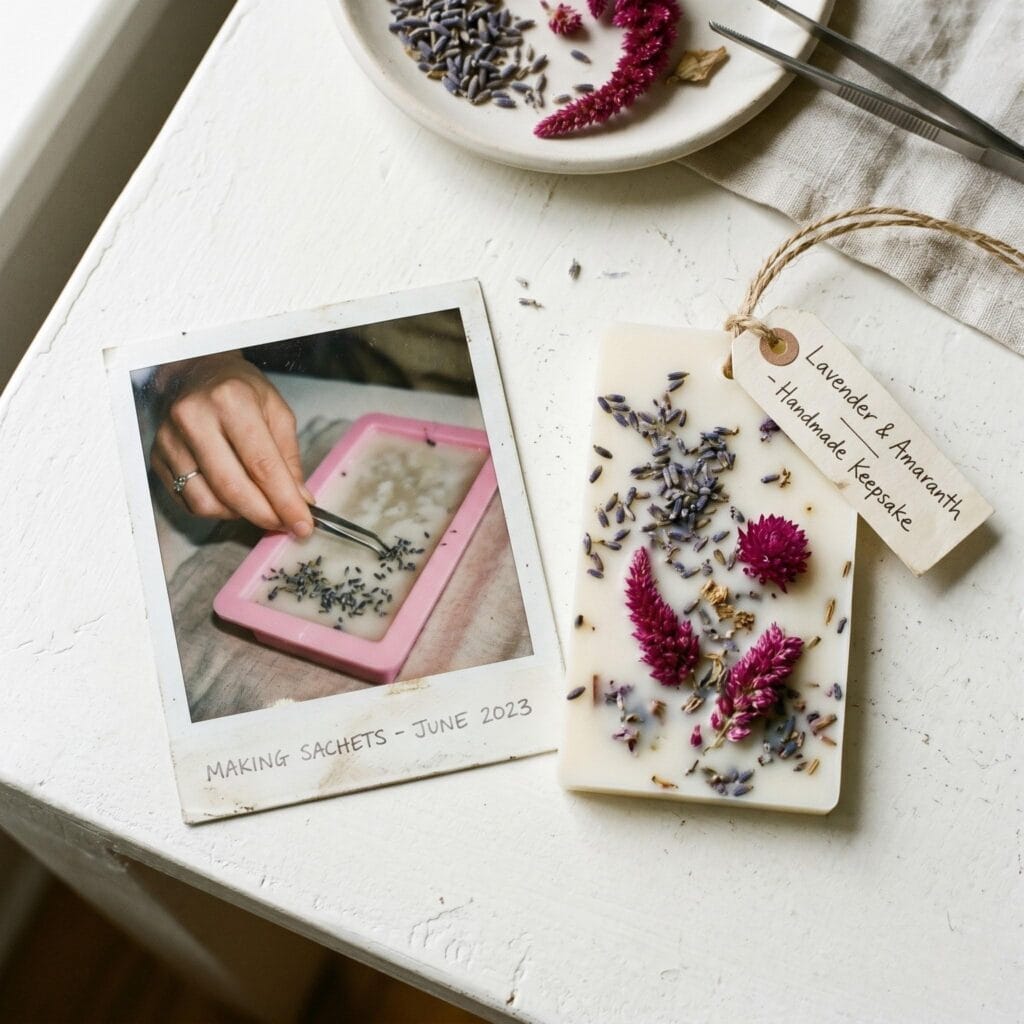
1. Lavender & Dried Amaranth Keepsake
Supplies Needed: Soy wax & beeswax blend, lavender essential oil, dried lavender buds, dried amaranth flowers, silicone sachet mold, linen ribbon, small plastic eyelets, double boiler pot set, candy/wax thermometer, kitchen scale, fine-tip tweezers.
- Weigh your wax flakes and blend a 1:1 mix of soy wax and yellow beeswax.
- Create a double boiler and heat the wax gently until it reaches 185°F (85°C).
- Stir in essential or fragrance oils right after melting.
- Pour the wax into the silicone sachet mold and press dried botanicals onto the cooling surface.
Infusing a calm, romantic aesthetic into your bedroom closet, this sachet uses a base of premium soy and beeswax blend. Subsequently, topping the cooling surface with dried lavender buds and vibrant purple amaranth flowers creates a timeless, heritage-inspired look.
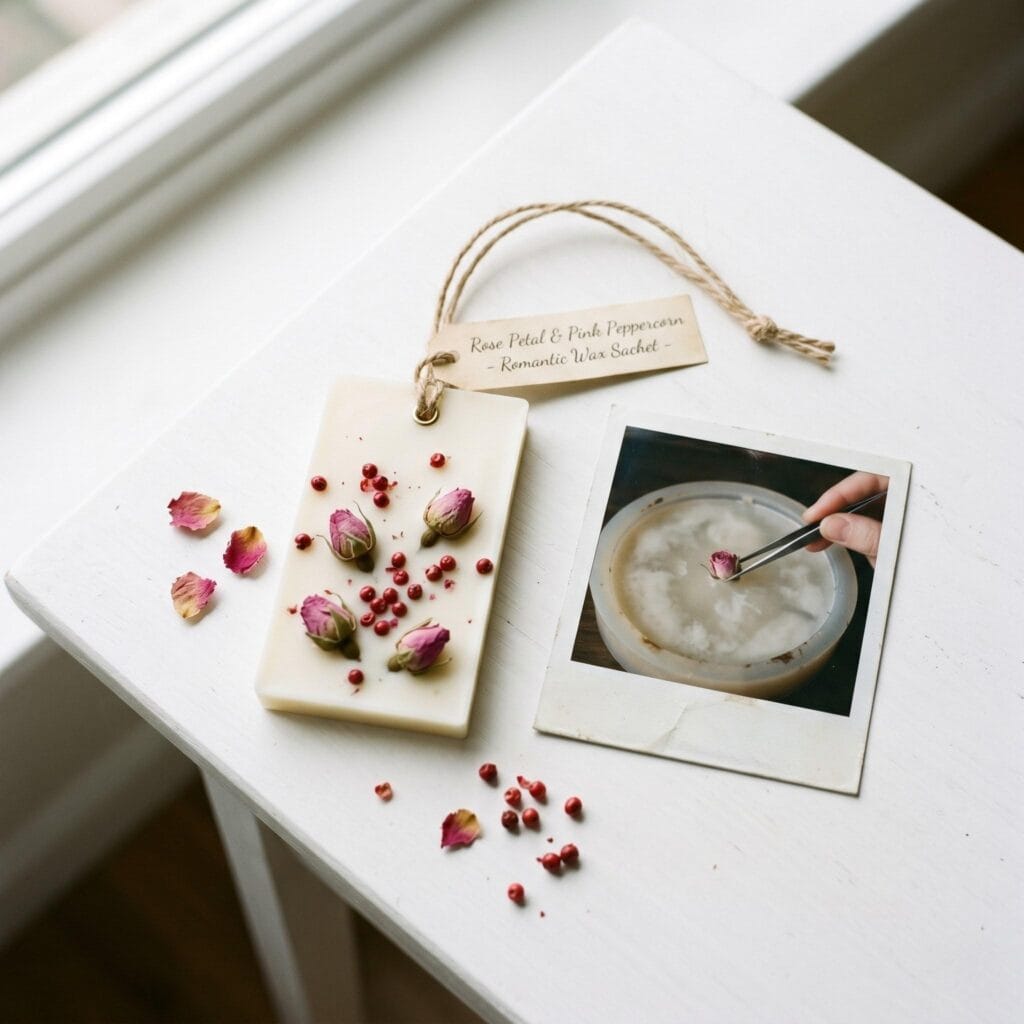
2. Rose Petal & Pink Peppercorn Romantic
Supplies Needed: Soy wax & beeswax blend, rose fragrance oil, dried whole rosebuds, pink peppercorns, silicone sachet mold, linen ribbon, small plastic eyelets, double boiler pot set, candy/wax thermometer, kitchen scale, fine-tip tweezers.
Elegant and visually striking, this combination pairs whole dried pink rosebuds with deep-red peppercorns embedded onto a soft cream-colored wax base. Overall, it creates a rich tactile contrast that is ideal for refreshing a delicate lingerie drawer.
3. Wildflower & Heather Summer Meadow
Supplies Needed: Soy wax & beeswax blend, light floral fragrance oil, dried wildflower mix (marigold & cornflower), dried heather sprigs, silicone sachet mold, linen ribbon, small plastic eyelets, double boiler pot set, candy/wax thermometer, kitchen scale, fine-tip tweezers.
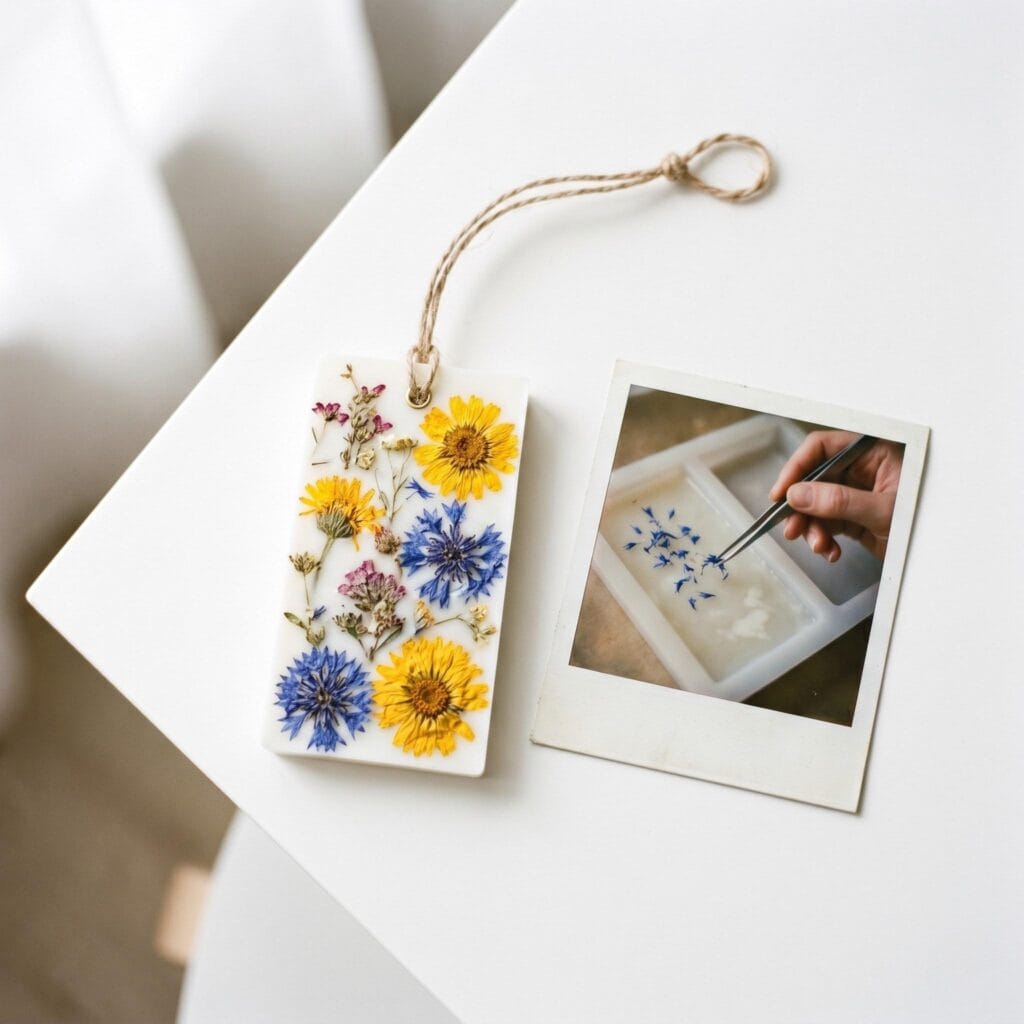
A vibrant splash of meadow blooms gives this tablet a whimsical, summer-inspired look. In particular, a blend of colorful dried wildflowers—including yellow marigolds, blue cornflowers, and delicate sprigs of purple heather—turns your wax sachets into miniature pieces of hanging art.
4. Chamomile & Oatmeal Soothing Bar
Supplies Needed: Soy wax & beeswax blend, chamomile essential oil, dried chamomile flowers, rolled oats, silicone sachet mold, linen ribbon, small plastic eyelets, double boiler pot set, candy/wax thermometer, kitchen scale, fine-tip tweezers.
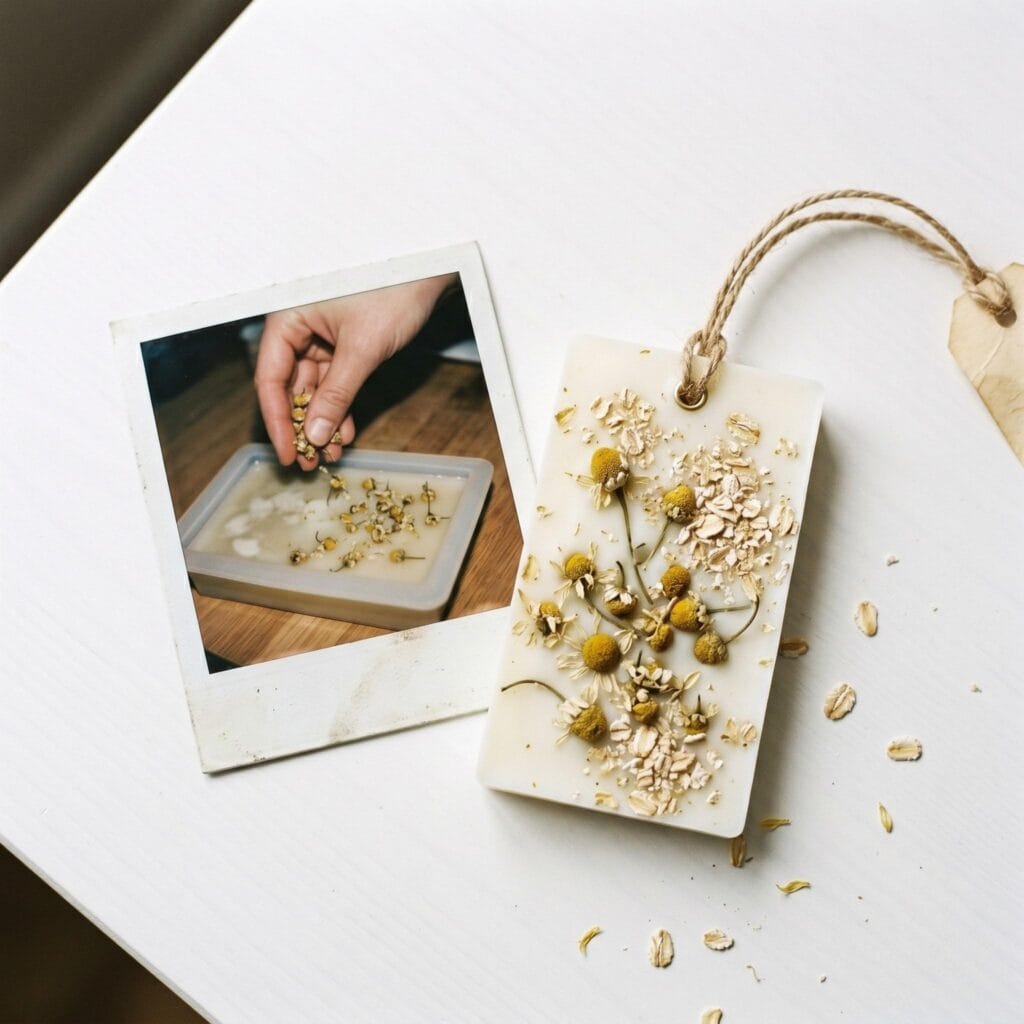
Rustic and rich in texture, chamomile flowers dust the cooling wax surface to give this tablet an organic feel. In addition, a light sprinkling of coarse rolled oats enhances the cozy, apothecary-inspired aesthetic.
5. Jasmine & Green Tea Botanical
Supplies Needed: Soy wax & beeswax blend, jasmine fragrance oil, dried jasmine buds, loose-leaf green tea, silicone sachet mold, linen ribbon, small plastic eyelets, double boiler pot set, candy/wax thermometer, kitchen scale, fine-tip tweezers.
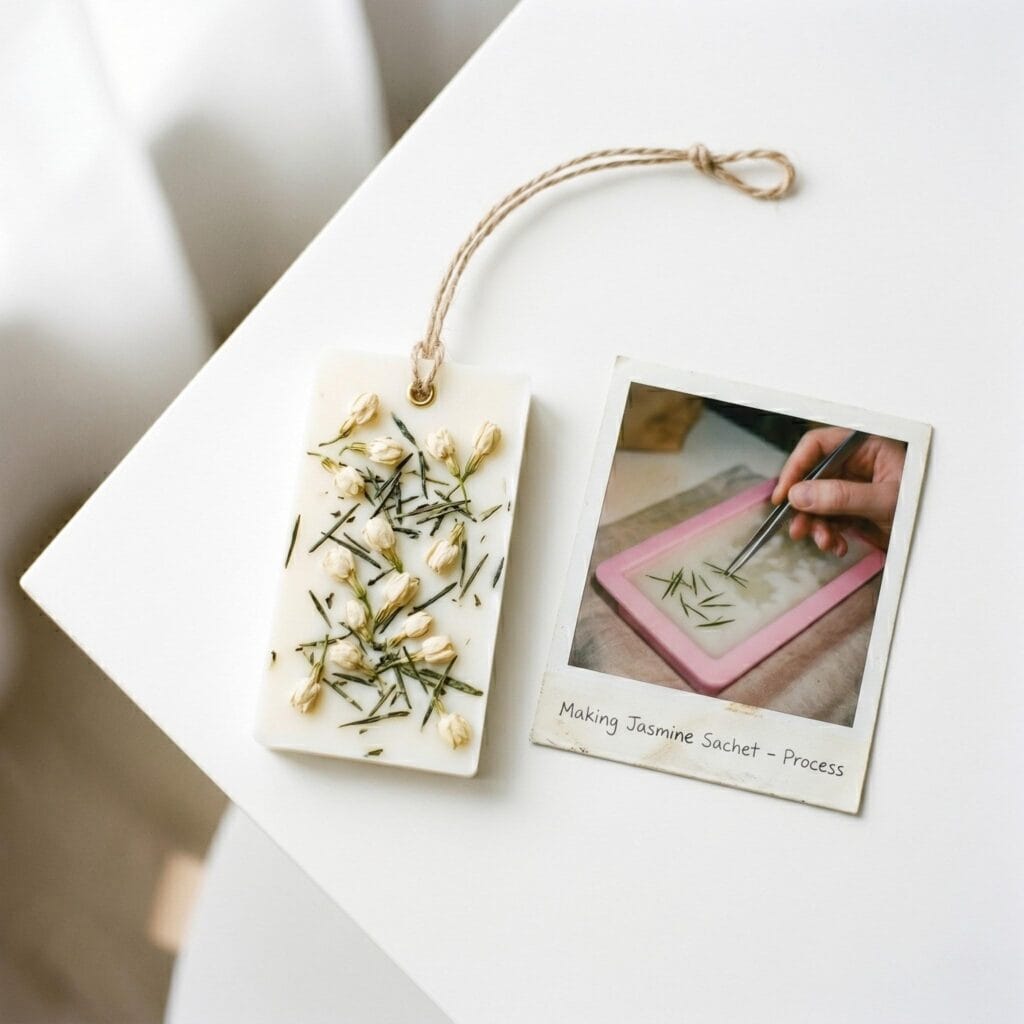
Featuring a crisp contrast of white and emerald tones, whole dried jasmine buds align alongside loose-leaf organic green tea needles. As a result, you get a fresh, delicate botanical profile that is deeply calming.
Before you continue: If you love working with premium wax and creating beautiful aromatic items for your home workspace, don’t miss our comprehensive guide on DIY soy candles to master temperature control and fragrance binding!
Woodsy and Earthy Sachet Designs
6. Citrus & Cinnamon Holiday Tablet
Supplies Needed: Soy wax & beeswax blend, citrus & spice fragrance oil, dehydrated orange slices, cinnamon sticks, whole star anise, silicone sachet mold, linen ribbon, small plastic eyelets, double boiler pot set, candy/wax thermometer, kitchen scale, fine-tip tweezers. (See our note on preparing add-ins above.)
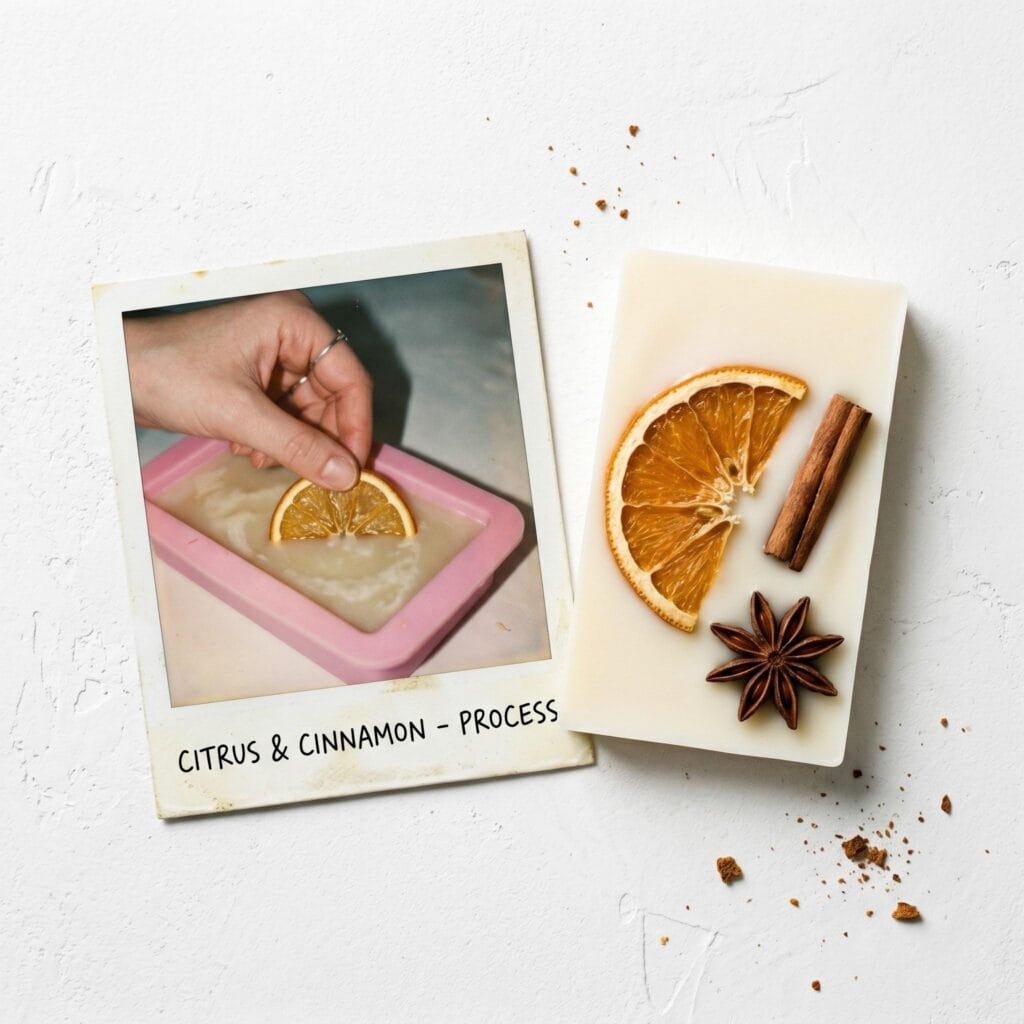
A warm, festive palette defines this cozy harvest design. While the wax is cooling, gently press a thin slice of dehydrated orange into the surface, then frame it with a piece of crushed cinnamon stick and a whole star anise pod.
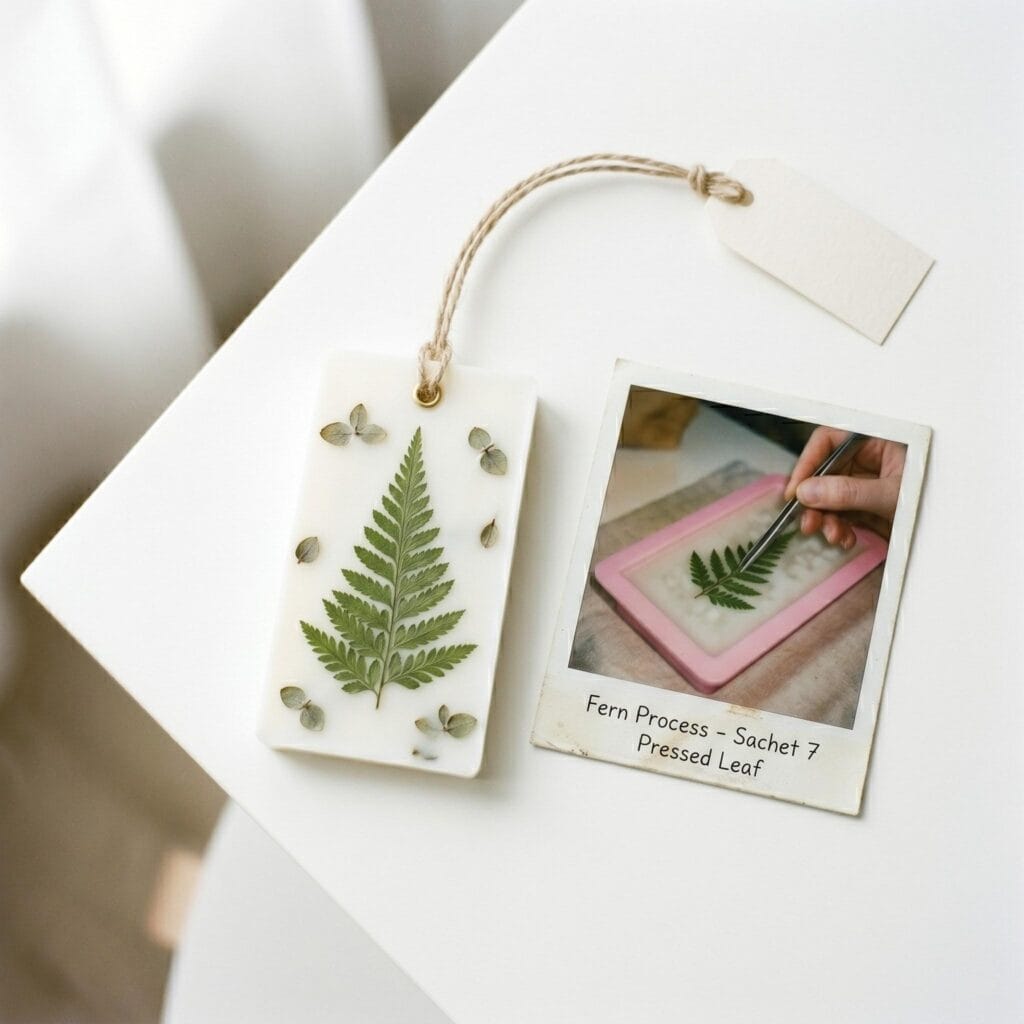
7. Pressed Fern & Eucalyptus Minimalist
Supplies Needed: Soy wax & beeswax blend, woodsy fragrance oil, pressed fern frond, dried silver dollar eucalyptus, silicone sachet mold, linen ribbon, small plastic eyelets, double boiler pot set, candy/wax thermometer, kitchen scale, fine-tip tweezers.
A clean, woodland-focused design featuring a single pressed green fern frond laid across the center. Thus, it frames the white wax tablet beautifully alongside tiny dried silver dollar eucalyptus leaves.
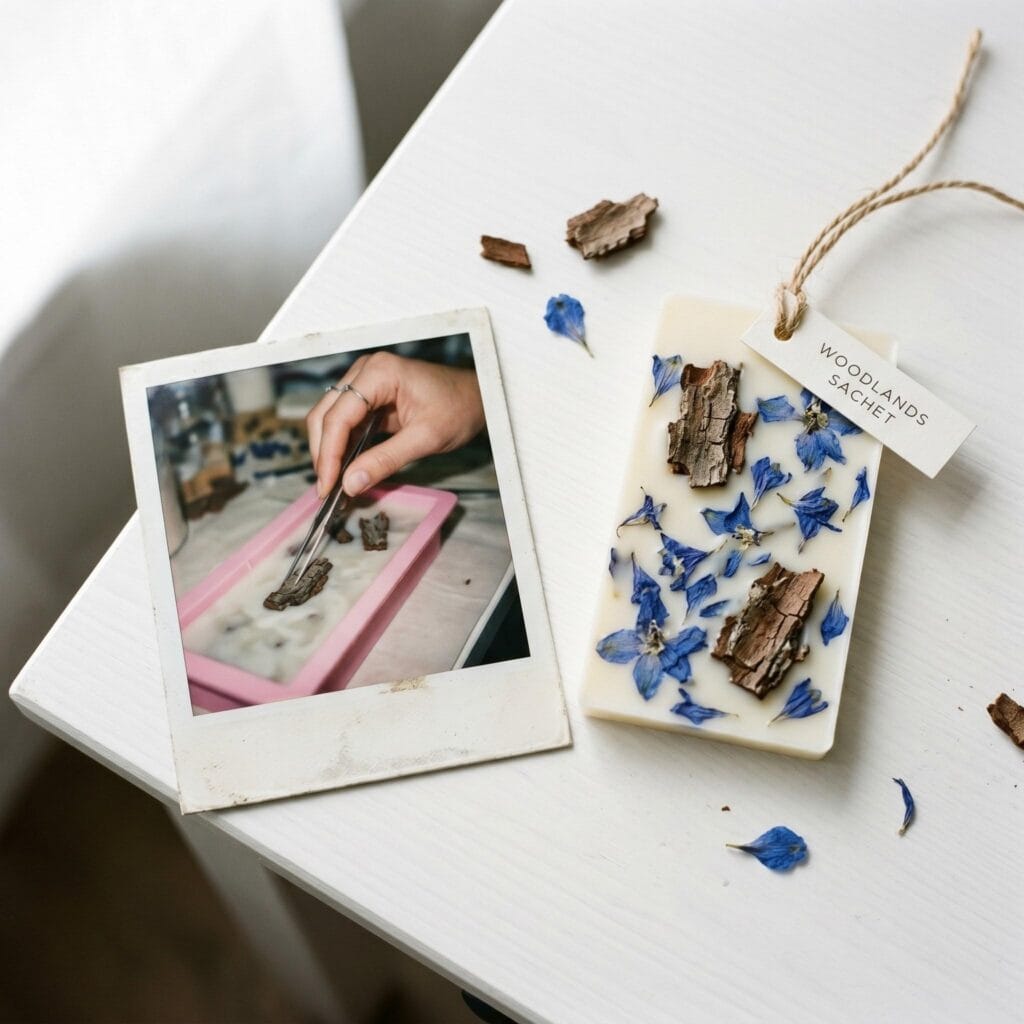
8. Cedarwood & Pressed Larkspur Woodlands: DIY wax sachets
Supplies Needed: Soy wax & beeswax blend, cedarwood essential oil, natural tree bark fragments, pressed larkspur petals, silicone sachet mold, linen ribbon, small plastic eyelets, double boiler pot set, candy/wax thermometer, kitchen scale, fine-tip tweezers. (See our note on preparing add-ins above.)
Combining rugged timber accents with delicate flora, this cedarwood-scented tablet features fragments of natural tree bark. In addition, vibrant blue pressed larkspur petals elevate the deep woodsy aesthetic instantly.
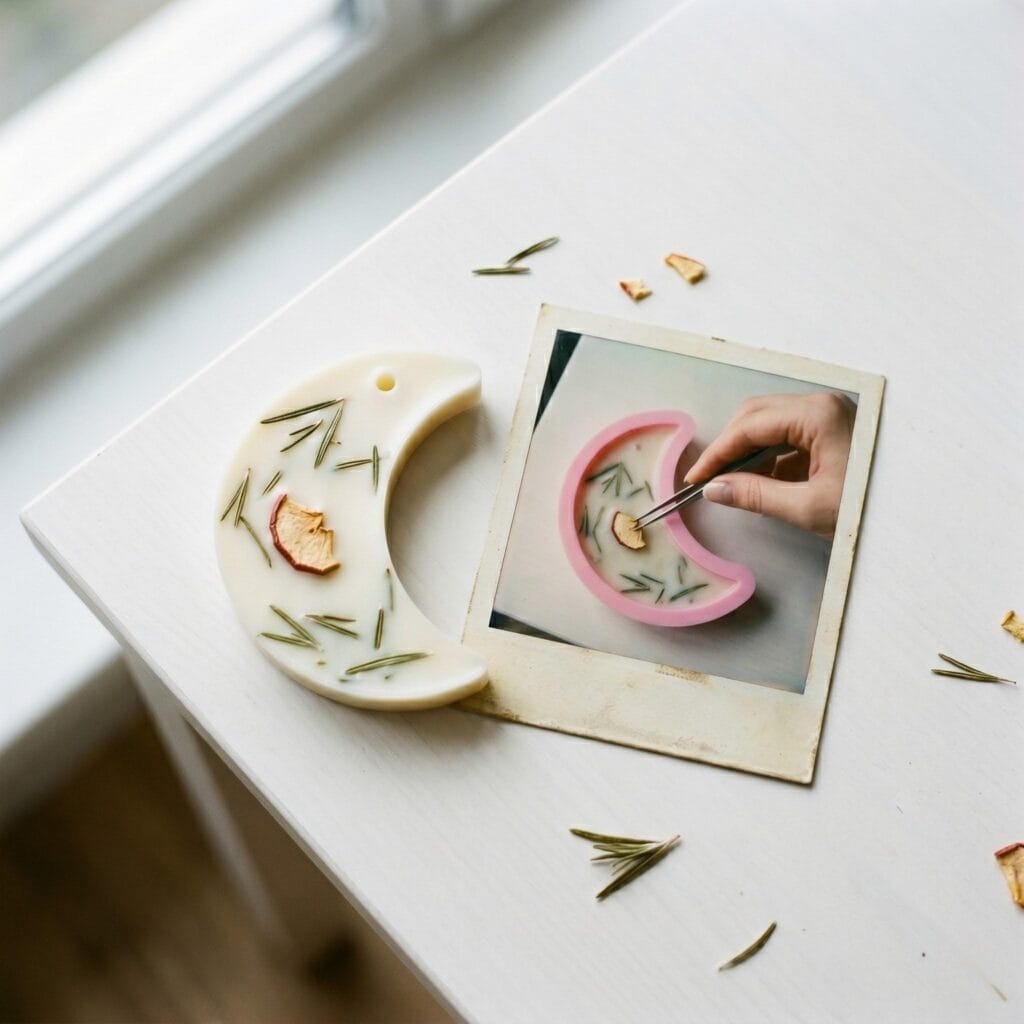
9. Rosemary & Dehydrated Apple Orchard: DIY wax sachets
Supplies Needed: Soy wax & beeswax blend, rosemary essential oil, dried apple slice, dried rosemary needles, crescent-shaped silicone mold, linen ribbon, small plastic eyelets, double boiler pot set, candy/wax thermometer, kitchen scale, fine-tip tweezers. (See our note on preparing add-ins above.)
Poured into a unique crescent mold, this autumn-inspired arrangement captures the essence of a crisp orchard stroll. Decorating the semi-solid wax with a thin wedge of dried apple slice and aromatic rosemary needles completes the seasonal theme.
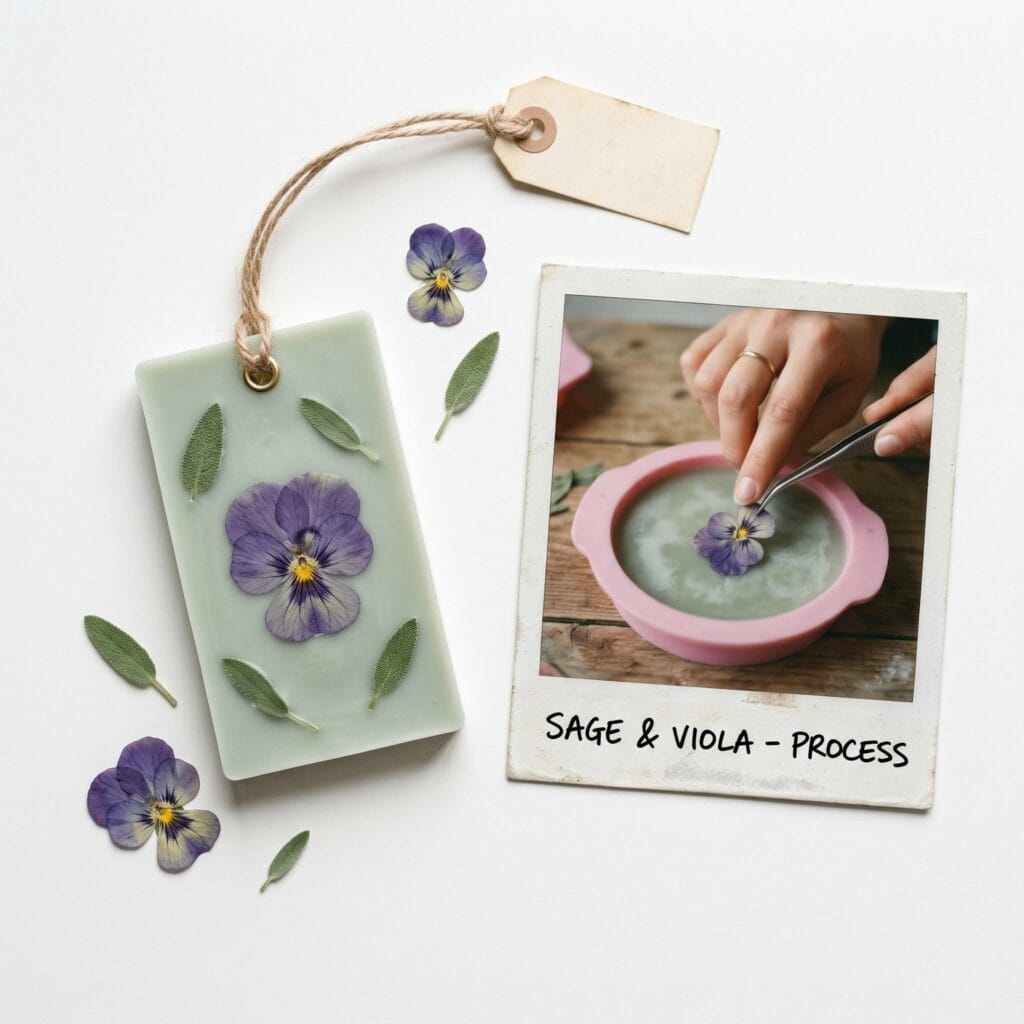
10. Sage & Pressed Viola Cleansing Tablet: DIY wax sachets
Supplies Needed: Soy wax & beeswax blend, sage essential oil, pressed viola flower, silicone sachet mold, linen ribbon, small plastic eyelets, double boiler pot set, candy/wax thermometer, kitchen scale, fine-tip tweezers.
Designed for an earth-focused, botanical aesthetic, a soft sage-scented green wax tablet features a single pressed purple viola flower directly in the center. Therefore, this makes a peaceful, balancing accent to hang near your vanity or entryway.
Love creative home decor? If you enjoy using unique and natural vessels or materials for your weekend crafting sessions, check out our highly popular tutorial on upcycled glass jar crafts for your next green project!
Quick Reference: All Supplies at a Glance
Ready to pour your first batch? Here’s everything from this guide, organized for quick shopping.
WAX BASE
- — Soy Wax Flakes (used throughout) | Check Soy Wax on Amazon
- — Yellow Beeswax Pellets (used throughout) | Check Beeswax on Amazon
FRAGRANCE & SCENT
- — Essential Oil & Fragrance Oil Set (used throughout) | Check Fragrance Oils on Amazon
BOTANICALS & ADD-INS
- — Dried Lavender Buds | Check Dried Lavender on Amazon
- — Dried Amaranth Flowers | Check Dried Amaranth on Amazon
- — Dried Whole Rosebuds | Check Dried Rosebuds on Amazon
- — Pink Peppercorns | Check Pink Peppercorns on Amazon
- — Dried Wildflower Mix | Check Dried Wildflowers on Amazon
- — Dried Chamomile Flowers | Check Dried Chamomile on Amazon
- — Rolled Oats | Check Rolled Oats on Amazon
- — Dried Jasmine Buds | Check Dried Jasmine on Amazon
- — Loose-Leaf Green Tea | Check Loose-Leaf Green Tea on Amazon
- — Dehydrated Orange Slices | Check Dehydrated Orange on Amazon
- — Cinnamon Sticks & Star Anise | Check Cinnamon & Star Anise on Amazon
- — Pressed Fern Fronds | Check Pressed Ferns on Amazon
- — Dried Silver Dollar Eucalyptus | Check Dried Eucalyptus on Amazon
- — Natural Tree Bark Fragments | Check Natural Bark on Amazon
- — Pressed Larkspur Petals | Check Pressed Larkspur on Amazon
- — Dried Apple Slices | Check Dried Apple Slices on Amazon
- — Dried Rosemary Needles | Check Dried Rosemary on Amazon
- — Pressed Viola Flowers | Check Pressed Violas on Amazon
- — Dried Heather Sprigs | Check Dried Heather on Amazon
MOLDS & TOOLS
- — Silicone Sachet Molds (used throughout) | Check Silicone Molds on Amazon
- — Crescent-Shaped Silicone Mold | Check Crescent Mold on Amazon
- — Small Plastic Eyelets (used throughout) | Check Plastic Eyelets on Amazon
- — Linen Ribbon (used throughout) | Check Linen Ribbon on Amazon
- — Fine-Tip Tweezers (used throughout) | Check Tweezers on Amazon
MELTING ESSENTIALS
- — Double Boiler Pot Set (used throughout) | Check Double Boiler on Amazon
- — Candy/Wax Thermometer (used throughout) | Check Wax Thermometer on Amazon
- — Kitchen Scale (used throughout) | Check Kitchen Scale on Amazon
Important Crafting Safety Notes:
Always melt your wax using a safe double boiler method and never leave it unattended on a hot stove. Keep your workspace completely clear of loose, dry botanicals while working near heat. Remember that wax sachets are strictly designed for small, ambient spaces like closets and drawers. Never leave them in direct sunlight or inside a hot car, as the wax will soften and damage nearby fabrics. Keep out of reach of curious pets and children.
A note on handling hot wax: Melted wax at pouring temperature (around 185°F/85°C) can cause serious burns on contact. Always pour slowly and carefully, keep your pouring hand steady and away from the stream, and consider wearing an oven mitt on your holding hand. Keep children and pets out of the room entirely during pouring, not just away from the workspace.
A note on essential oils and pets: Several fragrance choices in this guide — including citrus, cinnamon, and rosemary — are known to be toxic to cats, even through skin contact or inhalation. Hang finished sachets somewhere your cat can’t access, and consider choosing a cat-safe scent (like lavender in moderation) if your pet spends time in the room where the sachet will hang.
Which botanical combination speaks to you most — the cozy Citrus & Cinnamon tablet, or the delicate Jasmine & Green Tea blend? We’d love to see which design you pour first, so share a photo in the comments below!