A teacup, clear jar, or shallow pot can hold a whole pocket-sized landscape when you layer it with moss, soil, stones, and a few well-chosen props. DIY miniature worlds give you room to build fairy gardens and terrariums with the materials close at hand: soft green moss, a winding pebble path, a weathered twig fence, or a tiny bench tucked beneath a fern. The work is small enough to finish at a kitchen table, yet detailed enough to reward a careful eye.
Affiliate Disclosure: This post contains affiliate links. As an Amazon Associate, I earn from qualifying purchases. If you buy through these links, I may earn a commission at no additional cost to you.
Key Facts:
- Technique: Miniature Worlds
- Difficulty: Beginner-friendly
- Makes: 8 Designs
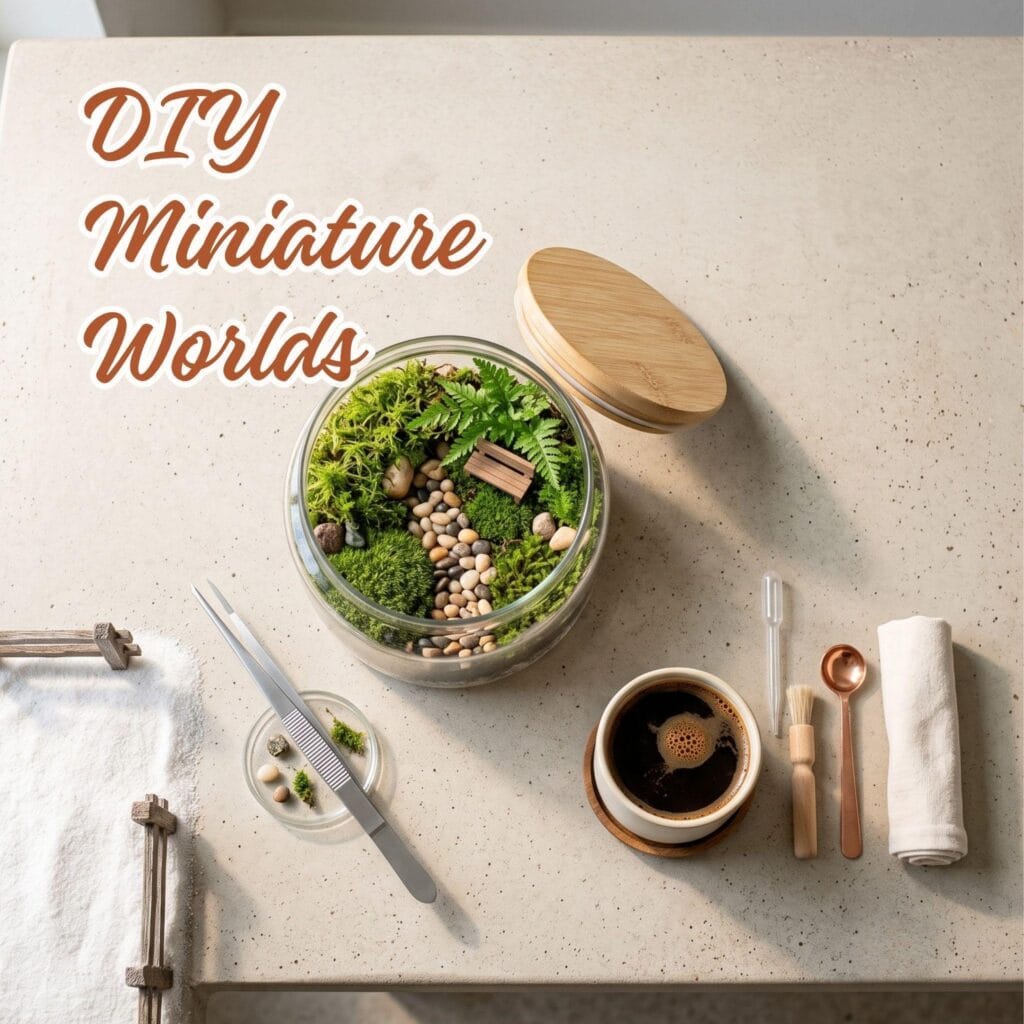
You do not need expert gardening skills or a dedicated studio for this craft. Many of these projects begin with a container from a thrift shop, a handful of potting mix, and small supplies from a craft store or dollar shop. This beginner guide walks through fairy garden and terrarium ideas for different skill levels, with practical material lists, assembly steps, and scale tips that keep each scene tidy and believable. A moss-covered path looks more convincing when the stones narrow as they approach a tiny door, and a bench needs enough open space around it to remain visible. If sunny outdoor projects appeal to you, expand your weekend craft list with our popular guide on summer craft ideas featuring 10 stunning and easy projects. Those ideas pair nicely with miniature gardens placed on a porch, patio table, or windowsill.
Why DIY Miniature Worlds Are So Popular Right Now
Miniature gardens and indoor terrariums appear often on Pinterest and Etsy because they bring two satisfying materials together: tiny hand-built details and living greenery. A small container gives you a manageable place to arrange texture, color, and proportion, while mosses, ferns, and succulents bring a fresh green note indoors without the workload of a full garden bed.
These projects suit beginners because the footprint stays small and the arrangement remains easy to adjust. You can build a simple scene in an afternoon, then shift a path, stone, or figurine before anything is permanently glued in place. Move the tiny bench toward the edge of the container if it crowds the planting area, or turn it slightly so it faces a path. If you plan to sell custom mini landscapes online, use specialized software to review market data and identify active buyers. For instance, our list of the 4 best Etsy tools to explode your shop growth fast can help you compare current demand and pricing patterns.
What You’ll Need to Get Started
| Supply | Spec / Size | Used For |
|---|---|---|
| Containers | Glass jars, fishbowls, apothecary jars, shallow terracotta pots,… | |
| Base Materials | Potting soil, activated charcoal, small pebbles for drainage, sheet… | |
| Plants (Optional) | Small succulents, air plants, moss varieties, and miniature ferns | |
| Miniature Props | Tiny fairy figurines, gnomes, miniature benches, tables, small… |
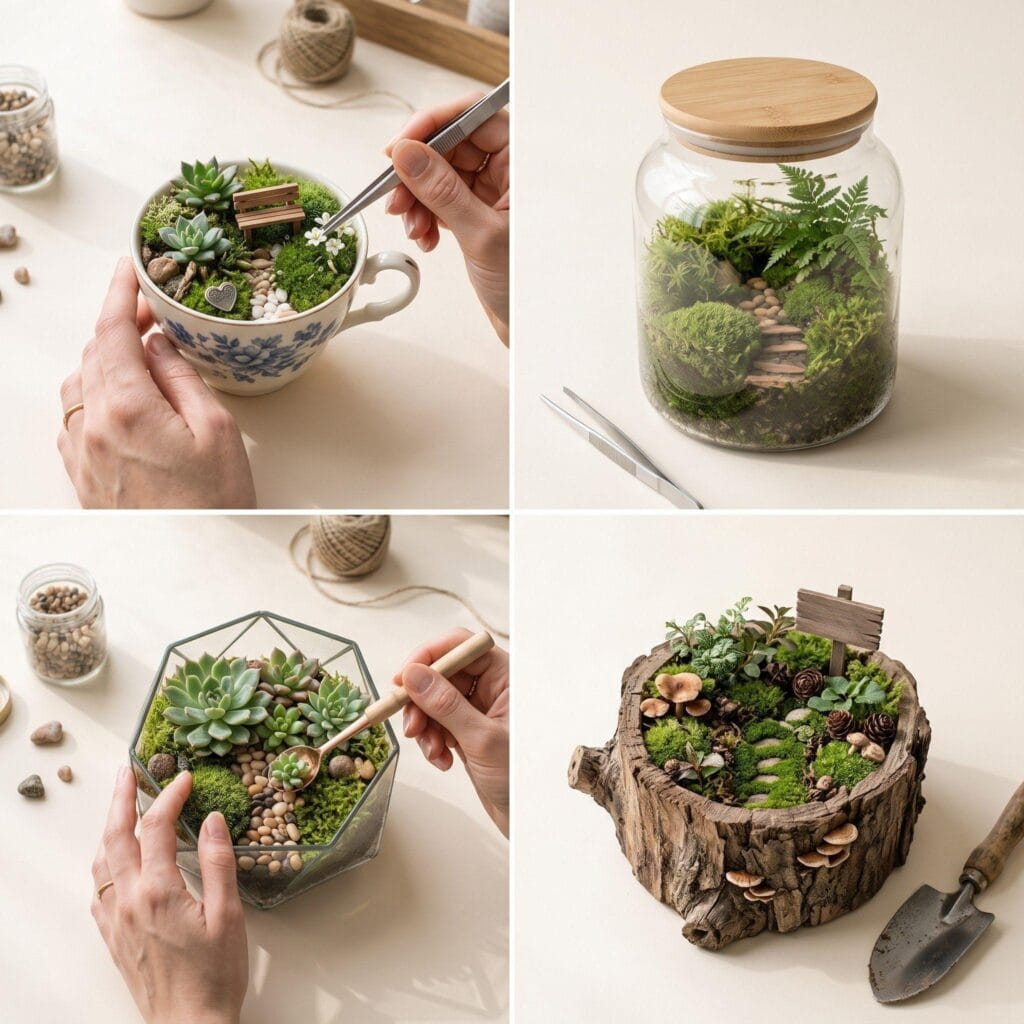
Gather a compact toolkit before you start a project. Keep tweezers for placing small props, a craft awl for making planting holes, a teaspoon for adding soil, sharp scissors for trimming moss, and a small paintbrush for sweeping loose grit from glass and leaves. Most of these supplies carry over from one build to the next, so you can keep a small box ready for future scenes.
- Containers: Glass jars, fishbowls, apothecary jars, shallow terracotta pots, wooden crates, or vintage teacups. | View on Amazon
- Base Materials: Potting soil, activated charcoal, small pebbles for drainage, sheet moss, and reindeer moss. | View on Amazon
- Plants (Optional): Small succulents, air plants, moss varieties, and miniature ferns. | View on Amazon
- Miniature Props: Tiny fairy figurines, gnomes, miniature benches, tables, small stones, and popsicle sticks. | View on Amazon
With a basic stash of moss, pebbles, potting mix, miniature furniture, and adhesive, you can combine the same supplies in several ways without making a separate shopping trip for every idea. Sort tiny stones by size, save short pieces of driftwood, and keep leftover sand in labeled jars so the materials are easy to reach when a new scene takes shape.
Creative Fairy Garden Ideas
1. Teacup Fairy Garden
- Choose a vintage teacup with a saucer from a thrift store, and place a 1/2-inch layer of fine gravel in the bottom if the cup has no drainage hole.
- Add a thin layer of cactus mix for a small succulent, or use preserved moss if you prefer a scene that needs no watering.
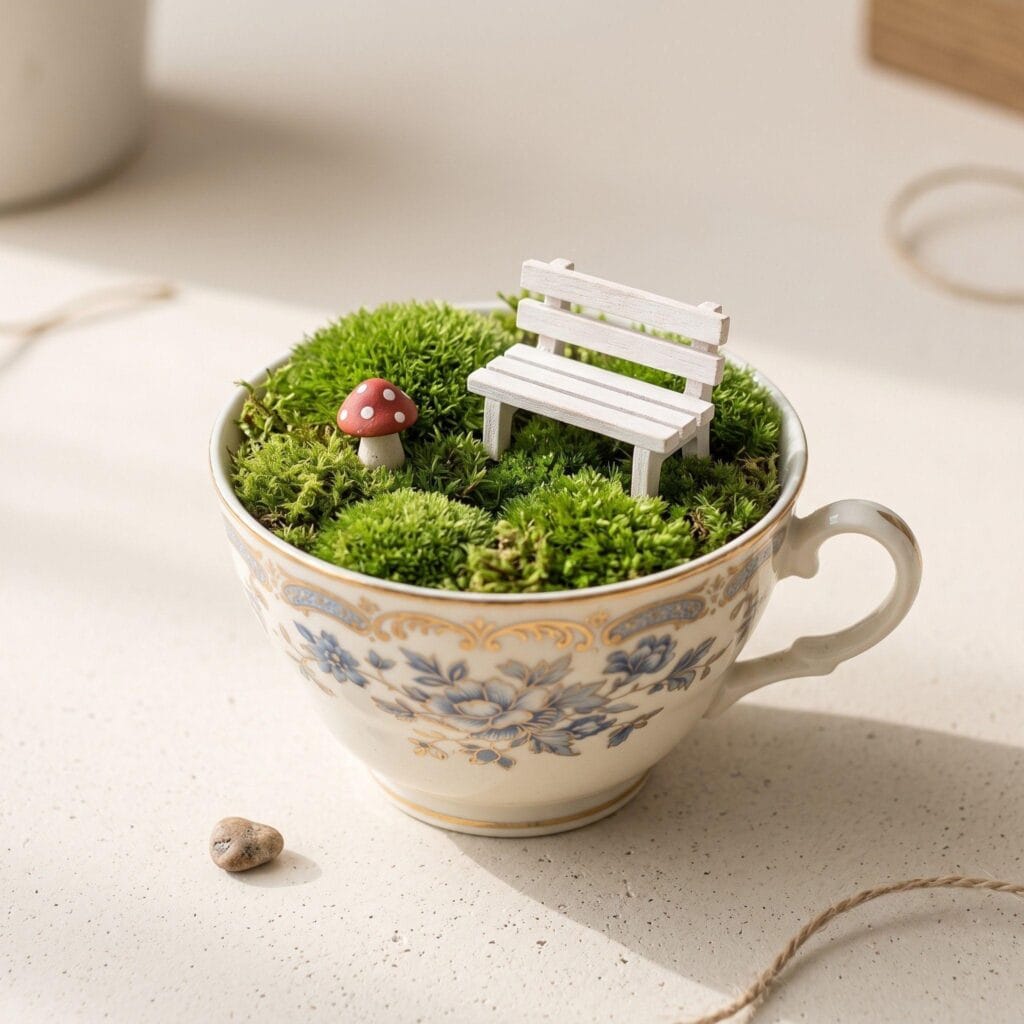
- Set one low moss mound or plant toward the back of the cup, then place a tiny bench, door, or figurine near the front where it can be seen.
- Keep the props in proportion to one another; a bench that is too large will make the planting look flat and crowded.
A teacup garden offers a friendly first project for DIY miniature worlds. Choose a vintage teacup with a saucer from a thrift store, and place a 1/2-inch layer of fine gravel in the bottom if the cup has no drainage hole. Add a thin layer of cactus mix for a small succulent, or use preserved moss if you prefer a scene that needs no watering. Set one low moss mound or plant toward the back of the cup, then place a tiny bench, door, or figurine near the front where it can be seen. Keep the props in proportion to one another; a bench that is too large will make the planting look flat and crowded.
2. Woodland Stump Garden
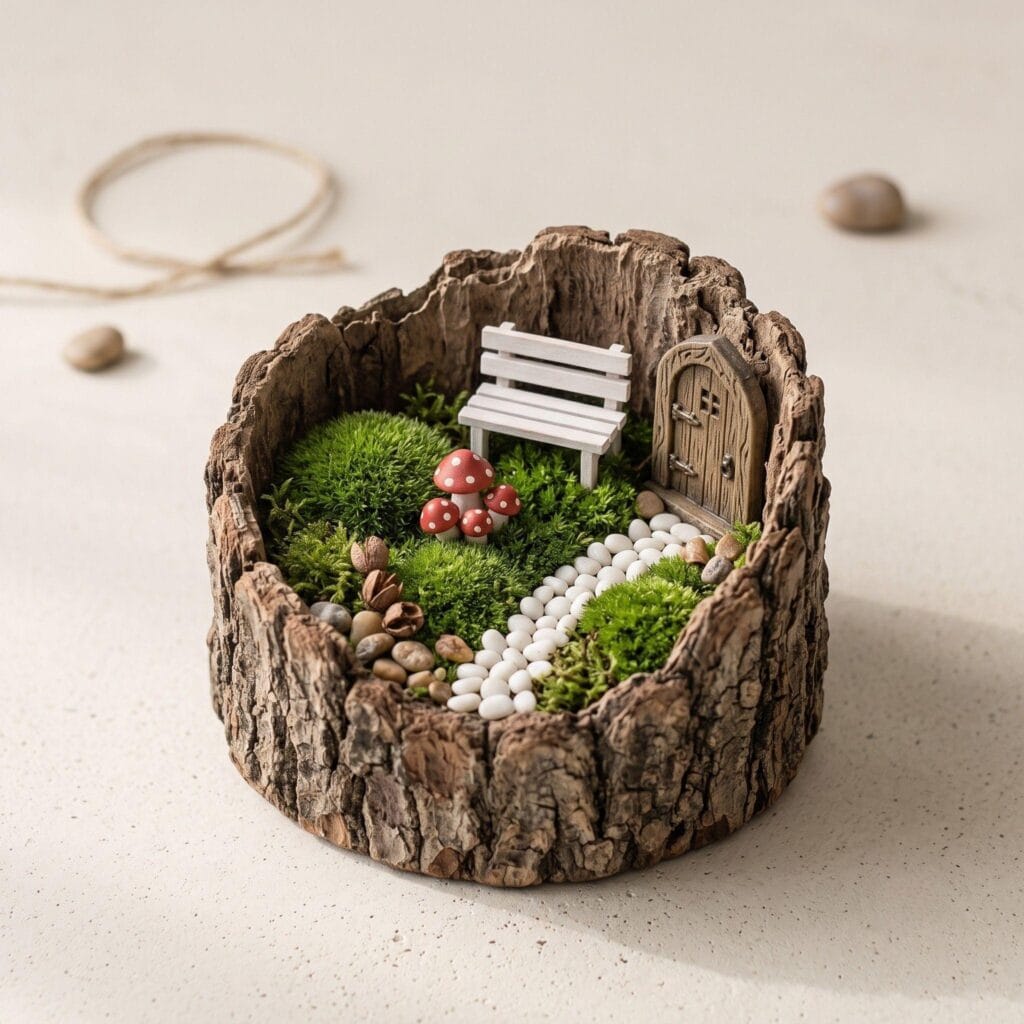
A small tree stump or piece of driftwood makes a sturdy base for a woodland fairy scene. Hollow a shallow pocket with a gouge, spoon, or rotary tool, then brush out the dust and line the space with damp sheet moss. Press tiny clay mushrooms into the moss and glue a small wooden door to the side of the stump with waterproof craft adhesive. Place the finished piece in a sheltered, shady porch corner where rain will not soak the props or loosen the glue. Check the moss every few days and mist lightly when it feels dry to the touch.
3. Potted Fairy Village
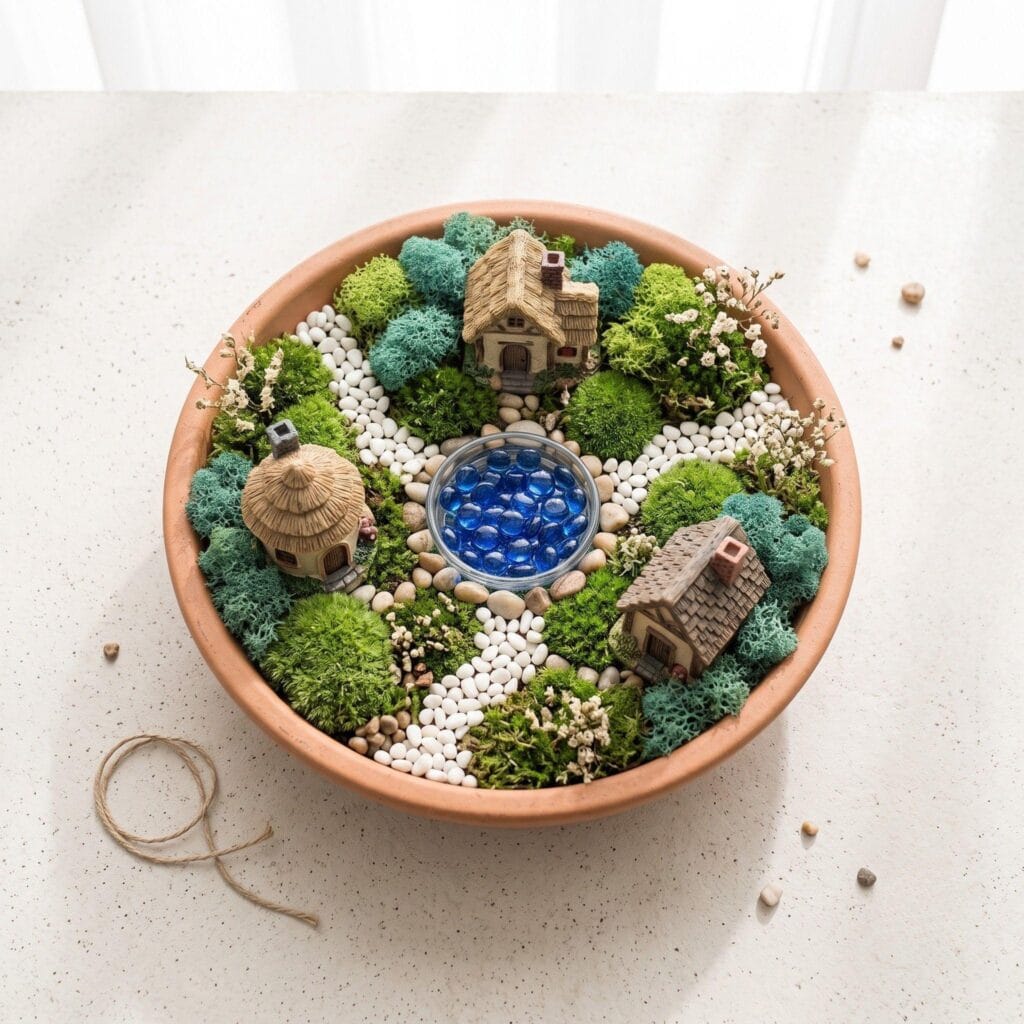
Use a wide, shallow planter when you want room for a complete miniature village. Sketch the arrangement first, then divide the surface into small zones with curved stone paths or strips of bark. Make a pond with a rounded mirror shard set into the soil, or fill a shallow depression with blue glass beads and a border of pea gravel. Group two or three miniature houses near the back and leave a clear foreground path so each detail remains visible. This project works well as a family activity because one person can arrange paths while another paints signs, makes mushrooms, or plants moss.
4. Hanging Fairy Terrarium
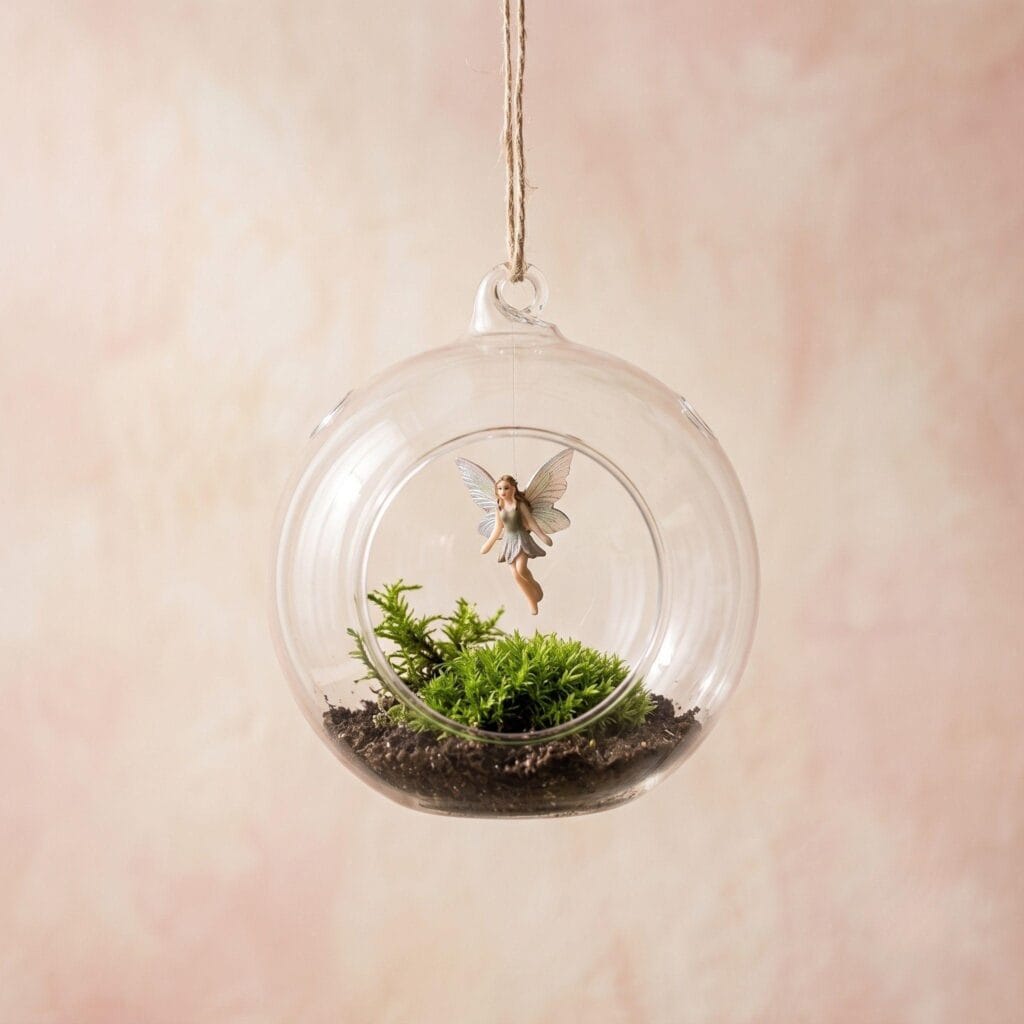
A hanging glass globe or glass ornament with a front opening holds a light, airy miniature scene. Add a small pinch of well-draining soil, a tuft of green moss, and one tiny fairy figure secured with clear fishing line so it appears to float among the greenery. Use a long pair of tweezers to place each piece without smearing soil across the glass. Hang the ornament near a bright window with indirect light, since direct afternoon sun can heat the glass quickly. If you enjoy adding delicate wire details to hanging decorations, explore our creative tutorial on 10 epic DIY wire flower crafts to try now for more handmade texture.
Creative Terrarium Ideas
5. Closed Jar Terrarium
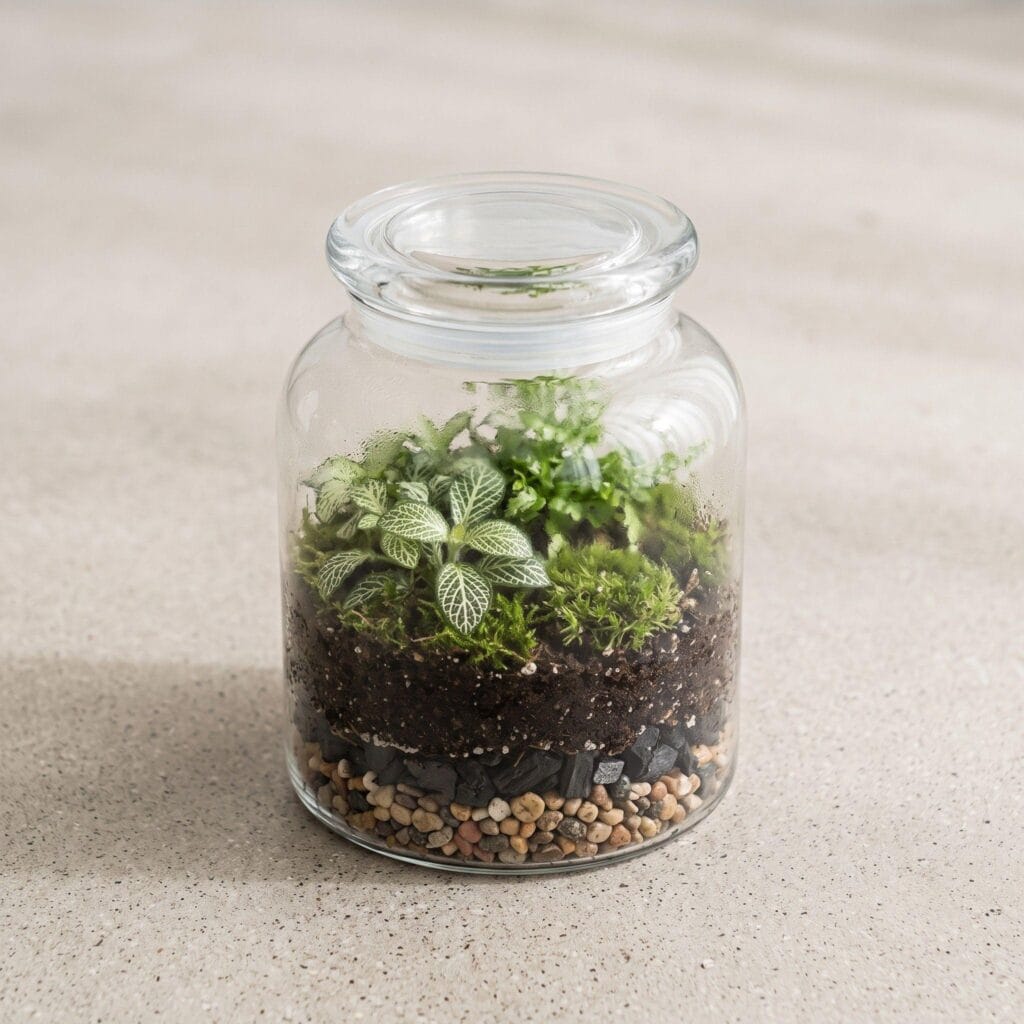
Closed glass terrariums recycle moisture inside the container as water evaporates from the soil and condenses on the glass. Build the base with 1 inch of rinsed pebbles, a thin layer of activated charcoal, and enough terrarium soil to hold small ferns and mosses. Tuck the plants in with a spoon or narrow trowel, mist them lightly, and seal the jar once the leaves are clean and dry. A light haze on the glass is normal. If large droplets run down the sides or the soil looks wet, open the lid for a day and let excess moisture escape.
6. Open-Air Succulent Terrarium
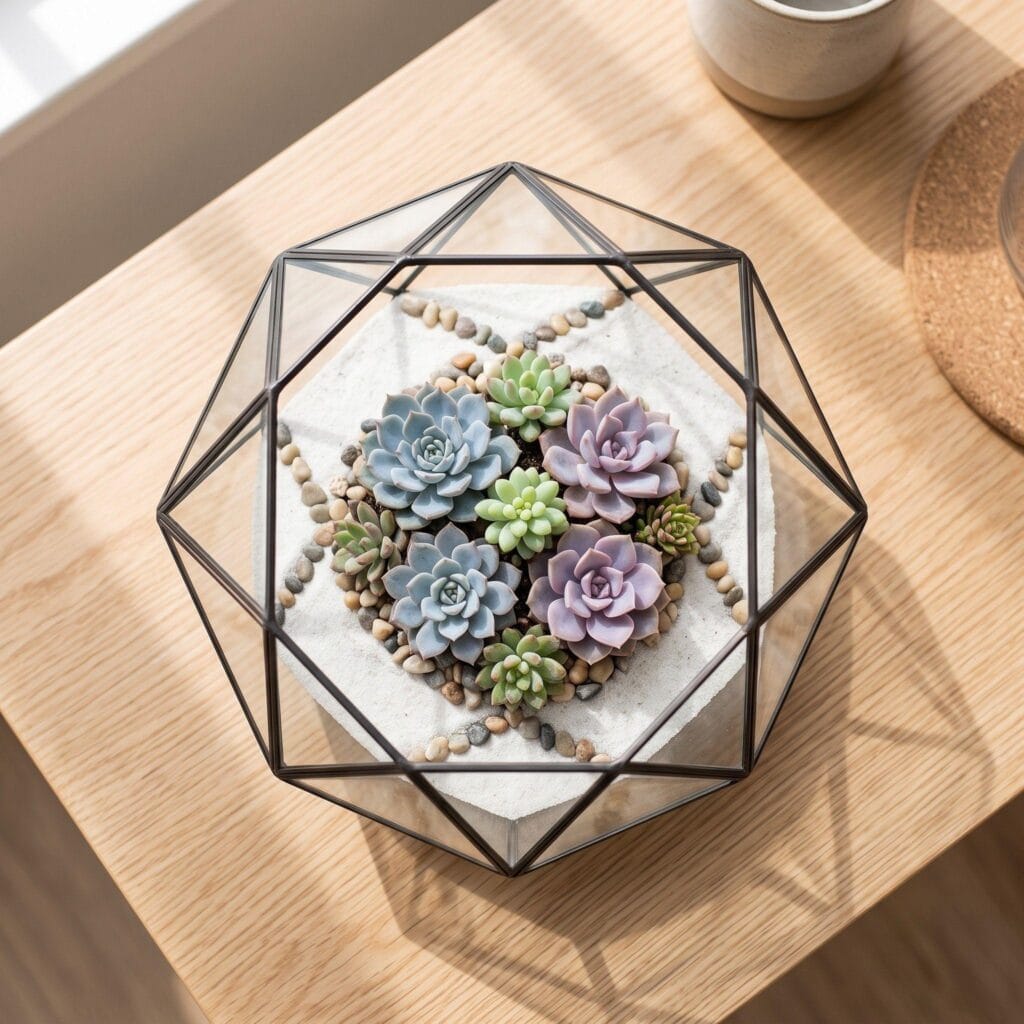
Succulents need moving air and dry soil between waterings, so plant them in an open container rather than a sealed glass jar. Choose a shallow glass bowl or low ceramic dish, add a 1/2-inch gravel layer, and fill it with cactus soil mix. Arrange small succulents with enough space between leaves for air circulation, then cover the exposed soil with decorative sand or fine gravel. Set the finished planter on a bright dining table or windowsill, and water only when the soil has dried through. To add a natural detail nearby, check out our guide on botanical plaster casting with 10 stunning ideas for making leaf impressions in stone.
7. Desert Landscape Terrarium
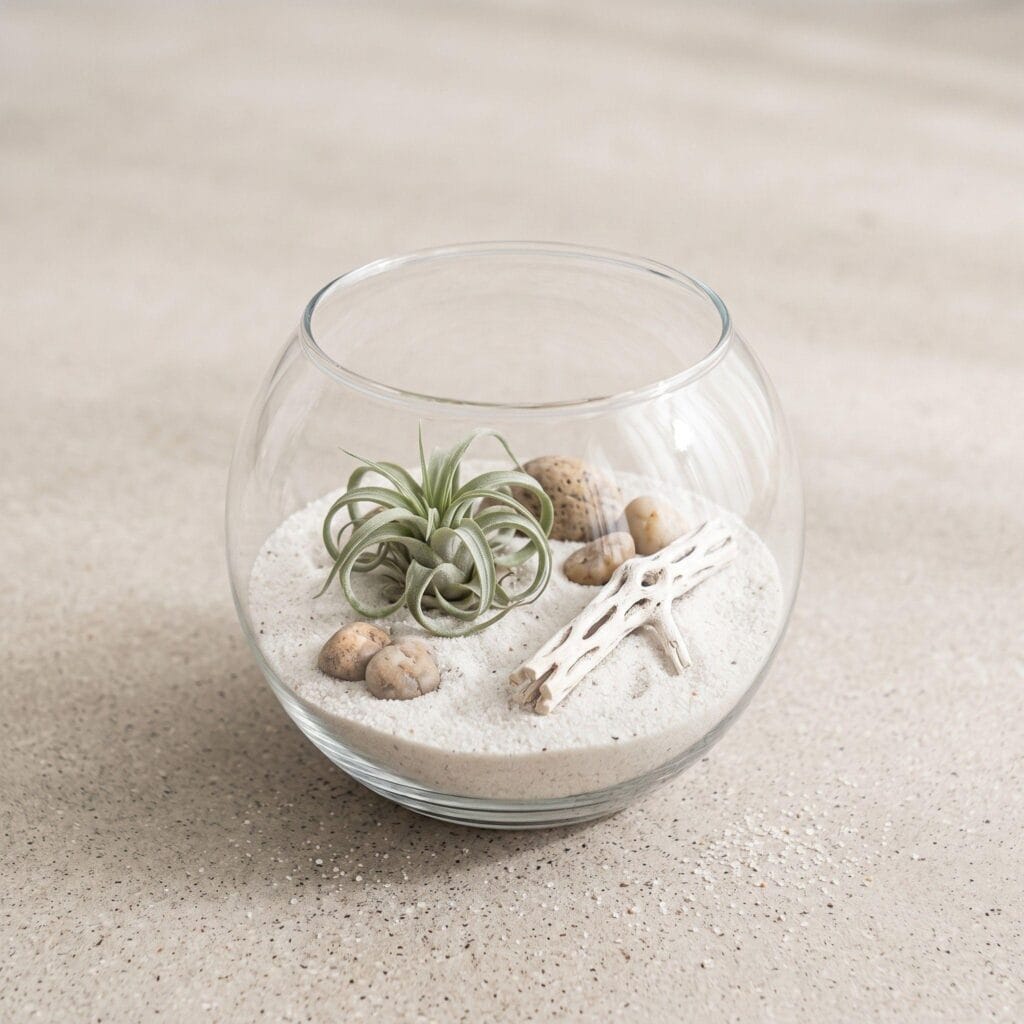
Build a miniature desert scene with clean sand, smooth rocks, and a few slow-growing succulents or air plants. Shape the sand into a low ridge with the back of a spoon, then press in stones of different sizes to mimic a dry wash or rocky outcrop. Add a tiny cactus figurine, a small clay lizard, or a piece of bleached driftwood with branching arms for a dry, sun-baked look. Keep the palette simple with cream sand, warm brown stone, and muted green plants so the small details do not compete with one another.
8. Glow-in-the-Dark Fairy Terrarium
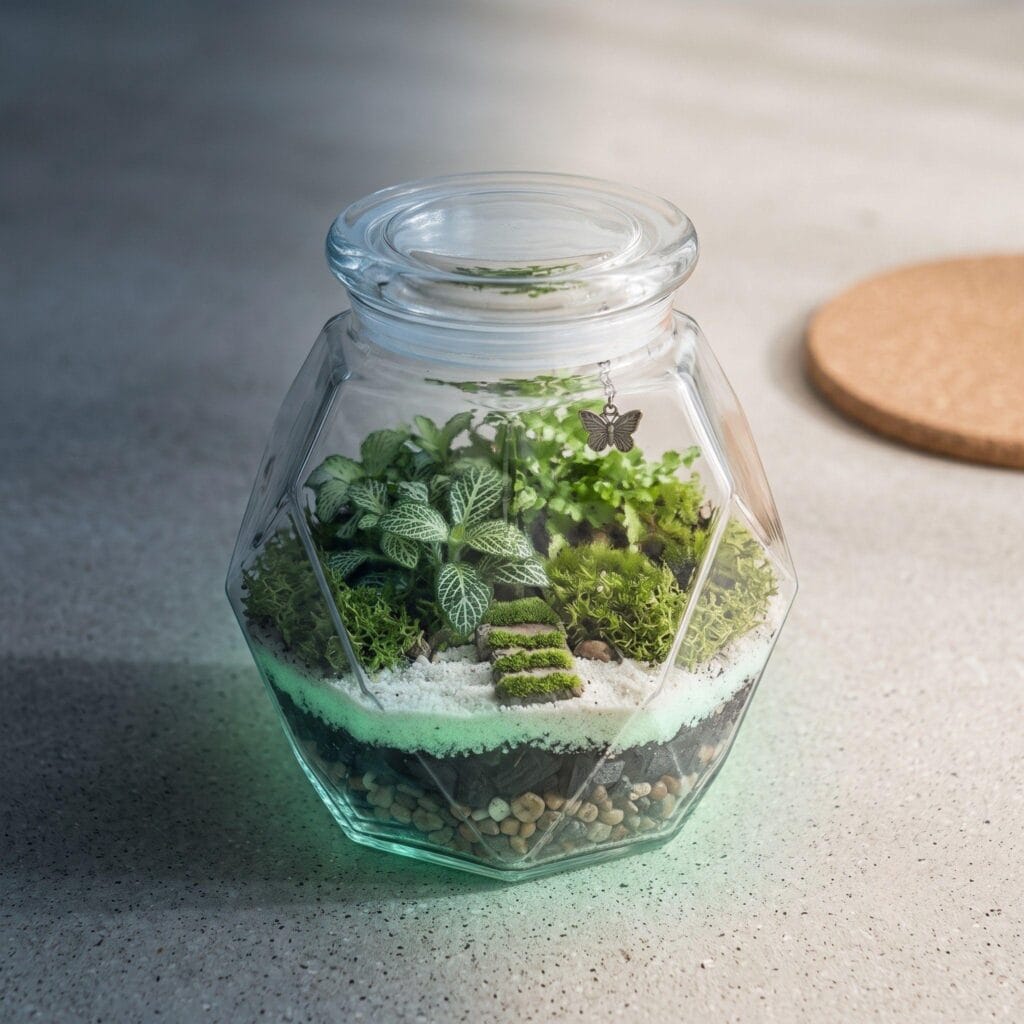
For a playful nighttime detail, mix a small amount of glow-in-the-dark sand or paint-coated pebbles into the top layer of a terrarium base. In daylight, the material blends into the moss, gravel, or sand around it. After several hours near a bright window or lamp, the pebbles give off a soft glow that works especially well in a child’s room or on a covered bedside shelf. Keep glow materials above the soil line and away from moisture-sensitive plants so they remain easy to clean and replace.
Tips to Make Any Miniature World Look Polished
- Vary Your Textures: Combine moss, pebbles, sand, and bark instead of just raw soil to make the scene feel real.
- Think in Layers: Build height with small rocks or risers under your moss before placing props on top.
- Don’t Overcrowd: A few well-placed elements almost always look better than a container packed with tiny objects.
- Match Your Theme: Decide if your world is woodland, desert, cottagecore, or whimsical fantasy before you start gluing.
- Use Faux Materials Carefully: Faux moss and artificial plants hold up longer while you are still learning care requirements for live plants.
Caring for Living Fairy Gardens and Terrariums
If your custom miniature world includes real plants, regular care keeps the leaves healthy and the scene looking neat:
- Closed terrariums rarely need watering, so check every few weeks and mist lightly only if the soil looks dry.
- Open terrariums with succulents need watering every 1 to 2 weeks, and only once the soil has fully dried out.
- Fairy gardens with living moss benefit from a light misting every few days, especially in dry indoor air.
- Keep everything out of direct, harsh sunlight, which can scorch delicate moss and small plants inside glass containers.
🛠️ What If It Goes Wrong? Crafting Troubleshooting Guide
- Problem:My closed jar terrarium is growing white mold on the moss.
- Reason: There is too much trapped moisture inside the container. Furthermore, a lack of activated charcoal allows bacteria to thrive.
- Solution: Open the lid completely for 48 hours to let the excess water evaporate. Then, mist lightly only when the soil feels dry.
- Problem:My tiny hot-glued fences keep falling apart inside the humid container.
- Reason: Standard hot glue weakens quickly when exposed to high moisture or damp soil.
- Solution: Specifically switch to a premium waterproof cyanoacrylate gel or E6000 craft adhesive. Consequently, your structural props will stay locked in place.
⚠️ Important Crafting Safety Notes
- Choking Hazards: Creating DIY miniature worlds involves handling tiny resin animals, small glass beads, and miniature figurines. Because these small pieces pose significant choking risks, always store your supplies safely out of reach of toddlers and pets.
- Sharp Elements: Working with sharp mirror shards for faux ponds or breaking old terracotta pots requires extreme caution. Therefore, always wear protective safety glasses and heavy-duty utility gloves during these specific assembly steps.
- Glue Gun Safety: High-temperature glue guns can cause severe skin burns quickly. Never touch the brass nozzle while the tool is plugged in, and always place a protective silicone mat underneath to catch hot drips safely.
- Soil Hygiene: Raw potting soil and gathered outdoor moss contain active bacteria and fungi. Consequently, wear lightweight gardening gloves during your build, and wash your hands thoroughly with soap immediately after completing your project.
🙋♂️ Frequently Asked Questions (FAQ)
Can I make a miniature world without live plants?
Yes, faux moss, silk greenery, and artificial succulents work well. They are especially useful for a display that will sit in low light, travel to a craft fair, or go for long stretches without care. Brush dust from the leaves with a soft paintbrush every few weeks, and secure loose pieces with a small dot of clear-drying craft glue.
What’s the difference between a fairy garden and a terrarium?
A fairy garden focuses on a small scene built with props, paths, doors, furniture, and figures, usually arranged in open soil or a pot. A terrarium focuses on plant conditions inside a glass container, which may be open, partially covered, or sealed to manage moisture and humidity. Many projects borrow from both styles by combining living plants with a few restrained miniature details.
Are these projects kid-friendly?
Most miniature garden projects work well for children with adult supervision. Handle hot glue, craft knives, glass containers, and tiny loose parts with care, since small props can become choking hazards for very young children. Give younger makers larger stones, wooden figures, and blunt-tip scissors so they can help arrange the scene safely.
⚠️ Important Crafting Safety Notes
- Choking Hazards: Creating DIY miniature worlds involves handling tiny resin animals, small glass beads, and miniature figurines. Because these small pieces pose significant choking risks, always store your supplies safely out of reach of toddlers and pets.
- Sharp Elements: Working with sharp mirror shards for faux ponds or breaking old terracotta pots requires extreme caution. Therefore, always wear protective safety glasses and heavy-duty utility gloves during these specific assembly steps.
- Glue Gun Safety: High-temperature glue guns can cause severe skin burns quickly. Never touch the brass nozzle while the tool is plugged in, and always place a protective silicone mat underneath to catch hot drips safely.
- Soil Hygiene: Raw potting soil and gathered outdoor moss contain active bacteria and fungi. Consequently, wear lightweight gardening gloves during your build, and wash your hands thoroughly with soap immediately after completing your project.
Which miniature world are you building first — a fairy garden or a terrarium? Tell me in the comments, and share a photo if you make one!