

Are you looking for elegant decorations? First, creating wire flower crafts is deeply rewarding. However, many artificial plants look cheap. Therefore, we designed these ten sophisticated projects. Because we use raw brass, they look luxurious. Plus, the construction process is highly satisfying. As a result, you can upgrade your interior easily. Indeed, your living room will feel serene. Also, check our stunning seashell crafts and decorations post for your table!
This blog post contains affiliate links. As an Amazon Associate, I earn from qualifying purchases. The content on some of these projects may be enhanced with structural craft inspirations.
Key Facts:
- Technique: Wire Flower Crafts
- Drying time: 15 minutes
- Makes: 10 Wire Flower Crafts
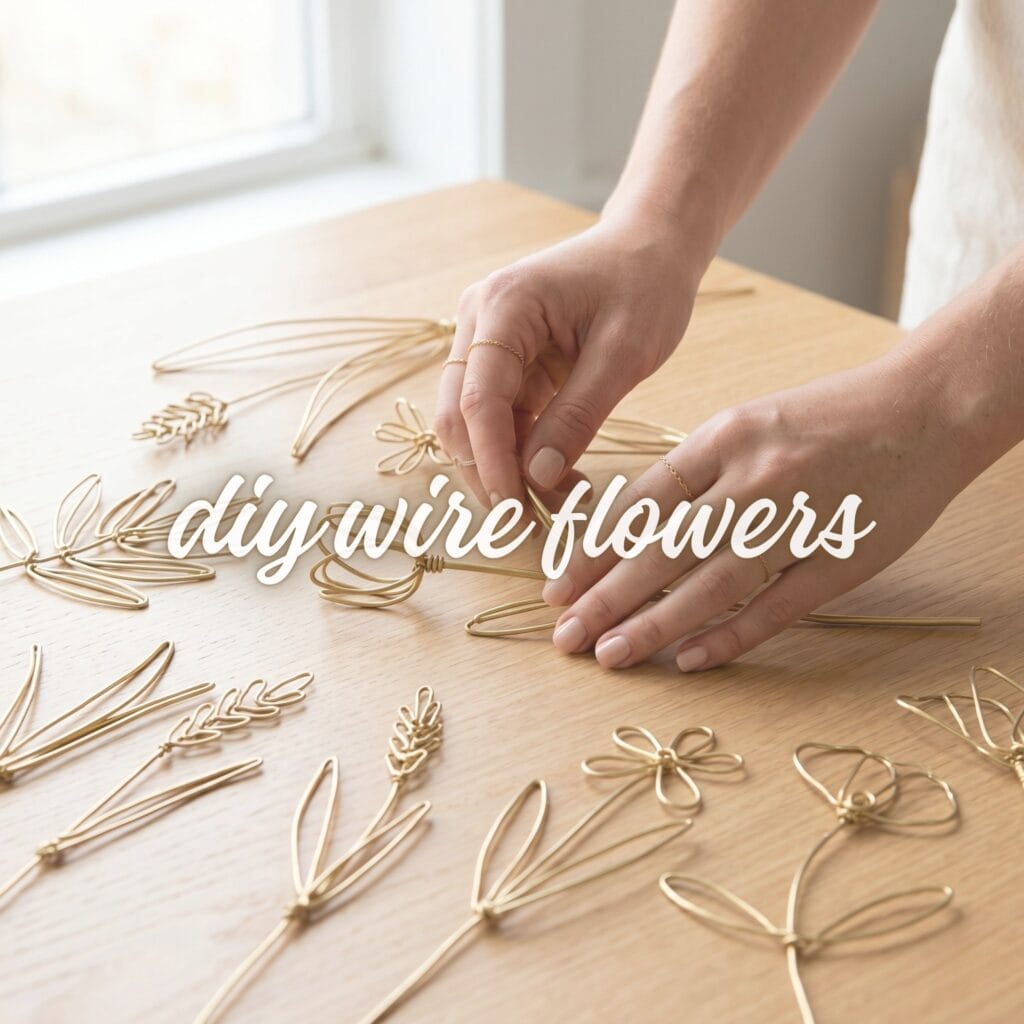
Essential Supplies for Wire Flower Crafts
| Supply | Spec / Size | Used For |
|---|---|---|
| Raw Brass Wire (18-Gauge) | the primary structural metal for nearly every flower in this guide | |
| Copper Craft Wire | a warmer-toned alternative for softer, organic shapes | |
| Heavy-Duty Wire Cutters | cleanly cuts thick brass and copper wire without fraying the ends | |
| Needle-Nose Pliers | shapes tight bends, loops, and twists with precision | |
| Sun-Bleached Driftwood | a natural base for mounting Brass Tulips and other freestanding pieces | |
| Raw Linen Fabric | a soft, neutral backing for wire-and-textile wall art |
A few premium materials make all the difference here. Luckily, artisan supplies like these are affordable and easy to find. Gather everything below before you start, and your studio time will go smoothly from the first knot to the last petal.
A few foundational tools and metallic structural pieces are used throughout multiple projects in this guide, marked with a (used throughout) tag below.
🎨 Base Metals & Tools
Raw brass wire and copper wire form the structural backbone of every design, while professional-grade cutters and pliers keep every finished piece secure.
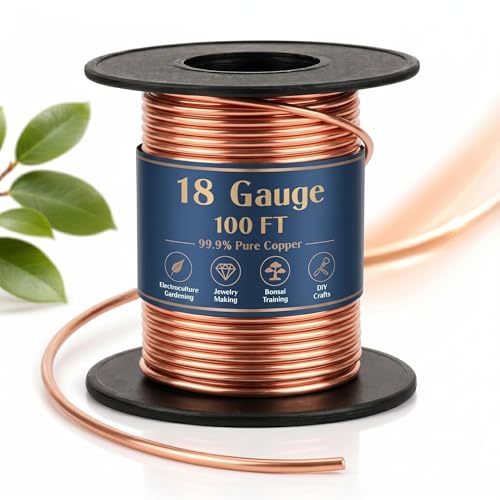
- Raw Brass Wire (18-Gauge) (used throughout) — the primary structural metal for nearly every flower in this guide | [Check Brass Wire Price on Amazon]
- Copper Craft Wire (used throughout) — a warmer-toned alternative for softer, organic shapes | [Check Copper Wire Price on Amazon]
- Heavy-Duty Wire Cutters (used throughout) — cleanly cuts thick brass and copper wire without fraying the ends | [Check Wire Cutters on Amazon]
- Needle-Nose Pliers (used throughout) — shapes tight bends, loops, and twists with precision | [Check Pliers Price on Amazon]
🪵 Bases & Backings
Sun-bleached driftwood and raw linen fabric add incredible rustic texture to the more sculptural and textile-based designs.
- Sun-Bleached Driftwood — a natural base for mounting Brass Tulips and other freestanding pieces | [View Driftwood on Amazon]
- Raw Linen Fabric — a soft, neutral backing for wire-and-textile wall art | [View Linen Fabric on Amazon]
🧪 Specialized Crafting Supplies
A handful of specialty materials support the mixed-media, painted, and leather-accented designs in this guide.
- Craft Adhesive — bonds metal wire securely to wood bases | [Check Craft Glue on Amazon]
- White Matte Clay — an easy-to-shape polymer clay for embedding wire petals | [Check Matte Clay on Amazon]
- Liquid Gold Leaf — a professional metallic paint for luxurious petal tip accents | [Check Gold Leaf on Amazon]
- Leather Scraps — raw brown leather for crafting tassels and bookmarks | [Check Leather Scraps on Amazon]
- Heavy-Duty Sewing Needle & Strong Thread — stitches wire-formed petals securely onto fabric | [Check Sewing Supplies on Amazon]
Core Wire-Bending Techniques
Every flower in this guide is built from the same handful of wire movements. Learn these five techniques once, and you’ll recognize them in every project below — from the tulip masterclass to the ginkgo leaves.
What you’ll need: brass or copper wire, wire cutters, needle-nose pliers
1. Teardrop Bend (buds & poppies)
Cut a length of wire and hold one end with your pliers. Curve the wire into a smooth loop, crossing it back near the starting point but leaving one end pointed rather than round — creating a teardrop instead of a circle. Pinch the crossed base with pliers to lock the shape. Used in: Brass Tulips, Wire Poppy Stems.
2. Leaf Loop (small accent loops)
Take a short offcut of wire and bend it into a narrow, elongated oval, twisting the base once or twice to close it. Keep this loop noticeably smaller and thinner than your petal loops so it reads as foliage, not a bloom. Used in: Brass Tulips (leaf), Ginkgo Leaves (stem attachment).
3. Petal Loop (wide blooms)
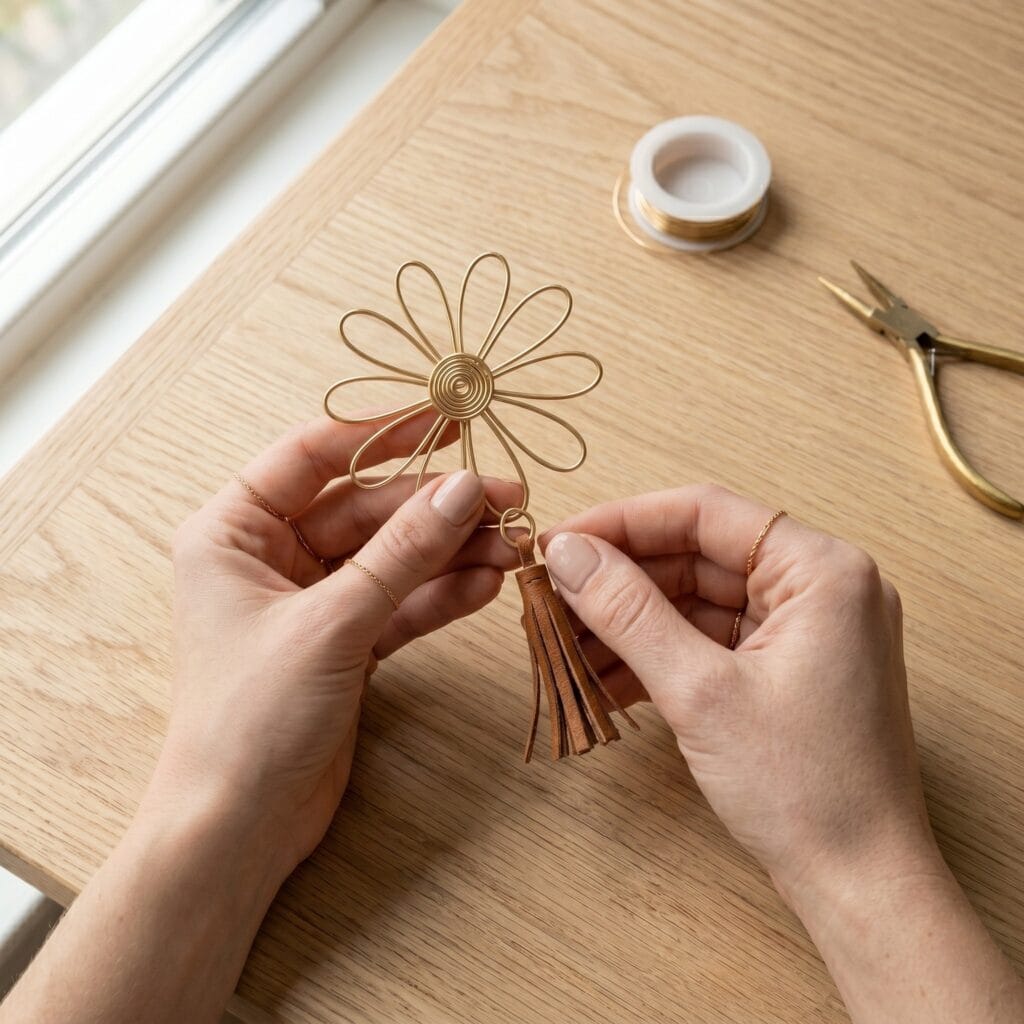
For fuller petals, form a much wider, rounder loop than the teardrop — closer to a circle or fan shape. Flatten it slightly with your fingers for a natural curve. Repeat 4–6 times per flower, then gather all the loop bases together and twist them into one stem. Used in: Copper Lotus, Geometric Lily, Leather Daisy.
4. Twist & Coil (branches, roses, texture)
Hold two wire ends together and twist them around each other like a rope to create a stem or branch line. For a tighter coil (used in rose centers or ginkgo fans), wrap the wire repeatedly around a pen or your finger, then slide it off and gently stretch the coil open. Used in: Abstract Rose, Wabi-Sabi Cherry Blossom, Ginkgo Leaves.
5. Wire Wrapping (joining & securing)
To join two wire elements, take a thin separate piece of wire and wind it tightly around the intersection 3–4 times, then tuck the cut end inward with pliers so no sharp point is exposed. This is how multiple flower units get “interlocked” into a single centerpiece. Used in: Abstract Rose (interlocking), Brass Tulips (stem-to-driftwood reinforcement).
Once you’re comfortable with these five moves, every idea below is really just a different combination of them.
How to Make Brass Tulips Masterclass
Do you want to try a signature project? Here, we explain a minimalist brass tulip. Because the steps are detailed, you will succeed.
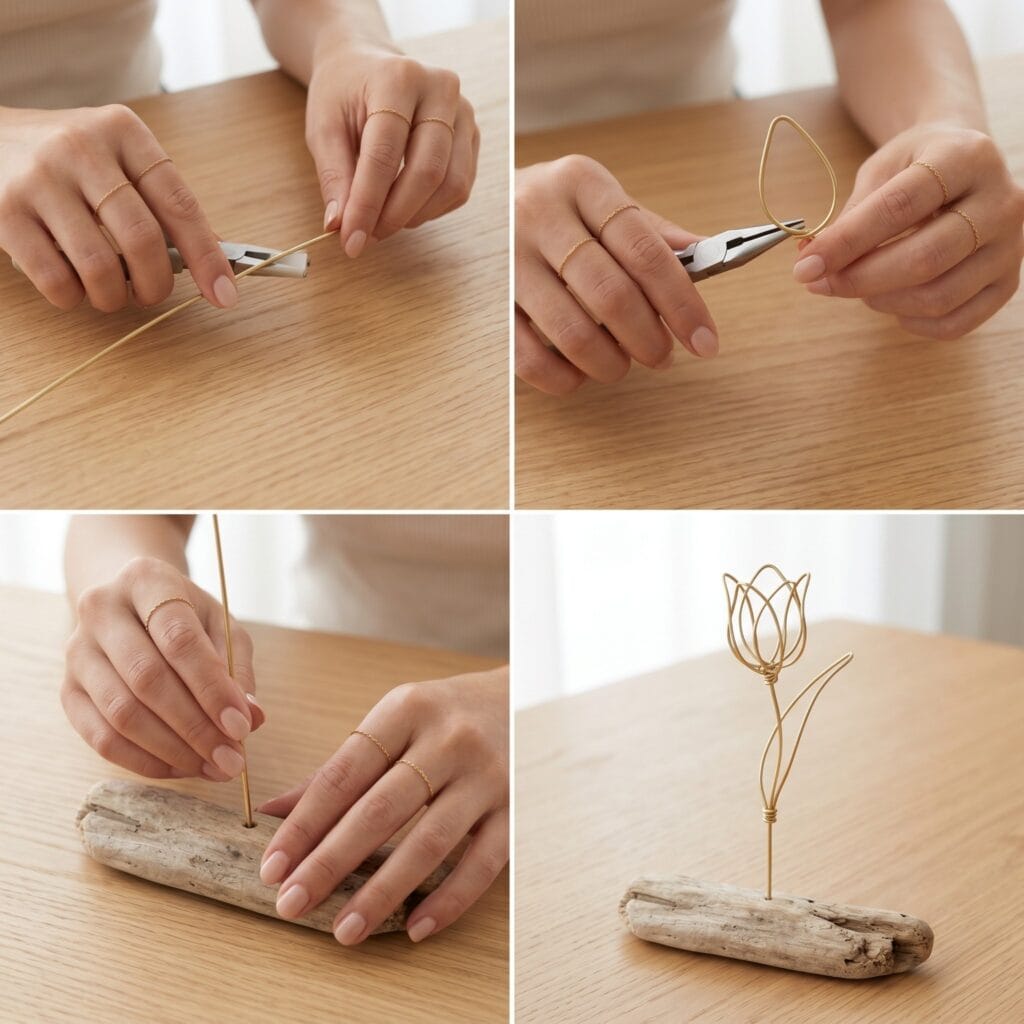
Step 1: First, cut a 12-inch (30 cm) piece of 18-gauge raw brass wire using heavy-duty wire cutters. Next, straighten the metal completely with your fingers. Important: Warming the metal slightly between your palms helps soften it for easier bending.
Step 2: Furthermore, bend the top 4 inches of the wire. Create a continuous teardrop shape. Use your pliers carefully. Consequently, you create the main bud.
Step 3: Additionally, leave the remaining wire straight. Then, make a small leaf loop using a short 3-inch offcut. Because real tulips have leaves, this adds realism.
Step 4: Next, take a driftwood piece. Drill a shallow hole in the center using a small drill bit. As a result, the wood holds your metal flower.
Step 5: Then, apply a drop of craft adhesive inside the hole. Push the wire stem into the hole. Consequently, it cures perfectly.
Step 6: Finally, leave your creation alone for 15 minutes to dry. Indeed, your artisan tulip is complete. Plus, it makes a gorgeous addition!

Finishing & Mounting Techniques
A few projects go beyond wire-bending into other crafts entirely — stitching, painting, and clay work. These are different skill sets, so here’s a quick primer for each.
Stitching Wire Flowers to Linen (for Copper Wire and Linen Lotus Art)
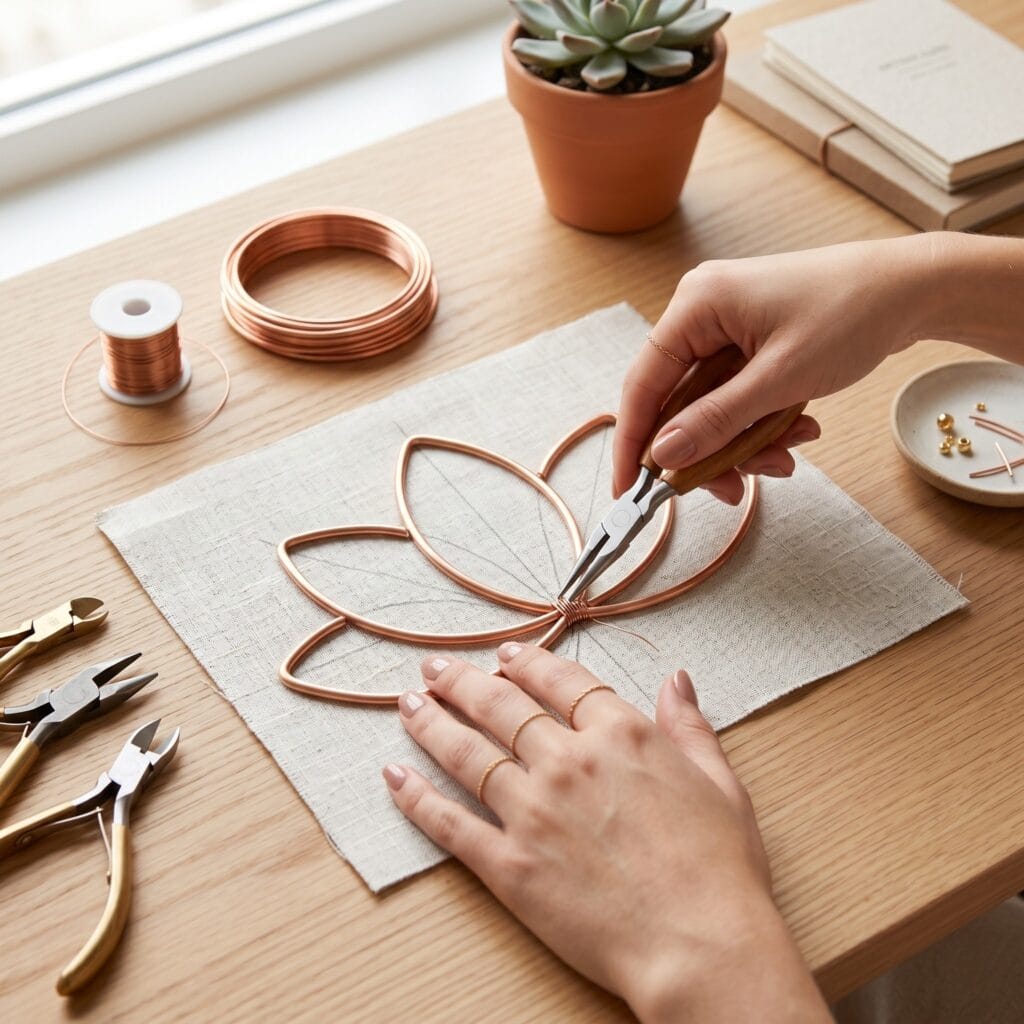
Once your lotus petals are formed, thread a needle with strong thread and stitch through the twisted wire base at 2–3 points, securing it flat against the linen. Stretch the linen taut over a canvas frame afterward so the stitches don’t pucker the fabric.
Applying Liquid Gold Leaf (for Gold-Plated Orchid Sculptures)
Using a small detail brush, apply liquid gold leaf only to the outer 1/4 of each petal tip — not the whole petal. Let it dry fully (check product instructions for timing) before handling, as the finish can smudge while curing.
Embedding Wire into Clay (for Delicate Sunflowers)
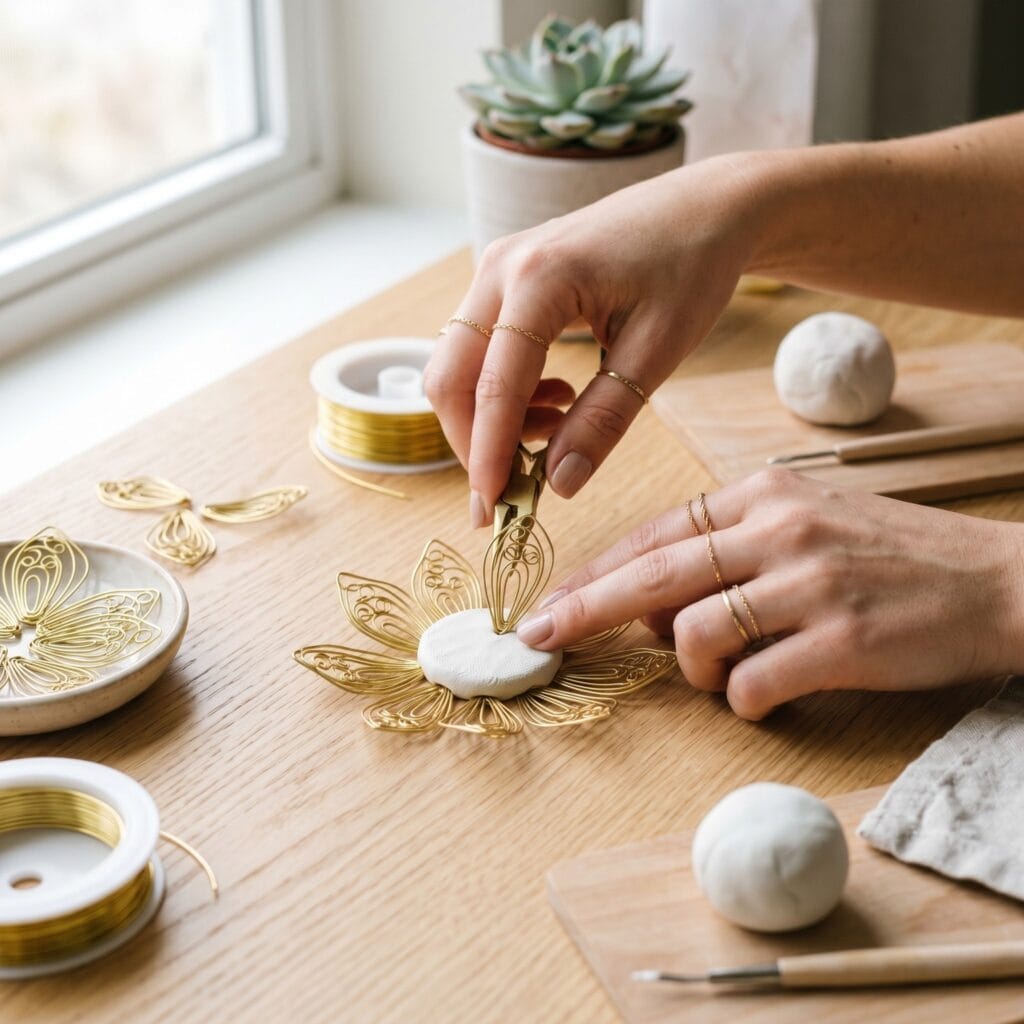
Soften a small piece of white matte clay in your hands until pliable, then press the twisted base of your wire petals directly into the clay disc, arranging them in a circle. Let the clay air-dry or cure per package instructions before moving the piece.
Leather Tassel Making (for Leather Daisy Bookmarks)
Cut 5–6 thin strips of leather scrap of equal length. Fold them in half over the base of your wire stem, then wrap a short wire piece around the folded point to secure — this creates the hanging tassel beneath the daisy.
10 Ideas for DIY Wire Flower Crafts
Additionally, these projects focus on minimalist lines. Here, we present ten unique ideas.
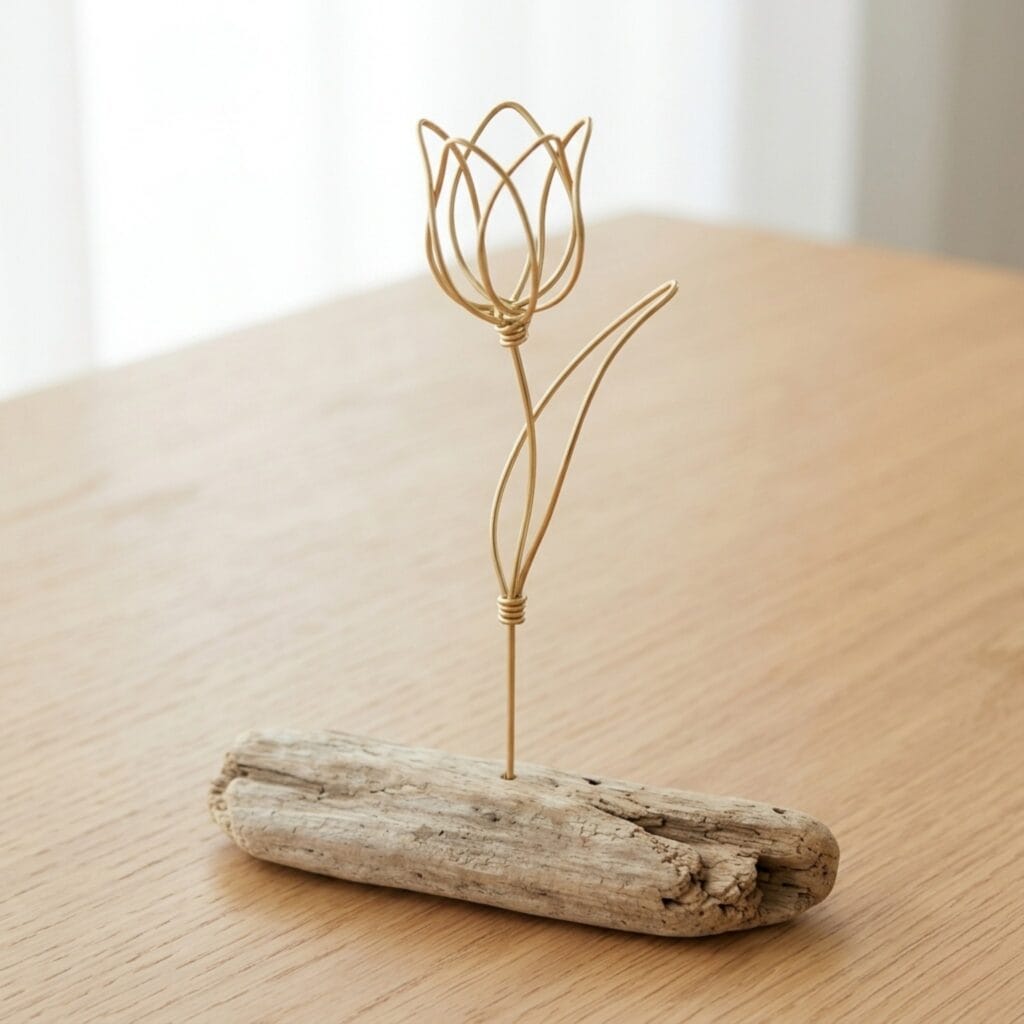
1. Minimalist Brass Tulips: Wire Flower Crafts
Supplies Needed: Raw Brass Wire, Sun-Bleached Driftwood, Craft Adhesive, Heavy-Duty Wire Cutters, Needle-Nose Pliers.
- Cut the raw brass wire with heavy-duty wire cutters.
- Sculpt a tulip silhouette from the brass wire.
- Mount the tulip onto sun-bleached driftwood with craft adhesive.
Transform plain metal into art. First, sculpt a tulip silhouette. Next, mount it onto driftwood. Because the brass shines, it looks luxurious.
2. Copper Wire and Linen Lotus Art
Supplies Needed: Copper Craft Wire, Raw Linen Fabric, Heavy-Duty Sewing Needle & Strong Thread, Canvas Frame (Household), Heavy-Duty Wire Cutters, Needle-Nose Pliers.
Create striking wall decor. First, bend copper craft wire. Next, form wide lotus petals (see Technique 3: Petal Loop above). Then, sew them onto frayed raw linen (see Stitching Wire Flowers to Linen above). Finally, stretch the linen over canvas.
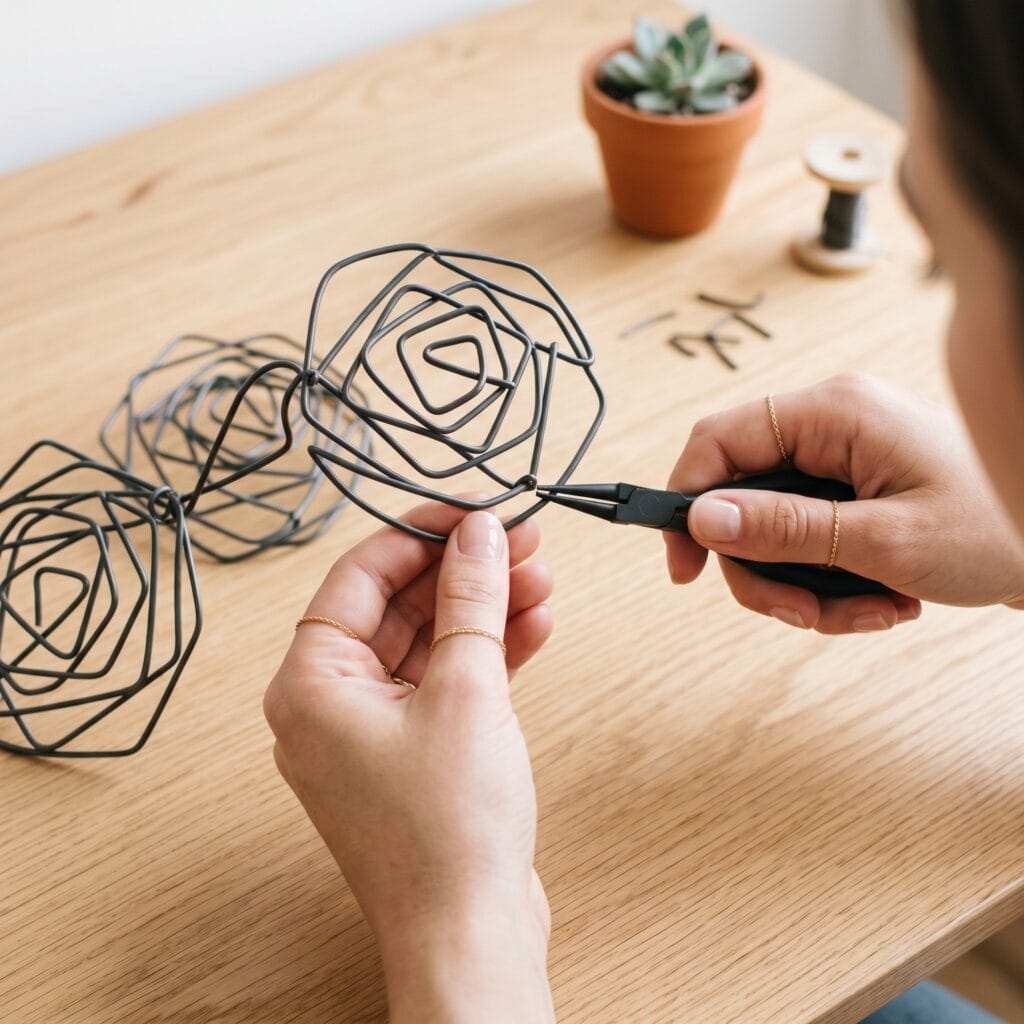
3. Abstract Rose Table Centerpiece
Supplies Needed: Raw Brass Wire (or thick dark wire), Heavy-Duty Wire Cutters, Needle-Nose Pliers.
Add modern movement to your room. First, twist thick dark wire (see Technique 4: Twist & Coil above). Next, make an abstract rose. Then, interlock multiple roses together (see Technique 5: Wire Wrapping above). Consequently, you create a geometric centerpiece.
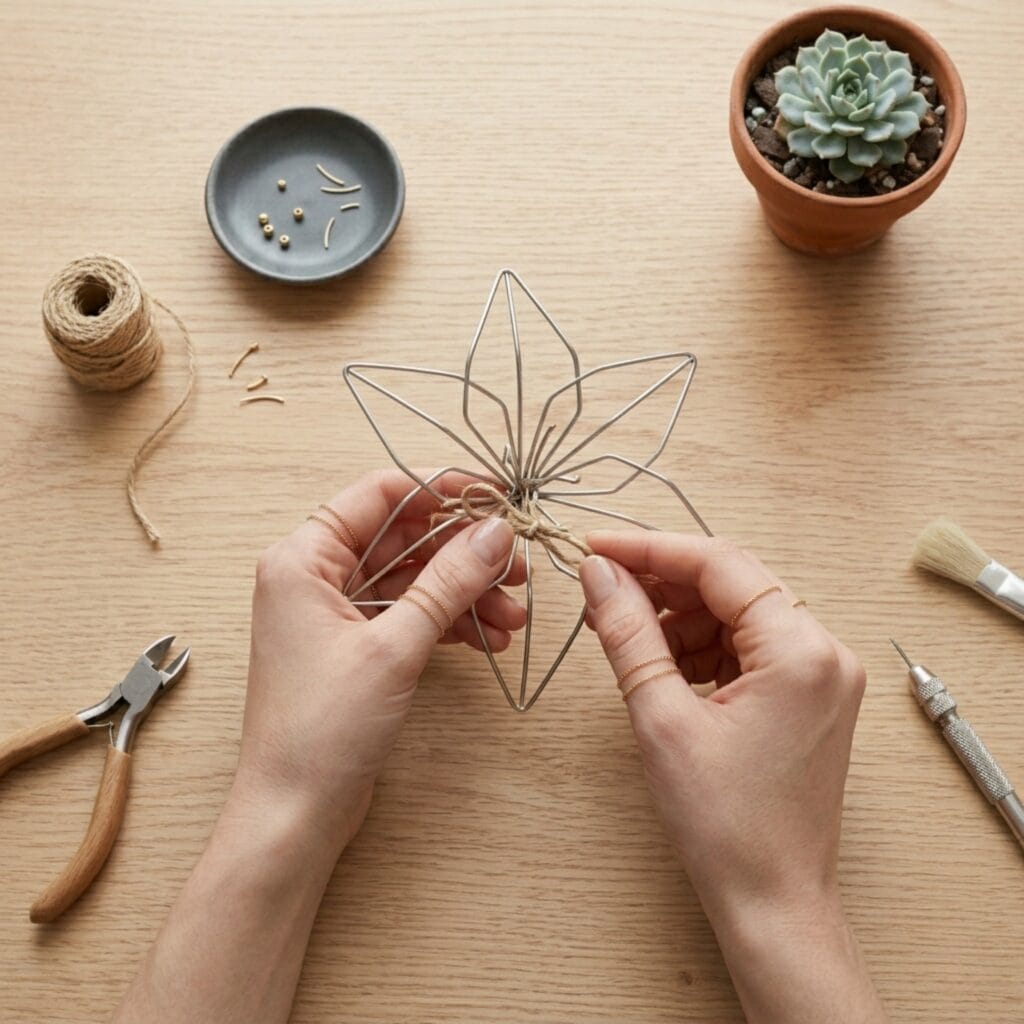
4. Geometric Lily Wall Hangings
Supplies Needed: Raw Brass Wire, Heavy-Duty Wire Cutters, Needle-Nose Pliers.
Bring sleek lines to your walls. First, construct large lily blossoms (see Technique 3: Petal Loop above). Next, use sharp wire bends. Then, hang them individually. Therefore, you get a highly stylish display.
5. Delicate Sunflowers: Wire Flower Crafts
Supplies Needed: Raw Brass Wire, White Matte Clay, Heavy-Duty Wire Cutters, Needle-Nose Pliers.
Try mixed-media art. First, shape intricate yellow brass petals. Next, press them into white matte clay (see Embedding Wire into Clay above). Then, let the clay harden completely. Thus, you create stunning wire flower crafts.
6. Gold-Plated Orchid Sculptures
Supplies Needed: Raw Brass Wire (Thick), Liquid Gold Leaf, Detail Paintbrush (Household), Heavy-Duty Wire Cutters, Needle-Nose Pliers.
Display elegant exotics beautifully. First, form a long orchid branch. Next, use thick wire. Then, paint the petal tips. Next, use liquid gold leaf (see Applying Liquid Gold Leaf above). As a result, a beautiful luxury sculpture appears.
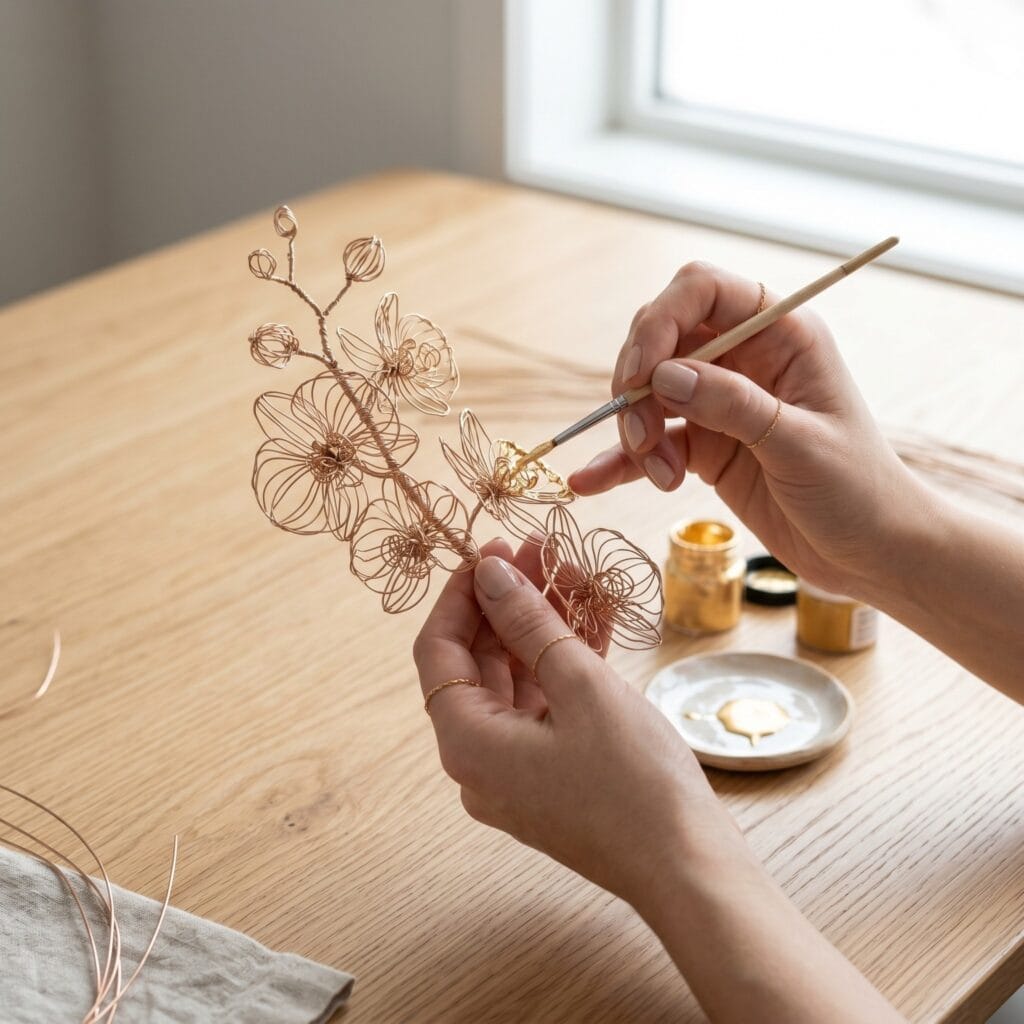
7. Wabi-Sabi Cherry Blossom Branches
Supplies Needed: Copper Craft Wire (or dark wire), Heavy-Duty Wire Cutters, Needle-Nose Pliers.
Create a calming piece. First, twist dark craft wire tightly (see Technique 4: Twist & Coil above). Next, mimic jagged tree branches. Then, add tiny circular wire loops. Indeed, you get a minimalist design.
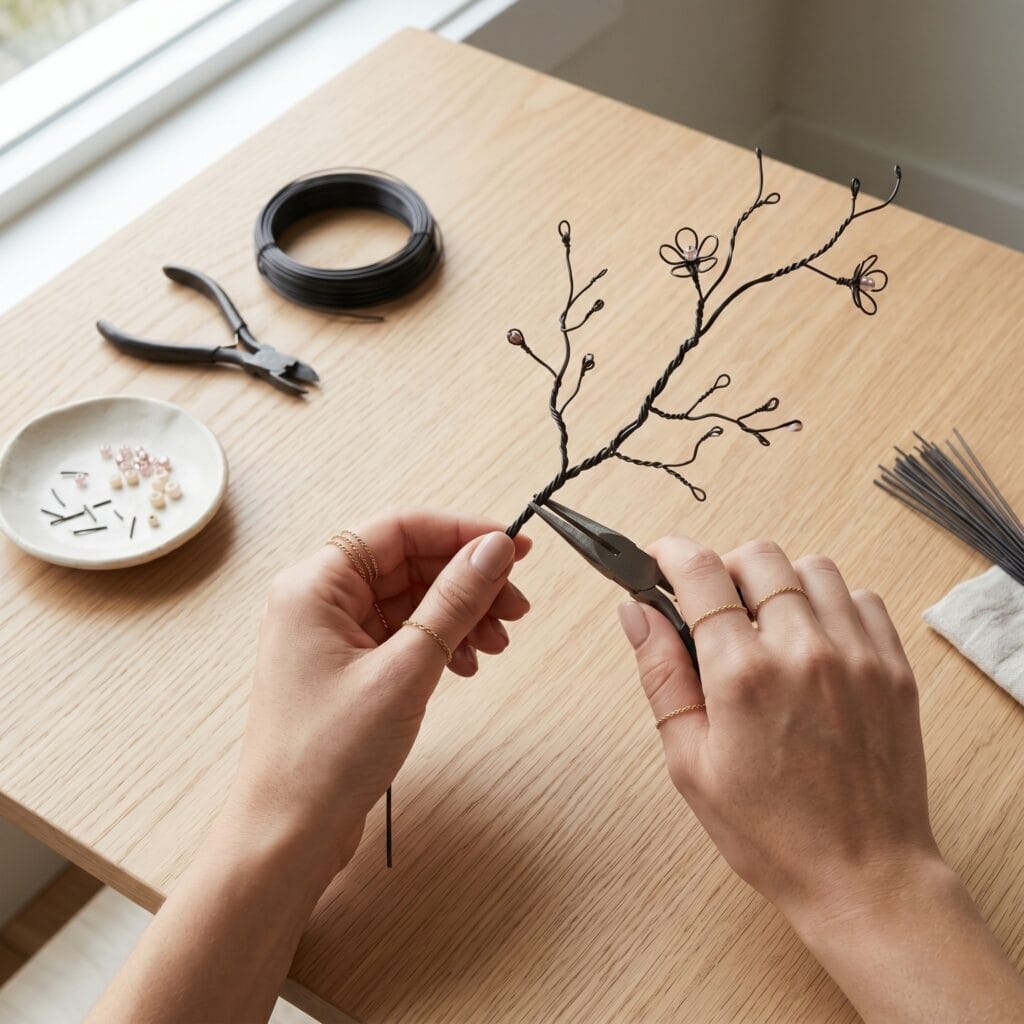
8. Minimalist Wire Poppy Stems
Supplies Needed: Raw Brass Wire, Ceramic Vase (Household), Heavy-Duty Wire Cutters, Needle-Nose Pliers.
Upgrade your shelf styling easily. First, bend round wire (see Technique 1: Teardrop Bend above). Next, form a simple poppy shape. Then, leave a long wire stem. Consequently, you can display these modern wire flower crafts inside a small ceramic vase (Household).
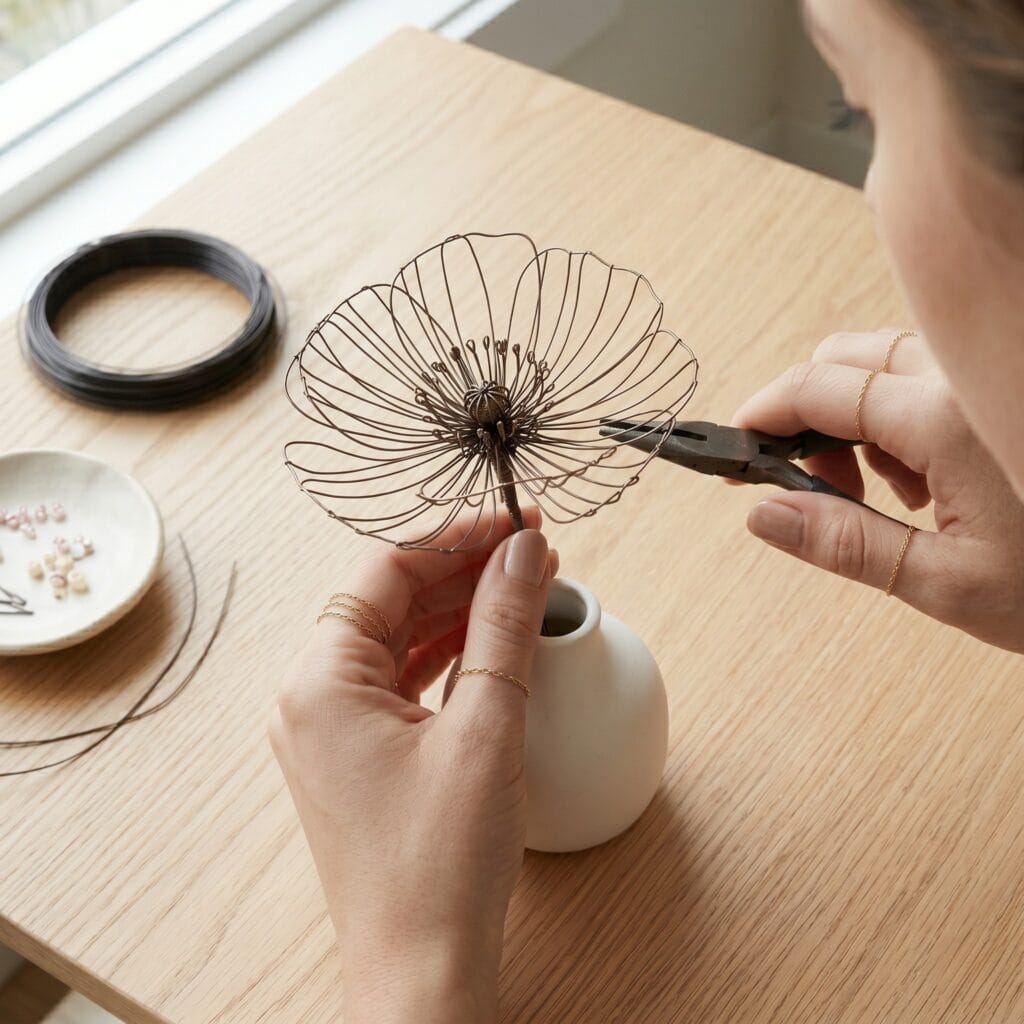
9. Elegant Wire Ginkgo Leaves
Supplies Needed: Raw Brass Wire, Glass Vial (Household), Heavy-Duty Wire Cutters, Needle-Nose Pliers.
Bring sophisticated nature indoors. First, bend round brass wire. Next, form a wide fan shape (see Technique 4: Twist & Coil above, for the fan coiling). Then, twist the ends to form a delicate stem (see Technique 2: Leaf Loop above, for stem attachment). Therefore, you create a stunning architectural leaf. Thus, these wire flower crafts look incredible in a minimalist glass vial.
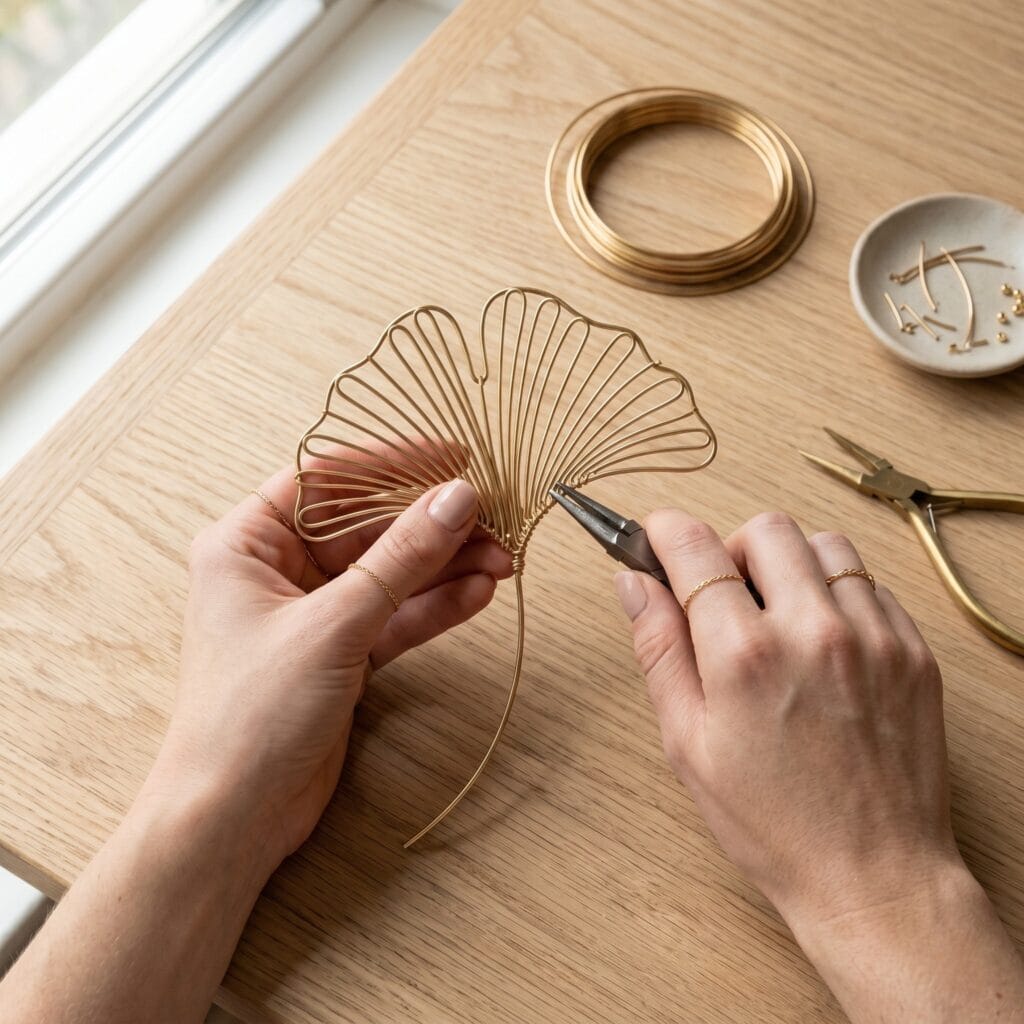
10. Leather Daisy Bookmarks: Wire Flower Crafts
Supplies Needed: Raw Brass Wire, Leather Scraps, Heavy-Duty Wire Cutters, Needle-Nose Pliers.
Create a beautiful gift for readers. First, bend round wire. Next, form a minimalist daisy shape (see Technique 3: Petal Loop above). Then, attach a small tassel (see Leather Tassel Making above). Specifically, use a raw brown leather scrap. As a result, you get elegant wire flower crafts.
Elevate Your Space with Metal Botanicals
Designing your own metal flora is deeply satisfying. Ultimately, these wire flower crafts will instantly upgrade your interior. First, dedicate a few hours this weekend. Consequently, you can introduce a sophisticated aesthetic to your home. So, which minimalist bloom are you planning to shape first? Please, share your upcoming projects in the comments below!
Quick Reference for the Full Materials List
Ready to gather everything before you start bending wire? Here’s the complete list in one place.
BASE METALS & TOOLS
- Raw Brass Wire (18-Gauge) | [Check Brass Wire Price on Amazon]
- Copper Craft Wire | [Check Copper Wire Price on Amazon]
- Heavy-Duty Wire Cutters | [Check Wire Cutters on Amazon]
- Needle-Nose Pliers | [Check Pliers Price on Amazon]
BASES & BACKINGS
- Sun-Bleached Driftwood | [View Driftwood on Amazon]
- Raw Linen Fabric | [View Linen Fabric on Amazon]
SPECIALIZED CRAFTING SUPPLIES
- Craft Adhesive | [Check Craft Glue on Amazon]
- White Matte Clay | [Check Matte Clay on Amazon]
- Liquid Gold Leaf | [Check Gold Leaf on Amazon]
- Leather Scraps | [Check Leather Scraps on Amazon]
- Heavy-Duty Sewing Needle & Strong Thread | [Check Sewing Supplies on Amazon]
Important Crafting Safety Note:
Please craft safely! Remember that you are responsible for your own safety and tool handling. For more details, please read our Terms and Conditions.
Creating artisan decorations is a safe and relaxing activity. However, safety must always come first. Therefore, please use caution when cutting thick wire with wire cutters. Because cut metal edges can be sharp, always handle them carefully.
A note on drilling driftwood: When drilling a mounting hole into driftwood (as in the Brass Tulips Masterclass), wear safety glasses to protect against flying wood chips, and secure the driftwood firmly so it can’t shift while drilling.
A note on pets and small parts: Cut wire ends, small leather scraps, and clay offcuts can be sharp or present a choking hazard. Keep your workspace tidy while crafting, and store finished pieces — especially anything with fine wire tips — somewhere curious pets can’t reach or chew.
Finally, keep sharp pliers, wire cutters, and strong glue completely away from children.



[…] and ready for a small vase, gift topper, or classroom display. If you enjoy the structure of our DIY wire flower crafts, these soft chenille blooms offer a gentler, lower-tool way to build a cheerful […]