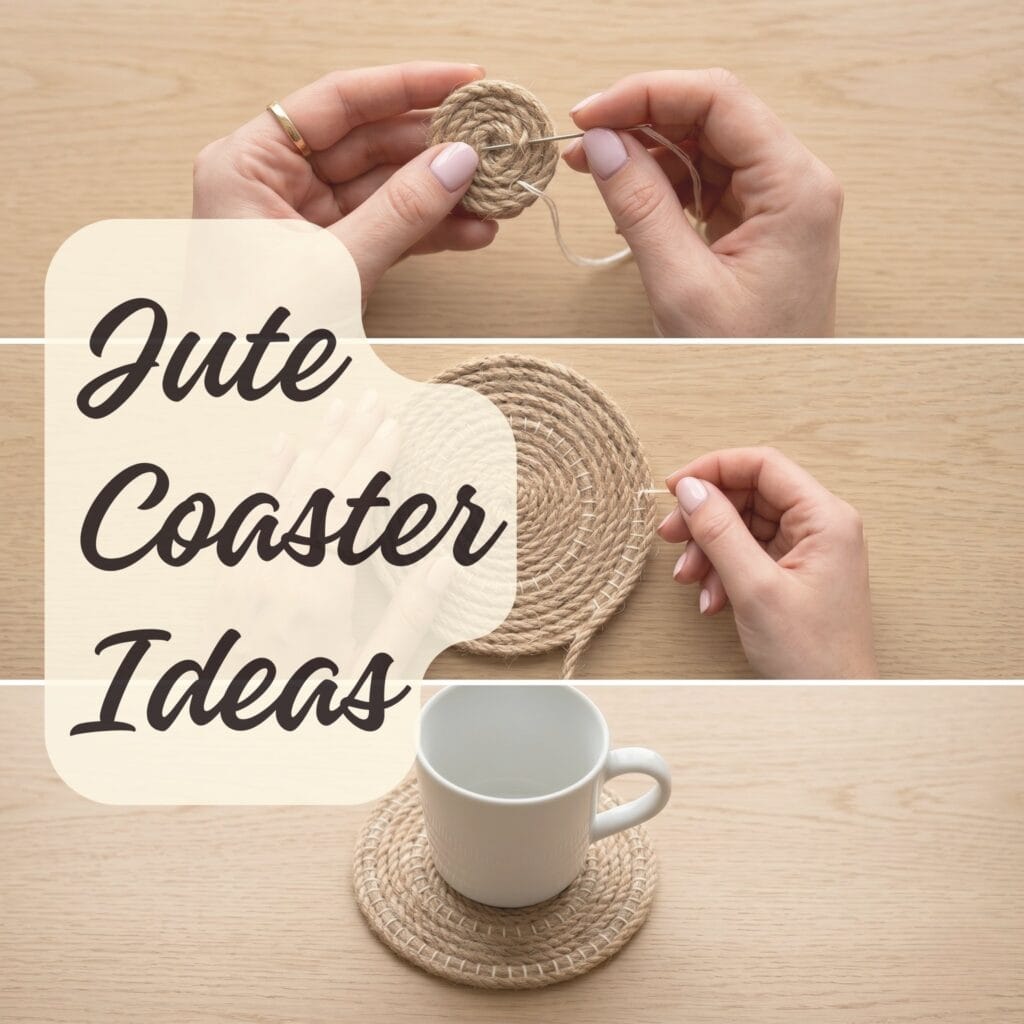
Bringing natural textures into your living space is easy. For instance, it instantly creates a warm, organic atmosphere. Specifically, if you are searching for dynamic diy jute coasters, advanced crafting skills are definitely not required. Instead, a simple spool of utility rope can quickly transform into stunning bohemian tableware. Furthermore, you just need to use basic coiling and binding techniques.
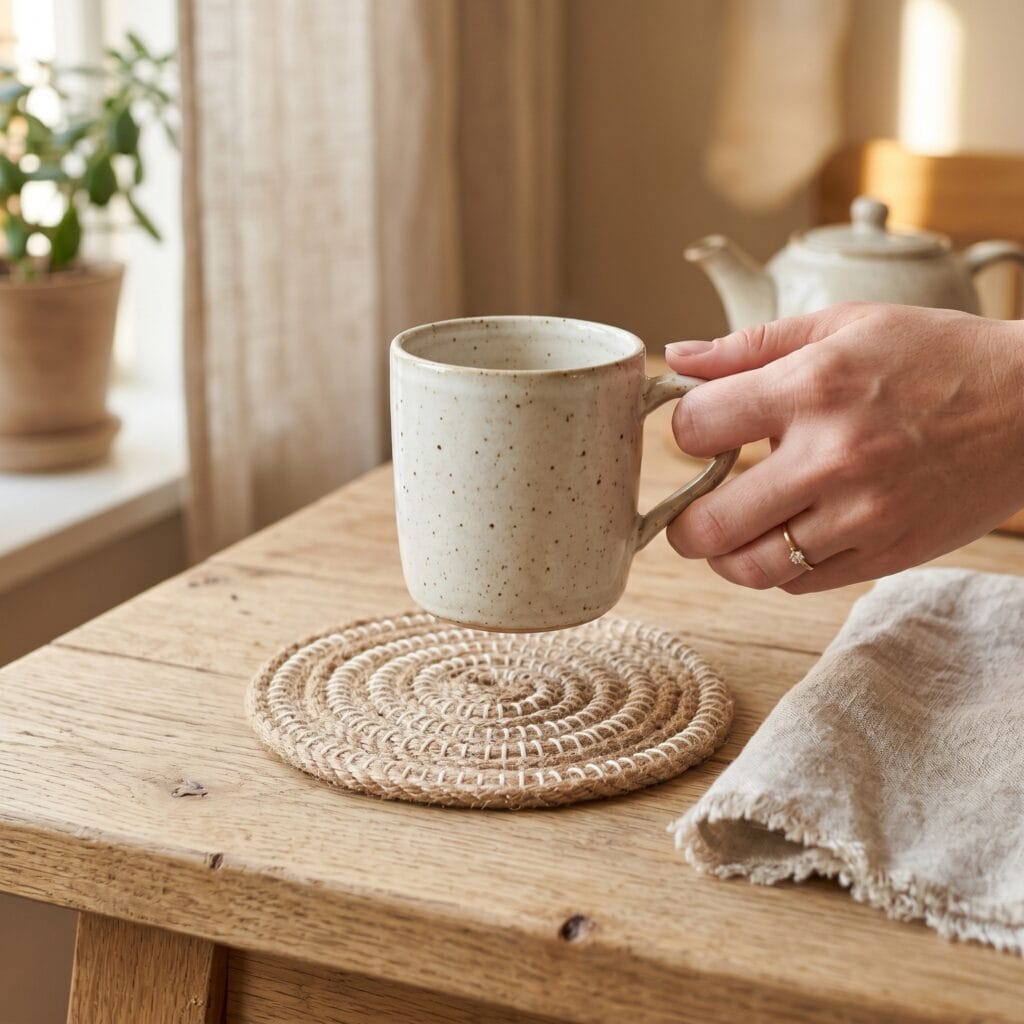
Clearly, a handmade jute rope coaster offers a highly tactile, rustic aesthetic. Consequently, it elevates your coffee table styling instantly. Moreover, you might already know the organic textures found in our guide to easy clay models. In that case, you will find working with fiber art deeply satisfying.
The Essential Toolkit for DIY Jute Coasters
Before beginning your first jute rope coaster tutorial, you should gather the right supplies. Certainly, this initial setup ensures your finished pieces are flat, durable, and clean. Consequently, proper preparation is key to making beautiful diy jute coasters.
- The Rope: 3mm to 5mm natural jute twine or twisted jute rope. Thinner rope allows for tighter, more intricate coils.
- The Adhesive: A heavy-duty hot glue gun with clear glue sticks. Alternatively, use strong embroidery floss with a large tapestry needle.
- The Base: Small circular pieces of natural cork or felt. These provide a non-slip, protective backing.
- Decorative Accents: Matte acrylic paints, painter’s tape, small cowrie shells, raw wooden beads, and a fine detail brush.
10 Creative Styling Ideas for DIY Jute Coasters
1. Classic Spiral Coaster with White Stitching
Traditional fiber arts celebrate structural details. Because of this, exposing the stitches on a jute rope coaster yields a gorgeous artisan look. Indeed, the contrasting cream thread beautifully breaks up the coarse texture of the rope. Therefore, it is perfect for classic diy jute coasters.
- What you need: 4mm jute rope, cream embroidery floss, a large tapestry needle.
- How to make it: First, coil the very tip of the rope into a tight central circle. Next, pass the needle through the adjacent coils to lock the core. Afterward, continue wrapping the rope outward in a spiral. Finally, execute a neat blanket stitch across each row to bind them together securely.
Pro-Tip: Of course, you must make sure to pull each stitch with even tension. Otherwise, if you pull too tightly, the coaster will cup upward instead of laying perfectly flat.
2. Terracotta Painted Half-Moon Designs (Painted DIY Jute Coasters)
In addition, you can easily introduce a pop of modern color to your space. To do this, simply mask off your finished diy jute coasters with painter’s tape. Consequently, this step creates a crisp, contemporary layout. Similarly, this look mirrors the lovely earthy tones found in our hand-painted terracotta pots tutorial.
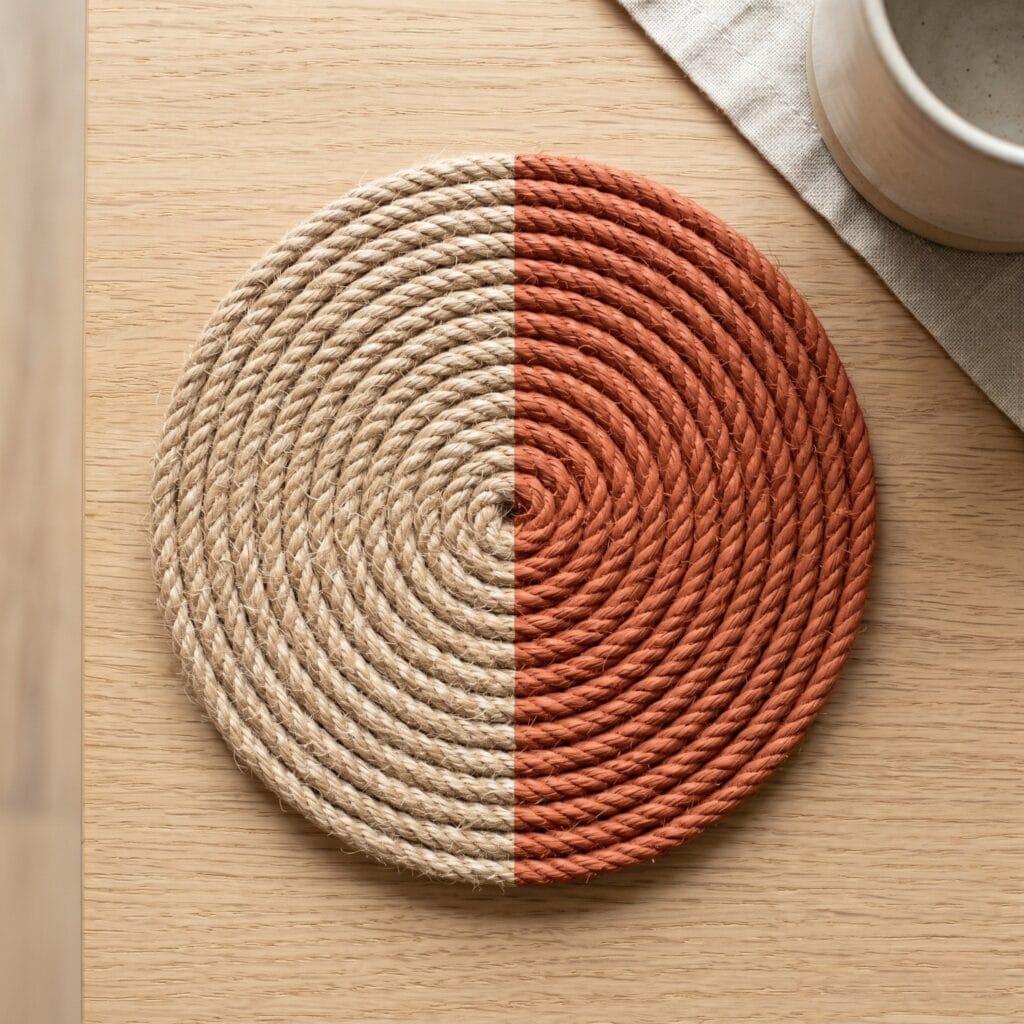
- What you need: A completed glued jute coaster, matte terracotta acrylic paint, painter’s tape, a flat brush.
- How to make it: Initially, wait for your coiled coaster to dry completely. Then, place a strip of painter’s tape exactly across the center. After that, paint one half with a solid layer of terracotta paint. Meanwhile, ensure the pigment sinks deep into the rope fibers. Finally, peel the tape away while the paint is damp.
3. Fringed Macrame Border Jute Coaster
Furthermore, this unique approach combines two iconic bohemian materials. Specifically, it blends a structured jute center with a wonderfully soft, combed cotton perimeter. As a result, you get lovely, texture-rich diy jute coasters.
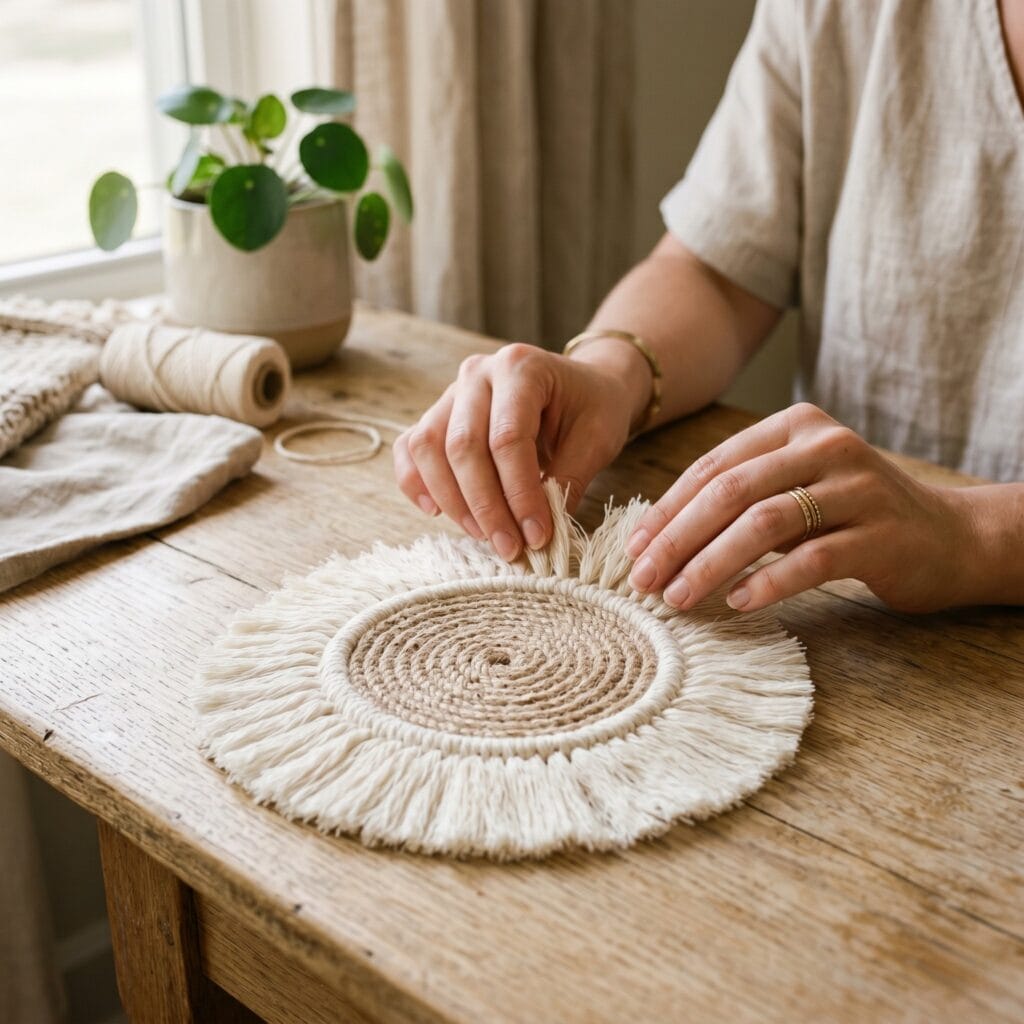
- What you need: 3mm jute rope, 3mm single-strand cream cotton macrame cord, hot glue.
- How to make it: To begin, coil your jute rope into a small 3-inch circle and secure it with hot glue. Next, cut dozens of 2-inch segments of cotton cord. After that, fold each segment in half. Then, glue the loops securely along the outer edge of the jute circle. Finally, brush through the cotton with a fine comb to create a fluffy fringe.
4. Scandi Black Geometric Line Patterns (Minimalist DIY Jute Coasters)
On the other hand, some crafters prefer a Scandinavian approach to bohemian decor. For instance, adding sharp lines to your diy jute coasters provides a beautiful graphic contrast.

- What you need: A plain jute coaster, matte black multi-surface paint, an ultra-fine detail brush.
- How to make it: First, ensure your jute surface is smooth and clean. Next, load your fine brush with a minimal amount of black paint. Then, gently paint fine, delicate geometric hashes, small triangles, or a clean plus sign (+) directly over the rustic coils.
5. Cowrie Shell Boho Fringe Coaster
Undoubtedly, nothing captures the relaxing energy of beach-boho styling quite like genuine seashells. Moreover, this coastal jute rope coaster looks incredibly premium. For instance, it works perfectly as a summer catch-all tray.
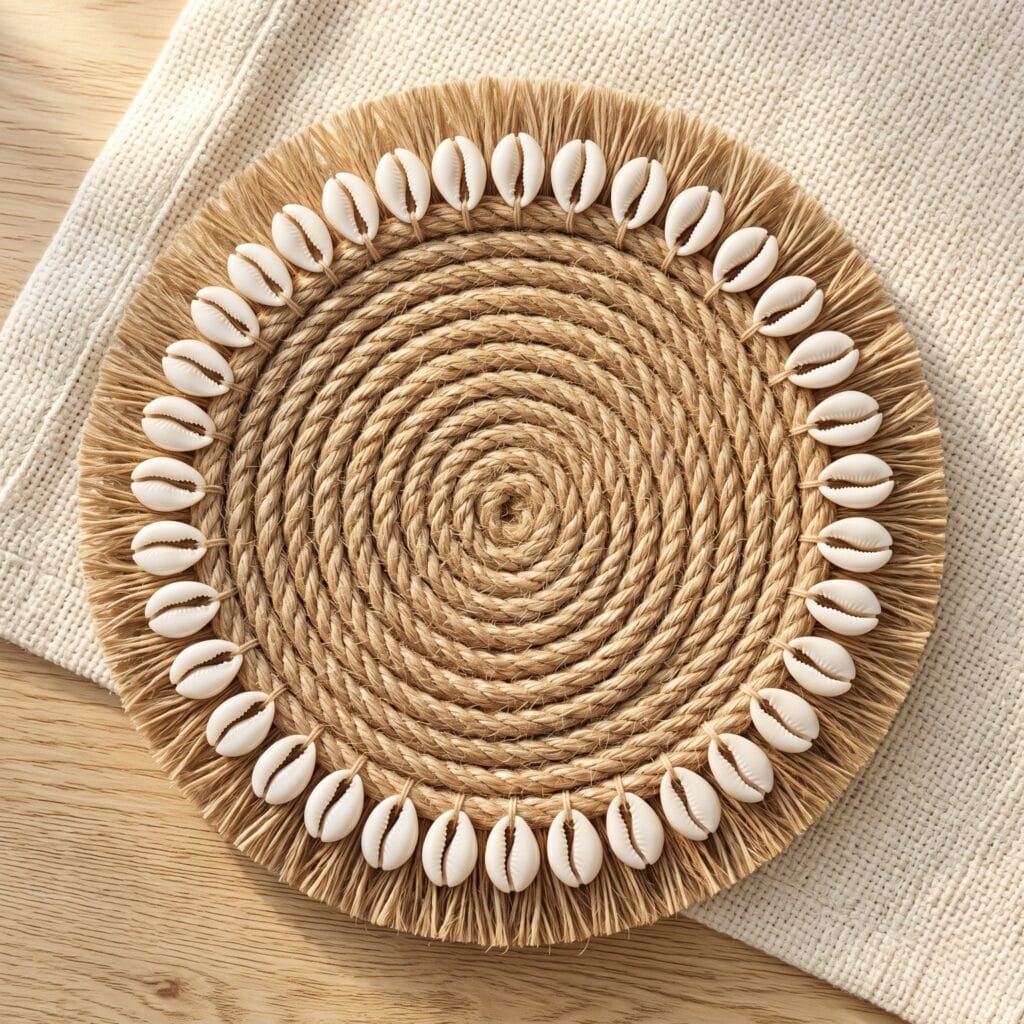
- What you need: Jute rope, 12 small pre-drilled cowrie shells, strong linen thread.
- How to make it: First, construct a standard coiled jute coaster using hot glue. Afterward, use your linen thread to stitch the cowrie shells evenly around the outermost ring of the rope. Meanwhile, space them roughly half an inch apart.
6. Color-Blocked Pastel Designs (Structured DIY Jute Coasters)
Alternatively, you do not have to paint the surface after coiling. Instead, this advanced technique introduces different colored fibers directly into the winding process. Consequently, this creates a seamless, modern style for your diy jute coasters.
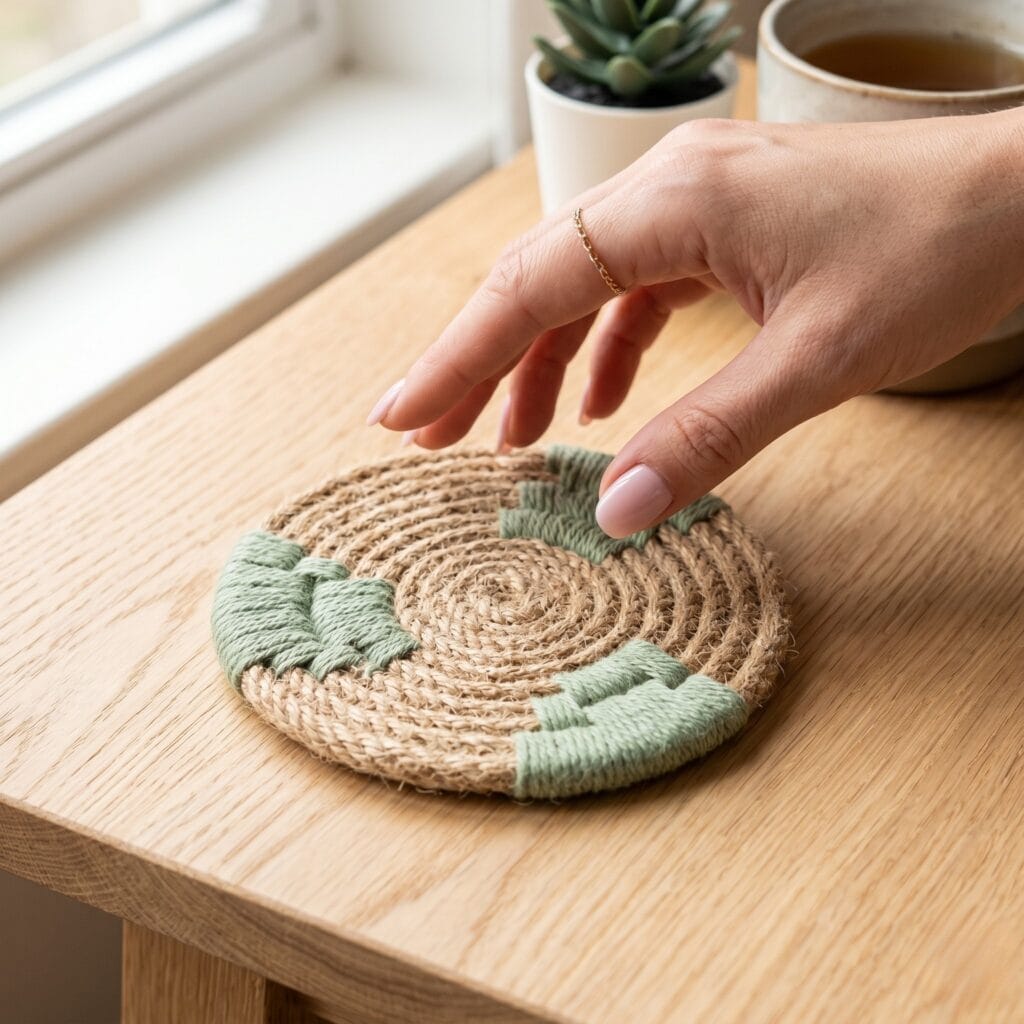
- What you need: Jute rope, soft sage green yarn or pastel pink embroidery thread.
- How to make it: To start, coil your natural jute rope normally. However, after three rows, wrap a section of the rope tightly with your sage green yarn. Crucially, do this before gluing down the next spiral. As a result, this creates beautiful blocks of color built right into the structure.
7. Square Coiled Minimalist Mat
In addition, you can easily move away from traditional circular shapes for a new jute rope coaster. To do this, try bending your rope into crisp angles. Clearly, it offers a highly modern, geometric alternative.
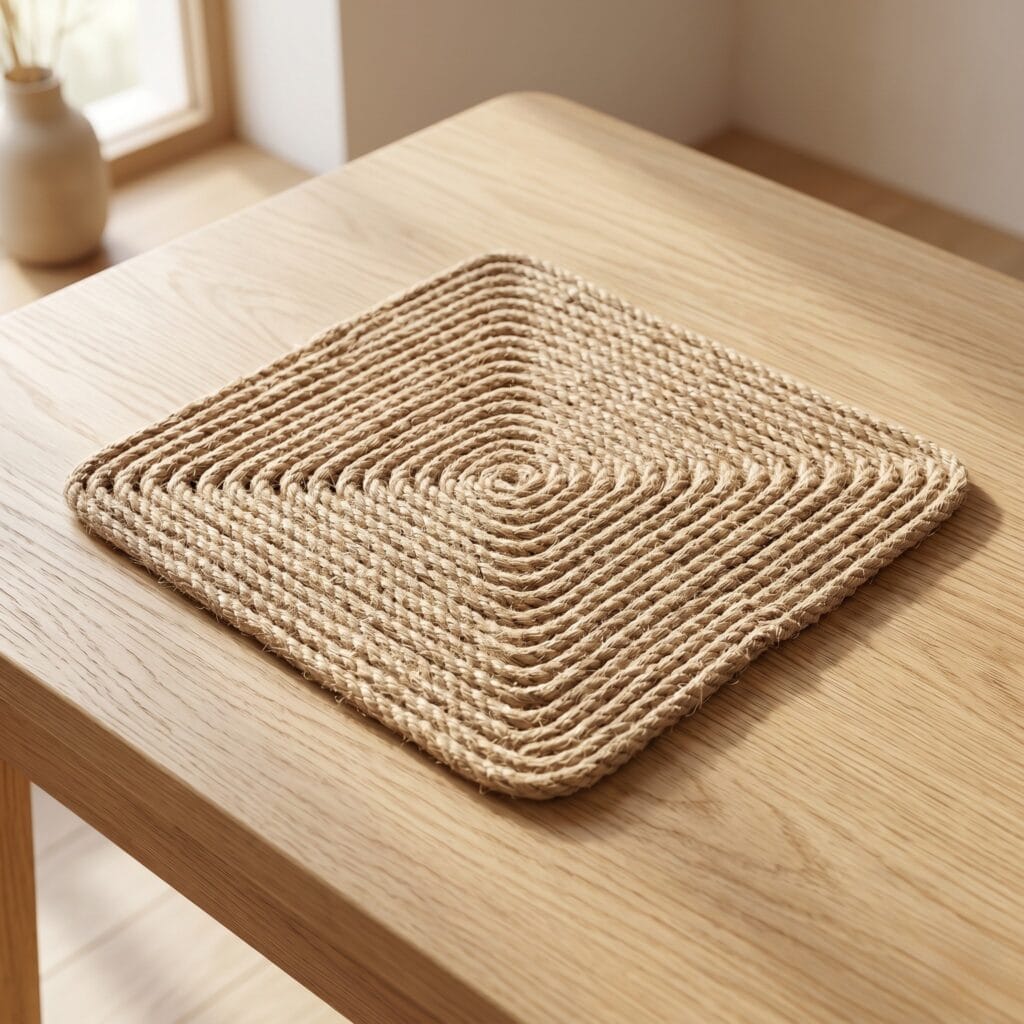
- What you need: 5mm thick jute rope, hot glue, a metal ruler.
- How to make it: To start, bend the end of your rope into a small 1-inch straight line. Then, fold it sharply back on itself. Afterward, continue folding and gluing the rope around this central core. Finally, use a ruler to press the edges into a perfect square layout as you expand.
8. Wooden Bead Trimmed Edges (Textured DIY Jute Coasters)
Certainly, adding raw timber accents to your diy jute coasters is a fantastic idea. Moreover, it introduces a lovely three-dimensional silhouette. Consequently, this detail grounds your coffee table vignette beautifully.
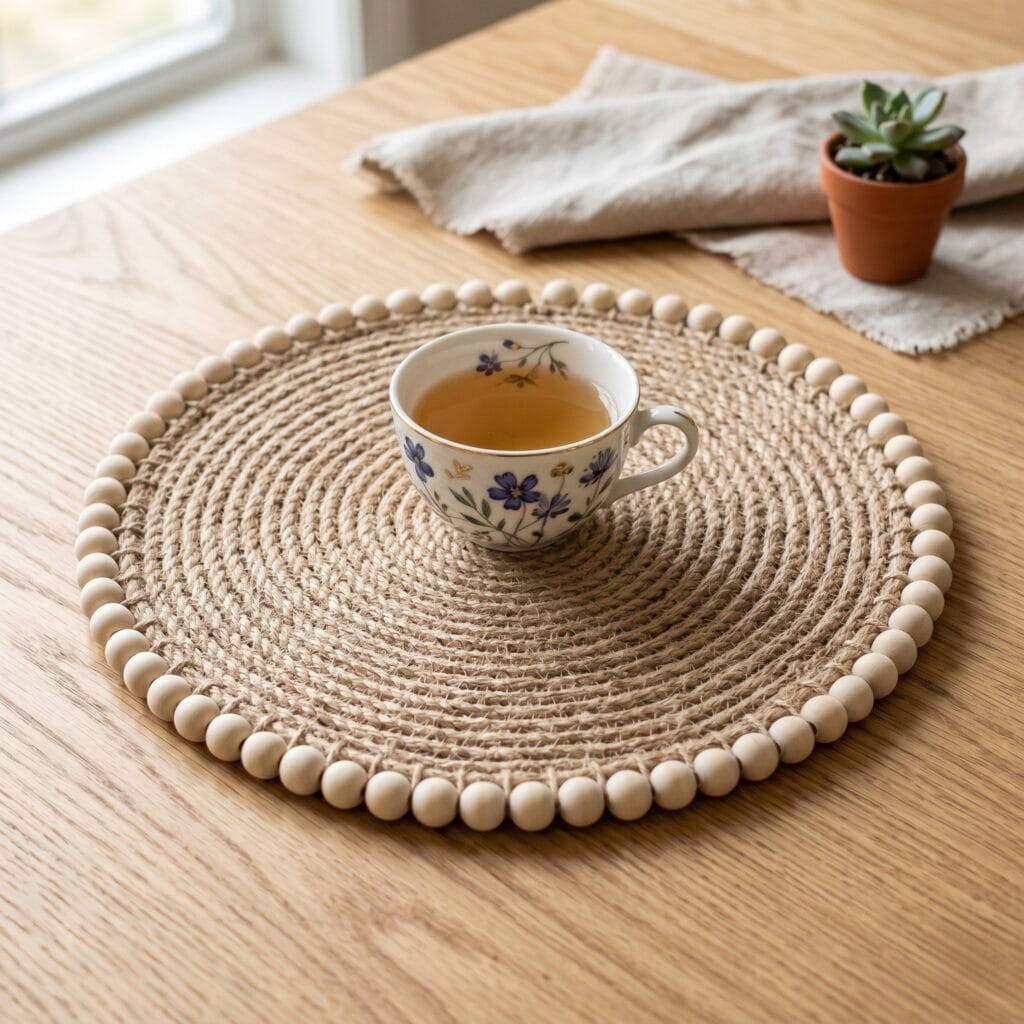
- What you need: Coiled jute coaster, small 6mm unvarnished wooden beads, hot glue or wire.
- How to make it: Initially, complete your main jute spiral structure. Next, string your raw wooden beads onto the final outer tail of the jute rope. After that, do this before gluing that last row down around the perimeter of the coaster.
9. Embroidered Botanical Jute Coaster
Of course, you might enjoy the rhythmic precision of needlework. If so, treating a flat jute rope coaster as a canvas for simple embroidery is a highly rewarding process.
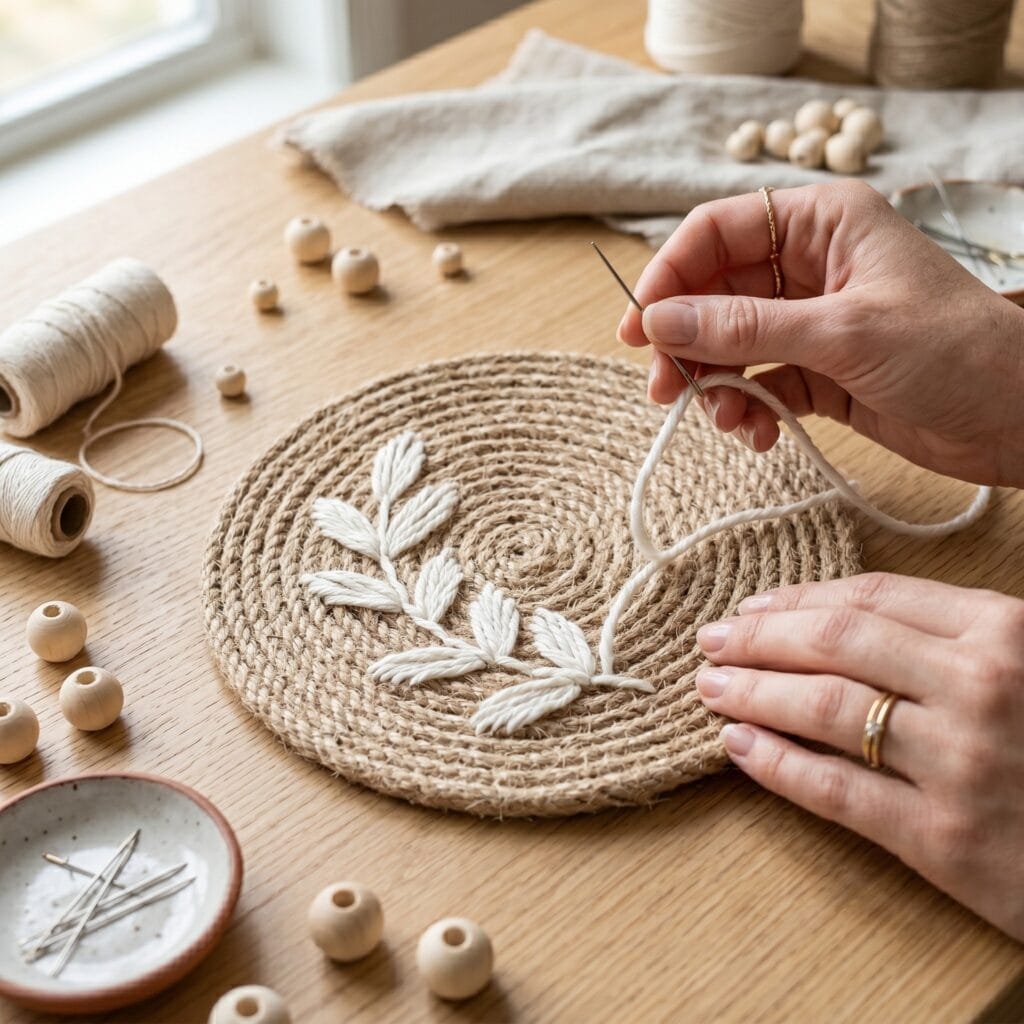
- What you need: A completed stitched jute coaster, thick white cotton yarn, a tapestry needle.
- How to make it: To begin, map out a very simple leaf silhouette in your mind. Then, use your needle to thread the white yarn up and down through the jute coils. Finally, execute simple straight stitches to form a minimalist botanical sprig.
10. Lace-Overlay Romantic Aesthetic (Elegant DIY Jute Coasters)
In conclusion, this is a beautiful, vintage-inspired interpretation. Specifically, it combines rugged utility rope with delicate, intricate fabrics. As a result, you get a high-contrast feminine finish on these diy jute coasters.
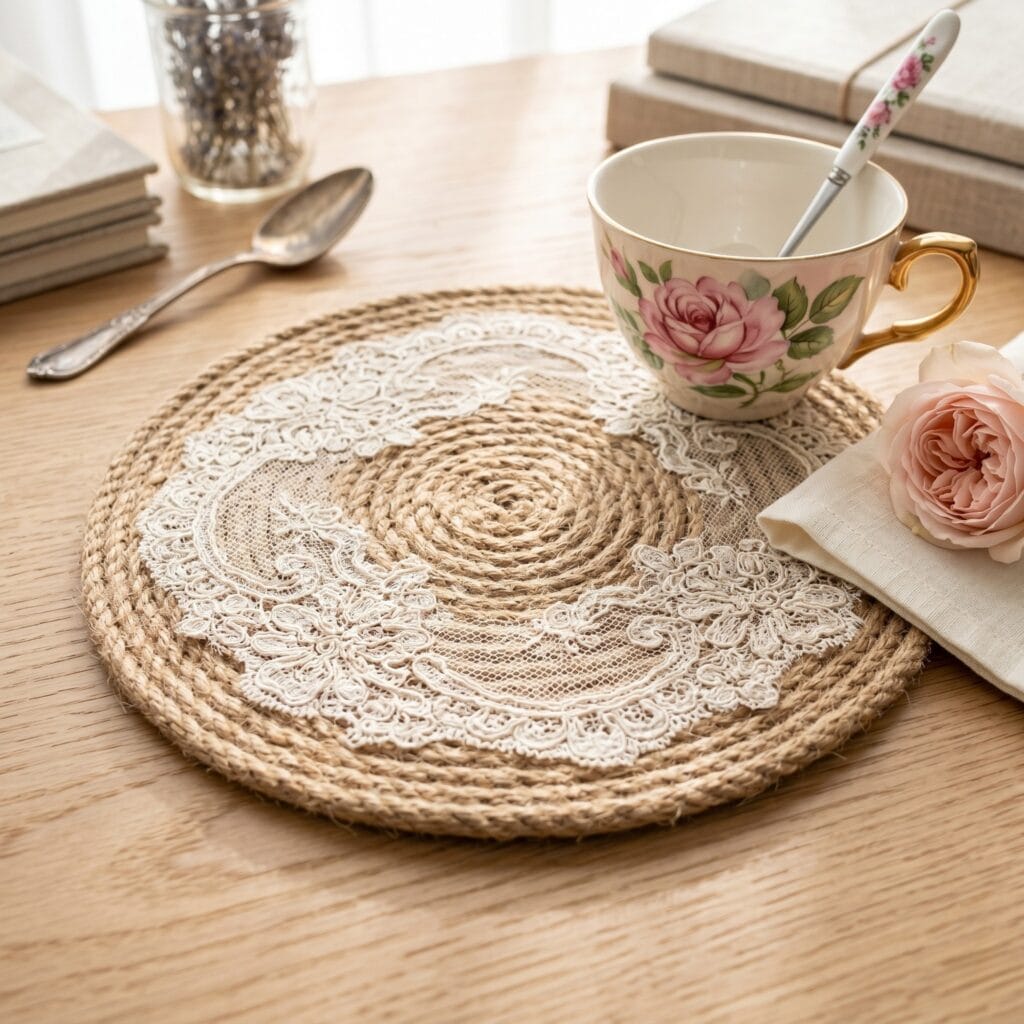
- What you need: Jute rope, a scrap of cream French lace fabric, clear matte decoupage glue.
- How to make it: First, assemble a flat jute coaster using your glue gun. Next, cut a circular piece of lace. Meanwhile, make sure it perfectly matches the diameter of your coaster. Finally, brush a thin layer of decoupage glue over the jute. After that, press the lace down firmly and let it dry completely.
Important Crafting Safety Note:
When undertaking a jute rope coaster tutorial, always handle hot glue guns with extreme caution. Because jute is a fibrous, porous material, hot glue can easily seep through the gaps between the strands and cause painful burns on your fingertips. To prevent this, consider using silicone finger protectors or the flat side of a wooden spoon to press the coils together while the adhesive cools down completely.