This guide takes ten plain terracotta pots from bare clay to finished hand painted terracotta pots: retro half-circles, painted lemons, a single-line face, desert bands, terrazzo flecks, taped arches, a distressed wash, daisies, chevrons, and gold moons on black. Every design lists its own supplies and sits behind the same six-step shared prep.
Affiliate Disclosure: This post contains affiliate links. As an Amazon Associate, I earn from qualifying purchases. If you buy through these links, I may earn a commission at no additional cost to you.
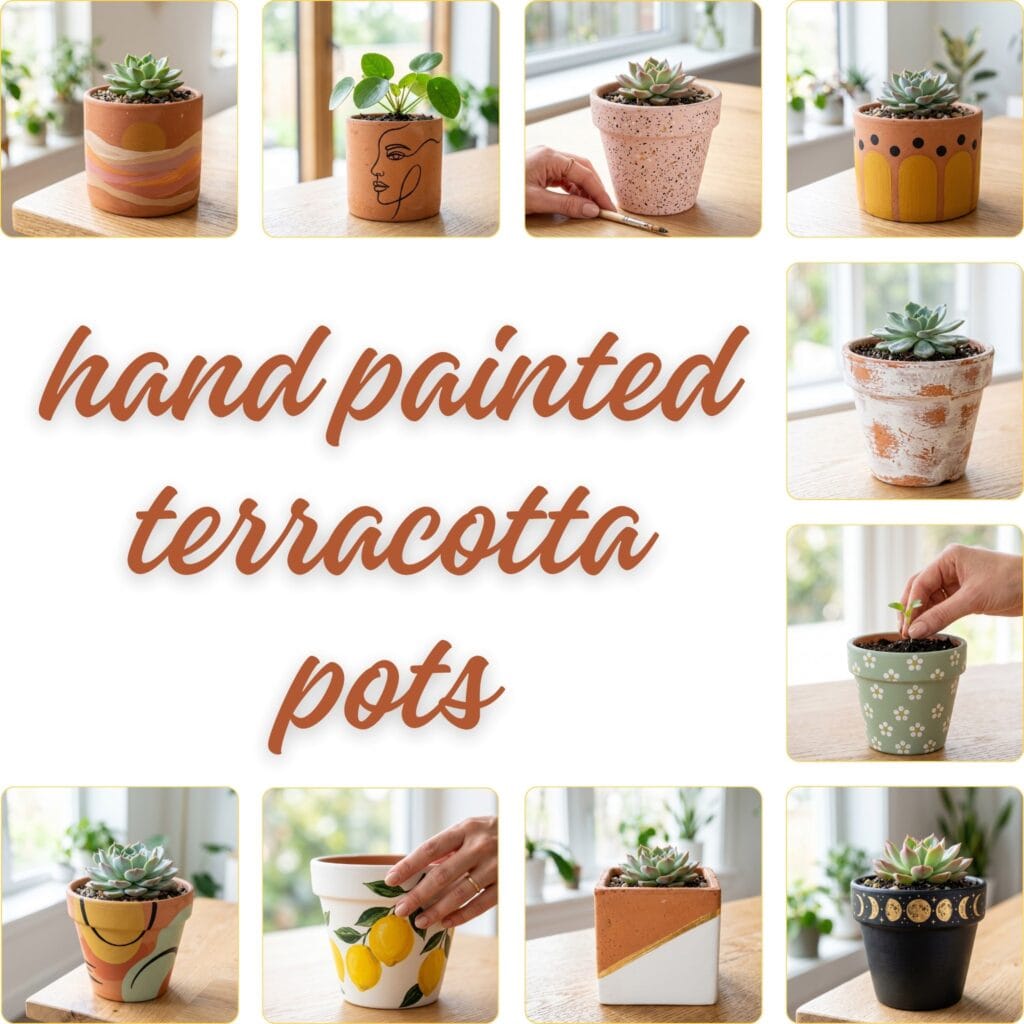
Start with the shared prep — smooth, wash, seal the inside and base — then open the supply list for the design you picked; the last prep step names which designs also need gesso, tape, the paint pen, gold paint, or the coarse sanding block.
Pro-Tip
Seal the inside and base of the pot before planting, and save the exterior clear topcoat until the paint has fully cured. Similarly, do you love mixing earthy textures with glass? Then, explore our studio guide on Sea Glass Chimes!
10 Hand Painted Terracotta Pots to Style
Supplies Needed: Unglazed Terracotta Pots with Drainage Holes, Outdoor Multi-Surface Acrylic Paint Set, Metallic Gold Acrylic Paint, Opaque Black Acrylic Paint Pen, Exterior-Rated Clear Acrylic Sealer
Essential Materials & Tools
✨ Core Supplies
- Unglazed Terracotta Pots with Drainage Holes — Provides natural porous clay planters in multiple sizes for testing patterns, creating coordinated plant groupings, and painting all ten styles. | Check Unglazed Terracotta Pots with Drainage Holes on Amazon
- Outdoor Multi-Surface Acrylic Paint Set — Durable opaque pigments adhere well to prepared clay and provide the mustard, sage, pink, black, white, yellow, and earthy shades used throughout the designs. | Check Price on Amazon
- Artist Detail Paintbrush Set — A mix of liner, round, flat, and angled brushes supports lemon leaves, daisy petals, narrow horizon bands, and larger base coats. | See Artist Detail Paintbrush Set on Amazon
- 220-Grit Sanding Sponge Set — Smooths factory rim edges and small clay imperfections before primer or paint is applied. | Find on Amazon
- Exterior-Rated Clear Acrylic Sealer — Exterior-rated topcoat that protects the finished painted exterior from handling, humidity, and light splashes; confirm the label states exterior/outdoor use. Preserves a matte hand-painted appearance. | Check Exterior-Rated Clear Acrylic Sealer on Amazon
- Waterproof Terracotta Sealer — Seals porous clay before decorating to limit moisture migration that can cause paint bubbling, discoloration, or peeling. | Check Price on Amazon
- N95 Dust Mask — A fitted N95 mask filters the fine ceramic dust released when sanding dry terracotta. | Check N95 Dust Mask on Amazon
🎨 Design-Specific Supplies (Optional)
- White Acrylic Gesso Primer — Creates a bright, even painting surface for the Mediterranean lemon pot and improves color coverage on porous terracotta. | View White Acrylic Gesso Primer on Amazon
- Opaque Black Acrylic Paint Pen — Makes controlled continuous face profiles, leaf silhouettes, crescent moons, dots, and crisp graphic outlines without loading a detail brush. | Find Opaque Black Acrylic Paint Pen on Amazon
- Metallic Gold Acrylic Paint — Adds warm reflective terrazzo flecks and small celestial details while remaining easy to apply with a fine brush. | See Price on Amazon
- Foam Brush Set — Applies gesso, broad color fields, washes, and clear sealers smoothly with minimal brush streaks. | Explore Foam Brush Set on Amazon
- Low-Tack Painter’s Tape — Masks sharp chevrons, arches, stripes, and color-blocked layouts while reducing the risk of lifting cured paint. | View on Amazon
- Coarse Sanding Block — A coarse abrasive strips the white wash for the distressed Wabi-Sabi finish, distinct from the fine 220-grit sponge. | Check Coarse Sanding Block on Amazon
Two prep steps also rely on household supplies you probably already own: mild dish soap, warm water, and one clean rag or damp cloth for washing the pots and wiping away sanding dust.
Shared Prep for All Ten Pots
Six shared steps cover what every pot needs before the design work begins. The last step tells you exactly which of the ten designs need gesso, tape, the paint pen, gold paint, or the coarse sanding block.
- Smooth the rims. Wear the N95 dust mask and rub every pot rim and base with the 220-grit sanding sponge until smooth, then wipe the dust away. Fine ceramic dust is exactly why the mask matters.
- Wash and dry. Rinse each pot with mild soap and water and let it dry fully — paint adheres only to clean, dry clay.
- Seal the inside and base. Brush the waterproof terracotta sealer onto the inside walls and the base only, choosing a sealer whose label explicitly permits interior planter use once fully cured. Let it cure for the full time on the label, usually 24-48 hours, and keep the pot away from soil and plants until it is fully cured.
- Check what your design needs. Gesso: designs 2 and 8. Painter’s tape: designs 6 and 9. Black paint pen: designs 1, 3, and 6. Metallic gold paint: designs 5 and 10. Coarse sanding block: design 7 only. Everything else comes from the core supplies.
- Paint in thin coats. Every painted design uses two thin coats of outdoor acrylic, 30-45 minutes apart; let the last coat feel dry to the touch before handling the pot.
- Cure, then topcoat. Let the exterior paint cure per the paint label, about 24 hours, then brush on the exterior-rated clear sealer to the outside only — a thin coat over raw clay and linework, a full coat over painted or distressed surfaces. The interior and base stay protected by the sealer from step 3.
Paint Layout and Tape Tips
Paint-layout guide: Plan each layout before opening a paint bottle. Set the widest element first — the half-circles, bands, or arches — then mark the remaining space with light pencil ticks so repeats stay even, and keep every element within one hand-width of its neighbors so you can turn the pot without touching wet paint.
Tape placement: Press each strip down firmly along its whole length before painting, especially at the edges, and overlap the ends of neighboring strips instead of leaving gaps so paint cannot reach the pot between pieces.
Tape removal: Peel tape at the tack stage your paint label recommends — while the last coat is still slightly tacky, not after it has dried fully — pulling the tape back on itself at a low angle so the lines stay crisp.
1. The Mid-Century Abstract Hand Painted Terracotta Pots
Supplies Needed: Unglazed Terracotta Pots with Drainage Holes, Outdoor Multi-Surface Acrylic Paint Set, Opaque Black Acrylic Paint Pen, Artist Detail Paintbrush Set, Exterior-Rated Clear Acrylic Sealer
This design captures the nostalgia of retro rooms: overlapping abstract half-circles in mustard, terracotta, and soft sage, finished with sharp black crescent lines on a medium pot (12-15 cm).
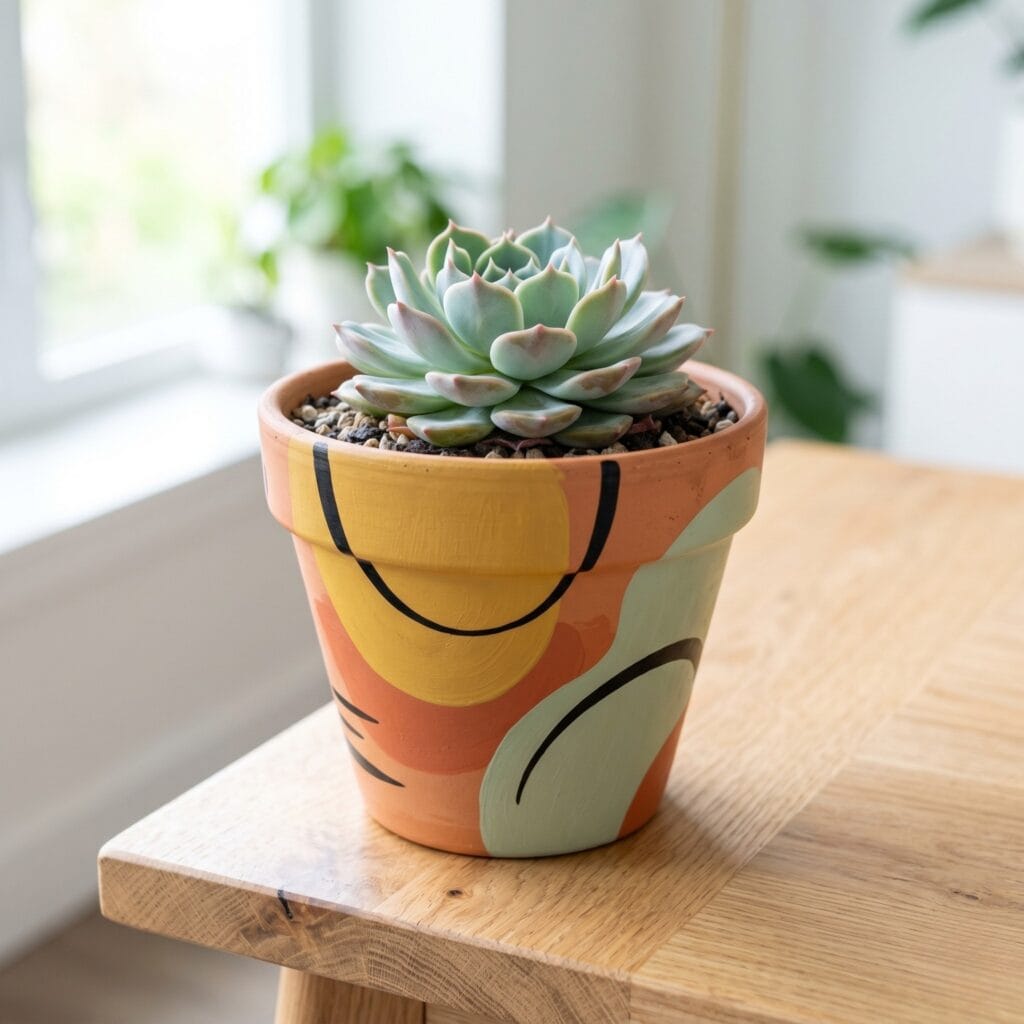
- Base shapes. Work with mustard, terracotta, and soft sage outdoor acrylic. On a medium pot (12-15 cm), paint overlapping abstract half-circles around the upper two thirds — one color per shape, two coats each, 30-45 minutes apart.
- Let it set. Let the base shapes dry at least an hour before linework so the pen does not drag the paint.
- Black crescents. With the opaque black paint pen, draw sharp crescent lines along the edges of the shapes; keep the strokes thin and confident, one pass.
- Second pass. Where the black looks uneven, go over it once more after 15 minutes and neaten any wobbly paint edges with a fine brush.
2. The Mediterranean Lemon Grove Hand Painted Terracotta Pots
Supplies Needed: Unglazed Terracotta Pots with Drainage Holes, White Acrylic Gesso Primer, Outdoor Multi-Surface Acrylic Paint Set, Artist Detail Paintbrush Set, Exterior-Rated Clear Acrylic Sealer
Embrace a sleek coastal aesthetic — a bright white gesso base makes round yellow lemons and dark green leaves pop on a medium pot.
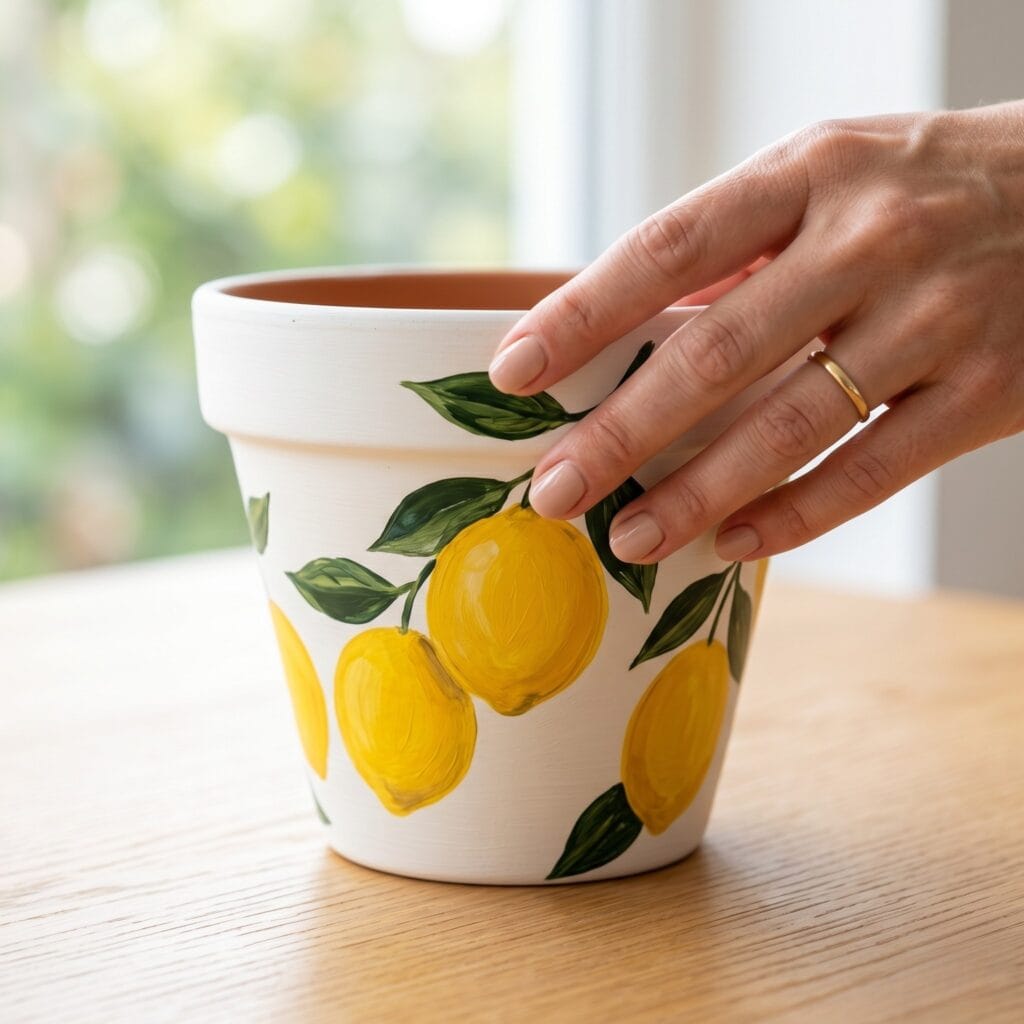
- White gesso base. Brush the entire outside of a medium pot (12-15 cm) with white acrylic gesso — two thin coats, one hour apart — so the fruit colors stay bright on porous clay.
- Place the lemons. Space three to five lemon clusters evenly around the widest part of the pot; leave generous white space between them.
- Paint the fruit. With a fine detail brush, fill each lemon shape with yellow outdoor acrylic (two coats, 30 minutes apart) and add two or three dark green leaves beside each one.
- Outline. Once the yellow is touch-dry, outline each lemon lightly with olive green for definition; keep the lines loose.
3. Scandinavian Ribbed Line Art
Supplies Needed: Unglazed Terracotta Pots with Drainage Holes, Opaque Black Acrylic Paint Pen, Exterior-Rated Clear Acrylic Sealer
Reduce visual clutter instantly: keep the ribbed orange clay unpainted and let a single black line do all the work on a small ribbed pot (10-12 cm).
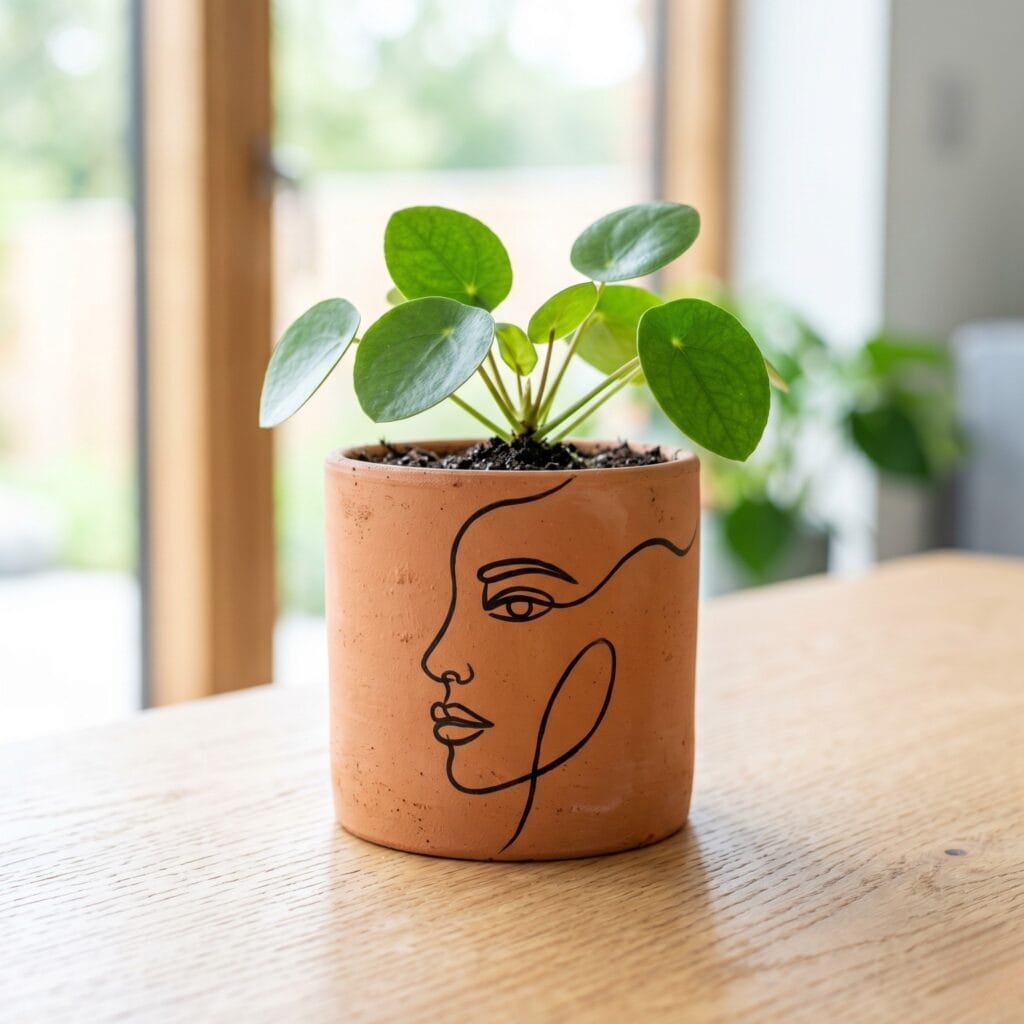
- Keep the clay raw. Leave the ribbed orange clay unpainted on the small pot (10-12 cm) — the negative space is the design. Wipe the surface clean and dry before drawing.
- Draw the profile. With the opaque black paint pen, draw one continuous face profile around the ribbed middle of the pot, using the ribs as even guides.
- Leaf alternative. Alternatively, draw an abstract leaf silhouette in the same single-line style if you prefer a botanical motif.
- Let the ink set. Let the pen lines dry 15-20 minutes so they do not smear when handled.
4. Terracotta Desert Horizon
Supplies Needed: Unglazed Terracotta Pots with Drainage Holes, Outdoor Multi-Surface Acrylic Paint Set, Artist Detail Paintbrush Set, Exterior-Rated Clear Acrylic Sealer
This treatment introduces a relaxing desert scene: warm clay and muted pink wavy bands with a solid ochre sun, brushed freehand across a medium pot.
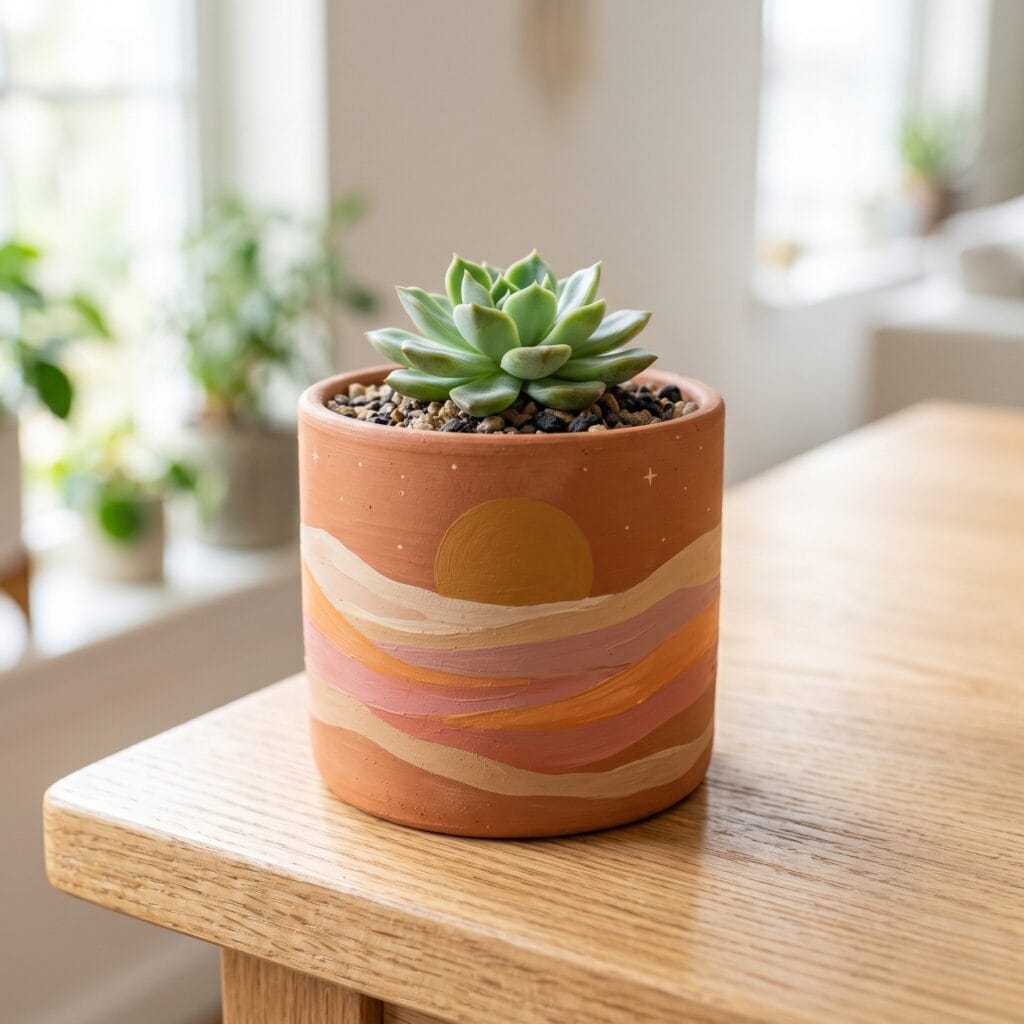
- Mix the palette tones. Mix warm clay, muted pink, and ochre from the outdoor paint set, thinning each color with a drop of water so the bands flow smoothly.
- Brush the bands. Freehand four to six horizontal wavy bands around the pot — one color per band, following a gentle up-and-down line like rolling dunes.
- Second coat. Apply a second coat over each band after 30-45 minutes; keep the edges soft where two colors meet.
- Paint the sun. Add a solid ochre sun circle on the horizon band and let it dry for an hour.
5. Terrazzo Mosaic Speckle Hand Painted Terracotta Pots
Supplies Needed: Unglazed Terracotta Pots with Drainage Holes, Outdoor Multi-Surface Acrylic Paint Set, Metallic Gold Acrylic Paint, Artist Detail Paintbrush Set, Exterior-Rated Clear Acrylic Sealer
Merge stone textures with simple techniques — a blush pink base flicked with charcoal and metallic gold specks gives the classic terrazzo look on a medium pot.
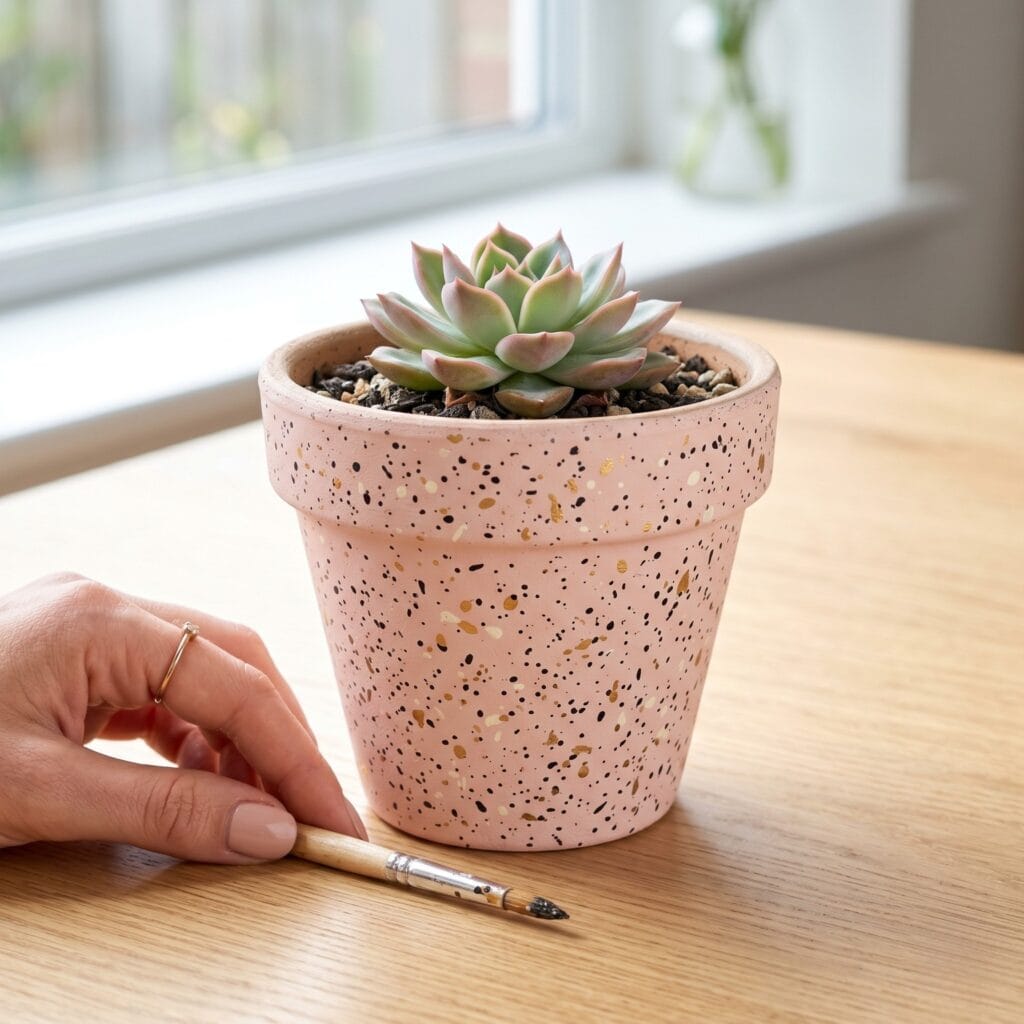
- Blush base. Paint the whole medium pot with a blush pink base — two thin coats, 30-45 minutes apart, right up to the rim.
- Charcoal flecks. Dip a stiff detail brush into charcoal paint and flick the bristles with your finger to spray fine specks across the base.
- Gold flecks. Repeat with metallic gold acrylic for a sparser second layer of specks; this is what gives the terrazzo its quartz-like depth.
- Clean the rim. Wipe the rim clean before the paint sets and touch up any bare spots after 30 minutes.
6. The Mustard Retro Arch Hand Painted Terracotta Pots
Supplies Needed: Unglazed Terracotta Pots with Drainage Holes, Outdoor Multi-Surface Acrylic Paint Set, Opaque Black Acrylic Paint Pen, Low-Tack Painter’s Tape, Exterior-Rated Clear Acrylic Sealer
This pattern celebrates bold geometry with zero effort: mustard yellow arches masked with tape, each topped with a single black dot.
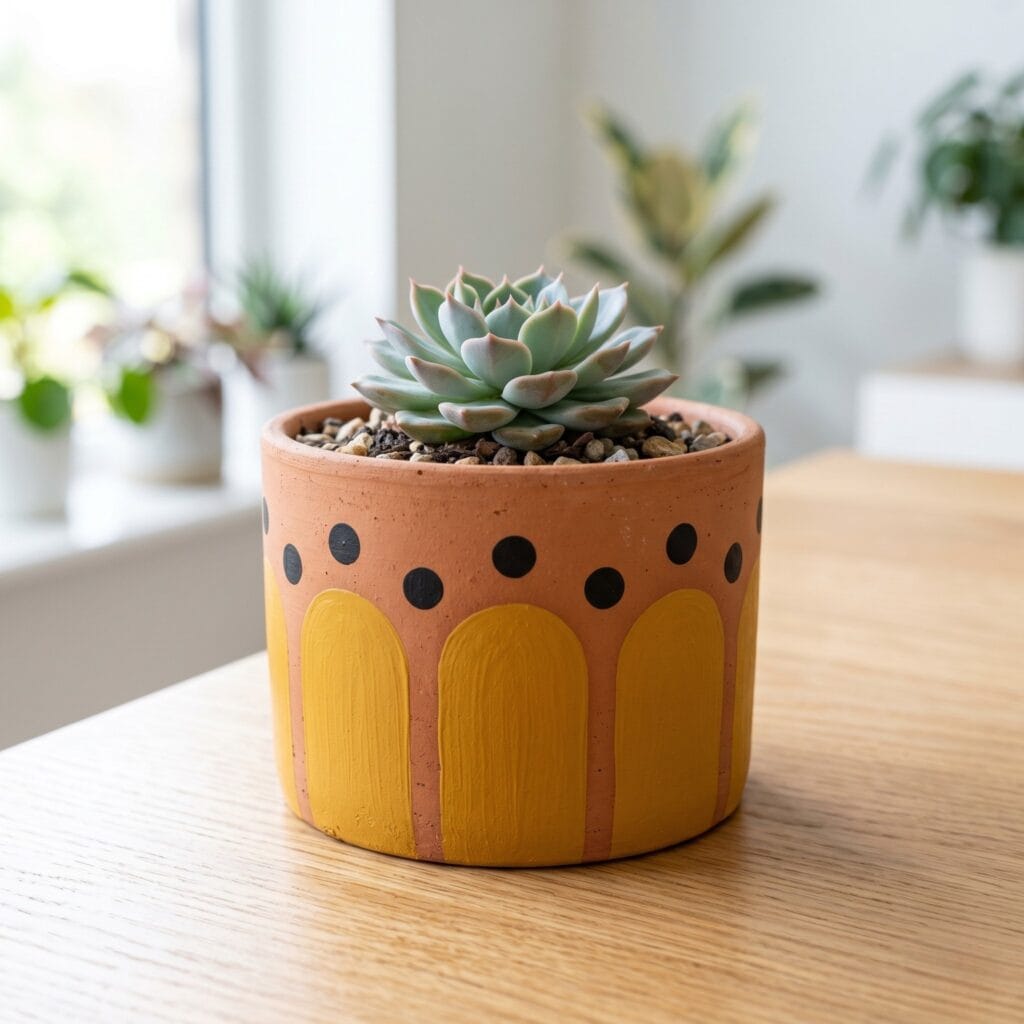
- Tape the arches. Lay strips of low-tack painter’s tape vertically around the medium pot, then curve the top edges with shorter tape pieces to form rounded arch tops; press every edge down firmly.
- Fill with mustard. Apply mustard yellow outdoor acrylic inside each arch — two coats, 30 minutes apart — staying within the tape.
- Black dots. After 15 minutes, add a single black dot above each arch with the opaque black paint pen.
- Peel the tape. Peel the tape away while the final coat is still slightly tacky so the arch edges stay crisp; touch up any bleed with the pen.
7. Distressed Wabi-Sabi Wash
Supplies Needed: Unglazed Terracotta Pots with Drainage Holes, Outdoor Multi-Surface Acrylic Paint Set, Foam Brush Set, Coarse Sanding Block, Exterior-Rated Clear Acrylic Sealer
This technique mimics vintage antique pottery: a thin white wash distressed back to raw clay until the natural terracotta shows through.
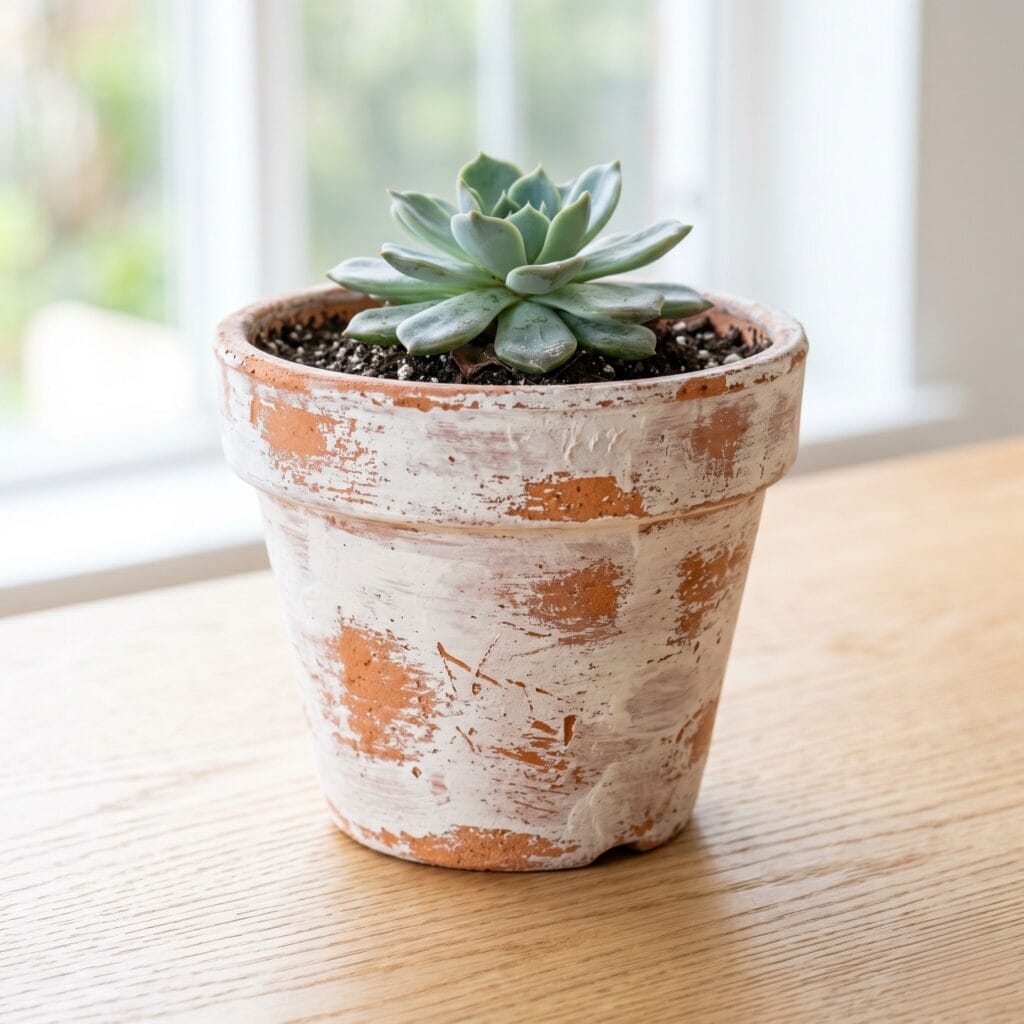
- Thin the white wash. Thin white outdoor acrylic with water — roughly one part water to one part paint — so the coat runs translucent.
- Wash unevenly. With the foam brush, sweep the thin white wash unevenly across the pot: some areas heavy, some nearly bare. Let it dry completely, about an hour.
- Distress with the coarse block. Take the coarse sanding block and scratch away sections of the white coat until the natural clay shows through — press light for subtle wear, heavy for a chipped look.
- Dust off. Wipe away the sanding dust with your hand or a dry rag before the next step; sand in a ventilated spot.
8. Whimsical Daisy Meadow Hand Painted Terracotta Pots
Supplies Needed: Unglazed Terracotta Pots with Drainage Holes, White Acrylic Gesso Primer, Outdoor Multi-Surface Acrylic Paint Set, Artist Detail Paintbrush Set, Exterior-Rated Clear Acrylic Sealer
This combination is a fantastic project for beginners: a sage green pot scattered with simple five-petal daisies — white petals, yellow centers.
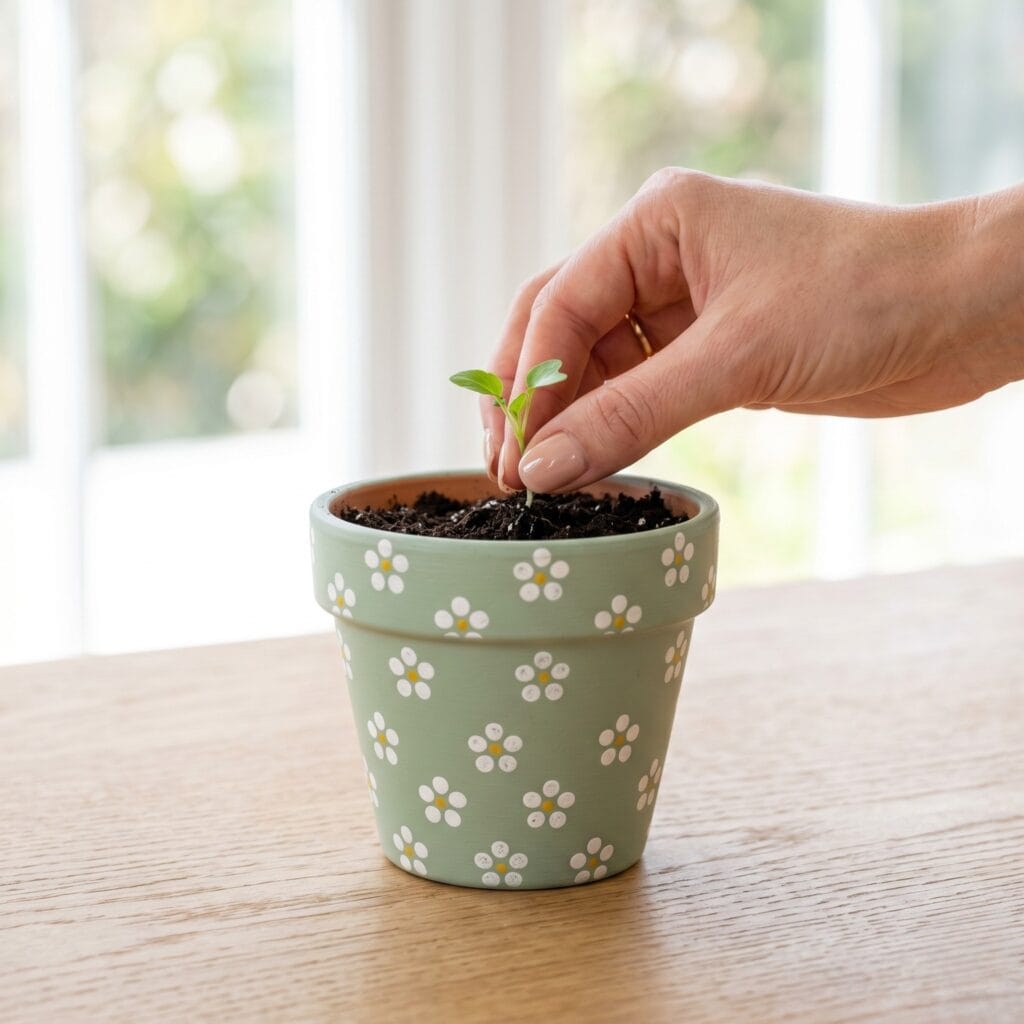
- Prime first. Brush one even coat of white acrylic gesso over the medium pot and let it dry an hour — the sage green stays true over white.
- Sage background. Apply two smooth coats of sage green outdoor acrylic over the gesso, one hour apart.
- Paint the daisies. Load the bristles of a detail brush with white paint and draw five short petals radiating from each center point — small even strokes, spaced in clusters around the pot.
- Yellow centers. Once the petals dry, about 30 minutes, dip the handle end of the detail brush into yellow paint and press one dot into each flower center — the round handle tip makes a cleaner dot than the bristles.
9. Geometric Chevron Dip
Supplies Needed: Unglazed Terracotta Pots with Drainage Holes, Outdoor Multi-Surface Acrylic Paint Set, Low-Tack Painter’s Tape, Artist Detail Paintbrush Set, Exterior-Rated Clear Acrylic Sealer
This project pairs modern angles with raw textures: crisp white chevrons cut with painter’s tape around the base of a medium pot.
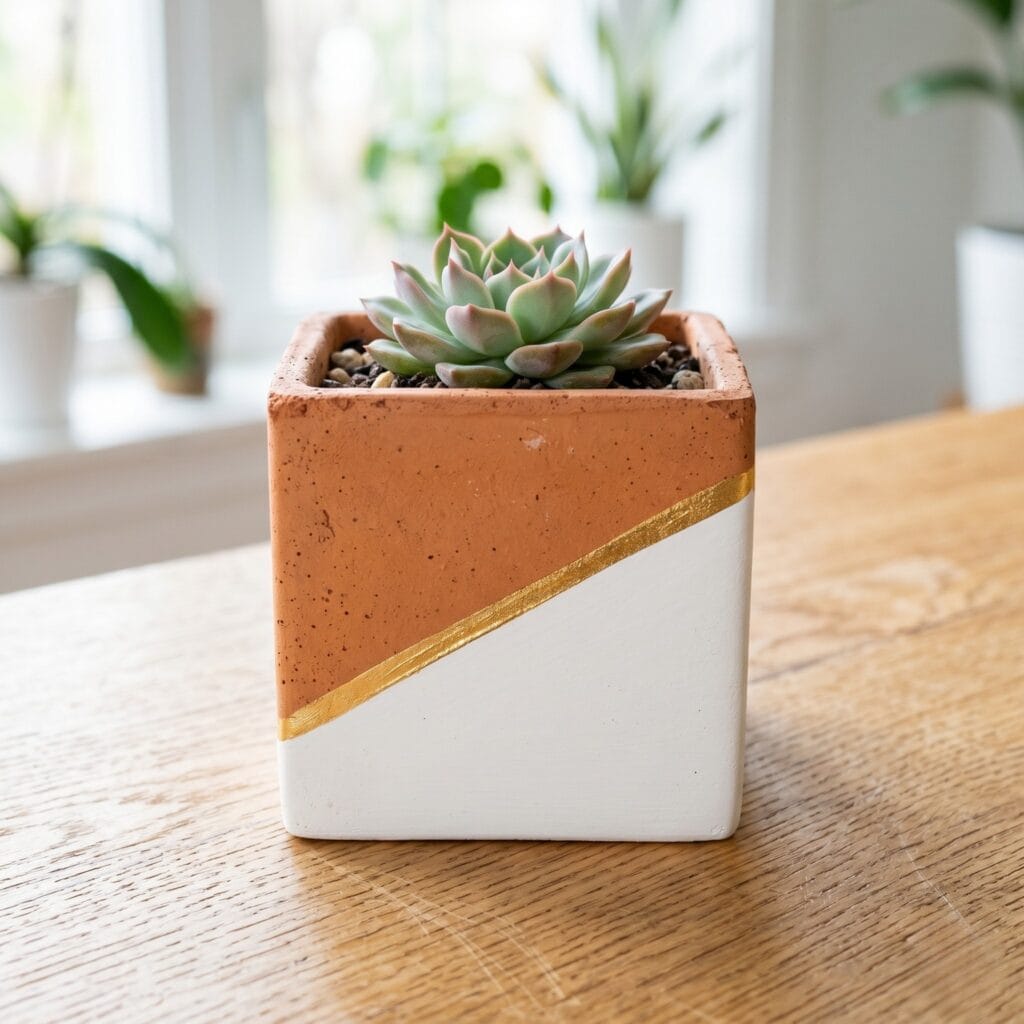
- Tape the chevrons. Wrap low-tack painter’s tape diagonally around the medium pot in a zigzag and press the edges down where the paint will cross.
- White dip. Paint the taped bottom section with crisp white outdoor acrylic — two coats, 30 minutes apart.
- Peel. Remove the tape while the last coat is still slightly tacky so the chevron edges stay sharp.
- Fix bleeds. Neaten any paint that bled under the tape with a fine brush dipped in the base tone.
10. The Celestial Moon Phase Hand Painted Terracotta Pots
Supplies Needed: Unglazed Terracotta Pots with Drainage Holes, Outdoor Multi-Surface Acrylic Paint Set, Metallic Gold Acrylic Paint, Artist Detail Paintbrush Set, Exterior-Rated Clear Acrylic Sealer
This mystical theme rings a medium pot with twelve golden moons in a repeating crescent-to-gibbous motif over a matte black base — a celestial piece for dark shelves. Also, if you love creating face ornaments, view our guide on Clay Mask Ideas!
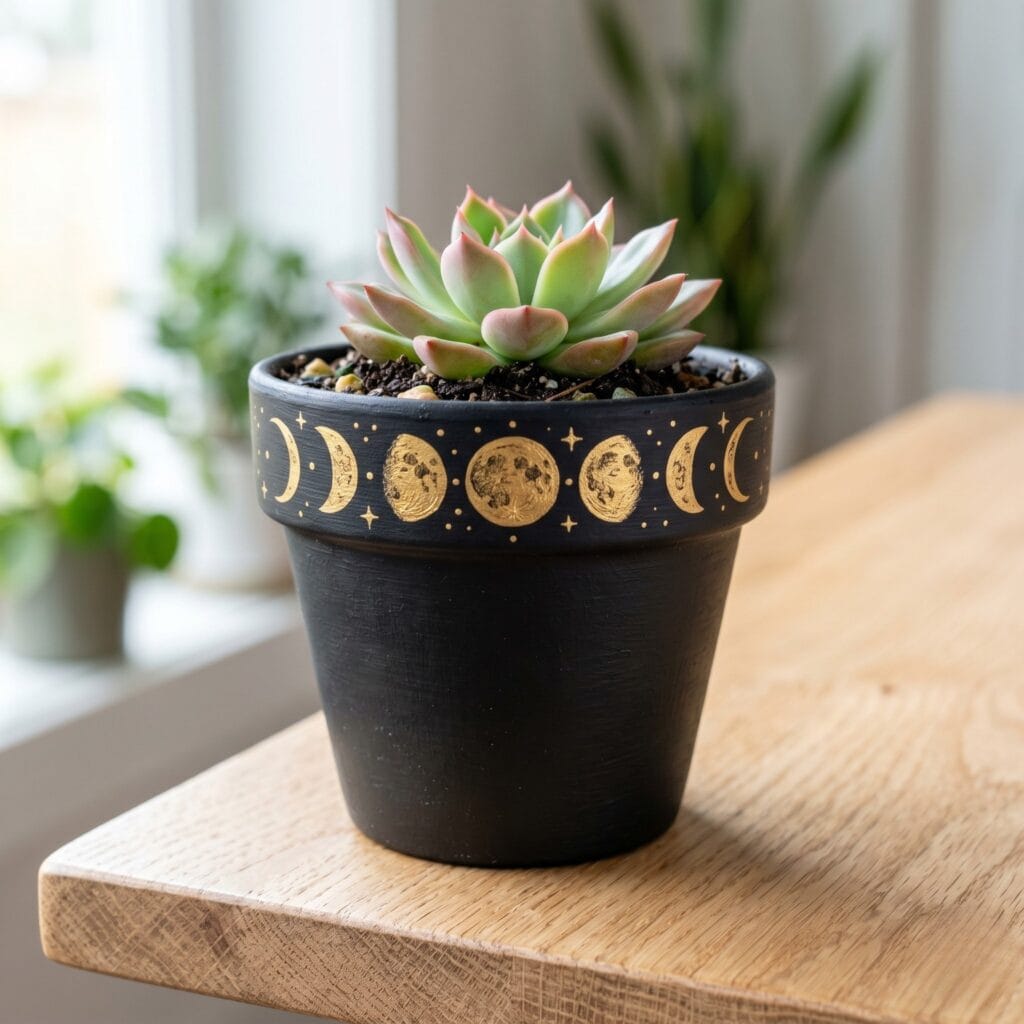
- Matte black base. Coat the entire exterior of a medium pot (12-15 cm) with matte black outdoor acrylic — two even coats, 45 minutes apart — leaving the inside untouched.
- Mark the moons. Space twelve small marks at the same height around the rim: divide the rim into four quarters first, then add two marks evenly between each pair of quarter marks. This is a decorative repeating moon motif, not twelve distinct lunar phases.
- Paint the moons. With a fine detail brush and metallic gold acrylic paint, fill each mark as a small circle, crescent, or gibbous shape.
- Second gold coat. Add a second gold coat after 30 minutes so the metallic reads bright against the black.
Styling Your Hand Painted Terracotta Pots
Group two or three finished hand painted terracotta pots on a tray, or pair one bold pattern with a raw clay pot so the designs do not compete. Which one did you make? Tell us in the comments.
Working with acrylic mediums and raw clay pots is an extremely enjoyable hobby. Still, safety must guide your studio practice. Always wear a lightweight dust mask when sanding dry terracotta to prevent fine ceramic particles from entering your lungs. Because acrylic paints contain pigments that dry permanently, protect your clothing with an apron and cover your studio table with scrap paper. Finally, keep all chemical sealants and liquid varnishes safely stored out of reach of children and pets!
Important Crafting Safety Notes
Crafting is a rewarding creative activity, but maintaining a safe workshop environment is essential for yourself, your family, and your pets. Please review these vital safety precautions before starting:
• Sanding dust: Always wear an N95 dust mask when sanding dry terracotta — fine ceramic dust irritates the lungs. Sand in a ventilated spot and wipe up the dust with a damp cloth afterwards.
• Paint and sealer ventilation: Work near an open window or fan when painting and sealing, avoid breathing spray mists directly, and follow each product label’s ventilation advice.
• Cure times: Let paint, gesso, and sealers cure for the full time stated on the label before handling the pot heavily or planting in it — dry to the touch is not fully cured.
• Keep sealers away from soil: Do not add soil or plants until the interior sealer has fully cured, and store sealers and solvents away from children, pets, and food-prep areas.
• Tool hygiene: Never use food-preparation utensils or kitchen cookware for paint or sealer; wash brushes separately and keep every chemical container sealed and labelled.
For more detailed guidance on safe crafting practices, liability disclosures, and website usage, please review our Terms and Conditions.
Hand Painted Terracotta Pots FAQ
Do I need to prime terracotta first?
Prep the surface first: sand the rims smooth with an N95 dust mask, wash each pot with mild soap and water, and let it dry fully — paint adheres only to clean, dry clay. Gesso is only needed for the lemon-grove and daisy designs.
How many coats of paint does a pot need?
Two thin coats of outdoor acrylic, 30–45 minutes apart, letting the last coat feel dry to the touch before handling. Let the exterior paint cure about 24 hours before the clear topcoat.
Which sealer goes where?
Brush waterproof terracotta sealer onto the inside walls and base only, choosing a sealer whose label explicitly permits interior use — then apply the exterior-rated clear acrylic sealer to the outside after the paint has cured.
How do I keep painter’s tape lines crisp?
Press each strip down firmly along its whole length, especially at the edges, and overlap neighboring strips instead of leaving gaps so paint cannot reach the pot between pieces. Plan the layout before opening a paint bottle.
“Which of these Hand Painted Terracotta Pots: 10 Easy Ideas You’ll Love ideas are you excited to try first, or do you have a creative tip of your own to share? Drop a comment below—I’d love to hear your thoughts and see what you create!”