This guide builds ten rope crafts from jute, cotton cord, and a hot glue gun: a weighted doorstop, a coaster, a tassel garland, a rope-framed mirror, a square-knot plant hanger, a wrapped vase, a driftwood towel bar, a curtain tieback, a wall pennant, and a loop-knotted trivet. Each project carries its own supply list, exact measurements, and mounting or cure notes.
Affiliate Disclosure: This post contains affiliate links. As an Amazon Associate, I earn from qualifying purchases. If you buy through these links, I may earn a commission at no additional cost to you.
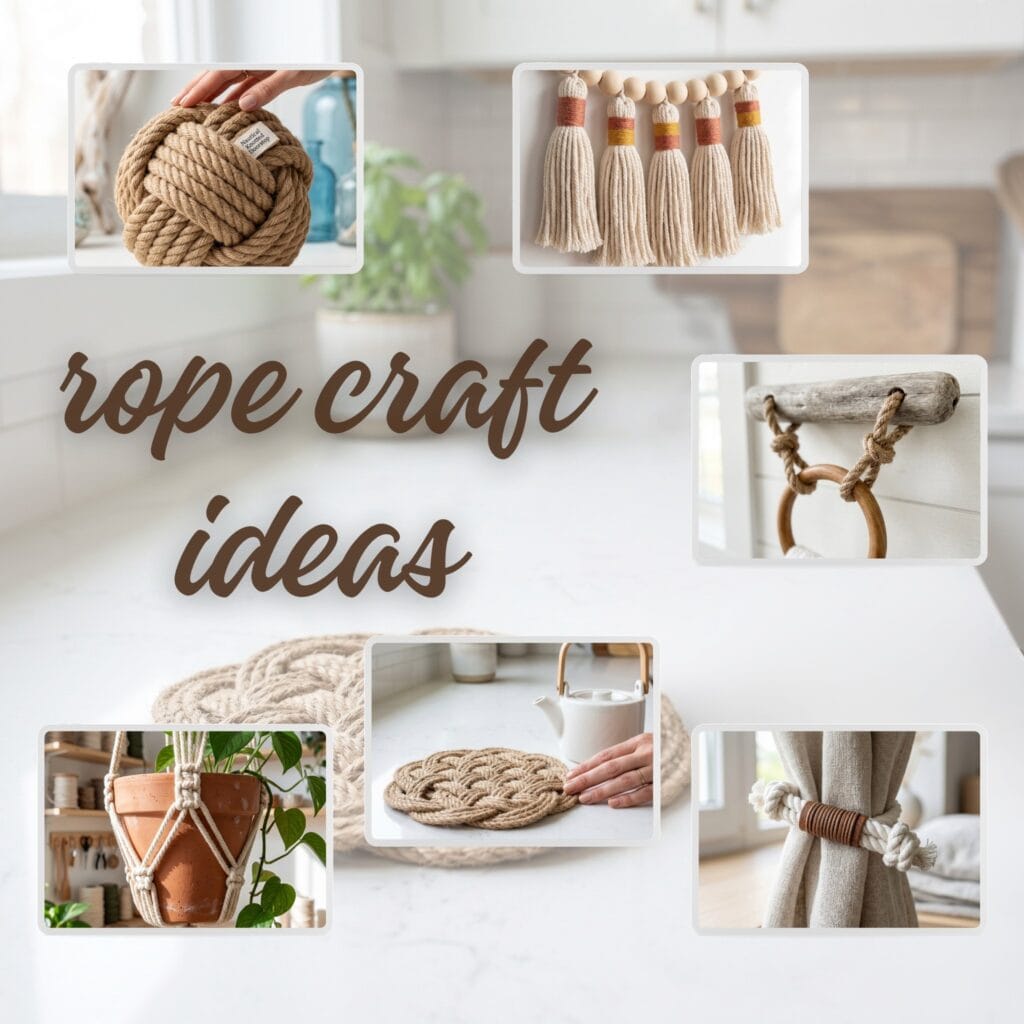
You only need the supplies each list names — scissors and glue sticks for most projects, a drill and wall anchors for the towel bar and pennant. Every rope crafts project here draws on the five core techniques taught above: clean cutting, safe gluing, drilling, mounting, and load testing.
When cutting thick twisted fibers, wrap a piece of clear tape tightly around the rope before you snip it. Indeed, this vital step stops the strands from unravelling instantly. Similarly, do you love matching organic textures with painted surfaces? Then, explore our studio guide on Hand Painted Terracotta Pots!
10 Knotted Rope Craft Ideas to Style
Supplies Needed: Thin Natural Cotton Rope, High-Temperature Hot Glue Sticks, High-Temperature Hot Glue Gun, Fabric Shears
Essential Materials & Tools
✨ Cords, Fibers & Consumables
- Thick Natural Jute Rope — Heavy, rustic rope gives doorstops, mirror frames, vases, towel holders, tiebacks, and trivets a durable coastal texture. | Check Thick Natural Jute Rope on Amazon
- Braided Cotton Macrame Cord — Low-stretch, soft cotton cord is ideal for crisp square knots, tassels, fringe, and modern boho wall accents. | Check Price on Amazon
- Thin Natural Cotton Rope — A flexible, fine rope coils smoothly into flat coasters and small decorative trims without bulky gaps. | View Thin Natural Cotton Rope on Amazon
- Cotton Embroidery Floss Assortment — Colorful floss creates neat wrapped bands around tassels, vases, and rope accents. | Find Cotton Embroidery Floss Assortment on Amazon
- Pastel Acrylic Craft Paint Set — Water-based acrylic paint adds the clean pastel color-block finish used on coiled rope coasters and wall pennants. | See Price on Amazon
- High-Temperature Hot Glue Sticks — Clear, high-bond glue secures rope coils, wrapped rows, mirror borders, and hidden cord ends. | View on Amazon
- Clear Packing Tape — Clear packing tape wrapped around the cut point keeps twisted rope ends from unravelling. | Check Clear Packing Tape on Amazon
- Mirror-Safe Construction Adhesive — Mirror-safe construction adhesive bonds glass to the wood backer without damaging the mirror backing. | Check Mirror-Safe Construction Adhesive on Amazon
🪵 Project Bases & Components
- Round Glass Craft Mirror — A plain round mirror provides the base for a layered jute border and brushed fringe treatment. | See Round Glass Craft Mirror on Amazon
- Clear Glass Cylinder Vases — Straight-sided glass cylinders make rope wrapping easy to align in clean, even rows. | Explore Clear Glass Cylinder Vases on Amazon
- Natural Driftwood Branches — Smooth, dried driftwood pairs naturally with jute to form a relaxed coastal towel holder. | View on Amazon
- Unfinished Round Wood Beads — Natural wood beads add spacing and a warm handmade finish to rope tassel garlands. | Check Unfinished Round Wood Beads on Amazon
- Terracotta Plant Pots with Drainage Holes — Lightweight clay pots nest securely inside a knotted cotton plant hanger and allow excess water to drain. | Check Price on Amazon
- Blank Canvas Wall Pennants — A ready-to-decorate canvas pennant provides a stable backing for geometric rope layouts and painted details. | View Blank Canvas Wall Pennants on Amazon
- Brown Leather Scraps — Scrap brown leather wraps the middle of rope tiebacks for a clean modern finish. | Check Brown Leather Scraps on Amazon
- Thick Craft Felt — Thick craft felt cuts into firm banner shapes that hold glued cord rows without curling. | Check Thick Craft Felt on Amazon
- Smooth River Stones for Weighted Cores — A smooth 400-500 g river stone enclosed inside the monkey’s fist gives the rope doorstop its working weight. | Check Smooth River Stones for Weighted Cores on Amazon
- Plywood or MDF Mirror Backer — A rigid plywood or MDF backer gives the frameless mirror a screwable surface so the sawtooth hanger grips wood instead of rope. | Check Plywood or MDF Mirror Backer on Amazon
🧰 Tools & Equipment
- High-Temperature Hot Glue Gun — A high-temperature gun melts glue sticks evenly for fast, strong bonds on rope, glass, and felt. | Check High-Temperature Hot Glue Gun on Amazon
- Fabric Shears — Sharp shears make clean cuts through jute, cotton cord, embroidery floss, and tassel fringe. | See Price on Amazon
- Fine-Tooth Fringe Comb — A dedicated comb separates twisted cotton cord into soft, even fringe for mirrors and pennants. | See Fine-Tooth Fringe Comb on Amazon
- Detail Paintbrush Set — Small synthetic brushes create controlled painted edges on coasters and decorative rope accents. | Explore Detail Paintbrush Set on Amazon
- Drill and Wood Drill Bit — A cordless drill with a wood drill bit bores clean pilot holes through driftwood without splitting it. | Check Drill and Wood Drill Bit on Amazon
- Silicone Finger Protectors — Silicone finger protectors let you press hot-glued rope joints without burning your fingers. | Check Silicone Finger Protectors on Amazon
- Small Bar Clamp — A small bar clamp holds the driftwood branch steady so the drill bit cannot wander. | Check Small Bar Clamp on Amazon
💎 Hardware, Fasteners & Finishing
- Sawtooth Picture Hangers and Screws — Compact hanging hardware helps mount finished mirror frames and rope wall decor securely. | Check Sawtooth Picture Hangers and Screws on Amazon
- Wooden Macrame Rings — A smooth wooden ring provides the top anchor for the square-knot hanging planter. | Explore Wooden Macrame Rings on Amazon
- Wall Anchors and Screws — Wall anchors and screws hang rope pieces securely in plaster and drywall. | Check Wall Anchors and Screws on Amazon
Core Techniques for Cutting, Gluing, and Hanging Rope
These five techniques cover the hands-on skills the ten projects below draw on. Each note names the projects it belongs to, so you only work through what your project needs.
- Cut rope cleanly. Wrap a piece of clear packing tape tightly around the rope at the cut point and snip through the tape with sharp fabric shears — the twisted strands stay sealed instead of unravelling. Use this technique for every rope or cord cut below, and match the diameter to the project: 3 mm thin cotton for the coaster and tieback, 4 mm braided cord for the garland and planter, thick jute for the doorstop, mirror, vase, and towel bar, and a thinner jute strand for the trivet.
- Hot-glue without burns. Lay a thin bead of glue along the rope, glass, or felt and press with silicone finger protectors instead of bare fingers. Work in a ventilated room, hold each joint for 10 to 15 seconds, and let the glue fully set before handling. Projects 2, 4, 6, 9, and 10 use this step.
- Drill driftwood safely. Clamp the branch on a steady surface and drill pilot holes through both ends with a wood drill bit, keeping the bit perpendicular so the wood does not split. Project 7.
- Mount pieces on walls. Hang the mirror, driftwood towel bar, and felt pennant from a wall anchor or screw rated for the finished weight — never trust a bare nail in loose plaster. Projects 4, 7, and 9.
- Load-test before use. Hang the plant hanger empty for a day first, add the potted plant gradually, and re-check the knots after 24 hours — this pattern carries no published load rating, so start with your smallest pot and re-tie at the first sign of slip. Project 5.
1. The Nautical Knotted Doorstop: Rope Crafts DIY
Supplies Needed: Thick Natural Jute Rope, Smooth River Stones for Weighted Cores (about 400-500 g), Fabric Shears, Clear Packing Tape
This monkey fist doorstop combines a three-pass jute knot with an enclosed 400-500 g stone core, settling at about 11 cm (4.5 in) across — solid enough to read as a sculpture and to prop a light interior door.
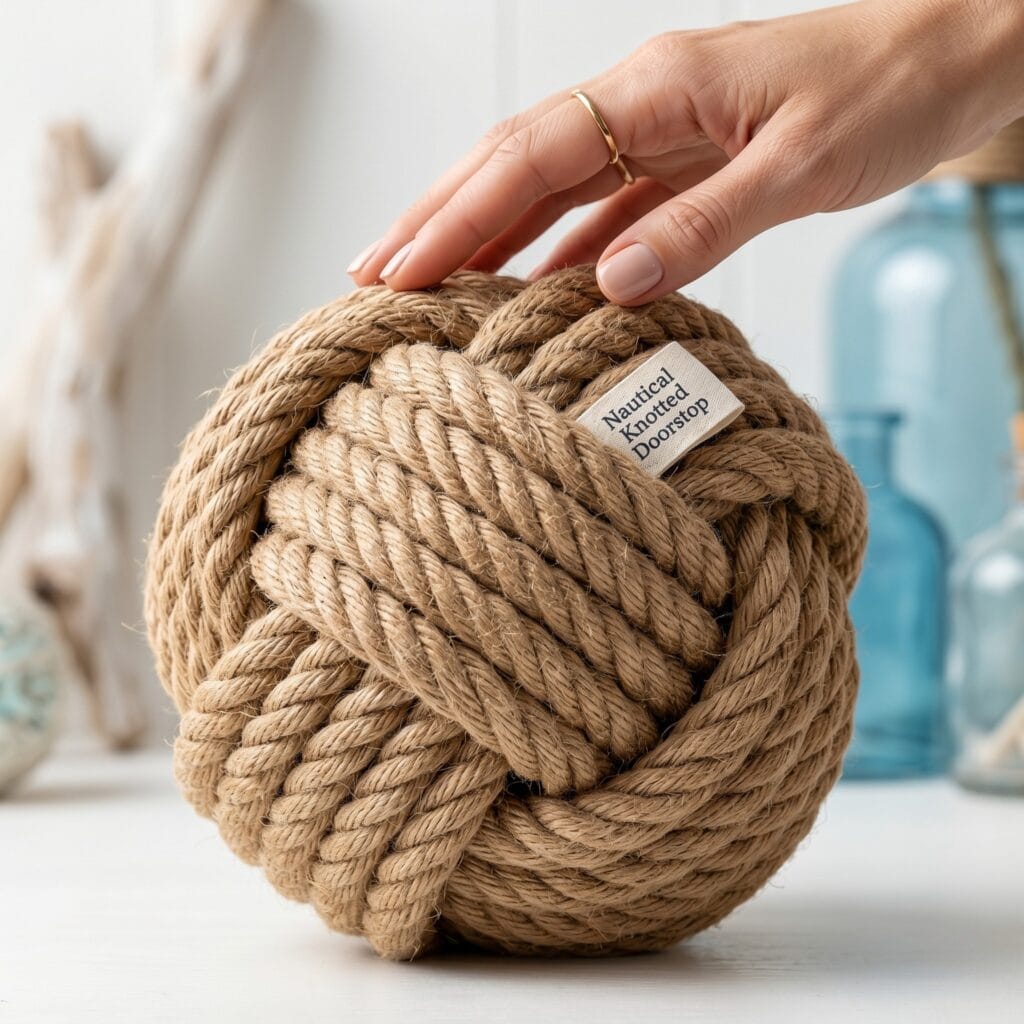
- Tape and cut. Wrap clear packing tape around the thick jute rope at the cut point and snip through the tape with fabric shears so the twisted strands stay sealed. Cut a 4 m length — it shrinks as the knot tightens.
- Form the core pocket. Coil a small starter nest in your palm and set a smooth river stone of about 400-500 g in the center — this enclosed core is what gives the stopper its weight.
- Tie the monkey’s fist. Work a three-pass monkey’s fist around the stone: three wraps over the top, three around the sides, three through the middle. Keep every pass parallel and evenly tensioned.
- Close and tuck. Pull the passes snug so the stone cannot shift, then tuck the loose tails inside the ball and roll it against a flat surface until the knot settles evenly.
- Test it. The finished ball is about 11 cm (4.5 in) across. Test it against your own interior door (this design suits interior doors up to about 20 kg); without the stone core the knot is purely decorative.
2. The Spiral Coated Rope Coaster: Rope Crafts DIY
Supplies Needed: Thin Natural Cotton Rope, High-Temperature Hot Glue Sticks, High-Temperature Hot Glue Gun, Pastel Acrylic Craft Paint Set, Detail Paintbrush Set, Fabric Shears
This spiral coaster coils 1.5 m of 3 mm cotton rope into a 10 cm (4 in) disc, finished with two thin coats of pastel paint — a firm mat for condensation rings and warm mugs.
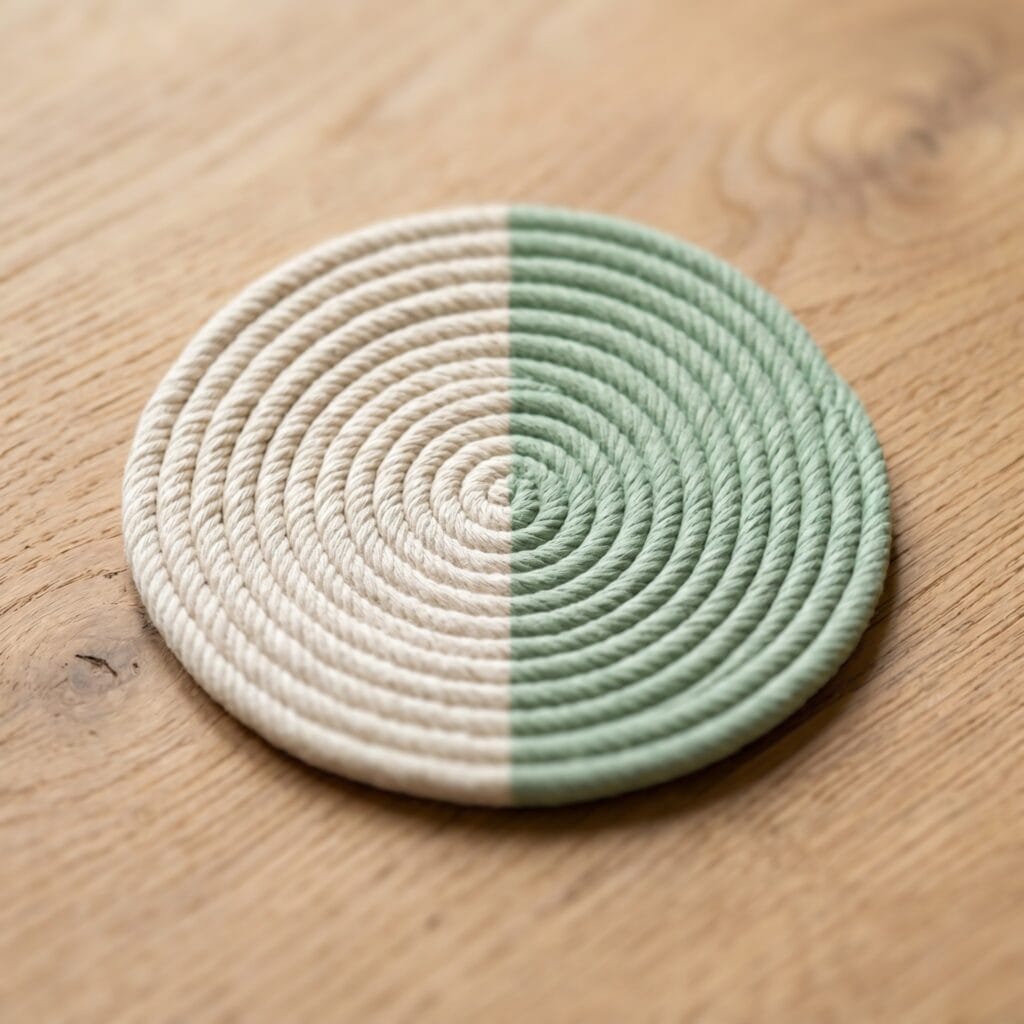
- Coil the disc. Cut a 1.5 m length of thin natural cotton rope, start a tight flat spiral, and lay a thin bead of hot glue along the inner edge of each new row.
- Size and press. Keep coiling to a 10 cm (4 in) disc, pressing each row for 10 to 15 seconds as the glue grabs.
- Finish the back. Glue the final tail to the underside and trim any fuzz with fabric shears.
- Paint the color block. Brush a pastel color block across the surface — two thin coats, letting each coat dry about an hour or per the paint label.
- Cure and use. Let the paint cure fully before use; the finished piece protects dining tables from condensation and warm mugs.
3. Boho Wrapped Rope Tassel Garland
Supplies Needed: Braided Cotton Macrame Cord, Unfinished Round Wood Beads, Cotton Embroidery Floss Assortment, Fabric Shears
This tassel garland hangs five floss-wrapped tassels on a 90 cm beaded strand, finishing at about 60 cm (24 in) long.
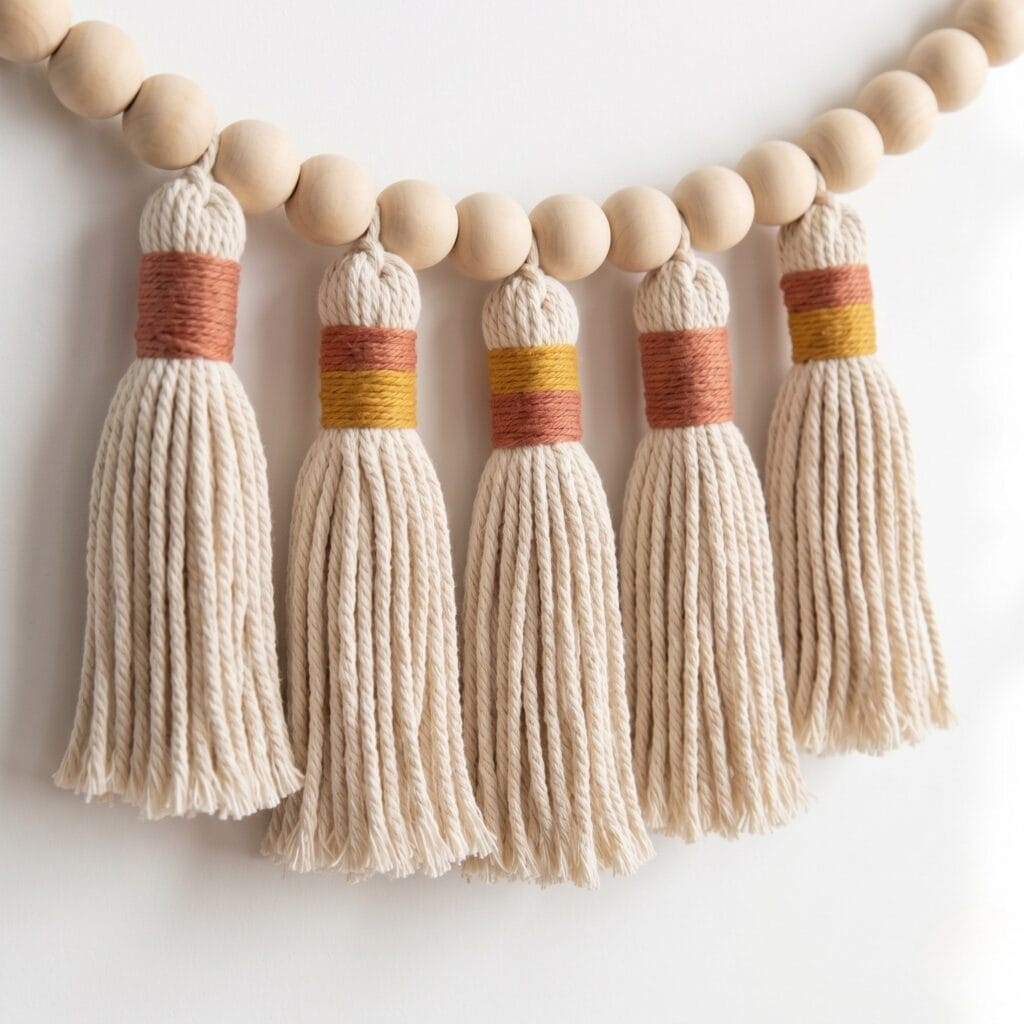
- String the hanger. Cut a 90 cm hanger strand of braided cotton macrame cord, thread unfinished round wood beads evenly across its middle, and tie an overhand knot at each end.
- Cut the loops. Cut five equal 40 cm lengths of cord for the tassel loops.
- Loop them on. Attach each tassel loop to the beaded hanger with a lark’s-head knot, spacing the five loops evenly.
- Tie the tassel heads. Wrap colorful embroidery floss tightly around the top of each loop — three or four turns, knotted at the back — to form the tassel heads.
- Trim and hang. Trim all tails level with fabric shears. The finished strand measures about 60 cm (24 in) and is ready to hang.
4. Minimalist Wrapped Rope Mirror Frame
Supplies Needed: Round Glass Craft Mirror, Thick Natural Jute Rope, High-Temperature Hot Glue Sticks, High-Temperature Hot Glue Gun, Fine-Tooth Fringe Comb, Plywood or MDF Mirror Backer, Mirror-Safe Construction Adhesive, Sawtooth Picture Hangers and Screws, Fabric Shears, Wall Anchors and Screws
This mirror frame glues three concentric jute rows around a round craft mirror, with the bottom ends left 8 cm (3 in) extra-long to comb out into fringe.
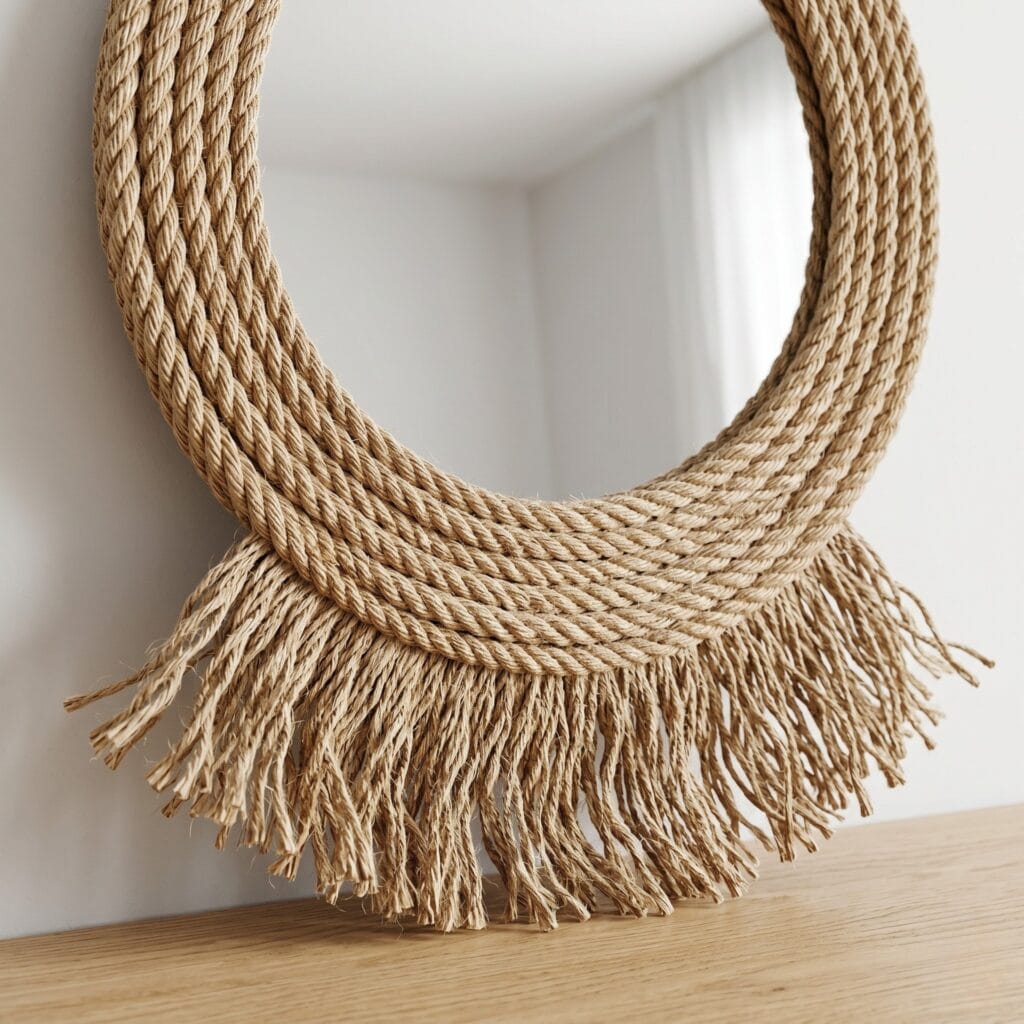
- Border the mirror. On a round craft mirror 15-30 cm (6-12 in) across, lay a thin bead of hot glue around the mirror’s outer edge and press the first row of thick jute rope into it, working in 10 cm sections.
- Add two more rows. Glue two more concentric rows outward, keeping the rope joins stacked on the same side so they disappear.
- Leave the fringe long. Leave the bottom ends 8 cm (3 in) extra-long, glue the final row down, and hold for about a minute until the glue sets.
- Comb the fringe. Unravel the loose tails and brush them out with the fine-tooth fringe comb until the fringe lies flat and fluffy.
- Mount it with a backer. Cut a plywood or MDF backer 2-3 mm larger than the mirror, bond the mirror to it with mirror-safe construction adhesive and let it cure fully per the label, then screw the sawtooth hanger into the top of the backer — never onto rope — and hang it from a wall anchor rated for the assembly’s weight.
5. The Square Knot Hanging Planter
Supplies Needed: Braided Cotton Macrame Cord (4 mm), Wooden Macrame Rings, Terracotta Plant Pots with Drainage Holes, Fabric Shears
This square-knot planter nets eight 4 mm cord tails around a wooden ring into a basket sized for a 12-15 cm (5-6 in) terracotta pot.
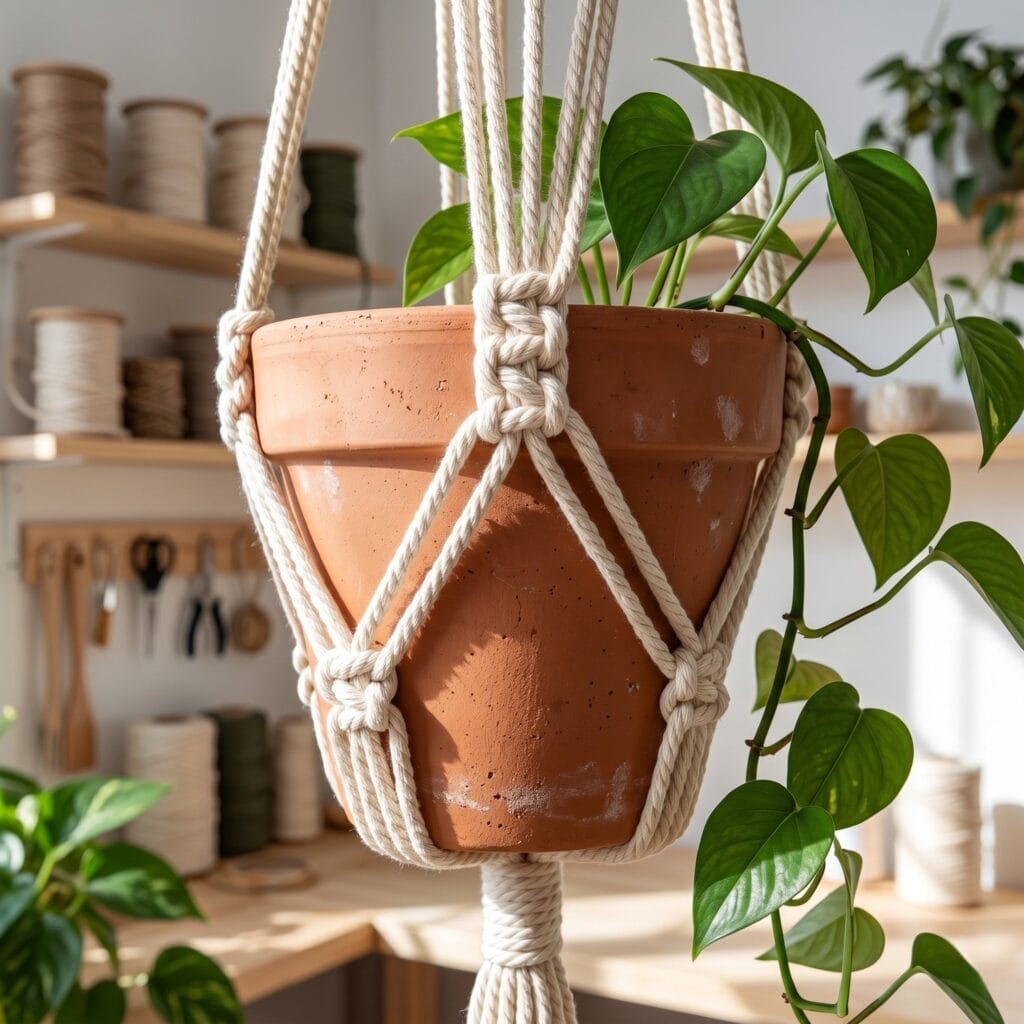
- Set the cords. Cut four 2 m lengths of 4 mm braided cotton macrame cord and fold them over the wooden ring with four lark’s-head knots so eight tails hang evenly — two tails at each of the four knot points.
- First knot row. Tie the first row 8 cm (3 in) below the ring as two separate square knots: each square knot takes four cords, so use tails 1-2-3-4 for the first knot and tails 5-6-7-8 for the second.
- Alternate the rows. Work three more rows spaced 6 cm (2.5 in) apart, each row again two square knots but shifted half a knot out of line: pair the last two cords of one knot with the first two cords of the next so the offset knots lock into a net around the pot.
- Gather the base. Bring all eight tails together 4 cm (1.5 in) below the last row and tie one gathering knot — wrap the bundle once around, pass the tails through the loop, and pull tight — then trim the ends to an even 5 cm (2 in).
- Seat the pot. Set a 12-15 cm (5-6 in) terracotta pot into the basket, hang the hanger empty for a day first, then add the planted pot gradually and re-check every knot after 24 hours.
6. The Wrapped Rope Cylinder Vase
Supplies Needed: Clear Glass Cylinder Vases, Thick Natural Jute Rope, Cotton Embroidery Floss Assortment, High-Temperature Hot Glue Sticks, High-Temperature Hot Glue Gun, Fabric Shears
This wrapped vase covers a plain 20 cm (8 in) glass cylinder in jute rows, split at the middle by one bright mustard embroidery-floss band.
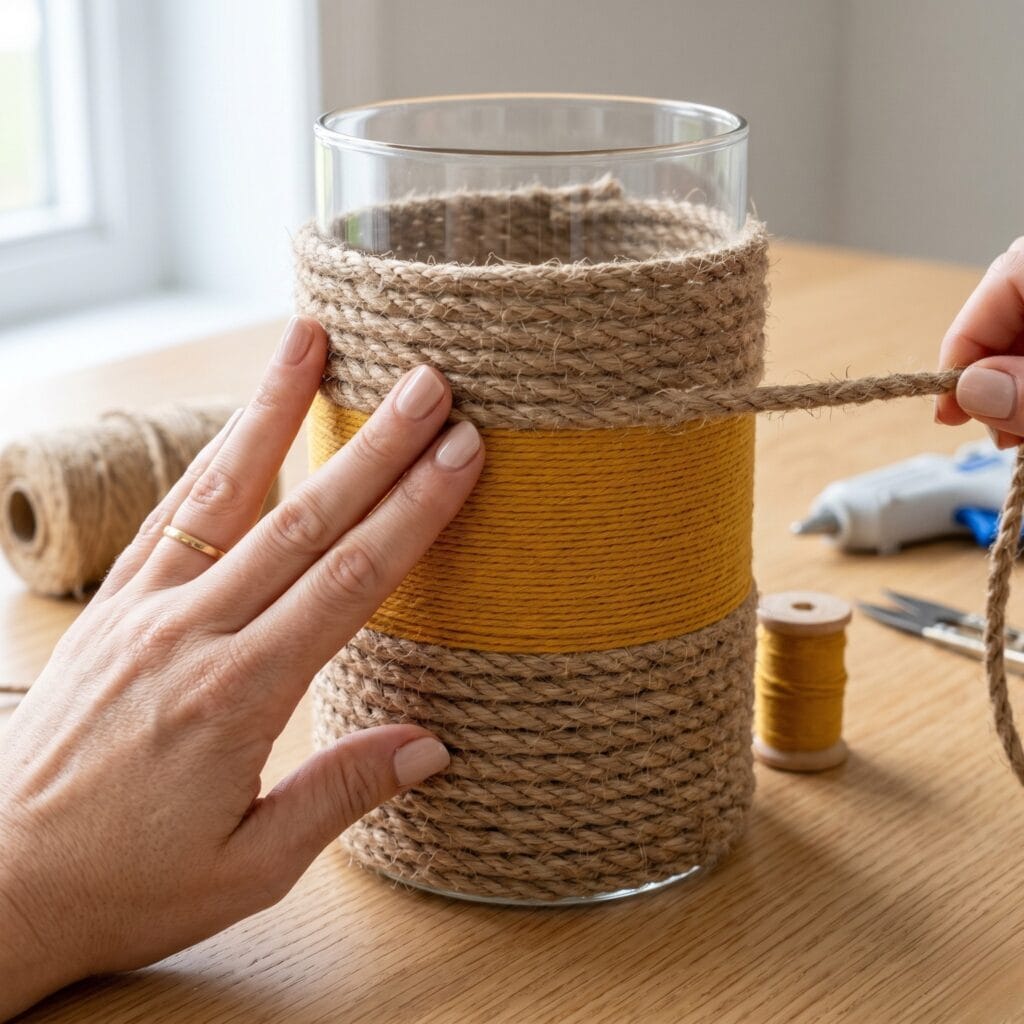
- Start at the base. Glue the first jute row around the base of a 20 cm (8 in) glass cylinder vase with a thin bead of hot glue, holding each 10 cm section until it grabs.
- Wrap upward. Continue in neat rows for about a third of the vase height, adding glue every third row to keep the tension.
- Wrap the color band. Tie off the jute and wrap the middle section with bright mustard yellow embroidery floss, gluing only the start and finish tails.
- Finish the top. Continue with jute rows into the top third, end with a final glued row, and trim the tail flush.
- Set and display. Let the glue cool for a few minutes before arranging flowers in the vase; the color-block accent shows from across the room.
7. Rustic Driftwood Rope Towel Holder
Supplies Needed: Natural Driftwood Branches, Thick Natural Jute Rope, Wooden Macrame Rings, Small Bar Clamp, Drill and Wood Drill Bit, Fabric Shears, Wall Anchors and Screws
This towel bar drills a clamped driftwood branch about 45 cm (18 in) wide, threads jute through both ends, and loops a wooden ring at the center for towels.
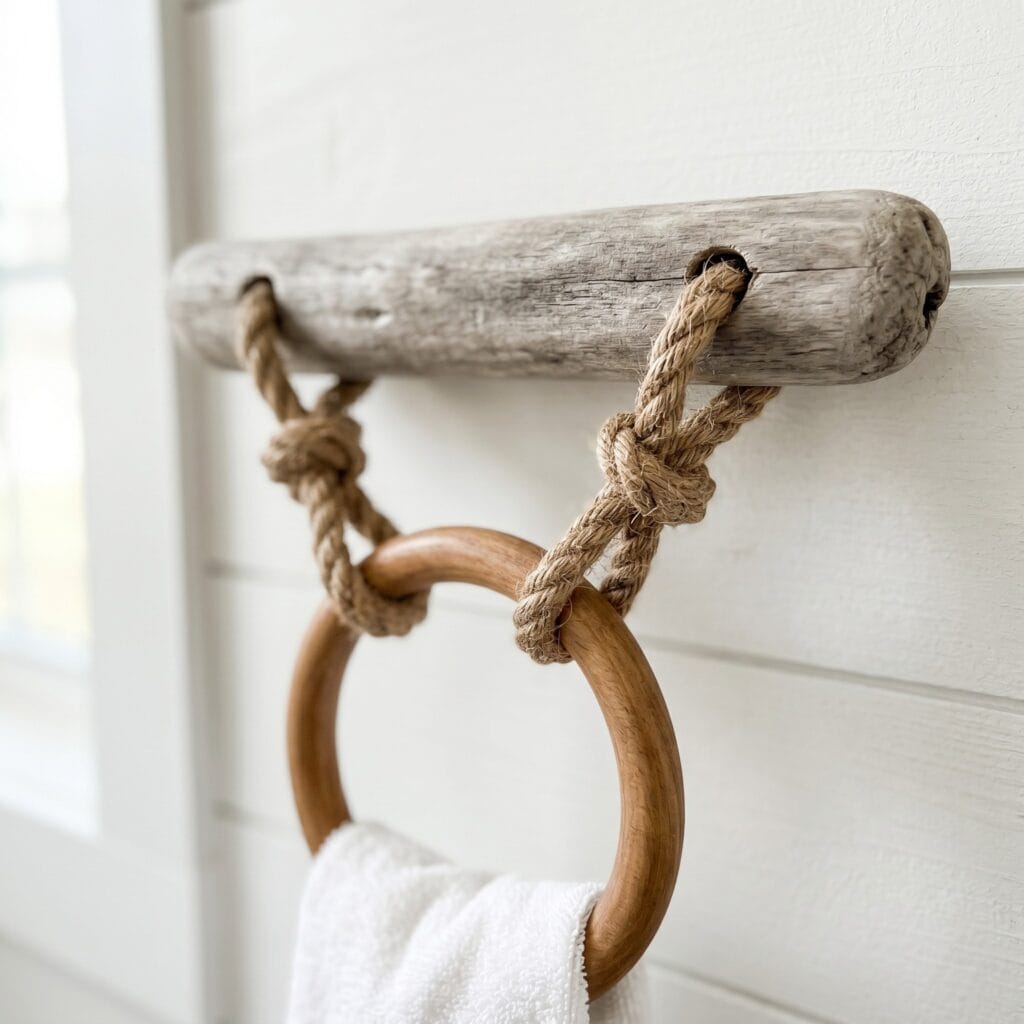
- Clamp and drill. Clamp a smooth driftwood branch about 45 cm (18 in) long and 3-5 cm (1-2 in) thick to a steady surface, mark a hole 2 cm (1 in) in from each end, and drill each pilot hole about 2 mm wider than your jute rope — keep the bit perpendicular so the branch does not split.
- Thread the cord. Cut two 40 cm lengths of thick jute rope and thread one through each hole, finishing with an overhand knot behind the wood.
- Add the ring. Loop a round wooden ring into the bottom center knot so towels can hang from it.
- Hang the bar. Bring both cords together at the top, tie an adjustable knot, and hang the bar from a wall anchor rated for the loaded weight.
- Load it. Loop a towel over the ring and bar, check the knots after a day, and tighten anything that slipped.
8. The Wrapped Rope Curtain Tieback
Supplies Needed: Thin Natural Cotton Rope (a bright white 30 cm section), Brown Leather Scraps, Fabric Shears
This curtain tieback knots a 30 cm (12 in) length of 3 mm white cotton rope at both ends and wraps a brown leather strip around the middle.
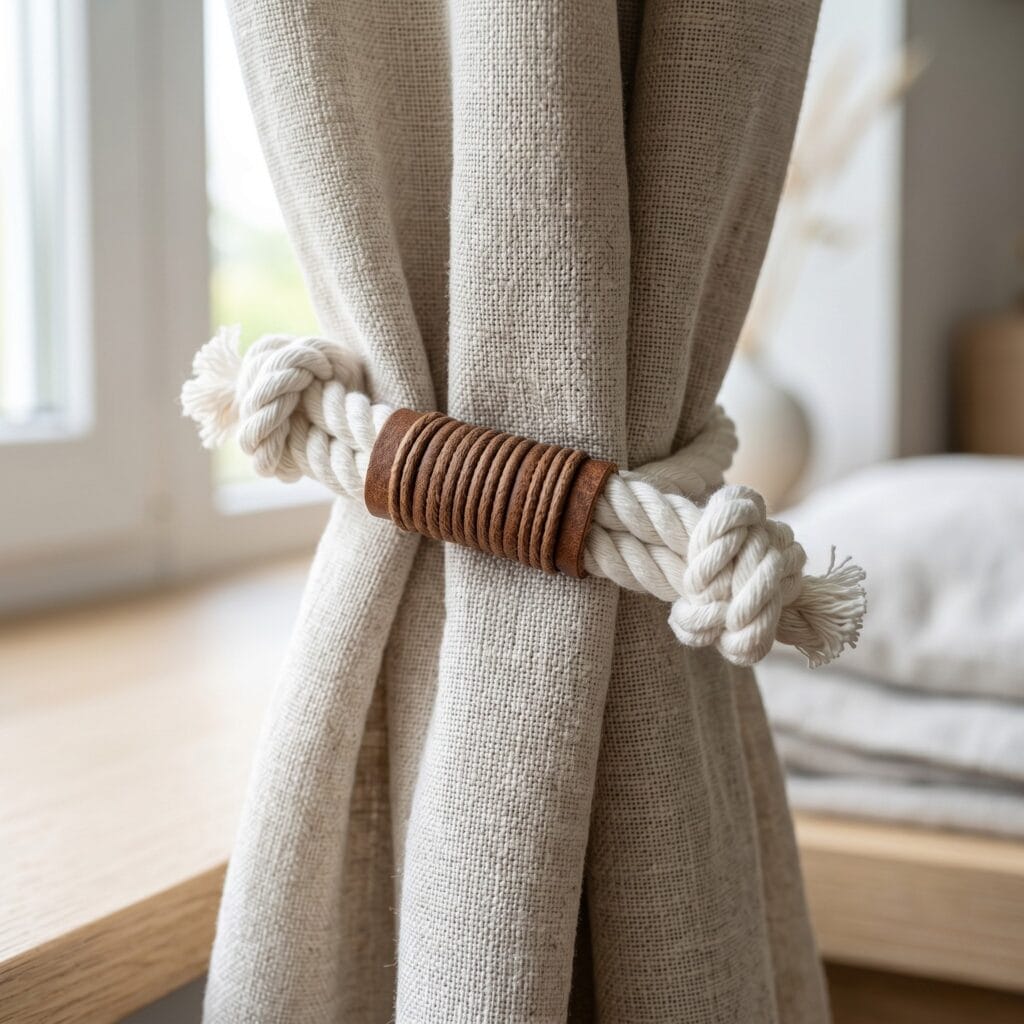
- Cut the rope. Cut a 30 cm (12 in) section of 3 mm bright white cotton rope with fabric shears — tape the cut point first so the clean cut keeps this minimal design sharp.
- Knot both ends. Tie a large overhand knot at each end, leaving about 5 cm of tail beyond each knot.
- Cut the leather. Cut a strip of brown leather scrap wide enough to overlap itself once around the rope’s middle.
- Wrap the middle. Wrap the leather snugly between the two knots; the knots hold it in place, so no adhesive is needed.
- Style it. Loop the finished tieback around your curtain panel and let the knots sit in front as a clean Scandinavian detail.
9. Geometric Wrapped Rope Wall Pennant
Supplies Needed: Thick Craft Felt or Blank Canvas Wall Pennants (choose one base), Braided Cotton Macrame Cord, Thick Natural Jute Rope, High-Temperature Hot Glue Gun, High-Temperature Hot Glue Sticks, Fabric Shears, Wall Anchors and Screws
This wall pennant glues parallel jute and cotton rows across a felt or canvas triangle about 25 x 30 cm (10 x 12 in).
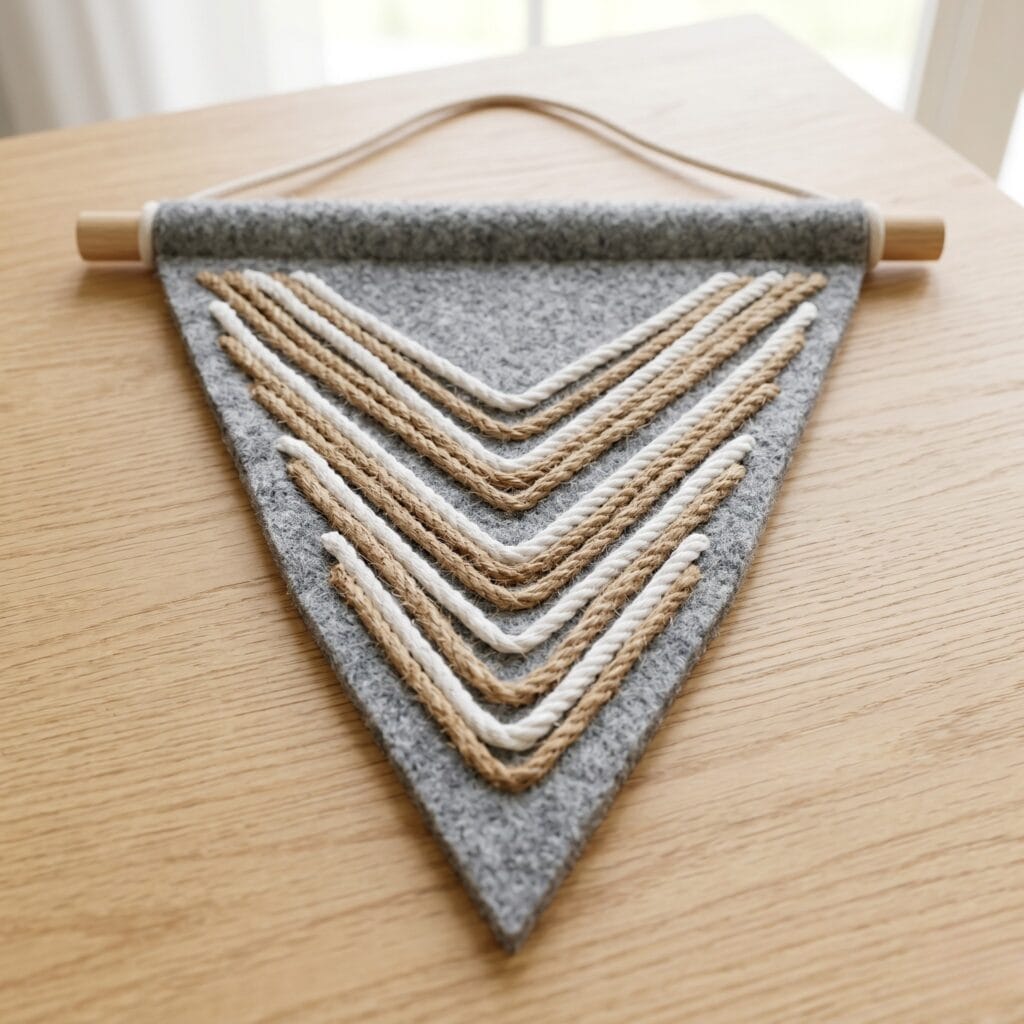
- Cut the base. Choose one base: cut thick craft felt into a triangle banner about 25 x 30 cm (10 x 12 in), or start directly from a blank canvas wall pennant — one base or the other, never both.
- Cut the cord rows. Cut thick jute and braided cotton macrame cord into parallel lengths that cover the base from top to bottom.
- Glue the rows. Lay straight beads of hot glue across the base and press each cord row into place for 10 to 15 seconds.
- Trim the edges. Once the glue has set, trim the overhanging cord ends flush with fabric shears.
- Add the hanging loop. Glue a short loop of cord to the top back and hang the pennant from a wall anchor.
- Build the gallery. Repeat with different shapes and colors to fill a gallery wall.
10. The Loop Knotted Trivet: Rope Crafts DIY
Supplies Needed: Thick Natural Jute Rope, High-Temperature Hot Glue Sticks, High-Temperature Hot Glue Gun, Fabric Shears
This loop-knot trivet weaves four jute strands flat to about 15 cm (6 in) across and is for warm serving dishes only. If you also make hanging glass art, view our guide on Sea Glass Chimes!
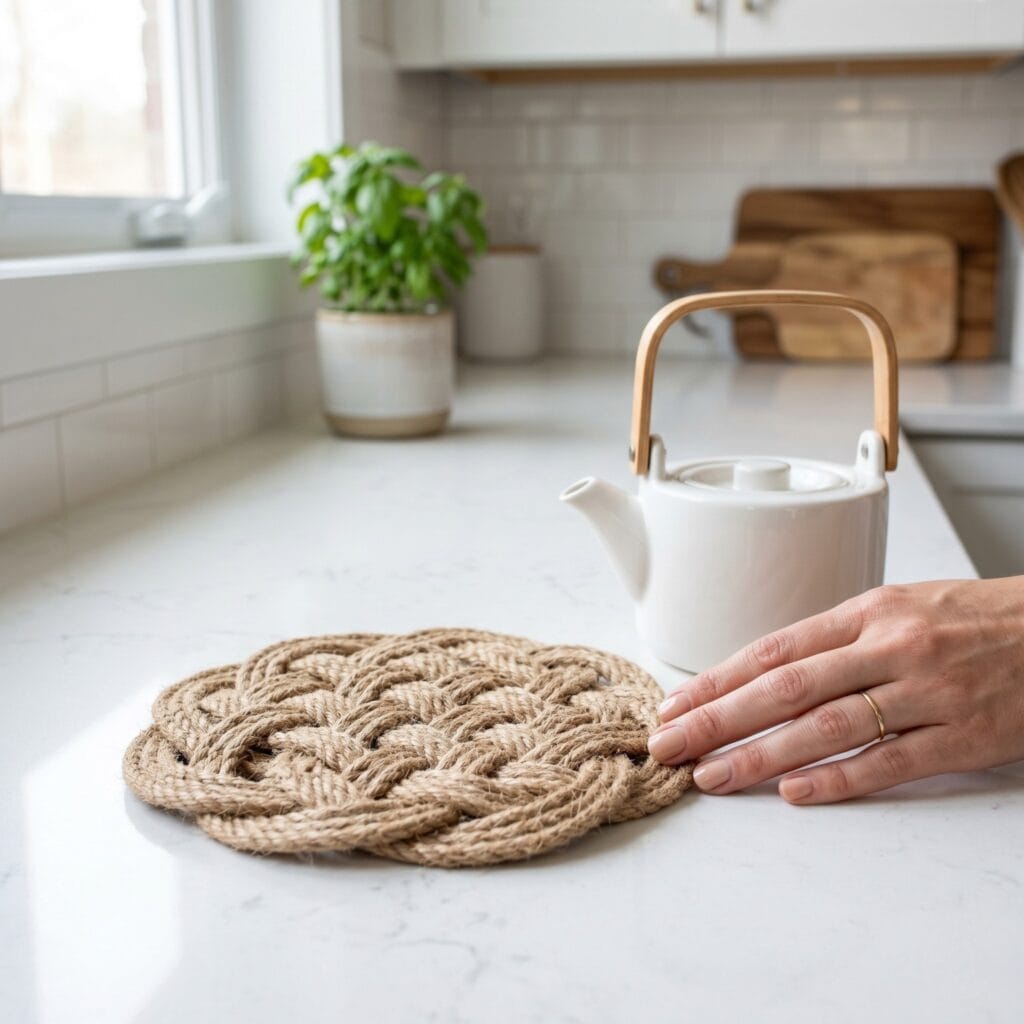
- Cut the strands. Cut four 80 cm lengths of medium-thickness jute rope and mark the midpoint of each.
- Weave the knot. Interlock the strands around the center mark into a flat, woven sailor’s knot, passing each end through the loop of its neighbor.
- Flatten it. Pull the knot down evenly until it lies flat at about 15 cm (6 in) across.
- Glue the seams. Run thin beads of hot glue along the back seams to secure the shape, then trim the tails flush with fabric shears.
- Cool and use. Let the glue cool for five minutes before moving it; the mat is for warm serving dishes only — hot-glue seams can soften under hot cookware, so never set hot pans straight from the stove onto it.
Styling Your Knotted Rope Crafts
Curating your own apartment accents is deeply satisfying. Ultimately, these creative rope crafts will elevate your home aesthetic. First, spend an afternoon matching fiber textures to your current furniture layout. Do you love these weekend crafts? Please, leave a comment below. Also, share your favorite design with our community!
Working with heavy fiber cords and sharp shears is an enjoyable hobby. Still, safety must guide your studio practice. Always point your scissor blades away from your body when cutting thick ropes. Consequently, you stop accidental slips from causing deep cuts. Because hot glue guns reach very high temperatures, protect your fingers with silicone caps. Finally, keep all chemical fabric adhesives safely stored out of reach of pets!
Frequently Asked Questions
Which rope diameters should I use?
Match the cord to the project: 3 mm thin cotton for the coaster and curtain tieback, 4 mm braided cotton for the tassel garland and square-knot planter, and jute for the rest — thick for the doorstop, mirror, vase, and towel bar, a thinner strand for the trivet. Drill any pilot hole about 2 mm wider than the rope that must pass through it.
How do I stop rope ends from fraying?
Wrap clear packing tape tightly around the rope at the cut point and snip through the tape; trim cotton and jute ends at a sharp angle, and only singe synthetic cords — natural fibers scorch.
Which glue should I use?
A high-temperature hot glue gun bonds the rope, glass, and felt used here. Work in a ventilated room, press joints with silicone finger protectors, hold each joint 10 to 15 seconds, and let the glue cure fully before the piece carries weight.
How do I mount these pieces safely?
Hang the mirror, driftwood towel bar, and pennant from a wall anchor or screw rated for the finished weight. Hot glue is never a structural hanger: the mirror’s sawtooth screws into its plywood or MDF backer, not into rope.
Is the square-knot plant hanger safe for heavy pots?
Follow the staged test: hang it empty for a day, add the smallest potted plant gradually, and re-check every knot after 24 hours. The pattern carries no published load rating — keep the pot light and re-tie at the first sign of slip.
Important Crafting Safety Notes
Crafting is a rewarding creative activity, but maintaining a safe workshop environment is essential for yourself, your family, and your pets. Please review these vital safety precautions before starting:
• Cutting rope: Wrap clear tape around the cut point and cut on a stable surface with fabric shears pointed away from your body; keep your free hand and fingers behind the blade line.
• Hot-glue burns: The gun runs hot enough to burn skin on contact. Keep the nozzle and molten glue away from skin, press joints with silicone finger protectors, and let each joint cool before handling.
• Adhesive ventilation: Glue in a ventilated room, avoid breathing fumes directly over the work, follow the label’s cure time before loading the finished piece, and keep glue sticks and chemicals out of reach of children and pets.
• Plant-hanger loads: Test the hanger empty first, add the potted plant gradually, and re-check every knot after 24 hours; this pattern has no published load rating, so keep the pot light and re-tie at the first sign of slip.
• Drilling and wall mounting: Clamp driftwood before drilling pilot holes, and hang wall pieces from an anchor or stud rated for the finished weight; keep loose cords and small parts away from children and pets.
For more detailed guidance on safe crafting practices, liability disclosures, and website usage, please review our Terms and Conditions.
“Which of these Brilliant Ways to Use Rope for Beautiful DIY Home Decor ideas are you excited to try first, or do you have a creative tip of your own to share? Drop a comment below—I’d love to hear your thoughts and see what you create!”