Coiling thick cotton fibers is a wonderful studio ritual. Starting a fresh Rope Basket DIY is a very relaxing experience. There is something satisfying about thick textile textures. Because natural cotton cord forms a sturdy shape, it serves as a functional art piece. Also, hand-sewn spiral rows add quiet character to empty desks. You can easily clean up your workspace clutter. You save cash on boutique organizer bins.
Affiliate Disclosure: This post contains affiliate links. As an Amazon Associate, I earn from qualifying purchases. If you buy through these links, I may earn a commission at no additional cost to you.
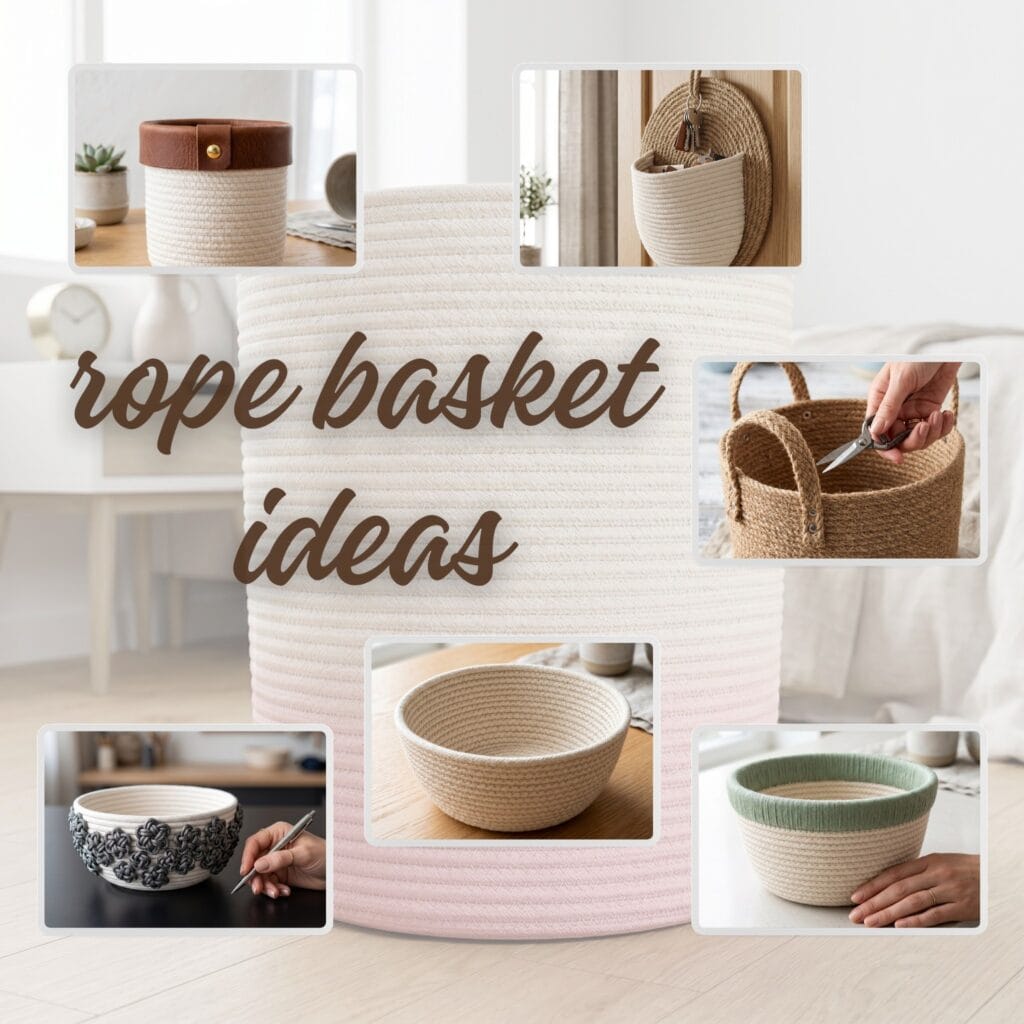
Do you have loose craft supplies scattered on your tables? If so, reach for your favorite cotton string now. Mastering a Rope Basket DIY is a peaceful weekend project. First, you gather your thick braided materials. Next, these functional containers keep small tools organized inside your workspace. In this guide, we outline the exact items you need. Finally, we share 10 easy design variations to try.
Essential Supplies for a Hand-Sewn Coiled Rope Basket DIY
Building structural fiber containers requires proper prep. Selecting a tight, non-stretch cord material is critical. Specifically, using high-density cotton rope prevents the structural basket walls from collapsing. This keep your round baseline rows perfectly stable. This is the golden rule when organizing a Rope Basket DIY. It keeps your handmade vessels looking symmetric and crisp. Every idea below uses the same hand-sewn coil technique — one continuous rope joined row by row with a blunt tapestry needle, coiled and stitched by hand rather than tied into knots (the only knots here are the decorative star clusters on Idea 10, tied after the bowl is coiled).
Pro-Tip
When building your basket base, keep your stitching tension uniform across every single loop. Pulling the thread too tight will warp the flat circular center into an unwanted cone shape. Similarly, do you love pairing raw fiber textures with matching wall hangings? Then, check out our masterclass guide on styling beautiful Rope Crafts!
Essential Materials & Tools
✨ Consumable Raw Materials
- 6mm Natural Cotton Braided Rope — A dense, low-stretch cotton rope creates stable bases, crisp basket walls, and a soft minimalist finish. | Check 6mm Natural Cotton Braided Rope on Amazon
- 8mm Natural Cotton Braided Rope — The thicker diameter adds structure for taller toy bins, storage cylinders, and larger utility baskets. | Check Price on Amazon
- 4mm Cotton Cord — A slimmer cotton cord bends smoothly around the tight curves needed for shallow jewelry dishes and small bowls. | View 4mm Cotton Cord on Amazon
- Natural Jute Rope — Textured jute gives the handled basket variation its earthy color, firm body, and rustic character. | Find Natural Jute Rope on Amazon
- Waxed Linen Thread Assortment — Waxed thread glides through dense rope fibers while providing durable, tidy structural stitches. | See Price on Amazon
- Cotton Embroidery Floss Color Pack — Colorfast floss supplies the sage rim, mustard block, ombre fade, chevron details, and celestial accents. | See Cotton Embroidery Floss Color Pack on Amazon
- Sage Green Cotton Yarn — A soft sage yarn makes a clean contrasting wrap for the multicolor rim design. | Explore Sage Green Cotton Yarn on Amazon
- Vegetable-Tanned Leather Strips — Pre-cut leather strips form polished tabs for storage-cylinder pulls or handle accents. | Find on Amazon
- Pink Fabric Dye — a diluted bath tints the lower rows of the ombre bin in Idea 9 | Find Pink Fabric Dye on Amazon
- Metallic Charcoal Thread — dark metallic thread for the star knot clusters of Idea 10 | Find Metallic Charcoal Thread on Amazon
🧰 Core Crafting Tools & Equipment
- Blunt Large-Eye Tapestry Needles — Large-eye blunt needles carry waxed thread through rope seams without splitting or snagging cotton fibers. | Check Blunt Large-Eye Tapestry Needles on Amazon
- Heavy-Duty Fabric Shears — Sharp shears create clean rope ends and easily cut jute, thread, yarn, and leather tabs. | Check Price on Amazon
- Flexible Sewing Measuring Tape — A flexible tape follows curved walls accurately while checking base diameter and finished basket height. | View Flexible Sewing Measuring Tape on Amazon
- Leather Hole Punch Pliers — Punches evenly spaced holes in leather tabs before they are stitched or riveted onto the rope cylinder. | Find Leather Hole Punch Pliers on Amazon
- Small Metal Ruler — checks base diameter and wall height exactly as Step 5 asks | Find Small Metal Ruler on Amazon
- Metal Thimble — pushes the blunt tapestry needle through dense rope rows without sore fingertips | Find Metal Thimble on Amazon
- Rubber Gloves — protect hands during the dye dip and while brushing on glue | Find Rubber Gloves on Amazon
💎 Hardware, Fasteners & Finishing
- Clear-Drying Fabric Glue — A small amount holds the starter coil in position while you begin stitching, then dries clear so the finished base shows no glue marks. | See Price on Amazon
- Cotton Twill Tape — Strong cotton tape creates a discreet hanging loop for a doorway pocket basket. | Explore Cotton Twill Tape on Amazon
- Fray Check Fabric Sealant — A clear anti-fray sealant neatens trimmed cotton or jute ends at the final seam. | View on Amazon
- No-Sew Leather Rivets — Rivets provide a secure, finished attachment option for leather tabs and handle details. | See No-Sew Leather Rivets on Amazon
Optional Studio Upgrades
Never required to finish the projects above — convenience upgrades for makers who want them.
📦 Beginner Project Kits & Coordinated Bundles
For beginners or makers starting from scratch, these coordinated bundles and all-in-one project packs bring together the core supplies in one convenient order.
- Coiled Rope Basket Making Kit — A coordinated optional project kit can provide rope, thread, needles, and instructions in one pack. | View Coiled Rope Basket Making Kit on Amazon
⚡ Studio Tools & Workshop Equipment
Optional studio upgrades — every project above can be completed without these.
- Heavy-Duty Sewing Machine with Adjustable Zigzag Stitch — Listed for makers who already own one; this guide teaches only the hand-sewn method, so no machine step appears in the projects above. | Find on Amazon
- Daylight LED Magnifying Craft Lamp — Bright, shadow-free light helps keep decorative stitching even around curved seams; a sunny window does the same job. | Check Daylight LED Magnifying Craft Lamp on Amazon
- Self-Healing Rotary Cutting Mat — Protects the table while trimming rope and cutting leather tabs; a folded towel works as a stand-in. | Check Price on Amazon
Baseline Recipe: Hand-Sewn Rope Basket Assembly Sequence
📐 Baseline Recipe — set these before you start: Decide your finished size first and mark the target base diameter on the table with a strip of tape; keep coiling until the disc reaches it (Step 3). Use one rope for the whole basket: 4 mm cord for small dishes, 6 mm for everyday bins, 8 mm for sturdy storage bins. Estimate rope generously: every base ring costs about one circumference of rope and every wall row about the rim circumference, so a palm-sized bowl lands near 5–6 m of 6 mm cord while a wide tall bin can run past 30 m — count your rings and keep a spare spool handy. Thread a blunt large-eye tapestry needle (the shaft should slip between the braid fibres, not through them; a no. 18 is a common pick for 6 mm rope) with waxed thread: carry about an arm’s length at a time and budget roughly two to three times the rope length in thread. The stitch is a simple overhand whip that catches the rope below on every pass — place each stitch about one rope-diameter apart (roughly 4–8 mm depending on your cord), one stitch per wrap as you travel around. Keep the tension firm and even (snug enough that rows touch without dimpling), and when a length runs out, overlap the new thread by two stitches and keep going. Begin with the glued starter coil of Step 1 and finish with the tucked, overcast end of Step 6.
Step 1: Initiating the Starter Center Coil
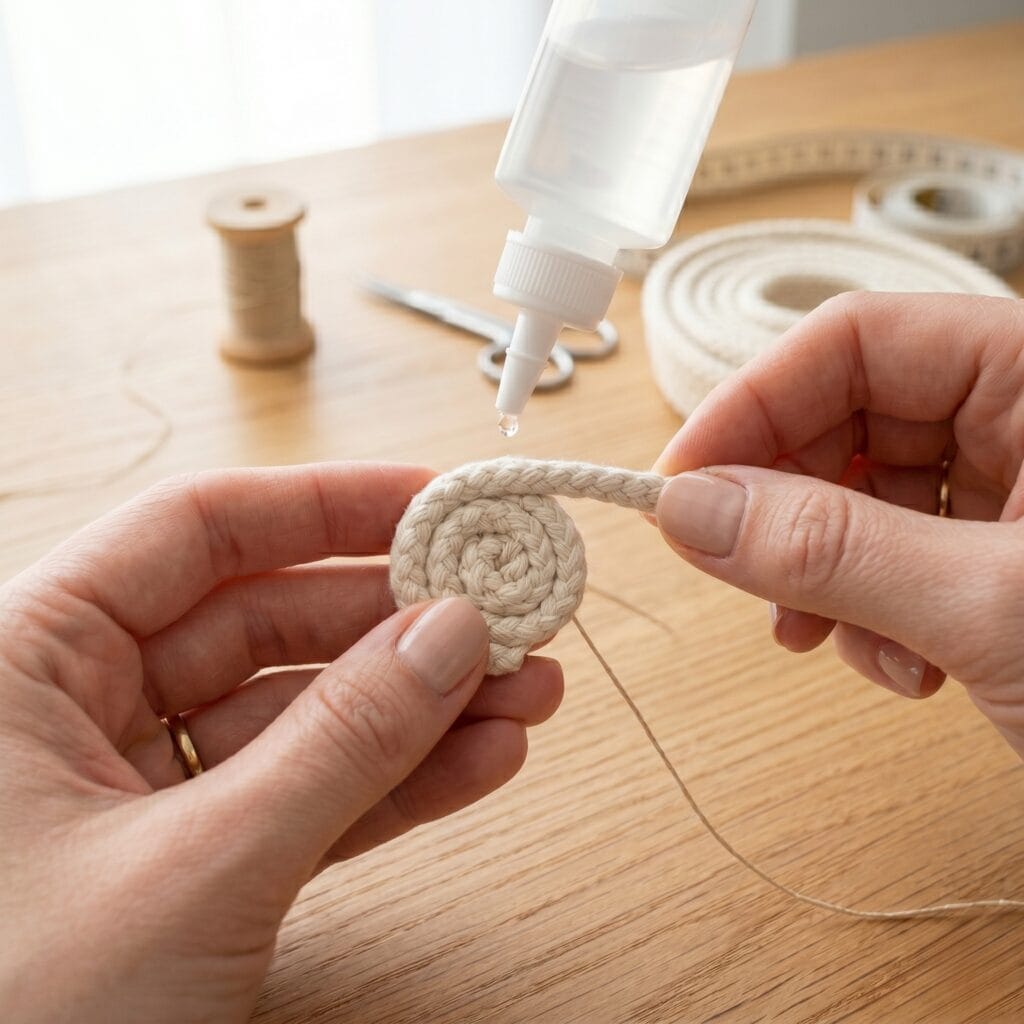
First, apply a tiny drop of clear craft glue from your plastic bottle onto the raw end of your cotton rope. Next, fold the tip over tightly to form a tiny snail-like spiral disk. Then, wrap your thread around this starter core twice. This initial step secures your center base structure instantly for a clean Rope Basket DIY start.
Step 2: Stitching the Flat Base Foundation
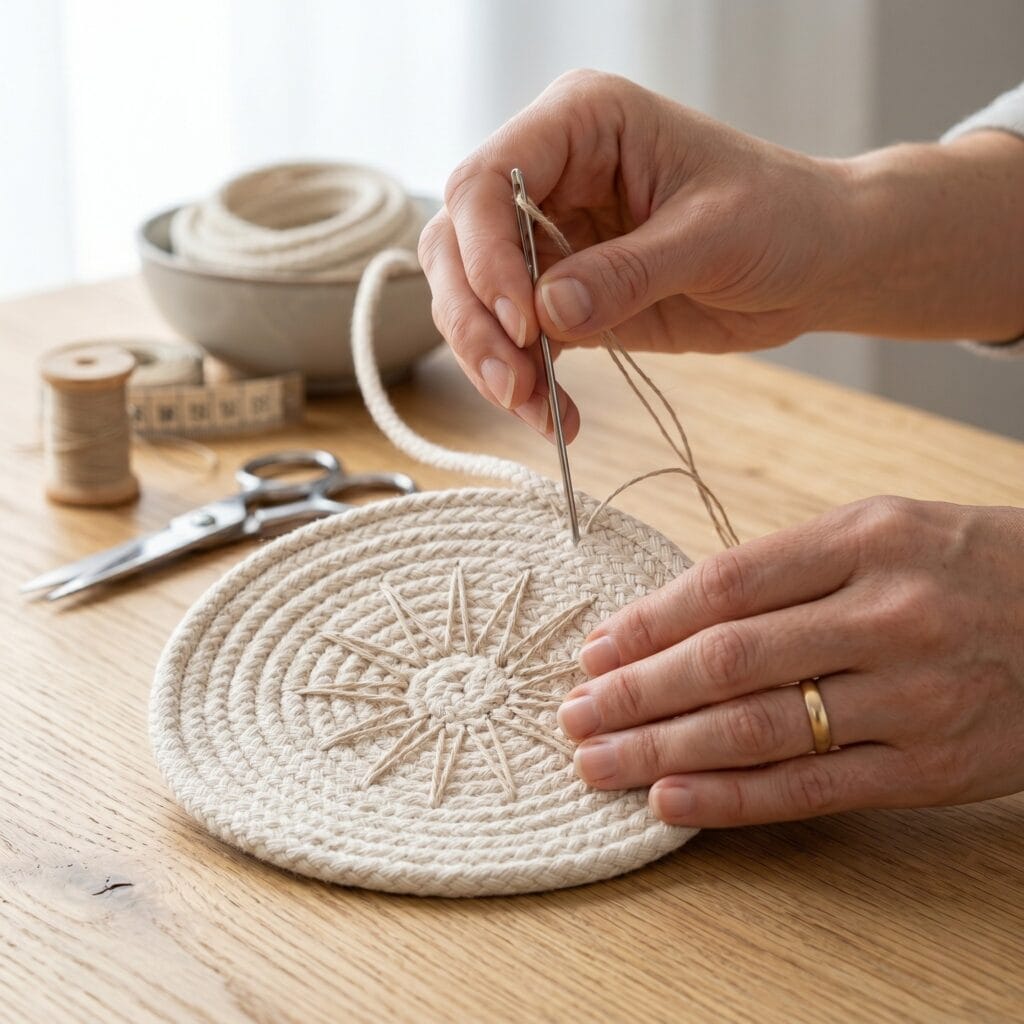
Next, place the core flat against your table workspace. Then, guide the loose rope around the center ring in a growing circular path. Finally, push your blunt tapestry needle through the adjoining rows with the same overhand whip stitch from the baseline: each pass catches the rope below, about one rope-diameter apart. You build a solid, flat bottom plate.
Step 3: Completing the Base Diameter
Then, continue expanding your flat circular layers until you reach your desired container width. Next, pull your working linen thread tight across the final outermost rim row. Ensure that the entire disk lays completely flat without any warping. Your completed Rope Basket DIY base foundation is solid and ready.
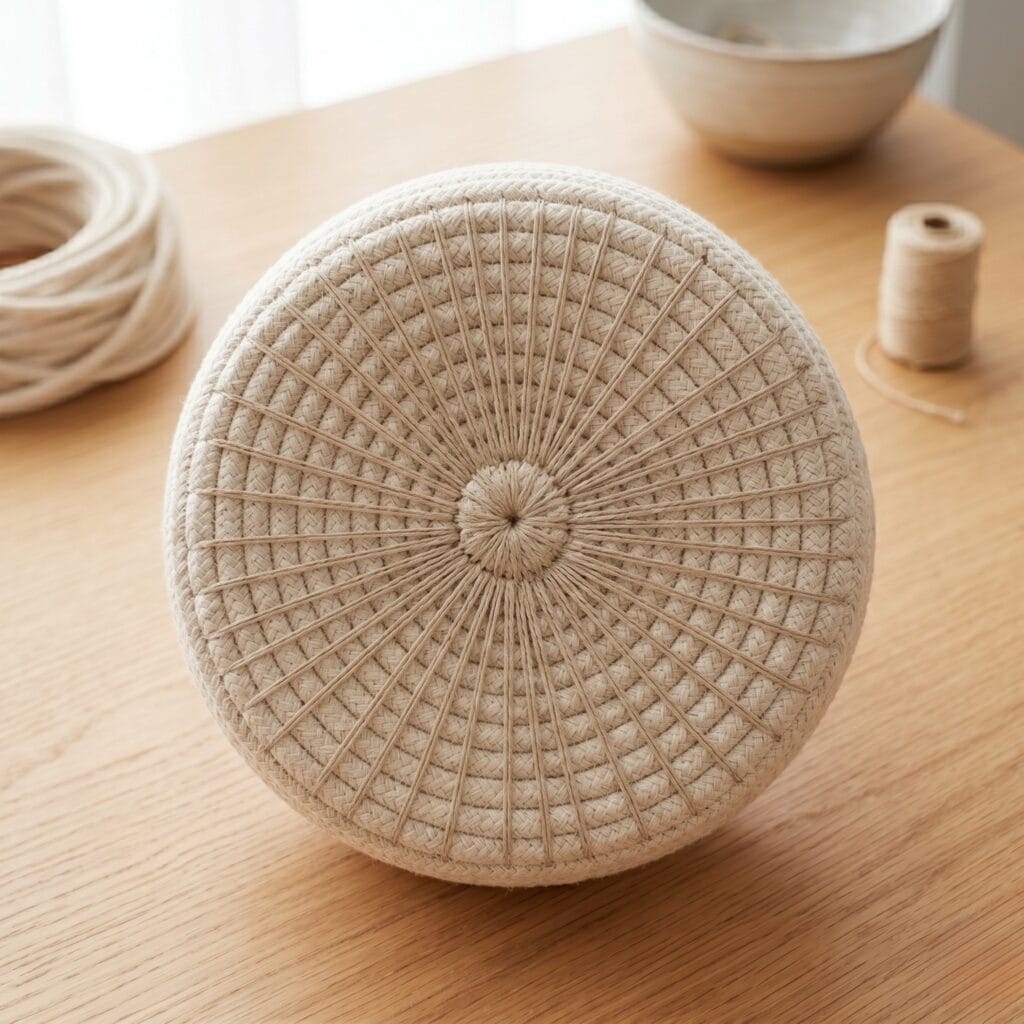
Step 4: Attaching the Vertical Wall Seam
Lift your long working needle to attach the primary vertical side walls directly onto the outer baseline. Hold the rising continuous rope wall segment at a sharp 90-degree angle for straight-sided baskets — or lean it inward for tapered shapes like the jewelry dish — while stitching it securely into the flat foundation edge. Specifically, this vital step anchors your storage structure perfectly.
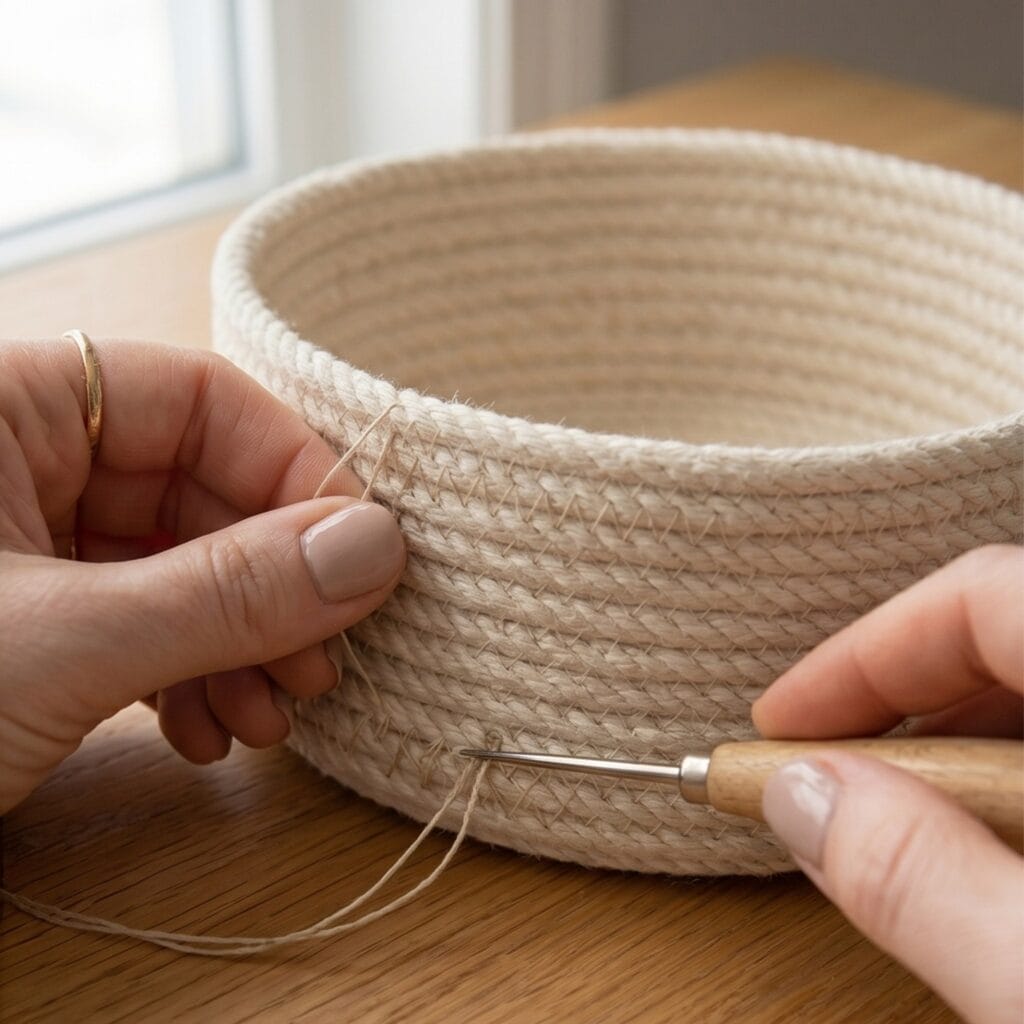
Step 5: Measuring the Stacking Wall Height
Then, continue stacking the cord rows upward in a smooth spiral motion. Next, repeat the same whip stitch along the entire perimeter while tracking your progress. Use a small metal ruler to verify your vertical wall height accurately. In the end, your growing Rope Basket DIY project will look neat and even.
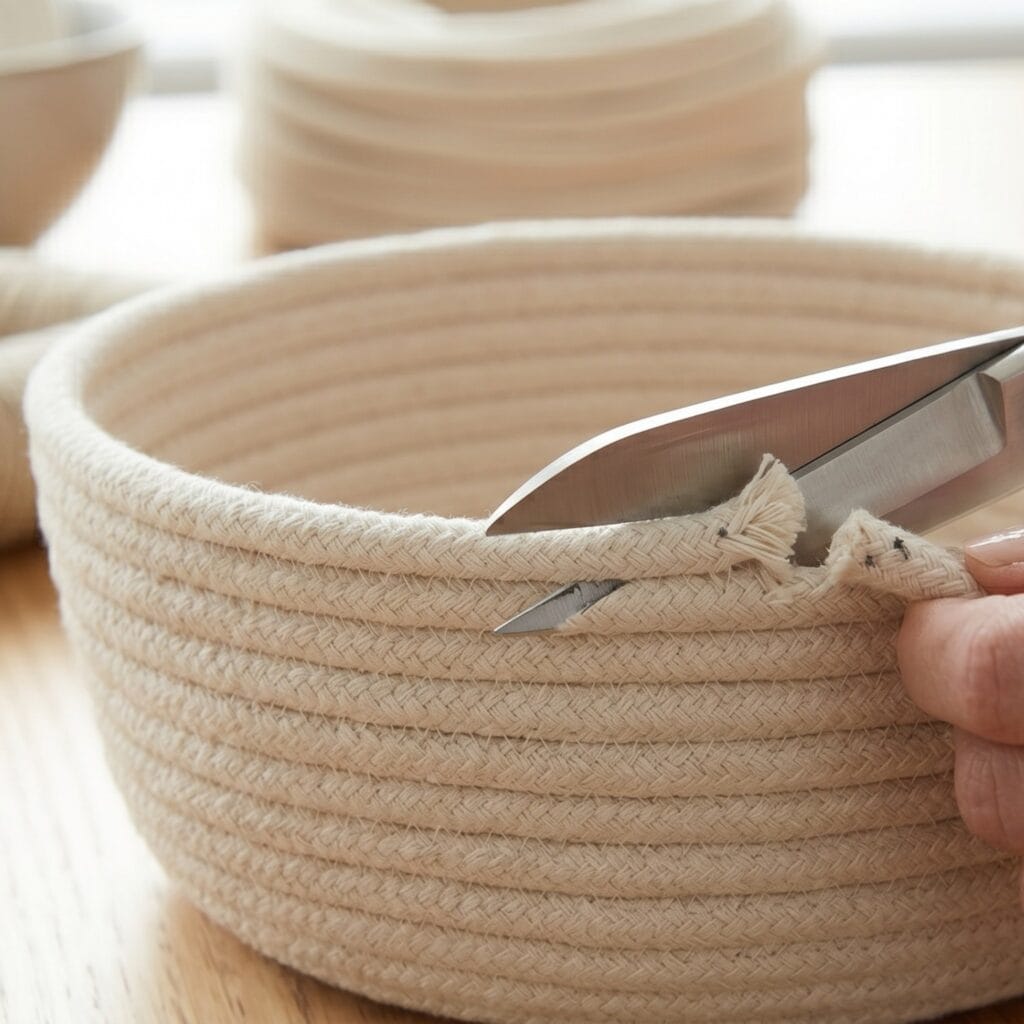
Step 6: Securing the Final Seamless Terminus
Finally, finish the end: cut the rope tip so the end thins gradually, then dab the cut with a touch of glue to lock the fibres before it can fray. Tuck the thinned tip flat against the inside top rim row to hide the raw edge completely. Work several more passes of the same whip stitch over the boundary to lock it down. Your handmade organizer vessel is officially complete. Now, you can safely drop your studio accessories inside!
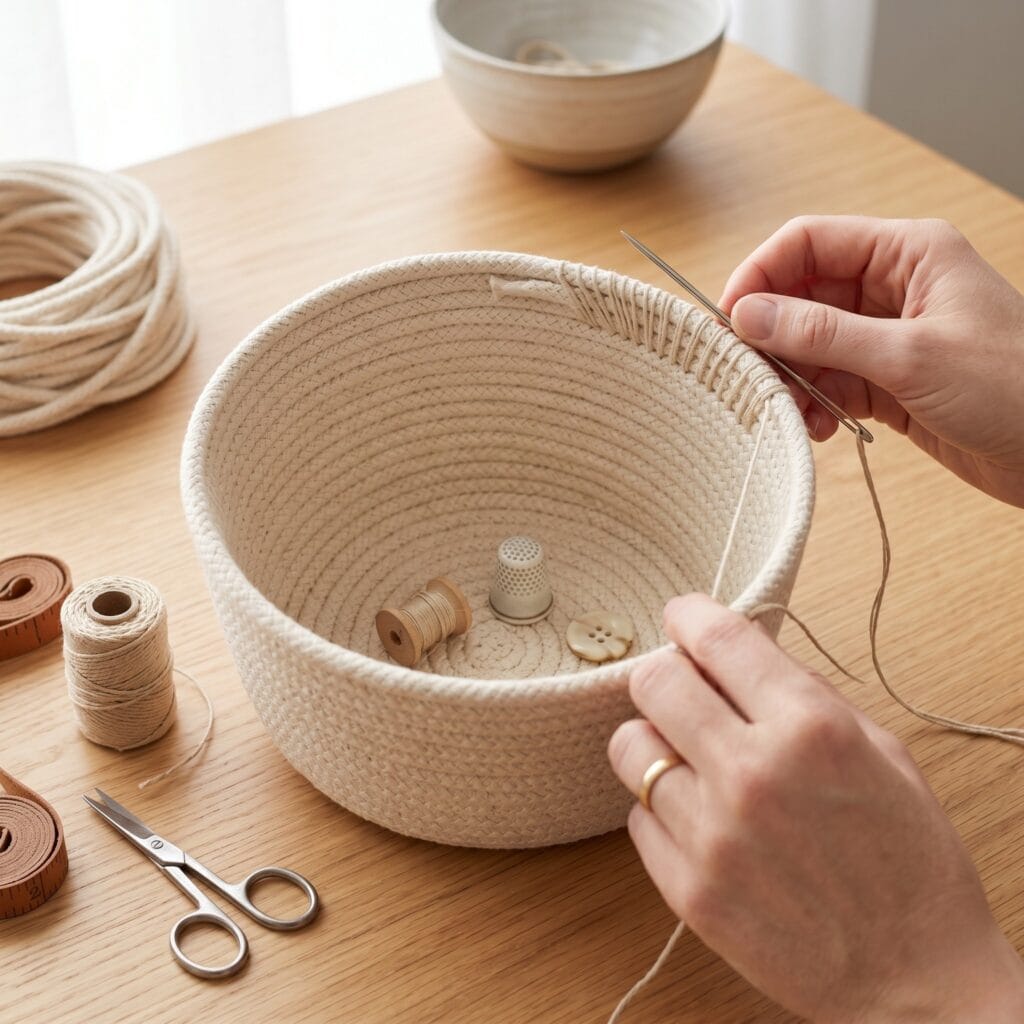
10 Creative Rope Basket DIY Variations
Supplies Needed: 6mm Natural Cotton Braided Rope, Cotton Embroidery Floss Color Pack, Blunt Large-Eye Tapestry Needles, Waxed Linen Thread Assortment
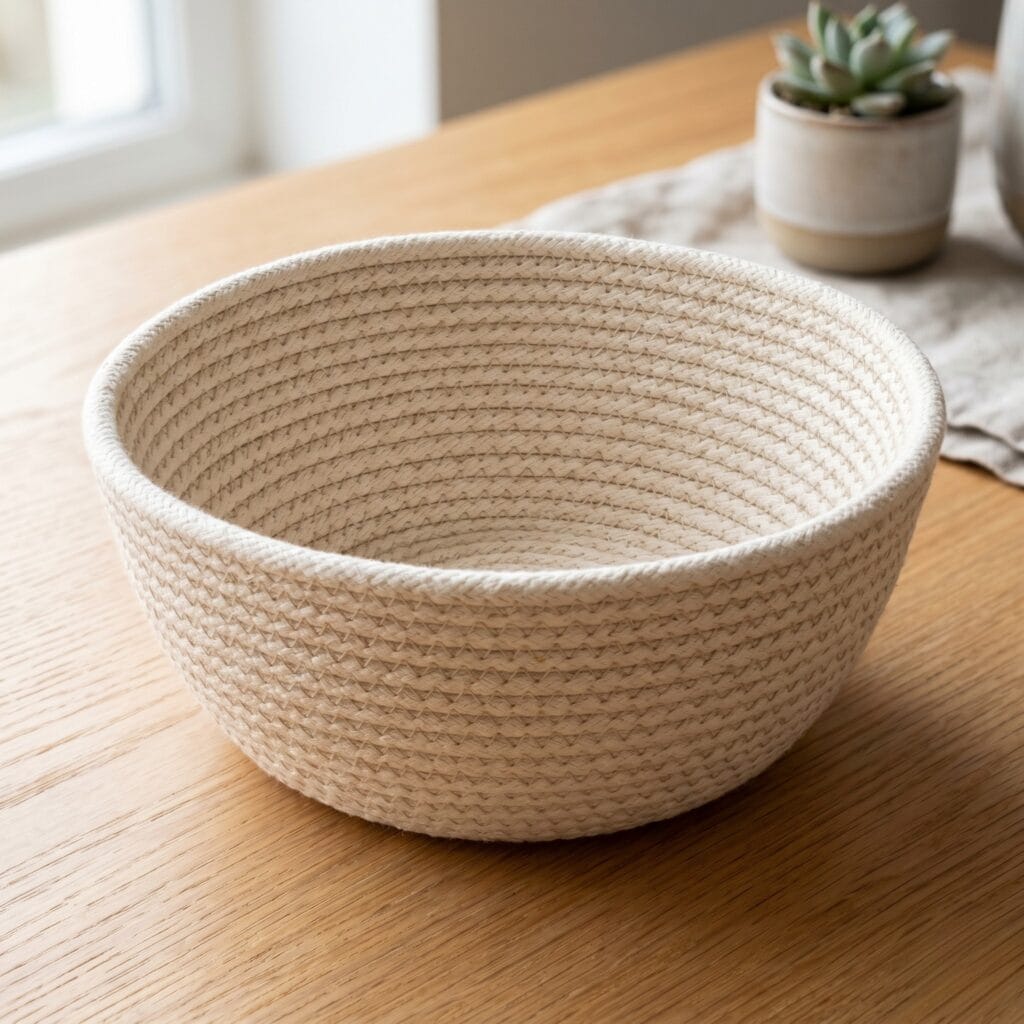
1. The Classic Minimalist Coiled Bowl: Rope Basket DIY Idea
Supplies Needed: 6mm Natural Cotton Braided Rope, Waxed Linen Thread Assortment, Blunt Large-Eye Tapestry Needles, Heavy-Duty Fabric Shears, Clear-Drying Fabric Glue
📏 Size it: Aim for a 15–18 cm base and 8–10 cm of wall — a display bowl that holds fruit or keys. Count rings with the baseline rule to estimate rope.
This design captures the clean texture of modern Scandinavian shelves. First, form a small circular disk. Next, continue wrapping rows horizontally. Then, tie simple overcast stitches through the preceding cord row using cream twine. Finally, secure the top edge cleanly. You finish the basic layout. You create a timeless desk bowl for your Rope Basket DIY setup.
2. The Multi-Color Wrapped Rim Basket: Rope Basket DIY Idea
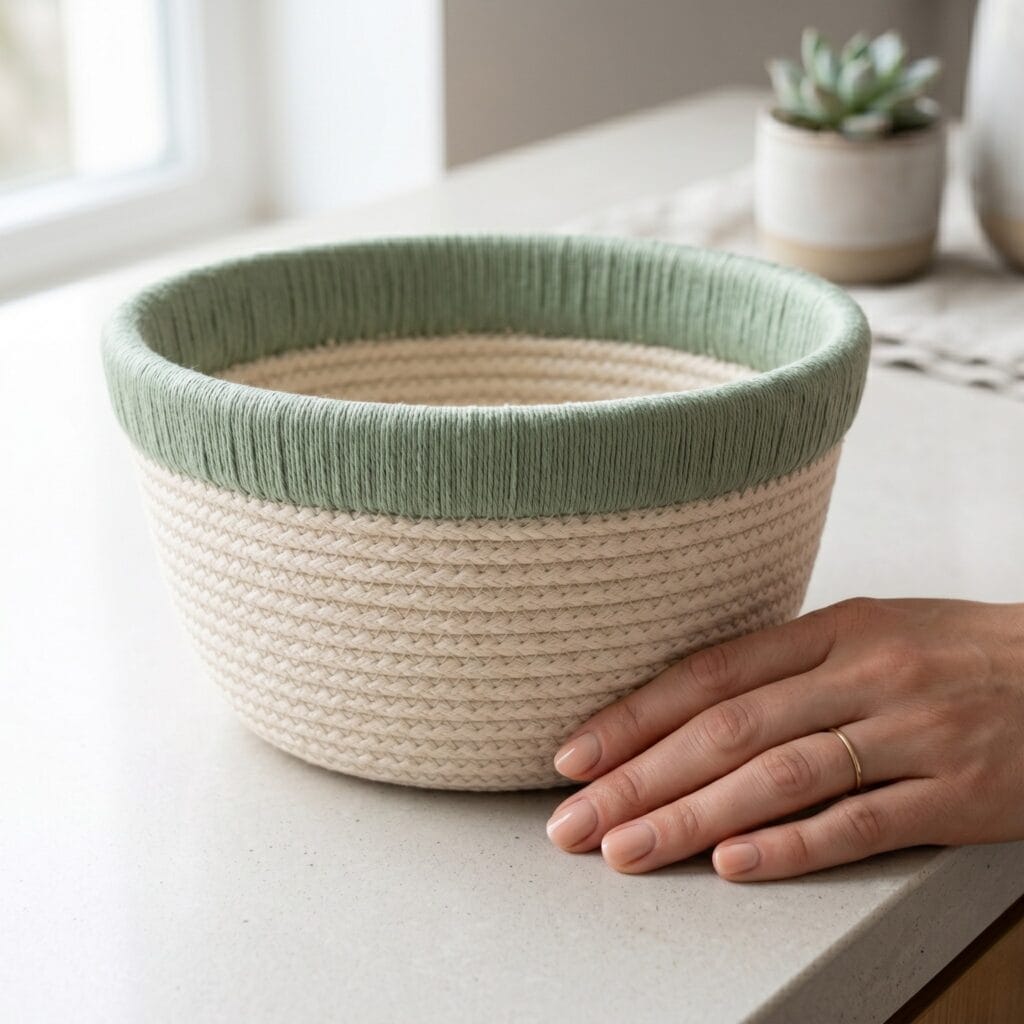
Supplies Needed: 6mm Natural Cotton Braided Rope, Sage Green Cotton Yarn, Waxed Linen Thread Assortment, Blunt Large-Eye Tapestry Needles, Fray Check Fabric Sealant
📏 Size it: Aim for a 12–15 cm base and 10–12 cm of wall — bookshelf scale. Start the sage wrap for the final rim rows, as described above.
Embrace a vibrant look using color blocks. Because of the contrasting accents, this small bin stands out on open bookshelves. First, build a standard raw cream base structure. Next, switch your thread to soft sage green yarn near the top rim rows. Then, wrap the border tightly. Brush a small amount of Fray Check onto the cut rope end before the final tuck so the braid cannot unravel. As a result, you finish a Rope Basket DIY accent piece.
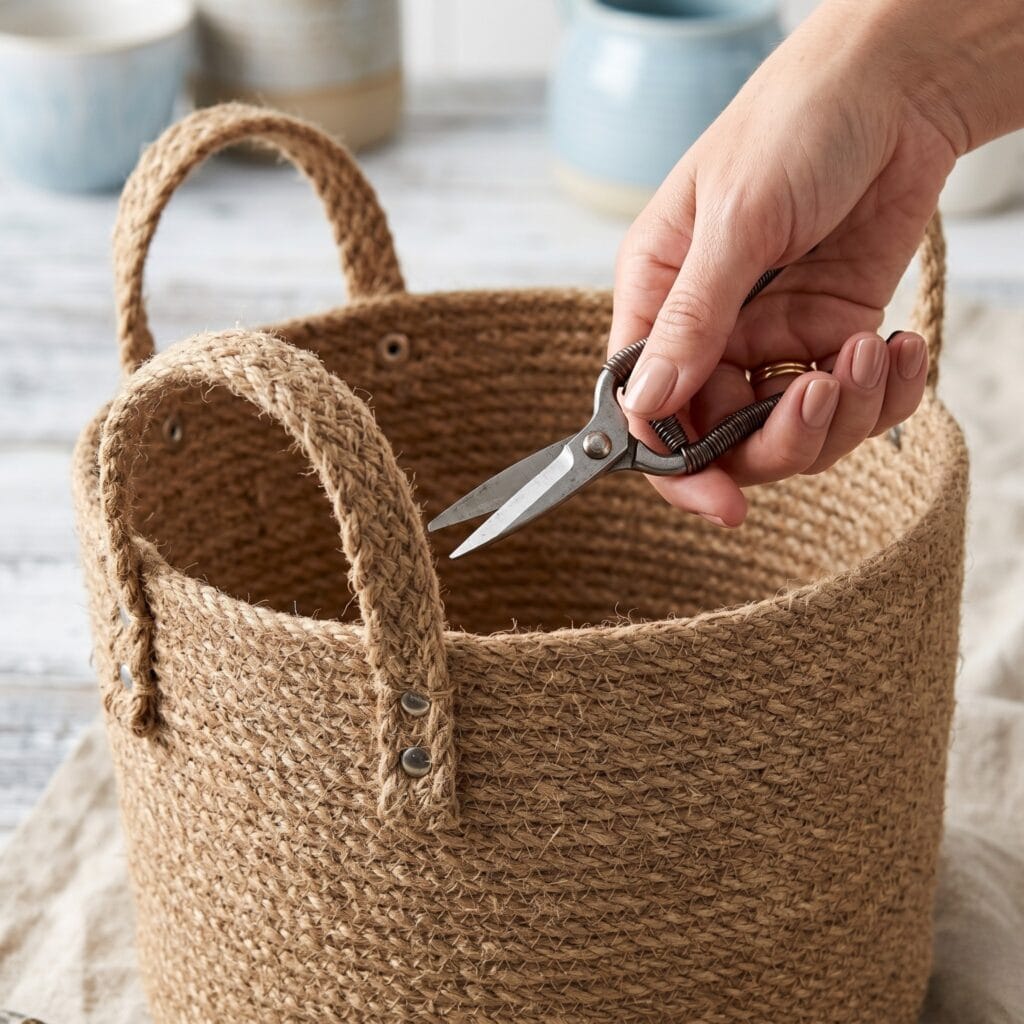
3. The Rustic Dual Jute Handle Basket
Supplies Needed: Natural Jute Rope, Waxed Linen Thread Assortment, Blunt Large-Eye Tapestry Needles, Heavy-Duty Fabric Shears, Fray Check Fabric Sealant
📏 Size it: Aim for an 18–20 cm base and 12–15 cm of wall, with each handle loop about 3–4 cm across.
Reduce workspace visual clutter easily. First, select a thick natural brown jute cord instead of cotton string. Next, build high, sturdy vertical basket walls. Then, leave two loop gaps open near the top rows to create matching handles. Seal each cut end with Fray Check before tucking it into the inside wall so the jute cannot unravel. Because these rustic Rope Basket DIY crafts are solid for everyday tools — match your rope thickness, stitch density, and handle loops to the weight you intend to carry, since rope baskets have no rated load.
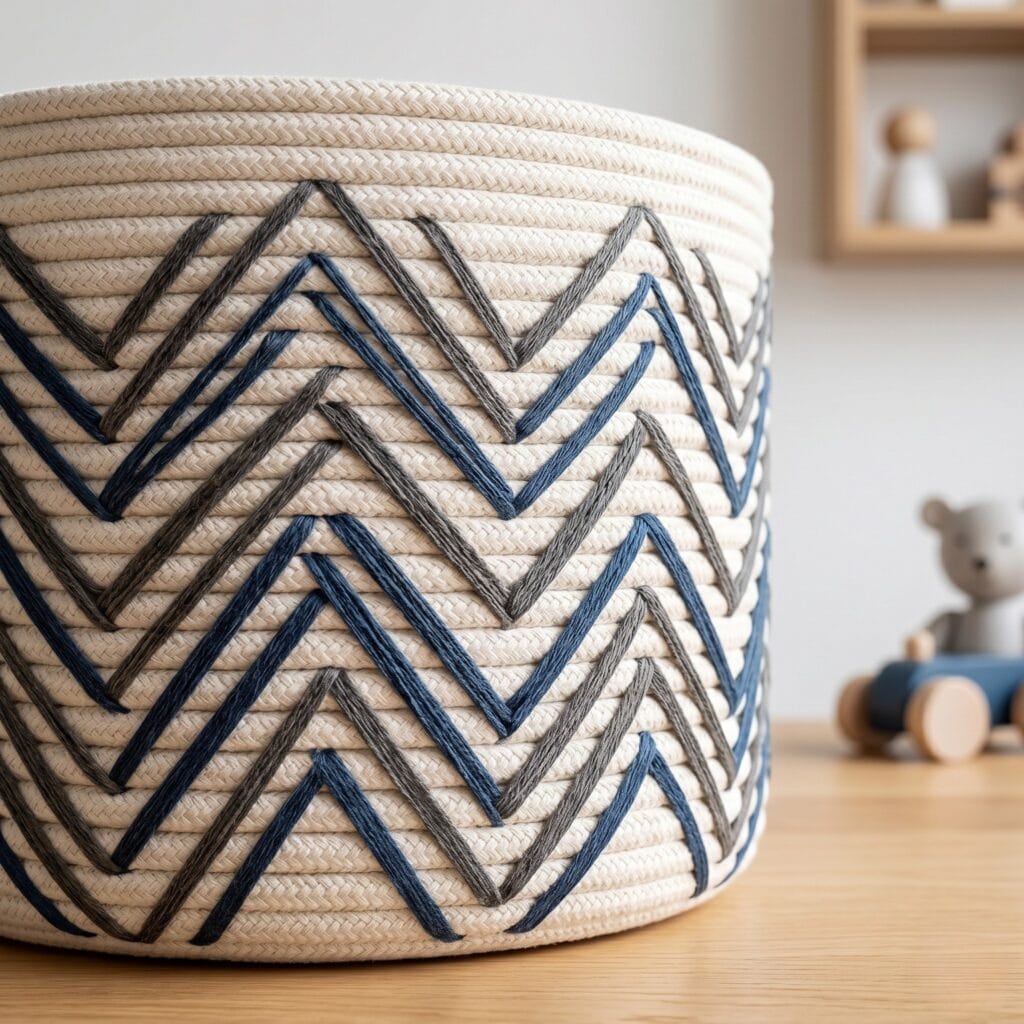
4. The Chevron Stitch Toy Bin
Supplies Needed: 8mm Natural Cotton Braided Rope, Cotton Embroidery Floss Color Pack, Blunt Large-Eye Tapestry Needles, Flexible Sewing Measuring Tape
📏 Size it: Aim for a 25–30 cm base and 15–20 cm of wall — toy-bin scale. Work the chevron band across the walls where you want the color to read.
This treatment introduces a crisp geometric pattern across your basket walls. First, prepare an extra-long cotton cord spool. Next, drop alternating diagonal loops across the stacked rows to form a classic chevron pattern. Finally, pull the joints tight. It creates a cozy structural wave across your Rope Basket DIY layout.
5. The Tapered Boho Jewelry Dish
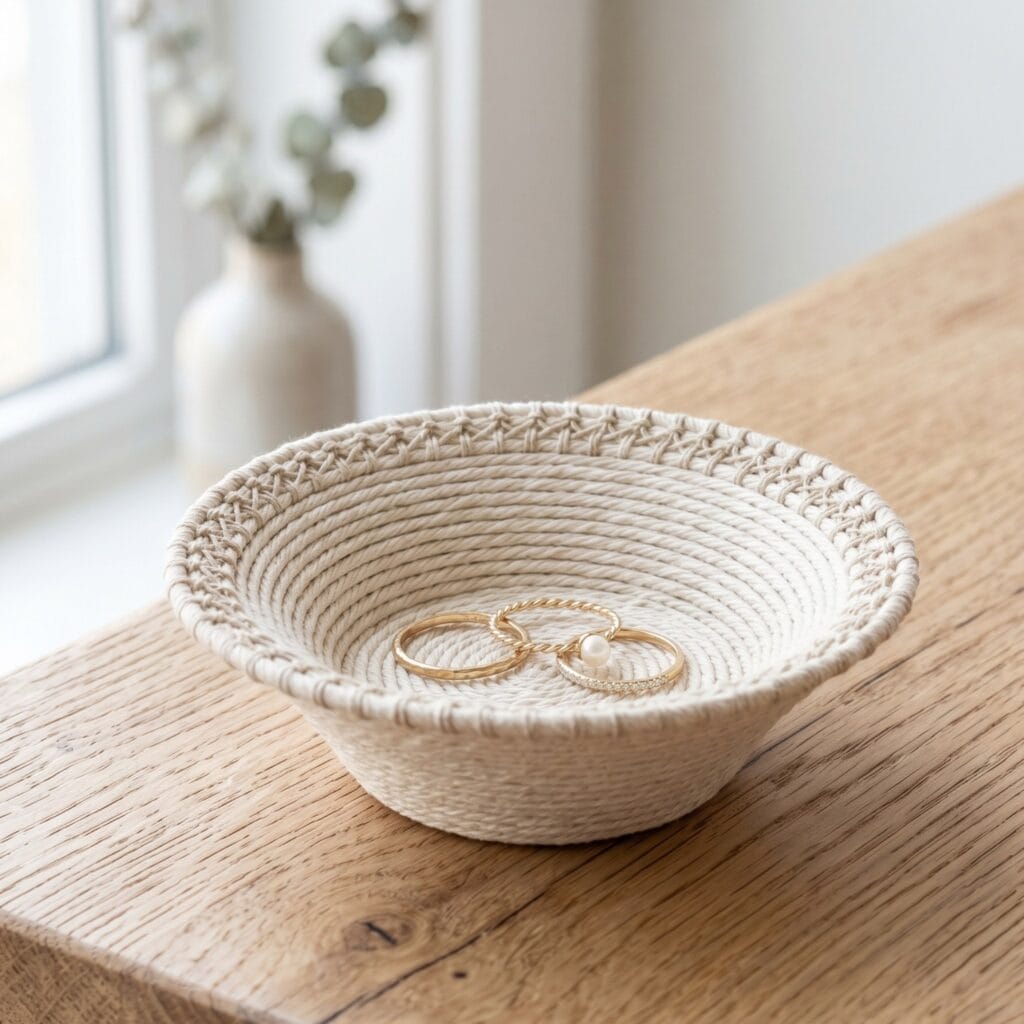
Supplies Needed: 4mm Cotton Cord, Waxed Linen Thread Assortment, Blunt Large-Eye Tapestry Needles, Heavy-Duty Fabric Shears
📏 Size it: Aim for an 8–10 cm base and 4–5 cm of height with the walls leaning inward — use the Step 4 taper option for that slant.
Merge delicate small storage shapes with simple lacing techniques. Specifically, use thin 4mm cotton string to build a tiny shallow dish shape. Next, pull your working thread firmly to angle the side walls inward sharply. Your finished Rope Basket DIY project will display a clean, modern flared silhouette.
6. The Mustard Cotton Rope Basket
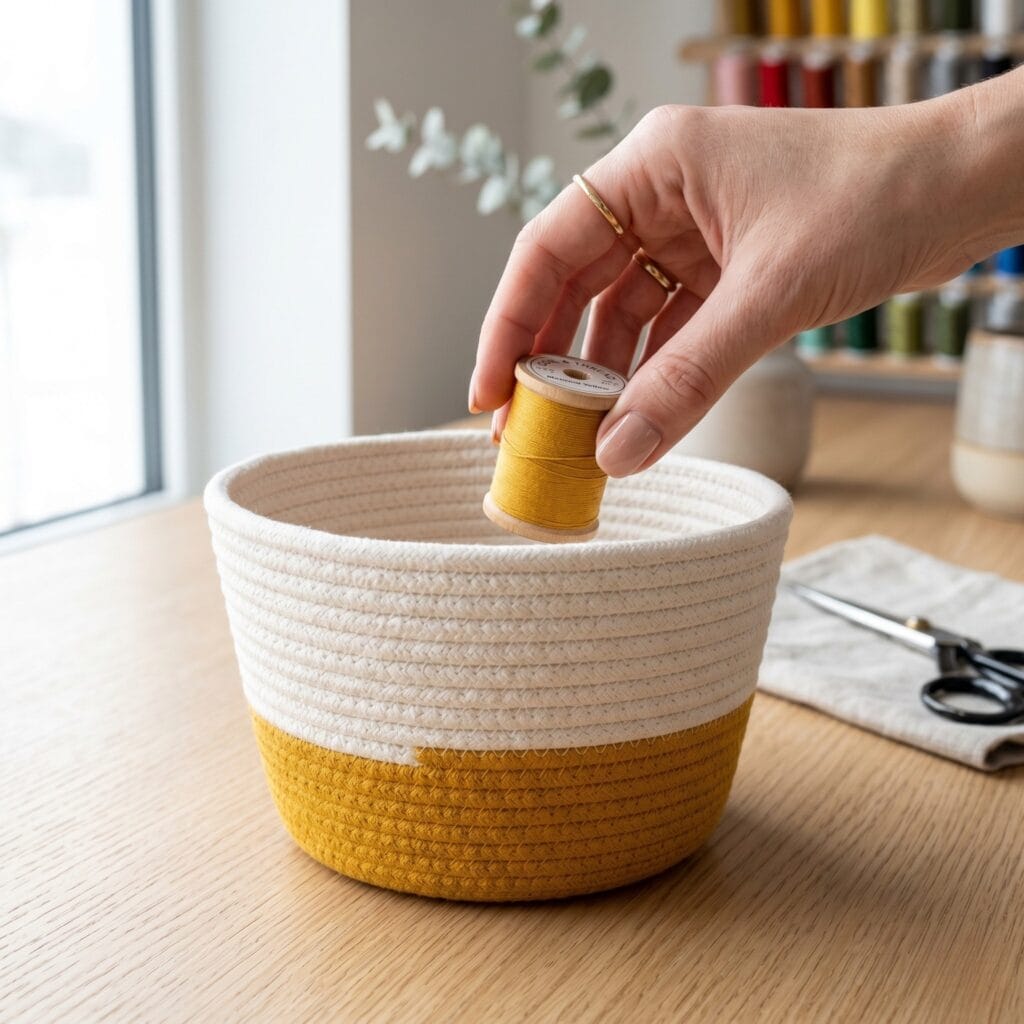
Supplies Needed: 6mm Natural Cotton Braided Rope, Cotton Embroidery Floss Color Pack, Waxed Linen Thread Assortment, Blunt Large-Eye Tapestry Needles
📏 Size it: Aim for a 15–20 cm base and 10–12 cm of wall — a desk-side basket.
This pattern celebrates bold storage geometry with zero effort. First, coil thick cotton cord upward to form a small bucket shape. Next, sew each row securely. Then, wrap the bottom third of the basket with bright mustard yellow thread. This creates a color-blocked storage piece for your desk.
7. The Leather Tab Storage Cylinder
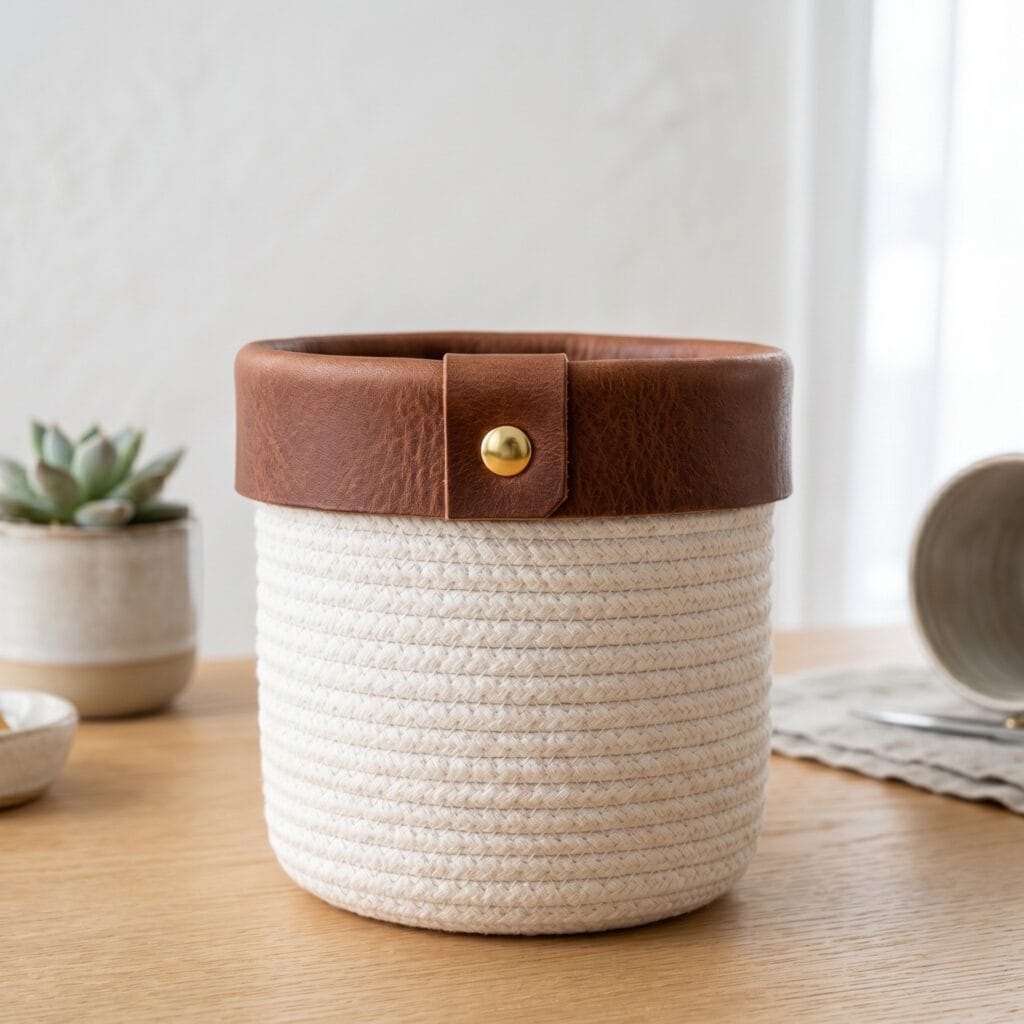
Supplies Needed: 8mm Natural Cotton Braided Rope, Vegetable-Tanned Leather Strips, Leather Hole Punch Pliers, No-Sew Leather Rivets, Waxed Linen Thread Assortment, Blunt Large-Eye Tapestry Needles, Heavy-Duty Fabric Shears
📏 Size it: Aim for a 10–12 cm base and 15–20 cm of height — a tall cylinder. Add the leather tabs once the walls are complete.
This clever craft addition adds a professional touch to simple storage vessels. First, sew a tall, straight-sided storage container using white cotton rope. Next, cut a small rectangular strip of raw brown leather material. Then, fold the leather over the rim. Finally, secure it with a bright brass rivet button to level up your Rope Basket DIY project.
Do you love blending heavy fibers with genuine leather accents? Then, explore our creative tutorial on crafting elegant Mini Leather Bag Charms to level up your studio skills!
8. The Hanging Doorway Pocket Basket
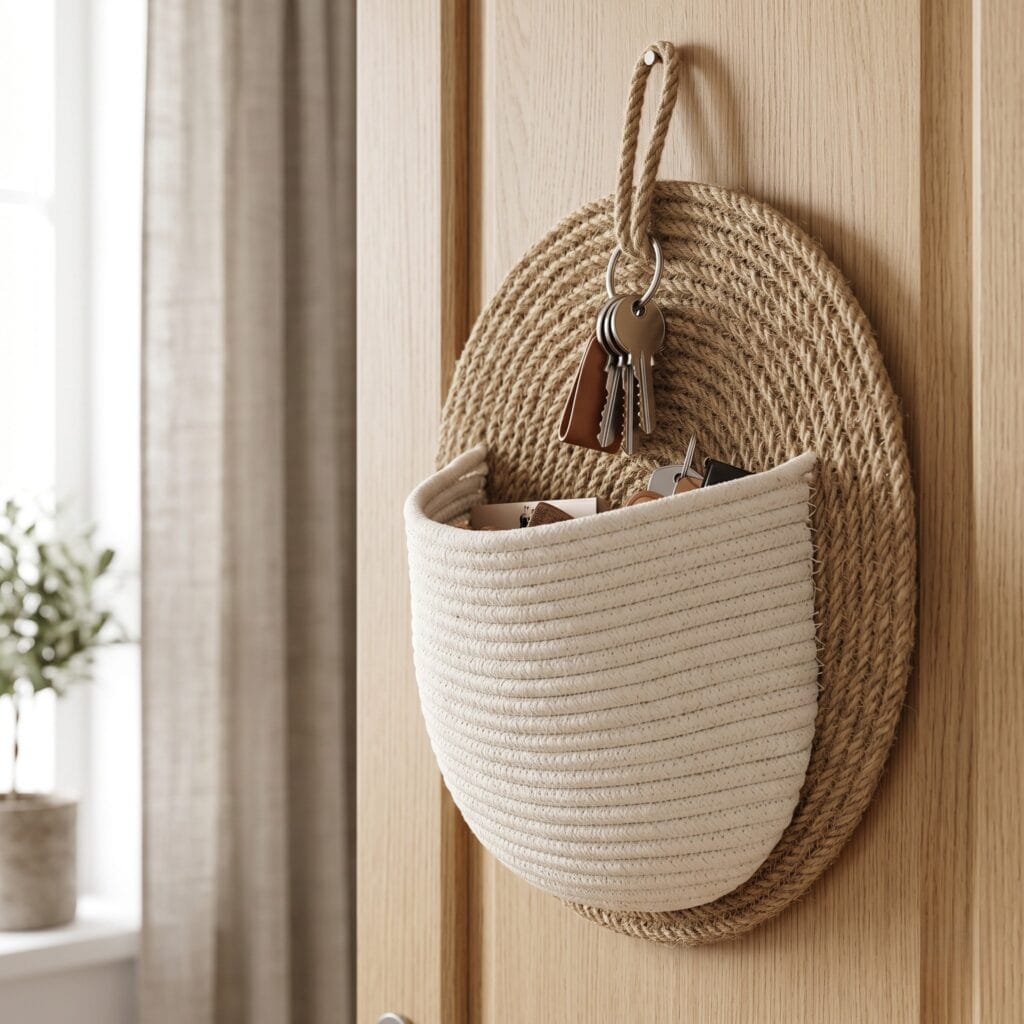
Supplies Needed: Natural Jute Rope, Cotton Twill Tape, Waxed Linen Thread Assortment, Blunt Large-Eye Tapestry Needles, Flexible Sewing Measuring Tape
📏 Size it: Aim for a backplate about 15 cm across with a pocket 10–12 cm deep — size it to the door or hook it will hang from.
This combination is a fantastic utility project for busy entryway spaces. First, build a flat semi-circular backplate from natural jute rope. Next, sew a deep pocket pouch across the front curve. Then, attach a sturdy rope loop to the top center point, backing the anchor with a folded strip of cotton twill tape stitched across the inside. You form a practical Rope Basket DIY for loose keys.
9. The Ombre Pastel Fade Bin
Supplies Needed: 8mm Natural Cotton Braided Rope, Pink Fabric Dye, Rubber Gloves, Blunt Large-Eye Tapestry Needles, Heavy-Duty Fabric Shears
📏 Size it: Aim for an 18–22 cm base and 15–20 cm of wall; the dip covers the bottom 5–7 cm for the ombre fade.
This project pairs soft paint gradients with organic fiber surfaces. First, stitch a classic tall storage bin using pure unbleached cotton rope. Next, mix a diluted bath of soft pink fabric dye. Then, dip the bottom section of the basket into the dye. Moreover, you can match these colored Rope Basket DIY items with soft bedroom fabrics.
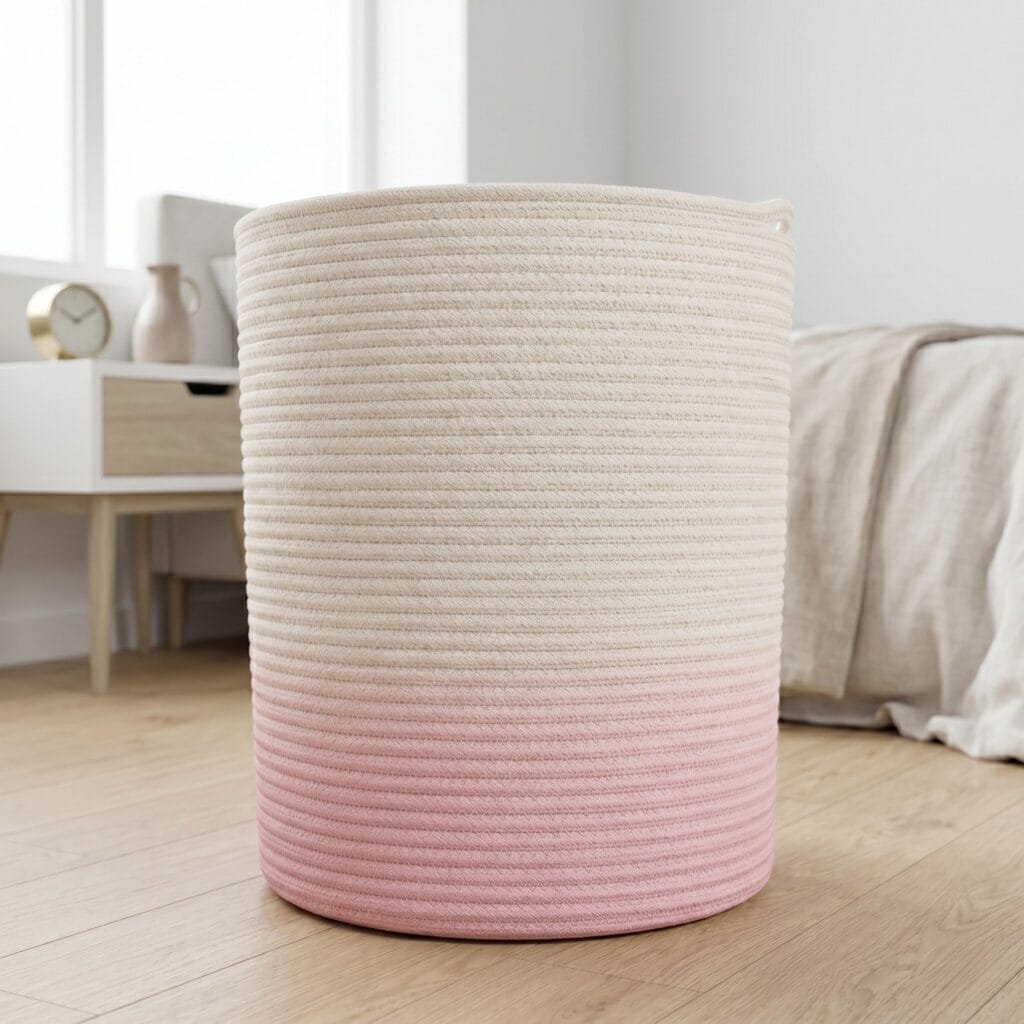
Dye method (cotton-safe): Use a dye labelled for cotton and other plant fibres. Mix it in cool-to-warm water at the label’s dilution, stir until fully dissolved, and wet the basket with plain water first so the dip spreads evenly. Soak the bottom section for the label’s time — about 10–20 minutes gives a soft ombre — then rinse under cool water until it runs clear and stand the basket upright to dry completely before use. Follow the dye maker’s colour-setting advice (many fibre dyes want a fixative, some use salt) so the shade does not bleed later. Dye after stitching for cleaner seams; dyeing the rope first colours the thread too.
10. The Celestial Star Stitch Bowl
Supplies Needed: 8mm Natural Cotton Braided Rope, Metallic Charcoal Thread, Blunt Large-Eye Tapestry Needles, Heavy-Duty Fabric Shears
📏 Size it: Aim for a 12–15 cm base and 6–8 cm of height — a low bowl so the star clusters read from the side.
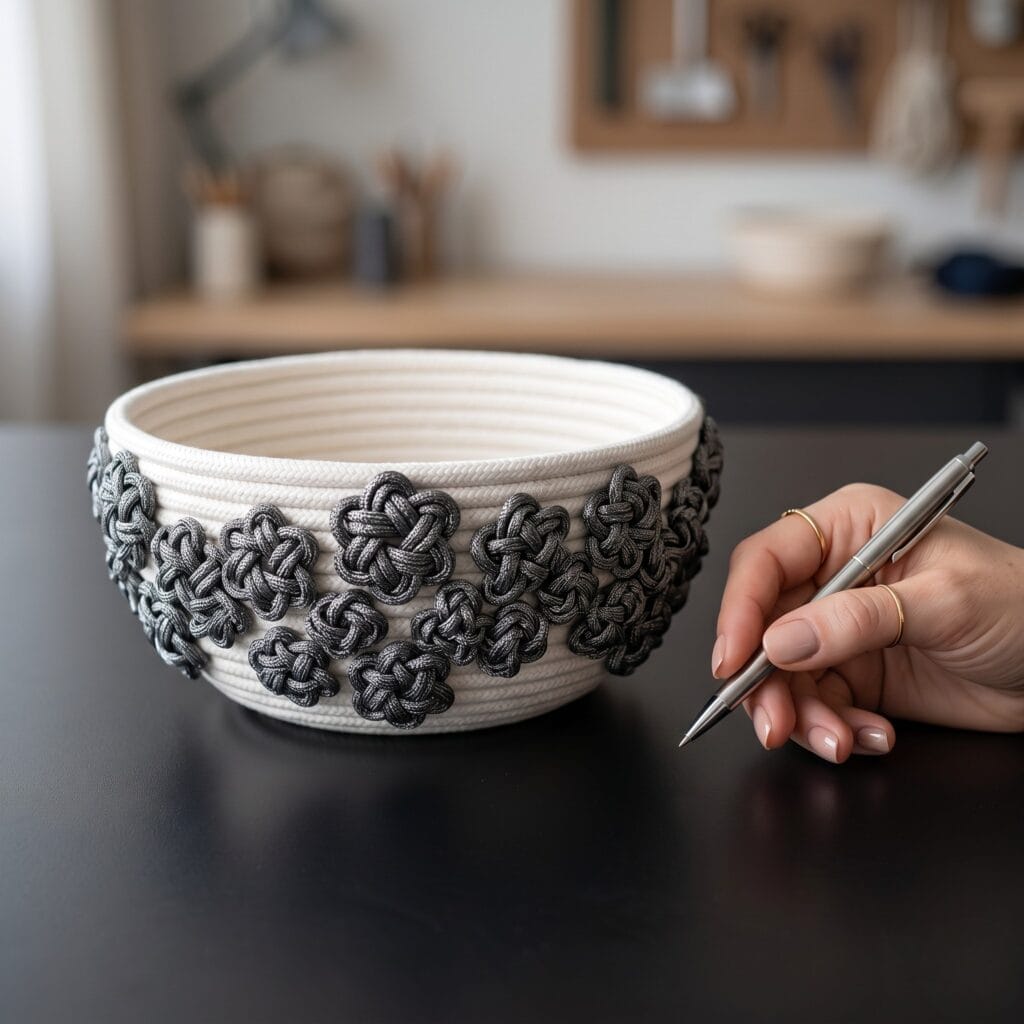
Undoubtedly, this mystical design pattern looks incredible on dark office tables. First, select a smooth white cotton rope base. Next, use metallic charcoal thread to tie decorative star-shaped knot clusters around the sides. Also, if you love pairing storage bowls with custom planters, view our guide on Hand Painted Terracotta Pots!
Finishing Your Clever Rope Basket DIY
Curating your own organizer bins is deeply satisfying. Completing a clever Rope Basket DIY will elevate your room styling. First, spend an afternoon placing your new fiber vessels on open shelves. Do you love these weekend crafts? Please, leave a comment below. Also, share your favorite storage design with our community!
Working with thick cords and sharp needles is an enjoyable hobby. Still, safety must guide your studio practice. Always use a metal thimble tool to push heavy tapestry needles through dense rope rows. You prevent accidental needle punctures on your fingertips. Because fabric dyes contain strong pigments, protect your hands with rubber gloves. Finally, keep all craft glue bottles safely stored out of reach of pets!
Important Crafting Safety Notes
Crafting is a rewarding creative activity, but maintaining a safe workshop environment is essential for yourself, your family, and your pets. Please review these vital safety precautions before starting:
• Needle Puncture & Thimble: A blunt tapestry needle still pierces skin. Push it through dense rope with the metal thimble from your kit — never with a bare fingertip — and if it sticks, back it straight out instead of levering sideways. Park it in a pincushion or lidded tin the moment you set it down.
• Cutting Rope & Shears: Trim rope on your cutting mat or table edge with sharp shears, cutting away from your body; braided rope ends spring back when snipped, so keep your fingers off the cut line and sweep offcuts into a bin straight away.
• Glue & Label Directions: Follow the label on your craft glue exactly — open time, clamping advice, and ventilation guidance are written there for a reason. Wipe away squeeze-out before it skins over so the finished rim stays smooth.
• Dye Ventilation & Gloves: Fabric dye is the one step here that needs real preparation: open a window or work under an exhaust fan, wear the rubber gloves from the moment you mix the bath, cover the table, and keep pets away from the dye water while the bin soaks.
• Pet & Child Safety (Thread & Needles): A dangling thread loop and a dropped needle are the two real hazards in basket coiling. Snip thread tails short, keep work-in-progress out of reach when you step away, and keep pets and small children clear of the coiling station while needles are out.
For more detailed guidance on safe crafting practices, liability disclosures, and website usage, please review our Terms and Conditions.
“Which of these Brilliant Ideas for a Beautiful Rope Basket DIY Project ideas are you excited to try first, or do you have a creative tip of your own to share? Drop a comment below—I’d love to hear your thoughts and see what you create!”