Do you want a beautiful summer home?
Are you looking for nice paper hibiscus flowers for your home? First, making paper plants is very relaxing. However, real tropical plants die fast. Therefore, we love this easy DIY project. Because we use premium crepe paper, they look incredibly realistic. Plus, the crafting steps are very easy. As a result, you can create lasting floral decor quickly. Indeed, your dining table will look like a luxury resort. Also, if you want more seasonal inspiration, check our summer craft ideas post for your home!
Detailed Supplies for Paper Hibiscus Flowers
You need a few specific items to start. Fortunately, professional floral materials are affordable. So, gather these supplies for your paper hibiscus flowers. Consequently, your flower-making process will be perfect.
- High-Quality Paper: First, buy fine Italian crepe paper in soft pastel colors. Because it stretches beautifully, the petals look real.
- Floral Basics: Next, get thin green floral wire and floral tape. Therefore, you can build a strong, flexible stem for your flower.
- Essential Tools: Finally, grab sharp craft scissors, liquid glue, and soft watercolors. Thus, you can paint beautiful, realistic details on your petals.
How to Make Paper Hibiscus Flowers (Step-by-Step)
Do you want to try our signature botanical project? Here, we explain how to build a perfect tropical bloom. Because the steps are logical, you will finish it smoothly.
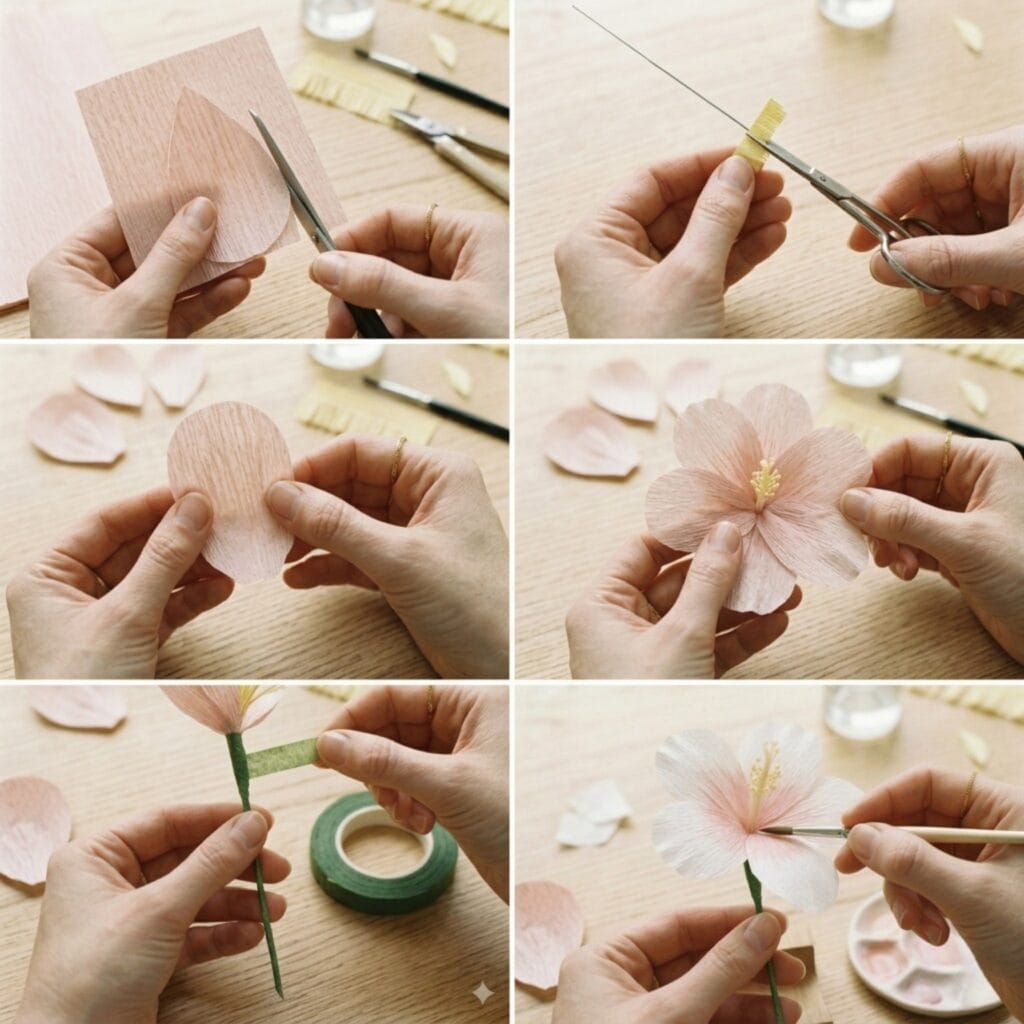
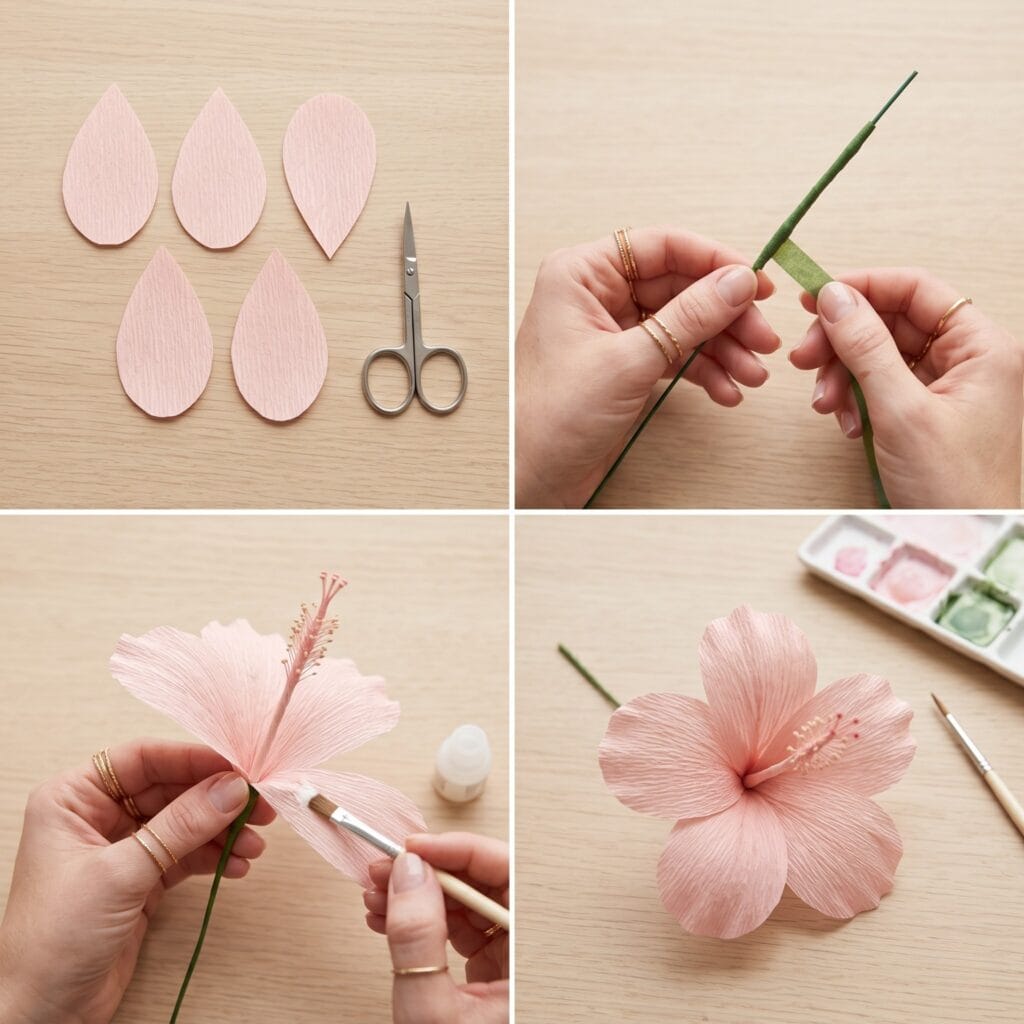
Step 1: Prepare the Petals. First, cut five large teardrop shapes from your Italian crepe paper. Important: Ensure the paper grain runs vertically so you can stretch the petals later. Pro Tip: Use a template to keep all petals perfectly symmetrical.
Step 2: Create the Stamen. Cut a thin 2-inch strip of yellow paper and fringe the top edge with fine scissors. Next, wrap it tightly around the tip of your green floral wire. Therefore, you create a realistic, textured center for your flower.
Step 3: Shape for Realism. Gently stretch the center of each petal with your thumbs to create a cup shape. Then, use a pencil to curl the top edges outward. Because of the paper’s stretch, it will hold this organic shape beautifully.
Step 4: Layer the Bloom. Place the first petal against the stamen. Next, overlap the second petal slightly over the first one. Consequently, continue this pattern until all five petals are arranged in a perfect circle.
Step 5: Secure with Floral Tape. Wrap green floral tape tightly around the base of the petals and down the wire stem. Pro Tip: Pull the tape gently as you wrap to activate the adhesive. As a result, your flower will be sturdy and professional.
Step 6: Artisan Finishing Touches. Use a soft brush to apply a tiny amount of watercolor to the center of the bloom. Finally, open the petals wide to mimic a real tropical hibiscus. Indeed, your flower is now a stunning piece of botanical art.
10 Aesthetic Paper Hibiscus Flower Ideas
Additionally, these projects offer a high-end botanical look. Here, we have ten unique floral ideas to try right now.
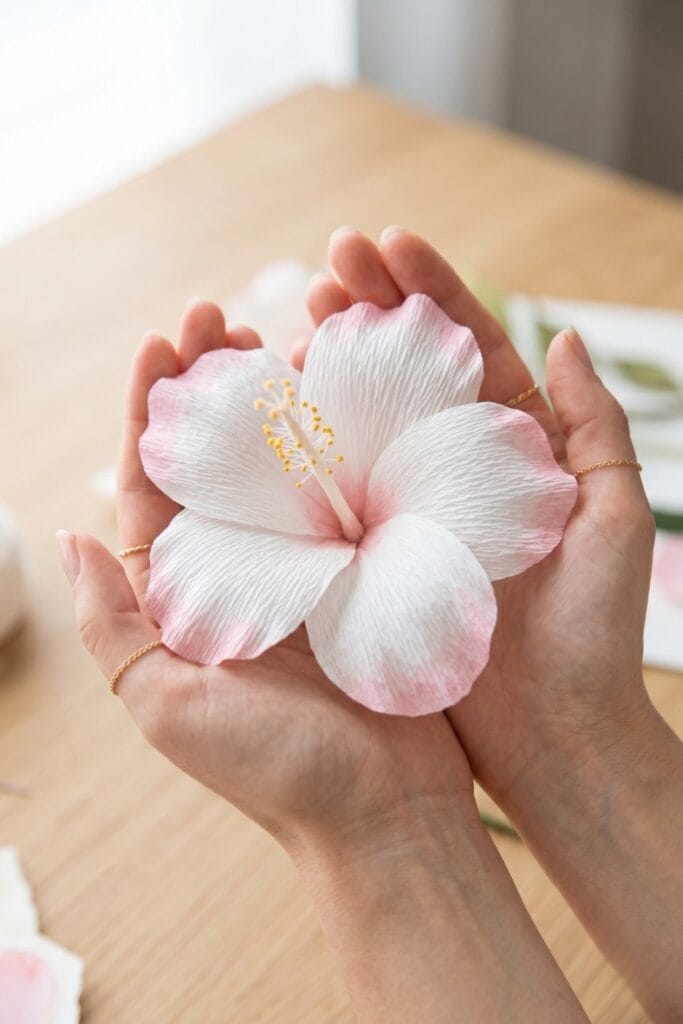
1. Watercolor Pastel Paper Hibiscus Flowers
Add a wabi-sabi touch to your blooms. First, make white crepe paper flowers. Next, lightly paint the edges with pale pink watercolors. Because the colors blend naturally, they look highly artistic. Indeed, it is a stunning piece.
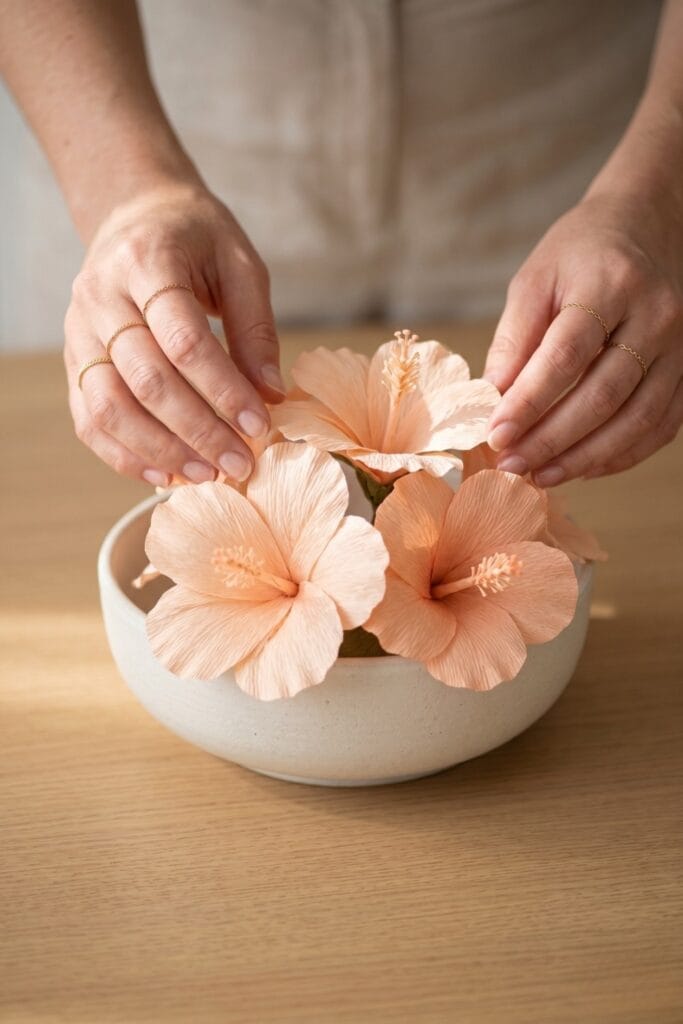
2. Centerpiece with Paper Hibiscus Flowers
Decorate your summer dining table. First, create three large flowers in soft peach tones. Next, arrange them in a low, minimalist ceramic bowl. Consequently, they look very earthy and sophisticated. Plus, they will never wilt during dinner.
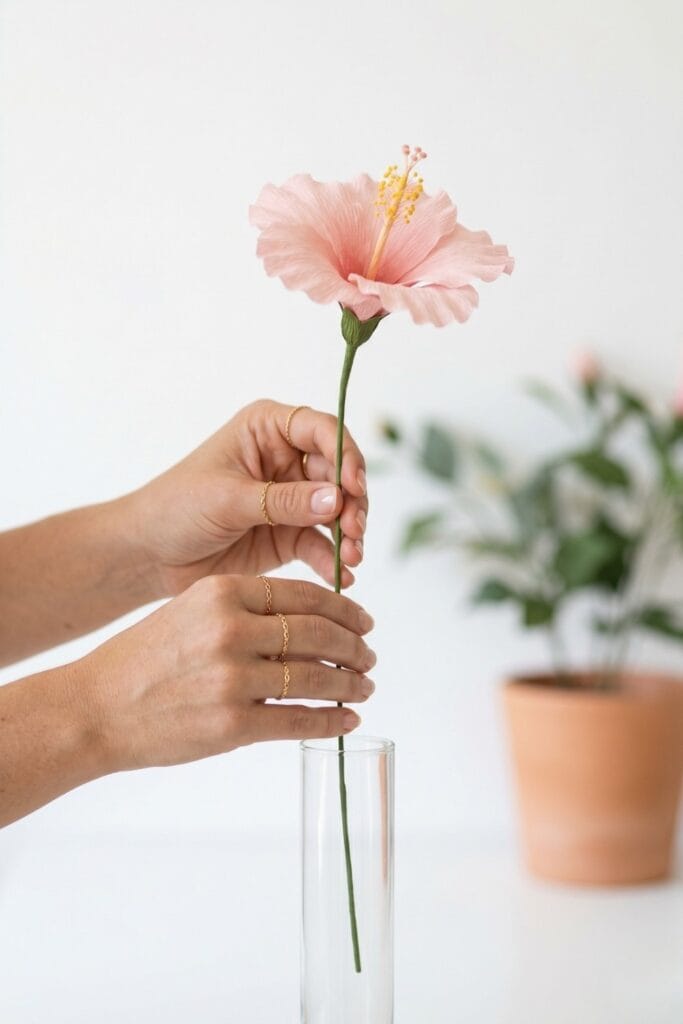
3. Minimalist Single Stem Hibiscus
Keep your decor simple and clean. First, build one highly detailed, realistic flower. Next, place it alone in a tall, clear glass vase. Therefore, you create a modern, striking statement piece. As a result, it fits minimalist homes perfectly.
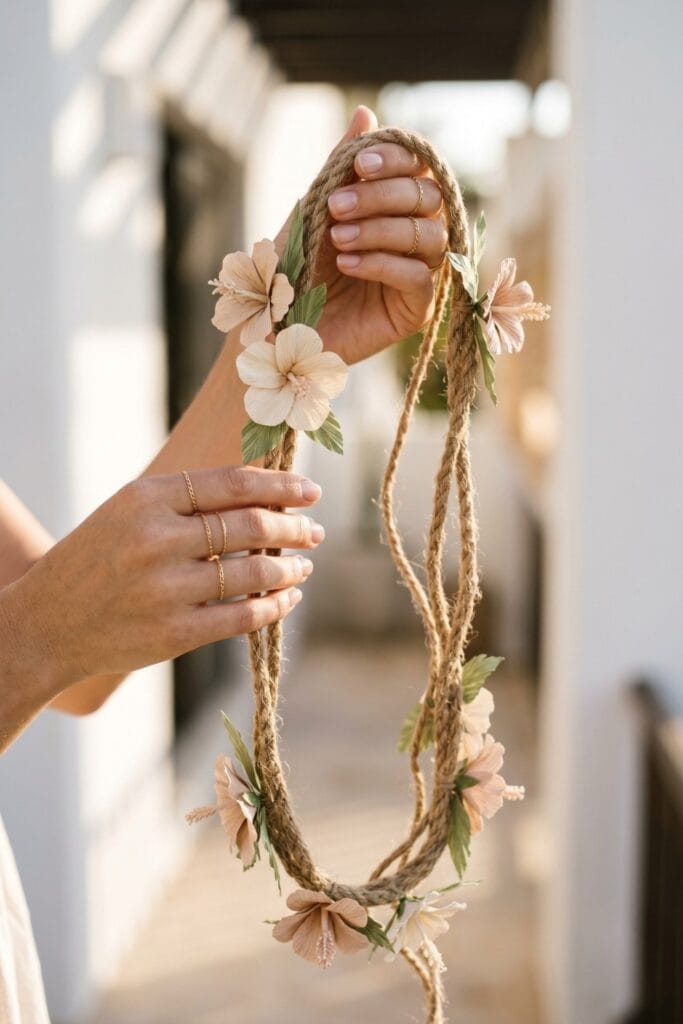
4. Boho Garland Using Paper Hibiscus Flowers
Decorate your patio beautifully. First, make several small paper hibiscus flowers. Next, attach them to a long natural jute rope. Consequently, you create a beautiful rustic garland. Indeed, it is perfect for aesthetic summer parties.
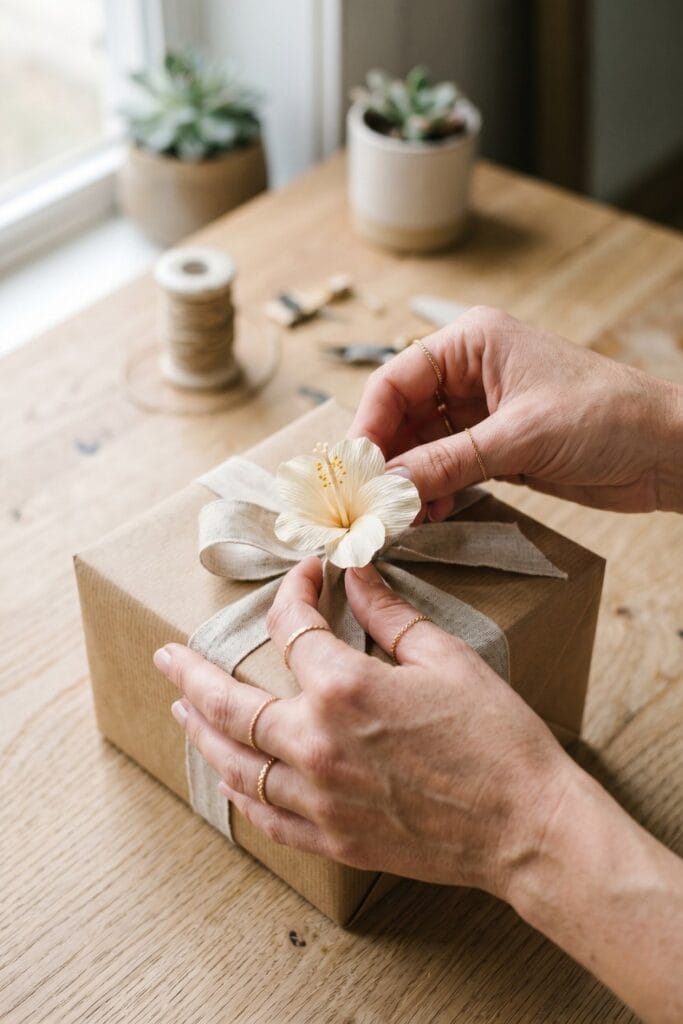
5. Tropical Gift Toppers
Upgrade your gift wrapping. First, wrap your box in plain kraft paper. Next, tie a natural linen ribbon around it. Then, attach a small paper bloom to the top. Therefore, your simple gift looks incredibly luxurious.
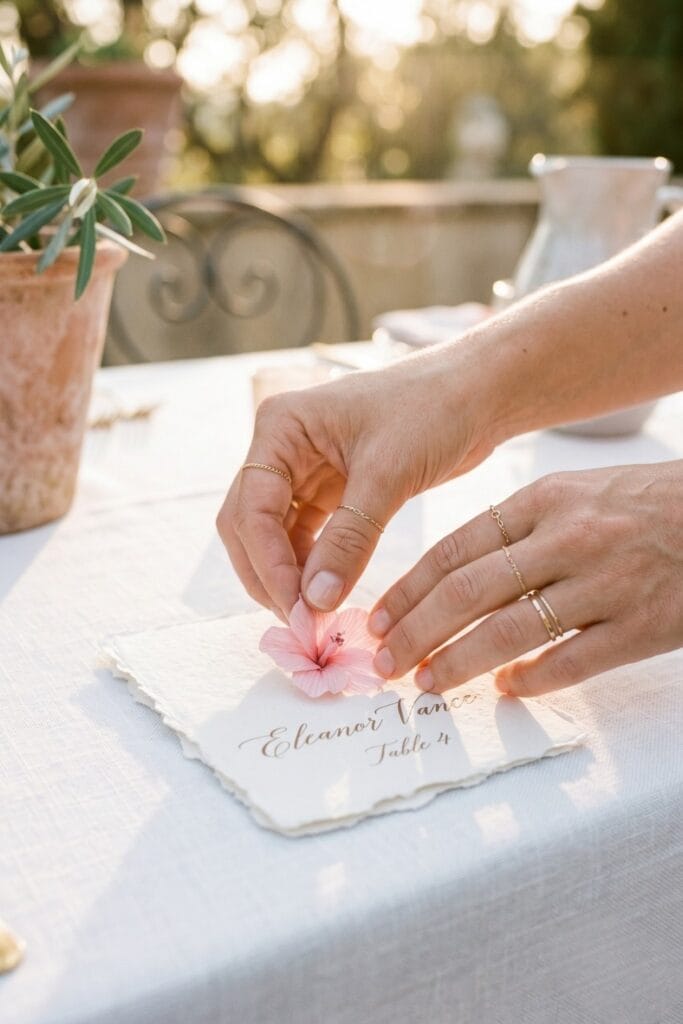
6. Wedding Place Cards
Create elegant seating arrangements. First, make tiny, delicate flowers. Next, glue them to raw, handmade paper name cards. Because of the artisan texture, they look very expensive. As a result, your guests will love them.
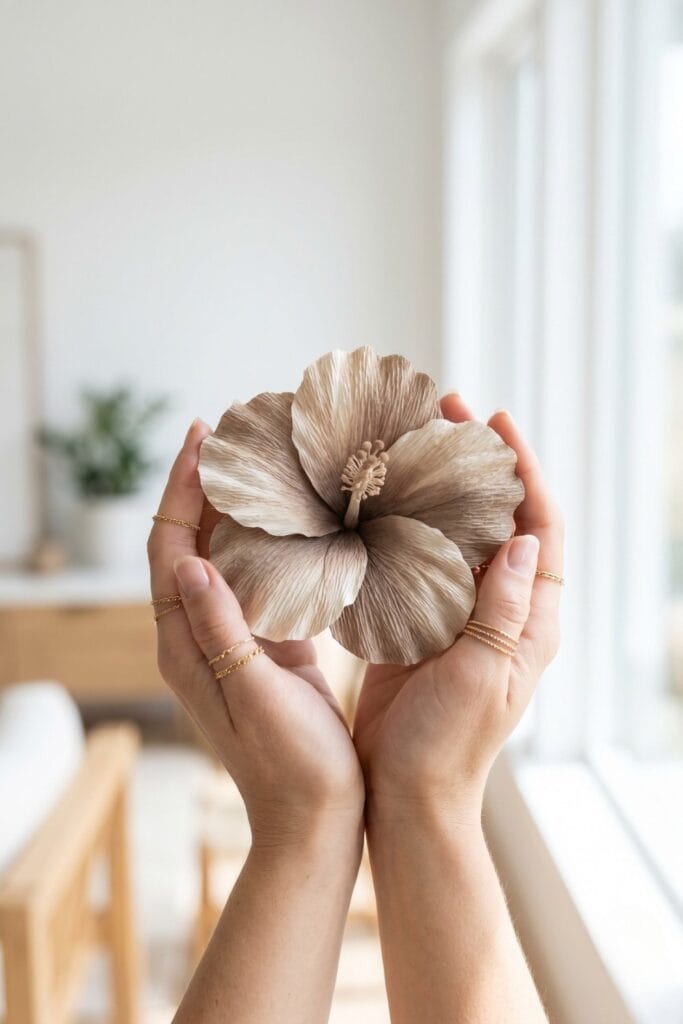
7. Neutral Tone Blooms
Match your earthy home aesthetic. First, skip the bright red paper completely. Next, use beige, cream, and taupe crepe paper. Thus, your tropical flowers blend seamlessly with your minimalist living room.
8. Brass Wreath with Paper Hibiscus Flowers
Create a modern door decoration easily. First, buy a simple, thin raw brass craft hoop. Next, attach just one or two paper hibiscus flowers to the bottom edge. Consequently, you get a beautiful, minimalist summer wreath. Moreover, it takes very little time to build.

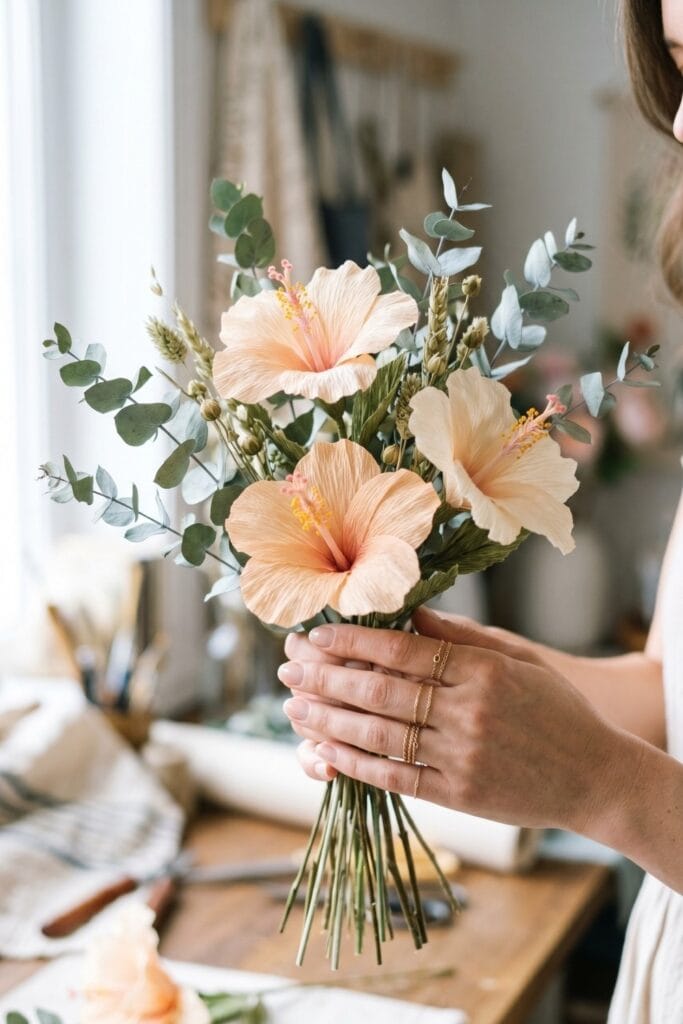
9. Hibiscus and Eucalyptus Bouquet
Mix paper with real dried plants. First, create three stunning paper blooms. Next, arrange them with real dried green eucalyptus stems. Because you mix textures, the bouquet looks very organic. Indeed, it is highly sophisticated.
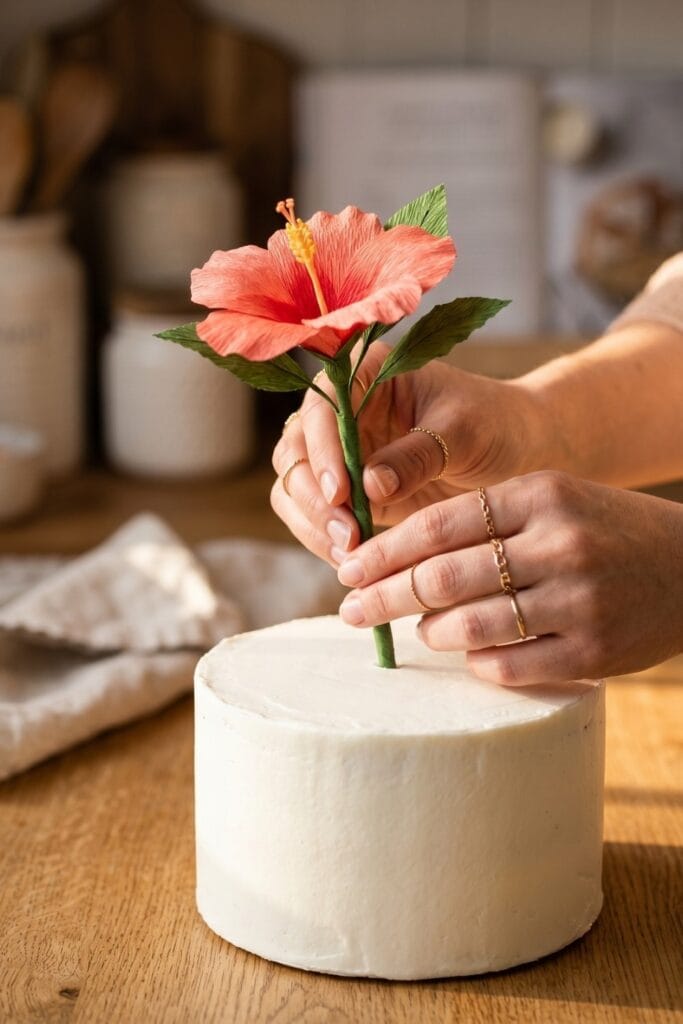
10. Cake Topper Flowers
Decorate a summer cake safely. First, create your flowers carefully. Next, wrap the wire stems completely in food-safe floral tape. As a result, you can push them into a simple white cake. Therefore, you get a professional bakery look.
Final Thoughts on Botanical Crafts
Making beautiful paper plants is incredibly rewarding. Therefore, try making these paper hibiscus flowers this week. Also, they are perfect gifts for your friends. So, what color will you choose for your first bloom? Please, leave a comment below!
Important Crafting Safety Note:
Making paper flowers is a very safe and calming activity. However, always use caution when crafting. Therefore, please be careful when using sharp scissors or wire cutters. Because floral wire is sharp, always bend the ends safely. Finally, keep liquid craft glue away from small pets and children!