

Working with layered resin allows you to move beyond basic, flat pours and create three-dimensional art with incredible depth. By building your artwork in thin, successive layers, you can suspend objects floating in mid-air, create realistic deep-water illusions, or preserve delicate botanicals without them sinking to the bottom. While the process requires patience and attention to curing times, mastering the layer technique can produce a professional, glass-like finish. Below is our complete guide to resin layering, including essential studio supplies, core techniques, and 12 structural projects to try.
This post contains affiliate links. As an Amazon Associate, I earn from qualifying purchases. If you buy through these links, I may earn a commission at no additional cost to you.
If you enjoy casting and molding, you should also check out our guide on DIY Cement Crafts to Upgrade Your Home to build custom displays for your new resin pieces.
Essential Supplies for Layered Resin Art
Creating flawless, bubble-free layers requires the right chemical formulas and protective studio gear. A few foundational tools are used throughout every single project in this guide, marked with a (used throughout) tag below.
🧪 EPOXY RESIN & CHEMICALS
Choosing the right resin viscosity and preparation chemicals is crucial for layer thickness, bubble release, and preserving natural elements.
- 🧪 Clear Art Coating Resin (used throughout) — medium-viscosity epoxy ideal for shallow layers, top coats, and doming |
Check Price for Clear Art Coating Resin on Amazon - 🧪 Deep Pour Epoxy Resin — slow-curing, thin liquid resin designed for casting thick floral blocks without overheating |
Find Deep Pour Epoxy Resin on Amazon - 🧴 Mod Podge Clear Sealer — water-based sealer used to prep porous paper and organic materials before resin exposure |
View Mod Podge Clear Sealer on Amazon - 🌸 Silica Gel Floral Drying Powder — fine desiccant crystals used to rapidly dry flowers while preserving their 3D shape and vibrant color | Check Price for Silica Gel Floral Drying Powder on Amazon
- 🌿 Chemically Preserved Moss — color-fast, completely dehydrated moss tufts safe for direct resin encapsulation |
Find Chemically Preserved Moss on Amazon
🛠️ MIXING & SAFETY GEAR
Proper mixing tools and safety equipment protect both your health and the clarity of your final piece.
- 🧤 Disposable Nitrile Gloves (used throughout) — protects skin from sticky resin and chemical sensitization |
Check Price for Disposable Nitrile Gloves on Amazon - 😷 Half-Face Respirator Mask (used throughout) — use only with fitted, in-date organic-vapor cartridges; a bare mask does not filter epoxy fumes |
Find Half-Face Respirator Masks on Amazon - 🥽 Chemical Splash Safety Glasses — protects eyes from resin splashes while mixing and pouring |
Check Price for Chemical Splash Safety Glasses on Amazon - 📏 Silicone Mixing Cups & Stir Sticks (used throughout) — reusable, non-stick measuring tools that wipe clean after the resin cures | Explore Silicone Mixing Cups on Amazon
- 🔥 Butane Kitchen Torch (used throughout) — sweeps over wet resin layers to instantly pop rising micro-bubbles |
View Butane Kitchen Torches on Amazon - ⚖️ Digital Craft Scale (used throughout) — ensures perfectly accurate resin-to-hardener ratios by weight |
Check Availability for Digital Craft Scales on Amazon
🎨 PIGMENTS & MOLDS
Specialized colorants behave differently in liquid resin than standard acrylic paints.
- 🎨 Liquid Alcohol Inks — highly concentrated translucent drops perfect for nebulas and water effects |
Find Liquid Alcohol Inks on Amazon - ✨ Metallic Mica Powders — fine dust pigments that create shimmering, opaque color shifts and faux marble veins |
View Metallic Mica Powders on Amazon - 🖌️ Opaque Resin Pigment Paste — thick, solid coloring for creating dark space backgrounds or flat bases |
Check Price for Opaque Resin Pigment Paste on Amazon - 🌟 Gold Foil Flakes — delicate metallic sheets for adding floating stars and luxurious accents |
Find Gold Foil Flakes on Amazon - 🧊 Geometric Resin Silicone Molds Set — flexible, non-stick geometric shapes that release cured resin easily |
Explore Geometric Resin Silicone Molds Set on Amazon
Core Techniques for Layered Resin
Every project in this guide relies on these foundational resin rules. Understanding how epoxy behaves between layers is the secret to 3D depth without visible seam lines.
Optional Studio Upgrades
Never required to finish the projects above — convenience upgrades for makers who want them.
📦 Beginner Project Kits & Coordinated Bundles
For beginners or makers starting from scratch, these coordinated bundles and all-in-one project packs bring together the core supplies in one convenient order.
- Epoxy Resin Starter Kit — Convenience bundle combining resin supplies, mixing accessories, pigments, molds, and project guidance for new makers. | Find on Amazon
⚡ Studio Tools & Workshop Equipment
Optional studio upgrades — every project above can be completed without these.
- Resin Pressure Pot — A sealed casting chamber that compresses bubbles in poured resin for clearer deep casts and detailed molds. | Check Resin Pressure Pot on Amazon
- Resin Vacuum Chamber — Studio equipment for degassing mixed resin before pouring, helping reduce trapped air in clear layers. | Check Price on Amazon
- Resin Polishing Kit — Reusable finishing equipment and abrasives for restoring clarity and gloss after sanding cured resin edges. | View Resin Polishing Kit on Amazon
Resin Vacuum Chamber
Studio equipment for degassing mixed resin before pouring, helping reduce trapped air in clear layers.
I earn a commission if you make a purchase, at no additional cost to you.
1. Accurate Measuring & Mixing
Supplies Needed: Clear Art Coating Resin (used throughout), Digital Craft Scale (used throughout), Silicone Mixing Cups & Stir Sticks (used throughout), Disposable Nitrile Gloves (used throughout), Half-Face Respirator Mask (used throughout)
Resin is a strict chemical formula, not a casual recipe. Measure your resin and hardener with a digital craft scale the way your resin’s label directs — some systems mix by weight and others by volume, so the exact ratio comes from the manufacturer. Stir the mixture slowly with a silicone stick, constantly scraping the sides and bottom of the cup, for the mixing time your label specifies. Unmixed resin streaks will never cure and will leave permanent sticky spots in your artwork.
2. Sealing Porous Inclusions
Supplies Needed: Mod Podge Clear Sealer, Disposable Nitrile Gloves (used throughout), Half-Face Respirator Mask (used throughout)
Resin acts like a liquid magnifying glass. If you drop untreated paper, photographs, or raw fabric into mixed epoxy, the resin will seep into the fibers, causing ugly dark stains and trapping hundreds of micro-bubbles. Always paint two thin coats of Mod Podge or clear acrylic spray over porous items and let them dry completely before encapsulating them.
3. Timing the “Gel Stage”
Supplies Needed: Clear Art Coating Resin (used throughout), Digital Craft Scale (used throughout), Silicone Mixing Cups & Stir Sticks (used throughout), Disposable Nitrile Gloves (used throughout), Half-Face Respirator Mask (used throughout)
To create seamless layers, you cannot wait for the first pour to cure rock-hard before adding the next. Wait until the first layer reaches the “gel stage” your resin’s data sheet describes — it should feel tacky but transfer no liquid when touched with a toothpick. That window depends on resin temperature, layer depth, and formula, so treat the label’s recoat guidance as the authority. Pouring the second layer within that window lets the two coats chemically bond, erasing any visible horizontal line between them. If a layer cures fully before you get to it, wash, lightly sand, and recoat exactly as your resin manufacturer directs instead of pouring over a glossy cured surface.
4. Managing Bubbles with Heat
Supplies Needed: Clear Art Coating Resin (used throughout), Butane Kitchen Torch (used throughout), Disposable Nitrile Gloves (used throughout), Half-Face Respirator Mask (used throughout)
Vigorous mixing traps air. After pouring a layer, let it sit for 5 minutes so bubbles rise to the surface. Hold the torch at the distance your resin’s instructions allow and sweep it quickly across the surface in brief, fluid passes. Never hold the flame in one spot, or you risk burning the resin and fusing it permanently to your silicone mold. Never direct a flame or heat gun at alcohol-ink-tinted resin or other flammable solvents — let ink-tinted layers cure first and follow your resin’s and ink maker’s instructions.
5. Preparing Botanicals
Supplies Needed: Silica Gel Floral Drying Powder, Dried Pressed Flowers, Chemically Preserved Moss
Fresh flowers and living moss contain water. If cast directly into resin, they will turn brown, rot, and release massive air pockets. Any organic material used in resin art must be 100% dried and pressed (or silica-dried) beforehand.
Beginner Workflow: From First Mix to Demolding
The beginner workflow these projects assume — every ratio, timing, and pour depth below belongs to your resin’s own label and technical sheet, so keep them beside the mold.
- Choose one resin system. Pick a single art-coating or deep-pour epoxy and stay with it for the whole piece; if you must switch systems, confirm compatibility on both manufacturers’ data sheets first.
- Verify the label ratio and maximum pour depth. Check the exact mixing ratio (by weight or by volume) and the maximum single-pour depth printed on your resin’s label, then scale your mold choice to that limit.
- Prepare the mold and workspace. Work in a well-ventilated area on a level surface with nitrile gloves, chemical splash safety glasses, and a fitted organic-vapor respirator on, and make sure the mold is clean and dry.
- Measure and mix. Measure the way your resin’s label directs and stir slowly with a silicone stick, scraping the sides and bottom of the cup for the mixing time the label specifies.
- Pour the base layer. Pour a thin base layer first so bubbles can rise and escape, and use brief torch passes only if your resin’s instructions allow an open flame.
- Wait for the recoat window. Let the layer reach the tacky or gel stage your label describes before the next pour; if a layer cures fully, wash, lightly sand, and follow the manufacturer’s recoat guidance.
- Add inclusions. Place botanicals, foil flakes, or pigment accents onto the tacky layer so they anchor instead of floating.
- Cure undisturbed. Let the piece cure on a level surface for the full time your label specifies, away from dust, drafts, and temperature swings.
- Demold. Once the piece is firm and no longer tacky, flex the mold and release it; if it resists, wait instead of forcing it.
- Finish. Sand and polish or add a thin top coat per your resin’s instructions, and store finished pieces away from direct sun and heat so the resin stays clear.
12 Ultimate Layered Resin Art Ideas
Supplies Needed: Clear Art Coating Resin (used throughout), Metallic Mica Powders, Geometric Resin Silicone Molds Set, Digital Craft Scale (used throughout), Silicone Mixing Cups & Stir Sticks (used throughout), Disposable Nitrile Gloves (used throughout), Half-Face Respirator Mask (used throughout), Chemical Splash Safety Glasses (used throughout), Butane Kitchen Torch (used throughout)
From deep aquatic scenes to suspended vintage lace, these projects utilize the gel stage and multi-pour techniques to create complex, professional-grade artwork.
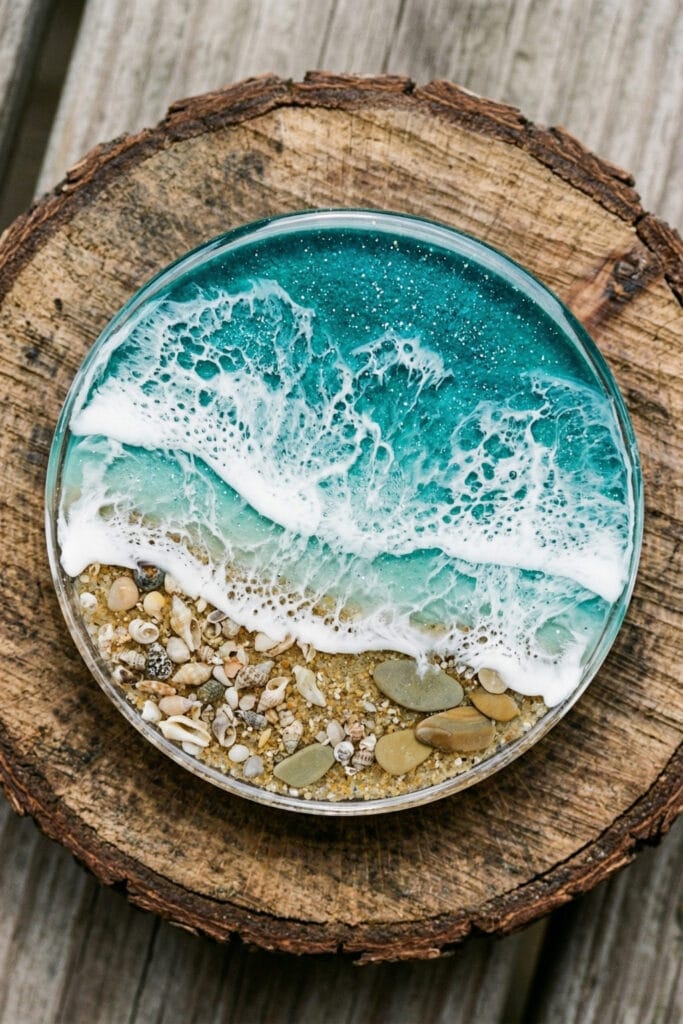
1. Ocean & Beach Depth Themes
Supplies Needed: Clear Art Coating Resin, digital craft scale, silicone mixing cups & stir sticks, disposable nitrile gloves, half-face respirator mask, craft sand, blue liquid alcohol ink, opaque white resin pigment paste, silicone casting mold, butane kitchen torch, heat gun.
The Concept: Recreate the shoreline by building depth vertically rather than mixing everything in one shallow puddle.
Quick Steps: Mix a small batch of clear resin with real sand and press it into one side of your mold to form the beach. Once that reaches the gel stage (See Core Technique 3), pour a base layer of deep translucent blue for the ocean. For the final touch, stir opaque white resin pigment paste into a top layer, pour it where the water meets the sand, and use a heat gun on brief, sweeping passes to blow the white resin outward, creating frothy wave lacing. Keep the heat aimed at the pigment layer and never let heat or flame contact uncured alcohol ink, which is flammable; follow your ink maker’s guidance.
2. Botanical Flower Encapsulation
Supplies Needed: Deep Pour Epoxy Resin, digital craft scale, silicone mixing cups, disposable nitrile gloves, half-face respirator mask, completely dried flowers and leaves, silicone casting mold, butane kitchen torch.
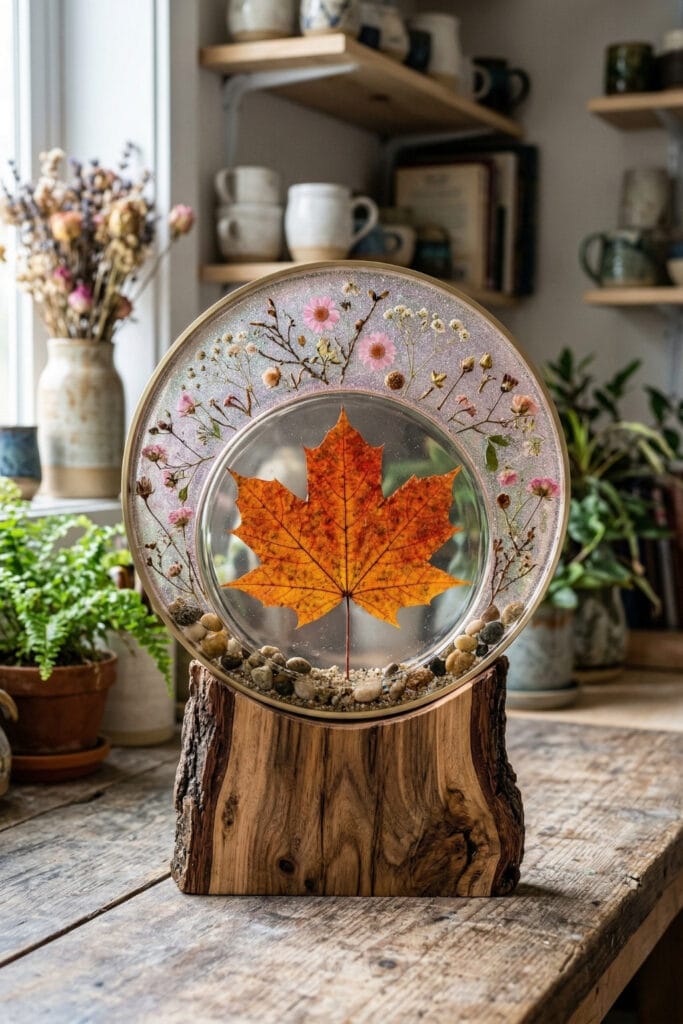
The Concept: Preserve the vibrancy of a seasonal garden by suspending flora in a glass-like block without trapping air.
Quick Steps: Ensure all flowers and leaves are completely silica-dried (See Core Technique 5). Pour a thin base layer of clear resin into your mold and let it gel. Gently place your dried botanicals face down onto this tacky surface so they anchor in place and won’t float. Once set, mix your deep pour epoxy and slowly fill the rest of the mold to encapsulate the arrangement, staying within that resin’s stated maximum pour depth — and confirm on both data sheets that your deep-pour formula is compatible with the cured art-coating base before switching systems.
3. Color Shift & Gradient Effects
Supplies Needed: Clear Art Coating Resin, digital craft scale, silicone mixing cups, disposable nitrile gloves, half-face respirator mask, magenta, copper, and gold metallic mica powders, silicone casting mold, butane kitchen torch.
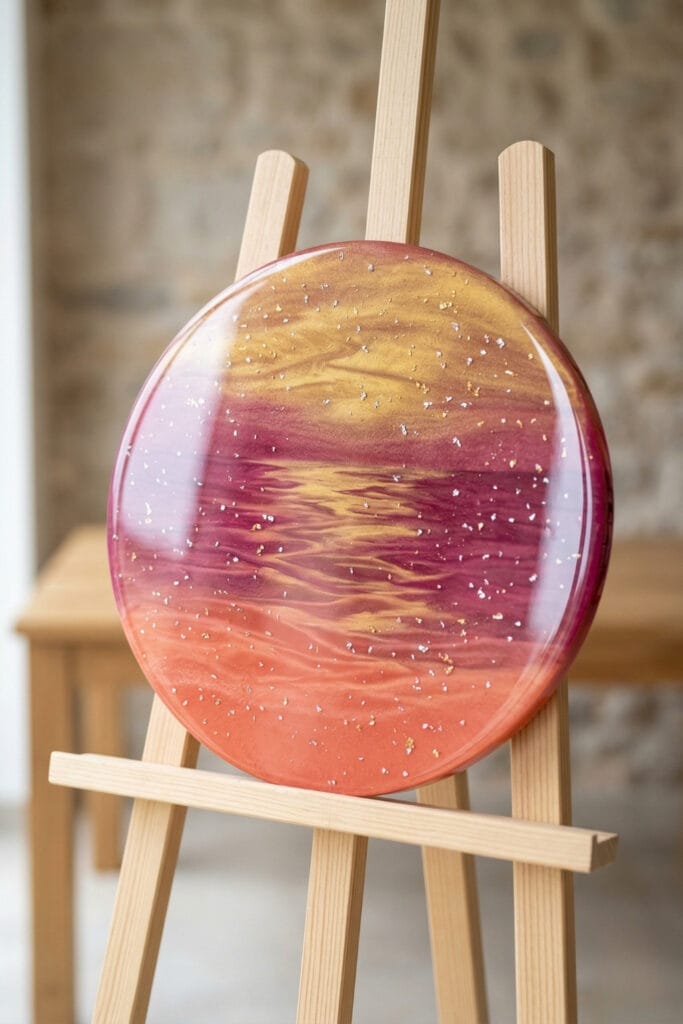
The Concept: Blending pigmented resin creates a stunning, dimensional sunset effect that changes depending on the viewing angle.
Quick Steps: Mix three separate cups of resin with different mica powder shades. Pour the darkest color as your bottom layer. Wait for it to become highly viscous but still moving, then gently pour the next color directly into the center. The heavy mica pigments will push against each other, creating a natural, soft-edged gradient.
4. Celestial Star & Night Sky
Supplies Needed: Clear Art Coating Resin, digital craft scale, silicone mixing cups, disposable nitrile gloves, half-face respirator mask, indigo and black opaque resin pigment paste, gold foil flakes, thin craft wire, tweezers, silicone casting mold, butane kitchen torch.
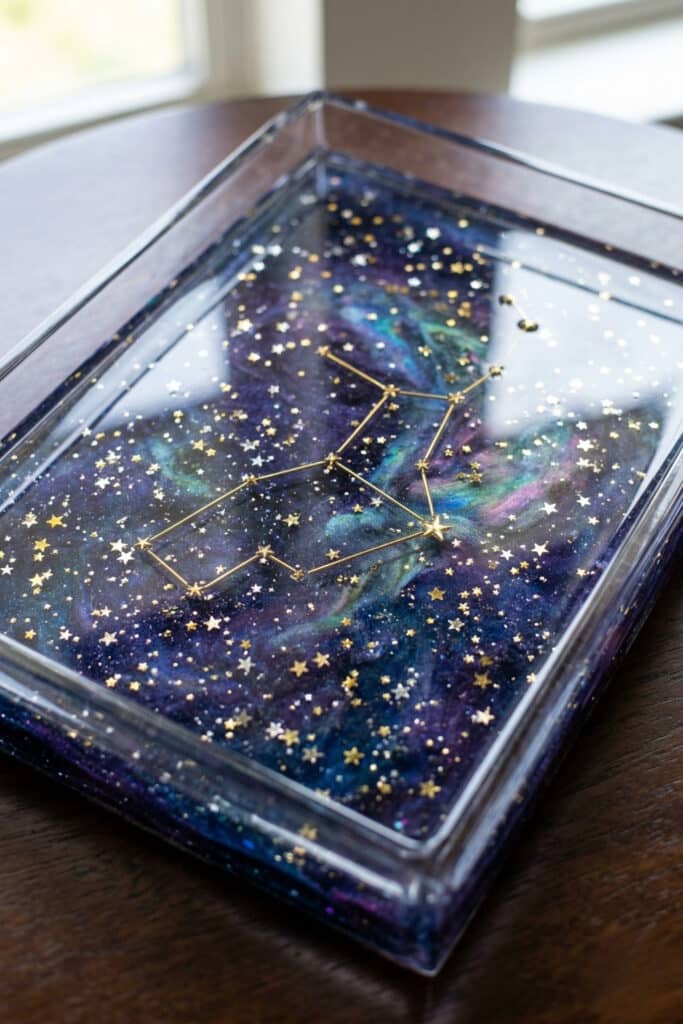
The Concept: Build a 3D galaxy by separating your dark background from your bright foreground stars.
Quick Steps: Pour a base layer heavily tinted with indigo and black pigment paste, then torch the bubbles (See Core Technique 4). Once this dark backdrop reaches the gel stage, pour a thin layer of clear resin. Use tweezers to carefully arrange gold foil flakes and tiny wire constellation shapes onto the clear layer, allowing them to cast shadows onto the dark background below.
5. Dried Kitchen Spice Art
Supplies Needed: Clear Art Coating Resin, digital craft scale, silicone mixing cups, disposable nitrile gloves, half-face respirator mask, fully dehydrated star anise and cinnamon sticks, silicone casting mold, butane kitchen torch.
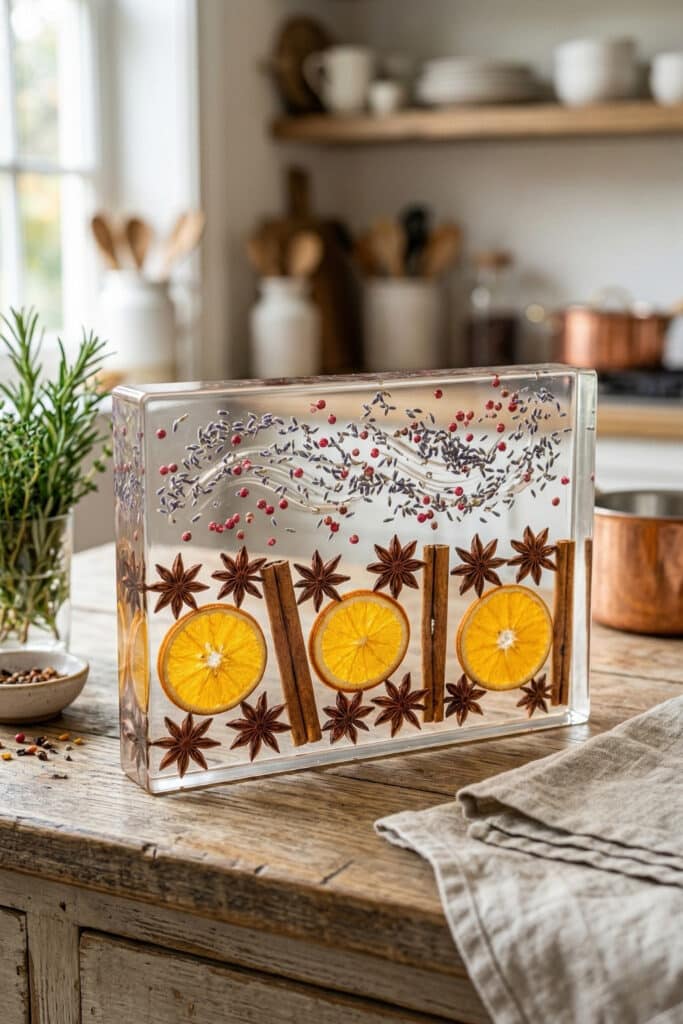
The Concept: A beautiful, rustic kitchen display piece utilizing the natural geometry of culinary spices.
Quick Steps: Select visually striking, completely dehydrated spices. Any moisture will cause clouding, so bake them on a low oven setting for 20 minutes if unsure. Anchor the heavier cinnamon sticks in a shallow base layer. Once gelled, add the star anise in a second pour so they appear to float above the wood bark.
6. Vintage Lace Encapsulation
Supplies Needed: Clear Art Coating Resin, digital craft scale, silicone mixing cups, disposable nitrile gloves, half-face respirator mask, piece of vintage lace, opaque resin pigment paste, a fine artist brush, silicone mat, silicone casting mold, butane kitchen torch.
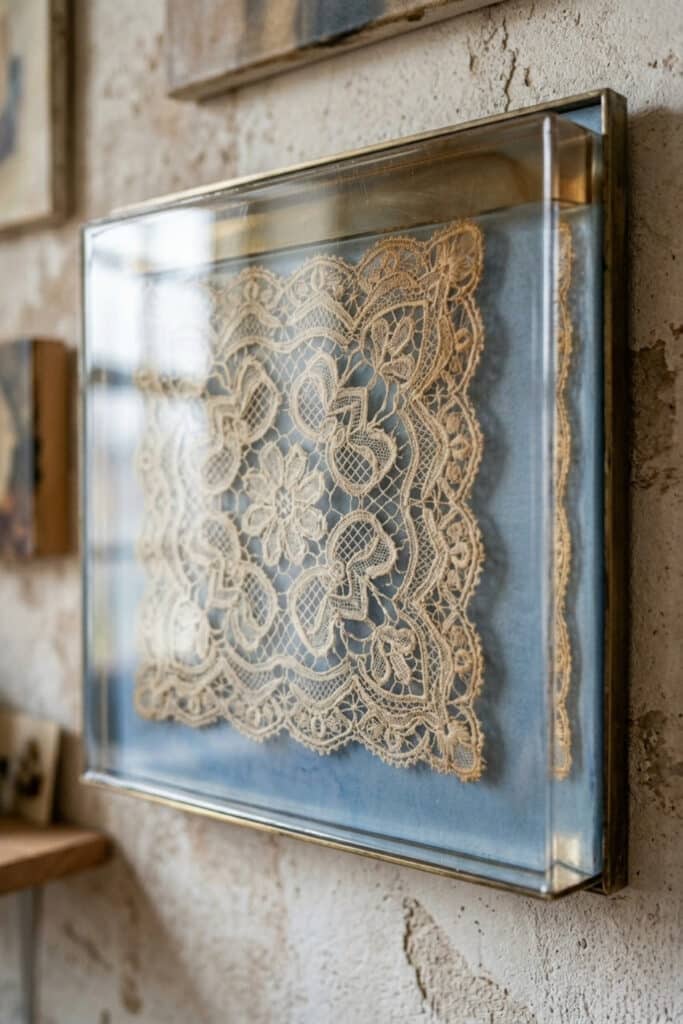
The Concept: Preserve delicate heirloom textiles without ruining their intricate woven patterns.
Quick Steps: Fabric is notorious for trapping microscopic air pockets. Before putting the lace into the mold, lay it on a silicone mat and paint it thoroughly with a thin coat of mixed resin (See Core Technique 2). Once this “primer” coat cures, you can safely sink the stiffened lace into your main colored resin pour without fear of bubbles.
7. Geometric Gemstones
Supplies Needed: Clear Art Coating Resin, digital craft scale, silicone mixing cups, disposable nitrile gloves, half-face respirator mask, holographic craft glitter, opaque resin pigment paste, faceted gemstone silicone mold, butane kitchen torch.
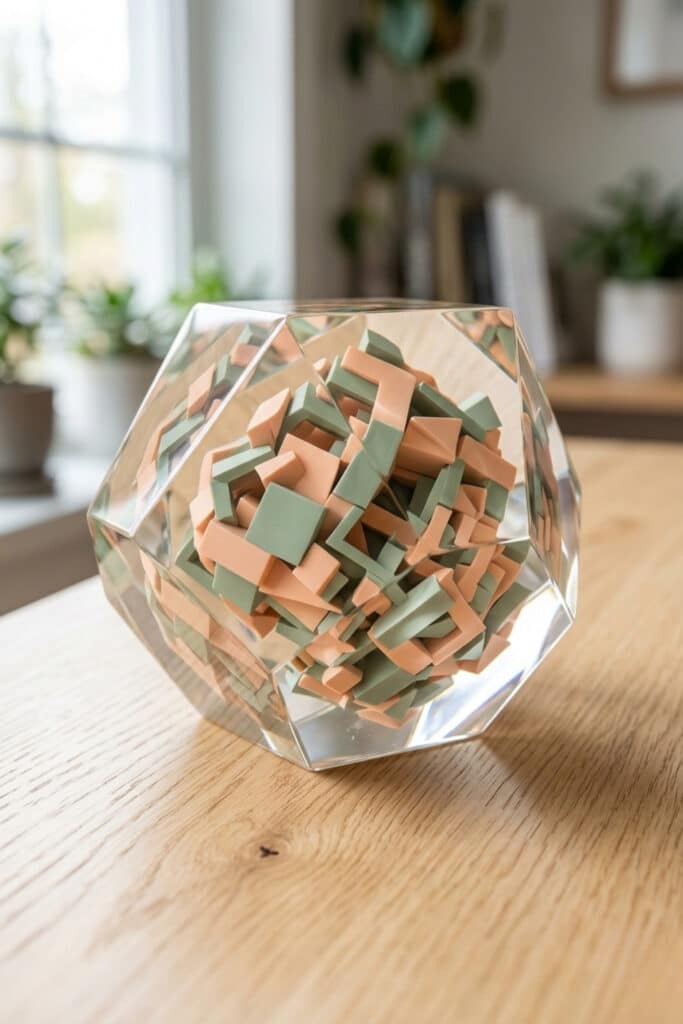
The Concept: Create sharp, modern desk paperweights that mimic the look of polished quartz or amethyst.
Quick Steps: Never attempt to cut cured resin with a knife. Instead, use a faceted silicone gemstone mold. Pour a clear tip layer and drop in a pinch of holographic glitter. Once tacky, backfill the rest of the mold with a solid, opaque pastel resin. The contrast between the clear, sparkly tip and the solid base highlights the geometric angles of the mold.
8. 3D City Grid Maps
Supplies Needed: Clear Art Coating Resin, digital craft scale, silicone mixing cups, disposable nitrile gloves, half-face respirator mask, opaque grey resin pigment paste, metallic paint pens, small balsa wood blocks, craft glue, a ruler for the grid, silicone tray mold, butane kitchen torch.

The Concept: An architectural mixed-media piece that builds a miniature metropolis trapped in glass.
Quick Steps: Pour a flat, opaque grey base layer. Once cured, use a ruler to draw a street grid using metallic paint pens. For the buildings, cut small varying heights of balsa wood blocks. Glue these blocks onto your grid lines, then encapsulate the entire structural map in a final deep pour of clear epoxy.
9. Heirloom Recipe Cards
Supplies Needed: Clear Art Coating Resin, digital craft scale, silicone mixing cups, disposable nitrile gloves, half-face respirator mask, paper recipe card, Mod Podge Clear Sealer, silicone tray mold, butane kitchen torch.
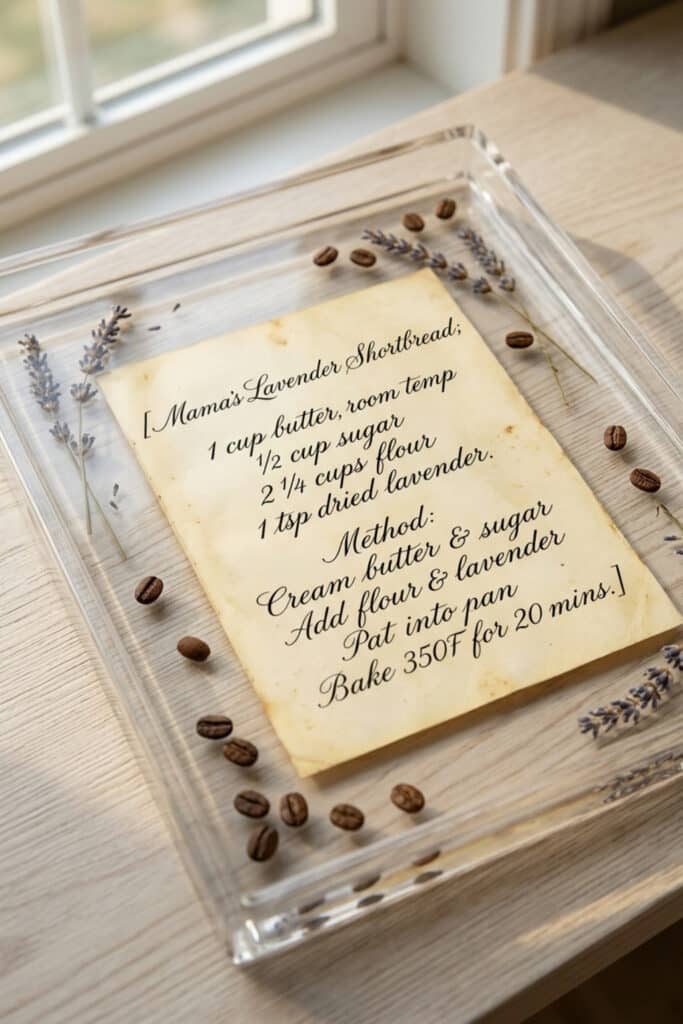
The Concept: A highly personalized gift: a resin-coated recipe card that wipes clean after everyday kitchen splashes — the coat can scratch and yellow over time and is not food-, heat-, or dishwasher-safe.
Quick Steps: Coat the paper recipe card front, back, and along the paper edges with Mod Podge (See Core Technique 2). Once completely dry, pour a clear base layer into a tray mold and let it gel. Gently roll the sealed card onto the tacky resin starting from one edge to push air outward. Cover with a final clear protective top coat.
10. Faux Marble & Stone
Supplies Needed: Clear Art Coating Resin, digital craft scale, silicone mixing cups, disposable nitrile gloves, half-face respirator mask, opaque white resin pigment paste, black or gold metallic mica powder, silicone casting mold, butane kitchen torch, heat gun.
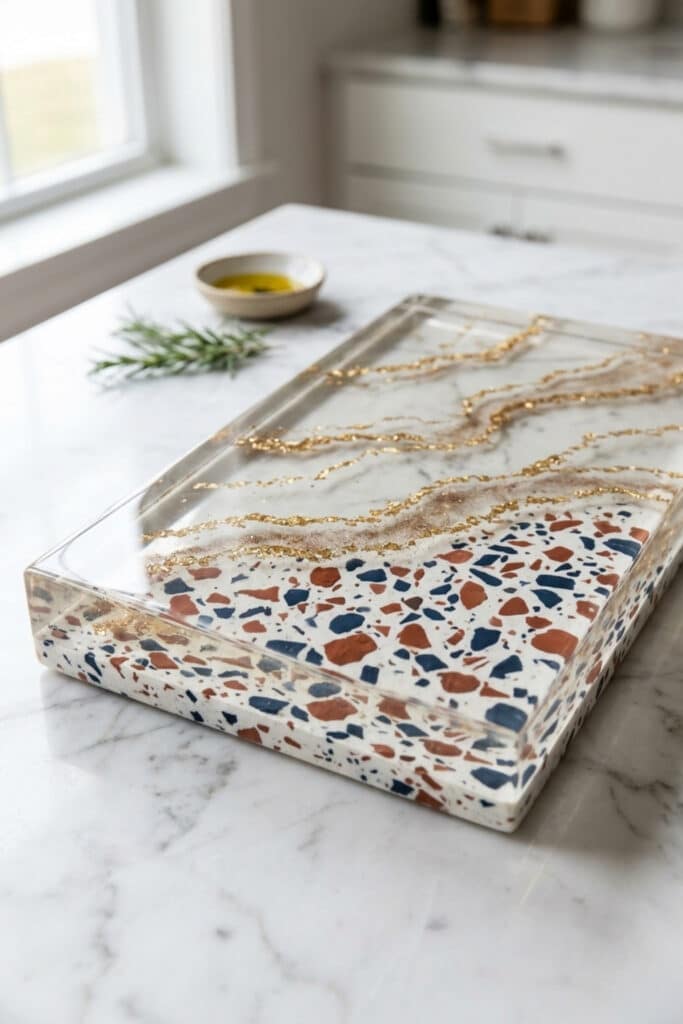
The Concept: Achieve the luxurious look of heavy marble countertops using lightweight epoxy.
Quick Steps: Dropping chunks of color will not create marble. Mix a large batch of opaque white resin and pour it as your main slab. While the white layer is still wet, dip a stir stick into a tiny cup of concentrated black or gold mica powder mixed with resin. Drag the stick through the wet white base in jagged, diagonal lines to draw organic veins, then lightly swipe with a heat gun to soften the harsh edges.
11. Nebula Space Swirls
Supplies Needed: Clear Art Coating Resin, digital craft scale, silicone mixing cups, disposable nitrile gloves, half-face respirator mask, blue liquid alcohol ink, a dedicated sinking white alcohol ink made for petri effects (a regular white alcohol ink is not a reliable substitute), silicone casting mold, butane kitchen torch.
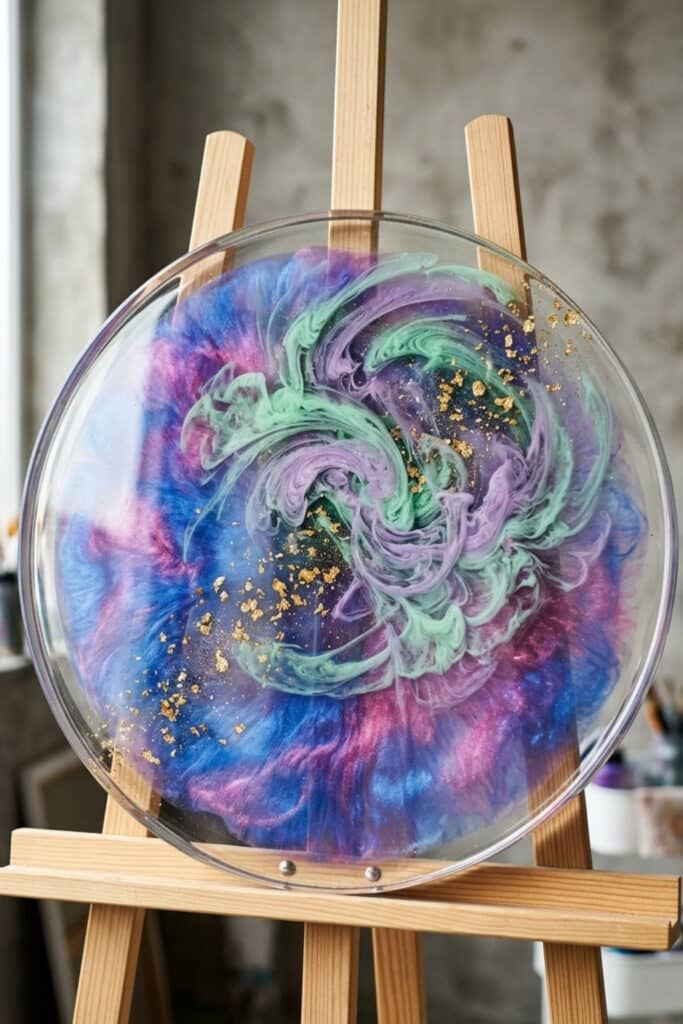
The Concept: Use liquid inks to create suspended, floating clouds of color that mimic outer space.
Quick Steps: Fill your mold halfway with clear resin. Drop directly into the wet resin alternating drops of blue alcohol ink and a sinking white alcohol ink formulated for petri effects — check that the sinking ink is designed for your resin, because a regular white alcohol ink is not a reliable substitute. The sinking white ink pulls the colored ink downward as it drops, creating 3D, tentacle-like swirls as the layer cures.
12. Forest Floor Microcosms
Supplies Needed: Clear Art Coating Resin, digital craft scale, silicone mixing cups, disposable nitrile gloves, half-face respirator mask, chemically preserved moss, small pebbles, natural cork bark, silicone casting mold, butane kitchen torch.
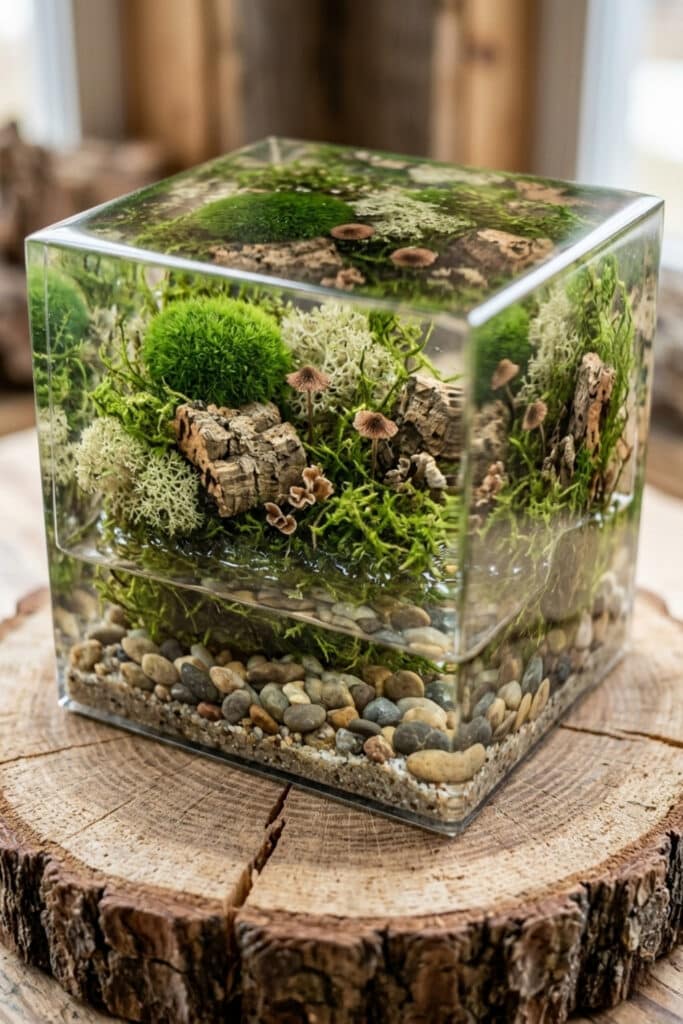
The Concept: Build a terrarium aesthetic featuring woodland textures.
Quick Steps: Never use fresh, damp moss. Purchase chemically preserved moss or thoroughly dried lichen from a craft store. Anchor small pebbles and torn pieces of natural cork bark in a thin, tacky base layer. Once secured, position your preserved moss tufts around the rocks and slowly pour the remaining clear epoxy down the side of the mold to prevent crushing the delicate textures.
Care, Polishing & Maintenance
Even the highest quality epoxy can scratch or yellow if neglected. Always keep your finished layered resin art out of direct, intense sunlight to prevent UV yellowing over time. If the demolded piece has sharp edges or a matte finish from the mold, wet-sand the edges lightly with high-grit sandpaper, then apply a final, thin “dome” coat of clear liquid resin to restore a flawless, glass-like shine. Clean your displays simply using a soft microfiber cloth and standard glass cleaner—never use harsh chemical solvents or abrasive scrubbers.
Have you tried working with the gel stage before? Share your favorite resin color combinations or project ideas in the comments below!
Important Resin Studio & Household Safety Notes:
Working with liquid two-part epoxy resin involves a real chemical reaction that requires strict studio safety precautions. Always pour and mix resin in a dedicated, well-ventilated space with active cross-ventilation or open windows. Wear a fitted half-face respirator mask equipped with organic vapor cartridges—standard dust masks or cloth coverings will not filter out chemical VOC fumes. Wear powder-free disposable nitrile gloves at all times to prevent chemical sensitization and contact dermatitis; avoid latex gloves, as liquid epoxy can break down latex over time. Always wear shatterproof safety glasses to protect your eyes from accidental chemical splashes or liquid flicks while stirring.
Curing Exotherm & Household Safety: Epoxy resin generates heat as it cures (an exothermic reaction). Never pour deep layers using fast-curing resin formulas, as the mixture can overheat, boil, crack your mold, and release toxic fumes. Keep liquid resin bottles, uncured mixing cups, and curing molds completely out of reach of children and domestic pets. Pets—especially birds and cats—are highly sensitive to airborne chemical vapors; keep them out of your working area until the resin has fully cured and off-gassed. Unless a specific manufacturer explicitly certifies a cured top coat as FDA food-grade, always assume your resin crafts are not safe for direct food contact, microwave use, or hot dish placement.
SDS & Disposal: Read the resin and hardener safety data sheets (SDS) before first use and follow their handling and first-aid guidance; choose cartridges the SDS and mask manufacturer rate for organic vapors, and confirm the mask seals with a fit check. Dispose of cured scrap, leftover resin, and containers per the product instructions and local household-hazardous-waste rules — never pour liquid resin or hardener down the drain.
Layered Resin Art Ideas FAQ
When can I pour the next resin layer?
Wait for the recoat window your resin’s label describes — the tacky or gel stage — so the new layer bonds instead of lifting. If a layer cures fully, wash it, lightly sand it, and wipe away the dust before pouring again.
How do I keep bubbles out of layered resin?
Pour a thin base layer first so bubbles can rise and escape, and stir slowly instead of whipping air into the cup. Use brief torch passes over the wet surface only if your resin’s instructions allow an open flame.
Why does resin yellow, and how do I prevent it?
Epoxy can yellow with UV exposure, so keep finished layered resin art out of direct, intense sunlight. Store finished pieces away from sun and heat so the resin stays clear.
Do I need a respirator for resin work?
Yes — pair a half-face respirator with fitted, in-date organic-vapor cartridges with nitrile gloves and splash glasses while mixing and pouring. A bare mask does not filter epoxy fumes.
“Which of these Layered Resin Art Ideas: 12 Ultimate Stunning Ideas for You ideas are you excited to try first, or do you have a creative tip of your own to share? Drop a comment below—I’d love to hear your thoughts and see what you create!”


