

Do you want to craft beautiful home decor? First, you might think of children’s crafts. However, coffee filter butterflies can look incredibly elegant. Therefore, we upgraded this classic project for adults. Plus, we use natural dyes and brass details. Because the materials are simple, the process is very relaxing. Consequently, you can make stunning boho pieces easily. Indeed, these modern designs will elevate any room.
This blog post contains affiliate links. As an Amazon Associate, I earn from qualifying purchases. The content on some of these projects may be enhanced with structural craft inspirations.
Key Facts:
- Technique: Coffee Filter Butterflies
- Dye simmer time: 15 minutes
- Difficulty: Easy
- Makes: 12 project ideas
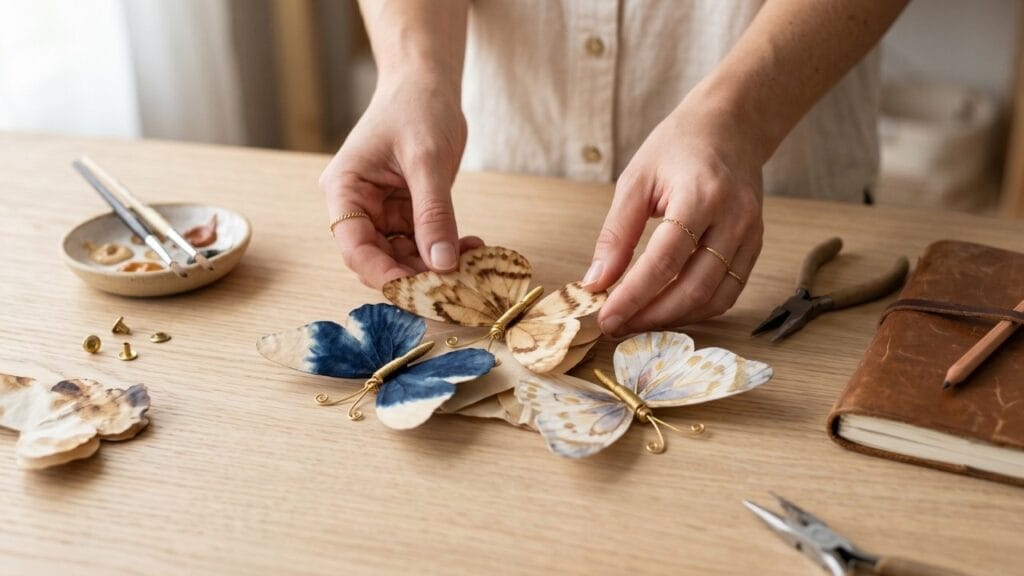
Essential Supplies for Coffee Filter Butterflies
| Supply | Spec / Size | Used For |
|---|---|---|
| Round White Coffee Filters | soft, absorbent texture that soaks up dye and ink evenly | |
| Thin Brass Wire | wraps the center to build the body and shape the antennae without… | |
| Leather Cord | ties through the clothespin to finish the antennae with a warm,… | |
| Natural Indigo Dye | creates that rich, one-of-a-kind porcelain-blue bleed | |
| Watercolor Paint Set | perfect for soft, dreamy terracotta washes | |
| Metallic Gold Wax | a subtle way to dress up wing edges without overdoing it |
To make high-end art, you need just a handful of good materials. Fortunately, these items are affordable and easy to find. Gather everything below, and your finished pieces will look truly professional.
A few foundational tools and structural supplies are used throughout multiple projects in this guide, marked with a (used throughout) tag below.
🦋 Base Materials
Round white coffee filters form the wings for every design in this guide — their natural texture takes dye beautifully.
- Round White Coffee Filters (used throughout) — soft, absorbent texture that soaks up dye and ink evenly | [Check Price on Amazon]
🎨 Wire & Structure
Thin brass wire and soft leather cord give your butterflies real structure, letting you shape wings and antennae that hold their form.
- Thin Brass Wire — wraps the center to build the body and shape the antennae without kinking | [Check Price on Amazon]
- Leather Cord — ties through the clothespin to finish the antennae with a warm, earthy texture | [Check Price on Amazon]
🌿 Dyes & Color
A natural indigo dye, a simple watercolor set, and metallic gold wax cover nearly every color technique in this guide, from deep blues to soft pastel washes.
- Natural Indigo Dye — creates that rich, one-of-a-kind porcelain-blue bleed | [Check Price on Amazon]
- Watercolor Paint Set — perfect for soft, dreamy terracotta washes | [Check Price on Amazon]
- Metallic Gold Wax — a subtle way to dress up wing edges without overdoing it | [Check Price on Amazon]
✂️ Finishing & Embellishments
A few small extras — velvet ribbon, a fine-tip ink pen, wooden clothespins, clear craft glue, and embroidery floss — let you personalize each butterfly‘s finish.
- Velvet Ribbon — the little luxe touch that elevates a plain brass wire binding | [Check Price on Amazon]
- Fine-Tip Black Ink Pen — ideal for adding delicate, hand-drawn vein details | [Check Price on Amazon]
- Wooden Clothespins — pinches the center to form a cozy, artisanal body | [Check Price on Amazon]
- Clear Craft Glue — holds pressed leaves and embellishments securely in place | [Check Price on Amazon]
- Embroidery Floss — wraps the center to build a soft, sage-toned body in place of wire | [Check Price on Amazon]
- Craft Scissors (used throughout) — for clean, precise pleats and trims on every design | [Check Price on Amazon]
- Detail Paintbrushes — small enough for controlled ink splatters and soft washes | [Check Price on Amazon]
- Black Liquid Ink — flicks into fine, abstract splatter patterns | [Check Price on Amazon]
🍃 Collected & Household Items
A few projects use things you likely already have around the house or garden — no purchase needed for these.
- Strong Black Coffee (Household) — soaks filters into a rustic, sepia antique tone
- Natural Turmeric & Beetroot (Household) — boils down into soft pantry-safe pastel dyes
- Collected Flat Leaves (Foraged) (Household) — small, flat leaves gathered from your yard for the botanical design
🖼️ Display & Framing
For the wall-art variation, raw linen and a simple oak shadow box turn your finished butterflies into a permanent gallery piece.
- Raw Linen Fabric — a natural, neutral backdrop that lets framed butterflies stand out | [Check Price on Amazon]
- Oak Shadow Box Frame — turns your finished butterflies into permanent wall art | [Check Price on Amazon]
How to Fold a Coffee Filter Butterfly (Base Technique)
Before you dye, splatter, or embellish anything, every design in this guide starts with the same simple fold. Master this once, and you can apply any color or finish from the list above.
What you’ll need: 1 round white coffee filter, brass wire (or embroidery floss/clothespin), scissors
- Flatten the filter. Open your coffee filter completely and press it flat with your hand.
- Accordion-fold it. Starting from one edge, fold the filter back and forth in narrow, even pleats — about ½ inch (1 cm) wide — just like a paper fan. Continue until the entire filter is pleated.
- Find the center and pinch. Fold the pleated strip in half to mark the midpoint. This crease becomes the butterfly’s body line.
- Secure the center. Wrap thin brass wire tightly around the middle of the pleated strip, twisting to secure. Leave two long wire ends free — these will become the antennae. (You can swap in embroidery floss or a wooden clothespin here instead, depending on which idea you’re following.)
- Build the body. Continue wrapping the wire (or floss) three to four times around the same center point, pulling each pass snug. This creates a small, rounded bump at the center, which becomes your butterfly’s body. Keep wrapping until the shape feels secure and sits slightly raised above the pleats, then move on to shaping the antennae.
Pro-Tip: Wrapping wire or floss tightly gives a minimal, modern body. For a
more textured, traditional look, swap this step for a wooden clothespin (see
idea 6) and let the leather cord finish the antennae.
- Fan out the wings. Gently pull the pleated sides apart and open them upward on both sides of the center, like a bowtie. Adjust until the wings sit symmetrically.
- Shape the antennae. Curl the two loose wire ends upward and inward with your fingers to finish the classic butterfly silhouette.
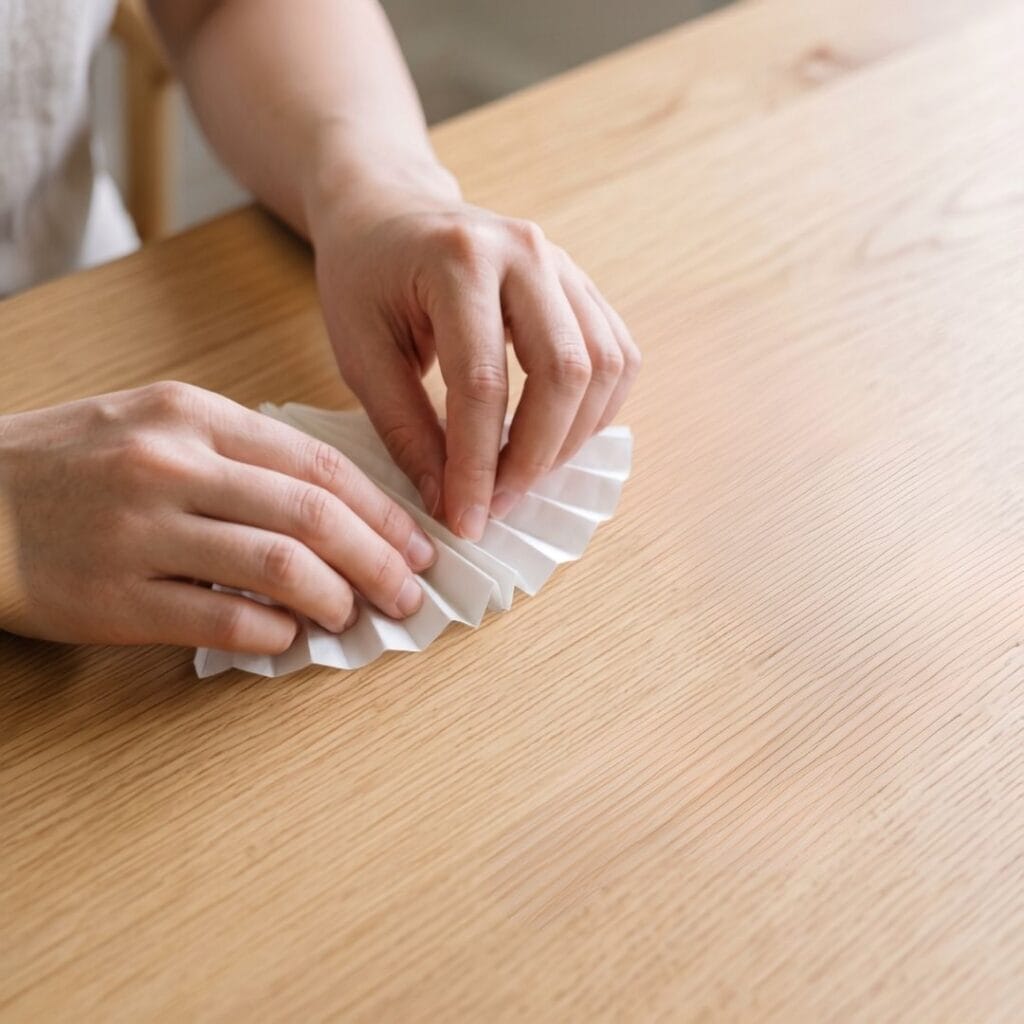
That’s it — you now have a plain, unfinished coffee filter butterfly. From here, apply any of the 12 techniques below before or after folding, depending on the project (dyeing works best before folding; ink splatter and gold wax work best after).
12 Elegant Ideas: Coffee Filter Butterflies
Additionally, these projects focus on a clean aesthetic. Here, we have twelve beautiful variations to try right now.
1. Indigo Dip-Dyed Wings
Supplies Needed: Round White Coffee Filters, Natural Indigo Dye, Thin Brass Wire, Craft Scissors.
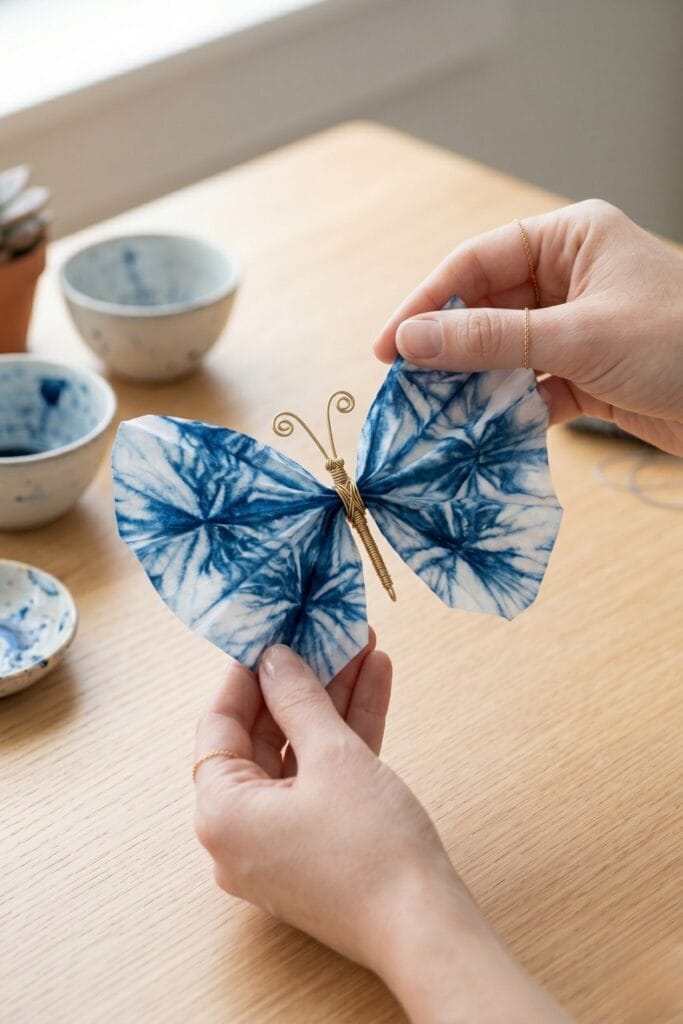
Use natural indigo dye for a rich blue. First, dip the flattened filter’s edges into the dye before running the Base Technique fold above. Next, let the deep blue bleed naturally. Consequently, you get a beautiful porcelain look. Plus, every single pattern is completely unique. (Indigo can stain skin and fabric — see our safety note below.)
2. Vintage Coffee-Stained Decor
Supplies Needed: Round White Coffee Filters, Strong Black Coffee (Household), Thin Brass Wire, Craft Scissors.
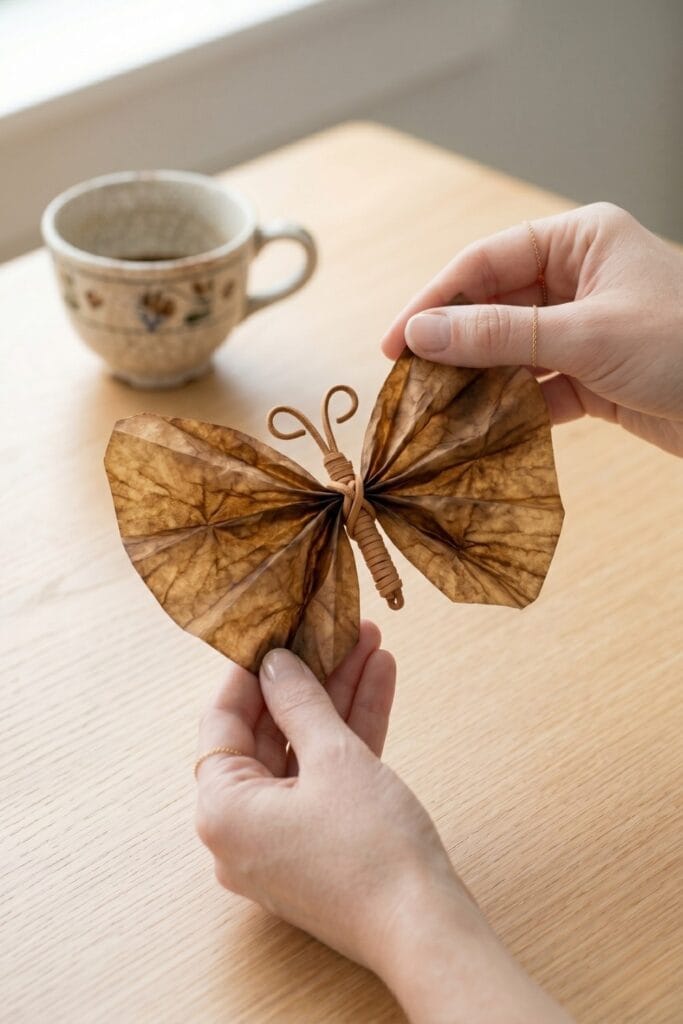
Give your art a rustic, sepia tone. First, soak the filters in strong black coffee. Then, let them dry completely in the sun before running the Base Technique fold above. Therefore, they look like vintage antique paper. Indeed, this is a perfect boho touch. (Coffee stains fabric and countertops — see our safety note below.)
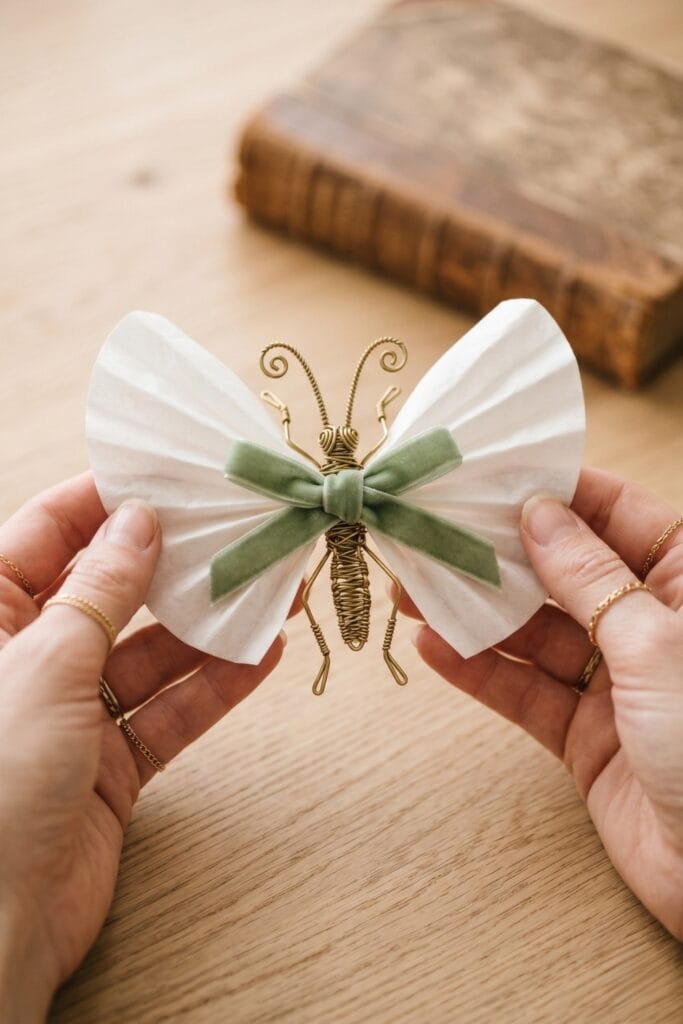
3. Brass Wire and Velvet Ribbon
Supplies Needed: Round White Coffee Filters, Thin Brass Wire, Velvet Ribbon, Craft Scissors.
Skip the cheap plastic pipe cleaners entirely. Instead, use thin brass wire for Step 4 of the Base Technique above. Next, tie a soft sage green velvet ribbon over the wire. As a result, your craft feels very luxurious. Also, the brass catches the light beautifully when twisted around the center. (Trim wire ends carefully — see our safety note below.)
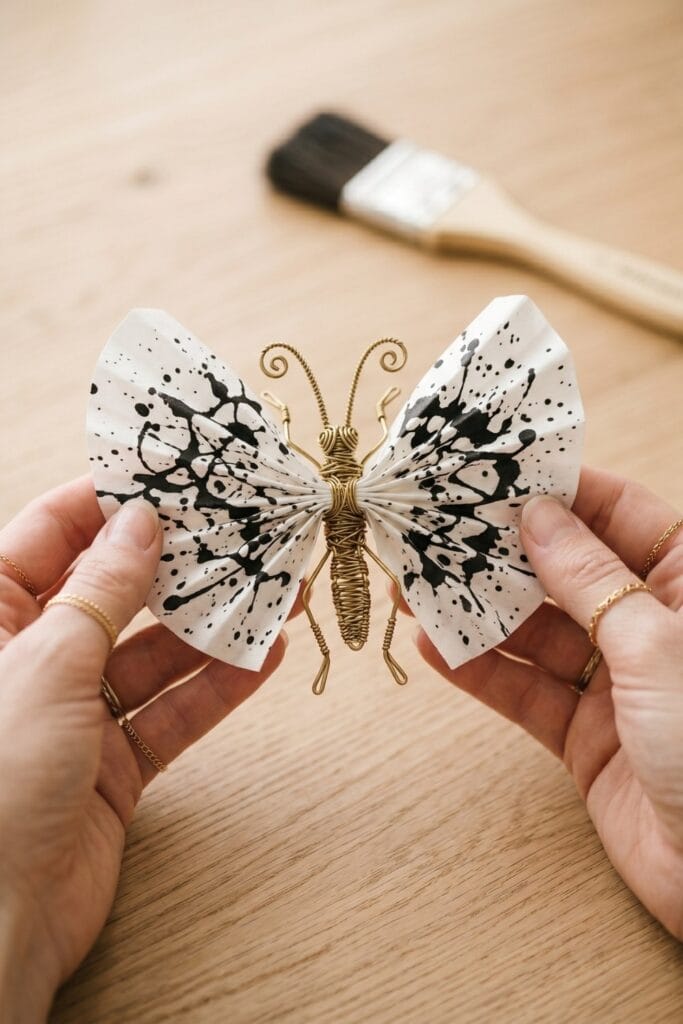
4. Black Ink Splatter (Coffee Filter Butterflies)
Supplies Needed: Round White Coffee Filters, Black Liquid Ink, Detail Paintbrushes, Thin Brass Wire, Craft Scissors.
Create a modern and artistic dot pattern. First, complete the Base Technique fold above. Then, flick a brush loaded with thin black ink over the finished wings. Because the splatters are random, it looks very abstract. Thus, it fits perfectly in a modern home.
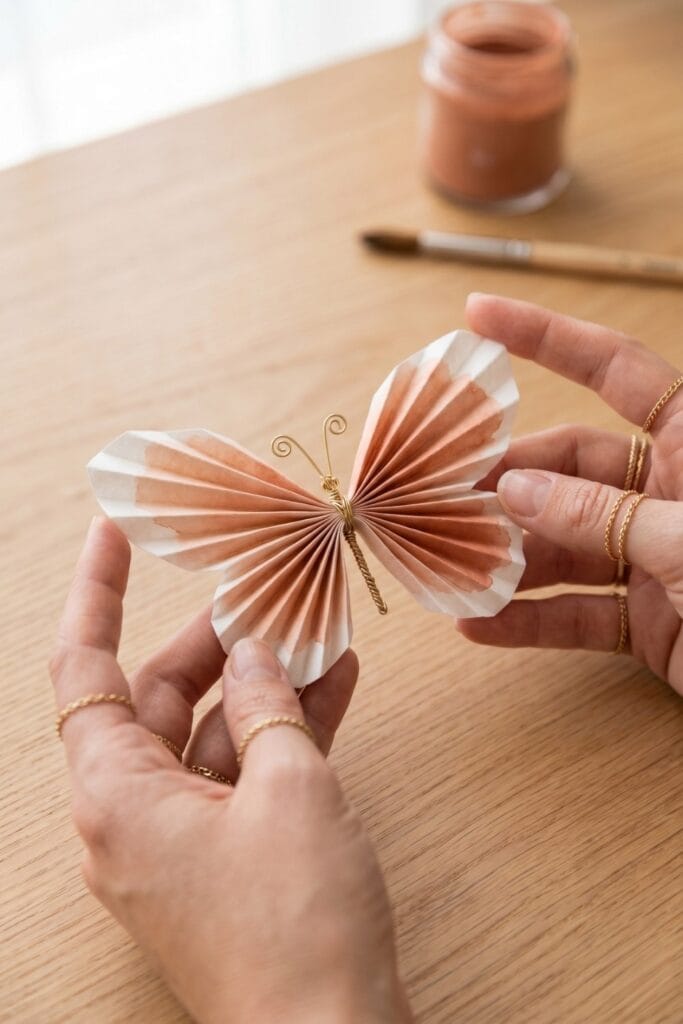
5. Monochromatic Watercolor Washes
Supplies Needed: Round White Coffee Filters, Watercolor Paint Set, Detail Paintbrushes, Thin Brass Wire, Craft Scissors.
Add soft, earthy colors to your craft. First, paint the flattened filter with terracotta watercolors, before running the Base Technique fold above. Next, blend the edges with clean water. Once the wash is fully dry, use the fine-tip black ink pen to add a few delicate vein lines for extra realism. Consequently, the wings look very soft and dreamy.
Pro-Tip: let the wash dry completely before folding, or the pleats will smear.
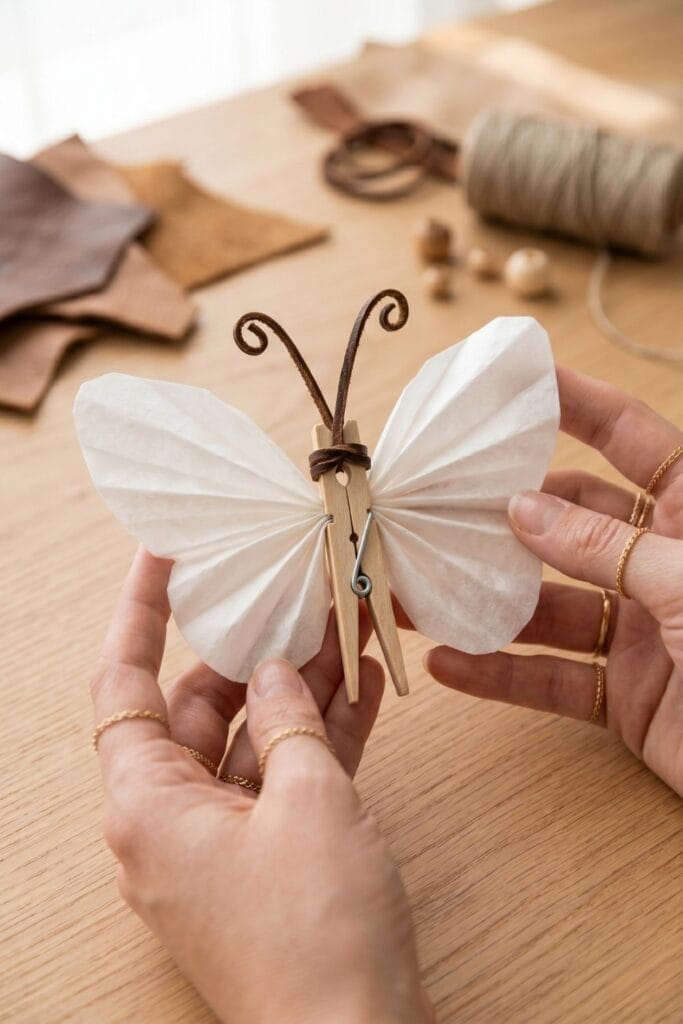
6. Wooden Clothespin and Leather Cord
Supplies Needed: Round White Coffee Filters, Wooden Clothespins, Leather Cord, Craft Scissors.
Combine natural wood and rich leather textures. For example, check our easy painting for beginners post to see how natural textures enhance modern art. This variation swaps Step 4 of the Base Technique above: instead of brass wire, pinch the pleated center with a wooden clothespin. Then, tie thin leather cords through the clothespin for antennae. Therefore, your coffee filter butterflies gain a great artisanal vibe.
7. Metallic Gold Accents for Coffee Filter Butterflies
Supplies Needed: Round White Coffee Filters, Metallic Gold Wax, Thin Brass Wire, Craft Scissors.
Add a touch of luxury without the high cost. First, complete the Base Technique fold above so your wings are fully shaped. Next, put metallic gold wax on your finger and gently rub the edges of the wings. Because you only highlight the edges, it stays minimalist. As a result, you get a premium gallery look easily. (Trim wire ends carefully — see our safety note below.)
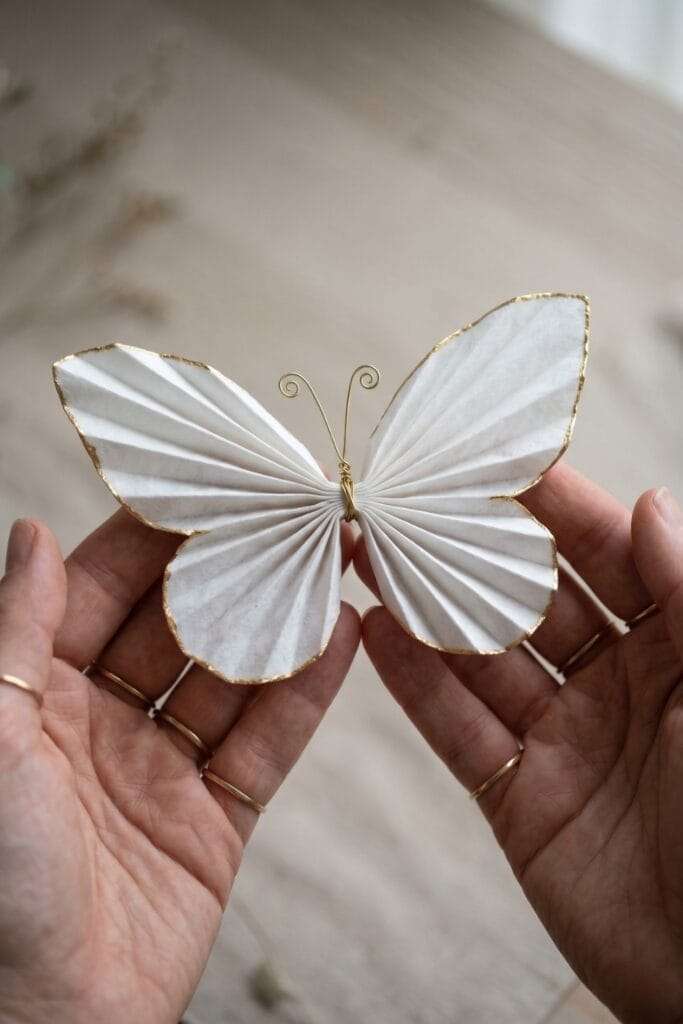
8. Natural Turmeric and Beetroot Dye
Supplies Needed: Round White Coffee Filters, Natural Turmeric & Beetroot (Household), Thin Brass Wire, Craft Scissors.
Use items right from your kitchen pantry. For a soft blush pink, simmer 1 medium chopped beetroot in 2 cups (475 ml) of water for 15 minutes, then strain and let it cool. For a muted pastel yellow, simmer 2 tablespoons of turmeric powder in 2 cups (475 ml) of water for 10 minutes, then strain and cool. Dip your flattened filter into either dye before running the Base Technique fold above. Thus, your dyes are completely safe and natural. (Beetroot and turmeric can stain skin, clothing, and countertops — see our safety note below.)
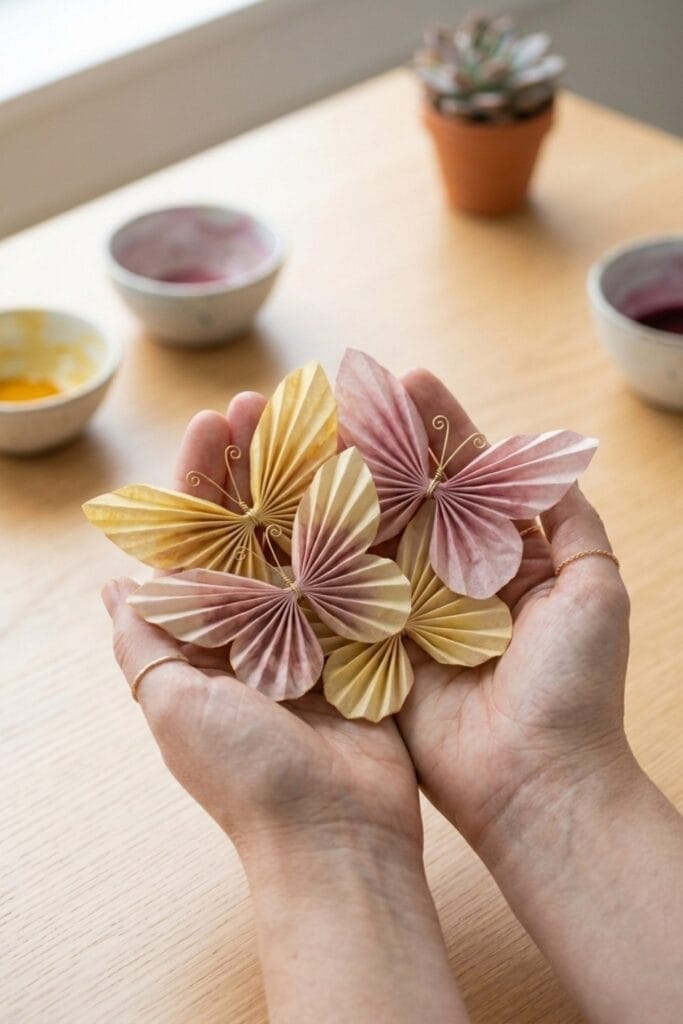
9. Botanical Pressed Leaf Design
Supplies Needed: Round White Coffee Filters, Collected Flat Leaves, Clear Craft Glue, Thin Brass Wire, Craft Scissors.
Incorporate real nature into your paper craft. First, collect tiny, flat green leaves. Next, complete the Base Technique fold above, then use clear glue to press the leaves onto the finished wings. Consequently, you create a stunning botanical silhouette. Indeed, this idea is truly one of a kind.
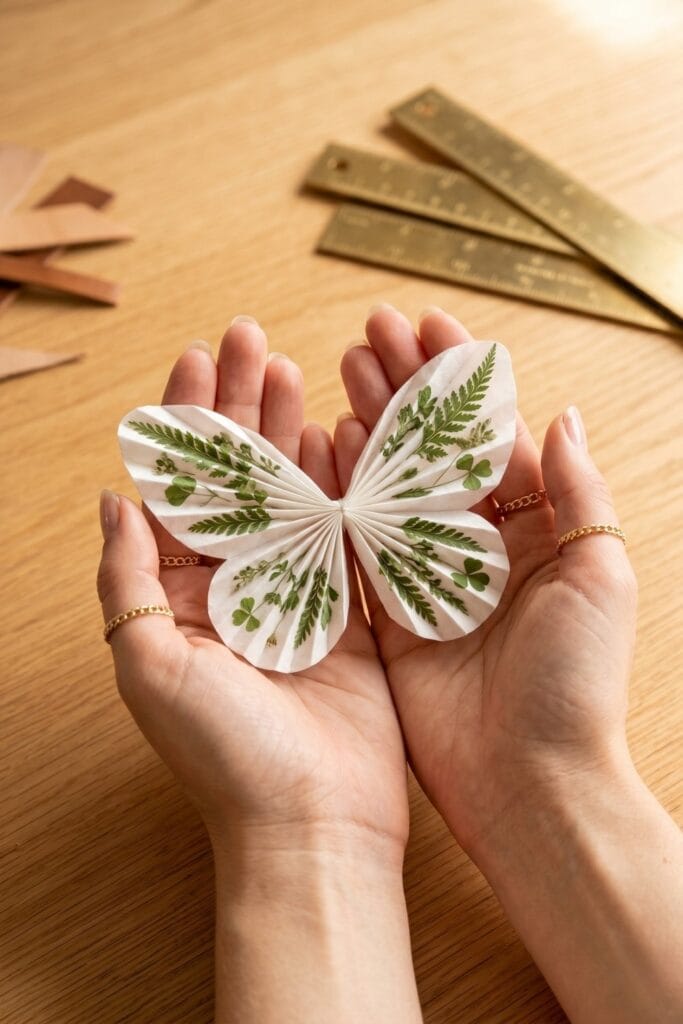
10. Layered Ruffle Wings (Coffee Filter Butterflies)
Supplies Needed: Round White Coffee Filters (3-4 sheets per unit), Thin Brass Wire, Craft Scissors.
Create a much fuller, peony-like appearance. This variation starts the Base Technique above with 3-4 stacked filters instead of one: stack the sheets together, then accordion-fold and pinch them tightly in the center as usual. Because of the layers, the wings look very voluminous. Therefore, they make a beautiful table centerpiece.
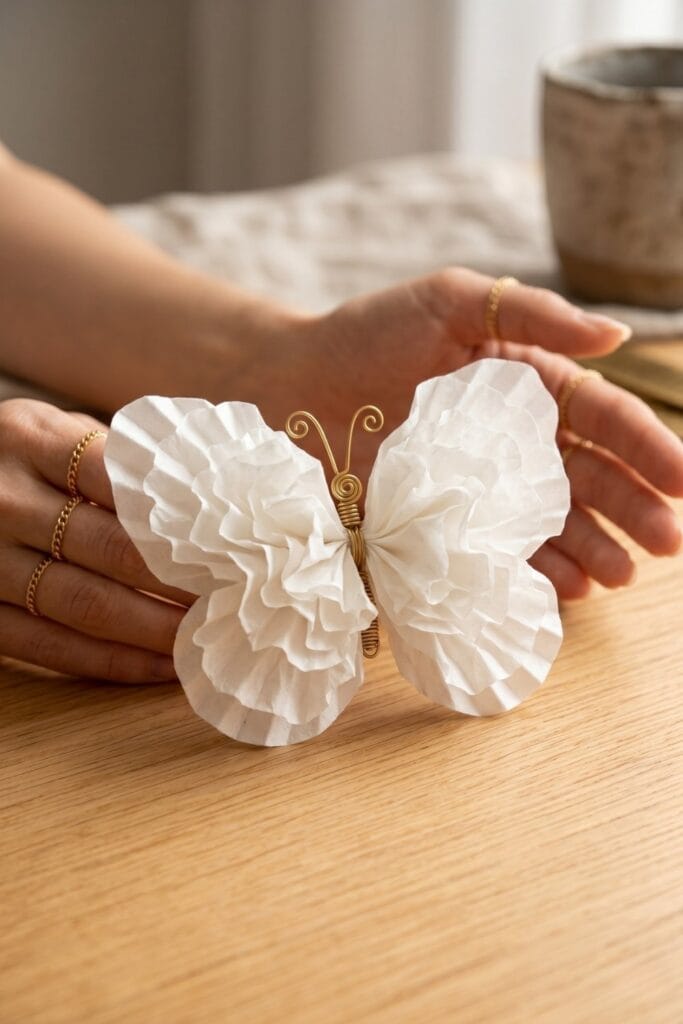
11. Muted Embroidery Floss Ties
Supplies Needed: Round White Coffee Filters, Embroidery Floss, Craft Scissors.
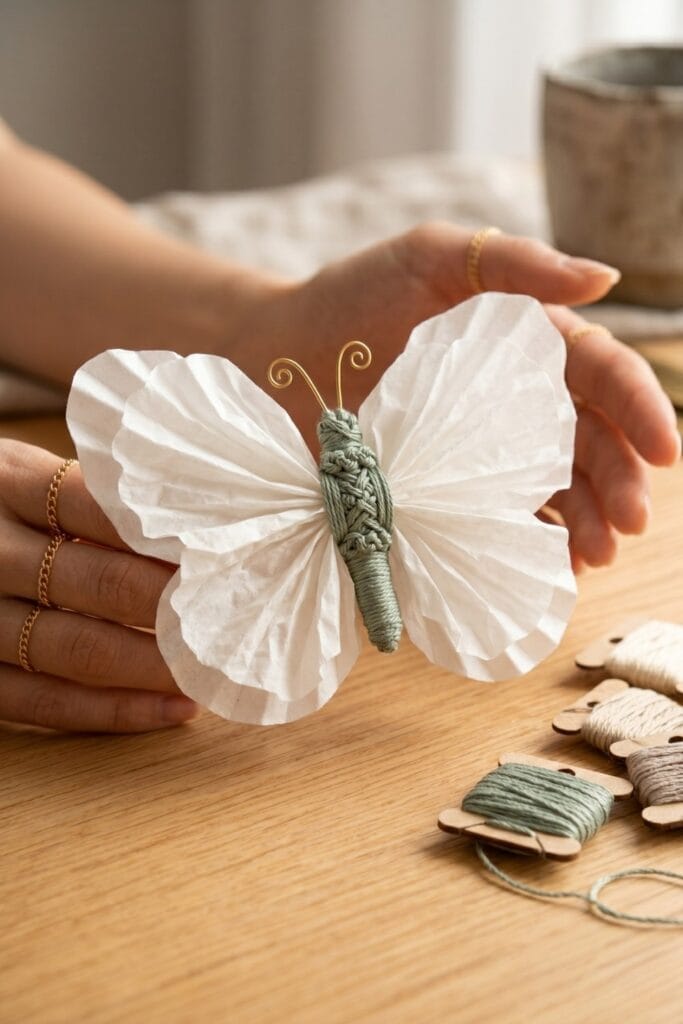
Avoid bright, neon string for a mature look. Instead, use sage green or cream embroidery floss in place of brass wire for Step 4 of the Base Technique above. Wrap the center tightly with the thread. Thus, the binding looks intentional and neat. Moreover, it keeps the minimalist color palette intact.
12. Minimalist Wall Art Display
Supplies Needed: Round White Coffee Filters, Raw Linen Fabric, Oak Shadow Box Frame, Clear Craft Glue, Thin Brass Wire, Craft Scissors.
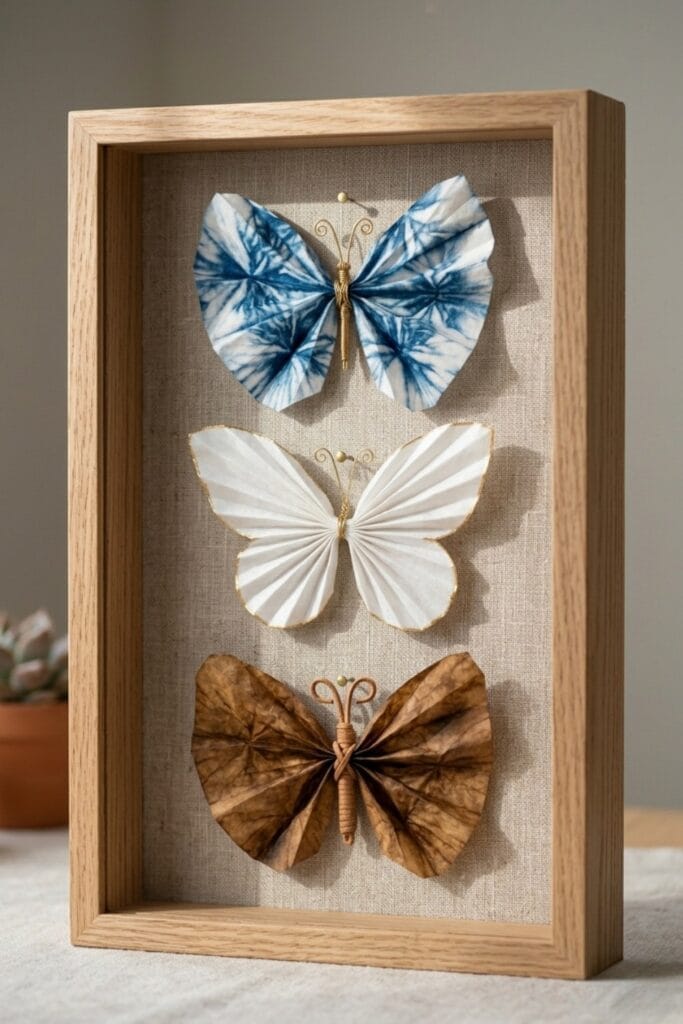
Turn your craft into permanent wall decor. First, gather several butterflies you’ve already folded using the Base Technique above — mix in a few variations like the indigo or gold-accent designs. Next, arrange them on raw linen and frame the linen in a simple oak wood shadow box. As a result, you have a stunning 3D art piece. Indeed, making coffee filter butterflies is true artistry.
Final Thoughts
Crafting can be both simple and highly sophisticated. Therefore, try these elegant ideas this weekend. So, which natural dye will you test first? Please, leave a comment below and share!😊
Quick Reference: All Supplies at a Glance
Before you clear your studio workbench or start mixing your dyes, use this comprehensive visual checklist to streamline your gathering process. This master directory organizes every base texturing medium, structural binding wire, and artisanal accent piece detailed across our twelve butterfly design frameworks. By checking your inventory against these categorized project pillars first, you can ensure a seamless, mindful crafting session without interrupting your creative flow to source an forgotten tool.
🦋 Base Materials
- Round White Coffee Filters (used throughout)| [Check Price on Amazon]
🎨 Wire & Structure
- Thin Brass Wire | [Check Price on Amazon]
- Leather Cord | [Check Price on Amazon]
🌿 Dyes & Color
- Natural Indigo Dye | [Check Price on Amazon]
- Watercolor Paint Set | [Check Price on Amazon]
- Metallic Gold Wax | [Check Price on Amazon]
✂️ Finishing & Embellishments
- Velvet Ribbon | [Check Price on Amazon]
- Fine-Tip Black Ink Pen | [Check Price on Amazon]
- Wooden Clothespins | [Check Price on Amazon]
- Clear Craft Glue | [Check Price on Amazon]
- Embroidery Floss | [Check Price on Amazon]
- Craft Scissors (used throughout) | [Check Price on Amazon]
- Detail Paintbrushes | [Check Price on Amazon]
- Black Liquid Ink | [Check Price on Amazon]
🍃 COLLECTED & HOUSEHOLD ITEMS
- Strong Black Coffee (Household)
- Natural Turmeric & Beetroot (Household)
- Collected Flat Leaves (Foraged) (Household)
🖼️ Display & Framing
- Raw Linen Fabric | [Check Price on Amazon]
- Oak Shadow Box Frame | [Check Price on Amazon]
Important Crafting Safety Note:
Please craft safely! Remember that you are responsible for your own safety and tool handling. For more details, please read our Terms and Conditions.
Making coffee filter butterflies is a relaxing, low-risk activity, but a few precautions help keep it that way. Natural dyes like indigo and turmeric can stain skin, clothing, and countertops, so work on a covered surface and consider wearing gloves. Because brass wire ends can be sharp after cutting, always trim them carefully and file down any rough edges before handling. Finally, keep small wire pieces, embroidery floss, and other tiny embellishments away from young children and pets, as they can pose a choking hazard.



You never explained how to build the body for these butterflies! Please send me the directions for the entire build. I would apprecia5e it very much.
Thank You,
Rizae
Hi Rizae,
You were absolutely right. I realized that I had not explained clearly enough how to shape the butterfly’s body. Thank you so much for pointing this out. Your feedback helped me see that this part of the tutorial needed a clearer explanation.
I have now updated the blog post and added the missing details to the “How to Fold a Coffee Filter Butterfly (Base Technique)” section. You can find the body-shaping instructions in Step 5:
5. Build the body. Continue wrapping the wire (or floss) three to four times around the same center point, pulling each pass snug. This creates a small, rounded bump at the center, which becomes your butterfly’s body. Keep wrapping until the shape feels secure and sits slightly raised above the pleats, then move on to shaping the antennae.
The blog post has now been updated, so please feel free to take another look when you have a chance. I really appreciate you taking the time to point this out. It helps me make the tutorial clearer and easier to follow.
Thank you for your interest, and happy simple daily crafting!
The bodies r not included in the instructions
Hi! Thanks so much for reaching out.
In the tutorial, the body is actually formed right in Step 5 (“Build the body”). You simply wrap your wire (or embroidery floss) around the center 3 to 4 times until it builds up a small, rounded core. So you don’t actually need a separate physical piece for it!
That said, you made a great point. It was easy to overlook while reading through the steps. I’ve just updated the post to make Step 5 and the materials list much clearer and easier to spot.
Thanks again for the helpful feedback, and happy simple daily crafting! 😊
The butterflies are beautiful.
I see that you’ve included information on the basic body instructions – the wire wrapped multiple times around the center – allowing a bit of wire to extend at the top of the center and then at the end after winding to create antennas. However, where I am confused, and I believe some of the others are as well, is that I’m not able to find the instructions for the long, thicker bodies with the head. Also, in the pics, the larger bodies appear to have the coffee filter wings attached through the center of the long body – not merely glued to the underside of the larger bodies. There are no instructions or pattern for cutting the wings into various shapes or more comprehensive explanations regarding the layered wings.
AI is a wonderful tool. It allows us to share our ideas, thoughts, and vision with others even though we may not have mastered drawing, sketching, or producing live videos for reference. However, the ideas put forward must be applicable and the finished product attainable in the practical world. (We have to be able to create ones that look like the pictures you have posted of finished work. What you have pictured is flawless, and some of the details in the imagery doesn’t correlate with what the product will truly look like by following only the instructions posted.).
Perhaps adding a video or two regarding how to actually create both types of bodies (the minimal thin wire, the thicker/linger/headed body made of wire, attaching the bodies to the wings, and instructions regarding cutting the wings into variable shapes, rather than leaving the rounded edges you would get by leaving the filter in its original form.
It’s truly a beautiful concept. We just need more thorough and practical information.
Hi! Thank you so much for taking the time to leave such a detailed and thoughtful comment. You made some really great points here, and I appreciate your honesty.
You are spot on about the gap between conceptual imagery and hands-on crafting. Visual tools are awesome for exploring ideas, but you’re right: making those sculpted bodies, custom wing cuts, and slotted designs in real life requires a lot more detailed instruction than a basic wire wrap fold.
I really want to make sure every project on this blog is completely achievable in the real world. I’ve been taking notes on how to expand this tutorial, and I’m putting together a plan to cover all those missing pieces. While I don’t have a fixed timeline or release date set yet, I’m working hard to bring these updates to the post as soon as I can.
Here is what I am aiming to add:
Custom Wing Patterns: Printable guides for cutting rounded filters into swallowtail or scalloped shapes before folding.
Sculpted Bodies Tutorial: A step-by-step guide on making thicker bodies with heads using materials like wooden beads, wire, or paper clay.
Advanced Assembly: Instructions on how to slot wings inside a sculpted body rather than just tying around the center.
Short Video Demos: Quick video walkthroughs showing both the 5-minute wire fold and the full structural build.
Feedback like yours is super helpful because it bridges the gap between inspiration and practical crafting. Thanks again for helping make this space better!
Happy Simple Daily Crafting! 😊