

Transitioning to a zero-waste lifestyle often starts right in the kitchen. Therefore, many people want better storage options. You might throw away single-use plastic baggies every single day. Instead, making DIY reusable snack bags is a very practical solution. Indeed, these eco-friendly fabric scrap projects help reduce your daily household waste. They also give you a great way to upcycle leftover cotton prints. Furthermore, if you enjoy quick craft sessions, you will definitely love this tutorial. It is just as fun and relaxing as making our popular Aesthetic Phone Charm Ideas at home.
Affiliate Disclosure: This post contains affiliate links. As an Amazon Associate, I earn from qualifying purchases. If you buy through these links, I may earn a commission at no additional cost to you.
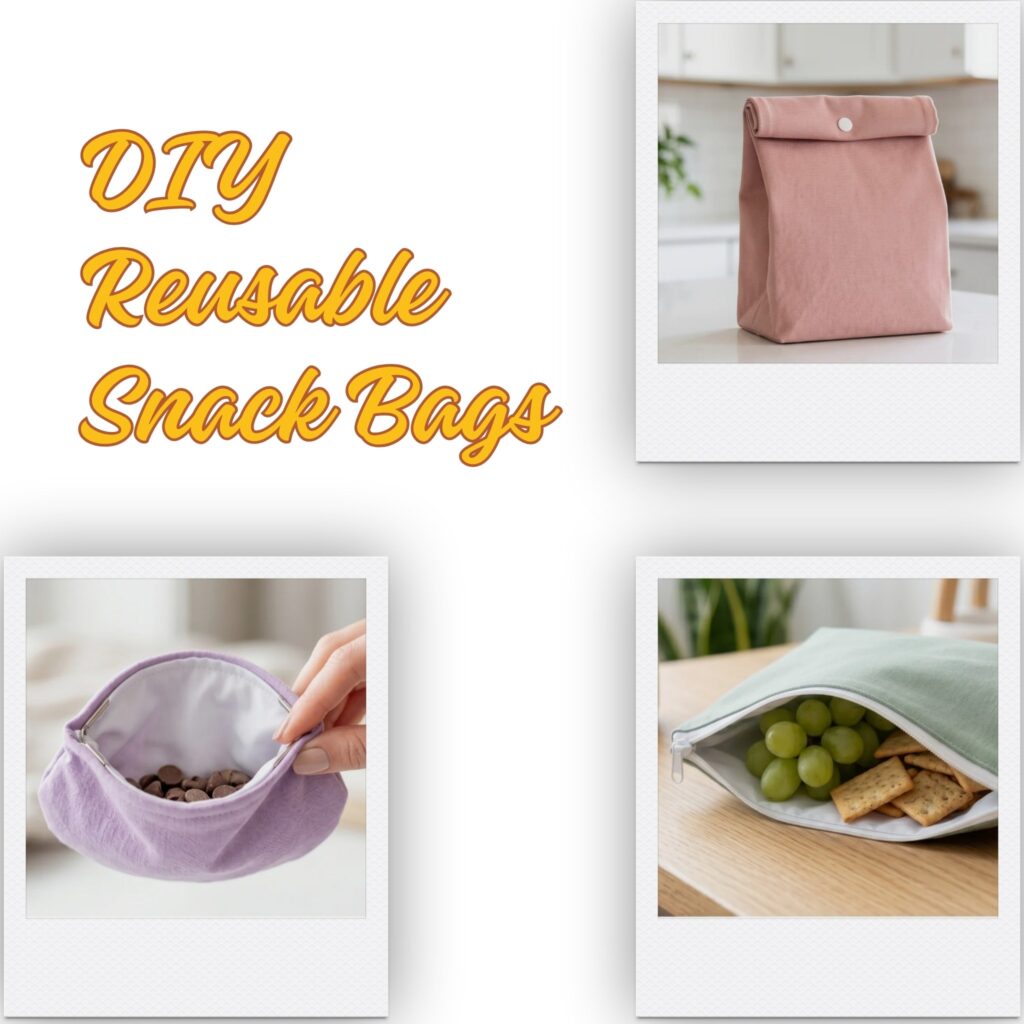
Creating a functional food pouch requires a special approach. First, you can customize the exterior with any breathable cotton fabric. Next, you must line the interior with a safe, water-resistant material. Usually, crafters choose polyurethane laminate (PUL) or natural beeswax. As a result, your food stays perfectly fresh all day long. Moreover, these DIY reusable snack bags are very easy to wipe clean after lunch. Here are 10 distinct DIY reusable snack bags you can sew to elevate your daily routine.
Top 10 DIY Reusable Snack Bags to Sew Today
Essential Materials & Tools
✨ Consumable Raw Materials
- Food-Safe PUL Fabric — Water-resistant wipe-clean lining material for washable snack pouches, lunch sacks, and zip bags. | Check Price on Amazon
- Clear TPU Vinyl — Flexible clear panel material for a window pouch that lets children see the snack inside. | See Price on Amazon
- Quilting Cotton Fabric Fat Quarters — Provides washable, colorful outer fabrics in practical small cuts for making multiple pouch styles. | Check Quilting Cotton Fabric Fat Quarters on Amazon
- Heavyweight Cotton Canvas — Durable outer fabric that gives structured designs such as bento pouches and lunch sacks body. | See Heavyweight Cotton Canvas on Amazon
- Cotton Twill Fabric — Strong washable woven fabric with a crisp finish for a paper-bag-inspired roll-top sack. | View Cotton Twill Fabric on Amazon
- Natural Linen Fabric Scraps — Breathable textured exterior material suited to upright double-drawstring snack pouches. | Find Natural Linen Fabric Scraps on Amazon
- Insulated Fleece Batting — Adds light insulation and structure between the exterior fabric and waterproof lining of a lunch sack. | Check Latest Price on Amazon
- Beeswax Food Wrap Wax — Natural wax ingredient for the beeswax-wrap hybrid design and for refreshing homemade fabric food wraps. | View on Amazon
- Organic Cotton Cord — Soft washable cord for double-drawstring closures without using synthetic rope. | Check Price on Amazon
- All-Purpose Polyester Sewing Thread — Strong, washable thread for seams, topstitching, casing channels, and reinforced closure points. | See Price on Amazon
🧰 Core Crafting Tools & Equipment
- Fabric Wonder Clips — Holds layered fabric, waterproof lining, and clear vinyl together without leaving pin holes. | Check Latest Price on Amazon
- Rotary Cutter and Self-Healing Mat — Makes clean, accurate cuts through cotton, canvas, PUL, batting, and lining fabrics. | View on Amazon
- Clear Acrylic Quilting Ruler — Helps measure rectangles, mark window openings, and square up pouch panels accurately. | Check Price on Amazon
- Zipper Sewing Machine Foot Set — Lets makers stitch close to zipper teeth for clean, durable zippered pouch construction. | See Price on Amazon
- Bodkin and Safety Pin Set — Makes threading cotton cord through narrow drawstring casings quick and frustration-free. | Check Bodkin and Safety Pin Set on Amazon
- Handheld Kam Snap Pliers — Installs plastic snap closures securely without needing a bulky bench-mounted press. | See Handheld Kam Snap Pliers on Amazon
💎 Hardware, Fasteners & Finishing
- Nylon Coil Zippers — Washable rust-free closures for zippered bento pouches and side-gusset bags. | Check Nylon Coil Zippers on Amazon
- Sew-On Hook and Loop Tape — Secure adjustable closure for window pouches and simple fold-over snack bags. | See Sew-On Hook and Loop Tape on Amazon
- Plastic Kam Snaps — Washable, rust-free fasteners for roll-top, flap, taco-shell, and envelope-style closures. | View Plastic Kam Snaps on Amazon
- Sew-In Magnetic Snaps — Low-profile closure option for a flap-and-snap envelope pouch. | Find Sew-In Magnetic Snaps on Amazon
⚡ Studio Tools & Workshop Equipment
- Computerized Heavy-Duty Sewing Machine — Reliable adjustable stitching and stronger fabric handling support repeatable production of lined snack bags. | View Computerized Heavy-Duty Sewing Machine on Amazon
- Serger Overlock Sewing Machine — Creates neat, durable seam finishes on cotton and canvas, especially useful for frequent washing and batch sewing. | Find Serger Overlock Sewing Machine on Amazon
- Large Self-Healing Cutting Mat and Rotary Trimmer — Studio-scale cutting setup speeds up accurate cutting of repeated pouch panels, linings, and gussets. | Check Latest Price on Amazon
1. The Window Pouch DIY Reusable Snack Bags
Supplies Needed: Quilting Cotton Fabric Fat Quarters, Food-Safe PUL Fabric, Clear TPU Vinyl, Sew-On Hook and Loop Tape, All-Purpose Polyester Sewing Thread, Fabric Wonder Clips
This clever design looks just like a normal plastic bag. However, it has a clear viewing panel on the front. You can easily see the food inside without opening it. Thus, it is perfect for packing different school lunches. This is certainly one of our favorite DIY reusable snack bags.
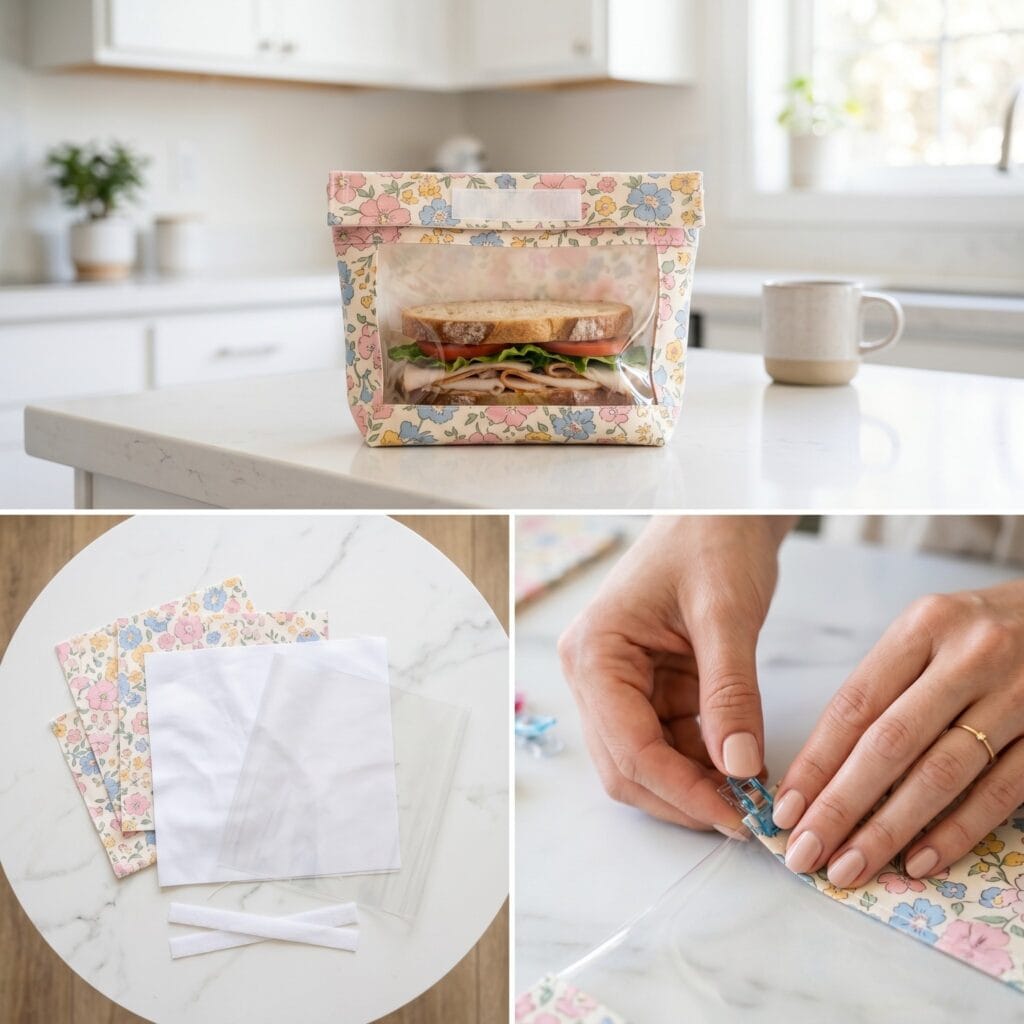
- Special Supplies: Medium cotton fabric scraps, food-safe PUL lining, clear vinyl yardage, and hook and loop strips.
- How to Make It: First, cut a rectangle out of your main cotton piece. Next, pin the clear vinyl behind this opening. Then, sew carefully around the edge to secure the window. After that, place your outer fabric and PUL lining together. Sew around the edges, but leave a small gap. Finally, turn it right side out, fold the bottom up, and sew the sides together.
Pro-Tip: Tissue paper is incredibly helpful when sewing vinyl. Place a layer of tissue paper between your machine foot and the vinyl. This prevents the sticky material from jamming. You can easily tear the paper away later.
2. The Double-Drawstring Snack Pouch
Supplies Needed: Natural Linen Fabric Scraps, Food-Safe PUL Fabric, Organic Cotton Cord, All-Purpose Polyester Sewing Thread, Bodkin and Safety Pin Set
This round pouch sits perfectly upright on a desk or table. Therefore, it is ideal for loose items like nuts or popcorn. The dual string keeps the bag securely closed during travel.
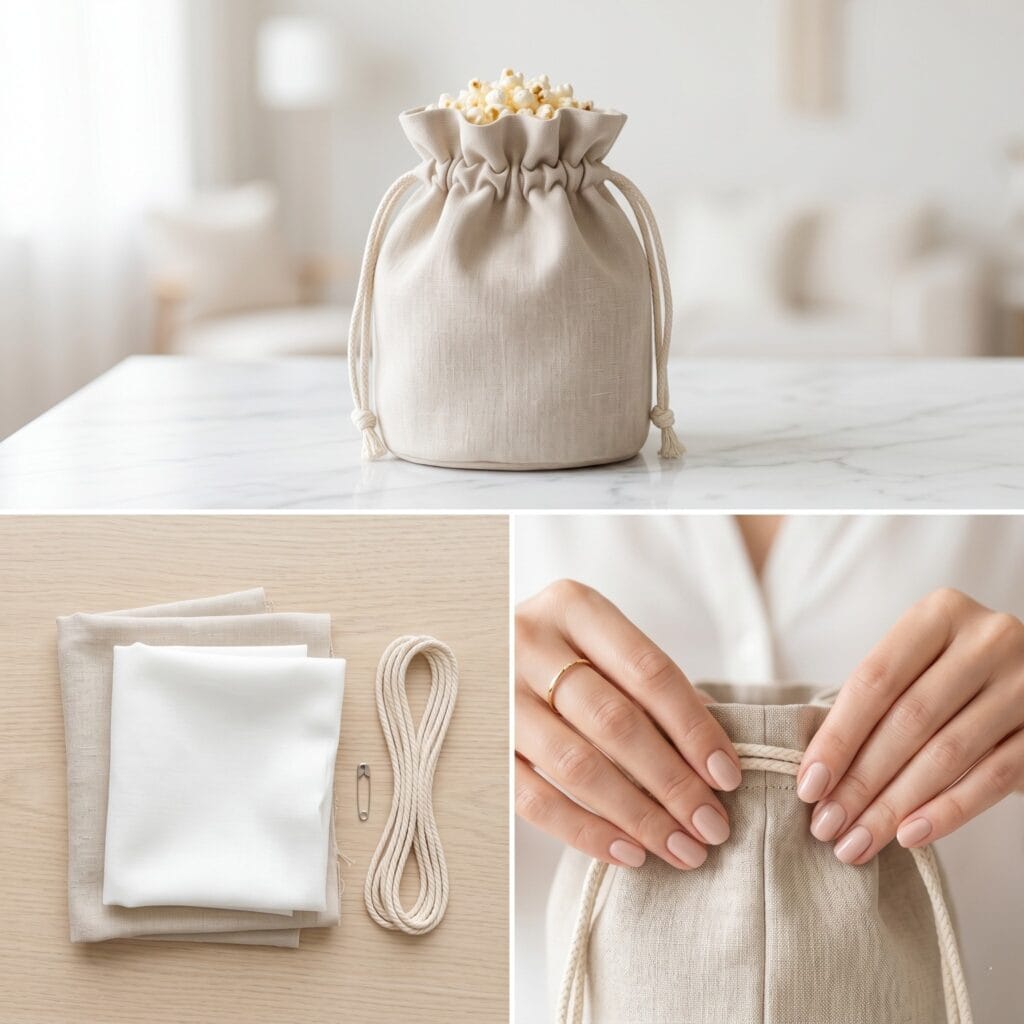
- Special Supplies: Linen fabric scraps, food-safe EVA lining, two cotton macrame cords, and a small safety pin.
- How to Make It: First, cut your fabrics into two tall rectangles and two round bases. Next, sew the side seams of the rectangles. Then, attach them to the round bases to form two buckets. Afterward, slip the lining inside the exterior bucket. Sew around the top edge and leave a small opening. Finally, turn it inside out, sew a top casing, and thread your cords through.
Pro-Tip: Always finish the raw edges of your cotton cords. You can tie tight knots or wrap them tightly with thread. Consequently, this stops the drawstrings from unraveling in the washing machine.
3. The Zippered Bento DIY Reusable Snack Bags
Supplies Needed: Heavyweight Cotton Canvas, Food-Safe PUL Fabric, Nylon Coil Zippers, All-Purpose Polyester Sewing Thread, Zipper Sewing Machine Foot Set
This horizontal pocket has a very wide bottom. Thus, it slips easily into backpacks or narrow briefcases. The zipper closure makes these DIY reusable snack bags highly secure. It keeps all those tiny crumbs trapped safely inside.
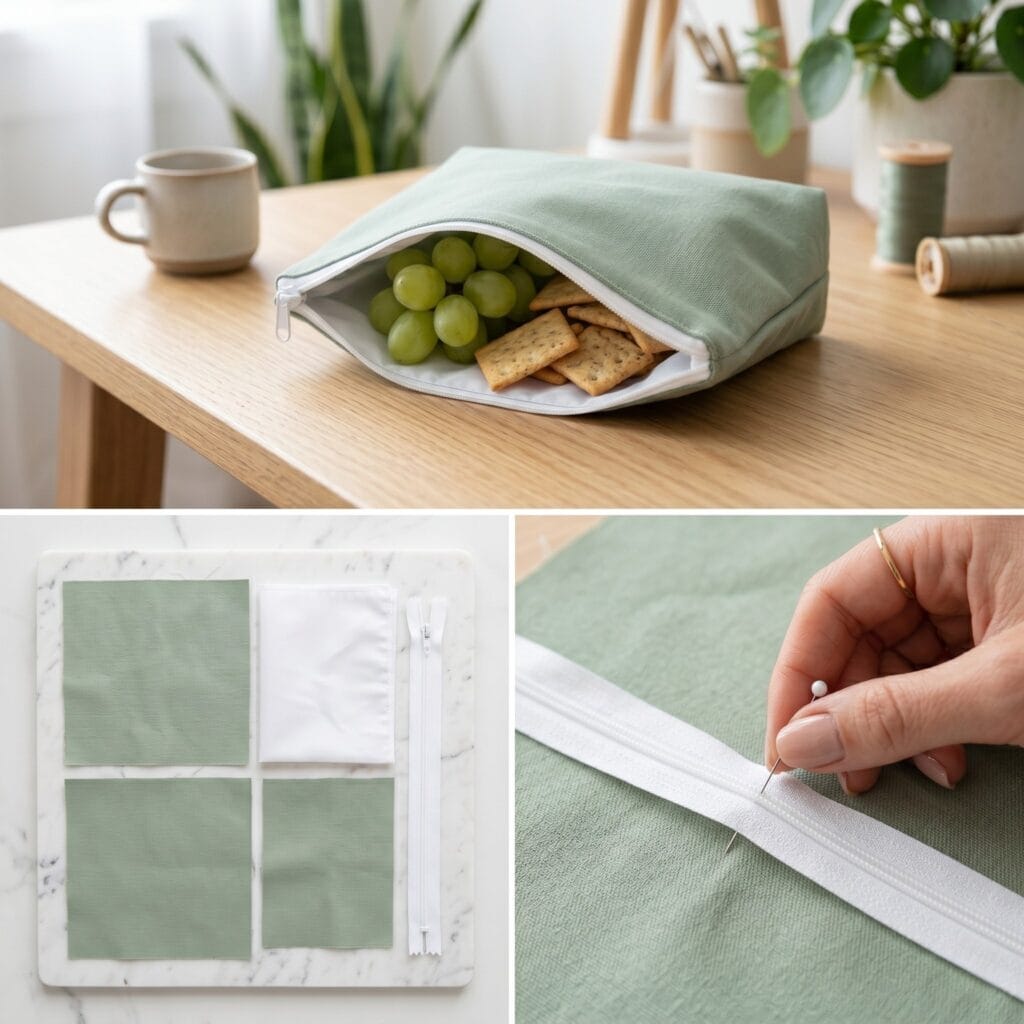
- Special Supplies: Sturdy cotton canvas, flexible PUL lining, and a nylon zipper. Avoid metal zippers because they can rust over time.
- How to Make It: First, sandwich one side of the zipper between your exterior fabric and the lining. Next, sew along the zipper line using a zipper foot. Then, repeat this step for the other side. After that, open the zipper halfway. Sew around the entire border, leaving a small gap in the bottom. Finally, turn the bag right side out and stitch the gap closed.
Pro-Tip: Ironing PUL fabric requires extra caution. Never apply a hot iron directly to the shiny coated side. Instead, always press from the cotton side using a very low heat setting.
4. The Roll-Top Lunch Sack
Supplies Needed: Cotton Twill Fabric, Insulated Fleece Batting, Food-Safe PUL Fabric, Plastic Kam Snaps, Handheld Kam Snap Pliers
This nostalgic design looks exactly like a classic brown paper lunch bag. However, it is much stronger and highly reusable. It is large enough to hold whole fruits and sandwiches at the same time.
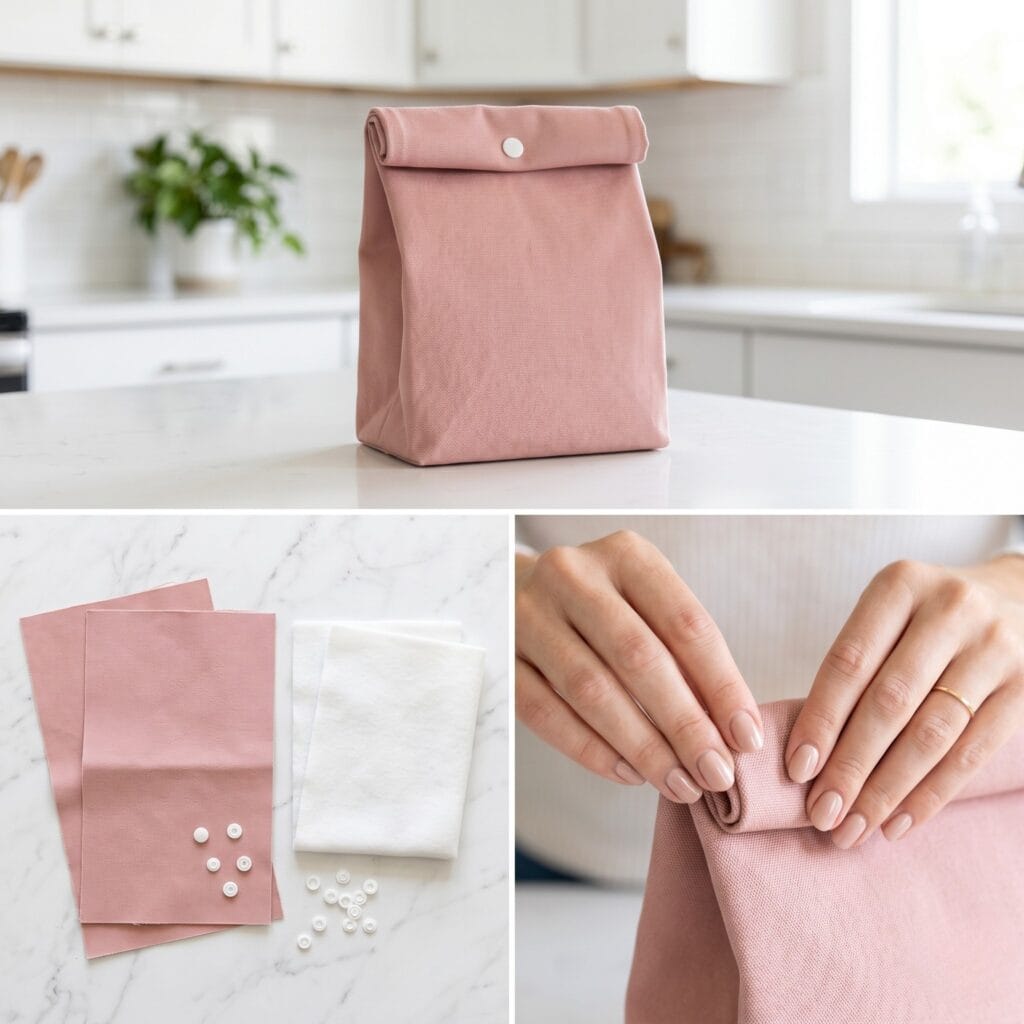
- Special Supplies: Heavyweight cotton twill, insulated fleece batting, waterproof PUL lining, and plastic snaps.
- How to Make It: First, layer your outer fabric with the insulated fleece. Quilt them together with simple straight lines. Next, sew the side seams to build the bag structure. Then, box the bottom corners by sewing across the folded triangle. Repeat this exact process for your PUL lining. After that, insert the lining into the outer shell. Finally, fold the top edges inward, sew the rim, and add your plastic snaps.
Pro-Tip: Your sewing machine might struggle with thick canvas layers. Therefore, switch to a heavy-duty denim needle. This simple change prevents skipped stitches and broken needles.
5. The Triangle Treat Pod DIY Reusable Snack Bags
Supplies Needed: Quilting Cotton Fabric Fat Quarters, Food-Safe PUL Fabric, Sew-On Hook and Loop Tape, All-Purpose Polyester Sewing Thread, Fabric Wonder Clips
This 3D geometric pouch is actually very simple to sew. In fact, its unique pyramid shape protects delicate food nicely. It keeps soft berries or crispy crackers from getting crushed. This definitely makes it a great choice among our DIY reusable snack bags.
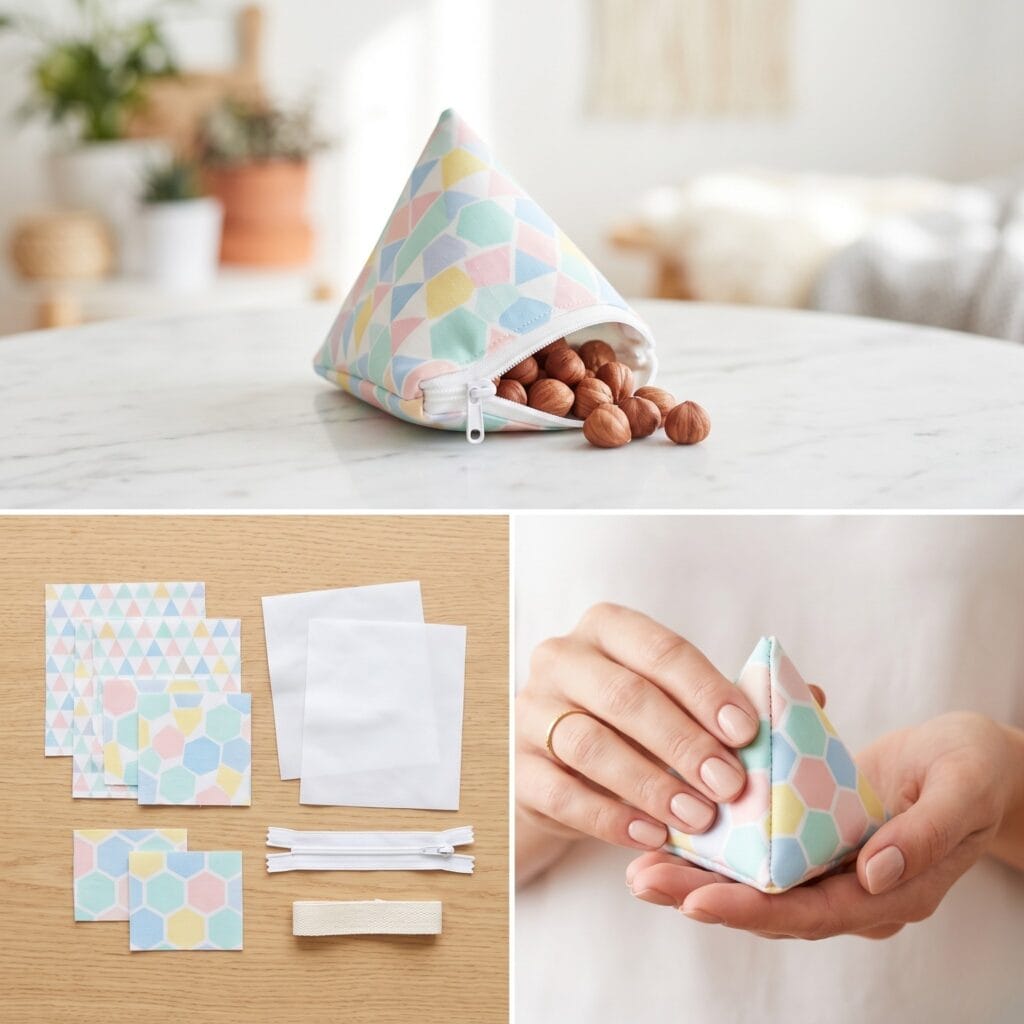
- Special Supplies: Quilting cotton scraps, food-safe PUL lining, a short nylon zipper, and a small nylon webbing loop.
- How to Make It: First, sew a rectangular pouch just like a standard flat zippered bag. Next, attach the zipper to the short ends. Then, pinch the bottom corners in the opposite direction of the top zipper. This creates a perpendicular seam. Insert your nylon webbing loop right here. Finally, sew it shut and turn the pod right side out.
Pro-Tip: Use pinking shears when trimming the internal seams of this pyramid. Consequently, this reduces annoying bulk in the corners. It also helps the pod maintain its sharp shape.
6. The Beeswax Wrap Hybrid
Supplies Needed: Quilting Cotton Fabric Fat Quarters, Beeswax Food Wrap Wax, Food-Safe PUL Fabric, All-Purpose Polyester Sewing Thread
This pouch combines beeswax wraps with basic sewing techniques. Therefore, it completely removes the need for zippers or synthetic fabrics. The wax makes the cotton naturally water-resistant and self-adhering.
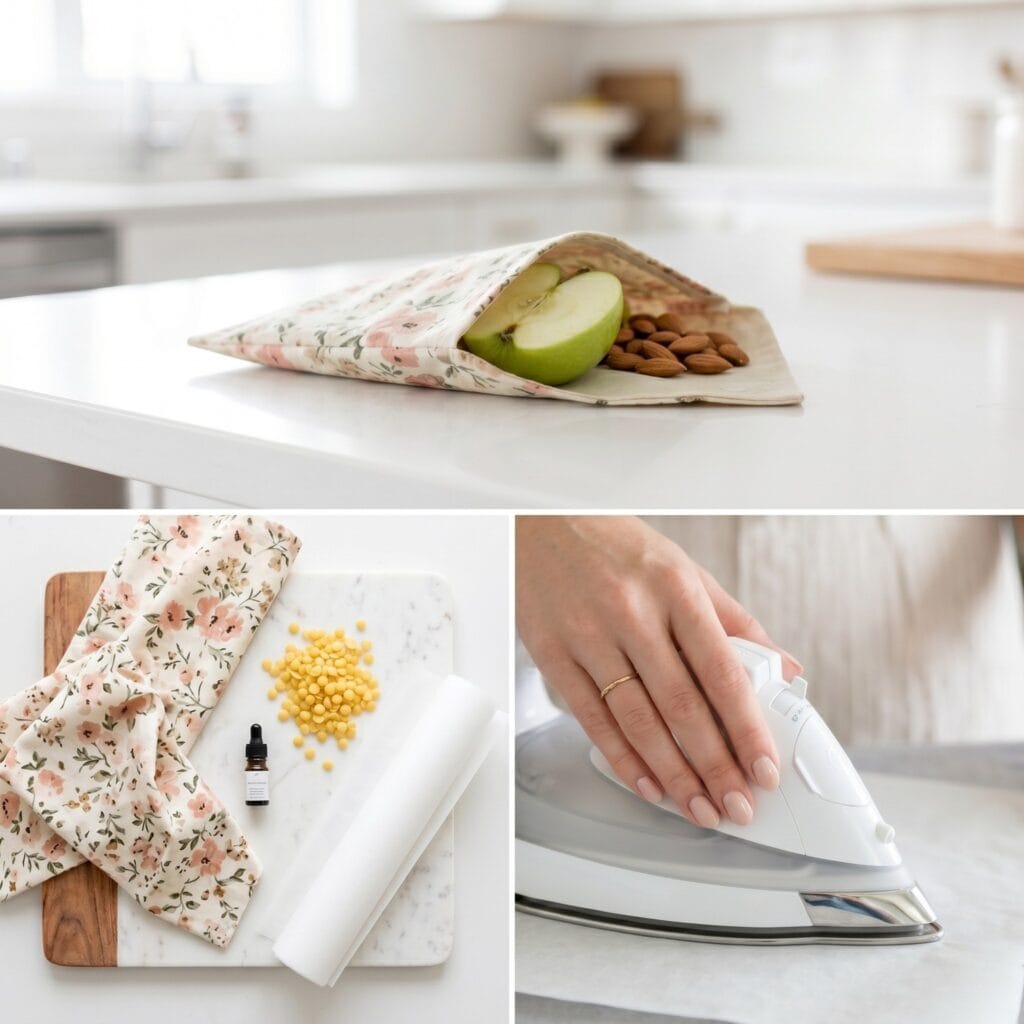
- Special Supplies: Organic lightweight cotton scraps, cosmetic-grade beeswax pellets, jojoba oil, powdered pine rosin, and parchment paper.
- How to Make It: First, sew your cotton scraps into a simple envelope pouch. Use a tight zigzag stitch on the raw edges. Next, lay the pouch flat on a baking sheet. Then, sprinkle the fabric with beeswax, pine rosin, and jojoba oil. Cover it with parchment paper. Finally, use a warm iron to melt the wax deep into the fabric fibers.
Pro-Tip: Never wash beeswax fabric items in hot water. The hot water will instantly melt the wax away. Instead, clean this pouch by gently wiping it with a cool damp cloth.
7. The Flap & Snap Envelope
Supplies Needed: Quilting Cotton Fabric Fat Quarters, Food-Safe PUL Fabric, Sew-In Magnetic Snaps, All-Purpose Polyester Sewing Thread, Fabric Wonder Clips
This slim envelope design is perfect for dry goods. It easily holds granola bars, dried fruit, or small cookies. Also, it slides effortlessly into tight jacket pockets.
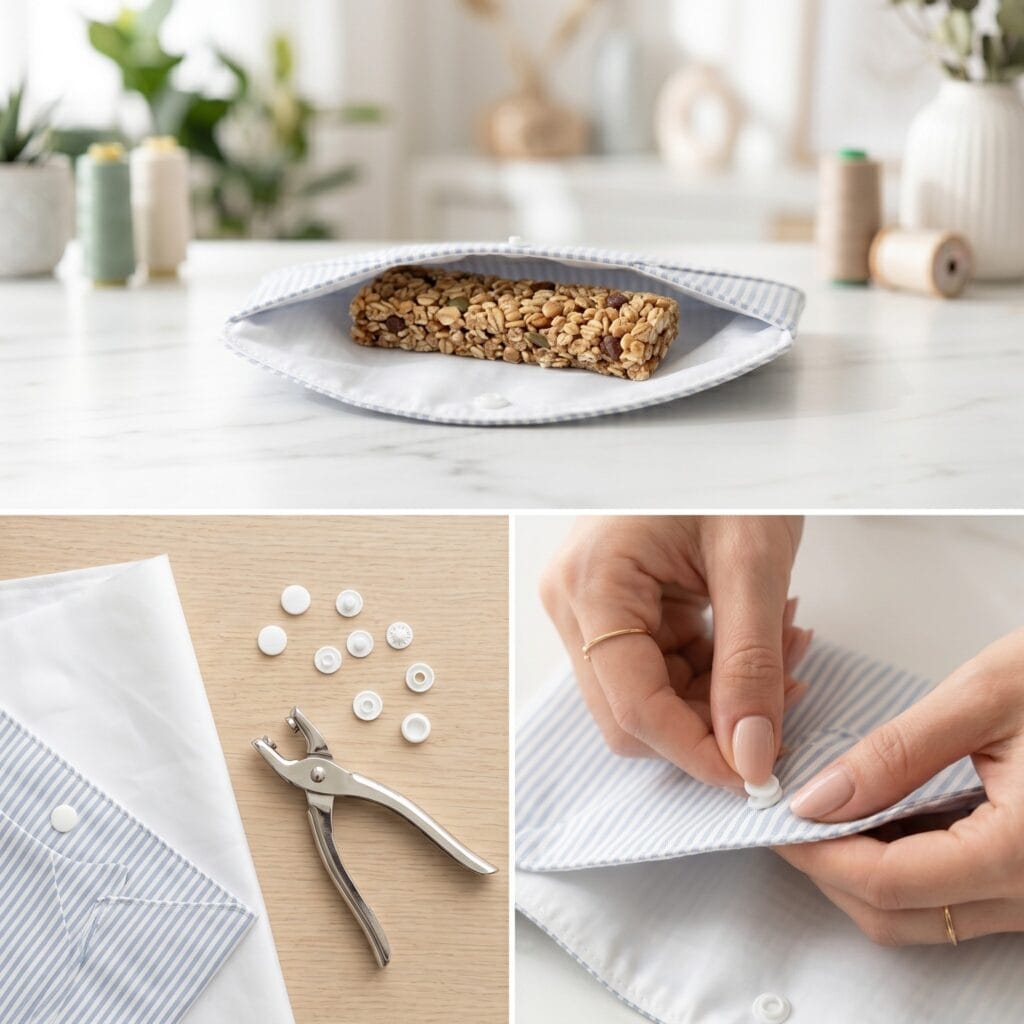
- Special Supplies: Patterned cotton, waterproof PUL lining, plastic snap fasteners, and a snap setting tool.
- How to Make It: First, cut a long rectangle with a curved top edge. Next, place the outer fabric and lining together. Sew around the border, but leave a small gap at the bottom. Then, turn the fabric right side out and sew the perimeter flat. Fold the bottom edge up to form the main pocket. Finally, stitch the sides together and install your snap closure on the flap.
Pro-Tip: Always reinforce the fabric area before punching a snap hole. Iron a tiny square of interfacing behind the snap. As a result, the fabric will not tear over time with repeated pulling.
8. The Side-Gusset Expandable Bag
Supplies Needed: Heavyweight Cotton Canvas, Food-Safe PUL Fabric, Nylon Coil Zippers, All-Purpose Polyester Sewing Thread, Rotary Cutter and Self-Healing Mat
When making DIY reusable snack bags, this design is built specifically for larger portions. The clever side folds allow it to lay completely flat when empty. However, it expands greatly to hold bulky items like big bagels.
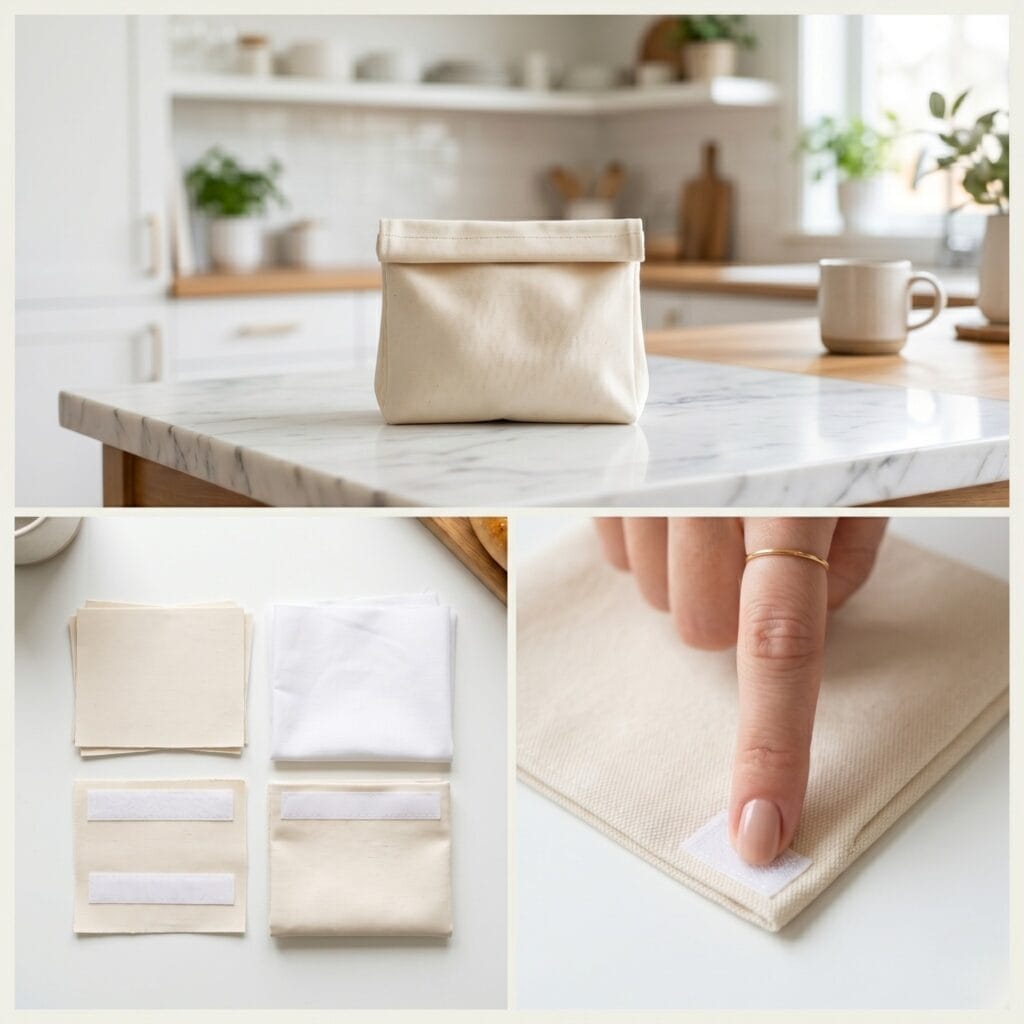
- Special Supplies: Sturdy canvas scraps, thick food-safe EVA lining, and wide hook and loop tape.
- How to Make It: First, build a standard flat pouch using your canvas and lining. Next, push the side seams inward by one inch to create folds. Then, press these folds flat with a warm iron. Pin the folds securely near the top opening. Finally, sew across the top edge and attach the hook and loop tape inside the rim.
Pro-Tip: Always turn your sewing machine handwheel manually over thick side folds. This gives you precise control. Furthermore, it stops the needle from snapping on the heavy canvas joints.
9. The Taco Shell Wrap DIY Reusable Snack Bags
Supplies Needed: Quilting Cotton Fabric Fat Quarters, Food-Safe PUL Fabric, Plastic Kam Snaps, Handheld Kam Snap Pliers, All-Purpose Polyester Sewing Thread
This round design serves two amazing purposes for lunch breaks. First, it holds your snack securely during travel. Second, it unfolds completely flat to become a clean mini placemat. This is truly one of the most useful DIY reusable snack bags for kids.
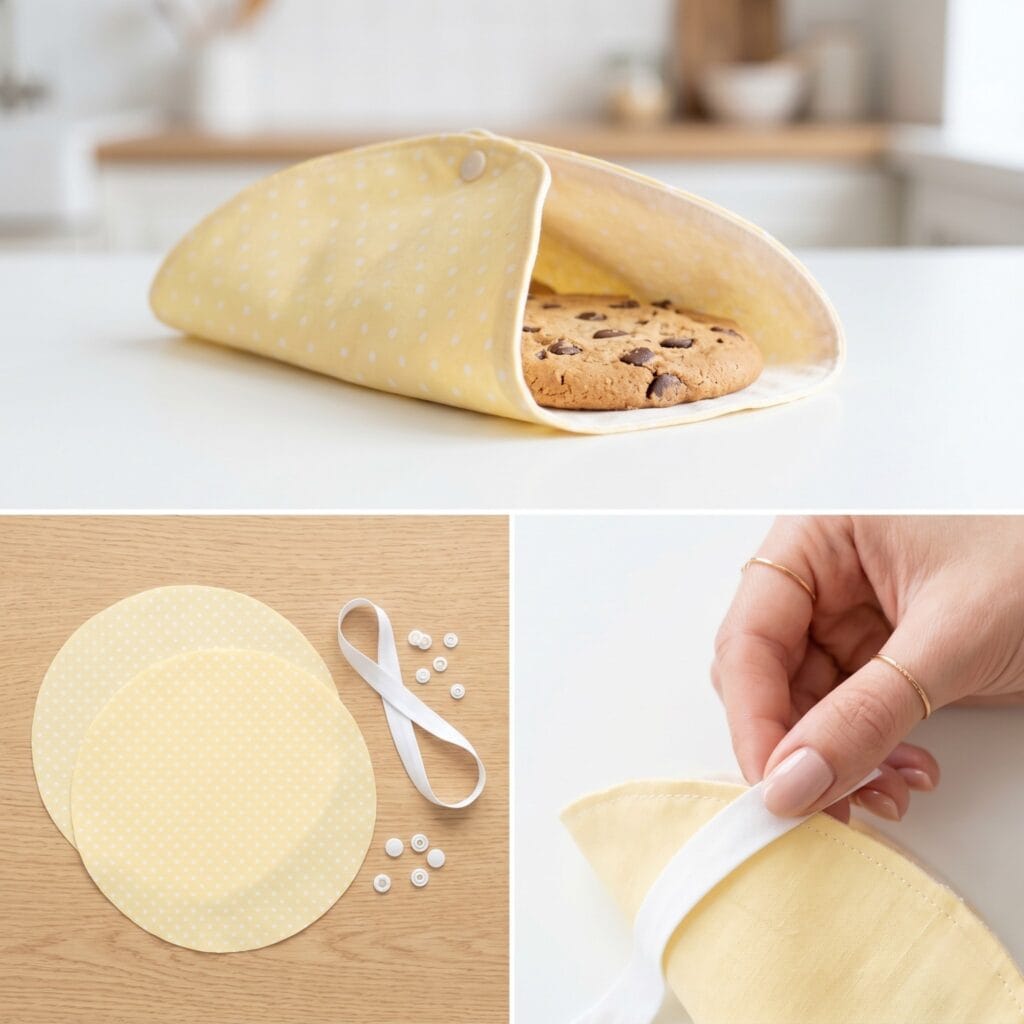
- Special Supplies: Two large cotton circles, one PUL lining circle, pre-folded bias tape, and plastic snaps.
- How to Make It: First, layer the PUL lining between the two cotton circles. Next, bind the raw outer edge completely with your bias tape. Then, fold the finished circle in half to find the center line. Finally, add two plastic snaps along the curved edge of one half. Add the receiving snaps to the exact opposite side.
Pro-Tip: Sewing bias tape around a curve can be very tricky. Therefore, steam iron your tape into a gentle curve before pinning it. This simple step ensures a perfectly smooth border without ugly wrinkles.
10. The Dumpling Pouch
Supplies Needed: Quilting Cotton Fabric Fat Quarters, Food-Safe PUL Fabric, Organic Cotton Cord, All-Purpose Polyester Sewing Thread, Fabric Wonder Clips
This cute design uses a hidden metal flex frame closure. Consequently, the bag snaps open easily when you squeeze the sides. It springs shut automatically when you let go. It offers great one-handed access for quick snacking.
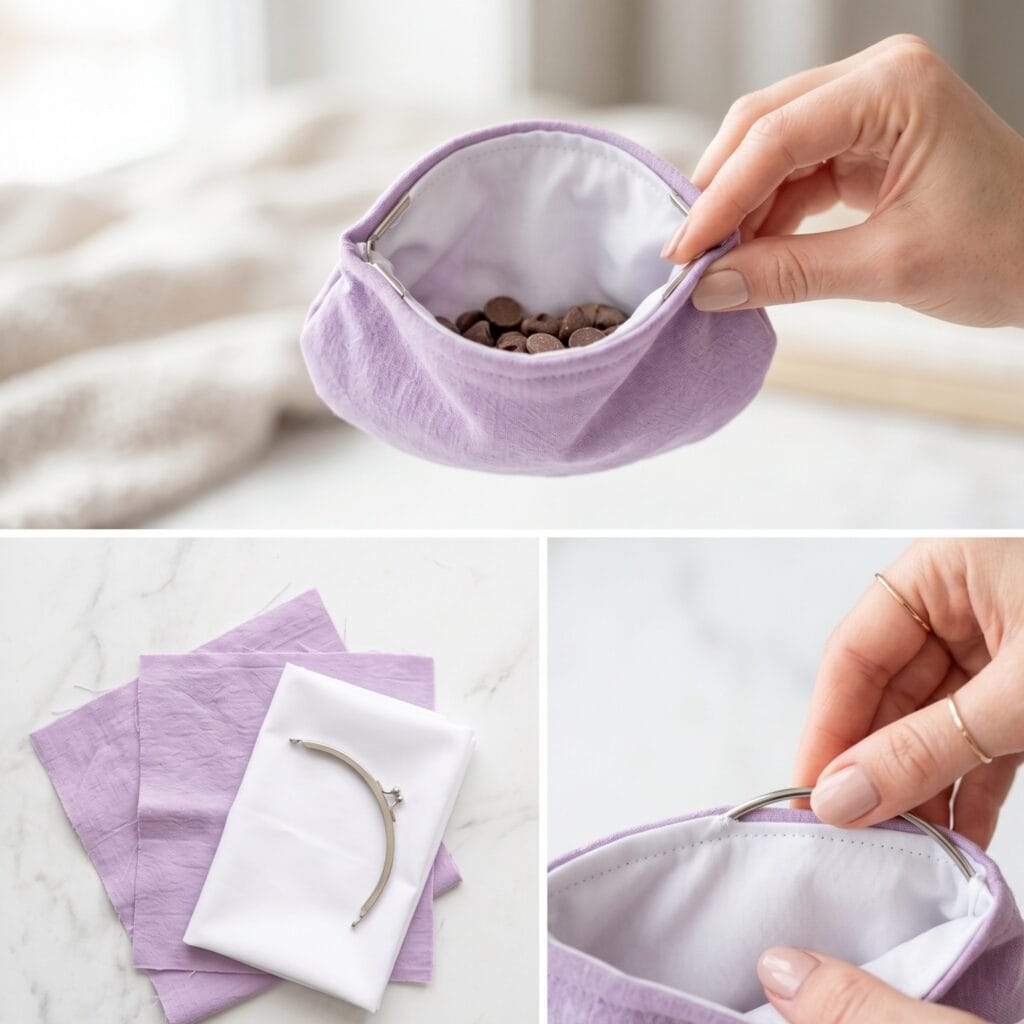
- Special Supplies: Soft cotton scraps, flexible PUL lining, and an internal metal flex frame.
- How to Make It: First, sew a square pouch body using your outer and inner fabrics. Next, fold the top raw edges down by one inch. Sew a horizontal line to make a hollow tube. Leave a tiny gap in the side seams. Then, push the metal flex frame completely through this tube. Finally, insert the small metal hinge pin and stitch the gap closed.
Pro-Tip: You must remove metal flex frames before deep cleaning. If your bag gets very dirty, hand wash it carefully. Otherwise, the internal metal parts might rust inside your washing machine.
Quick Reference: All Supplies at a Glance
For your convenience, here is a quick summary of all materials and tools used in this tutorial:
✨ Consumable Raw Materials
- Food-Safe PUL Fabric | Check Price on Amazon
- Clear TPU Vinyl | See Price on Amazon
- Quilting Cotton Fabric Fat Quarters | Check Quilting Cotton Fabric Fat Quarters on Amazon
- Heavyweight Cotton Canvas | See Heavyweight Cotton Canvas on Amazon
- Cotton Twill Fabric | View Cotton Twill Fabric on Amazon
- Natural Linen Fabric Scraps | Find Natural Linen Fabric Scraps on Amazon
- Insulated Fleece Batting | Check Latest Price on Amazon
- Beeswax Food Wrap Wax | View on Amazon
- Organic Cotton Cord | Check Price on Amazon
- All-Purpose Polyester Sewing Thread | See Price on Amazon
🧰 Core Crafting Tools & Equipment
- Fabric Wonder Clips | Check Latest Price on Amazon
- Rotary Cutter and Self-Healing Mat | View on Amazon
- Clear Acrylic Quilting Ruler | Check Price on Amazon
- Zipper Sewing Machine Foot Set | See Price on Amazon
- Bodkin and Safety Pin Set | Check Bodkin and Safety Pin Set on Amazon
- Handheld Kam Snap Pliers | See Handheld Kam Snap Pliers on Amazon
💎 Hardware, Fasteners & Finishing
- Nylon Coil Zippers | Check Nylon Coil Zippers on Amazon
- Sew-On Hook and Loop Tape | See Sew-On Hook and Loop Tape on Amazon
- Plastic Kam Snaps | View Plastic Kam Snaps on Amazon
- Sew-In Magnetic Snaps | Find Sew-In Magnetic Snaps on Amazon
⚡ Studio Tools & Workshop Equipment
- Computerized Heavy-Duty Sewing Machine | View Computerized Heavy-Duty Sewing Machine on Amazon
- Serger Overlock Sewing Machine | Find Serger Overlock Sewing Machine on Amazon
- Large Self-Healing Cutting Mat and Rotary Trimmer | Check Latest Price on Amazon
Important Crafting Safety Notes
Crafting is a rewarding creative activity, but maintaining a safe workshop environment is essential for yourself, your family, and your pets. Please review these vital safety precautions before starting:
• Personal Protective Equipment (PPE) & Safe Handling: Always wear safety glasses or protective eyewear when cutting metal wire, clipping jump rings, trimming hard findings, or using power tools to prevent flying shards. Use heat-resistant work mats and exercise caution around high-temperature glue guns, irons, or heating tools to avoid burns. Wear disposable nitrile gloves and a particle dust mask when sanding wood or working with clays, resins, and solvent-based sealants to protect your skin and lungs.
• Room Ventilation & Fume Safety: Always craft in a well-ventilated space with open windows, cross-ventilation, or active exhaust whenever using solvent-based adhesives, instant bonders, aerosol sprays, epoxy resins, or heat-curing materials. Never inhale chemical fumes directly, and allow finished pieces to off-gas and cure completely in an airy area away from everyday living spaces.
• Child & Pet Safety (Choking & Swallowing Prevention): Small craft components—including safety eyes, split rings, clasps, jump rings, beads, bells, small magnets, unbaked clay scraps, and loose polyester fiberfill—present severe choking, intestinal obstruction, and ingestion hazards for babies, toddlers, and pets. Keep all unattached hardware, yarn cutoffs, and stuffing strictly out of reach. For handmade gifts intended for infants or young children, omit plastic washer eyes and detachable findings entirely in favor of securely stitched, double-knotted embroidered details.
• Sharp Tool Storage & Clean Work Area: Store sharp tools—such as rotary cutters, craft knives, bent-tip yarn needles, snips, scissors, and jewelry pliers—in secure, latching cases or high cabinets immediately after use. Thoroughly inspect, sweep, or vacuum your craft area and floor after finishing to ensure no dropped needles, pins, wire clippings, or small findings remain where curious pets or bare feet could step on or swallow them.
• Certified, Quality & Non-Toxic Supplies: Always choose verified non-toxic craft supplies (such as ACMI AP-certified paints and adhesives, lead-free and nickel-free jewelry findings, and skin-safe materials). Follow manufacturer label guidelines for curing durations, safe operating temperatures, and proper product disposal. Never use food preparation utensils or kitchen cookware for craft chemicals.
For more detailed guidance on safe crafting practices, liability disclosures, and website usage, please review our Terms and Conditions.
“Which of these DIY Reusable Snack Bags You Will Love ideas are you excited to try first, or do you have a creative tip of your own to share? Drop a comment below—I’d love to hear your thoughts and see what you create!”


