Do you have small leftover timber pieces lying around after a home improvement project? Put those off-cuts to work with a little sanding, paint, wax, or leather cord. Simple scrap wood crafts offer a practical, low-waste way to use material already waiting in the garage or workshop. You can make something useful without buying fresh boards, clearing room for large machinery, or wrestling with heavy power tools. These small projects also make thoughtful handmade gifts, especially after you sand the wood flat and round every sharp edge. If you enjoy low-waste projects made from everyday leftovers, you will also enjoy our creative guide on upcycled glass jar crafts.
Affiliate Disclosure: This post contains affiliate links. As an Amazon Associate, I earn from qualifying purchases. If you buy through these links, I may earn a commission at no additional cost to you.
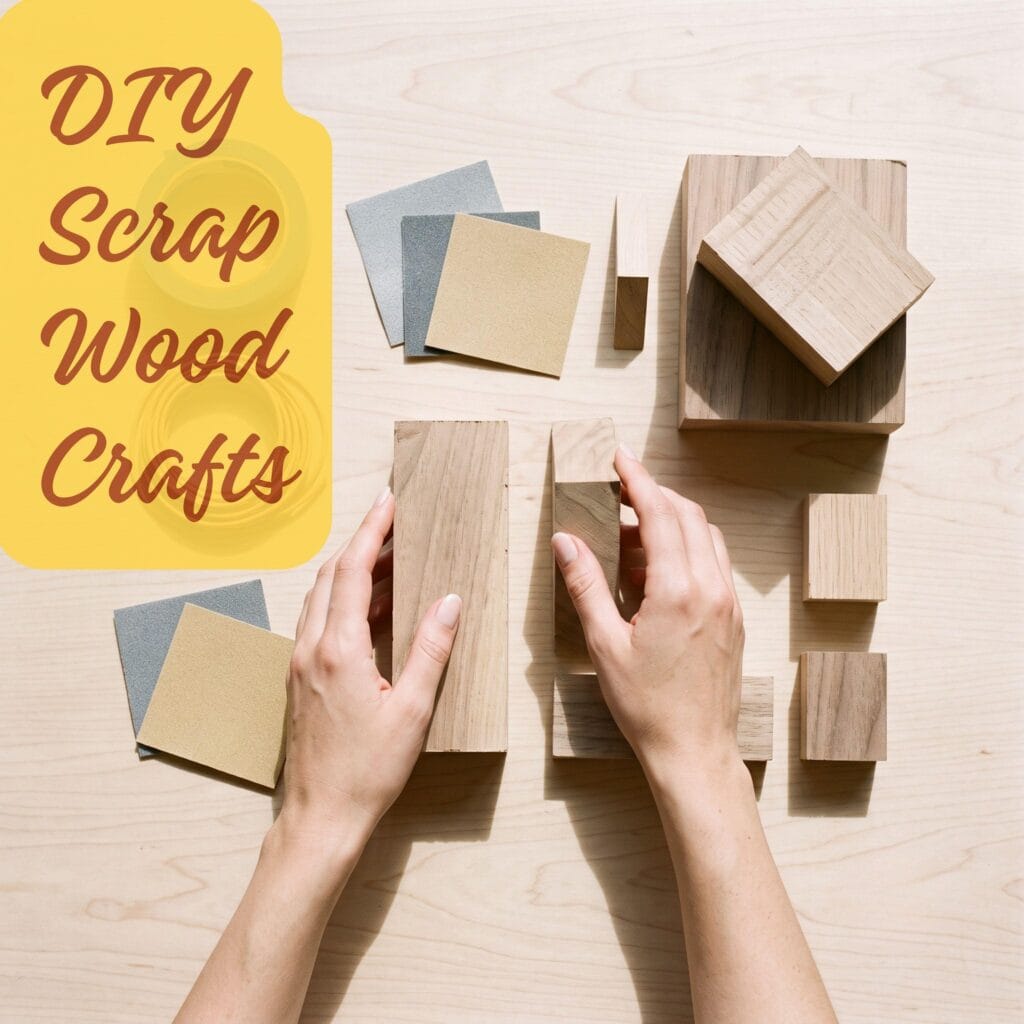
This step-by-step tutorial covers five small woodworking ideas made with basic hand tools and manageable pieces of lumber. Keep a sanding block nearby, clear a steady patch of your work surface, and keep off-cuts that are dry, thick enough for the project, and free of splits. A small scrap becomes useful once its rough saw marks, splinters, and dusty edges are sanded away.
Essential Hand Tools for Small Scrap Wood Crafts
You do not need a fully equipped workshop for these miniature projects. Gather the beginner-friendly supplies below, then choose scraps that are dry, free from deep splits, and large enough to hold securely while you cut, drill, and sand. Pine, poplar, cedar, and leftover hardwood trim all work well, provided the piece feels solid and has no loose knots near the area you plan to shape. Avoid scraps with old nails, staples, dried construction adhesive, or paint of an unknown age, since those surfaces can damage hand tools and create unsafe dust when sanded.
- Hand Saw: A Japanese pull saw or small backsaw for straight cuts in thin stock.
- Sandpaper: Medium (120-grit) and fine (220-grit) blocks for a smooth finish.
- Small Hand Drill: A pin vise (manual hand drill) that takes standard 1/8 in bits for making tiny holes.
- Finishes: Clear furniture wax, tabletop-rated clear wood sealer, leather cord, and acrylic paints.
5 Easy Scrap Wood Crafts You Can Make Today
| # | Project | Finished size | Blank | Key tools | Finish | Hands-on |
|---|---|---|---|---|---|---|
| 1 | Photo & recipe holder | 2 × 2 × 1 in | 2 in square, ≥1 in thick | hand saw, clamp, 120/220 | paste wax | ~15 min |
| 2 | Rustic coasters | 4 × 4 in | thin matching scrap | saw, sanding block, tape | paint + 2 sealer coats | ~20 min |
| 3 | Leather & wood keychain | 1–1½ in | ≥1/4 in thick | pin vise, 1/8 in bit, backing board | paste wax | ~15 min |
| 4 | Plant markers | 5–6 × 1/2–3/4 in | narrow strips, ≥3/16 in thick | sandpaper, paint, marker | acrylic only (no sealer) | ~20 min |
| 5 | Ring display blocks | varies (off-cuts) | smallest wedges | sandpaper only | paint or wax | ~15 min |
Hands-on time assumes tools and sandpaper are already on the bench. Finish and cure times come from the Finish & cure guide below.
Essential Materials & Tools
🛡 Required Safety Gear
- Safety Glasses — Required eye protection while sawing and drilling small blanks. | Find Safety Glasses on Amazon
- N95 Dust Mask — Worn while sanding indoors to keep wood dust out of your lungs. | Find on Amazon
Finish & cure guide. Paste wax adds a low sheen and deepens grain — it does not waterproof. Buff it after a 10-minute haze, follow the wax label’s dry time before heavy use, and renew with a thin coat every few months. Tabletop-rated clear wood sealer is what resists damp mugs: two thin coats, the first dry fully before the second, and treat the surface as water-resistant only once the label’s full cure time has passed. Acrylic paint is handleable once touch-dry, but written labels should cure overnight. Where a project says “see the label,” the label wins over any time printed in this article.
✨ Consumables & Raw Materials
- Scrap Wood Offcuts, 1/4 to 1 inch Thick — Provides small solid pieces for photo holders, 4 × 4 inch coasters, keychains, and plant markers — keep one flat spare as the backing board you drill against. | Check Scrap Wood Offcuts, 1/4 to 1 inch Thick on Amazon
- 120-Grit & 220-Grit Sandpaper Sheets — Smooths saw marks, rounds sharp edges, and creates the satin finish specified for each wood piece. | Check Price on Amazon
- 1-Inch Blue Painter’s Tape — Masks crisp diagonal paint sections on the 4 by 4 inch coasters. Project 2 (coaster edges) only. | See 1-Inch Blue Painter’s Tape on Amazon
- Natural Brown Leather Cord, 2 mm — Threads through drilled wood keychain holes for durable knotted loops. Used in Project 3 (keychains) only. | Explore Natural Brown Leather Cord, 2 mm on Amazon
- Pencil — Marking centres and cut lines on every project. | Check Price on Amazon
- Wax Paper Roll — Plant labels rest on it while the paint dries. | See Price on Amazon
- Matte Acrylic Craft Paint, Sage Green & White — Creates the painted diagonal finish on wood coasters and decorative details on small wood crafts. | Find Matte Acrylic Craft Paint, Sage Green & White on Amazon
🧰 Core Crafting Tools & Equipment
- 1/8-inch (3.2 mm) Drill Bit — the only bit Project 3 needs. Buy it with the pin vise above, unless the kit you choose already ships one. Project 3 only, and only if the pin vise kit has no bit. | Find on Amazon
- Small Paintbrush Set — Applies paint and brush-on sealer to coasters and markers. | View Small Paintbrush Set on Amazon
- Fine-Tip Black Paint Marker — Writes plant-label names cleanly over dry paint. | Find Fine-Tip Black Paint Marker on Amazon
- Clean Cotton Cloths — Dust removal and wax buffing in the photo-holder process. | Explore Clean Cotton Cloths on Amazon
- Sanding Block — Keeps 120/220 grit flat while smoothing cut edges. | Check Sanding Block on Amazon
- Pin Vise Drill Set — Hand drill that accepts a 1/8 in shank — check whether the kit you pick ships with the bit. Check the collet capacity first: it must accept a 1/8 in (3.2 mm) shank. | Check Price on Amazon
- Small Hand Saw — A Japanese pull saw or small backsaw is the easiest beginner choice; it cuts the offcuts to size for holders, coasters, and markers. | View Small Hand Saw on Amazon
- Small Bar Clamps — Holds small blanks secure while sawing/drilling — never hand-hold a 2-inch piece. | See Price on Amazon
💎 Hardware, Fasteners & Finishing
- Clear Furniture Paste Wax — Adds a low sheen and deepens the wood grain of sanded pieces; it does not waterproof them, so renew with a thin coat every few months. | View Clear Furniture Paste Wax on Amazon
- Tabletop-Rated Clear Wood Sealer — Protects painted coaster surfaces from damp mugs — choose a tabletop-rated sealer and let it cure fully. | See Price on Amazon
- Adhesive Felt Pads Stick a small pad under each ring display block (Project 5 only) — no other project in this guide needs them. | View on Amazon
The Five Projects, Step by Step
1. Minimalist Photo & Recipe Holders
This practical desk accessory uses the cube-shaped off-cuts you already have and gives a favorite photograph, place card, or recipe card a solid little base.
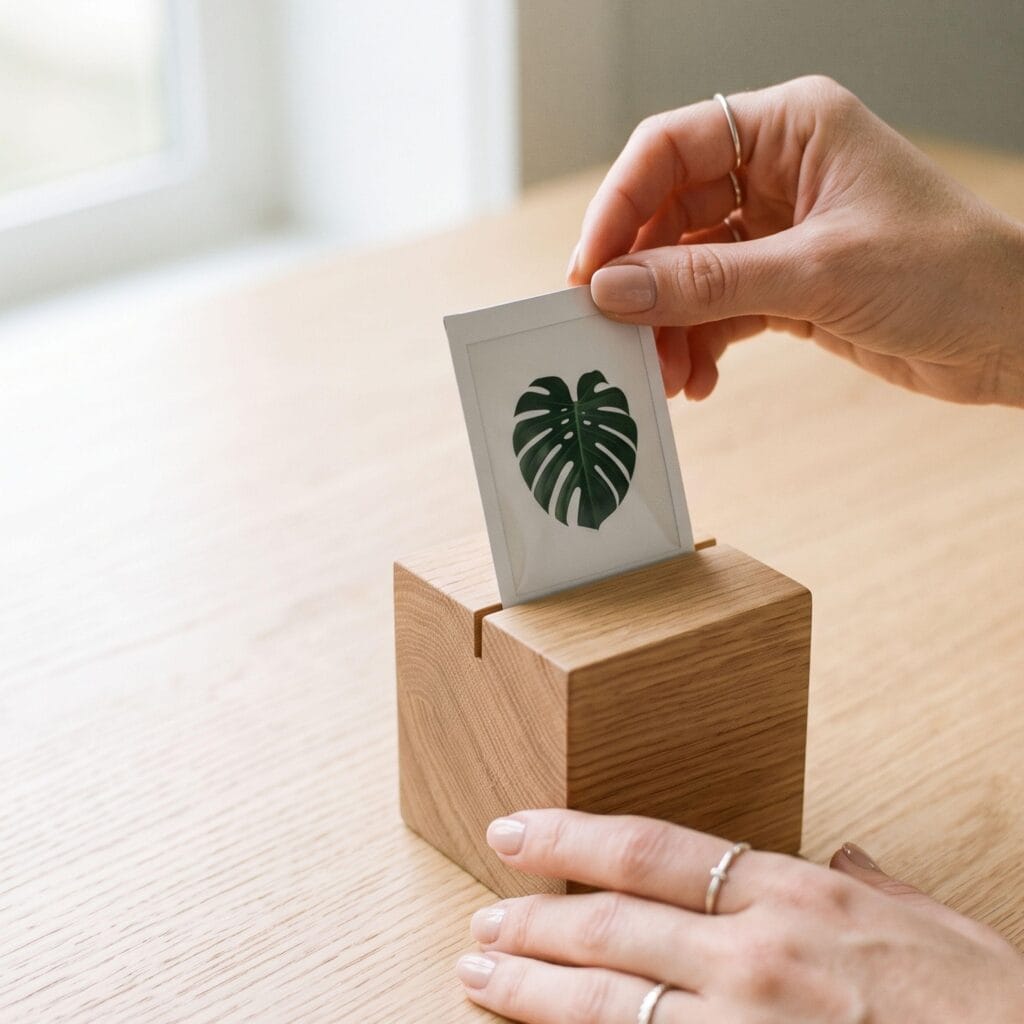
Finished size: a block about 2 in wide and at least 1 in thick, with one saw kerf cut across the centre, roughly halfway down. Cut list: 1 square off-cut, no other cutting.
- one square scrap-wood block, about 2 in wide and at least 1 in thick
- pencil, small hand saw and a small bar clamp
- 120-grit and 220-grit sandpaper, plus a dry cloth
- clear furniture wax and a clean cotton cloth
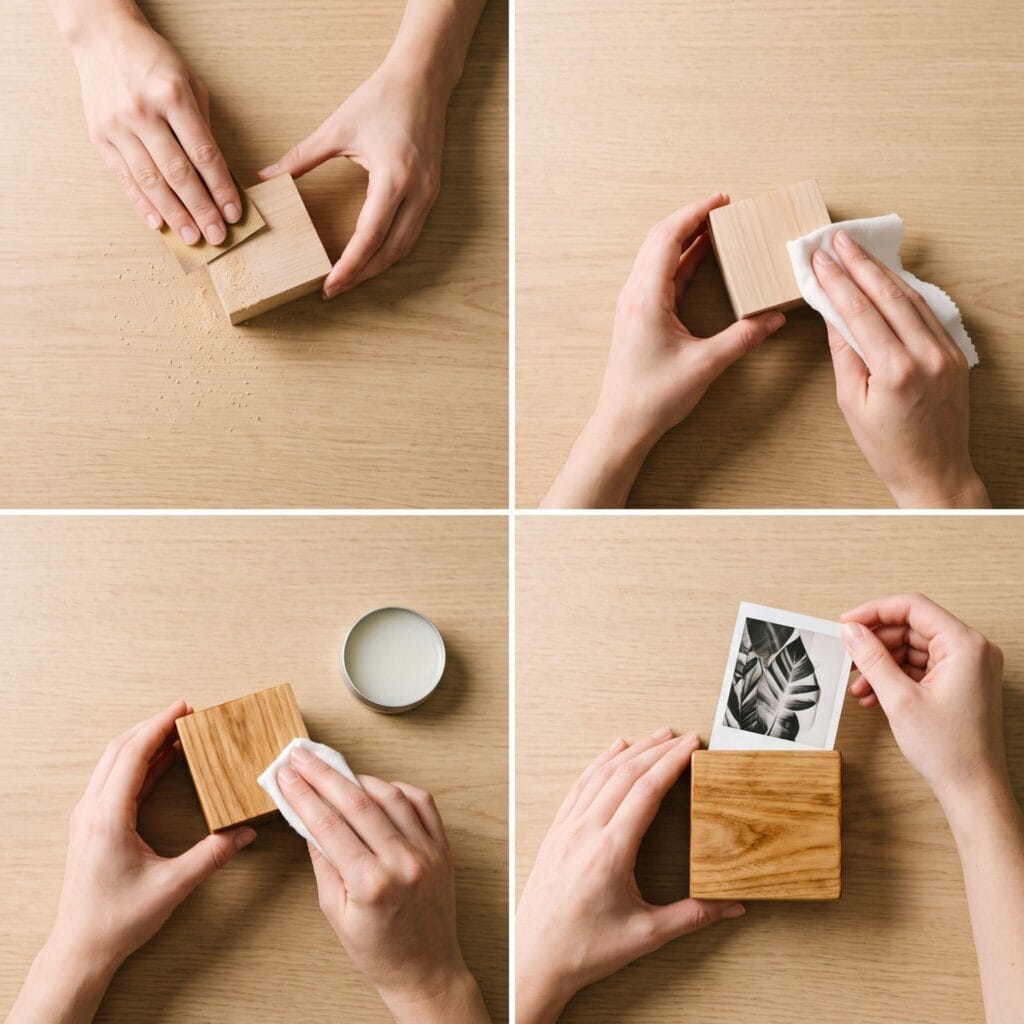
- Choose and mark the block. Pick a square off-cut about 2 inches wide and at least 1 inch thick, dry and free of loose knots. Mark the centre of the top face with a pencil.
- Clamp it, then cut the slot. Fix the block down with a small bar clamp so both hands stay free, then saw one straight slit across the marked centre. Keep the saw upright and stop at roughly halfway down — the solid wood left under the cut is what holds the card without wobbling.
- Widen the kerf only if needed. If the slot feels too narrow for a photo or a thick recipe card, make one or two additional passes with the saw rather than forcing the card into place.
- Sand, then refine. Sand every face with 120-grit paper, then move to 220-grit until the corners feel softened and the saw marks disappear. Brush the pale dust off with a dry cloth.
- Wax and buff (finish & cure). Rub clear furniture wax into the block with a clean cotton cloth, let it haze for about 10 minutes, then buff to a soft sheen.
If it goes wrong: the card leans or rocks — the slot is too shallow or too tight. Saw one more pass deeper, or re-sand the saw faces; never force a thick card into an over-tight kerf.
2. Rustic Wood Coasters
Thin, flat pieces of scrap wood can become modern coasters with a painted diagonal that leaves plenty of warm grain visible. Make a matching set from boards of similar thickness so they stack neatly in a small basket or sit evenly on a coffee table. Cedar and pine are easy to cut and sand, while hardwood trim makes especially durable coasters with a denser, smoother edge.
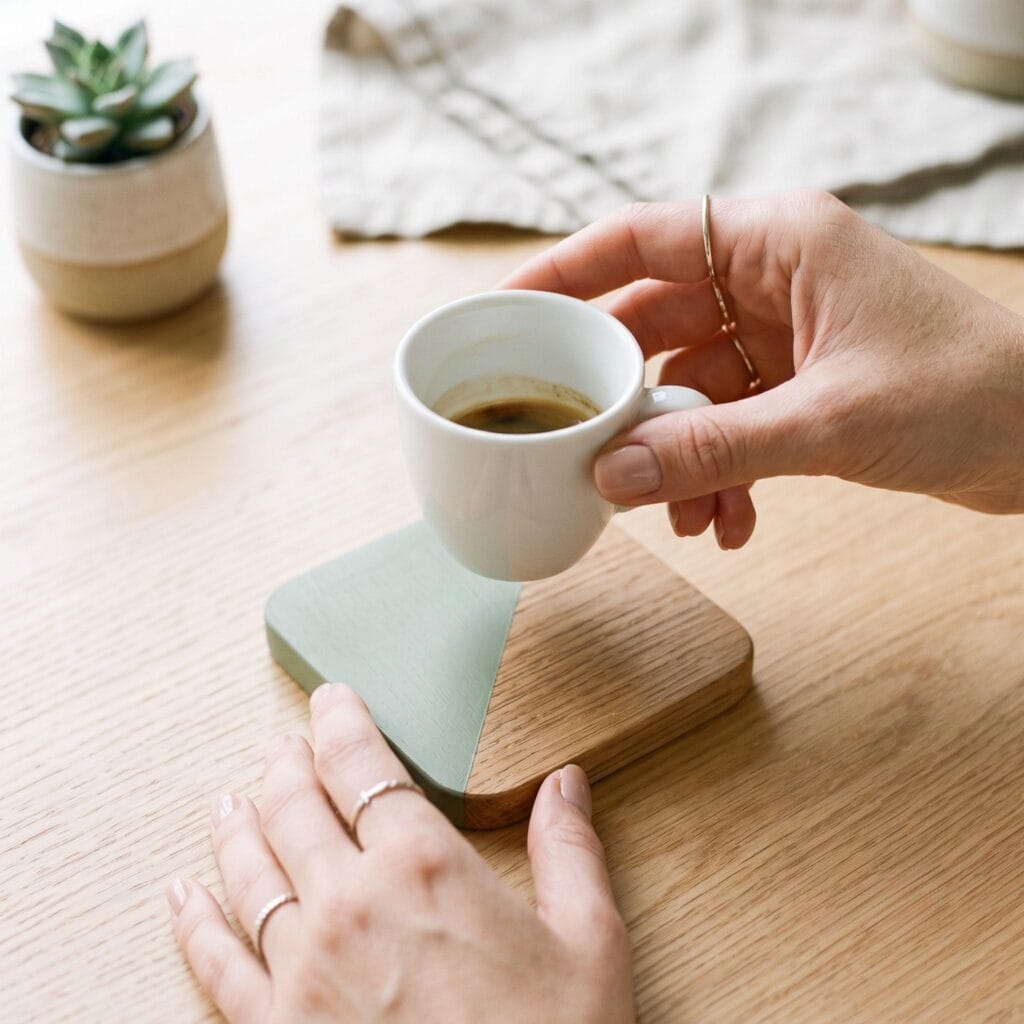
Finished size: 4 × 4 in squares from thin scrap of similar thickness. Cut list: one 4 × 4 in square per coaster.
- thin scrap wood of matching thickness, cut to 4 × 4 in
- pencil, small hand saw and a small bar clamp
- sanding block with 120-grit and 220-grit paper
- painter’s tape and matte acrylic paint
- tabletop-rated clear wood sealer for the two topcoats
- Cut matching squares. Use thin scrap at least 1/4 in thick and cut matching 4-by-4-inch squares. Keep the boards of similar thickness so the set stacks neatly. Clamp each blank to the bench edge, or rest it on a sacrificial board, so it cannot shift under the saw.
- Ease the edges. With a sanding block, ease each sharp corner and smooth the edges, paying extra attention to exposed end grain that can feel rough or splintery. Start with 120-grit, then a few light passes with 220-grit.
- Tape the diagonal. Press painter’s tape diagonally across each square and burnish the tape edge with a fingernail or bone folder so paint cannot creep underneath.
- Paint, then pull the tape. Paint the exposed half with matte sage green, soft white, or another muted pastel, and remove the tape while the paint still feels slightly wet for a crisp line.
- Seal in two thin coats (finish & cure). Let the coasters dry flat, brush on a first thin coat of tabletop-rated clear wood sealer, and let it dry fully before the second. Lightly sand any raised grain with 220-grit before the final coat if the surface feels fuzzy. Pick a label-approved tabletop-rated clear wood sealer — not every clear wood sealer is rated for hot or wet drinkware — and follow its ventilation and full-cure directions.
If it goes wrong: paint crept under the tape — the edge was not burnished enough. Re-press it firmly for touch-ups, and on the next coaster burnish harder and pull the tape while the paint is still slightly wet.
3. Leather & Wood Keychains
Even the smallest sliver of wood makes a workable keychain when you shape them carefully and round the edges for a comfortable, pocket-friendly finish. Choose a piece with enough thickness around the drilled hole to keep the cord from pulling through. Skip any scrap with a knot sitting where the hole will be — it splits as soon as the cord is tightened.
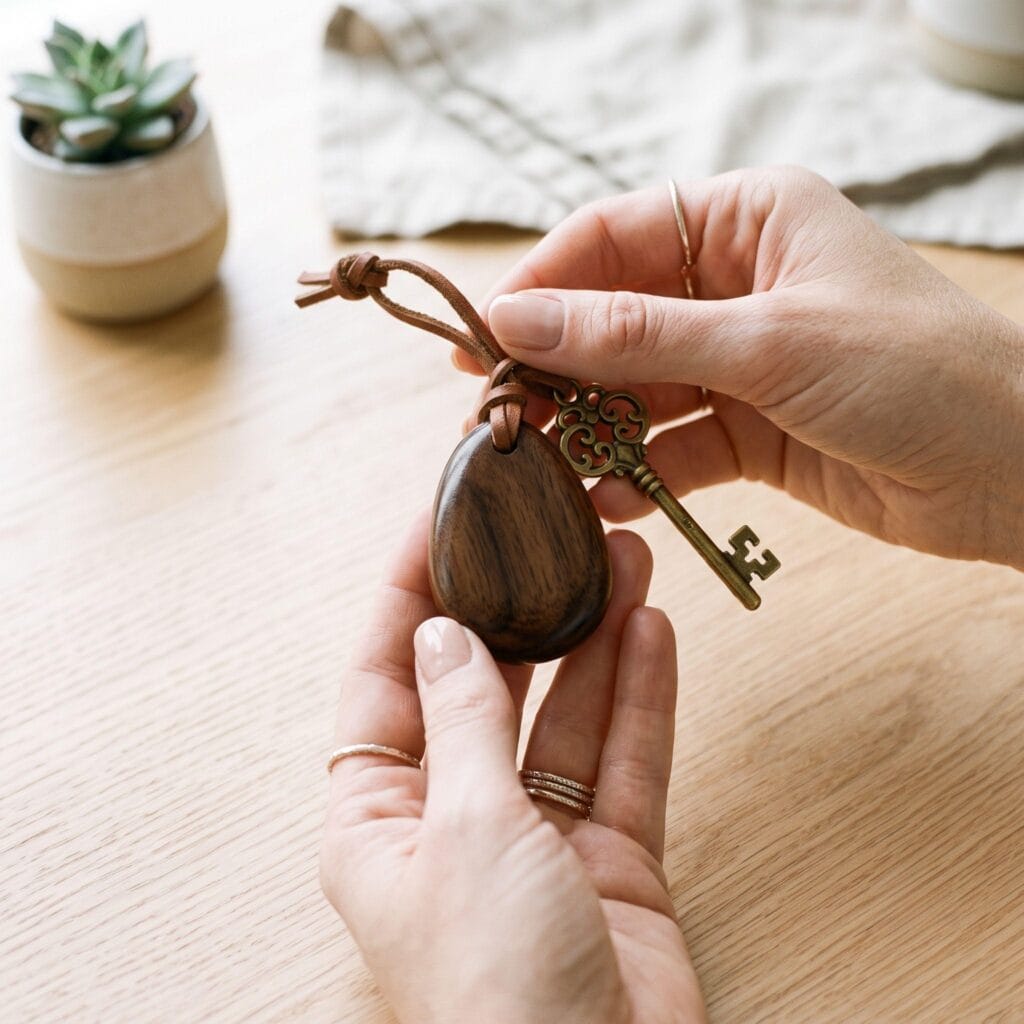
Finished size: a sliver roughly 1–1½ in long and at least 1/4 in thick, hole centred 1/4 in below the top edge. Cut list: 1 small rectangular off-cut.
- wood sliver at least 3/4 in wide and 1/4 in thick, plus a scrap backing board
- 120-grit and 220-grit sandpaper, pencil and a small bar clamp
- a pin vise that accepts a standard 1/8 in (3.2 mm) shank, plus one 1/8 in bit if the kit does not include it
- natural leather cord, 2 mm
- clear furniture wax for the final coat
- Select the blank. Choose a rectangular piece at least 3/4 in wide and 1/4 in thick — and 3/8 in thick for soft, weak-grained wood. Centred in a 3/4 in-wide blank, the 1/8 in hole leaves about 5/16 in of sidewall on each side. Treat 3/16 in as a conservative starting figure rather than a guarantee: straight-grain, knot-free wood with the hole centred on the face resists splitting far better, so test-drill one blank before you cut the rest. It must be thick enough to drill without splitting, with material left around the future hole for the cord to pull against.
- Sand to a pebble. Work with 120-grit until the corners round over and the piece feels smooth in the hand, then refine the surface with 220-grit so it will not snag in a pocket.
- Mark the hole. Mark a point about 1/4 inch below the top edge and keep the mark centred so the wall behind the hole stays even. Use ONE bit size throughout: 1/8 in (3.2 mm), which suits the 2 mm leather cord: the cord passes through, while the double knot tied on the far side stays outside the wood. Drill the test hole in an off-cut with that same 1/8 in bit, then drill the blank — no other size is needed.
- Clamp the blank to the backing board, then drill. Lay the scrap backing board under the keychain, clamp both together, and drill through the marked point in one slow pass — the board behind the piece is what stops the back face from tearing out. Clear dust from the hole every few twists, especially in dense hardwood. Run a test hole in an off-cut first with a 1/8 in bit: it gives the 2 mm cord room to pass without forcing it, and shows you how the wood reacts before you touch the real blank.
- Thread and knot. Push natural leather cord through the hole, tie a firm double knot, and trim the tails to your preferred length.
- Wax (finish & cure). Buff a thin coat of clear furniture wax into the sanded wood to deepen the grain, then leave it to settle before the keychain goes into daily use.
If it goes wrong: the back face splintered — the piece was not backed, or you pushed too fast. Back the blank with scrap wood next time, clamp it down, and clear the dust every few twists. This wood-and-leather pairing also sits nicely beside our DIY leather valet trays.
4. Modern Indoor Plant Markers
A set of wooden plant labels brings a warm handmade touch to a shelf of indoor plants and keeps similar-looking pots easy to identify. The narrow strips are quick to shape, and their painted tops stay easy to read. Make several at once while you have paint and sandpaper on the table.
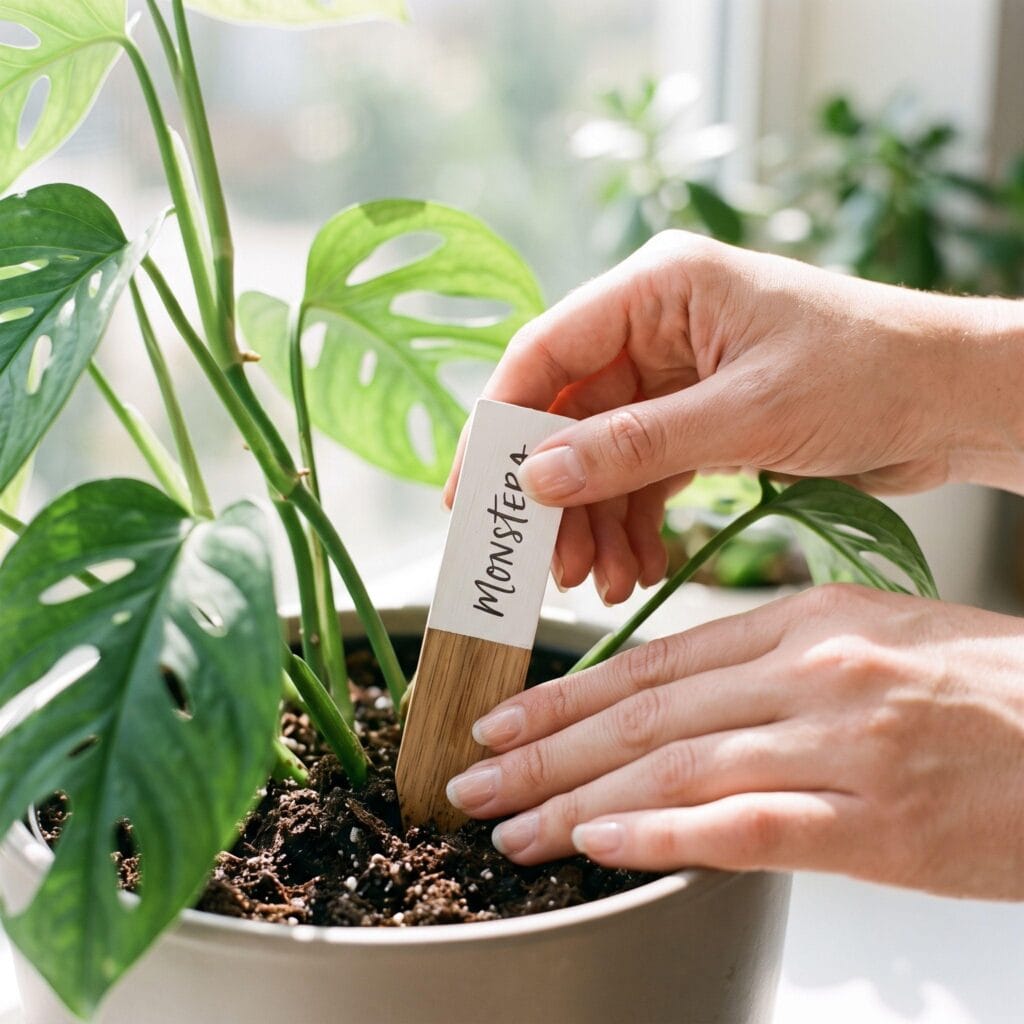
Finished size: strips about popsicle-stick width but sturdier, painted across the top half only. Cut list: several narrow strips from one off-cut — make a set while the tools are out.
- narrow wood strips, 5–6 in long, 1/2–3/4 in wide and at least 3/16 in thick
- 120-grit and 220-grit sandpaper
- matte white acrylic paint and a sheet of wax paper
- fine-tip black paint marker
- Choose the strips. Pick long, narrow strips of scrap wood roughly 5 to 6 inches long, 1/2 to 3/4 inch wide, and at least 3/16 in (about 5 mm) thick — popsicle-stick proportions, but sturdier, so they push into soil without bending. Clamp a strip to the bench before sawing its point; it is too small to hold by hand.
- Shape the points. Sand the lower ends into gentle points so they slide into potting soil without forcing apart tender roots — keep the point blunt enough that it will not snap when pressed in. Push the strip in with a slow twisting motion rather than forcing it straight down.
- Dust off. Brush all dust from the wood so paint and ink will sit evenly.
- Paint the top half. Dip the top half of each strip into matte white acrylic paint. Rest the labels on wax paper while the paint dries, and add a second coat if the wood grain still shows through heavily.
- Write the names. Write each plant name — “Monstera,” “Pothos” — on the painted area with a fine-tip black paint marker or permanent marker, and let the ink dry completely before the labels go into the pots.
- Keep them indoor-only (finish & cure). As made here these are temporary indoor labels: keep the painted end above the soil line, wipe splashed soil with a damp cloth, and do not use them outdoors or in soil that stays wet. No sealer is needed for this use.
If it goes wrong: the ink smears or the paint lifts — you placed the label before the ink cured, or soaked it while cleaning. Let both dry fully and clean with a wiped, not soaked, cloth.
5. Geometric Ring Display Blocks
Wedge-shaped and irregular off-cuts can become jewelry rests that keep rings from rolling across a dresser or nightstand. No two pieces need to match. Wedges and corners are awkward to save for larger woodworking jobs, which is exactly what this project is for.
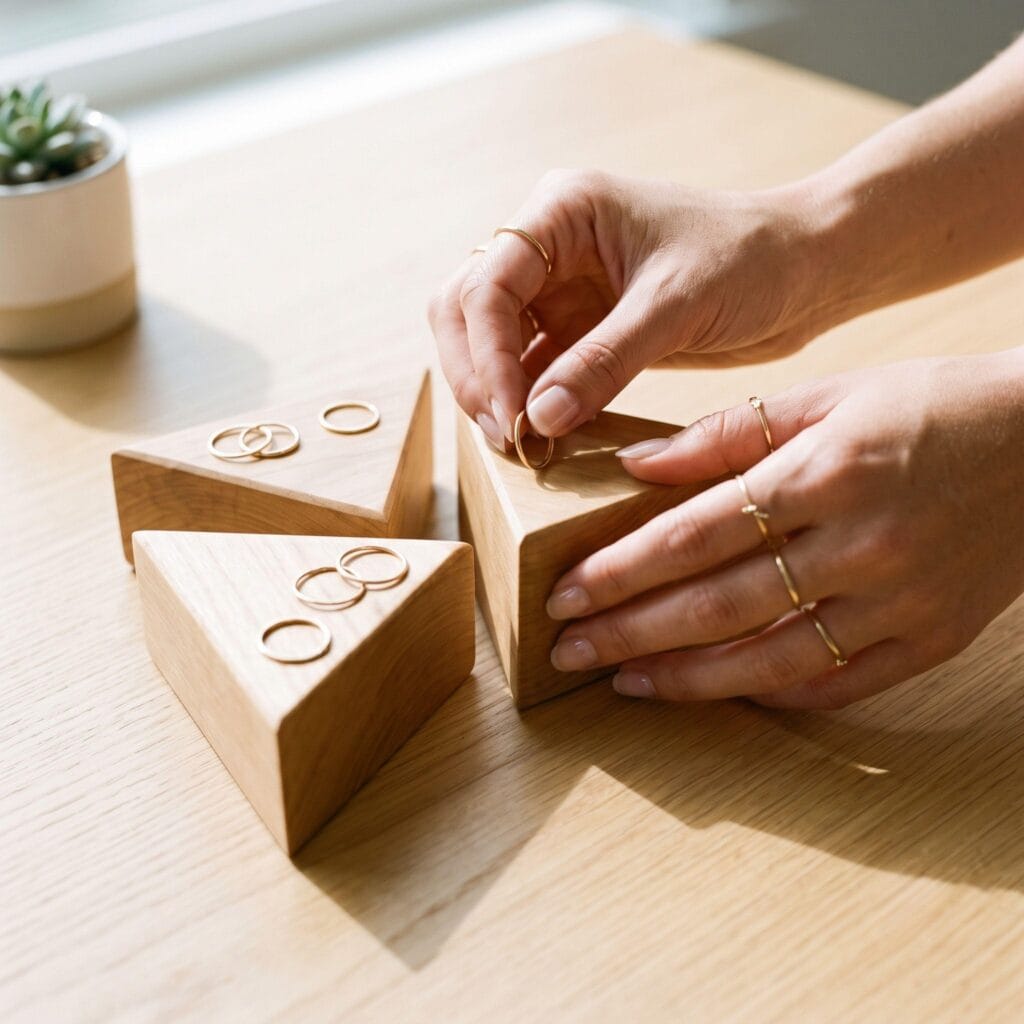
Finished size: whatever the off-cuts already are — small wedges and corners, no cutting required. Cut list: none; this project uses the pile’s smallest pieces.
- the smallest, most irregular off-cuts from your pile
- 120-grit and 220-grit sandpaper
- matte acrylic paint or clear furniture wax
- adhesive felt pads for the underside
- Gather the blanks and test the fit. Take the smallest wedges and corners from your pile, but keep any triangular wedge whose point is taller than your ring band. Sit a ring on the RAW block first: it should balance without tipping, and the band should clear the wood. Sort out the shapes now, before anything is sanded or finished.
- Sand every edge. Start with 120-grit and finish with 220-grit until no rough edge remains, so the pieces will not catch on delicate chains, knit fabric, or soft-lined jewelry boxes.
- Finish — paint or wax. Paint them in complementary pastel shades, or rub on a simple wax coat if you want the natural grain, knots, and saw marks to stay visible.
- Cure completely. Let paint or wax dry completely before any jewelry touches the blocks — a full cure is what stops paint transferring onto rings.
- Arrange. Set the pieces in a shallow tray or directly on the dresser, leaving a little space between shapes so each one is easy to reach. Rings rest over the pointed pieces; earrings, charms, and small pendants sit in the low gaps.
- Protect the surface. Only after the fit works, stick a small felt pad beneath each block so it cannot scratch a finished tabletop or shift when you reach for a necklace.
If it goes wrong: edges still snag a chain or fabric — a face was left at 120-grit only. Go back over every face with 220-grit before applying paint or wax.
Frequently Asked Questions: Scrap Wood Crafts
What scrap wood is safe to use?
Dry, solid pieces free of nails, staples, dried adhesive, and paint of unknown age. Pine, poplar, cedar, and leftover hardwood trim all work.
Does paste wax waterproof wood?
No. Wax only adds sheen; water resistance comes from the tabletop-rated clear wood sealer, and only after its full cure time.
Can the plant markers go outdoors?
No. As made here they are temporary indoor labels: keep the painted end above the soil line, wipe soil away with a damp cloth, and do not use them outdoors or in soil that stays wet.
Which projects need a saw or a drill?
Only the keychain needs drilling (pin vise, 1/8 in bit). The photo holder, the coasters, and the plant markers all need the hand saw. The ring display blocks need no cutting at all.
Important Safety Tips for Scrap Wood Crafts
- Inspect before you cut. Work only with dry, solid scraps free of nails, staples, and dried adhesive. Avoid paint of an unknown age — sanding unknown old paint can release lead dust, so leave it untouched or strip it professionally.
- Clamp small work. A 2-inch off-cut must never be held in your hand while you saw or drill. Fix it with a small bar clamp or press it against a bench hook so both hands stay clear of the blade and the bit.
- Protect your eyes. Safety glasses for every saw and drill pass — end grain and off-cut chips flick up without warning.
- Control the dust. Use an N95 dust mask while sanding, ideally outdoors or at an open window. Pine, poplar, and old hardwood dust all irritate the lungs.
- Cut and drill away from your body toward the bench, and clear chips by brushing — never blow them toward your face.
- Ventilate while finishing. Open a window when you wax or seal, and keep working in open air until the smell clears.
This site uses affiliate links and general craft guidance only — see our Terms and Conditions for the full terms covering this content.
Keep a small box near your workbench for clean, usable off-cuts. A 2-inch cube, a narrow strip, or an oddly shaped corner may be exactly the piece you need for the next coaster, plant label, keychain, or desk accessory. Store the scraps by thickness when possible, and you will spend less time digging through the pile when a small project calls for one particular piece. A quick pencil note on the box lid, such as “thin trim,” “1/2-inch blocks,” or “hardwood pieces,” makes the collection even easier to sort through later.
Optional Studio Upgrades
One note on power tools. Nothing below is required — all five projects above are finished with the hand tools in the Essentials list. Each tool only replaces one hand-tool step and makes it faster: the scroll saw cuts coaster blanks faster than a hand saw, and a rotary tool sands edges instead of the sanding block.
⚡ Studio Tools & Workshop Equipment
- Small Drill Press — Optional — batch holes only. | View on Amazon
- Rotary Tool Kit — Optional — edge sanding only. | Find on Amazon
- Scroll Saw — Optional — square cuts only. | Check Scroll Saw on Amazon
Small Drill Press
Optional only: bores the keychain hole in one pass if you have one. The pin vise, backing board and 1/8 in bit above cover the same job — skip it entirely if you do not own it.
I earn a commission if you make a purchase, at no additional cost to you.
Which one are you building first — and do you have an off-cut shape that cut and sanded better than the rest? Tell me what you made and I will fold it into the next batch of projects.