Hosting a dinner party is always exciting. In fact, setting a beautiful table makes the meal feel truly special. You do not need to buy expensive new tableware. Instead, creating DIY stamped napkins is a perfect way to elevate your dining experience. Plus, these custom linens bring a warm artisan touch to your home.
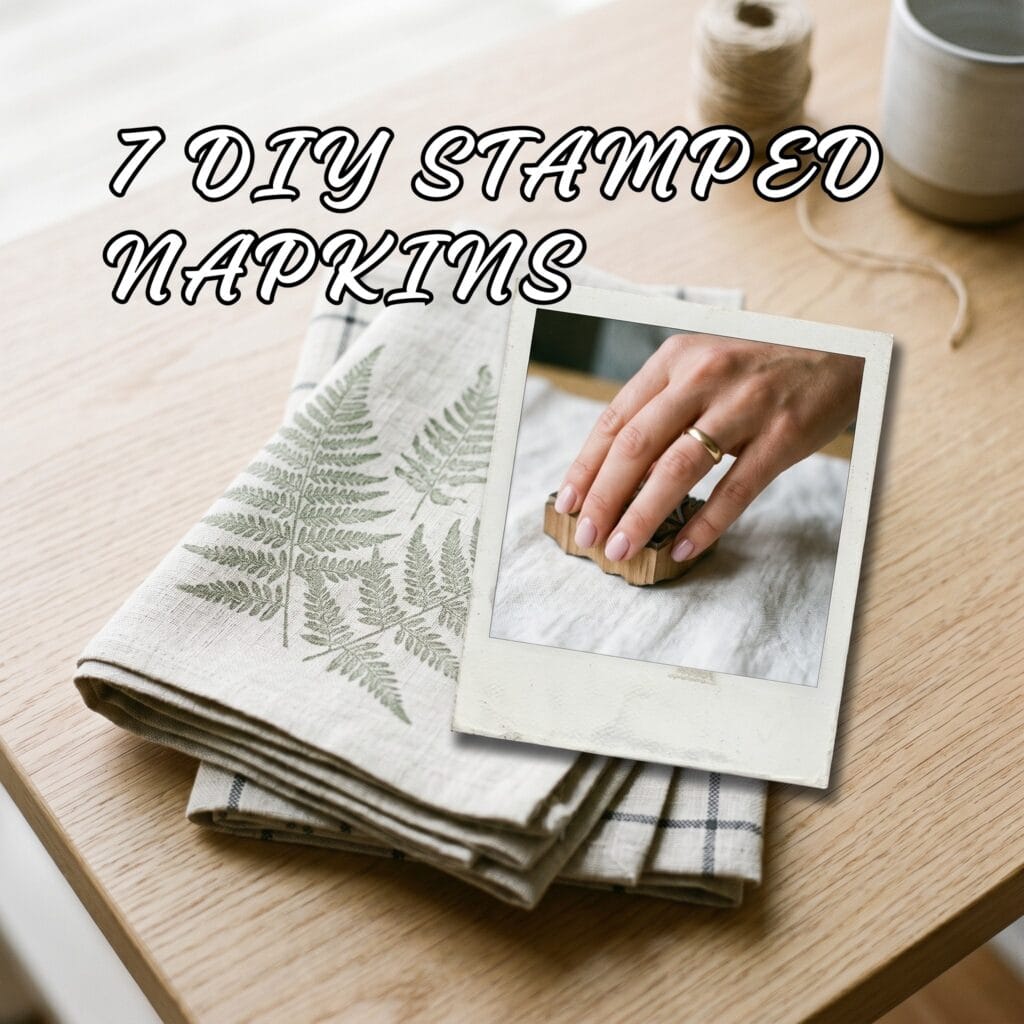
Naturally, handmade details make your guests feel welcome. For instance, a simple linen cloth instantly looks like a boutique item with a little ink. Luckily, you only need a few supplies to start. So, if you love hosting, you will completely enjoy this simple weekend craft.
What You Need for DIY Stamped Napkins
Before you start, you must gather your supplies. Of course, having the right materials ensures your DIY stamped napkins will survive many dinner parties.
- First, pick your fabric: 100% natural linen or smooth cotton cloth napkins work best.
- Next, choose your ink: High-quality fabric block printing ink is ideal. Alternatively, you can use fabric paint.
- Also, get your stamps: Carved wooden blocks or soft rubber stamps are great.
- Finally, grab the essentials: A soft foam brayer (roller) to apply ink, a palette, and scrap cardboard.
How to Make Custom Linens Step-by-Step
Making DIY stamped napkins is a very relaxing project. Basically, just follow these simple steps for flawless results:
- To begin, wash and iron your plain napkins. By doing this, you remove chemicals and create a smooth canvas.
- Second, place scrap cardboard under the fabric. Consequently, this prevents wet ink from bleeding onto your table.
- Next, roll fabric ink onto your stamp using the brayer. Make sure the ink coverage is completely even.
- Now, press the stamp firmly onto the fabric. Then, lift it straight up carefully.
- Afterward, let the ink dry completely overnight. Lastly, heat-set the design with a hot iron so it becomes washable.
Pro-Tip: Always practice your design on a paper towel first. Specifically, this helps you check the ink flow and pressure before stamping your final dinner napkins.
7 Creative Ideas for DIY Stamped Napkins
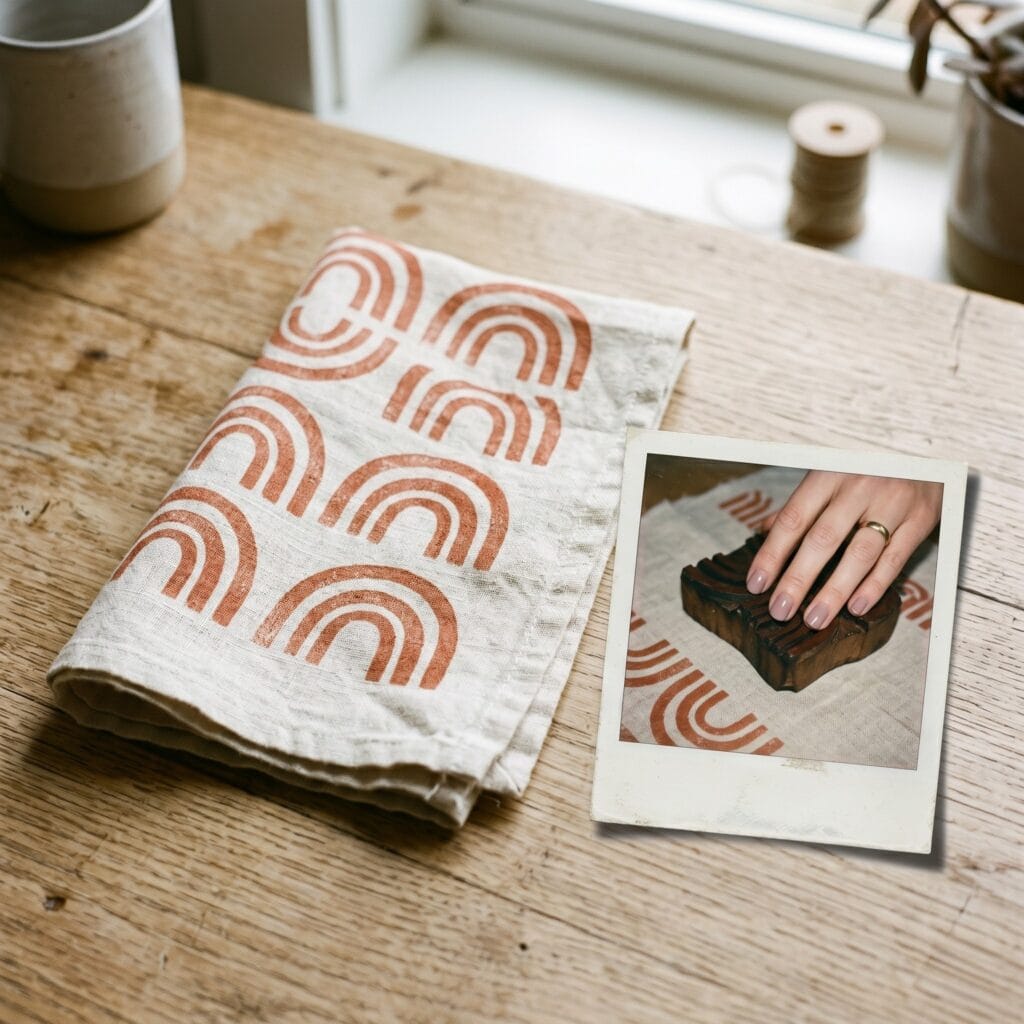
1. Modern Minimalist Arches: DIY Stamped Napkins
Geometric shapes are very trendy right now. For example, stamping simple half-arches creates a modern boho look. Simply use a warm terracotta ink. As a result, you get a chic, desert-inspired tablescape.
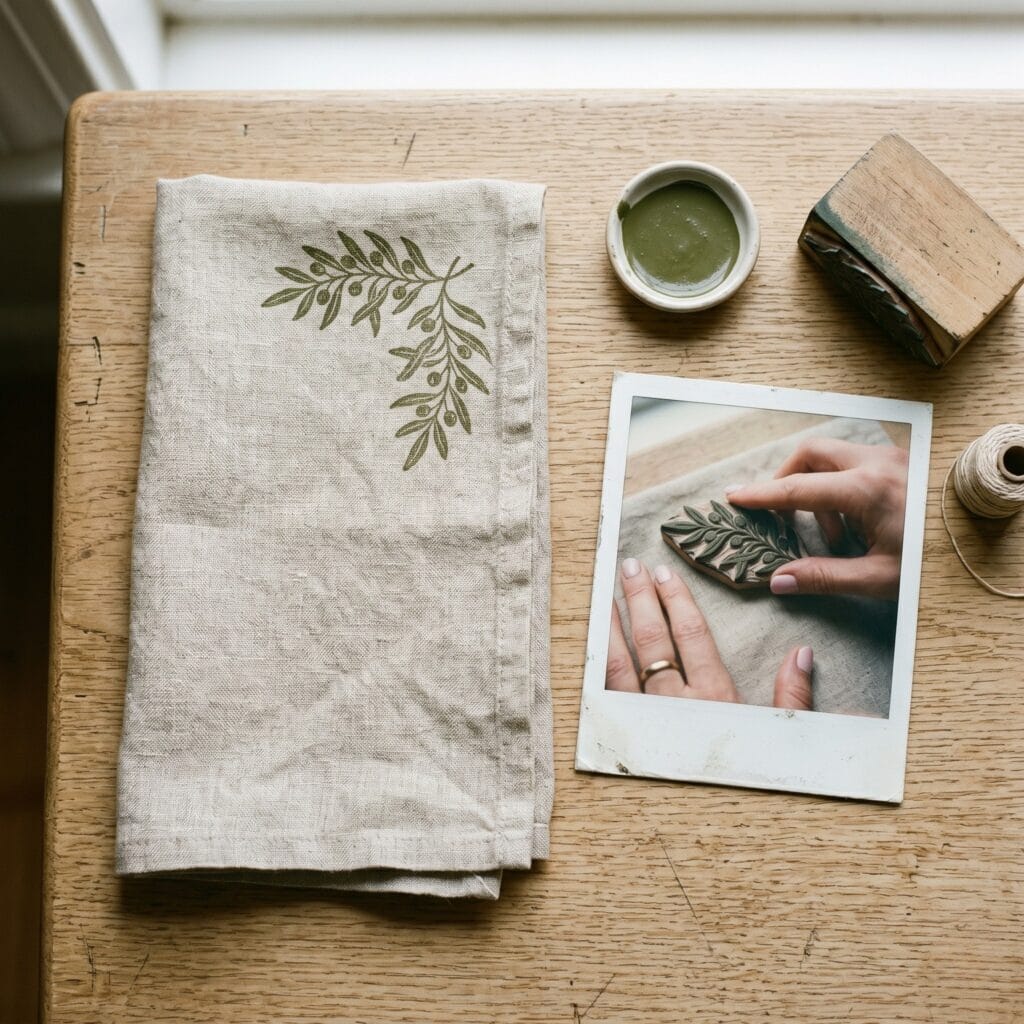
2. Delicate Olive Branches
Nature-inspired designs always work well for dining. Simply stamp a green olive branch in the corner of your DIY stamped napkins. Also, this organic look pairs perfectly with the earthy textures in our Hand Painted Terracotta Pots: 10 Easy Ideas You’ll Love centerpiece guide.
3. Abstract Geo Blocks
You can easily play with asymmetry. In this case, use solid squares and circles in neutral tones like beige and charcoal. Consequently, this creates a highly contemporary, artistic dining setup.

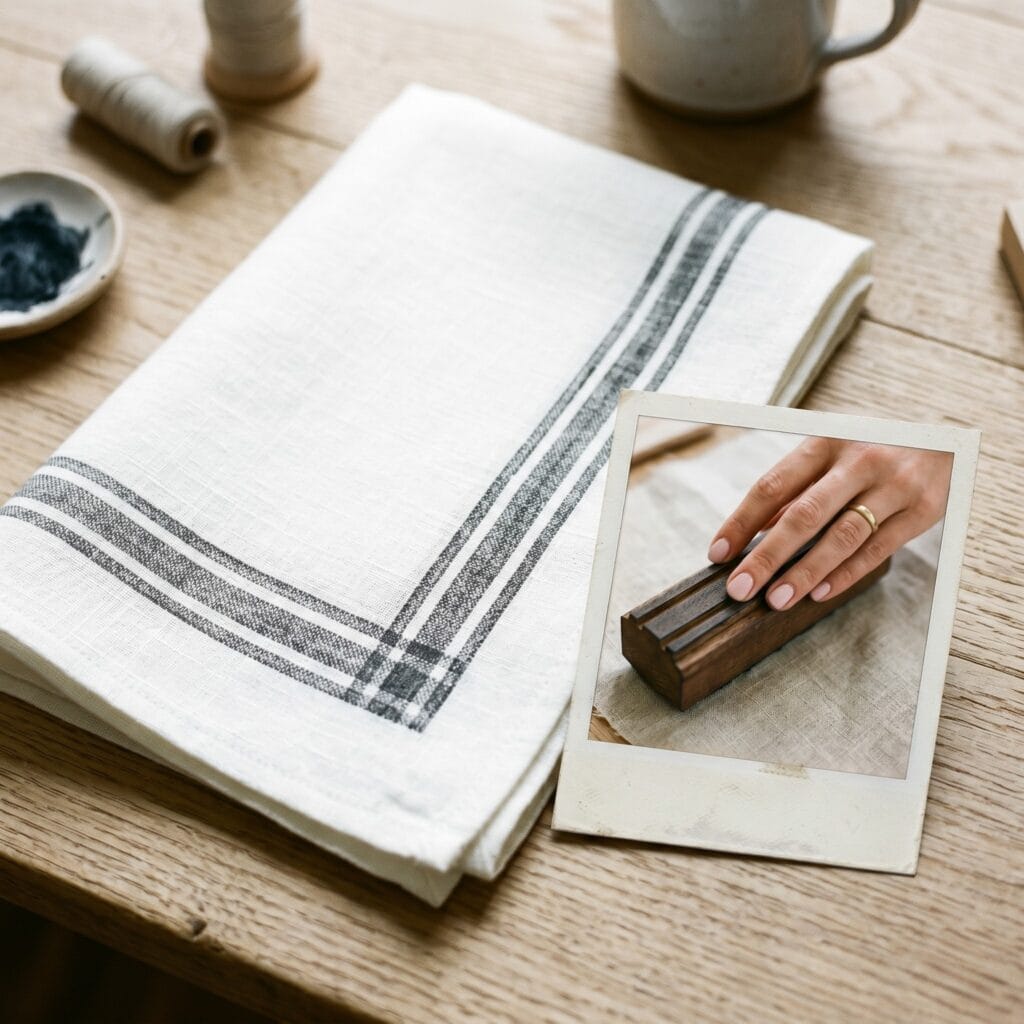
4. Rustic French Stripes
Striped edges are an absolute classic. First, grab a long rectangular stamp. Next, press it along the borders of a white linen cloth. Clearly, this adds a sophisticated vintage farmhouse vibe.
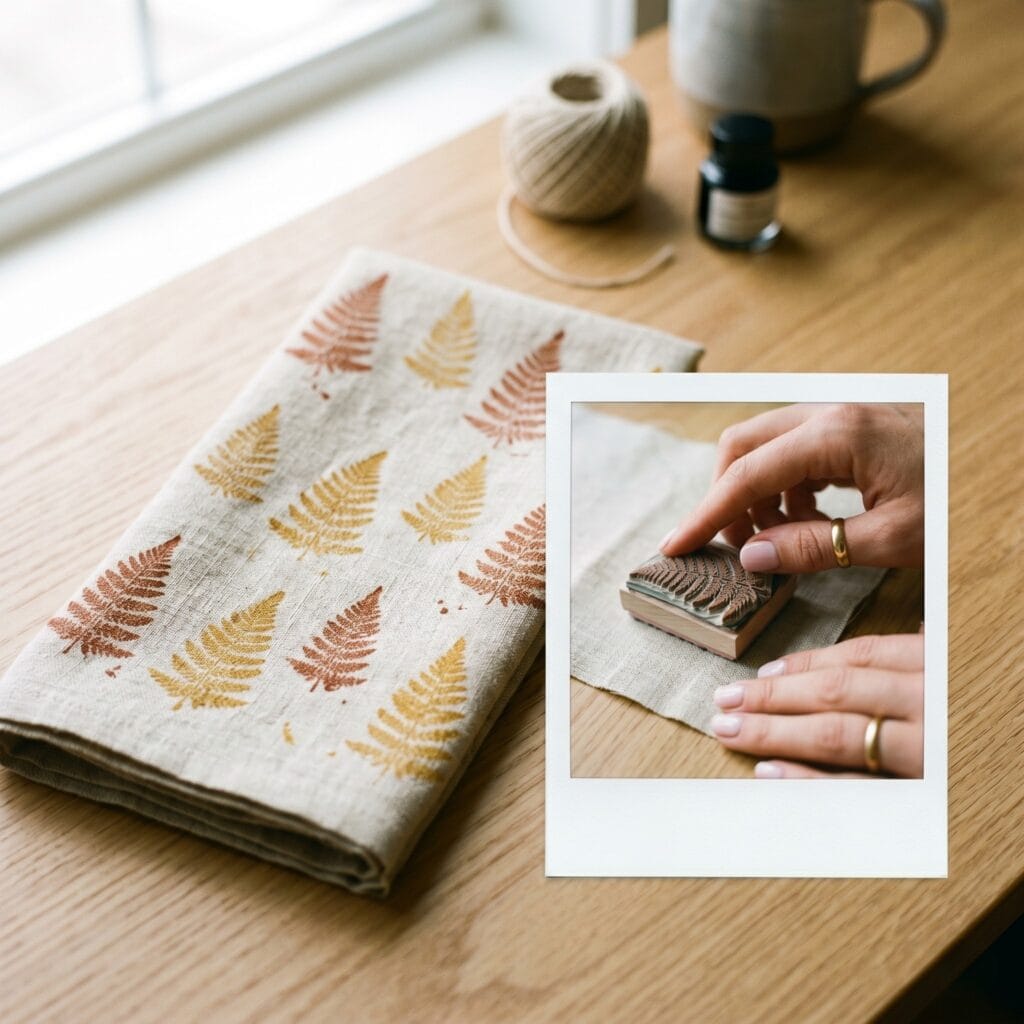
5. Fall Botanical Ferns
Seasonal decor is always a huge hit. Because of this, using warm rust and mustard inks to stamp tiny fern leaves is a great idea. Plus, you can check our Botanical Plaster Casting: 10 Stunning DIY Studio Secrets tutorial for even more nature inspiration for your home.
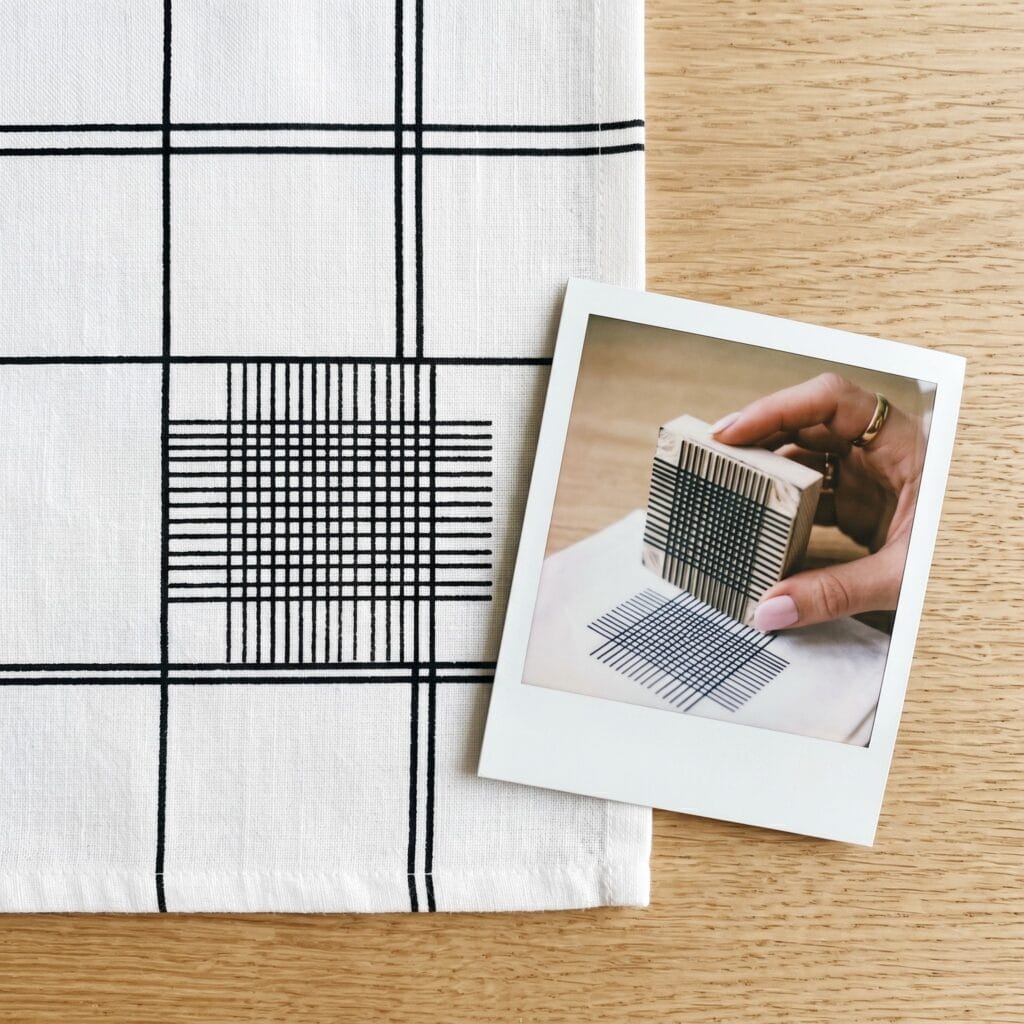
6. Scandi Monoline Grids
Clean lines look very elegant. Actually, stamping a simple, thin grid pattern is a great choice for minimalist dining. Therefore, keep the ink strictly black for high contrast.
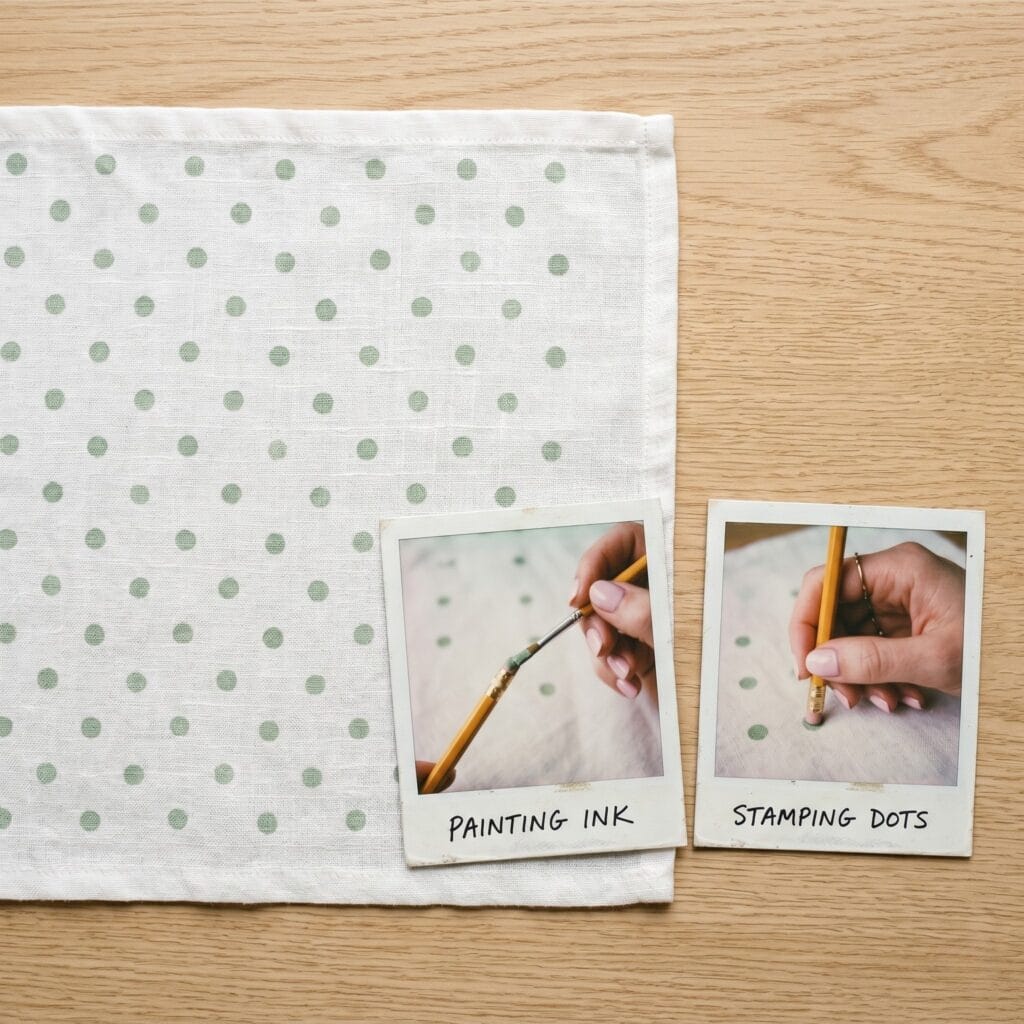
7. Whimsical Polka Dots
Polka dots are playful and extremely easy. In fact, you can just use the round eraser end of a pencil as your stamp. Thus, you create a fun, casual design perfect for outdoor summer brunches.
Important Crafting Safety Note:
When using sharp carving tools to make custom blocks for your DIY stamped napkins, always cut away from your body. Because linoleum carving blades are extremely sharp, one small slip can cause a deep cut. Therefore, keep your non-dominant hand safely behind the blade path at all times. Additionally, ensure good ventilation in your room when using fabric mediums or heat-setting your linens.