

Making art from ocean finds is a fun studio ritual. Specifically, building sea glass chimes is very relaxing. Indeed, it offers a grounding experience for any maker. Because waves shape these pieces, each one carries a unique story.
This blog post contains affiliate links. As an Amazon Associate, I earn from qualifying purchases. The content on some of these projects may be enhanced with structural craft inspirations.
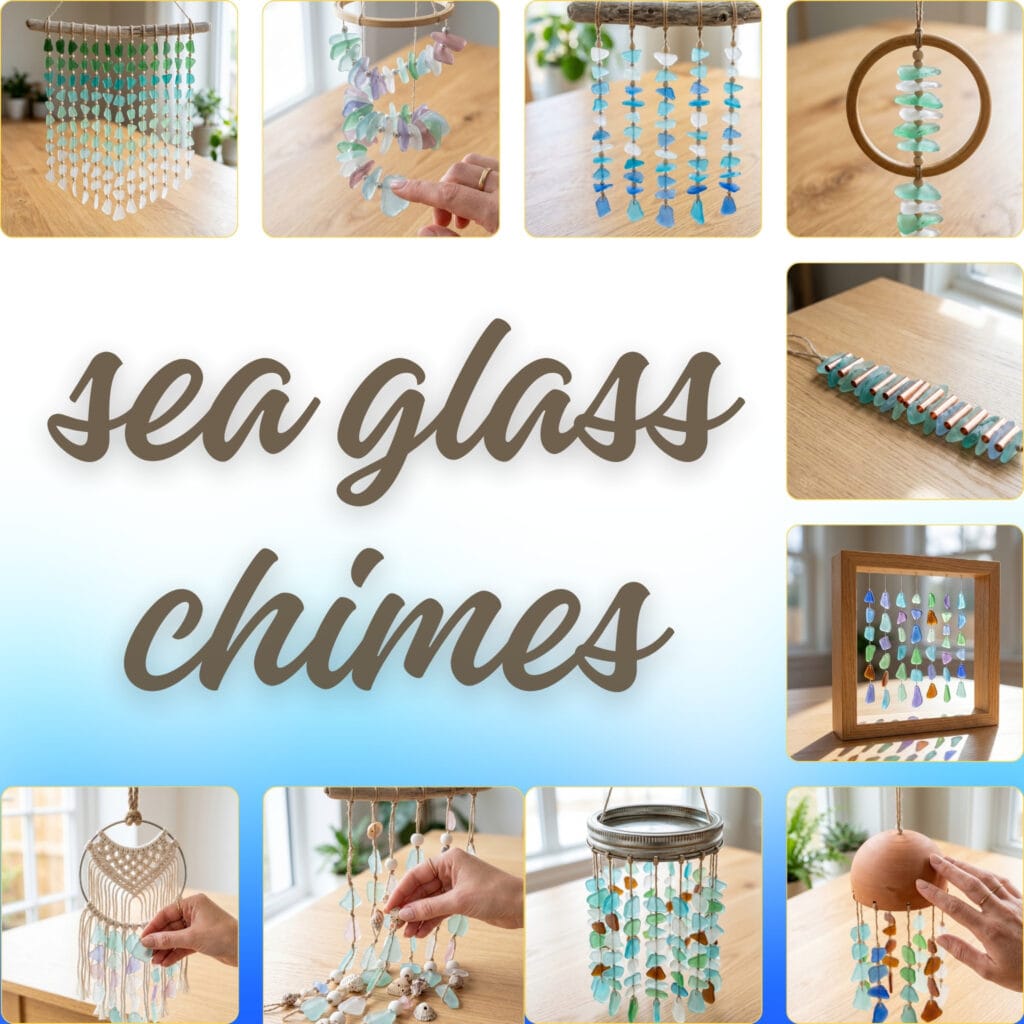
Do you have a jar of beach shards? If so, it is time to use them. Truly, crafting sea glass chimes is a peaceful weekend activity. In this guide, we outline the exact tools you need. Next, we share 10 design concepts for your workspace.
Core Techniques for Sea Glass Chimes
Every design below builds on the same handful of core skills. Master these once, and all 10 ideas become simple variations.
1. Submerged Cooling Setup
Roll out a shallow, water-safe tray and lay your selected glass flat inside it. Pour just enough water to keep the glass submerged the whole time you drill. Applies to: every glass-drilling project (all ideas except #10).
Wet-drilling safety rules — follow all of them for every hole:
- Support the glass. Brace it flat on the tray floor — a folded cloth corner props up irregular pieces — so the bit cannot skate across the surface.
- Light pressure, wet contact. Let the diamond bit do the cutting and never let the glass dry out mid-hole.
- Protect your eyes. Safety glasses on for every drilled hole — slivers fly.
- Keep water away from the motor. Hold the tool cord and vents above the waterline, use a GFCI-protected outlet, and dry your hands before touching the plug.
- Stop at the first sign of trouble. If the glass cracks, chips, or the bit or glass feels hot, stop, let everything cool, and start over with a fresh piece.
Stable setup for irregular glass: sea glass rarely sits flat, and fingers have no place near a spinning bit. Prop each piece on a folded corner of cloth in the tray, brace it against the tray wall, or grip it gently with needle-nose pliers while drilling. Keep the water just deep enough to cover the glass — a few millimeters, always well below the tool body. A 2–3 mm diamond bit suits nearly every chime hole, and the rotary-tool body, vents, and cord stay above the waterline the whole time.
2. Drilling Sea Glass
Hold the wet glass steady. Position your mini rotary tool exactly at a 45-degree angle. Once the bit catches, bring the tool upright, then apply light pressure until it wears through the glass. Note: if you’re drilling shells instead of glass (Idea #7), use much lighter pressure — shells crack far more easily than sea glass and don’t need the same angle-and-catch approach.
3. Knotting Strands
Cut a length of hemp twine or nylon cord and thread it through the drilled hole. Tie a secure double knot directly underneath the glass. Repeat for each shard, spacing pieces to suit the design — about a two-inch gap for airy strands, closer together inside filled frames (each idea’s Quick Specs gives its own spacing).
4. Attaching Strands to Your Base
How you attach your finished strands depends on your base:
- Driftwood or wooden frames (#1, #6): tie strands directly around the wood using square knots, spacing them evenly.
- Rings (bamboo, metal craft ring, or jar rim — #3, #8): tie strands around the ring’s circumference at even intervals.
- Circular frames (#2): tie pre-drilled strands around the frame, making each strand slightly longer than the last to build the spiral effect.
5. Braiding the Top Hanger
Wrap a thick piece of jute rope around both ends of your base and tie it securely to form a sturdy triangle. This is your finished chime’s hanging point.
6. Macramé Base Knotting
For fiber-based designs, take a metal craft ring and knot a simple macramé pattern (such as alternating half-hitch knots) across the top of the frame to create a woven net. Once your pattern is complete, use a needle and thread to sew your drilled glass shards directly onto the loose threads. Used in: The Seaglass Macrame Hoop (#9).
7. Shaping and Drying Clay Bases
Shape a shallow, smooth dome using premium air-dry clay. While the clay is still soft, carefully poke evenly spaced holes around the rim using a toothpick or skewer. Let the dome air-dry fully for 24–48 hours (depending on thickness) before threading any glass strands through the cured holes — threading too early will distort the shape. Used in: The Artisan Clay Dome (#10).
Essential Materials & Tools
Drilling hard materials requires absolute precision. Therefore, selecting the correct tools is critical. Using professional tools prevents cracked fragments. This is the golden rule of crafting sea glass chimes. Ultimately, it keeps your design lines perfectly aligned.
Pro-Tip: First, arrange your glass shapes onto your table before you begin stringing. Indeed, this vital step saves premium shards, since you can plan your color layout without wasting a single piece.
(If you love matching raw textures with metal hardware, explore our guide on 10 Epic DIY Copper Jewelry Ideas!)
🧰 Shared Wet-Drilling Tools
- Mini Rotary Tool with Diamond Bit (used throughout) — Essential precision power tool equipped with a diamond bit for wet-drilling glass | Find Mini Rotary Tool with Diamond Bit (used throughout) on Amazon
- Craft Organizer Tray — Shallow tray that holds water for submerged cooling and keeps loose glass shards sorted | See Price on Amazon
A few foundational tools and hanging supplies are used across all setups in this guide, marked with a (used throughout) tag below.
A precision rotary tool keeps your drilling clean, while a shallow tray and safety glasses protect both your materials and yourself.
🛡️ Wet-Drilling Safety Supplies
- Safety Glasses (used throughout) — Protective eyewear required to block flying glass dust and water spray during drilling | See Safety Glasses (used throughout) on Amazon
- Needle-Nose Pliers or Glass-Holding Clamp — grips small or irregular glass steady without fingers anywhere near the spinning bit | Check Needle-Nose Pliers on Amazon
- GFCI-Protected Outlet or Adapter — keeps the whole wet-drilling bench on one protected outlet, exactly as Technique 1 requires | Check GFCI Adapter on Amazon
✨ Shared Stringing & Hanging Supplies
- Authentic Sea Glass (mixed blues, greens, whites) — Frosted coastal glass pieces ideal for stringing into soft-sounding wind chimes | Check Authentic Sea Glass (mixed blues, greens, whites) on Amazon
- High-Tensile Hemp Twine — Durable natural fiber twine that holds wet-drilled glass knots securely over time | View on Amazon
- Heavy-Duty Nylon Cord — Clear or colored cord offering maximum weather resistance for outdoor chime strands | Find on Amazon
- Jute Rope (for the top hanger) (used throughout) — Thick braided rope used to construct a sturdy triangular top hanging point | Check Jute Rope (for the top hanger) (used throughout) on Amazon
Authentic sea glass and a driftwood anchor form the heart of every design, while rings and frames give you six different base styles to build around.
Hemp twine and nylon cord hold your glass strands together, while a length of jute rope finishes every design with a sturdy hanging point.
A few specialty pieces — copper tubes, ocean shells, and porcelain beads — let you mix metal and organic texture into select designs.
10 Sea Glass Chimes to Master
1. The Driftwood Cascade Sea Glass Chimes
- Project base: Grey Driftwood Piece
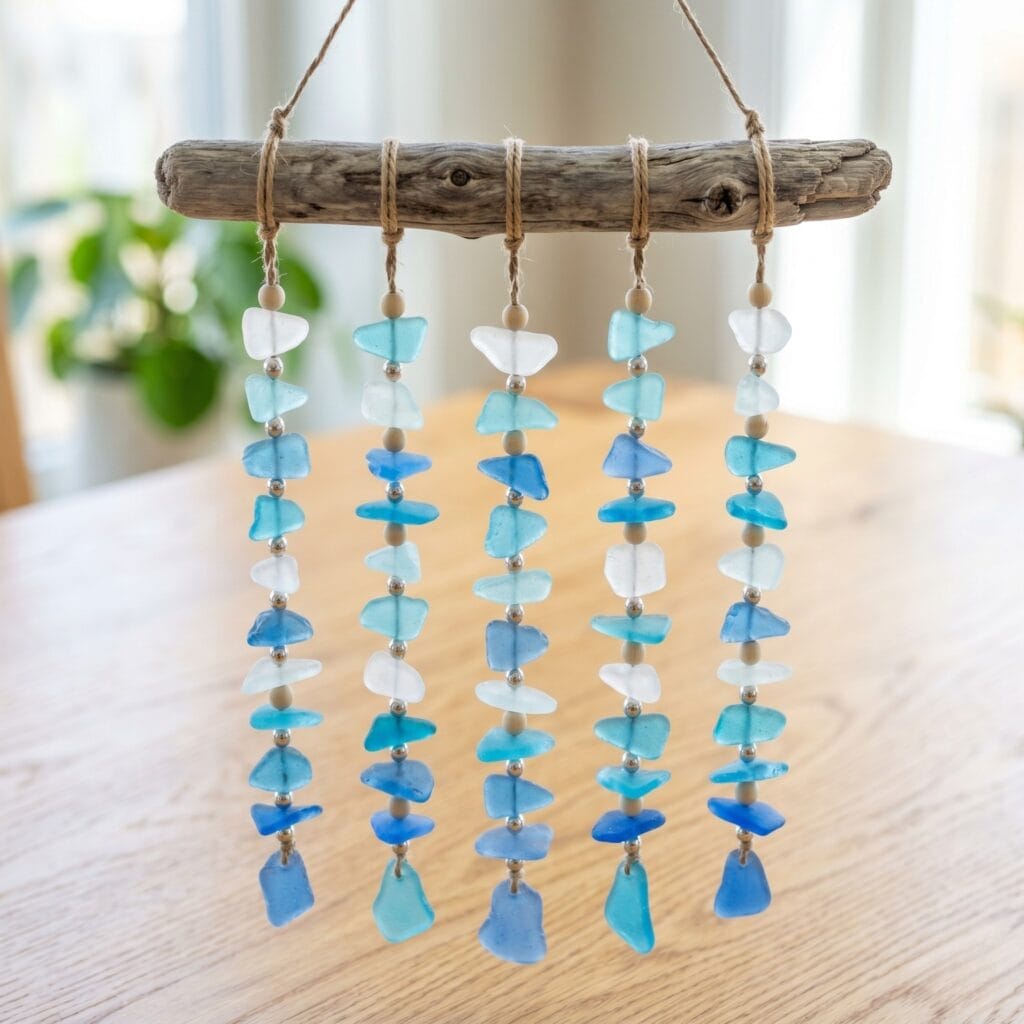
Quick Specs (guide): base: a smooth driftwood branch about the width of your shoulders; strands: 5; cord per strand: your chosen drop length plus a fist’s worth for knots; glass: about 7 frosted white and blue shards per strand; spacing: equal intervals across the branch; hanger: jute triangle at the branch’s balance point.
This design captures the nostalgia of coastal summers. To build this coastal cascade, select a smooth piece of grey driftwood. This will serve as your main anchor. Next, string five parallel lines of glass (see Techniques 1–3 above). Use only frosted white and blue shards. Finally, tie them to the wood at equal intervals (see Technique 4 above). Thus, you create a stunning waterfall silhouette.
Quick Steps:
- Drill and knot your frosted white and blue shards (Techniques 1–3).
- String five parallel lines, keeping each line’s glass pieces consistent.
- Tie the strands to the driftwood at equal intervals across the branch.
- Braid the jute top hanger and hang it from the branch’s balance point.
2. The Spiral Helix Sea Glass Chimes
- Project base: Circular Metal Frame
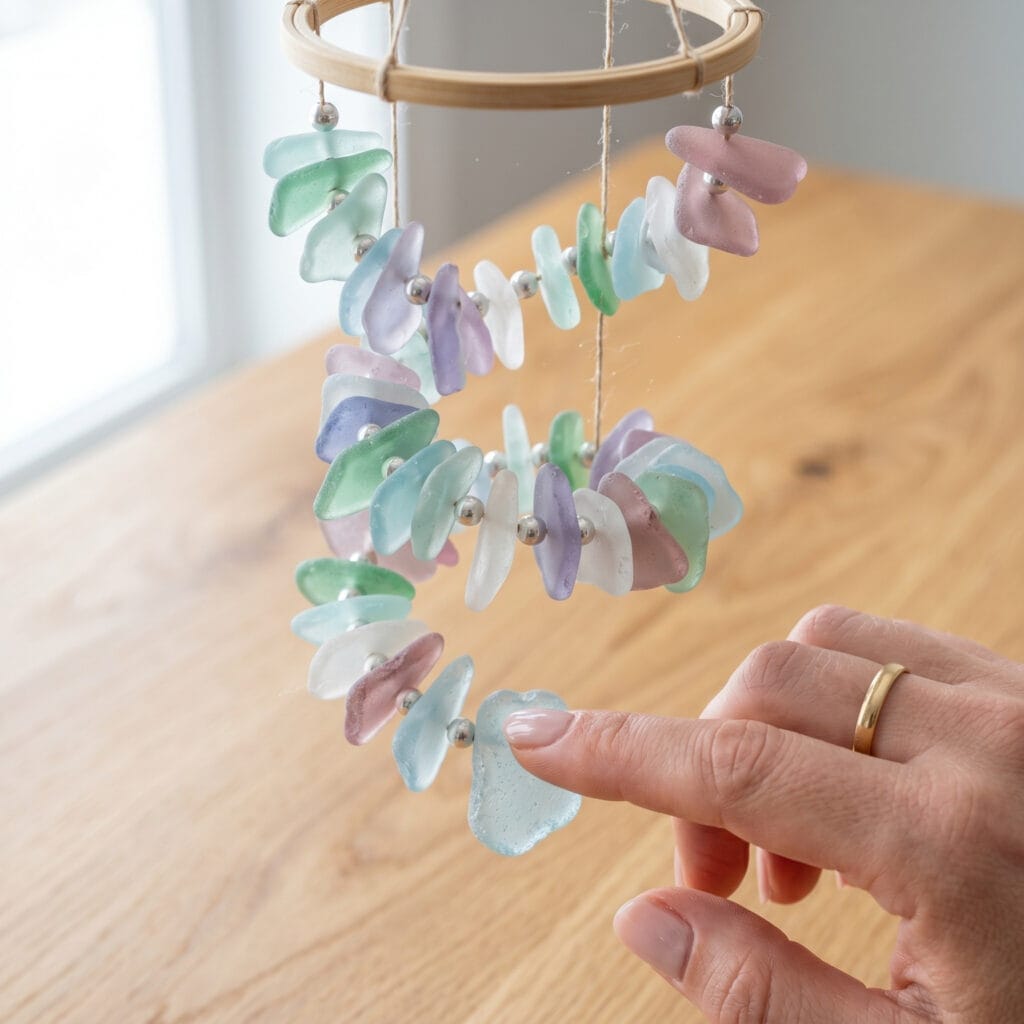
Quick Specs (guide): base: a dinner-plate-sized metal ring; strands: 8–10 vertical lines around the rim; cord: each line slightly longer than the last; glass: 5–7 shards per line; spacing: even gaps all around the ring; hanger: single rope loop at the top center.
Embrace a sleek and modern style. Because of the spiral layout, the base catches the sun beautifully. First, hang your pre-drilled strands around a circular frame (see Technique 4 above) and secure your top rope loop (see Technique 5 above). So, make each vertical line slightly longer. As a result, you get a chic, spinning sculpture. Furthermore, it turns beautifully in the wind.
Quick Steps:
- Drill and knot the glass for each vertical line (Techniques 1–3).
- Hang your pre-drilled strands around the circular frame and secure each one (Technique 4).
- Make each vertical line slightly longer than the last for the spiral fall.
- Secure the top rope loop at the frame’s center (Technique 5) and hang.
3. The Minimalist Bamboo Ring: Zen Sea Glass Chimes
- Project base: Bamboo Ring
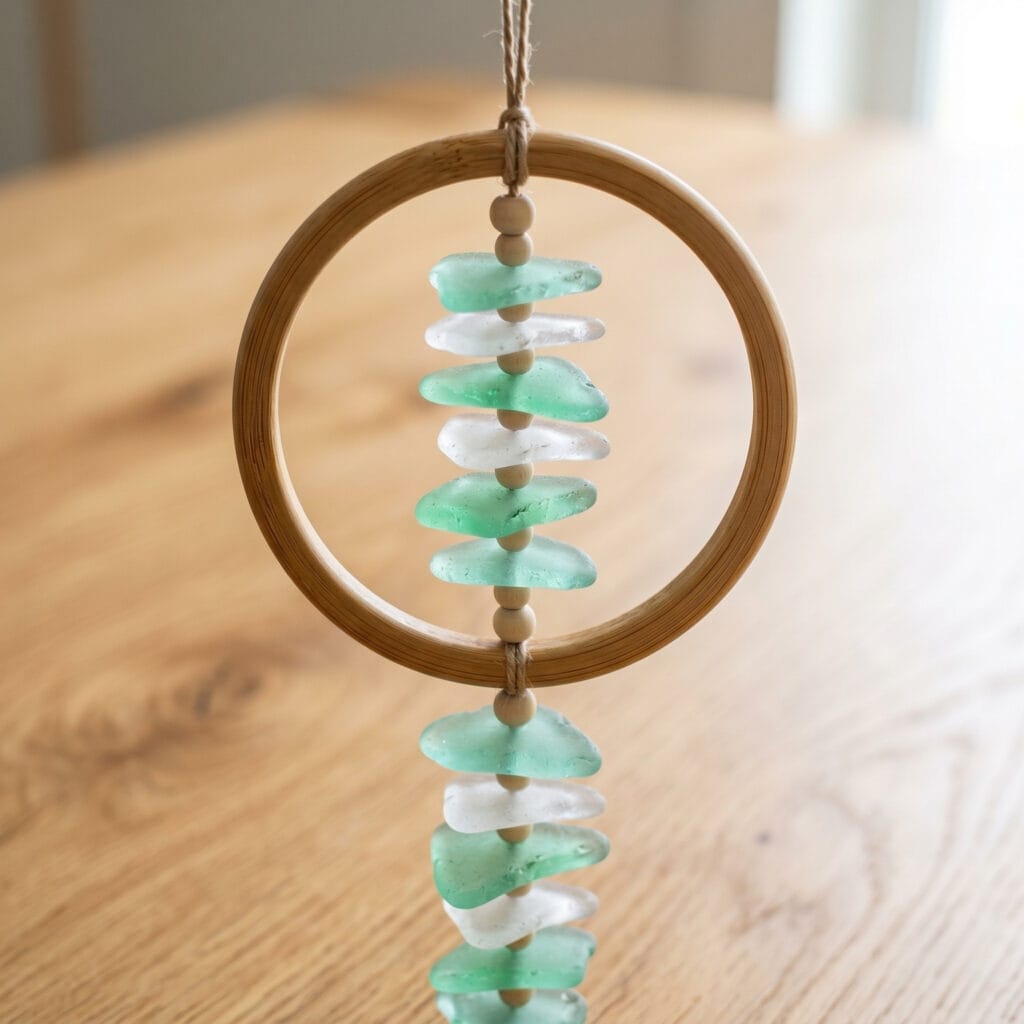
Quick Specs (guide): base: a solid bamboo ring about a salad plate wide; strands: 1 through the center; cord: long enough to drop to eye level plus knot slack; glass: one extra-large shard; spacing: a single centered focal piece; hanger: jute tied across the ring’s top.
Start your zen layout by selecting a smooth, solid bamboo ring. Next, suspend a single line of extra-large glass right through the center (see Techniques 1–4 above). Because this design relies on negative space, it looks amazing. Consequently, it highlights the raw anatomy of your premium pieces.
Quick Steps:
- Drill the single extra-large shard (Techniques 1–2) and knot it onto its cord.
- Suspend the line right through the center of the bamboo ring (Technique 4).
- Tie the jute hanger across the ring (Technique 5) and check the shard hangs level.
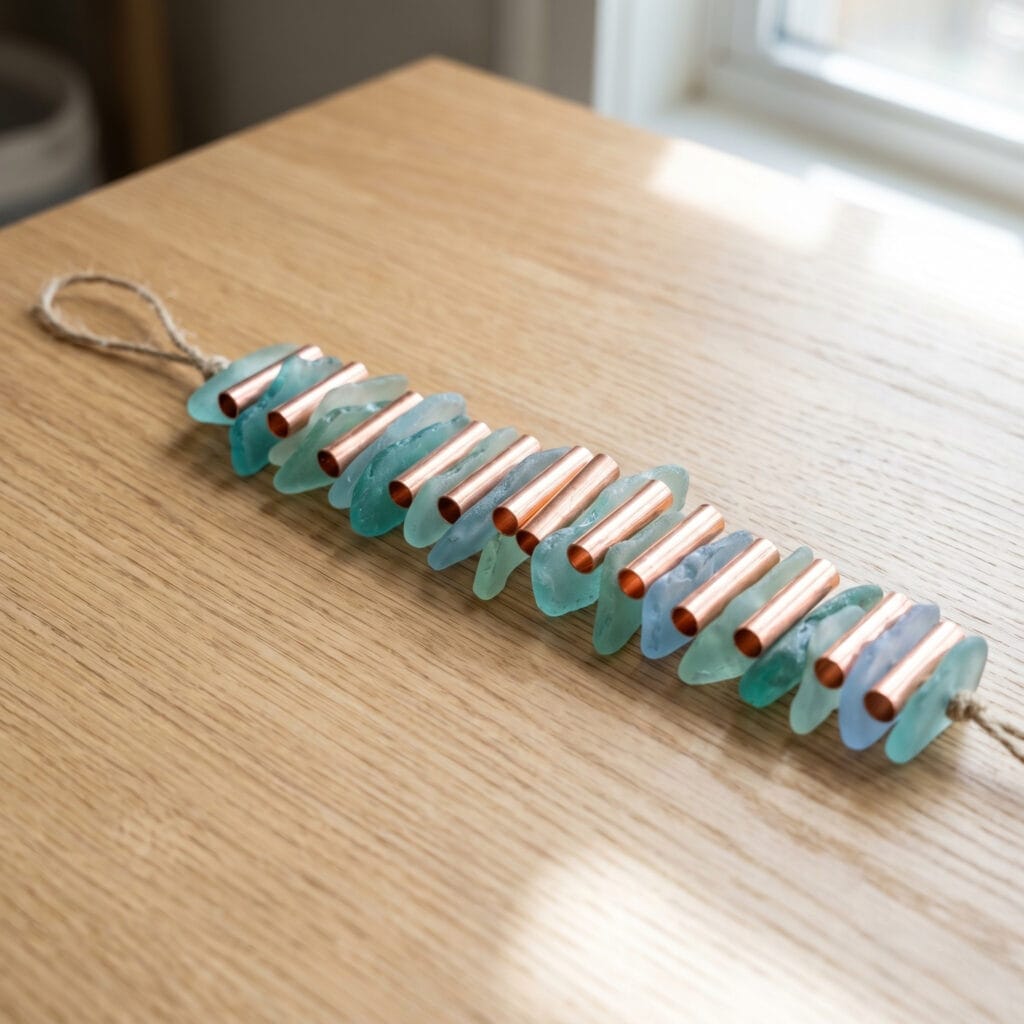
4. Copper & Glass Symphony: Modern Sea Glass Chimes
- Project base: Grey Driftwood Piece
- Accent: Short Copper Tubes
Quick Specs (guide): base: driftwood or a frame about shoulder-width; strands: 5; cord: drop length plus knot slack; glass: 4–6 shards per strand alternating with 3–4 copper tube segments; spacing: a shard–tube–shard rhythm; hanger: jute loop at the balance point.
Merge cool glass with raw metal. Specifically, alternate your frosted shards with short copper tubes (see Technique 3 above). So, the warm metallic tones look gorgeous next to pastel colors. Furthermore, the metal components introduce a ringing tone. Thus, your sea glass chimes will sound crisp.
Quick Steps:
- Drill the glass for every strand (Techniques 1–3).
- Cut the copper tubes to your chosen lengths and deburr the cut ends with a nail file or fine sandpaper so no sharp edge can fray the cord.
- Alternate frosted shards with copper tubes along every strand.
- Tie the strands to the base at even intervals across the piece.
- Add the jute top loop (Technique 5) and hang from the balance point.
5. The Ombre Gradient Wave Sea Glass Chimes
- Project base: Grey Driftwood Piece
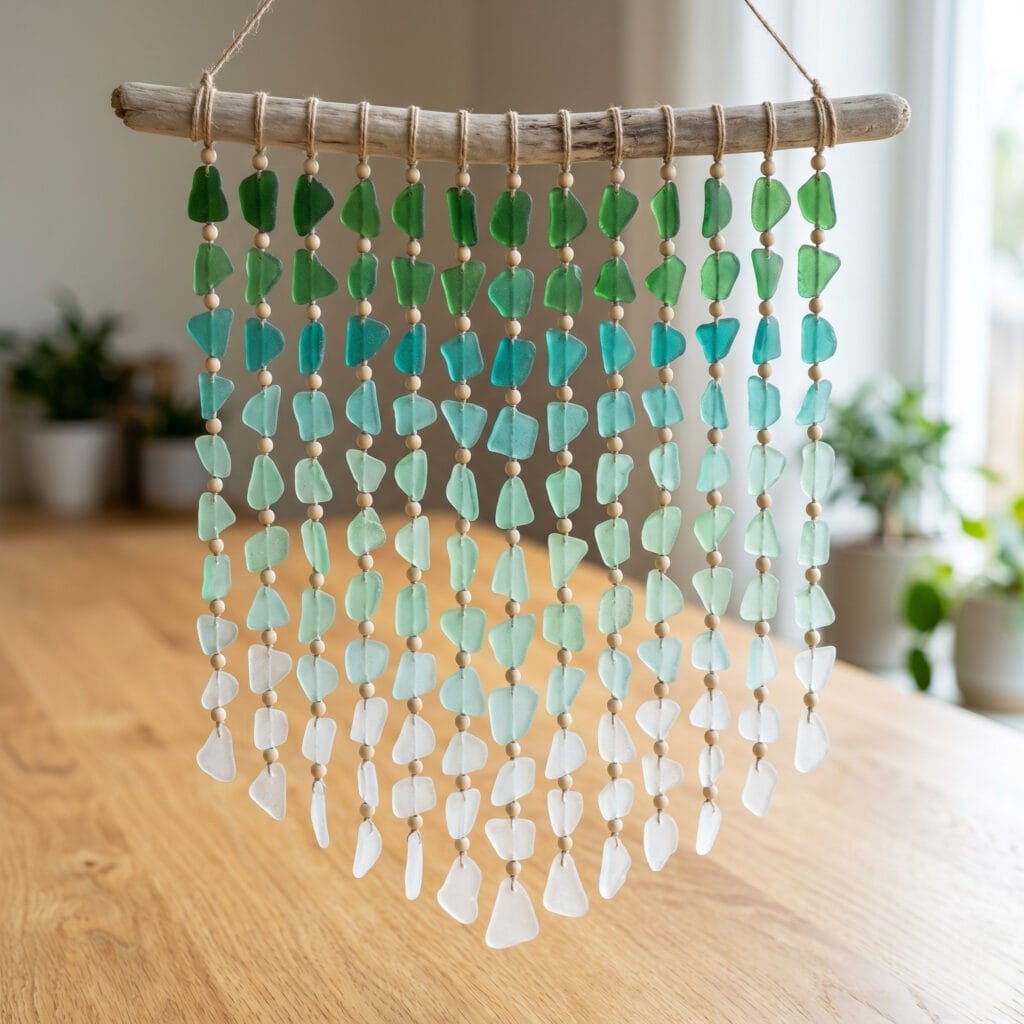
Quick Specs (guide): base: driftwood or a frame; strands: 5–7; cord: drop length plus knot slack; glass: 7–9 shards per strand kept in shade order; spacing: even, with the gradient running top to bottom; hanger: braided jute at the top center.
Begin by sorting your glass remnants into clear color gradient piles before drilling. Naturally, arranging the pieces in a smooth color melt creates a striking visual impact. Start with deep forest green shards at the top, transition into pale mint green in the middle, and finish with pure frosted clear glass at the bottom (see Techniques 1–3 above). Finally, bind your strands to the wooden anchor and attach your top rope hanger (see Techniques 4 & 5 above).
Quick Steps:
- Sort your glass into deep green, mint, and frosted piles before drilling.
- Drill and knot each strand, keeping its color order intact (Techniques 1–3).
- Tie the strands so the gradient reads top to bottom (Technique 4).
- Finish with the braided jute hanger (Technique 5).
6. The Framed Sun-Catcher: Geometric Sea Glass Chimes
- Project base: Open Square Wooden Frame
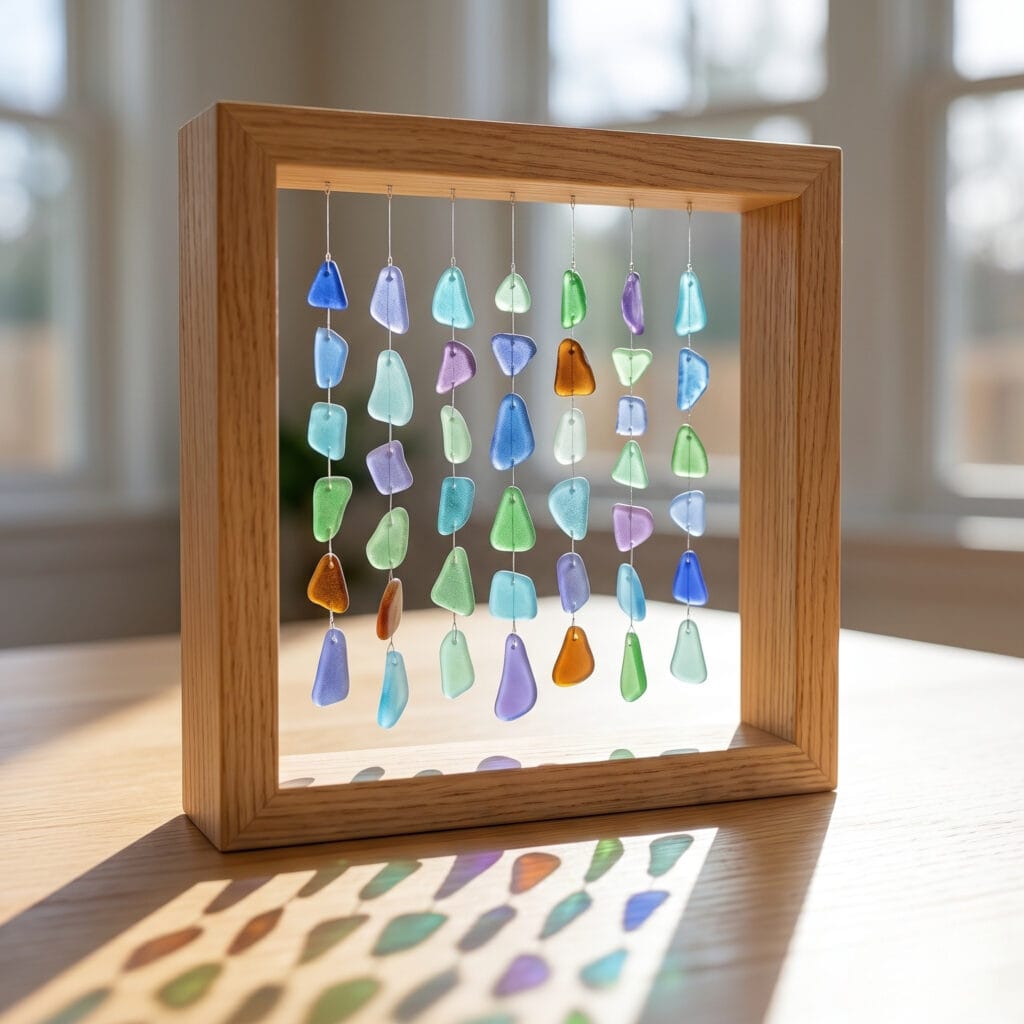
Quick Specs (guide): base: an open square wooden frame; strands: 6–8 verticals; cord: frame height plus a fist’s worth for knots; glass: 5–7 shards per strand; spacing: about a fingertip apart; hanger: braided loop at the frame’s top center.
Take an empty, open square wooden frame to establish a geometric perimeter while maintaining rich acoustics. Next, suspend pre-drilled vertical strands of glass closely together inside the open frame (see Technique 4 above) and finish the frame with a sturdy braided top loop (see Technique 5 above). Hanging this open block near a window allows gentle breezes to sway the glass, casting colorful shadows while producing a crisp, melodic chime.
Quick Steps:
- Drill the vertical strands (Techniques 1–3).
- Suspend the strands closely together inside the open frame (Technique 4).
- Braid a sturdy top loop and attach it to the frame’s top center (Technique 5).
- Hang the frame near a window and check every strand falls free.
7. Bead & Shell Fusion: Coastal Sea Glass Chimes
- Project base: Grey Driftwood Piece
- Accent: Ocean Shells & Unglazed Porcelain Beads
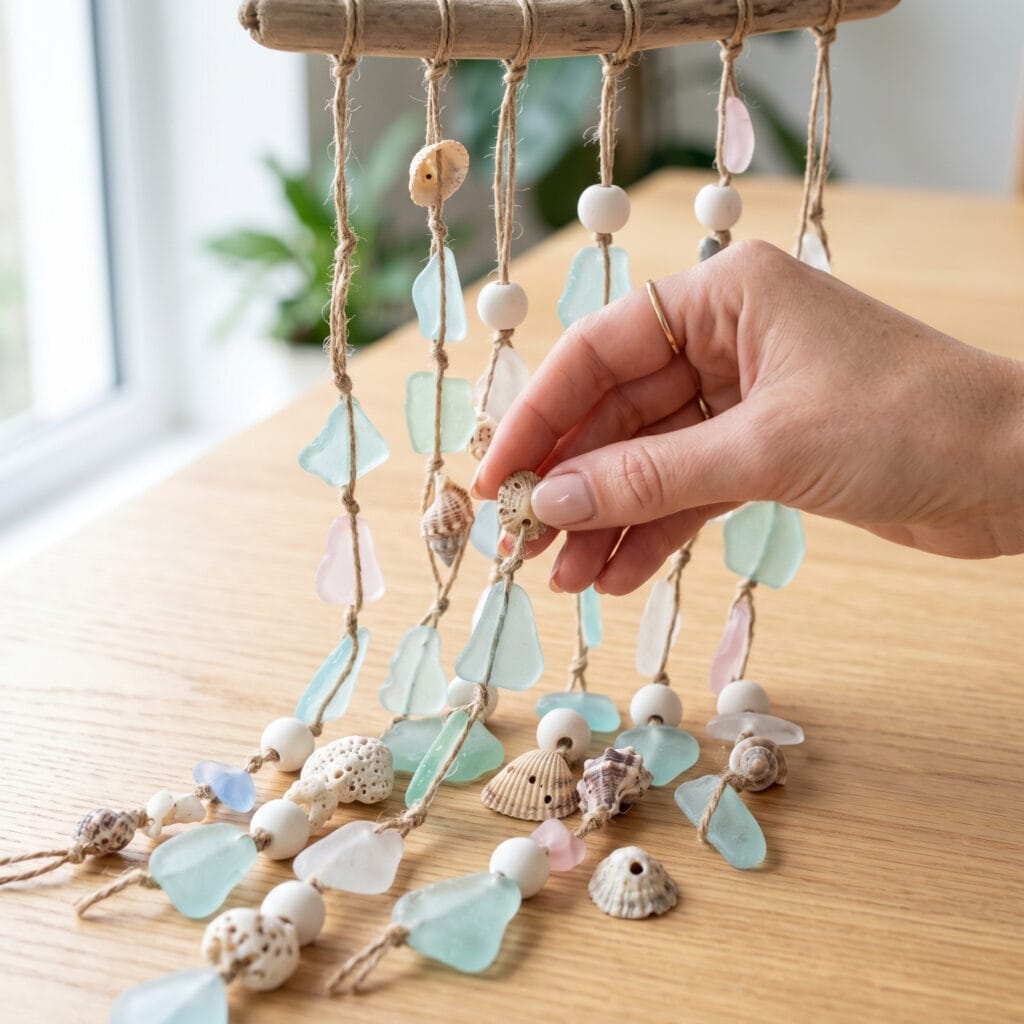
Quick Specs (guide): base: driftwood or a frame; strands: 5; cord: drop length plus knot slack; glass: 4–6 shards per strand with 3–4 shells and 2–3 beads scattered between; spacing: one accent between every two or three shards; hanger: jute loop at the balance point.
Truly, this design mixes woodland and beach elements perfectly. First, strand tiny ocean shells between your glass (see Technique 2 above for shell-specific drilling care). Next, add unglazed porcelain beads. This recipe pairs different materials smoothly.
If you love using tiny studio leftovers to create highly detailed accessories, check out our 10 Easy Mini Leather Bag Charms project too!
Quick Steps:
- Drill the glass with care — shells need much lighter pressure (Technique 2).
- Thread shells and porcelain beads between the glass pieces, knotting below each accent so nothing slides; drill any unholed shell first with the same wet setup (much lighter pressure).
- Tie the strands to the base at even intervals (Technique 4).
- Add the jute top hanger (Technique 5).
- (Be sure to check our small hardware safety notes below regarding the handling of loose porcelain beads and shells in your workshop).
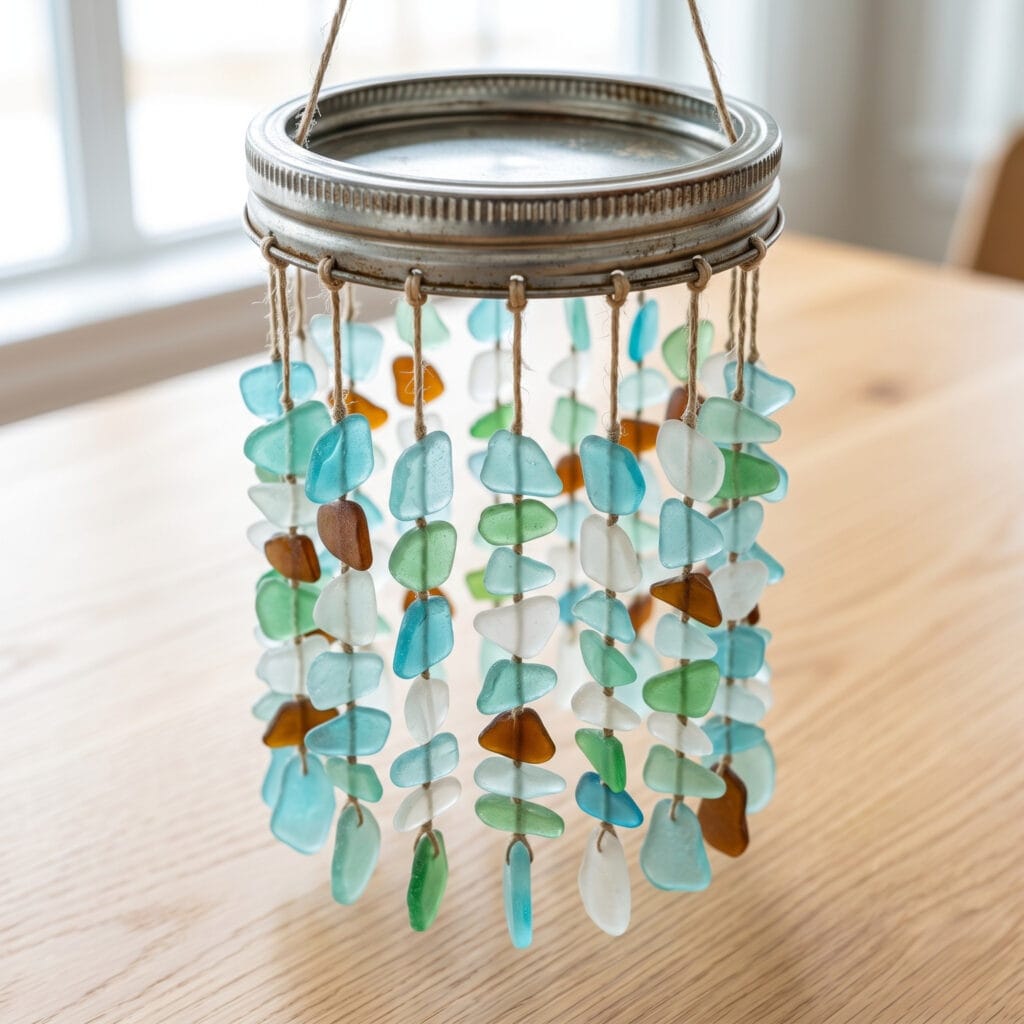
8. The Mason Jar Rim: Upcycled Sea Glass Chimes
- Project base: Metal Jar Lid Rim (Upcycled)
Quick Specs (guide): base: a palm-sized mason jar rim; strands: 3–4 lines; cord: drop length plus knot slack; glass: 4–6 shards per strand; spacing: even around the ring; hanger: a 3-point jute at the top.
Grab a clean metal lid rim saved from an old glass mason jar for a quick, eco-friendly crafting base. Tie your wet-drilled hemp twine strands evenly around the circular metal ring (see Technique 4 above), then add a 3-point jute rope hanger at the top (see Technique 5 above). In the end, your glass lines hang in a neat circle, creating a charming, rustic ornament for your patio.
Quick Steps:
- Drill and knot your glass lines (Techniques 1–3).
- Tie the strands evenly around the mason jar rim (Technique 4).
- Make a 3-point jute hanger at the top (Technique 5).
- Hang it and adjust until the ring sits level.
9. The Seaglass Macrame Hoop: Boho Sea Glass Chimes
- Project base: Metal Craft Ring
- Sewing: Nylon Thread
- Sewing: Sewing Needles
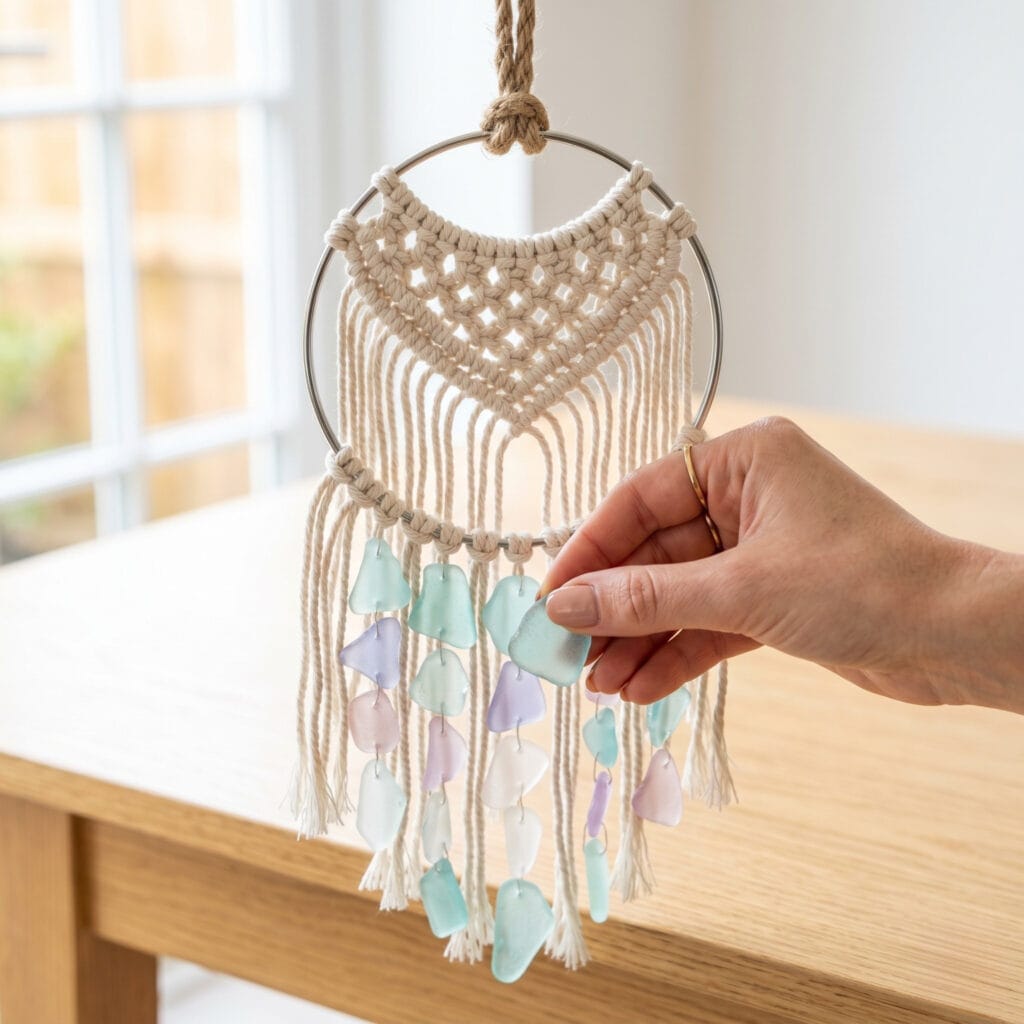
Quick Specs (guide): base: a dinner-plate-sized metal ring; strands: a macramé net across the top plus 4–6 sewn lines; cord: macramé cord for the net and nylon thread for sewing; glass: 5–7 sewn shards; spacing: spread across the net’s loose threads; hanger: thick jute at the metal’s middle.
Lay your metal craft ring flat on your work table to begin weaving your fiber base. Knot a simple macramé pattern across the top of the frame, then sew your pre-drilled sea glass shards directly onto the loose hanging threads (see Technique 6 above). Finally, complete the boho look by securing a thick jute hanging rope to the metal top (see Technique 5 above).
Quick Steps:
- Drill and knot your shards (Techniques 1–3).
- Knot a macramé pattern across the top of the ring (Technique 6).
- Sew the pre-drilled shards onto the loose hanging threads with the nylon thread and sewing needle.
- Secure a thick jute rope to the metal’s middle for hanging.
10. The Artisan Clay Dome Sea Glass Chimes
- Project base: Air-Dry Clay
- Clay tool: Toothpick or Skewer
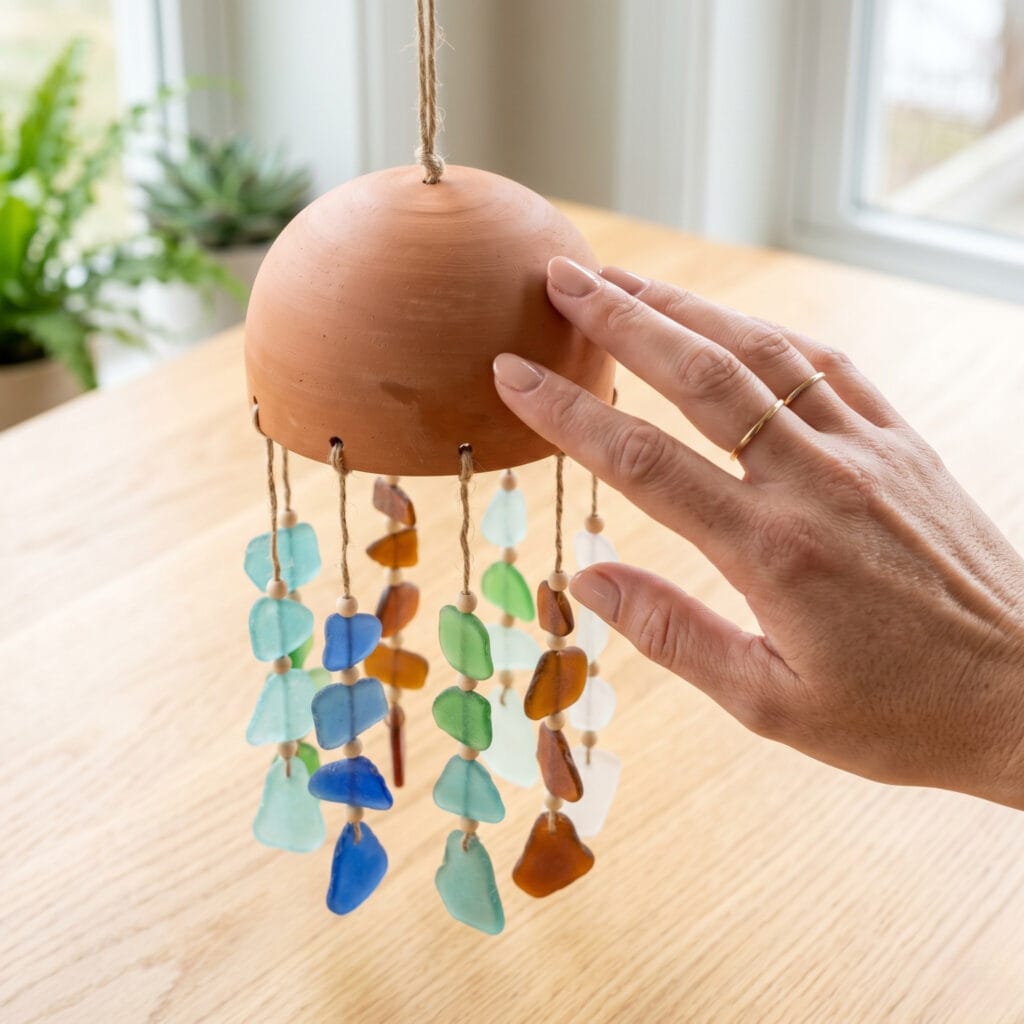
Quick Specs (guide): base: a palm-sized shallow clay dome; strands: 3–4 lines from evenly spaced rim holes; cord: drop length plus knot slack; glass: 4–6 shards per strand; spacing: holes about a fingertip apart around the rim; hanger: a jute loop pressed into the dome’s soft top.
This mixed-media treatment looks incredibly high-end. First, shape a shallow, smooth dome using premium air-dry clay. Next, carefully poke evenly spaced holes around the rim before the clay dries completely. Finally, suspend your frosted sea glass strands from these cured holes (see Technique 7 above for full drying guidance). Ultimately, you build elite sea glass chimes that perfectly blend earthy terracotta with coastal glass.
Quick Steps:
- Shape a shallow, smooth dome from the clay and poke evenly spaced rim holes with the toothpick or skewer while it is still soft (Technique 7).
- Punch two small holes near the dome’s top center while the clay is soft, thread the jute loop through both, and knot it flat on the inside — a mechanically anchored loop, not one merely pressed into the surface.
- Let the dome cure fully (24–48 hours) before threading anything — air-dry clay softens with moisture, so keep this chime indoors or on a sheltered porch, or brush on a clear acrylic sealer first if it may ever catch rain.
- Suspend your frosted glass strands from the cured rim holes and hang from the top loop.
Styling Your Sea Glass Chimes
First, spend an afternoon matching local glass tones to your room. If you want another stunning, minimalist way to decorate your walls using raw earth materials, view our complete guide on Clay Mask Ideas: 10 Genius DIY Secrets!
Troubleshooting Your Sea Glass Chimes
- Cracked a shard while drilling. Slow down, add water, and restart the hole on a fresh piece — a cracked strand should never carry weight.
- The hole won’t start. The bit is skating or glazed: keep the glass braced and wet, use barely-there pressure, and let the bit bite before leaning in at all.
- Cord frays at the knot. Move the knot to a fresh spot, trim the frayed tail, and tie a second overhand knot over the first so it cannot work loose.
- The chime hangs tilted. Slide the strand positions along the base a little at a time, re-hanging after each move, until the base sits level on its hook.
- Strands never touch or chime. Pieces only ring when they can meet: move neighbouring strands a fingertip’s width closer or shorten one strand so the breeze can swing it into contact.
Important Crafting Safety Notes
Crafting with glass, power tools, and small parts deserves real caution. These are the precautions that matter for the projects on this page:
• Eyes and hands while drilling: wear safety glasses for every hole, hold small glass pieces with the tray or pliers — never your fingers — and let the rotary tool come to a full stop before setting it down.
• Sharp edges and slivers: fresh-drilled glass edges and chips cut. Sweep or vacuum slivers immediately, wipe the work surface down, and keep every shard — including broken ones — away from children and pets.
• Water near power: wet drilling puts water and a rotary tool on one bench. Keep cords and vents dry, plug into a GFCI-protected outlet, and never reach into the tray while the tool is running.
• Small parts and finished chimes: beads, shells, glass pieces, and loose knots are choking hazards; hang finished chimes out of pets’ reach so curious noses can’t knock them down.
For more detailed guidance on safe crafting practices, liability disclosures, and website usage, please review our Terms and Conditions.
Sea Glass Chimes FAQ
Do I need a special tool to drill sea glass?
Yes — a mini rotary tool with a diamond bit, used in a shallow water tray. Brace the glass flat, use light pressure, keep it submerged, and stop at the first sign of heat or cracking — a cracked strand should never carry weight.
Why won’t the drill bit start a hole?
The bit is skating or glazed. Keep the glass braced and wet, use barely-there pressure, and let the bit bite before leaning in at all.
How do I stop the cord fraying at the knots?
Move the knot to a fresh spot, trim the frayed tail, and tie a second overhand knot over the first so it cannot work loose. Hemp twine holds knots securely; nylon cord adds weather resistance for outdoor strands.
Why doesn’t my chime make any sound?
Pieces only ring when they can meet — move neighbouring strands a fingertip’s width closer or shorten one strand so the breeze can reach it. If the chime hangs tilted, slide the strand positions a little at a time until the base sits level.
“Which of these Sea Glass Chimes: 10 Easy DIY Ideas You’ll Love ideas are you excited to try first, or do you have a creative tip of your own to share? Drop a comment below—I’d love to hear your thoughts and see what you create!”


