

Cheerful Halloween decor beats spooky clutter every time. These diy cute halloween decorations use warm orange, plum, black, cream, and soft mint to bring handmade personality to small rooms, classroom tables, and covered porches without tombs, gore, or complicated power tools.
Each project follows a dependable order: measure, cut or form, assemble, dry or cure, finish, then add the hanger or light. If you enjoy using small handmade accents in a display, these mini leather bag charm ideas offer more playful details to tuck beside your pumpkins and garlands. All illuminated paper projects use flameless LED lights only.
Affiliate Disclosure: This post contains affiliate links. As an Amazon Associate, I earn from qualifying purchases. If you buy through these links, I may earn a commission at no additional cost to you.
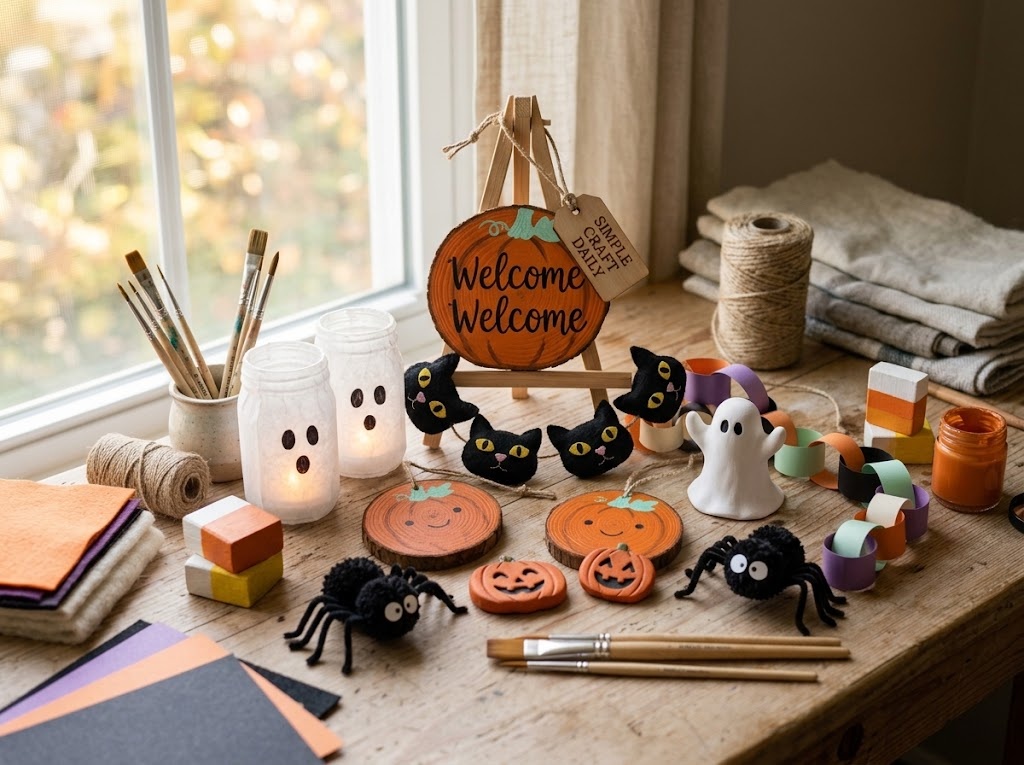
Essential Materials & Tools
wp:paragraphChoose supplies for the projects you want to make rather than collecting every item at once. Cardstock, felt, clay, paint, glue, and twine cover most of these diy cute halloween decorations, while a few optional studio tools make repeated cuts and tiny painted faces easier to manage.
/wp:paragraph wp:paragraphFor a playful color plan, combine warm orange and plum with black, white, and soft mint. You can also borrow the bold, graphic color-blocking approach from these modern tufting art pattern ideas when arranging banners, felt shapes, and paper chains.
/wp:paragraph✨ Consumable Raw Materials
- Heavyweight Halloween Cardstock Pack, 65 lb — Sturdy 65 lb sheets hold crisp folds — confirm the pack covers the orange, green, black, white, yellow, plum, mint, and cream sheets the projects cut | Check Heavyweight Halloween Cardstock Pack, 65 lb on Amazon
- Wool Blend Craft Felt Sheets — Dense felt cuts with clean edges and stays smooth on lightweight door hangers and applique shapes | Check Price on Amazon
- ACMI AP-Certified Acrylic Paint Set — Opaque paint gives wood and fully cured clay a clean orange, plum, black, white, mint, green, or cream finish | Find ACMI AP-Certified Acrylic Paint Set on Amazon
- Black Craft Pom-Poms, 5 cm — One 5 cm black pom-pom forms each spider body in project 6 | Check Black Craft Pom-Poms, 5 cm on Amazon
- Orange Craft Pom-Poms, 3 cm — One 3 cm orange pom-pom caps each smiley pumpkin pick in project 17 | Check Orange Craft Pom-Poms, 3 cm on Amazon
- Black Chenille Stems — Black chenille stems bend into the spider legs in project 6 | Check Black Chenille Stems on Amazon
- White Air-Dry Clay | Find on Amazon
- Natural Unfinished Wood Slices — Pre-drilled 3-inch rounds for the hanging pumpkin slices (project 1) and a 4-inch round for the black cat sign (project 15); the hanging holes are already in place | Check Natural Unfinished Wood Slices on Amazon
- Natural Jute Twine — Ties tassel necks, garland hangers, and rustic bows; the projects thread 2 mm jute twine | Check Natural Jute Twine on Amazon
- Orange and Black Satin Ribbon — 20 cm lengths tie ghost tassel necks and add the orange-black Halloween finish | Check Orange and Black Satin Ribbon on Amazon
- Unfinished Wood Craft Blocks — Smooth unfinished blocks create sturdy freestanding candy corn decorations. | View on Amazon
- Clear Mason Jars — Clear jars hold flameless lights safely inside friendly ghost luminaries. | Find on Amazon
- Natural Raffia — Natural raffia forms the bristled end of a miniature broomstick wall accent. | View Natural Raffia on Amazon
- Bamboo Skewers — Wooden skewers create stems for pumpkin picks and handles for miniature broomsticks. | Find Bamboo Skewers on Amazon
- White Tissue Paper — Torn pieces form the glowing ghost skin on mason jar luminaries and the tassels in the garland | Check White Tissue Paper on Amazon
- Wooden Dowel — The support bar that suspends the paper bat mobile | Check Wooden Dowel on Amazon
- Small Kraft Paper Bags — Monster centerpiece bags that hold a sealed bean packet for stability | Check Small Kraft Paper Bags on Amazon
- Sealed Dried Bean Packets — Ballast inside each centerpiece bag — the unopened retail bean bag works as-is; keep it sealed for child and pet safety | Check Sealed Dried Bean Packets on Amazon
- Recycled Cardboard — Backing under the felt candy-corn layers — reuse cereal-box cardboard instead of buying | Check Recycled Cardboard on Amazon
- Straight Dry Twigs — A 20 cm straight branch from the yard becomes the broomstick handle | Check Straight Dry Twigs on Amazon
- Small Paper Balls — 3 cm ball forms each ghost head under the tissue wrap in the tassel garland | Check Small Paper Balls on Amazon
🧰 Core Crafting Tools & Equipment
- Low-Temperature Mini Hot Glue Gun and Glue Sticks — Gives adults a quick bond for pom-poms, chenille stems, skewers, and ribbon details | View on Amazon
- Precision Craft Knife, Metal Ruler, and Self-Healing Mat — Keeps repeated card-stock strips, window shapes, and banner edges measured and clean | Find on Amazon
- Clay Sculpting Tool Set with Acrylic Roller | View Clay Sculpting Tool Set with Acrylic Roller on Amazon
- Wooden Embroidery Hoop — A 20 cm wood hoop provides the circular foundation for a cheerful Halloween welcome accent | See Price on Amazon
- Black Paint Marker — Draws spider legs, ghost faces, and fine lines where a wet brush would smudge | Check Black Paint Marker on Amazon
- Detail Paintbrushes — Small rounds and liners handle eyes, whiskers, and thin stripes across several projects | Check Detail Paintbrushes on Amazon
- Fabric Scissors — Cuts felt, ribbon, and chenille cleanly where paper scissors chew and fray | Check Fabric Scissors on Amazon
- Painter’s Tape — Masks crisp candy-corn bands on painted blocks before each color coat | Check Painter’s Tape on Amazon
- Circle Cutter and Drinking Straw — Cuts uniform ornament rounds, and a straw stamps the 8 mm hanging hole | Check Circle Cutter and Drinking Straw on Amazon
- Hole Punch — Punches the hanging holes at the top corners in project 14 and the ribbon holes in project 18 | Check Hole Punch on Amazon
- Circle Punch — Punches the confetti circles in project 18 — a quick squeeze instead of cutting each round by hand | Check Circle Punch on Amazon
- Black Permanent Marker — Name flags, spider legs, and tassel faces on tissue, pom-poms, and paper (projects 6, 11, 16, 17) | Check Black Permanent Marker on Amazon
- Fine-Tip Marker — Thin whisker and facial details in project 7 that a broad marker would blot | Check Fine-Tip Marker on Amazon
- 10 cm Bowl Form — Household item — any clean 10 cm kitchen bowl shapes the trinket dish; the search shows craft clay bowls | Check 10 cm Bowl Form on Amazon
- Disposable Mixing Cup — Household item — any throwaway cup mixes the 1:1 PVA glue and water solution in project 4; tap water works | Check Disposable Mixing Cup on Amazon
💎 Hardware, Fasteners & Finishing
- Clear-Drying PVA Craft Glue | Check Price on Amazon
- Gloss Water-Resistant Acrylic Varnish | See Price on Amazon
- Battery-Operated Warm White LED Tea Lights | See Battery-Operated Warm White LED Tea Lights on Amazon
Paint clay only after it is fully dry through its center. A clay piece that feels cool, dark, or flexible needs more drying time before acrylic paint or varnish touches the surface.
/wp:paragraph wp:paragraphUse PVA glue for paper, felt, tissue, and other lightweight layers because it dries clear without stiff plastic ridges. Use the low-temperature glue gun only for quick adult assembly of heavier decorative pieces. Adults should operate craft blades and hot glue tools.
/wp:paragraph wp:paragraphApply varnish only over cured clay and dry paint. Never place a real candle or exposed wick in paper, felt, tissue, wood, or clay decor; use a battery-operated LED tea light instead.
/wp:paragraph wp:paragraphThese studio upgrades are optional long-term workshop fixtures rather than per-project requirements. They support a tidy surface, precise cuts, and accurate lighting when you make several decorations in one session.
/wp:paragraphOptional Studio Upgrades
Never required to finish the projects above — convenience upgrades for makers who want them.
📦 Beginner Project Kits & Coordinated Bundles
For beginners or makers starting from scratch, these coordinated bundles and all-in-one project packs bring together the core supplies in one convenient order.
- Beginner Halloween Craft Kit | Explore Beginner Halloween Craft Kit on Amazon
⚡ Studio Tools & Workshop Equipment
Optional studio upgrades — every project above can be completed without these.
- Daylight LED Magnifying Craft Lamp with Desk Clamp — Accurate light and magnification help with painted faces, tiny dots, and close cutting | See Daylight LED Magnifying Craft Lamp with Desk Clamp on Amazon
- Large Self-Healing Rotary Cutting Mat, Rotary Cutter, and Acrylic Ruler Set — Creates an organized work surface for straight, repeated felt and card-stock cuts | Explore Large Self-Healing Rotary Cutting Mat, Rotary Cutter, and Acrylic Ruler Set on Amazon
- Heavy-Duty Three-Tier Rolling Craft Cart with Wooden Top — Keeps paints, adhesives, tools, and small components sorted during multi-project sessions | View on Amazon
20 DIY Cute Halloween Decorations to Make This Weekend
Supplies Needed: Wooden Embroidery Hoop, Wool Blend Craft Felt Sheets, Heavyweight Halloween Cardstock Pack, 65 lb, Natural Jute Twine and Satin Ribbon Assortment, Clear-Drying PVA Craft Glue
Set up a protected table before starting. First, measure and cut every component; next, form or paint the main pieces; then, assemble them and allow the stated drying or curing time. Finish with varnish, ribbon, twine, or LED lighting only after the surface is dry. Subsequently, sweep away paper scraps and clay crumbs before beginning another project.
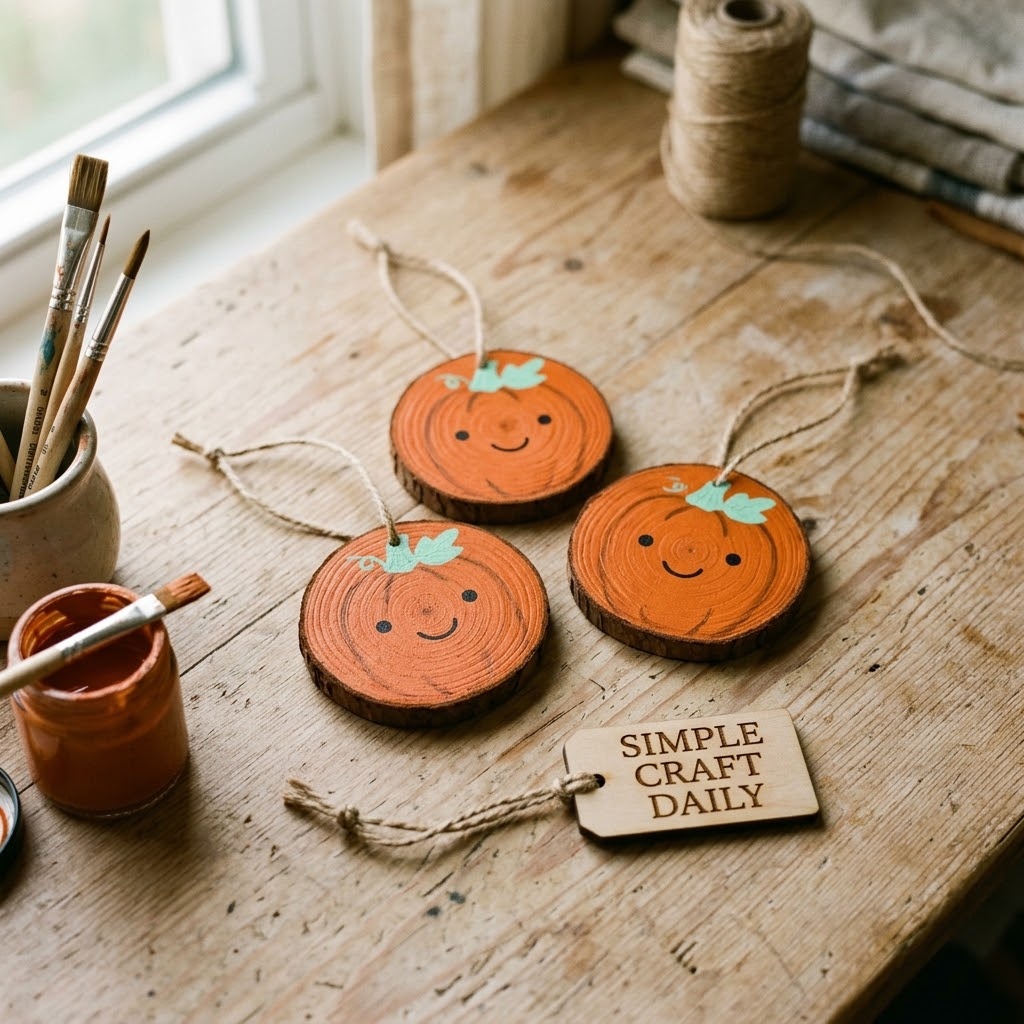
1. DIY Cute Halloween Decorations: Painted Pumpkin Wood Slices
Supplies Needed: 3-inch unfinished wood slices, ACMI AP-certified acrylic paint, detail paintbrush, gloss acrylic varnish, 2 mm jute twine.
Paint each 3-inch wood slice with two thin coats of orange acrylic paint. Allow the first coat to dry for 1 hour before applying the second coat, then use a detail brush to add a curved black smile, two small eyes, and a green stem. Keep the face centered so the ornament hangs evenly.
After the painted pumpkin dries for 24 hours, brush on a thin coat of gloss acrylic varnish and follow the varnish label for drying time. Finally, thread a 20 cm length of 2 mm jute twine through the existing hole and tie a secure double knot. These diy cute halloween decorations look especially sweet in a window or on a narrow entry hook.
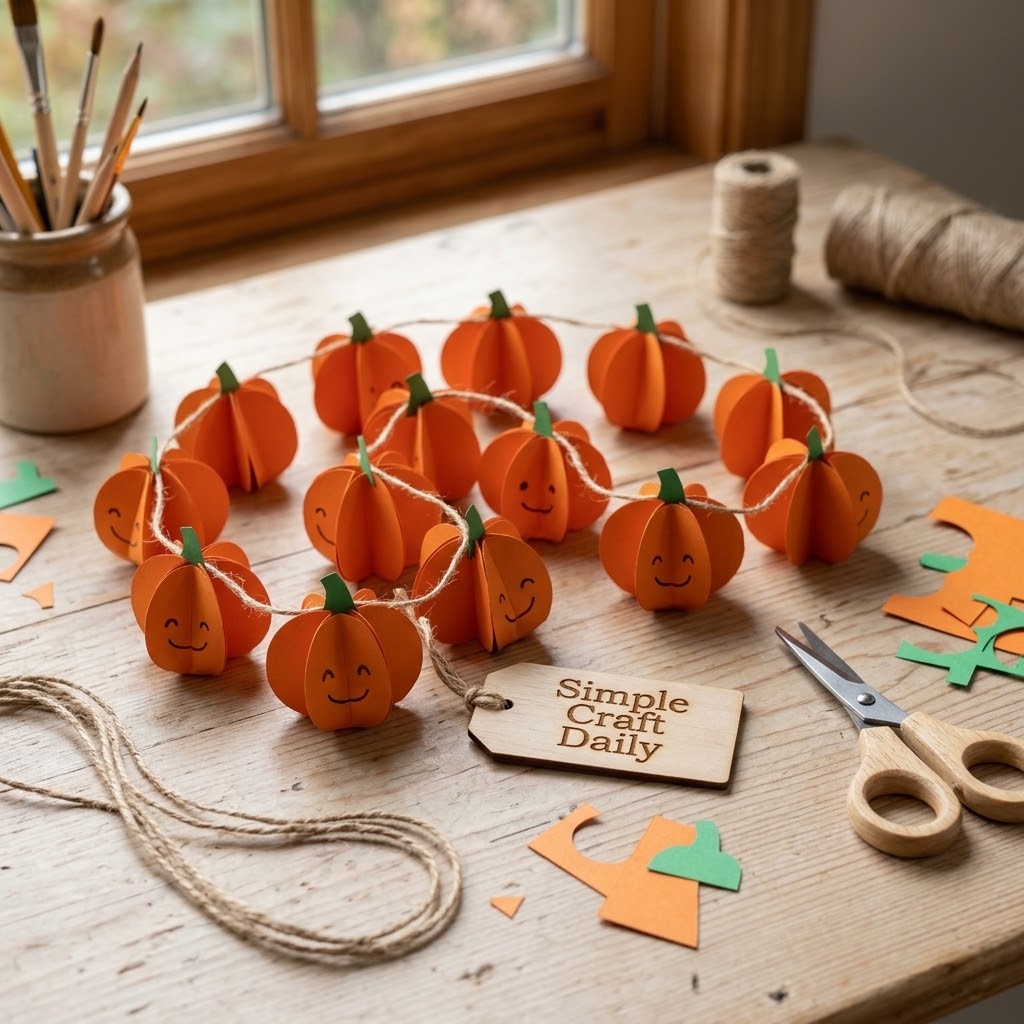
2. DIY Cute Halloween Decorations: Smiling Paper Pumpkin Garland
Supplies Needed: Orange and green heavyweight card-stock, PVA craft glue, craft knife, metal ruler, jute twine.
Use the metal ruler and craft knife to cut ten orange card-stock circles measuring 8 cm across. Fold every circle exactly in half with the color facing outward. Cut ten small green rectangles measuring 1 cm by 2 cm, then fold each rectangle once to make a pumpkin stem.
Lay jute twine across your mat and mark pumpkin positions 10 cm apart. Brush a thin coat of PVA glue on one folded circle, set the twine along its center fold, and press a matching folded circle on top. Add a green stem at the top edge. Let the garland dry flat for 30 minutes before hanging so the circles do not slide along the twine.
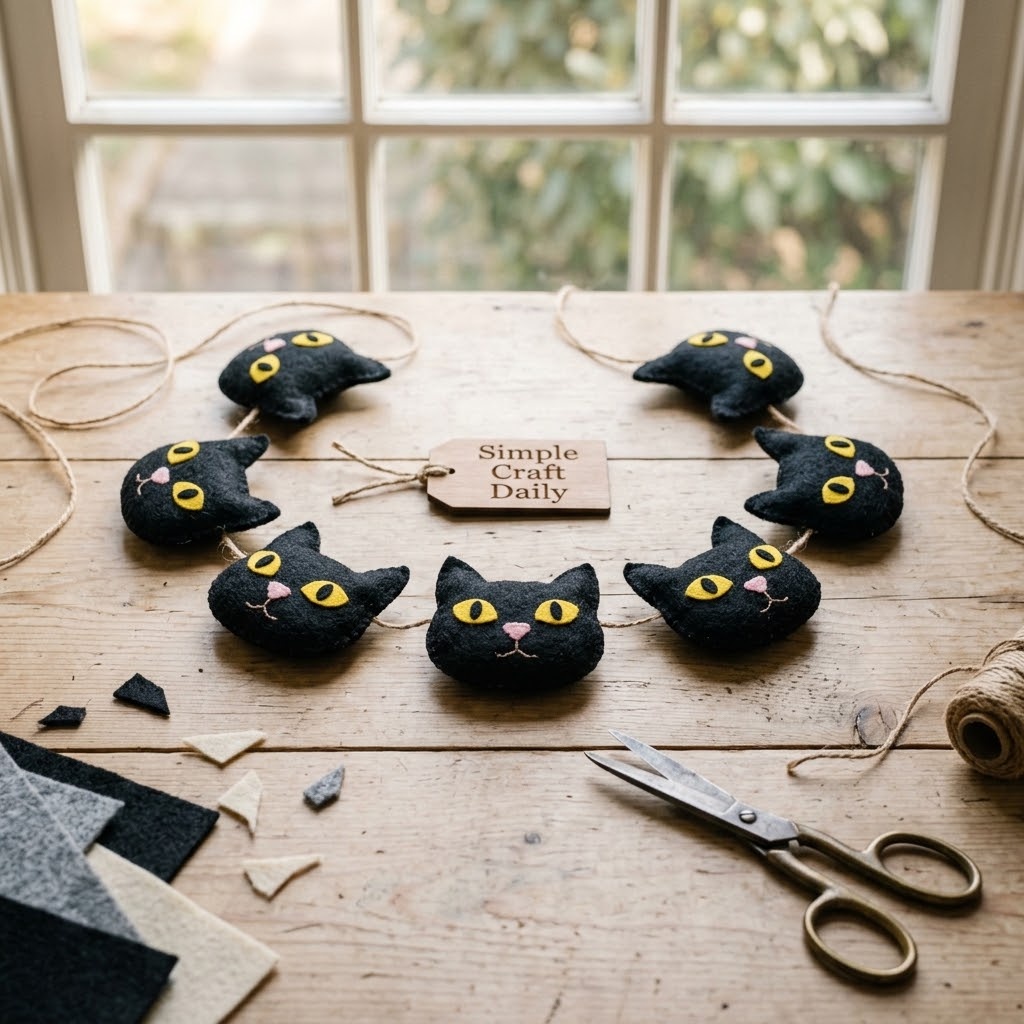
3. DIY Cute Halloween Decorations: Felt Black Cat Garland
Supplies Needed: Black wool-blend felt, white and yellow card-stock, PVA craft glue, fabric scissors, jute twine.
Draw an 9 cm tall cat template with pointed ears, a rounded head, and a 2 cm top tab. Cut eight cats from black wool-blend felt with fabric scissors. Cut sixteen 1 cm white card-stock circles and sixteen 5 mm yellow card-stock circles, then layer yellow circles over the white circles with PVA glue.
Test each pair of eyes on a felt cat before gluing so every face looks friendly and balanced. Fold the top tab over a length of jute twine to create a channel, add PVA glue inside the fold, and press it flat. Allow 30 minutes of drying before lifting the garland. The reinforced tabs hold better than gluing cats directly onto twine.
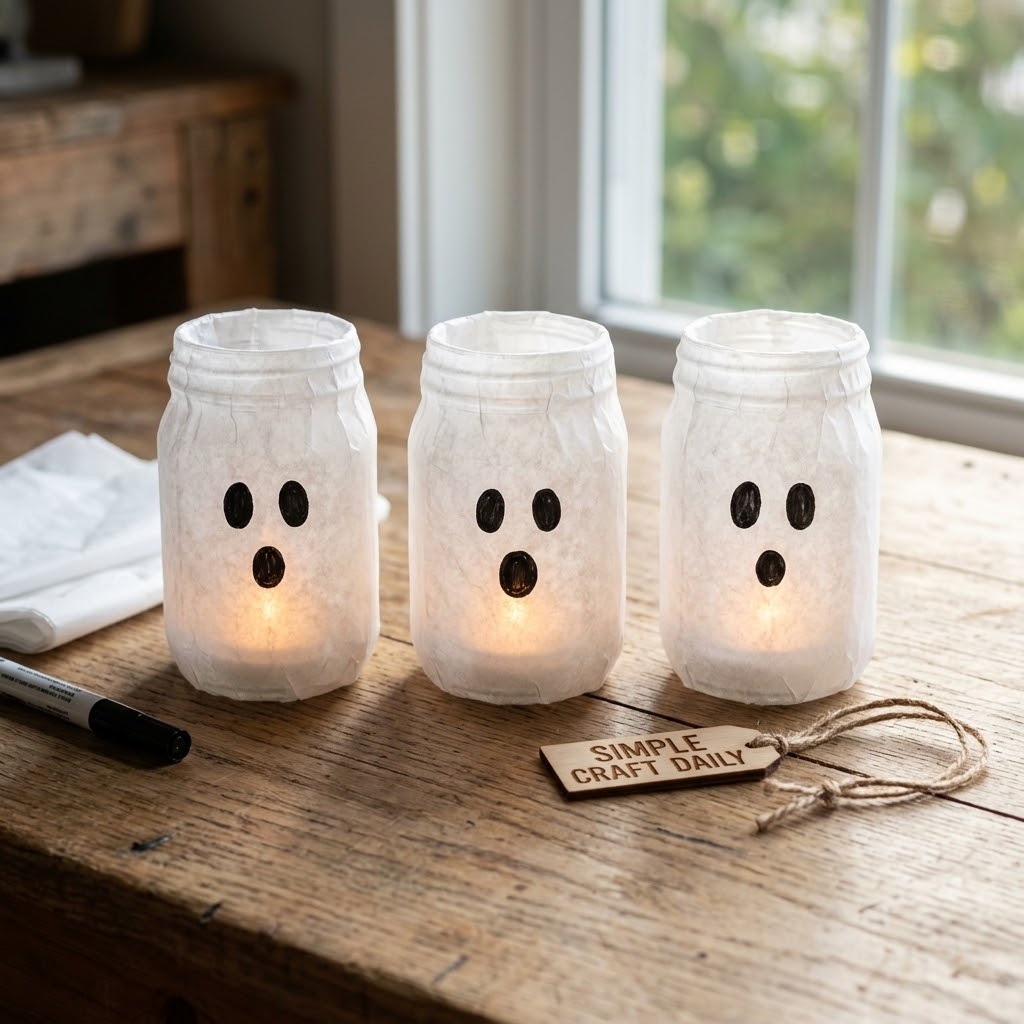
4. DIY Cute Halloween Decorations: Friendly Ghost Mason Jar Luminaries
Supplies Needed: Clean glass jars, white tissue paper, clear-drying PVA glue, black paint marker, warm white LED tea lights.
Wash and fully dry each glass jar. Tear white tissue paper into pieces measuring roughly 5 cm to 8 cm wide. Mix equal parts clear-drying PVA glue and water in a disposable craft cup, then brush a thin coat onto the jar. Lay tissue over the wet glue and brush another thin coat across the tissue.
Overlap the tissue pieces until the jar looks softly frosted, but avoid thick ridges near the rim. Let the jar dry for 2 hours in an airy room. Next, use a black paint marker to add two oval eyes and a small smiling mouth. Place one warm white LED tea light inside each jar. Never use an open flame in this project.
5. DIY Cute Halloween Decorations: Clay Ghost Tea-Light Holder
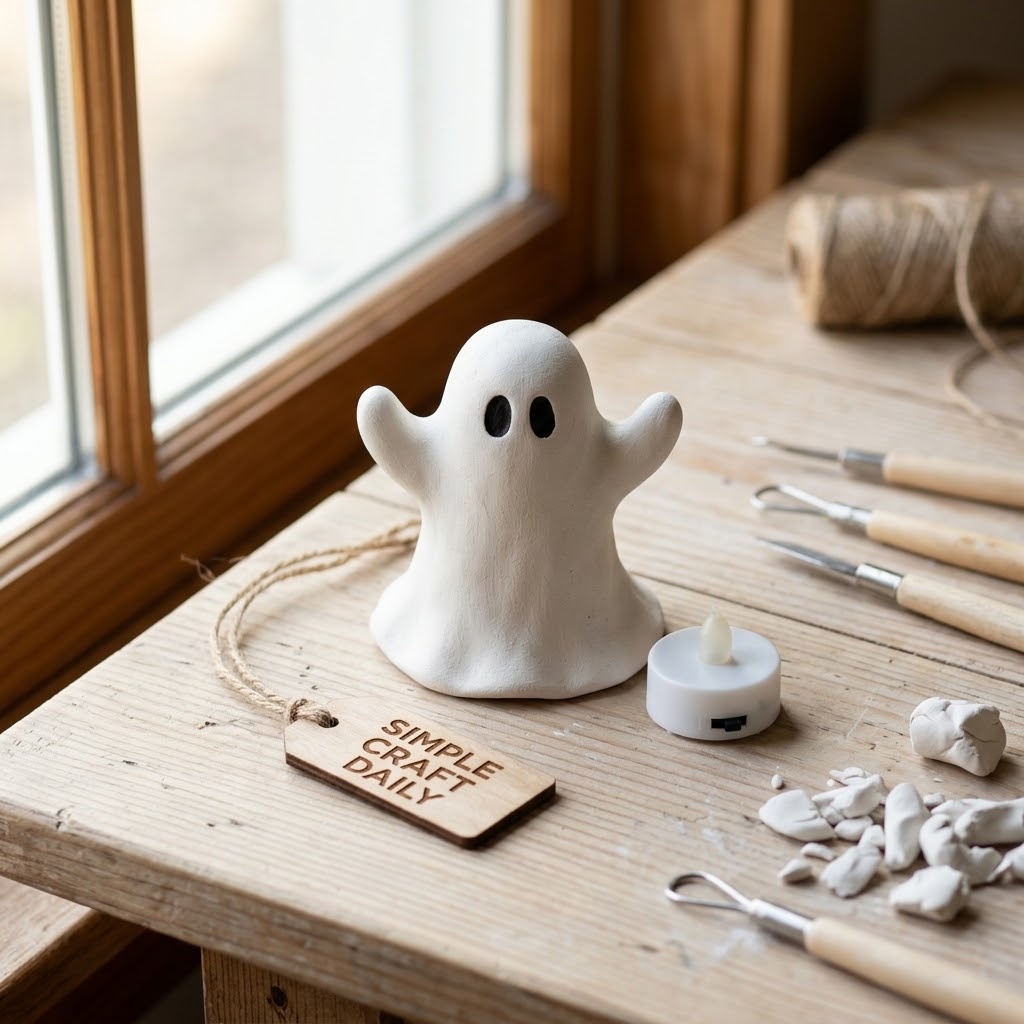
Supplies Needed: White air-dry clay, acrylic roller, clay sculpting tools, black acrylic paint, gloss acrylic varnish, LED tea light.
Roll white air-dry clay to a 6 mm thickness with an acrylic roller. Set an inverted LED tea light on the clay as a temporary sizing guide, then drape the clay into a loose ghost shape around it. Use clay sculpting tools to form a wavy hem and make two small face indentations.
Remove the LED tea light before drying so air can reach the inside of the holder. Smooth cracks with a damp fingertip, then leave the clay on a flat, breathable surface for 24 to 48 hours. Once fully dry, paint the eyes black and allow the paint to dry for 1 hour. Brush on gloss acrylic varnish, let it dry according to the label, and then place the LED inside.
6. DIY Cute Halloween Decorations: Pom-Pom Spider Shelf Sitters
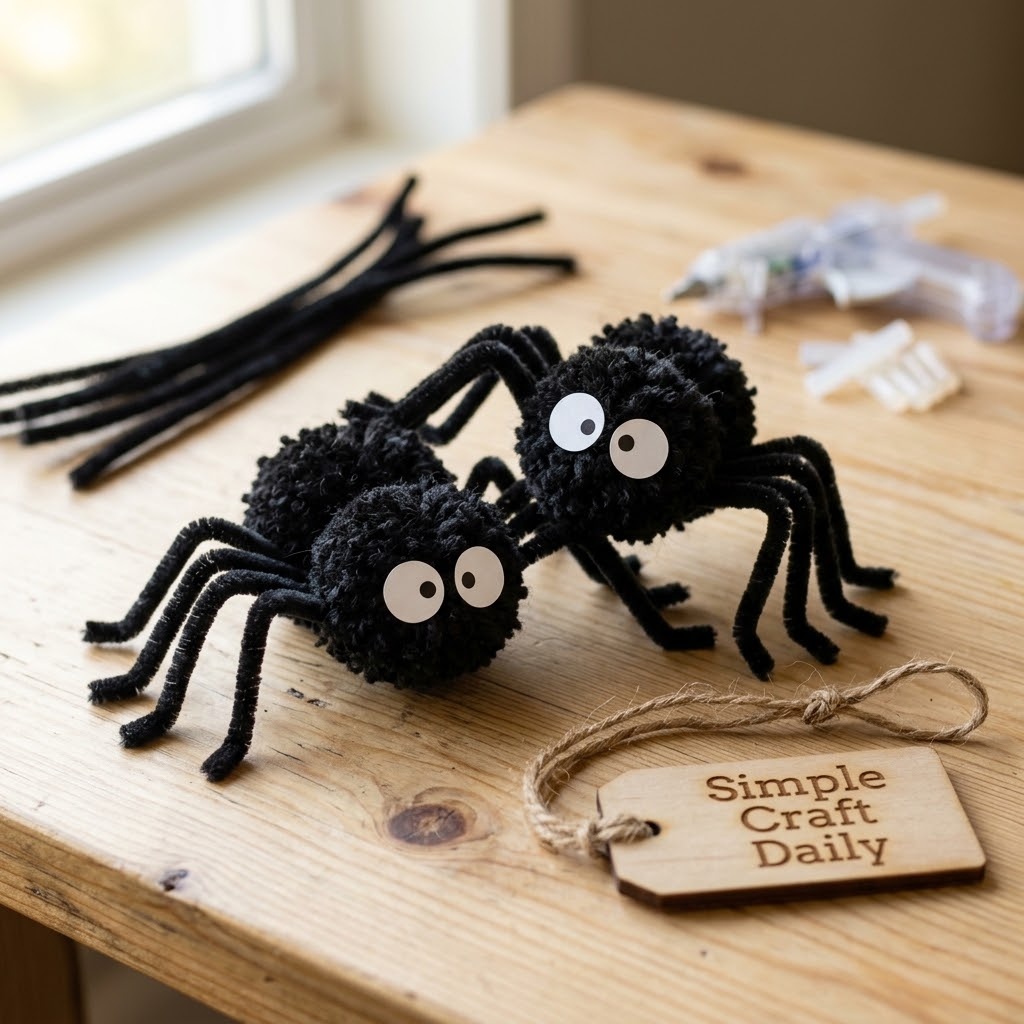
Supplies Needed: Black craft pom-poms, black chenille stems, low-temperature hot glue gun, white card-stock circles, black marker.
For each spider, use one 5 cm black pom-pom body and four black chenille stems measuring 15 cm each. Fold every stem in half, then bend the two ends into gentle zigzags. Arrange all eight legs beneath the pom-pom before gluing so the spider has a stable two-point stance on each side.
An adult should apply a small bead of low-temperature hot glue across the leg bundle and press the pom-pom body into place. Cut two 1 cm white card-stock circles, mark black pupils, and glue the eyes to the front after the body bond cools. Wait 5 minutes before displaying the spider on a shelf, bookcase, or windowsill.
Precision Craft Knife, Metal Ruler, and Self-Healing Mat
Every cut in these 20 projects starts here: a sharp craft knife, steel ruler and self-healing mat together.
I earn a commission if you make a purchase, at no additional cost to you.
7. Pastel Witch Hat Place Cards
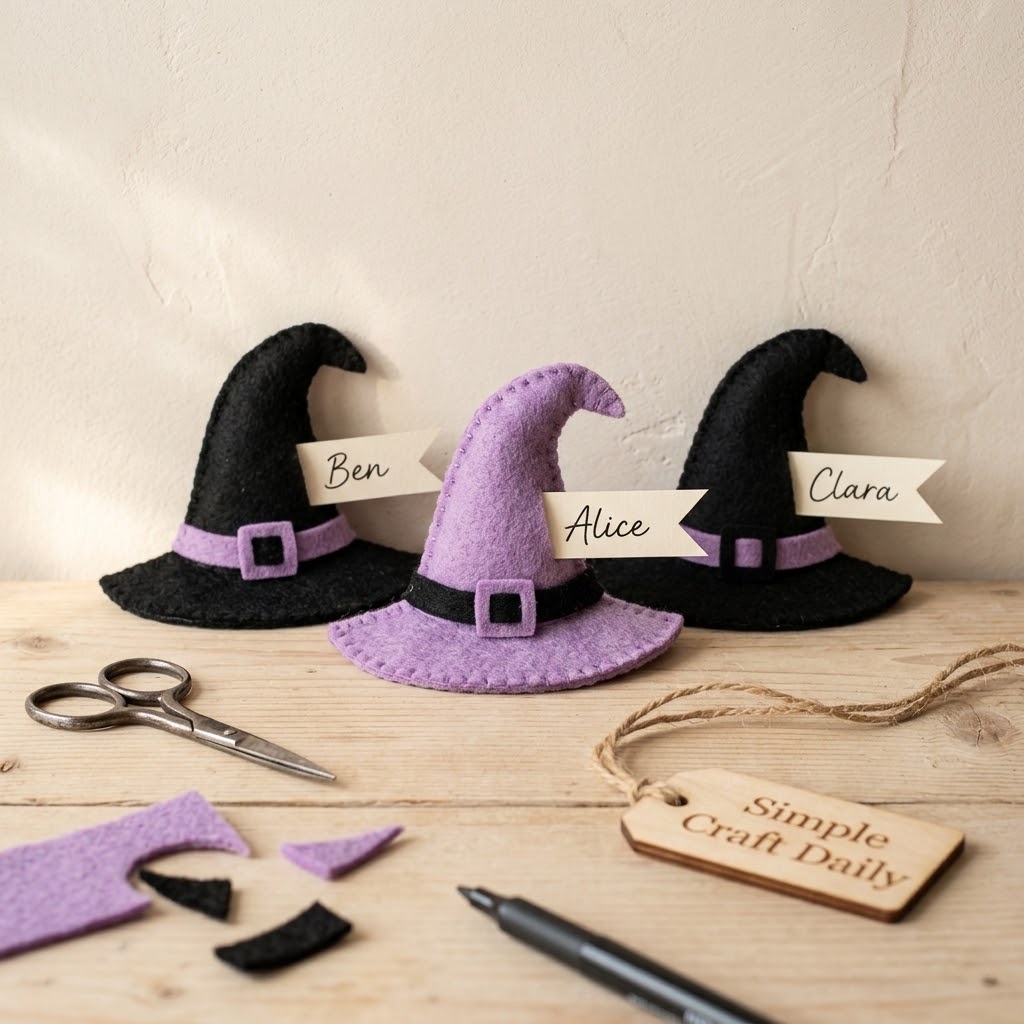
Supplies Needed: Purple and black wool-blend felt, PVA craft glue, card-stock, fabric scissors, fine-tip marker.
Cut one 10 cm brim circle and one 12 cm cone sector for each place card. Snip a small center opening in each brim circle, then overlap the straight edges of each felt sector until it forms a neat cone. Apply PVA glue along the overlap and hold the seam closed for 30 seconds.
Set the cone into the brim opening and glue it in place from underneath. Let the hat dry for 30 minutes on a flat surface. Next, cut card-stock name flags measuring 2 cm by 6 cm and write each guest name with a fine-tip marker. Slide the flag beneath the brim or glue it to the front edge after checking that the lettering is easy to read.
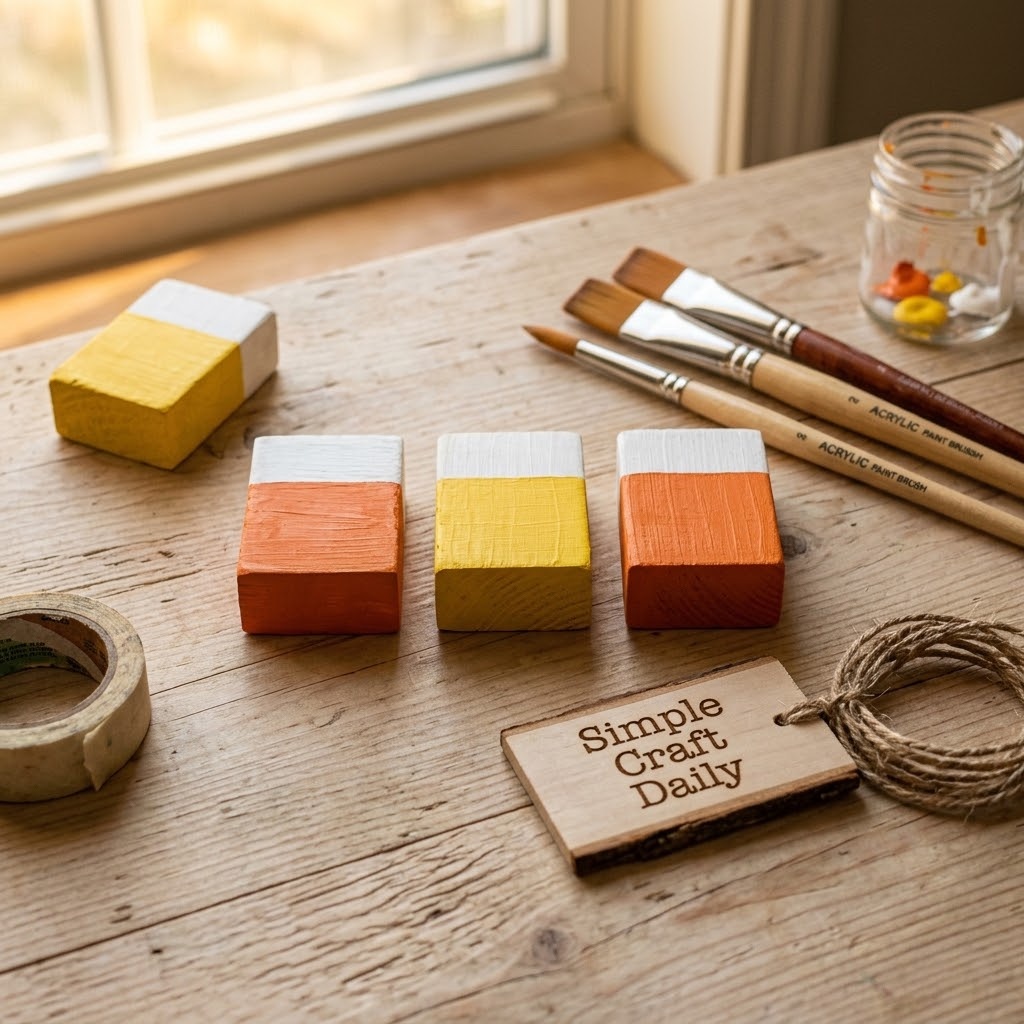
8. DIY Cute Halloween Decorations: Candy Corn Wood Blocks
Supplies Needed: Unfinished rectangular wood blocks, white yellow and orange acrylic paint, painter’s tape, paintbrushes, gloss acrylic varnish.
Wipe each unfinished rectangular wood block with a dry cloth. Measure the height of the block and divide it into three equal bands. Apply painter’s tape along the band lines, pressing every edge firmly so paint cannot wick underneath.
Paint the top band white, the center band orange, and the bottom band yellow. Allow each color to dry for 45 to 60 minutes before adjusting tape or applying a second coat. Remove the tape slowly while the final paint coat is dry to the touch. Let the blocks dry overnight, then brush on gloss acrylic varnish and let it dry according to the label before placing them on a shelf.
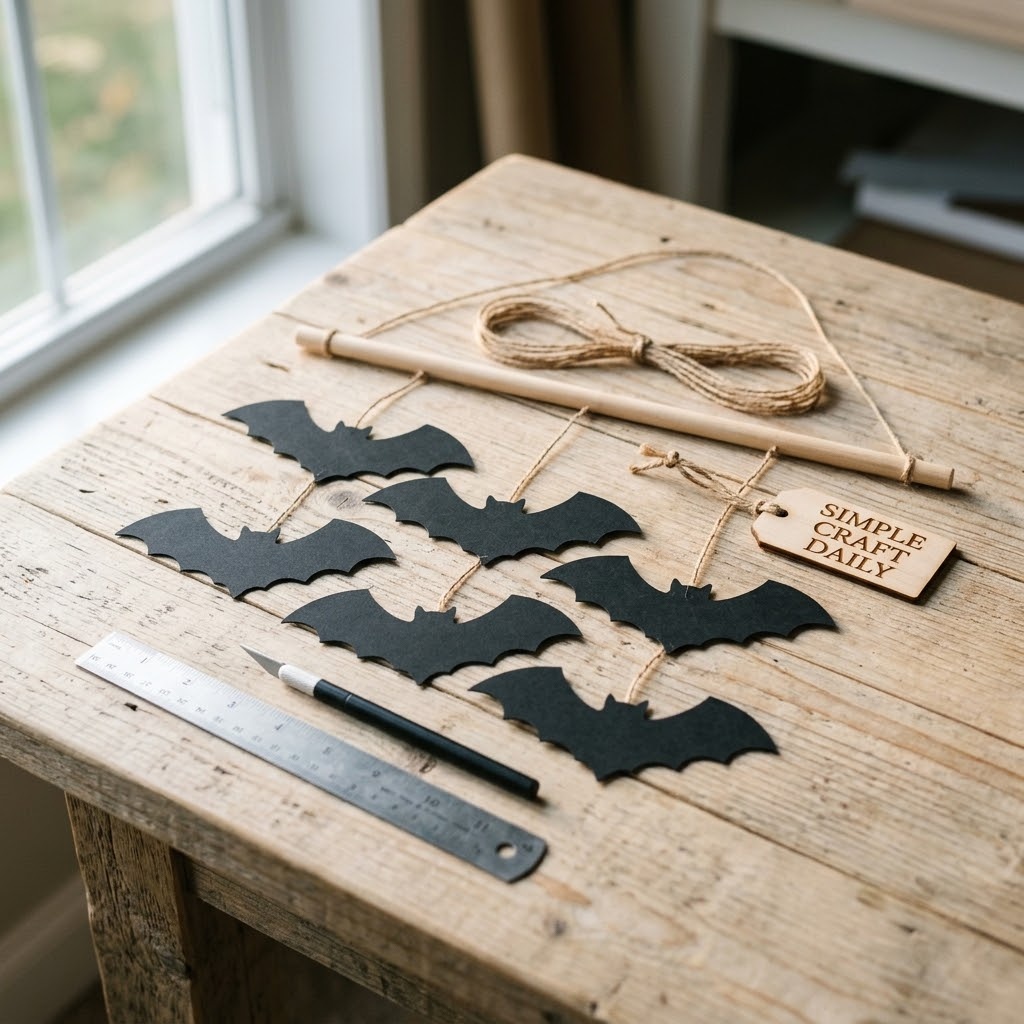
9. Paper Bat Window Mobile
Supplies Needed: Black heavyweight card-stock, craft knife, self-healing mat, wooden dowel, jute twine, PVA craft glue.
On a self-healing mat, cut six black card-stock bats in three sizes: two bats measuring 12 cm wide, two measuring 9 cm wide, and two measuring 6 cm wide. An adult should handle the craft knife. Cut three jute twine lengths measuring 25 cm, two lengths measuring 18 cm, and one length measuring 12 cm.
Tie the twine lengths across the wooden dowel, spacing the knots evenly from left to right. Attach one bat to each hanging length with a small PVA glue tab at the back. Hold the dowel from its center and shift knots until both sides balance. Once the mobile hangs level, add a tiny PVA dot to each knot and let it dry for 30 minutes before hanging in a window.
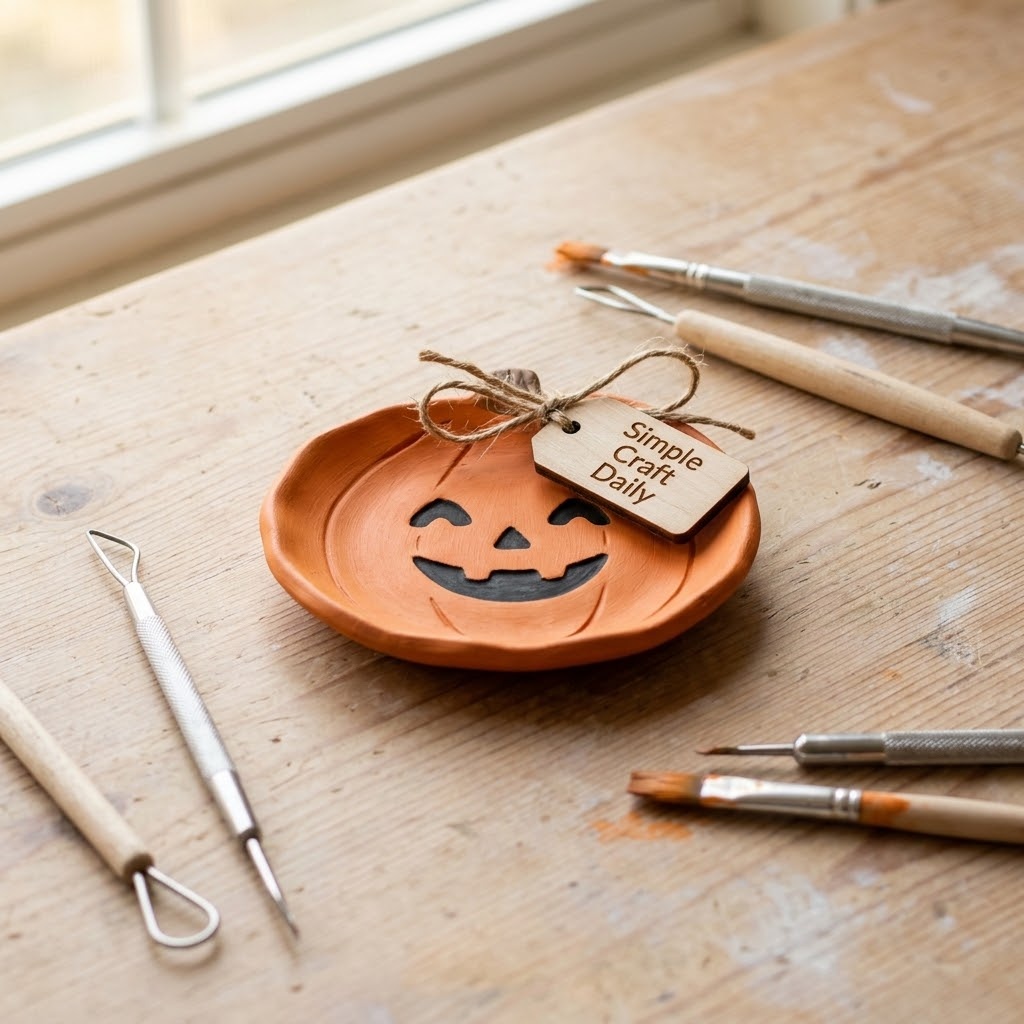
10. DIY Cute Halloween Decorations: Mini Pumpkin Trinket Dish
Supplies Needed: White air-dry clay, acrylic roller, 10 cm bowl form, clay sculpting tools, acrylic paint, gloss acrylic varnish.
Roll white air-dry clay to 7 mm thick. Place the clay across the outside of a clean 10 cm bowl form and press gently so it curves into a shallow dish. Trim the edge into a soft pumpkin outline with clay sculpting tools, then score shallow grooves from the center toward the rim.
Leave the dish on the bowl form for 2 hours, then lift it carefully and dry it on a flat breathable surface for 24 to 48 hours. Once the clay is fully dry, paint the dish orange with a green stem detail. Allow paint to dry for 1 hour, then apply gloss acrylic varnish. Use this dish for rings or wrapped treats only; it is not food-safe.
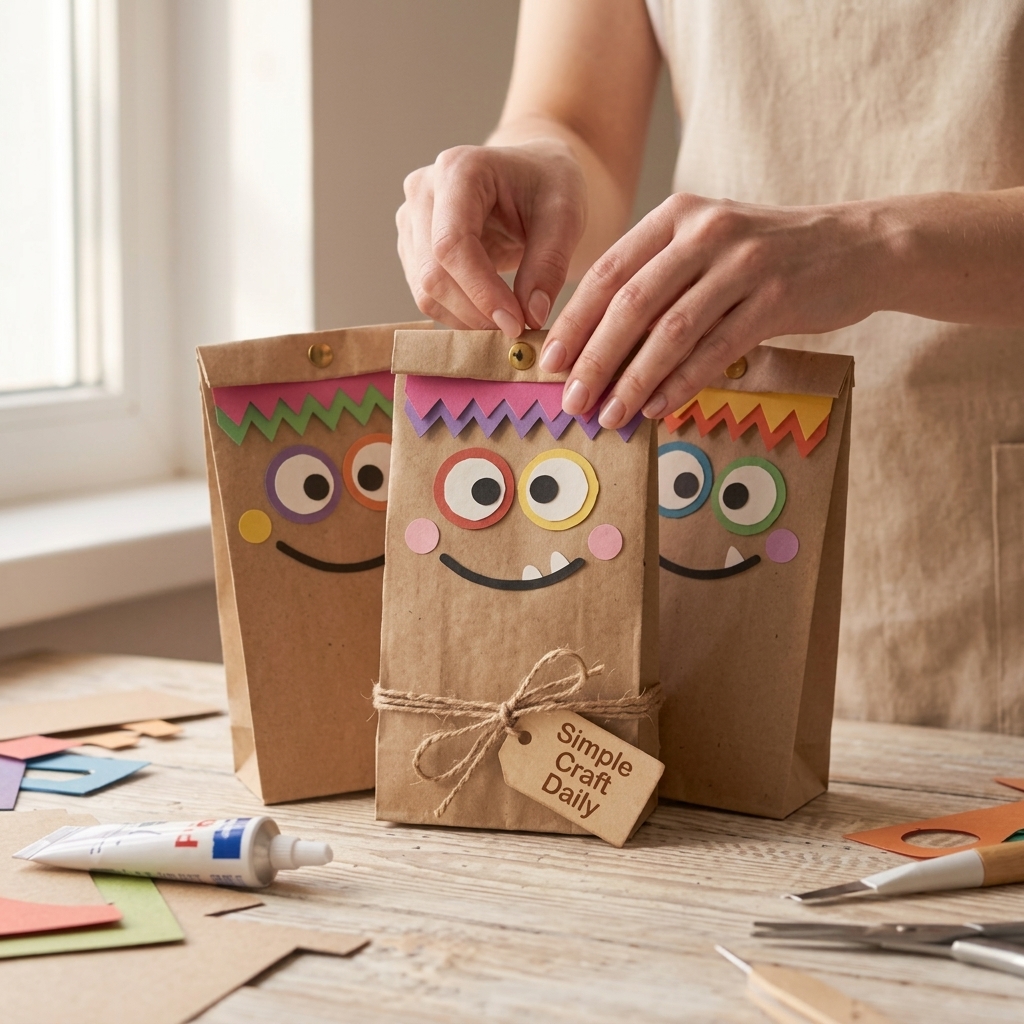
11. Happy Monster Paper Bag Centerpieces
Supplies Needed: Small kraft paper bags, colored card-stock, PVA craft glue, dried beans in sealed packets, marker.
Open a small kraft paper bag and press its base flat. Place a sealed packet of dried beans inside the bottom as ballast, then fold the top edge down once. Keep the packet enclosed at all times and place finished centerpieces out of reach of children and pets.
Cut the declared colored card-stock into hair, horns, teeth, and eyes in bright orange, plum, mint, cream, or black. Arrange the pieces on the bag before gluing, then secure them with thin PVA glue layers. Add a wide smile or dotted freckles with a marker. Let the centerpiece dry upright for 30 minutes before placing it on a table.
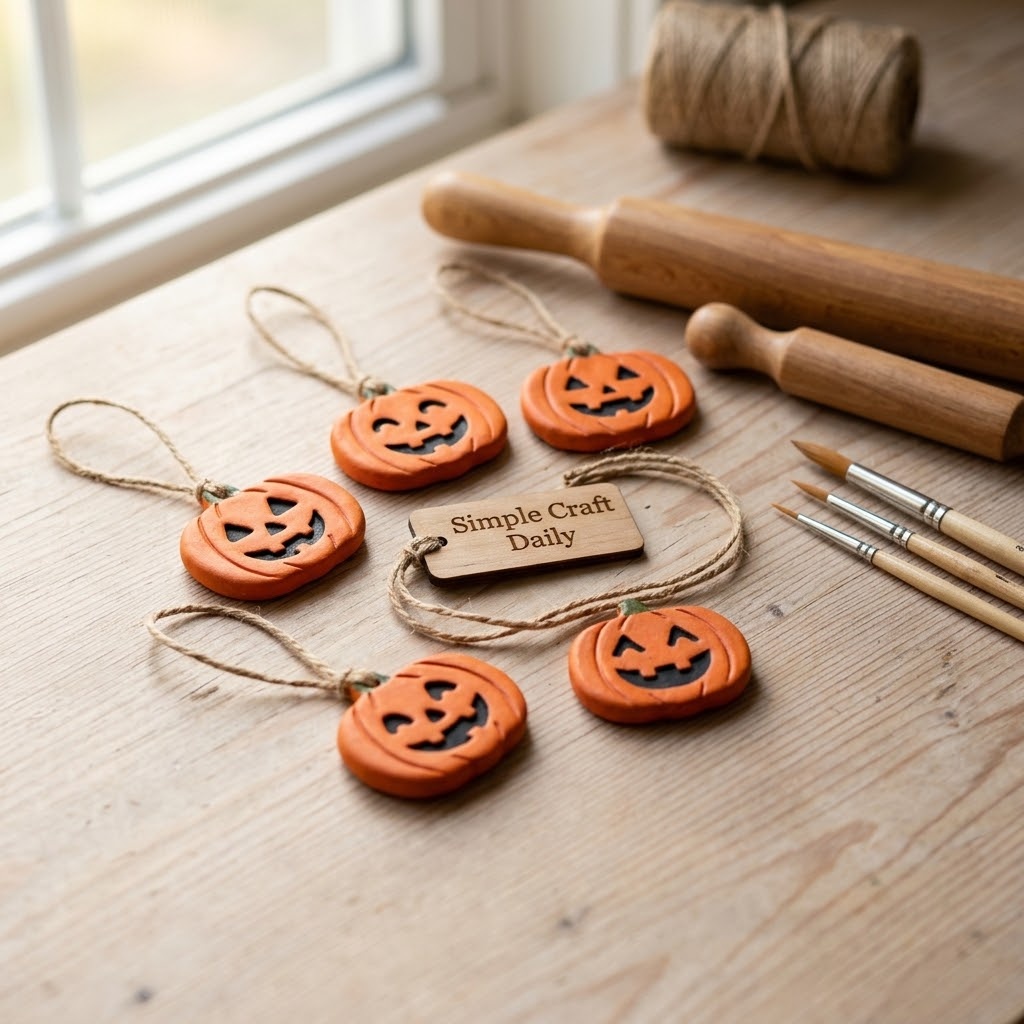
12. Friendly Jack-o’-Lantern Clay Ornaments
Supplies Needed: White air-dry clay, acrylic roller, circle cutter, straw for hanging holes, acrylic paint, jute twine.
Roll white air-dry clay to 6 mm thick. Use a circle cutter to make 6 cm rounds, then flatten each round slightly into a pumpkin shape. Press shallow vertical grooves across the clay and use a straw to make an 8 mm hanging hole at least 8 mm below the top edge.
Dry the ornaments flat for 24 to 48 hours, flipping each one once after 12 hours so both sides dry evenly. Paint only when the clay feels room temperature and rigid. Add friendly black eyes and smiles, then let the paint dry for 1 hour. Thread jute twine through the dry ornament holes and tie double knots for hanging.
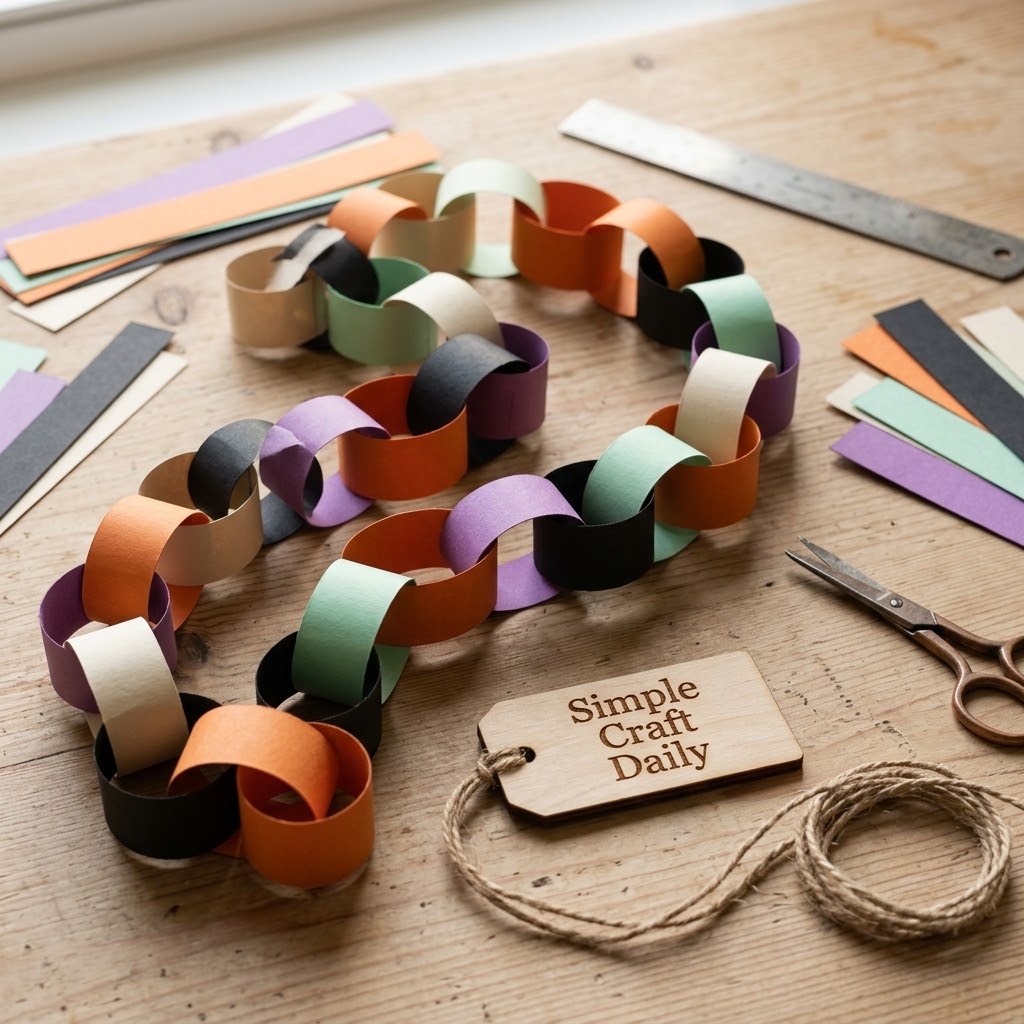
13. Rainbow Halloween Paper Chain
Supplies Needed: Heavyweight card-stock, metal ruler, craft knife, PVA craft glue.
Use a metal ruler and craft knife to cut thirty card-stock strips measuring 2.5 cm by 15 cm. Choose orange, purple, mint, black, and cream sheets, then arrange the strips in a repeating color order before gluing. Adults should make the knife cuts on a protected surface.
Curve the first strip into a ring and glue the ends with a narrow PVA glue line. Thread the next strip through the ring before joining its ends. Let each new link set for 10 minutes before gently pulling on the chain. Continue until all thirty links are connected, then hang it over a doorway, mantel, or classroom bulletin board.
Low-Temperature Mini Hot Glue Gun and Glue Sticks
The most-used tool in this roundup: it bonds felt, wood, cardstock and twine within seconds.
I earn a commission if you make a purchase, at no additional cost to you.
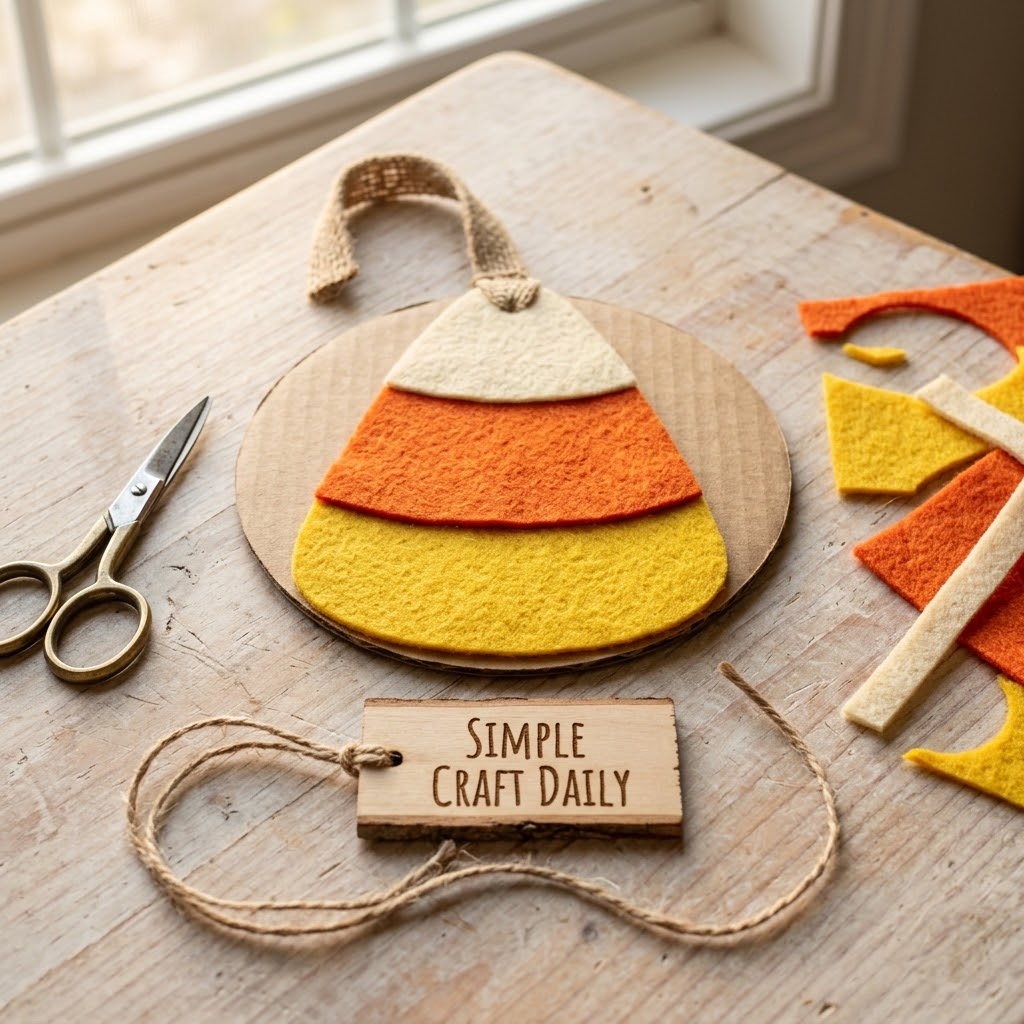
14. Felt Candy Corn Door Hanger
Supplies Needed: Yellow orange and cream wool-blend felt, recycled cardboard, PVA craft glue, fabric scissors, jute twine, hole punch.
Cut a 20 cm tall triangle from recycled cardboard. Cut matching felt layers that follow the triangle shape: yellow for the lower third, orange for the center third, and cream for the top third. Trim each felt edge with fabric scissors so the layers meet neatly without overlapping too far.
Glue the yellow layer first, then orange, then cream with PVA craft glue. Press the piece flat under a clean book for 10 minutes, then let it dry flat for 1 hour. Punch two holes near the top corners, thread a 30 cm length of jute twine through them, and tie knots on the back before hanging.
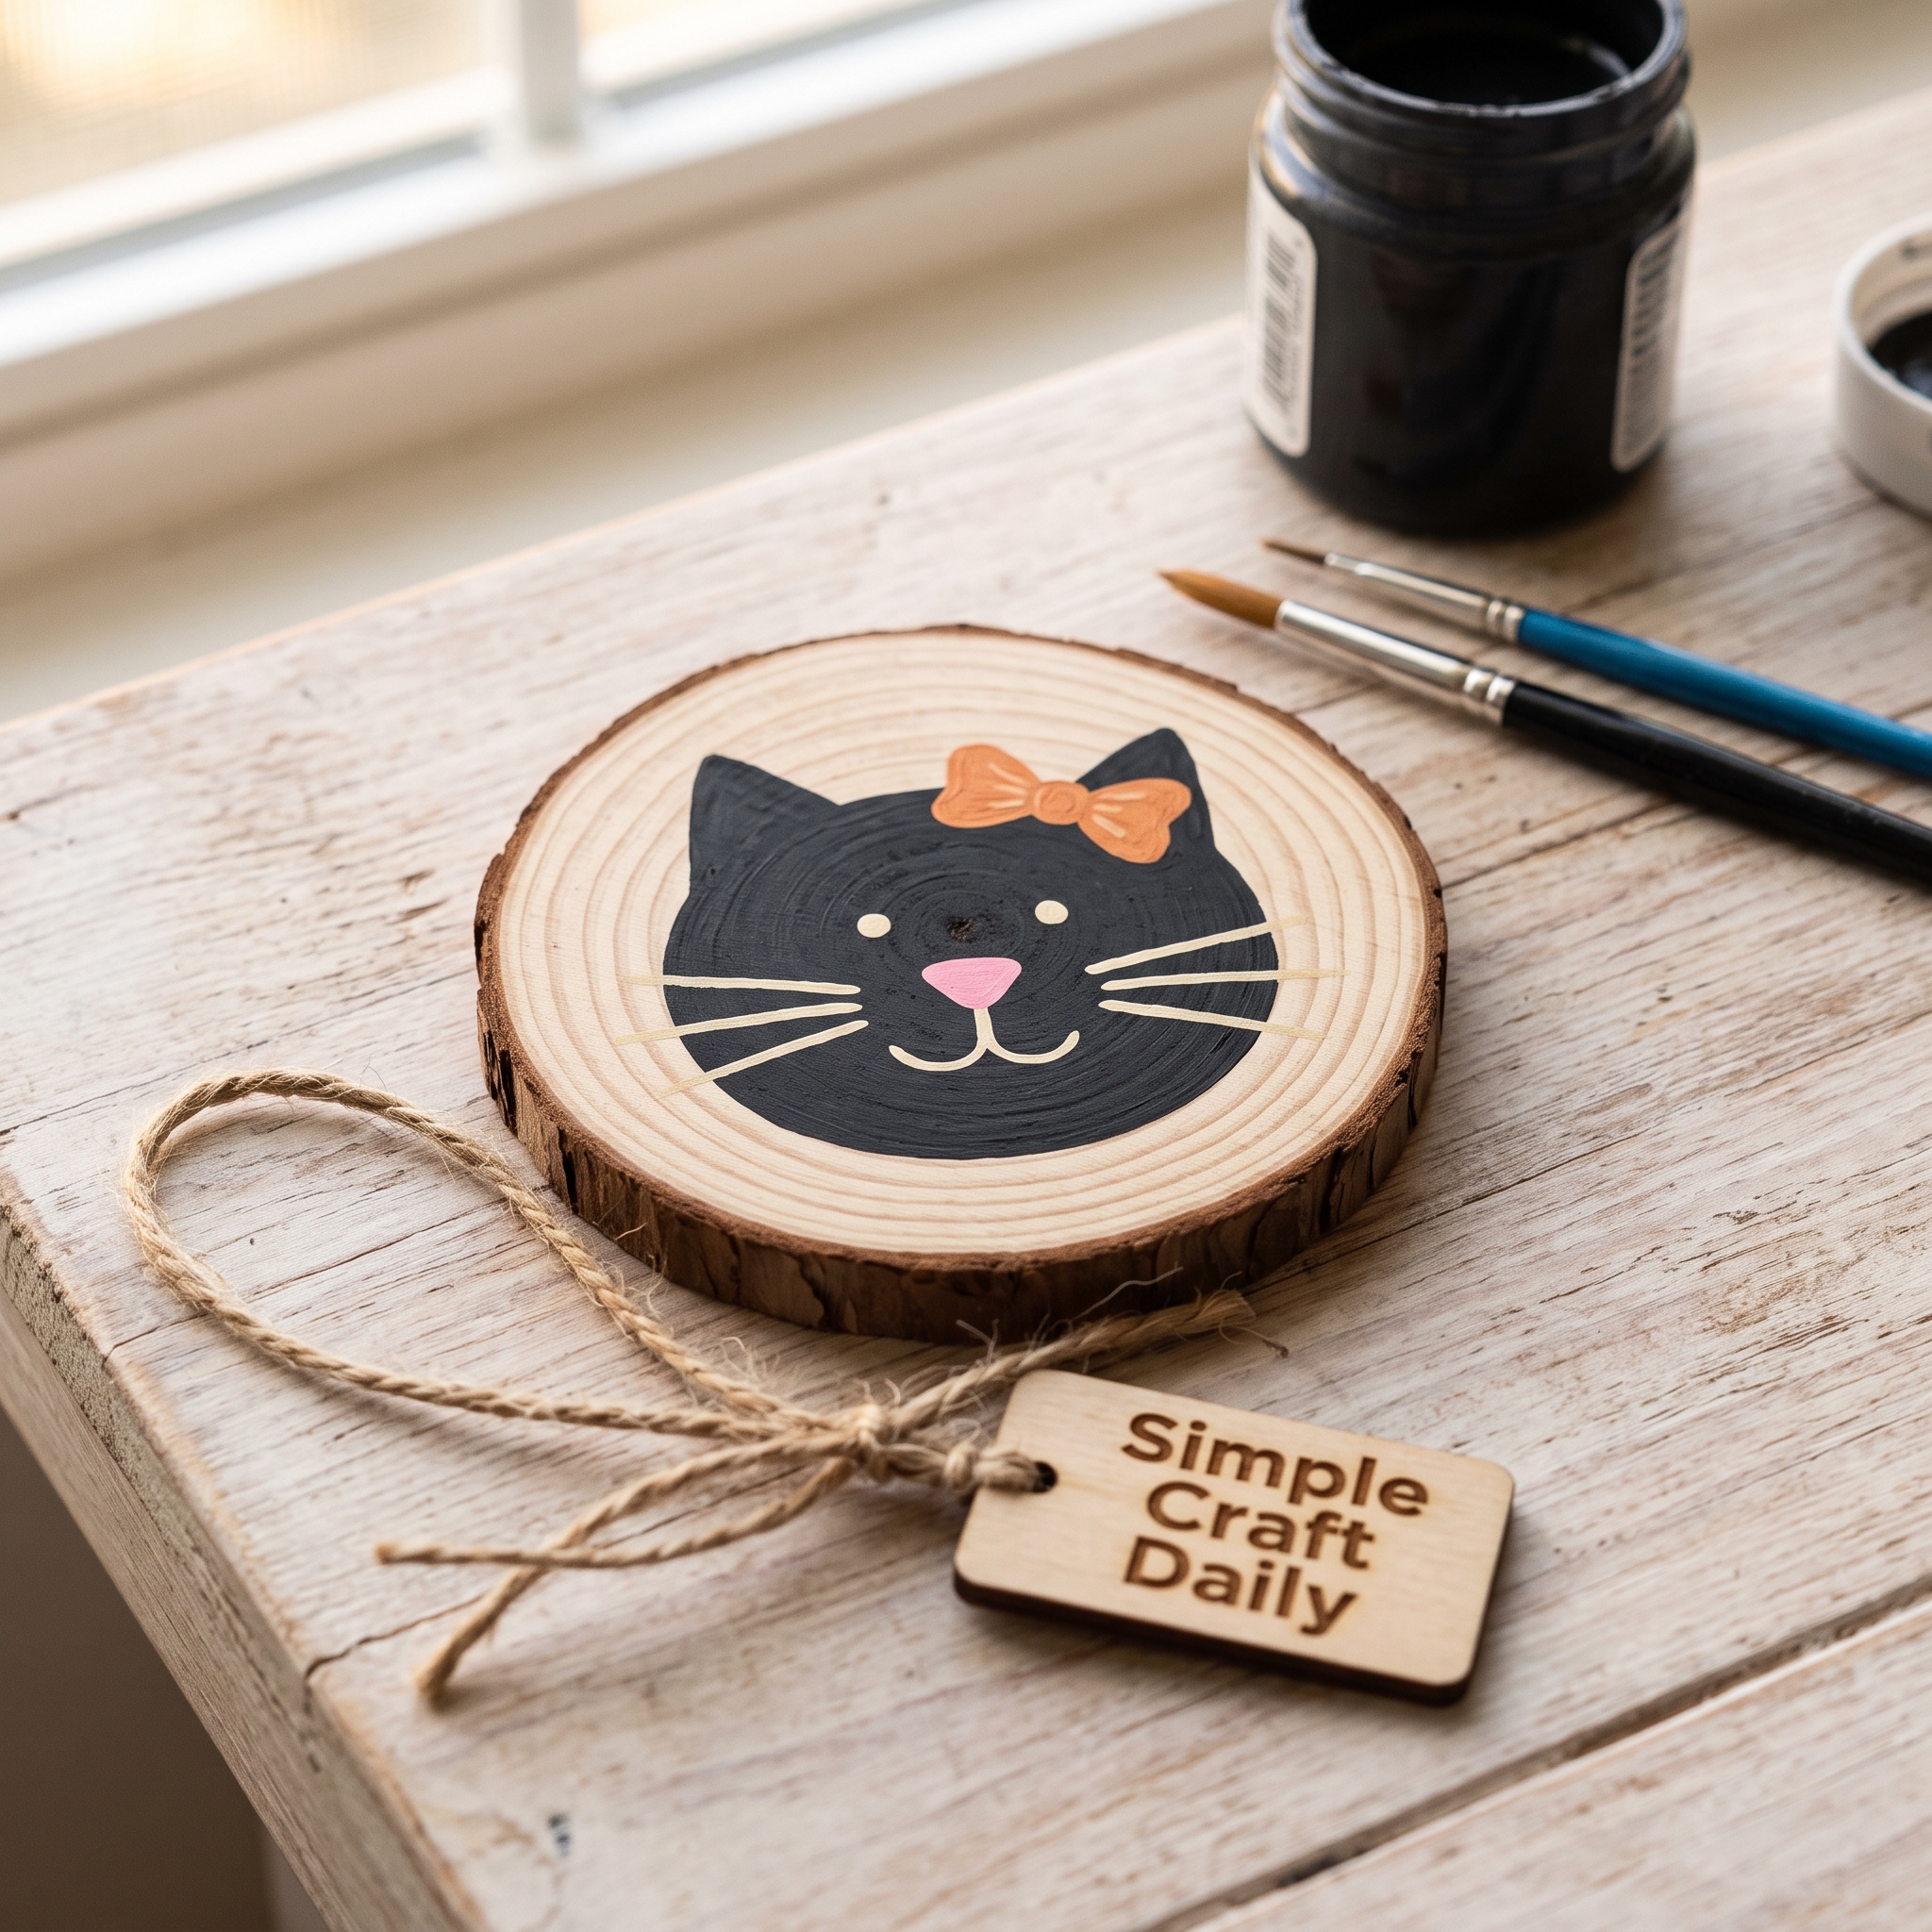
15. DIY Cute Halloween Decorations: Black Cat Wood Slice Sign
Supplies Needed: Unfinished 4-inch wood slice, black white and pink acrylic paint, detail paintbrushes, gloss acrylic varnish, jute twine.
Paint the front of a 4-inch unfinished wood slice with a cream acrylic base so the cat portrait has clean contrast. Let it dry for 1 hour. Next, paint a rounded black cat head with pointed ears, leaving a narrow cream border near the edge of the slice.
After another 1 hour of drying, add white eyes, pink inner ears, and a tiny curved mouth with detail paintbrushes. Let the finished sign dry for 24 hours before brushing on gloss acrylic varnish. When the varnish has dried according to its label, thread jute twine through the hole and tie a secure hanging loop.
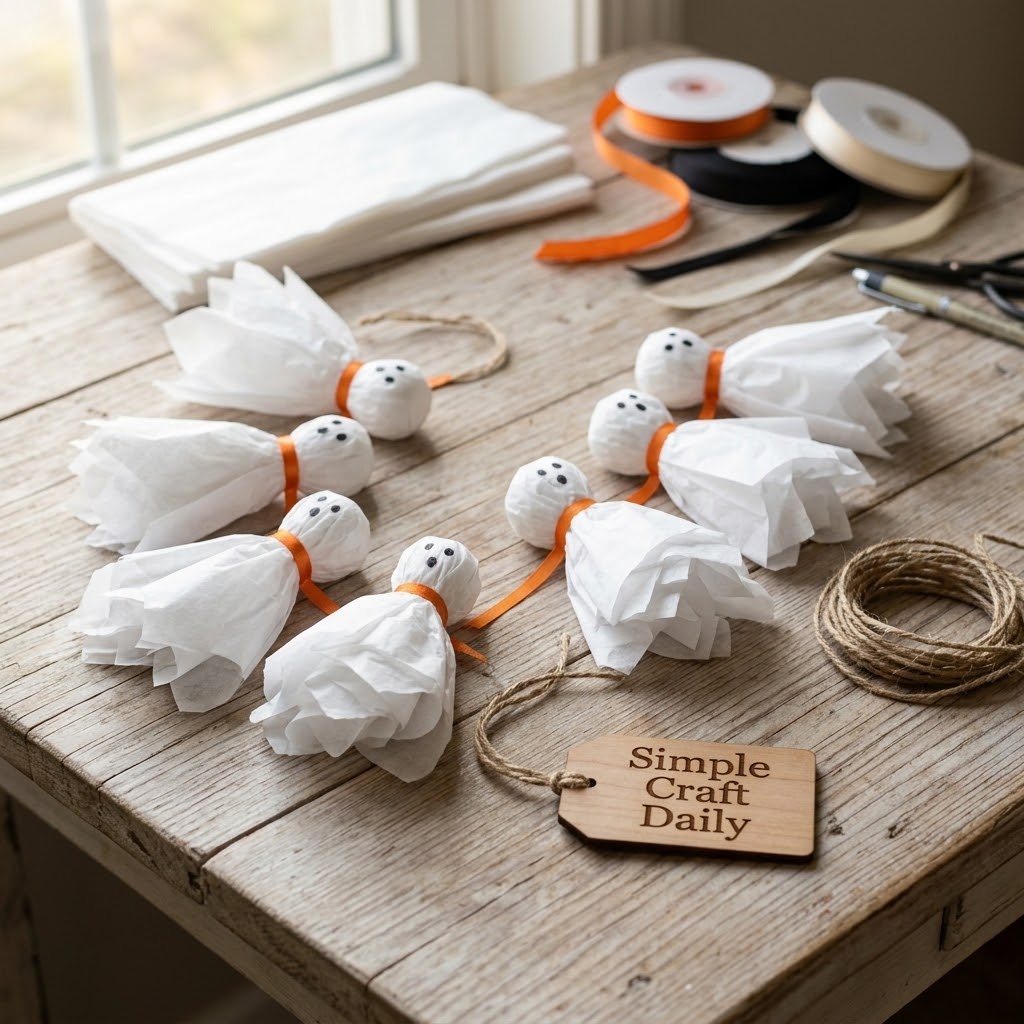
16. Ghost Tassel Garland
Supplies Needed: White tissue paper, small paper balls, black marker, orange satin ribbon, jute twine, PVA craft glue.
Cut six white tissue squares measuring 20 cm by 20 cm. Place one 3 cm paper ball in the center of each square, gather the tissue around it, and tie the neck with a 20 cm length of orange satin ribbon. Trim the tissue ends into loose tassels, but keep the top wrapped tightly around the ball.
Use a black marker to add two dots for eyes. Apply a tiny PVA glue dot beneath each eye mark if you want a raised facial detail, then let the glue dry for 30 minutes. Tie the ghost neck ribbons onto jute twine, spacing them 12 cm apart. This soft garland works well across a mantel or a child-friendly party table.
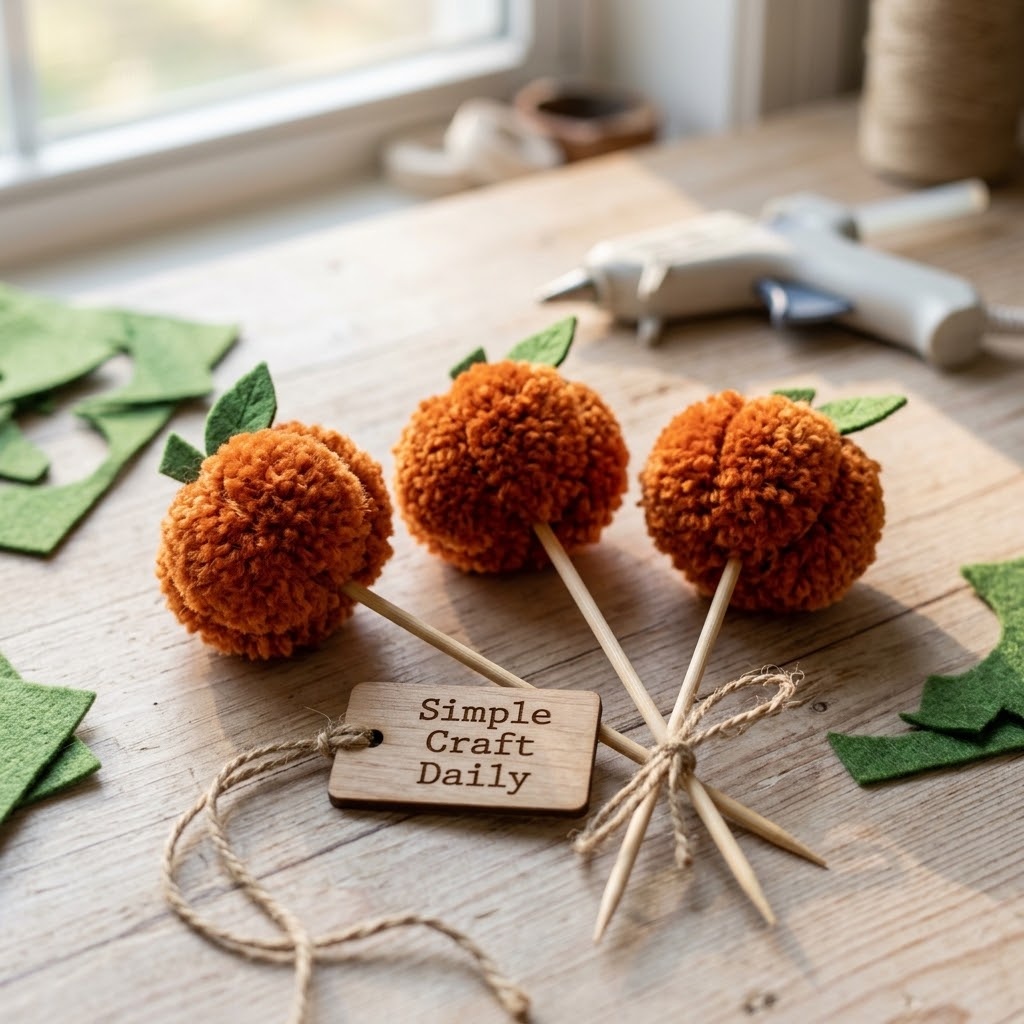
17. Smiling Pumpkin Pom-Pom Picks
Supplies Needed: Orange craft pom-poms, wooden skewers, green wool-blend felt, low-temperature hot glue gun, black marker.
Use one 3 cm orange pom-pom for each pick. An adult should apply a small bead of low-temperature hot glue to the blunt end of a wooden skewer, then press the pom-pom onto the glue and hold it steady for 20 seconds. Allow the bond to cool for 5 minutes.
Cut two small green felt leaves for every pumpkin, then glue them near the skewer connection after the first bond has cooled. Draw tiny black eyes and a smile with a marker. Use these picks in dry floral arrangements or beside wrapped treats only. Do not place the skewers or pom-poms in food.
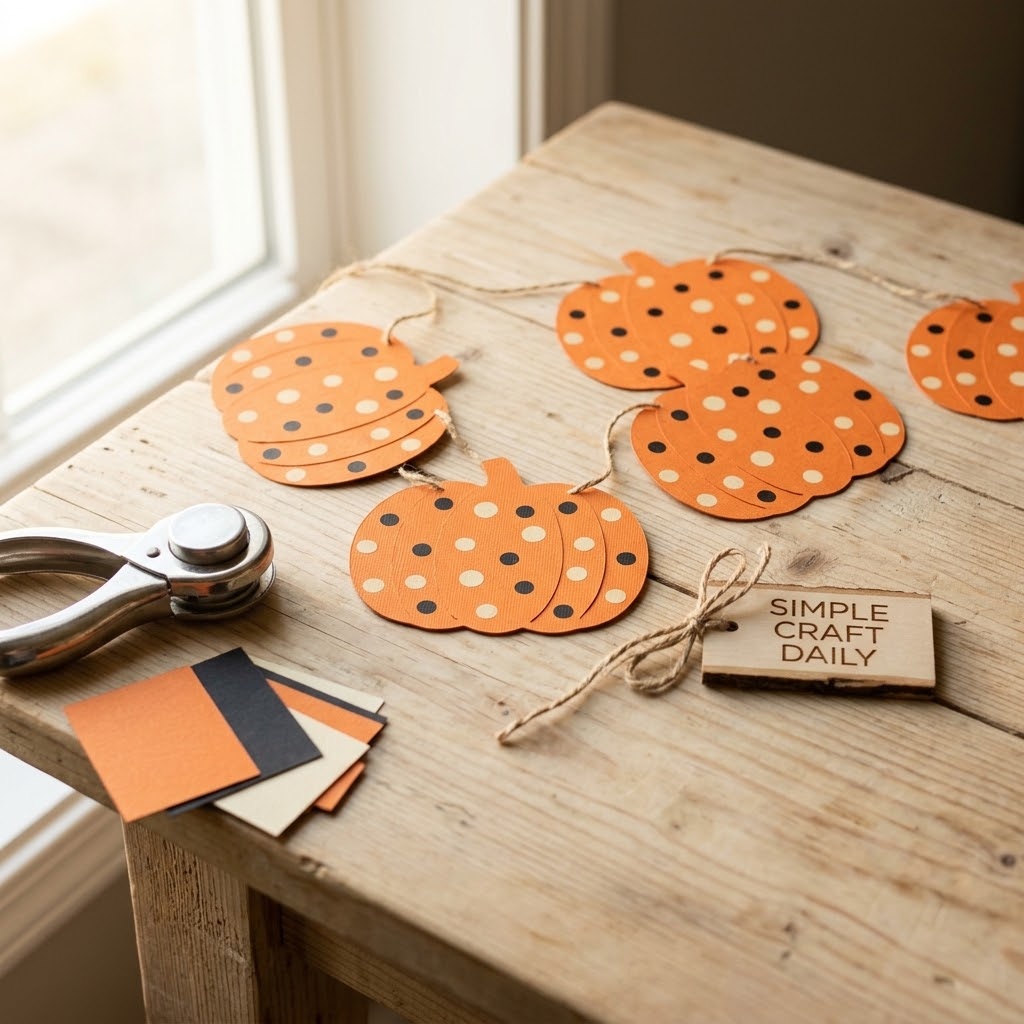
18. DIY Cute Halloween Decorations: Polka-Dot Pumpkin Banner
Supplies Needed: Orange black and cream card-stock, circle punch, PVA craft glue, hole punch, jute twine.
Cut five orange card-stock pumpkins measuring 15 cm tall. Use a circle punch to cut ten 2 cm circles from black and cream card-stock. Arrange two dots on each pumpkin before gluing, alternating black and cream so the banner has strong contrast from a distance.
Glue the dots flat with PVA craft glue and let them dry for 30 minutes. Punch two holes in every pumpkin, each 1.5 cm from the top edge. Thread jute twine through the holes, leaving 5 cm of twine between pumpkins. The reinforced holes help the banner hang straight without tearing the card-stock.
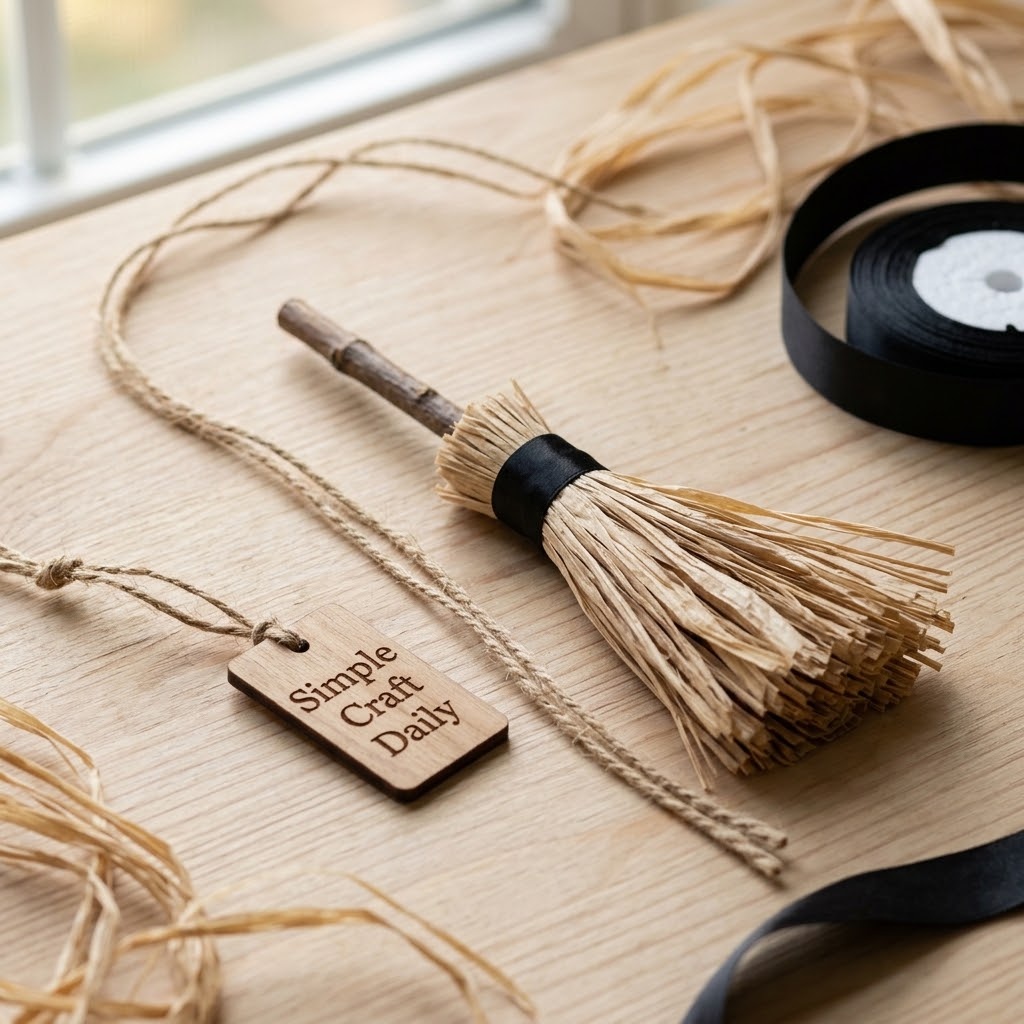
19. Mini Broomstick Wall Accent
Supplies Needed: Natural raffia, straight dry twigs, black satin ribbon, PVA craft glue, jute twine.
Choose a straight, dry twig measuring about 20 cm long. Trim natural raffia into bundles measuring 10 cm long. Hold the raffia against one end of the twig, positioning its top edge 3 cm from the end, then wrap black satin ribbon tightly around the bundle several times.
Tie the ribbon with a double knot and add one small PVA glue dot under the knot to stop it from unraveling. Let the adhesive dry for 30 minutes. Tie a jute twine loop around the twig for hanging. If you enjoy careful miniature assembly, these DIY copper jewelry projects offer more small-scale finishing practice.
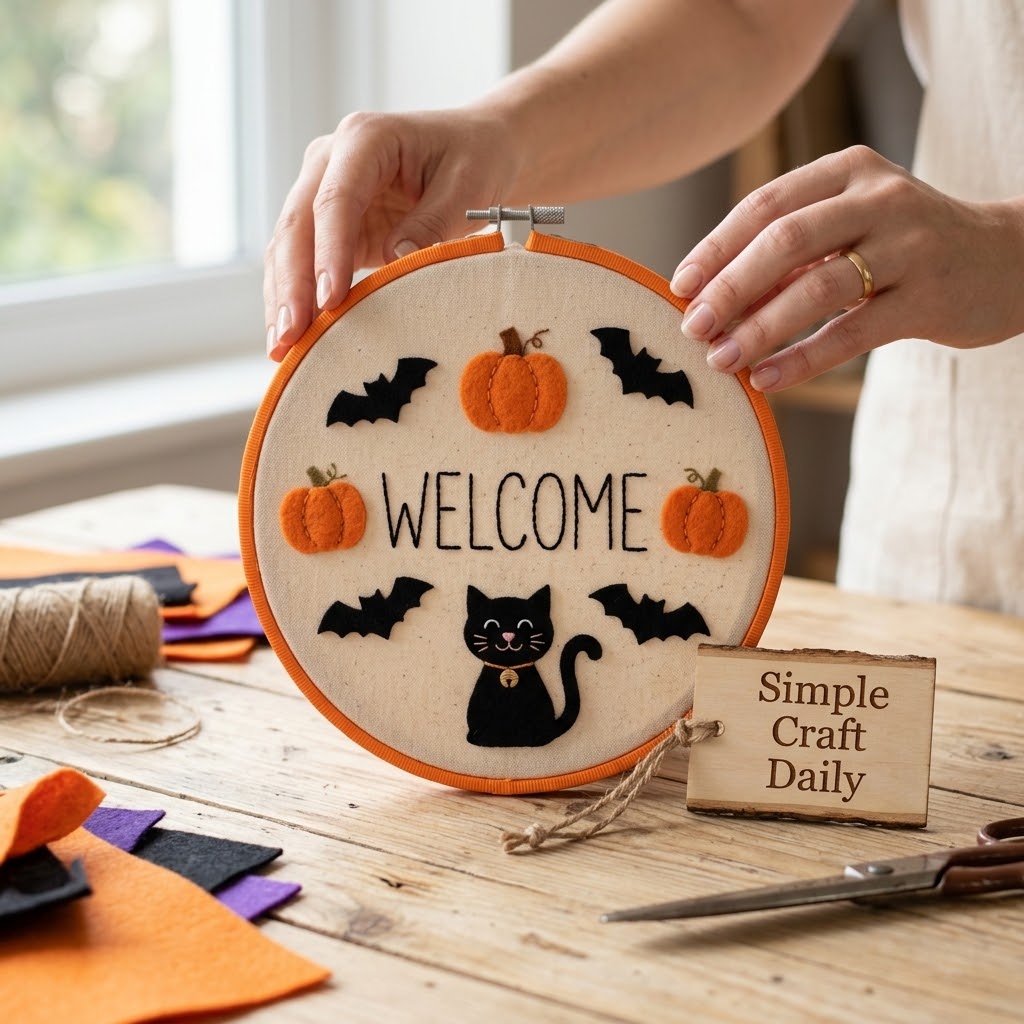
20. Cheerful Halloween Welcome Hoop
Supplies Needed: 20 cm wooden embroidery hoop, wool-blend felt, orange and black satin ribbon, PVA craft glue, fabric scissors, jute twine.
Separate the rings of a 20 cm wooden embroidery hoop, wrap the outer ring with orange and black satin ribbon, and secure the starting and ending points with PVA glue. Let the wrapped hoop dry for 30 minutes before assembling the felt details.
Cut small felt pumpkins, bats, and cat shapes with fabric scissors. Arrange every shape dry around the lower half of the hoop first, leaving the top clear for a jute twine hanger. When the arrangement feels balanced, glue the felt pieces one at a time. Let the hoop cure flat for 1 hour, then tie on a 25 cm jute loop for display.
DIY Cute Halloween Decorations FAQ
These answers help diy cute halloween decorations stay safe, clean, and ready for another October.
Can DIY Cute Halloween Decorations Stay Outside?
Paper, felt, tissue, and air-dry clay projects belong indoors or on a covered porch protected from rain and heavy dew. Bring them inside during wet weather. Acrylic varnish makes a painted surface water-resistant, but it does not make paper, felt, clay, or wood weatherproof.
How Long Should Air-Dry Clay Cure Before Painting?
Allow a 24- to 48-hour baseline for clay pieces measuring 6 mm to 7 mm thick. Humidity, thickness, and the clay brand can extend that window, so follow the manufacturer label. Do not paint clay that feels cool, dark, or flexible, and do not try to speed drying with thick paint layers.
What Is the Safest Light for DIY Cute Halloween Decorations?
Battery-operated warm white LED tea lights are the only recommended light source for paper Halloween lanterns, tissue-covered jars, and clay holders. Never use an open flame or a candle wick. Before every display, confirm that the battery compartment closes securely and that the light has no cracked casing.
How Can I Store Handmade Decorations Until Next Year?
Remove batteries from LED tea lights, then store decorations in labeled, crush-resistant boxes in a dry closet. Keep clay and wood pieces in a separate layer from paper and felt items. Flat banners and garlands stay neater when separated with clean tissue paper. For another colorful handmade home project, browse these creative mosaic art ideas for home and garden.
ACMI AP-Certified Acrylic Paint Set
AP-certified non-toxic color that covers cardstock, clay and wood slices in one coat.
I earn a commission if you make a purchase, at no additional cost to you.
Quick Reference: All Supplies at a Glance
For your convenience, here is a quick summary of all materials and tools used in this tutorial:
✨ Consumable Raw Materials
- Heavyweight Halloween Cardstock Pack, 65 lb | Check Heavyweight Halloween Cardstock Pack, 65 lb on Amazon
- Wool Blend Craft Felt Sheets | Check Price on Amazon
- ACMI AP-Certified Acrylic Paint Set | Find ACMI AP-Certified Acrylic Paint Set on Amazon
- Black Craft Pom-Poms, 5 cm | Check Black Craft Pom-Poms, 5 cm on Amazon
- Orange Craft Pom-Poms, 3 cm | Check Orange Craft Pom-Poms, 3 cm on Amazon
- Black Chenille Stems | Check Black Chenille Stems on Amazon
- White Air-Dry Clay | Find on Amazon
- Natural Unfinished Wood Slices | Check Natural Unfinished Wood Slices on Amazon
- Natural Jute Twine | Check Natural Jute Twine on Amazon
- Orange and Black Satin Ribbon | Check Orange and Black Satin Ribbon on Amazon
- Unfinished Wood Craft Blocks | View on Amazon
- Clear Mason Jars | Find on Amazon
- Natural Raffia | View Natural Raffia on Amazon
- Bamboo Skewers | Find Bamboo Skewers on Amazon
- White Tissue Paper | Check White Tissue Paper on Amazon
- Wooden Dowel | Check Wooden Dowel on Amazon
- Small Kraft Paper Bags | Check Small Kraft Paper Bags on Amazon
- Sealed Dried Bean Packets | Check Sealed Dried Bean Packets on Amazon
- Recycled Cardboard | Check Recycled Cardboard on Amazon
- Straight Dry Twigs | Check Straight Dry Twigs on Amazon
- Small Paper Balls | Check Small Paper Balls on Amazon
🧰 Core Crafting Tools & Equipment
- Low-Temperature Mini Hot Glue Gun and Glue Sticks | View on Amazon
- Precision Craft Knife, Metal Ruler, and Self-Healing Mat | Find on Amazon
- Clay Sculpting Tool Set with Acrylic Roller | View Clay Sculpting Tool Set with Acrylic Roller on Amazon
- Wooden Embroidery Hoop | See Price on Amazon
- Black Paint Marker | Check Black Paint Marker on Amazon
- Detail Paintbrushes | Check Detail Paintbrushes on Amazon
- Fabric Scissors | Check Fabric Scissors on Amazon
- Painter’s Tape | Check Painter’s Tape on Amazon
- Circle Cutter and Drinking Straw | Check Circle Cutter and Drinking Straw on Amazon
- Hole Punch | Check Hole Punch on Amazon
- Circle Punch | Check Circle Punch on Amazon
- Black Permanent Marker | Check Black Permanent Marker on Amazon
- Fine-Tip Marker | Check Fine-Tip Marker on Amazon
- 10 cm Bowl Form | Check 10 cm Bowl Form on Amazon
- Disposable Mixing Cup | Check Disposable Mixing Cup on Amazon
💎 Hardware, Fasteners & Finishing
- Clear-Drying PVA Craft Glue | Check Price on Amazon
- Gloss Water-Resistant Acrylic Varnish | See Price on Amazon
- Battery-Operated Warm White LED Tea Lights | See Battery-Operated Warm White LED Tea Lights on Amazon
Important Crafting Safety Notes
Crafting is a rewarding creative activity, but maintaining a safe workshop environment is essential for yourself, your family, and your pets. Please review these vital safety precautions before starting:
• Personal Protective Equipment (PPE) & Safe Handling: Always wear safety glasses or protective eyewear when cutting metal wire, clipping jump rings, trimming hard findings, or using power tools to prevent flying shards. Use heat-resistant work mats and exercise caution around high-temperature glue guns, irons, or heating tools to avoid burns. Wear disposable nitrile gloves and a particle dust mask when sanding wood or working with clays, resins, and solvent-based sealants to protect your skin and lungs.
• Room Ventilation & Fume Safety: Always craft in a well-ventilated space with open windows, cross-ventilation, or active exhaust whenever using solvent-based adhesives, instant bonders, aerosol sprays, epoxy resins, or heat-curing materials. Never inhale chemical fumes directly, and allow finished pieces to off-gas and cure completely in an airy area away from everyday living spaces.
• Child & Pet Safety (Choking & Swallowing Prevention): Small craft components—including safety eyes, split rings, clasps, jump rings, beads, bells, small magnets, unbaked clay scraps, and loose polyester fiberfill—present severe choking, intestinal obstruction, and ingestion hazards for babies, toddlers, and pets. Keep all unattached hardware, yarn cutoffs, and stuffing strictly out of reach. For handmade gifts intended for infants or young children, omit plastic washer eyes and detachable findings entirely in favor of securely stitched, double-knotted embroidered details.
• Sharp Tool Storage & Clean Work Area: Store sharp tools—such as rotary cutters, craft knives, bent-tip yarn needles, snips, scissors, and jewelry pliers—in secure, latching cases or high cabinets immediately after use. Thoroughly inspect, sweep, or vacuum your craft area and floor after finishing to ensure no dropped needles, pins, wire clippings, or small findings remain where curious pets or bare feet could step on or swallow them.
• Certified, Quality & Non-Toxic Supplies: Always choose verified non-toxic craft supplies (such as ACMI AP-certified paints and adhesives, lead-free and nickel-free jewelry findings, and skin-safe materials). Follow manufacturer label guidelines for curing durations, safe operating temperatures, and proper product disposal. Never use food preparation utensils or kitchen cookware for craft chemicals.
For more detailed guidance on safe crafting practices, liability disclosures, and website usage, please review our Terms and Conditions.
“Which of these Ways to Make Cute & Charming Halloween Crafts are you excited to try first, or do you have a creative tip of your own to share? Drop a comment below—I’d love to hear your thoughts and see what you create!”



[…] and thin protective coats make each design feel finished rather than rushed. If you enjoy making cute DIY Halloween decoration ideas, these pumpkin painting ideas give you another apartment-friendly way to build a coordinated fall […]