

Carved pumpkins rot before the party ends. These pumpkin painting ideas give you clean color, polished detail, and a no-carve display that can last through the season instead of collapsing into a damp porch mess. Use artificial craft pumpkins for reusable decor, reserve natural pumpkins for short indoor displays only.
Opaque acrylic paint, measured drying time, and thin protective coats make each design feel finished rather than rushed. If you enjoy making cute DIY Halloween decoration ideas, these pumpkin painting ideas give you another apartment-friendly way to build a coordinated fall display.
Affiliate Disclosure: This post contains affiliate links. As an Amazon Associate, I earn from qualifying purchases. If you buy through these links, I may earn a commission at no additional cost to you.
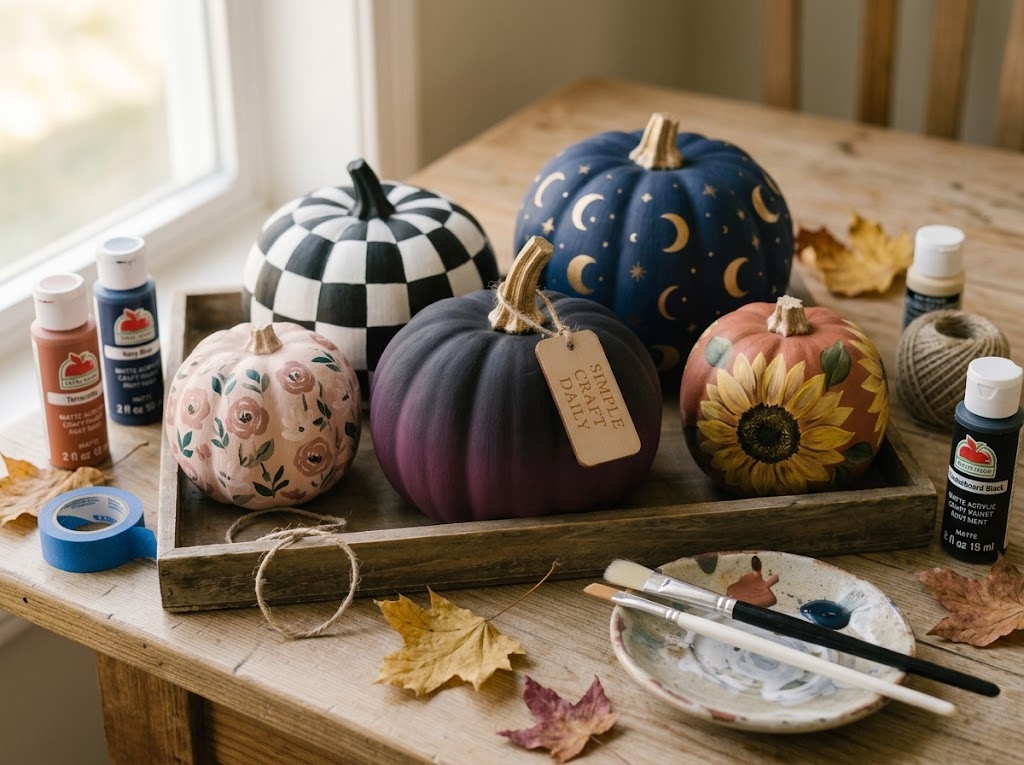
Essential Materials & Tools
wp:paragraphSet up every pumpkin painting ideas project on a clean, protected surface. Let each base coat dry according to its label before adding tape, stencils, glue, or varnish; acrylic that feels cool or tacky can lift under masking tape and blur under a topcoat. The optional studio equipment below remains in the master supply list because it makes repeated seasonal projects more orderly and comfortable.
/wp:paragraph wp:paragraphFor steady opaque coverage and controlled brushwork, the same habits used in these glass painting and decoration ideas also help on rounded pumpkin surfaces: load less paint, use thin coats, and turn the piece instead of stretching your wrist around it.
/wp:paragraph✨ Consumable Raw Materials
- Artificial Craft Pumpkins in Assorted Sizes — Lightweight foam forms provide reusable, paintable surfaces for all 20 designs | Check Artificial Craft Pumpkins in Assorted Sizes on Amazon
- ACMI AP-Certified Matte Acrylic Paint Set — Opaque matte colors build even base coats and clean graphic details | Check Price on Amazon
- Metallic Acrylic Paint Set — Fine metallic pigments add controlled gold and copper accents without loose glitter | View Metallic Acrylic Paint Set on Amazon
- Multi-Surface Satin Acrylic Paint — A durable option for slick artificial pumpkins after gentle scuffing and cleaning | See Price on Amazon
- Unfinished Wood Leaf Cutouts — Lightweight shapes add optional dimension to botanical pumpkin designs | See Price on Amazon
- Scrap Paper — Household item — junk-mail sheets test flicking pressure before paint touches the pumpkin | Check Scrap Paper on Amazon
- Clean Dry Cloth — Any clean lint-free rag wipes sanding dust before priming; this is the buyable microfiber version | Check Clean Dry Cloth on Amazon
🧰 Core Crafting Tools & Equipment
- Acrylic Paint Brush Set with Flat, Round, and Liner Brushes — Flat, round, and liner brushes cover ridges cleanly and keep small motifs sharp | Check Acrylic Paint Brush Set with Flat, Round, and Liner Brushes on Amazon
- Foam Pouncer Brush Set — Dense foam heads apply light stencil coats without flooding paint beneath the edges | Explore Foam Pouncer Brush Set on Amazon
- Low-Tack Painter’s Tape — Flexible masking tape helps create clean checkerboards, stripes, plaid, and color blocks | View on Amazon
- Reusable Fall Stencil Set — Mylar leaves, stars, and moons make repeated motifs easier to place around curved forms | Find on Amazon
- Fine-Grit Sanding Sponges — Use a light touch to dull slick surfaces before wiping away dust and priming | Check Fine-Grit Sanding Sponges on Amazon
- Palette Paper Pad and Silicone Mixing Cups — Keep custom colors clean and repeatable — one palette paper pad, a clean plate, or even a lid does the same job | Check Price on Amazon
- Silicone Craft Mat — Grippy work surface that holds pumpkins steady during speckling and polka-dot painting | Check Silicone Craft Mat on Amazon
- HB Pencils — Lightly sketches rainbow arches and traced face guides before any paint goes on | Check HB Pencils on Amazon
- Stiff-Bristle Paint Brush — Flicks the speckled-stone texture that soft detail brushes cannot push | Check Stiff-Bristle Paint Brush on Amazon
- Rinse Water Cup — Household item — any cup of clean water rinses brushes between colors and thins the speckled-stone wash | Check Rinse Water Cup on Amazon
- Paper Towels — Household item — a few sheets dry rinsed brushes between colors; the sanding cloth stays with surface prep | Check Paper Towels on Amazon
- Craft Scissors — Cuts narrow tape strips in design 2 without the rotary-cutter setup — the safer beginner option | Check Craft Scissors on Amazon
💎 Hardware, Fasteners & Finishing
- Acrylic Gesso Primer — A thin primer coat improves opacity under white, cream, and pale paint on foam | Find Acrylic Gesso Primer on Amazon
- Water-Based Matte Acrylic Varnish — A compatible matte topcoat guards fully dry paint from scuffs during display and storage | View Water-Based Matte Acrylic Varnish on Amazon
- Clear-Drying PVA Craft Glue — Secures lightweight wood details after the paint layer has dried | Find Clear-Drying PVA Craft Glue on Amazon
Optional Studio Upgrades
Never required to finish the projects above — convenience upgrades for makers who want them.
📦 Beginner Project Kits & Coordinated Bundles
For beginners or makers starting from scratch, these coordinated bundles and all-in-one project packs bring together the core supplies in one convenient order.
- Pumpkin Painting Starter Kit — A practical beginning set for makers who need paint, brushes, and practice pumpkins together | See Pumpkin Painting Starter Kit on Amazon
⚡ Studio Tools & Workshop Equipment
Optional studio upgrades — every project above can be completed without these.
- Daylight LED Magnifying Craft Lamp with Desk Clamp — Color-accurate light and magnification support fine stars, florals, and narrow black curves | Explore Daylight LED Magnifying Craft Lamp with Desk Clamp on Amazon
- Heavy-Duty Three-Tier Rolling Craft Cart with Wood Top — Keeps wet projects, paint bottles, brushes, and drying pieces arranged during larger fall sessions | View on Amazon
- Large Self-Healing Cutting Mat, Rotary Cutter and Acrylic Ruler Set — Protects the table and gives tape strips a straight, measured edge | Find on Amazon
- Dust Mask — Worn while sanding slick pumpkin surfaces so dust is not inhaled | Check Dust Mask on Amazon
- Safety Glasses — Eye protection while sanding — the safety section pairs it with the dust mask | Check Safety Glasses on Amazon
20 Pumpkin Painting Ideas to Make This Fall
Supplies Needed: Artificial Craft Pumpkins in Assorted Sizes, ACMI AP-Certified Matte Acrylic Paint Set, Acrylic Paint Brush Set with Flat, Round, and Liner Brushes, Palette Paper Pad and Silicone Mixing Cups, Water-Based Matte Acrylic Varnish
Choose one design first, then paint a small practice stroke on the underside of the pumpkin. These pumpkin painting ideas become easier when you test paint coverage before working around deeper pumpkin ridges. New painters can also warm up with these easy painting projects for beginners.
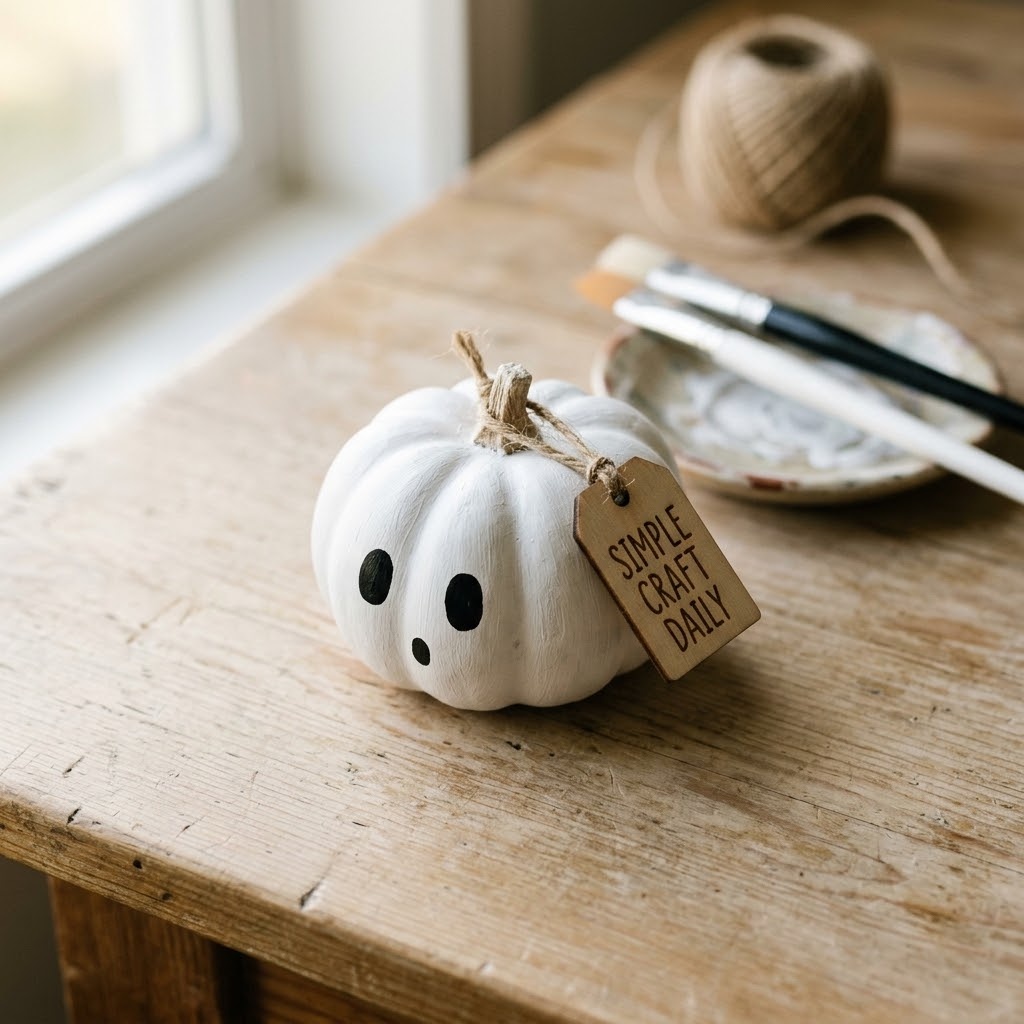
1. Matte White Ghost Pumpkin Painting Ideas
Supplies Needed: Artificial craft pumpkin, white and black matte acrylic paint, flat brush, round detail brush, water-based matte acrylic varnish.
Brush on two thin white coats with the flat brush, allowing 30 to 60 minutes between coats or following the paint label if it specifies a longer window. After the second coat is dry to the touch, use the round detail brush and black paint to place two oval eyes and one open oval mouth on the front center. This is one of the quickest pumpkin painting ideas for a clean Halloween shelf display. Let the face dry for 1 hour, then apply one thin coat of water-based matte acrylic varnish.
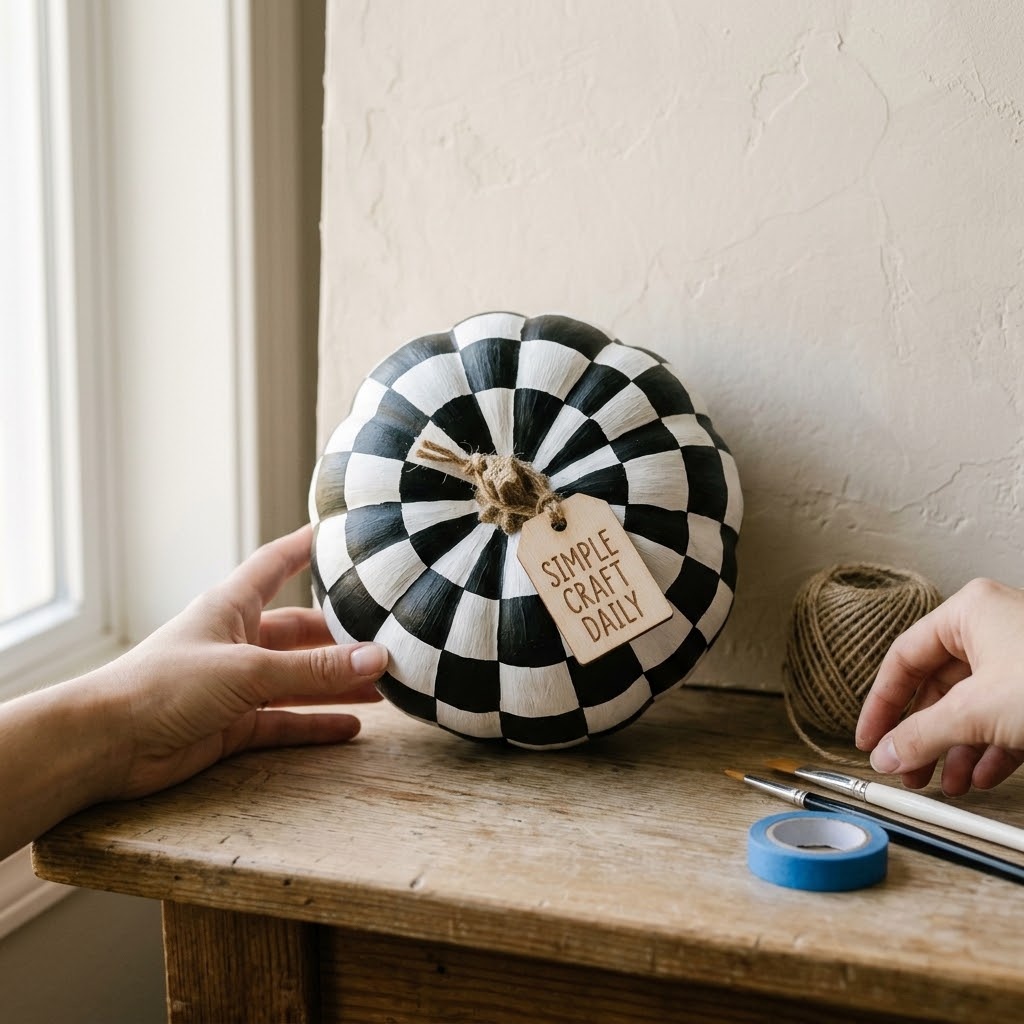
2. Black-and-White Checkerboard Pumpkin
Supplies Needed: Artificial craft pumpkin, white and black acrylic paint, low-tack painter’s tape, fine detail brush, water-based matte acrylic varnish, large self-healing cutting mat, rotary cutter and acrylic ruler set.
Paint the pumpkin white and allow the base to dry for at least 1 hour. On the cutting mat, use the acrylic ruler and rotary cutter to trim tape into narrow strips (sharp scissors work just as well and are simpler for beginners), then mark roughly 1/2-inch squares around the front of the pumpkin. Paint every other square black with the fine detail brush. Remove each tape strip while the black paint is slightly tacky, pulling it back slowly at a low angle. These pumpkin painting ideas benefit from measured tape placement on rounded forms. Cure the pattern for 2 hours before adding matte varnish.
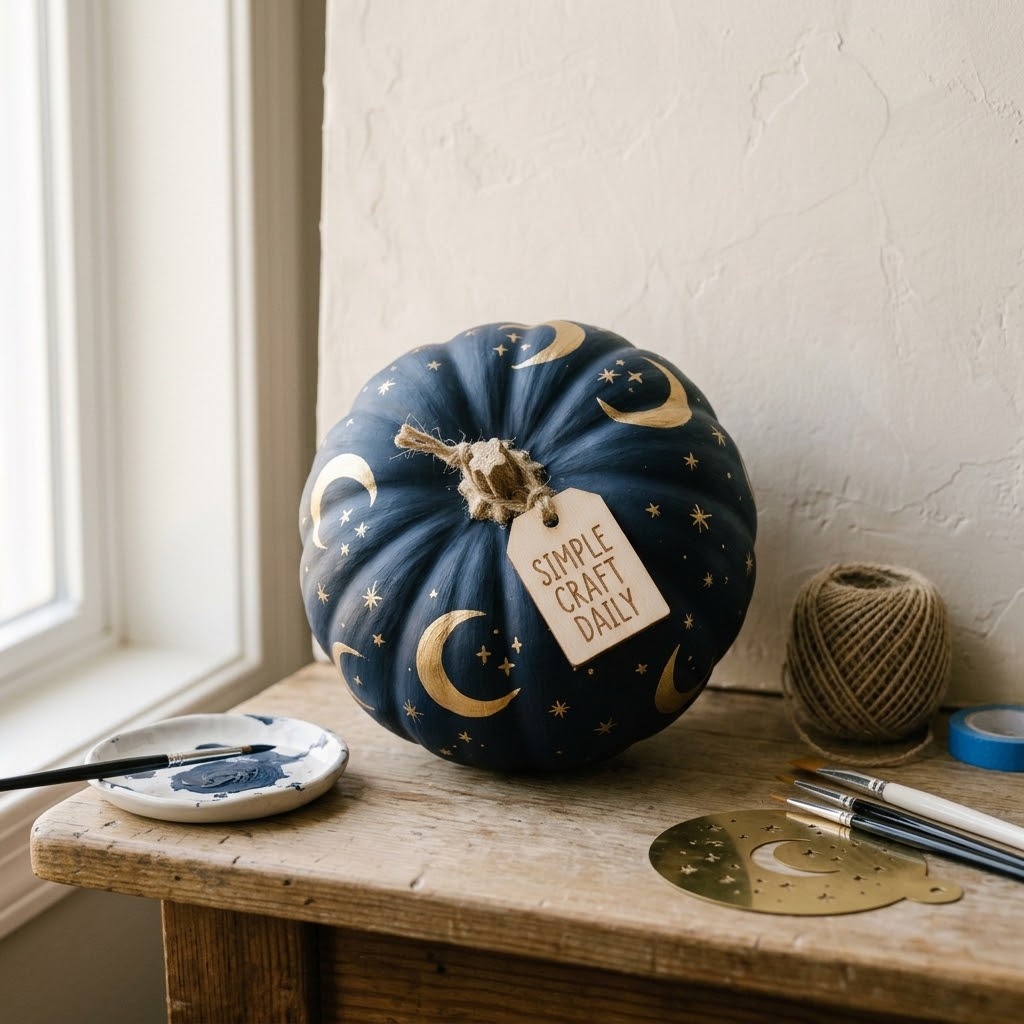
3. Celestial Pumpkin Painting Ideas in Midnight Blue
Supplies Needed: Artificial craft pumpkin, navy, white, and metallic gold acrylic paint, celestial stencil, foam pouncer, detail brush, water-based matte acrylic varnish.
Cover the pumpkin with two thin navy coats, drying each coat for 30 to 60 minutes. Once the surface feels dry, hold the celestial stencil flat against one ridge and pounce a small amount of white paint through the moon and star openings. Move the stencil only after lifting it straight away from the surface. Next, use the detail brush to add a few metallic gold stars and a narrow gold crescent edge. These pumpkin painting ideas stay sharp when the stencil carries very little paint. Let the design dry for 1 hour before varnishing.
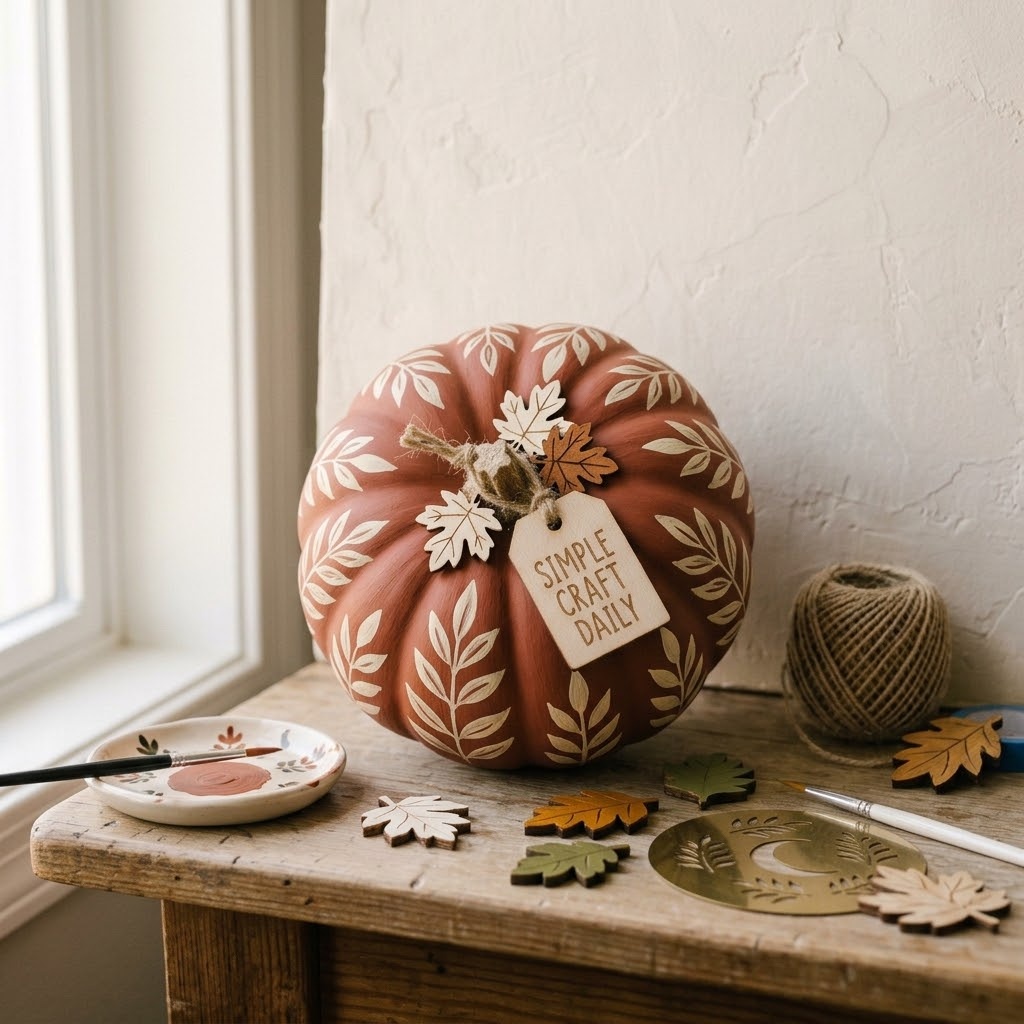
4. Terracotta Botanical Pumpkin
Supplies Needed: Artificial craft pumpkin, terracotta and cream acrylic paint, liner brush, unfinished wood leaf cutouts, clear-drying PVA craft glue, water-based matte acrylic varnish.
Paint the pumpkin terracotta and allow it to dry for 1 hour. With the liner brush, paint cream stems and leaves that follow the pumpkin ridges; use short tapered strokes for each leaf instead of outlining every shape. Paint the unfinished wood leaf cutouts cream, then let both the cutouts and pumpkin dry fully. Apply a thin layer of clear-drying PVA craft glue to the back of each lightweight leaf and press it onto the dried pumpkin for 30 seconds. Follow the glue label for dry time before sealing the painted areas with matte varnish. Botanical pumpkin painting ideas look best when the attached leaves remain sparse.
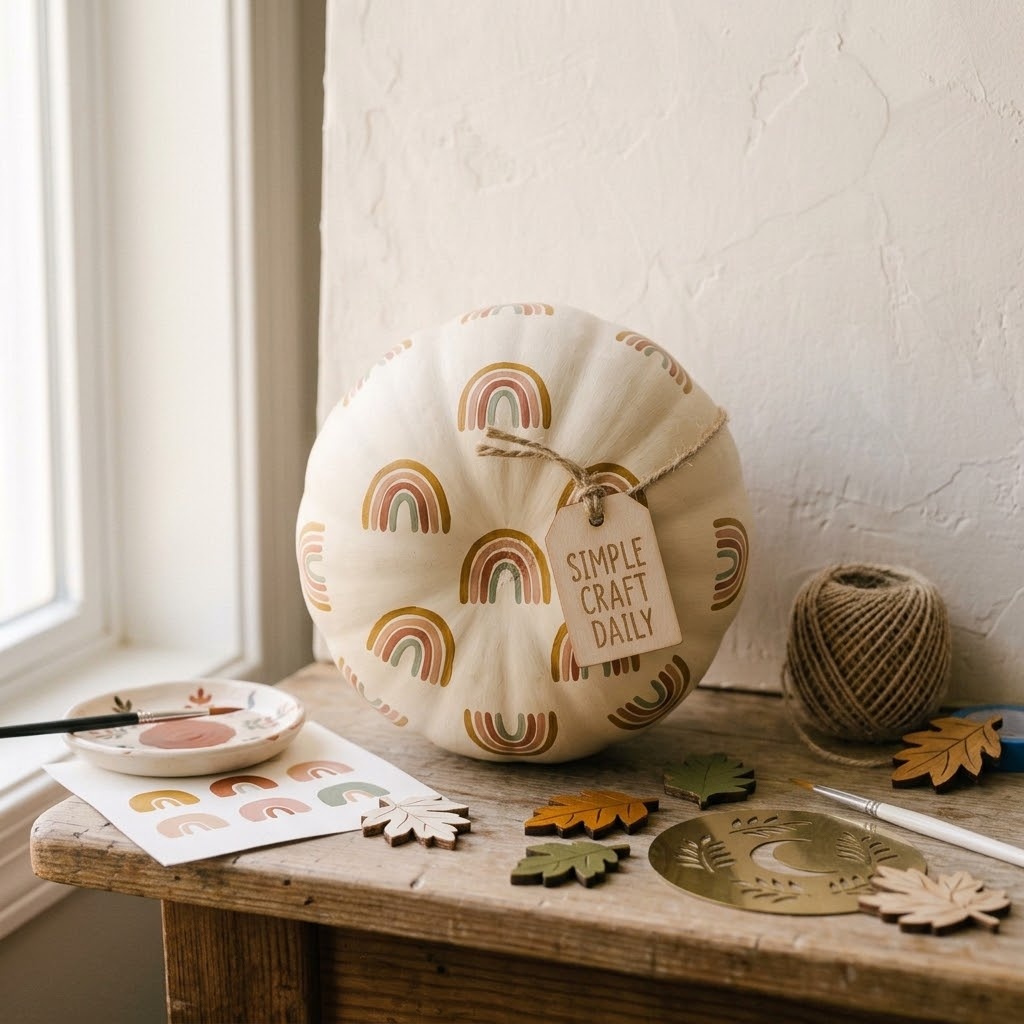
5. Easy Pumpkin Painting Ideas with Rainbow Arches
Supplies Needed: Artificial craft pumpkin, cream, mustard, rust, blush, and sage acrylic paint, round brushes, palette paper, water-based matte acrylic varnish.
Paint a cream base and let it dry for 1 hour. Place mustard, rust, blush, and sage paint on palette paper, then lightly sketch a set of nested arches with a pencil. Use round brushes to paint the largest arch first, leaving a 1/4-inch gap before each smaller color band. Rinse and dry the brush between colors so the arches stay clear instead of muddy. Allow this pumpkin painting idea to dry for 1 hour, then seal it with a thin matte varnish coat.
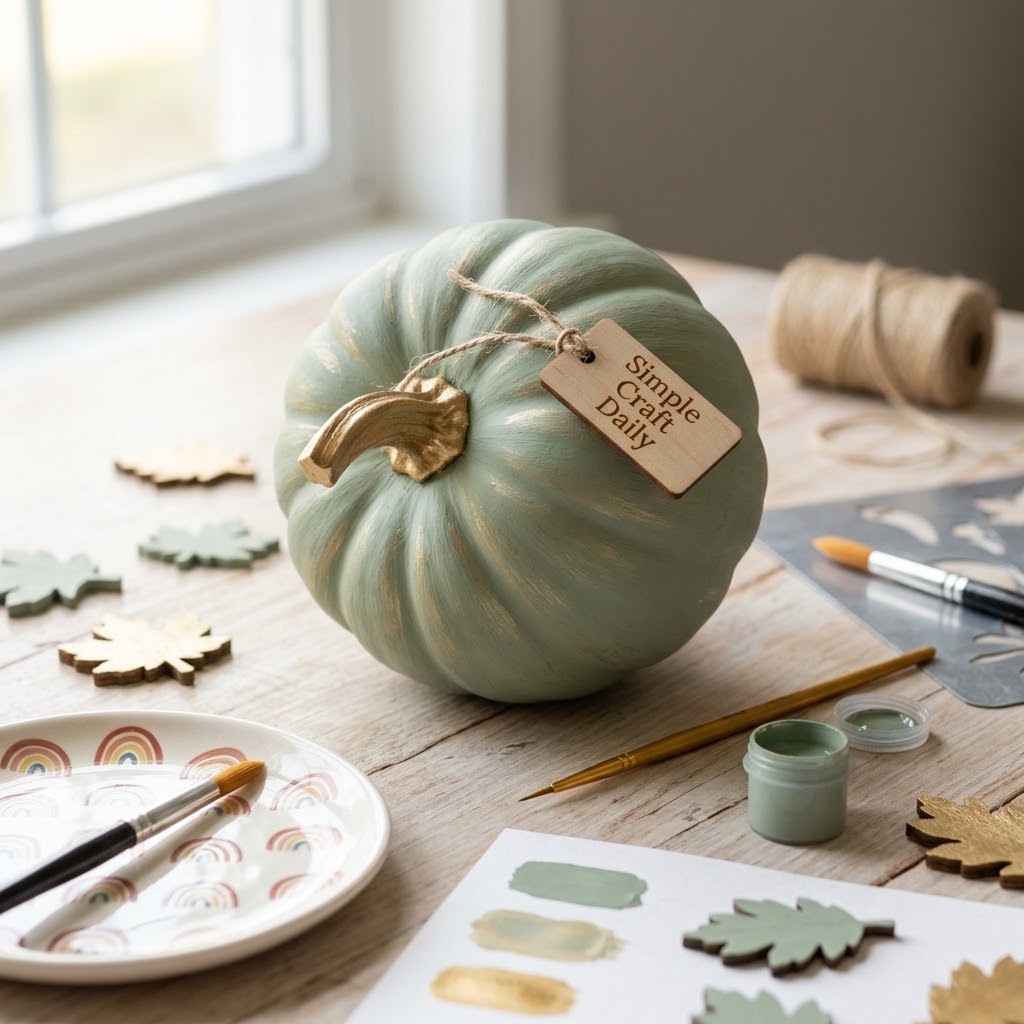
6. Gilded Stem Pumpkin
Supplies Needed: Artificial craft pumpkin, sage green acrylic paint, metallic gold acrylic paint, flat brush, small detail brush, water-based matte acrylic varnish.
Apply two thin sage green coats with the flat brush and let the body dry for 1 hour. Use the small detail brush to paint metallic gold only on the stem, keeping the paint out of the deep grooves where it can pool. Then wipe most of the gold from the brush and lightly skim the highest ridge edges for a soft dry-brushed highlight. This restrained finish suits pumpkin painting ideas for neutral fall tables. Let the metallic paint dry for 1 hour before applying matte varnish to the pumpkin body.
ACMI AP-Certified Matte Acrylic Paint Set
The core supply for all 20 designs: matte, non-toxic and easy to correct while still wet.
I earn a commission if you make a purchase, at no additional cost to you.
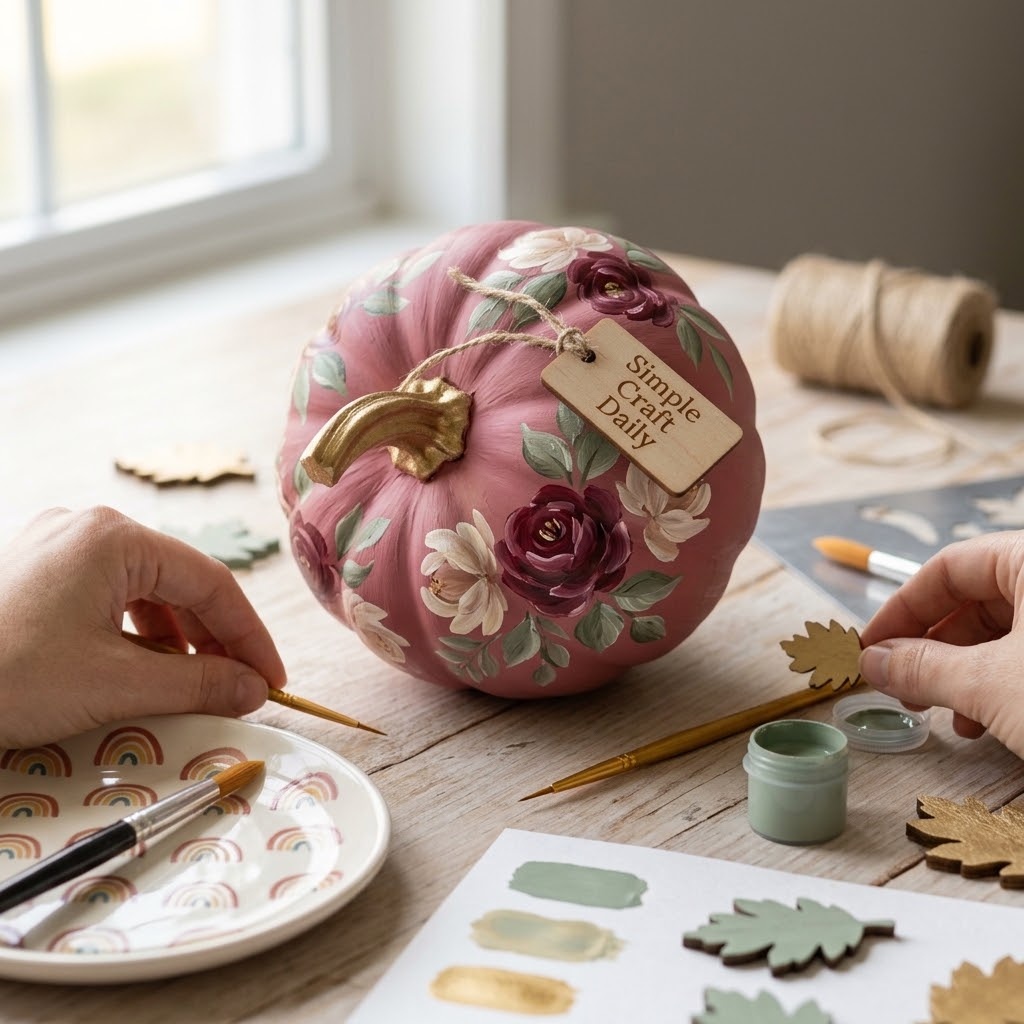
7. Vintage Floral Pumpkin Painting Ideas
Supplies Needed: Artificial craft pumpkin, blush, rose, burgundy, sage, and cream acrylic paint, round and liner brushes, palette paper, water-based matte acrylic varnish.
Paint a blush base and let it dry for 1 hour before adding flowers. Place rose, burgundy, sage, and cream paint on palette paper. With the round brush, build each rose from five or six comma-shaped petals that curve around a small center; leave small blush gaps between petals so the flower stays airy. Next, use the liner brush for sage stems, leaf veins, and tiny cream filler dots. Floral pumpkin painting ideas need a dry surface beneath every new color. Let the floral surface dry flat for 1 hour, then protect it with one thin matte varnish coat.
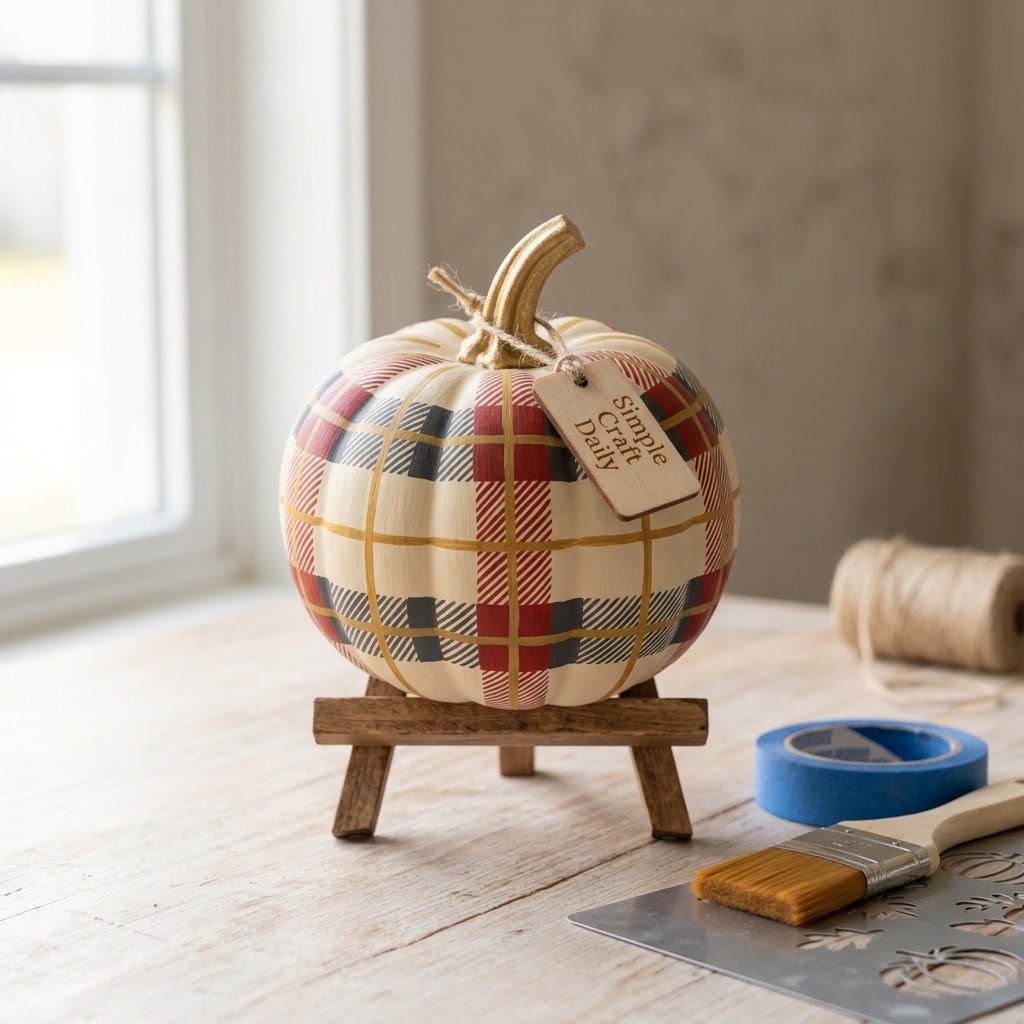
8. Plaid Flannel Pumpkin
Supplies Needed: Artificial craft pumpkin, cream, crimson, charcoal, and mustard acrylic paint, low-tack painter’s tape, flat brush, fine detail brush, water-based matte acrylic varnish.
Paint the lightest cream base first and dry it for 1 hour. Use low-tack painter’s tape to mark evenly spaced vertical bands, then brush crimson and charcoal stripes with the flat brush. Remove the tape while the paint is slightly tacky and let the stripes dry for 45 minutes. Following that, tape horizontal bands and repeat the colors. Use the fine detail brush to add narrow mustard lines where the broad bands meet. Allow the plaid to dry for 1 hour before varnishing. These pumpkin painting ideas work well when each taped layer has its own drying window.
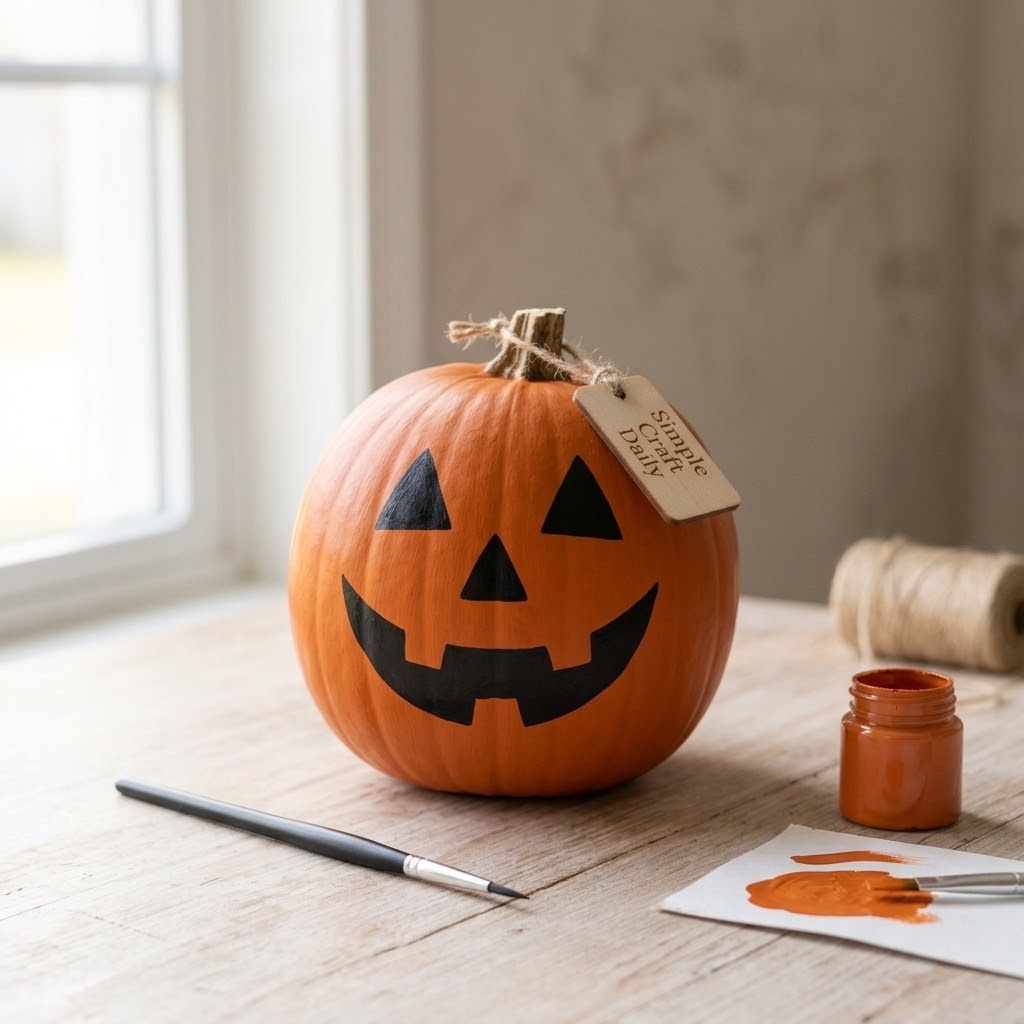
9. Monochrome Jack-o’-Lantern Face
Supplies Needed: Artificial craft pumpkin, orange and black acrylic paint, flat brush, detail brush, water-based matte acrylic varnish.
Paint two thin orange coats with the flat brush, allowing 30 to 60 minutes between coats. After the orange is dry, lightly sketch two triangles, a nose, and a wide smiling mouth at least 1 inch above the bottom curve. Fill the shapes with black paint using the detail brush. Keep the edges firm and simple so the face reads clearly from across a room. This classic option belongs among pumpkin painting ideas for a no-carve Halloween entryway. Let the pumpkin dry for 1 hour before adding a thin matte varnish coat.
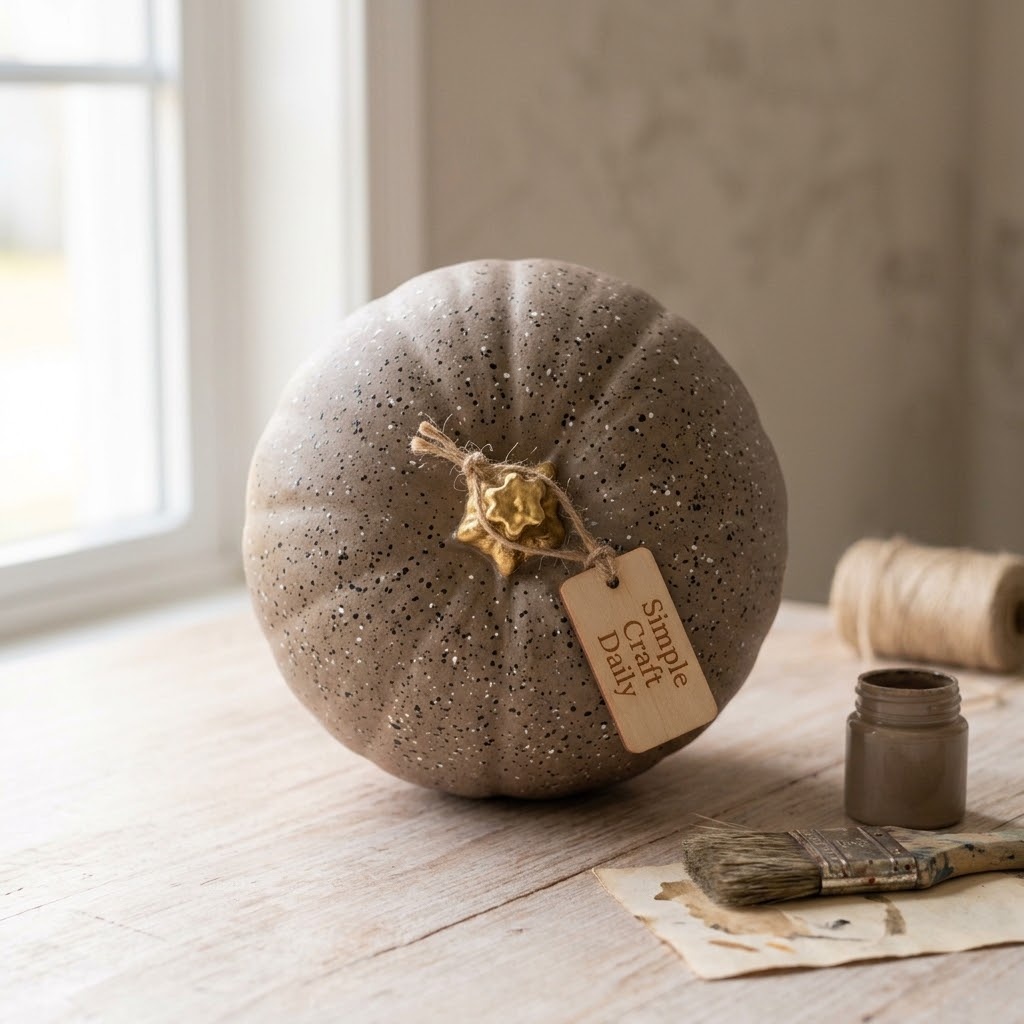
10. Speckled Stone Pumpkin
Supplies Needed: Artificial craft pumpkin, taupe, black, and white acrylic paint, stiff-bristle brush, silicone mat, water-based matte acrylic varnish.
Place the pumpkin on a silicone mat and paint it taupe. Let the base dry for 1 hour. Dip only the tips of the stiff-bristle brush into watered-down black paint, test the flicking pressure over scrap paper, then flick fine speckles across the pumpkin from 6 to 8 inches away. Repeat with white paint after the black dots dry for 20 minutes. Keep the pumpkin flat on the silicone mat until the speckles dry for 1 hour. Stone-inspired pumpkin painting ideas need light, separate flicks rather than wet paint blobs. Finish with a light matte varnish coat.
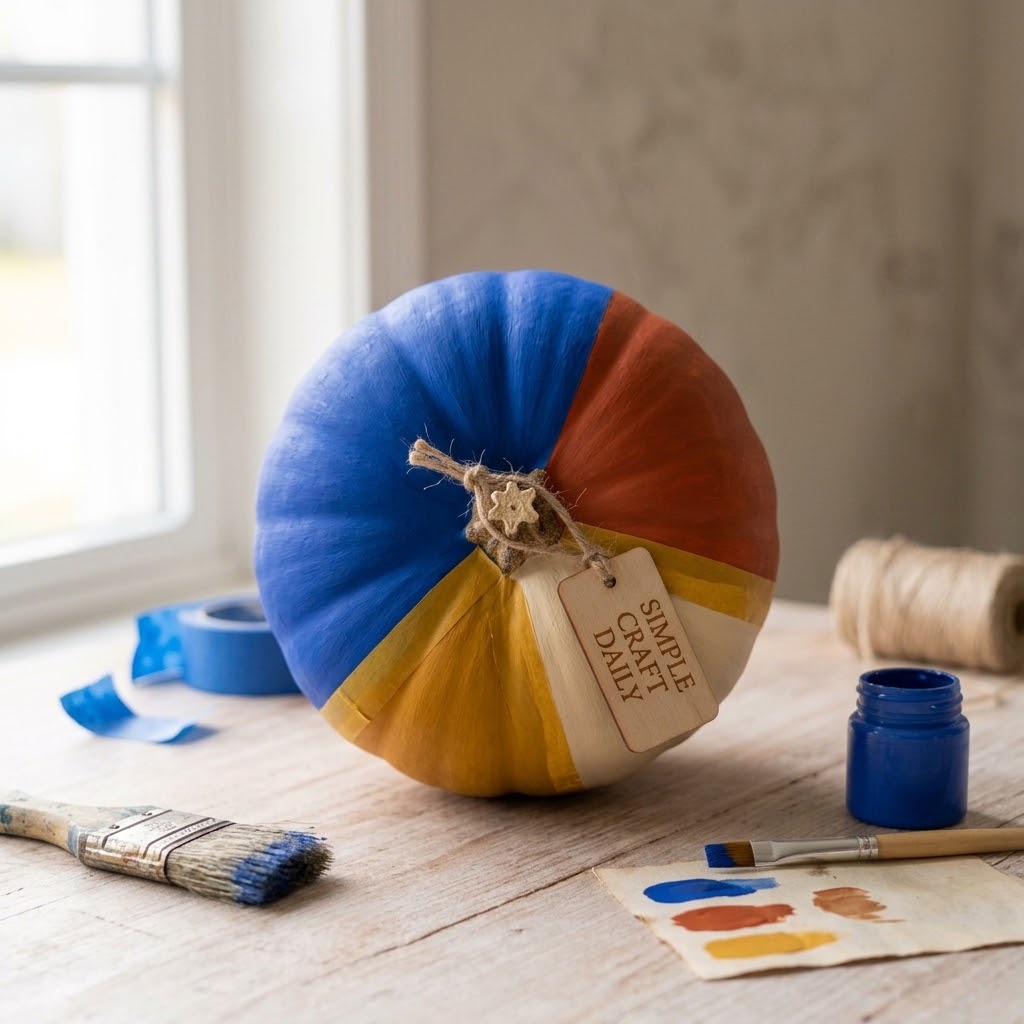
11. Color-Blocked Pumpkin Painting Ideas
Supplies Needed: Artificial craft pumpkin, cobalt, terracotta, mustard, and cream acrylic paint, low-tack painter’s tape, flat brush, water-based matte acrylic varnish.
Paint one large cream color field and let it dry for 1 hour. Burnish low-tack painter’s tape along the ridge edges with a clean fingernail, then paint an adjacent cobalt field with the flat brush. Peel the tape at a low angle while the cobalt remains slightly tacky. Repeat the dry, tape, paint, and peel sequence for terracotta and mustard sections. This measured approach keeps the pumpkin painting ideas crisp on a rounded surface. Let all fields dry for 1 hour before varnishing.
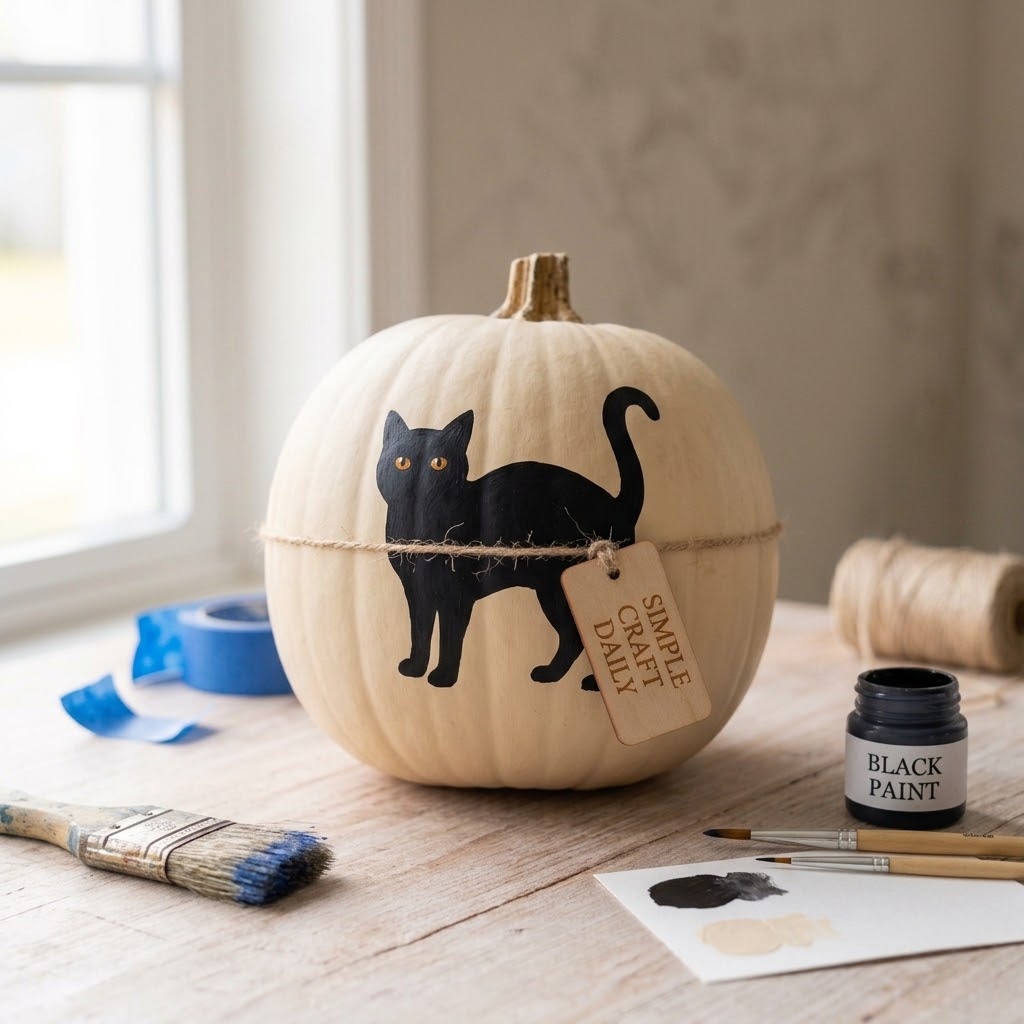
12. Black Cat Silhouette Pumpkin
Supplies Needed: Artificial craft pumpkin, ivory, black, and amber acrylic paint, detail brush, reusable stencil or traced guide, water-based matte acrylic varnish.
Paint the pumpkin ivory and allow the base to dry for 1 hour. Place a reusable stencil on the front, or lightly trace a simple sitting-cat guide with a pencil. Paint the largest black silhouette first with the detail brush, then let it dry for 30 minutes. Add two small amber eyes and leave the rest of the face unmarked for a clean graphic finish. For pumpkin painting ideas with strong contrast, keep the silhouette edge smooth and unbroken. Once dry to the touch, apply a thin matte varnish coat.
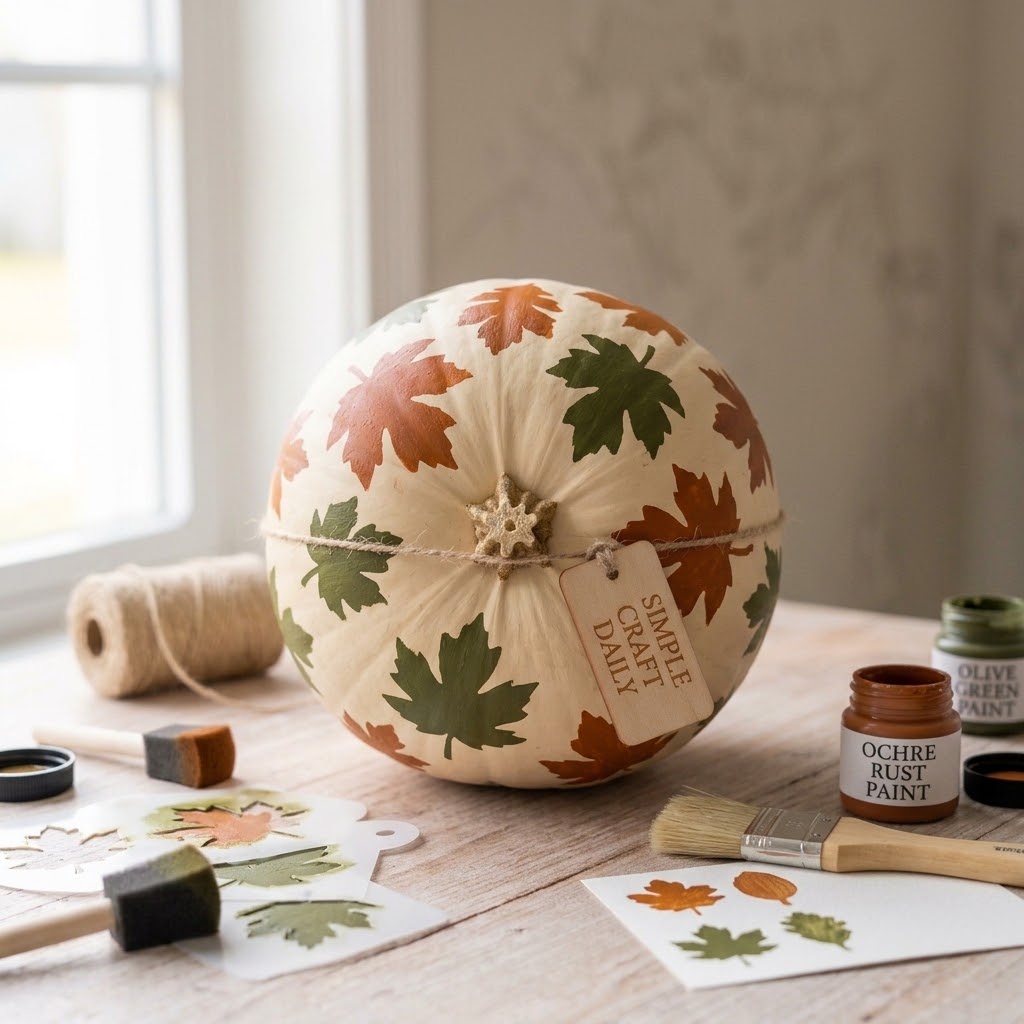
13. Pressed-Leaf Look Pumpkin
Supplies Needed: Artificial craft pumpkin, ochre, rust, olive, and cream acrylic paint, leaf stencils, foam pouncers, water-based matte acrylic varnish.
Paint a cream base and let it dry for 1 hour. Hold a leaf stencil flush against the pumpkin and use a foam pouncer to apply ochre with light vertical taps. Remove the stencil straight up and allow that layer to dry for 20 minutes. Next, overlap a few rust leaves, then add olive leaves last so the darker color creates depth. Reload the pouncer sparingly each time to prevent paint from creeping beneath the stencil. These layered pumpkin painting ideas stay readable when each leaf color dries before the next layer. Dry the finished surface for 1 hour before sealing.
Acrylic Paint Brush Set with Flat, Round, and Liner Brushes
Flat for base coats, round for shapes, liner for the fine faces and vines.
I earn a commission if you make a purchase, at no additional cost to you.
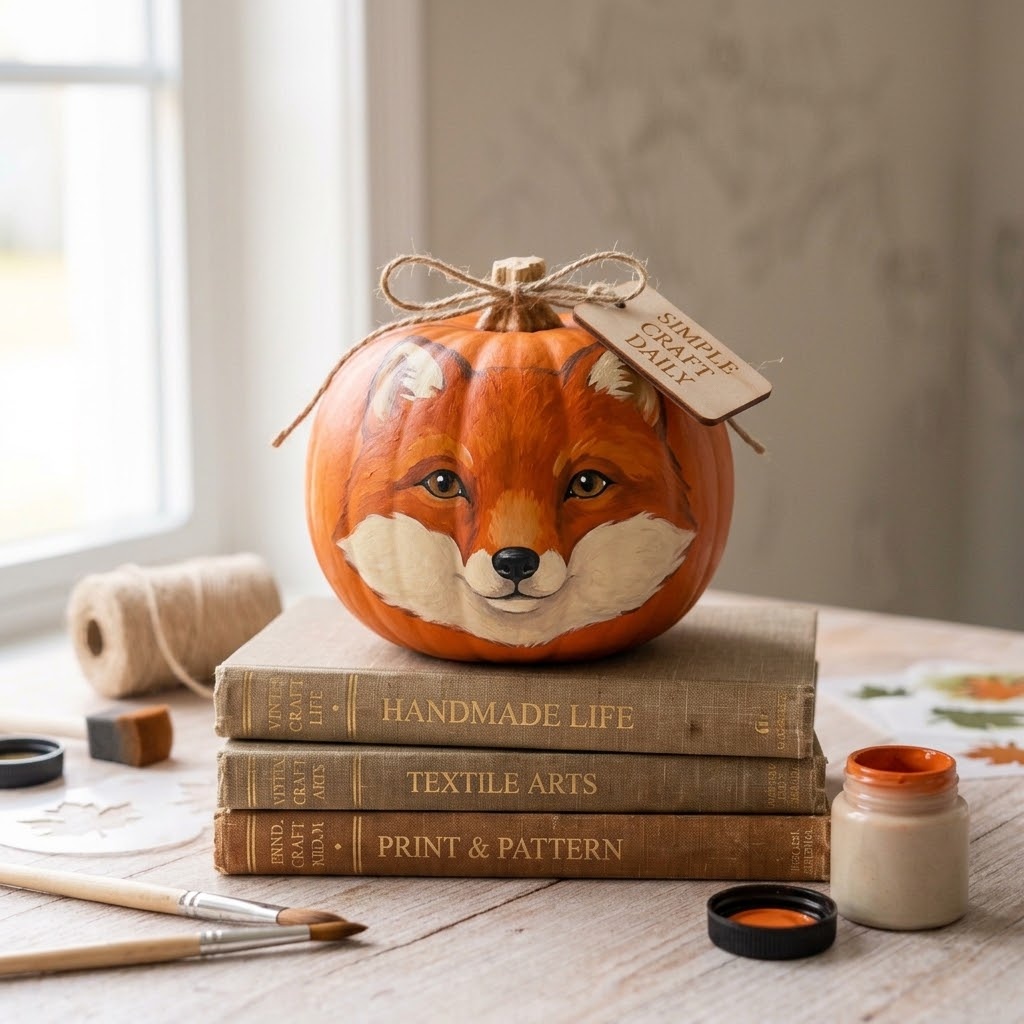
14. Mushroom-Free Woodland Fox Pumpkin
Supplies Needed: Artificial craft pumpkin, orange, cream, black, and white acrylic paint, round detail brush, flat brush, water-based matte acrylic varnish.
Use the flat brush to paint an orange base, then dry it for 1 hour. With the round detail brush, map two cream cheek shapes and a pointed cream muzzle before filling them in. Allow the cream paint to dry for 30 minutes. Then add black eyes, a small triangular nose, and a short mouth line; place two white highlights inside the eyes after the black paint dries. Keep the painted ears on the pumpkin surface so no loose pieces can detach. Animal pumpkin painting ideas are safer for child-handled decor when every feature is painted. Seal after 1 hour.
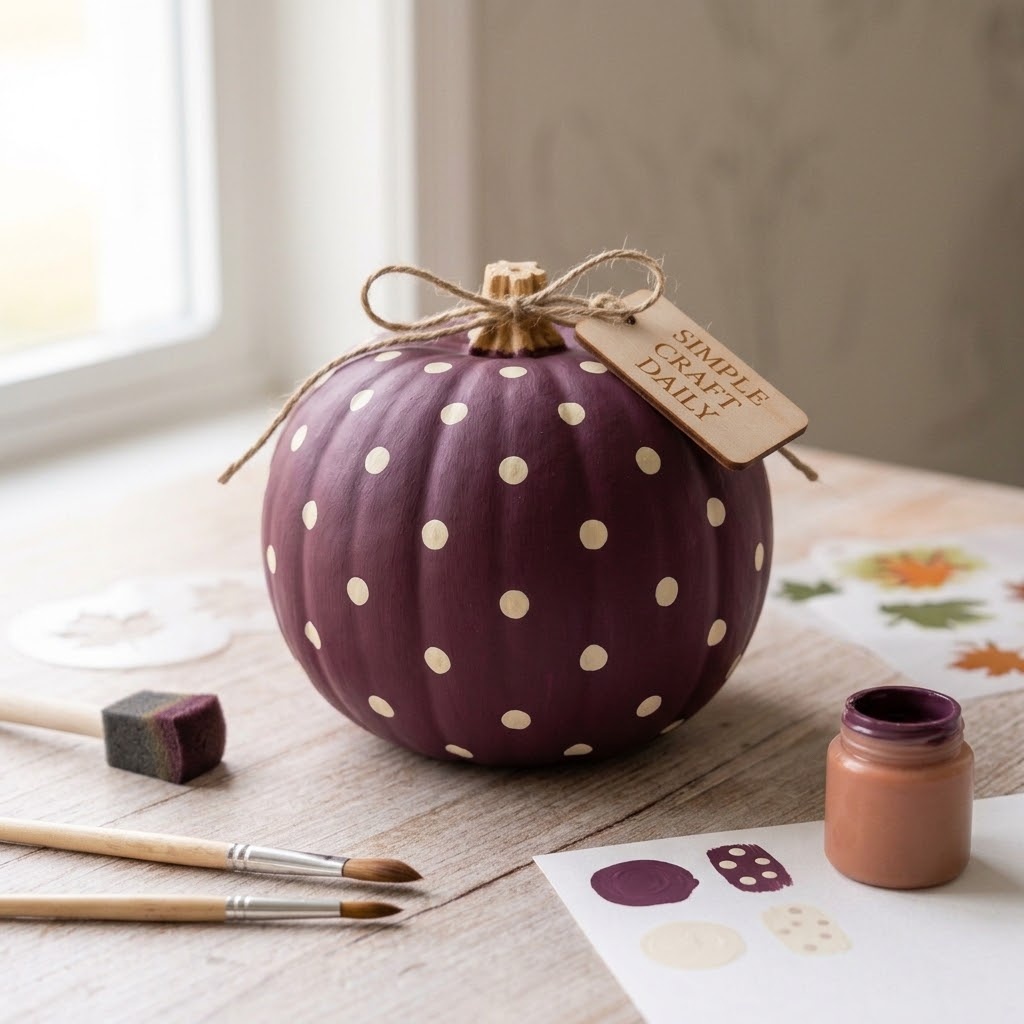
15. Easy Pumpkin Painting Ideas with Polka Dots
Supplies Needed: Artificial craft pumpkin, deep plum and cream acrylic paint, foam pouncer or brush handle, silicone mat, water-based matte acrylic varnish.
Set the pumpkin on a silicone mat, paint it deep plum, and dry it for 1 hour. Pour cream paint onto a palette or lid, then load only the end of a foam pouncer or clean brush handle. Press straight down and lift straight up to make each dot. Rotate the pumpkin on the stable mat after every few dots so the spacing remains even around the front. Let the dots dry for 1 hour, then add one thin coat of matte varnish. These pumpkin painting ideas look orderly when dot size stays consistent.
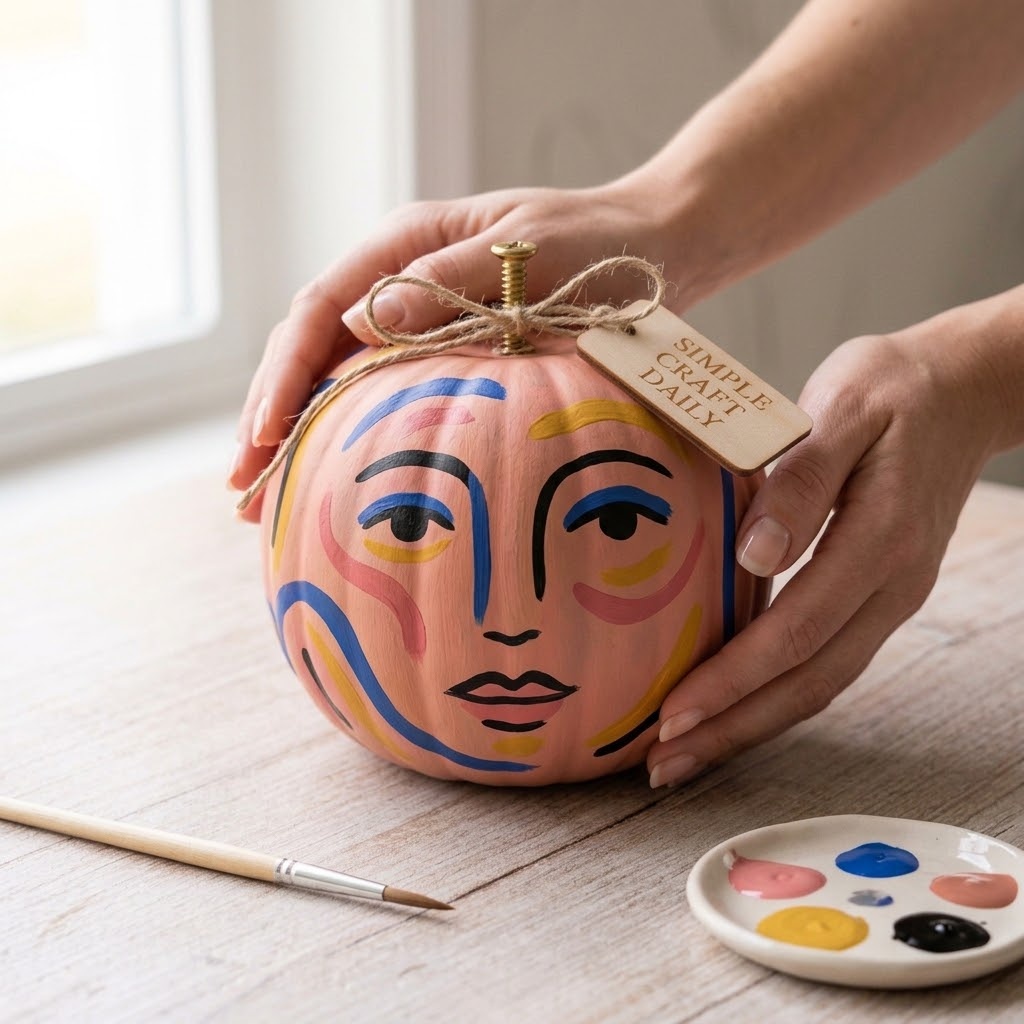
16. Abstract Face Pumpkin Painting Ideas
Supplies Needed: Artificial craft pumpkin, blush, cobalt, mustard, and black acrylic paint, liner brush, palette paper, daylight LED magnifying craft lamp with desk clamp (optional), water-based matte acrylic varnish.
First, sketch a face composition on paper with one eye, curved cheek shapes, and two or three large color patches. Clamp the optional daylight LED magnifying craft lamp over the work area, then paint blush, cobalt, and mustard patches from largest to smallest, mixing colors on palette paper. Let the patches dry for 45 minutes. Use the liner brush and black paint under the magnifying lamp to add curved brows, lashes, and a mouth. Abstract pumpkin painting ideas remain balanced when the black line work is added last. Let the pumpkin dry for 1 hour before applying matte varnish.
17. Candy Corn Stripe Pumpkin
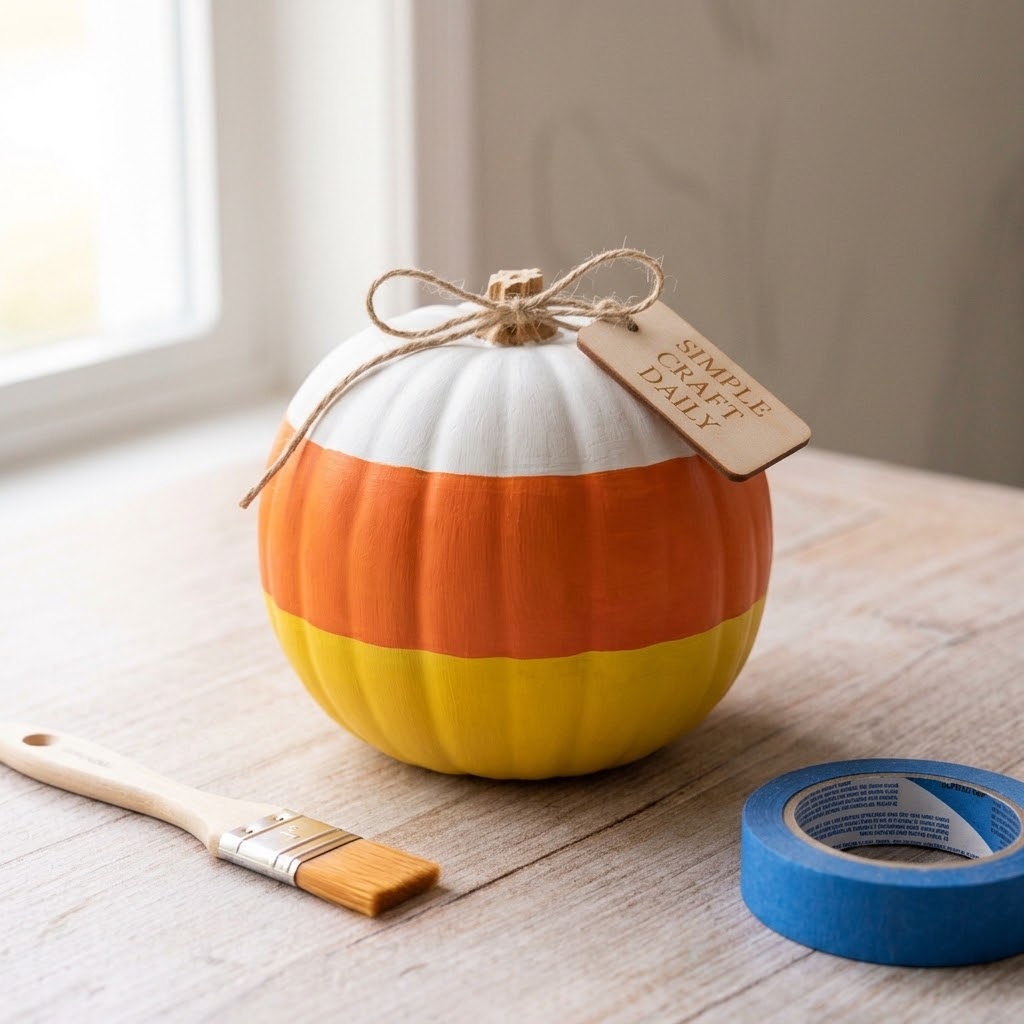
Supplies Needed: Artificial craft pumpkin, white, orange, and yellow acrylic paint, low-tack painter’s tape, flat brush, water-based matte acrylic varnish.
Paint the entire pumpkin white first as an even base coat; white is one of the less opaque acrylic colors, so add a second thin coat or a layer of gesso if the foam shows through. Let it dry for 1 hour, then use low-tack painter’s tape to mark the top third and paint the middle band orange with the flat brush. Dry the orange for 45 minutes before masking it. Paint the bottom third yellow, using a second thin coat if foam texture still shows through. Remove tape slowly while the yellow paint is slightly tacky. After 1 hour of drying, apply matte varnish. Striped pumpkin painting ideas need fully dry lower layers before fresh tape touches them.
18. Marble Swirl Pumpkin Painting Ideas
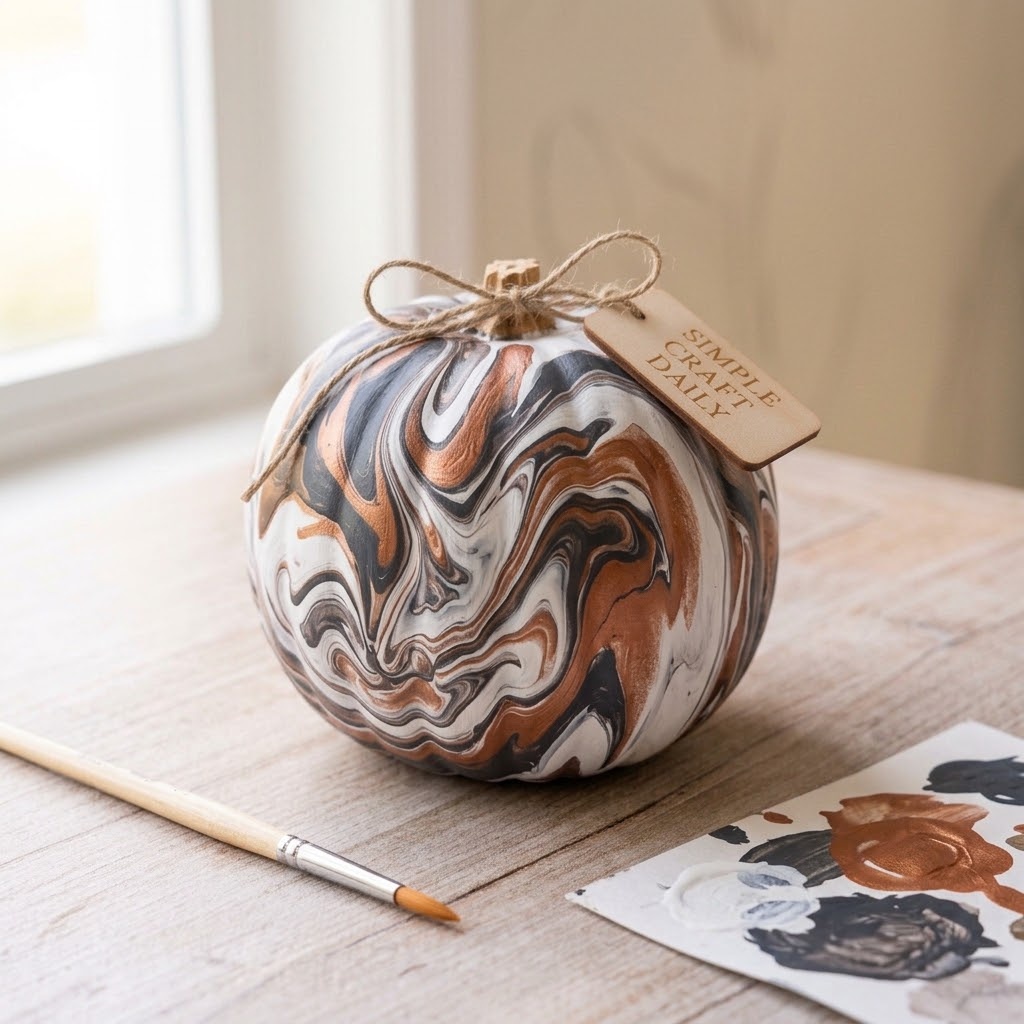
Supplies Needed: Artificial craft pumpkin, white, charcoal, and metallic copper acrylic paint, liner brush, palette paper, water-based matte acrylic varnish.
Place white, charcoal, and metallic copper paint on palette paper. Work on one pumpkin ridge section at a time so the acrylic stays workable. Brush a small white patch, add two narrow charcoal lines and one copper line, then drag a clean liner brush through the wet paint once or twice in a gentle curve. Stop before the colors turn gray. Repeat on the next ridge, leaving a little white space between swirled areas. Marble pumpkin painting ideas require small wet sections rather than one large, muddy blend. Let the full pumpkin rest upright on its base, undisturbed, for 2 hours before adding a thin varnish coat.
19. Sunflower Harvest Pumpkin
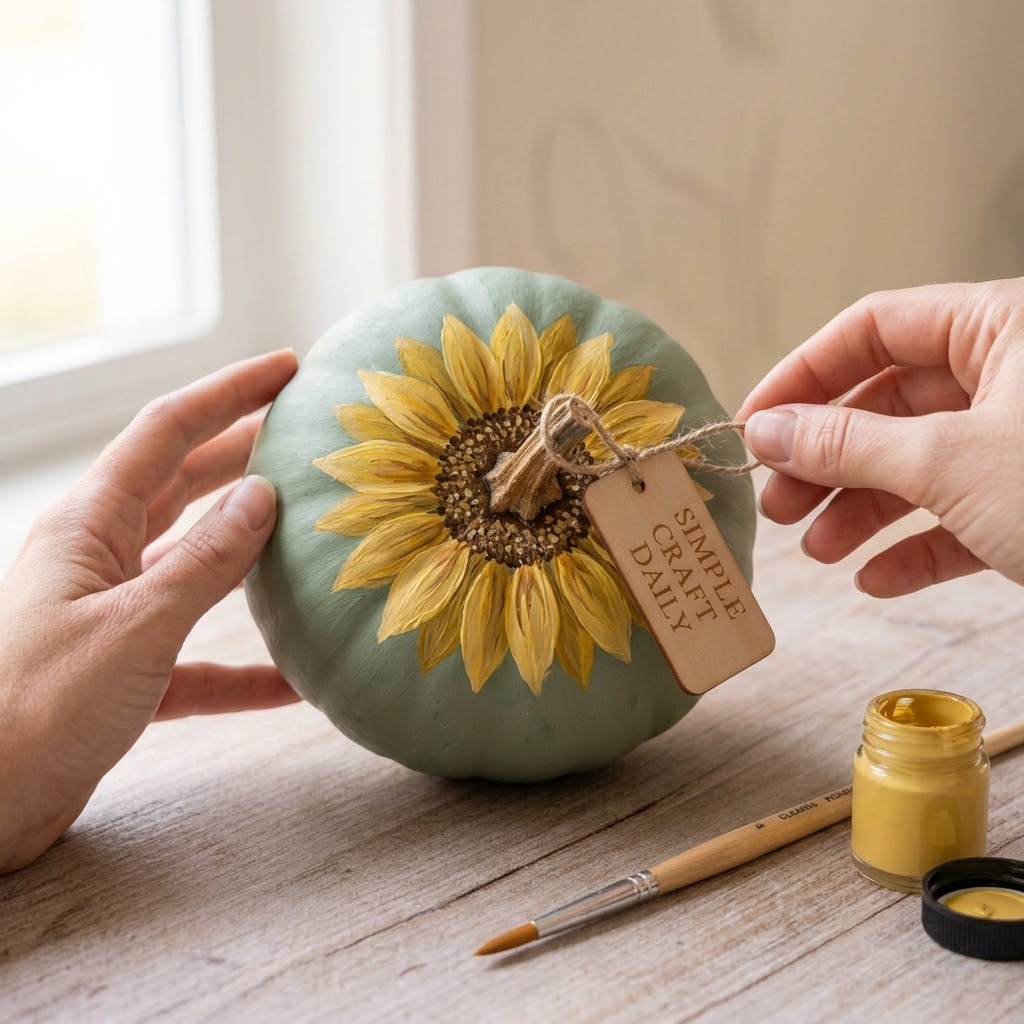
Supplies Needed: Artificial craft pumpkin, sage, yellow, brown, and black acrylic paint, round brush, detail brush, water-based matte acrylic varnish.
Paint the pumpkin sage and let it dry for 1 hour. Use the round brush to build yellow petals around the stem area, pulling each short stroke from the outside toward the center. Let the yellow petals dry for 30 minutes. Then use the detail brush to dot brown paint into a round center, followed by a few black dots for texture. Add a second layer of shorter yellow petals only if the first layer looks sparse. Harvest pumpkin painting ideas gain depth from separate petal layers rather than thick paint. Let the sunflower dry for 1 hour before varnishing.
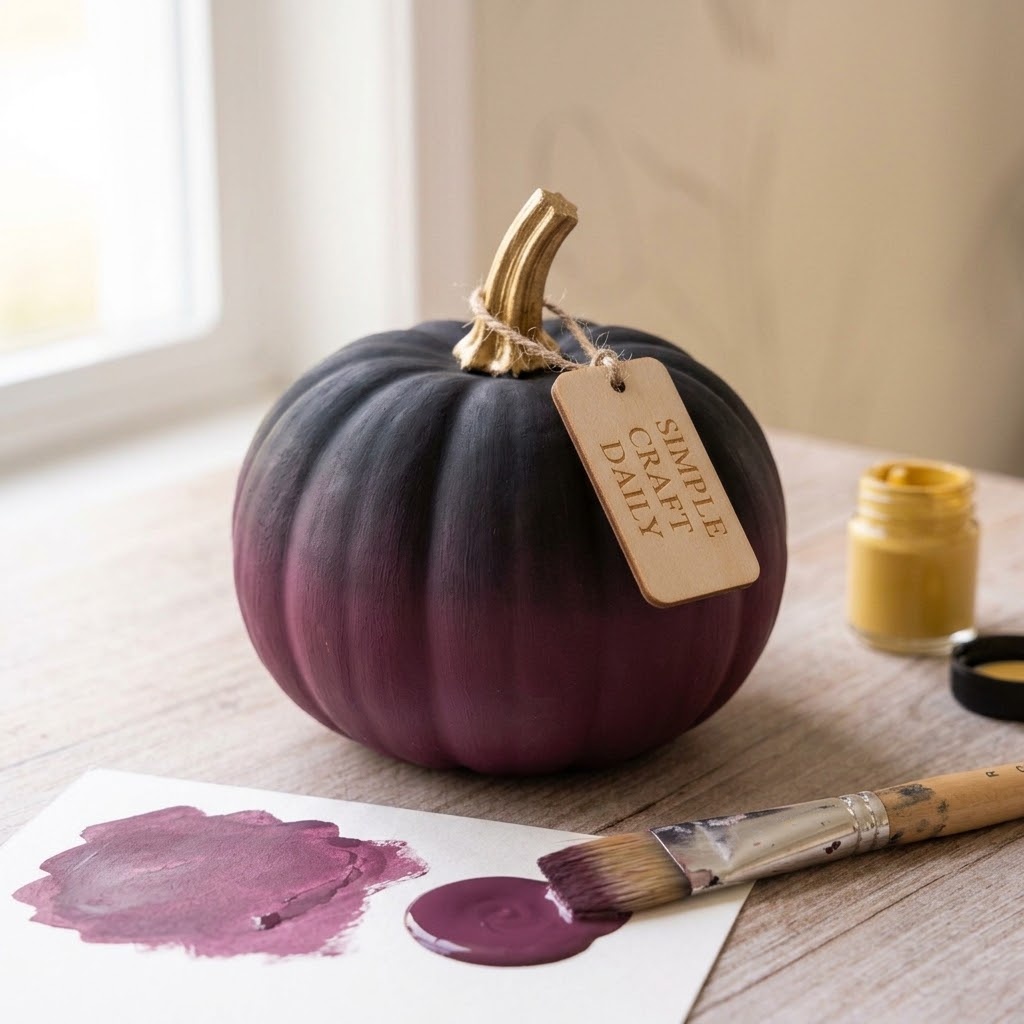
20. Moody Ombre Pumpkin Painting Ideas
Supplies Needed: Artificial craft pumpkin, plum, black, and metallic gold acrylic paint, soft flat brush, small detail brush, water-based matte acrylic varnish.
Work in a 3-inch-wide section at a time with the soft flat brush. Apply plum near the upper half and black near the lower half while both paints remain workable. Wipe the brush, dampen it lightly, then sweep across the meeting point with two or three soft passes. Repeat around the pumpkin, keeping the blend narrow so the colors do not become dull. Let the gradient dry for 2 hours. Finally, paint the stem metallic gold with the small detail brush, dry for 1 hour, and seal the body with matte varnish. Ombre pumpkin painting ideas need a clean brush for each blended transition.
Pumpkin Painting Ideas: Drying, Sealing, and Display
Acrylic paint can feel dry on the surface before it has settled enough for tape or varnish. Follow the manufacturer directions first; as a practical baseline, let a final acrylic layer dry at least 1 hour before a water-based matte acrylic varnish coat. Brush varnish in one thin direction with a clean flat brush, and do not keep brushing once it starts to drag. Proper drying keeps pumpkin painting ideas from developing cloudy or streaked topcoats.
Allow the first varnish coat to dry according to its label, commonly 1 to 2 hours, before adding a second thin coat. Keep the pumpkin on a clean surface while the varnish cures fully. Artificial pumpkins can be stored after the final coat has cured as directed. Natural painted pumpkins belong indoors, away from heat and moisture, and should be discarded immediately if they develop mold, leaking moisture, soft spots, or an unpleasant odor.
Pumpkin Painting Ideas FAQ
What paint works best for pumpkin painting ideas?
Matte acrylic paint works well on most foam craft pumpkins. For a slick plastic surface, lightly scuff it with a fine-grit sanding sponge, wipe away dust with a dry cloth, and apply a thin acrylic gesso primer before painting. Multi-surface satin acrylic paint is also useful for artificial pumpkins that need a tougher painted finish.
How long should pumpkin painting ideas dry before sealing?
Let the final acrylic paint layer dry according to its product label before sealing. A 1-hour dry window works for many thin acrylic coats in a dry room, although humidity and thick paint can extend that time. Apply varnish only when the surface feels dry, does not mark under gentle pressure, and has no cool tacky patches.
Can I paint a real pumpkin?
Yes, but treat real pumpkins as short-term decor. Wipe the shell clean and dry before painting, keep it indoors, and avoid placing it on damp soil or wet porch boards. Paint and varnish do not stop natural decay, so inspect the pumpkin every day and remove it when it develops a soft area or mold.
How do I stop painter’s tape from lifting acrylic paint?
Allow the base coat to dry completely, use low-tack painter’s tape, and press only the tape edge into the pumpkin ridges. Remove the tape slowly at a low angle while the new paint is still slightly tacky. The detail-brush control used for these pumpkin painting ideas also transfers nicely to relaxing rock painting ideas, where curved surfaces need the same patient approach.
Reusable Fall Stencil Set
Leaves, stars and crescents turn an uneven pumpkin surface into a clean, repeatable design.
I earn a commission if you make a purchase, at no additional cost to you.
Quick Reference: All Supplies at a Glance
For your convenience, here is a quick summary of all materials and tools used in this tutorial:
✨ Consumable Raw Materials
- Artificial Craft Pumpkins in Assorted Sizes | Check Artificial Craft Pumpkins in Assorted Sizes on Amazon
- ACMI AP-Certified Matte Acrylic Paint Set | Check Price on Amazon
- Metallic Acrylic Paint Set | View Metallic Acrylic Paint Set on Amazon
- Multi-Surface Satin Acrylic Paint | See Price on Amazon
- Unfinished Wood Leaf Cutouts | See Price on Amazon
- Scrap Paper | Check Scrap Paper on Amazon
- Clean Dry Cloth | Check Clean Dry Cloth on Amazon
🧰 Core Crafting Tools & Equipment
- Acrylic Paint Brush Set with Flat, Round, and Liner Brushes | Check Acrylic Paint Brush Set with Flat, Round, and Liner Brushes on Amazon
- Foam Pouncer Brush Set | Explore Foam Pouncer Brush Set on Amazon
- Low-Tack Painter’s Tape | View on Amazon
- Reusable Fall Stencil Set | Find on Amazon
- Fine-Grit Sanding Sponges | Check Fine-Grit Sanding Sponges on Amazon
- Palette Paper Pad and Silicone Mixing Cups | Check Price on Amazon
- Silicone Craft Mat | Check Silicone Craft Mat on Amazon
- HB Pencils | Check HB Pencils on Amazon
- Stiff-Bristle Paint Brush | Check Stiff-Bristle Paint Brush on Amazon
- Rinse Water Cup | Check Rinse Water Cup on Amazon
- Paper Towels | Check Paper Towels on Amazon
- Craft Scissors | Check Craft Scissors on Amazon
💎 Hardware, Fasteners & Finishing
- Acrylic Gesso Primer | Find Acrylic Gesso Primer on Amazon
- Water-Based Matte Acrylic Varnish | View Water-Based Matte Acrylic Varnish on Amazon
- Clear-Drying PVA Craft Glue | Find Clear-Drying PVA Craft Glue on Amazon
Important Crafting Safety Notes
Crafting is a rewarding creative activity, but maintaining a safe workshop environment is essential for yourself, your family, and your pets. Please review these vital safety precautions before starting:
• Personal Protective Equipment (PPE) & Safe Handling: Always wear safety glasses or protective eyewear when cutting metal wire, clipping jump rings, trimming hard findings, or using power tools to prevent flying shards. Use heat-resistant work mats and exercise caution around high-temperature glue guns, irons, or heating tools to avoid burns. Wear disposable nitrile gloves and a particle dust mask when sanding wood or working with clays, resins, and solvent-based sealants to protect your skin and lungs.
• Room Ventilation & Fume Safety: Always craft in a well-ventilated space with open windows, cross-ventilation, or active exhaust whenever using solvent-based adhesives, instant bonders, aerosol sprays, epoxy resins, or heat-curing materials. Never inhale chemical fumes directly, and allow finished pieces to off-gas and cure completely in an airy area away from everyday living spaces.
• Child & Pet Safety (Choking & Swallowing Prevention): Small craft components—including safety eyes, split rings, clasps, jump rings, beads, bells, small magnets, unbaked clay scraps, and loose polyester fiberfill—present severe choking, intestinal obstruction, and ingestion hazards for babies, toddlers, and pets. Keep all unattached hardware, yarn cutoffs, and stuffing strictly out of reach. For handmade gifts intended for infants or young children, omit plastic washer eyes and detachable findings entirely in favor of securely stitched, double-knotted embroidered details.
• Sharp Tool Storage & Clean Work Area: Store sharp tools—such as rotary cutters, craft knives, bent-tip yarn needles, snips, scissors, and jewelry pliers—in secure, latching cases or high cabinets immediately after use. Thoroughly inspect, sweep, or vacuum your craft area and floor after finishing to ensure no dropped needles, pins, wire clippings, or small findings remain where curious pets or bare feet could step on or swallow them.
• Certified, Quality & Non-Toxic Supplies: Always choose verified non-toxic craft supplies (such as ACMI AP-certified paints and adhesives, lead-free and nickel-free jewelry findings, and skin-safe materials). Follow manufacturer label guidelines for curing durations, safe operating temperatures, and proper product disposal. Never use food preparation utensils or kitchen cookware for craft chemicals.
For more detailed guidance on safe crafting practices, liability disclosures, and website usage, please review our Terms and Conditions.
“Which of these Beautiful Pumpkin Painting Ideas for a Cozy Fall ideas are you excited to try first, or do you have a creative tip of your own to share? Drop a comment below—I’d love to hear your thoughts and see what you create!”



[…] can build a mantel, entryway, table, or shelf display with confidence. Pair these ideas with our easy pumpkin painting ideas, or carry the handmade season into October with these cute DIY Halloween decoration […]
[…] size 2 round with dry brown paint for short stems. For another rounded fall subject, explore these gorgeous easy pumpkin painting ideas. This diy autumn watercolor idea works beautifully on a handmade harvest […]
[…] Practice a color mix on scrap paper before it reaches the canvas, especially for orange shadows and violet skies. Consistent test swatches help diy fall canvas paintings retain clean color relationships from the first brushstroke through the final details. For more seasonal gourd inspiration, see these easy pumpkin painting ideas for gorgeous decor. […]