

Flat seasonal wall art can make a whole room feel unfinished. These diy fall canvas paintings use simple acrylic layers, warm color mixing, and clean silhouettes so your Halloween and autumn decor looks handmade rather than mass-produced.
Choose one compact 8 x 10 in design for a shelf or paint an 11 x 14 in landscape for a larger wall. If you are also making party accents, pair these canvases with our cute DIY Halloween decoration ideas and build a coordinated seasonal display.
Affiliate Disclosure: This post contains affiliate links. As an Amazon Associate, I earn from qualifying purchases. If you buy through these links, I may earn a commission at no additional cost to you.
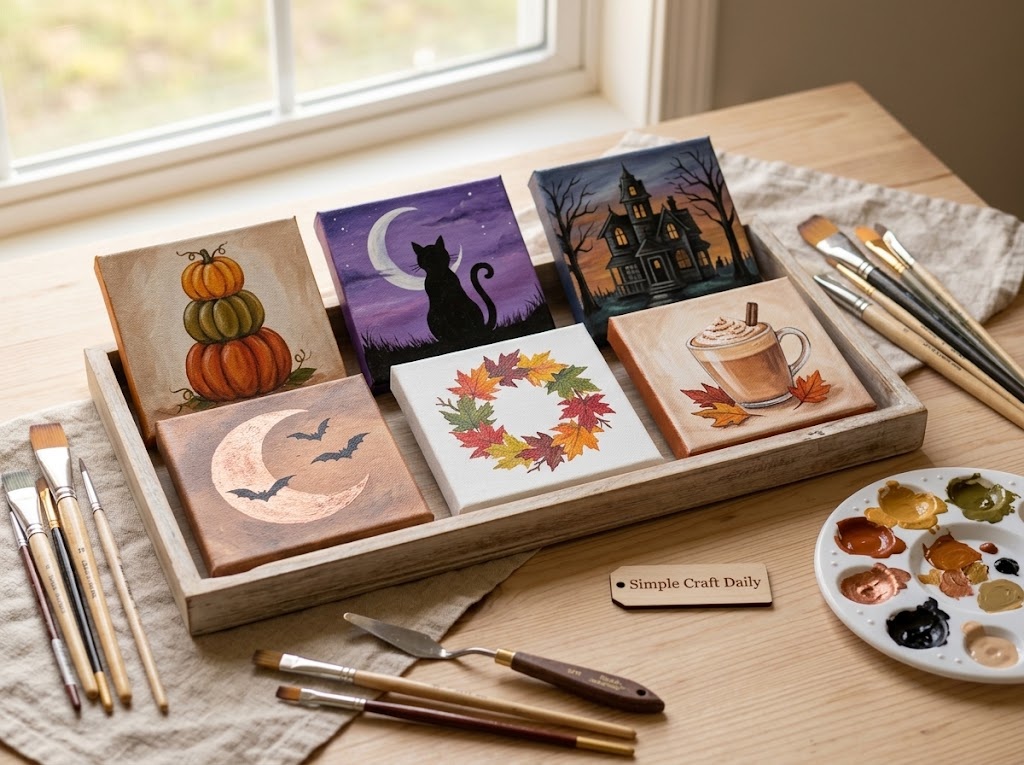
Essential Materials & Tools
wp:paragraphSet up your painting surface before opening any paint. Pre-primed cotton canvases accept acrylic smoothly, while a limited palette keeps your pumpkin orange, shadow brown, moon yellow, and leaf colors visually connected across the collection.
/wp:paragraph wp:paragraphFor diy fall canvas paintings, keep one water cup for rinsing and one for clean blending water. In addition, apply varnish only after the acrylic paint has fully cured according to the paint and varnish labels; a painting that feels dry to the touch may still need several days before finishing.
/wp:paragraph✨ Consumable Raw Materials
- Pre-Primed Stretched Cotton Canvases, 8 x 10 in and 11 x 14 in — Ready-to-paint cotton surfaces keep backgrounds smooth and support layered acrylic work | Check Pre-Primed Stretched Cotton Canvases, 8 x 10 in and 11 x 14 in on Amazon
- Artist Acrylic Paint Set in Autumn and Halloween Colors — Choose titanium white, carbon black, burnt umber, burnt sienna, yellow ochre, orange, crimson, deep violet, blue, and green for flexible seasonal mixing | Check Price on Amazon
- Matte Gel Medium for Acrylic Blending — Used for the misty ghost effect — mix one part titanium white with one part matte gel medium. | Check Matte Gel Medium for Acrylic Blending on Amazon
🧰 Core Crafting Tools & Equipment
- Synthetic Acrylic Brush Set with Flat, Filbert, Round, and Liner Brushes — A 3/4 in flat, size 8 filbert, size 4 round, and size 0 liner cover broad skies through fine whiskers | See Synthetic Acrylic Brush Set with Flat, Filbert, Round, and Liner Brushes on Amazon
- Stay-Wet Paint Palette (or Any Standard Palette) — A regular ceramic plate works for every design here — the stay-wet surface only helps when you want acrylics to stay open longer while blending. | Explore Stay-Wet Paint Palette with Disposable Palette Sheets on Amazon
- Painter’s Tape, 0.94 in Low-Tack — Creates crisp moon arcs, plaid borders, and geometric stripes without pulling cured paint | View on Amazon
- Graphite Transfer Paper — Transfers the Haunted House outline cleanly instead of redrawing it by hand. | Check Graphite Transfer Paper on Amazon
- White Chalk Pencil — Draws the 6 in wreath guide for Maple Leaf Wreath; wipes away after painting. | Check White Chalk Pencil on Amazon
- Palette Knife Set for Acrylic Texture — Applies controlled bark, leaf, moon, and pumpkin-ridge texture | Check Palette Knife Set for Acrylic Texture on Amazon
- Two Water Cups for Rinsing and Blending — One cup for rinsing brushes, one kept clean for blending washes. | Check Two Water Cups for Rinsing and Blending on Amazon
Opaque paint straight from the tube works well for backgrounds, pumpkins, and silhouettes. Mix a small amount of matte medium into paint when you need a transparent glaze, such as the fog in the forest scene. This controlled palette also makes diy fall canvas paintings easier to group together on one wall. For another layered-surface project, browse our glass painting and decoration ideas.
/wp:paragraph wp:paragraphUse the flat brush for broad skies, a filbert for curved pumpkin forms, and a liner for branches, bats, and lettering. Next, press tape edges firmly and remove painter’s tape only after the paint is touch-dry, usually 20 to 30 minutes for a thin layer.
/wp:paragraphOptional Studio Upgrades
Never required to finish the projects above — convenience upgrades for makers who want them.
📦 Beginner Project Kits & Coordinated Bundles
For beginners or makers starting from scratch, these coordinated bundles and all-in-one project packs bring together the core supplies in one convenient order.
- Acrylic Painting Kit with Canvas Easel — An optional coordinated starter bundle that combines acrylic paints, brushes, canvases, and an easel for first-time painters. | View on Amazon
⚡ Studio Tools & Workshop Equipment
Optional studio upgrades — every project above can be completed without these.
- Daylight LED Magnifying Craft Lamp with Desk Clamp — Shows paint color accurately and helps with tiny stars, labels, and cobwebs | See Price on Amazon
- Rolling Three-Tier Craft Cart with Worktop — Keeps paint bottles, brushes, canvases, and clean-up tools organized between painting sessions | Explore Rolling Three-Tier Craft Cart with Worktop on Amazon
- Large Self-Healing Cutting Mat, Rotary Cutter, and Acrylic Ruler Set — Protects the table while cutting paper stencils, masking strips, and printed transfers | See Large Self-Healing Cutting Mat, Rotary Cutter, and Acrylic Ruler Set on Amazon
- Mini Tabletop Painting Easel — Comfort upgrade for painting upright — every design also works flat on a protected table. | View Mini Tabletop Painting Easel on Amazon
- Fine-Mist Spray Bottle for Acrylic Painting — Optional misting bottle to keep acrylics workable — the two water cups the projects need are in the required list. | Check Price on Amazon
- Gloss or Satin Acrylic Varnish — Optional final protective finish once the paint has fully cured — skip it if you prefer the raw painted look. | Find Gloss or Satin Acrylic Varnish on Amazon
18 DIY Fall Canvas Paintings to Make This Season
Supplies Needed: Pre-Primed Stretched Cotton Canvases, 8 x 10 in and 11 x 14 in, Artist Acrylic Paint Set in Autumn and Halloween Colors, Synthetic Acrylic Brush Set with Flat, Filbert, Round, and Liner Brushes, Stay-Wet Paint Palette (or Any Standard Palette), Graphite Transfer Paper, White Chalk Pencil, Two Water Cups for Rinsing and Blending
Every design follows the same dependable order: sketch the main shapes, paint the background, add middle layers, paint details, allow thin layers to dry, and finish only after full cure. Use 8 x 10 in canvases for icons and still lifes; choose 11 x 14 in canvases when you want room for landscapes, porches, or a wide pumpkin patch.
Practice a color mix on scrap paper before it reaches the canvas, especially for orange shadows and violet skies. Consistent test swatches help diy fall canvas paintings retain clean color relationships from the first brushstroke through the final details. For more seasonal gourd inspiration, see these easy pumpkin painting ideas for gorgeous decor.
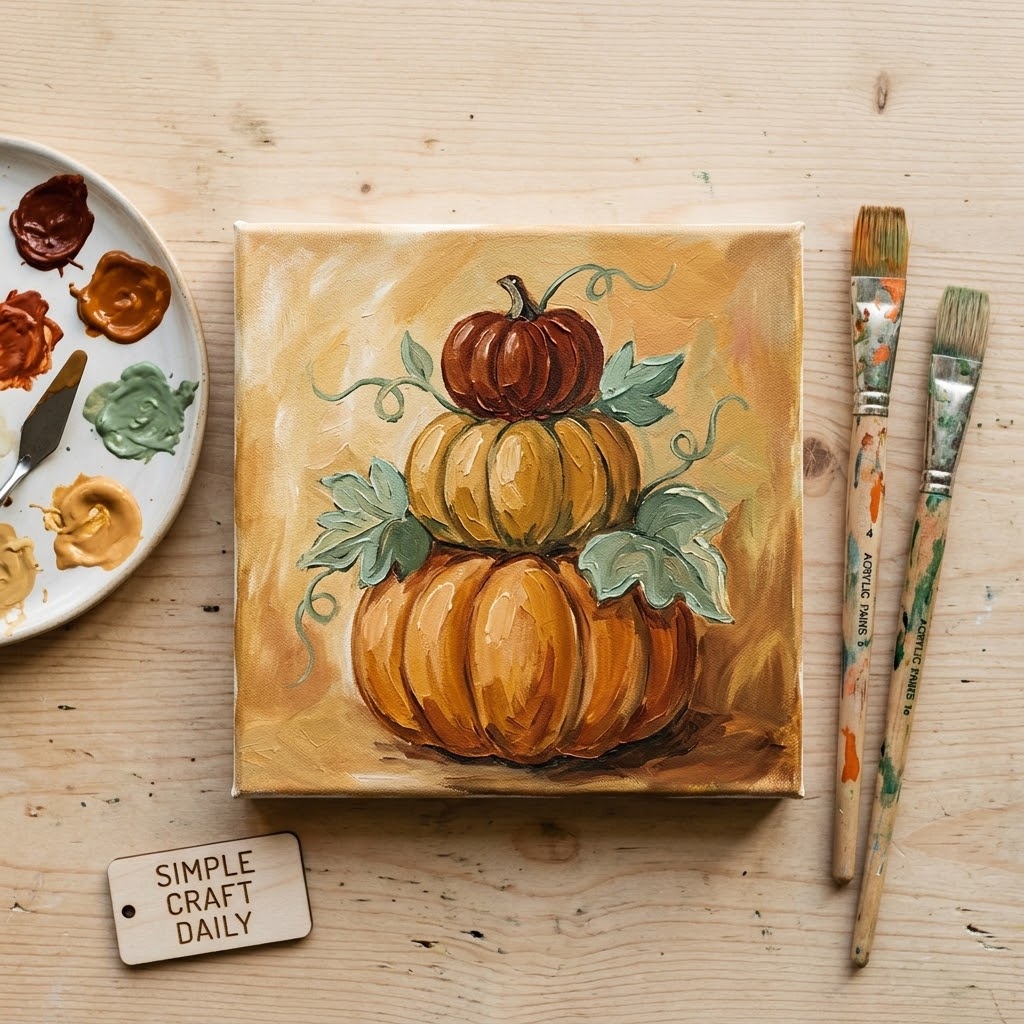
1. DIY Fall Canvas Paintings: Harvest Pumpkin Stack
Supplies Needed: 8 x 10 in canvas, orange acrylic paint, yellow ochre acrylic paint, burnt sienna acrylic paint, titanium white acrylic paint, green acrylic paint, 3/4 in flat brush, size 4 round brush, water cups.
Cover the 8 x 10 in canvas with a yellow ochre background using the 3/4 in flat brush. Let this thin coat dry for 20 to 30 minutes. Next, use the size 4 round brush to paint three overlapping orange pumpkin silhouettes, with the largest pumpkin at the bottom.
Mix burnt sienna into orange for curved segment shadows, placing each arc along one side of a pumpkin. Then dry-brush a pale orange made from titanium white and orange across the opposite side. Paint short green stems last. Allow this diy fall canvas painting to cure for 24 hours before applying varnish.
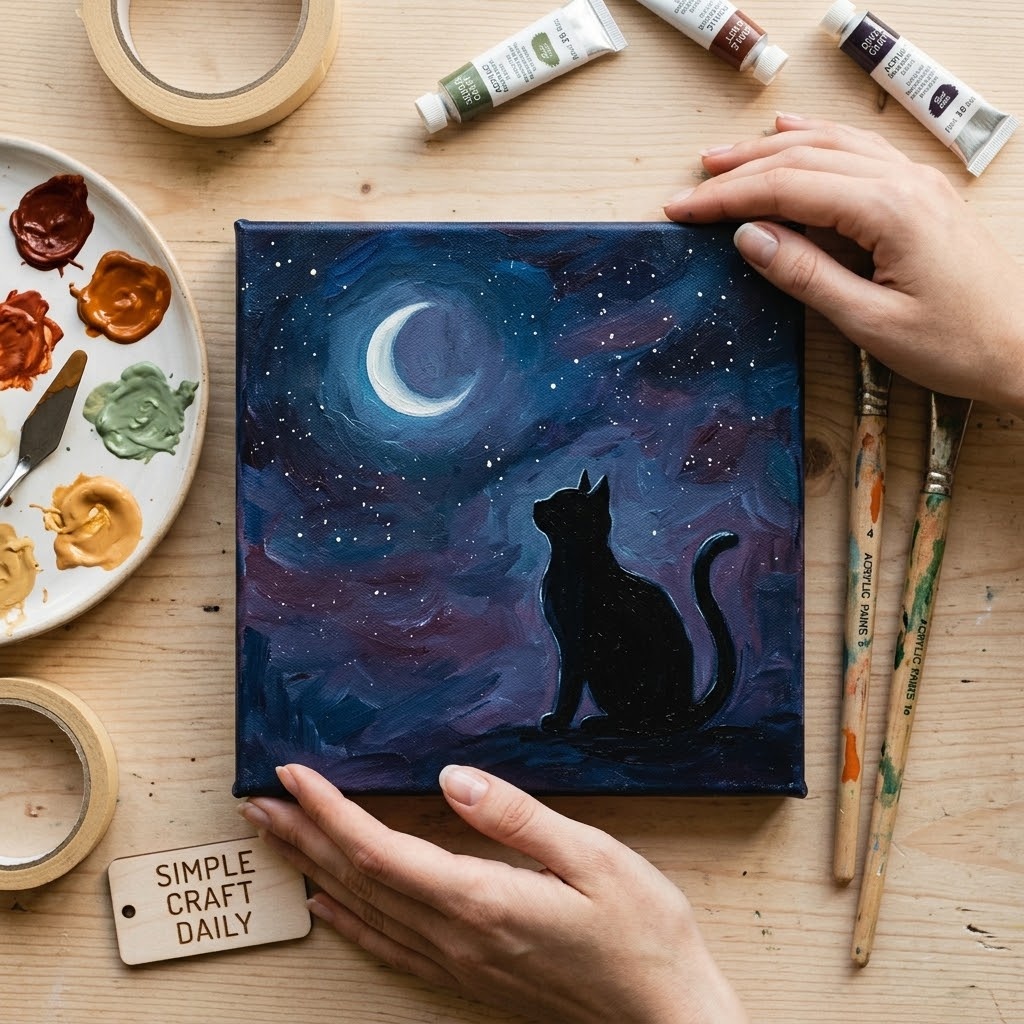
2. Black Cat Under a Crescent Moon
Supplies Needed: 8 x 10 in canvas, black acrylic paint, deep blue acrylic paint, violet acrylic paint, titanium white acrylic paint, yellow acrylic paint, painter’s tape, flat brush, size 0 liner brush, water cups.
Cut a crescent from painter’s tape and press it onto the upper third of the canvas. With a flat brush, blend deep blue, violet, and a touch of black while the paint is wet. Keep the lower edge darker and leave a blue-violet glow around the taped moon.
Wait 20 to 30 minutes until the sky is touch-dry, then peel the tape slowly. Paint the cat as one black silhouette with a curved back, pointed ears, tail, and narrow legs. After the silhouette dries for 20 minutes, use the size 0 liner brush for thin white whiskers and two tiny yellow eyes. This diy fall canvas painting needs a clean, unbroken cat outline to read clearly from across the room.
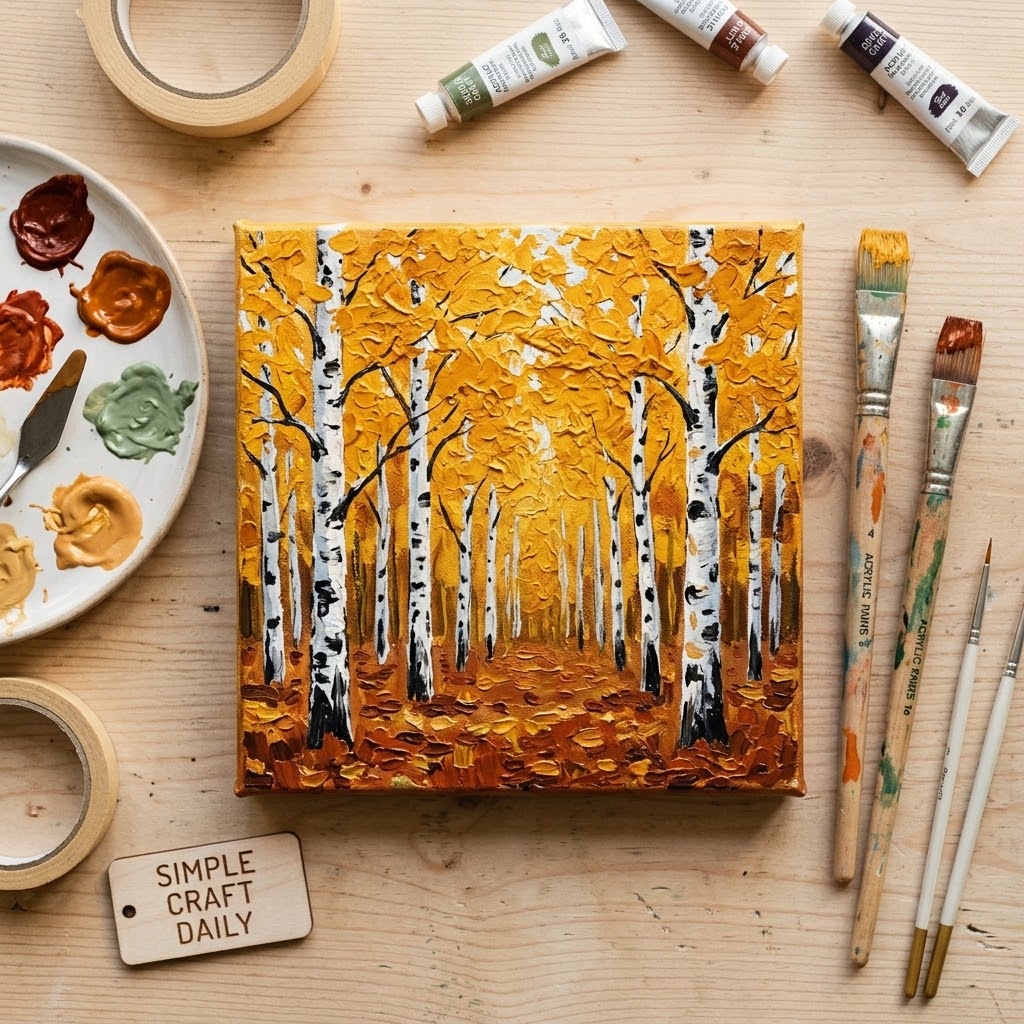
3. DIY Fall Canvas Paintings: Golden Birch Grove
Supplies Needed: 11 x 14 in canvas, yellow ochre acrylic paint, orange acrylic paint, burnt umber acrylic paint, titanium white acrylic paint, black acrylic paint, flat brush, liner brush, water cups.
Brush a loose yellow ochre and orange wash across the 11 x 14 in canvas. While it dries, use burnt umber with the flat brush to dab distant foliage across the upper half. Keep those marks smaller and softer than the foliage near the bottom edge.
After 30 minutes, paint three to five white birch trunks from top to bottom. Let the trunk edges wander slightly instead of making rigid stripes. Add broken black bark marks with the liner brush, leaving plenty of white visible. Finally, place larger orange and ochre leaf marks in the foreground so the diy fall canvas painting has clear depth.
4. Haunted House at Dusk
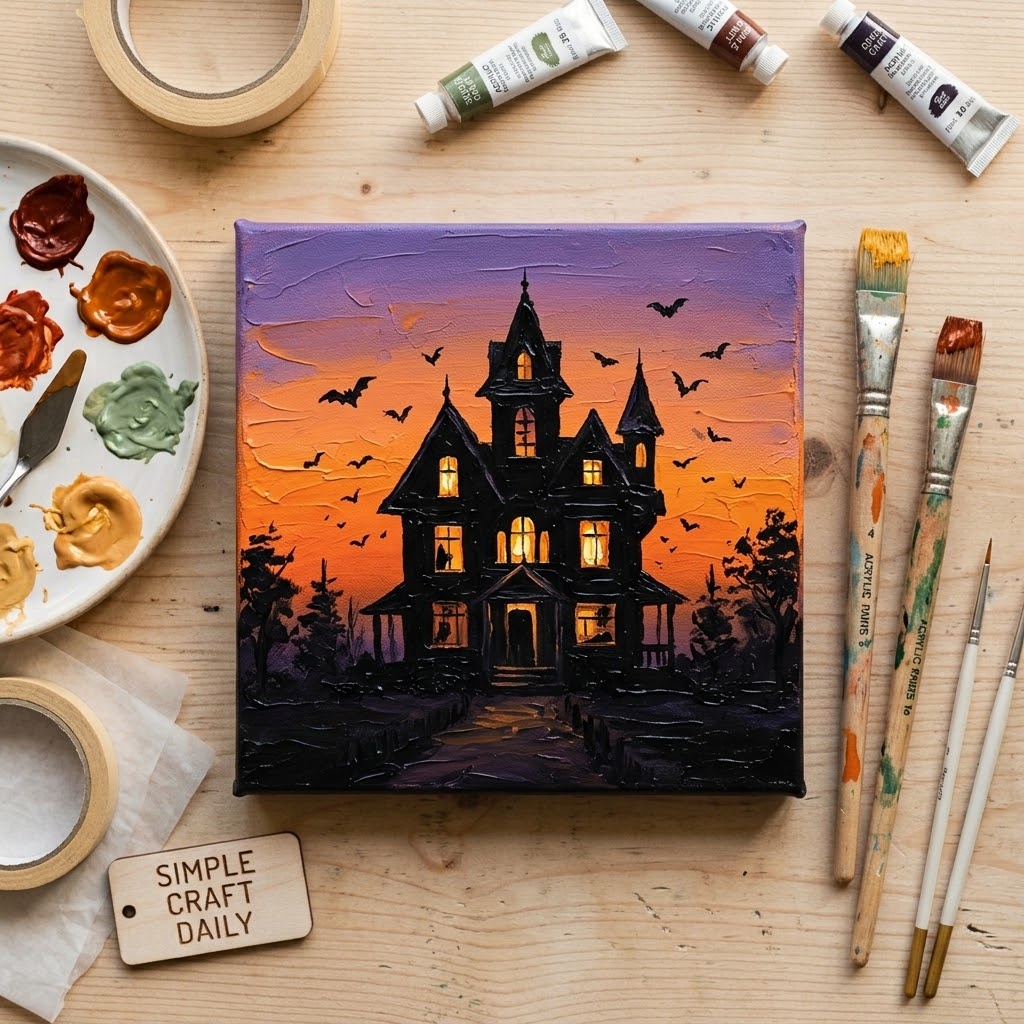
Supplies Needed: 11 x 14 in canvas, violet acrylic paint, orange acrylic paint, black acrylic paint, yellow acrylic paint, titanium white acrylic paint, graphite transfer paper, flat brush, liner brush, water cups.
Use graphite transfer paper to place a simple house outline with a roof peak, chimney, and three windows. Paint a violet-to-orange gradient around the transferred lines with a flat brush, keeping violet near the top and orange near the horizon. Let the sky dry for 30 minutes.
Cover the house shape with black paint, including the roof and ground line. Next, paint small yellow window rectangles and add thin black crossbars with the liner brush. Use the same liner brush for three small bats against the sky. Add a little titanium white to violet for a faint horizon haze if the sky needs separation. This diy fall canvas painting benefits from leaving a narrow, bright band near the horizon.
5. DIY Fall Canvas Paintings: Cozy Pumpkin Patch
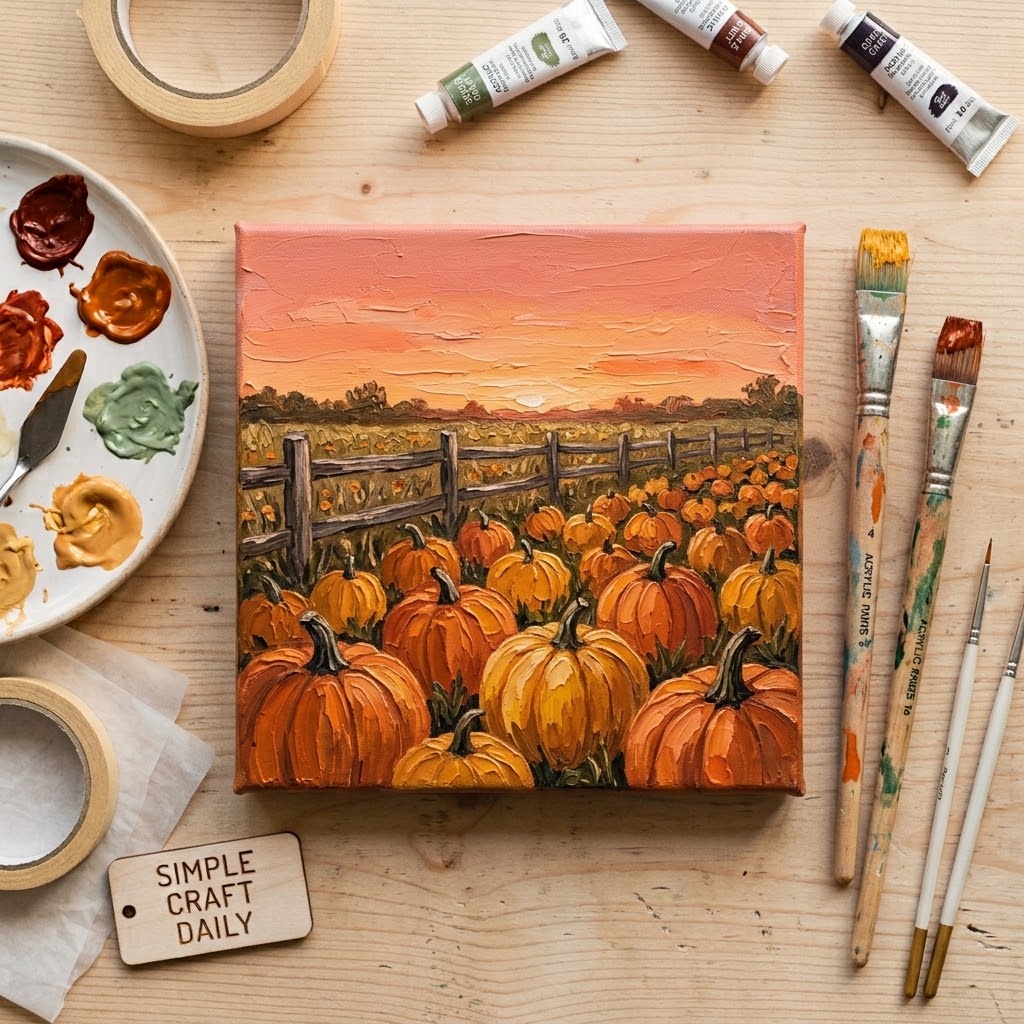
Supplies Needed: 11 x 14 in canvas, orange acrylic paint, crimson acrylic paint, green acrylic paint, black acrylic paint, titanium white acrylic paint, flat brush, filbert brush, round brush, water cups.
Mark a horizon line one-third of the way from the top. Use the flat brush to paint a soft crimson-and-white sunset band above it, then paint a dark green field below. Allow the background to dry for 20 to 30 minutes before adding pumpkins.
Use the filbert brush to place small orange pumpkins near the horizon and larger overlapping pumpkins at the front. Add black-green stems with the round brush. Then use a nearly dry flat brush with green and white paint to pull short grass marks upward around each pumpkin. This diy fall canvas painting looks strongest when the foreground pumpkins overlap rather than sit in a single row.
6. Witch Hat and Wildflowers
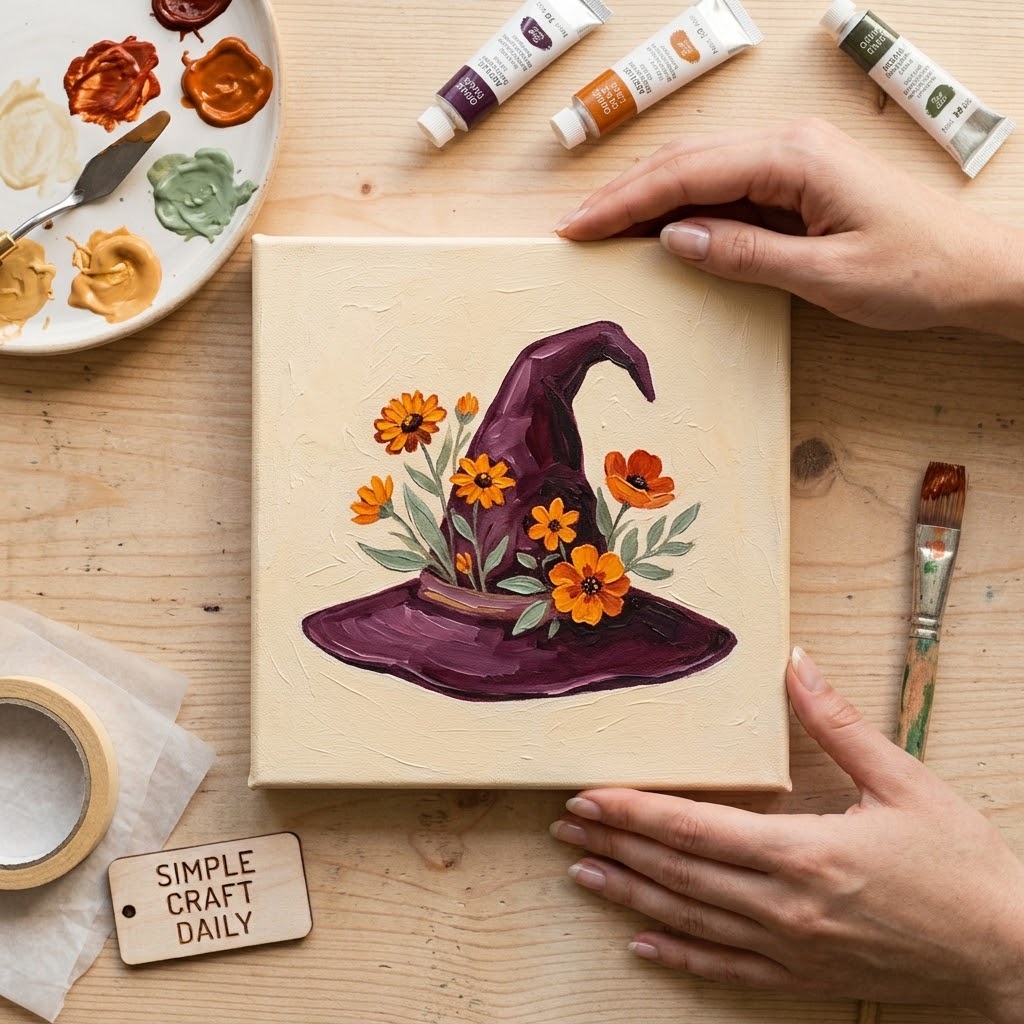
Supplies Needed: 8 x 10 in canvas, plum acrylic paint, black acrylic paint, cream acrylic paint, orange acrylic paint, green acrylic paint, yellow ochre acrylic paint, filbert brush, round brush, liner brush, water cups.
Paint the full canvas cream with the filbert brush and allow 20 minutes of drying time. Sketch a bent cone and wide brim in the center. Fill the shape with plum paint mixed with a little black, leaving a narrow plum highlight on one fold.
Use the liner brush to paint thin green stems around the lower edge. Let the stems dry for 15 minutes, then dot orange flowers with the round brush. Finish with a thin yellow ochre buckle on the hat brim. Keep the flowers loose and varied so the hat remains the main form. This diy fall canvas painting gains its charm from the contrast between the dark hat and airy cream ground.
Artist Acrylic Paint Set in Autumn and Halloween Colors
Heavy-body artist paint: the core supply for all 18 canvases, in the autumn tones these designs use.
I earn a commission if you make a purchase, at no additional cost to you.
7. DIY Fall Canvas Paintings: Raven on an Oak Branch
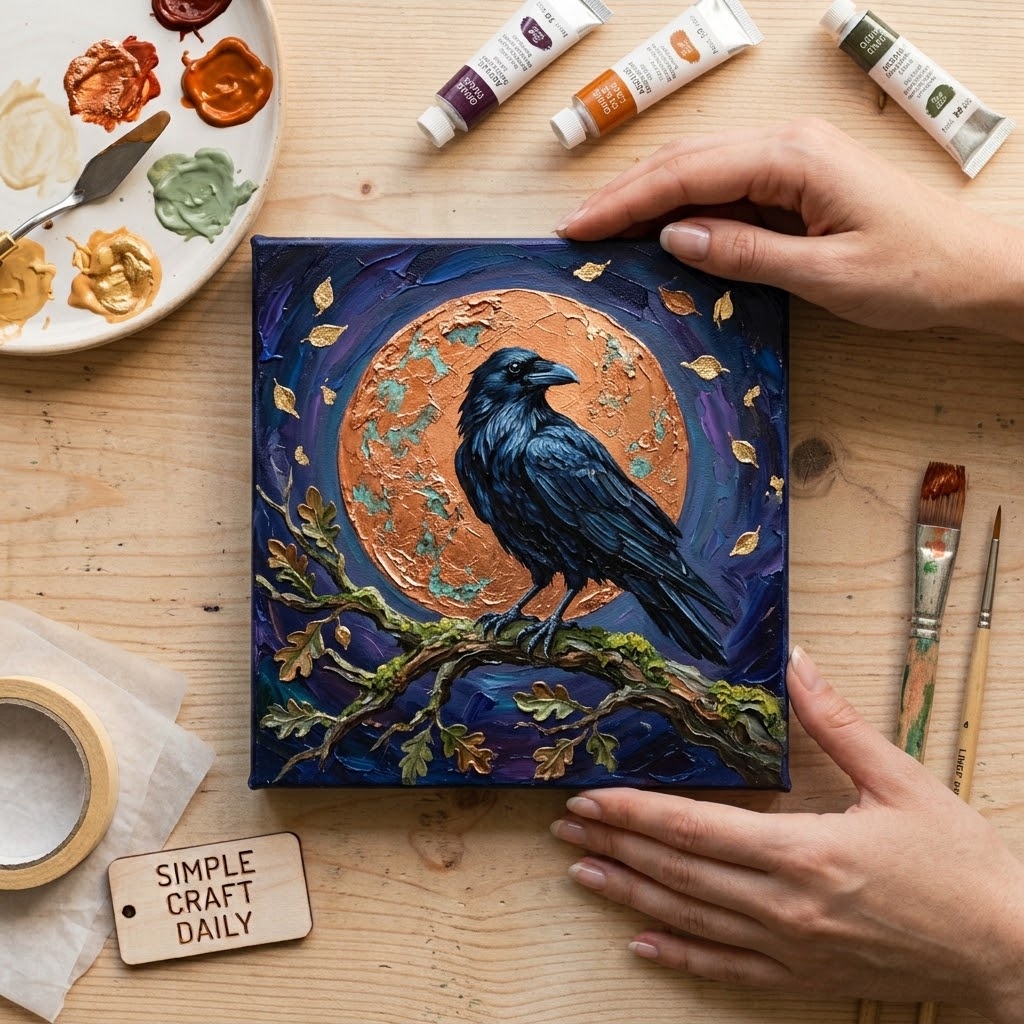
Supplies Needed: 8 x 10 in canvas, copper orange acrylic paint, black acrylic paint, burnt umber acrylic paint, gold acrylic paint, titanium white acrylic paint, round brush, liner brush, palette knife, water cups.
Paint a copper-orange circle slightly above center with the round brush. Apply two thin coats, allowing 20 minutes between coats, so the moon reads as a solid disk. Add a touch of titanium white to copper orange for a few soft marks across the lower edge.
After the circle dries, paint a burnt umber branch across its lower third. Build the raven with a black oval body, pointed beak, tail, and claw marks gripping the branch. Use the palette knife sparingly for gold and burnt umber oak leaves around the branch. This diy fall canvas painting stays graphic when the raven silhouette remains solid and uncluttered.
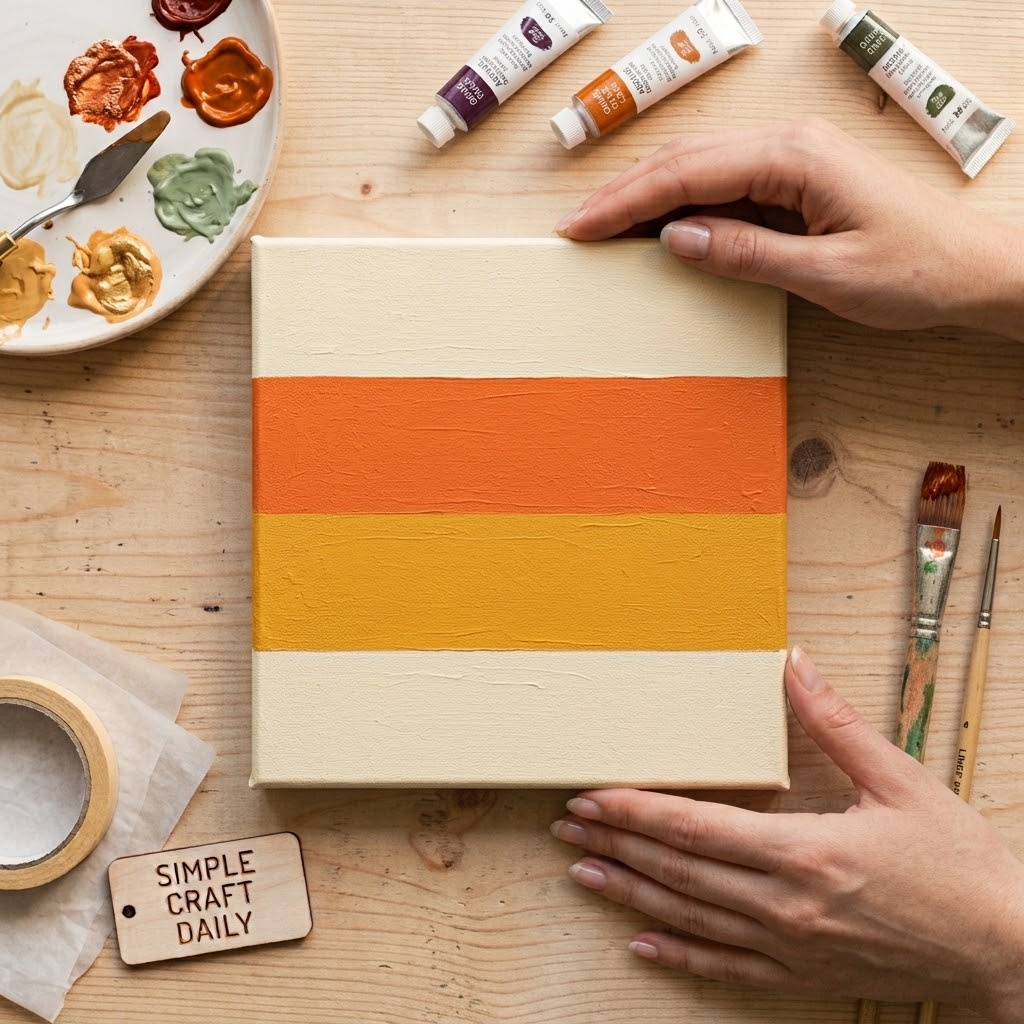
8. Candy Corn Stripe Canvas
Supplies Needed: 8 x 10 in canvas, cream acrylic paint, orange acrylic paint, yellow acrylic paint, low-tack painter’s tape, 3/4 in flat brush, water cups.
Paint the canvas cream and let it dry for 30 minutes. Apply two horizontal rows of low-tack painter’s tape to mark three broad bands. Brush a thin cream coat along every tape edge first; this seals small gaps and keeps the later colors from bleeding underneath.
Paint yellow in the bottom section and orange in the middle section with the 3/4 in flat brush. Use two thin coats rather than one heavy coat, allowing 20 minutes between them. Once the second coat is touch-dry, pull each tape strip back slowly at a 45-degree angle. Leave the top cream section uncovered for the classic candy corn order. Crisp tape lines give this diy fall canvas painting a polished finish.
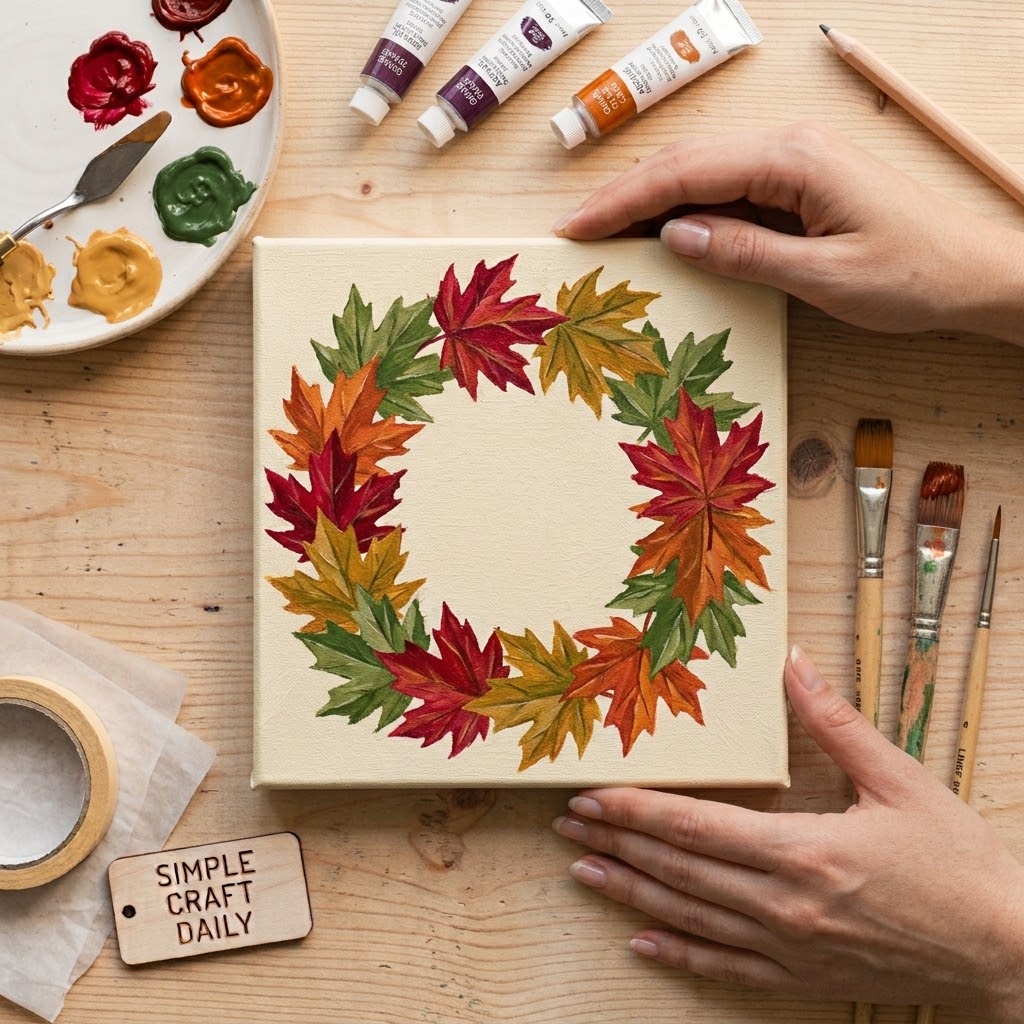
9. DIY Fall Canvas Paintings: Maple Leaf Wreath
Supplies Needed: 8 x 10 in canvas, crimson acrylic paint, orange acrylic paint, yellow ochre acrylic paint, burnt umber acrylic paint, green acrylic paint, white chalk pencil, round brush, liner brush, water cups.
Use the white chalk pencil to draw a 6 in circle guide at the canvas center. Keep the center open. With the round brush, stamp loose five-point maple leaf shapes around the guide using burnt umber and crimson first.
Next, overlap brighter orange, yellow ochre, and muted green leaves across the darker layer. Let the leaves dry for 20 minutes. Use the liner brush to add veins to only six to eight leaves; veins on every leaf can make the wreath feel crowded. Wipe away visible chalk after the paint dries. This diy fall canvas painting works beautifully in a small gallery wall.
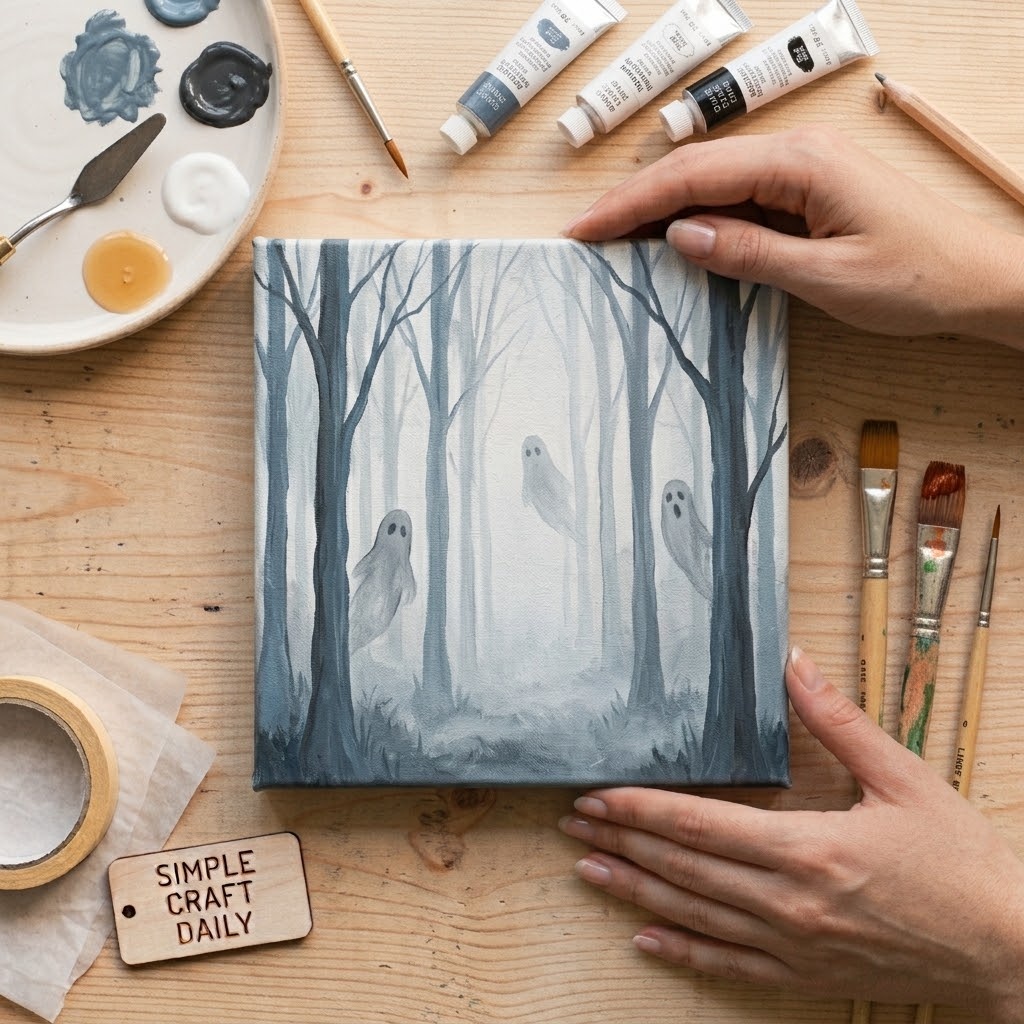
10. Ghosts in a Misty Forest
Supplies Needed: 11 x 14 in canvas, blue-gray acrylic paint, black acrylic paint, titanium white acrylic paint, violet acrylic paint, matte gel medium, flat brush, liner brush, water cups.
Paint a blue-gray and violet background with the flat brush. Build distant black tree trunks first, keeping them thin and low contrast. Then add wider, darker trunks at the sides of the foreground. Let the tree layer dry for 30 minutes.
Mix one part titanium white paint with one part matte gel medium. Brush this mixture lightly across the dry trees in horizontal fog bands. After 20 minutes, paint three white ghost forms with softly rounded tops and wavy lower edges. Let the ghosts dry for 20 minutes before adding small black eyes and mouths with the liner brush. The transparent medium keeps this diy fall canvas painting from becoming chalky or flat.
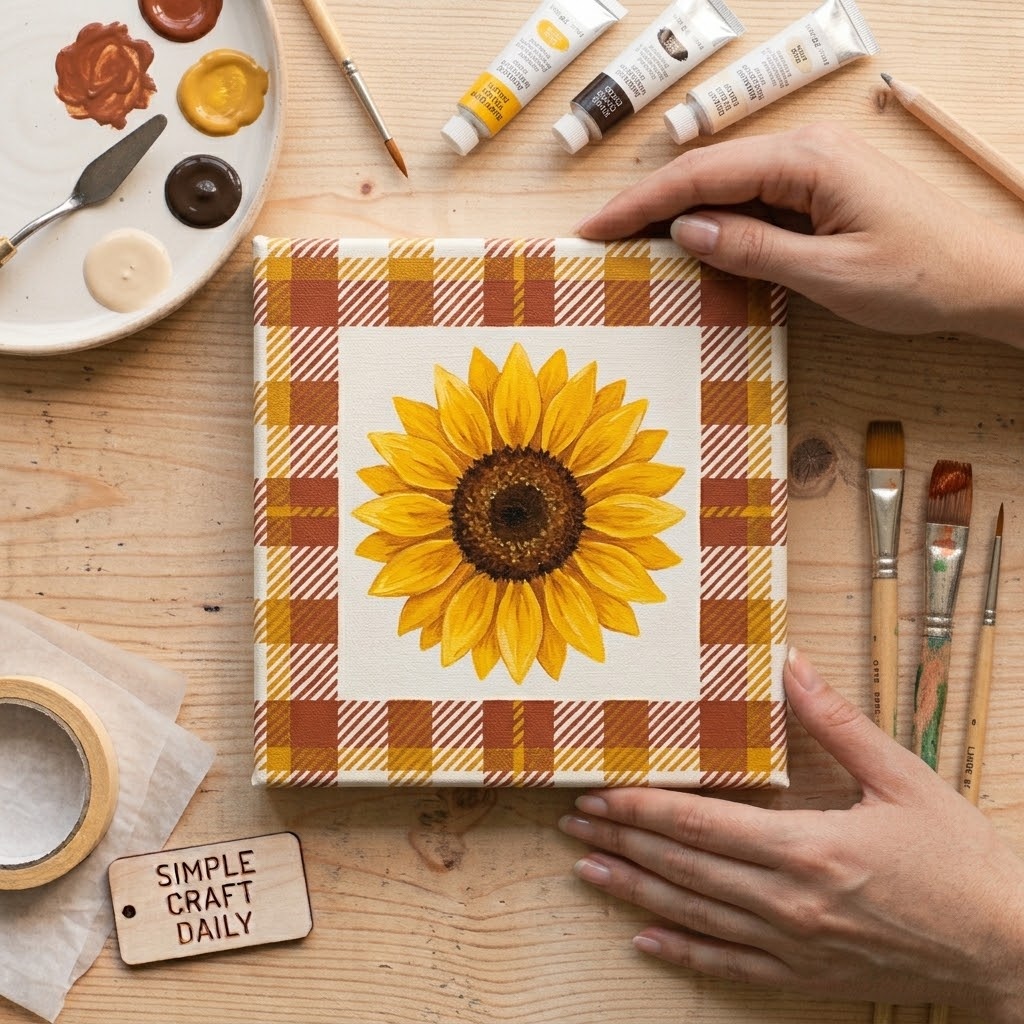
11. DIY Fall Canvas Paintings: Sunflower and Plaid
Supplies Needed: 11 x 14 in canvas, yellow acrylic paint, brown acrylic paint, rust acrylic paint, cream acrylic paint, green acrylic paint, painter’s tape, filbert brush, liner brush, water cups.
Paint a cream ground and let it dry for 20 minutes. Use the filbert brush to paint a brown center disk slightly off-center, then pull yellow petals outward in two uneven rings. Add short green leaves around the lower half and allow the flower to dry for 30 minutes.
Mask a 1 in border with painter’s tape. Paint rust vertical and horizontal lines inside the border, then add thinner cream crossing lines over the dry rust. The crossing lines should remain slightly translucent so the border reads like woven plaid. Remove the tape after the paint is touch-dry. This diy fall canvas painting combines a bold focal flower with a controlled decorative edge.
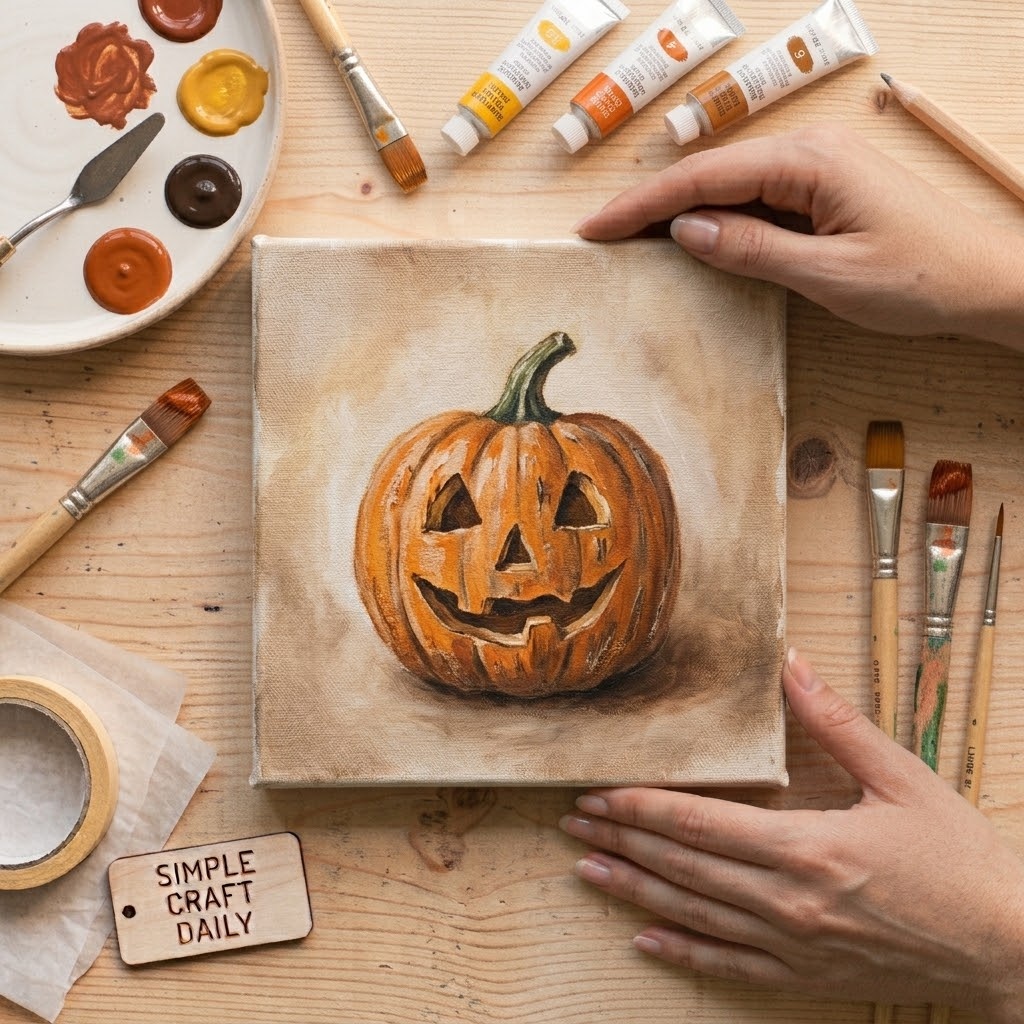
12. Vintage Jack-o’-Lantern
Supplies Needed: 8 x 10 in canvas, orange acrylic paint, burnt umber acrylic paint, black acrylic paint, cream acrylic paint, green acrylic paint, filbert brush, round brush, liner brush, water cups.
Use the filbert brush to paint a muted cream background, then let it dry for 20 minutes. Paint a slightly uneven orange pumpkin in the center with the round brush. Mix burnt umber into orange and shade the lower edge plus the segment valleys.
Mix black with burnt umber for the carved eyes and mouth. This softer dark mixture creates an aged look without harsh solid-black cutouts. Dry-brush cream across the pumpkin’s high points using a nearly empty filbert brush. Finally, use the liner brush for a small curved green stem and a few short pumpkin ridges. For diy fall canvas paintings with a vintage finish, keep the cream dry-brushing light and broken.
13. DIY Fall Canvas Paintings: Copper Moon Bats
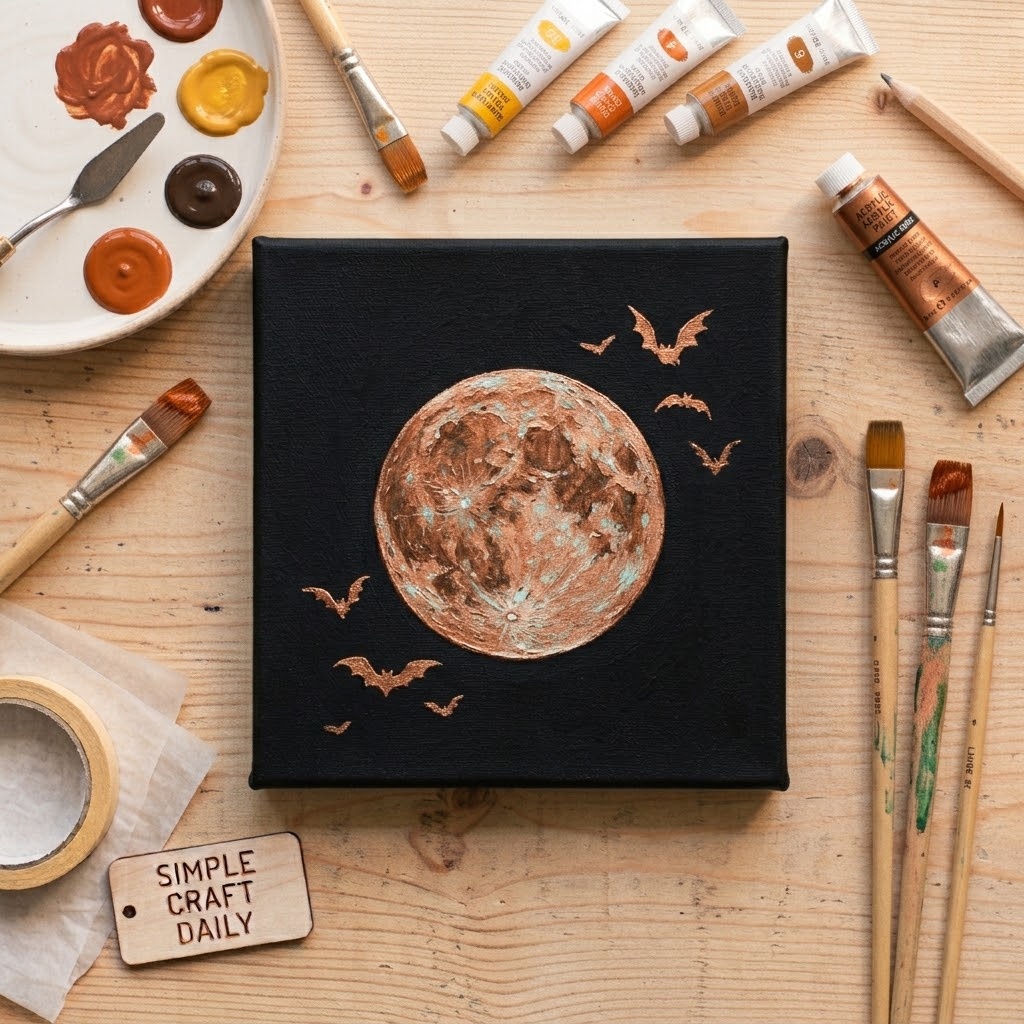
Supplies Needed: 8 x 10 in canvas, black acrylic paint, copper orange acrylic paint, titanium white acrylic paint, round brush, size 0 liner brush, water cups.
Cover the canvas with black paint and let it dry for 30 minutes. Use the round brush to paint a large copper-orange moon slightly off-center. Apply a second opaque coat after the first coat dries for 20 minutes.
Mix a small amount of titanium white into copper orange and add a few curved texture marks across the moon. After another 20 minutes, use the size 0 liner brush to paint black bats. Make two bats near the moon large, two medium bats farther away, and several tiny distant bats near the upper edge. Varied wing spans create believable distance in this diy fall canvas painting.
Mini Tabletop Painting Easel
Optional upgrade: holds an 8×10 upright so layers dry without touching your work surface.
I earn a commission if you make a purchase, at no additional cost to you.
14. Acorn Branch on Cream
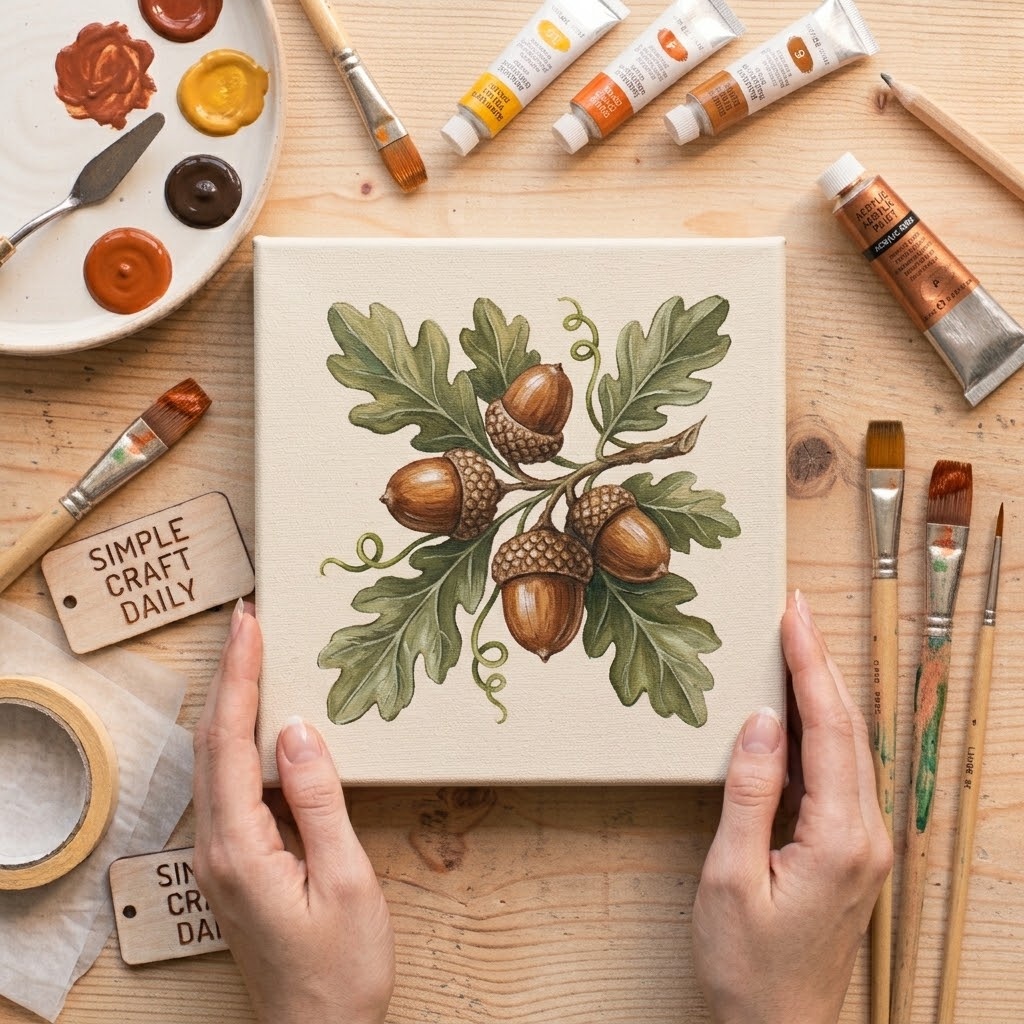
Supplies Needed: 8 x 10 in canvas, cream acrylic paint, burnt umber acrylic paint, yellow ochre acrylic paint, green acrylic paint, black acrylic paint, round brush, liner brush, water cups.
Paint the canvas cream and allow 20 minutes of drying. Lightly sketch one curved branch with the liner brush using diluted burnt umber. Add three acorn bodies with the round brush, placing them at different heights along the stem.
Paint each acorn cap with burnt umber mixed with a little black, then stipple a few yellow ochre marks across the caps for texture. Add muted green leaves with the round brush and use the liner brush for central leaf veins. Keep the leaves restrained so the calm cream background remains visible around the branch. This diy fall canvas painting suits narrow wall spaces where a quieter botanical scene is needed.
15. DIY Fall Canvas Paintings: Spooky Apothecary Shelf
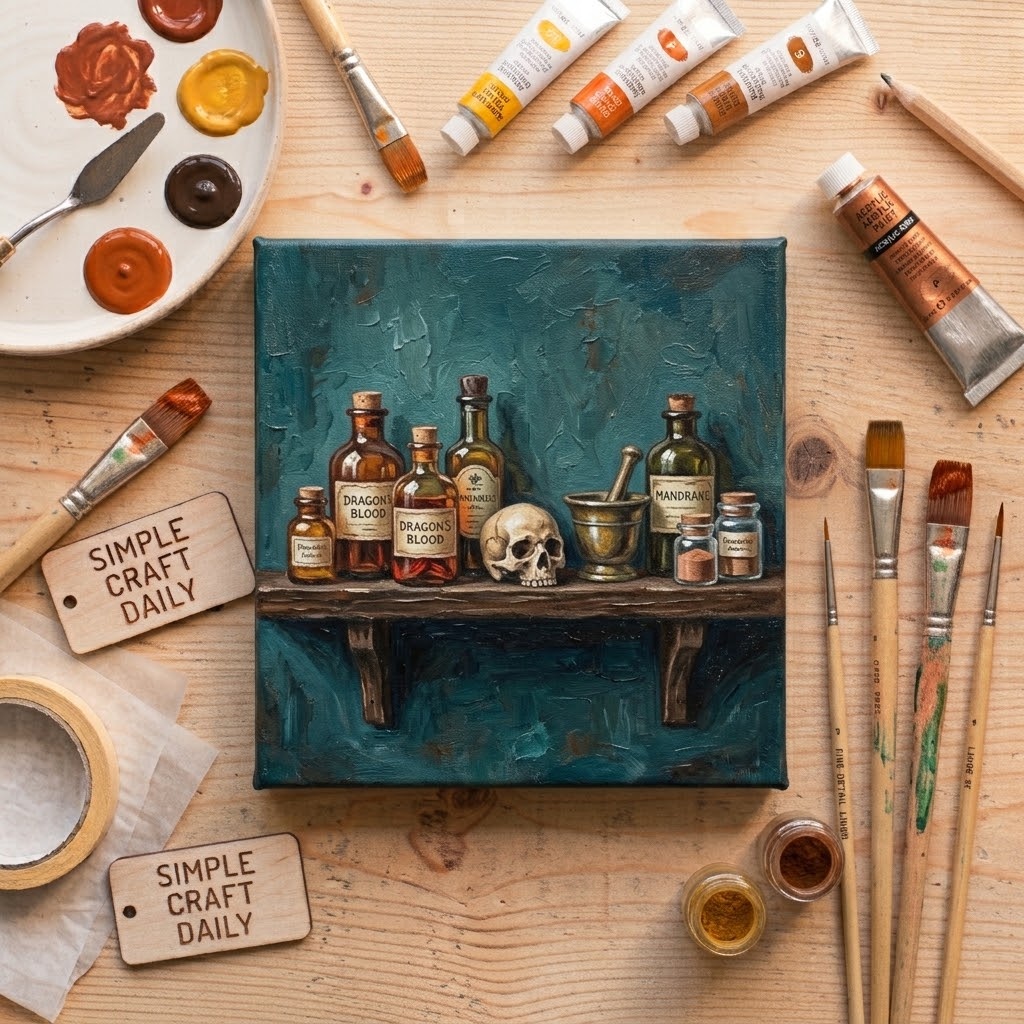
Supplies Needed: 11 x 14 in canvas, deep teal acrylic paint, black acrylic paint, amber acrylic paint, violet acrylic paint, titanium white acrylic paint, green acrylic paint, flat brush, round brush, liner brush, water cups, daylight LED magnifying craft lamp with desk clamp.
Paint the canvas deep teal with the flat brush and let it dry for 30 minutes. Paint two black horizontal shelf boards before adding any bottles. Then use the round brush to place simple bottle shapes in amber, violet, green, and black, varying the neck heights and widths.
Paint each label as a small light rectangle instead of attempting miniature ornate labels. Add a tiny white skull between bottles with the round brush, then use the liner brush for shelf shadows and short label marks. Use a daylight lamp for the fine lettering so white paint stays clean rather than gray. This diy fall canvas painting looks best when bottle spacing remains uneven and slightly mysterious.
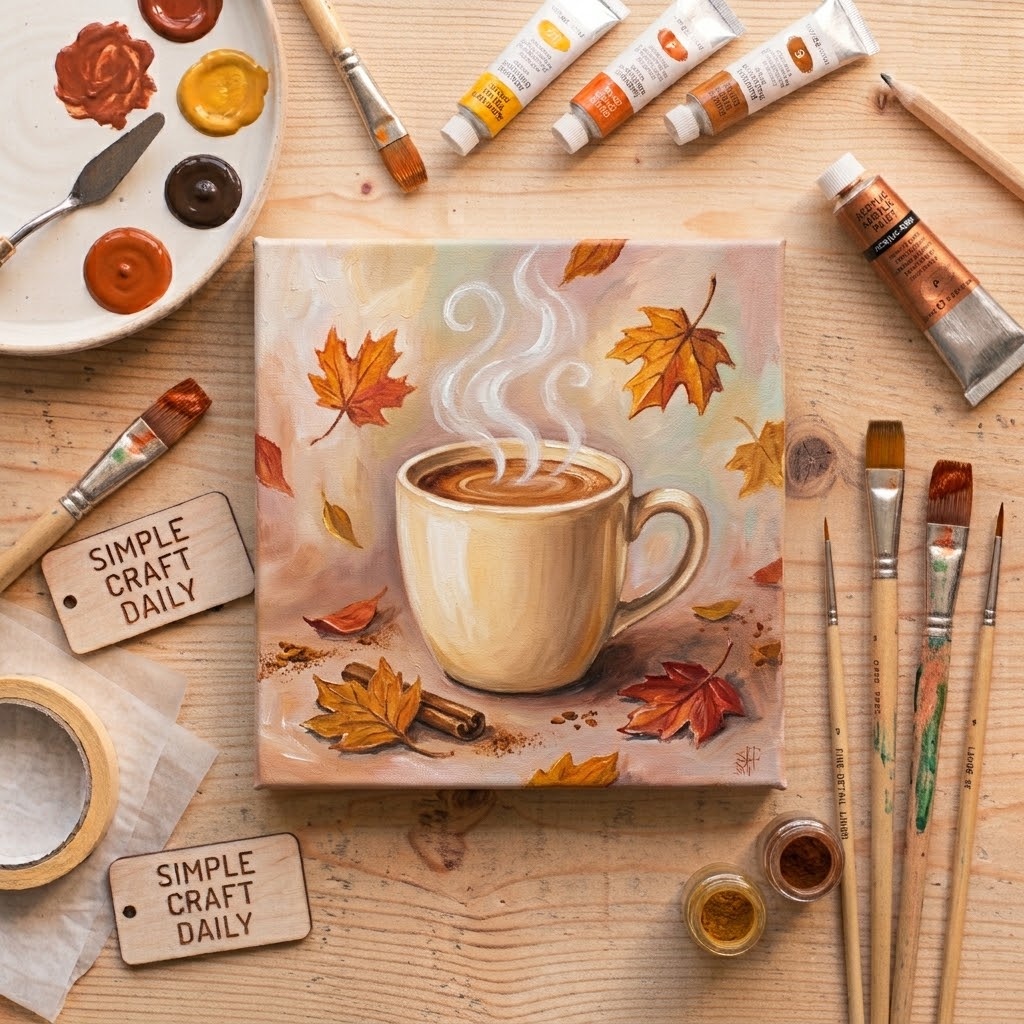
16. Cinnamon Latte and Falling Leaves
Supplies Needed: 8 x 10 in canvas, cream acrylic paint, cinnamon brown acrylic paint, orange acrylic paint, crimson acrylic paint, titanium white acrylic paint, round brush, liner brush, water cups.
Paint a cream background and let it dry for 20 minutes. Draw a shallow ellipse for the mug rim with the liner brush, then paint a cinnamon-brown mug body below it using the round brush. Add a smaller dark ellipse inside the rim to suggest coffee.
When the background is fully dry, paint two thin steam curls with semi-opaque titanium white on the liner brush. Scatter orange, crimson, and brown leaves in three sizes around the mug, keeping the largest leaves near the lower corners. Use a few small white highlights along the mug rim to separate it from the background. This diy fall canvas painting works well in a kitchen or coffee nook display.
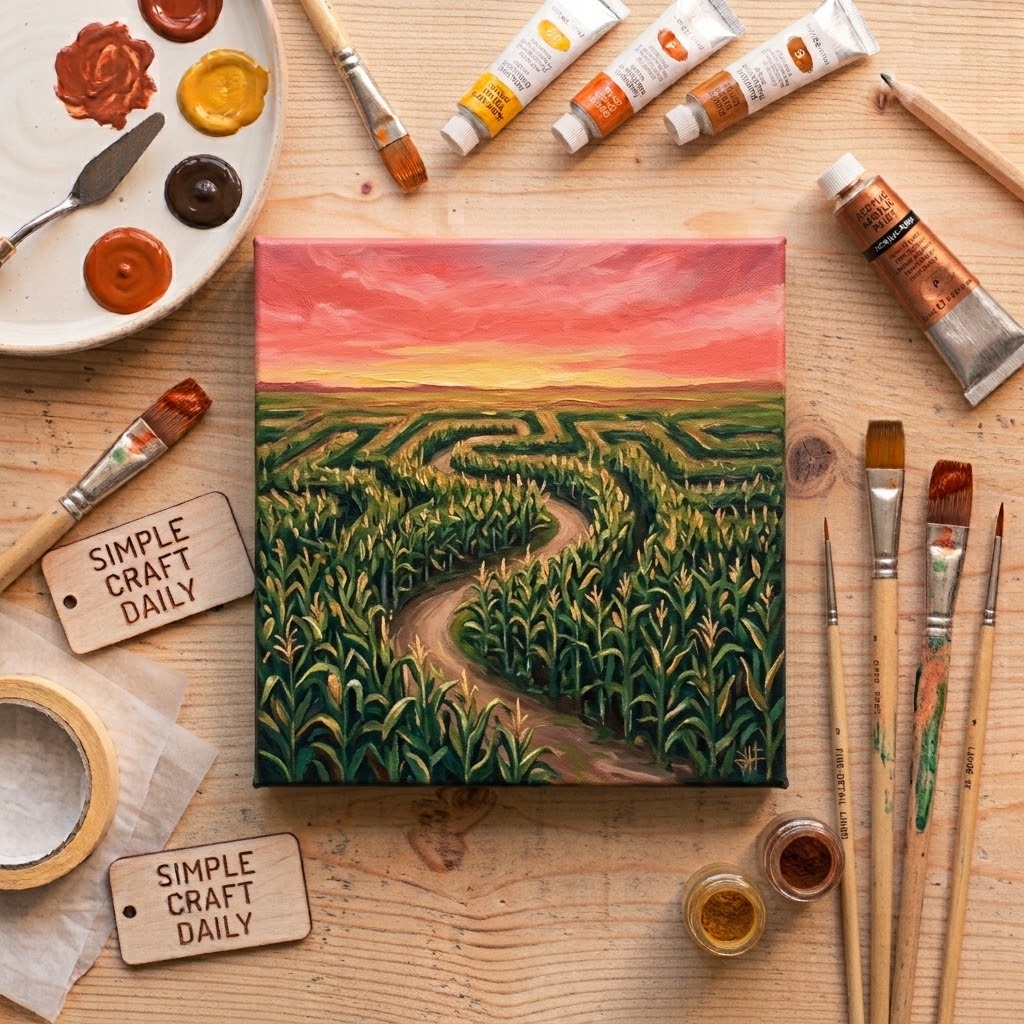
17. DIY Fall Canvas Paintings: Corn Maze at Sunset
Supplies Needed: 11 x 14 in canvas, coral acrylic paint, orange acrylic paint, yellow acrylic paint, green acrylic paint, black acrylic paint, titanium white acrylic paint, flat brush, filbert brush, liner brush, water cups.
Blend coral, orange, yellow, and a small amount of titanium white across the sky with the flat brush. Keep the yellow closest to the horizon. Let the sky dry for 30 minutes before building the cornfield so the greens stay clear.
Use the filbert brush to paint thin, low-contrast green rows near the horizon. Make each row wider and darker as it approaches the foreground, leaving a pale winding path between them. Add dark green and black leaves at both lower corners with the liner brush to frame the path. This diy fall canvas painting gains depth from thinner distant rows, not from extra detail.
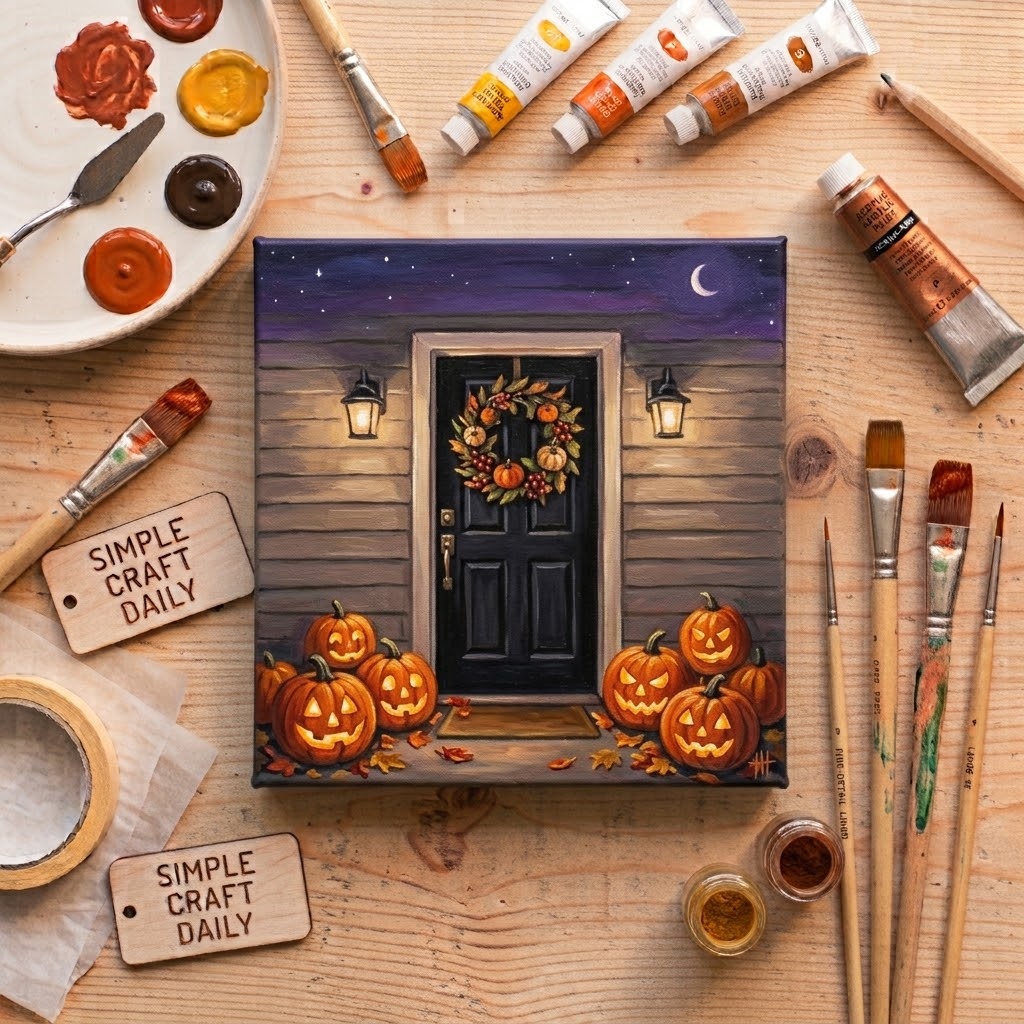
18. Halloween Night Porch
Supplies Needed: 11 x 14 in canvas, black acrylic paint, warm gray acrylic paint, orange acrylic paint, yellow acrylic paint, green acrylic paint, titanium white acrylic paint, flat brush, round brush, liner brush, water cups.
Paint the house wall warm gray with the flat brush. Add the black door, doorframe, porch boards, and steps before placing pumpkins or a wreath. Let these architectural layers dry for 30 minutes so the smaller shapes stay crisp.
Use the round brush to paint three orange pumpkins on the steps and a green wreath on the door. Add tiny yellow-orange marks to the pumpkins and beside the door for candle glow, keeping those highlights sparse. Finally, use the liner brush for porch-board seams and a small wreath bow. A few titanium white touches on the doorframe give this diy fall canvas painting a cool night contrast.
DIY Fall Canvas Paintings FAQ
What acrylic colors do I need for DIY fall canvas paintings?
Start with titanium white, carbon black, burnt umber, yellow ochre, orange, crimson, deep blue, violet, and green. These colors mix into pumpkin shadows, rusty leaves, deep night skies, cream highlights, and muted botanical greens. For diy fall canvas paintings with warmer shadows, add burnt sienna; however, burnt umber and orange can also create a close substitute.
How long should acrylic paint dry before a second layer?
Thin acrylic layers usually become touch-dry in 20 to 30 minutes under typical indoor conditions. However, heavy paint, humid rooms, and medium-rich mixtures can need longer. Test an edge lightly with a clean fingertip; if it feels cool, tacky, or lifts under pressure, wait before adding the next layer to avoid muddy color. This patience keeps diy fall canvas paintings crisp when light and dark layers meet.
Can beginners make DIY fall canvas paintings without drawing?
Yes. Build paintings from circles, ovals, rectangles, branches, and simple silhouettes. Use tape for stripes and moon masks, and use graphite transfer paper for complex haunted houses, porch architecture, or lettering. First, practice the main shape on paper at the same approximate size as your canvas. This small rehearsal makes diy fall canvas paintings easier to control with a brush.
When can I varnish a seasonal acrylic canvas?
Follow the varnish manufacturer’s label because cure windows vary by formula and paint thickness. Acrylic paint often needs several days to fully cure before varnishing, even though it dries quickly to the touch. Test varnish on a painted scrap or a small corner first, then apply a thin, even coat in a well-ventilated room. Proper curing helps diy fall canvas paintings resist scuffs when they are stored or moved each season.
Once your paintings are dry and framed or propped on a shelf, combine your diy fall canvas paintings with our creative mosaic art ideas for home and garden or other DIY fall decorations for cozy seasonal styling for a layered autumn display.
Quick Reference: All Supplies at a Glance
For your convenience, here is a quick summary of all materials and tools used in this tutorial:
✨ Consumable Raw Materials
- Pre-Primed Stretched Cotton Canvases, 8 x 10 in and 11 x 14 in | Check Pre-Primed Stretched Cotton Canvases, 8 x 10 in and 11 x 14 in on Amazon
- Artist Acrylic Paint Set in Autumn and Halloween Colors | Check Price on Amazon
- Matte Gel Medium for Acrylic Blending | Check Matte Gel Medium for Acrylic Blending on Amazon
🧰 Core Crafting Tools & Equipment
- Synthetic Acrylic Brush Set with Flat, Filbert, Round, and Liner Brushes | See Synthetic Acrylic Brush Set with Flat, Filbert, Round, and Liner Brushes on Amazon
- Stay-Wet Paint Palette (or Any Standard Palette) | Explore Stay-Wet Paint Palette with Disposable Palette Sheets on Amazon
- Painter’s Tape, 0.94 in Low-Tack | View on Amazon
- Graphite Transfer Paper | Check Graphite Transfer Paper on Amazon
- White Chalk Pencil | Check White Chalk Pencil on Amazon
- Palette Knife Set for Acrylic Texture | Check Palette Knife Set for Acrylic Texture on Amazon
- Two Water Cups for Rinsing and Blending | Check Two Water Cups for Rinsing and Blending on Amazon
Important Crafting Safety Notes
Crafting is a rewarding creative activity, but maintaining a safe workshop environment is essential for yourself, your family, and your pets. Please review these vital safety precautions before starting:
• Personal Protective Equipment (PPE) & Safe Handling: Always wear safety glasses or protective eyewear when cutting metal wire, clipping jump rings, trimming hard findings, or using power tools to prevent flying shards. Use heat-resistant work mats and exercise caution around high-temperature glue guns, irons, or heating tools to avoid burns. Wear disposable nitrile gloves and a particle dust mask when sanding wood or working with clays, resins, and solvent-based sealants to protect your skin and lungs.
• Room Ventilation & Fume Safety: Always craft in a well-ventilated space with open windows, cross-ventilation, or active exhaust whenever using solvent-based adhesives, instant bonders, aerosol sprays, epoxy resins, or heat-curing materials. Never inhale chemical fumes directly, and allow finished pieces to off-gas and cure completely in an airy area away from everyday living spaces.
• Child & Pet Safety (Choking & Swallowing Prevention): Small craft components—including safety eyes, split rings, clasps, jump rings, beads, bells, small magnets, unbaked clay scraps, and loose polyester fiberfill—present severe choking, intestinal obstruction, and ingestion hazards for babies, toddlers, and pets. Keep all unattached hardware, yarn cutoffs, and stuffing strictly out of reach. For handmade gifts intended for infants or young children, omit plastic washer eyes and detachable findings entirely in favor of securely stitched, double-knotted embroidered details.
• Sharp Tool Storage & Clean Work Area: Store sharp tools—such as rotary cutters, craft knives, bent-tip yarn needles, snips, scissors, and jewelry pliers—in secure, latching cases or high cabinets immediately after use. Thoroughly inspect, sweep, or vacuum your craft area and floor after finishing to ensure no dropped needles, pins, wire clippings, or small findings remain where curious pets or bare feet could step on or swallow them.
• Certified, Quality & Non-Toxic Supplies: Always choose verified non-toxic craft supplies (such as ACMI AP-certified paints and adhesives, lead-free and nickel-free jewelry findings, and skin-safe materials). Follow manufacturer label guidelines for curing durations, safe operating temperatures, and proper product disposal. Never use food preparation utensils or kitchen cookware for craft chemicals.
For more detailed guidance on safe crafting practices, liability disclosures, and website usage, please review our Terms and Conditions.
“Which of these DIY Fall Canvas Paintings You Will Absolutely Love ideas are you excited to try first, or do you have a creative tip of your own to share? Drop a comment below—I’d love to hear your thoughts and see what you create!”



[…] if muddy prints become frustrating. For adults who enjoy adapting the tree shape after class, these DIY fall canvas painting ideas offer a separate grown-up project. Dry these fall crafts for kindergarten flat for 30 to 45 […]