

Small handmade details beat generic key fobs every time. These diy crochet keychains turn a few tight spiral rounds into eight cheerful charms with texture, color, and hardware that can handle daily use.
Most designs use beginner-friendly amigurumi shaping with light fiberfill stuffing: the cloud, bee, strawberry, cat, mushroom, and heart are gently stuffed, while the daisy and lemon slice stay flat by design. Every design finishes with a reinforced hanging loop.
Affiliate Disclosure: This post contains affiliate links. As an Amazon Associate, I earn from qualifying purchases. If you buy through these links, I may earn a commission at no additional cost to you.
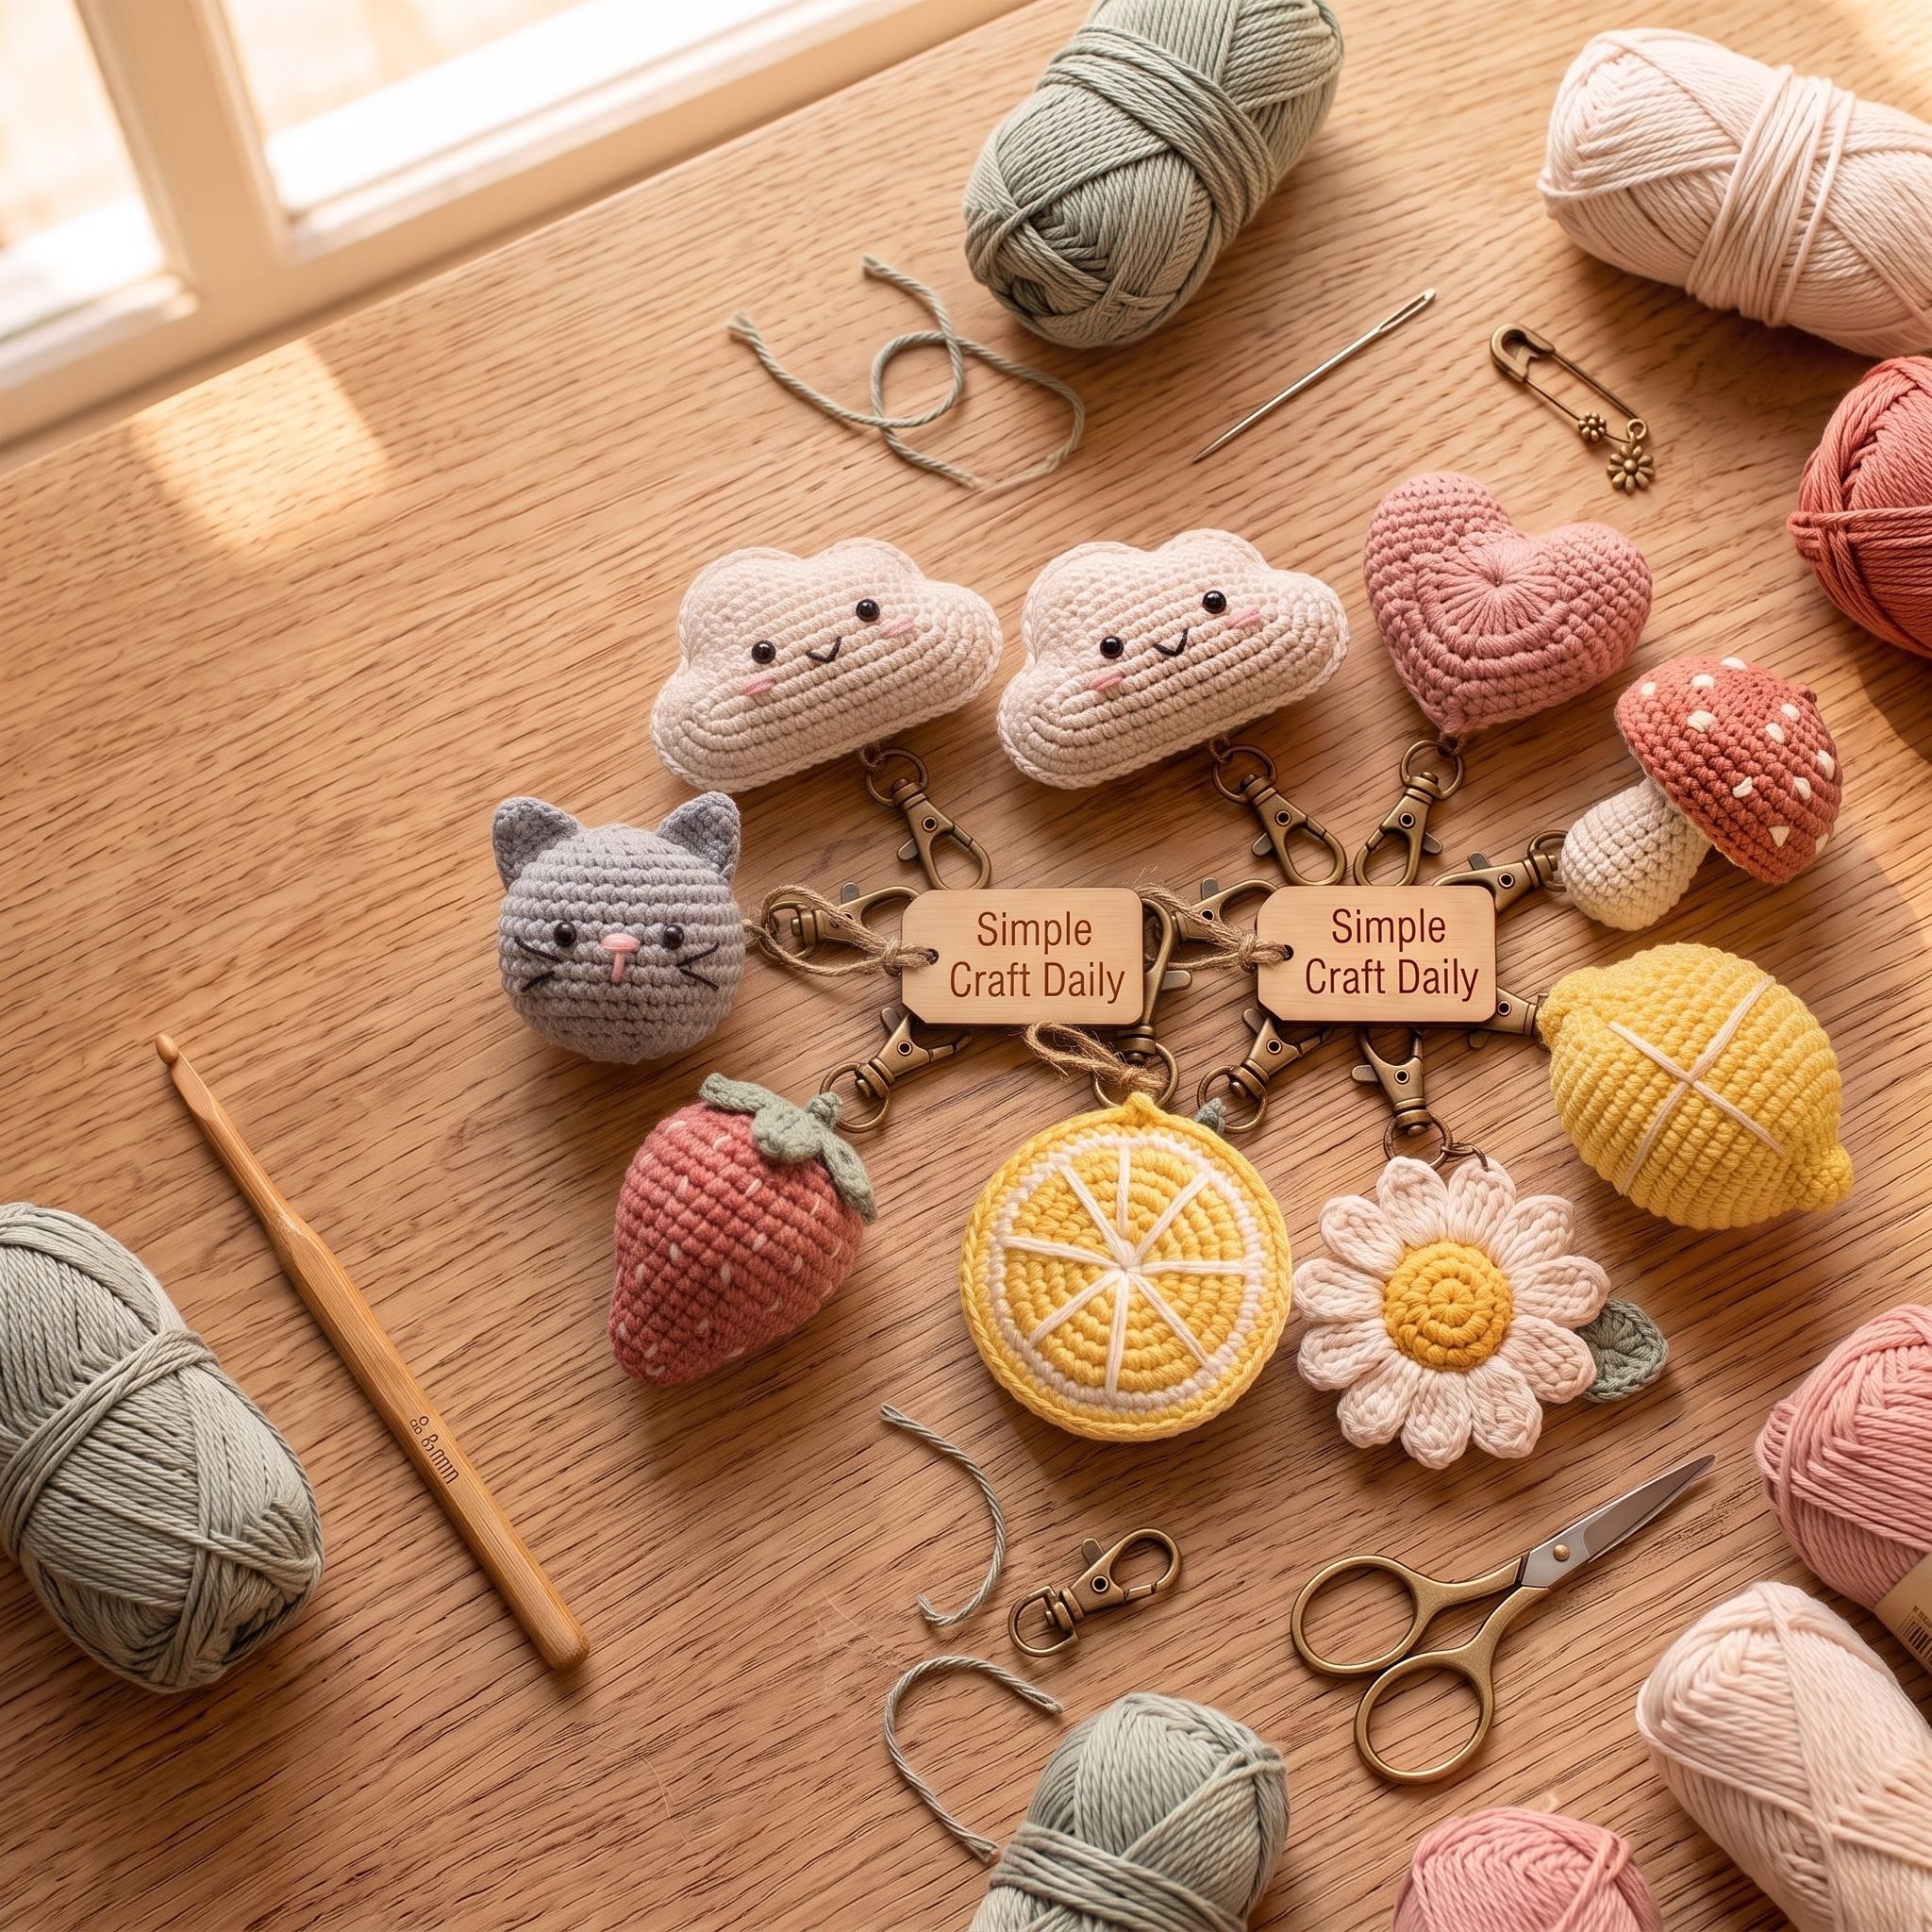
Essential Supplies for DIY Crochet Keychains
Small crochet charms hold their shape when the fabric is dense, the filling is light, and the hardware is properly closed. Choose soft muted colors such as cream, sage, blush, terracotta, buttercup yellow, and soft blue so the collection feels coordinated without looking uniform.
🧶 Yarn, Filling & Detail Materials
- Cotton Amigurumi Yarn — Smooth, tightly spun cotton shows tiny stitches clearly and resists fuzzy wear from frequent handling |
[Check Price on Amazon] - Polyester Fiberfill Stuffing — Clean washable filling stays springy inside miniature forms; use small pinches so each charm remains compact |
[See Price on Amazon] - Safety Eyes (Optional) — Washer-backed pieces for the bee and cat faces; stitched floss eyes are the equally safe alternative, and plastic eyes stay off charms meant for young children |
[View Safety Eyes on Amazon] - Embroidery Floss — Fine cotton strands make crisp smiles, whiskers, seeds, spots, and surface lines without bulky knots |
[Find Embroidery Floss on Amazon]
🧰 Crochet Tools & Stitch Control
- Ergonomic Crochet Hook Set — A 2.5 mm to 3 mm hook helps create firm fabric; choose a hook slightly smaller than the yarn label suggests |
[Check Ergonomic Crochet Hook Set on Amazon] - Large-Eye Blunt Yarn Needles — Blunt tips pass through dense crochet cleanly when joining ears, petals, wings, and loops |
[See Large-Eye Blunt Yarn Needles on Amazon] - Locking Stitch Markers — Removable markers identify the first stitch of each spiral round and keep shaping even |
[View Locking Stitch Markers on Amazon] - Yarn Snips — Small sharp scissors trim yarn and floss tails once the ends are woven in |
[Check Yarn Snips on Amazon]
🔩 Keychain Hardware
- Swivel Lobster Clasp Keychain Hardware — The clasp connects to each charm through a jump ring opened sideways with pliers and closed flush, sitting between the clasp and the doubled yarn loop stitched through two structural rounds |
[Check Swivel Lobster Clasp Keychain Hardware on Amazon] - Jewelry Pliers and Jump Ring Tool — These compact tools close jump rings flush so the charm cannot slip through a gap |
[Find Jewelry Pliers and Jump Ring Tool on Amazon]
Crochet Basics: Terms Used in These Eight Patterns
Quick definitions for the terms the instructions below assume, so you can follow along without a separate tutorial.
- Magic Ring — An adjustable starting loop that pulls the first round closed so no hole shows at the center.
- Single Crochet (sc) — The basic stitch: insert the hook, yarn over, pull through, yarn over, pull through both loops.
- Increase (inc) — Two single crochet stitches worked into the same stitch to widen the round.
- Decrease (dec) — Two stitches worked together as one to narrow the round.
- Slip Stitch (sl st) — A flat stitch used to join rounds or move the yarn without adding height.
- Continuous Rounds — Spiral rounds worked without joining; mark the first stitch of each round to keep your place.
- Invisible Decrease — A decrease worked through the front loops only, keeping stuffed shaping smooth.
Optional Studio Upgrades
Never required to finish the projects above — convenience upgrades for makers who want them.
📦 Beginner Project Kit — Optional Alternative
- Beginner Amigurumi Crochet Kit — An optional all-in-one starting bundle; verify its yarn colors, stuffing, clasp-and-jump-ring hardware, and hook size against the lists above, since kit contents vary by seller |
[View Beginner Amigurumi Crochet Kit on Amazon]
Yarn Ball Winder
A durable tabletop winder turns loose yarn into tidy center-pull cakes for smoother color changes and less tangling.
I earn a commission if you make a purchase, at no additional cost to you.
Eight DIY Crochet Keychains to Make
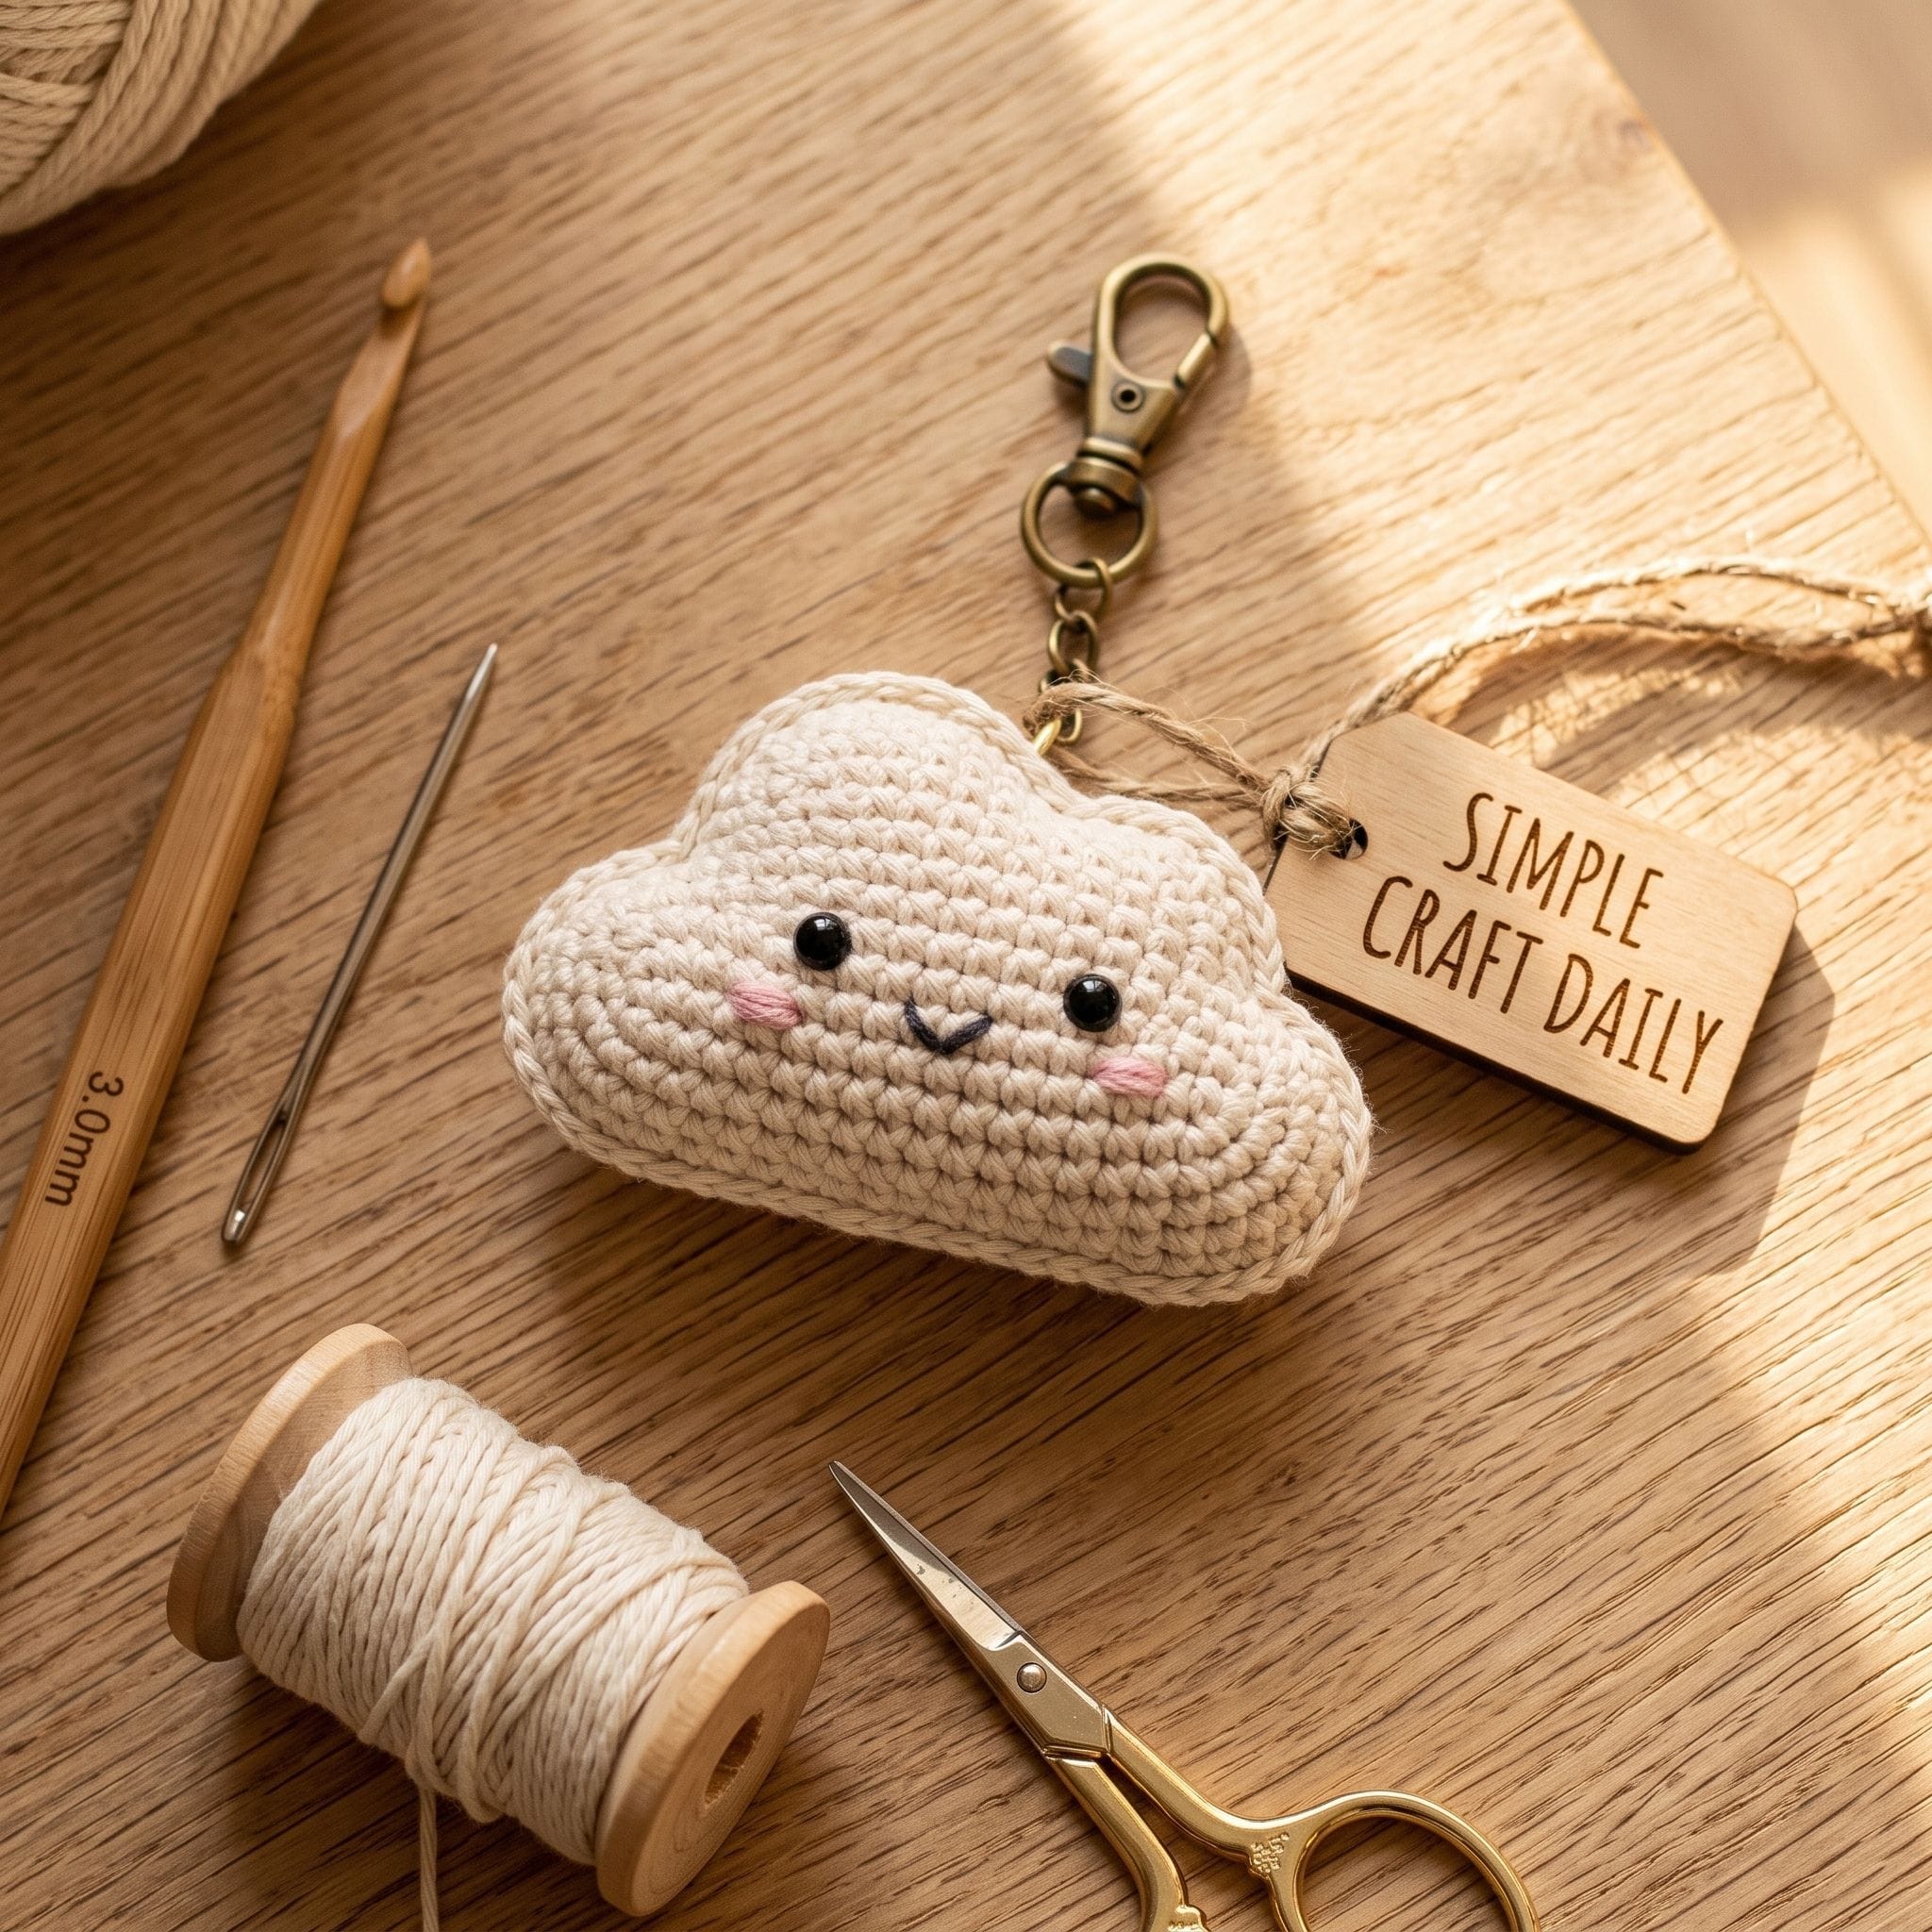
1. Smiling Cloud DIY Crochet Keychain
Supplies Needed: Cream cotton yarn, polyester fiberfill, black embroidery floss, crochet hook, yarn needle, swivel clasp hardware.
Quick Steps:
- Make three small cream circles in continuous rounds, stopping after the final increase round so each lobe stays firm.
- Lay the circles in a shallow arc, then whipstitch the touching edges together from the back before adding any filling.
- Next, crochet a simple oval backing that follows the cloud outline.
- Stitch the front and back together with single crochet, adding tiny pinches of fiberfill as you move around the edge.
- Keep the center lightly filled so the lobes remain distinct.
- Use two short black floss stitches for sleepy eyes and a curved stitch for the smile.
- Finally, fold an 8-inch strand of cream yarn in half, stitch the doubled loop through two upper structural rounds, and attach the swivel clasp through that loop.
2. Bumblebee DIY Crochet Keychain
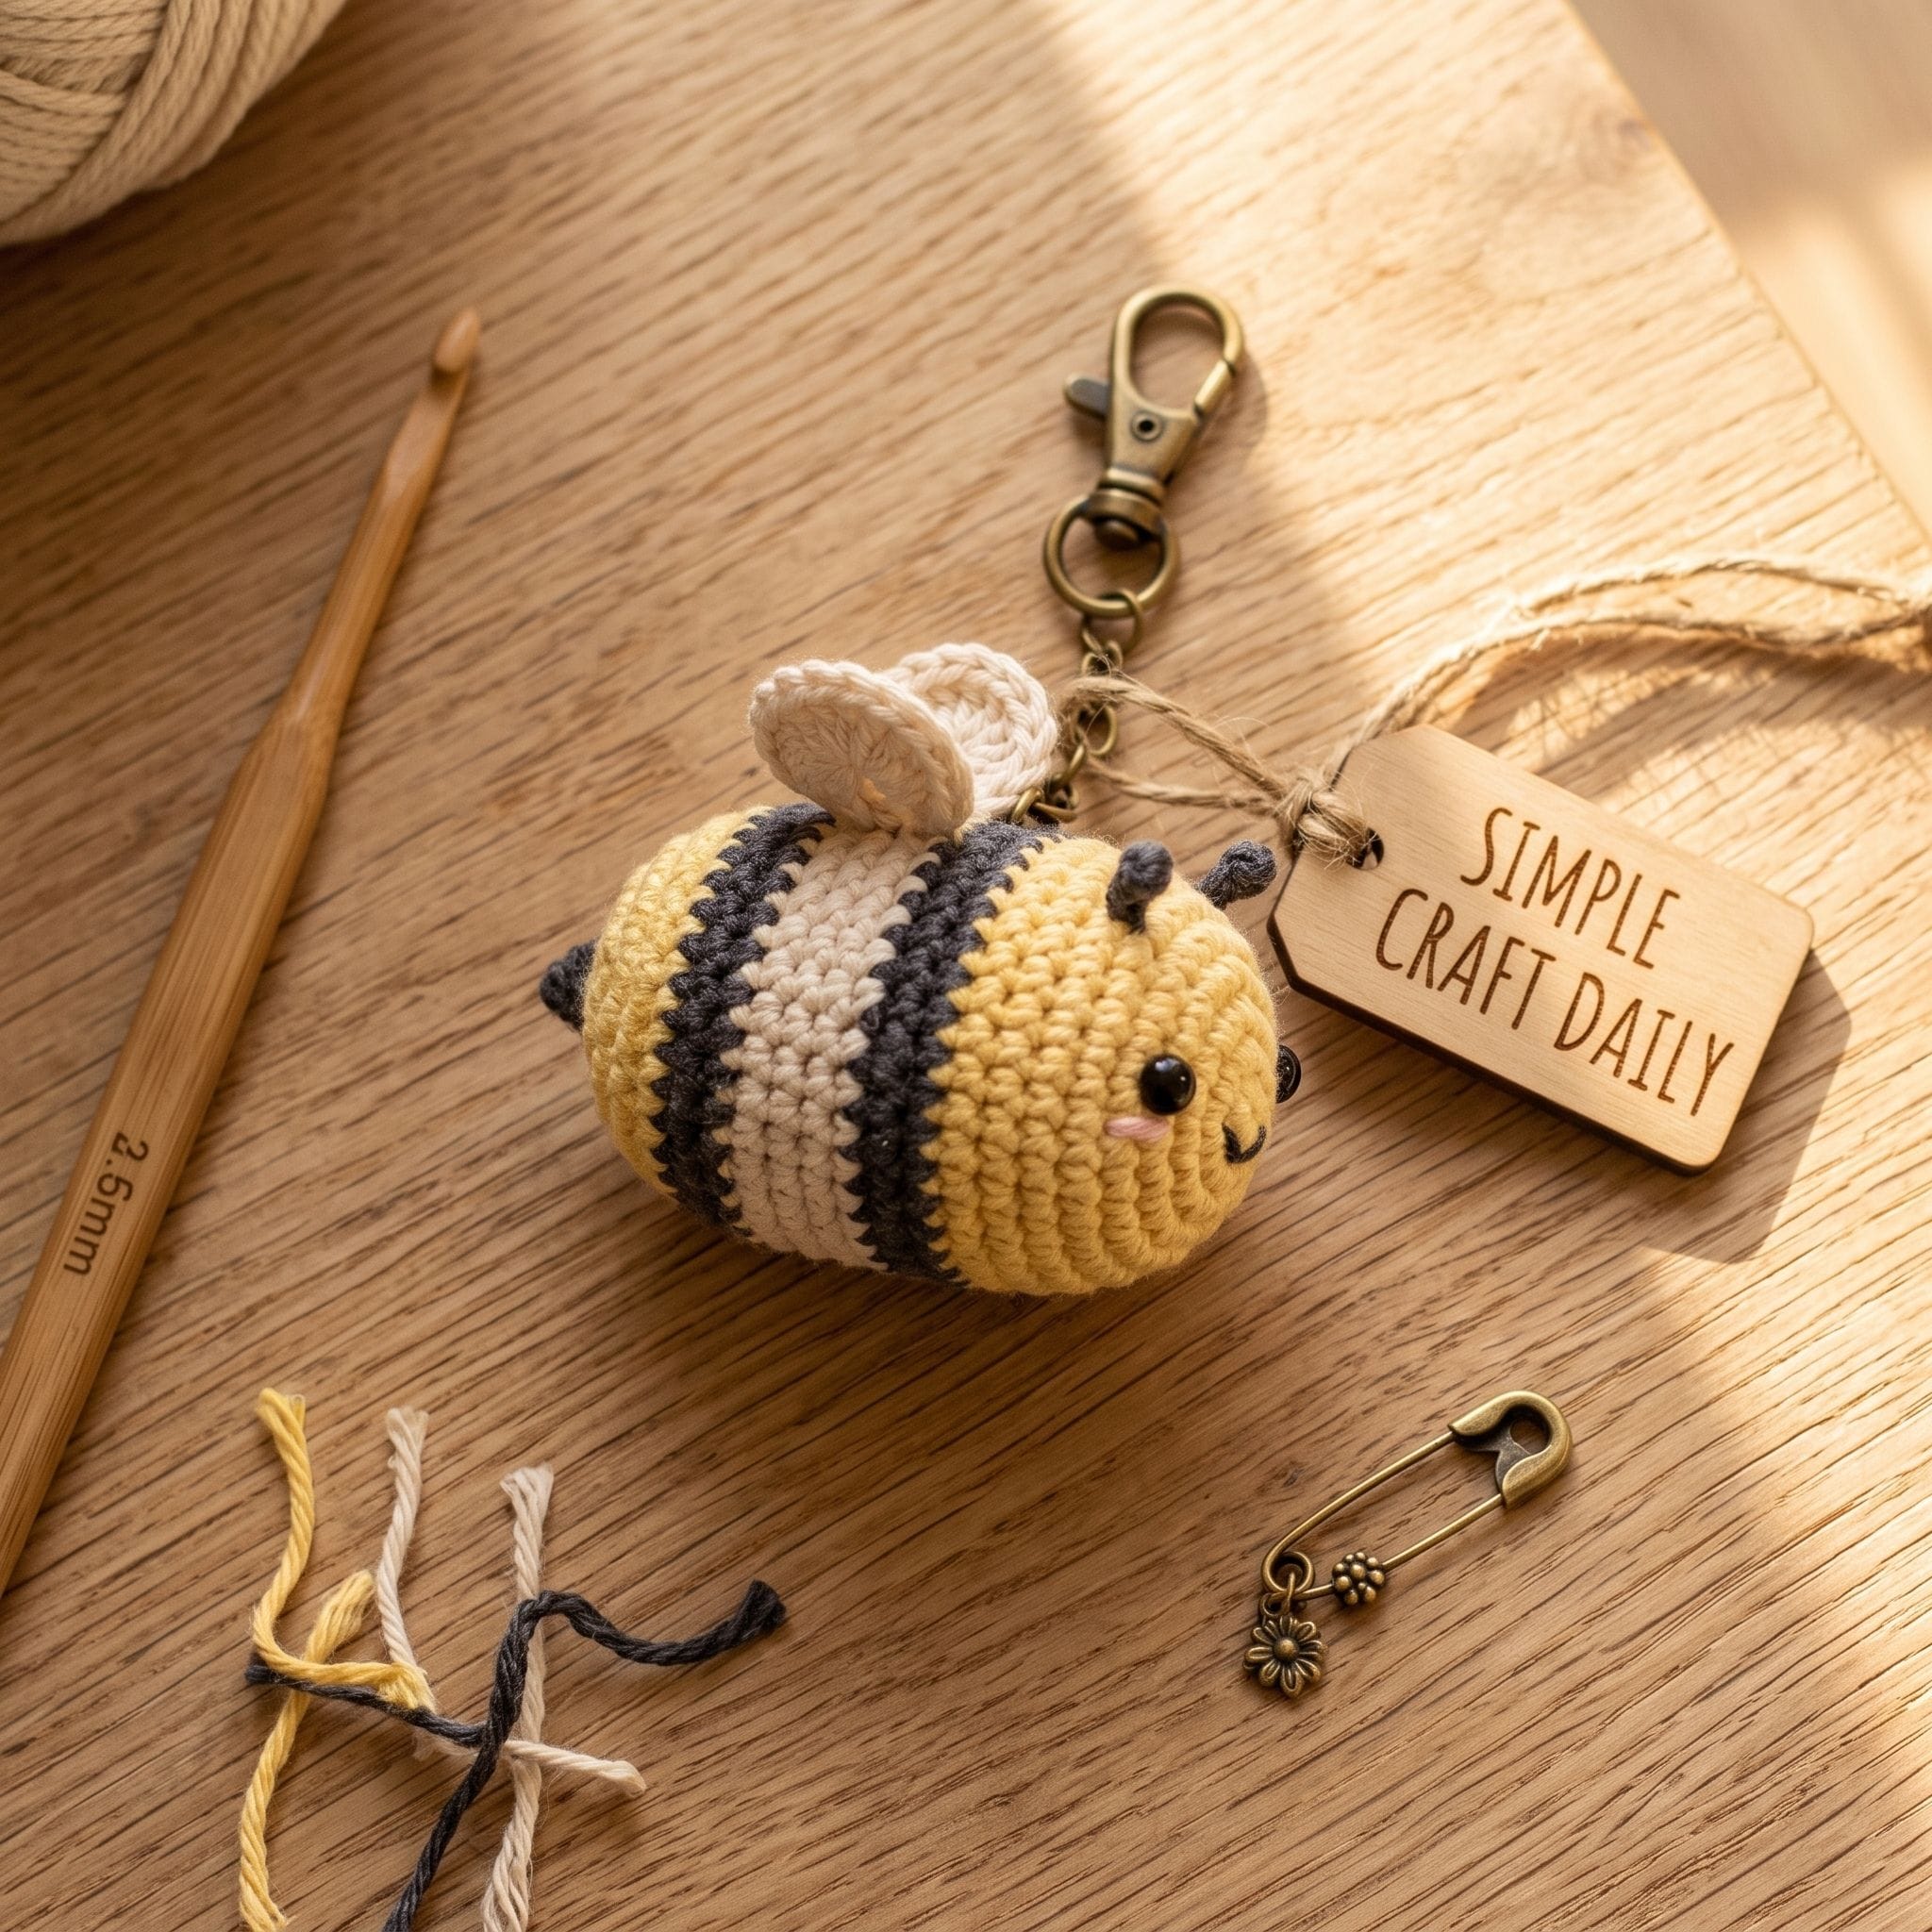
Supplies Needed: Yellow, cream, and charcoal cotton yarn, polyester fiberfill, safety eyes or embroidery floss, crochet hook, yarn needle, keychain hardware.
Quick Steps:
- Begin the bee with yellow yarn in a magic ring and build a small oval with steady increases.
- Change to charcoal for one narrow stripe, then return to yellow, keeping the color changes on the underside where the seam will be less visible.
- Use a hook small enough to keep every single crochet stitch closed.
- If stuffing shows between stitches, start again with a smaller hook or pull the working yarn more firmly after each stitch.
- Add fiberfill gradually before the final decrease rounds.
- Crochet two cream wings as flat teardrops.
- Then sew each wing through the bee body several times, passing through different stitches instead of relying on one tight pull.
- Add safety eyes or stitched eyes, secure the doubled top loop, and connect the hardware.
3. Strawberry DIY Crochet Keychain
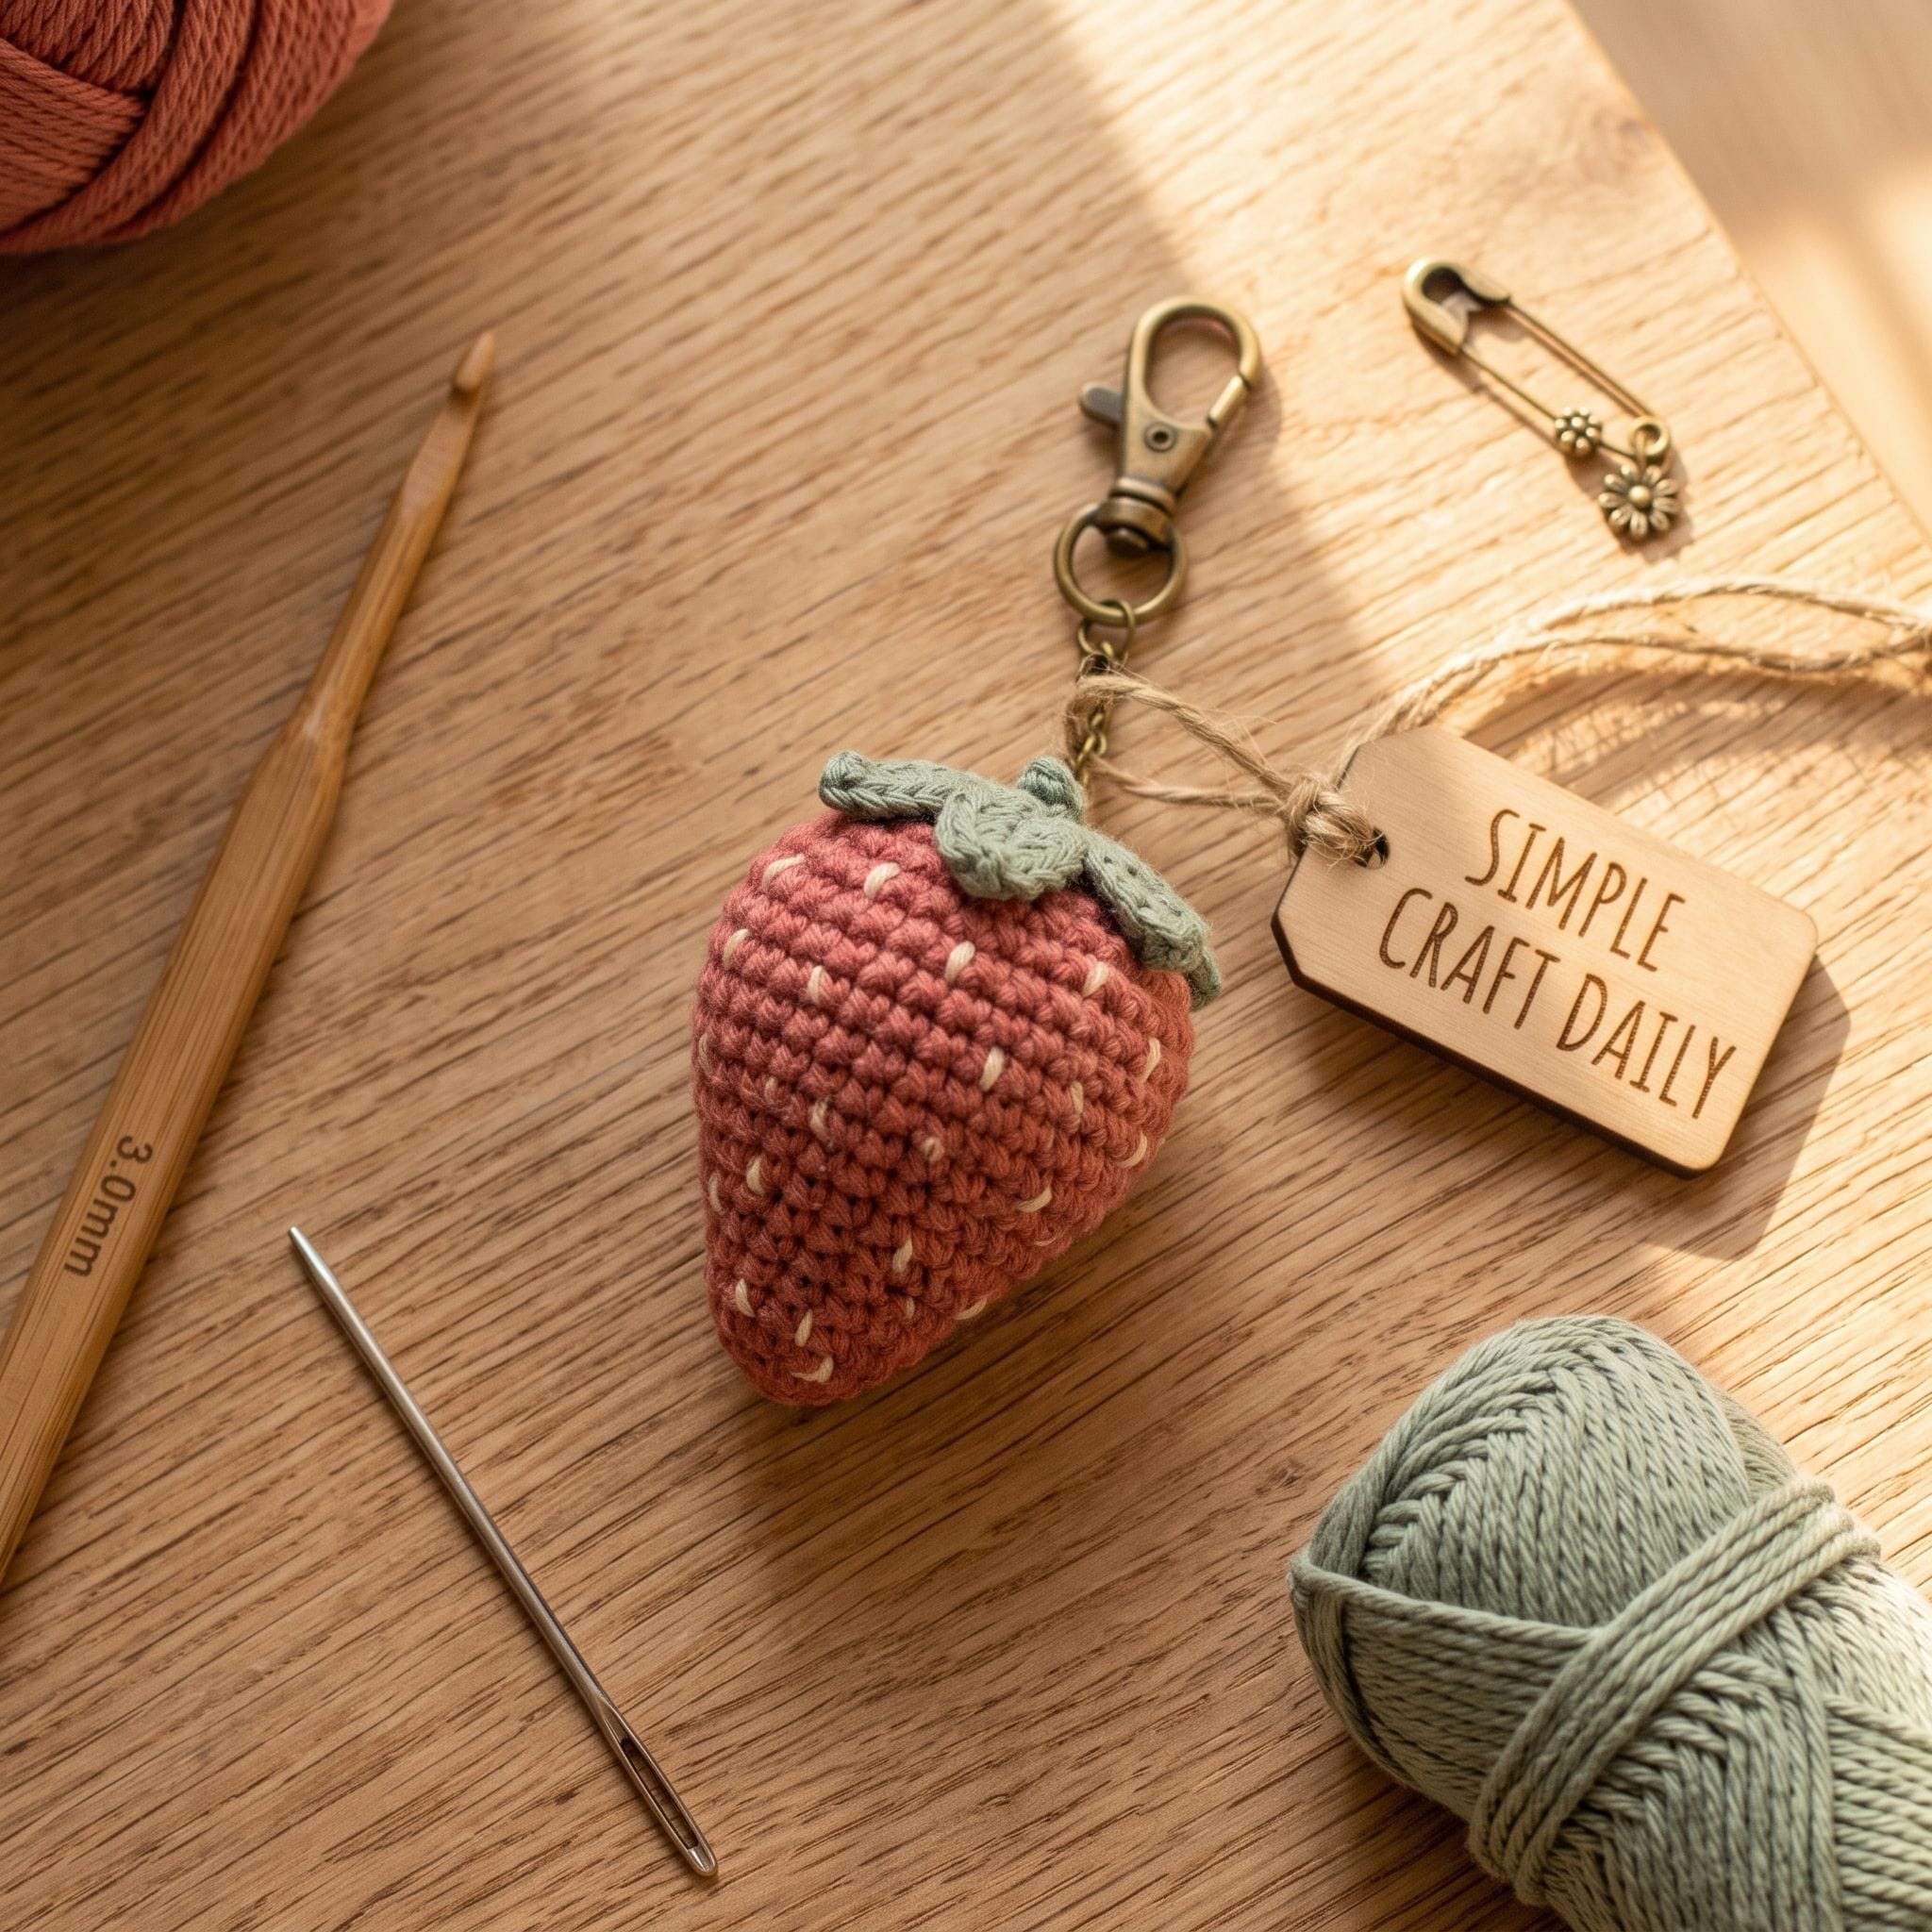
Supplies Needed: Dusty red and sage cotton yarn, pale yellow embroidery floss, polyester fiberfill, crochet hook, yarn needle, swivel clasp hardware.
Quick Steps:
- Start with dusty red yarn and work a small rounded base.
- Increase over two rounds to create the strawberry shoulder, then work even rounds before decreasing gently toward the pointed base.
- Mark the first stitch of every round so both sides stay balanced.
- Stuff the berry when the opening is still wide enough for your fingertip.
- Close the final stitches neatly, weave in the red tail, and add pale yellow seed stitches across the front.
- Keep each seed only one stitch long so it sits flat against the berry.
- Crochet a sage leaf cap with five small points.
- Sew it through several top stitches, then pass a doubled yarn loop through the cap and the berry body beneath it.
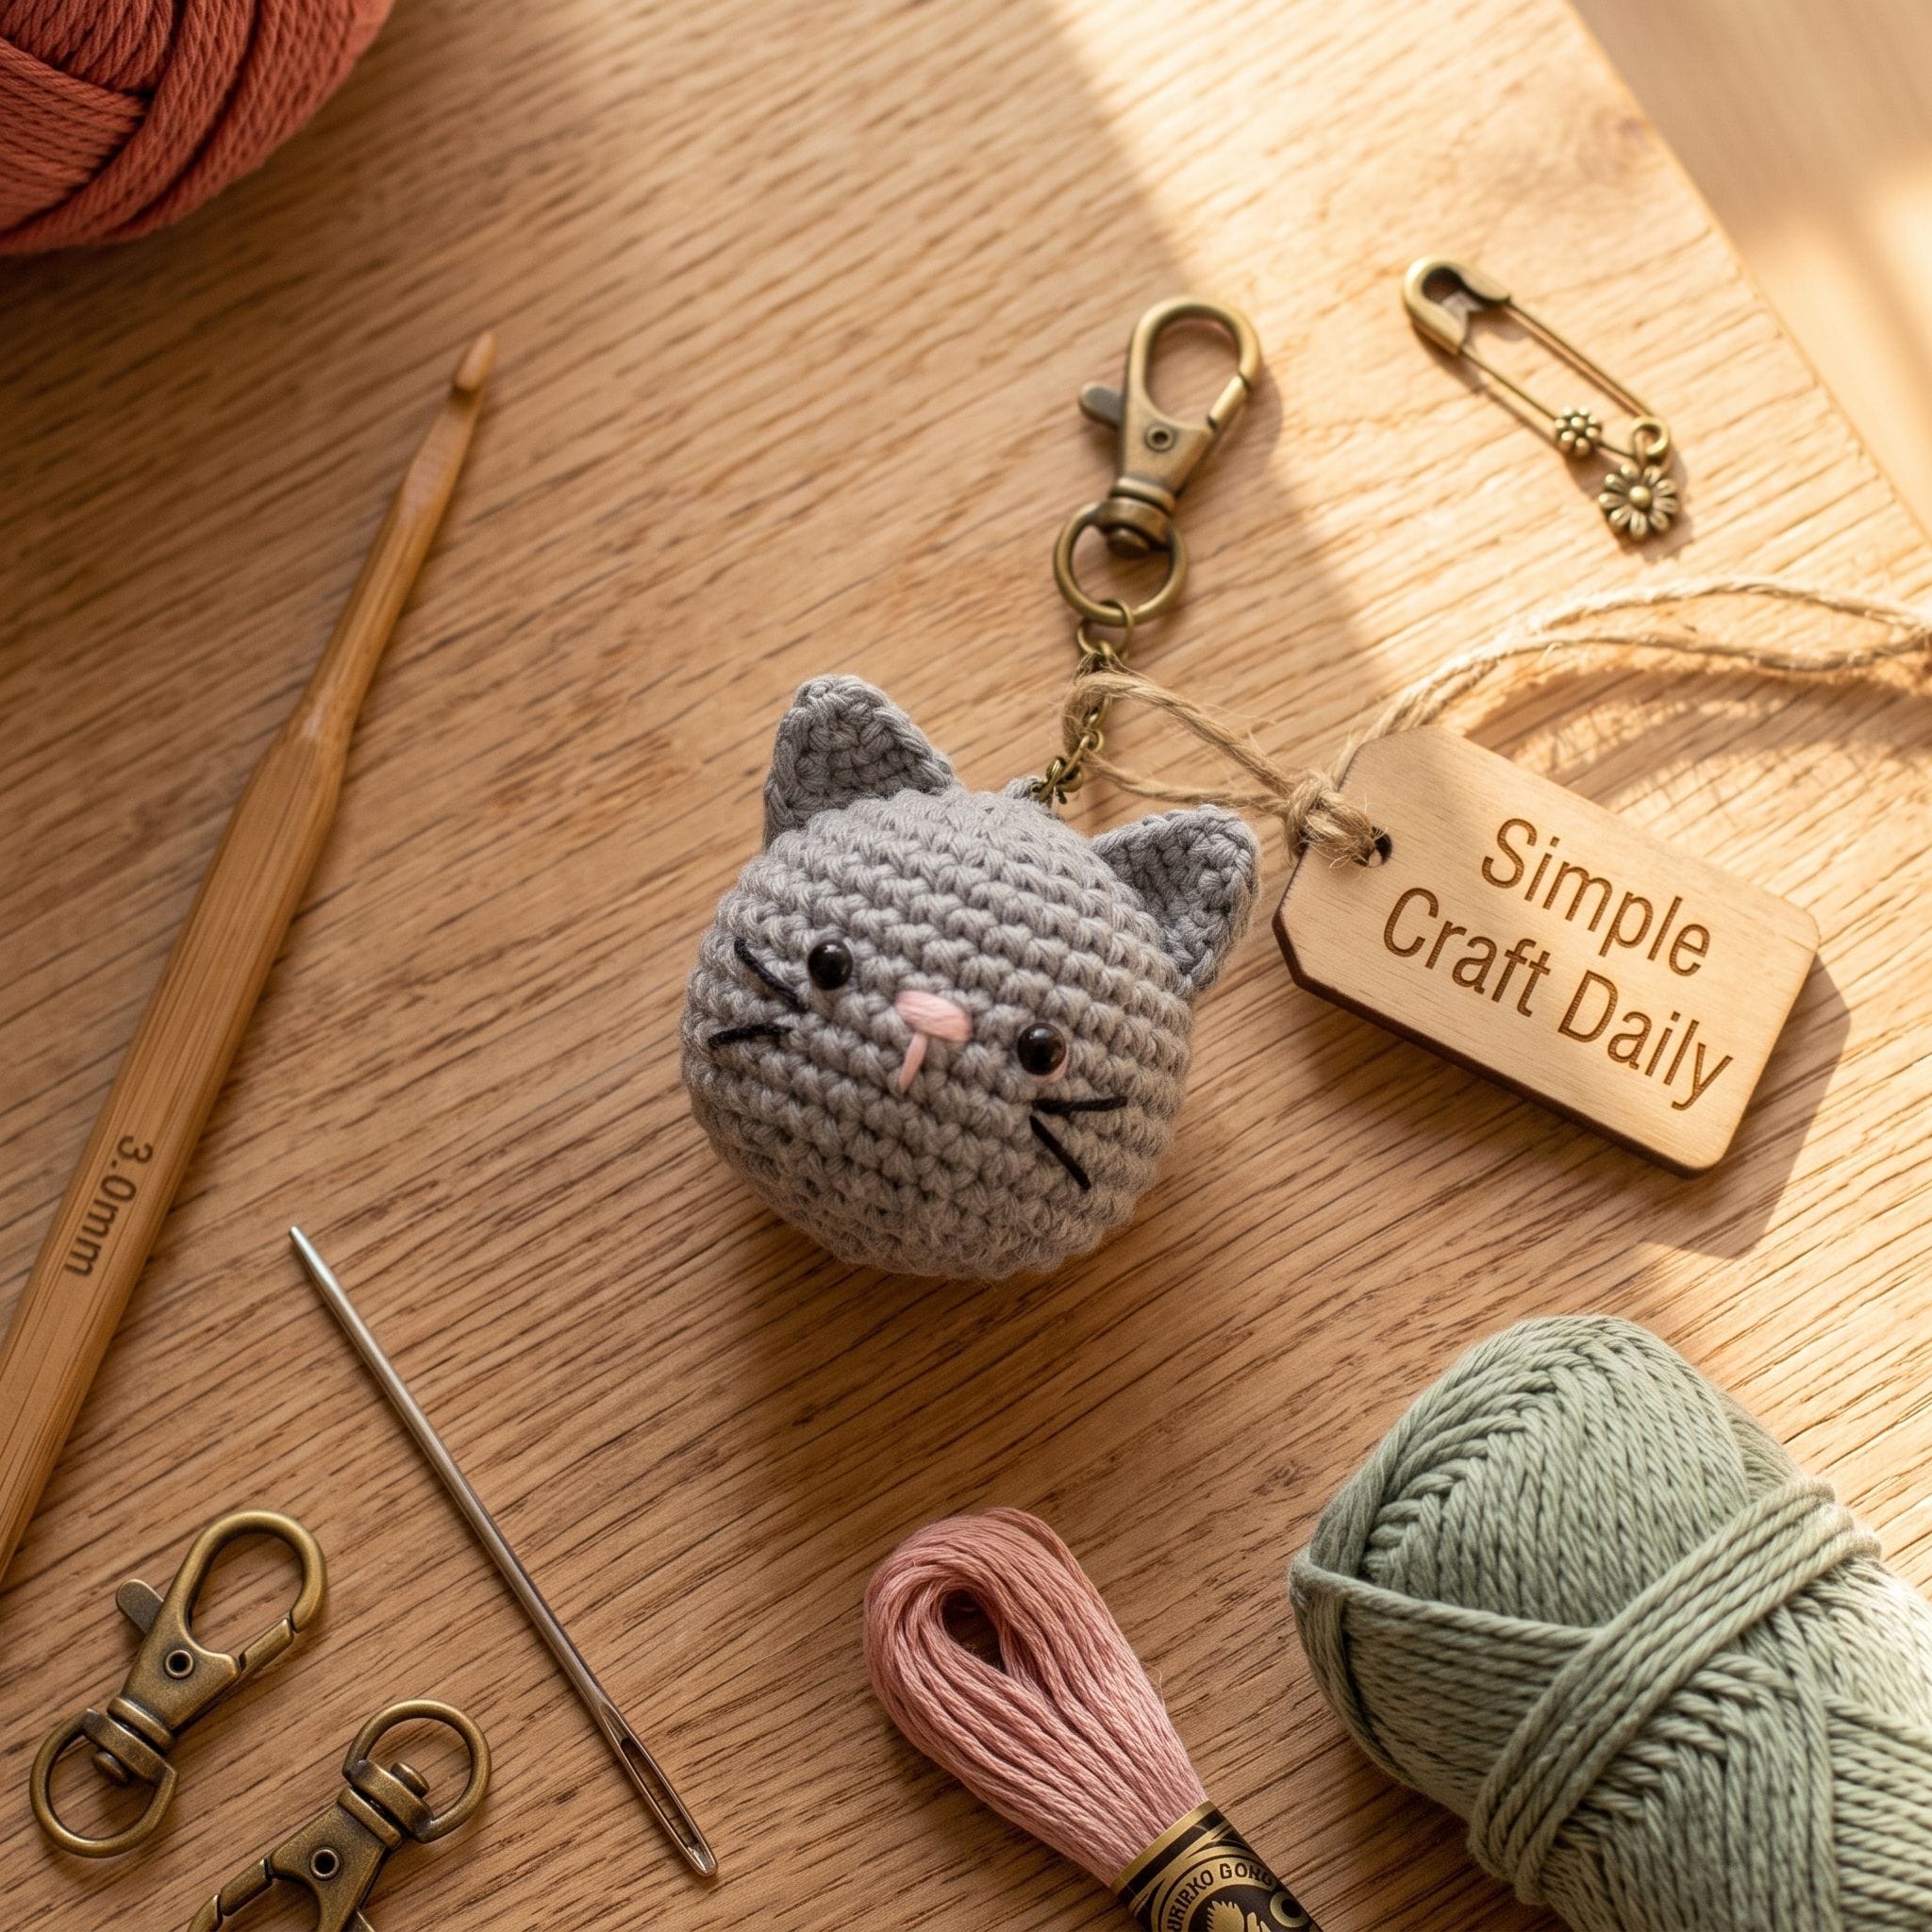
4. Tiny Cat DIY Crochet Keychain
Supplies Needed: Soft gray or blush cotton yarn, black and pink embroidery floss, safety eyes, polyester fiberfill, crochet hook, yarn needle, keychain hardware.
Quick Steps:
- Crochet a round cat head in soft gray or blush yarn, using compact spiral rounds and small, even increases.
- Insert safety eyes before closing the final rounds, or stitch small eyes with black floss if the charm will be handled around children.
- Make each ear separately as a tiny triangle.
- Fold the base of each triangle slightly, then sew through the fold and head several times so the points remain crisp.
- Add a short pink nose and three black floss whiskers on each side; keep the whiskers short so they do not snag.
- Attach the doubled hanging loop between the ears, where the head has the most structure.
5. Mushroom DIY Crochet Keychain
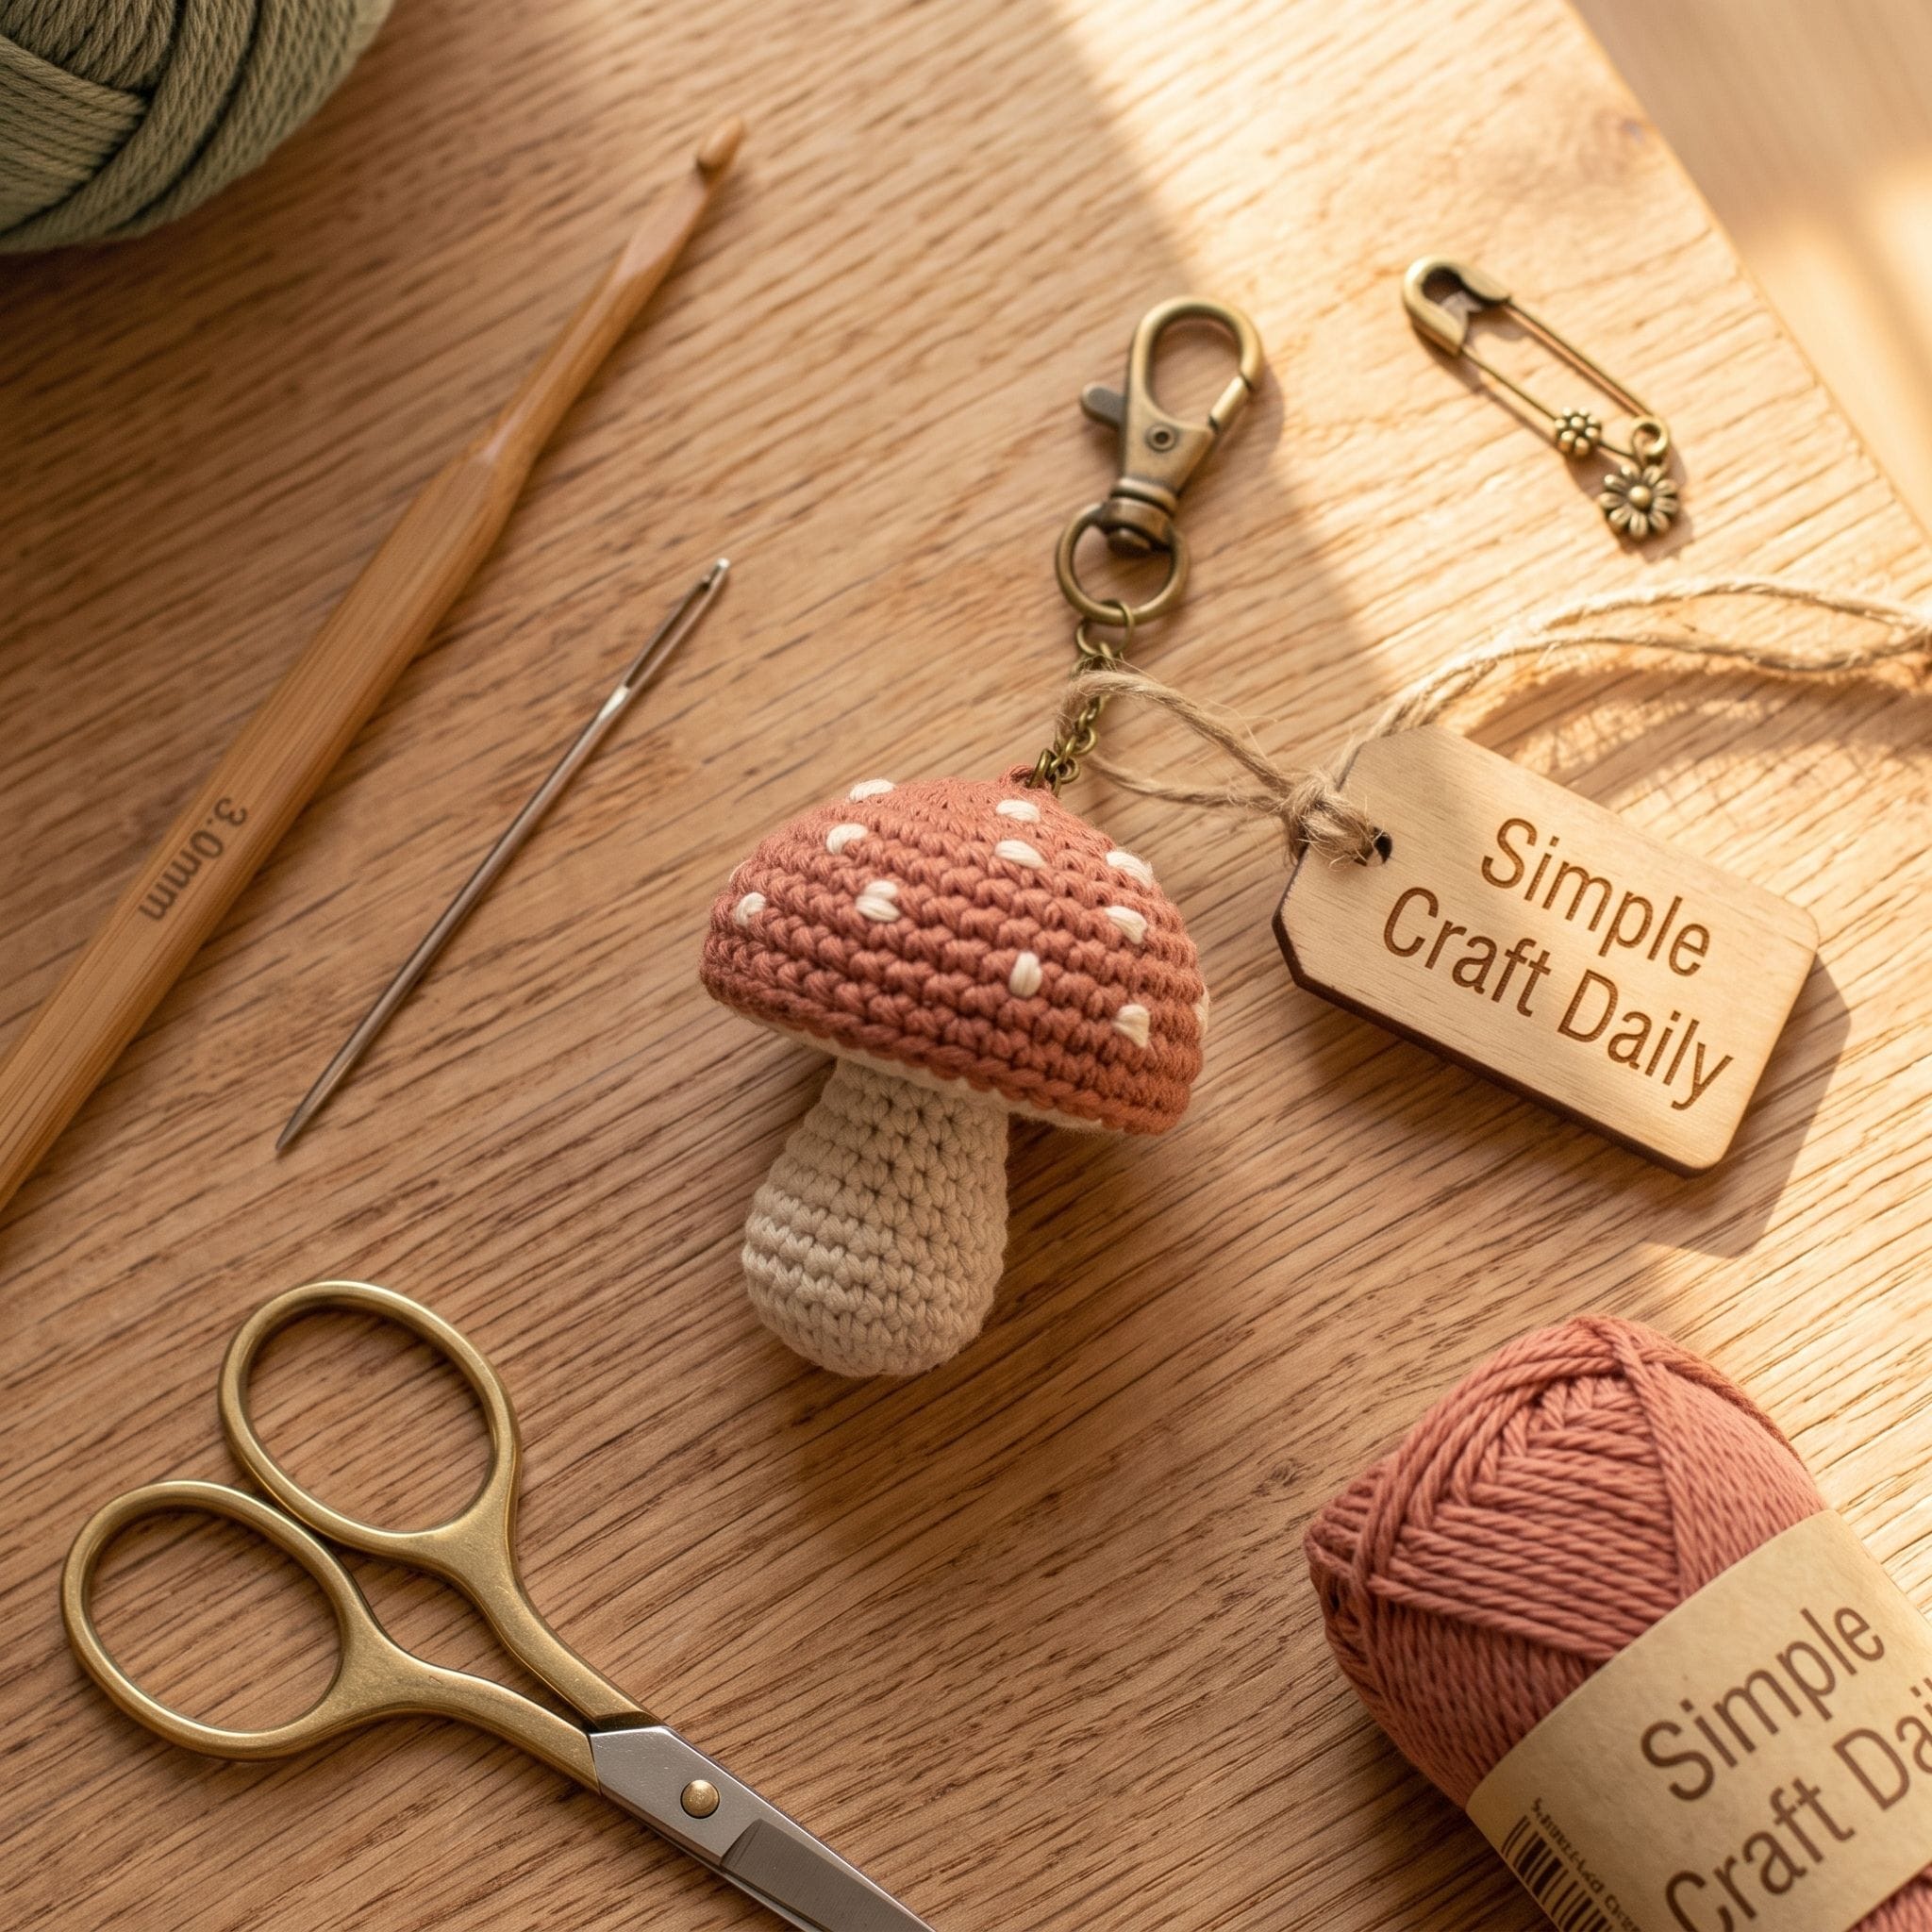
Supplies Needed: Terracotta and cream cotton yarn, cream embroidery floss, polyester fiberfill, crochet hook, yarn needle, keychain hardware.
Make the cream stem first as a short tube, adding only a small amount of fiberfill before closing it. Next, crochet the terracotta cap as a shallow dome with a flat lower edge. The cap should feel lightly padded rather than stiff or overfilled.
Follow a simple assembly order for a balanced shape:
- Center the stem beneath the cap.
- Sew around the full stem opening with short, tight stitches.
- Add three to five small cream floss spots across the cap.
- Stitch the doubled hanging loop through the cap center and into the top of the stem.
Finally, open the jump ring sideways with pliers, attach it through the yarn loop, close it flush, and add the clasp.
6. Puffed Heart DIY Crochet Keychain
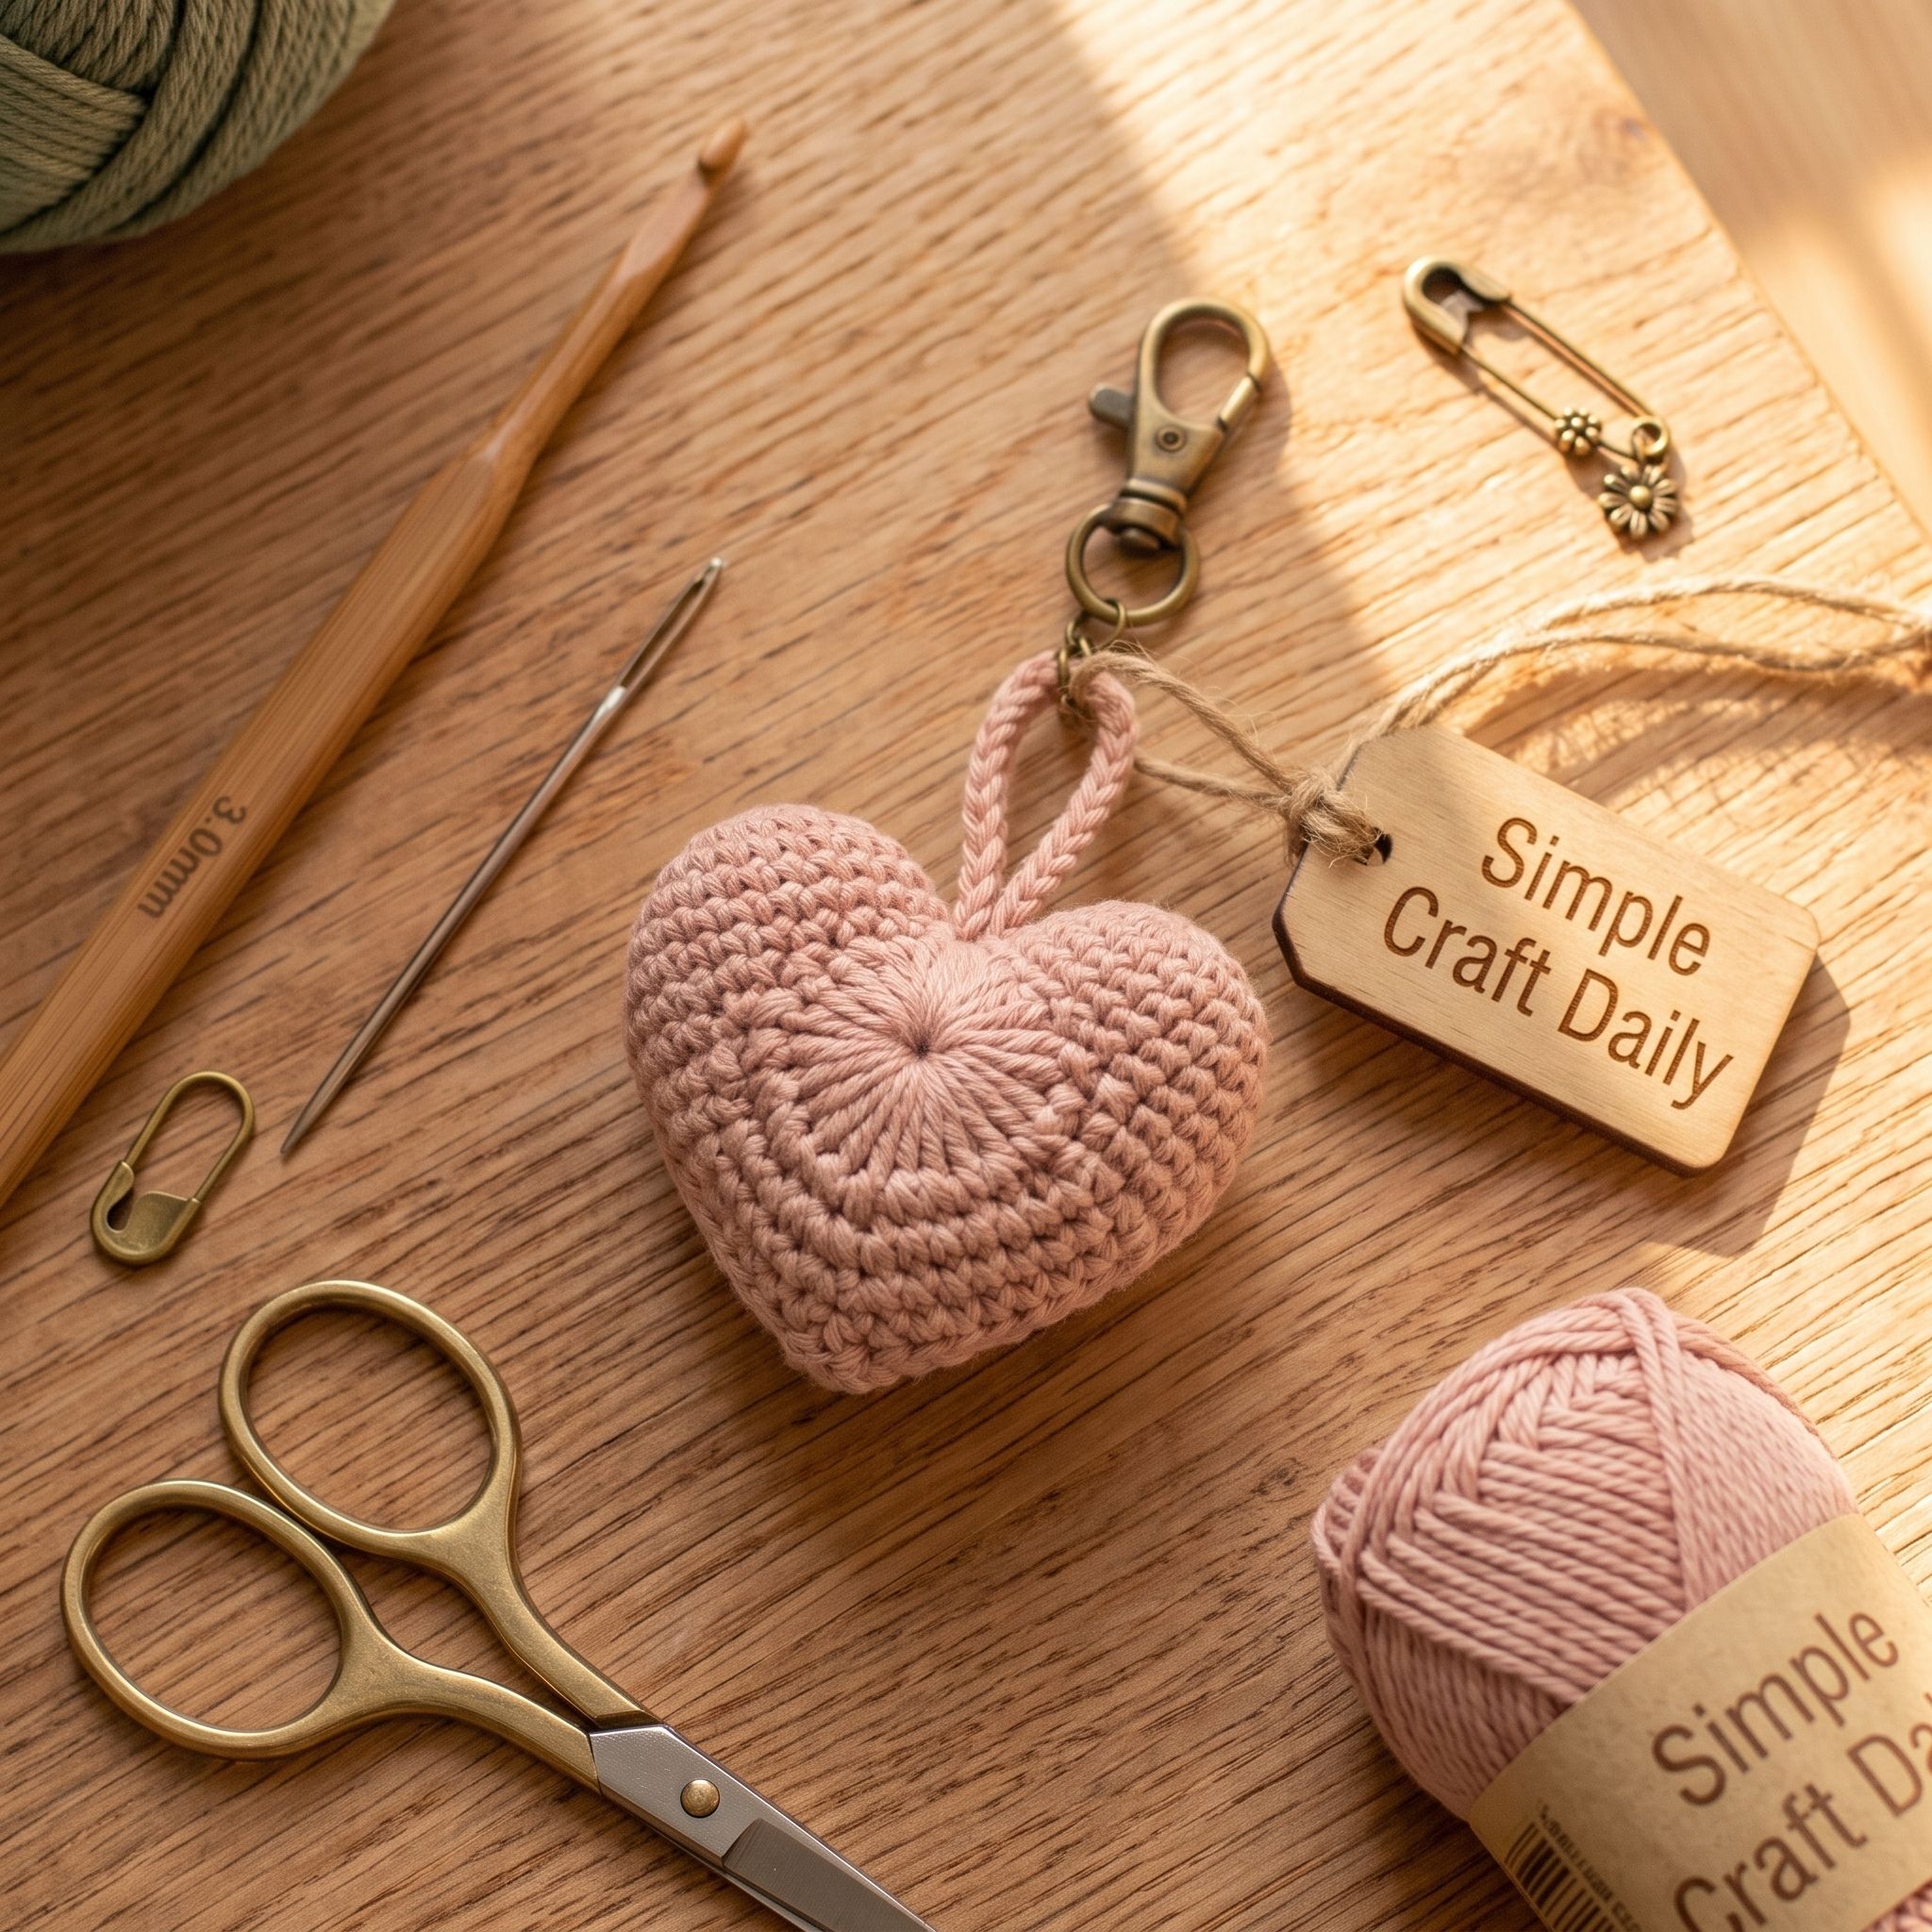
Supplies Needed: Blush or terracotta cotton yarn, polyester fiberfill, crochet hook, locking stitch marker, yarn needle, swivel clasp hardware.
Quick Steps:
- Crochet two matching rounded cups in blush, dusty pink, or muted terracotta yarn.
- Count the final round on both cups before joining them; matching stitch counts keep the heart’s top lobes the same height.
- Place the cups side by side and crochet across both openings to form the top of the heart.
- Mark the first stitch of the joined round, then decrease gradually along each side until the body tapers to a soft point.
- Add fiberfill in small pinches before the opening becomes narrow.
- At the center notch, sew a doubled yarn loop through both cups and the joined round below them.
- Weave the tail through several interior stitches before trimming.
7. Daisy DIY Crochet Keychain
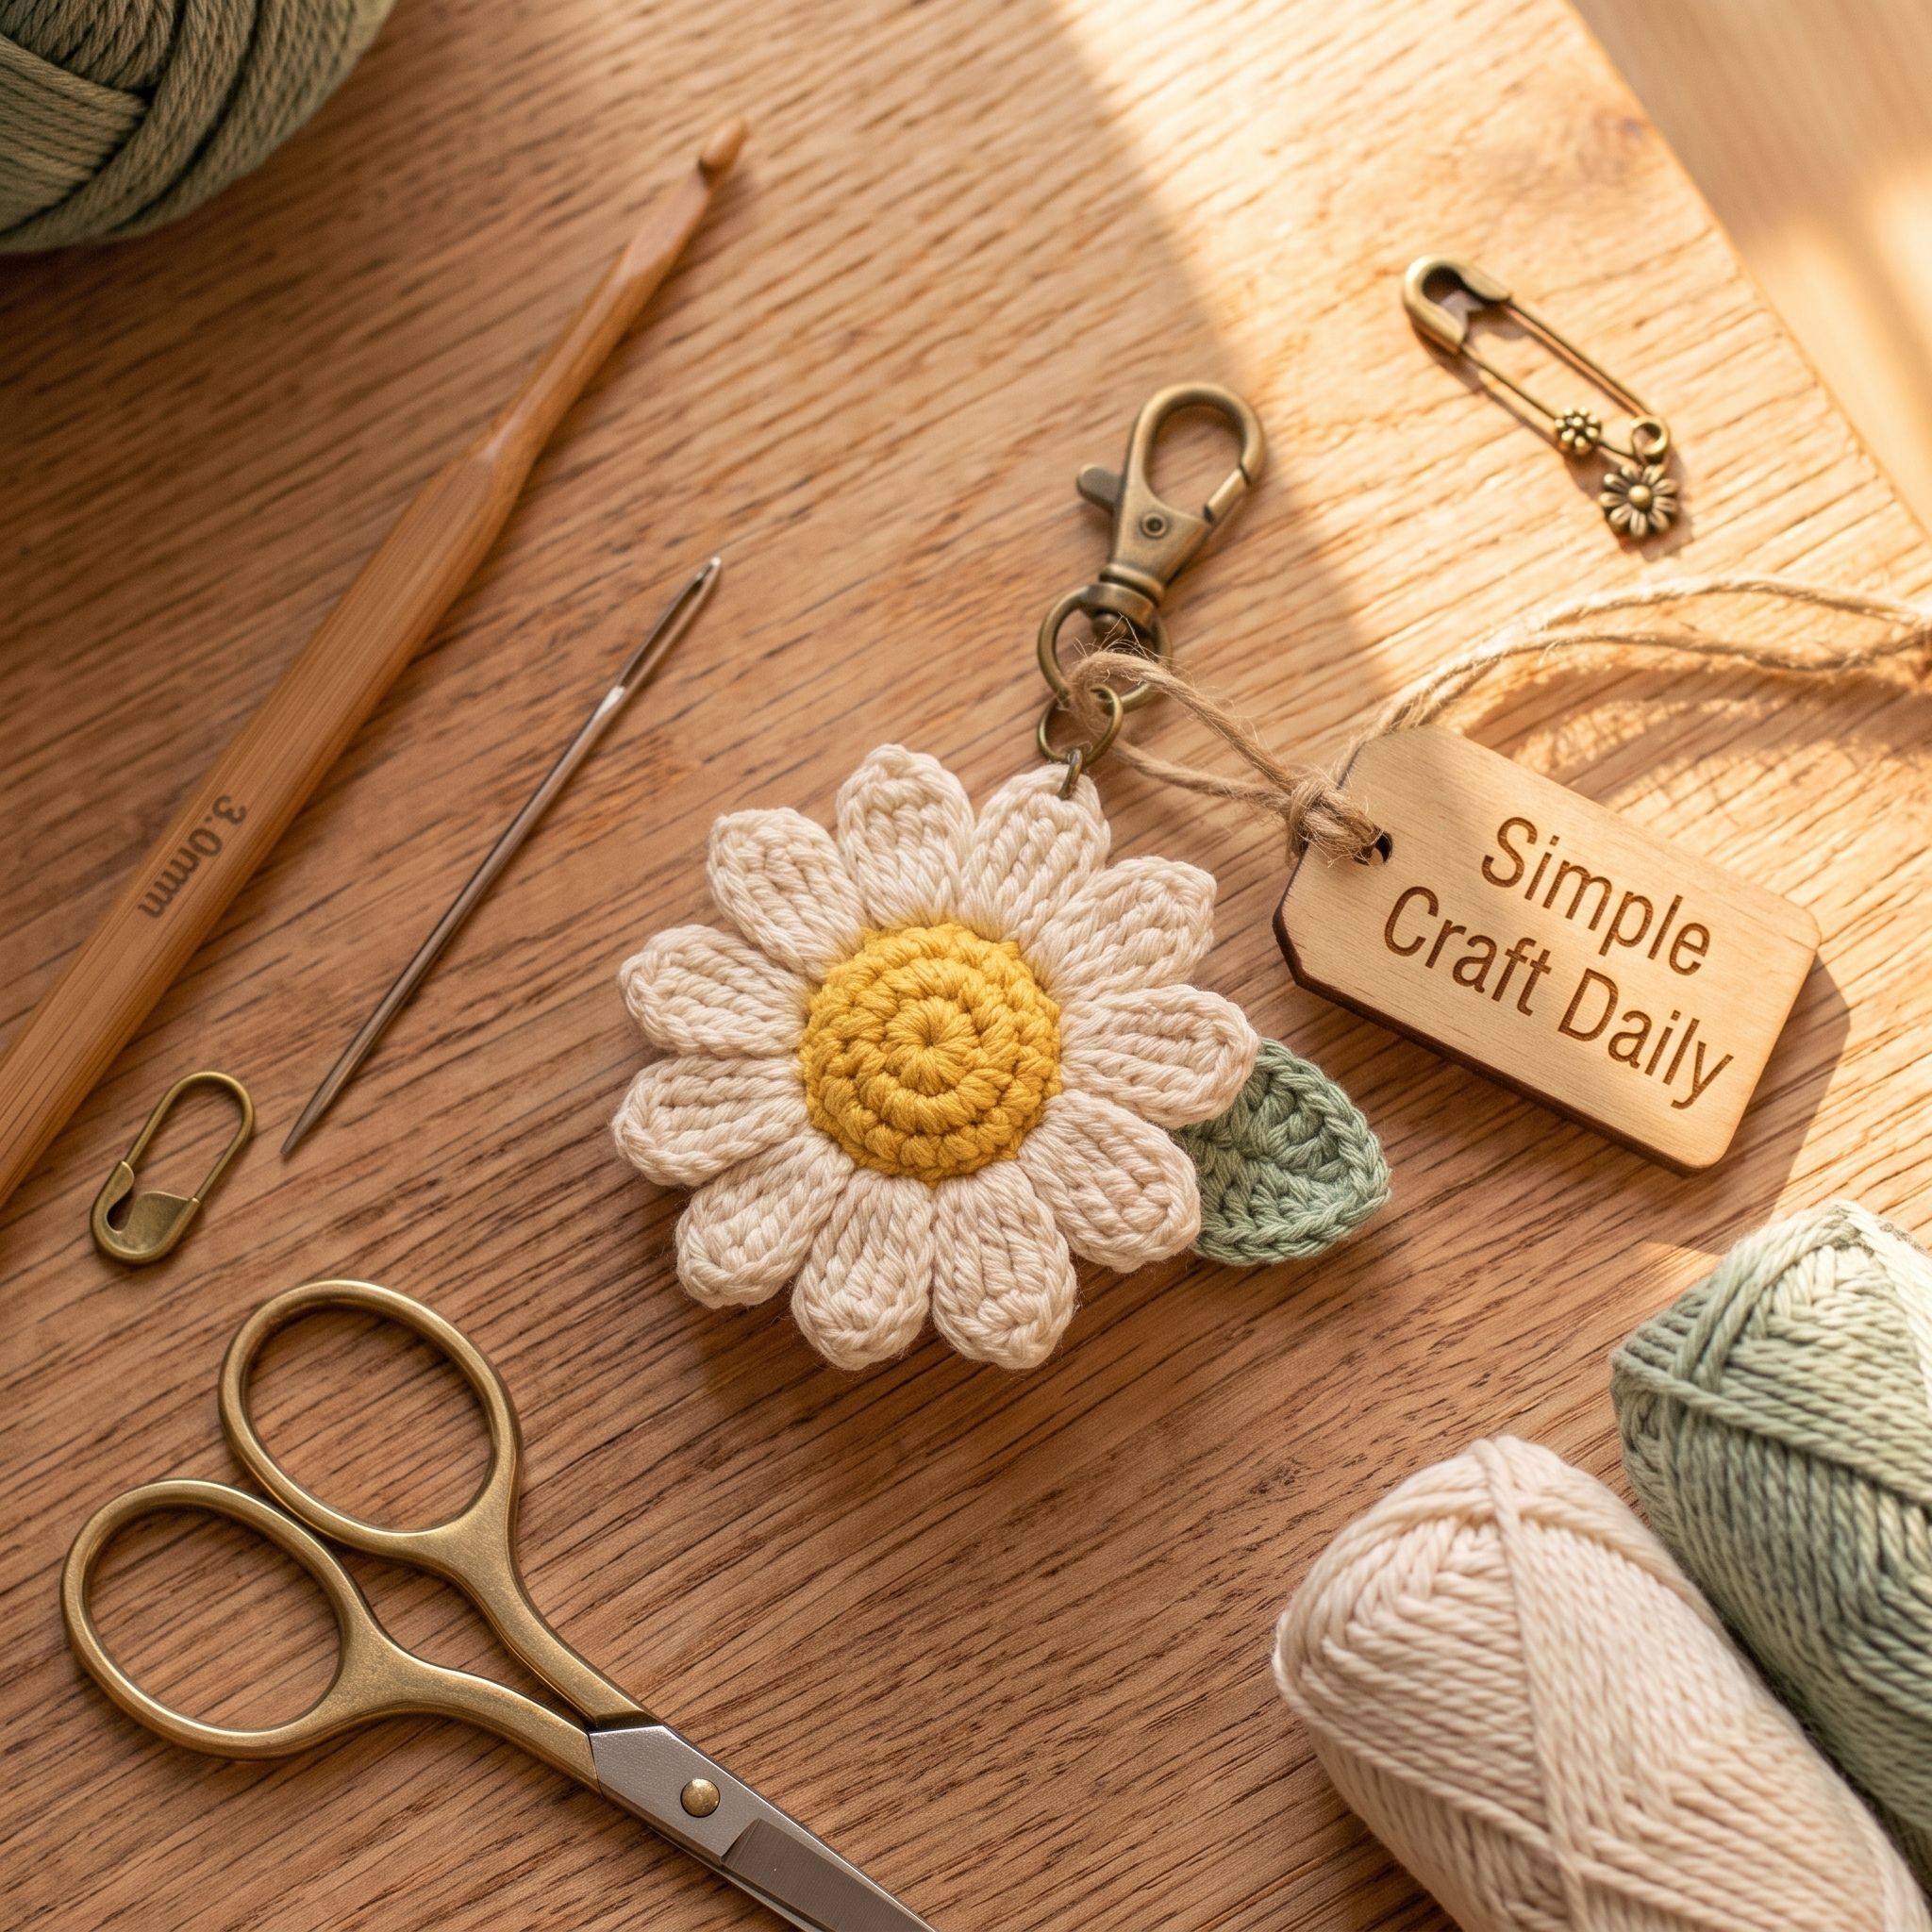
Supplies Needed: Cream, yellow, and sage cotton yarn, crochet hook, yarn needle, locking stitch marker, swivel clasp hardware.
Quick Steps:
- Crochet a compact yellow center with one or two increase rounds.
- A small center gives the petals a neat spread and keeps the finished daisy from becoming floppy.
- Add a few raised stitches on the front if you want a lightly textured pollen effect.
- Make five or six cream petals separately as narrow ovals.
- Sew every petal to the center twice: first through its base, then through one stitch slightly higher on the petal.
- Crochet a tiny sage leaf and sew it behind one lower petal.
- Then stitch the hanging loop through the yellow center and a back petal base for extra strength.
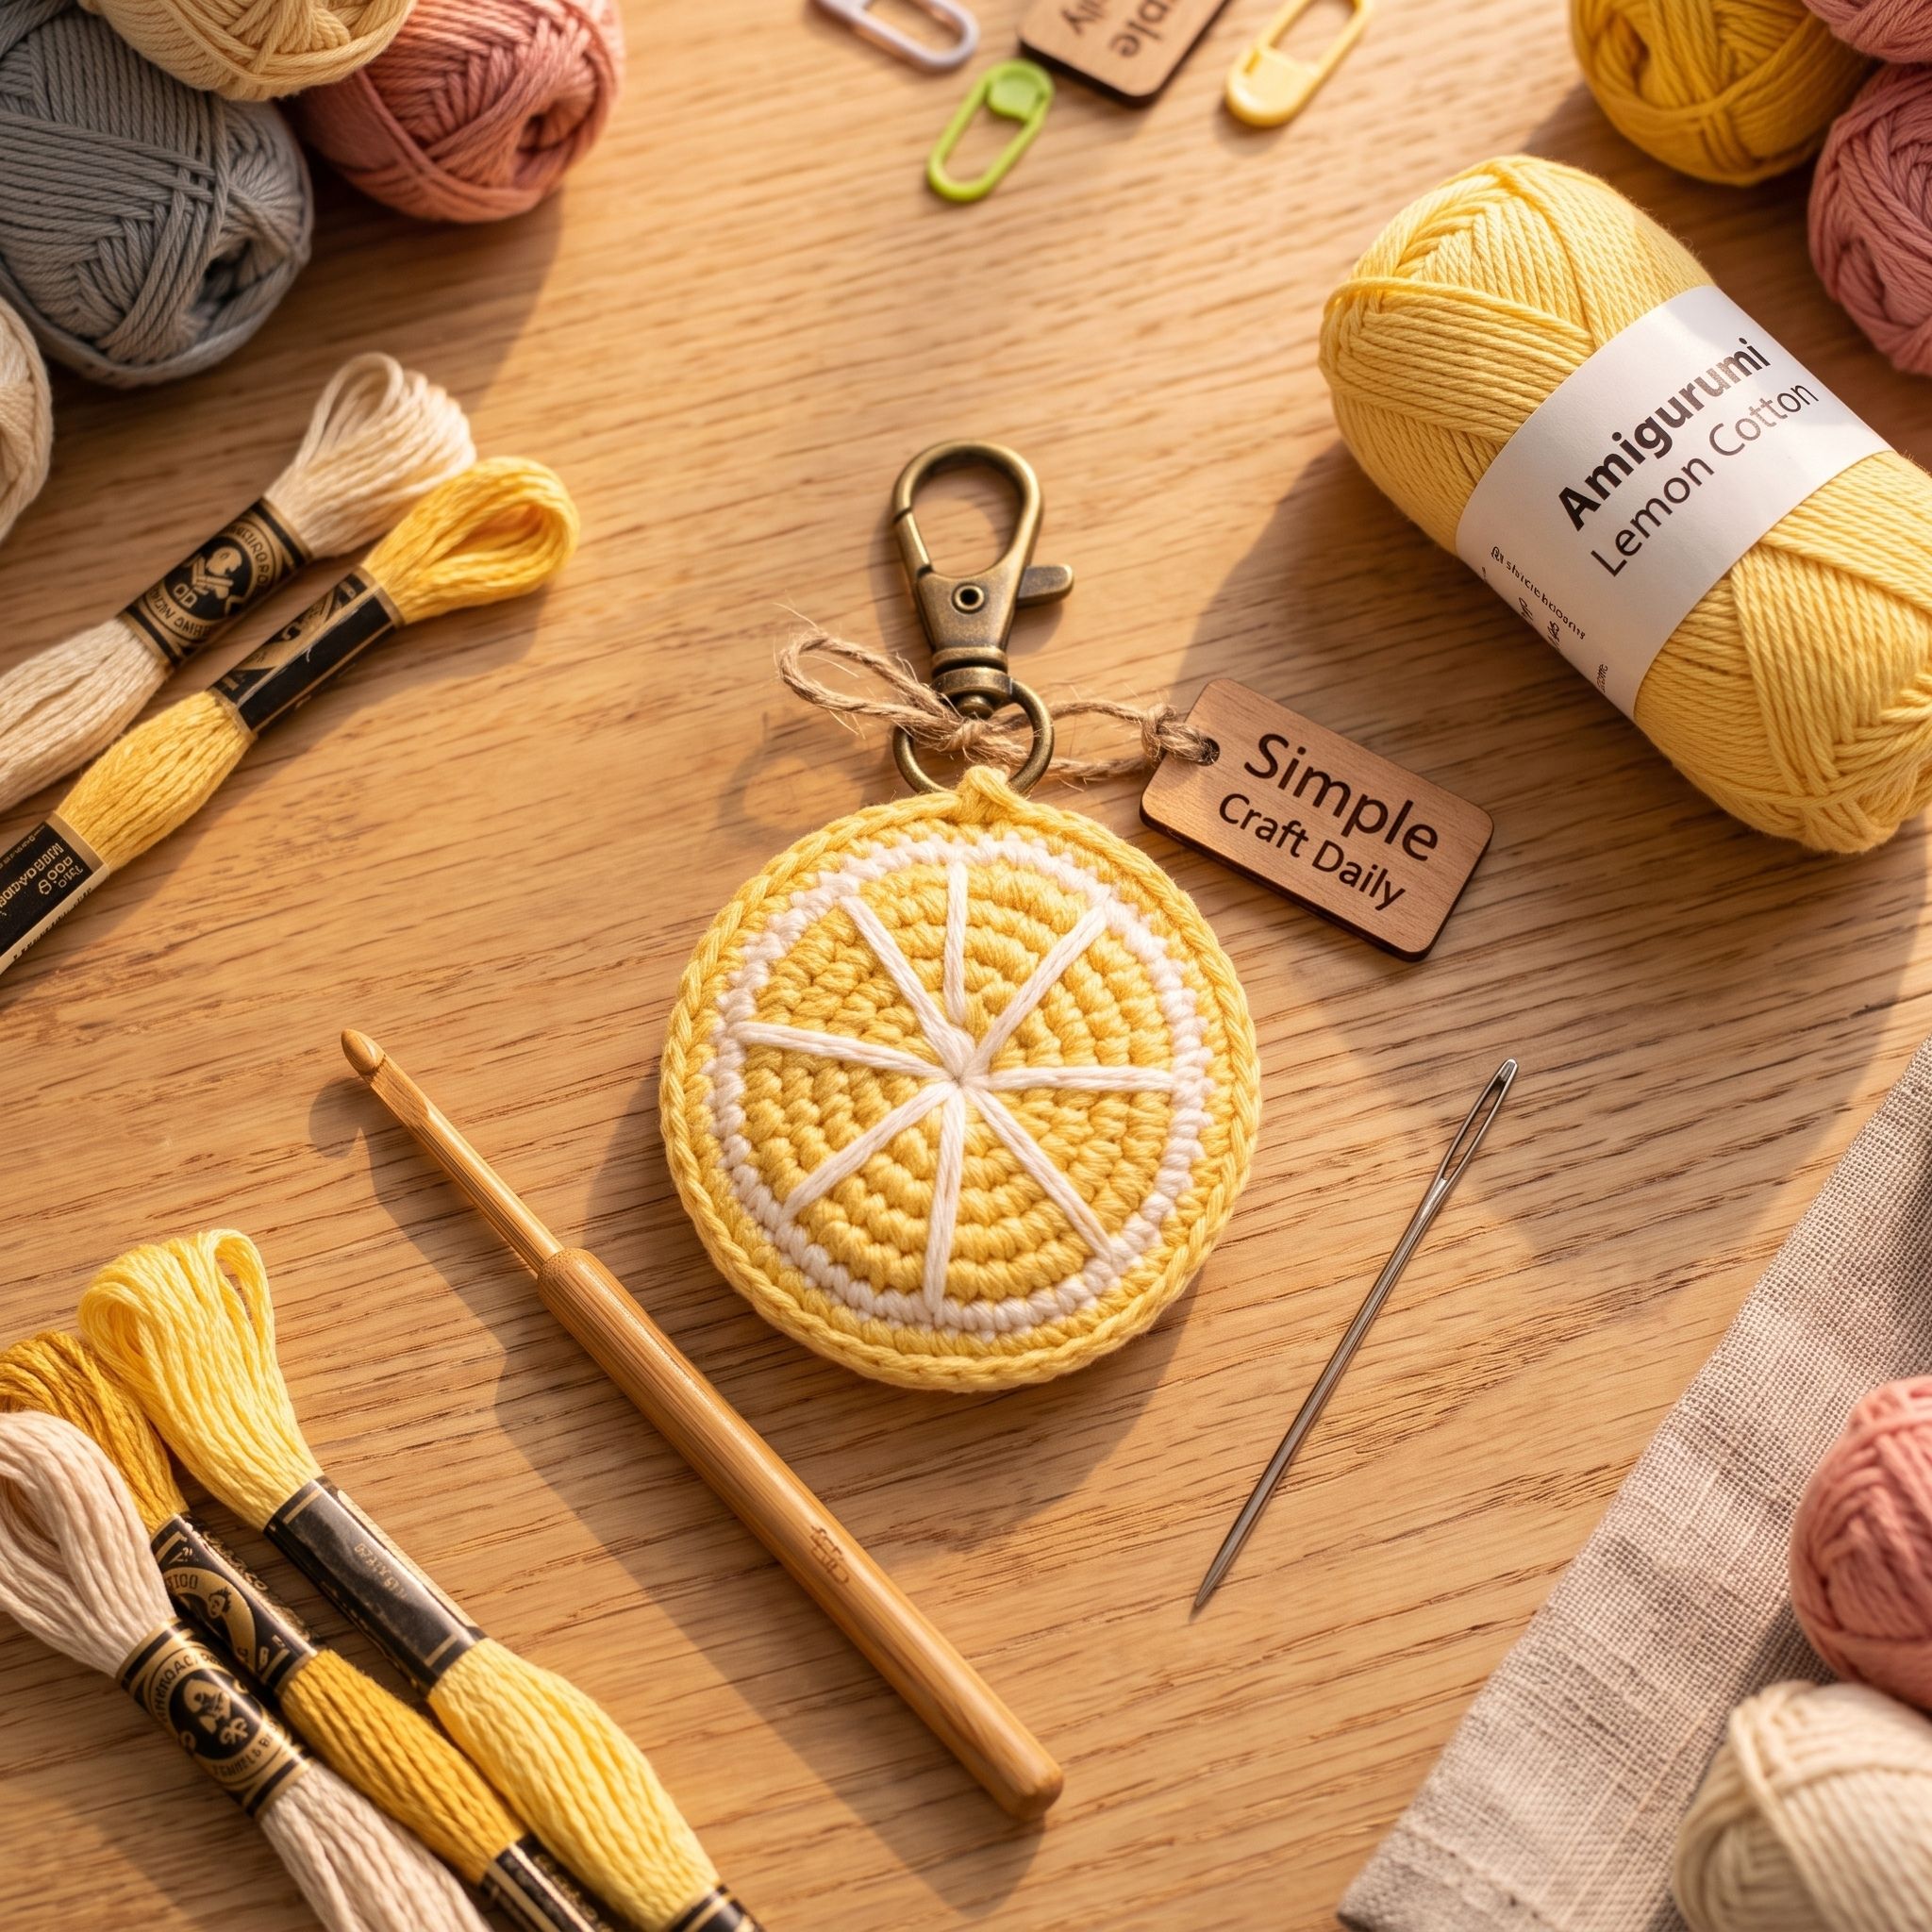
8. Lemon Slice DIY Crochet Keychain
Supplies Needed: Buttercup yellow, cream, and white cotton yarn, crochet hook, yarn needle, embroidery floss, swivel clasp hardware.
Quick Steps:
- Work the lemon as a flat circle rather than a stuffed form.
- Start with white yarn for the center, change to buttercup yellow for the fruit flesh, and finish with one narrow cream rind round.
- Keep each round flat by spacing your increases evenly.
- Next, use white embroidery floss or surface crochet stitches to make six citrus segments.
- Bring the thread from the center outward, catch one edge stitch, and return to the center.
- Repeat around the slice, keeping the lines straight and evenly spaced.
- Hide the hanging loop along the upper rind.
- Stitch it through two edge stitches, then secure the yarn tail through the back of the yellow rounds.
- Finally, connect the clasp with a closed jump ring.
How to Finish DIY Crochet Keychains So They Last
Finish every charm with a doubled yarn loop rather than a single chain. Cut an 8-inch yarn strand, fold it in half, and use a yarn needle to pass both ends through two structural rounds near the top of the charm. Tie the ends inside the body or weave them in opposite directions.
Next, open jump rings by twisting the two ends sideways instead of pulling them apart. Attach the ring to the yarn loop and clasp, twist it closed until the cut ends meet, and tug each connection firmly. A tiny gap can let hardware work loose over time.
Weave all yarn tails through at least 1 inch of dense stitches, change direction, and weave back through another section before trimming.
DIY Crochet Keychains FAQ
Why do my DIY crochet keychain stitches have gaps?
Gaps usually come from a hook that is too large or loose working tension. Move down one hook size, use cotton yarn with a firm twist, and pull the loop on your hook snugly after each stitch. The finished fabric should feel dense enough that the fiberfill does not show through.
How do I stop a DIY crochet keychain loop from stretching?
Use a doubled strand of yarn and stitch it through at least two structural rounds. Avoid attaching a clasp directly to a loose chain. Then add a jump ring between the yarn loop and clasp so the metal hardware moves freely without rubbing through the fibers.
Are safety eyes suitable for every keychain?
Safety eyes suit decorative keychains for adults and older children when installed with the backing washer fully pressed into place. However, small plastic parts can become a choking hazard. For baby gifts, pet accessories, or items handled by young children, stitch facial details with embroidery floss instead.
What yarn is best for small crochet gifts?
Smooth cotton amigurumi yarn works especially well for diy crochet keychains because it produces clear stitches, holds color well, and resists pilling. Acrylic yarn can work for display charms, although it often becomes fuzzy sooner when carried with keys or clipped to a bag.
Important Crafting Safety Notes
Crafting is a rewarding creative activity, but maintaining a safe workshop environment is essential for yourself, your family, and your pets. Please review these vital safety precautions before starting:
• Sharp Needles, Snips, and Pliers: Bent-tip yarn needles, snips, scissors, and jewelry pliers all pierce or cut. Store them in a latching case or a high cabinet right after each session, and sweep the work area for dropped needles and small findings before pets or bare feet find them.
• Loose Hardware and Choking: Clasps, jump rings, key rings, and other small findings are choking and ingestion hazards for babies, toddlers, and pets. Keep unattached hardware and yarn cutoffs out of reach, and close every jump ring flush so finished charms cannot shed metal parts.
• Plastic Safety Eyes: Washer-backed safety eyes suit decorative keychains for adults and older children only when the backing washer is fully pressed into place; small plastic parts remain a choking hazard. For baby gifts or items handled by young children, stitch facial details with embroidery floss instead.
• Fiberfill and Yarn Cutoffs: Loose polyester fiberfill and trimmed yarn tails are ingestion hazards for curious mouths. Use small pinches so each charm stays compact, and keep loose stuffing and trimmed tails out of reach until you clean up the work area.
For more detailed guidance on safe crafting practices, liability disclosures, and website usage, please review our Terms and Conditions.
“Which of these DIY Crochet Keychains: 8 Easy Crafts That Look Charming ideas are you excited to try first, or do you have a creative tip of your own to share? Drop a comment below—I’d love to hear your thoughts and see what you create!”


