

Random gems look messy, not luxurious. These rhinestone crafts use deliberate spacing, clean surfaces, and a restrained color plan so every sparkle reads as part of the design instead of a last-minute scatter.
Start with a few reliable placement habits, then carry them from accessories to DIY bling decor. If you have been saving jars from our DIY soy candle ideas, one becomes a polished crystal-trimmed sleeve in this collection of rhinestone crafts.
Affiliate Disclosure: This post contains affiliate links. As an Amazon Associate, I earn from qualifying purchases. If you buy through these links, I may earn a commission at no additional cost to you.
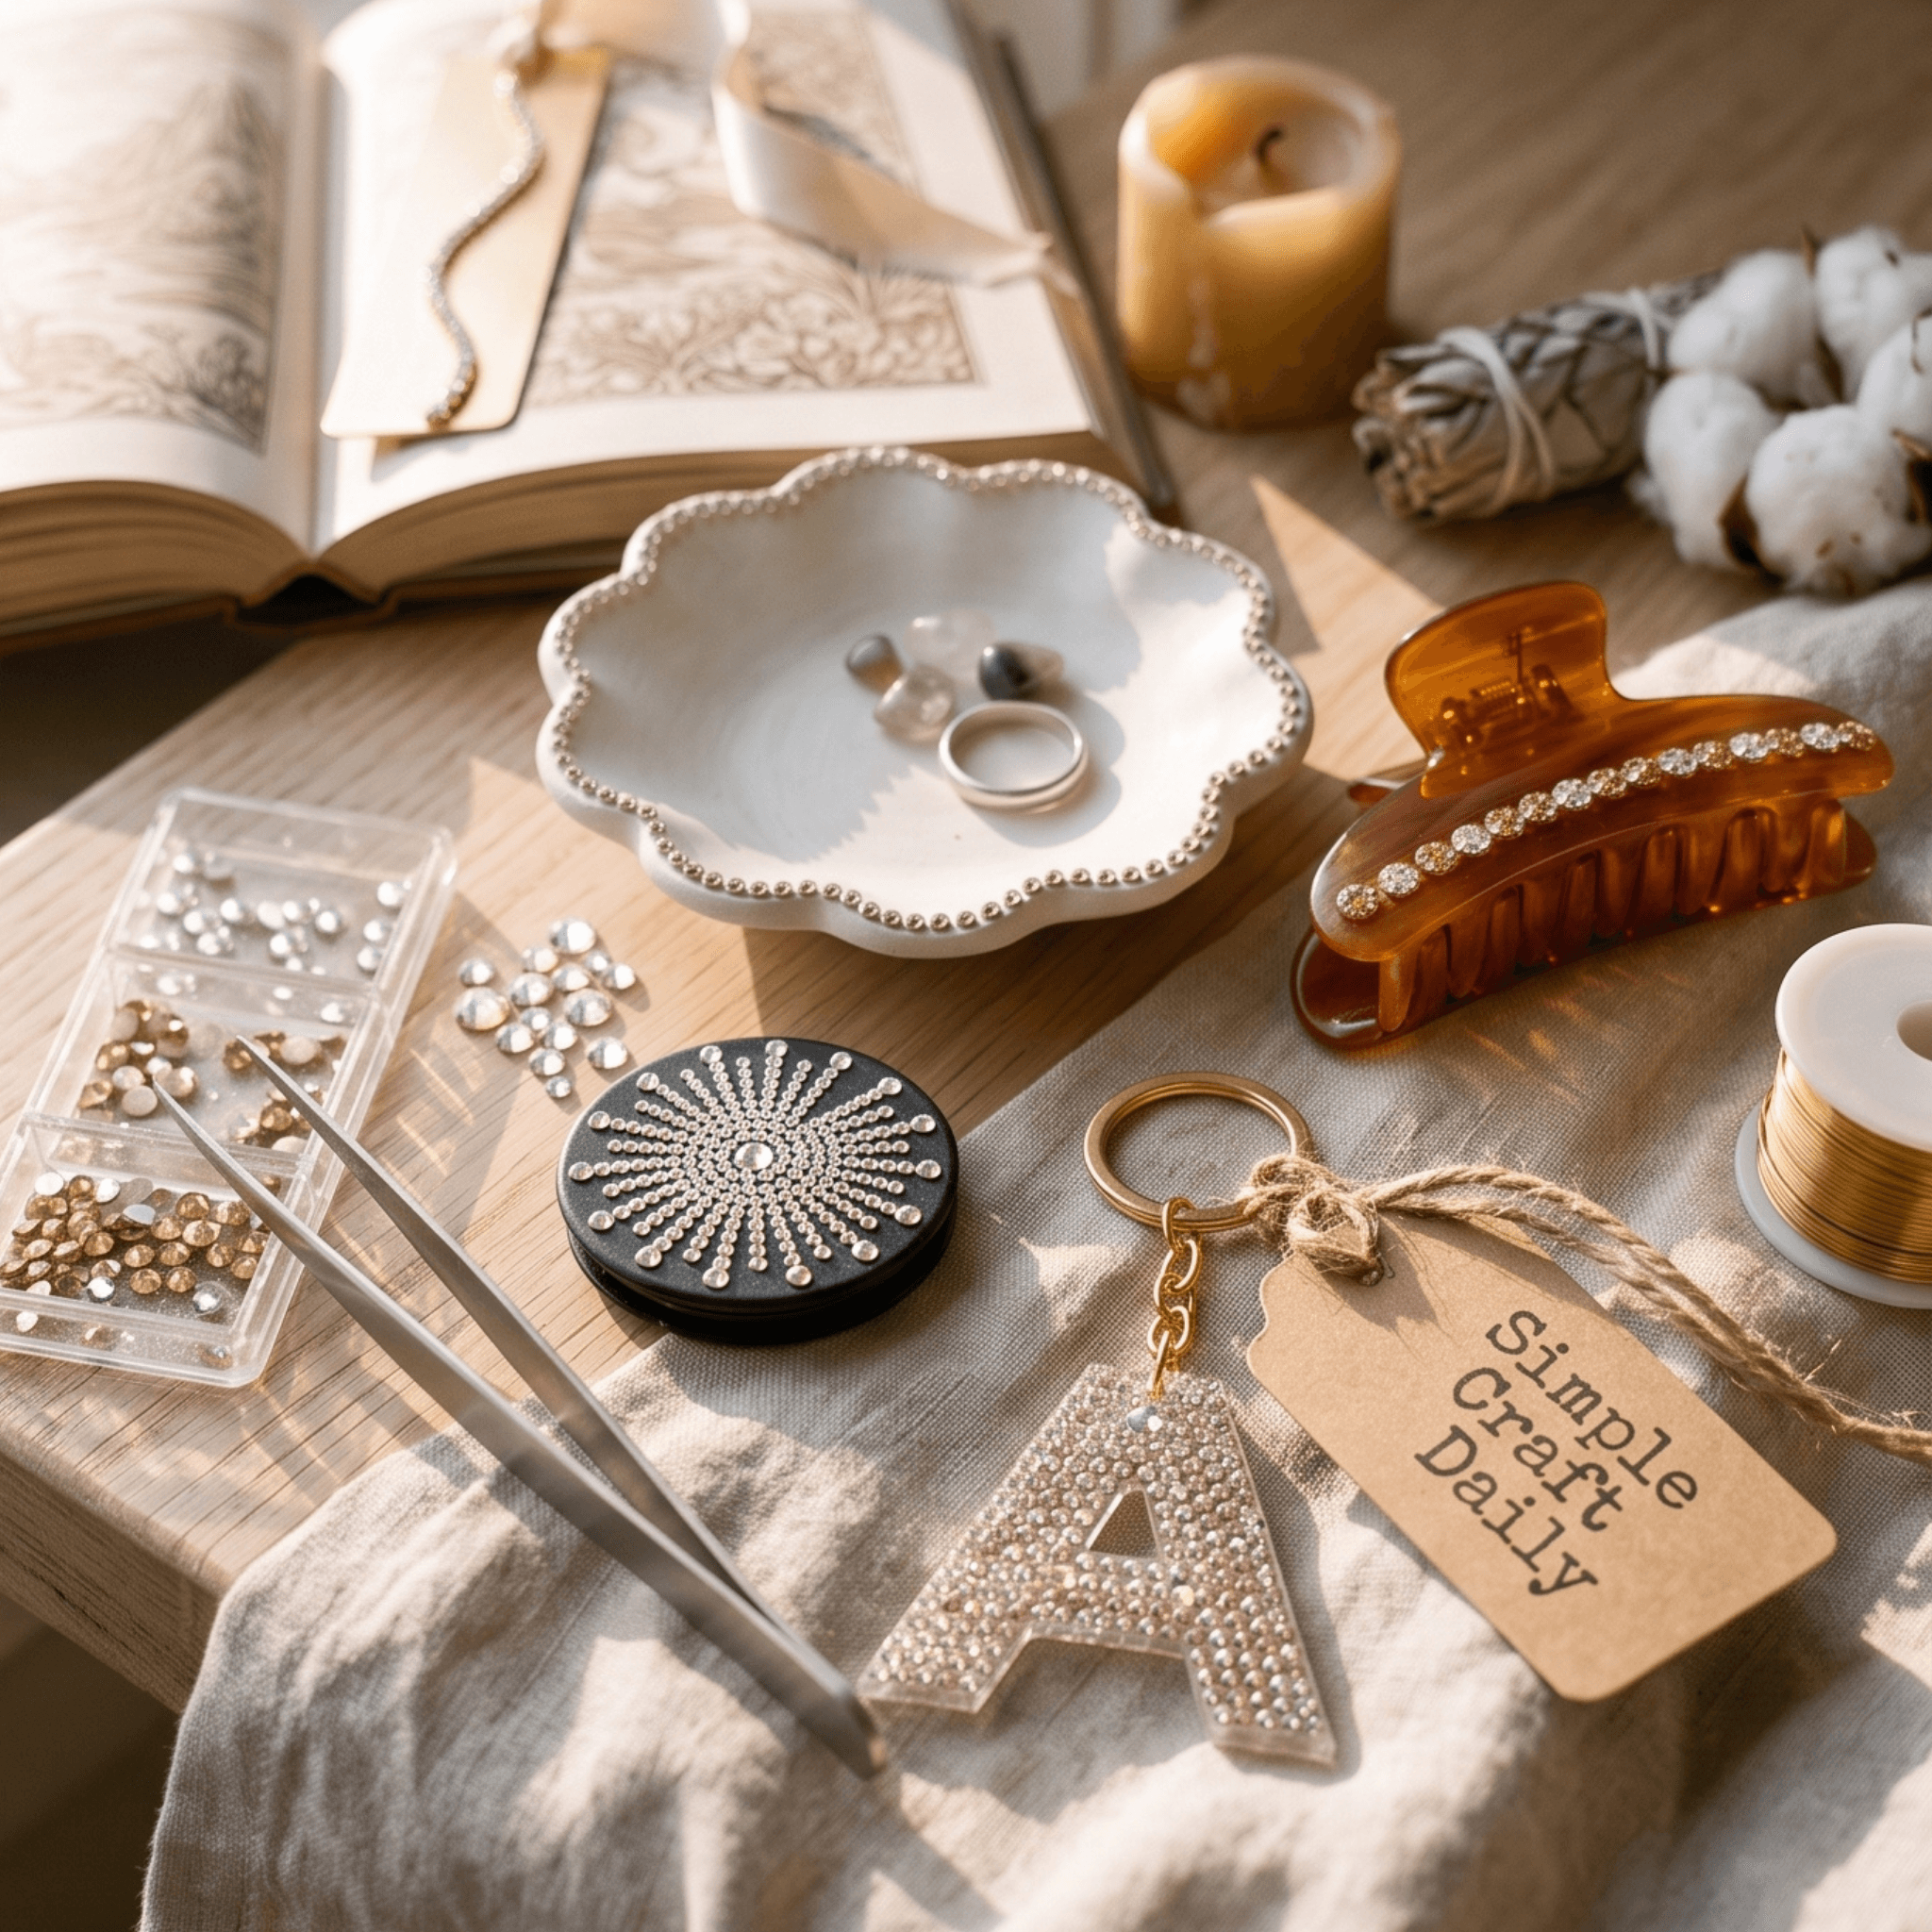
Rhinestone Crafts: Materials, Layout, and Clean Prep
The difference between refined bedazzle crafts and crowded-looking decor is planning. Before opening the glue, sort stones by color and size, dry-fit your border, and leave a little breathing room around edges, hardware, and seams.
Use the three-size rule for easy visual balance: small stones fill curves, medium stones create a steady rhythm, and larger stones become focal points. For rhinestone crafts for adults, a limited palette of clear crystal plus one accent color usually looks cleaner than a full mixed rainbow.
✨ Rhinestones & Color Planning
- Flatback Glass Rhinestones in Mixed Sizes — Faceted glass catches light sharply; use SS10 for curves, SS16 for borders, and SS20 for focal points | [Check Price on Amazon]
- Silicone Craft Mat and Sorting Tray — Keeps sizes separated and catches rolling stones before adhesive is applied | [Check Price on Amazon]
- Acrylic Paint Marker or Chalk Pencil — Marks centered lines and border guides that prevent drifting rows | [Check Price on Amazon]
💎 Adhesives & Placement Tools
- Clear Flexible Rhinestone Adhesive — Forms a durable, slightly flexible bond on many hard craft surfaces without drying brittle |
[Check Price on Amazon] - Wax Rhinestone Picker Pencil and Fine Tweezers — Lets you set small stones accurately without dragging glue across the base |
[Check Price on Amazon]
🧰 Surface Preparation
- Rubbing Alcohol and Lint-Free Cloths — Removes dust, skin oils, and factory residue from glass, metal, plastic, and sealed surfaces | [Check Price on Amazon]
- Clear Acrylic Sealer for Painted Bases — Seals porous painted clay or wood before rhinestone glue is added | [Check Price on Amazon]
- Blank Accessories and Decor Bases — Provides clean, flat surfaces for mirrors, frames, clips, boxes, and small decor |
[Check Price on Amazon]
🔥 Specialty Project Tools
- Hotfix Rhinestones and Hotfix Applicator — Adds heat-set details to denim and other compatible fabrics | [Check Price on Amazon]
- Heat-Resistant Pressing Sheet — Protects fabric layers during hotfix application | [Check Price on Amazon]
- Split Rings and Keychain Hardware — Finishes decorated acrylic initial keychains after adhesive cures | [Check Price on Amazon]
Easy Rhinestone Crafts for Everyday Accessories
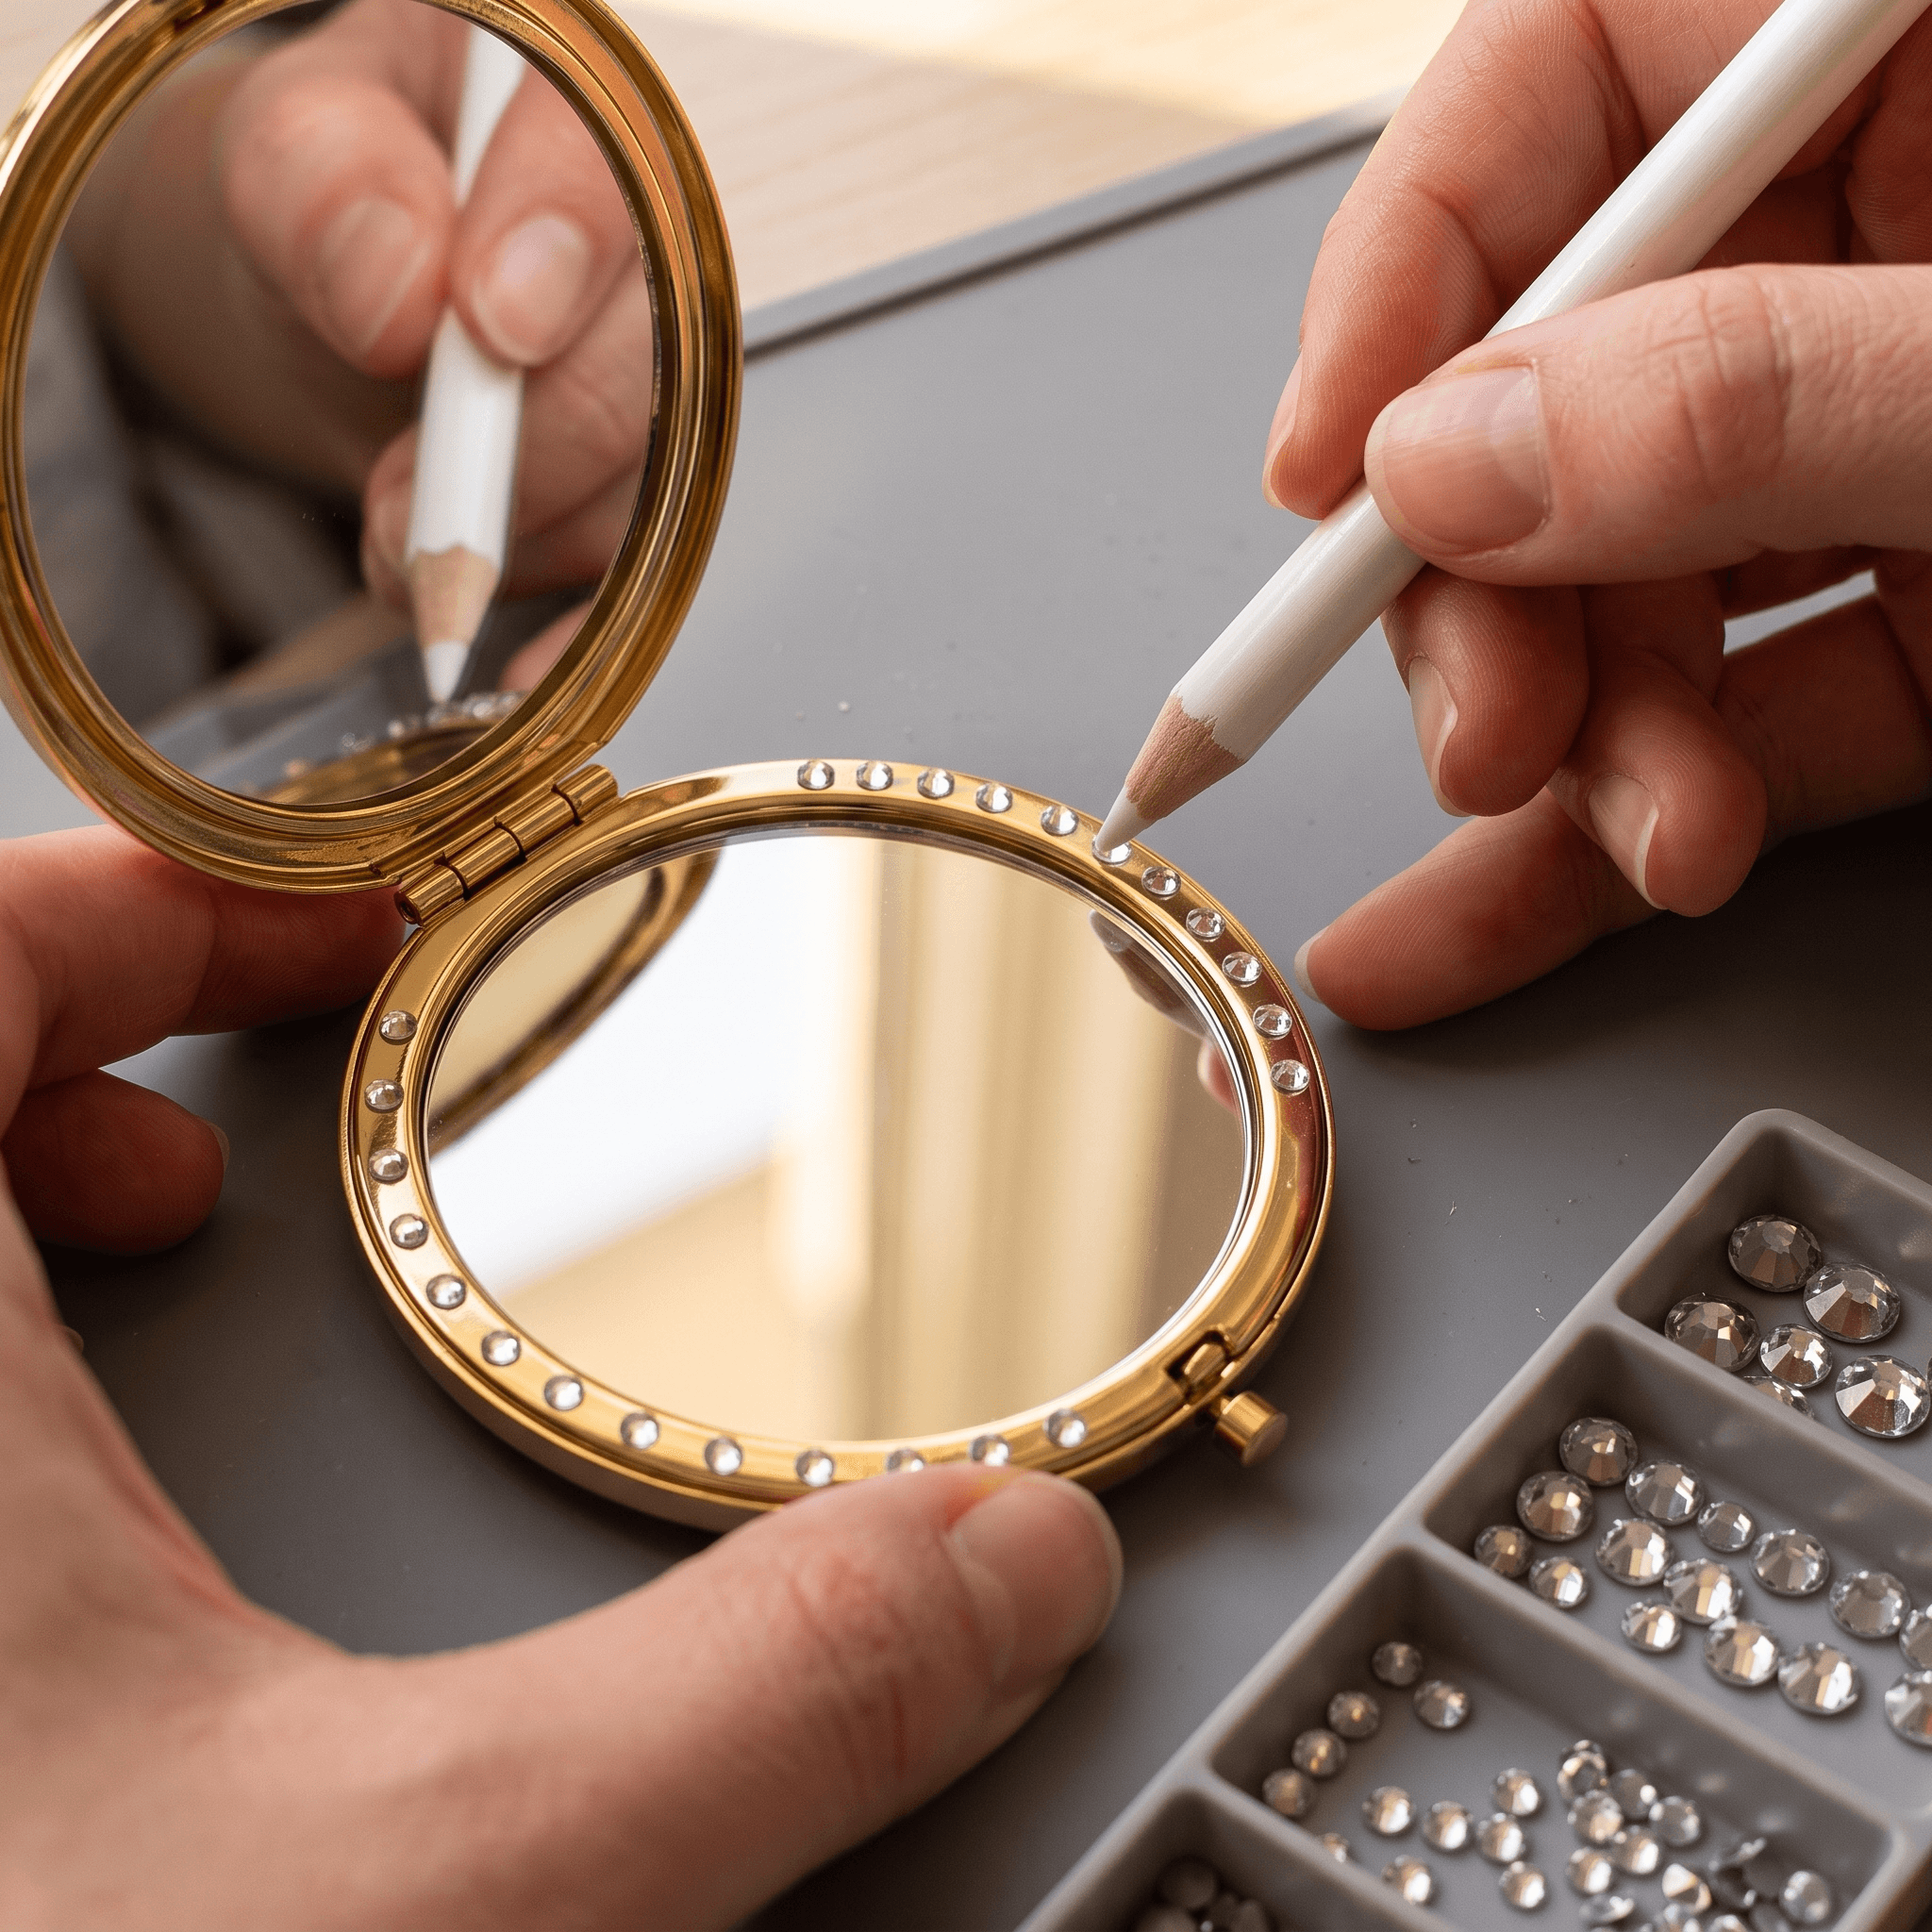
1. Crystal Edge Compact Mirror
Supplies Needed: Plain Compact Mirror, SS10 and SS16 Flatback Glass Rhinestones, Clear Flexible Rhinestone Adhesive, Wax Picker Pencil, Rubbing Alcohol.
A compact mirror needs a narrow, even border so it still feels pleasant in the hand. First, wipe the outer lid with rubbing alcohol and let it air-dry completely. Keep adhesive off the hinge, clasp, and mirror face.
- Dry-fit SS16 stones around the lid edge, leaving a 1/16-inch clean margin.
- Apply a thin adhesive bead along one short section rather than coating the whole lid.
- Set the larger stones first, then place SS10 stones only where a curve needs tightening.
- Wipe away stray glue immediately with a dry pointed swab and cure the compact open for the label-directed time.
Consequently, the border looks intentional from every angle. This is one of the most useful rhinestone crafts for practicing even spacing, so avoid stacking stones at the corners; one neatly spaced line has much more polish.
2. Bedazzled Claw Clip
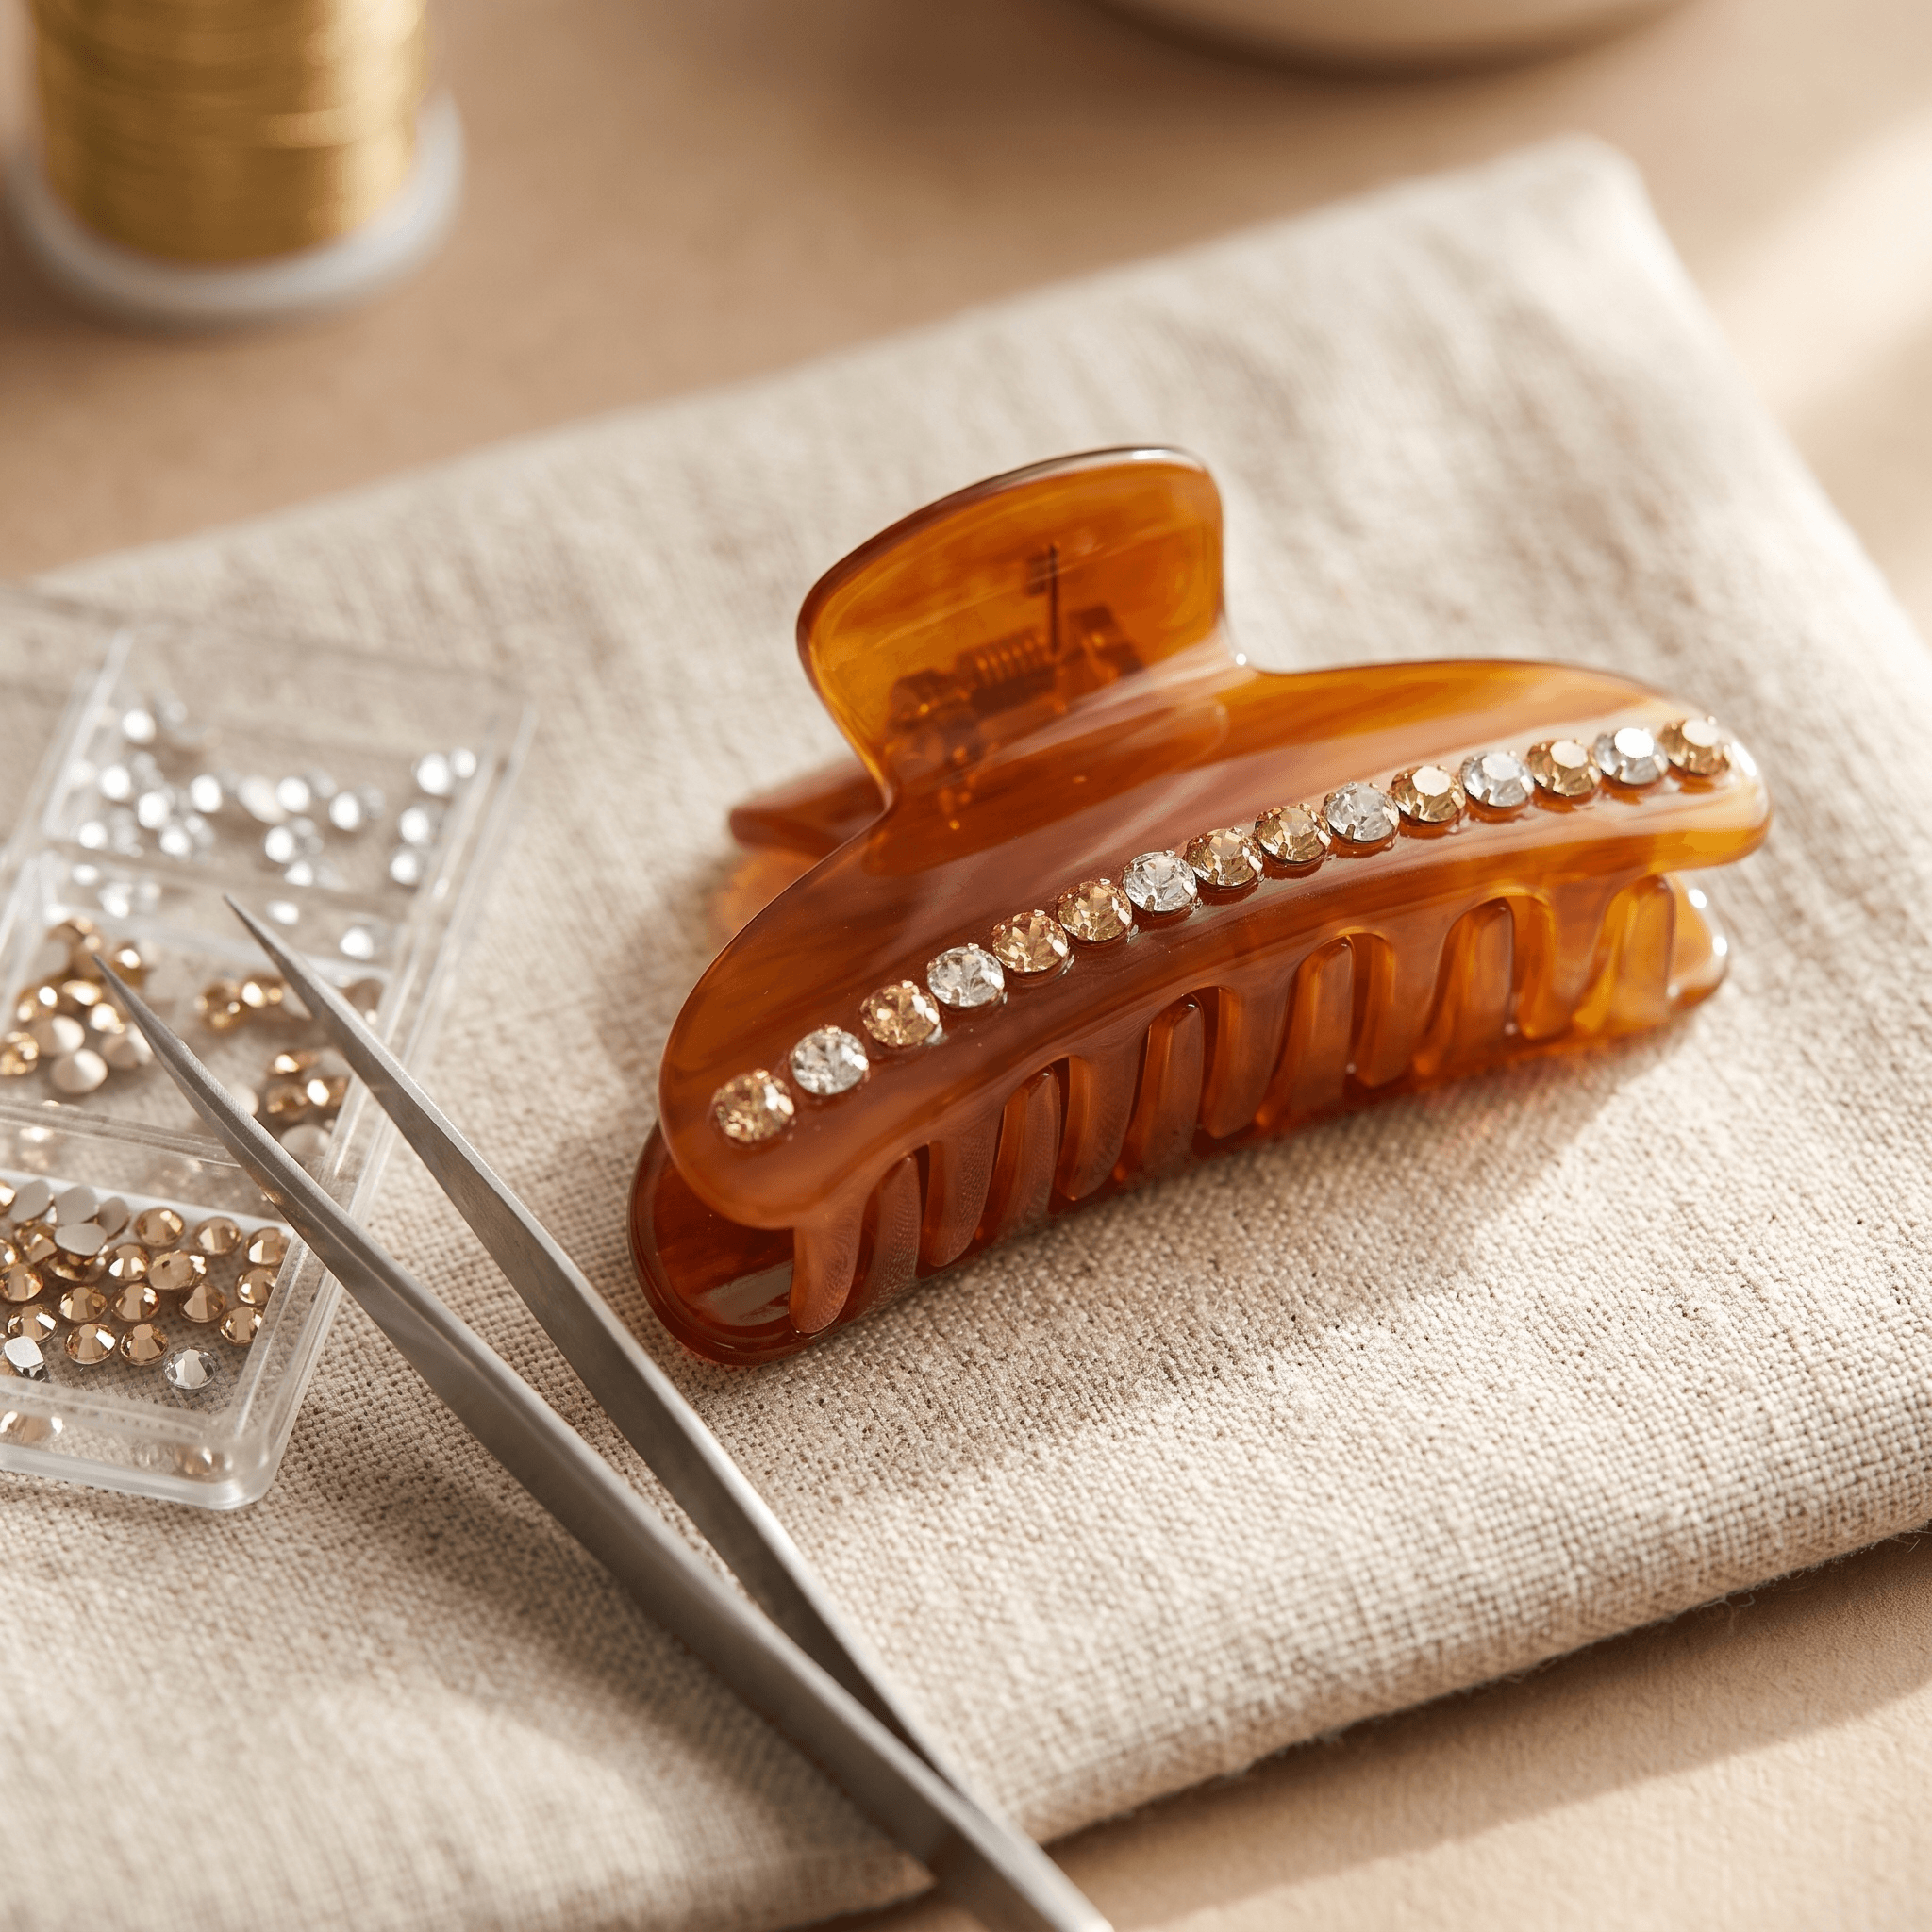
Supplies Needed: Large Acetate Claw Clip, Flatback Glass Rhinestones, Clear Flexible Rhinestone Adhesive, Fine Tweezers, Painter’s Tape.
Choose a wide acetate clip with a smooth outer shell and leave the teeth completely clear. Painter’s tape creates a clean stopping line near the spring, which protects the clip’s movement and gives the design a tailored edge.
- Close the clip and tape off the moving hinge, teeth, and spring area.
- Arrange stones on the clip without glue, using a single color or two neighboring shades.
- Next, add tiny dots of adhesive in a short row and set each stone with tweezers.
- Build from the center outward, checking both sides of the clip for balanced spacing.
- Remove the tape only after the adhesive has set enough that stones do not slide.
Let the clip cure fully before opening and closing it repeatedly. Among wearable rhinestone crafts, a thin adhesive layer matters here because thick glue can squeeze out and collect hair.
3. Rhinestone Phone Grip
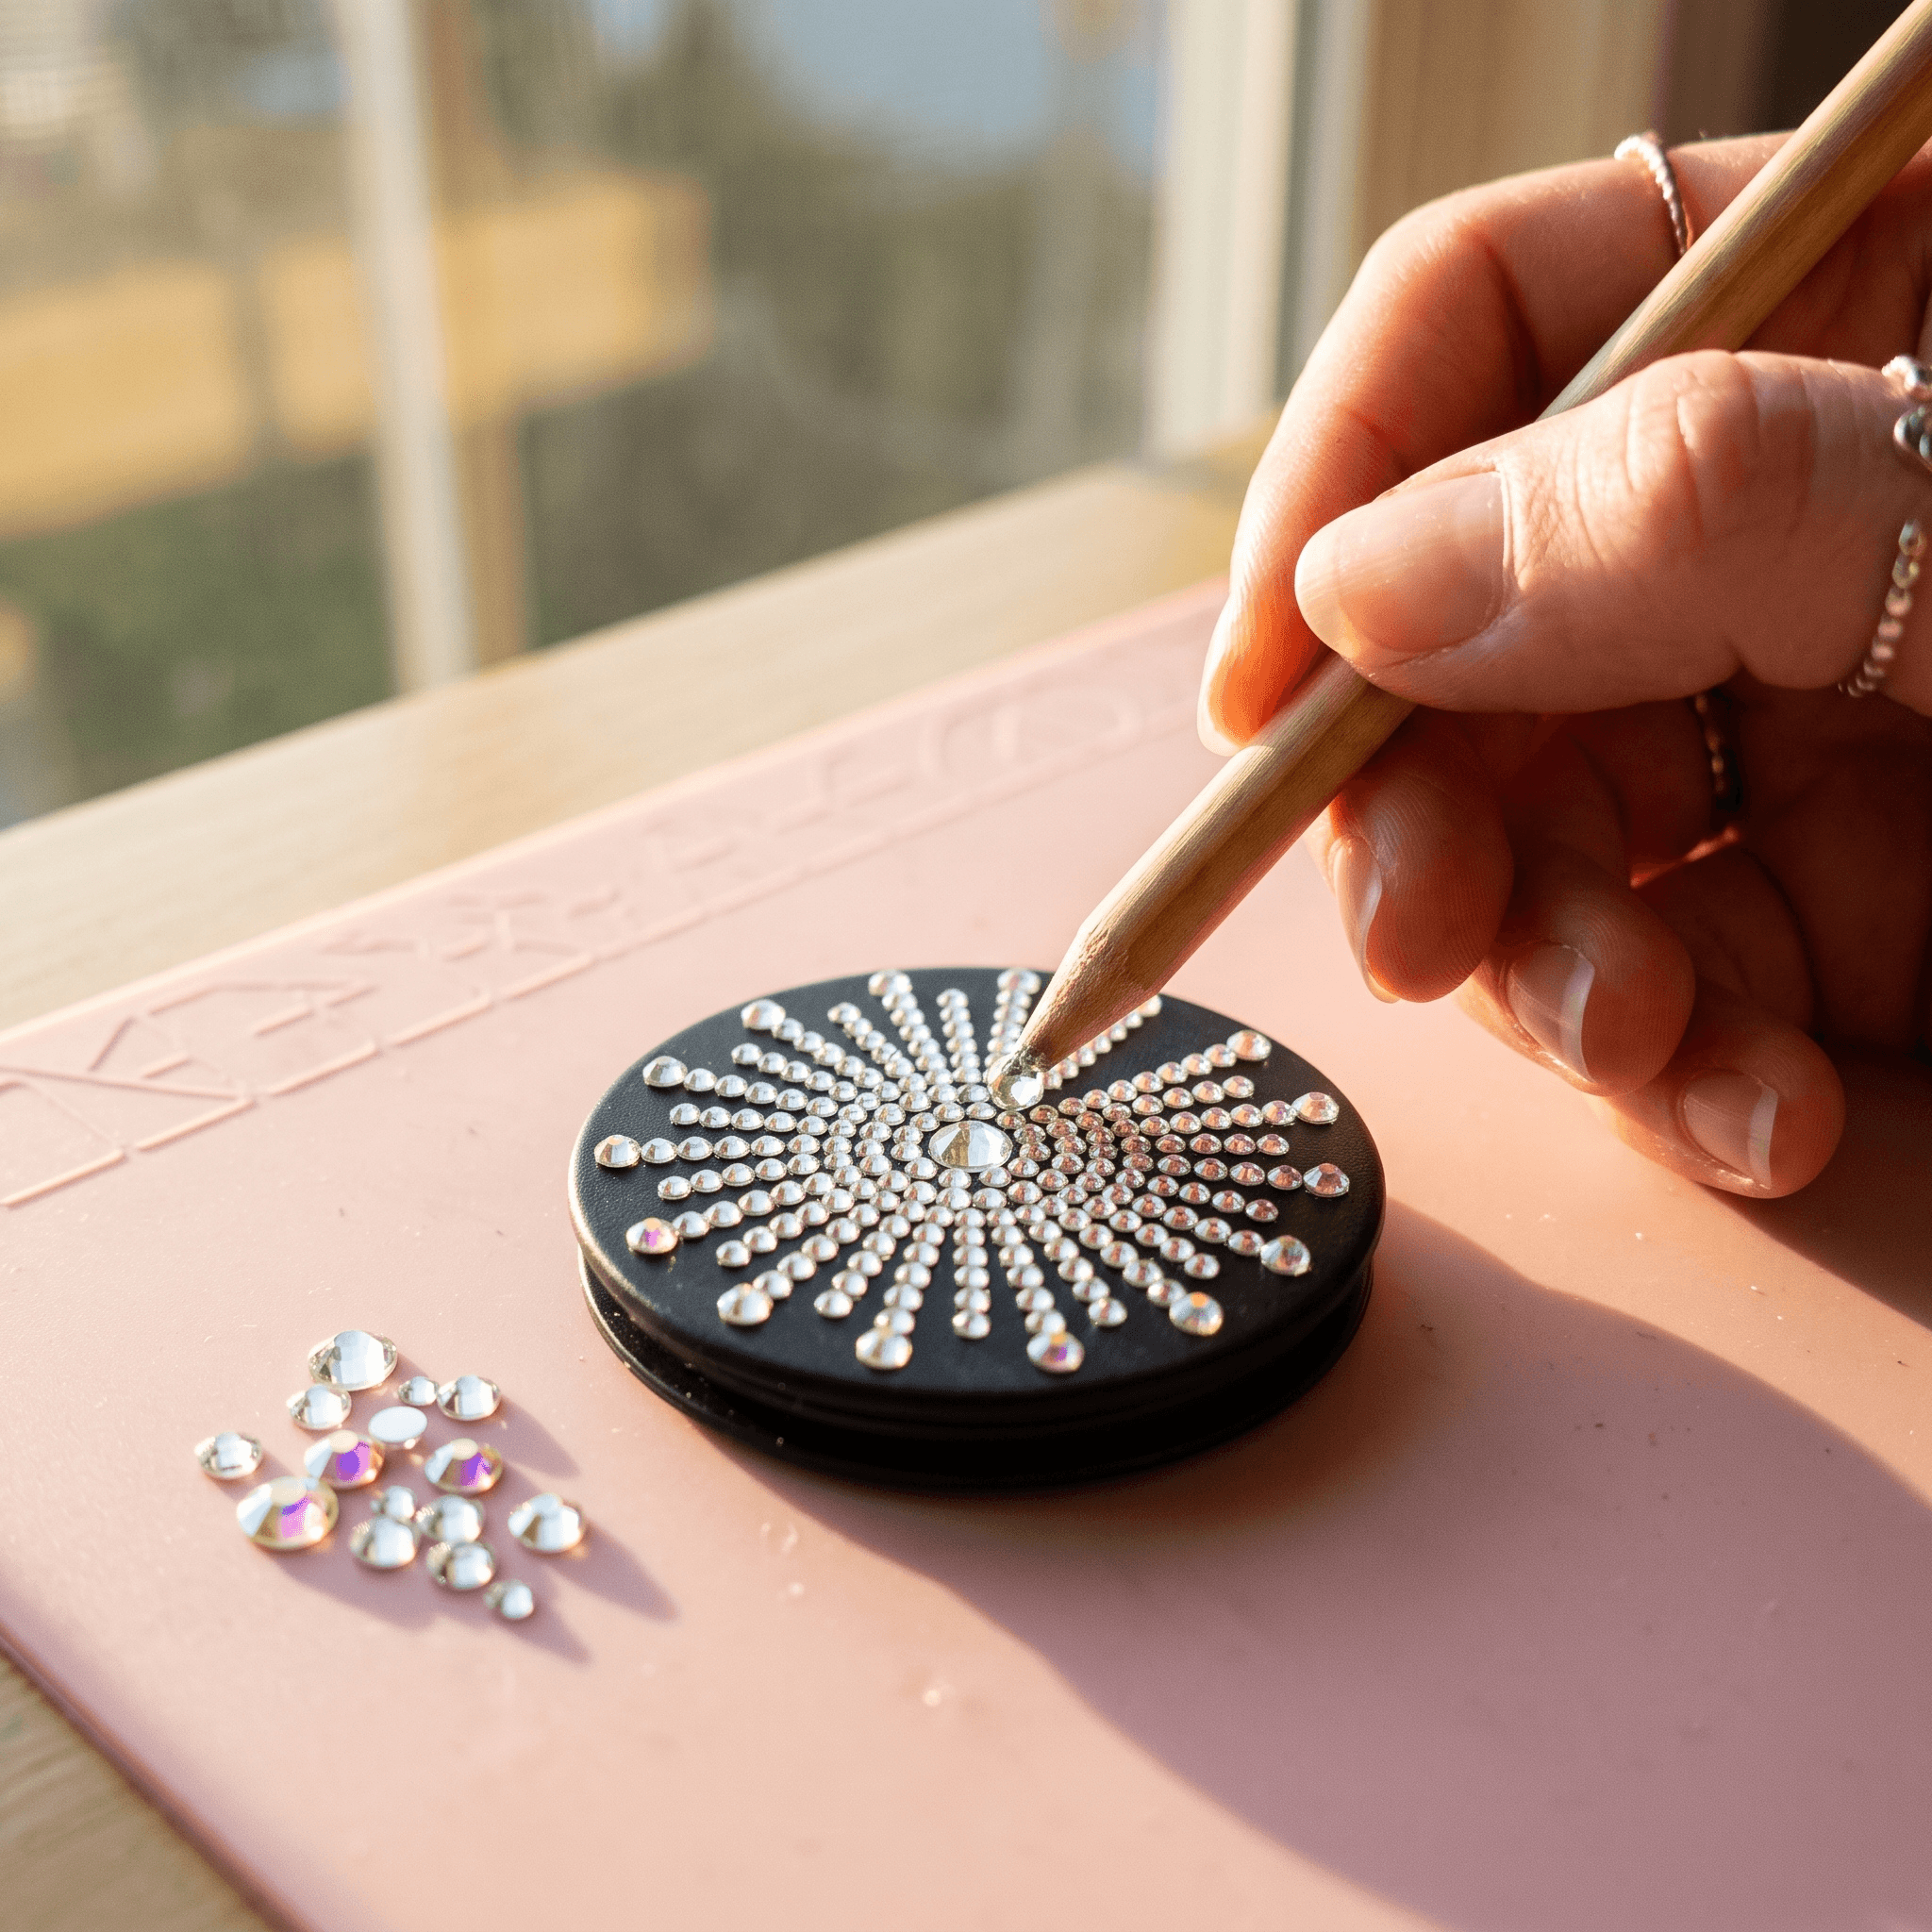
Supplies Needed: Plain Phone Grip, SS10 Flatback Glass Rhinestones, Clear Flexible Rhinestone Adhesive, Wax Picker Pencil, Silicone Mat.
A phone grip gets handled often, so cover only the flat top disc and keep the expandable joint clear. SS10 flatback rhinestones make a smooth, low-profile pattern that is less likely to catch on pockets or bag linings.
- Place the grip flat on a silicone mat with the decorative disc facing up.
- Dry-fit a center stone and build a small ring around it before using glue.
- Then, add adhesive dots no wider than each rhinestone base.
- Set stones from the center out with the wax picker pencil, maintaining identical gaps.
- Leave a narrow unembellished ring around the disc edge and cure it undisturbed.
Because this is a high-touch accessory, follow the adhesive label’s full cure window rather than judging by surface dryness. Rhinestone crafts used every day need room around moving parts, so the grip should expand and collapse without rubbing against the stones.
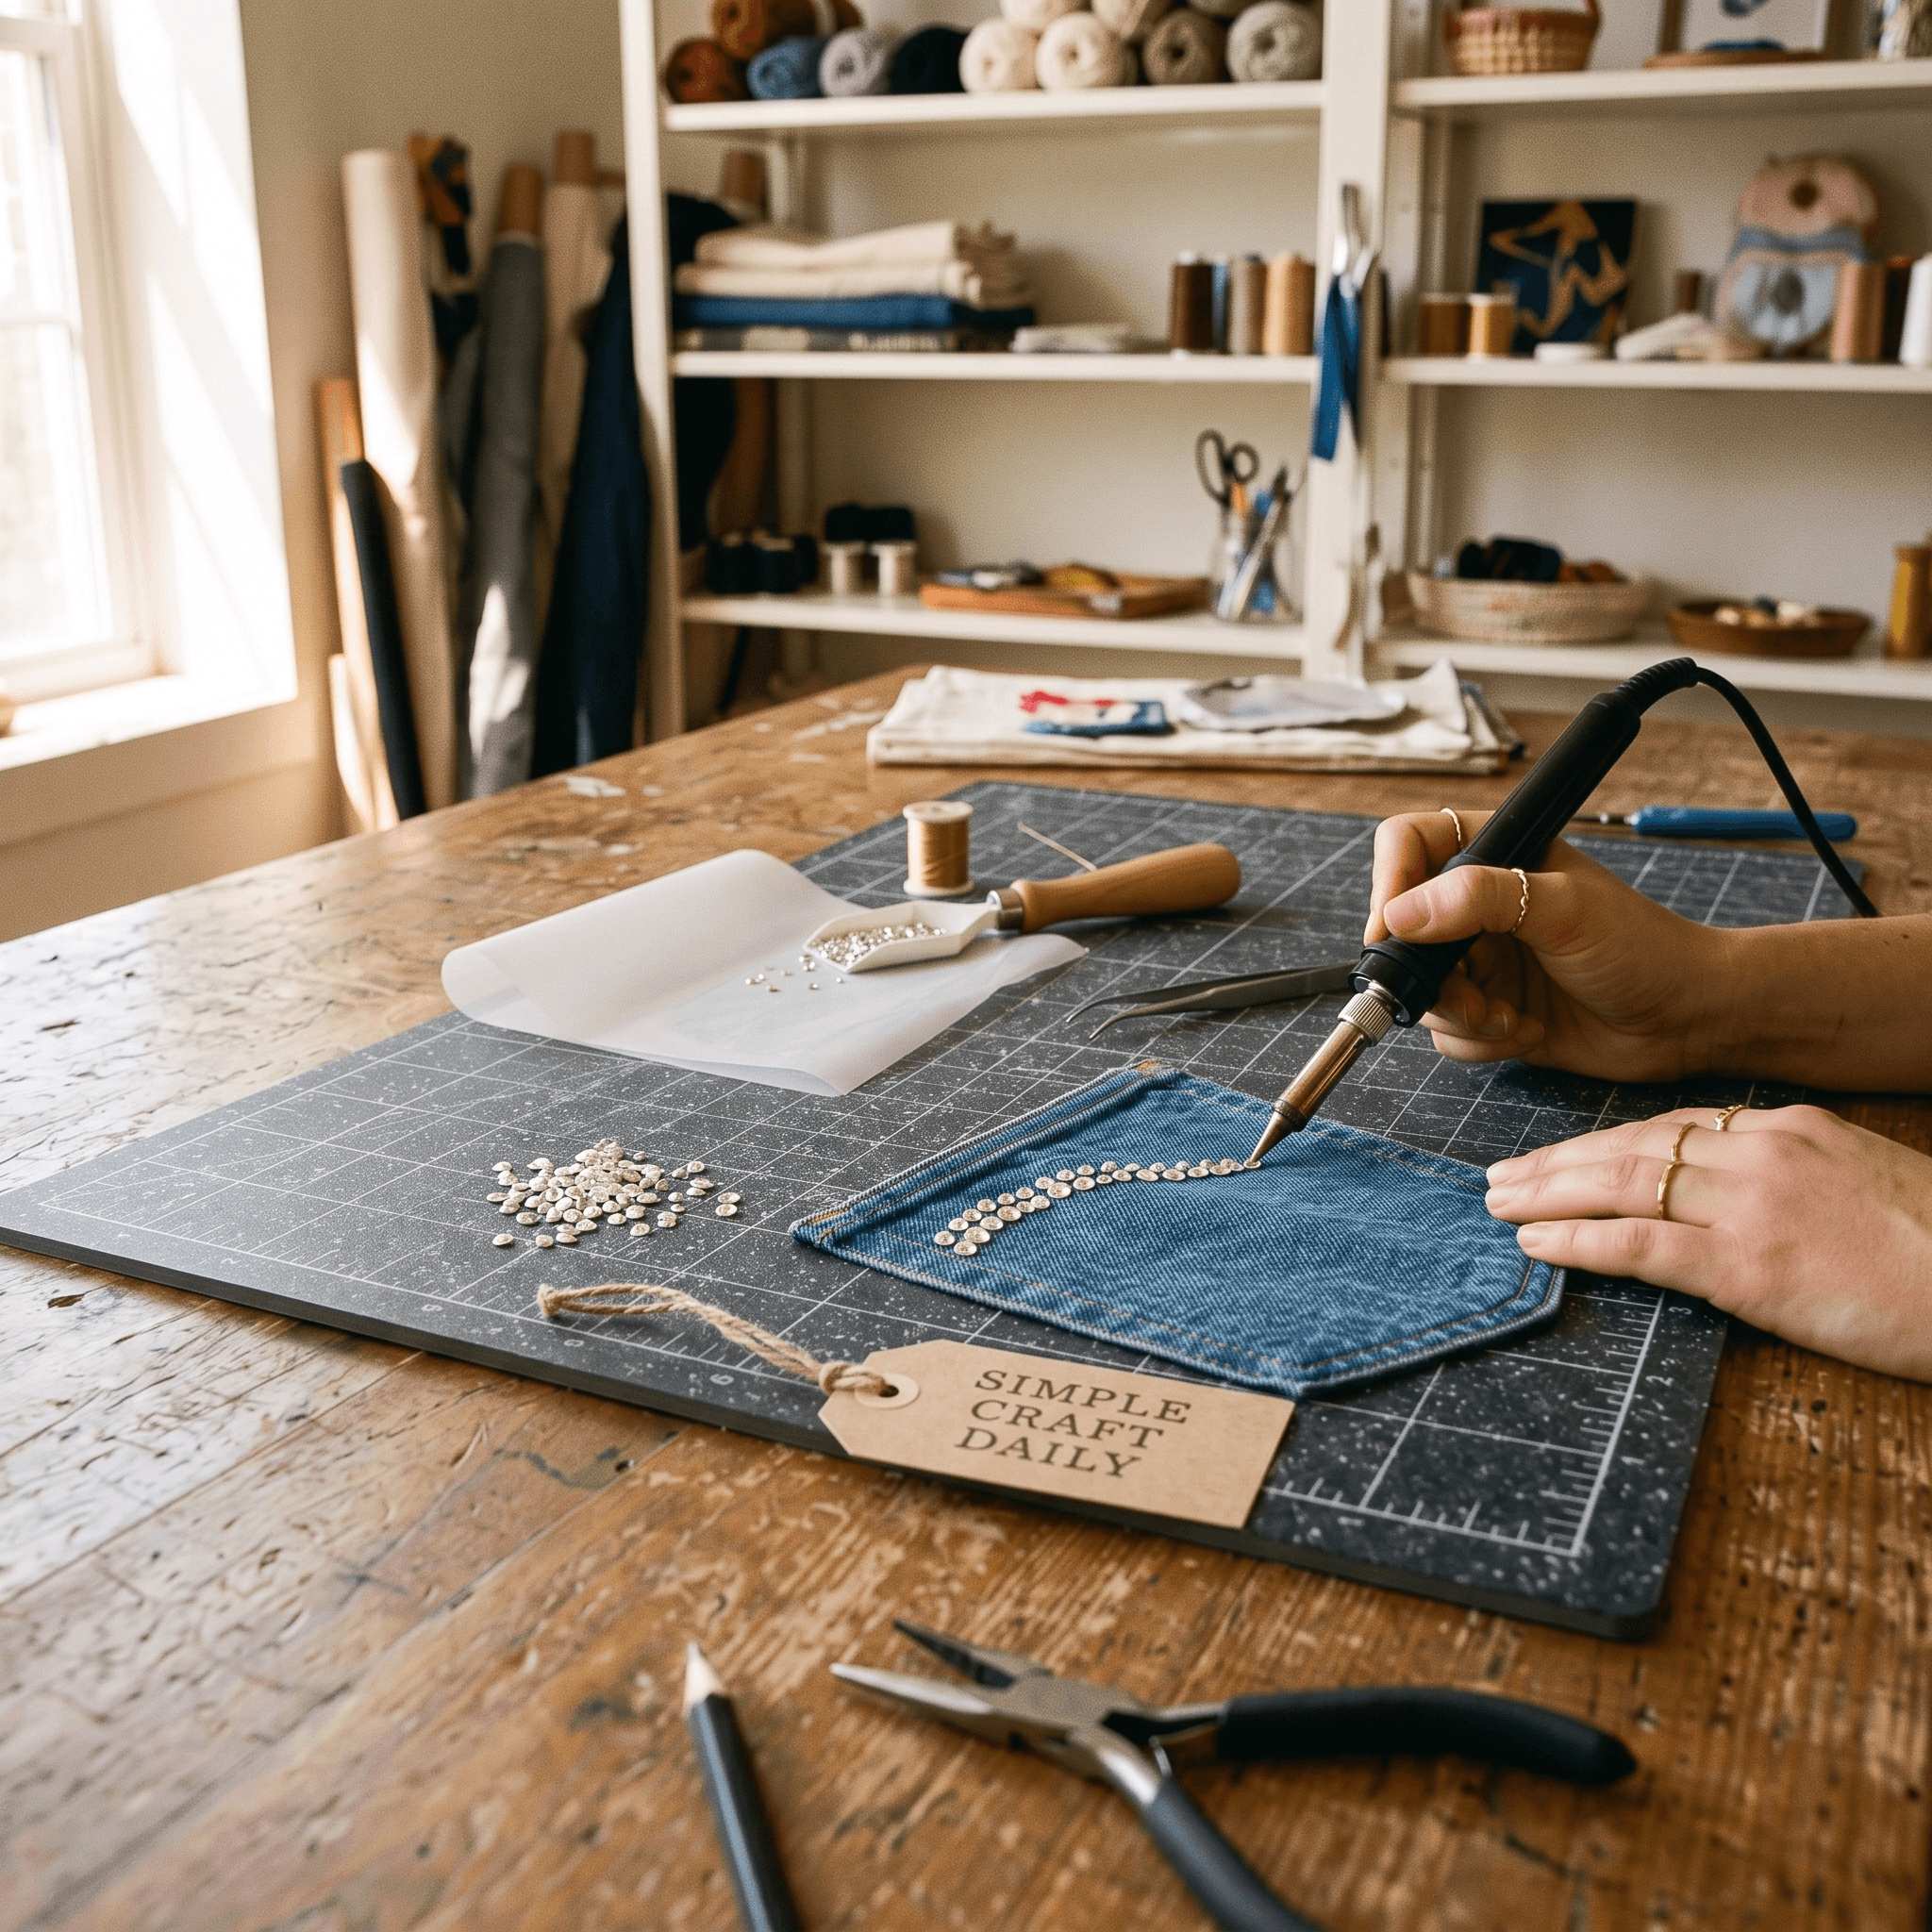
4. Sparkling Denim Jacket Pocket
Supplies Needed: Denim Jacket, Hotfix Rhinestones, Hotfix Applicator, Heat-Resistant Pressing Sheet, Chalk Pencil.
Hotfix stones are a practical choice for denim because their adhesive backs are activated by controlled heat. Design around the pocket rather than across its opening, so the jacket remains comfortable and useful.
- Lay the jacket flat and slide a heat-resistant pressing sheet inside the pocket.
- Mark a shallow arc or corner motif with a chalk pencil, staying 1/4 inch from the pocket edge.
- Arrange hotfix stones adhesive-side down, beginning with the largest accents.
- Following that, heat each stone with the applicator according to its stone size and manufacturer instructions.
- Let the denim cool flat before checking that every stone is secure.
Use a controlled motif instead of covering the full pocket. As a result, this fabric-based version of rhinestone crafts feels like custom detail work rather than a stiff, overloaded patch.
Rhinestone Home Decor Ideas with Lasting Shine
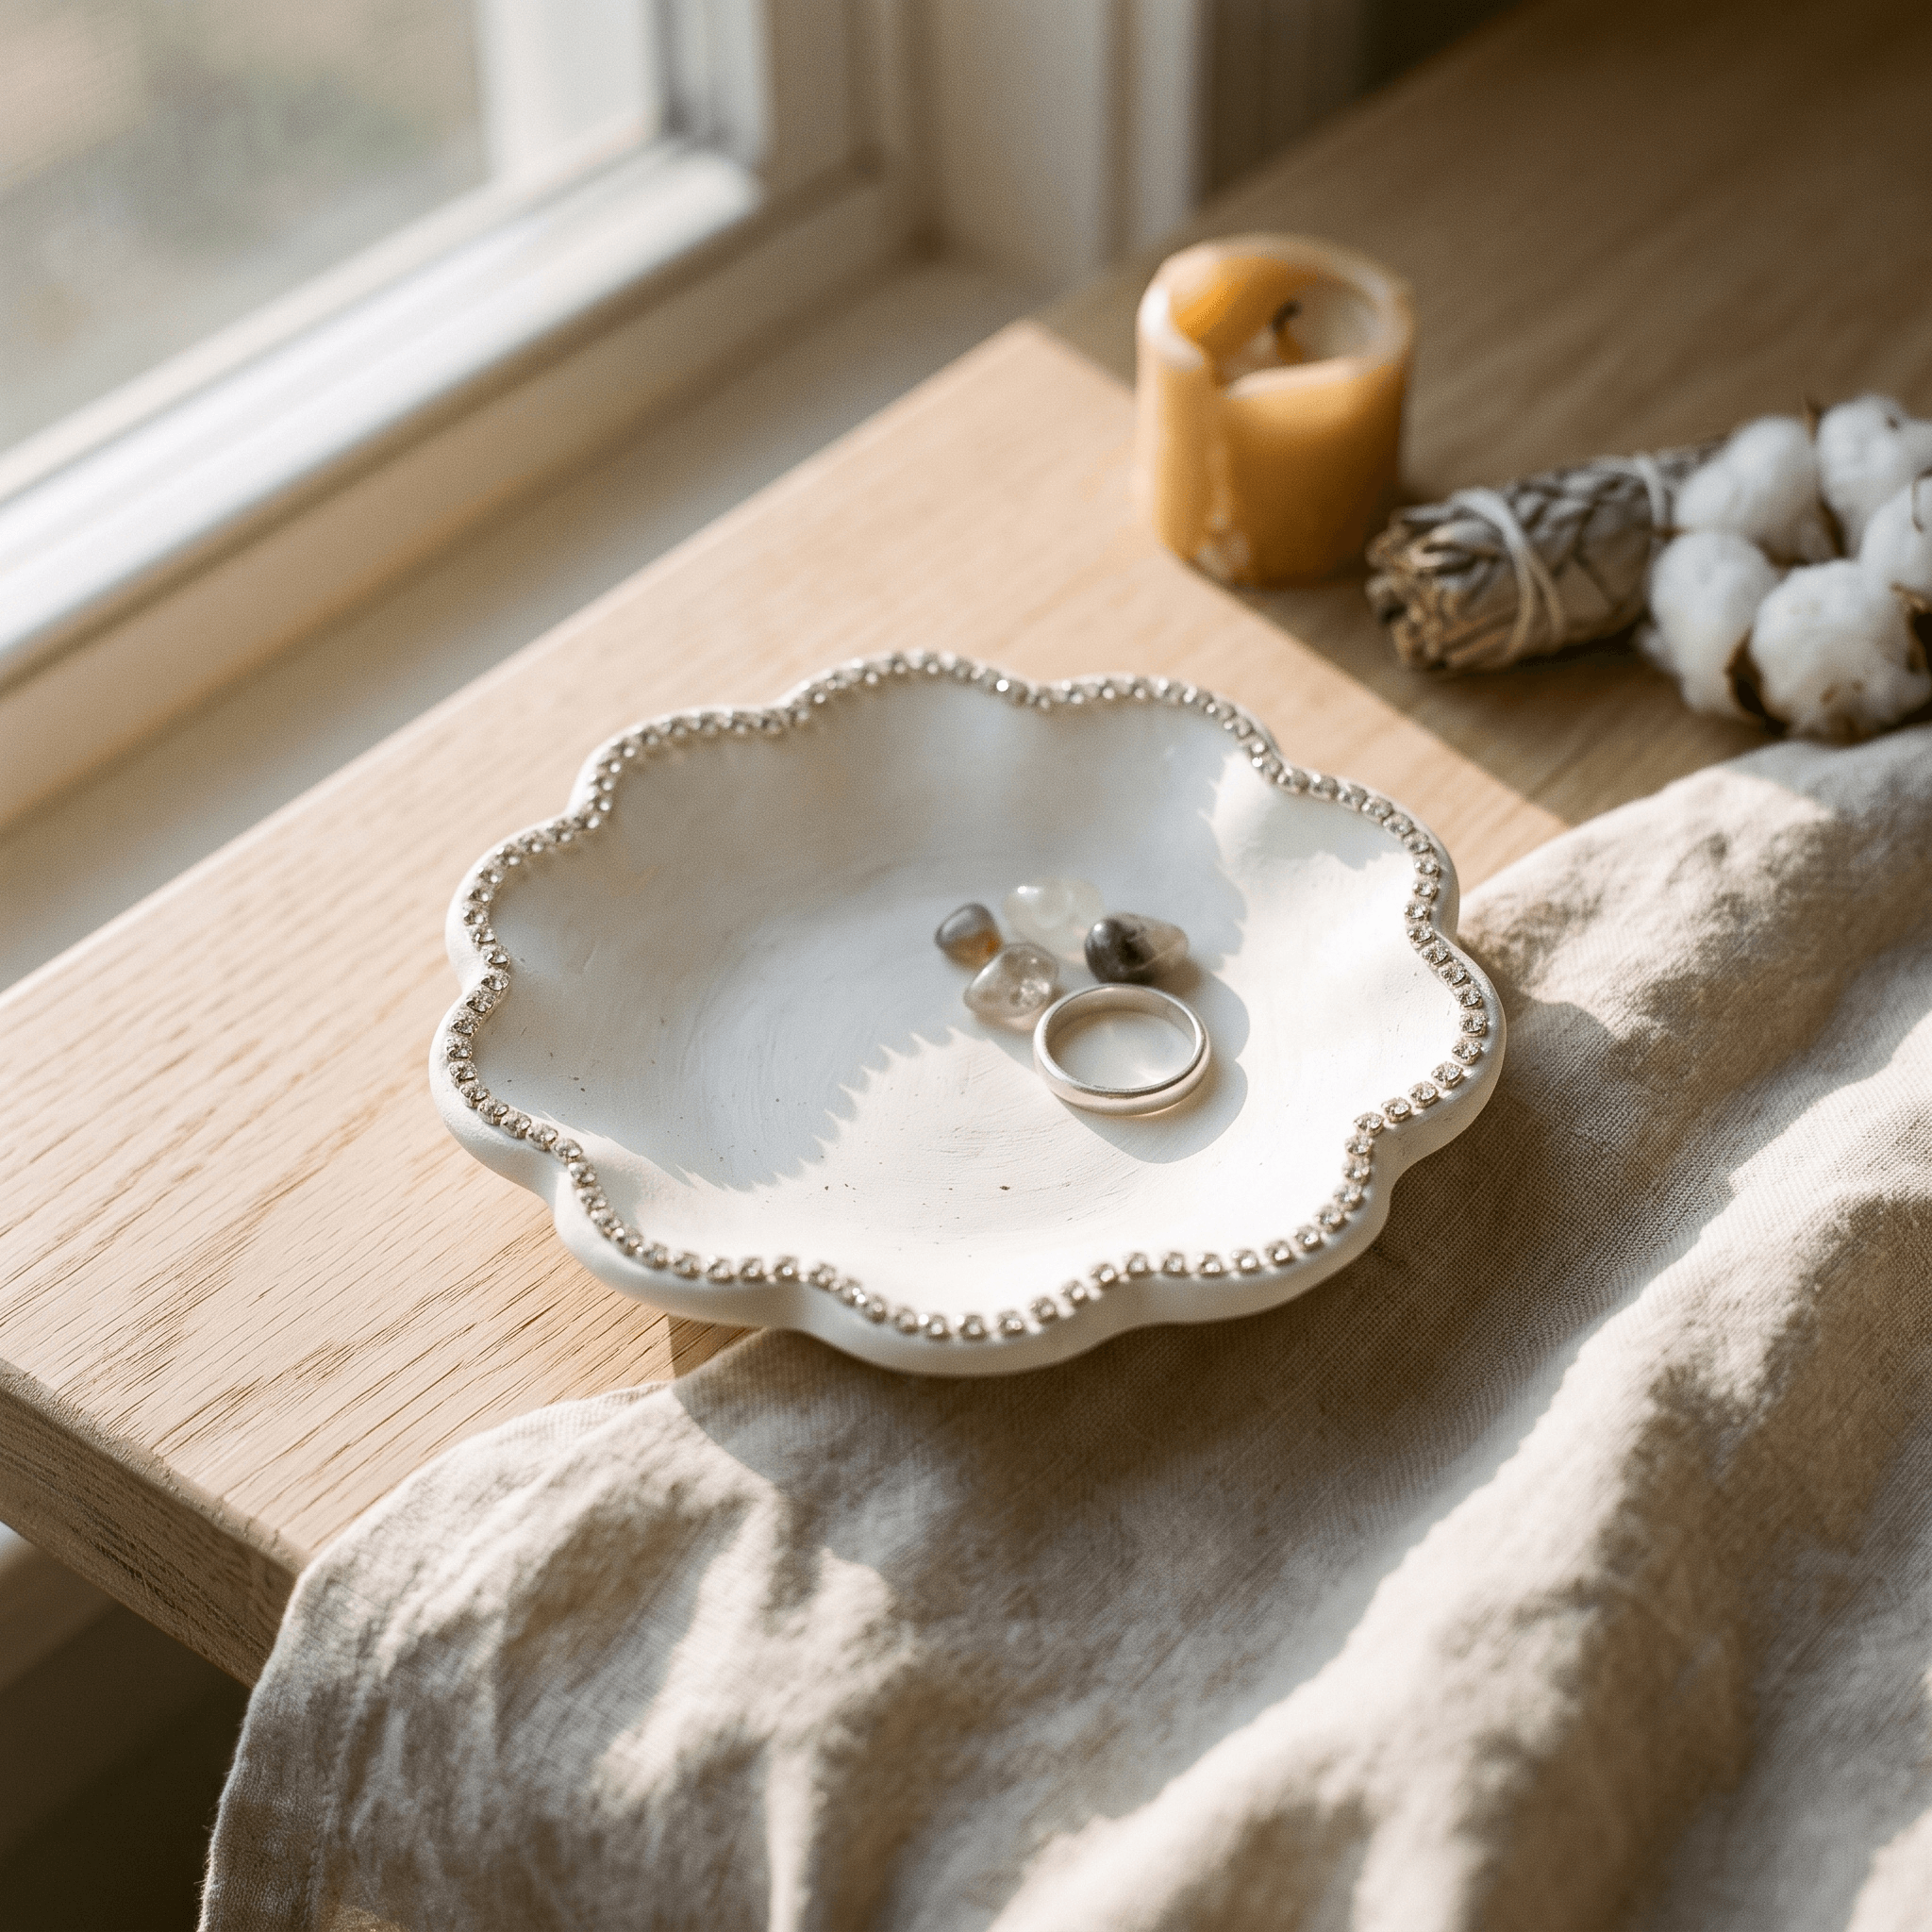
5. Jeweled Air-Dry Clay Trinket Dish
Supplies Needed: Finished Air-Dry Clay Trinket Dish, Clear Acrylic Sealer, SS10 Flatback Glass Rhinestones, Clear Flexible Rhinestone Adhesive, Wax Picker Pencil.
A handmade dish is an ideal base for a small ring of sparkle. If you need a base first, these air-dry clay pottery ideas offer shapes that suit bedside rings, earrings, and small treasures.
- Make sure the clay is fully dry, then seal it with clear acrylic sealer and let the finish cure.
- Mark a light border about 1/4 inch inside the rim.
- Apply tiny adhesive dots along a 2-inch stretch of the guide line.
- Set SS10 stones one at a time, following the curve without pressing glue up the sides.
- Continue around the dish and leave the center bare for a calm, useful surface.
Porous clay needs sealing first; otherwise, adhesive can sink into the surface and weaken the bond. For home rhinestone crafts, choose clear crystal or one soft accent shade to preserve the handmade character.
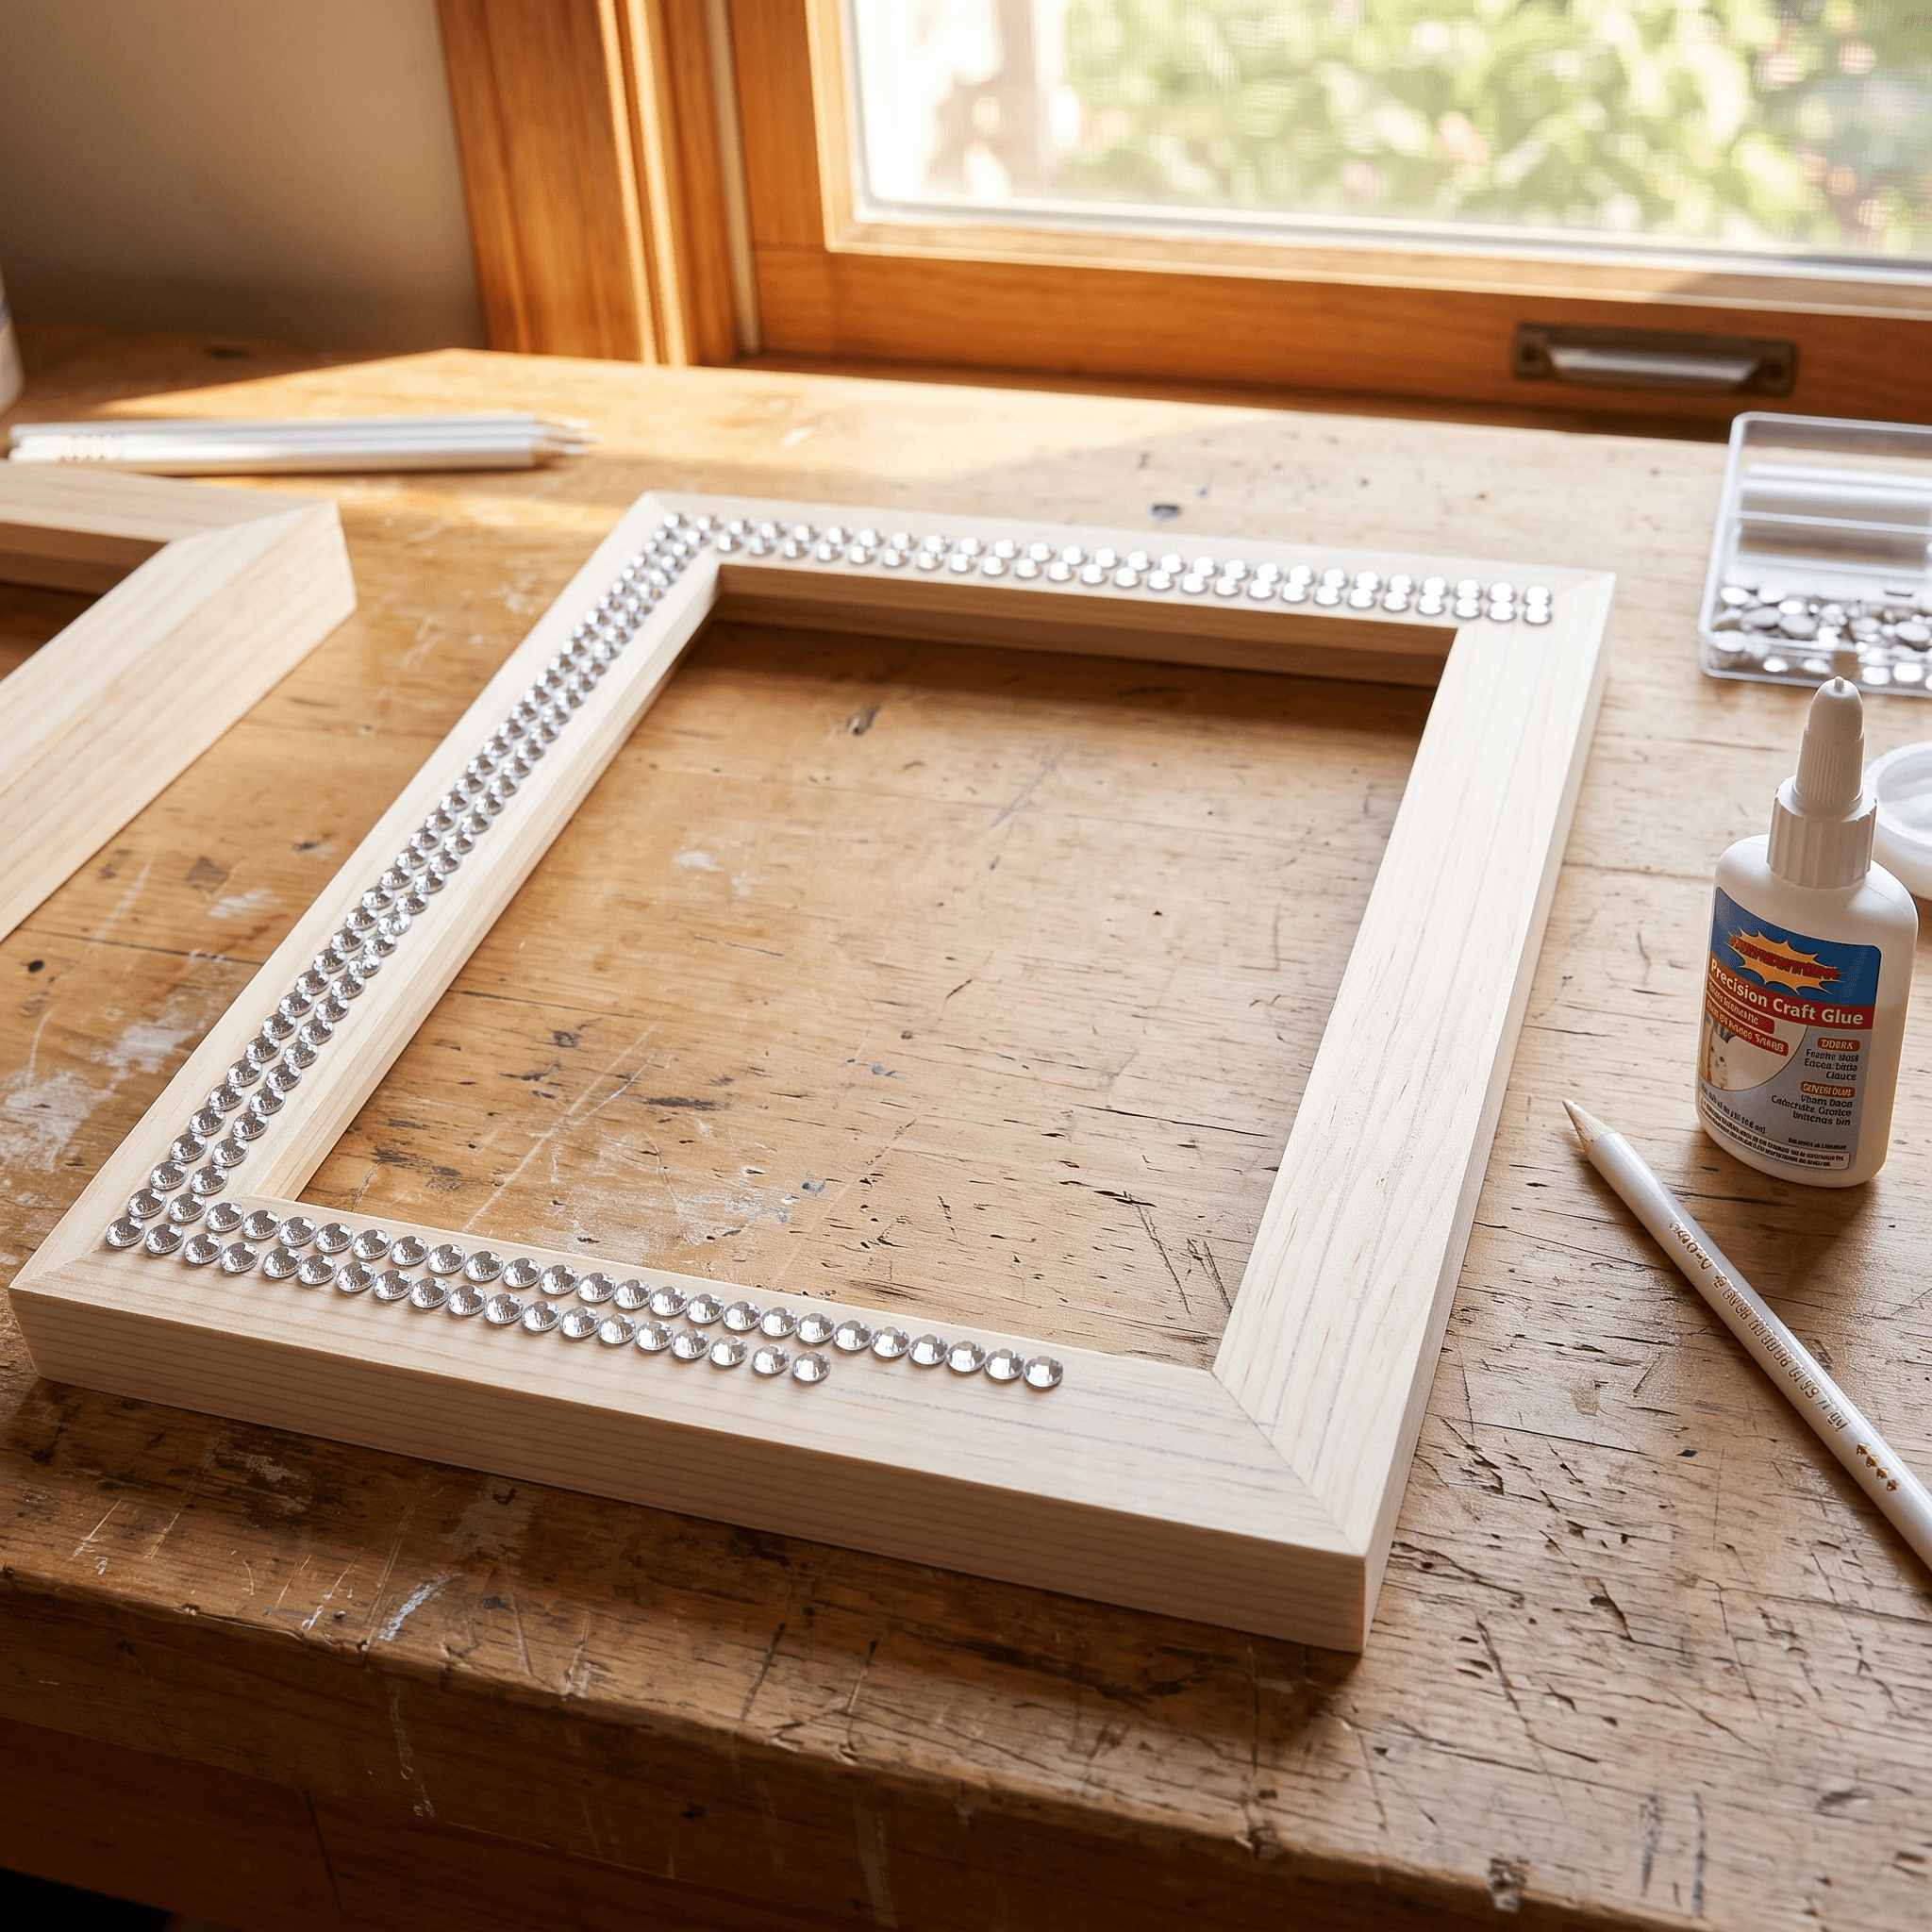
6. Rhinestone Picture Frame Border
Supplies Needed: Wood or Resin Picture Frame, SS16 Flatback Glass Rhinestones, Clear Flexible Rhinestone Adhesive, Rubbing Alcohol, Chalk Pencil.
A framed photograph already has a focal point, so the crystals should work as a quiet border rather than compete with the image. Smooth resin and sealed wood both accept rhinestone glue well once the surface is cleaned.
- Remove the photo, backing, and glass if possible, then clean the front frame surface with alcohol.
- Use a chalk pencil to mark matching inset margins on all four sides.
- Dry-place SS16 stones along the top and bottom to calculate even spacing.
- Next, glue stones one side at a time, working from each corner toward the center.
- Set the remaining sides to match, then allow the frame to cure flat.
Starting at the corners prevents the last stone from landing in an awkwardly wide gap. These rhinestone crafts look especially polished when you use one stone color and repeat the same spacing on every side.
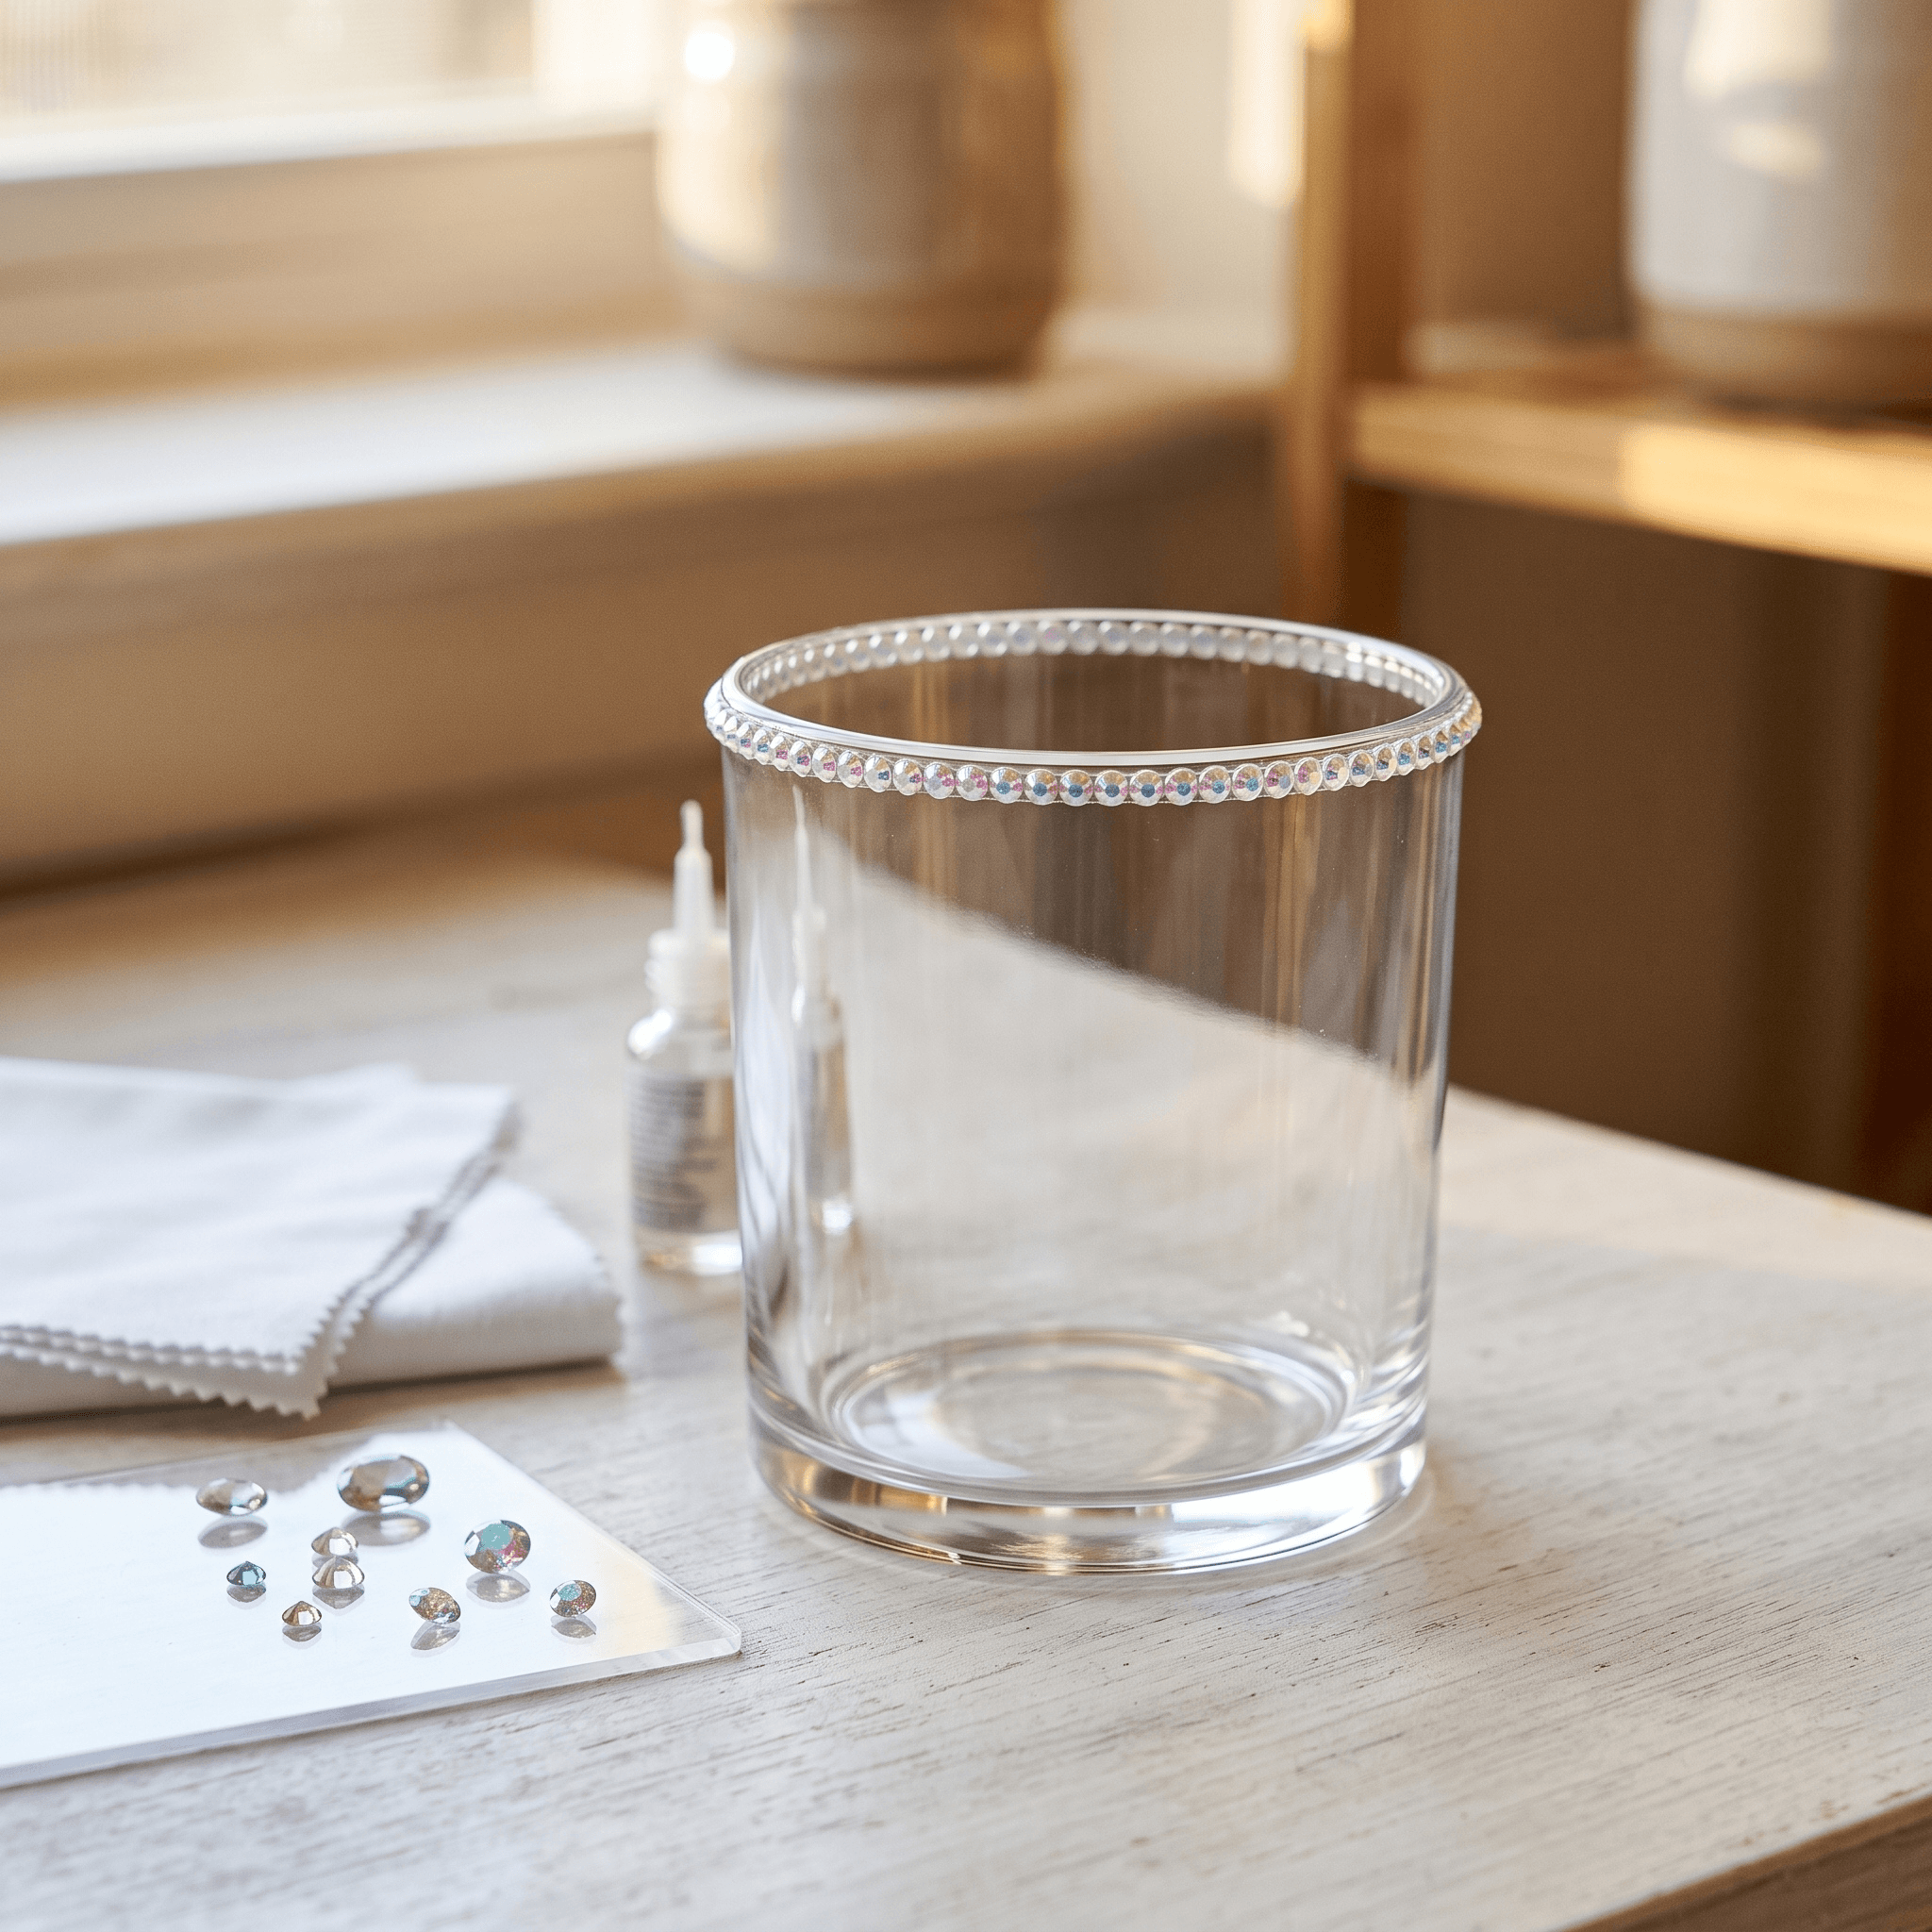
7. Bedazzled Candle Jar Sleeve
Supplies Needed: Empty Glass Candle Jar, Glass-Safe Clear Adhesive, Flatback Glass Rhinestones, Rubbing Alcohol, Fine Tweezers.
Use an empty, washed candle jar as a decorative sleeve for dried stems, makeup brushes, or battery-operated lights. Do not place rhinestones on a jar that will hold a burning candle, since heat can affect adhesive performance.
- Remove all wax and label residue, then clean the outside glass with rubbing alcohol.
- Mark a narrow band near the bottom or just below the rim.
- Apply glass-safe adhesive in short, thin beads around the jar.
- Set stones with tweezers, rotating the jar on the table instead of handling wet sections.
- Finish the band with a clean meeting point at the back and cure upright.
On nonporous glass, surface prep is especially important. A single crystal band paired with clear glass makes rhinestone crafts feel calm and catches light without making the jar visually heavy.
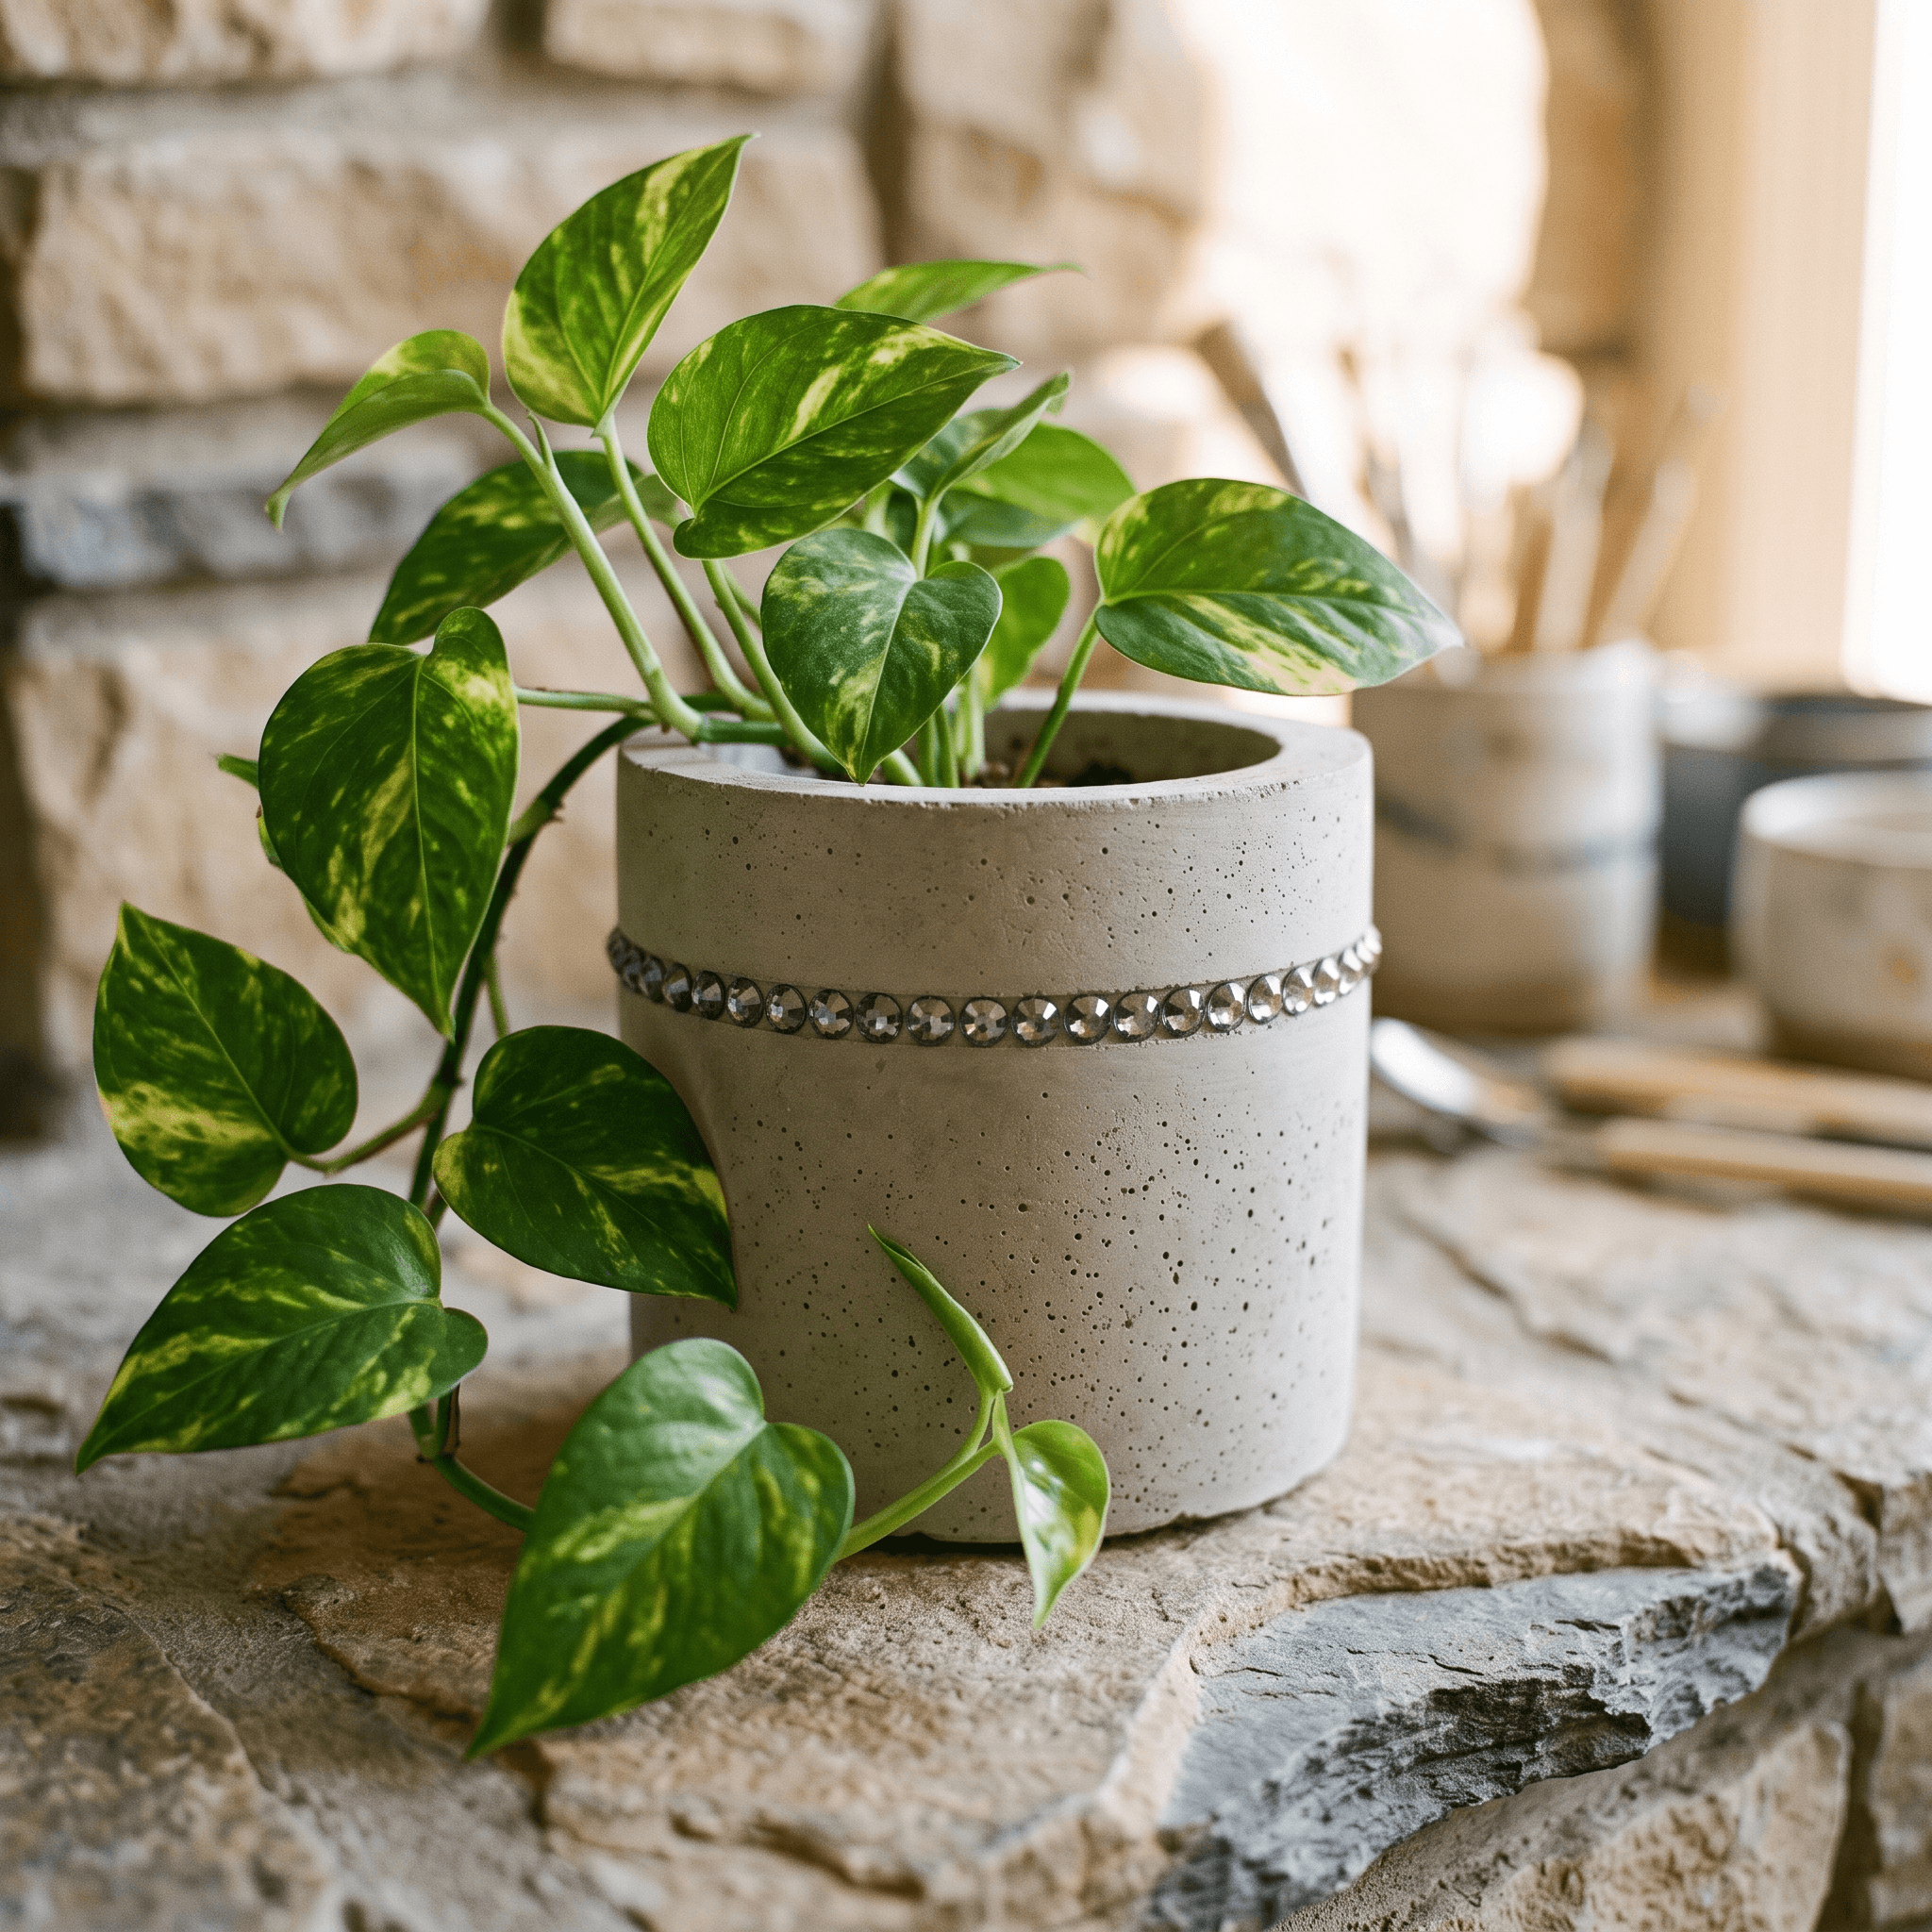
8. Crystal-Trimmed Cement Planter
Supplies Needed: Fully Cured Cement Planter, Masonry Sealer, SS16 Flatback Glass Rhinestones, Clear Flexible Rhinestone Adhesive, Painter’s Tape.
A cement planter gains warmth from a narrow crystal trim, especially when the stone color is restrained. You can cast a planter or select one inspired by these DIY cement crafts for your home.
- Let the cement cure completely, then apply masonry sealer and allow it to cure as directed.
- Wrap painter’s tape around the planter to make two parallel guide lines.
- Apply a fine adhesive bead in the exposed channel between the tape lines.
- Place SS16 stones in one straight row, checking alignment every few stones.
- Peel tape away slowly before the adhesive fully hardens, then leave the planter untouched.
Sealing first keeps adhesive from disappearing into porous cement. However, keep stones above the soil line and away from drainage areas, where repeated moisture can shorten their hold on rhinestone crafts.
Bedazzle Crafts for Gifts and Paper Goods
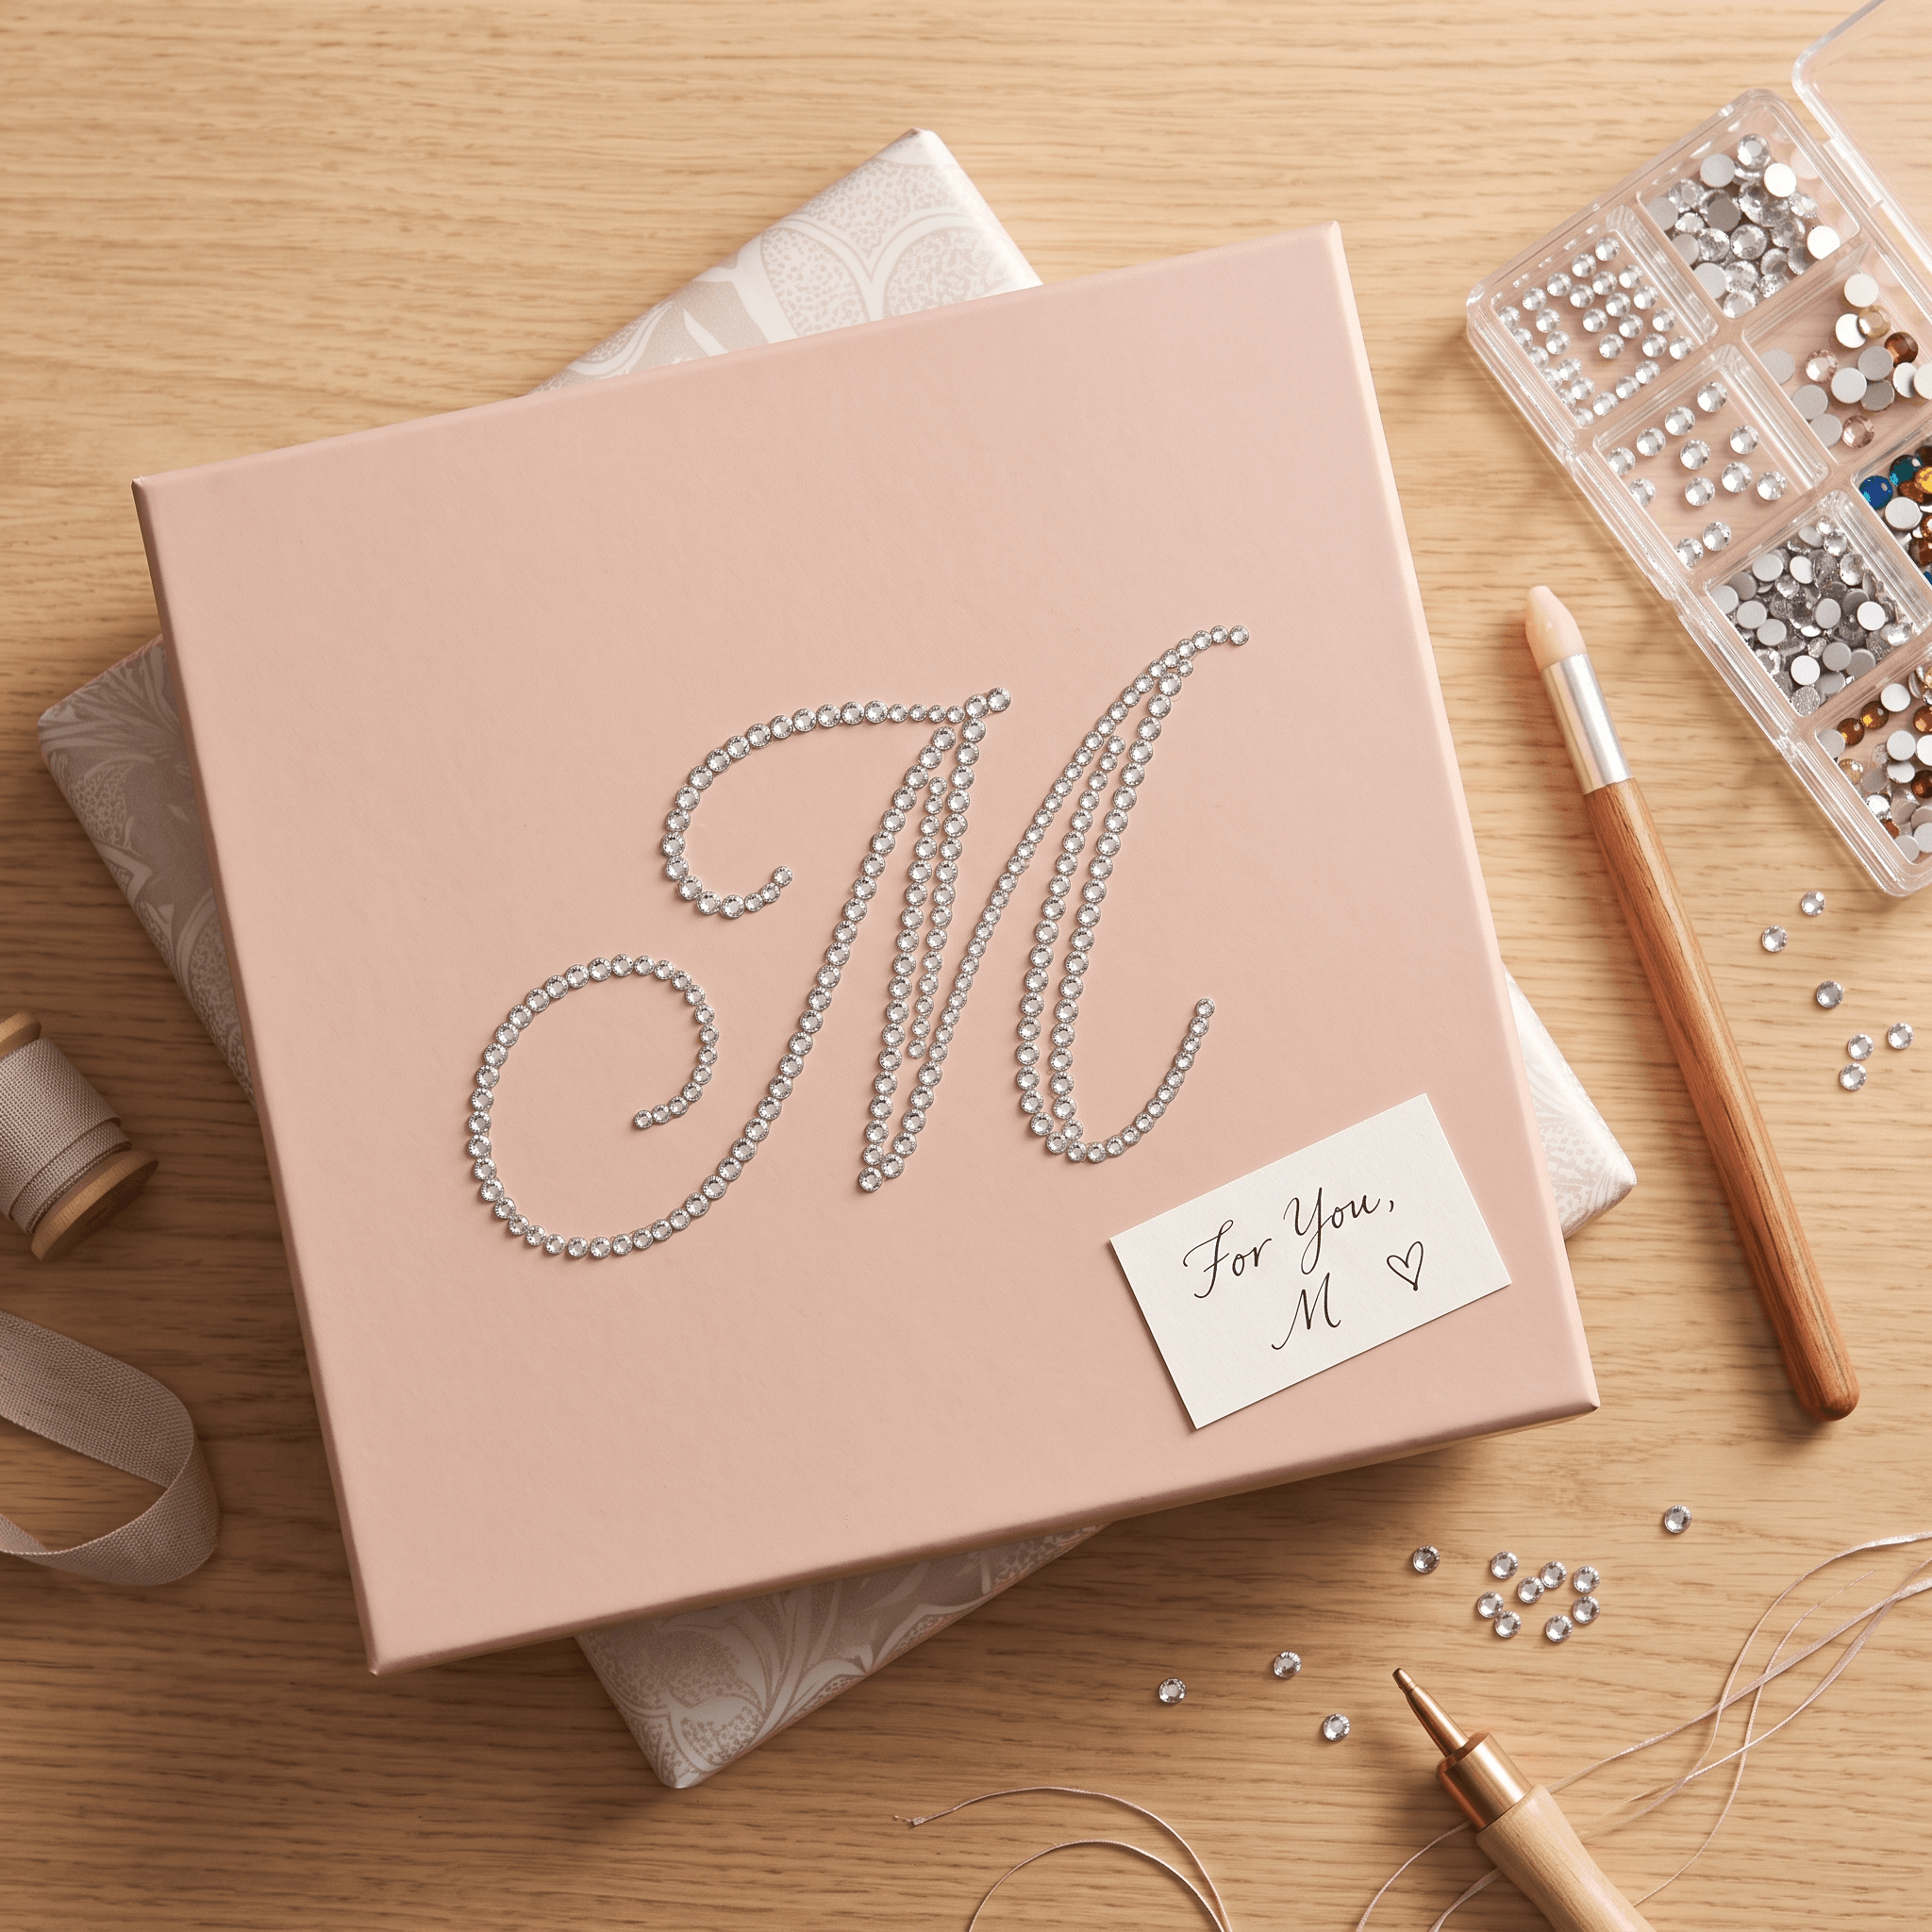
9. Rhinestone Monogram Gift Box
Supplies Needed: Rigid Gift Box, Adhesive Vinyl Monogram Template, SS10 Flatback Glass Rhinestones, Clear-Drying Craft Adhesive, Wax Picker Pencil.
A rhinestone monogram turns a simple rigid box into a keepsake package. Select a bold letter with open areas, and keep the design on the lid only so the box closes without stones scraping the sides.
- Center the vinyl monogram template on the clean box lid.
- Place a few stones inside the letter without glue to test the spacing.
- Apply clear-drying adhesive in small dots, beginning at the letter’s outer edge.
- Set SS10 stones with a wax picker pencil and follow the letter shape inward.
- Remove the template carefully once the rows are stable, then cure the lid flat.
Leave a narrow clean margin around every letter edge. Therefore, rhinestone crafts for gifting remain readable rather than becoming a glittering blur.
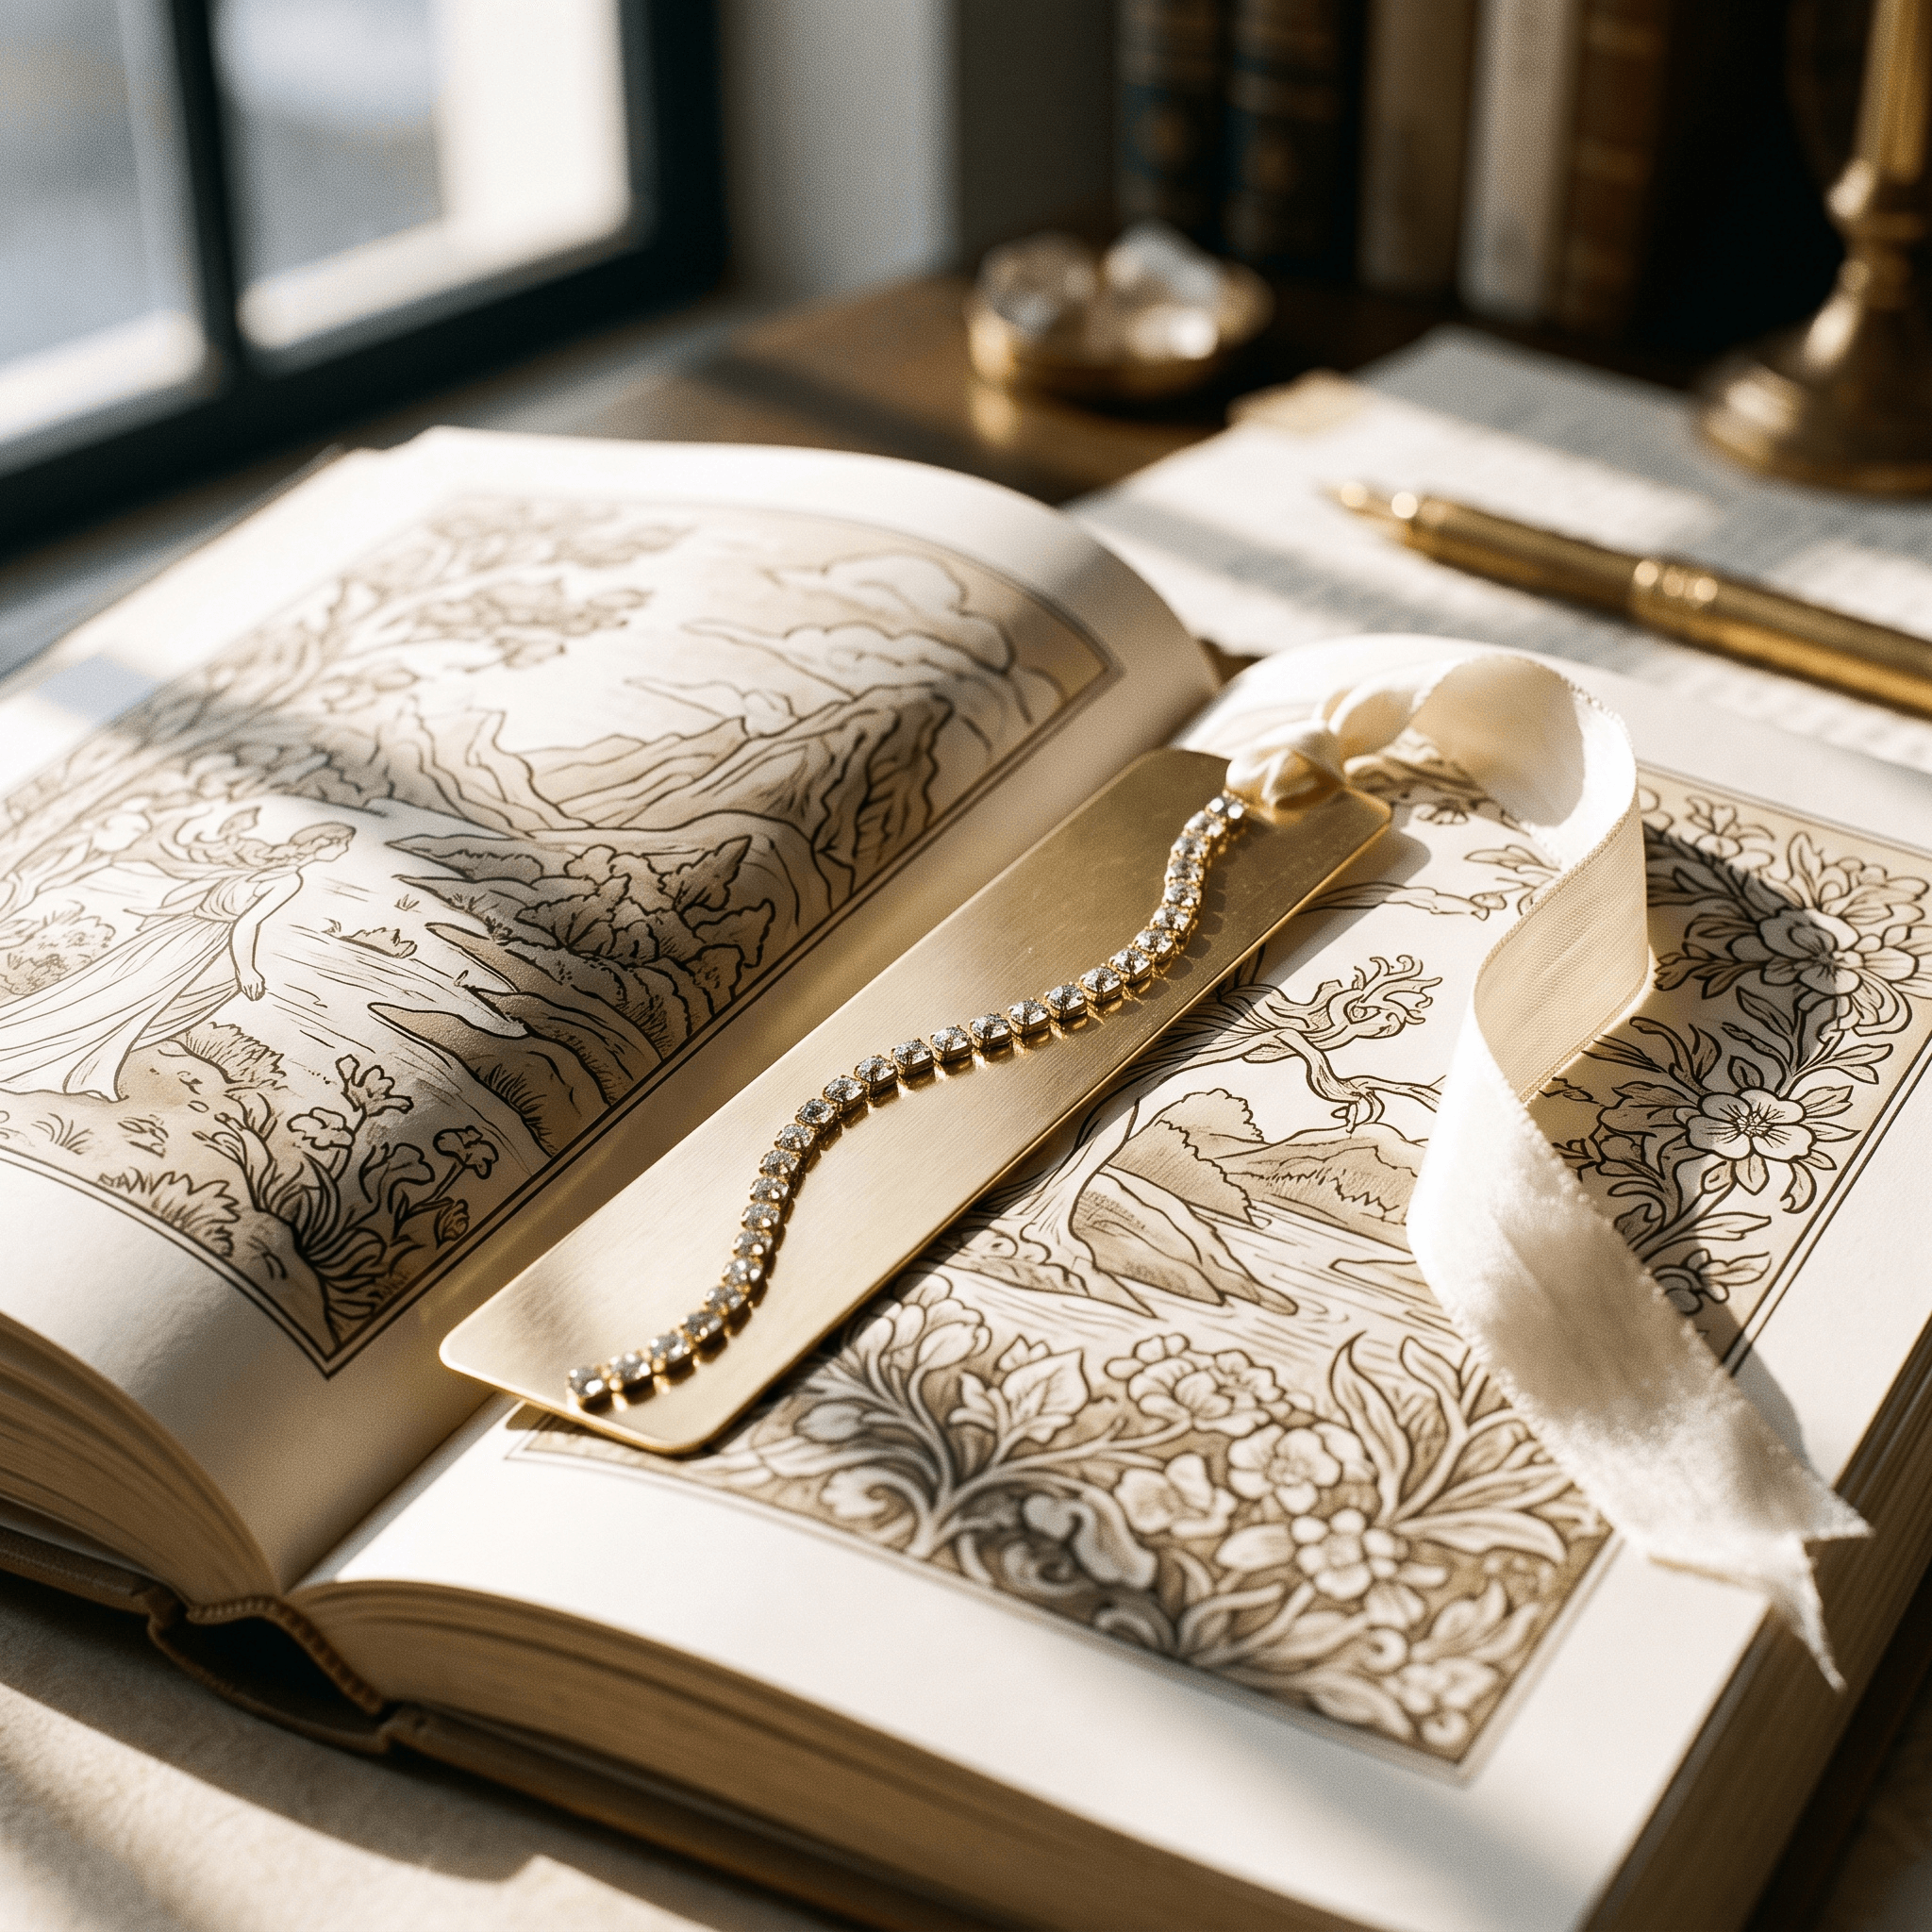
10. Jeweled Bookmark
Supplies Needed: Metal Bookmark Blank, SS10 Flatback Glass Rhinestones, Clear Flexible Rhinestone Adhesive, Fine Tweezers, Microfiber Cloth.
A metal bookmark is slim by design, so use only low-profile stones and decorate the top third. This placement keeps the lower portion smooth enough to rest between book pages without marking or bulking the paper.
- Polish the blank with a microfiber cloth and confirm it is free of residue.
- Lay out a small vertical cluster or a simple three-stone motif at the top.
- Then, add adhesive dots smaller than the rhinestone bases.
- Place SS10 stones with tweezers, leaving clear metal around the outer edges.
- Cure the bookmark flat before attaching any tassel or charm.
Keep functional hardware clear, including the hole where a tassel attaches. For slim rhinestone crafts, a quiet cluster of clear stones looks elegant against brass, silver, black, or colored metal.
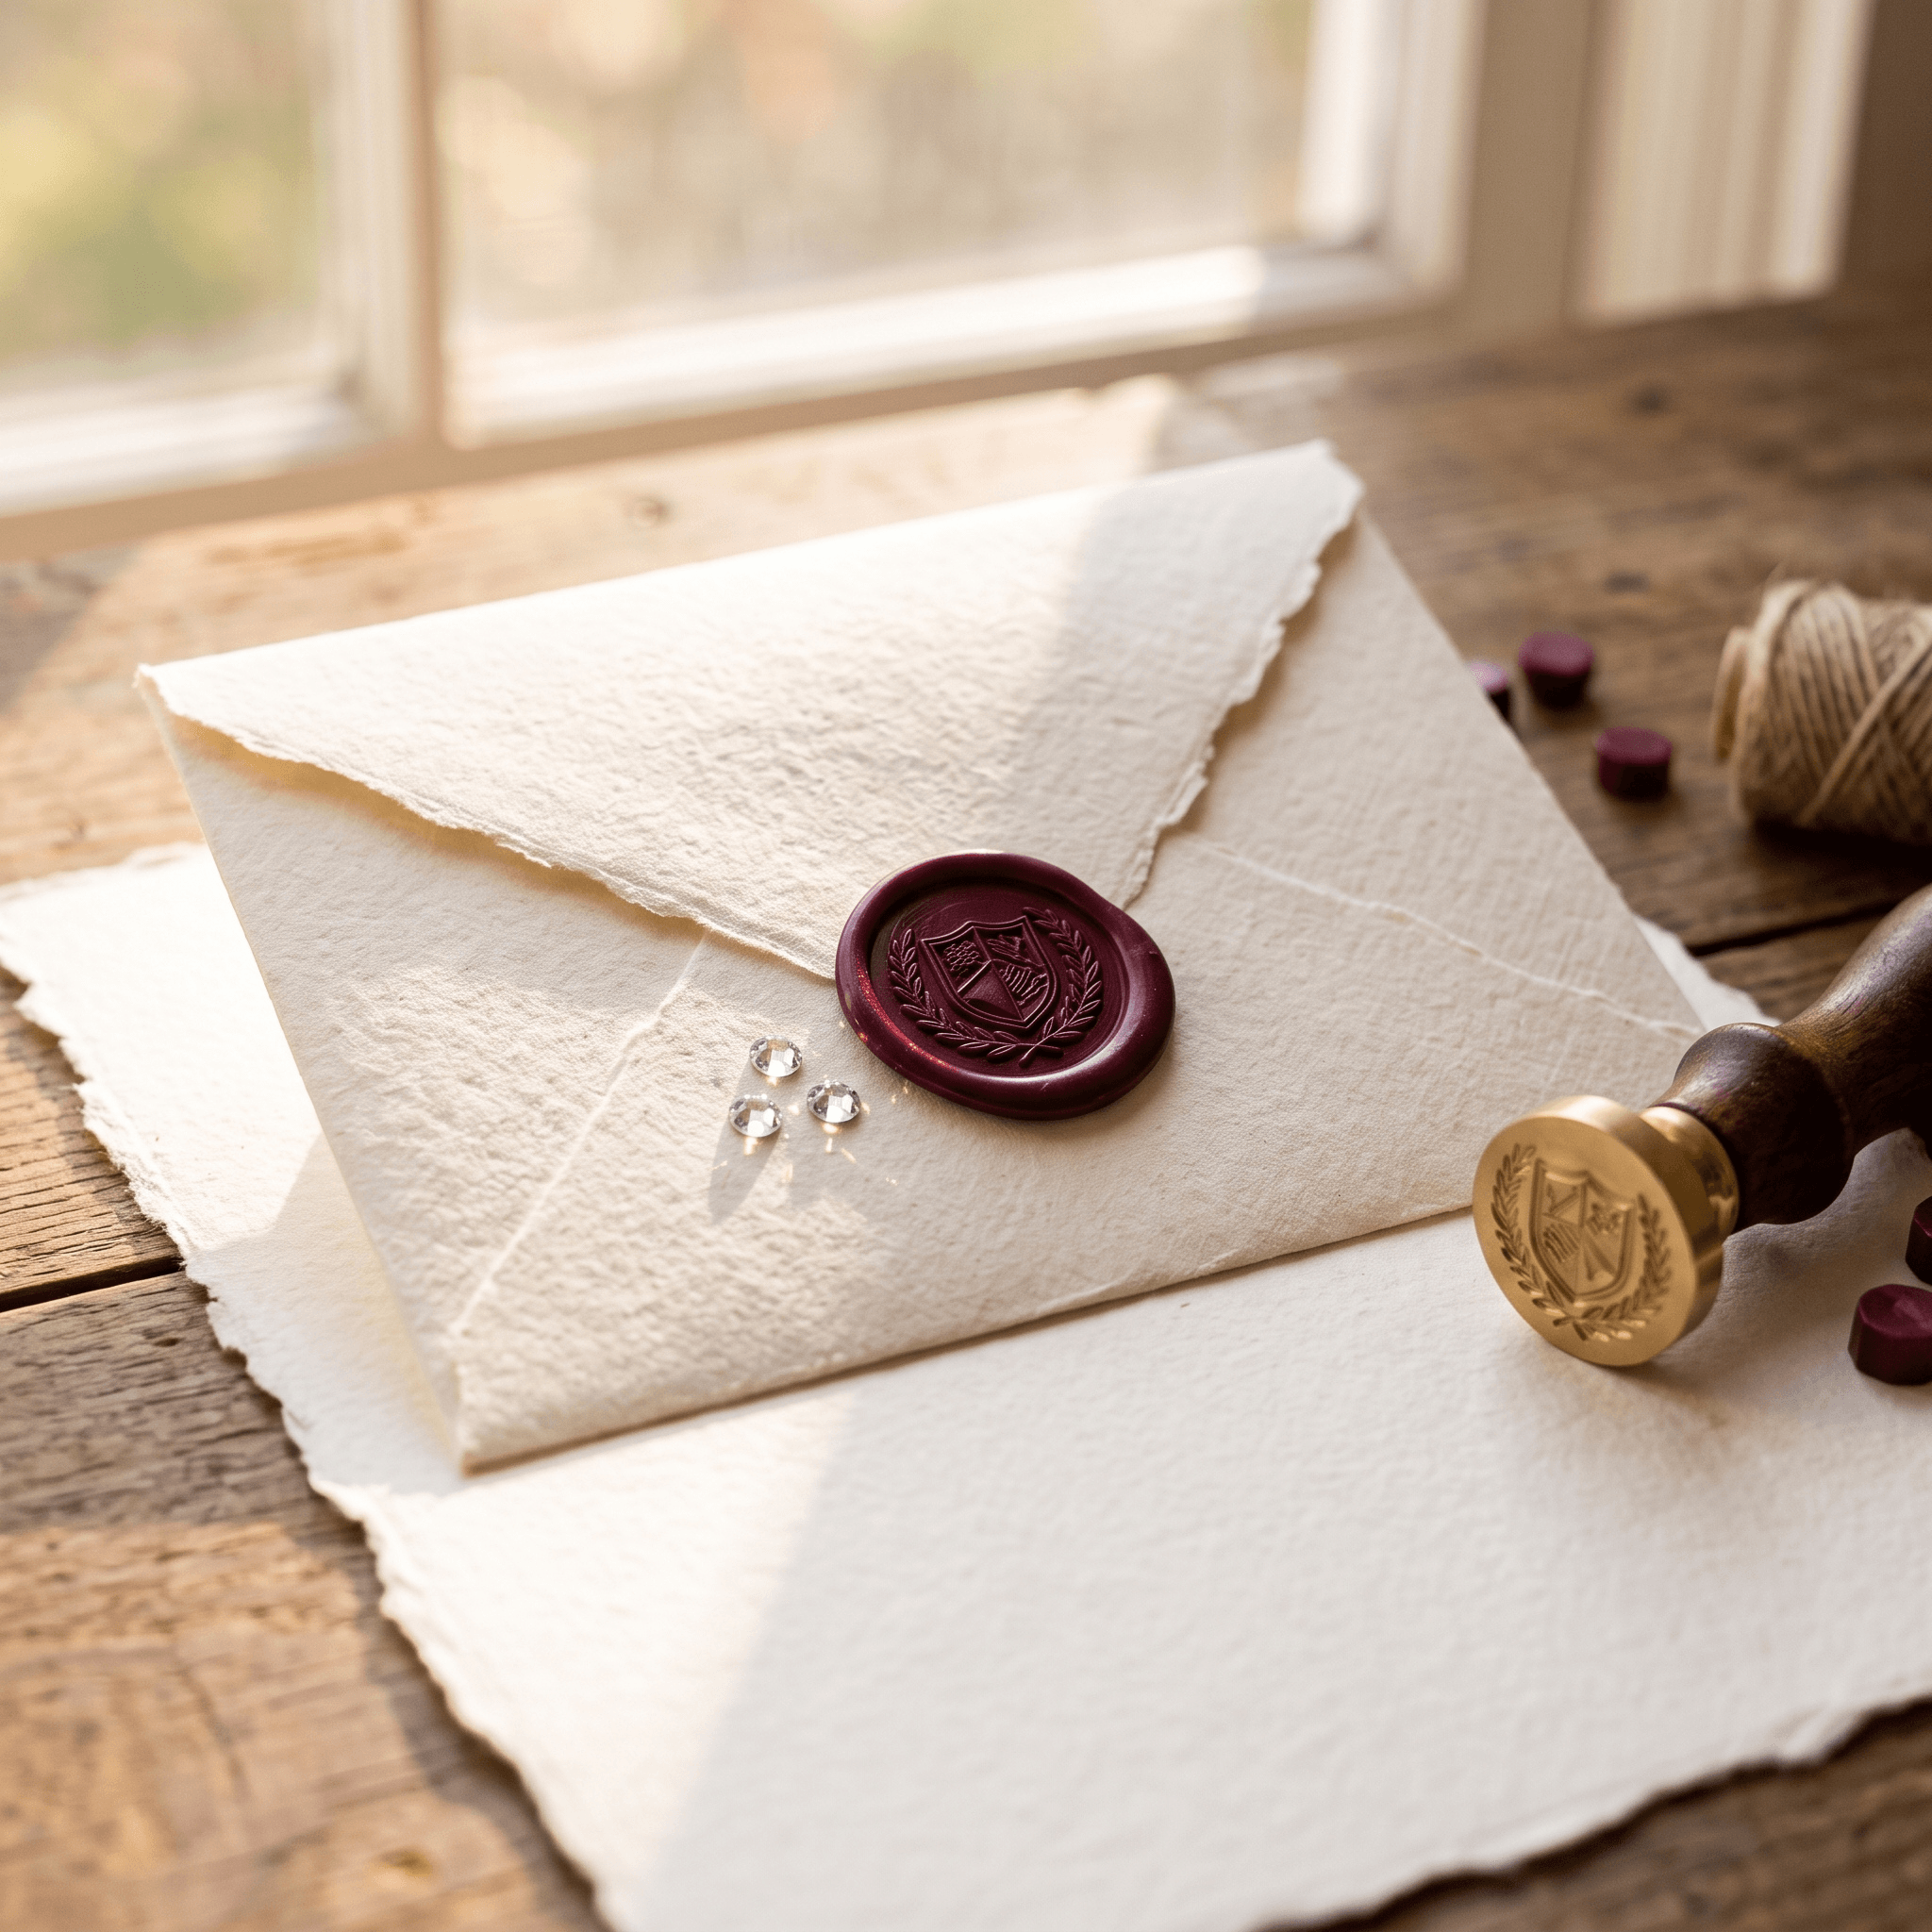
11. Bedazzled Wax Seal Envelope Accent
Supplies Needed: Wax-Sealed Envelope, SS6 and SS10 Flatback Glass Rhinestones, Acid-Free Clear Craft Adhesive, Wax Picker Pencil, Silicone Mat.
For invitations, thank-you notes, or a tucked-in gift card, a wax seal needs only a small accent. Make the seal first with these custom wax seal stationery crafts, then let the wax cool and harden before adding stones.
- Place the sealed envelope on a silicone mat so it remains flat.
- Choose one SS10 center stone or two to three SS6 stones along the seal’s lower curve.
- Apply acid-free adhesive sparingly with a toothpick or fine nozzle.
- Set each stone with a wax picker pencil, keeping glue away from paper edges.
- Let the envelope cure flat and hand-deliver it when possible.
Low-profile stones are best for anything that may be mailed, slid into a sleeve, or stacked. Also, rhinestone crafts on paper need a narrow bare margin around the paper and seal edge to prevent snags.
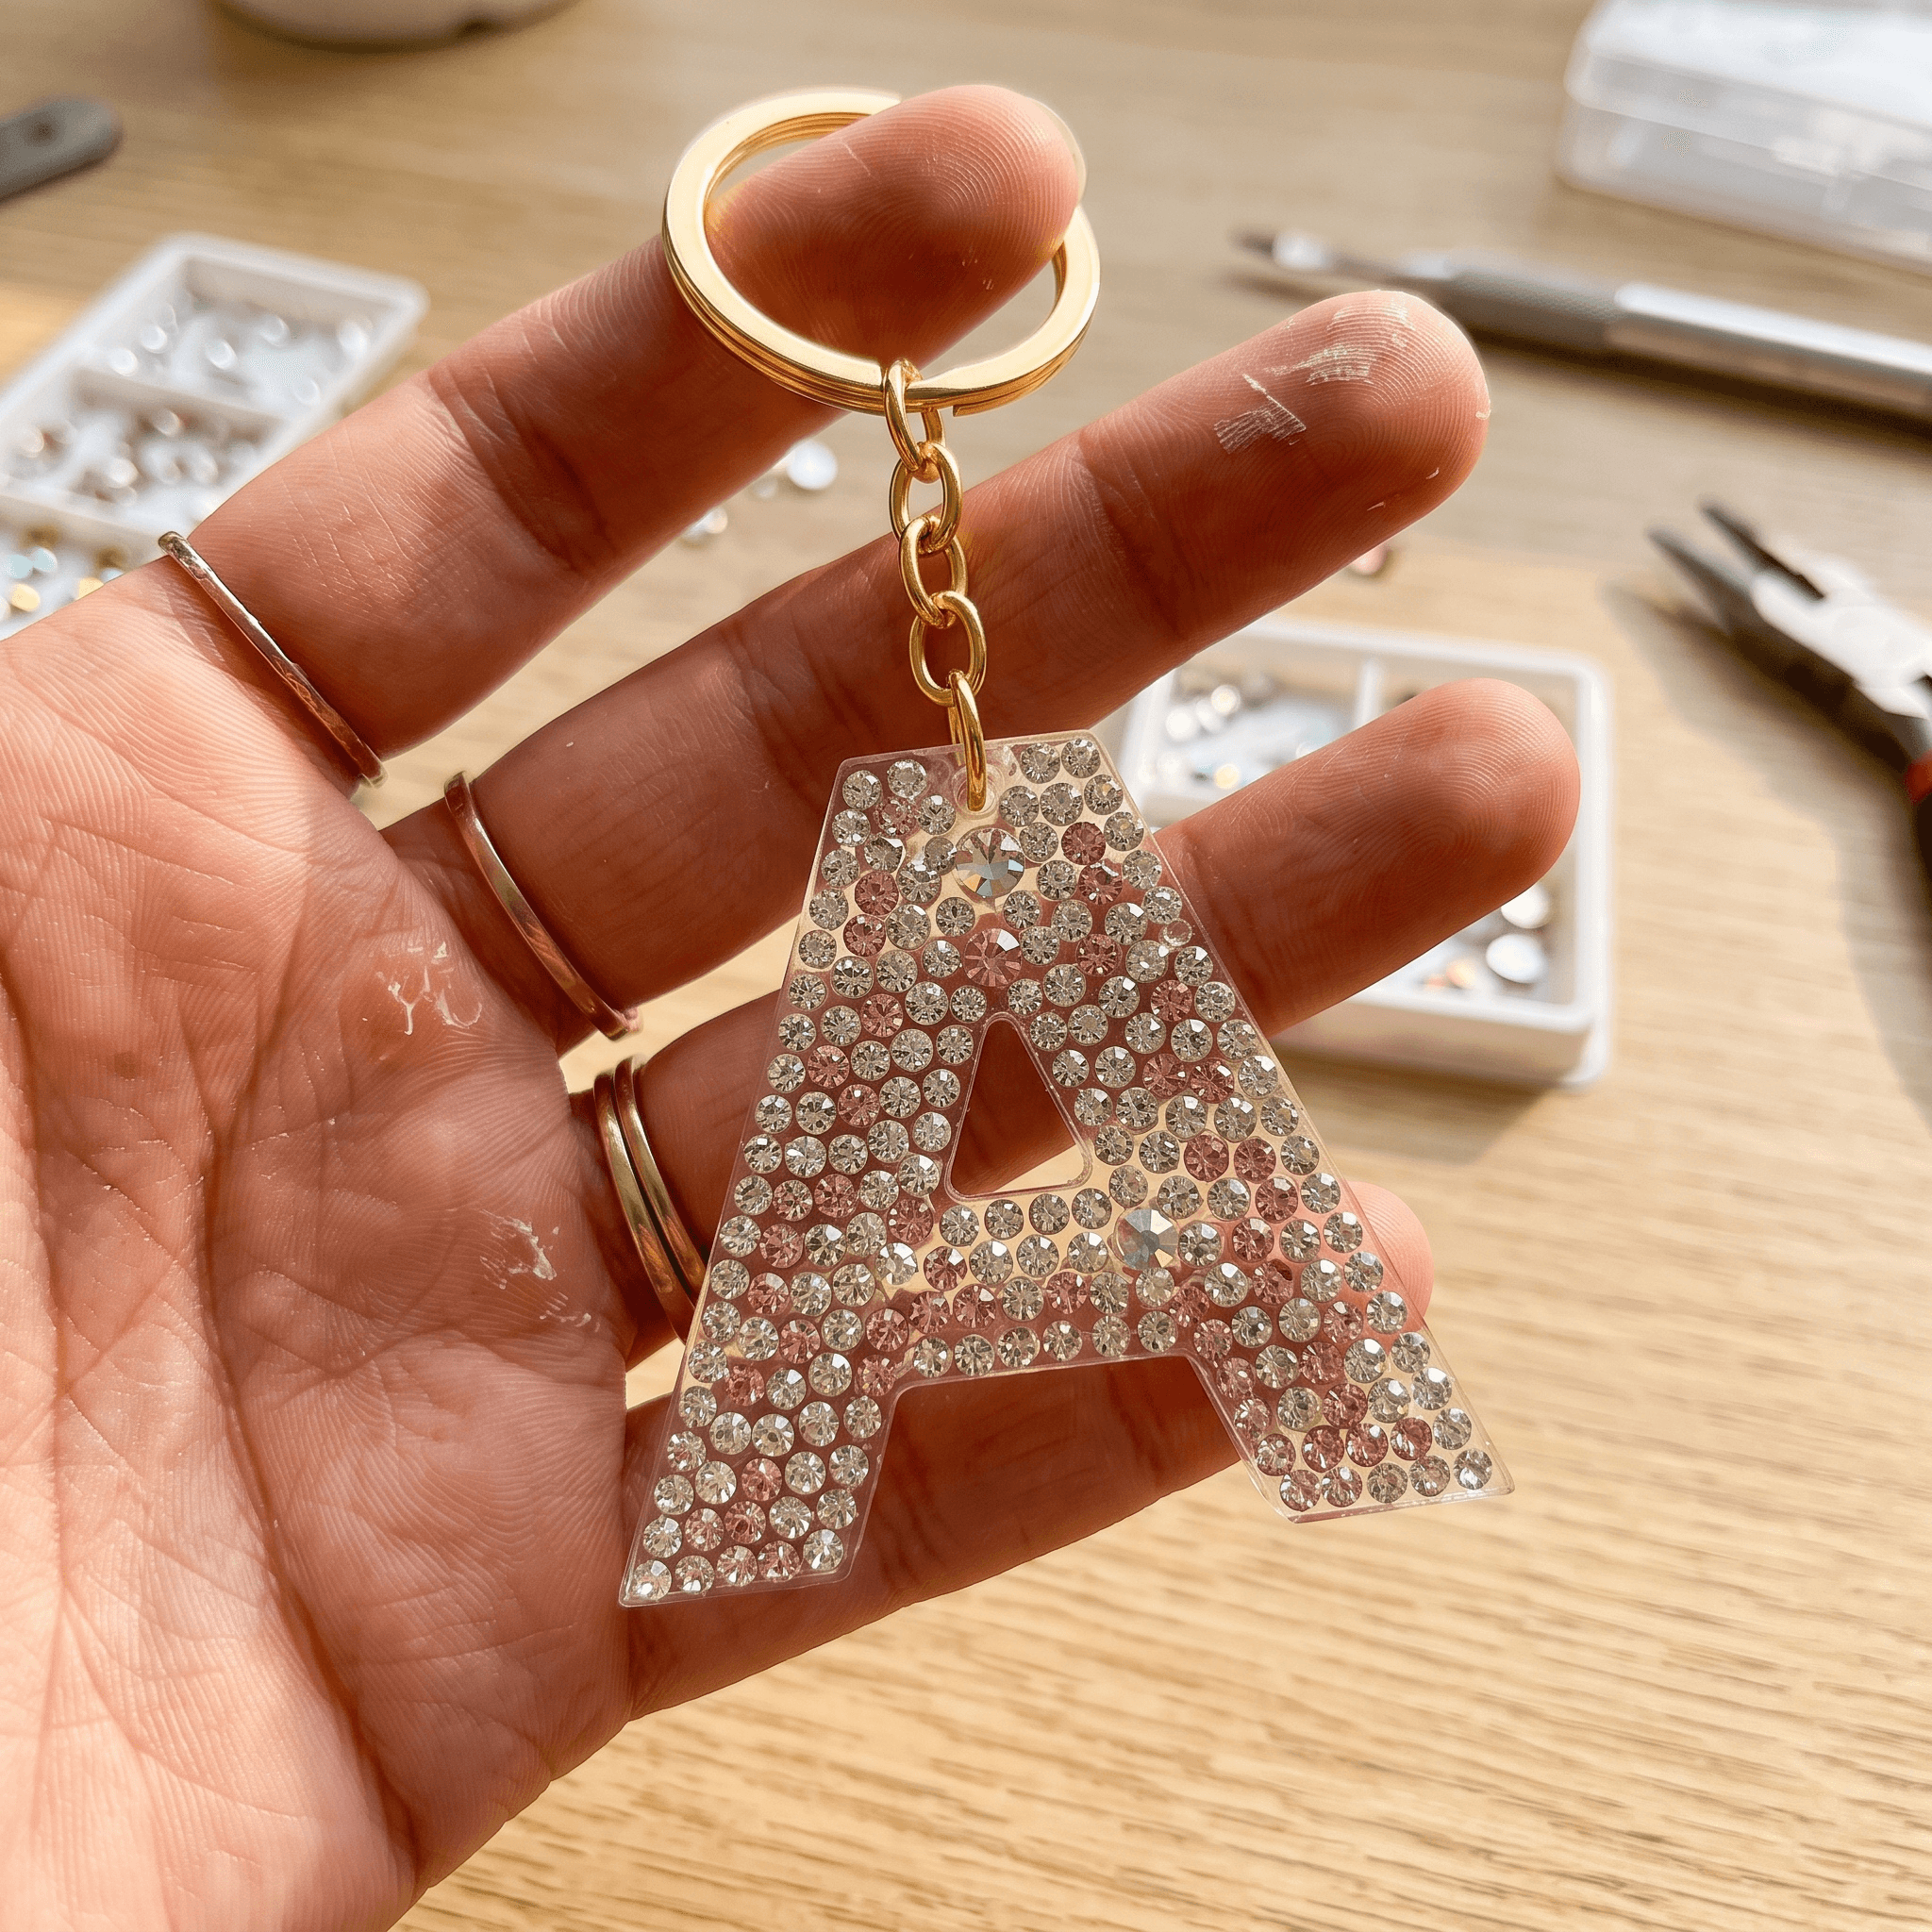
12. Rhinestone Initial Keychain
Supplies Needed: Acrylic Letter Keychain Blank, SS10 Flatback Glass Rhinestones, Clear Flexible Rhinestone Adhesive, Fine Tweezers, Split Ring and Keychain Hardware.
An acrylic initial makes a useful handmade gift when the rhinestones are positioned away from the drilled hardware hole. Keep the front design flat and simple, because keychains encounter friction from keys, bags, and tabletops.
- Clean the acrylic letter and decide which side will face forward.
- Dry-fit SS10 stones along one stroke of the letter or around its outer perimeter.
- Apply flexible adhesive in short, controlled dots rather than one long line.
- Set stones with tweezers, maintaining the same gap from the acrylic edge.
- After the adhesive cures fully, attach the split ring and keychain hardware.
Do not decorate the hole or the narrow neck near it. Instead, leave that area clean so the hardware can turn freely without rubbing the finished stones on high-use rhinestone crafts.
How to Make Rhinestone Crafts Look Professionally Finished
Design Rules for Clean Sparkle
Start with one focal area, then repeat one spacing rule across the project. Symmetrical borders look best when you work from corners toward the center, while circular patterns stay even when you begin at a marked midpoint.
Limit most rhinestone crafts to clear crystal plus one accent tone. In addition, use the smallest stones only to resolve tight curves; filling every empty patch with tiny stones is what makes a design feel crowded.
Curing and Care
Adhesive that feels dry on top may still be soft underneath. Follow the product label closely, with most rhinestone glues needing about 24 to 72 hours before regular handling, washing, flexing, or attaching hardware.
Clean finished rhinestone crafts with a soft microfiber cloth or a lightly damp cotton swab and mild soap. Avoid soaking, abrasive scrubbing, acetone, and high heat; these can cloud stones or weaken the adhesive bond.
Frequently Asked Questions
Why are my rhinestones falling off?
The usual causes are skin oil, dust, incompatible adhesive, or moving the item before the full cure time ends. Clean nonporous bases with rubbing alcohol, use adhesive made for that surface, and apply small dots that support the entire stone base.
Can I use hot glue for rhinestone crafts?
Hot glue works for temporary chunky decor, but it is usually too thick for polished flatback rhinestones. It can create visible glue halos and may release from smooth glass, metal, or plastic; flexible rhinestone adhesive is the cleaner choice for rhinestone crafts.
How do I straighten a crooked rhinestone row?
While the glue is still wet, nudge each stone gently with a wax picker pencil or tweezers. If adhesive has begun to grab, remove the crooked stone, clean excess glue carefully, and reset it rather than forcing the neighboring row out of line.
How should I clean a bedazzled item?
Dust rhinestone crafts first with a soft microfiber cloth. Then use a lightly damp cotton swab with mild soap around grime, taking care not to flood adhesive seams; finally, let the item air-dry completely before storing or using it.
Quick Reference: All Supplies at a Glance
For convenience, here is a categorized summary of the main materials and tools used throughout these rhinestone crafts.
✨ Rhinestones & Color Planning
- Flatback Glass Rhinestones in Mixed Sizes | [Check Price on Amazon]
- Silicone Craft Mat and Sorting Tray | [Check Price on Amazon]
- Acrylic Paint Marker or Chalk Pencil | [Check Price on Amazon]
💎 Adhesives & Placement Tools
- Clear Flexible Rhinestone Adhesive | [Check Price on Amazon]
- Wax Rhinestone Picker Pencil and Fine Tweezers | [Check Price on Amazon]
🧰 Surface Preparation
- Rubbing Alcohol and Lint-Free Cloths | [Check Price on Amazon]
- Clear Acrylic Sealer for Painted Bases | [Check Price on Amazon]
- Blank Accessories and Decor Bases | [Check Price on Amazon]
🔥 Specialty Project Tools
- Hotfix Rhinestones and Hotfix Applicator | [Check Price on Amazon]
- Heat-Resistant Pressing Sheet | [Check Price on Amazon]
- Split Rings and Keychain Hardware | [Check Price on Amazon]
Important Crafting Safety Note:
Use rhinestone adhesives in a well-ventilated work area, avoid skin and eye contact, and wear nitrile gloves if your adhesive label recommends them. Keep small rhinestones, sharp keychain findings, uncured glues, and hotfix tools away from children and pets. Use a heat-resistant mat with hotfix applicators, and let heated pieces cool fully before handling. For more information on safe crafting practices and website usage, please review our Terms and Conditions.
Which sparkly piece are you most excited to bedazzle first? Drop a comment below and share your project!😊


