

Loose fabric ruins beautiful stitches. DIY Embroidered Hoop Art earns its place on the wall when the fabric stays smooth, the floss sits evenly, and the back looks as considered as the front. These 12 small designs use approachable modern hand embroidery patterns, muted color, and a clean felt finish that makes each hoop ready to hang or gift.
Each DIY Embroidered Hoop Art idea begins with a simple transfer and a few dependable stitches, then ends with gathered fabric and a tidy backing. If you are already practicing surface stitches with our easy beginner guide to embroidering on knitting, these framed designs give those same hand skills a polished home-decor purpose.
Affiliate Disclosure: This post contains affiliate links. As an Amazon Associate, I earn from qualifying purchases. If you buy through these links, I may earn a commission at no additional cost to you.
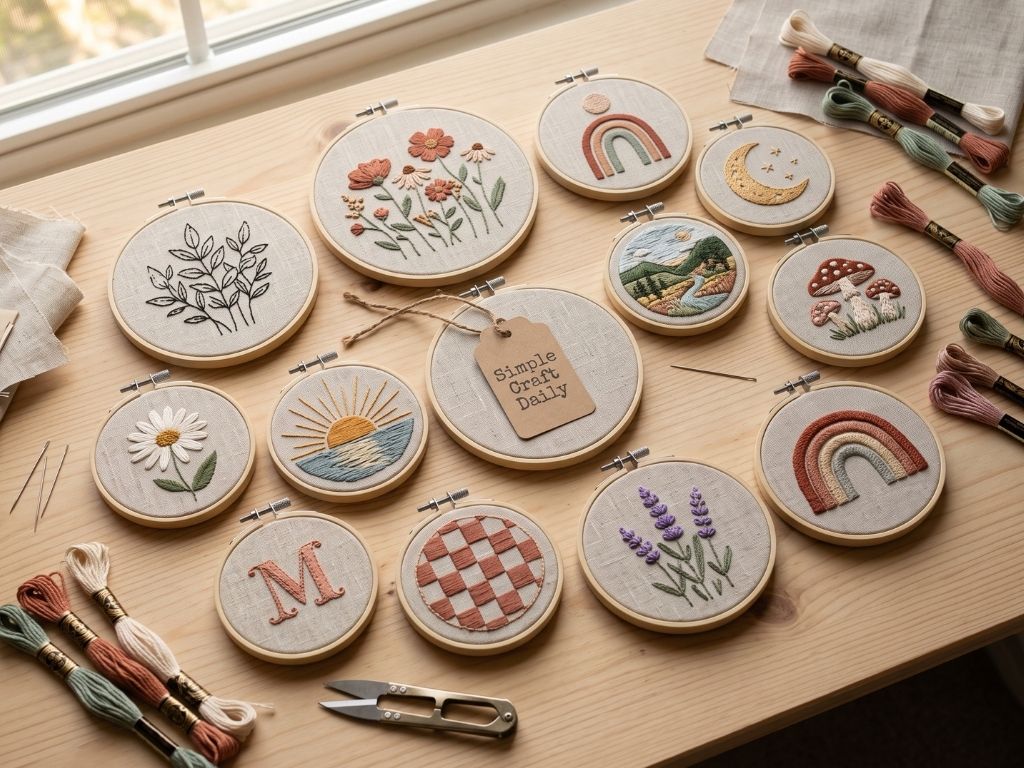
Essential Materials for DIY Embroidered Hoop Art
A shared supply system keeps these DIY Embroidered Hoop Art projects calm and cohesive. Choose 5-inch to 8-inch hoops, cut fabric with a 2-inch overhang beyond every hoop edge, and repeat a small palette of terracotta, sage, cream, dusty rose, mustard, charcoal, and pale blue.
For line work, separate six-strand floss and stitch with one or two strands. In addition, use three strands when you want fuller petals, color blocks, or small filled forms. Flexible felt backing and textile adhesive finish the reverse side without turning stiff or bulky.
🧵 DIY Embroidered Hoop Art Fabric, Hoops & Color Planning
- Bamboo Embroidery Hoops in Mixed Sizes — Smooth adjustable hoops hold ground fabric evenly and can become the final display frame | [Check Price on Amazon]
- Natural Linen-Cotton Embroidery Fabric — A stable matte weave supports clean stitch tension; cut every piece with a 2-inch margin beyond the hoop edge | [See Natural Linen-Cotton Embroidery Fabric on Amazon]
- Six-Strand Cotton Embroidery Floss — Divisible floss lets you control line weight while keeping modern hand embroidery patterns in a consistent muted palette | [View Six-Strand Cotton Embroidery Floss on Amazon]
- Water-Soluble Embroidery Transfer Pen — A fine point gives you accurate temporary lines; test removal on a fabric off-cut before drawing a full design | [Find Water-Soluble Embroidery Transfer Pen on Amazon]
- Water-Soluble Stick-and-Stitch Stabilizer Sheets — Printable adhesive sheets keep lettering, arches, and detailed outlines clear until rinsed away | [Check Stick-and-Stitch Stabilizer on Amazon]
✂️ DIY Embroidered Hoop Art Stitching & Finishing Tools
- Embroidery Needles, Sizes 5 to 9 — Sharp crewel needles have eyes that suit separated floss; match the eye to the strand count so the fabric does not distort | [See Price on Amazon]
- Embroidery Scissors with Fine Point Blades — Fine tips trim floss close to the fabric without catching nearby stitches |
[Check Embroidery Scissors on Amazon] - Wool Blend Felt Backing Sheets — Soft, stable felt conceals gathered fabric on the hoop back for a clean hanging finish |
[View Wool Blend Felt Backing Sheets on Amazon] - Clear Flexible Fabric Adhesive — Flexible textile adhesive secures felt without the brittle feel of instant glue |
[Find Clear Flexible Fabric Adhesive on Amazon] - Modern Hand Embroidery Starter Kit — A practical all-in-one option for stitchers who need hoops, fabric, floss, needles, and a pattern base | [View Modern Hand Embroidery Starter Kit on Amazon]
Attach any felt backing only after the transfer marks are gone and the fabric is fully dry. Next, test color contrast by laying short lengths of floss on the linen before threading the needle; this small check prevents a pale stitch from disappearing into the ground fabric.
12 Easy DIY Embroidered Hoop Art Ideas to Stitch
Work every DIY Embroidered Hoop Art design in its own hoop. First, transfer or apply the motif, then tighten the screw and pull the fabric in alternating directions until it feels drum-tight without pulling the weave out of shape. Stitch with short lengths of floss, remove marks or stabilizer after stitching, and let the fabric dry flat before finishing.
For each hoop, trim the excess fabric to a 1-inch border, gather that border at the back with a running stitch, pull it snug, and knot the thread. Subsequently, cut felt slightly smaller than the back opening, apply a narrow adhesive bead, and allow the adhesive to cure undisturbed for 24 hours before hanging.
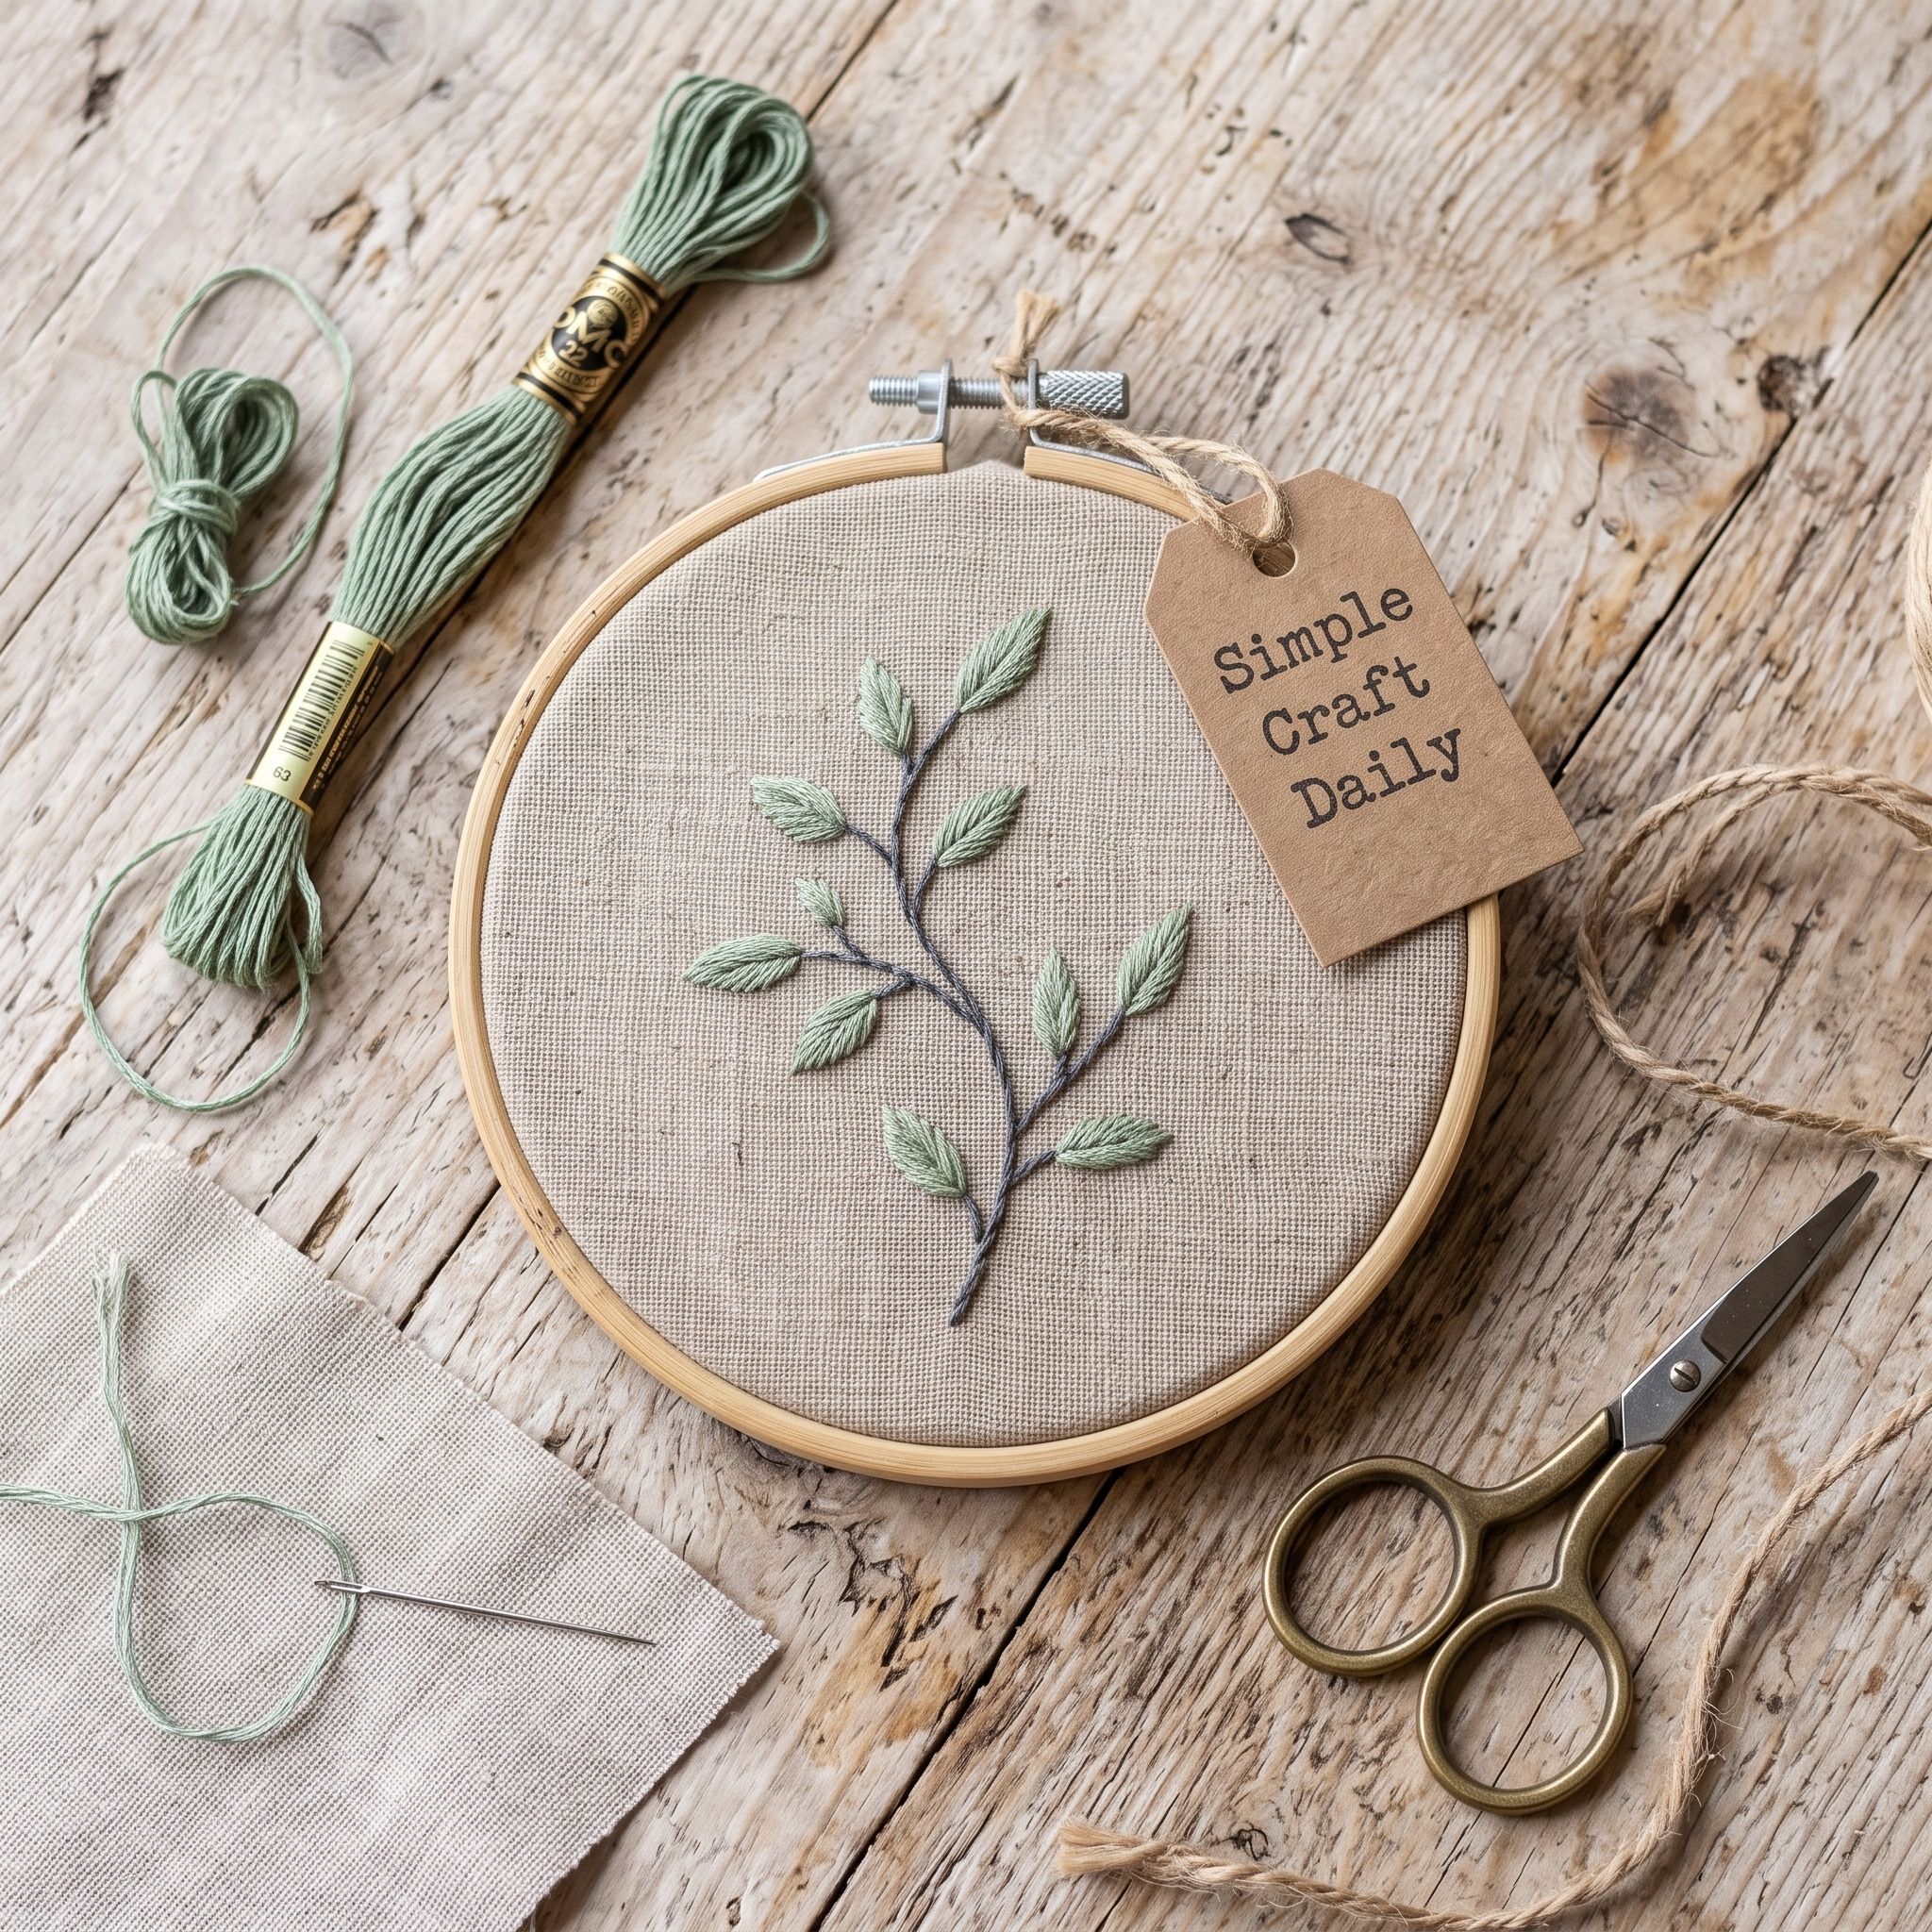
1. DIY Embroidered Hoop Art Minimal Botanical Linework
Supplies Needed: 6-inch bamboo embroidery hoop, 8 x 8 inch linen-cotton fabric square, sage and charcoal cotton embroidery floss, size 7 embroidery needle, water-soluble transfer pen, fine point embroidery scissors, cream wool blend felt, clear flexible fabric adhesive.
Draw one gently curved 4-inch stem with six paired leaves on the 8 x 8 inch linen-cotton square. Mount it in the 6-inch bamboo embroidery hoop and thread the size 7 embroidery needle with two strands of charcoal floss. Back stitch the stem with stitches about 1/8 inch long.
Next, thread three strands of sage floss and satin stitch each leaf. Bring every leaf stitch to one shared pointed tip, then return to the base in parallel strokes. This gives the DIY Embroidered Hoop Art design a narrow, crisp silhouette instead of rounded leaf ends.
Trim floss tails with fine point embroidery scissors. Rinse away the transfer pen, dry the fabric flat for 2 hours, re-tighten it in the hoop, gather the back edge, then adhere a cream wool blend felt circle with clear flexible fabric adhesive. Allow the adhesive to cure for 24 hours.
2. DIY Embroidered Hoop Art Terracotta Wildflowers
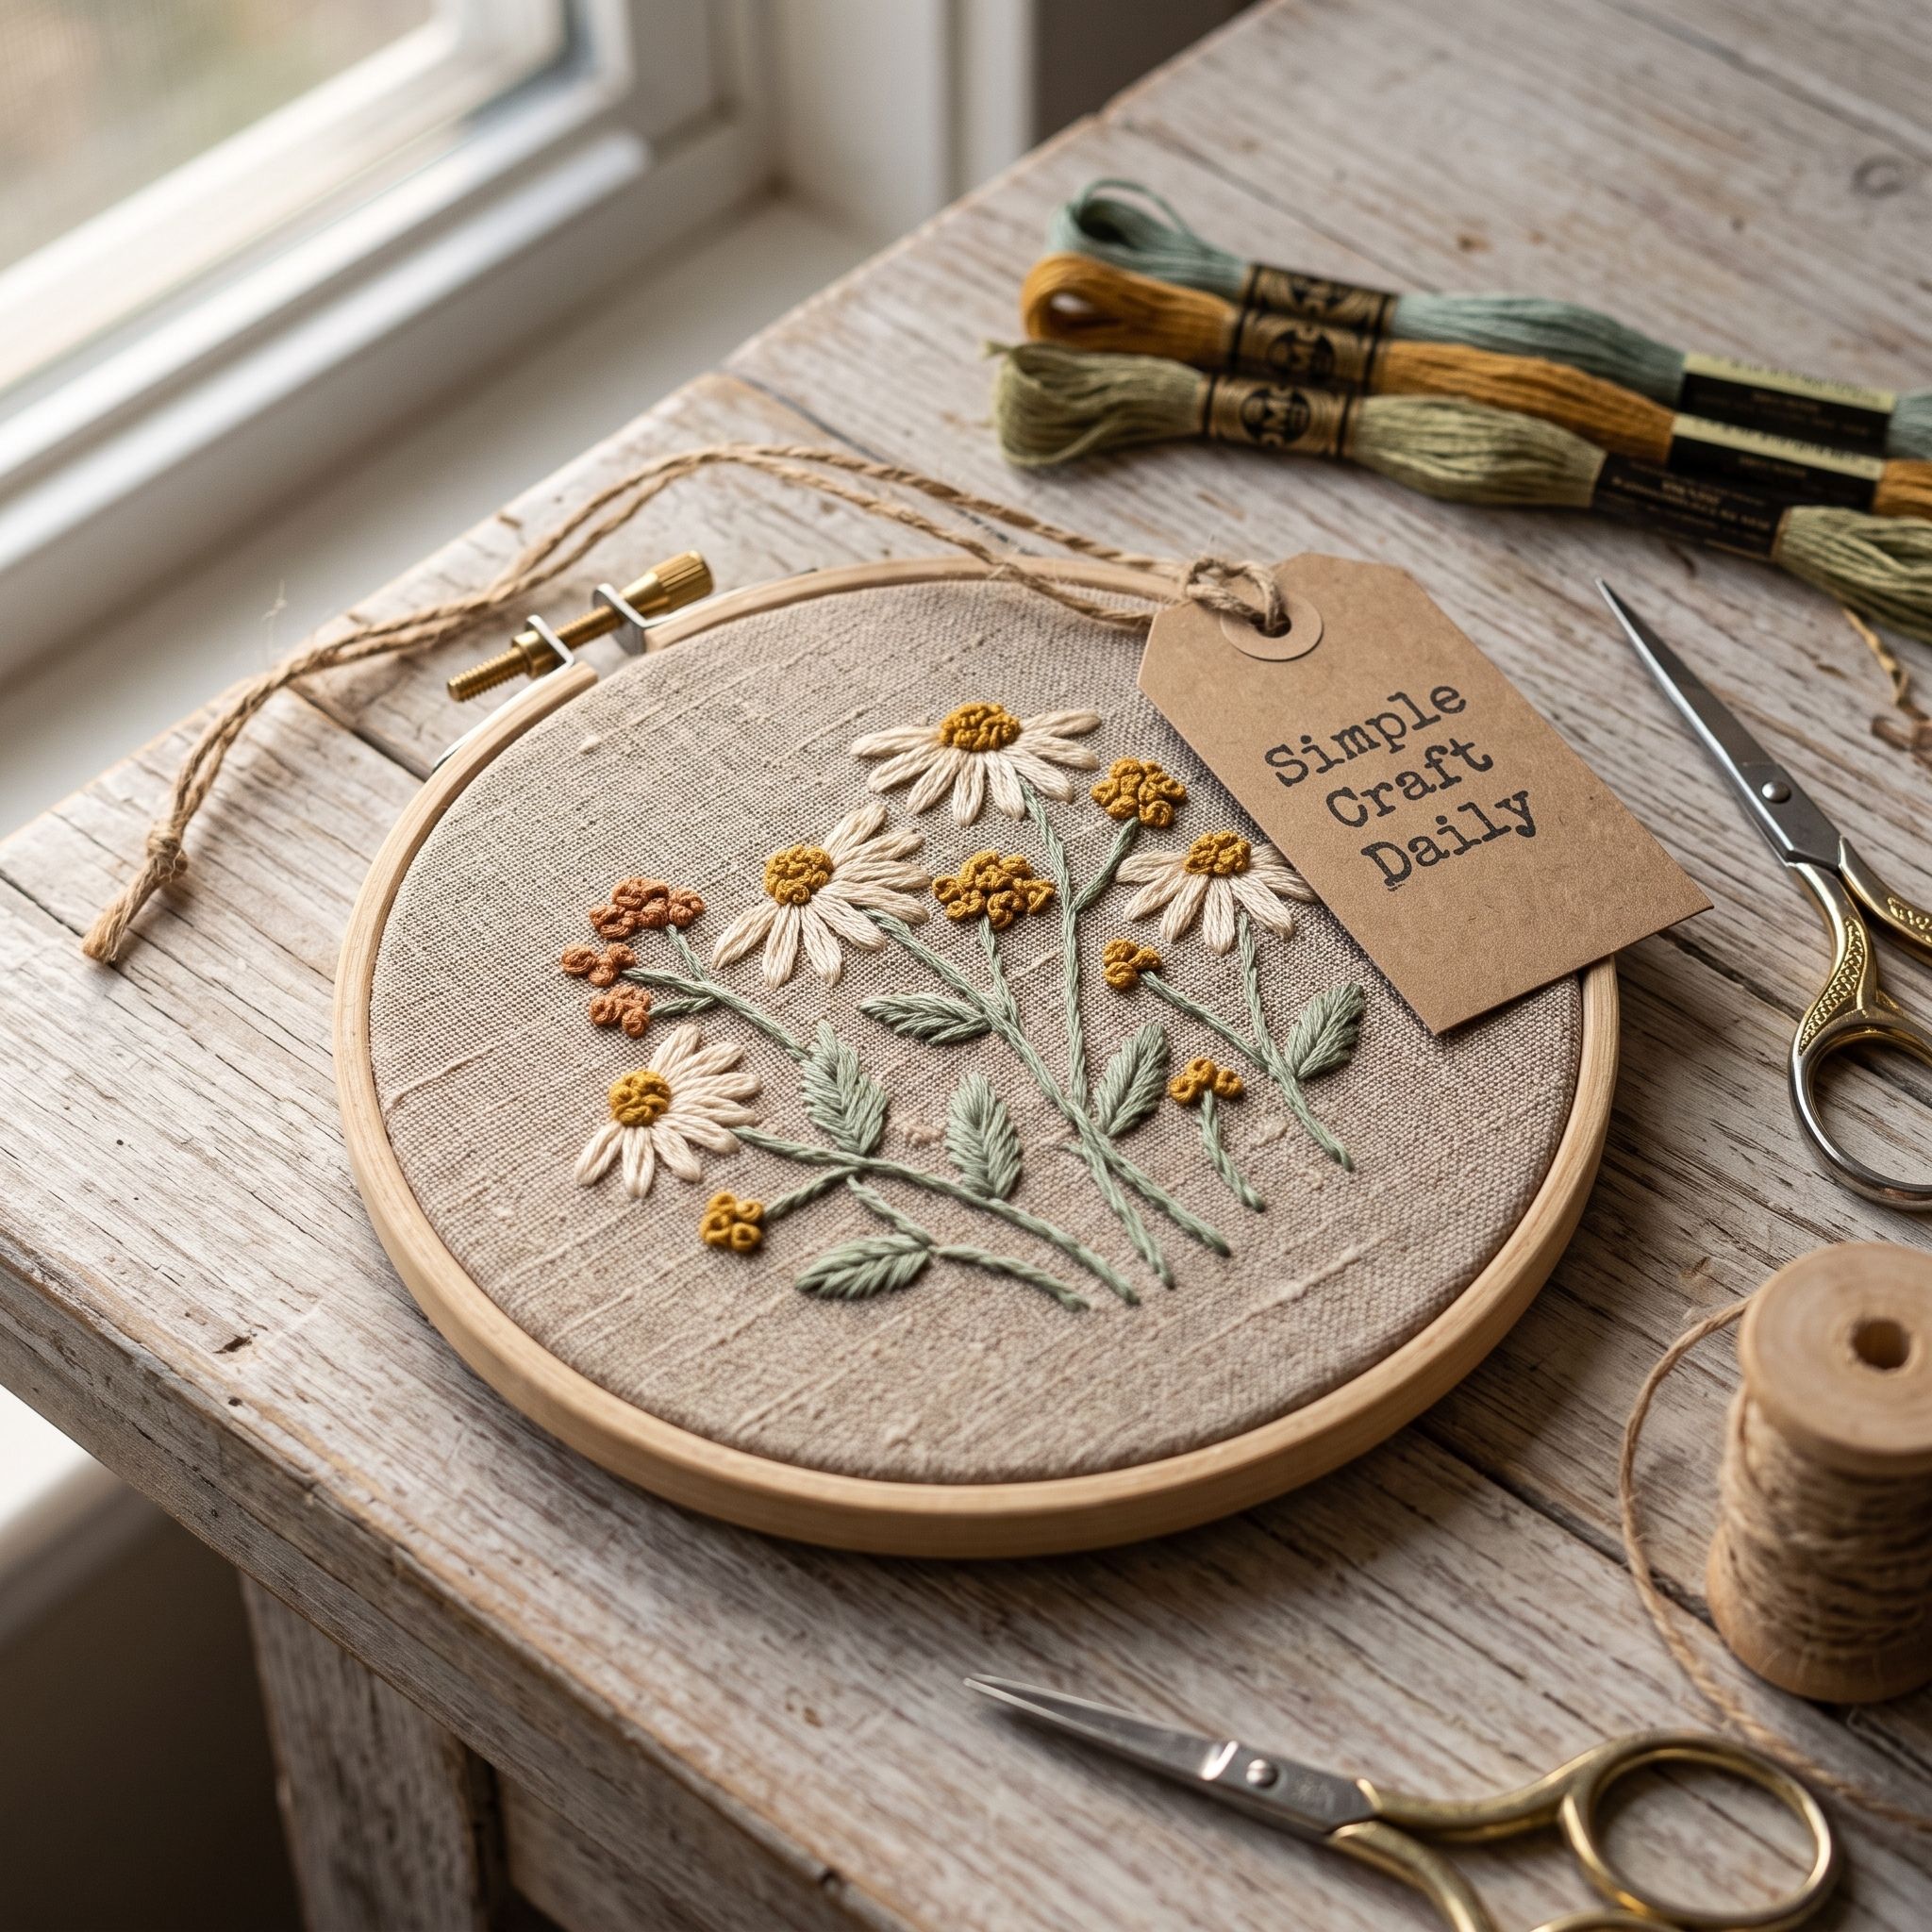
Supplies Needed: 7-inch bamboo embroidery hoop, 9 x 9 inch linen-cotton fabric square, terracotta, mustard, cream, and sage cotton embroidery floss, size 7 embroidery needle, water-soluble transfer pen, fine point embroidery scissors, cream wool blend felt, clear flexible fabric adhesive.
Draw three curved stems rising from the lower third of the 9 x 9 inch linen-cotton square. Secure the fabric in the 7-inch bamboo embroidery hoop. With two strands of sage floss in a size 7 embroidery needle, work each stem in stem stitch and add two small straight-stitch leaves per stem.
Use three strands of terracotta, cream, and mustard floss for five lazy daisy petals around each flower center. Make each petal about 3/8 inch long. Then wrap French knot centers once before pulling through, which keeps the knots small and rounded.
These warm DIY Embroidered Hoop Art flowers pair well with the color play in our modern crochet flower ideas. Cut threads close with fine point embroidery scissors, remove the pen marks, and dry the hoop flat for 2 hours. Finally, gather the back fabric, glue on cream wool blend felt with clear flexible fabric adhesive, and cure it for 24 hours.
3. DIY Embroidered Hoop Art Abstract Color Blocks
Supplies Needed: 8-inch bamboo embroidery hoop, 10 x 10 inch linen-cotton fabric square, dusty rose, pale blue, mustard, and rust cotton embroidery floss, size 5 embroidery needle, water-soluble stick-and-stitch stabilizer sheet, fine point embroidery scissors, cream wool blend felt, clear flexible fabric adhesive.
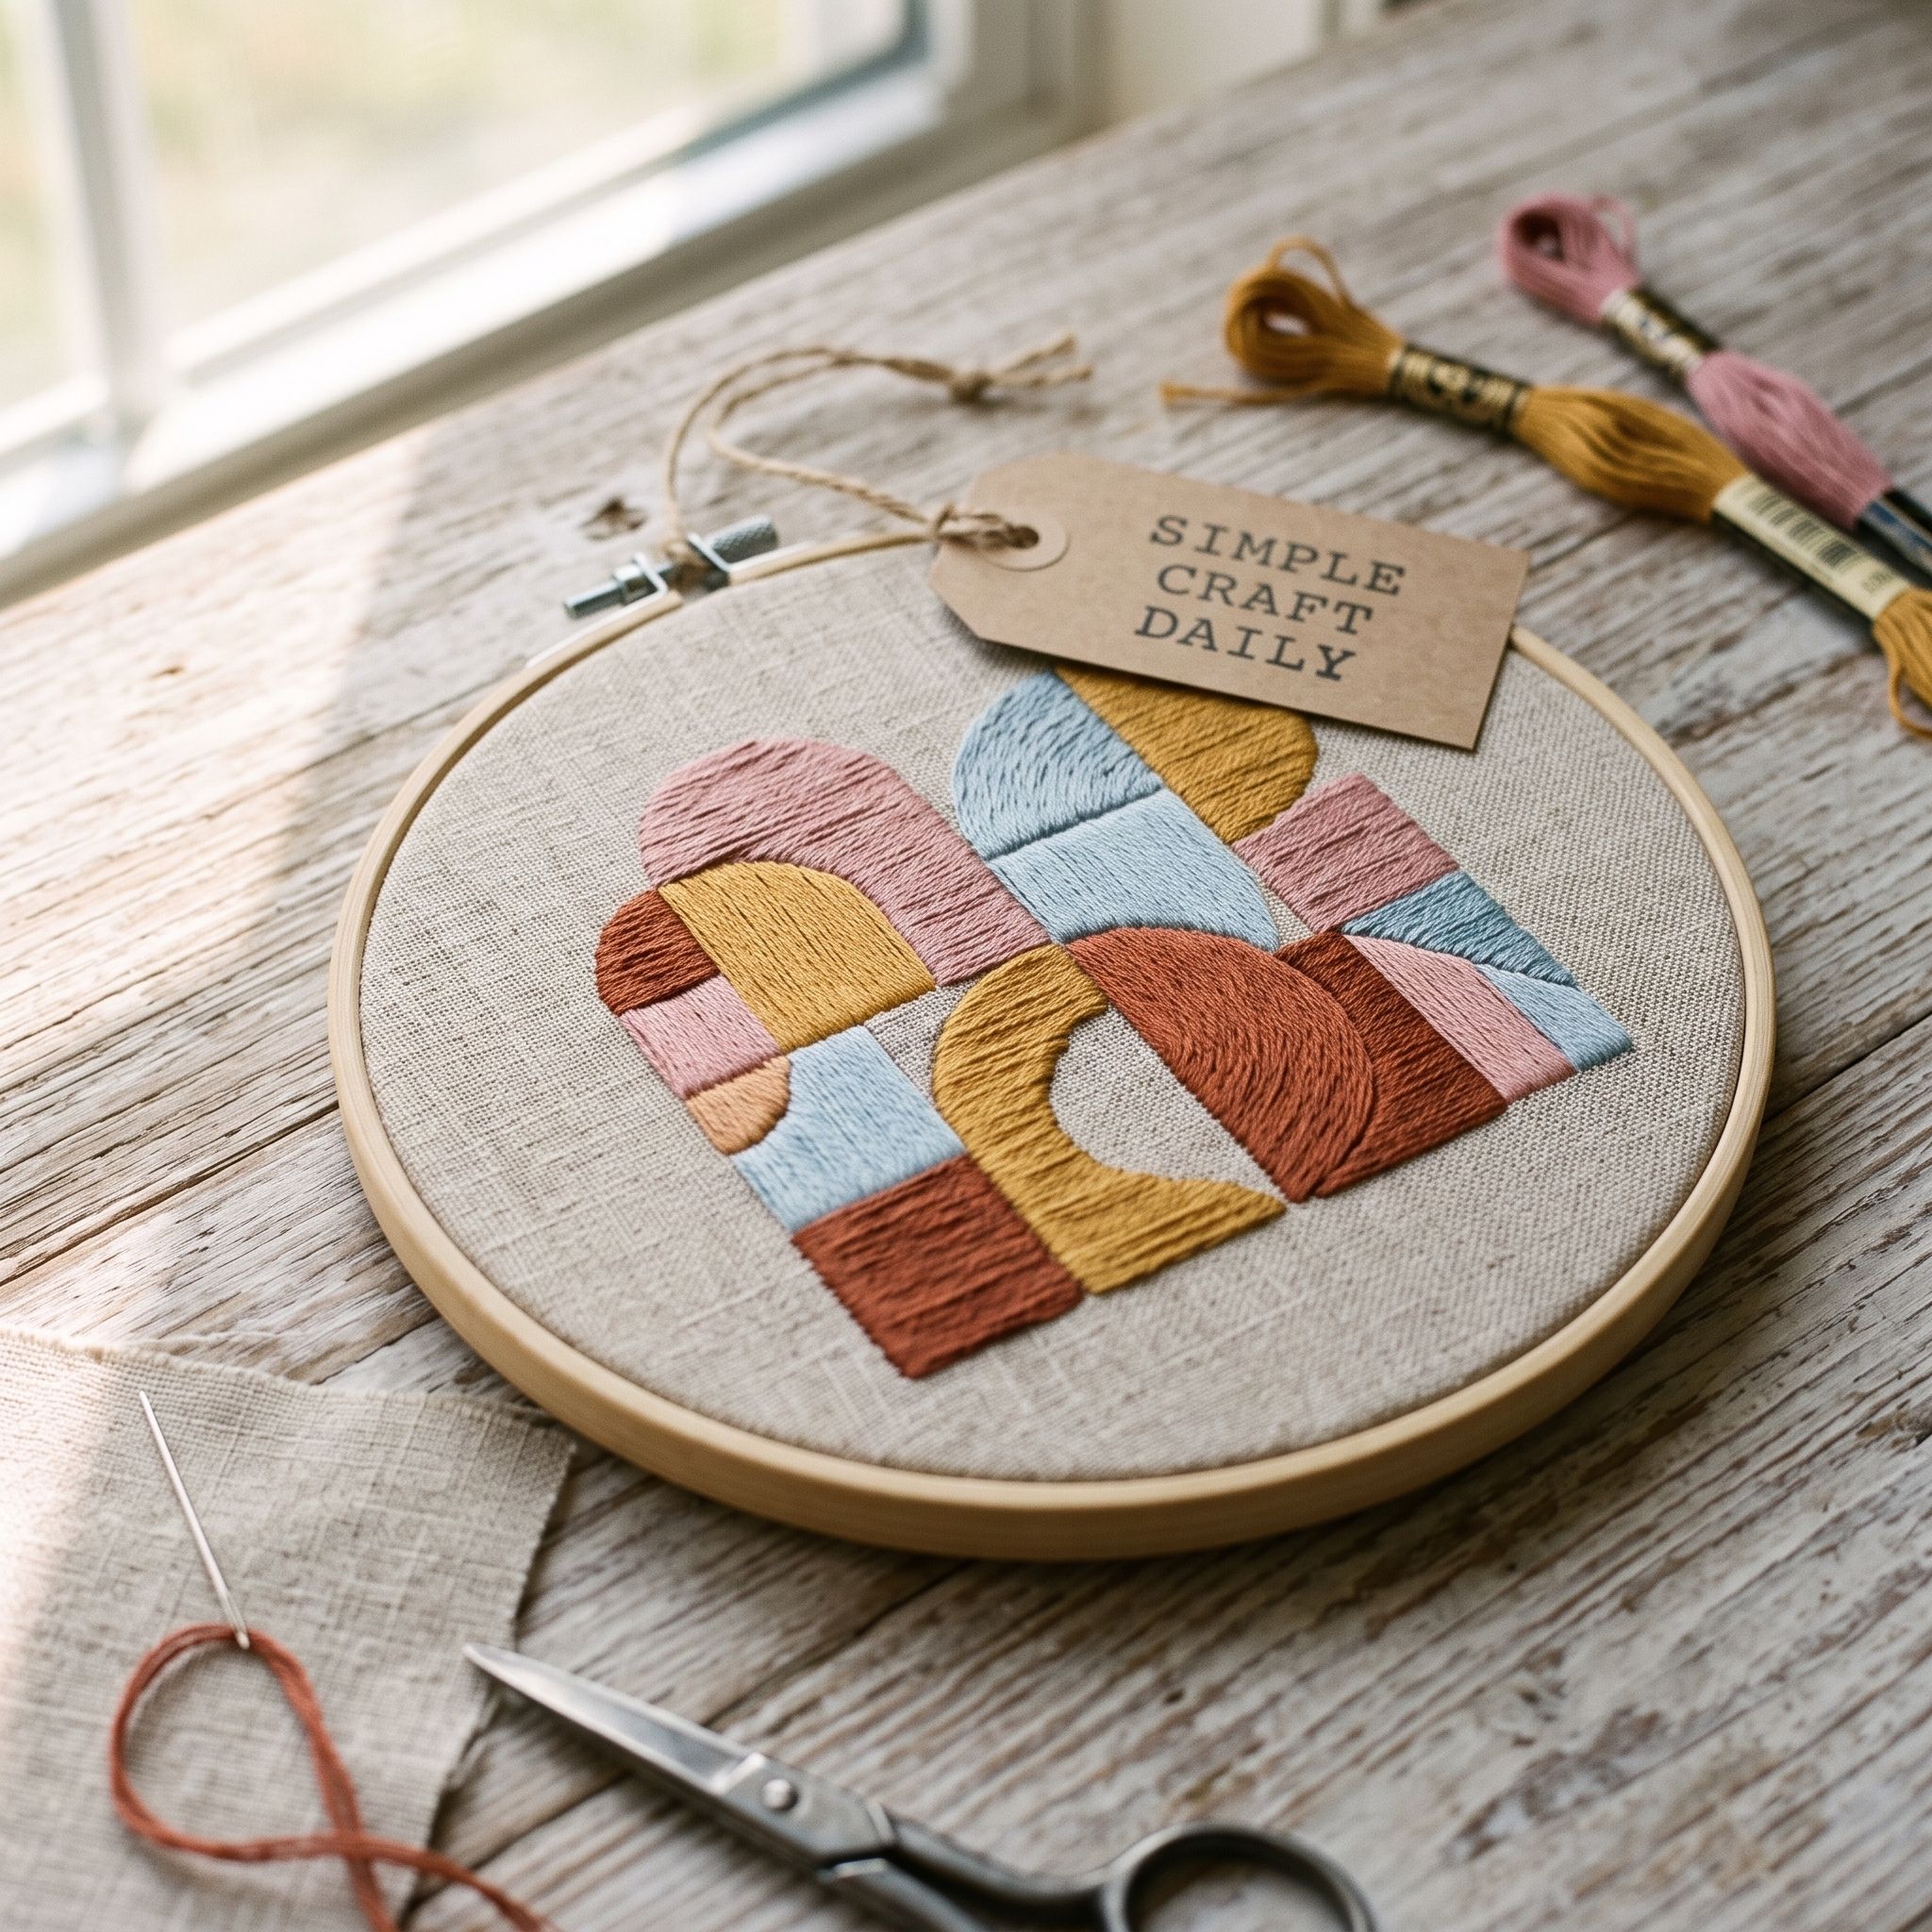
Draw three overlapping arches and two small rectangles on the water-soluble stick-and-stitch stabilizer sheet, then press it onto the center of the 10 x 10 inch linen-cotton fabric square. Mount the fabric in the 8-inch bamboo embroidery hoop. Thread the size 5 embroidery needle with three strands of dusty rose floss.
First, split stitch around one shape to establish a firm border. Fill inside that border with satin stitches that all travel in the same direction. Repeat with pale blue, mustard, and rust floss, leaving a narrow linen gap between neighboring blocks.
Keep the satin stitches parallel from edge to edge, because changing direction creates uneven reflected light. This DIY Embroidered Hoop Art idea gains its graphic finish from that consistent stitch grain. Snip tails with fine point embroidery scissors, soak the stabilizer away in cool water, and dry flat for 2 hours. Retension the fabric, gather the back, then secure cream wool blend felt with clear flexible fabric adhesive and allow it to cure for 24 hours.
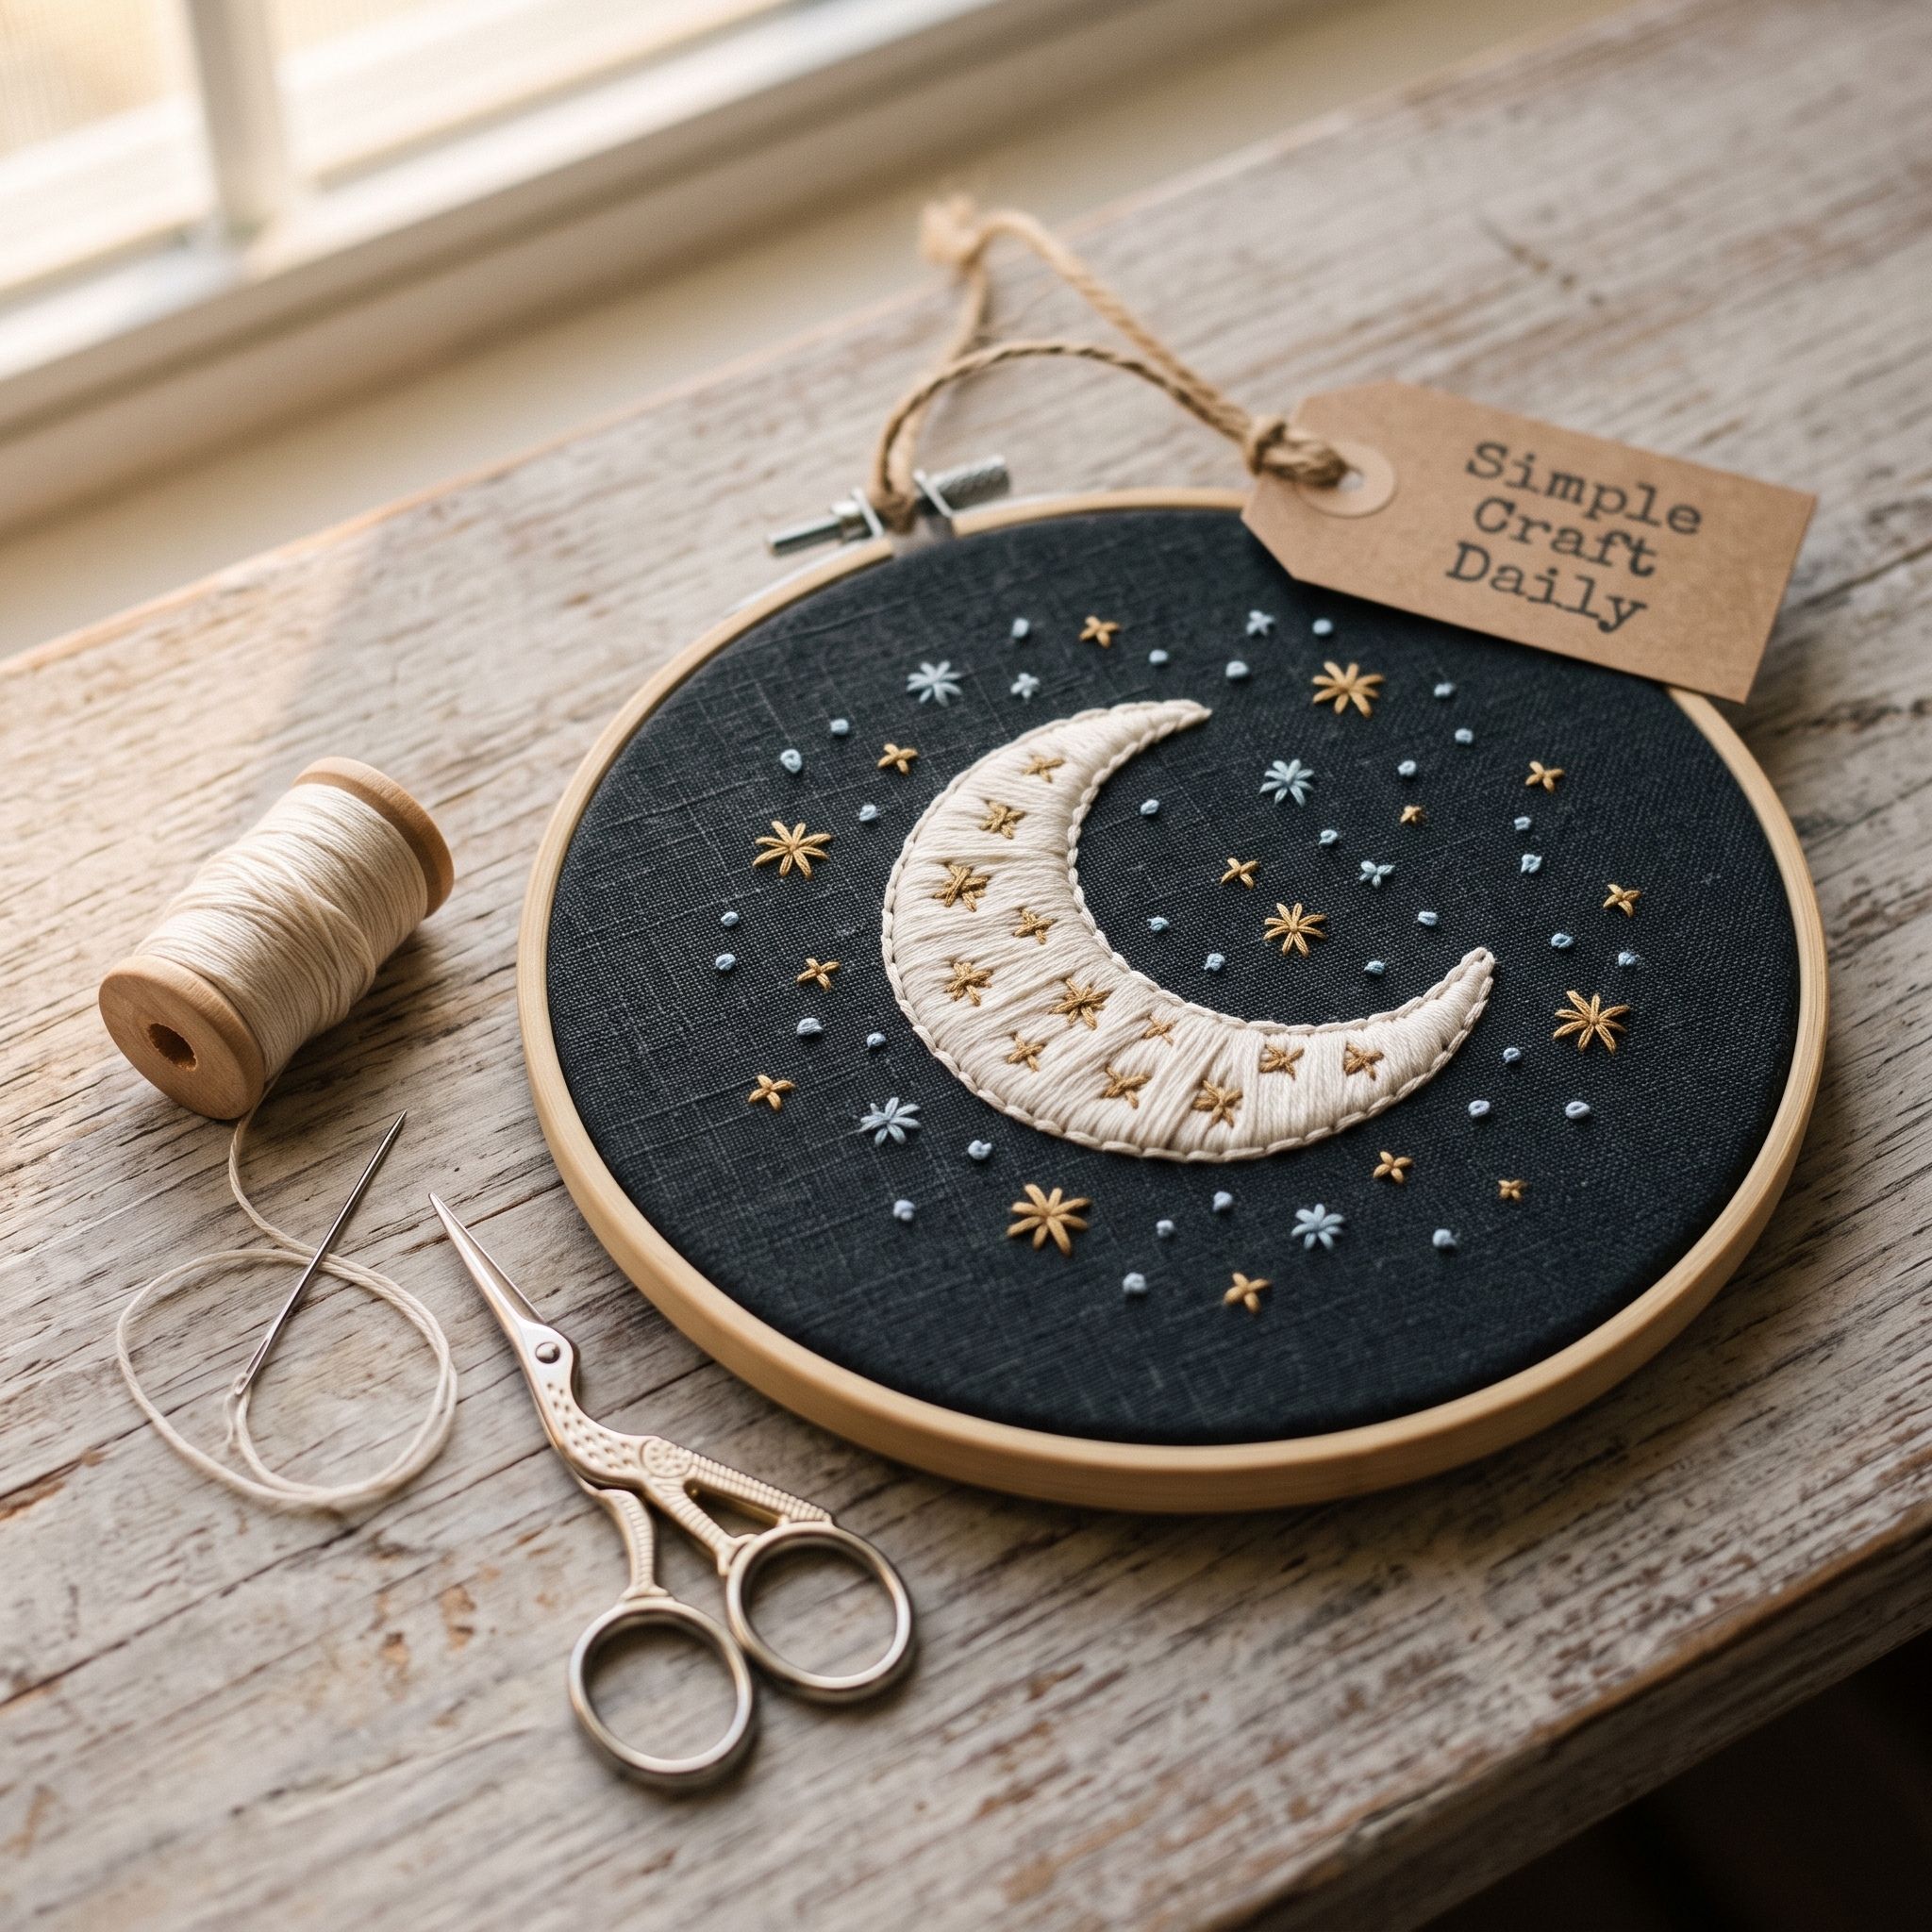
4. DIY Embroidered Hoop Art Moon and Stars
Supplies Needed: 6-inch bamboo embroidery hoop, 8 x 8 inch charcoal linen-cotton fabric square, cream, muted gold, and pale blue cotton embroidery floss, size 7 embroidery needle, water-soluble transfer pen, fine point embroidery scissors, charcoal wool blend felt, clear flexible fabric adhesive.
Use the water-soluble transfer pen to draw a 2 1/2-inch crescent and twelve small stars on the charcoal linen-cotton fabric square. Leave at least 1/2 inch between stars. Place the fabric in the 6-inch bamboo embroidery hoop and thread the size 7 embroidery needle with three strands of cream floss.
Pad the crescent with a first layer of long straight stitches. Then cover that layer with closely packed satin stitches that follow the curve. Add pale blue seed stitches between the stars, and use muted gold floss for small four-point star stitches.
This DIY Embroidered Hoop Art design benefits from generous charcoal negative space, so stop before the sky looks crowded. Trim the floss with fine point embroidery scissors, rinse away the pen, and dry flat for 2 hours. After retightening, gather the back fabric and attach charcoal wool blend felt with clear flexible fabric adhesive. Allow the adhesive to cure for 24 hours.
5. DIY Embroidered Hoop Art Archway Landscape
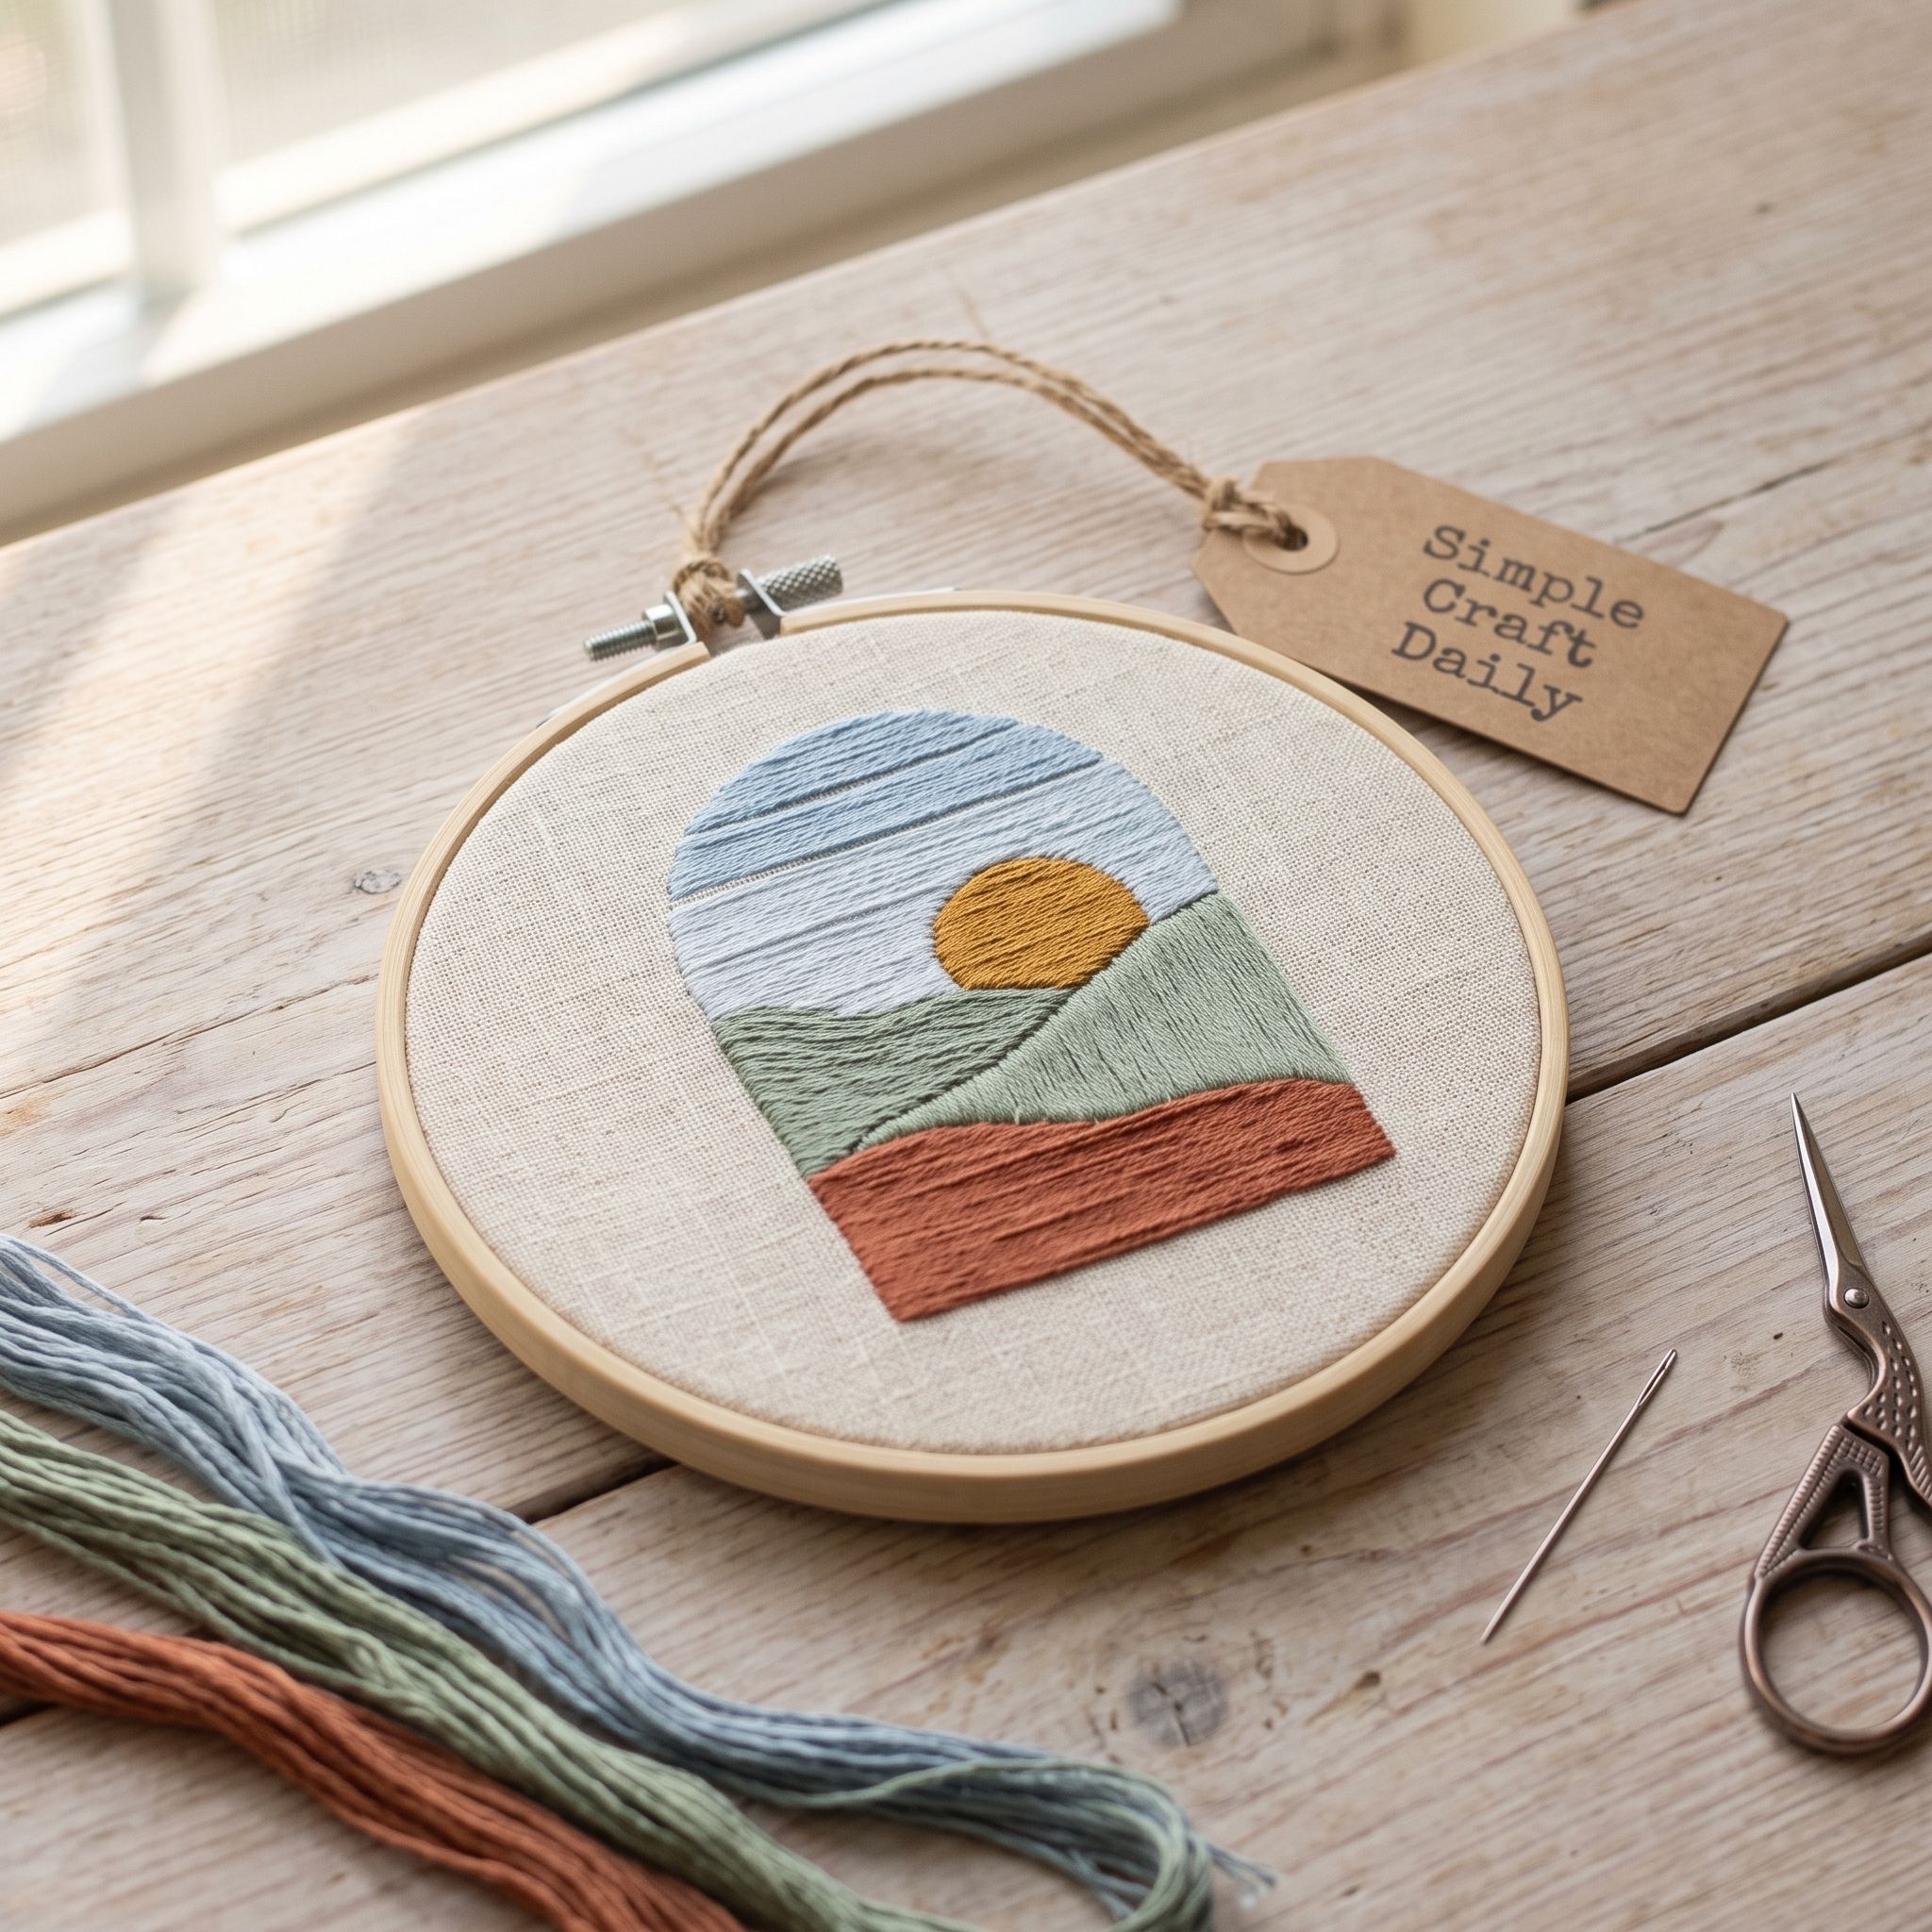
Supplies Needed: 7-inch bamboo embroidery hoop, 9 x 9 inch linen-cotton fabric square, pale blue, sage, terracotta, cream, and mustard cotton embroidery floss, size 7 embroidery needle, water-soluble stick-and-stitch stabilizer sheet, fine point embroidery scissors, cream wool blend felt, clear flexible fabric adhesive.
Draw an arch frame, two distant hill lines, one foreground hill, and a small sun onto a water-soluble stick-and-stitch stabilizer sheet. Press it onto the 9 x 9 inch linen-cotton fabric square and tighten the square in the 7-inch bamboo embroidery hoop. Use one strand of pale blue floss in the size 7 embroidery needle for fine horizon lines.
Work distant hills first with running stitch, then blend pale blue and cream sky bands in short long-and-short stitches. Add the foreground hill with sage and terracotta running stitches. Use three strands of mustard floss for a 1/2-inch satin-stitch sun.
Keep the foreground stitches slightly longer than the distant lines so the landscape reads in layers. Consequently, this DIY Embroidered Hoop Art landscape has depth without thick, heavy fills. Cut thread ends with fine point embroidery scissors, dissolve the stabilizer in cool water, and dry flat for 2 hours. Subsequently, re-tighten the hoop, gather the rear fabric, attach cream wool blend felt with clear flexible fabric adhesive, and let it cure for 24 hours.
6. DIY Embroidered Hoop Art Cozy Mushroom Cluster
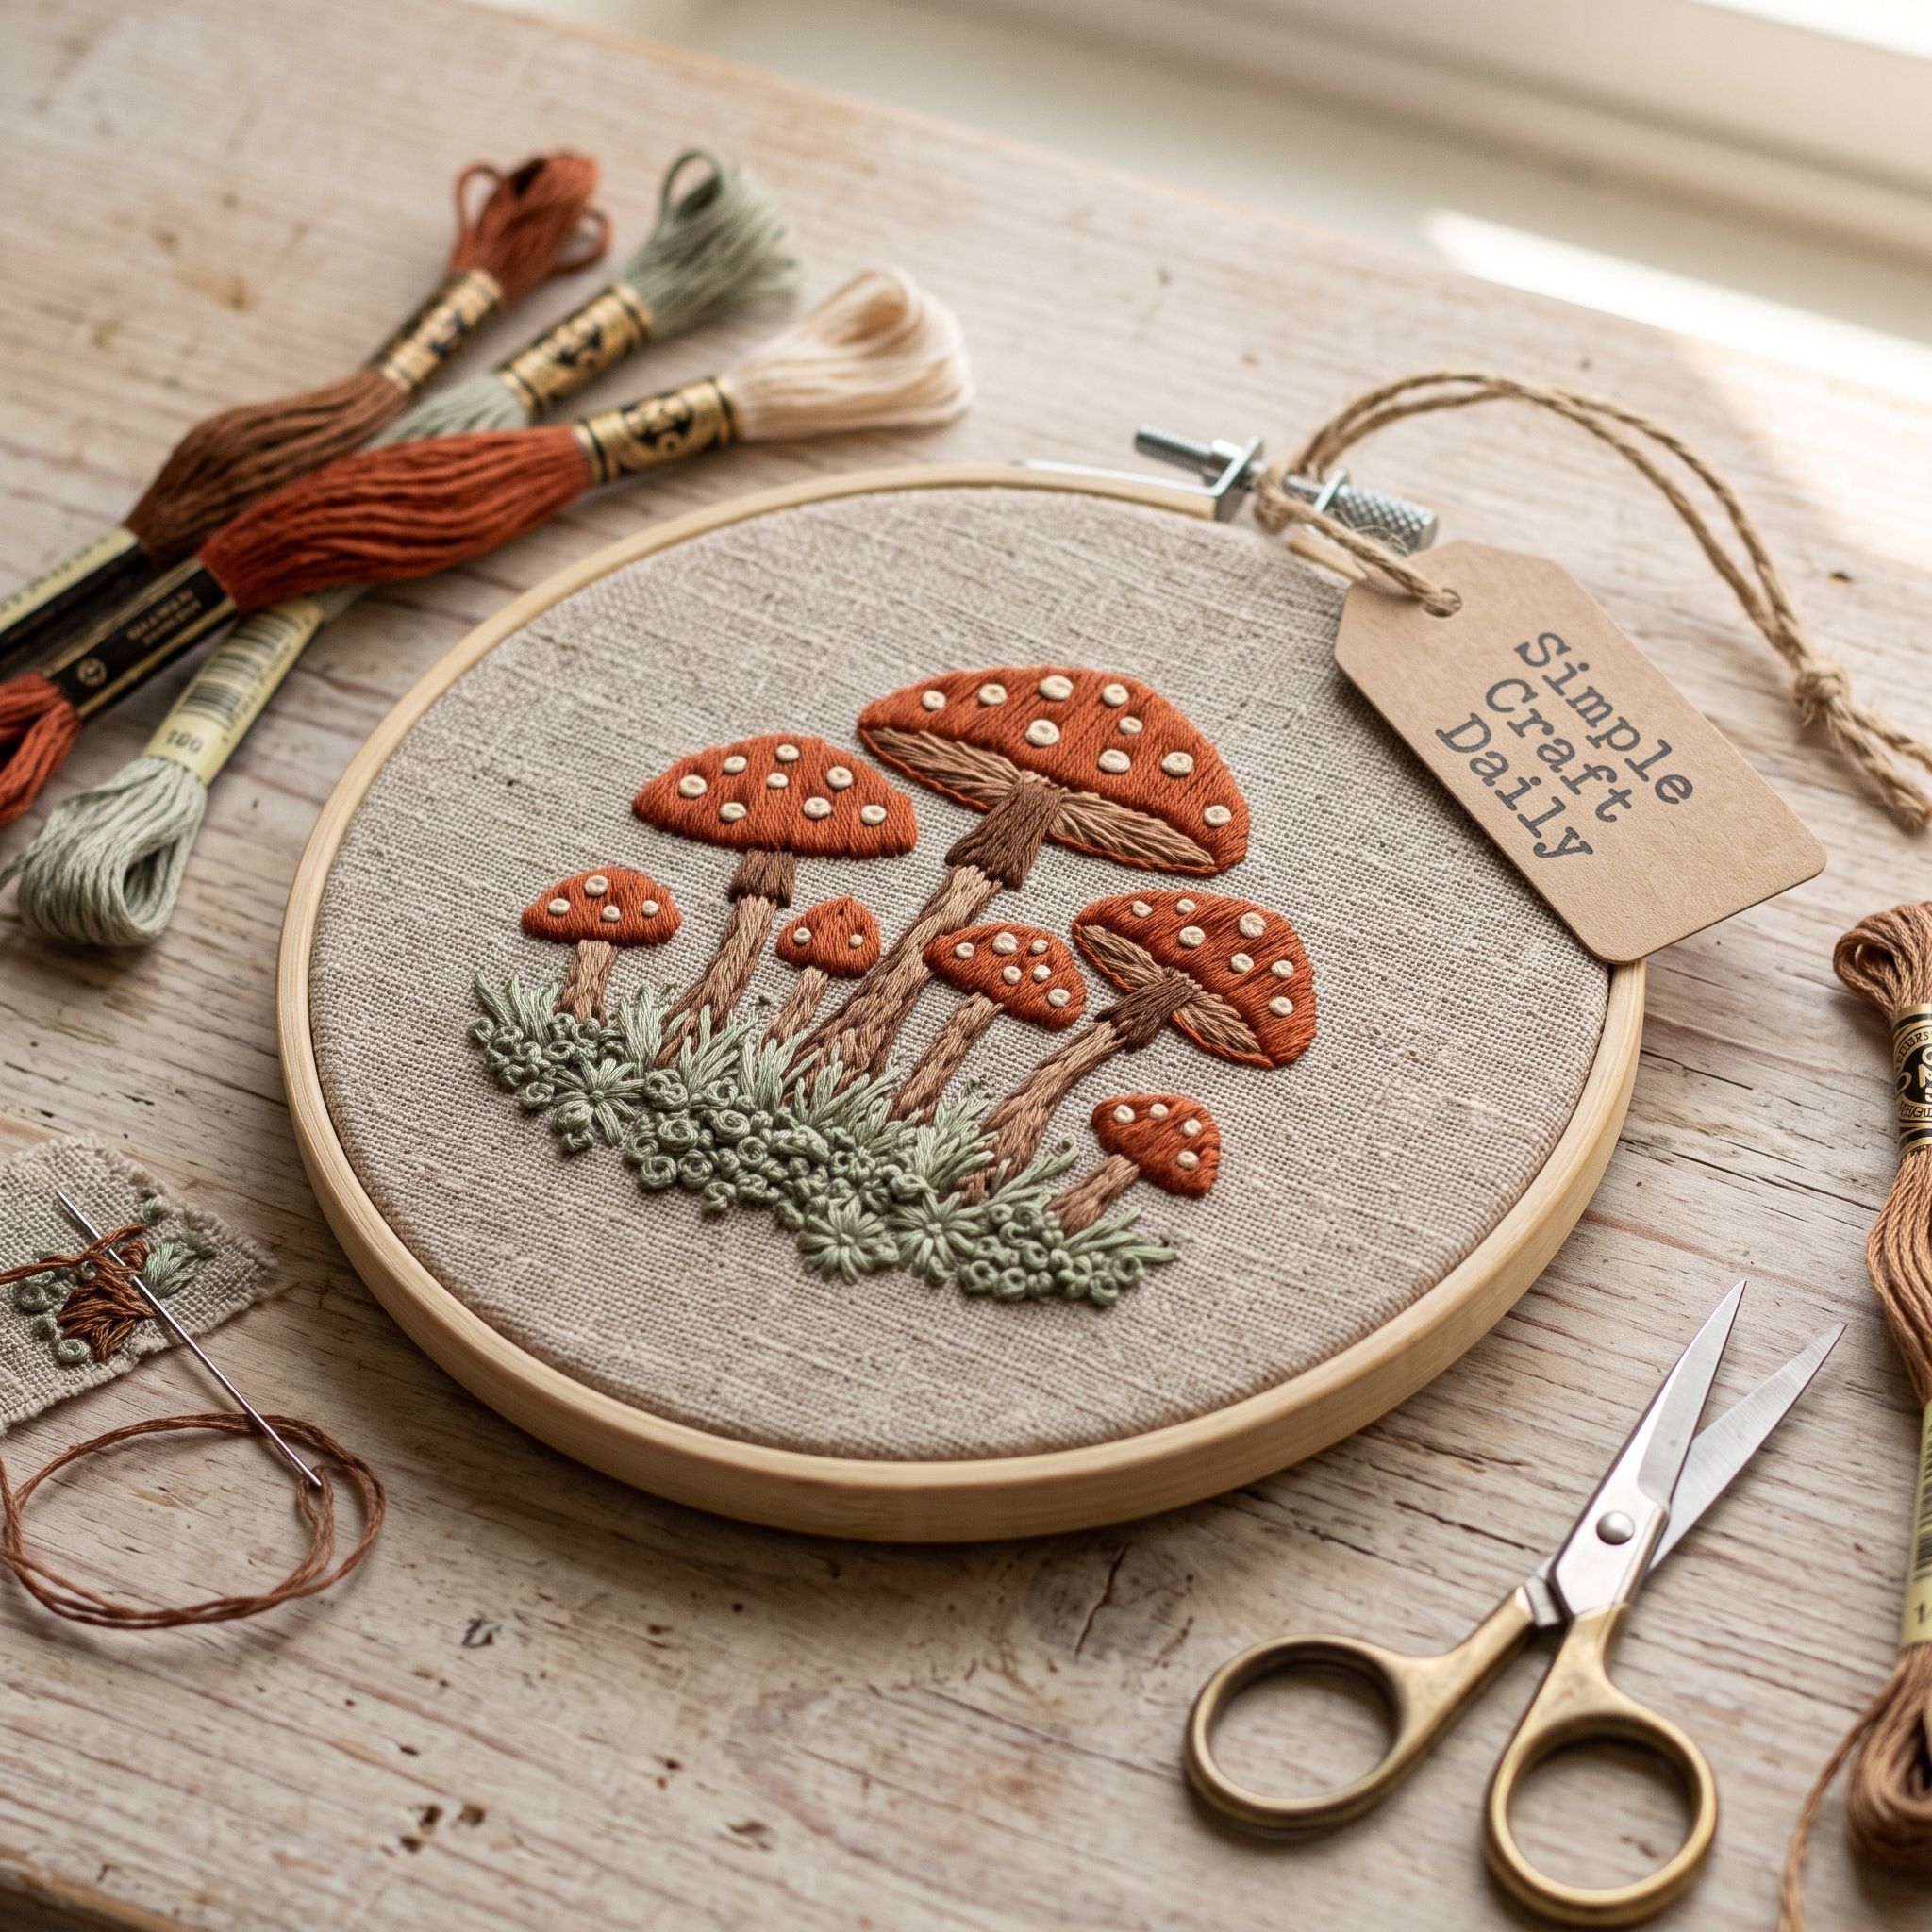
Supplies Needed: 5-inch bamboo embroidery hoop, 7 x 7 inch linen-cotton fabric square, rust, cream, brown, and sage cotton embroidery floss, size 7 embroidery needle, water-soluble transfer pen, fine point embroidery scissors, cream wool blend felt, clear flexible fabric adhesive.
Draw one large mushroom at the left side of the 7 x 7 inch linen-cotton fabric square, then arrange three smaller caps along the lower edge. Place the fabric in the 5-inch bamboo embroidery hoop. With three strands of rust floss in the size 7 embroidery needle, satin stitch the large cap first, then fill the smaller caps.
Use two strands of cream floss for straight-stitch stems and one strand for tiny cap spots. Add a few brown French knots and short sage straight stitches at ground level. This DIY Embroidered Hoop Art sequence gives the largest mushroom a clear focal point before the lower cluster fills the scene.
Remove pen marks with cool water and dry the fabric flat for 2 hours. Then use fine point embroidery scissors to trim all tails. Retighten the hoop, gather the back fabric, and bond a cream wool blend felt circle over it with clear flexible fabric adhesive. Let the adhesive cure for 24 hours before displaying the hoop.
7. DIY Embroidered Hoop Art Single-Stem Daisy
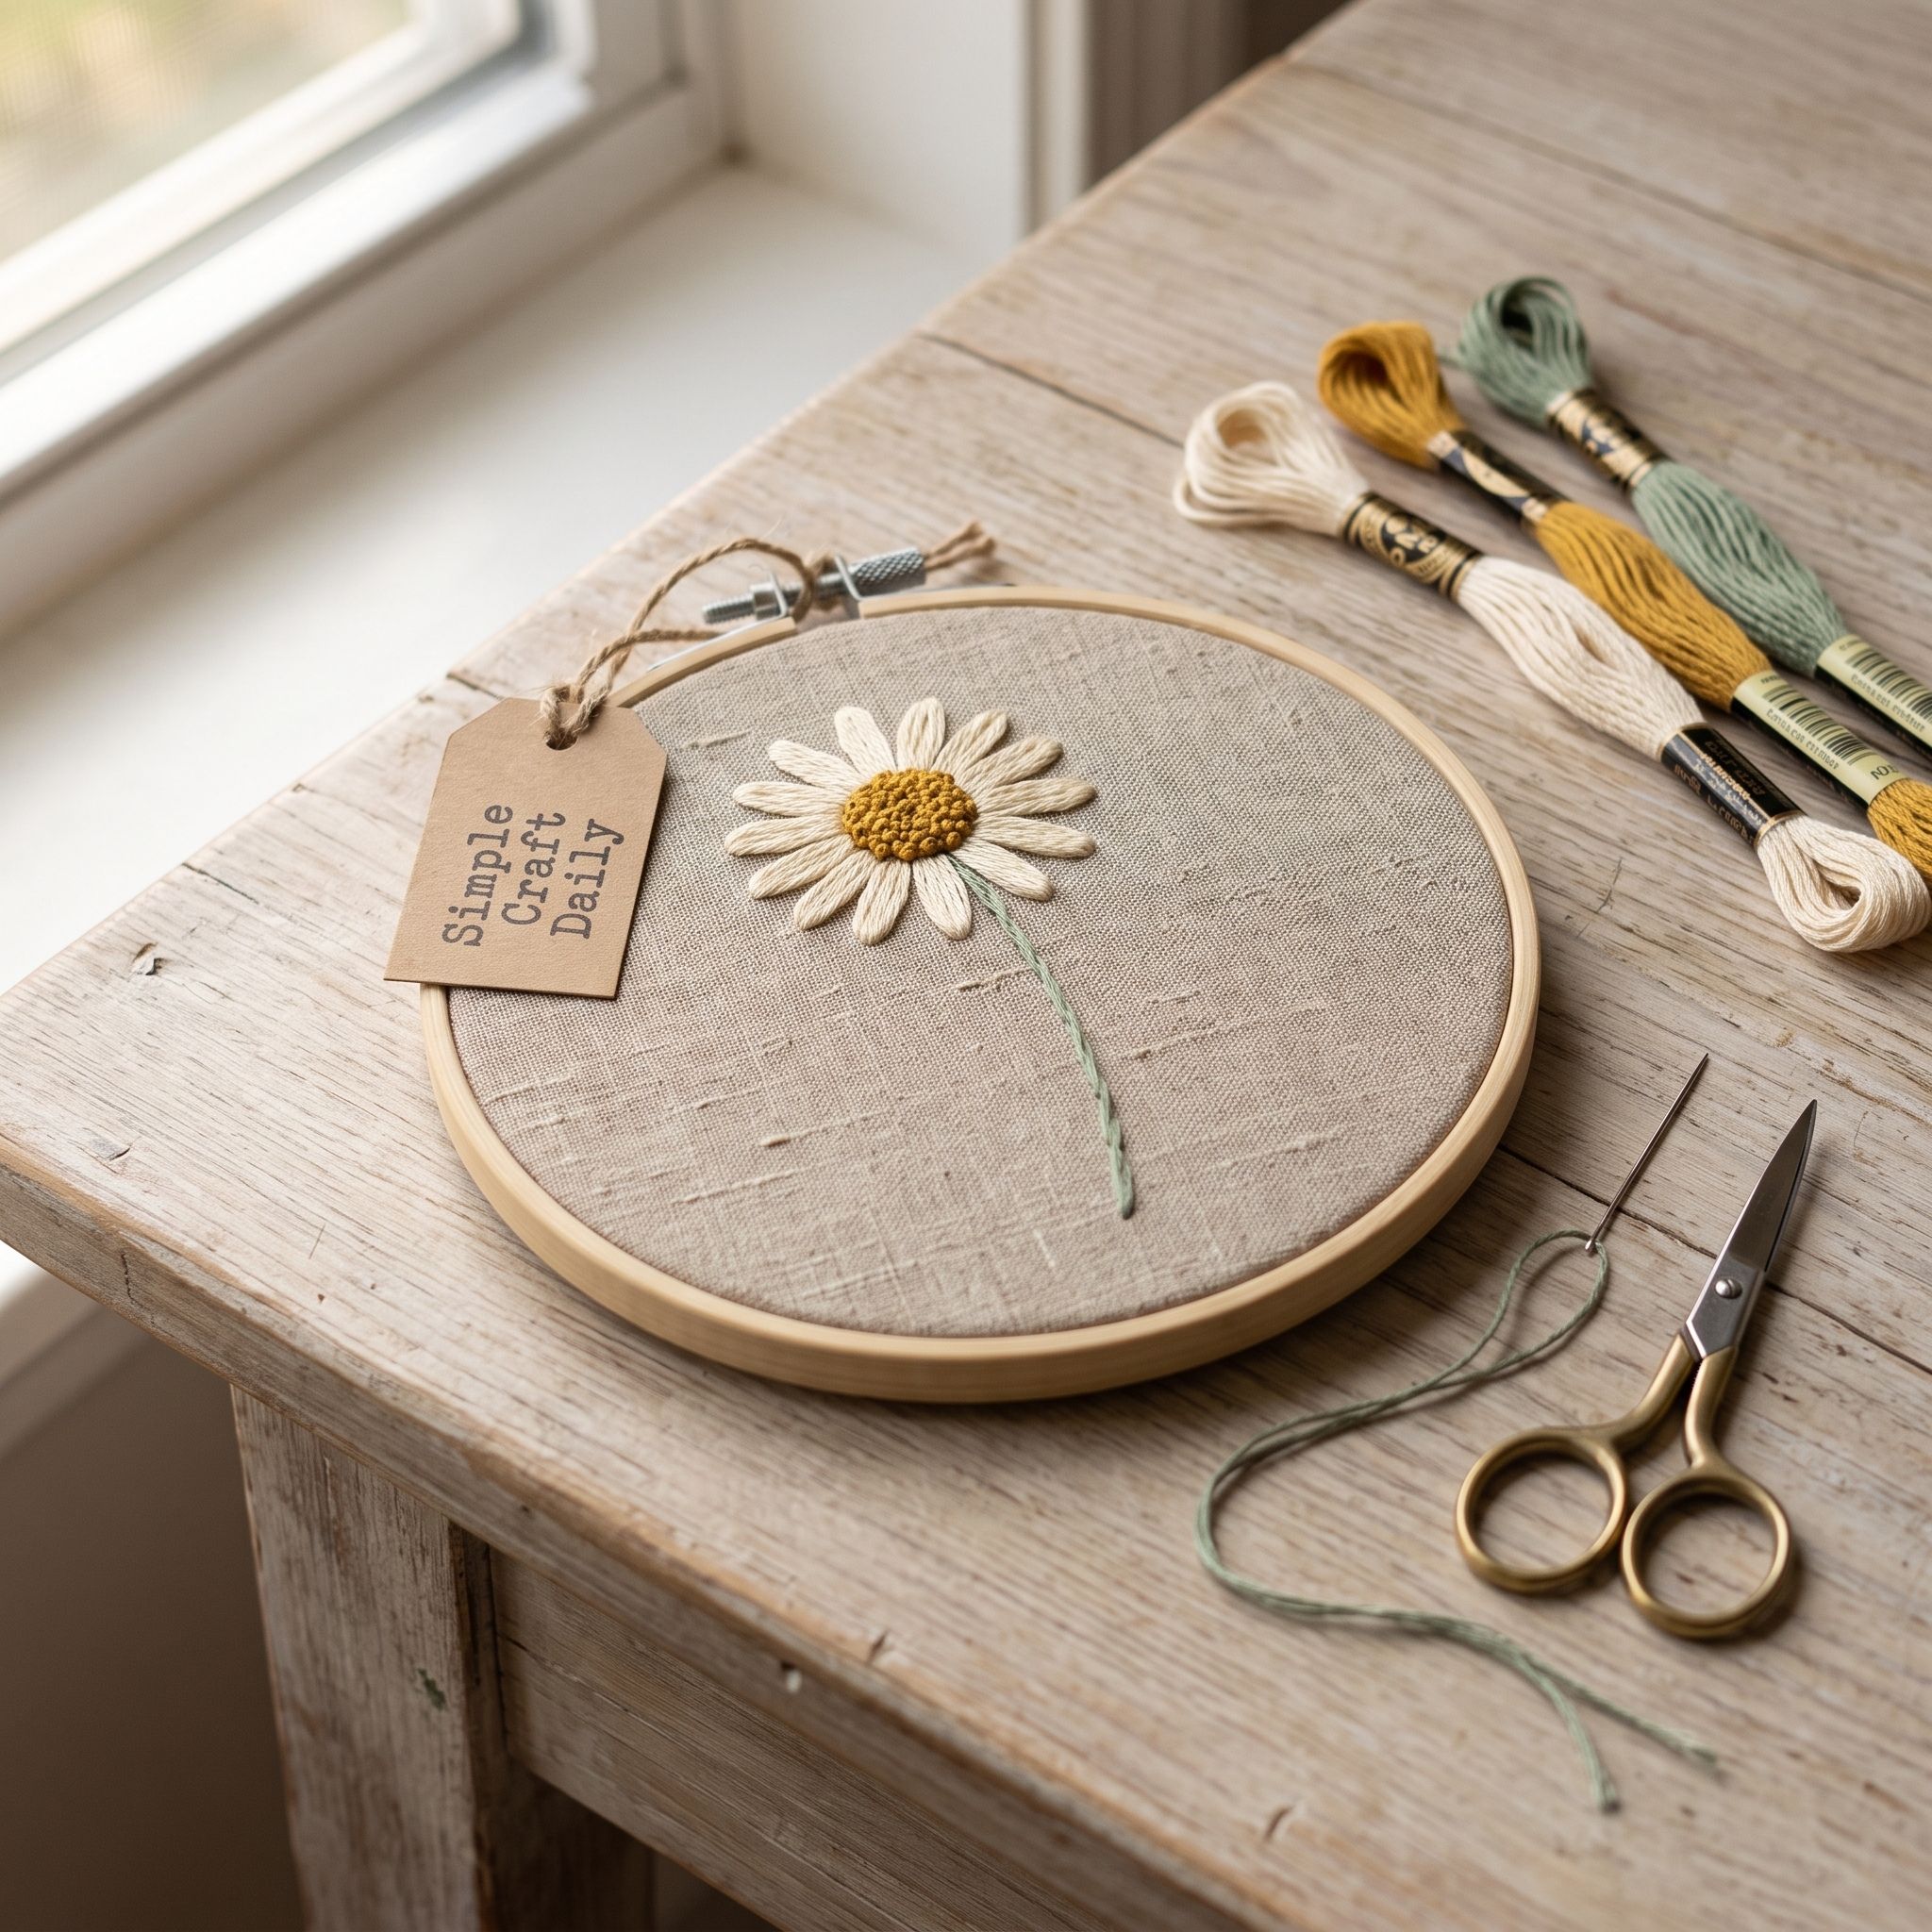
Supplies Needed: 5-inch bamboo embroidery hoop, 7 x 7 inch linen-cotton fabric square, cream, mustard, and sage cotton embroidery floss, size 7 embroidery needle, water-soluble transfer pen, fine point embroidery scissors, cream wool blend felt, clear flexible fabric adhesive.
Draw a 1/2-inch center circle near the upper half of the 7 x 7 inch linen-cotton fabric square. Mark twelve evenly spaced petal points around it, then secure the fabric in the 5-inch bamboo embroidery hoop. Thread the size 7 embroidery needle with three strands of cream floss and make twelve lazy daisy petals.
Wrap a French knot once with three strands of mustard floss to fill the center. Then switch to two strands of sage floss and work a slender wrapped stem stitch downward for about 2 inches. Add two detached-chain leaves near the lower half of the stem.
This compact DIY Embroidered Hoop Art flower leaves enough plain linen around the stem to keep its shape clear from across the room. Rinse off the transfer pen and dry flat for 2 hours. Trim the floss with fine point embroidery scissors, re-tighten the fabric, and gather its reverse-side edge. Finish the hoop with cream wool blend felt and clear flexible fabric adhesive, then allow the adhesive to cure for 24 hours.
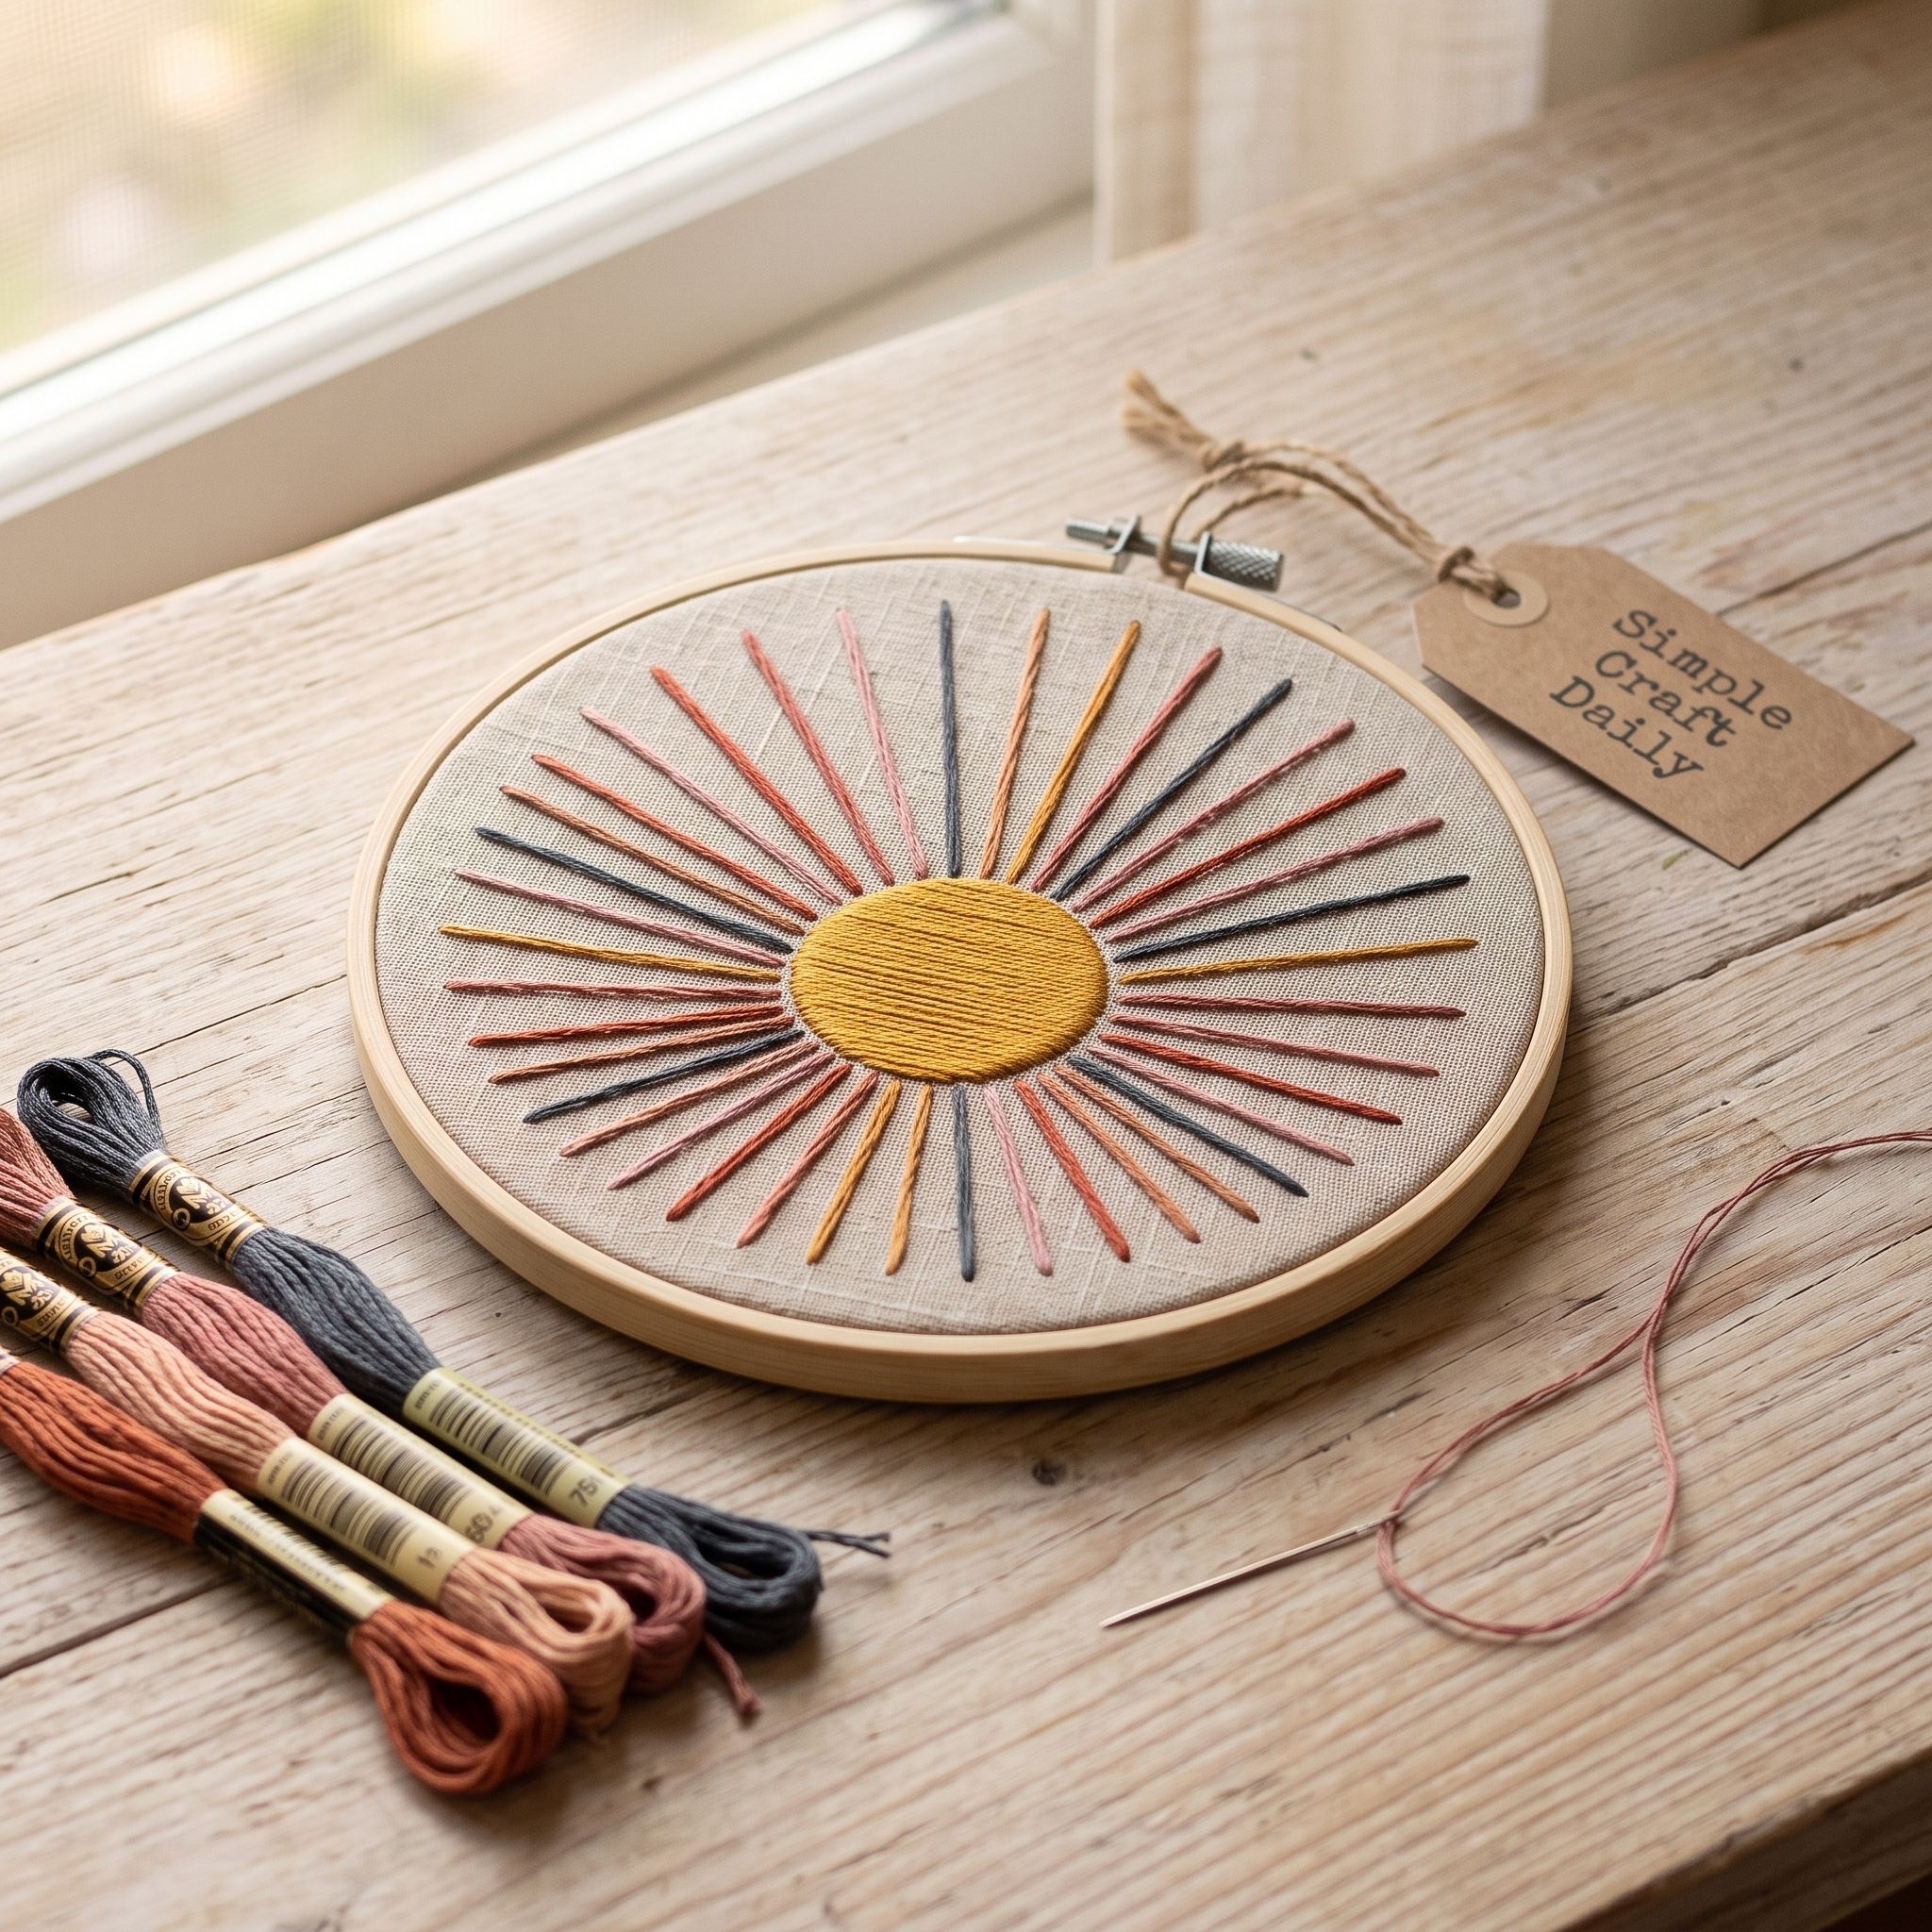
8. DIY Embroidered Hoop Art Geometric Sunrise
Supplies Needed: 6-inch bamboo embroidery hoop, 8 x 8 inch linen-cotton fabric square, mustard, dusty rose, terracotta, and charcoal cotton embroidery floss, size 7 embroidery needle, water-soluble stick-and-stitch stabilizer sheet, fine point embroidery scissors, cream wool blend felt, clear flexible fabric adhesive.
Draw a 1-inch half-circle sun, three arch lines, and fourteen evenly spaced rays on a water-soluble stick-and-stitch stabilizer sheet. Press it to the 8 x 8 inch linen-cotton fabric square and place it in the 6-inch bamboo embroidery hoop. Fill the sun with three strands of mustard floss using parallel satin stitches.
Next, back-stitch the geometric arcs with two strands of dusty rose, terracotta, and charcoal floss. Use two strands for the rays and bring each stitch toward the sun’s filled edge without piercing through the satin stitches. That clean stop line keeps the sun edge intact.
Use fine point embroidery scissors for close trimming. This DIY Embroidered Hoop Art pattern looks most even when the marked rays remain the same width from the sun to their tips. Soak away the stabilizer, dry the fabric flat for 2 hours, and re-tighten the hoop. Gather the excess fabric, secure cream wool blend felt with clear flexible fabric adhesive, and leave the hoop undisturbed for 24 hours.
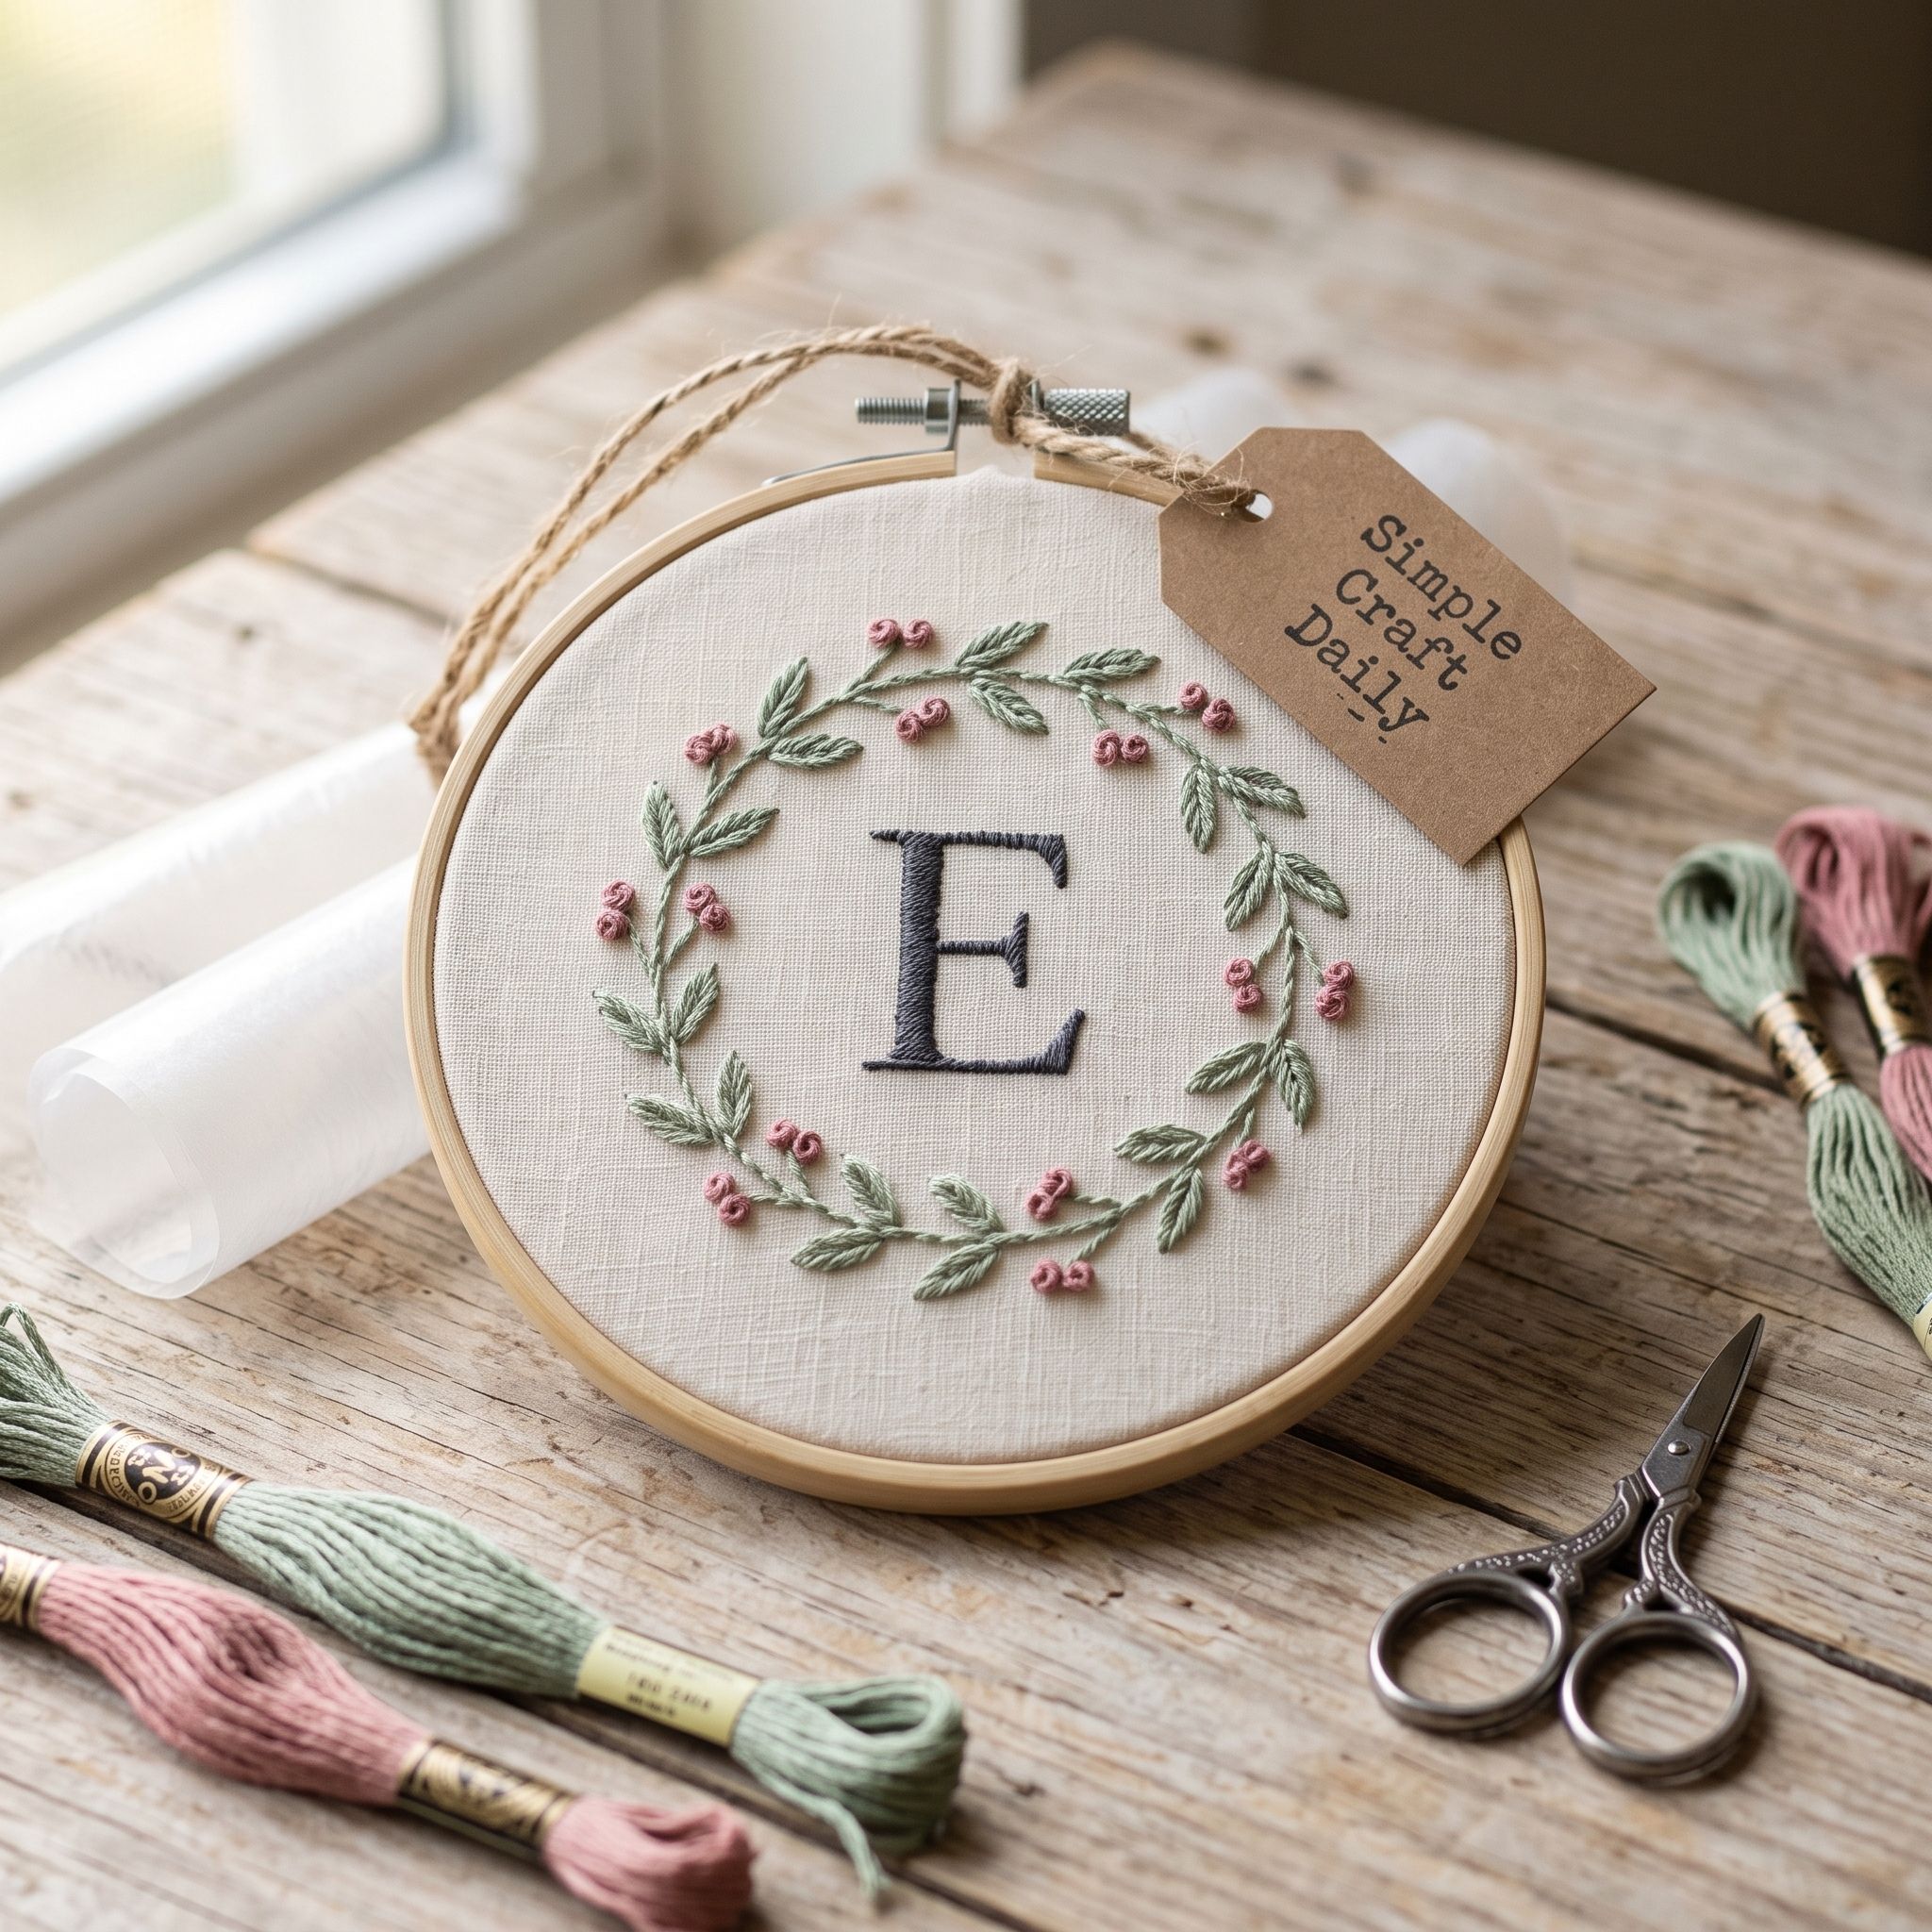
9. DIY Embroidered Hoop Art Monogram Wreath
Supplies Needed: 6-inch bamboo embroidery hoop, 8 x 8 inch linen-cotton fabric square, charcoal, sage, and dusty rose cotton embroidery floss, size 7 embroidery needle, water-soluble stick-and-stitch stabilizer sheet, fine point embroidery scissors, cream wool blend felt, clear flexible fabric adhesive.
Print or draw a 2-inch initial with a half-wreath of small leaves on the water-soluble stick-and-stitch stabilizer sheet. Press it onto the 8 x 8 inch linen-cotton fabric square and mount it in the 6-inch bamboo embroidery hoop. Thread the size 7 embroidery needle with one strand of charcoal floss.
Back stitch the monogram in 1/16-inch stitches, keeping curves smooth with shorter stitches around corners. Then use two strands of sage and dusty rose floss for detached-chain leaves. Secure the end of every leaf with a tiny straight stitch so the loops cannot catch during rinsing.
For a personalized DIY Embroidered Hoop Art gift, center the initial before stitching and check it from several feet away. Only after all leaf stitches are secured should you soak away the stabilizer. Dry flat for 2 hours, trim ends with fine point embroidery scissors, and re-tighten the fabric. Gather the back edge, adhere cream wool blend felt with clear flexible fabric adhesive, and cure the adhesive for 24 hours.
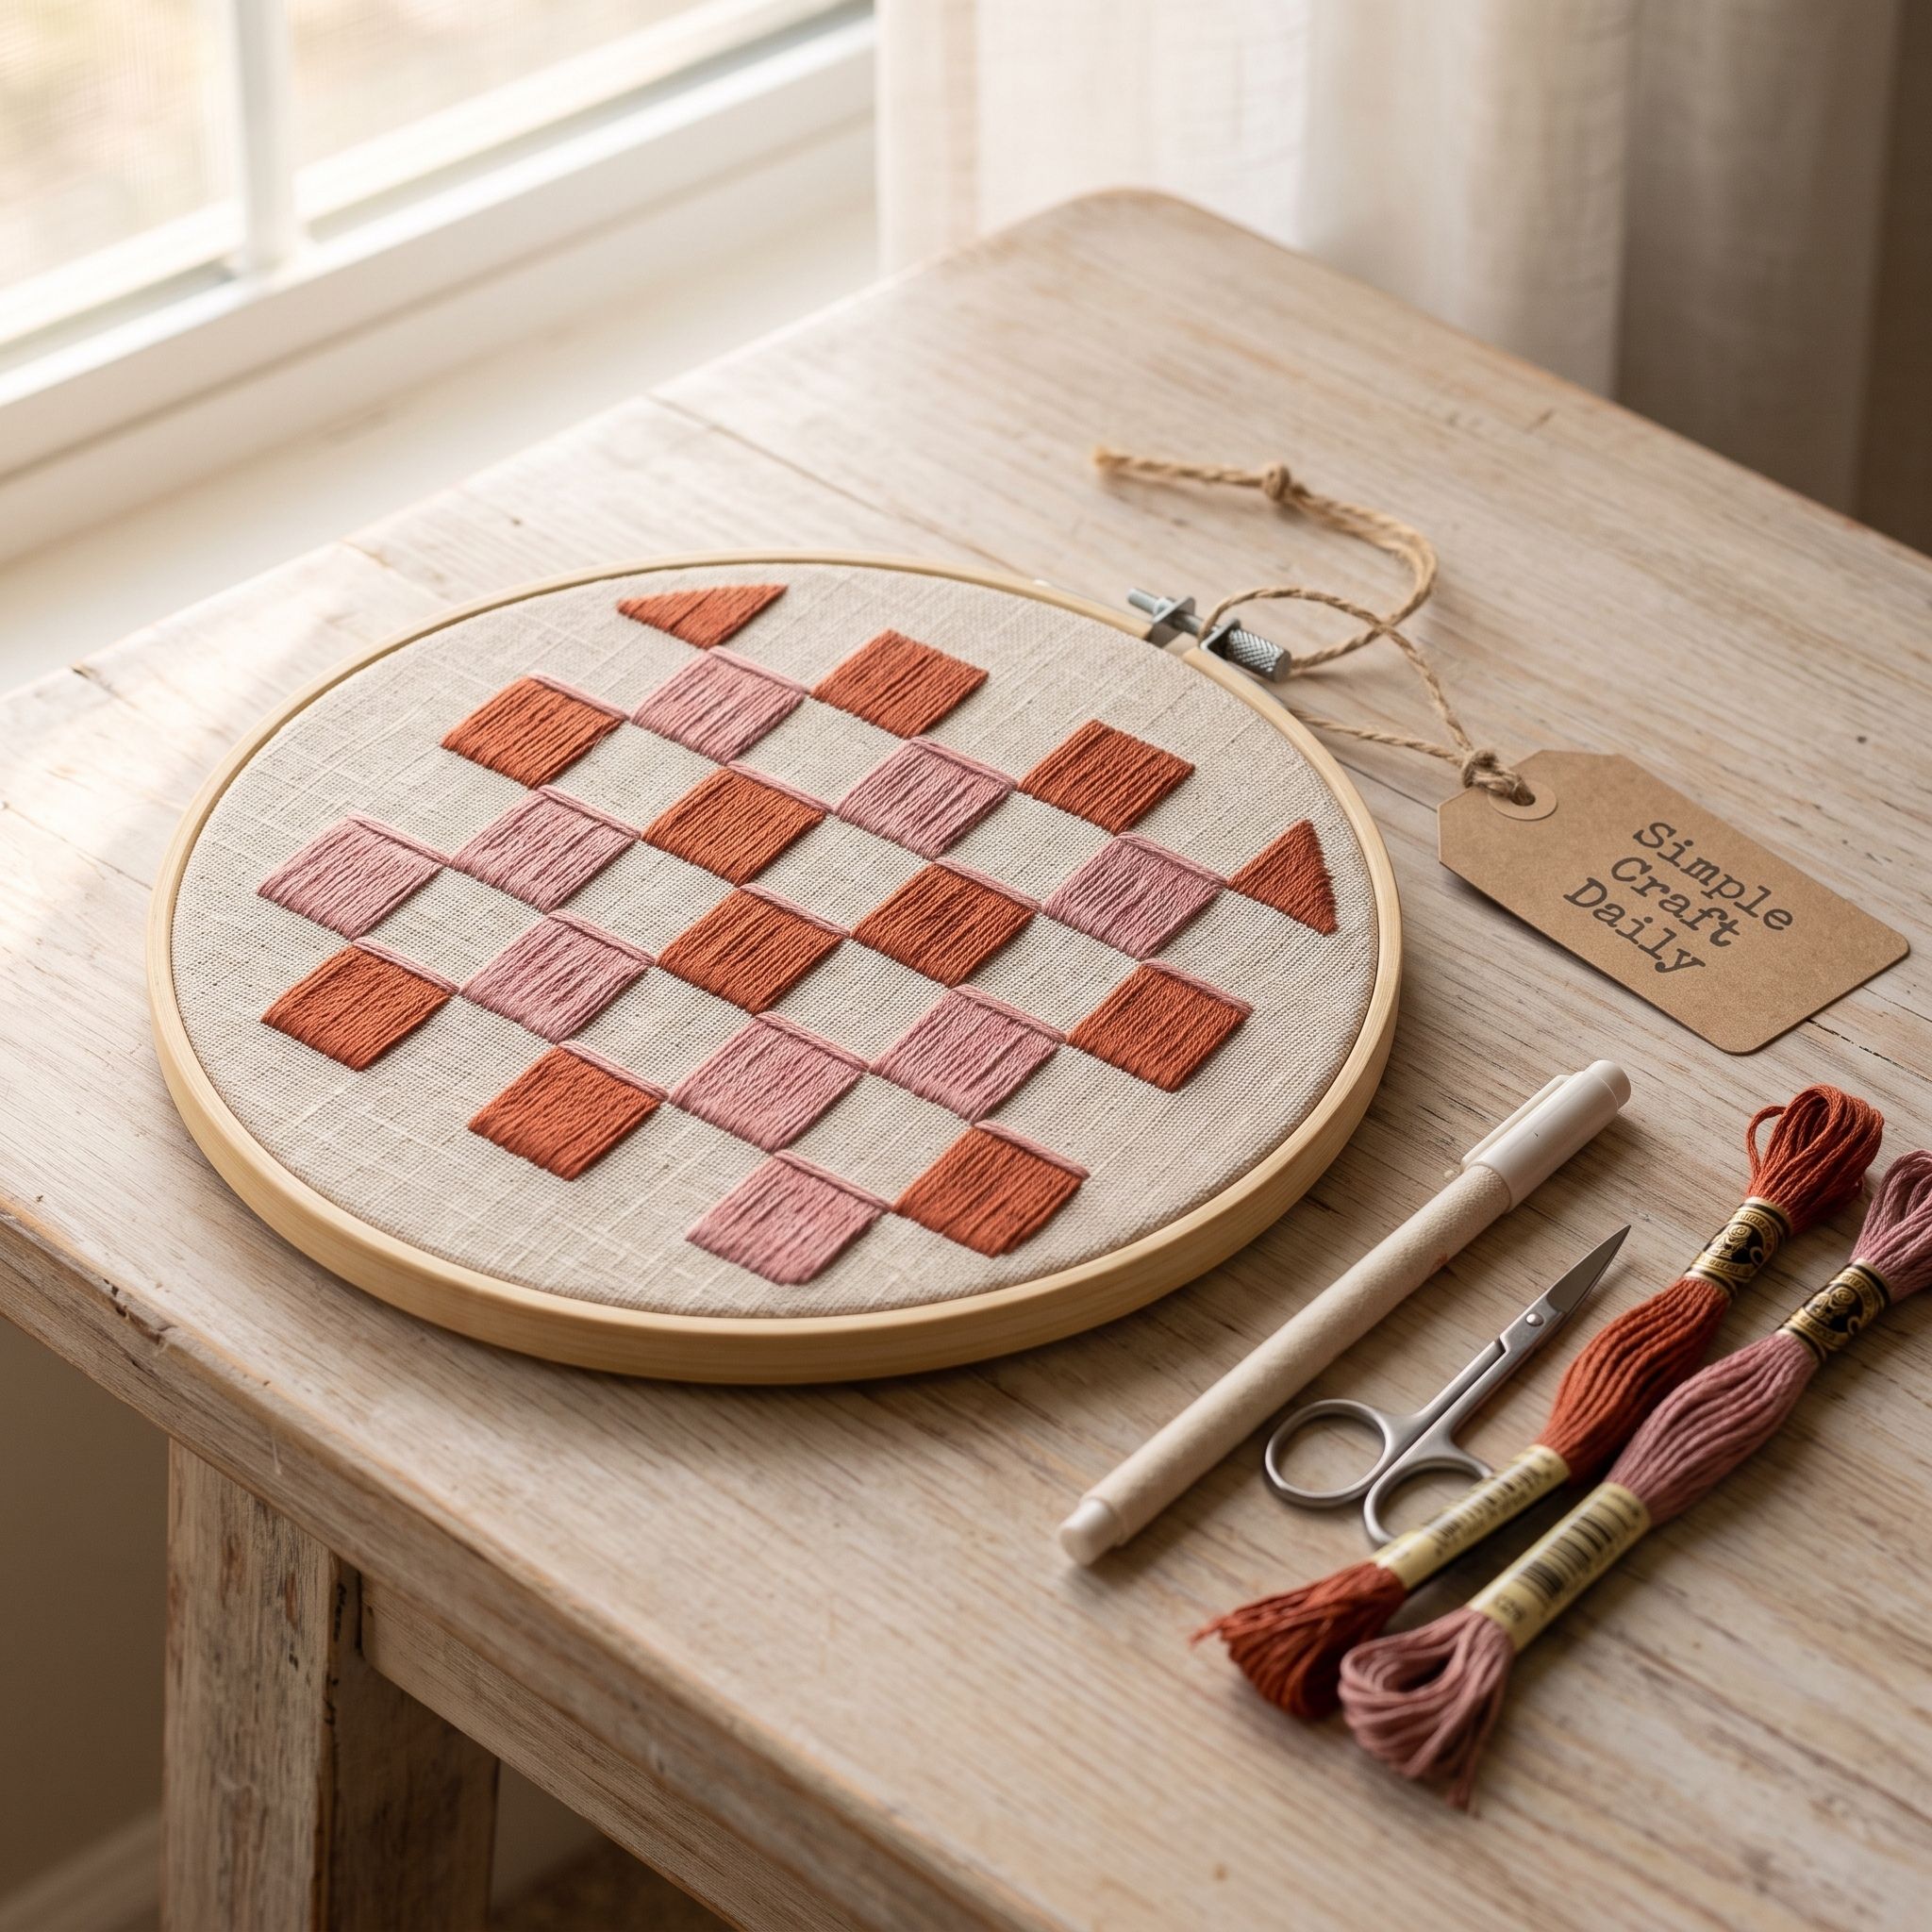
10. DIY Embroidered Hoop Art Modern Checkerboard
Supplies Needed: 7-inch bamboo embroidery hoop, 9 x 9 inch linen-cotton fabric square, terracotta and dusty rose cotton embroidery floss, size 5 embroidery needle, water-soluble transfer pen, fine point embroidery scissors, cream wool blend felt, clear flexible fabric adhesive.
Use the water-soluble transfer pen to draw a centered 4-inch square grid with 1/2-inch cells on the 9 x 9 inch linen-cotton fabric square. Secure it in the 7-inch bamboo embroidery hoop. Thread the size 5 embroidery needle with three strands of terracotta floss.
Satin stitch every other square, keeping the linen cells between them unstitched. Work non-adjacent squares first, moving across the grid like a chessboard. Then fill the remaining selected squares with three strands of dusty rose floss, again keeping each stitch parallel.
Alternating the work prevents tension from pulling one section of the fabric inward. As a result, the DIY Embroidered Hoop Art checkerboard stays square rather than pinching at its center. Cut floss tails with fine point embroidery scissors, remove the pen marks, and dry flat for 2 hours. Retighten the hoop, gather the rear fabric, glue on cream wool blend felt with clear flexible fabric adhesive, and let it cure for 24 hours.
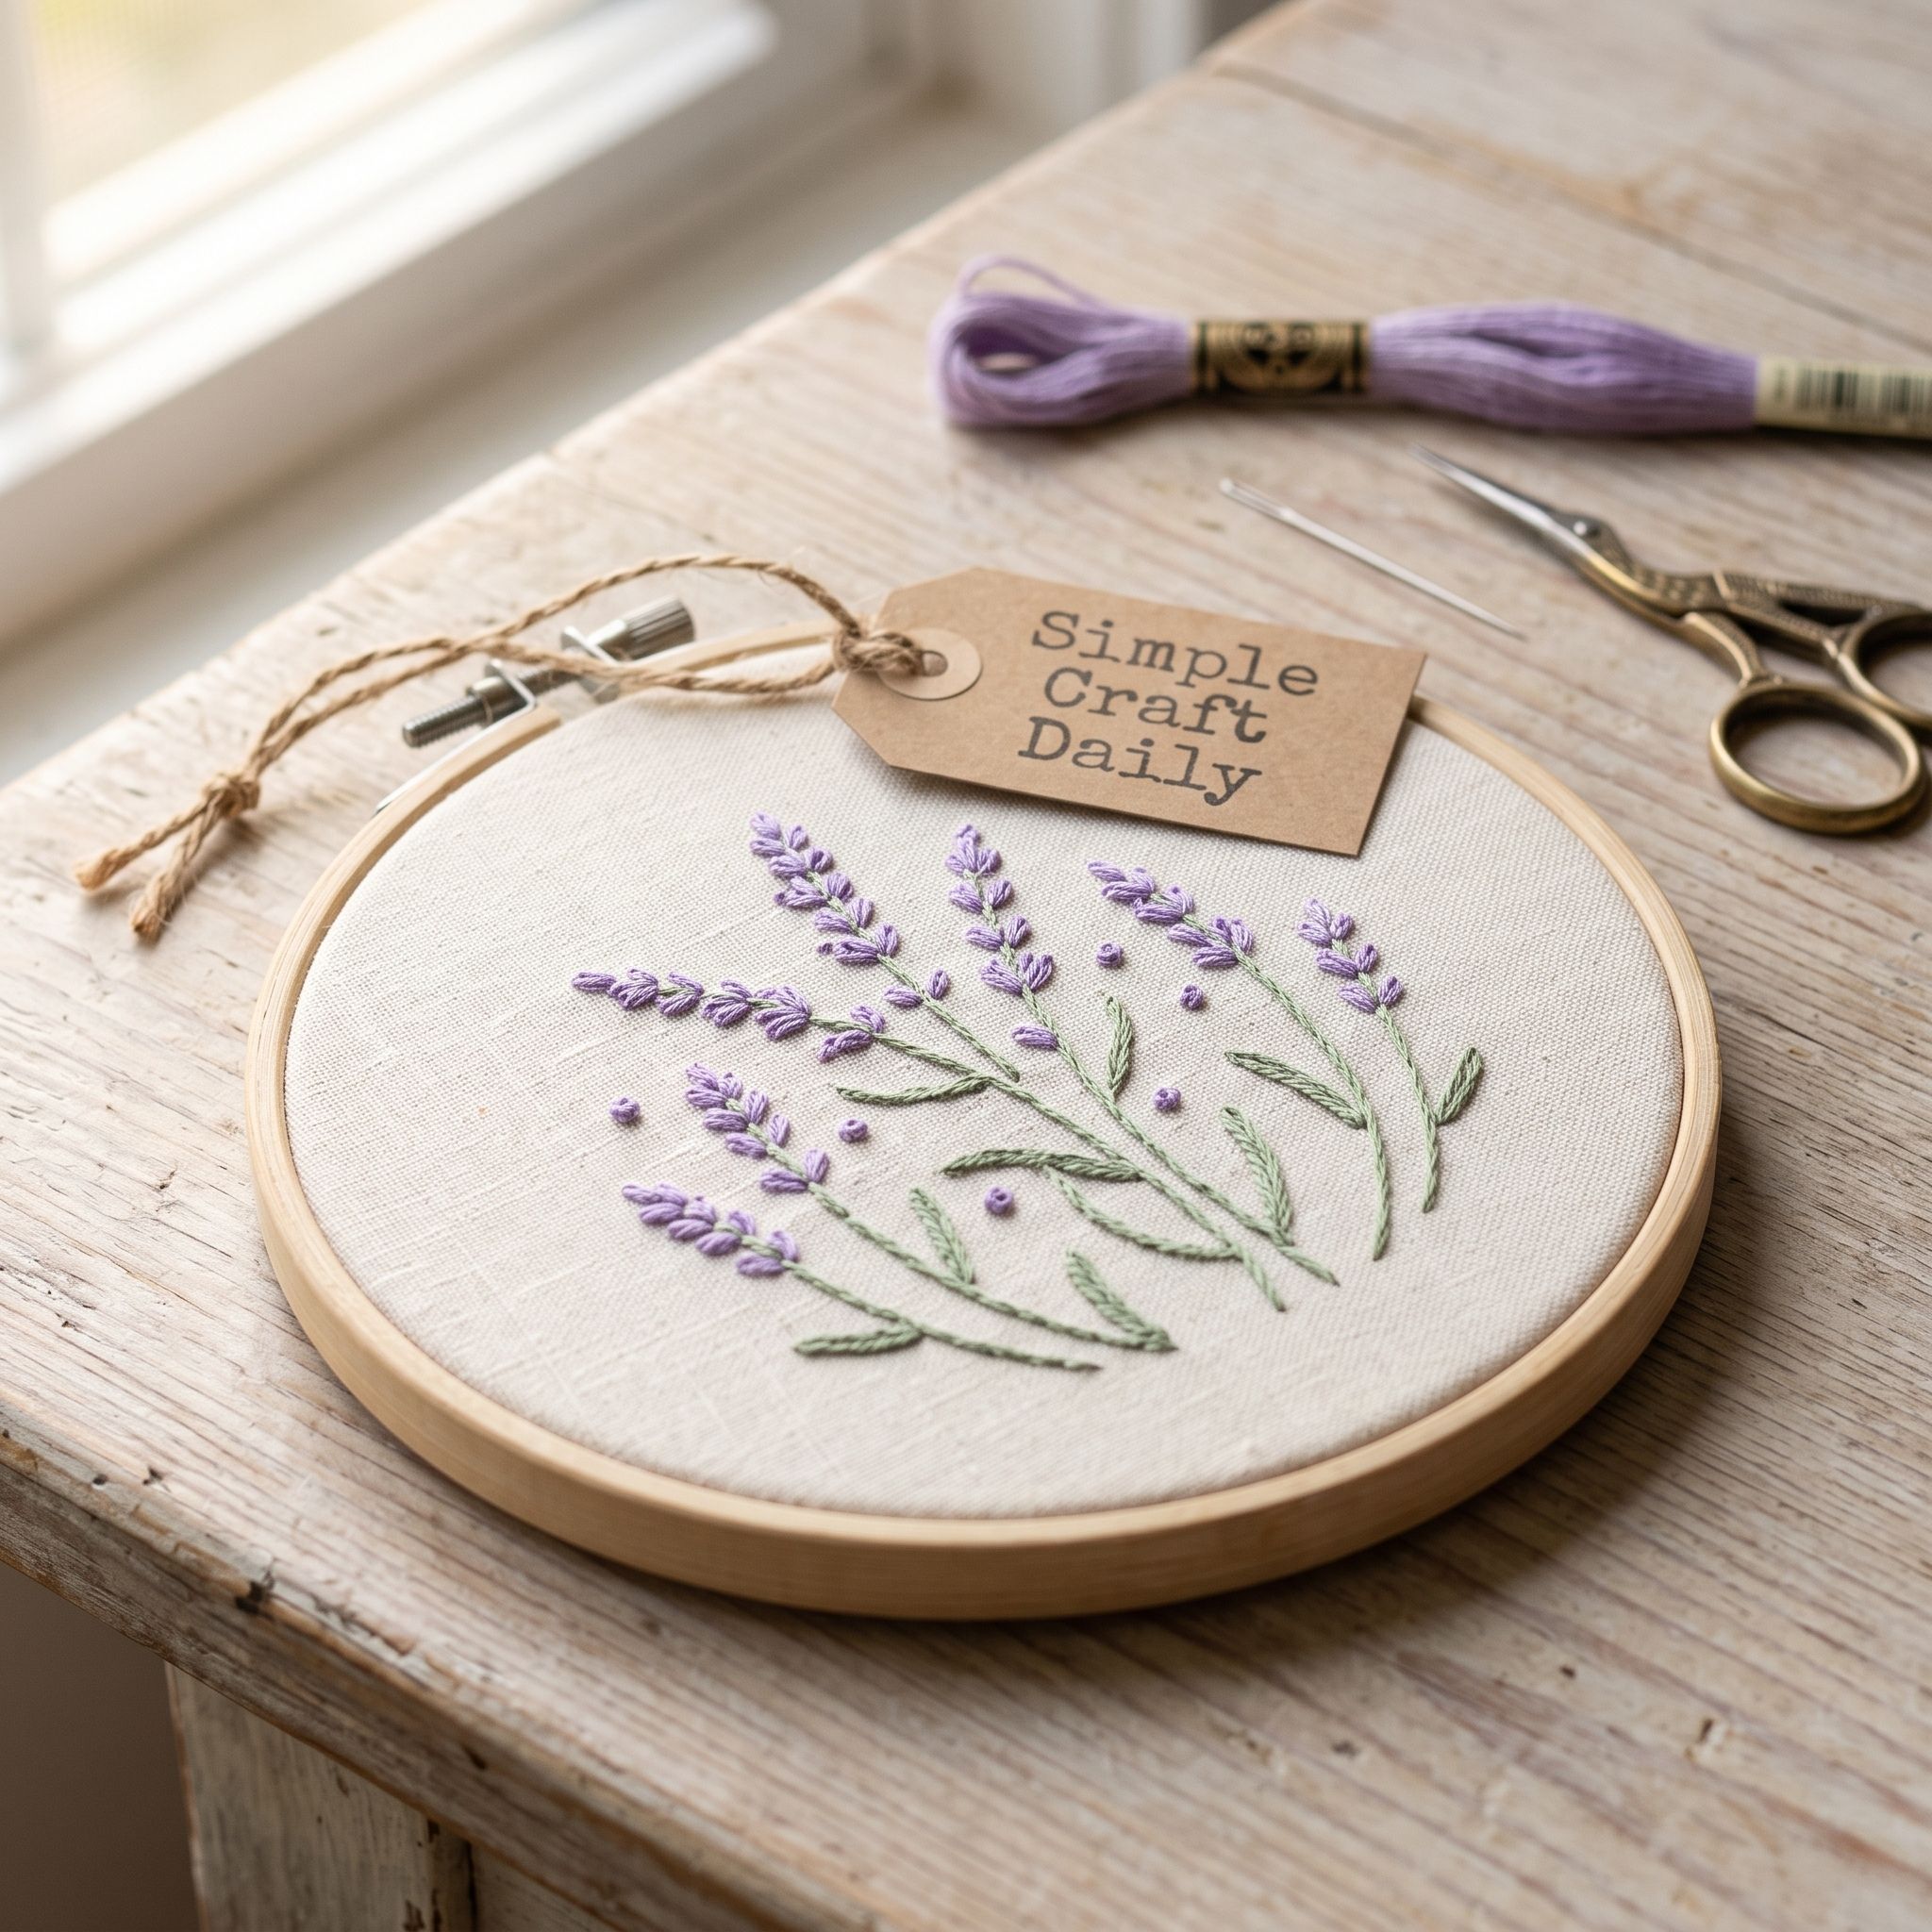
11. DIY Embroidered Hoop Art Lavender Sprigs
Supplies Needed: 5-inch bamboo embroidery hoop, 7 x 7 inch linen-cotton fabric square, lavender, sage, and cream cotton embroidery floss, size 7 embroidery needle, water-soluble transfer pen, fine point embroidery scissors, cream wool blend felt, clear flexible fabric adhesive.
Draw three lightly curved stems, each about 2 1/2 inches tall, on the 7 x 7 inch linen-cotton fabric square. Secure it in the 5-inch bamboo embroidery hoop. With two strands of sage floss in the size 7 embroidery needle, work each stem in a lightly curved stem stitch.
Use two strands of lavender floss to add paired straight-stitch buds that angle slightly upward from each stem. Vary each bud from 1/8 inch to 1/4 inch long. Add a few 1/8-inch cream straight stitches near the bud tips for a softly faded look.
This DIY Embroidered Hoop Art sprig design works well in a narrow wall grouping because its stems read clearly from a distance. Rinse the transfer pen marks away and dry the fabric flat for 2 hours. Trim all threads with fine point embroidery scissors, re-tighten the hoop, and gather the back fabric. Finish with a cream wool blend felt circle secured by clear flexible fabric adhesive, then wait 24 hours before hanging.
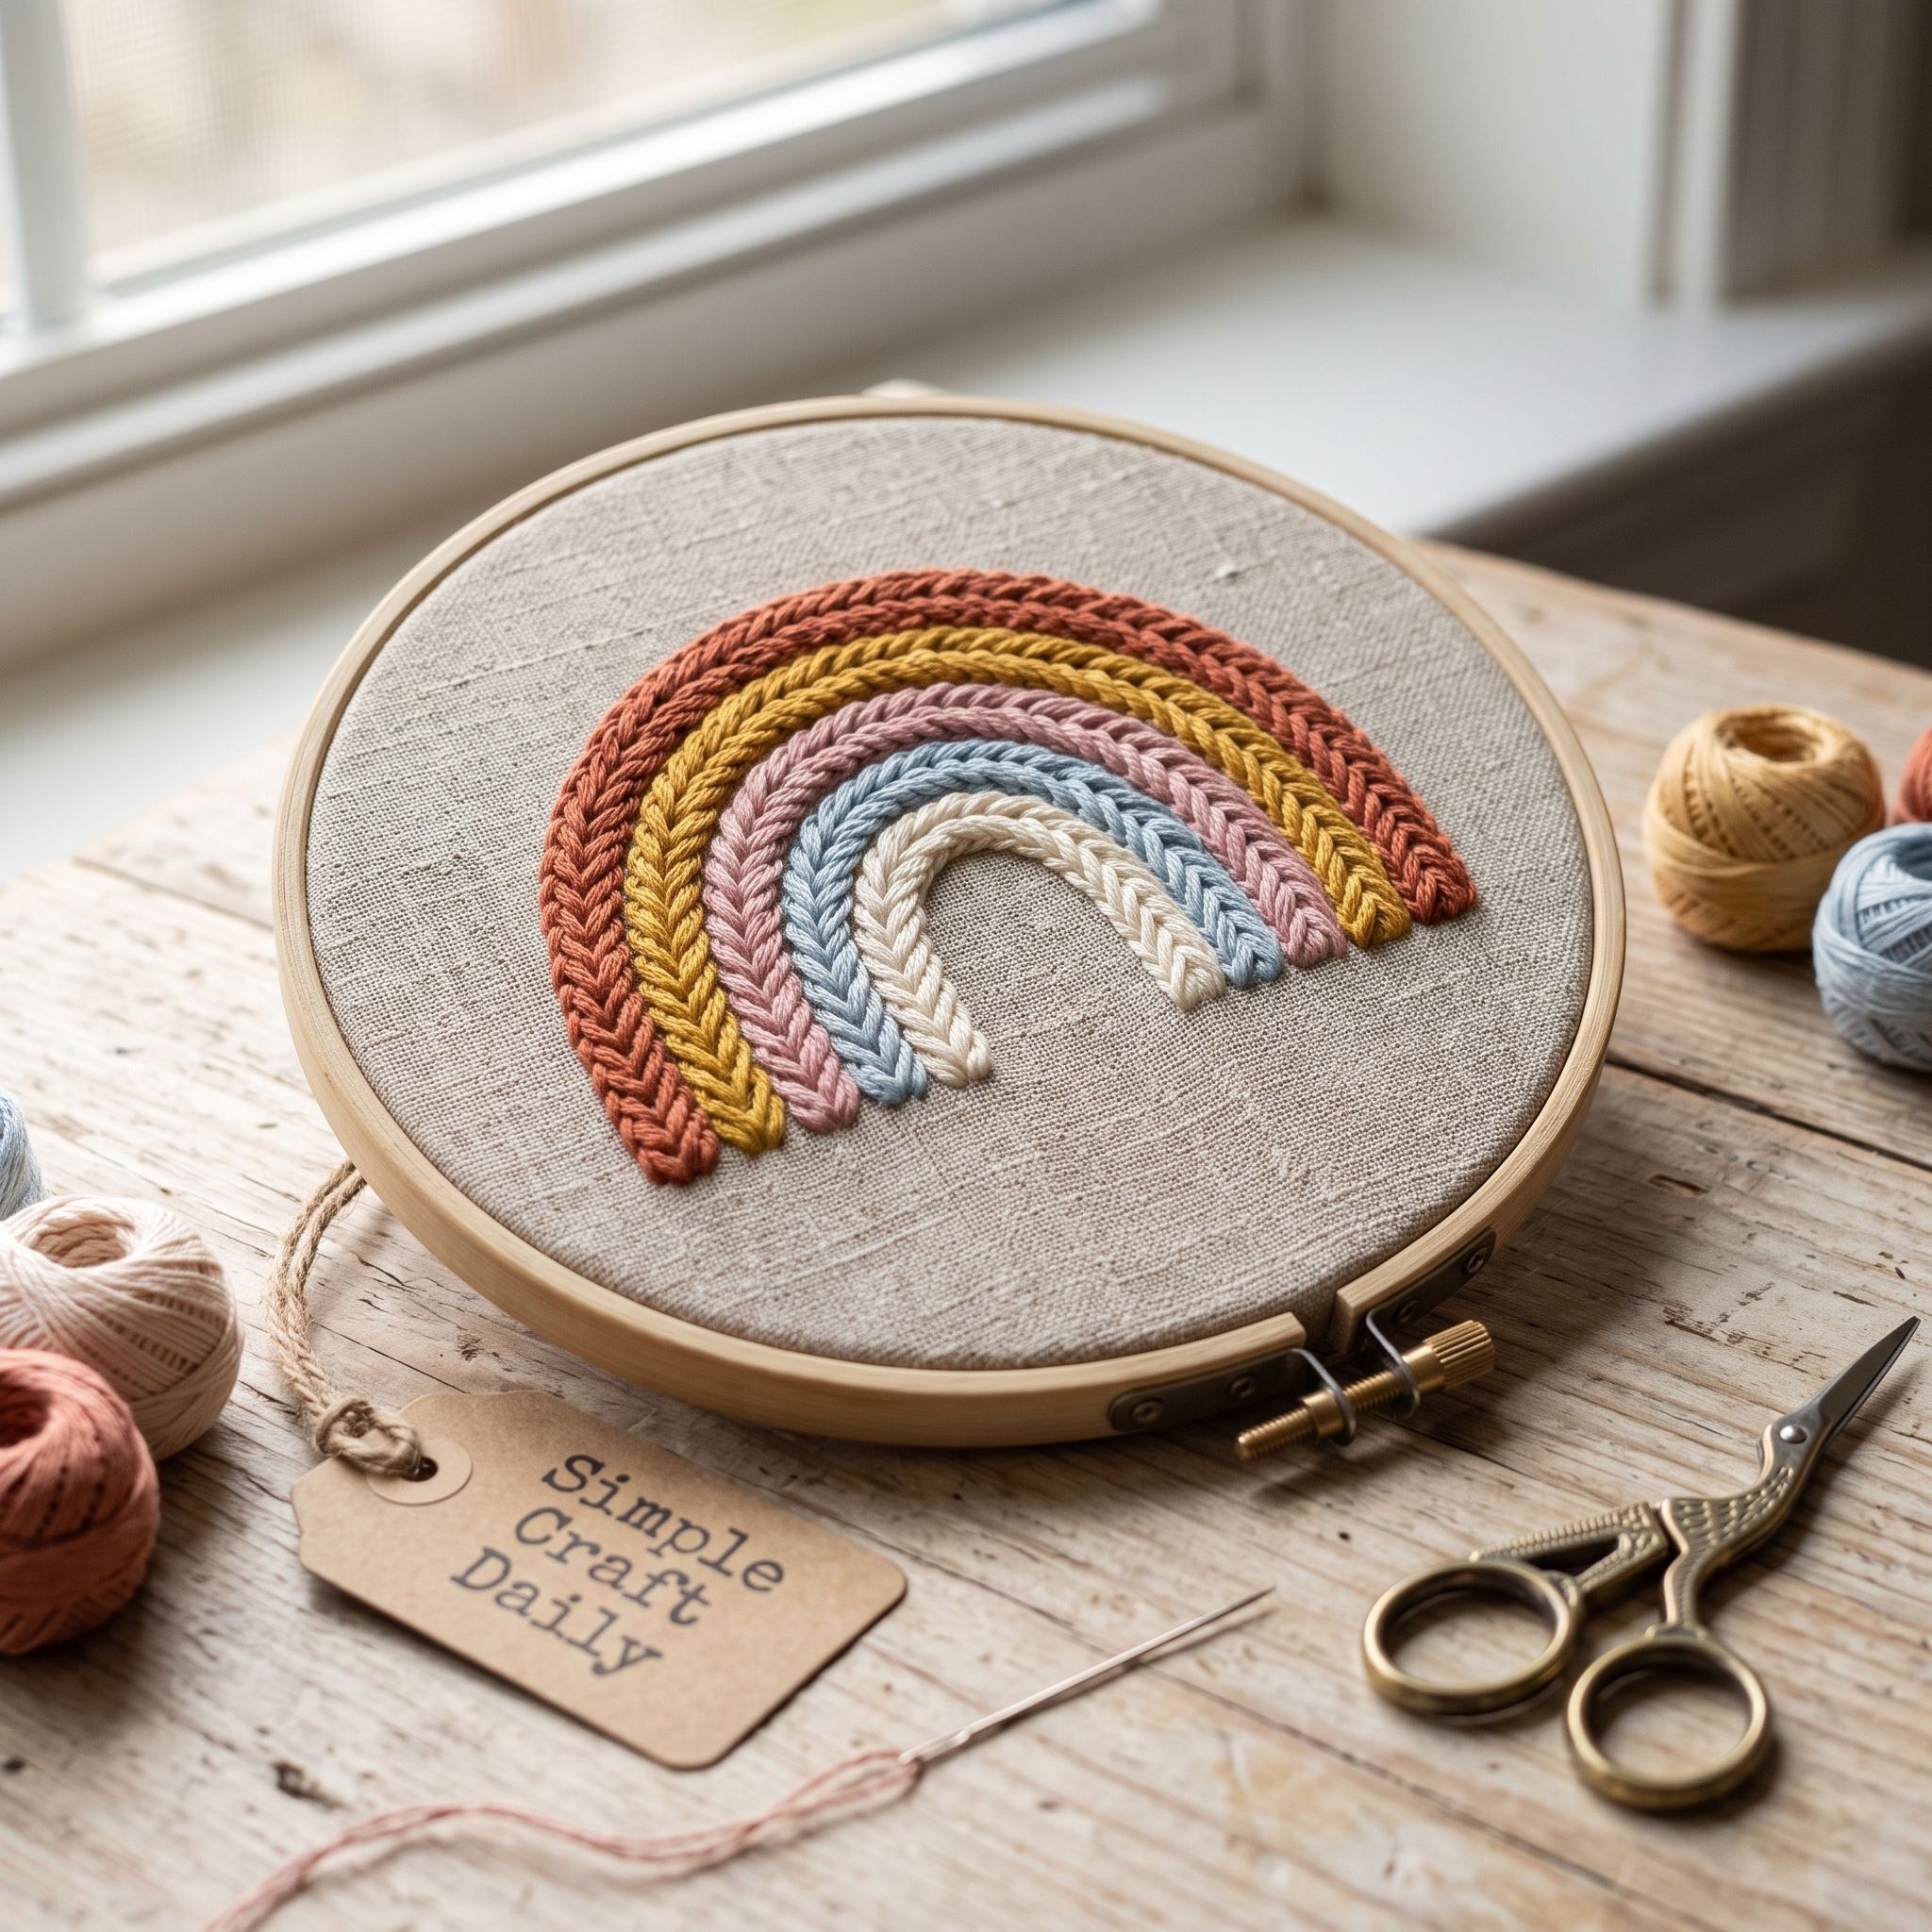
12. DIY Embroidered Hoop Art Textured Rainbow
Supplies Needed: 8-inch bamboo embroidery hoop, 10 x 10 inch linen-cotton fabric square, terracotta, mustard, dusty rose, pale blue, and cream cotton embroidery floss, size 7 embroidery needle, water-soluble stick-and-stitch stabilizer sheet, fine point embroidery scissors, cream wool blend felt, clear flexible fabric adhesive.
Draw five nested arches with a 1/8-inch gap between each line on a water-soluble stick-and-stitch stabilizer sheet. Press it onto the 10 x 10 inch linen-cotton fabric square and tighten it in the 8-inch bamboo embroidery hoop. Start with the outer arch in three strands of terracotta floss using chain stitch.
Work inward with mustard split stitch, dusty rose chain stitch, pale blue split stitch, and cream chain stitch. Keep the strand count at three strands for every rainbow band. Add five small French knots beneath the inner arch with cream floss for a subtle cloud-like texture.
Keep each arch gap visible so the colors remain separate after the fabric dries. This DIY Embroidered Hoop Art finish depends on those open linen channels to keep every stitched band distinct. Trim tails with fine point embroidery scissors, dissolve the stabilizer in cool water, and dry flat for 2 hours. Finally, re-tighten the hoop, gather the back fabric, attach cream wool blend felt with clear flexible fabric adhesive, and allow the adhesive to cure for 24 hours.
DIY Embroidered Hoop Art FAQs
Finished DIY embroidered hoop art looks best when the fabric, transfer removal, and adhesive curing are treated as separate stages. Let each washed hoop dry completely before re-tensioning the fabric or attaching the backing, because damp fabric can loosen as it finishes drying.
How do I keep DIY Embroidered Hoop Art fabric tight?
Tighten the hoop screw first, then pull the fabric gently at the north, south, east, and west edges. Repeat between those points until the surface feels firm. Use a clean cloth between your fingers and finished stitches so oils and friction do not roughen the floss.
Do not pull so hard that the weave distorts or the stitches begin to pucker. Before gathering the back, re-tighten the screw and smooth the fabric again. If the hoop loosens after washing, wait until the fabric is completely dry, then repeat the alternating pulls.
Which DIY Embroidered Hoop Art stitches suit modern patterns?
Back stitch makes clean outlines and lettering, while split stitch gives curves a slightly fuller edge. Satin stitch fills leaves, petals, suns, and graphic blocks. Lazy daisy stitch suits petals and foliage, chain stitch makes textured arches, and seed stitch adds light scattered detail.
French knots give flower centers and ground texture a raised finish. Practice each stitch on a linen-cotton off-cut before beginning your DIY Embroidered Hoop Art project. Use one or two strands of cotton embroidery floss for line work, then move to three strands when the pattern needs a denser filled shape.
Can I wash transfer marks from DIY Embroidered Hoop Art?
Yes, if the transfer pen or stabilizer label says it is water-soluble. Test the product on a fabric off-cut first, and confirm that your embroidery floss is colorfast before soaking the completed hoop. Follow the product’s stated removal method rather than guessing at water temperature.
Never iron washable stabilizer residue into the fabric. Rinse until the water runs clear, press excess water out gently without twisting, and dry the fabric flat for at least 2 hours. Then remount and re-tension the dry fabric before gathering the back and attaching felt.
How long should DIY Embroidered Hoop Art adhesive cure?
Allow clear flexible fabric adhesive to cure for 24 hours with the hoop lying flat, unless the manufacturer specifies a longer cure period. During that time, keep the felt backing pressed against the gathered fabric and avoid hanging the hoop.
After 24 hours, check that the felt edge has bonded all the way around before displaying the hoop. If one small edge lifts, add a thin bead of adhesive, press it into place, and allow another 24 hours of cure time.
Quick Reference: DIY Embroidered Hoop Art Supplies
For your convenience, here is a quick summary of all materials and tools used in this DIY Embroidered Hoop Art tutorial:
🧵 Fabric, Hoops & Color Planning
- Bamboo Embroidery Hoops in Mixed Sizes |
[Check Price on Amazon] - Natural Linen-Cotton Embroidery Fabric |
[See Natural Linen-Cotton Embroidery Fabric on Amazon] - Six-Strand Cotton Embroidery Floss |
[View Six-Strand Cotton Embroidery Floss on Amazon] - Water-Soluble Embroidery Transfer Pen |
[Find Water-Soluble Embroidery Transfer Pen on Amazon] - Water-Soluble Stick-and-Stitch Stabilizer Sheets |
[Check Stick-and-Stitch Stabilizer on Amazon]
✂️ Stitching & Finishing Tools
- Embroidery Needles, Sizes 5 to 9 |
[See Price on Amazon] - Embroidery Scissors with Fine Point Blades |
[Check Embroidery Scissors on Amazon] - Wool Blend Felt Backing Sheets |
[View Wool Blend Felt Backing Sheets on Amazon] - Clear Flexible Fabric Adhesive |
[Find Clear Flexible Fabric Adhesive on Amazon] - Modern Hand Embroidery Starter Kit |
[View Modern Hand Embroidery Starter Kit on Amazon]
Important Crafting Safety Notes
Crafting is a rewarding creative activity, but a safe workshop protects you, your family, and your pets. Review these precautions before starting.
• Personal Protective Equipment (PPE) & Safe Handling: Wear protective eyewear when sanding rough bamboo hoop edges or clipping metal findings. Keep needle points and fine embroidery scissors pointed away from your hands, and use a heat-resistant mat if you use a heat tool. Wear nitrile gloves and a particle mask when sanding wood or working with adhesives, resins, or solvent-based finishes.
• Room Ventilation & Fume Safety: Use clear flexible fabric adhesive in a well-ventilated space with open windows, cross-ventilation, or active exhaust. Avoid breathing fumes directly, and allow adhesive-backed hoops to dry and off-gas completely in an airy area away from everyday living spaces.
• Child & Pet Safety (Choking & Swallowing Prevention): Needles, scissors, loose floss cutoffs, hoops, beads, safety eyes, split rings, clasps, jump rings, and small magnets can cause choking, puncture, or intestinal obstruction hazards. Keep all unattached materials out of reach. For projects handled by young children, use securely stitched embroidered details instead of detachable plastic eyes or hardware.
• Sharp Tool Storage & Clean Work Area: Store embroidery needles, scissors, rotary cutters, craft knives, snips, and pliers in secure latching cases or high cabinets immediately after use. Subsequently, inspect and sweep or vacuum the work area and floor for dropped needles, pins, wire clippings, and thread cutoffs.
• Certified, Quality & Non-Toxic Supplies: Choose ACMI AP-certified non-toxic supplies, lead-free and nickel-free hardware, and textile products intended for their stated purpose. Follow all manufacturer directions for drying times, cure times, temperatures, and disposal. Never reuse food utensils or kitchen cookware for craft adhesive or other chemical materials.
For detailed guidance on safe crafting practices, liability disclosures, and website usage, please review our Terms and Conditions.
“Which DIY Embroidered Hoop Art design will you stitch first? Drop a comment below with your favorite palette or finishing tip—I’d love to see what you make.”


