

Are you looking for chic room accents that keep your pet happy? First of all, creating handmade crochet cat toys is a beautiful choice. It softens your interior design instantly. However, many traditional pet accessories look cluttered or neon. Therefore, we curated these ten sophisticated animal toy concepts. Because we focus on matte cotton yarns and soft neutral tones, these designs feel very fresh. Plus, selecting your own seasonal color palettes is highly satisfying. As a result, your living room floors will look curated instead of messy. For instance, you can easily layer these soft textile shapes with our How to Style Beautiful Crochet Flowers: 10 Modern Ideas for a cozy, cohesive pet-friendly setup. Let’s explore these concepts!
This blog post contains affiliate links. As an Amazon Associate, I earn from qualifying purchases. The content on some of these projects may be enhanced with structural craft inspirations.
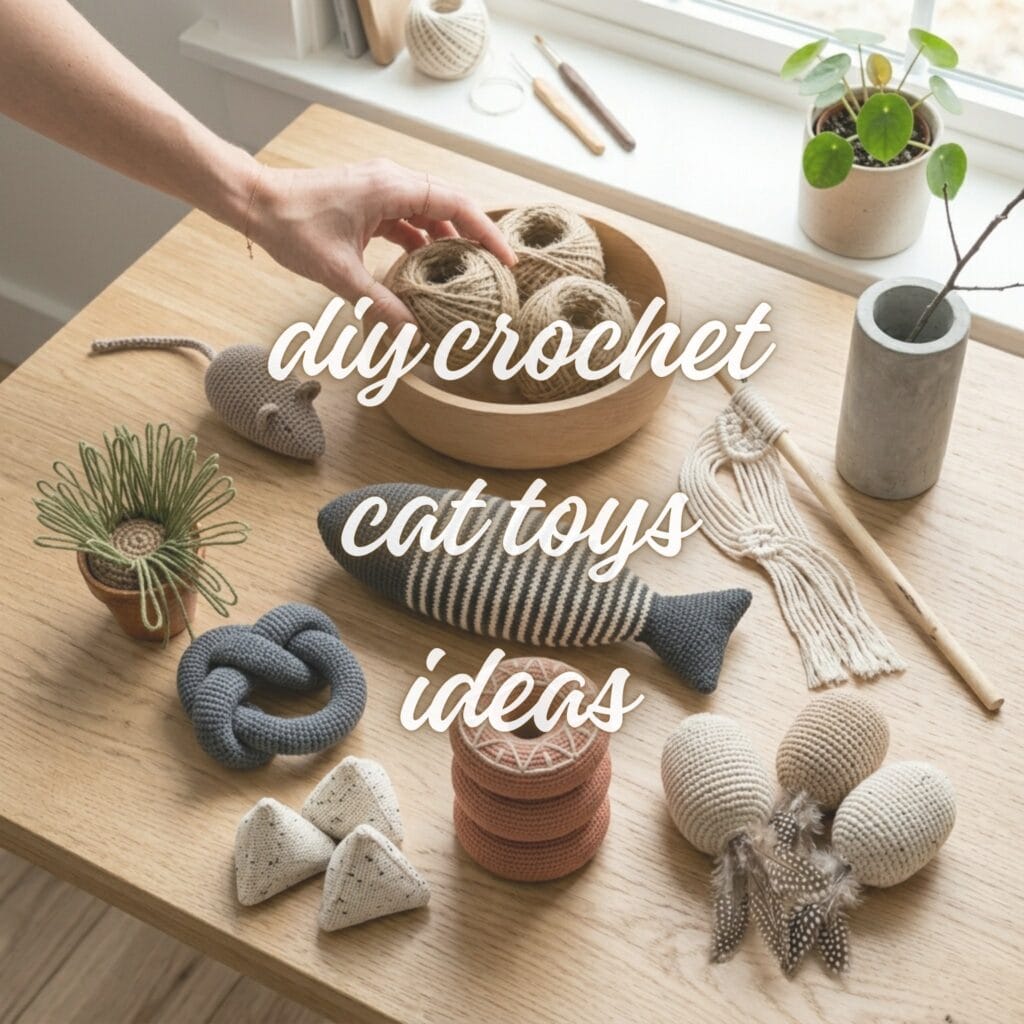
Essential Supplies for Elegant Crochet Cat Toys
You need a few foundational materials. This helps create high-end crochet cat toys projects. Fortunately, quality craft supplies are accessible. So, gather these staples to prepare your studio space. Consequently, your creating process will feel effortless.
A few foundational tools and supplies appear in several projects across this guide, so each one is listed only once below. The 3.0 mm hook is sized for the yarns shown; when you switch to thicker cord or jute twine, move up one hook size so your stitches stay firm and closed.
Buying note for the materials below: read each ball band for its fiber, weight, and yardage before you buy, plan on one ball per color for a small toy with a little left over, and stuff the toys lightly so the stitches stay closed around the filling. Pick jute twine and clothesline cord thick enough to hold a firm knot, cut the dowel rod and birch wand stick to a handle that fits your grip, and follow the stitch counts in the full mouse pattern below.
🧶 Yarns & Cords
A range of muted, matte-toned yarns and cords covers every shape in this guide, from the classic field mouse to the spiraled snake wand.
- Taupe & Sand Cotton Yarn — the muted base tone for the classic field mouse | [Check Price on Amazon]
- Charcoal & Cream Yarn — a crisp monochrome pairing for striped and dotted designs | [View Price on Amazon]
- Terracotta Pink Yarn — an earthy accent for the geometric donut rings | [Check Price on Amazon]
- Olive Green & Brown Yarn — mimics soil and blades for the cat grass pot | [See Price on Amazon]
- Oatmeal Wool Yarn — a soft, undyed tone that pairs naturally with feathers | [Check Price on Amazon]
- Slate Gray Yarn — a cozy, cabin-toned yarn for the cable-knot ring | [View Price on Amazon]
- Speckled Cream Yarn (Black Fleck) — adds a modern flecked texture to flat shapes | [Check Price on Amazon]
- Jute Twine — a rustic, textured cord for rough-hewn crinkle balls | [See Price on Amazon]
- Cotton Clothesline Cord — a sturdy core for wands and fringe designs | [Check Price on Amazon]
🐾 Pet-Safe Fillings
Organic catnip and clean fiberfill give every toy its satisfying texture and scent, while a few specialty inserts add crinkle and bounce.
- Organic Dried Catnip Flakes — the classic scent that gets toys played with | [Check Price on Amazon]
- Unbleached Cotton Fiberfill — a clean, natural stuffing for firm shapes | [View Price on Amazon]
- Wool Roving — adds extra loft and softness alongside catnip | [Check Price on Amazon]
- Pet-Safe Crinkle Foil — labeled for pet toys and fully enclosed by the crocheted shell | [See Price on Amazon]
- Silicone Core Tube (1 inch+ diameter) — gives ring toys structure and springiness | [Check Price on Amazon]
🪡 Tools
A comfortable steel hook and a blunt needle keep every stitch and knot tight and secure.
- 3.0mm Steel Crochet Hook — a comfortable size for tight, dense stitches | [Check Price on Amazon]
- Blunt-Tipped Darning Needle — for seams, embellishments, and weaving in ends | [View Price on Amazon]
- Sharp Yarn Scissors — sharp enough for yarn, cord, twine, and feathers; every project needs a pair | [Check Price on Amazon]
🎨 Finishing & Extras
A handful of specialty pieces — a wooden dowel, a birch wand stick, craft feathers, pet-safe glue, and a small lightweight pot — bring the more sculptural designs to life.
- Small Wooden Dowel Rod — the handle base for the feather dangler wand | [Check Price on Amazon]
- Raw Birch Wand Stick — an unpainted, natural handle for the snake wand | [See Price on Amazon]
- Cleaned Craft Feathers (Pet-Safe) — sold specifically for pet toys, free of parasites or residue | [Check Price on Amazon]
- Pet-Safe Fabric Glue — bonds feathers and embellishments securely | [View Price on Amazon]
- Small Lightweight Bamboo or Wooden Pot — lightweight, so it will not shatter like ceramic | [Check Price on Amazon]
1. Minimalist Field Mouse: Crochet Cat Toys Masterclass
Supplies Needed: Taupe & Sand Cotton Yarn, Unbleached Cotton Fiberfill, Organic Dried Catnip Flakes, 3.0mm Steel Crochet Hook, Blunt-Tipped Darning Needle, Sharp Yarn Scissors
Do you want to start with a timeless pet essential? This first project is a complete pattern, not a concept sketch: every round is counted below, so you can crochet the mouse from the first stitch to the last. Finished size is about 8 cm (3 in) from nose to rear, and one 50 g ball of the cotton yarn shown is far more than you need.
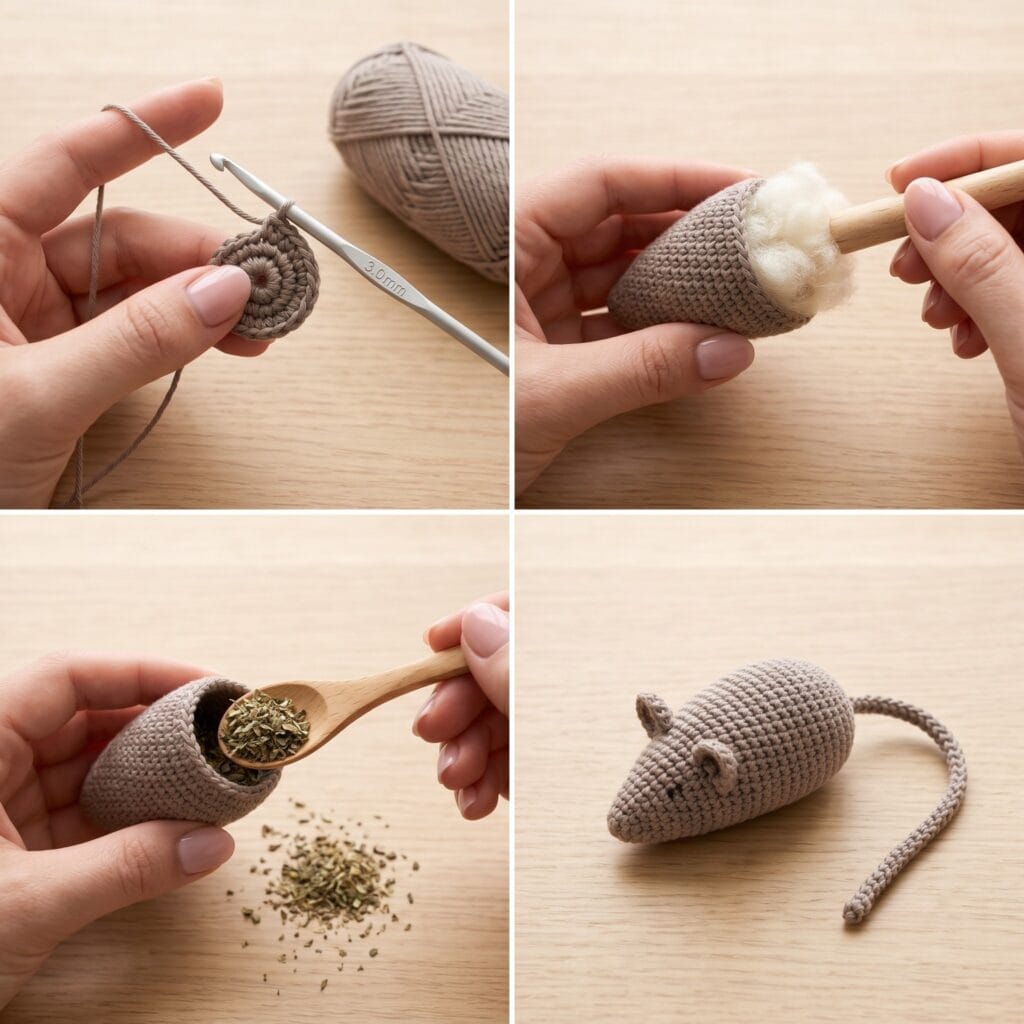
Supplies Needed: Taupe & Sand Cotton Yarn, Unbleached Cotton Fiberfill, Organic Dried Catnip Flakes.
- Cast on. With the taupe cotton yarn and the 3.0 mm hook, make a magic ring and work 6 single crochet into it, then pull the ring tight (6 stitches).
- Shape the head. Round 2: work 2 single crochet in every stitch (12). Round 3: (1 single crochet, 1 increase) repeated 6 times (18). Round 4: single crochet in every stitch (18).
- Build the body. Rounds 5–8: single crochet evenly in every stitch (18 stitches per round) until the body measures about 4 cm (1.5 in) from the cast-on edge. Keep the stitches firm so no gap shows when the toy is stuffed.
- Taper the rear. Round 9: (1 single crochet, 1 decrease) repeated 6 times (12). Round 10: work 1 decrease in every stitch (6), then stop and leave the round open.
- Stuff it. Fill the body firmly with unbleached cotton fiberfill and add a small pinch of organic catnip — a pinch per toy is plenty; see the safety note below. Keep the stuffing clear of the open round so the closure stays clean.
- Close and add the tail. Weave the yarn needle through the final 6 stitches and pull to close, then secure with a knot. Chain 12, slip stitch back along the chain for a firm tail, and sew the tail to the rear center.
- Finish. Crochet two ears (magic ring, 6 single crochet, 2 rounds, flattened) and sew them along the top of the head. Embroider the nose and eyes with dark yarn scraps — no plastic safety eyes. Trim the yarn with sharp scissors, weave in every end, then tug the tail and ears firmly before first play.
Core Techniques for Elegant Crochet Cat Toys
The Masterclass above covers the basics — magic rings, single crochet, tapering, and stuffing. The nine ideas below build on those basics with a few additional techniques. Here’s how each one works.
1. Ribbed Pattern
This creates the raised, textured stripes seen in the Scandinavian Fish Kicker.
Quick Steps: First, crochet one row working into the back loop only of each stitch, rather than both loops. Next, crochet the following row the same way, back loop only. Then, repeat this back-loop-only pattern for every row — the front loops left unworked create the raised ridge effect.
Used in: Scandinavian Ribbed Fish Kicker.
2. Square Knot Fringe (Macramé-Style)
This technique builds the airy, draping fringe on the Feather Dangler wand.
Quick Steps: First, fold a length of cotton rope in half and loop it around your dowel rod. Next, take the two left-hand strands and cross the left one over the right, then under and through, pulling snug. Then, repeat with the right strand crossing over to complete one full square knot. Repeat down the length of each strand to build a fringe row.
Used in: Macramé-Style Cotton Feather Dangler.
3. Joining Ends Into a Ring
This turns a straight crocheted tube into a closed donut or ring shape.
Quick Steps: First, crochet your tube to the required length, keeping your stitch count even throughout. Next, bring both ends of the tube together so they meet without twisting. Then, slip stitch around the join, working through both layers evenly, and weave in the loose ends.
Used in: Terracotta Geo-Puff Catnip Donuts, Chunky Cable-Knot Ring Toss.
4. Double Crochet
A taller, faster stitch than single crochet — good for flat, sturdy bases.
Quick Steps: First, yarn over your hook before inserting it into the next stitch. Next, pull up a loop (three loops now on your hook). Then, yarn over and pull through two loops, then yarn over and pull through the final two loops.
Used in: Minimalist Cotton Cat Grass Pots.
5. Loop Stitch (Grass Texture)
This creates the individual standing loops that mimic blades of grass.
Quick Steps: First, insert your hook into the stitch as usual, then wrap the yarn around one or two fingers to form a loop before pulling it through. Next, secure the loop with a regular single crochet stitch worked right over it. Then, repeat across the row, leaving each loop uncut so it stands upright.
Used in: Minimalist Cotton Cat Grass Pots.
6. Cable-Knot Braiding (Infinity Knot)
This technique turns a simple crocheted tube into a tidy, seamless ring knot.
Quick Steps: First, crochet your tube tightly and densely around your silicone core so no gap shows. Next, form the tube into a large loop, then pass one end back through the center of that loop. Then, pull both ends snug to lock the shape into a clean, seamless infinity knot, and weave in the ends.
Used in: Chunky Cable-Knot Ring Toss.
7. Waistcoat Stitch
A dense, ribbed-looking stitch (also called “knit stitch crochet”) that creates crisp, structured edges.
Quick Steps: First, work a single crochet as usual, but instead of inserting your hook under both top loops of the stitch below, insert it between the two “legs” of the stitch, lower down. Next, complete the single crochet as normal. Then, repeat across the row — this creates the tight, vertical “knit-look” texture.
Used in: Modernist Abstract Speckled Triangles.
8. Blanket Stitch (Seam Finishing)
A simple, visible hand-stitch used to close a seam decoratively rather than invisibly.
Quick Steps: First, thread your darning needle and bring it up through both layers of the seam. Next, loop the thread under the needle’s tip before pulling through, creating a small perpendicular stitch along the edge. Then, repeat evenly along the entire seam to close it with a neat, visible border.
Used in: Modernist Abstract Speckled Triangles.
9. Crochet Over Cord
This technique builds a thick, snake-like body directly around a sturdy core cord.
Quick Steps: First, hold your clothesline cord along the top of your work as you crochet. Next, work each half double crochet stitch over the cord, encasing it completely as you go. Then, continue down the full length of the cord, keeping your tension even so the cord doesn’t show through.
Used in: Spiraled Twine Snake Wand.
9 More Clever Ideas for Crochet Cat Toys
Supplies Needed: Speckled Cream Yarn (Black Fleck), Unbleached Cotton Fiberfill, Organic Dried Catnip Flakes, 3.0mm Steel Crochet Hook, Blunt-Tipped Darning Needle, Sharp Yarn Scissors
These nine designs are quick-start concepts rather than full row-by-row patterns: each one lists its own supplies and the core technique to follow, so use them as inspiration and adapt the size to your yarn. For a complete walkthrough with counted rounds, work the field mouse pattern above. Similarly, if you enjoy mixing soft fibers with functional storage on your vanity dresser, check out our popular How to Make a Beautiful DIY Earring Holder: 10 Epic Ideas.
2. Textured Jute Twine Crinkle Balls
Supplies Needed: Jute Twine, Pet-Safe Crinkle Foil, Organic Dried Catnip Flakes, 3.0mm Steel Crochet Hook, Blunt-Tipped Darning Needle, Sharp Yarn Scissors
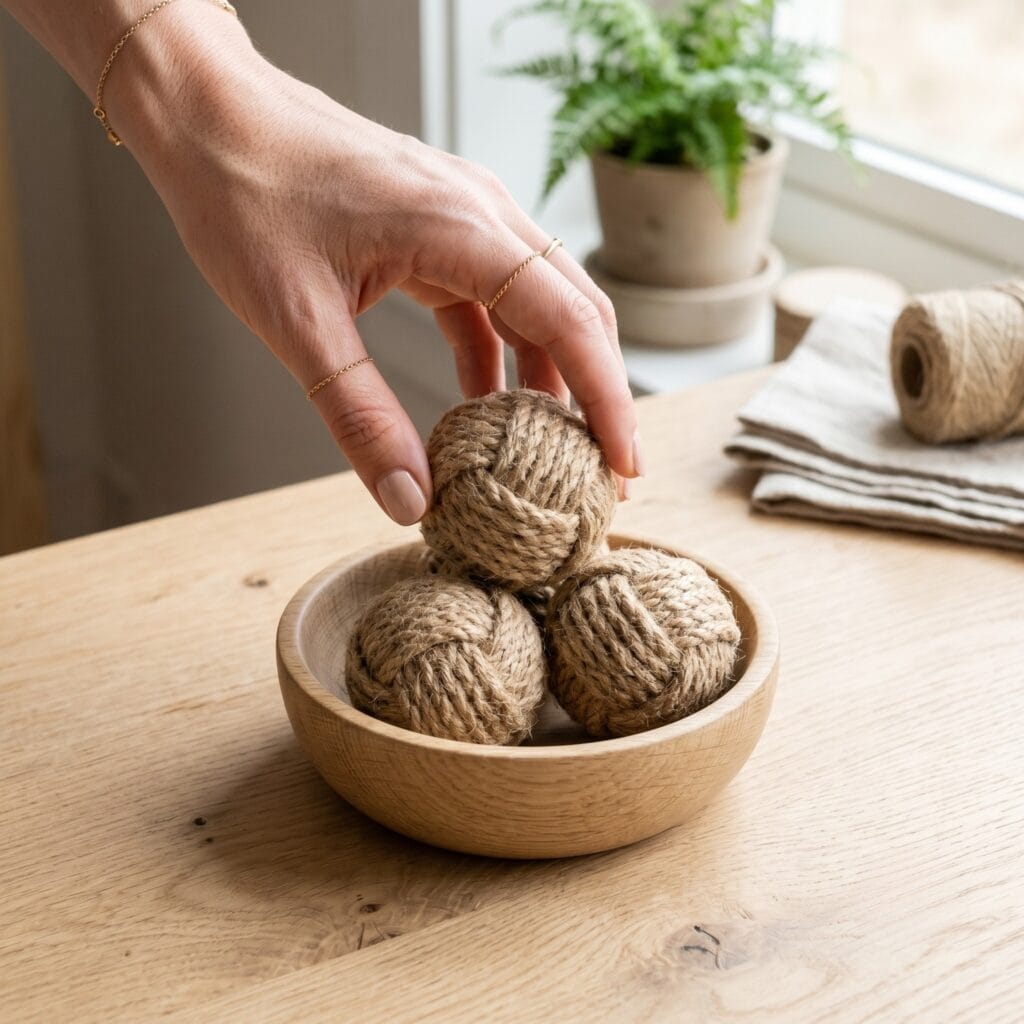
Supplies Needed: Jute Twine, Pet-Safe Crinkle Foil.
Basically, introduce a rustic tactile element to your cat’s play routine. Because dense rows of rough jute twine stitches look elegant, this style works in any modern living room. Quick Steps:
- First, envision a small hollow sphere worked in basic single crochet.
- Next, tuck a small piece of pet-safe crinkle foil (the kind made for cat toys) inside the core.
- Then, close the round tightly with a secure knot. Make sure the knot is tight and the stitches are firm so the foil stays seated inside — inspect the seams before every play session and retire the toy if an opening appears (see our safety note below).
- Styling Tip: Specifically, drop a trio of these tan twine balls into a minimalist wooden bowl on the floor.
3. Scandinavian Ribbed Fish Kicker
Supplies Needed: Charcoal & Cream Yarn, Organic Dried Catnip Flakes, Wool Roving, 3.0mm Steel Crochet Hook, Blunt-Tipped Darning Needle, Sharp Yarn Scissors
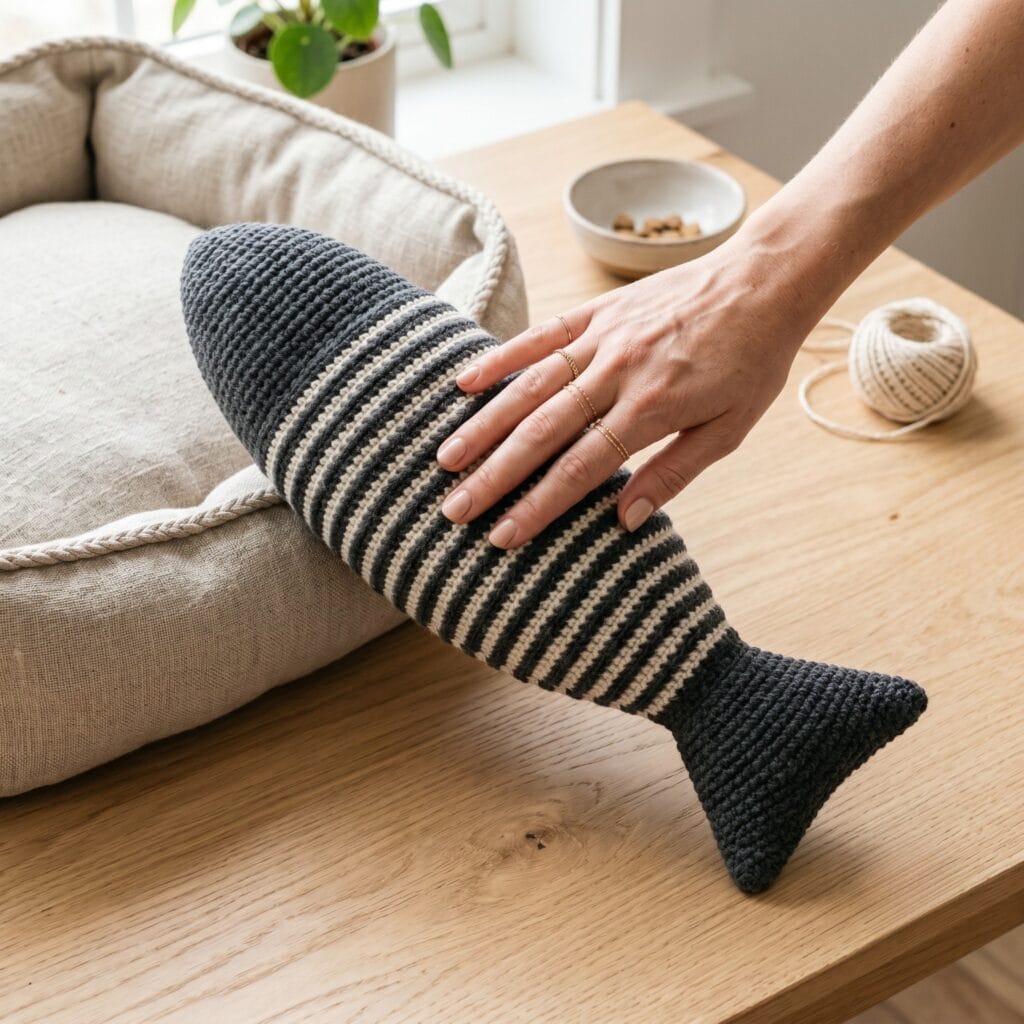
Supplies Needed: Charcoal & Cream Yarn, Organic Dried Catnip Flakes, Wool Roving.
Essentially, satisfy your pet’s hunting instincts with an oversized sleek kicker pillow. Indeed, the clean contrast of minimalist charcoal and cream stripes adds an instant artisan touch. Quick Steps:
- First, visualize a long, wide hollow cylinder stitched using a ribbed pattern (see Technique 1: Ribbed Pattern above).
- Next, taper one end into a simple, sharp triangle to form a graphic tail fin.
- Then, pack it tightly with a blend of dried catnip and premium wool roving.
- Styling Tip: Therefore, lean this modern monochrome fish against a neutral linen cat bed.
4. Macrame-Style Cotton Feather Dangler
Supplies Needed: Oatmeal Wool Yarn, Cotton Clothesline Cord, Small Wooden Dowel Rod, Cleaned Craft Feathers (Pet-Safe), Pet-Safe Fabric Glue, 3.0mm Steel Crochet Hook, Blunt-Tipped Darning Needle, Sharp Yarn Scissors
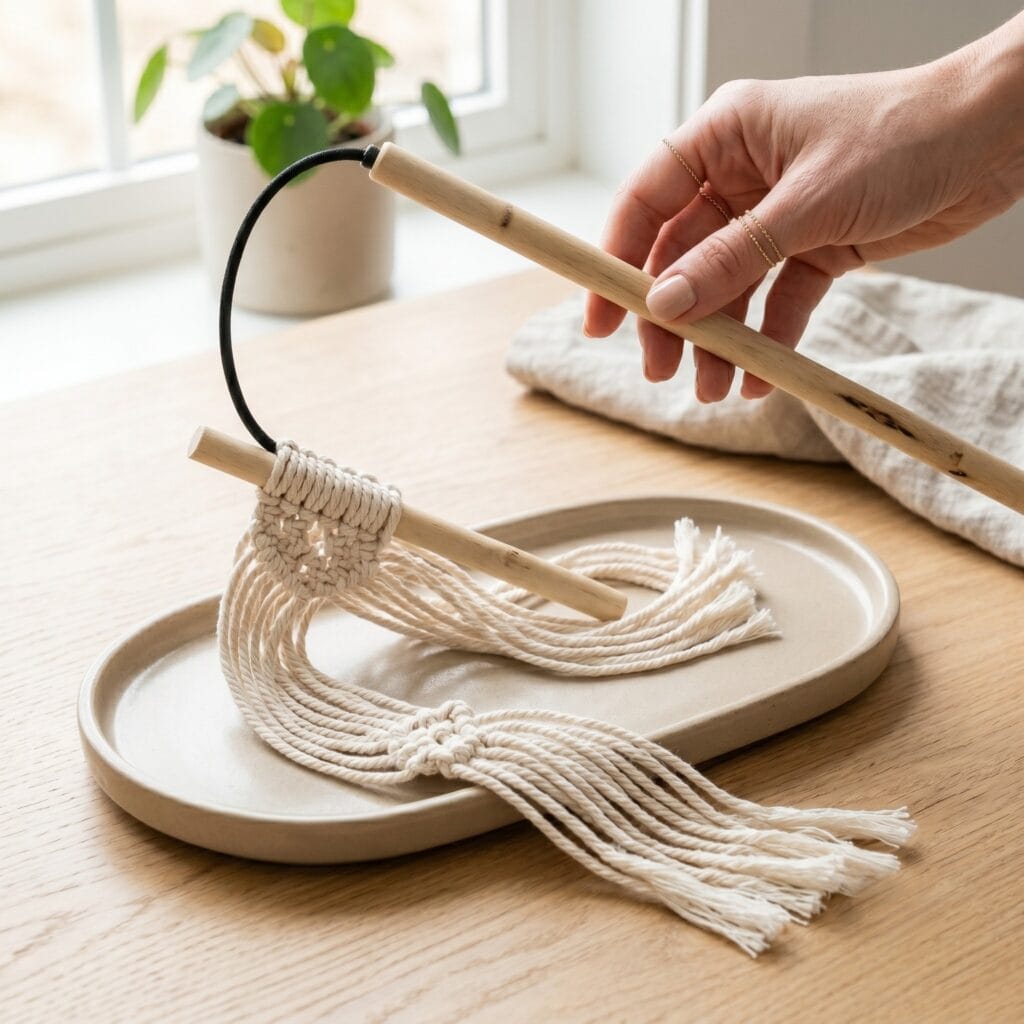
Supplies Needed: Cotton Clothesline Cord, Small Wooden Dowel Rod.
Chiefly, build an interactive wand attachment that matches your bohemian wall hangings. Moreover, repeating open-loop fringe stitches creates a beautiful, airy drape. Quick Steps:
- First, picture a short, sturdy wooden dowel rod smoothed on both ends.
- Next, loop long, unraveled cream cotton clothesline cord downward using square knots (see Technique 2: Square Knot Fringe above).
- Then, comb out the bottom yarn fibers to create soft, feathery leaf shapes.
- Styling Tip: Ultimately, rest this stylish wand across a modern ceramic tray when it is not in use.
5. Terracotta Geo-Puff Catnip Donuts: Crochet Cat Toys Design
Supplies Needed: Terracotta Pink Yarn, Organic Dried Catnip Flakes, 3.0mm Steel Crochet Hook, Blunt-Tipped Darning Needle, Sharp Yarn Scissors
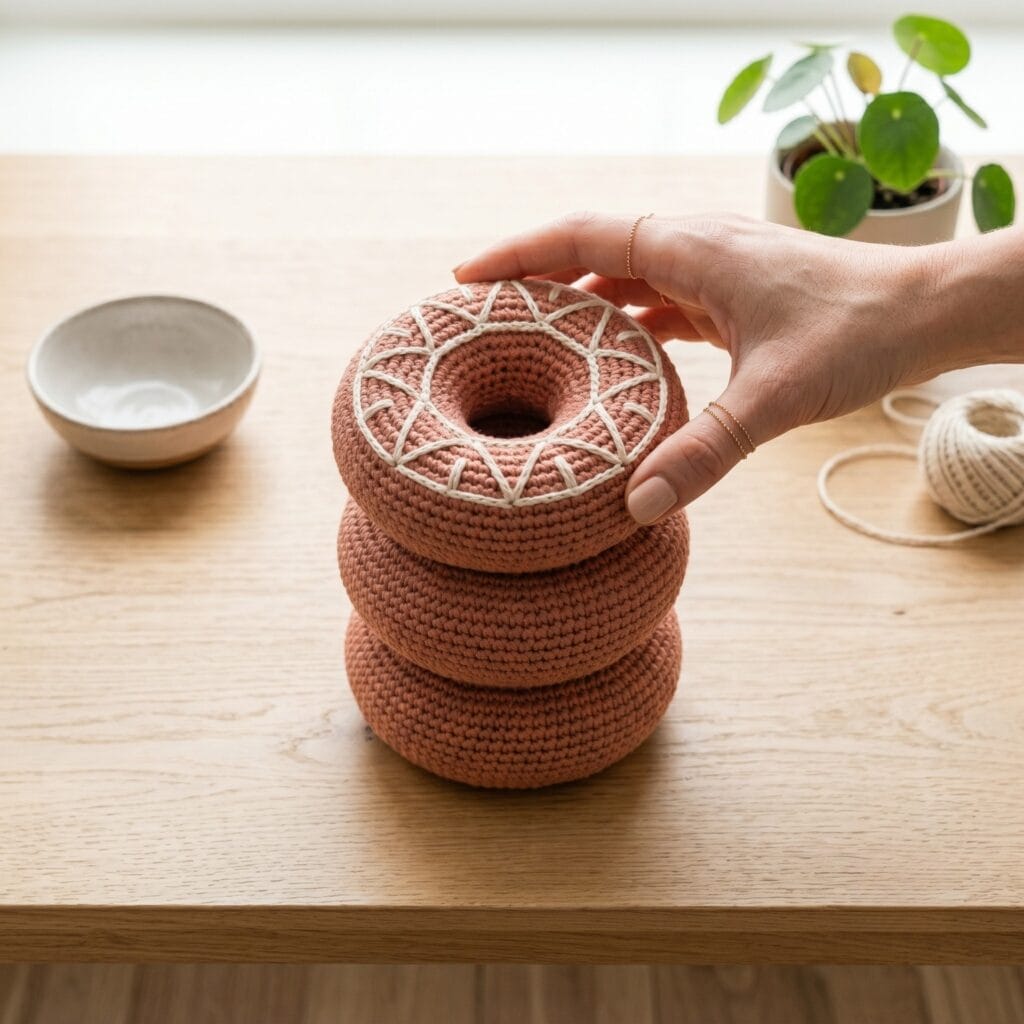
Supplies Needed: Terracotta Pink Yarn, Charcoal & Cream Yarn, Organic Dried Catnip Flakes.
Basically, construct a playful yet architectural geometric shape. Furthermore, working with warm terracotta pink yarn brings an earthy grounding effect to pet accessories. Quick Steps:
- First, follow a simple tube pattern. Join the ends together to form a perfect hollow donut ring (see Technique 3: Joining Ends Into a Ring above).
- Next, use a fine needle to add a few structural cream stitches along the top face.
- Then, pack the internal ring tightly with fresh catnip herb leaves.
- Styling Tip: Rotate two or three finished rings into your cat’s toy basket so the set stays interesting.
6. Minimalist Cotton Cat Grass Pots
Supplies Needed: Olive Green & Brown Yarn, Small Lightweight Bamboo or Wooden Pot, 3.0mm Steel Crochet Hook, Blunt-Tipped Darning Needle, Sharp Yarn Scissors
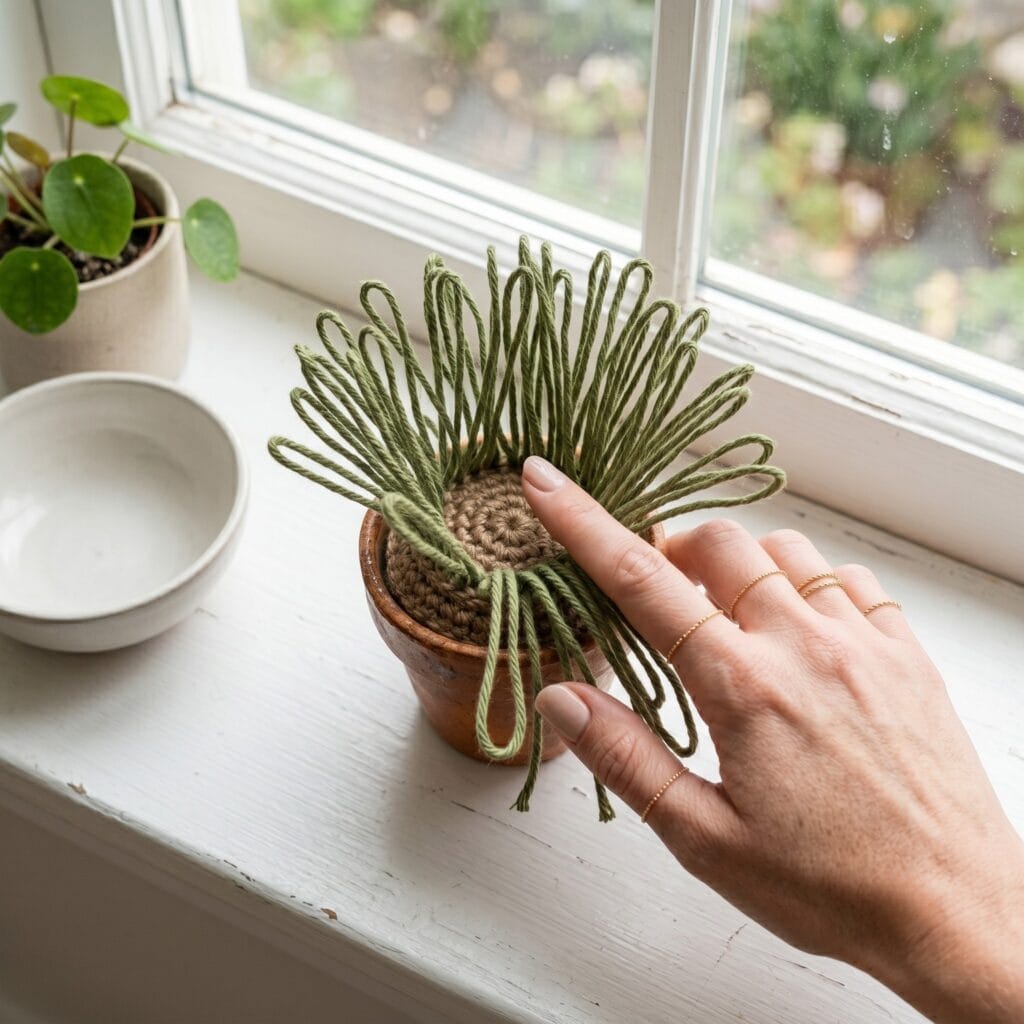
Supplies Needed: Olive Green & Brown Yarn, Small Lightweight Bamboo or Wooden Pot.
In short, enjoy a whimsical botanical look that your cat can actually play with safely. Because straight vertical rows of olive green yarn look highly structural, this design feels high-end. Quick Steps:
- First, crochet a tiny, dense brown soil disk using double crochet (see Technique 4: Double Crochet above).
- Next, attach dozens of individual long green loop stitches across the top surface (see Technique 5: Loop Stitch above).
- Then, nestle the soft finished textile root base into a small lightweight bamboo or wooden pot (lightweight, so it will not shatter — supervise play and remove the pot if it chips).
- Styling Tip: For example, display this faux yarn grass pot on a sunny low windowsill.
7. Soft Oatmeal Crinkle Feather Toys
Supplies Needed: Oatmeal Wool Yarn, Pet-Safe Crinkle Foil, Cleaned Craft Feathers (Pet-Safe), Organic Dried Catnip Flakes, Pet-Safe Fabric Glue, 3.0mm Steel Crochet Hook, Blunt-Tipped Darning Needle, Sharp Yarn Scissors
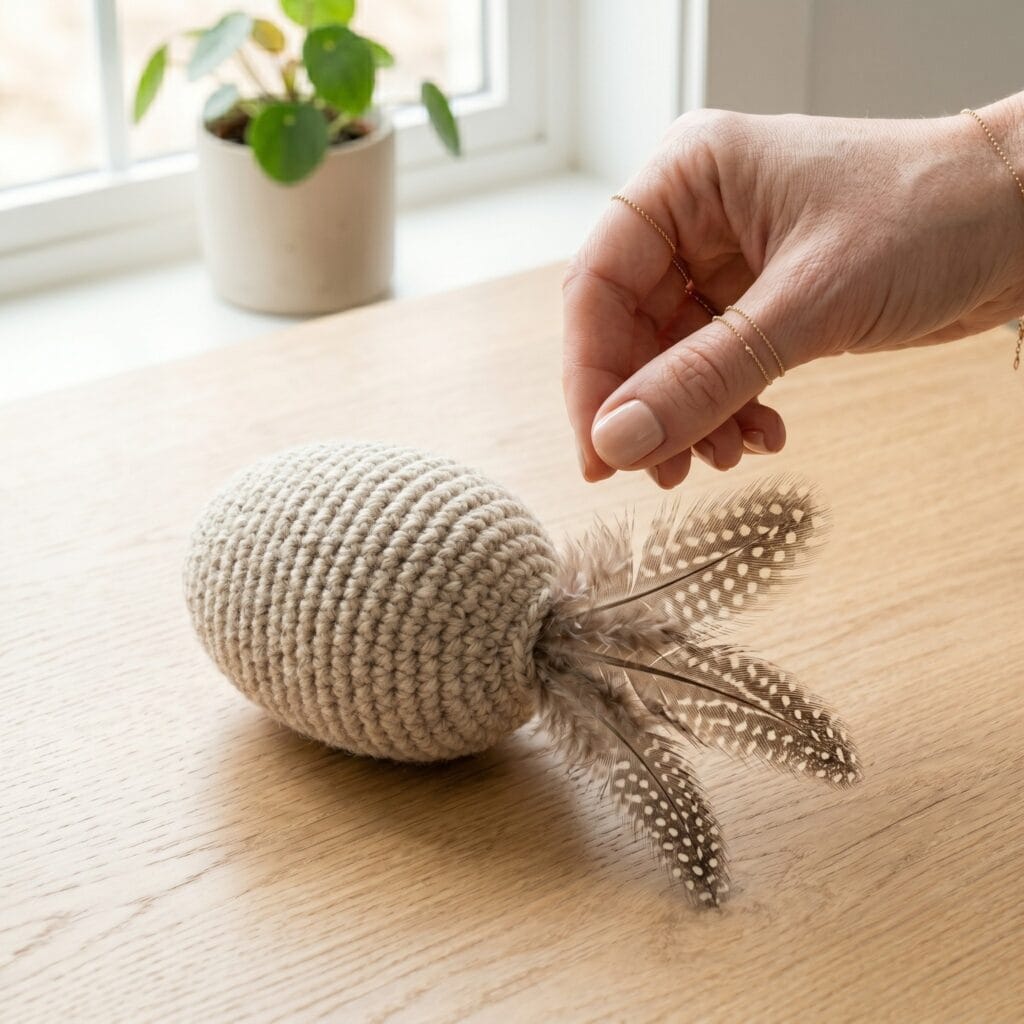
Supplies Needed: Oatmeal Wool Yarn, Pet-Safe Crinkle Foil, Cleaned Craft Feathers (Pet-Safe), Pet-Safe Fabric Glue.
Undoubtedly, introduce a pop of calming texture into a quiet nursery or reading nook. Plus, combining soft oatmeal wool yarn with natural un-dyed craft feathers looks sophisticated. Quick Steps:
- First, fashion a small oval egg shape using thick organic wool thread.
- Next, leave a tiny opening at the bottom base during the final row decreases.
- Then, slide a small square of pet-safe crinkle foil and a pinch of catnip into the opening, and set three cleaned craft feathers into the same opening with a small dot of pet-safe fabric glue. Let the glue cure fully per the label — at least 24 hours — and tug each feather to confirm it holds, then stitch the opening closed. See our safety note below for feather and glue guidance.
- Styling Tip: Specifically, use this neutral palette to keep your pet’s play zone matching a cream rug.
8. Chunky Cable-Knot Ring Toss
Supplies Needed: Slate Gray Yarn, Silicone Core Tube (1 inch+ diameter), 3.0mm Steel Crochet Hook, Blunt-Tipped Darning Needle, Sharp Yarn Scissors
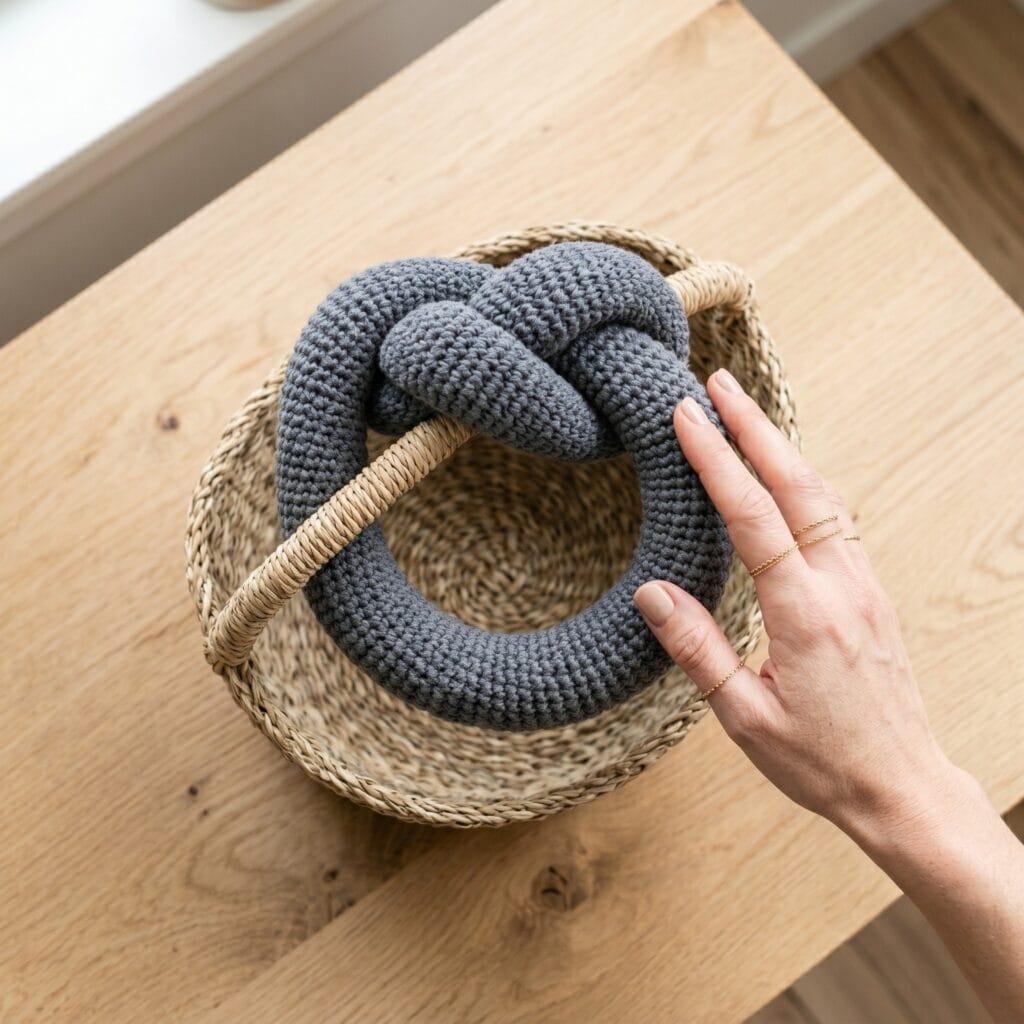
Supplies Needed: Slate Gray Yarn, Silicone Core Tube.
Overall, bring a permanent touch of cozy cabin warmth to your pet’s toy box. Indeed, thick interlaced braided cable rings look incredibly tidy and premium. Quick Steps:
- First, craft a thick, hollow rope tube using a rich slate gray yarn, working your stitches tightly and densely so the core stays fully covered (see Technique 3: Joining Ends Into a Ring above for closing the tube cleanly).
- Next, slide a flexible silicone core tube inside so the ring keeps its springy shape — crochet densely so the cover fits snugly, and retire the toy at once if a stitch loosens or the tube shows through.
- Then, weave the ends into a clean, seamless infinity knot ring (see Technique 6: Cable-Knot Braiding above).
- Styling Tip: Ultimately, loop this structural ring over the handle of a modern seagrass storage basket.
9. Modernist Abstract Speckled Triangles: Crochet Cat Toys Concept
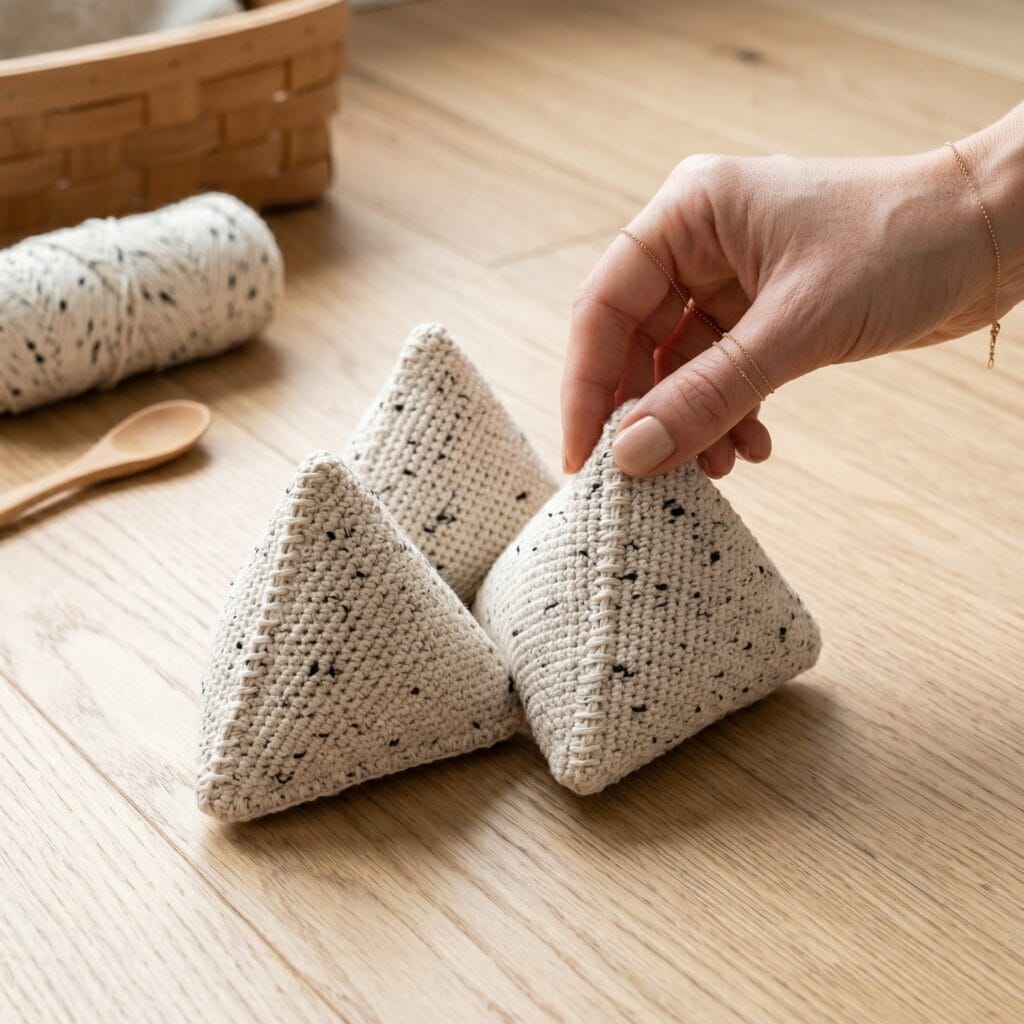
Supplies Needed: Speckled Cream Yarn (Black Fleck), Unbleached Cotton Fiberfill.
Basically, style a graphic, vertical pop element for a sunlit hardwood floor. Because working random black flecks into a cream background looks modern, the texture feels completely authentic. Quick Steps:
- First, stitch a simple flat pyramid pouch using a tight waistcoat stitch (see Technique 7: Waistcoat Stitch above).
- Next, stuff the corners firmly to keep the dramatic geometric edges sharp.
- Then, seal the final seam flat using a decorative visible blanket stitch (see Technique 8: Blanket Stitch above).
- Styling Tip: Therefore, arrange a cluster of these geometric tri-angles near a sleek modern scratching post.
10. Spiraled Twine Snake Wand
Supplies Needed: Jute Twine, Cotton Clothesline Cord, Raw Birch Wand Stick, 3.0mm Steel Crochet Hook, Blunt-Tipped Darning Needle, Sharp Yarn Scissors
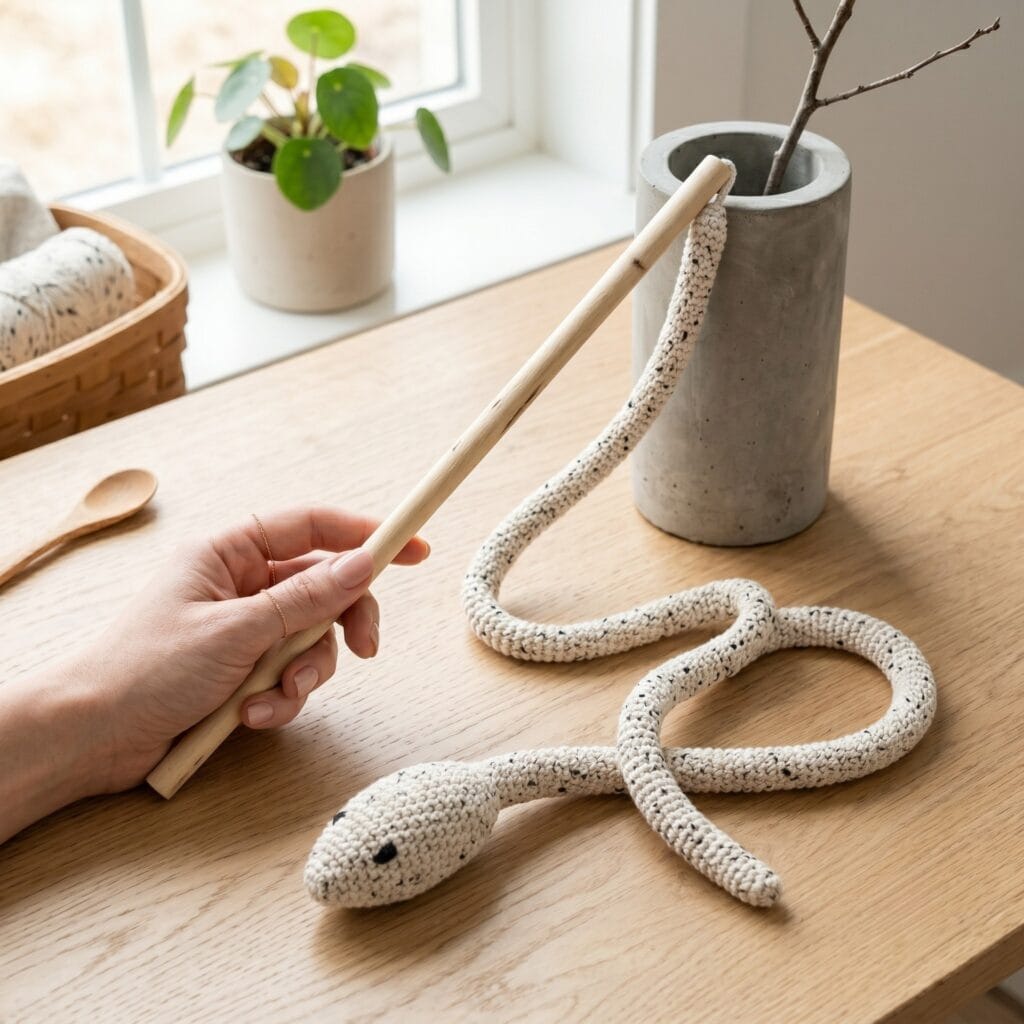
Supplies Needed: Cotton Clothesline Cord, Raw Birch Wand Stick.
Chiefly, design a long, cheerful playful ribbon stem to brighten a quiet corner. Indeed, a thick spiraling cord combination feels incredibly inviting. Quick Steps:
- First, cut a 30 cm (12 in) length of organic cotton clothesline cord for a firm, sturdy core.
- Next, work continuous half double crochets around the cord to build a thick snake body (see Technique 9: Crochet Over Cord above).
- Then, secure the finished head to a raw, unpainted birch wand stick (about 25 cm / 10 in): stitch through the neck into the wand end several times, wrap the join tightly with yarn, knot it, and tug firmly before first play.
- Styling Tip: Store this wand out of reach between play sessions, then bring it out for interactive play.
Enhance Your Floors with Modern Pet Curation
Rotating a few different shapes keeps cats interested: put two or three toys in the daily basket and swap the others out every few days so each design stays fresh. Which design are you making first? Tell us your cat’s favorite in the comments below!
Important Crafting Safety Notes
These toys spend time in your cat’s mouth, so workshop rules about dust and fumes do not apply here — what matters is what a cat can pull apart, chew, or swallow. Review these notes before you start, and re-check them before every play session:
• Supervise first, inspect always: Watch the first play session with any new toy, then check each toy before play — squeeze the seams, tug the tail, ears, feathers, and wand attachments — and retire any toy with loose yarn, exposed stuffing, or a detached part.
• Match the toy to supervision: For unsupervised play choose the fully soft, tightly crocheted designs (Projects 1, 2, 3, 5, 8, and 9). Reserve the feathered, glued, corded-wand, and potted designs (4, 6, 7, and 10) for interactive play you watch.
• Keep inserts enclosed: Work the stitches firmly so fiberfill, catnip, crinkle material, and cord ends stay inside, and use only crinkle material labeled for pet toys (Projects 2 and 7). Retire a toy the moment its covering loosens or an insert becomes reachable.
• Wand and cord safety: Never leave a wand toy (Projects 4 and 10) where a cat can play unsupervised; a pet allowed to chew the dowel, wand, or cord can splinter the wood or swallow fibers. Stop play if the head, feathers, or cord loosens from the wand.
• Glue and feathers: For glued feathers (Project 7), let the pet-safe fabric glue cure fully per the label — at least 24 hours — and tug each feather to confirm it holds before the toy is offered. Discard the toy if a feather works loose.
• Catnip, pots, and small parts: Offer catnip sparingly — a pinch per toy — and stop if your cat sneezes or becomes over-excited. The cat grass pot (Project 6) is supervised decor: a lightweight bamboo or wooden pot can still chip, so remove it if damaged. Keep scissors, snips, and yarn needles in a latching case and sweep the work surface after each session so clipped yarn ends never stay within a pet’s reach.
For more detailed guidance on safe crafting practices, liability disclosures, and website usage, please review our Terms and Conditions.
Crochet Cat Toys FAQ
What yarn and hook should I use?
Smooth cotton yarn with a 3.0 mm hook gives firm, clearly defined stitches — one 50 g ball covers a small toy with a little left over. Read the ball band for fiber, weight, and yardage before you buy.
Are plastic safety eyes okay for cat toys?
No — embroider the nose and eyes with dark yarn scraps instead of plastic safety eyes. Weave in every end, trim the yarn neatly, then tug the tail and ears firmly before first play.
How much catnip should I add?
Just a pinch per toy: add small pinches of organic catnip to the fiberfill as you stuff, and keep the filling light so the stitches stay closed around it.
How do I keep my cat interested in the toys?
Put two or three toys in the daily basket and swap the others out every few days so each design stays fresh.
“Which of these How to Beautiful Crochet Cat Toys: 10 Modern Design Ideas are you excited to try first, or do you have a creative tip of your own to share? Drop a comment below—I’d love to hear your thoughts and see what you create!”


