

If you have ever looked at your keys and wished for a bit more personal style, you are not alone. Finding the perfect accessory in stores can be challenging, as mass-produced options often look identical. Crafting your own polymer clay dangling keychain is an incredibly rewarding way to express your unique aesthetic, allowing you to blend custom colors, modern shapes, and rich textures into a functional everyday accessory.
This blog post contains affiliate links. As an Amazon Associate, I earn from qualifying purchases. The content on some of these projects may be enhanced with structural craft inspirations.
Key Facts:
- Technique: Polymer Clay Dangling Keychain Ideas
- Difficulty: Easy
- Makes: 7 project ideas
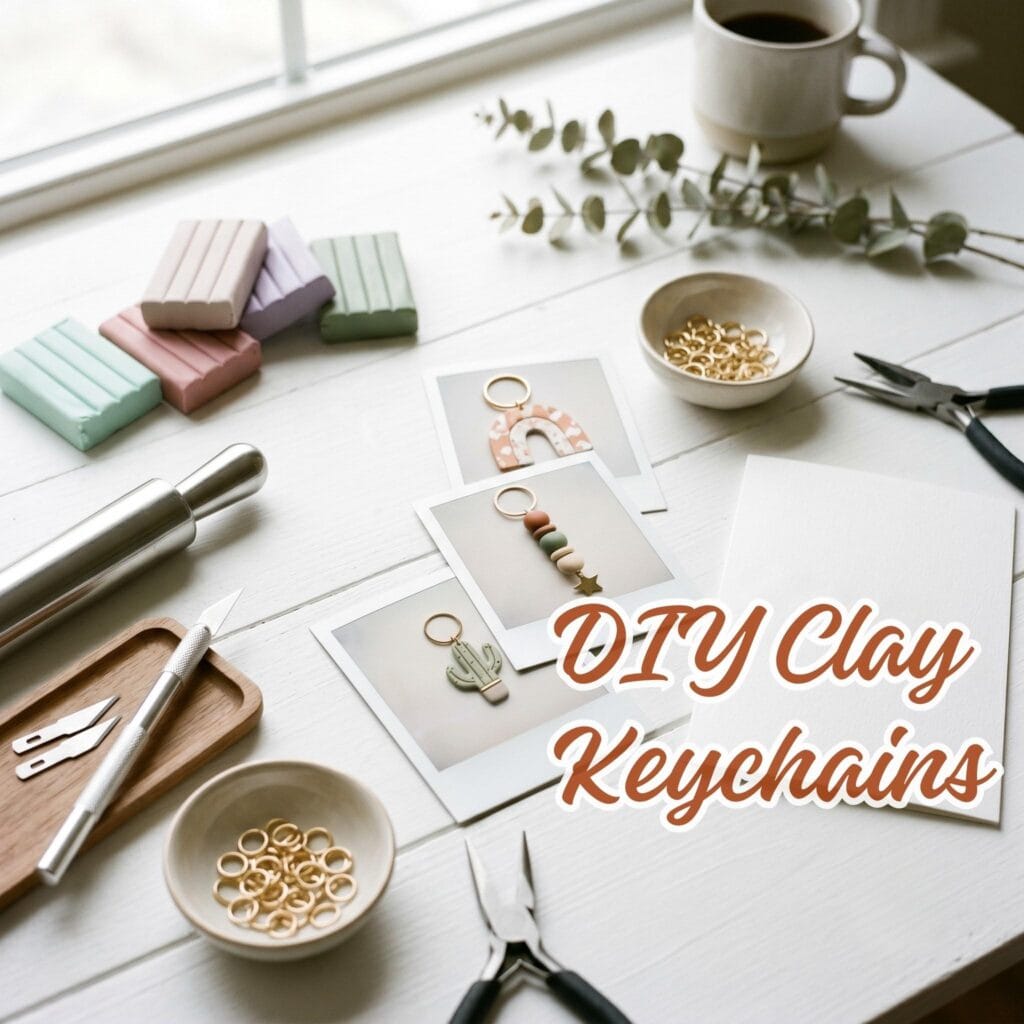
Furthermore, working with oven-bake clay is incredibly therapeutic and satisfying. You do not need any advanced sculpting skills to achieve a premium, boutique-quality look. If you are ready to start rolling and baking your new favorite accessory, simply scroll down to our comprehensive step-by-step guide. We also share expert tips to ensure your keychains turn out perfectly durable. But first, let’s explore some gorgeous design concepts to spark your imagination.
The Secret to Aesthetic Clay Colors
Think about your colors before you start. Soft, muted colors look very high-end. You can easily make custom shades at home. Just mix a tiny pea-sized amount of brown or black clay into bright white clay. This simple blending technique instantly elevates your work from looking like a school project to a high-end designer accessory.
Essential Supplies for Your Polymer Clay Dangling Keychain
| Supply | Spec / Size | Used For |
|---|---|---|
| Premium Oven-Bake Polymer Clay | Assorted colors | Modeling medium for the keychain charms |
| Clay Roller or Conditioning Machine | Flattening and conditioning the clay | |
| Sharp Craft Blade & Cutting Tools | Trimming and detailing raw clay | |
| Metal Jump Rings & Key Rings Bundle | Hardware connecting charm to keyring | |
| Jewelry Pliers Set | Opening jump rings and assembling | |
| Water-Based Matte or Glossy Sealer | Protective finish after baking |
A few foundational tools and assembly components are used throughout multiple projects in this guide, marked with a (used throughout) tag below.
🧶 Core Materials
Polymer clay and sealer form the foundation of every idea below, while resin and metallic paint add special finishing touches to a couple of standout designs.
- Premium Oven-Bake Polymer Clay (Assorted Colors) (used throughout) | [Check Polymer Clay on Amazon]
- Liquid Clear Resin (For Idea #5) | [View Clear Resin on Amazon]
- Metallic Silver Leaf & Gold Acrylic Paint | [Check Metallic Finishes on Amazon]
- Water-Based Matte or Glossy Sealer (used throughout) | [Check Clay Sealer on Amazon]
🌿 Natural Botanicals
Two designs press real dried botanicals directly into the clay — if you don’t have fresh ones on hand, a pre-dried pressed flower pack works just as well.
- Real Leaf Sprig (Natural, Fully Dried) | [Check Pressed Botanicals on Amazon]
- Real Pressed Viola Petal (Natural, Fully Dried) | [Check Pressed Flowers on Amazon]
✂️ Sculpting & Cutting Tools
A sharp blade and roller handle most shaping, while a detail brush and dedicated sculpting tools help with the more delicate, three-dimensional designs.
- Sharp Craft Blade & Cutting Tools (used throughout) | [Check Craft Knives on Amazon]
- Clay Roller or Conditioning Machine | [See Clay Rollers on Amazon]
- Piercing Needles or Toothpicks (used throughout) | [Check Piercing Tools on Amazon]
- Detail Brush (For Idea #4) | [View Detail Brushes on Amazon]
- Small Sculpting Tool Set (For Idea #5) | [Check Sculpting Tools on Amazon]
🔥 Baking & Work Surface Essentials
A smooth ceramic or glass work surface, parchment paper, and a dedicated toaster oven keep your clay clean and evenly baked, while an oven thermometer ensures your temperature is accurate every time.
- Ceramic Tile or Glass Work Sheet (used throughout) | [Check Work Surfaces on Amazon]
- Parchment Paper (used throughout) | [See Parchment Paper on Amazon]
Important Note: Because polymer clay leaves permanent chemical residues and odors when baked, you must designate this toaster oven strictly as a craft-only appliance and never use it for food preparation again.
- Dedicated Toaster Oven for Crafting (used throughout) | [Check Craft Ovens on Amazon]
- Oven Thermometer (used throughout) | [Check Oven Thermometers on Amazon]
🔩 Hardware & Assembly
Jump rings, headpins, and pliers turn your baked clay shapes into finished, wearable keychains.
- Metal Jump Rings & Key Rings Bundle (used throughout) | [Check Keychain Hardware on Amazon]
- Metal Jewelry Headpins (For Idea #1) | [View Jewelry Headpins on Amazon]
- Jewelry Pliers Set (used throughout) | [Check Jewelry Pliers on Amazon]
🧽 Finishing & Cleanup
Rubbing alcohol and cotton swabs are a quick fix for keeping lighter clay colors dust-free before baking.
- Rubbing Alcohol & Cotton Swabs (For Lighter Clay Colors) | [Check Rubbing Alcohol on Amazon]
Step-by-Step Guide: How to Make a Polymer Clay Dangling Keychain
Now you have a fun design idea. It is time to start crafting. Above all, working with a polymer clay dangling keychain requires clean hands and smooth surfaces.
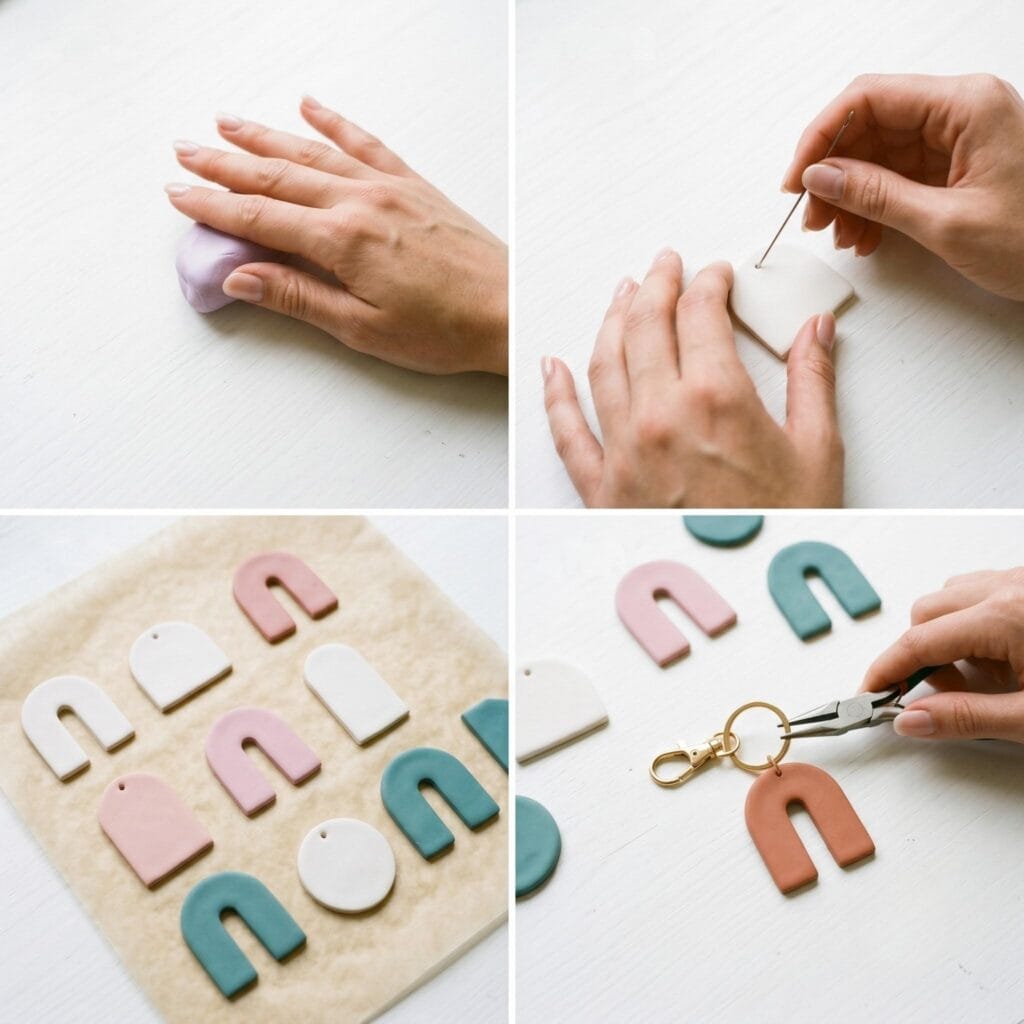
Shaping and Baking Your Keychain
Step 1: Condition the Clay
Warm the clay between your palms first. Cold clay is highly brittle and cracks easily during baking. Therefore, roll and knead the clay thoroughly. Keep going until it is totally soft, pliable, and smooth.
Step 2: Cut and Pierce the Shapes
Roll the conditioned clay flat onto a clean ceramic tile or glass sheet. Next, cut out your desired geometric or organic shapes using a sharp craft blade. Then, use a toothpick or thick needle to pierce a clean hole through the top of each shape before baking.
Step 3: Bake the Clay Shapes
Place your clay pieces onto a parchment-lined baking sheet. Preheat your dedicated craft oven. Always follow your clay package rules exactly. Afterward, let the pieces cool completely inside the oven to prevent cracking.
Assembling for Durability
Step 4: Assemble the Dangling Elements
Gather your metal jump rings and pliers. Immediately open a jump ring using pliers and slide it through the pre-drilled hole of your baked clay charm. Therefore, looping multiple shapes together creates that beautiful, rhythmic dangling effect on your key ring.
Step 5: Seal for Protection
Lastly, apply a thin coat of water-based matte or glossy sealer over your finished pieces. This important step protects the painted details from daily wear. Furthermore, it prevents scratches. Your new aesthetic polymer clay dangling keychain is now completely ready to use!
Core Techniques for Polymer Clay Dangling Keychains
The steps above cover the basics every idea shares. A few designs below call for one additional specialty technique. Here’s how each one works.
1. Terrazzo & Fleck Technique
- Roll thin logs of your accent colors and slice them into tiny, irregular flakes.
- Press these flakes randomly across the surface of your base shape, spacing them unevenly for a natural look.
- Roll gently over the entire surface with your clay roller to embed the flakes flush with the base.
This creates the speckled, natural-stone look seen in the Terrazzo Arch.
Quick Steps: Start by rolling thin logs of your accent colors and slicing them into tiny, irregular flakes. Next, press these flakes randomly across the surface of your base shape, spacing them unevenly for a natural look. Then, roll gently over the entire surface with your clay roller to embed the flakes flush with the base, smoothing any raised edges.
Used in: Speckled Terrazzo Arch.
2. Caning & Checkerboard Patterns
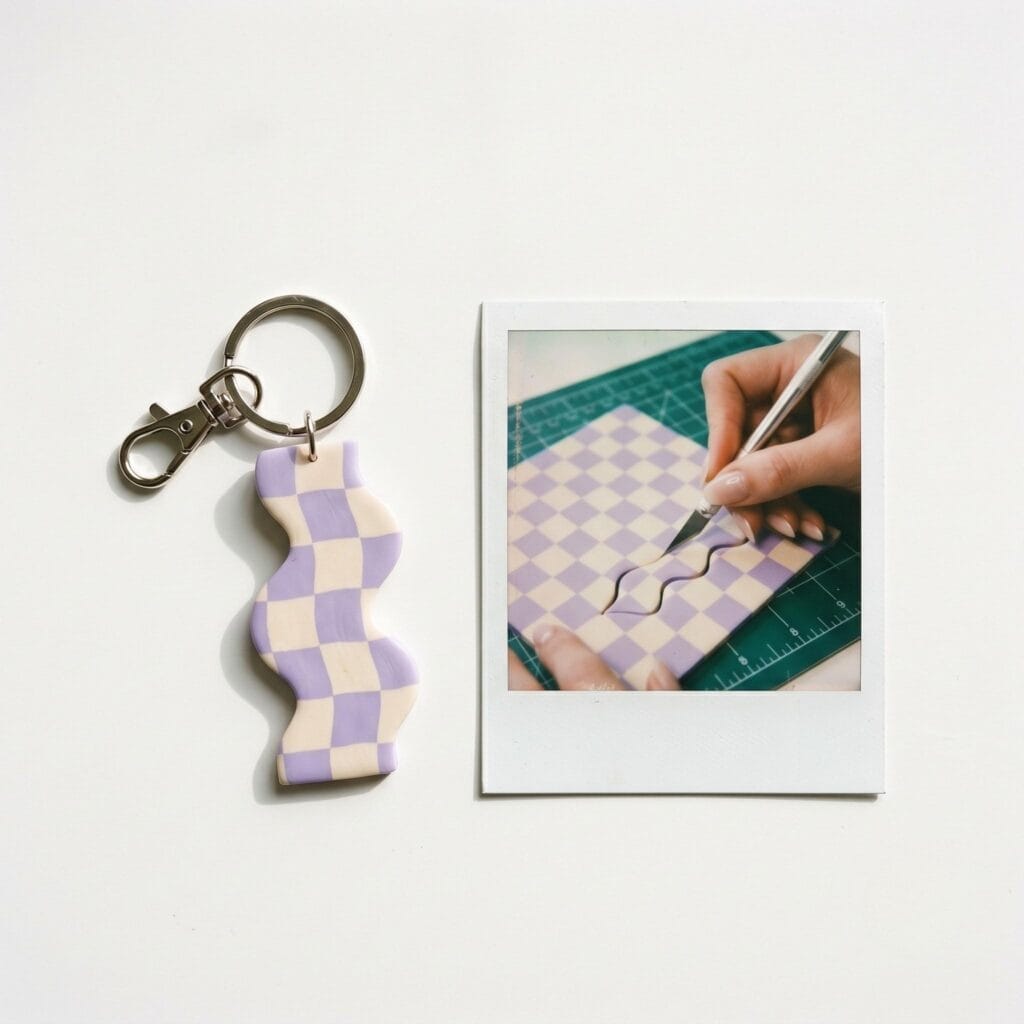
This builds the precise, repeating pattern seen in the Checkerboard Dangle.
Quick Steps: Roll two contrasting clay colors into even, matching square logs (canes) to begin. Next, slice each log into thin, uniform squares. Then, arrange the squares in an alternating pattern, pressing them gently together so the seams disappear, and roll lightly to fuse them into one flat sheet.
Used in: Retro Checkerboard Dangle.
3. Sculpting Hollow Forms & Venting
This technique prevents hollow shapes, like the Matcha Mug, from cracking or warping in the oven.
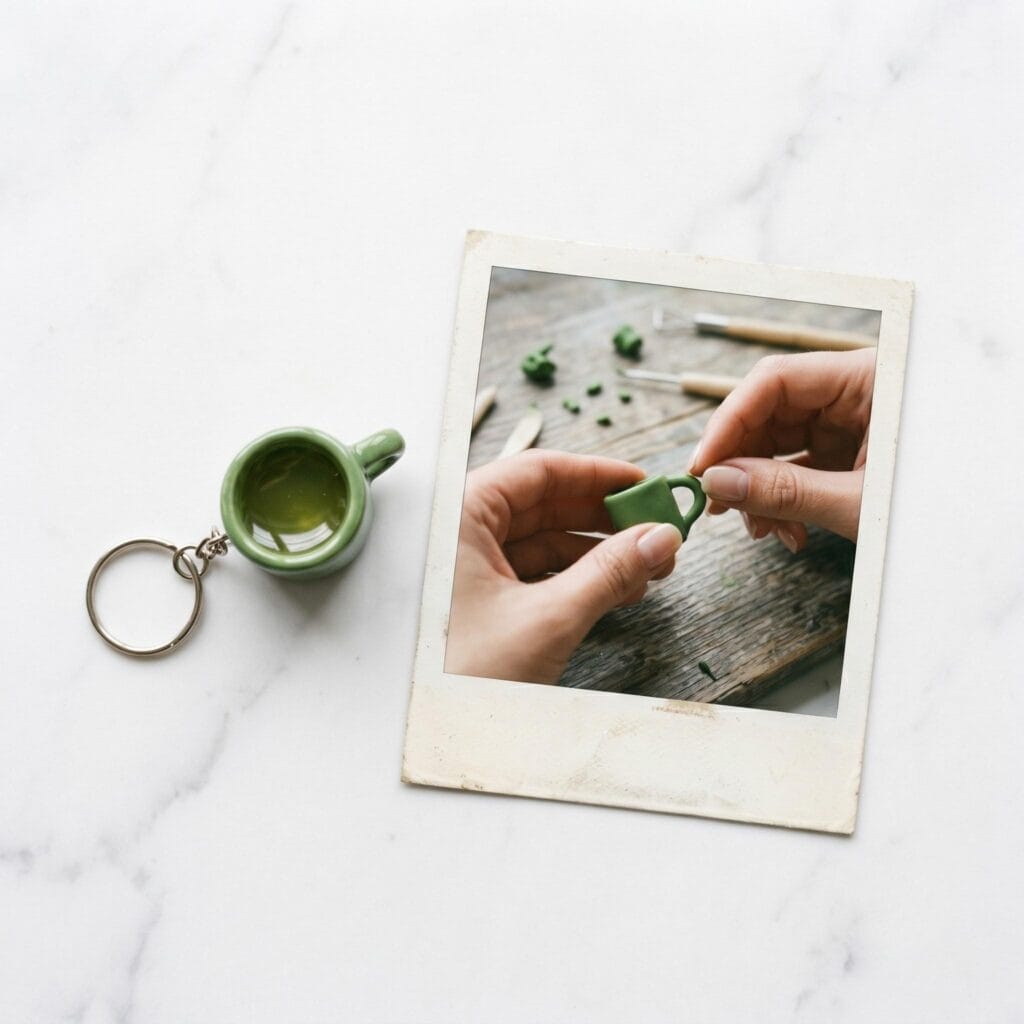
Quick Steps: Begin by building your hollow form over a small, oven-safe support (such as crumpled foil) rather than leaving it fully airtight. Next, use a fine needle to poke one tiny, hidden vent hole in an inconspicuous spot, such as the underside. Then, bake as usual — this small vent lets trapped air and steam escape instead of building up pressure inside the piece.
Used in: Miniature Clay Matcha Mug.
4. Pressing Natural Botanicals
This technique embeds real leaves and petals directly into raw clay for a delicate, heirloom look.
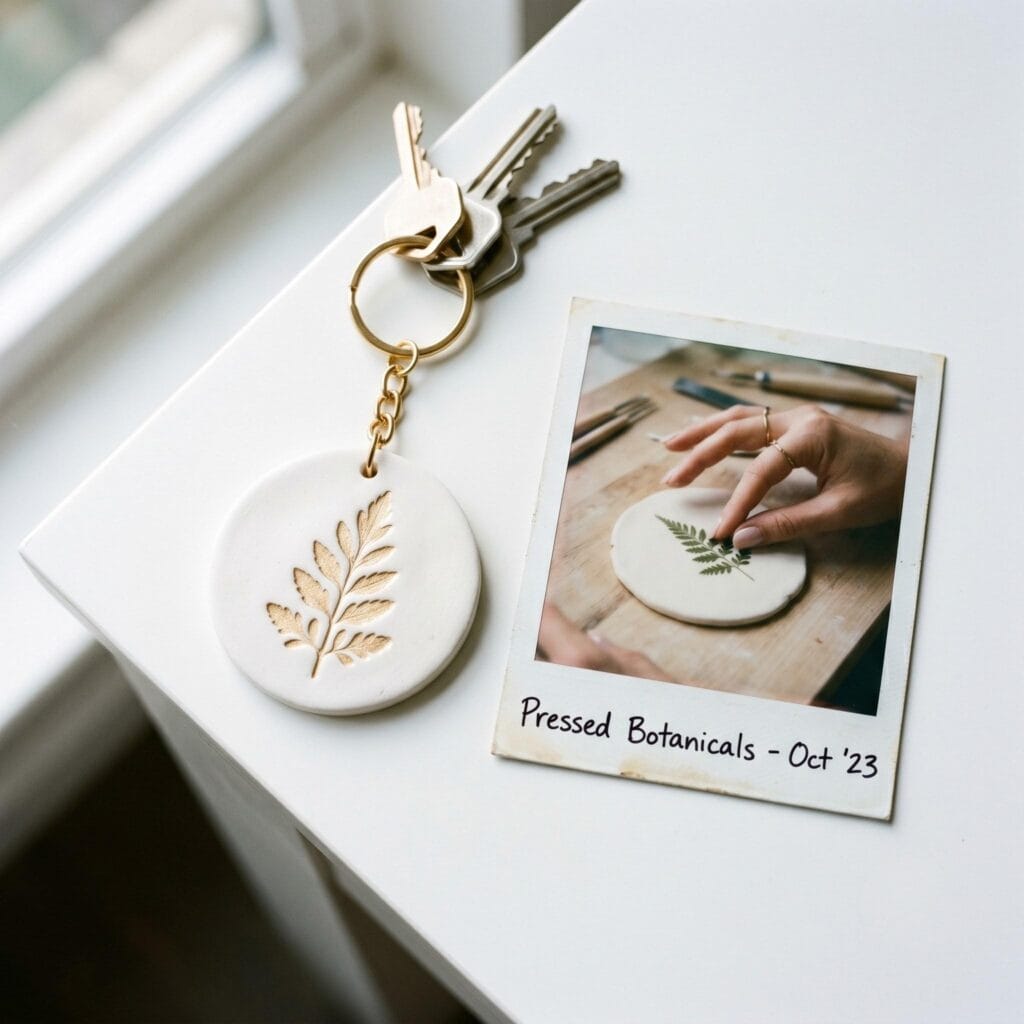
Quick Steps: Make sure your leaf or petal is completely dry and flat before you start — freshly picked or damp botanicals can release moisture and cause bubbling during baking. Next, lay the botanical onto your soft, unbaked clay and roll over it gently with your clay roller to press it in and transfer its texture. Then, either lift the botanical away to leave just the imprint, or bake it directly into the clay if you’d like to keep it in place permanently.
Used in: Pressed Botanical Disc, Pressed Viola Petal Drop.
5. Resin Pouring & Curing
This adds a glossy, liquid-look finish to baked clay pieces, as seen in the Matcha Mug.
Quick Steps: Before anything else, make sure your baked clay piece is fully cooled before pouring. Next, mix your resin according to the package instructions, working in a well-ventilated space and wearing gloves. Then, pour it slowly into the recessed area, and let it cure fully — check your specific resin’s instructions for exact timing — before handling the piece.
Used in: Miniature Clay Matcha Mug.
7 Ideas for Your Polymer Clay Dangling Keychain
Terrazzo and Abstract Geometric Shapes
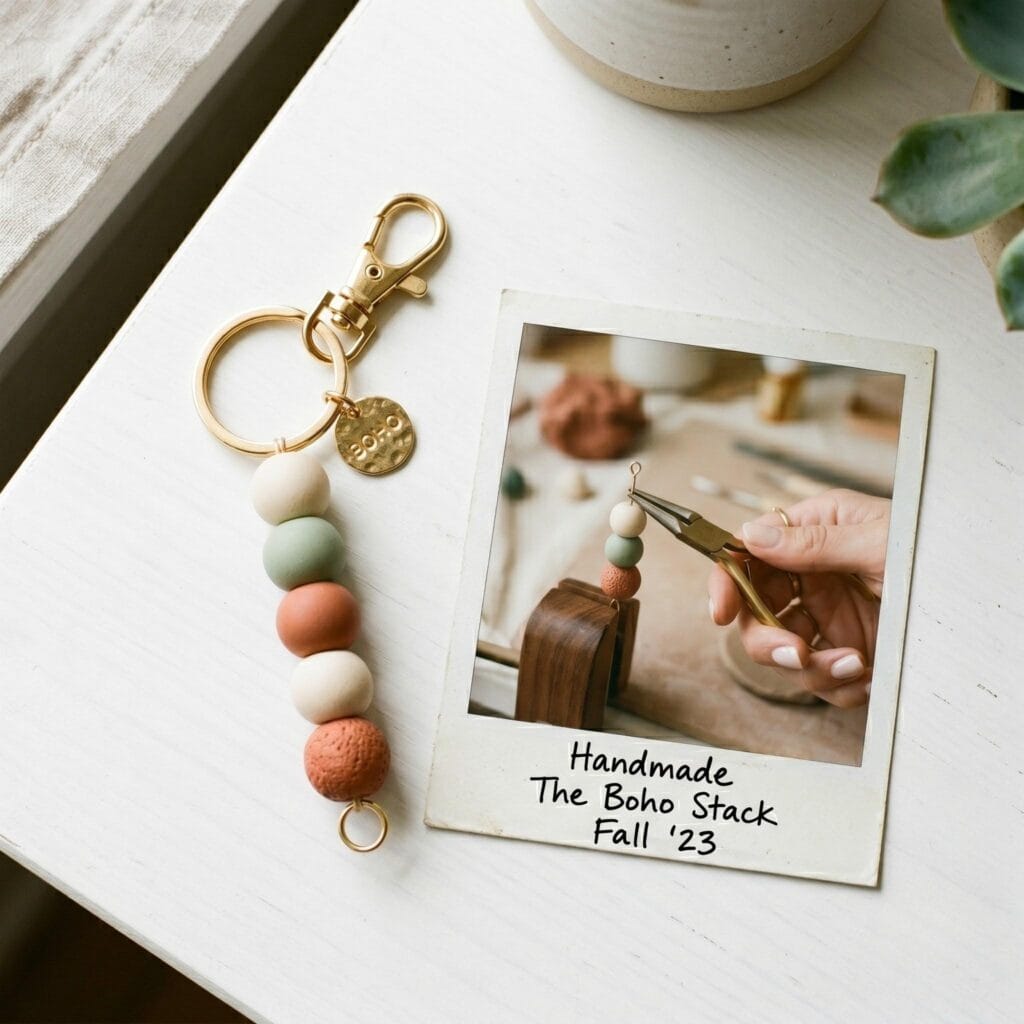
1. The Boho Terracotta Stack: Polymer Clay Dangling Keychain Idea
Supplies Needed: Premium Oven-Bake Polymer Clay (Terracotta, Sage, Cream), Metal Jewelry Headpins, Sharp Craft Blade, Keychain Hardware, Jewelry Pliers Set.
This design obviously uses warm earth tones and organic shapes. Roll small beads of terracotta, soft sage, and cream clay to start. Next, flatten them slightly. Finally, stack them vertically on a metal headpin. Consequently, it creates a beautiful, minimalist desert vibe on your polymer clay dangling keychain.
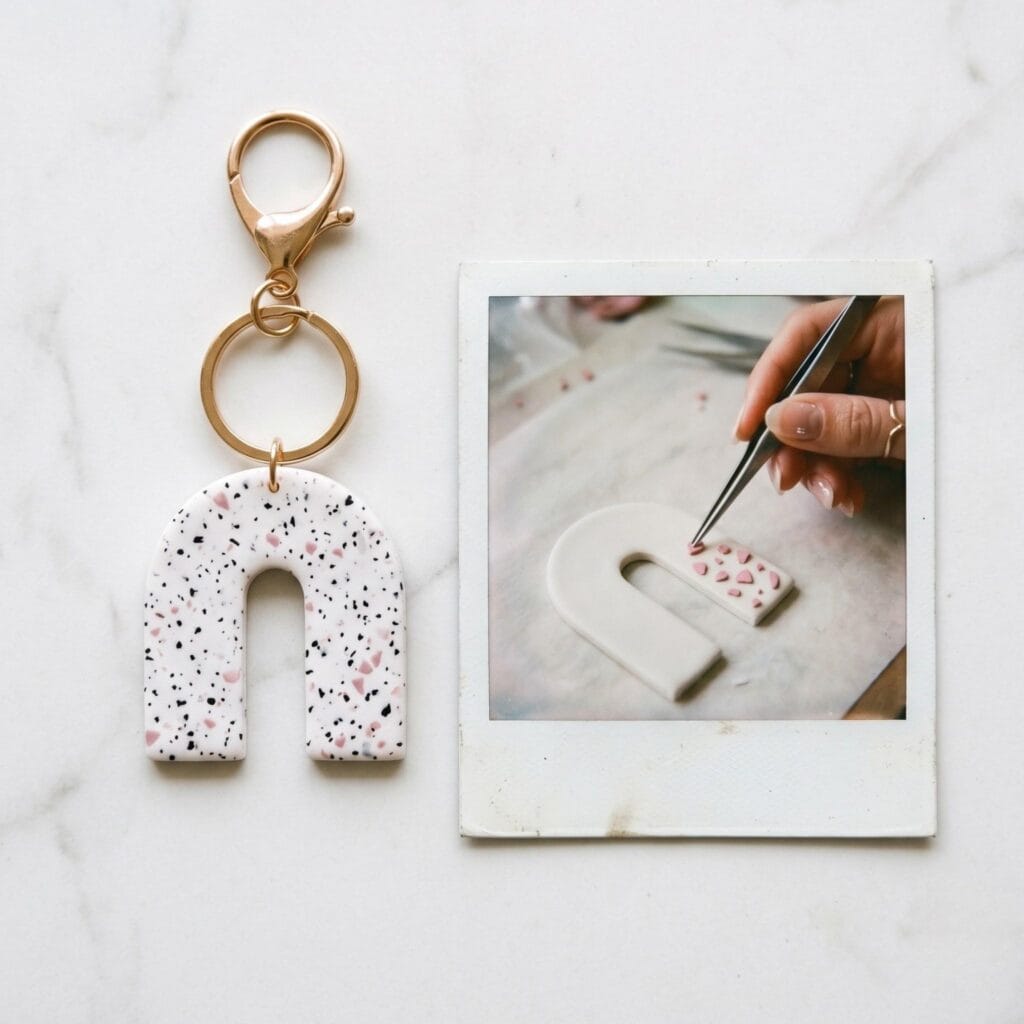
2. Speckled Terrazzo Arch: Polymer Clay Dangling Keychain Idea
Supplies Needed: Premium Oven-Bake Polymer Clay (White, Black, Pink), Sharp Craft Blade, Clay Roller, Piercing Tools, Keychain Hardware, Jewelry Pliers Set.
This combination is undeniably modern and chic. Specifically, make a smooth white arch shape as the main base. Press tiny, random flakes of black and pink clay onto the surface (see Technique 1: Terrazzo & Fleck Technique above). Therefore, it perfectly replicates a beautiful luxury stone look for your key ring.
3. Retro Checkerboard Dangle: Polymer Clay Dangling Keychain Idea
Supplies Needed: Premium Oven-Bake Polymer Clay (Lavender, Cream), Sharp Craft Blade, Clay Roller, Piercing Tools, Keychain Hardware, Jewelry Pliers Set.
This project instantly brings a fun, nostalgic aesthetic to your accessory collection. First of all, build a classic checkerboard pattern using soft lavender and cream clay squares (see Technique 2: Caning & Checkerboard Patterns above). Subsequently, cutting this pattern into a wavy, dangling charm adds a beautiful playful energy to your daily keys.
Before you continue: If you love exploring different creative mediums, check out our popular guide on DIY wax sachets for more amazing botanical crafting inspiration!
Nature and Cozy Lifestyle Concepts
4. Pressed Botanical Disc: Polymer Clay Dangling Keychain Idea
Supplies Needed: Premium Oven-Bake Polymer Clay (White), Real Leaf Sprig (Natural), Gold Acrylic Paint, Detail Brush, Piercing Tools, Keychain Hardware, Jewelry Pliers Set.
This is perfect for nature lovers. Initially, stamp a small white clay disc with a tiny real leaf sprig (see Technique 4: Pressing Natural Botanicals above). Therefore, filling the delicate indentation with a touch of gold acrylic paint after baking creates a highly elegant polymer clay dangling keychain.
5. Miniature Clay Matcha Mug: Polymer Clay Dangling Keychain Idea
Supplies Needed: Premium Oven-Bake Polymer Clay (Green), Liquid Clear Resin, Sculpting Tools, Piercing Tools, Keychain Hardware, Jewelry Pliers Set.
This tiny charm is incredibly cute and rich in detail. Basically, sculpt a tiny, hollow green mug with a small handle (see Technique 3: Sculpting Hollow Forms & Venting above). As a result, adding a layer of clear resin inside the mug (see Technique 5: Resin Pouring & Curing above) beautifully mimics the appearance of fresh, creamy matcha tea.
6. Cosmic Moon Phase Trio: Polymer Clay Dangling Keychain Idea
Supplies Needed: Premium Oven-Bake Polymer Clay (Navy), Metallic Silver Leaf, Sharp Craft Blade, Piercing Tools, Keychain Hardware, Jewelry Pliers Set.
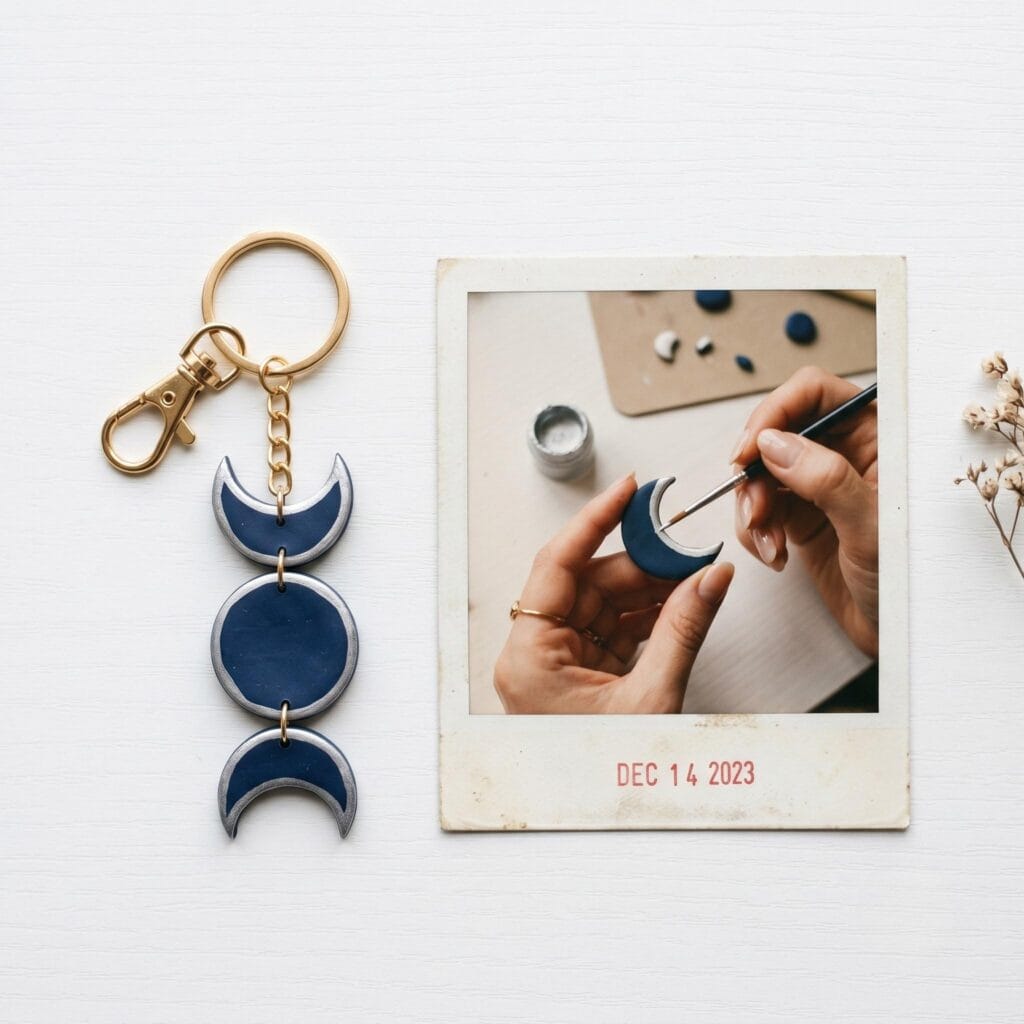
This clearly has a magical sky theme. Craft three separate small flat discs. Shape them like the crescent, half, and full moon phases. Afterward, painting the edges with metallic silver leaf creates a stunning contrast against a deep navy clay base on your ring.
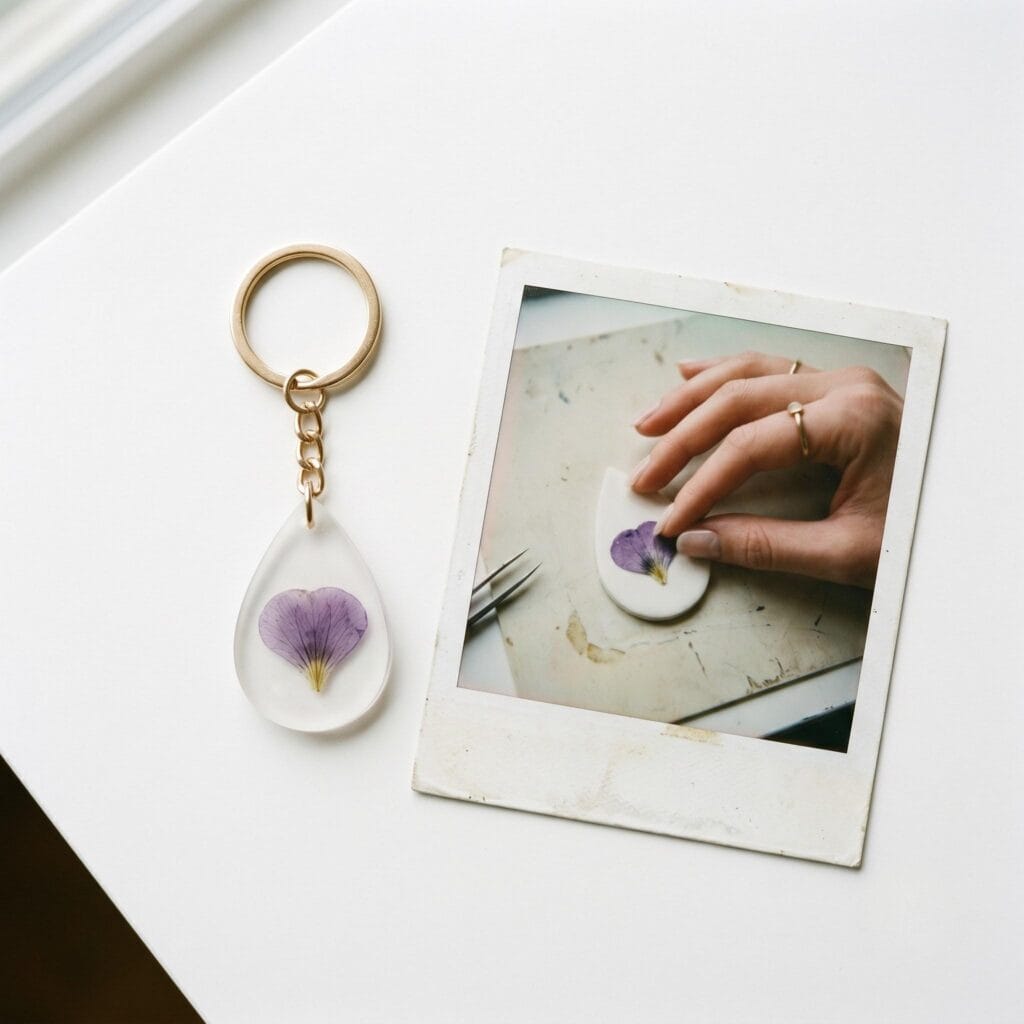
7. Pressed Viola Petal Drop: Polymer Clay Dangling Keychain Idea
Supplies Needed: Premium Oven-Bake Polymer Clay (Translucent White), Real Pressed Viola Petal (Natural), Clay Roller, Piercing Tools, Keychain Hardware, Jewelry Pliers Set.
This combination looks delicate and deeply artistic. Roll out a perfectly thin piece of translucent white clay in a tear-drop shape. Consequently, gently baking a real pressed purple viola petal directly onto the surface (see Technique 4: Pressing Natural Botanicals above) creates a gorgeous heirloom quality polymer clay dangling keychain.
Love premium handmade crafts? If you enjoy creating unique functional pieces, do not miss our comprehensive tutorial on hand poured soaps to master custom coloring techniques!
Tips to Keep Your Keychains from Breaking
Even simple crafts can have small issues. Therefore, here is how to ensure your creations remain perfectly strong. Undoubtedly, these expert tips will keep your charms secure.
Why did my clay snap after baking?
Under-baking is the leading cause of brittle polymer clay. Consequently, the clay cannot fuse into a strong, flexible structure. To avoid this, always use an external oven thermometer to verify the temperature matches your package instructions perfectly.
How do I remove dust from white clay?
White clay acts like a magnet for dust and lint. Fortunately, you can easily clean it before baking. First, use a cotton swab dipped in rubbing alcohol. Then, gently wipe the dirt away from the surface instantly. Dissolving the top layer slightly removes imperfections.
Why are my metal rings pulling through?
Do not poke holes too close to the edge of the clay shape. The metal ring will tear the clay over time. Always leave at least two millimeters of solid clay between the edge and the hole. Consequently, this rule keeps your polymer clay dangling keychain very secure.
Quick Reference: All Supplies at a Glance
Ready to start your first keychain? Here’s every item mentioned in this guide in one place.
🧶 Core Materials
- Premium Oven-Bake Polymer Clay (Assorted Colors) (used throughout) | [Check Polymer Clay on Amazon]
- Liquid Clear Resin (For Idea #5) | [View Clear Resin on Amazon]
- Metallic Silver Leaf & Gold Acrylic Paint | [Check Metallic Finishes on Amazon]
- Water-Based Matte or Glossy Sealer (used throughout) | [Check Clay Sealer on Amazon]
🌿 Natural Botanicals
- Real Leaf Sprig (Natural, Fully Dried) | [Check Pressed Botanicals on Amazon]
- Real Pressed Viola Petal (Natural, Fully Dried) | [Check Pressed Flowers on Amazon]
✂️ Sculpting & Cutting Tools
- Sharp Craft Blade & Cutting Tools (used throughout) | [Check Craft Knives on Amazon]
- Clay Roller or Conditioning Machine | [See Clay Rollers on Amazon]
- Piercing Needles or Toothpicks (used throughout) | [Check Piercing Tools on Amazon]
- Detail Brush (For Idea #4) | [View Detail Brushes on Amazon]
- Small Sculpting Tool Set (For Idea #5) | [Check Sculpting Tools on Amazon]
🔥 Baking & Work Surface Essentials
- Ceramic Tile or Glass Work Sheet (used throughout) | [Check Work Surfaces on Amazon]
- Parchment Paper (used throughout) | [See Parchment Paper on Amazon]
Important Note: Because polymer clay leaves permanent chemical residues and odors when baked, you must designate this toaster oven strictly as a craft-only appliance and never use it for food preparation again.
- Dedicated Toaster Oven for Crafting (used throughout) | [Check Craft Ovens on Amazon]
- Oven Thermometer (used throughout) | [Check Oven Thermometers on Amazon]
🔩 Hardware & Assembly
- Metal Jump Rings & Key Rings Bundle (used throughout) | [Check Keychain Hardware on Amazon]
- Metal Jewelry Headpins (For Idea #1) | [View Jewelry Headpins on Amazon]
- Jewelry Pliers Set (used throughout) | [Check Jewelry Pliers on Amazon]
🧽 Finishing & Cleanup
- Rubbing Alcohol & Cotton Swabs (For Lighter Clay Colors) | [Check Rubbing Alcohol on Amazon]
Important Crafting Safety Note
Always bake your polymer clay in a well-ventilated room or near an open window. Never use the same baking sheets or ovens for food prep after baking clay unless they are thoroughly cleaned. Keep sharp craft knives, piercing needles, and unbaked clay completely out of reach of curious pets and young children. Wash your hands thoroughly with warm soap and water immediately after completing your sculpting session.
A note on hollow forms: Always vent hollow sculpted pieces (like the Matcha Mug) with a small pinhole before baking. Trapped air can expand under heat and cause the piece to crack, warp, or even pop open in the oven.
A note on natural botanicals: Only use leaves and petals that are fully dried and free of pesticides or garden chemicals. Fresh or damp plant material can release moisture during baking, which may cause bubbling, mold, or an unpleasant smell.
A note on working with resin: Resin gives off fumes while curing, so always work in a well-ventilated space and wear gloves to protect your skin. Avoid touching or moving your project until it has fully cured — check your specific resin product’s instructions for exact timing.
Now that you know how to keep your charms strong and secure, it’s time to start rolling. Which design are you most excited to try first — the boho terracotta stack, or the miniature matcha mug? We’d love to hear about your experience making this polymer clay dangling keychain—share it in the comments below!


