

Transforming a plain sweater or hat with hand embroidery is a fun way to upgrade your wardrobe. However, learning how to embroider on knitting can seem tricky at first due to the natural stretch of the fabric. Fortunately, using the right tools makes it easy to create durable designs that move naturally with your garment. In addition, if you love rich fiber textures, explore these tufting art pattern ideas for modern rugs to expand your cozy handmade decor collection.
This post contains affiliate links. As an Amazon Associate, I earn from qualifying purchases. If you buy through these links, I may earn a commission at no additional cost to you.
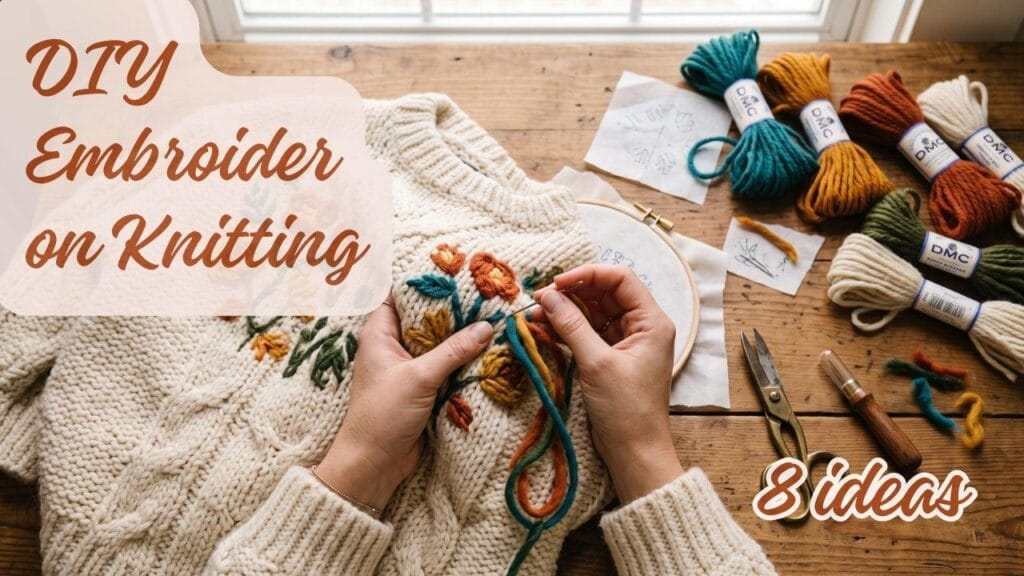
Essential Tools You Need to Embroider on Knitting
Adding stitched details to knitwear requires specialized needles and stabilizers that preserve the stretch and structure of your garment. First, you only need a few foundational materials to get started:
A few foundational tools and materials are used throughout every single project in this guide, marked with a (used throughout) tag below.
🪵 Base Knitwear Canvas
This category includes blank garments and knit accessories that provide a smooth, stable surface for hand stitching.
- Blank Chunky Knit Sweaters (used throughout) — provides a thick, stockinette stitch canvas ideal for duplicate stitching or surface motifs | Check Blank Knit Sweaters on Amazon
- Knit Beanie Blanks — offers a snug, stretchy surface perfect for small motif embroidery and floral accents |
View Knit Beanie Blanks on Amazon
🧵 Yarns & Threads
Selecting thread with a weight similar to your knit garment prevents your embroidery from pinching or pulling the underlying fabric.
- DMC Tapestry Wool Yarn (used throughout) — matches medium to heavy knit weights seamlessly without distorting the fabric stretch | Check Tapestry Wool Yarn on Amazon
- Six-Strand Cotton Embroidery Floss — ideal for fine-gauge knits where delicate line work or detailed French knots are needed |
See Embroidery Floss Set on Amazon
🪡 Needles & Stabilizers
These prep and finishing tools protect knit loops from snagging while keeping your design aligned.
- Tapestry Needles Set, Size 18–22 (used throughout) — features a blunt tip that glides between knit stitches without splitting yarn fibers | See Tapestry Needles on Amazon
- Water-Soluble Topper Stabilizer (used throughout) — prevents embroidery threads from sinking into fuzzy, chunky, or ribbed knits |
View Water-Soluble Stabilizer on Amazon - Water-Soluble Fabric Marking Pen — draws temporary guidelines onto the stabilizer or garment that rinse away completely in cold water | Check Marking Pens on Amazon
- Precision Craft Snips — clips thread tails cleanly close to the back of your work without nicking adjacent knit loops |
View Precision Craft Snips on Amazon
Core Techniques for Embroider on Knitting
Embroidering on knit fabric differs from woven cloth because knits move, stretch, and contract. Master these four fundamental techniques to ensure your stitches look even and maintain garment elasticity.
1. The Duplicate Stitch (Swiss Darning)
Duplicate stitch covers an existing knit “V” with new yarn. It mimics the knit texture perfectly and moves flexibly with the sweater.
- Bring your blunt tapestry needle up from the back of the work through the point of the “V” knit stitch.
- Slide the needle horizontally under both legs of the knit stitch directly above it.
- Insert the needle back down into the base of the original “V” point where you first emerged.
- Pull the yarn until it matches the tension of surrounding knit stitches—avoid pulling too tight.
Pro-Tip: Always maintain gentle tension. If you pull duplicate stitches too tightly, the surrounding knit fabric will pucker when worn.
2. Lazy Daisy Stitch for Knit Fabrics
Lazy daisy stitches form teardrop-shaped flower petals without compressing bulky knit fibers.
- Bring the needle up at the center point of your intended flower.
- Re-insert the needle into the exact same hole, leaving a loose loop of yarn on the front surface.
- Bring the needle back up at the outer tip of the petal, catching the yarn loop.
- Make a tiny anchoring stitch over the loop to secure the petal tip into the knit fabric.
3. French Knots without Pulling Knit Tension
Standard French knots can pull through large knit openings if not anchored properly.
- Anchor your thread behind a sturdy knit column on the back of the garment.
- Bring the needle to the front, wrap the yarn around the needle shaft two times, and insert the needle back into an adjacent yarn fiber rather than an open knit hole.
- Pull the thread through to the back slowly, holding the working thread taut with your non-dominant hand until the knot settles flush.
4. Using Water-Soluble Stabilizer on Chunky or Ribbed Knits
Chunky or ribbed knits have deep grooves that hide embroidery stitches if unmanaged.
- Cut a piece of water-soluble stabilizer slightly larger than your design area.
- Trace your design onto the stabilizer using a water-soluble fabric pen.
- Pin or basting-stitch the stabilizer directly onto the front of your knitwear.
- Embroider directly through both the stabilizer and knit fabric.
- Once complete, rinse the garment in cold water to dissolve the stabilizer completely.
Material Preparation: Securing Stretchy Knits
Before stitching, lay your garment flat on a clean surface without stretching it out of shape. Never stretch a knit garment in an embroidery hoop—doing so deforms the knit matrix, causing your embroidery to sag horribly once released from the hoop. If working on a stretchy or ribbed item, baste a sheet of water-soluble stabilizer behind or over the work area to lock the gauge temporarily while stitching.
8 Easy Ideas for Embroidering on Knitting
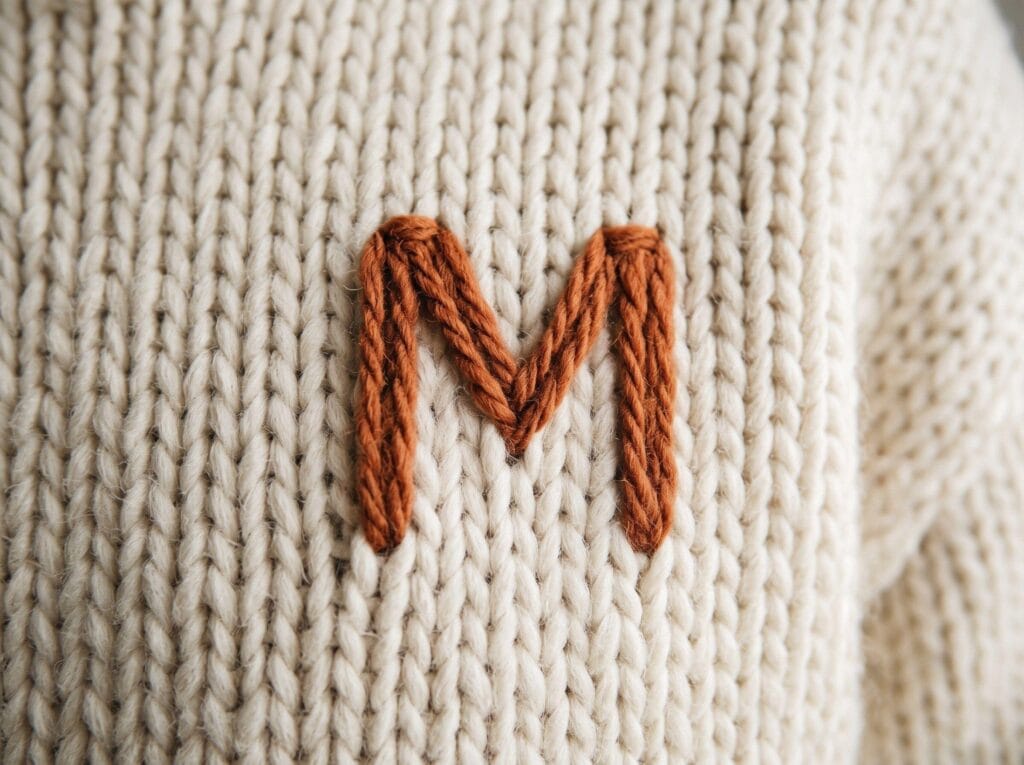
1. Minimalist Duplicate Stitch Initial on Sweater Chest
Supplies Needed: Blank Chunky Knit Sweater, DMC Tapestry Wool Yarn, Tapestry Needles Set, Size 18–22, Water-Soluble Fabric Marking Pen, Precision Craft Snips.
Lightly sketch a 3-inch block initial onto the sweater chest using a water-soluble marking pen. Follow the grid of the knit fabric, working row-by-row using the duplicate stitch technique (refer to Core Technique 1). Keep thread tension relaxed to match the sweater’s natural stretch. Always handle sharp craft snips with care; see our safety guidelines below.
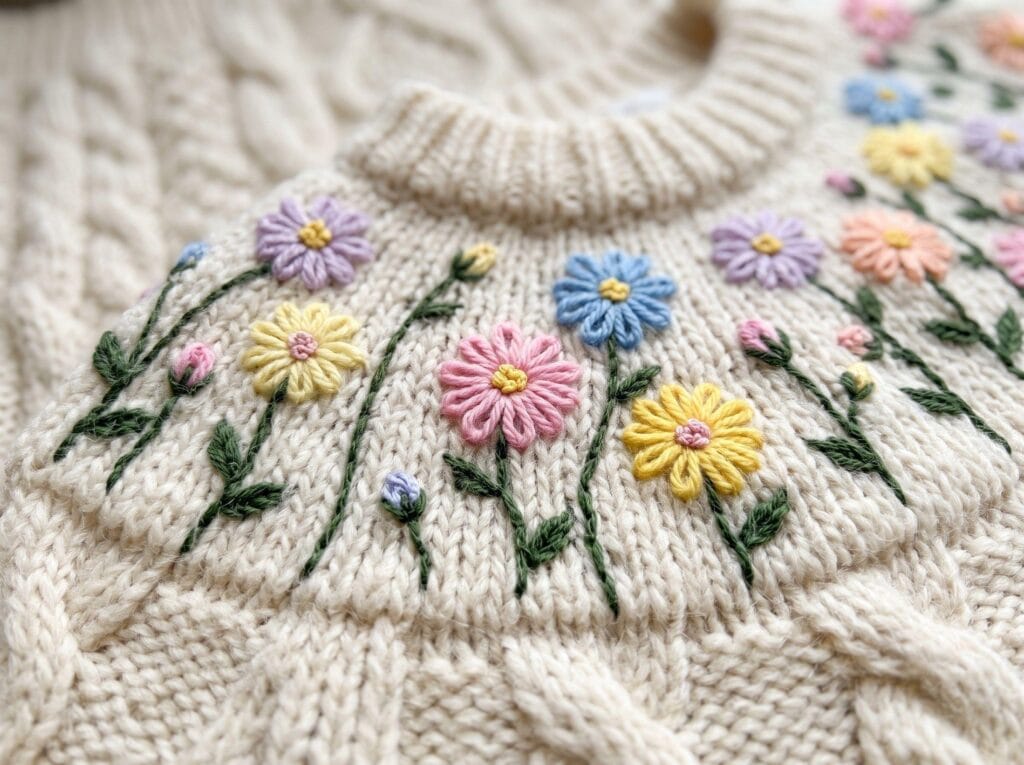
2. Lazy Daisy Flower Meadow on Sweater Yoke
Supplies Needed: Blank Chunky Knit Sweater, DMC Tapestry Wool Yarn, Tapestry Needles Set, Size 18–22, Water-Soluble Topper Stabilizer, Water-Soluble Fabric Marking Pen, Precision Craft Snips.
Pin a piece of water-soluble stabilizer across the front yoke (refer to Core Technique 4). Next, stitch lazy daisy petals in scattered clusters using tapestry wool (refer to Core Technique 2). Then, add straight-stitch stems connecting the blooms. For instance, if you love floral touches on yarn, check out how to style beautiful crochet flowers for more inspiration. Finally, rinse away the stabilizer in cold water.
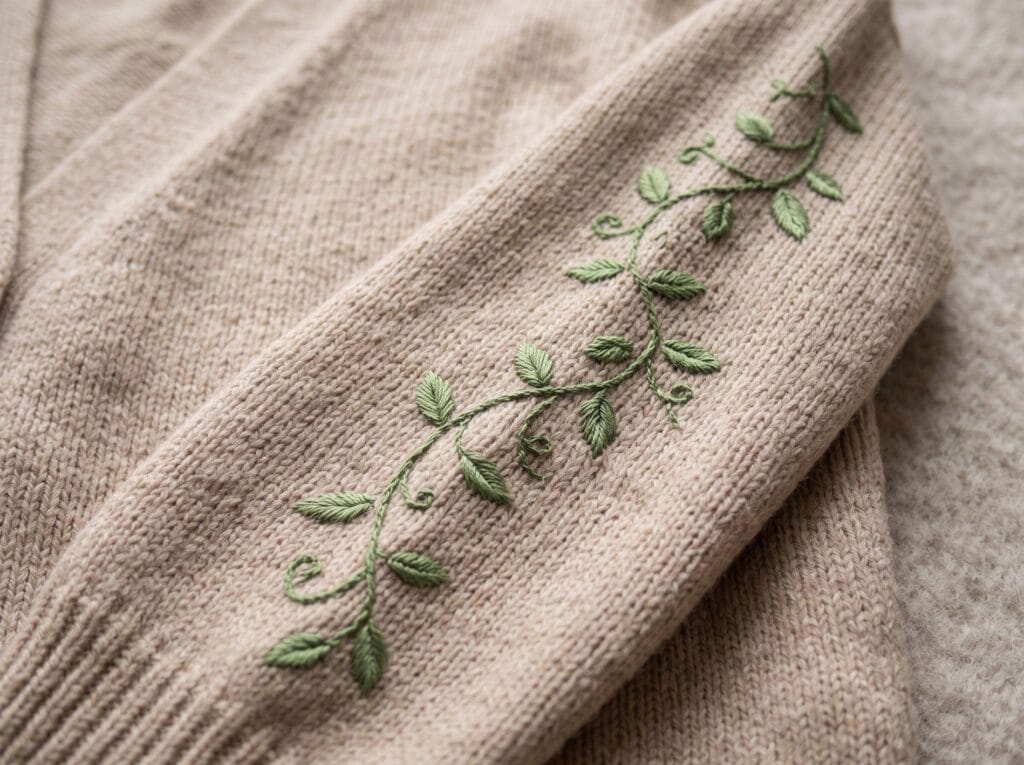
3. Embroidered Botanical Vines along Cardigan Sleeves
Supplies Needed: Blank Chunky Knit Sweater, DMC Tapestry Wool Yarn, Tapestry Needles Set, Size 18–22, Water-Soluble Topper Stabilizer, Water-Soluble Fabric Marking Pen, Precision Craft Snips.
Draw a flowing vine along the outer sleeve of a cardigan onto water-soluble stabilizer. Use a stem stitch or chain stitch with tapestry wool to form the central vine. Add small leaf shapes along the vine using short satin stitches, ensuring you do not pull the yarn tightly enough to restrict sleeve movement.
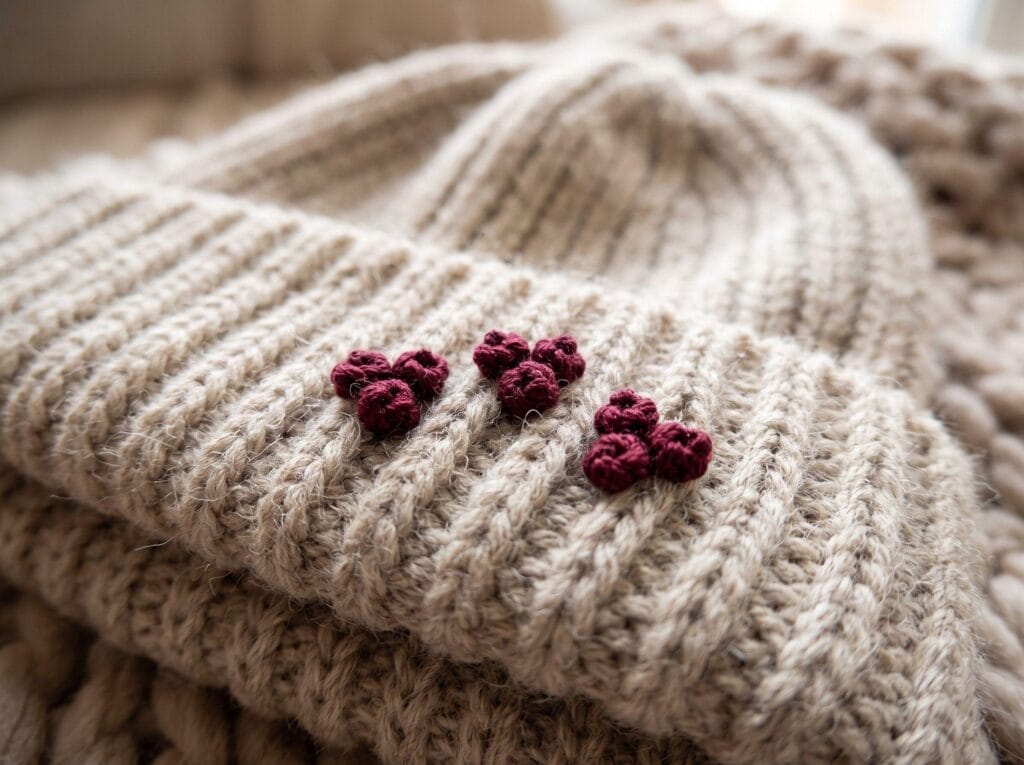
4. French Knot Berry Clusters on a Chunky Knit Beanie
Supplies Needed: Knit Beanie Blanks, Six-Strand Cotton Embroidery Floss, Tapestry Needles Set, Size 18–22, Precision Craft Snips.
First, mark small 3-dot clusters around the beanie brim. Next, work French knots at each marked dot using embroidery floss (refer to Core Technique 3). Be careful to penetrate yarn fibers instead of open gaps. Similarly, if you enjoy cute yarn projects, check out these crochet angels and amigurumi ideas for your next gift project.
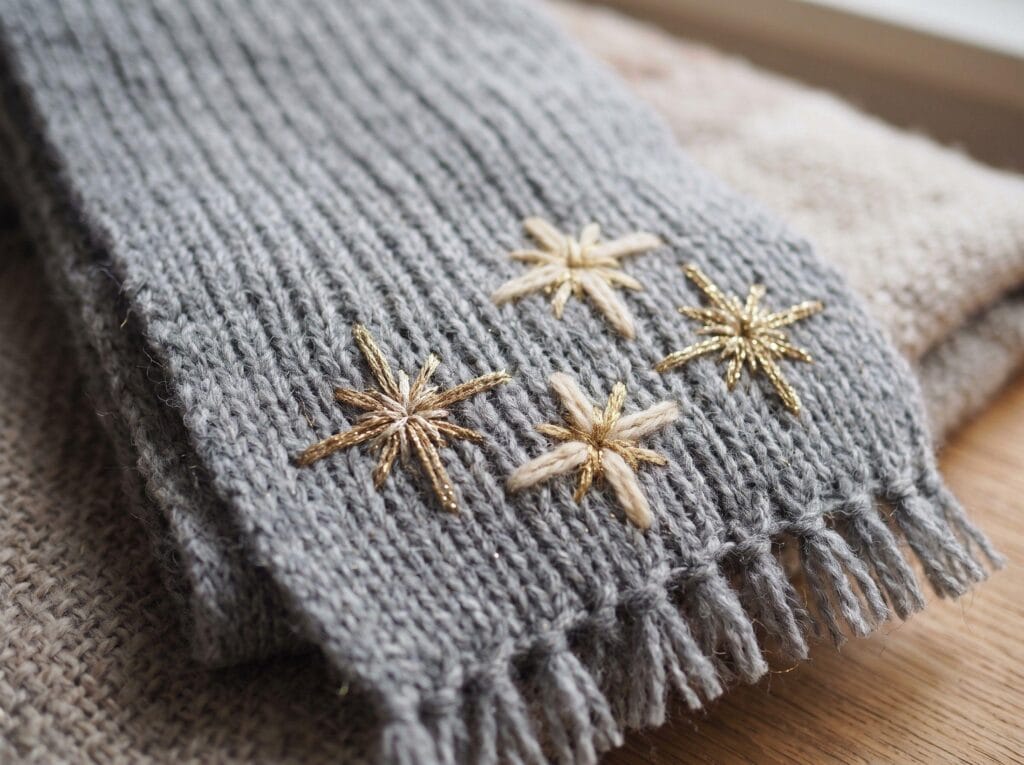
5. Celestial Starbursts on a Knit Scarf
Supplies Needed: DMC Tapestry Wool Yarn, Tapestry Needles Set, Size 18–22, Water-Soluble Fabric Marking Pen, Precision Craft Snips.
Mark evenly spaced points across the ends of a plain knit scarf. Stitch four-point starbursts by making intersecting straight stitches of varying lengths using metallic or contrasting tapestry wool. Secure thread ends firmly on the back using a weaving technique through nearby knit loops.
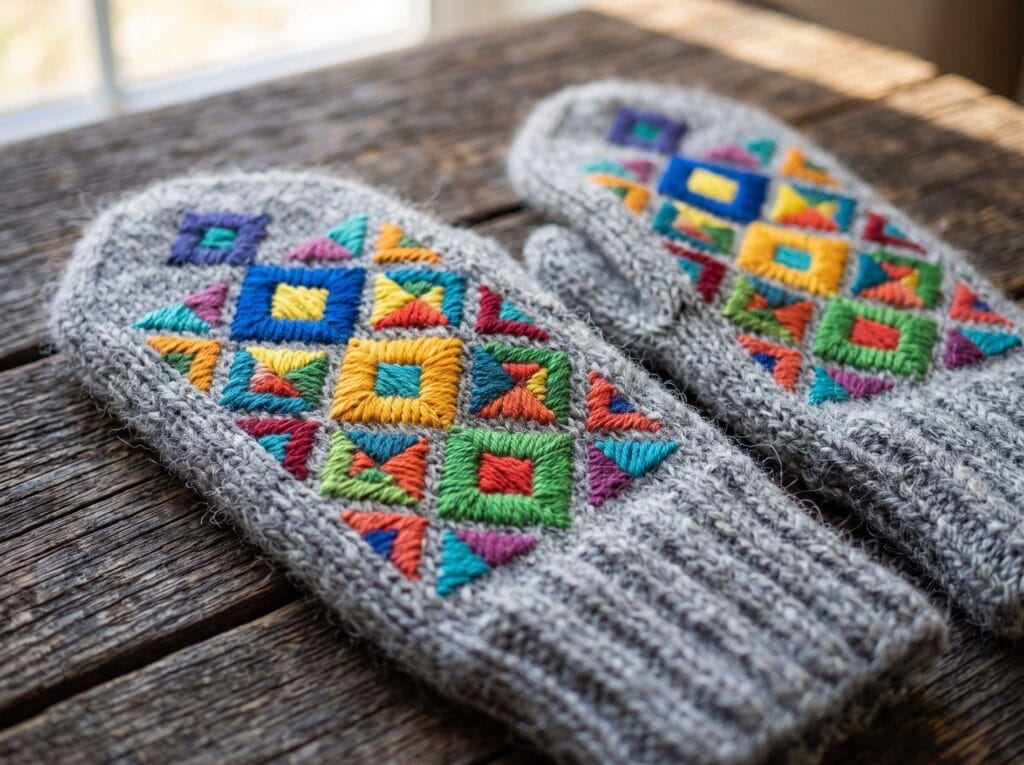
6. Satin Stitch Geometric Shapes on Mittens
Supplies Needed: Six-Strand Cotton Embroidery Floss, Tapestry Needles Set, Size 18–22, Water-Soluble Topper Stabilizer, Water-Soluble Fabric Marking Pen, Precision Craft Snips.
Place stabilizer over the back of a knit mitten and draw small triangles or diamonds. Fill each shape using horizontal satin stitches, placing stitches close together without overlapping. Keep the stitch length under one inch to prevent catching or snagging during daily wear.
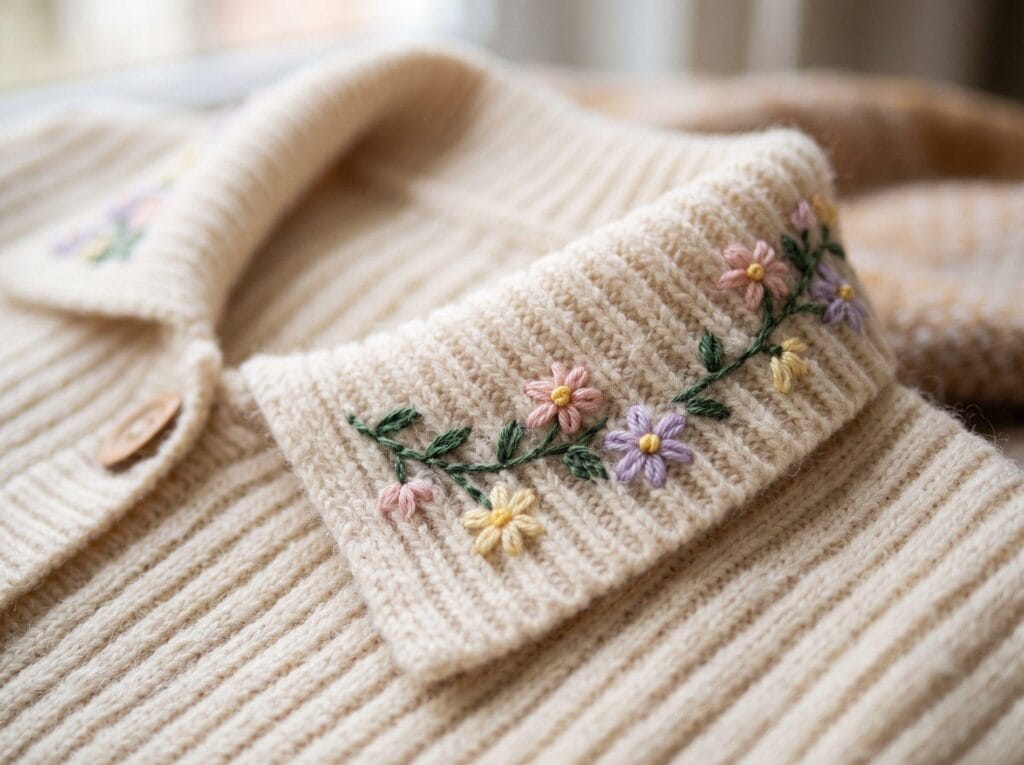
7. Embroidered Collar Accent on a Ribbed Cardigan
Supplies Needed: Blank Chunky Knit Sweater, Six-Strand Cotton Embroidery Floss, Tapestry Needles Set, Size 18–22, Water-Soluble Topper Stabilizer, Water-Soluble Fabric Marking Pen, Precision Craft Snips.
Baste stabilizer over the ribbed collar edges of a cardigan (refer to Core Technique 4). Stitch tiny floral sprigs using a combination of lazy daisy petals and French knot centers (refer to Core Techniques 2 and 3). Rinse the collar gently in cold water and lay flat to dry.
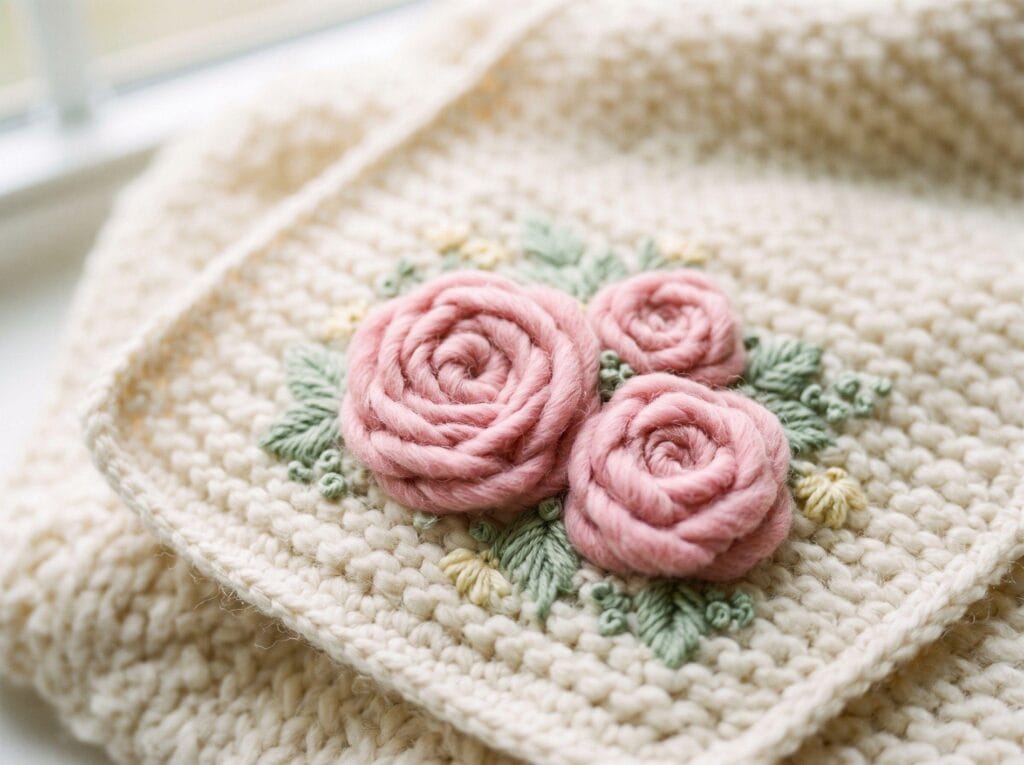
8. Woven Wheel Roses on a Baby Knit Blanket
Supplies Needed: DMC Tapestry Wool Yarn, Tapestry Needles Set, Size 18–22, Water-Soluble Topper Stabilizer, Water-Soluble Fabric Marking Pen, Precision Craft Snips.
Mark 1-inch circles on a corner of a knit blanket over stabilizer. Next, stitch an odd number of spokes radiating from the center. Then, weave your tapestry wool over and under the spokes continuously until a rose forms. Furthermore, for more textured textile crafts, explore these knotted rope crafts ideas for your home.
Styling, Care, and Maintenance for Embroidered Knitwear
Hand-embroidered knits require gentle care to preserve both the original garment shape and the delicate surface stitching.
- Washing Routine: Always hand-wash embroidered knitwear in cold water using a mild wool wash or gentle detergent. Never wring or twist the garment, as this will distort both the knit matrix and the embroidery stitches.
- Drying & Blocking: Gently press excess water out of the garment using a clean, dry towel. Lay the item flat on a blocking mat or fresh towel, reshaping the sweater and fluffing the embroidered motifs with your fingers.
- Storage: Always fold embroidered knits rather than hanging them. Store them flat in a breathable cotton storage bag to protect the raised stitches from catching on closet hardware.
Which knitwear project are you excited to embroider first? Have you tried stitching on stretchy fabrics before, or is this your very first attempt? Leave a comment below and share your thoughts—we would love to hear about your creative ideas!
QUICK REFERENCE: ALL SUPPLIES AT A GLANCE
Ready to start customizing your knitwear? Here is every supply from this guide in one quick list before you shop.
BASE KNITWEAR CANVAS
- Blank Chunky Knit Sweaters | Check Blank Knit Sweaters on Amazon
- Knit Beanie Blanks | View Knit Beanie Blanks on Amazon
YARNS & THREADS
- DMC Tapestry Wool Yarn | Check Tapestry Wool Yarn on Amazon
- Six-Strand Cotton Embroidery Floss | See Embroidery Floss Set on Amazon
NEEDLES & STABILIZERS
- Tapestry Needles Set, Size 18–22 | See Tapestry Needles on Amazon
- Water-Soluble Topper Stabilizer | View Water-Soluble Stabilizer on Amazon
- Water-Soluble Fabric Marking Pen | Check Marking Pens on Amazon
- Precision Craft Snips | View Precision Craft Snips on Amazon
Essential Safety Guidelines for Needlework
Please review these safety measures before beginning your knitwear embroidery project to ensure a safe crafting experience.
- Needle & Tool Safety: Always store blunt and sharp tapestry needles in a designated needle case or magnetic pin cushion when not in use. Never leave loose needles sticking out of garments resting on furniture, where they can cause accidental punctures.
- Sharp Cutting Tools: Keep precision craft snips capped or closed when resting on your workspace. Always cut threads away from your body and fingers.
- Steam & Iron Handling: If pressing or steam-blocking your finished embroidered garment, keep hands away from direct steam vents. Use a pressing cloth to avoid scorching wool yarns or melting synthetic fiber blends.
- Child & Pet Precautions: Loose yarn tails, embroidery floss strands, and small dissolved stabilizer remnants pose choking or ingestion hazards for pets and young children. Keep all thread scraps and supplies stored securely in a craft box when taking breaks.
Styling, Care, and Maintenance for Embroidered Knitwear
Hand-embroidered knits require gentle care. Therefore, always hand-wash your items in cold water using mild soap. Never wring or twist the garment, as this will ruin the shape. Next, press out excess water with a dry towel and lay the item flat. In addition, if you enjoy customizing home textiles, you will love these gorgeous DIY stamped napkins for your table. Always fold your knits to store them safely.
Now that you master the basics, which knitwear project will you embroider first? For instance, are you starting with a simple initial or jumping straight into a floral design? Leave a comment below and share your creative thoughts with us—we would love to hear from you!


