

Kids remember what their hands made. Thanksgiving crafts for kids carry more warmth than disposable decorations because each paint mark, crooked feather, and thankful note belongs to the child who made it.
These low-prep projects use washable supplies, simple shapes, and adult-guided cutting so they work at home, in classrooms, and around a busy November table. If you are planning seasonal activities for younger makers, these fall crafts for kindergarten offer more friendly ideas for small hands.
Affiliate Disclosure: This post contains affiliate links. As an Amazon Associate, I earn from qualifying purchases. If you buy through these links, I may earn a commission at no additional cost to you.
Key Facts:
- Total time: 20 to 45 minutes per project, plus 20 to 60 minutes drying
- Difficulty: Beginner-friendly
- Makes: 1 project per child, except the 12-link garland
- Core technique: Painting, folding, tearing, gluing, and simple stamping
- Best for: Ages 3 to 10 with adult supervision
Essential Materials for Thanksgiving Crafts for Kids
A shared supply tray keeps Thanksgiving craft time calm and flexible. Set out only the materials needed for one project at a time; then inspect collected leaves and pinecones outdoors so they are dry, clean, and free of insects before they reach the craft table.
| Supply | Spec / Size | Used For |
|---|---|---|
| Washable tempera paint | Non-toxic classroom set | Handprints, plates, sticks, and apple stamps |
| Fall cardstock | Heavyweight assorted colors | Cards, feathers, chains, and place cards |
| White paper plates | Uncoated, 9-inch | Painted turkey body |
| Jumbo craft sticks | 4.5-inch unfinished wood | Scarecrow ornament |
| Coffee filters | White basket style | Marbled leaf sun catchers |
| Washable school glue | Liquid PVA formula | Paper and lightweight assembly |
🎨 Thanksgiving Crafts for Kids Paper, Paint, and Natural Materials
- Washable Tempera Paint Set — Non-toxic washable paint covers hands, paper plates, wood sticks, and apple stamps with easy cleanup | Check Price on Amazon
- Fall-Colored Construction Paper and Cardstock Pack — Heavy paper holds paint and glue while providing orange, brown, red, yellow, green, and cream shades | See Fall Cardstock on Amazon
- Uncoated White Paper Plates — Matte plates accept tempera paint and school glue more reliably than glossy disposable plates | View Paper Plates on Amazon
- Natural Brown Paper Lunch Bags — The folded flap gives a turkey puppet a ready-made moving mouth | Find Paper Lunch Bags on Amazon
- Jumbo Wooden Craft Sticks — Wide unfinished sticks are easy for children to grip, paint, and glue into a sturdy ornament base | Check Craft Sticks on Amazon
- Coffee Filters and Washable Markers — White basket filters spread washable marker color when lightly misted for soft marbled leaves | See Price on Amazon
- Natural Pinecones and Assorted Craft Feathers — Dry pinecones and lightweight feathers make a textured turkey centerpiece without hard carving | View Pinecones and Feathers on Amazon
- Peel-Off Crayons and White Drawing Paper — Paper-wrapped crayons make broad leaf rubbings without a bulky wrapper getting in the way | Find Crayons on Amazon
- Natural Jute Twine and Yellow Yarn — Soft yarn forms scarecrow hair, while twine supports the finished gratitude garland | View Twine and Yarn on Amazon
- Fine-Mist Water Mister — A hand-pump mister applies a controlled light spray to coffee filters | Check Water Mister on Amazon
Wash apples, dry them well, and have an adult slice them immediately before the stamping project. In addition, keep natural finds dry until use so paper and glue stay flat rather than becoming damp or wrinkled.
✂ Kid-Friendly Building Tools
- Kid-Safe Scissors, Glue Brushes, Ruler, and Hole Punch — Blunt-tip scissors and glue brushes suit supervised paper work, while an adult manages the ruler-guided cuts and hole punch | Check Kid-Safe Tools on Amazon
- Leaf Template and Clear Tape — A reusable leaf outline gives sun catchers a clear shape, while clear tape secures them to glass | View Leaf Template on Amazon
Children can tear paper instead of cutting when their scissor control is still developing. Meanwhile, adults can pre-cut uniform strips, manage punches, and prepare any classroom table using these easy fall canvas painting ideas for extra seasonal color inspiration.
🧲 Fasteners, Kits, and Craft Storage
- Self-Adhesive Wiggle Eyes — Peel-and-stick facial details reduce wet-glue handling, although loose eyes require close adult supervision | Find Wiggle Eyes on Amazon
- Washable School Glue — Washable PVA glue bonds paper, feathers, craft sticks, and pinecone details in supervised projects | Check School Glue on Amazon
- Small Adhesive Magnet Strips — Flexible strips turn lightweight cardstock leaves into refrigerator decorations; magnets must stay away from children and pets | View Magnet Strips on Amazon
🏆 Optional Craft-Table Upgrades
12 Thanksgiving Crafts for Kids to Make Together
Choose one project for a short after-school activity or set up several stations for a family gathering. First, cover the work surface with washable paper or a reusable mat, then keep paint, glue, and small pieces within adult reach until each child is ready for them.
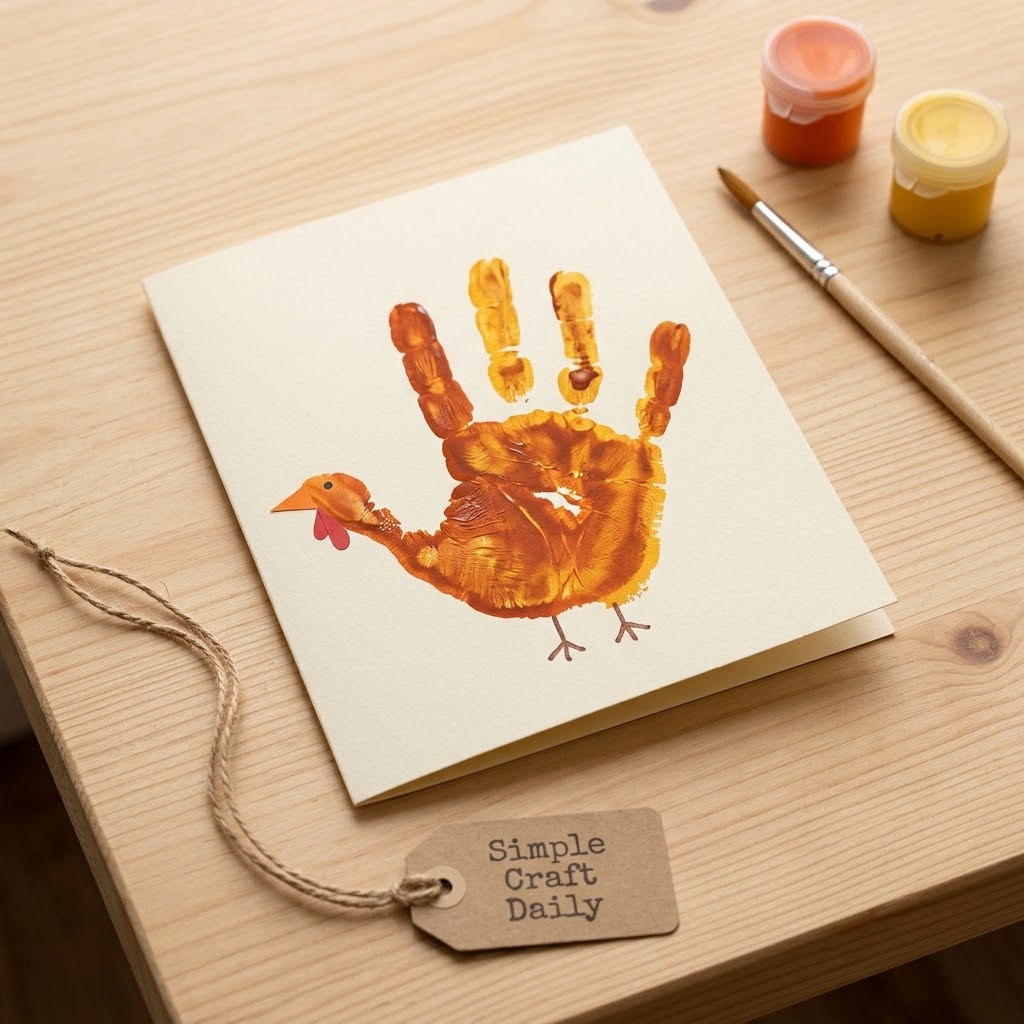
1. Handprint Turkey Cards for Thanksgiving Crafts for Kids
Supplies Needed: One folded 5 x 7-inch cream cardstock card, washable tempera paint, paintbrush, one orange cardstock beak, washable school glue, marker, soap and water.
- Protect the surface and place one folded 5 x 7-inch cream cardstock card flat.
- Use the paintbrush to coat the palm brown and each finger in a separate feather color.
- Press the painted hand once onto the card front, then wash hands with soap and water.
- Let the handprint dry flat for 20 to 30 minutes.
- Glue on the orange cardstock beak and use the marker for feet, eyes, and a message.
This card makes one keepsake that grandparents can display long after Thanksgiving dinner. Keep the paint layer thin so the handprint dries evenly; then use a tiny dot of washable school glue beneath the beak and leave the card open until the glue dries for 20 minutes. A marker-written message inside gives these Thanksgiving crafts for kids a personal finish without adding more loose pieces.
2. Painted Paper Plate Turkey
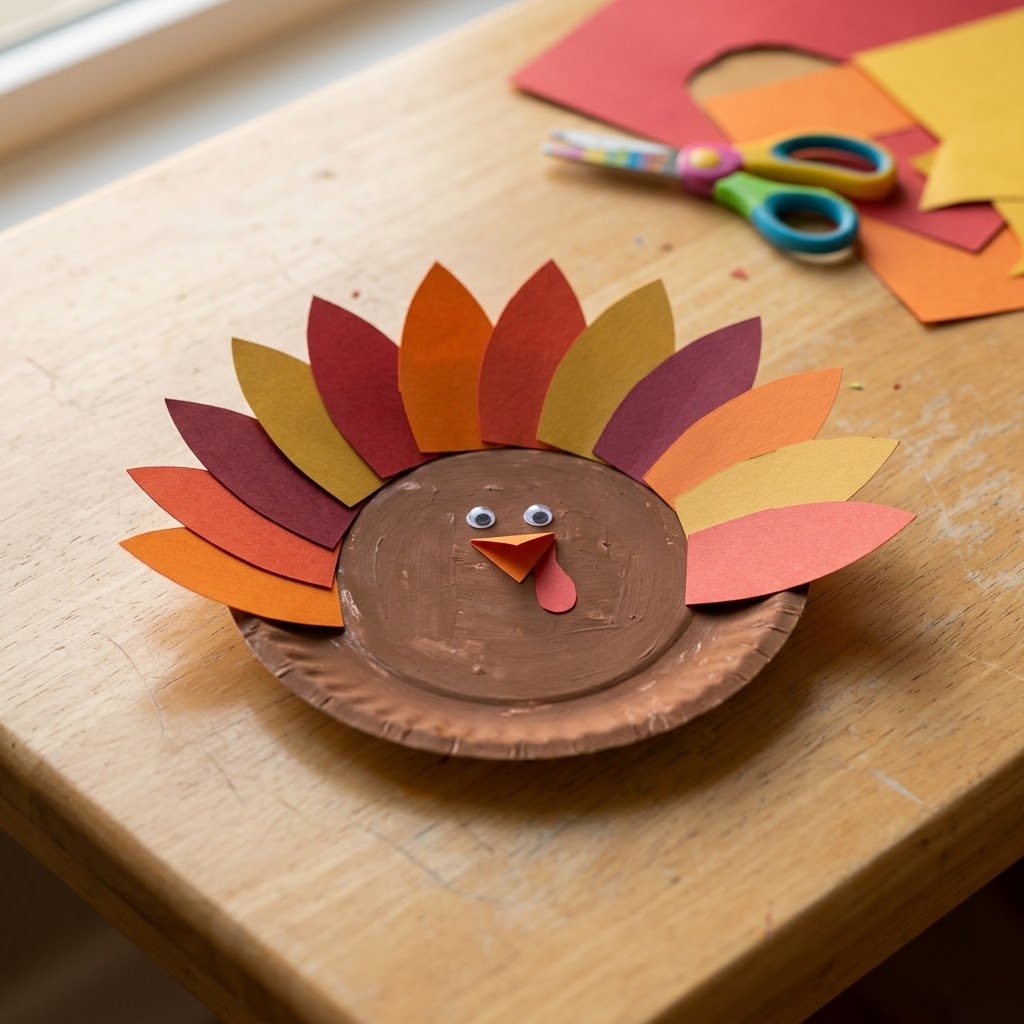
Supplies Needed: One uncoated 9-inch white paper plate, washable tempera paint, paintbrush, fall cardstock, washable school glue, two self-adhesive wiggle eyes, kid-safe scissors.
- Paint the front of one uncoated 9-inch white paper plate brown.
- Let the plate dry flat for 20 to 30 minutes.
- Cut five feather shapes from fall cardstock, or tear them by hand.
- Glue the feathers behind the upper edge of the plate.
- Add the wiggle eyes, a cardstock beak, and cardstock feet, then dry flat for 30 minutes.
The plate creates a broad turkey body that young children can decorate without complex drawing. For preschoolers, tearing feather shapes makes a pleasing textured edge and removes the need for precise scissor work. However, adults should handle the self-adhesive wiggle eyes and keep them secured until the display is placed out of reach of babies and pets.
3. Leaf Rubbing Art for Thanksgiving Crafts for Kids
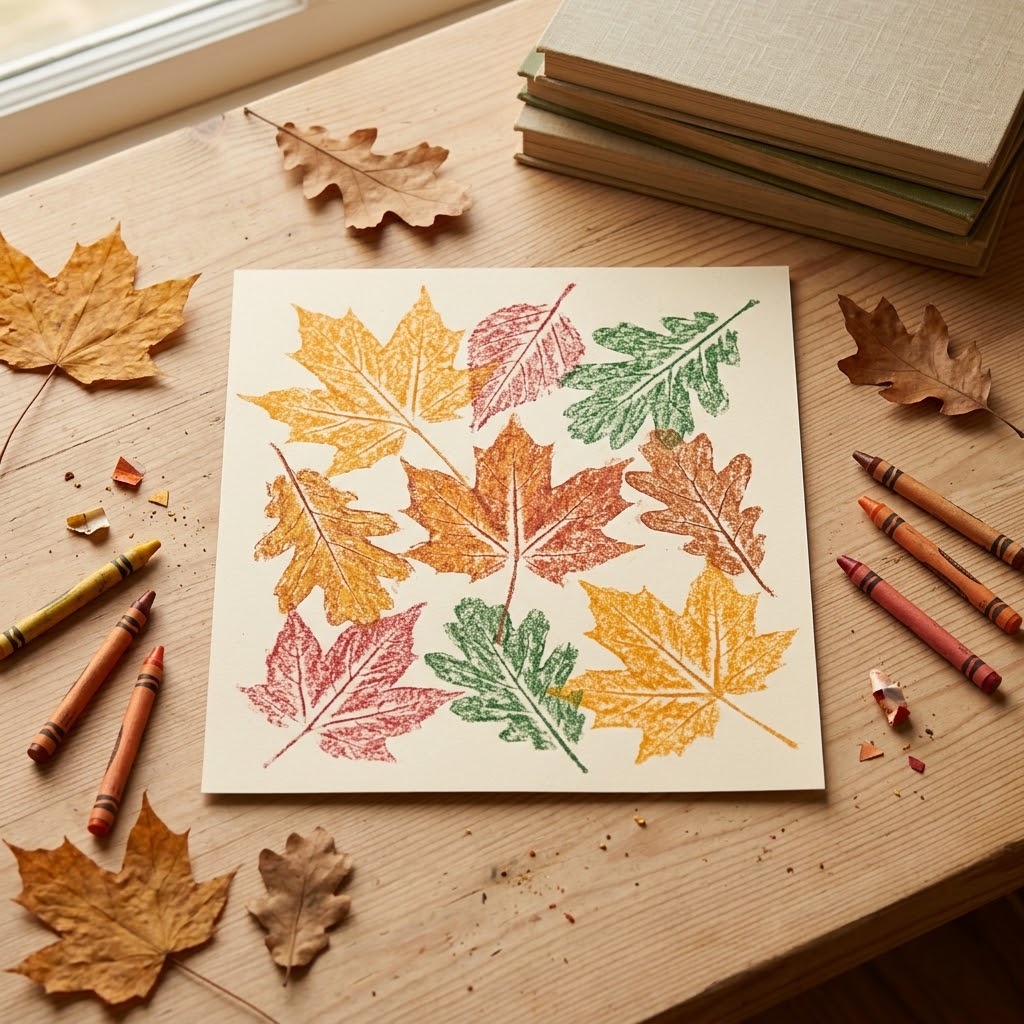
Supplies Needed: Dry flat leaves, white drawing paper, peeled crayons, fall cardstock, washable school glue, kid-safe scissors.
- Place dry, flat leaves vein-side up on the table.
- Cover each leaf with white drawing paper.
- Rub a peeled crayon sideways across the paper until the leaf veins appear.
- Tear or cut the rubbings into separate shapes.
- Glue the rubbings onto fall cardstock and let the collage dry flat for 20 minutes.
Choose leaves with clear veins that still bend slightly; brittle leaves often crumble under the paper. Next, hold the paper steady with one hand while rubbing lightly from the leaf edge toward the center. These Thanksgiving crafts for kids make a useful quiet-time project because the repeated crayon motion develops hand control while the natural shapes guide the artwork.
4. Paper Bag Turkey Puppet
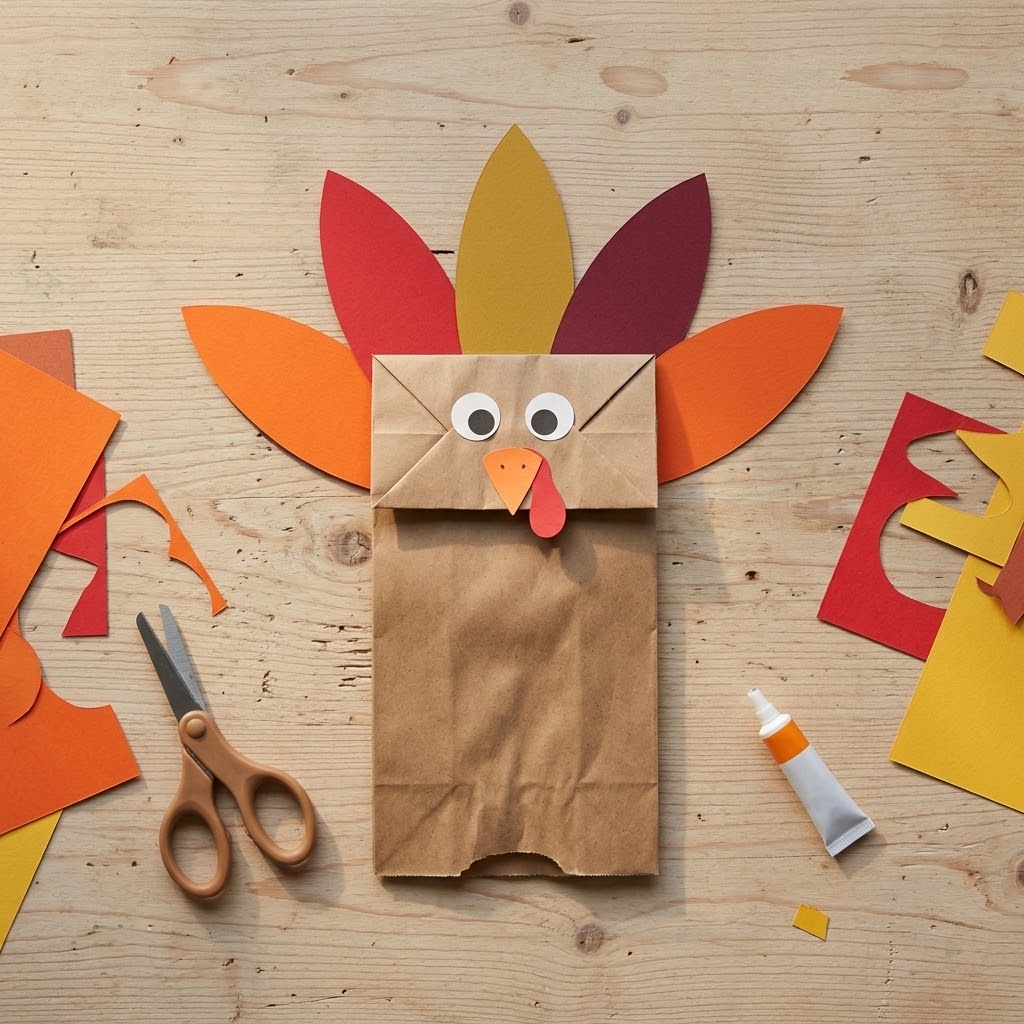
Supplies Needed: One brown paper lunch bag, fall cardstock, washable school glue, two self-adhesive wiggle eyes, kid-safe scissors, marker.
- Lay the brown paper lunch bag flat with the folded flap facing up.
- Cut feather shapes from fall cardstock.
- Glue the feathers behind the flap and let them set for 10 minutes.
- Attach the wiggle eyes, cardstock beak, and cardstock wattle to the flap.
- Use the marker for extra details and let the puppet dry for 30 minutes before use.
The bag flap becomes the turkey face, while a child’s hand inside makes the lower bag move like a puppet mouth. Press each glued feather firmly for 5 seconds so it contacts the bag surface. For children under three, use marker-drawn eyes instead of loose wiggle eyes, and remove all unused small pieces before play begins.
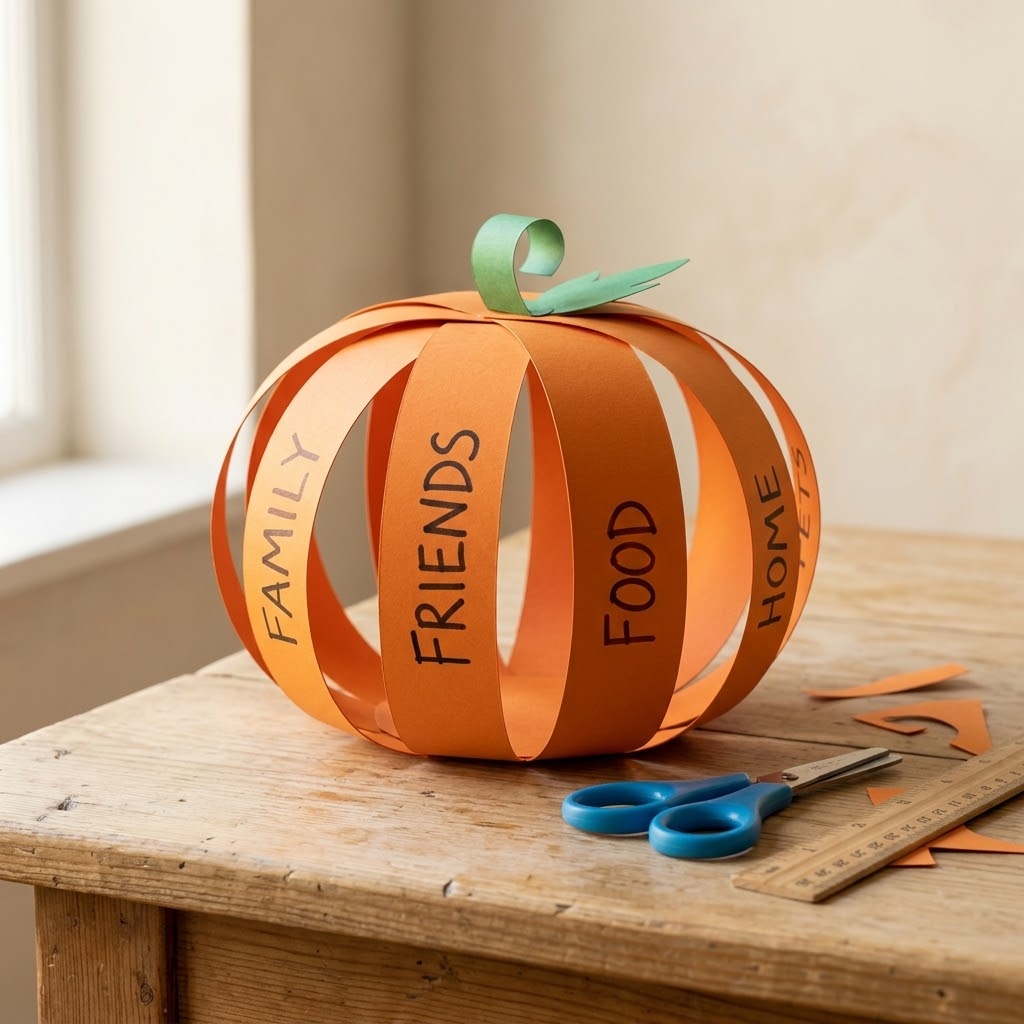
5. Thankful Paper-Strip Pumpkin
Supplies Needed: Orange cardstock, green cardstock, ruler, kid-safe scissors, washable school glue, marker.
- Use the ruler and scissors to cut eight orange cardstock strips measuring 1 x 8 inches.
- Write one thankful thought on each strip with the marker.
- Overlap and glue the ends of each strip into a loop.
- Glue all eight loops together at both ends to form a round pumpkin.
- Cut and glue on a green cardstock stem, then dry the pumpkin flat for 30 minutes.
Pre-cut the eight identical strips for younger children, then let them supply the thankful words and assemble the loops. Apply a pea-sized glue dot at each strip end; large puddles can soften cardstock and make the pumpkin slump. After this step, place the pumpkin on its side while the loops dry so the top and bottom joins stay aligned.
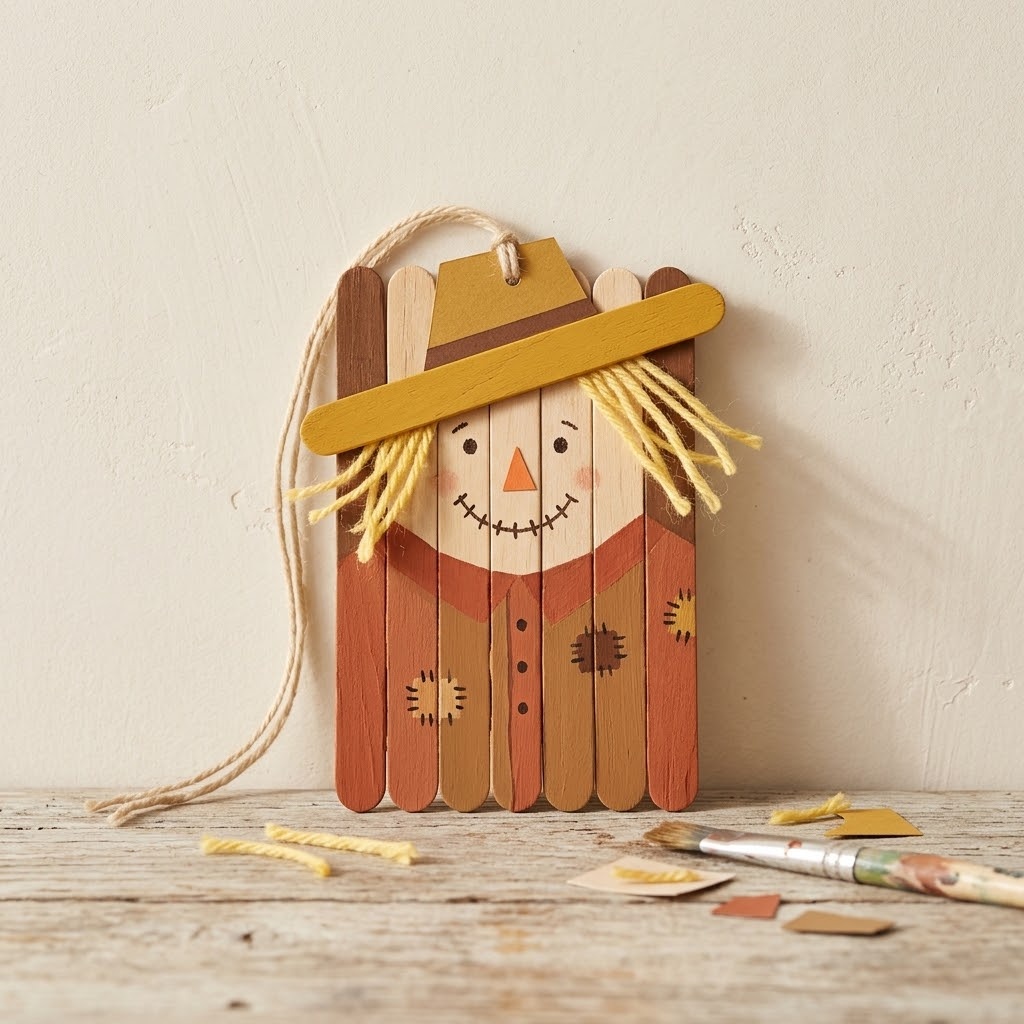
6. Craft-Stick Scarecrow Ornament for Thanksgiving Crafts for Kids
Supplies Needed: Seven jumbo wooden craft sticks, washable tempera paint, paintbrush, washable school glue, yellow yarn, fall cardstock, marker, awl or single-hole punch, one 10-inch yarn hanging loop, scrap paper, light book.
- Paint five jumbo craft sticks for the face and two sticks for the braces, then dry for 20 to 30 minutes.
- Glue the five face sticks vertically across the two horizontal braces.
- Cover the piece with scrap paper, place a light book on top, and let the glued wood base dry flat for 30 minutes.
- Glue on a fall cardstock hat and short yellow yarn hair, then add a face with the marker.
- Have an adult make one hanging hole with an awl or single-hole punch and tie the 10-inch yarn loop after the glue dries for 20 minutes.
Arrange the five face sticks edge to edge before adding glue so the scarecrow stays square. Use a thin line of washable school glue across each brace, then press the assembled piece beneath the protected light book while it sets. These Thanksgiving crafts for kids work well as ornaments or gift tags, although the finished piece should hang where toddlers cannot pull on the yarn loop.
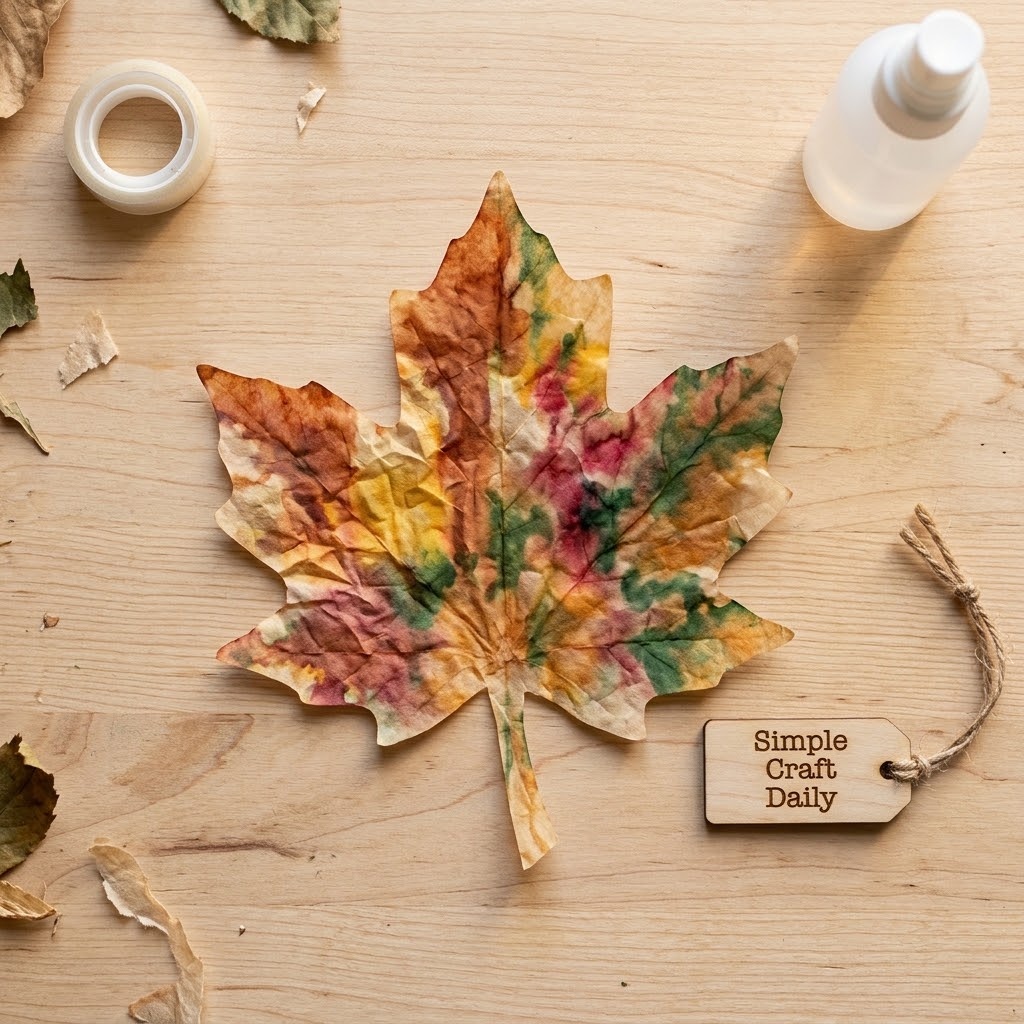
7. Thanksgiving Crafts for Kids Coffee Filter Leaf Sun Catcher
Supplies Needed: One white basket coffee filter, washable markers, water mister, paper towels, leaf template, kid-safe scissors, clear tape.
- Color one white coffee filter with washable markers.
- Mist the filter with 3 to 4 sprays from 10 inches away.
- Place the filter on paper towels and let it dry for 1 hour.
- Trace the leaf template onto the dry filter and cut out the shape.
- Use clear tape to attach the leaf to a window.
Use short, separated marker marks rather than solid blocks of color so the water can pull each shade outward. A light mist is enough; soaked filters tear when lifted and can stain the work surface. Subsequently, move the dry leaf by its edges and tape only the top points so window light can pass through the marbled paper.
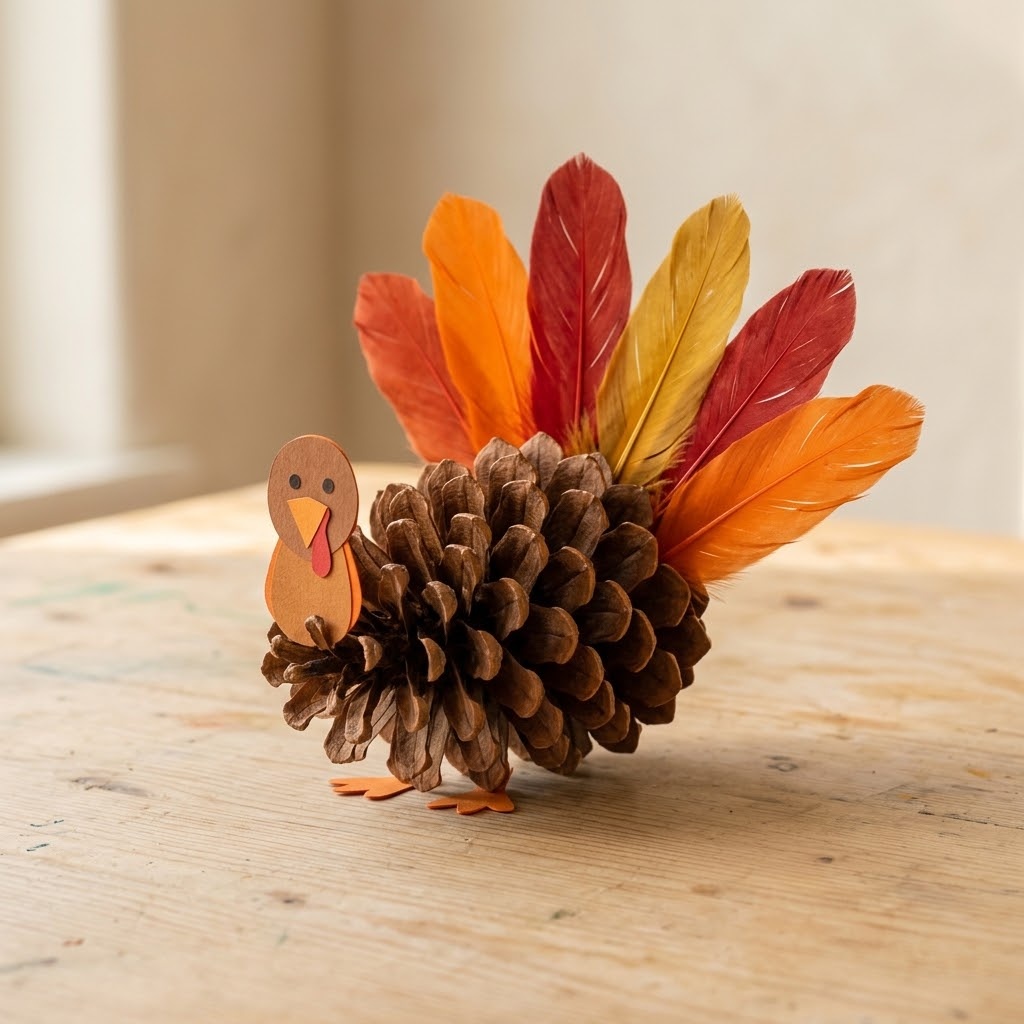
8. Pinecone Turkey Centerpiece
Supplies Needed: One dry pinecone, five craft feathers, brown cardstock, orange cardstock, washable school glue, two self-adhesive wiggle eyes, kid-safe scissors, display tray.
- Check the dry pinecone for moisture, loose debris, and insects.
- Cut one small round head from brown cardstock and one beak from orange cardstock.
- Glue five craft feathers into the rear pinecone scales.
- Glue the cardstock head, wiggle eyes, and beak to the front.
- Allow the turkey to dry undisturbed for 1 hour before placing it on a tray.
Use a pinecone that sits steadily on its broad end. Insert each feather stem only a short distance between the rear scales, then add a small dot of glue where the feather meets the cone. Consequently, the compact centerpiece stays balanced when displayed on its tray. It is a display piece, not a toy for infants or pets.
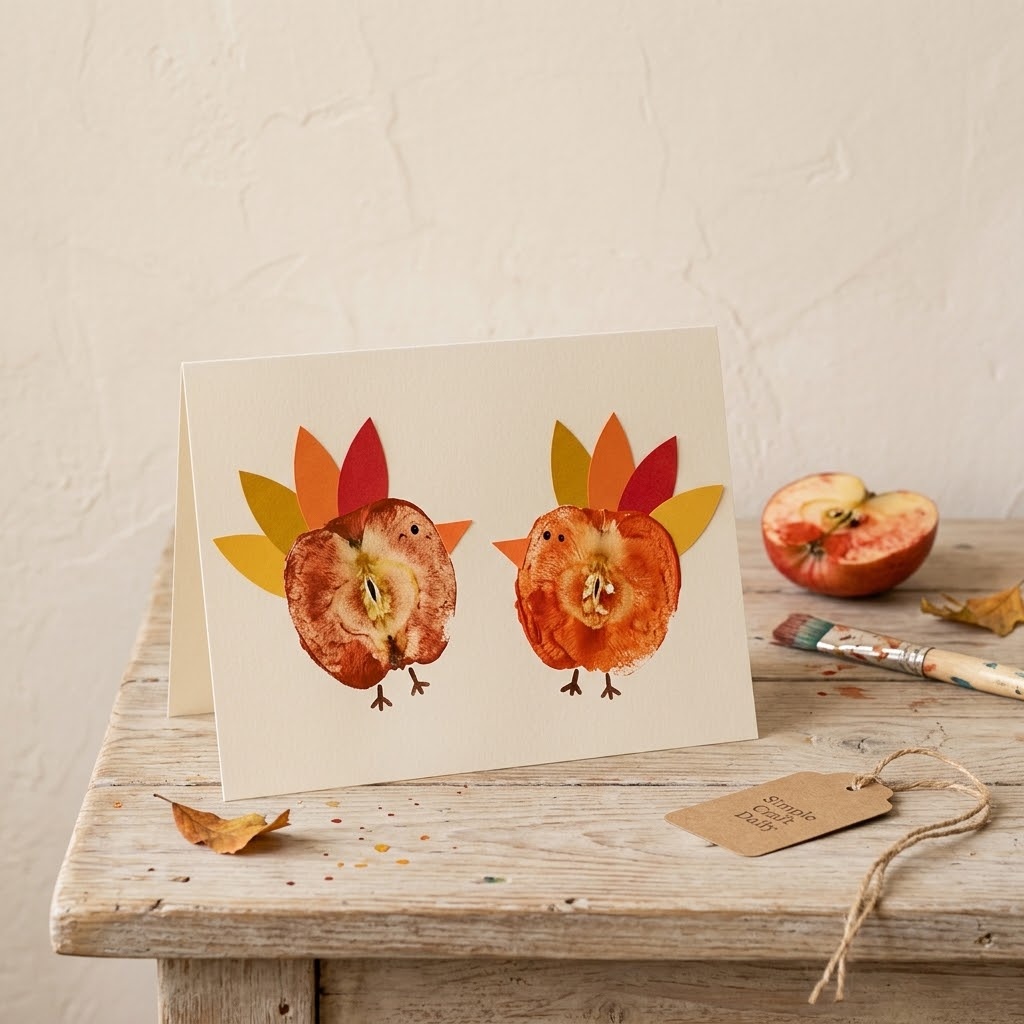
9. Apple-Stamped Turkey Art
Supplies Needed: One washed apple, washable tempera paint, white cardstock, paint tray, paintbrush, fall cardstock, washable school glue, adult knife, paper towel.
- Have an adult cut the washed apple in half and blot the cut surface dry with a paper towel.
- Pour washable tempera paint into the paint tray.
- Brush a thin paint layer onto the apple’s cut side.
- Stamp the apple once on white cardstock and let it dry for 20 to 30 minutes.
- Glue fall cardstock feathers, a beak, and feet around the dry stamp, then let the glue dry for 20 minutes.
A thin paint layer preserves the apple’s soft circular texture and prevents puddled prints. Reapply paint before each new stamp rather than rocking the apple on the paper. After paint touches the apple, discard it with food waste and do not store it for eating; craft paint and food should never share a container or be used interchangeably.
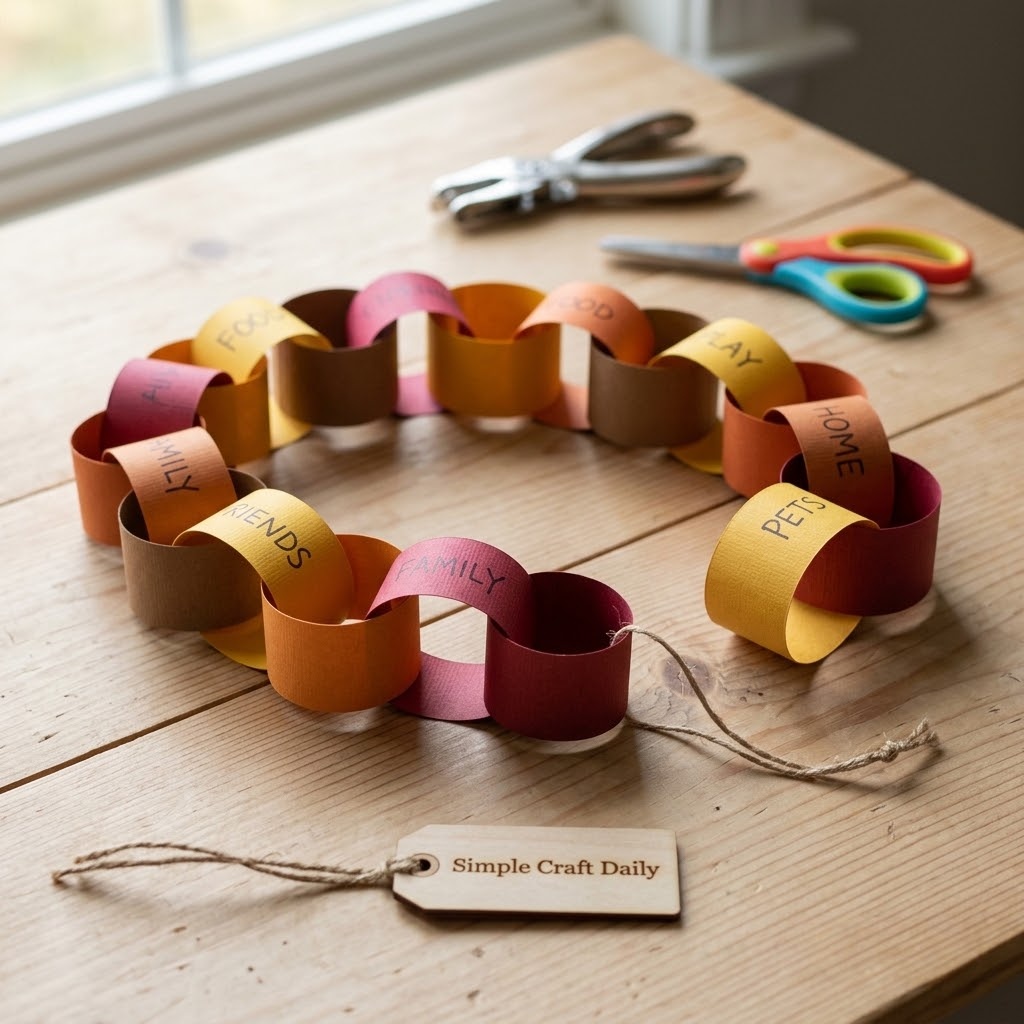
10. Thankful Chain Garland for Thanksgiving Crafts for Kids
Supplies Needed: Fall cardstock, ruler, kid-safe scissors, washable school glue, marker, hole punch, one 36-inch length of jute twine.
- Use the ruler and scissors to cut twelve fall cardstock strips measuring 1 x 6 inches.
- Write one gratitude message on each strip with the marker.
- Make and glue the first paper loop.
- Thread each remaining strip through the previous loop before gluing it closed.
- Have an adult punch the end loop, tie on the 36-inch twine, and let the garland dry for 30 minutes.
Write the messages before forming the loops so children have a flat, comfortable writing surface. Hold each glue seam closed for 10 seconds, and avoid pulling the chain until all seams have dried. At the family meal, read one paper link aloud at a time; this gives Thanksgiving crafts for kids a gentle gratitude ritual as well as a seasonal display.
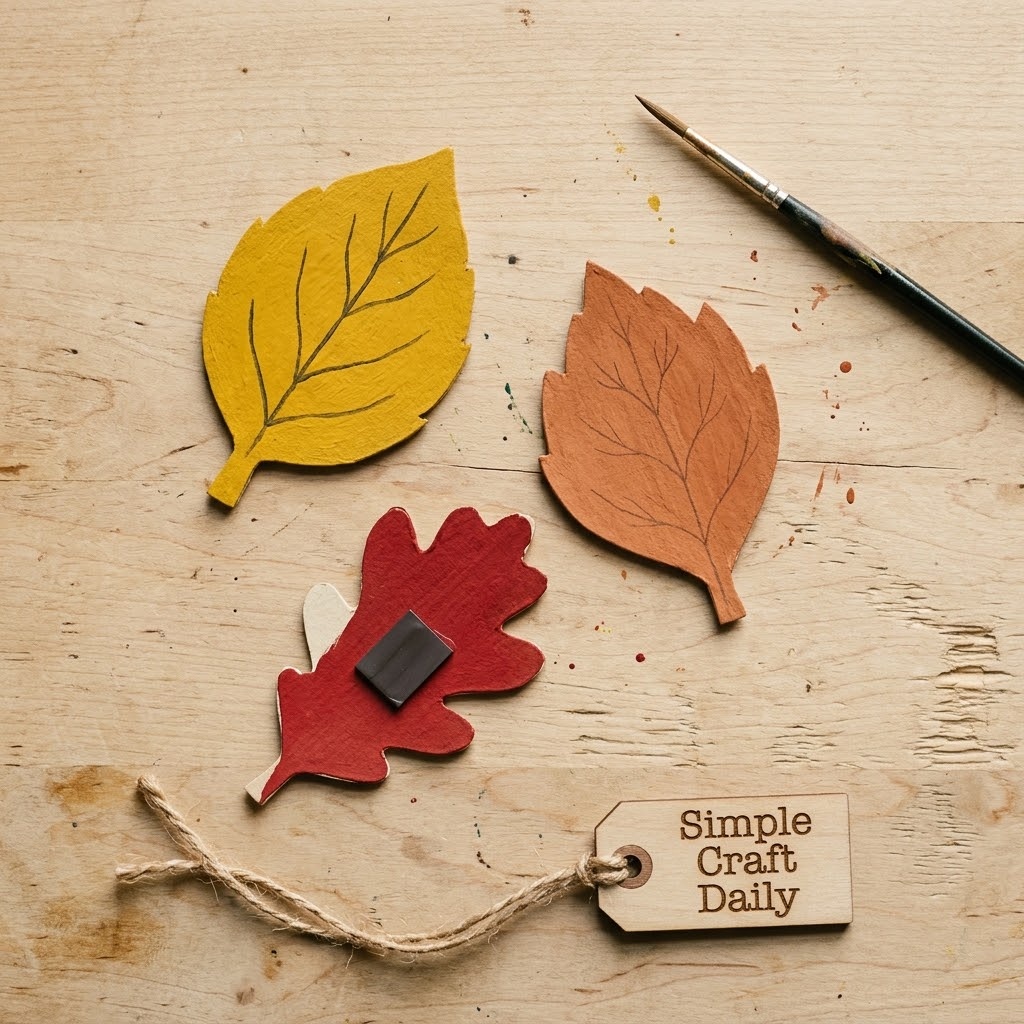
11. Painted Leaf Magnets
Supplies Needed: Fall cardstock, washable tempera paint, paintbrush, marker, kid-safe scissors, small adhesive magnet strips.
- Cut 3 to 4-inch leaf shapes from fall cardstock.
- Paint the leaves and let them dry flat for 20 to 30 minutes.
- Add leaf veins with the marker.
- Have an adult trim one 1-inch adhesive magnet strip for each leaf and apply it to the back.
- Wait 1 hour before placing the magnets on a high refrigerator surface.
Keep painted leaves lightweight so the flexible magnet strip can hold them flat. Press the strip onto clean, dry cardstock with an adult’s thumb, then leave the backing adhesive undisturbed for the full hour. Magnets are severe ingestion hazards, so skip this project entirely around children who mouth objects, and keep every magnet away from pets.
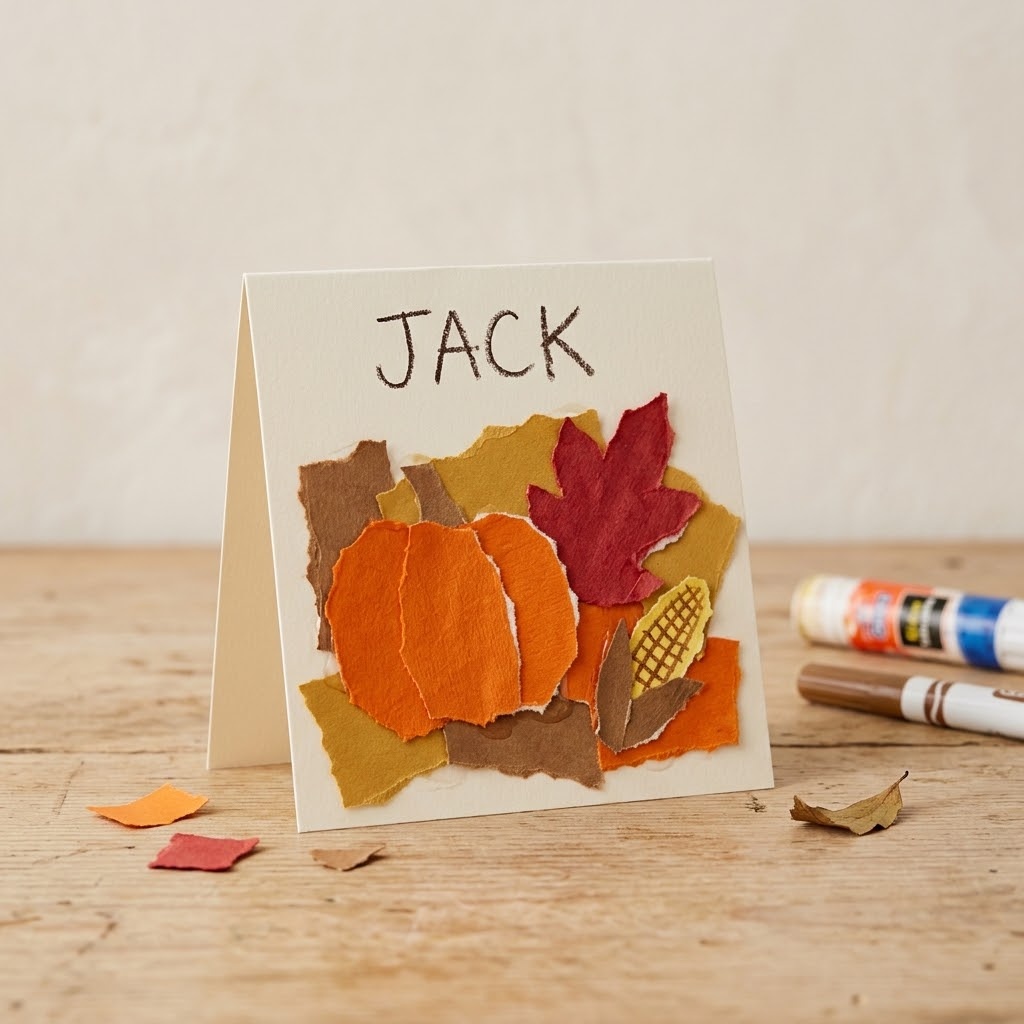
12. Harvest Collage Place Cards for Thanksgiving Crafts for Kids
Supplies Needed: One 4 x 6-inch cream cardstock card per guest, fall cardstock scraps, washable school glue, marker, kid-safe scissors, dry leaves.
- Fold one 4 x 6-inch cream cardstock card in half.
- Tear or cut small harvest shapes from fall cardstock scraps.
- Arrange the shapes and dry leaves on the card front before gluing.
- Glue the collage pieces in place and let the card dry flat for 20 minutes.
- Write one guest name with the marker after the surface is dry.
Make one folded place card per guest and keep each collage low enough that the name remains easy to read. Tearing paper gives younger children control over the design without demanding exact scissor cuts. If you enjoy displaying handmade seasonal details, pair these cards with a few simple fall mason jar crafts on an adult-managed table.
Thanksgiving Crafts for Kids FAQ
How long do Thanksgiving crafts for kids need to dry?
Thin washable-tempera layers usually need 20 to 30 minutes to dry, while dimensional glued projects need at least 30 to 60 minutes before handling. Cool or humid rooms can extend both times.
Keep finished pieces flat and undisturbed so paint does not smear and paper layers do not slide. For pinecone turkeys and magnet strips, allow the longer stated drying time because their parts need a firmer bond before display.
What are the easiest Thanksgiving crafts for preschoolers?
Handprint cards, paper plate turkeys, and leaf rubbings are the easiest Thanksgiving crafts for preschoolers. Pre-cut paper shapes, offer small amounts of glue, and let children choose colors and placement.
Avoid loose wiggle eyes, magnets, and feathers for children who mouth materials. In addition, for more group-friendly activities with simple preparation, browse these daycare craft ideas for kids and adapt the setup with autumn colors.
Can I use real leaves and pinecones indoors?
Fully dry, clean leaves and pinecones are suitable for short-term supervised craft displays. Inspect them outdoors first and discard anything damp, moldy, sticky, or filled with insects.
Dry natural materials can still shed small bits, so keep them away from babies and pets. Therefore, store finished projects on a tray or high shelf, particularly when they include feathers, loose paper, or small facial details.
How can I display simple Thanksgiving crafts safely?
Display cards on a mantel, place lightweight garlands high and out of reach, and keep dimensional projects on stable trays. Use magnets only on a high refrigerator surface that children cannot access.
Keep paper crafts away from candles, stoves, fireplaces, and heat vents. Also, remove damaged magnets or loose embellishments immediately so a cheerful seasonal display remains safe throughout the holiday.
Quick Reference: All Supplies at a Glance
For your convenience, here is a quick summary of the materials and tools featured in this post:
🎨 Paper, Paint, and Natural Materials
- Washable Tempera Paint Set | Check Price on Amazon
- Fall-Colored Construction Paper and Cardstock Pack | See Fall Cardstock on Amazon
- Uncoated White Paper Plates | View Paper Plates on Amazon
- Natural Brown Paper Lunch Bags | Find Paper Lunch Bags on Amazon
- Jumbo Wooden Craft Sticks | Check Craft Sticks on Amazon
- Coffee Filters and Washable Markers | See Price on Amazon
- Natural Pinecones and Assorted Craft Feathers | View Pinecones and Feathers on Amazon
- Peel-Off Crayons and White Drawing Paper | Find Crayons on Amazon
- Natural Jute Twine and Yellow Yarn | View Twine and Yarn on Amazon
- Fine-Mist Water Mister | Check Water Mister on Amazon
✂ Kid-Friendly Building Tools
- Kid-Safe Scissors, Glue Brushes, Ruler, and Hole Punch | Check Kid-Safe Tools on Amazon
- Leaf Template and Clear Tape | View Leaf Template on Amazon
🧲 Fasteners, Kits, and Craft Storage
- Self-Adhesive Wiggle Eyes | Find Wiggle Eyes on Amazon
- Washable School Glue | Check School Glue on Amazon
- Small Adhesive Magnet Strips | View Magnet Strips on Amazon
🏆 Optional Craft-Table Upgrades
Important Crafting Safety Notes
Crafting is a rewarding creative activity, but maintaining a safe workshop environment is essential for yourself, your family, and your pets. Please review these safety precautions before starting:
• Personal Protective Equipment (PPE) & Safe Handling: Adults should wear safety glasses when clipping wire, trimming findings, or using power tools. Use a heat-resistant mat around hot glue tools, and wear disposable gloves and a particle mask when sanding wood or using chemical sealants. For these children’s projects, adults should handle apple cutting, hole punching, and any preparation with sharp tools.
• Room Ventilation & Fume Safety: Work near open windows or active airflow when using adhesives, sealants, sprays, or heat-curing materials. Do not inhale chemical fumes directly, and allow projects with stronger adhesives or coatings to cure fully in an airy area away from living spaces.
• Child & Pet Safety (Choking & Swallowing Prevention): Wiggle eyes, magnets, feathers, pinecone pieces, paper scraps, clasps, beads, and other small components can cause choking, blockage, or injury. Keep all loose materials out of reach of babies, toddlers, and pets. Use marker-drawn facial details for child-handled projects, and never use magnets around children who mouth objects or around pets.
• Sharp Tool Storage & Clean Work Area: Store craft knives, rotary cutters, scissors, snips, needles, and pliers in secure latching cases or high cabinets immediately after use. Sweep or vacuum the craft area after each session to collect dropped pins, wire clippings, pinecone fragments, and small paper pieces.
• Certified, Quality & Non-Toxic Supplies: Choose ACMI AP-certified non-toxic paints and adhesives whenever possible, and follow each manufacturer’s directions for use and drying. Never reuse kitchen utensils for craft chemicals, paint, glue, or sealants.
For more detailed guidance on safe crafting practices, liability disclosures, and website usage, please review our Terms and Conditions.
“Which Thanksgiving craft for kids will your family make first? Drop a comment below and share the thankful detail your child added to it!”