
Generic ornaments disappear into the branches. These DIY Christmas ornaments bring your own colors, textures, and family stories to the tree, with 12 approachable designs made from clay, wood, cardstock, and clear baubles.
Each project works as a small keepsake or a thoughtful handmade gift, whether you prefer a folk-painted wood star or a crisp folded paper snowflake. If you enjoy making polymer clay gift ideas and other cheerful polymer clay crafts, several of these ornaments will feel familiar from the first roll of clay.
Affiliate Disclosure: This post contains affiliate links. As an Amazon Associate, I earn from qualifying purchases. If you buy through these links, I may earn a commission at no additional cost to you.
Key Facts:
- Total time: Up to 30 hours, including 4 to 6 hours of active work, package-directed clay baking, 1 hour of adhesive drying, and a 24-hour final varnish cure.
- Difficulty: Beginner to intermediate.
- Makes: 12 distinct ornament designs, each made independently.
- Core techniques: Cutting, folding, painting, baking polymer clay, sealing, and tying hangers.
- Best for: Makers who want 7 cm to 18 cm personalized tree decorations.
Essential Materials for DIY Christmas Ornaments
Set out the materials that match the ornaments you plan to make, then keep paint, clay, paper, and hanging cord in separate trays. The shared supplies below support the full collection and make it easier to repeat favorite colors across your DIY Christmas ornaments.
| Supply | Spec / Size | Used For |
|---|---|---|
| Oven-bake polymer clay | Holiday color assortment | Snowflakes, gingerbread people, discs, and stars |
| Wood ornament blanks | 8 cm with pre-drilled holes | Painted and photo keepsakes |
| Heavyweight cardstock | Red, green, ivory, and gold | Stars, snowflakes, fillers, and houses |
| Clear plastic baubles | 7 cm split-fill style | Orange and miniature tree scenes |
| Matte acrylic varnish | Brush-on water-resistant finish | Dry painted wood and clay accents |
| Hanging cord assortment | Twine, velvet ribbon, and jute | Measured ornament loops |
🎄 Base Materials
- Oven-Bake Polymer Clay in Holiday Colors — Holds stamped detail and cures into durable ornaments when baked according to its package directions | Check Price on Amazon
- Unfinished Wooden Ornament Blanks with Pre-Drilled Holes — Provides smooth, ready-to-paint shapes without drilling thin wood yourself | See Wood Ornament Blanks on Amazon
- Heavyweight Cardstock in Red, Green, Ivory, and Gold — Folds into crisp points and stays firm enough for lightweight hanging forms | View Holiday Cardstock on Amazon
- Clear Fillable Plastic Ornament Baubles — Open into two halves for dry botanical fillers and miniature scenes | Find Fillable Baubles on Amazon
- ACMI AP-Certified Acrylic Paint Set — Gives wood and cured clay clean color coverage with maker-safe labeling | Check Acrylic Paint Set on Amazon
- Fully Dehydrated Orange Slices — Adds dry citrus color to clear baubles without introducing moisture | Find Dried Orange Slices on Amazon
- Miniature Bottle-Brush Trees — Fits inside 7 cm clear baubles for small winter scenes | View Miniature Trees on Amazon
✂ Cutting and Shaping Tools
- Polymer Clay Roller, Shape Cutters, and Detail Tool Set — Keeps clay thickness even, cuts clean silhouettes, and pierces neat hanging holes | See Polymer Clay Tool Set on Amazon
- Precision Craft Knife, Metal Ruler, and Self-Healing Cutting Mat — Supports straight cardstock cuts, accurate photo trimming, and scored fold lines | View Craft Knife Set on Amazon
- Fine-Grit Sanding Sponge — Smooths rough wood edges before paint or varnish is applied | Check Sanding Sponge on Amazon
🎀 Hanging and Finishing Supplies
- Natural Cotton Twine, Velvet Ribbon, and Jute Cord — Offers soft, rustic, and polished hanging options for every ornament style | Find Ornament Cord on Amazon
- Matte Water-Resistant Acrylic Varnish — Protects fully dry paint and gives finished pieces a low-sheen surface | Check Latest Price on Amazon
- Polyurethane Gem Adhesive — Bonds lightweight paper seams and optional small accents with a flexible clear hold | View Gem Adhesive on Amazon
- Duplicate Printed Photos — Supplies replaceable images for photo keepsake ornaments while originals stay protected | Find Photo Paper on Amazon
🧰 Studio Upgrades
How to Make DIY Christmas Ornaments That Last
Protect the table with the self-healing mat or a dedicated craft surface before cutting, rolling, or painting. First, complete all cutting and shaping. Next, let paint, adhesive, and varnish reach the full drying or cure time printed on their labels before threading a hanger through the finished piece.
For polymer clay ornaments, bake each piece only at the temperature and duration stated on its package, then allow it to cool completely on the baking surface before adding paint, adhesive, or a ribbon loop. Measure hanging materials before tying: 20 cm loops suit most clay, wood, and paper ornaments, while a fuller 25 cm velvet ribbon works well for a 7 cm bauble.
Apply varnish only over completely dry paint or cured clay. Consequently, the finish will not trap moisture or smear your line work when you handle the ornament later.
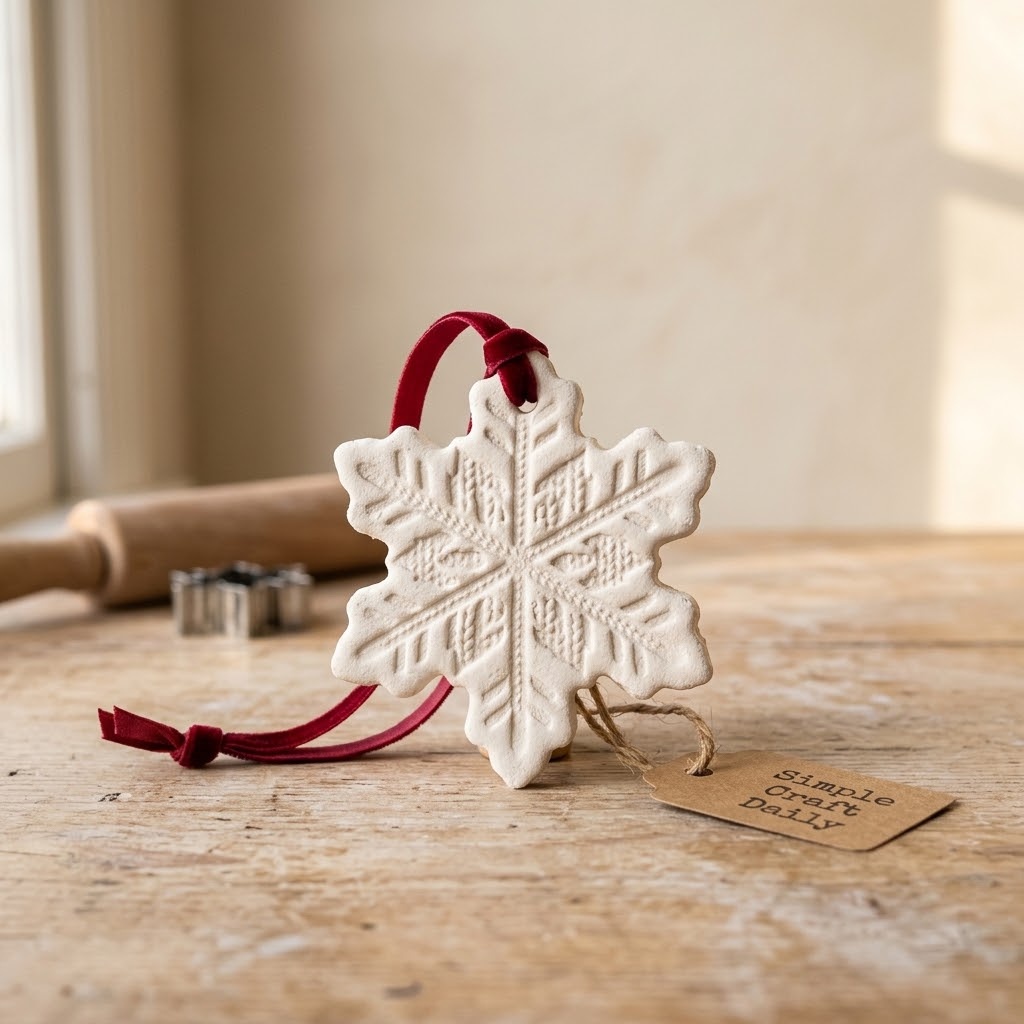
1. Stamped Snowflake DIY Christmas Ornaments
Supplies Needed: Oven-Bake Polymer Clay in Holiday Colors, Polymer Clay Roller, Shape Cutters, and Detail Tool Set, Natural Cotton Twine, Velvet Ribbon, and Jute Cord, Polyurethane Gem Adhesive.
- Condition a 25 g portion of polymer clay until it bends without cracking.
- Roll the clay to 6 mm thick and stamp the surface.
- Cut one 7 cm snowflake and pierce one 4 mm hanging hole.
- Bake according to the clay package and cool the piece completely.
- Thread a 20 cm velvet ribbon loop through the hole and add an optional gem after its adhesive cures for 24 hours.
Use the roller to keep the slab even, then press the stamp firmly enough to leave a clear pattern without flattening the clay edges. Next, cut the snowflake, lift it with the detail tool, and make the hole at least 5 mm from the nearest edge.
After baking, leave the ornament untouched until it is fully cool. Thread the velvet ribbon through the hole and tie a neat double knot; if you want a tiny accent, secure one lightweight gem with a pinhead-sized dot of polyurethane gem adhesive and allow the adhesive to cure for 24 hours. This DIY Christmas ornament makes one sturdy 7 cm snowflake.
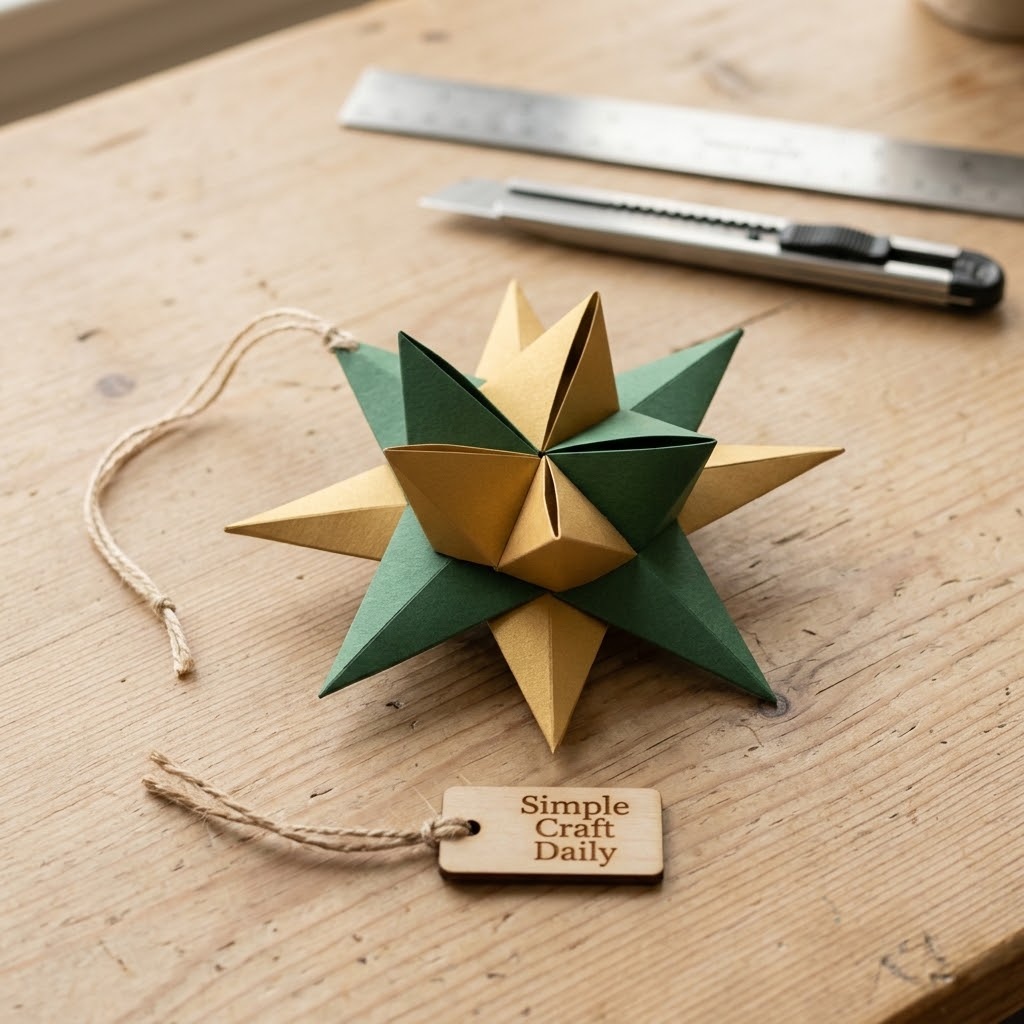
2. Folded Paper Star Decorations
Supplies Needed: Heavyweight Cardstock in Red, Green, Ivory, and Gold, Precision Craft Knife, Metal Ruler, and Self-Healing Cutting Mat, Polyurethane Gem Adhesive, Natural Cotton Twine, Velvet Ribbon, and Jute Cord.
- Cut eight equal 10 cm cardstock squares on the cutting mat.
- Score and fold each square into a pointed star section with the metal ruler.
- Apply small dots of polyurethane gem adhesive to join matched halves.
- Press the star flat under a clean book for 30 minutes.
- Pierce the top point and thread a 20 cm cotton twine loop through it.
Keep the blade against the ruler’s outer edge and cut each square in one steady pass. Then fold sharp center creases and pair the folded sections so their points alternate around the middle.
Use adhesive sparingly along the contact edges; a heavy layer can soften cardstock and blur the folds. Press the joined star under a clean book or flat board for 30 minutes, then pierce the top point and thread the twine. The finished eight-point star stays dimensional while remaining light enough for a slender branch.
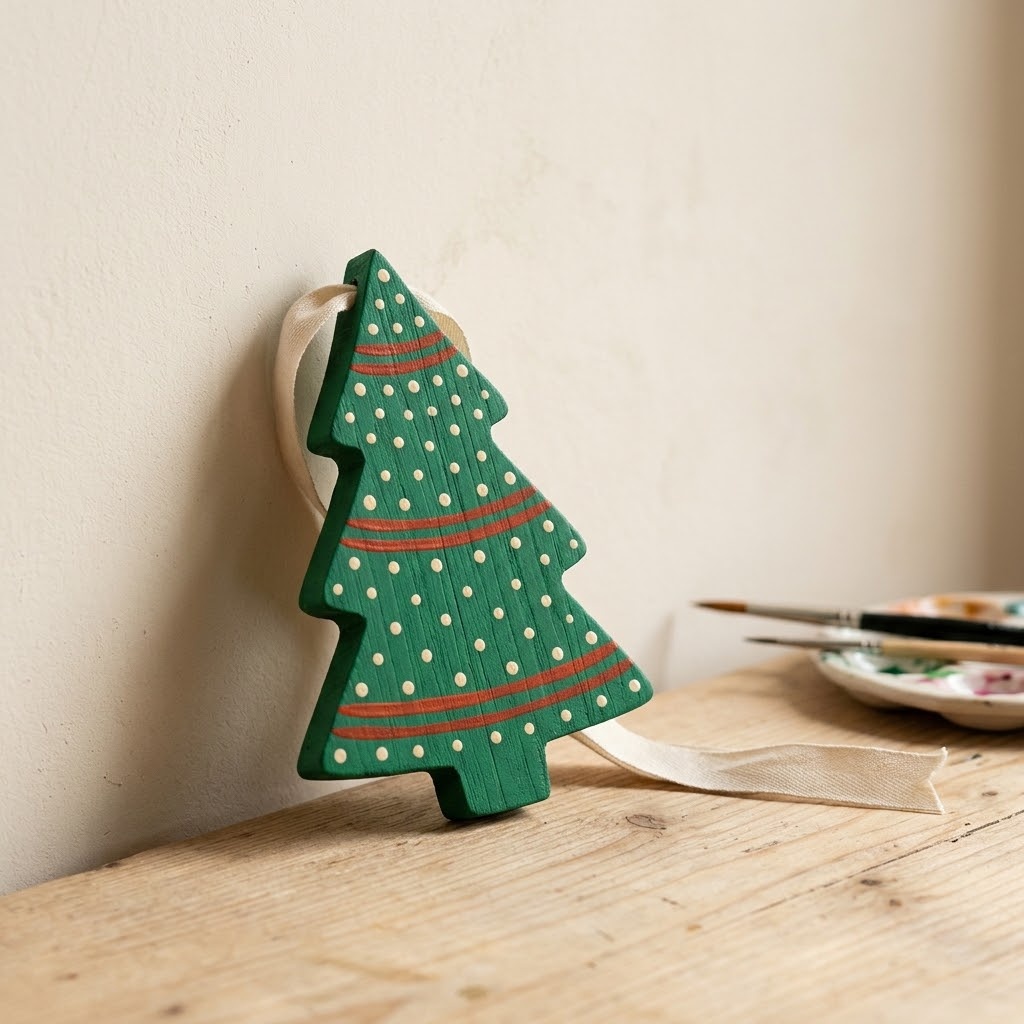
3. Painted Folk Tree DIY Christmas Ornaments
Supplies Needed: Unfinished Wooden Ornament Blanks with Pre-Drilled Holes, Fine-Grit Sanding Sponge, ACMI AP-Certified Acrylic Paint Set, Matte Water-Resistant Acrylic Varnish, Natural Cotton Twine, Velvet Ribbon, and Jute Cord.
- Lightly sand one 8 cm pre-drilled wooden tree blank by hand.
- Paint two thin base coats and dry each coat for the time listed on the paint label.
- Add dots and stripes after the base color is fully dry.
- Brush on two thin varnish coats, allowing the stated drying time between coats.
- Let the final coat cure for 24 hours, then tie a 20 cm ribbon loop through the hole.
Brush away sanding dust before painting so the acrylic paint settles evenly. Use two thin coats rather than one thick coat, allowing the first coat to dry fully before applying the second.
Next, add tiny dots with the end of a detail brush and paint narrow stripes with a steady hand. Keep the pre-drilled hole clear of paint. When the decoration is dry, brush on one thin varnish coat, let it dry according to its label, and repeat with a second coat. Finally, allow the final finish to cure for 24 hours before tying velvet ribbon through the hole.
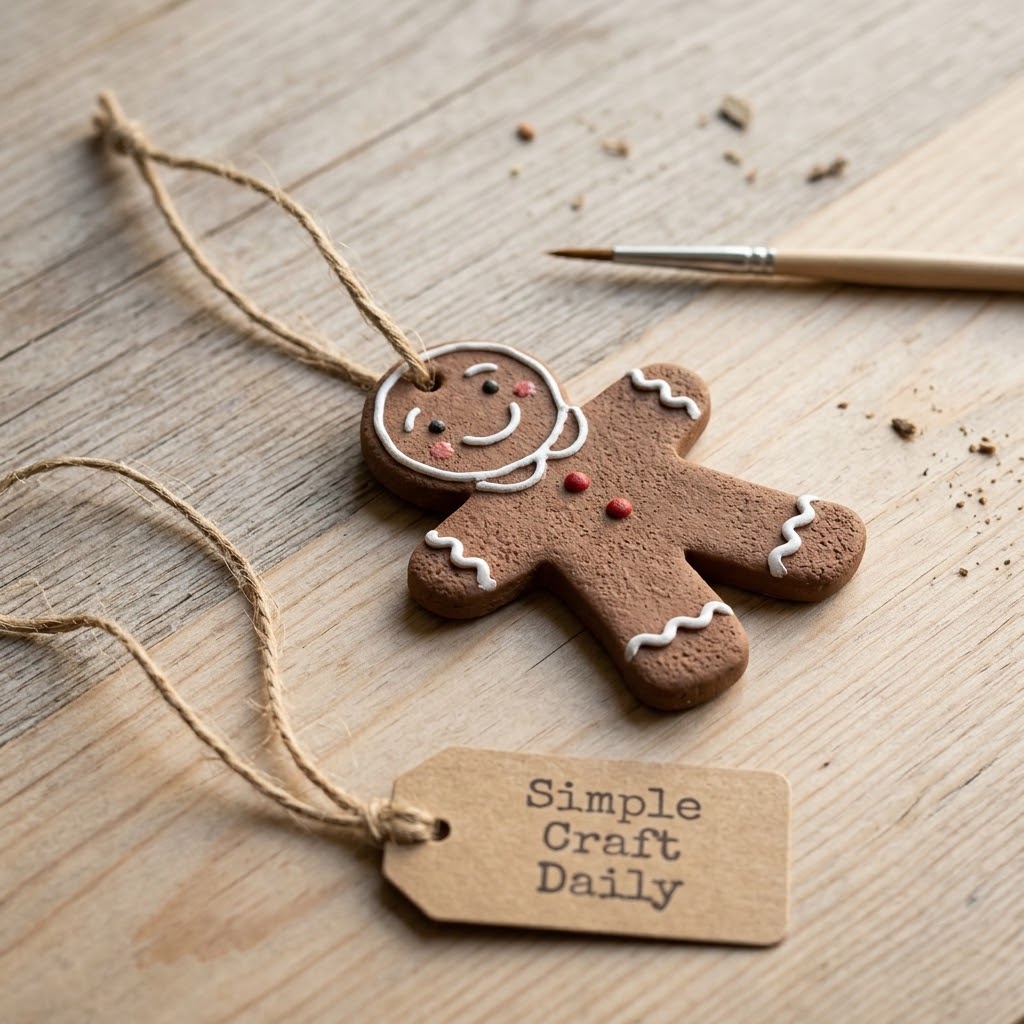
4. Gingerbread Polymer Clay DIY Christmas Ornaments
Supplies Needed: Oven-Bake Polymer Clay in Holiday Colors, Polymer Clay Roller, Shape Cutters, and Detail Tool Set, ACMI AP-Certified Acrylic Paint Set, Matte Water-Resistant Acrylic Varnish, Natural Cotton Twine, Velvet Ribbon, and Jute Cord.
- Roll brown polymer clay to a 6 mm thickness.
- Cut one 9 cm gingerbread-person shape and smooth the edges with the detail tool.
- Pierce a 4 mm hanging hole above the head.
- Bake according to the clay package and cool completely.
- Paint icing details, let the paint dry, varnish the piece, cure it for 24 hours, and tie a 20 cm jute loop.
Condition the brown clay before rolling so the edges do not crack during cutting. Cut the figure, refine the outline with the detail tool, and keep the hanging hole centered above the head for balanced hanging.
After the clay cools, paint small white scallops, buttons, and cuffs with acrylic paint. Let the paint dry fully before brushing on a thin coat of matte varnish. Once the varnish has cured for 24 hours, thread 20 cm of jute cord through the hole and secure the loop with a double knot. This is one of the sweetest DIY Christmas ornaments for a cookie-inspired tree theme.
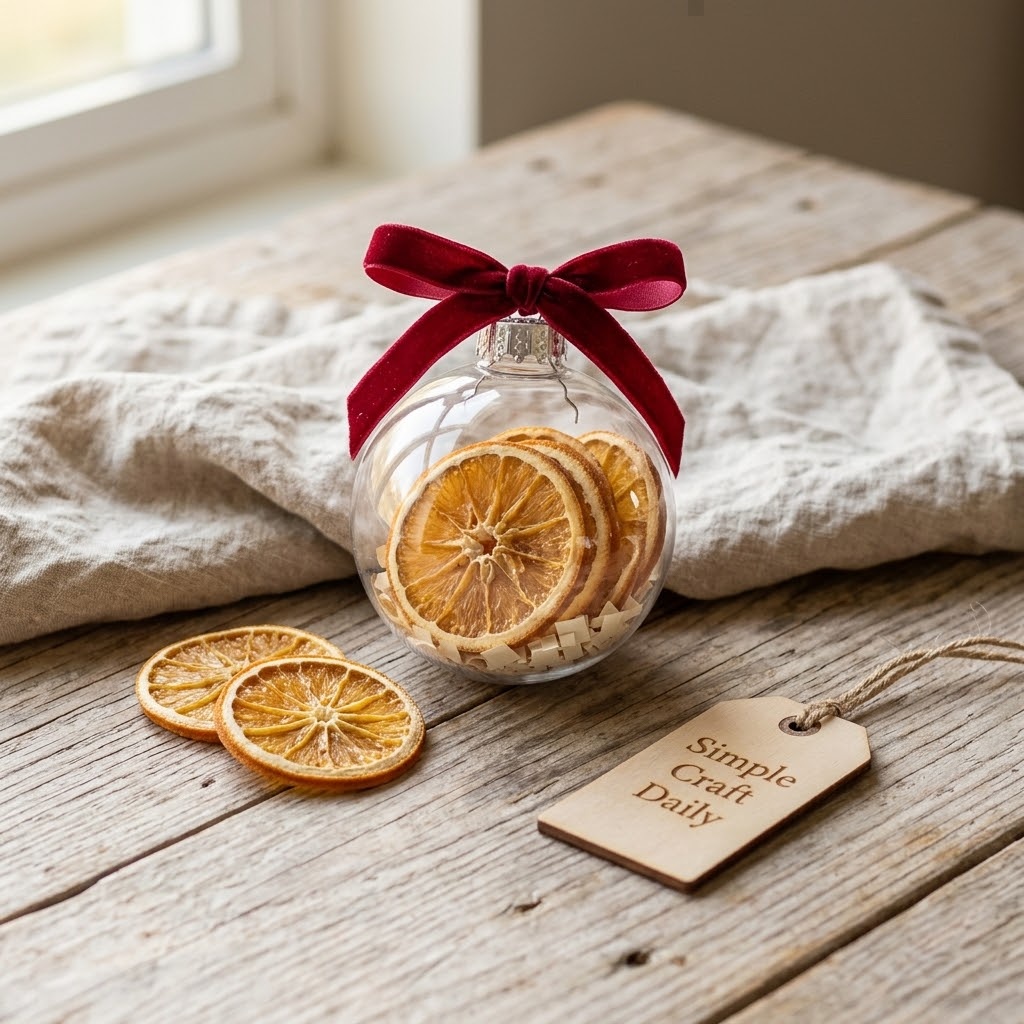
5. Orange Slice Fillable Bauble
Supplies Needed: Clear Fillable Plastic Ornament Baubles, Fully Dehydrated Orange Slices, Heavyweight Cardstock in Red, Green, Ivory, and Gold, Natural Cotton Twine, Velvet Ribbon, and Jute Cord.
- Check that one orange slice is fully dehydrated and crisp before opening one 7 cm bauble.
- Cut a small pinch of cardstock confetti no larger than 8 mm.
- Place one orange slice and the confetti inside the bauble halves.
- Close the halves firmly until the seam is fully seated.
- Thread a 25 cm velvet ribbon through the top cap and tie the hanger.
Only use orange slices that are completely dry and crisp. Any remaining moisture can cloud the plastic and encourage spoilage inside the sealed ornament.
Cut tiny cardstock confetti pieces no larger than 8 mm, then keep the amount light so the bauble cap is not strained. Place the slice upright, add the confetti, and press both halves together until the seam is fully closed. Finally, thread velvet ribbon through the top cap and tie a 25 cm loop.
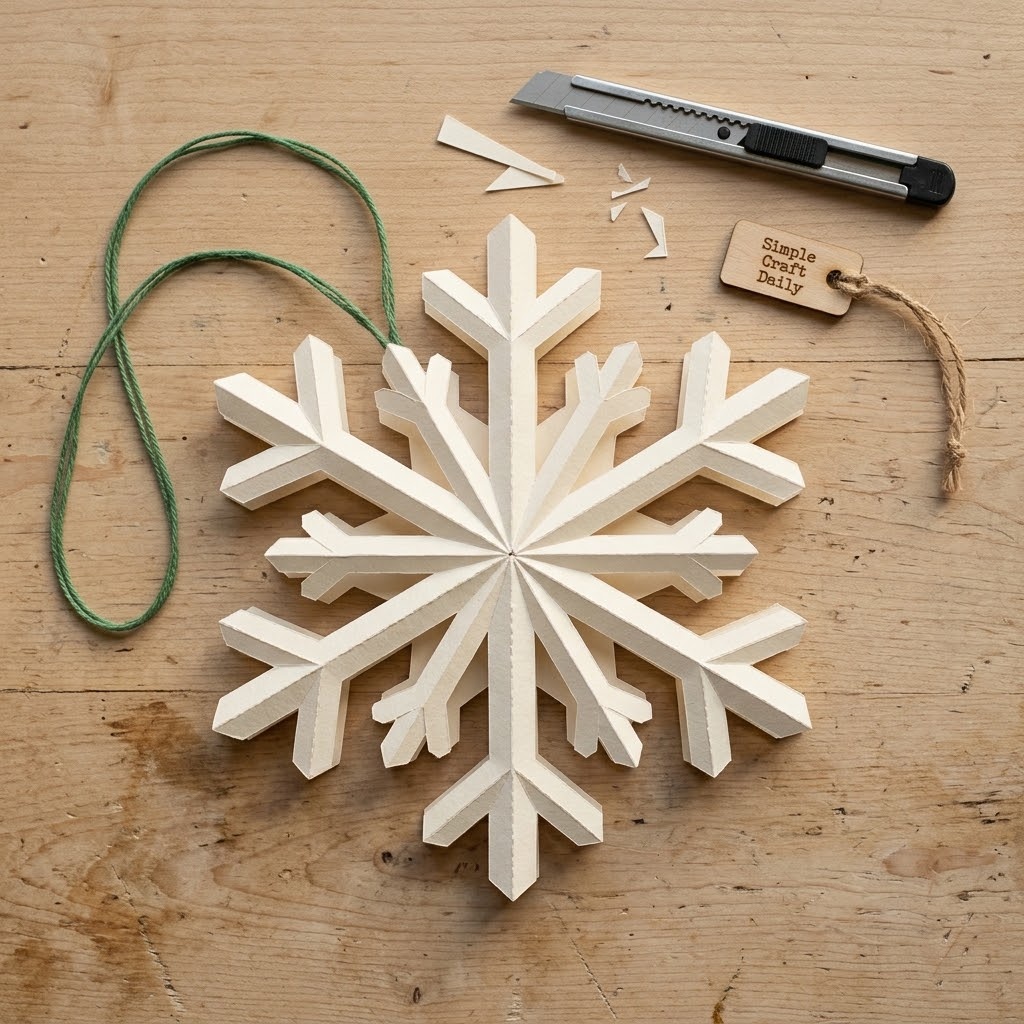
6. Layered Paper Snowflake DIY Christmas Ornaments
Supplies Needed: Heavyweight Cardstock in Red, Green, Ivory, and Gold, Precision Craft Knife, Metal Ruler, and Self-Healing Cutting Mat, Polyurethane Gem Adhesive, Natural Cotton Twine, Velvet Ribbon, and Jute Cord.
- Cut six 8 cm cardstock squares with the craft knife and metal ruler.
- Fold each square and make matching symmetrical cuts.
- Open each section and glue alternating inner points with polyurethane gem adhesive.
- Join the six finished arms at the center.
- Allow the center joint to dry flat for 30 minutes, then add a 20 cm twine loop.
Fold every square the same way so all six arms match when opened. Cut slowly on the self-healing mat and keep fingers behind the ruler edge throughout each pass.
Open one arm, then bring the first pair of inner points together and secure them with a tiny adhesive dot. Turn the piece over and join the next pair from the opposite side. Subsequently, repeat the alternating pattern, assemble all six arms at the center, and allow the snowflake to dry flat for 30 minutes. Thread cotton twine through one outer point to hang the finished 18 cm snowflake.
7. Marbled Bauble DIY Christmas Ornaments
Supplies Needed: Oven-Bake Polymer Clay in Holiday Colors, Polymer Clay Roller, Shape Cutters, and Detail Tool Set, Natural Cotton Twine, Velvet Ribbon, and Jute Cord.
- Condition two 15 g portions of contrasting polymer clay.
- Twist the colors together once and roll them without overmixing.
- Cut one 7 cm circle and pierce a 4 mm hanging hole.
- Bake according to the clay package and cool completely.
- Add a 20 cm velvet ribbon loop after the disc has cooled.
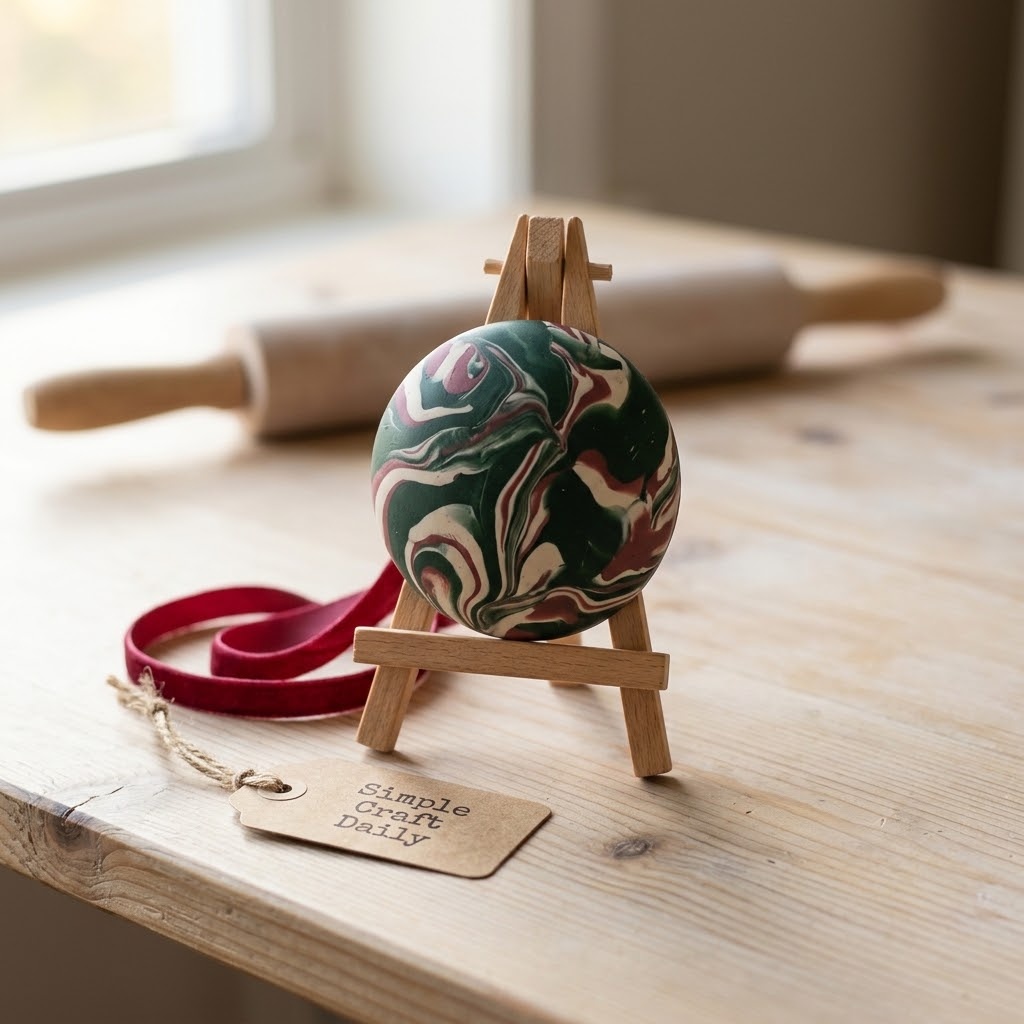
Choose colors with clear contrast, such as ivory and forest green or red and pearl white. Twist the two conditioned pieces once, fold them in half, and roll only until ribbons of both colors remain visible.
Stop rolling before the colors blend into one muddy shade. Next, cut the disc, smooth any rough rim with the detail tool, and pierce the hole near the top edge. Bake and cool the piece according to the package directions, then thread velvet ribbon through the opening. Leave the cured surface unvarnished unless you later add painted accents.
8. Decoupage Family Photo Wood Ornament
Supplies Needed: Unfinished Wooden Ornament Blanks with Pre-Drilled Holes, Duplicate Printed Photos, Precision Craft Knife, Metal Ruler, and Self-Healing Cutting Mat, Polyurethane Gem Adhesive, Matte Water-Resistant Acrylic Varnish, Natural Cotton Twine, Velvet Ribbon, and Jute Cord.
- Trim a duplicate printed photo 3 mm smaller than one 8 cm wood blank.
- Apply a thin layer of polyurethane gem adhesive across the blank.
- Set the photo in place and smooth from the center outward.
- Allow the adhesive to dry flat for 1 hour.
- Brush on thin varnish coats, cure the final coat for 24 hours, and add a 20 cm ribbon loop.
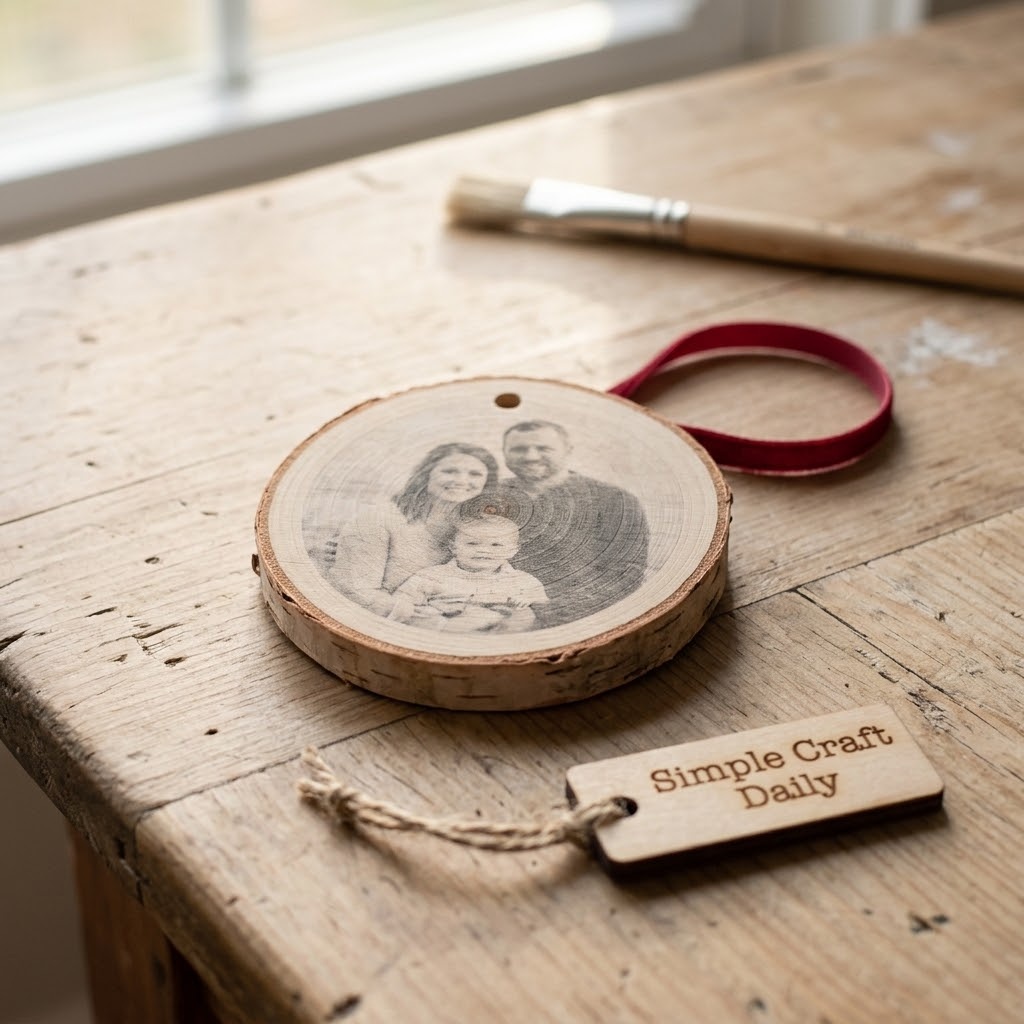
Use a duplicate printed photo rather than an original. Measure the wood blank, mark the photo border with the metal ruler, and trim on the cutting mat so a narrow wood frame remains visible around all edges.
Spread a very thin, even adhesive layer, position the print, and smooth outward with a clean fingertip to remove trapped air. Let it dry flat for 1 hour. Then brush on a thin varnish coat, allow it to dry as directed, and repeat once if the surface needs more protection. Allow the final varnish coat to cure for 24 hours before adding ribbon. For another personalized sealed-paper project, see our DIY mason jar decor ideas.
9. Mini Bottle-Brush Tree Bauble
Supplies Needed: Clear Fillable Plastic Ornament Baubles, Miniature Bottle-Brush Trees, Heavyweight Cardstock in Red, Green, Ivory, and Gold, Natural Cotton Twine, Velvet Ribbon, and Jute Cord.
- Check that one lightweight miniature bottle-brush tree fits inside an open 7 cm bauble.
- Trim the tree base if needed so it stands below the bauble seam.
- Cut a 4 cm ivory cardstock snow mound and place the tree upright on it.
- Close both halves until they click together.
- Tie a 20 cm velvet ribbon hanger through the top cap.
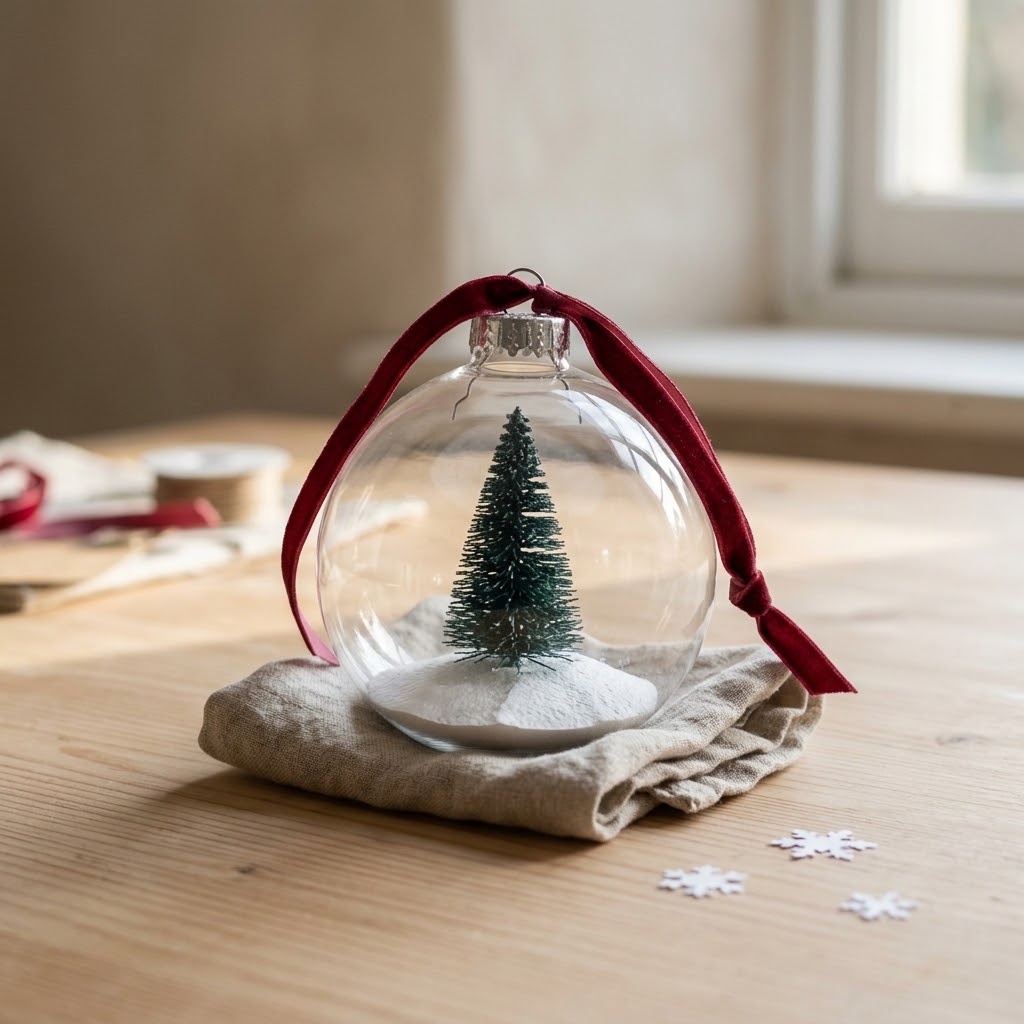
Test-fit the miniature tree before cutting the cardstock mound. The tree must sit below the seam so neither bauble half bows outward when closed.
Cut a 4 cm uneven oval from ivory cardstock and crease it lightly for a snowy mound. Then place the tree upright on the paper, guide both bauble halves together, and check that the seam closes evenly. Press until the halves click fully together before lifting the ornament. A 20 cm velvet ribbon loop gives this tiny scene a soft finish.
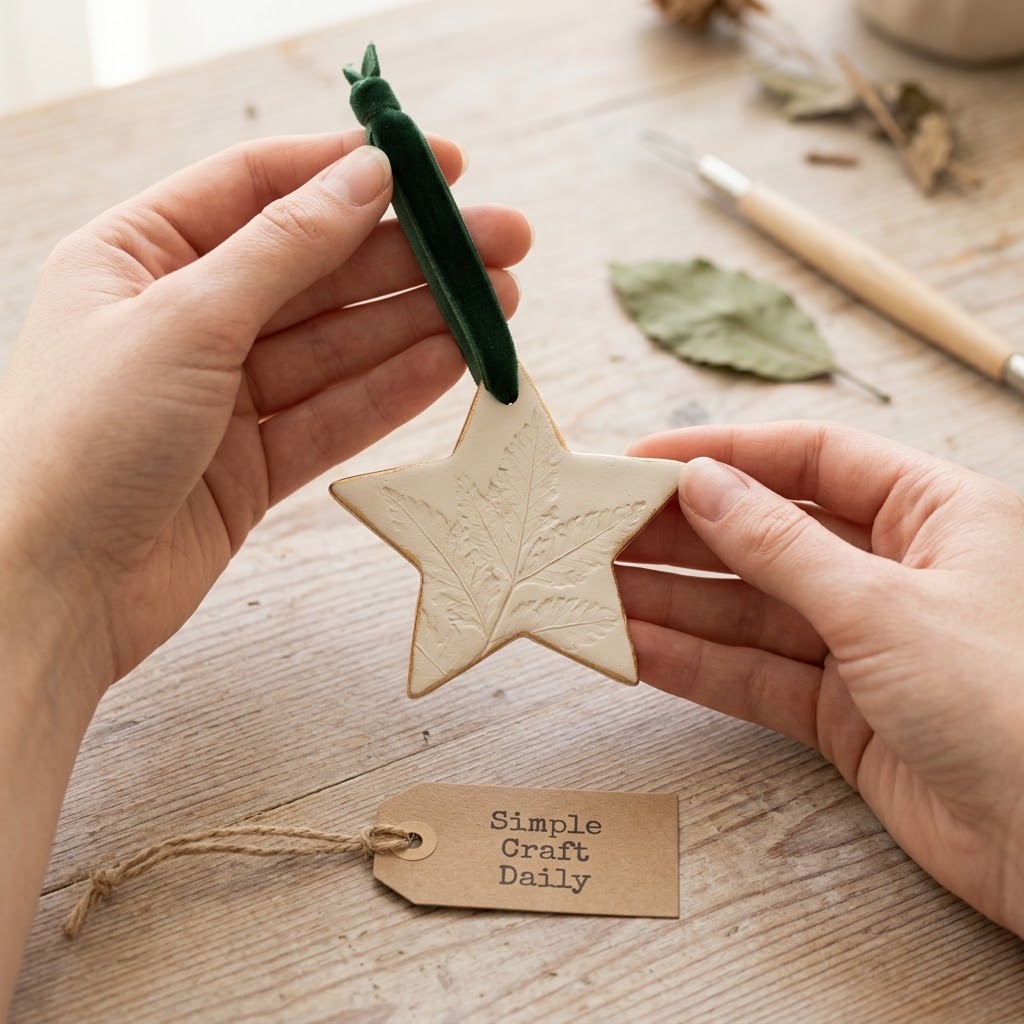
10. Botanical Clay Star DIY Christmas Ornaments
Supplies Needed: Oven-Bake Polymer Clay in Holiday Colors, Polymer Clay Roller, Shape Cutters, and Detail Tool Set, ACMI AP-Certified Acrylic Paint Set, Natural Cotton Twine, Velvet Ribbon, and Jute Cord, One Clean Fully Dry Textured Leaf.
- Roll ivory polymer clay to a 6 mm thickness.
- Press one clean, dry textured leaf lightly into the clay surface.
- Cut one 8 cm star and pierce a 4 mm hanging hole.
- Bake according to the clay package and cool completely.
- Add optional acrylic paint accents after cooling, then tie a 20 cm velvet ribbon loop.
Use a clean, fully dry leaf with firm veins and no loose damp material. Press it lightly into the rolled clay, then lift it straight away so the imprint stays sharp.
Cut the textured star and pierce the hanging hole before baking. After the piece has cooled completely, leave the natural ivory surface plain or brush a small amount of acrylic paint over the raised texture. Then thread 20 cm of velvet ribbon through the hole and tie the ends securely. The soft botanical imprint gives this ornament a quiet handmade finish.
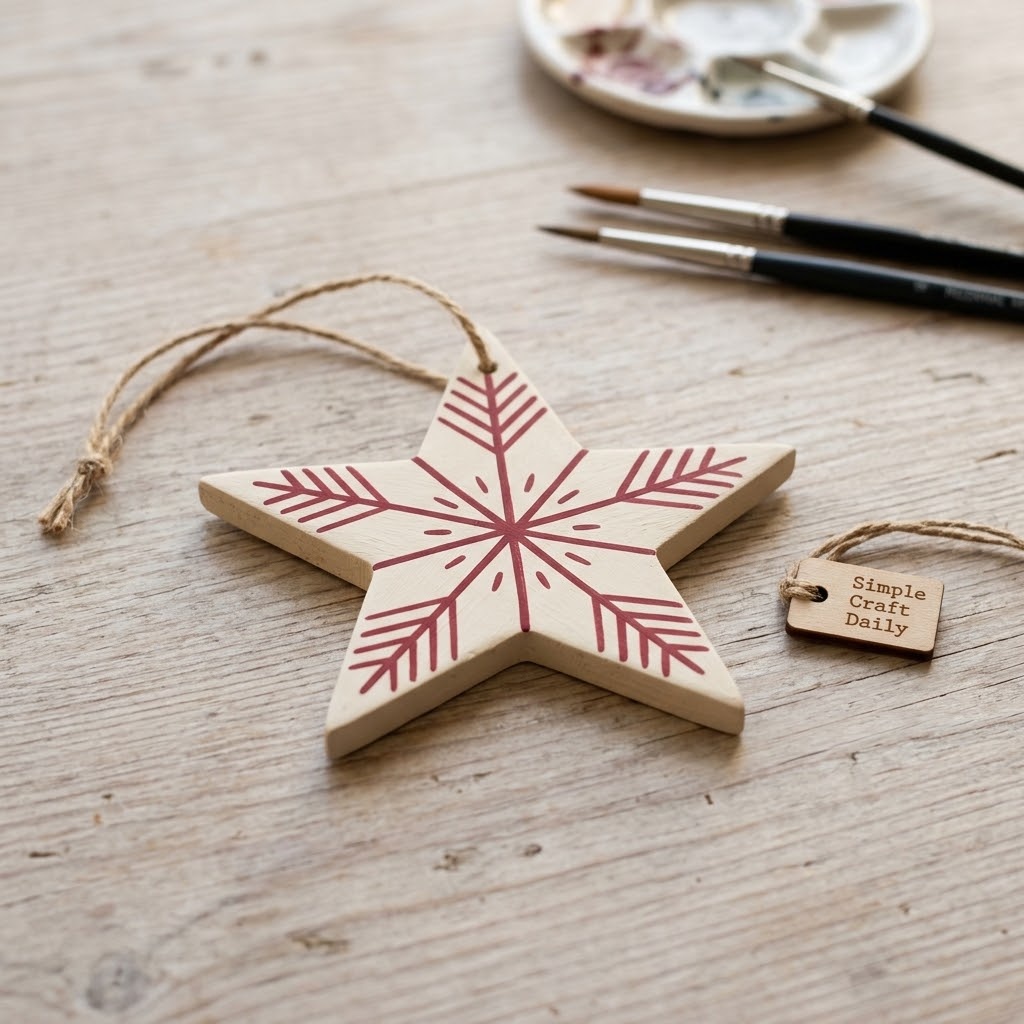
11. Scandinavian Painted Wood Star
Supplies Needed: Unfinished Wooden Ornament Blanks with Pre-Drilled Holes, Fine-Grit Sanding Sponge, ACMI AP-Certified Acrylic Paint Set, Matte Water-Resistant Acrylic Varnish, Natural Cotton Twine, Velvet Ribbon, and Jute Cord.
- Lightly sand the edges of one 8 cm wooden star blank.
- Paint two thin ivory base coats and let each coat dry as directed.
- Add red geometric lines after the ivory paint is dry.
- Apply one thin varnish coat and allow it to cure for 24 hours.
- Attach a 20 cm jute hanger with a double knot.
Sand the edges with light pressure until they feel smooth, then remove dust before applying paint. Brush on two thin ivory coats so the wood grain stays subtle instead of becoming clogged beneath heavy paint.
Once the base is dry, paint simple red lines from the center toward the points, leaving a clean ivory border around the edge. Keep paint away from the pre-drilled hole so the cord slides through without snagging. Finally, brush on a thin matte varnish coat, let it cure for 24 hours, and finish with a double-knotted jute loop.
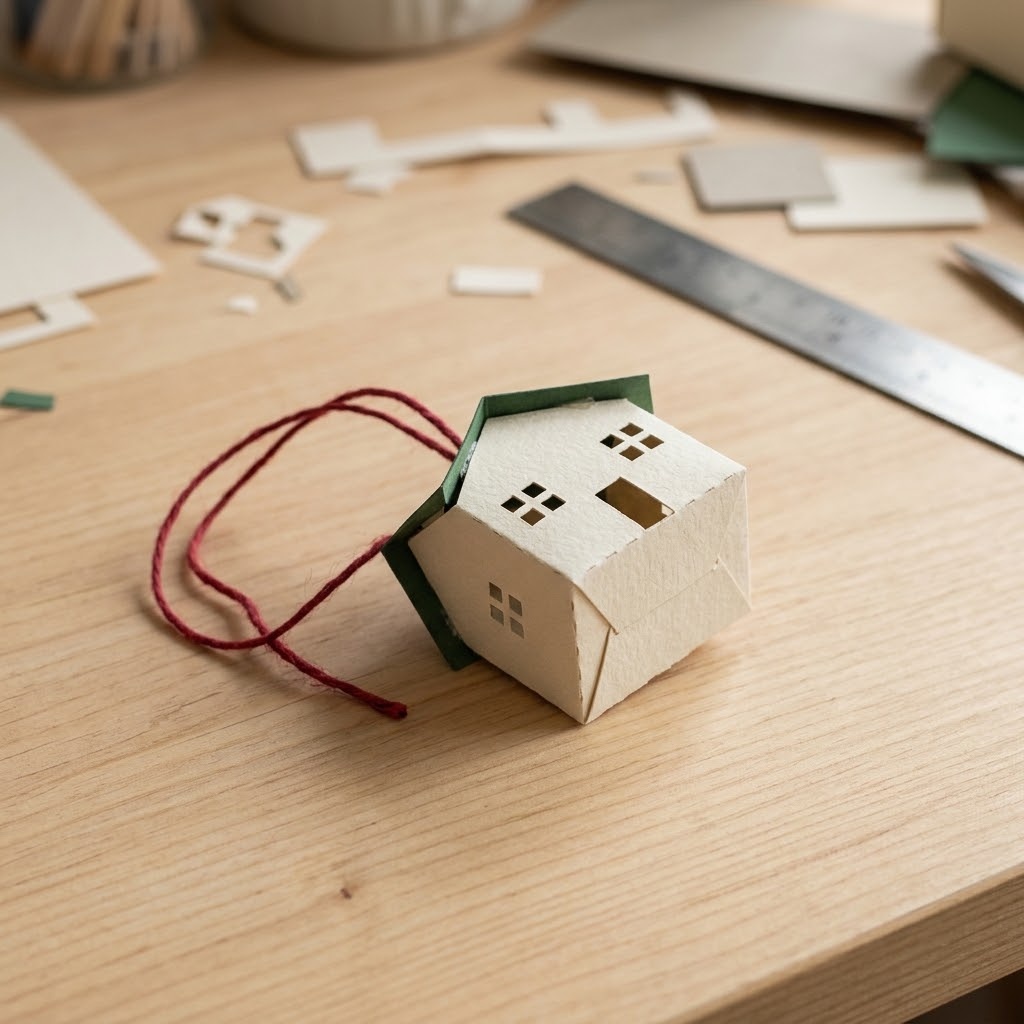
12. Paper House DIY Christmas Ornaments
Supplies Needed: Heavyweight Cardstock in Red, Green, Ivory, and Gold, Precision Craft Knife, Metal Ruler, and Self-Healing Cutting Mat, Polyurethane Gem Adhesive, Natural Cotton Twine, Velvet Ribbon, and Jute Cord.
- Cut one 9 cm by 12 cm house template from heavyweight cardstock.
- Score the fold lines with the metal ruler and cut out the windows.
- Fold the walls and roof along the scored lines.
- Apply polyurethane gem adhesive to the tabs and form a shallow box.
- Allow the tabs to dry for 30 minutes, then thread a 20 cm twine hanger through the reinforced roof.
Draw the house template with a peaked roof, 1 cm side tabs, and two small window openings before cutting. Use the metal ruler for each straight cut and score the fold lines lightly so the cardstock bends without tearing.
Fold the walls inward, add small adhesive dots to the tabs, and hold the shallow house shape together for 30 seconds. Let the tabs dry for 30 minutes before making two tiny roof holes and threading through cotton twine. A battery-operated micro LED may sit outside the paper structure for display; however, keep any light source away from the cardstock and never use a heat-producing bulb. These DIY Christmas ornaments look especially charming grouped as a miniature village.
DIY Christmas Ornaments FAQ
How long do polymer clay DIY Christmas ornaments last?
Properly cured polymer clay DIY Christmas ornaments can last for many holiday seasons when stored in a dry box and protected from crushing. Use the baking temperature and duration printed on the specific clay package, because different formulas can require different curing instructions.
Allow each piece to cool fully before adding paint or a hanger. Then wrap ornaments individually in tissue paper after the season, especially pieces with raised stamped textures or delicate points.
Can I use air-dry clay for DIY Christmas ornaments?
Yes, air-dry clay can make DIY Christmas ornaments, but it needs a longer drying period and a protective finish before hanging. Roll it slightly thicker than 6 mm and dry it flat according to the manufacturer’s directions to reduce warping.
Air-dry clay is more vulnerable to damp storage than oven-bake polymer clay. Therefore, seal completely dry pieces with a compatible varnish and store them away from humidity.
How do I stop paper ornaments from bending?
Heavyweight cardstock, light adhesive application, and flat drying prevent most paper ornaments from bending. Use small adhesive dots instead of thick glue layers, then press seams flat for the stated drying time.
In addition, store finished paper ornaments in a rigid box with tissue between layers. Keep them away from humid windows, damp basements, and crowded storage bins where points can crease.
When can I hang painted ornaments on my tree?
Hang painted ornaments only after the paint and any varnish have dried or cured for the full label time. A surface may feel dry to the touch before the coating has hardened enough to resist fingerprints or sticking.
For extra confidence, rest painted wood ornaments on a clean flat surface overnight after the final varnish coat. The ACMI certification program also explains the labeling used to identify art materials assessed for safe intended use.
Quick Reference: DIY Christmas Ornaments Supplies at a Glance
For your convenience, here is a quick summary of the materials and tools featured in this post:
🎄 Base Materials
- Oven-Bake Polymer Clay in Holiday Colors | Check Price on Amazon
- Unfinished Wooden Ornament Blanks with Pre-Drilled Holes | See Wood Ornament Blanks on Amazon
- Heavyweight Cardstock in Red, Green, Ivory, and Gold | View Holiday Cardstock on Amazon
- Clear Fillable Plastic Ornament Baubles | Find Fillable Baubles on Amazon
- ACMI AP-Certified Acrylic Paint Set | Check Acrylic Paint Set on Amazon
- Fully Dehydrated Orange Slices | Find Dried Orange Slices on Amazon
- Miniature Bottle-Brush Trees | View Miniature Trees on Amazon
✂ Cutting and Shaping Tools
- Polymer Clay Roller, Shape Cutters, and Detail Tool Set | See Polymer Clay Tool Set on Amazon
- Precision Craft Knife, Metal Ruler, and Self-Healing Cutting Mat | View Craft Knife Set on Amazon
- Fine-Grit Sanding Sponge | Check Sanding Sponge on Amazon
🎀 Hanging and Finishing Supplies
- Natural Cotton Twine, Velvet Ribbon, and Jute Cord | Find Ornament Cord on Amazon
- Matte Water-Resistant Acrylic Varnish | Check Latest Price on Amazon
- Polyurethane Gem Adhesive | View Gem Adhesive on Amazon
- Duplicate Printed Photos | Find Photo Paper on Amazon
🧰 Studio Upgrades
Important Crafting Safety Notes
Crafting is a rewarding creative activity, but maintaining a safe workshop environment protects you, your family, and your pets. Review these important precautions before starting:
• Personal Protective Equipment (PPE) & Safe Handling: Wear safety glasses when cutting wire, clipping findings, trimming hard materials, or using power tools. Use a heat-resistant work mat around hot tools, and supervise all oven use for polymer clay. Wear nitrile gloves and a particle mask when sanding wood or working with solvent-based finishes.
• Room Ventilation & Fume Safety: Work near open windows, cross-ventilation, or active exhaust when using adhesives, varnish, sprays, or heat-curing materials. Allow varnish and adhesive to cure fully in an airy area away from everyday living spaces, and never inhale fumes directly.
• Child & Pet Safety (Choking & Swallowing Prevention): Small bauble parts, ribbon pieces, clay scraps, loose hardware, beads, split rings, clasps, and fiberfill can cause choking, obstruction, or ingestion injuries. Keep all raw materials out of reach of children and pets. For child-handled gifts, use securely stitched or painted details instead of detachable small pieces.
• Sharp Tool Storage & Clean Work Area: Store craft knives, rotary cutters, snips, scissors, needles, and pliers in secure latching cases or high cabinets immediately after use. Adult supervision is required when children use craft knives. Sweep or vacuum the work area and floor after crafting to collect dropped pins, wire clippings, and small findings.
• Certified, Quality & Non-Toxic Supplies: Choose ACMI AP-certified non-toxic supplies and lead-free, nickel-free hardware when appropriate. Follow every manufacturer instruction for curing durations and temperatures. Ovens, trays, and tools used for polymer clay must not be reused for food preparation, and kitchen utensils must never be used with craft chemicals.
For more detailed guidance on safe crafting practices, liability disclosures, and website usage, please review our Terms and Conditions.
“Which DIY Christmas ornament will you make first? Drop a comment below with your favorite design or a holiday color combination you plan to try.”