
Forgettable gifts disappear by January. These DIY Christmas gifts give friends and family something useful, personal, and made with care instead of another rushed store-bought item.
Each project uses a practical technique you can repeat in small batches, from painted ornaments to food-safe cocoa jars. If you enjoyed our personalized polymer clay gift ideas, these seasonal projects offer more ways to add names, colors, and small personal details.
Affiliate Disclosure: This post contains affiliate links. As an Amazon Associate, I earn from qualifying purchases. If you buy through these links, I may earn a commission at no additional cost to you.
Key Facts:
- Total time: 45 active minutes to 3 days of hands-on work, plus up to 7 days of unattended cure time for the soy candle project.
- Difficulty: Beginner to intermediate.
- Makes: 12 independently made gift ideas.
- Core techniques: Paint, shape, bake, pour, stitch, package, and personalize.
Essential Materials for DIY Christmas Gifts
First, build a shared supply tray, then choose the gifts that fit your available time and recipients. Several materials overlap, so one clay, paint, and packaging session can cover multiple DIY Christmas gifts.
| Supply | Spec / Size | Used For |
|---|---|---|
| White air-dry clay | White, smooth finish | Ornaments and ring dishes |
| Polymer clay | Mixed color pack | Keychains and photo stands |
| Soy wax flakes | Container-candle wax | 120 ml jar candles |
| Cotton yarn | Worsted weight | Crochet dishcloths |
| Wood ornament blanks | Pre-drilled unfinished wood | Painted keepsakes |
| Acrylic varnish | Clear water-based | Dry painted surfaces |
🎨 Clay, Paint & Finish
- White Air-Dry Clay — Smooth white clay accepts stamped names, paint, and a protective topcoat after drying | Check Price on Amazon
- Polymer Clay Color Pack — Coordinated colors make initials and small photo-holder bases easy to personalize | See Polymer Clay Color Pack on Amazon
- Acrylic Paint Set — Opaque paint gives clean coverage on dry clay, wood, and paper accents | View Acrylic Paint Set on Amazon
- Clear Water-Based Acrylic Varnish — Protects fully dry painted clay and wood with simple water cleanup | Find Clear Acrylic Varnish on Amazon
- Clay Sculpting Tool Set — Provides clean cutting, shaping, and hole-making tools for clay pieces | Check Clay Sculpting Tool Set on Amazon
🕯 Candle Supplies
- Natural Soy Wax Flakes — Container-grade wax supports small jar candles when paired with a tested wick | See Price on Amazon
- Candle-Safe Fragrance Oil — Formulated for wax use and measured according to the wax maker’s stated load | View Candle-Safe Fragrance Oil on Amazon
- Digital Gram Scale — Measures wax and fragrance accurately for repeatable small batches | Check Digital Gram Scale on Amazon
🧶 Yarn, Wood & Hardware
- Cotton Yarn Skeins — Washable cotton gives dishcloths firm stitch definition and everyday usefulness | Find Cotton Yarn Skeins on Amazon
- Unfinished Wood Ornament Blanks — Pre-cut blanks reduce saw work and provide a reliable painting surface | Check Wood Ornament Blanks on Amazon
- Split Key Rings with Jump Rings — Matched hardware turns baked clay initials into functional keychains | View Split Key Rings on Amazon
- Clear Cellophane Treat Bags — Food-safe bags keep cocoa toppings tidy and easy to label | See Clear Treat Bags on Amazon
🏆 Studio Upgrades & Starter Kits
- Electric Wax Melter with Spout — A controlled melting setup helps maintain steady wax temperatures across larger candle sessions | View Electric Wax Melter on Amazon
- Daylight LED Magnifying Craft Lamp — Clear illumination helps with painted names, fine lettering, and small hardware | Find Daylight Craft Lamp on Amazon
- Heavy-Duty Rolling Craft Cart — Keeps drying pieces, wrapping supplies, and tools together during a multi-project making session | Check Price on Amazon
- Holiday Craft Starter Kit — A contained starting point for beginners who want coordinated seasonal materials | See Holiday Craft Starter Kit on Amazon
12 DIY Christmas Gifts You Can Make by Hand
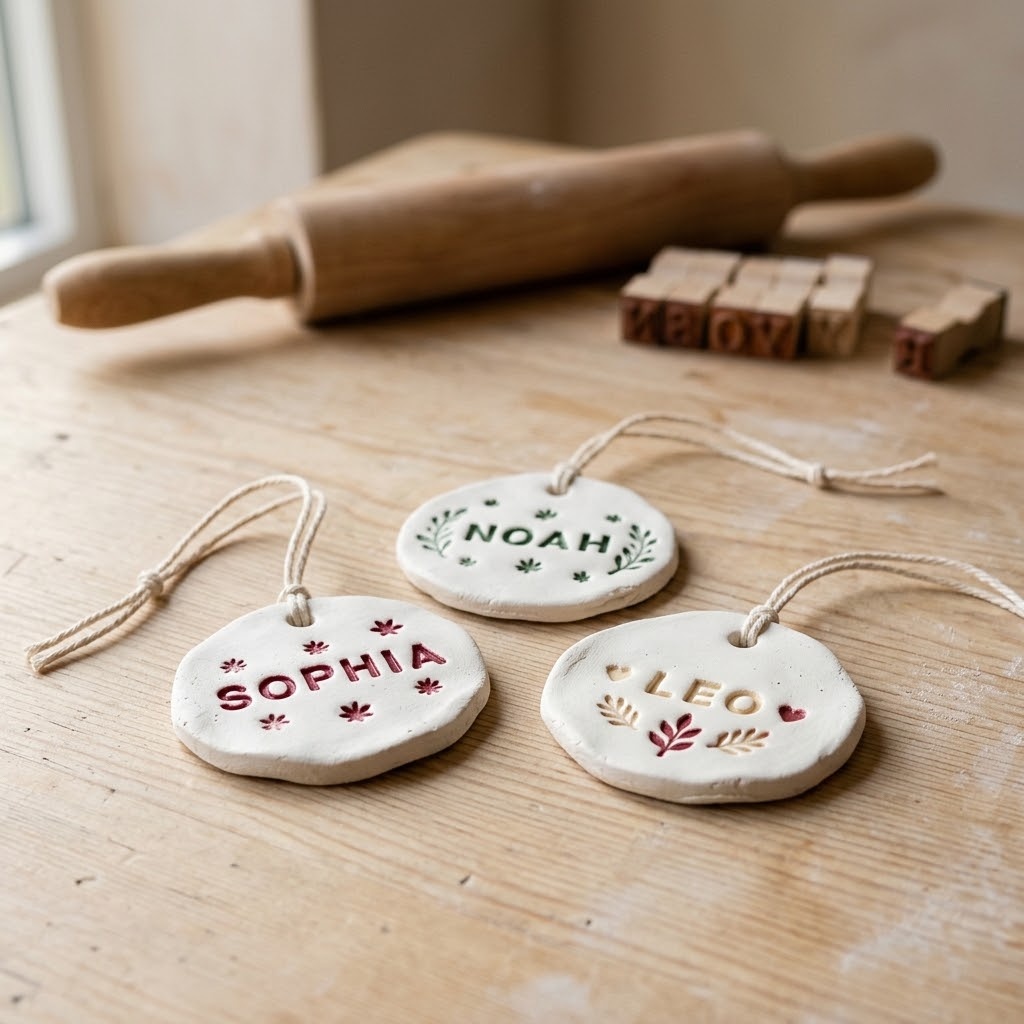
1. Stamped Clay Name Ornaments: DIY Christmas Gifts for Every Tree
Supplies Needed: 100 g white air-dry clay, rolling pin, letter stamps, 3 mm skewer, 7 cm round cutter, acrylic paint, clear water-based acrylic varnish, 20 cm cotton twine.
- Condition and roll the clay to 6 mm thick.
- Stamp one name into the clay.
- Cut a 7 cm round and pierce one hanging hole with the skewer.
- Dry the ornament flat for 24 to 48 hours.
- Paint, varnish, and thread the cotton twine through the dry hole.
Roll the clay on a smooth work surface and turn it once halfway through rolling so the slab stays even. First, press each letter stamp straight down, then lift it vertically to keep the name edges crisp.
Humidity changes air-dry clay drying time, so leave each ornament flat until both sides feel hard and cool-free. Next, add thin paint details, allow them to dry for 1 hour, then brush on varnish only after the paint is dry. These DIY Christmas gifts work especially well for relatives, neighbors, and teachers.
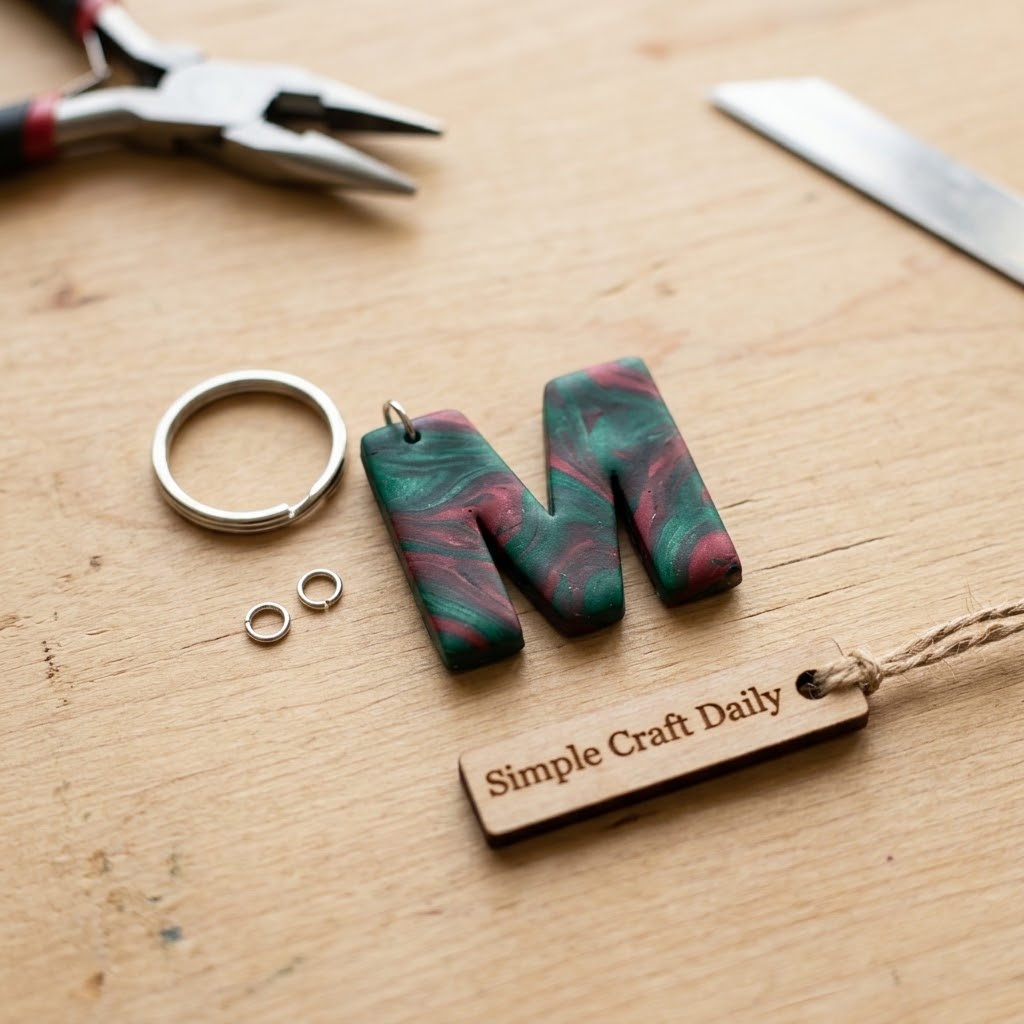
2. DIY Christmas Gifts: Monogram Polymer Clay Keychains
Supplies Needed: 30 g polymer clay, craft blade, letter cutter, 6 mm eye pin, split key ring with jump ring, smooth-jaw pliers, parchment-lined baking tray.
- Condition the polymer clay until flexible.
- Cut one 4 cm initial with the letter cutter and craft blade.
- Press the 6 mm eye pin into the top edge.
- Bake on the parchment-lined tray at the package temperature and duration.
- Cool completely, then attach the jump ring and split key ring with pliers.
Keep the initial at least 5 mm thick around the eye pin so the charm does not crack under everyday pulling. Then follow the exact package baking directions because polymer clay brands use different formulas and bake times.
After the charm reaches room temperature, twist the jump ring open sideways with smooth-jaw pliers, add the eye pin loop and key ring, then close it flush. For more color combinations, browse our polymer clay keychain ideas.
3. Small Soy Jar Candles for Cozy Evenings
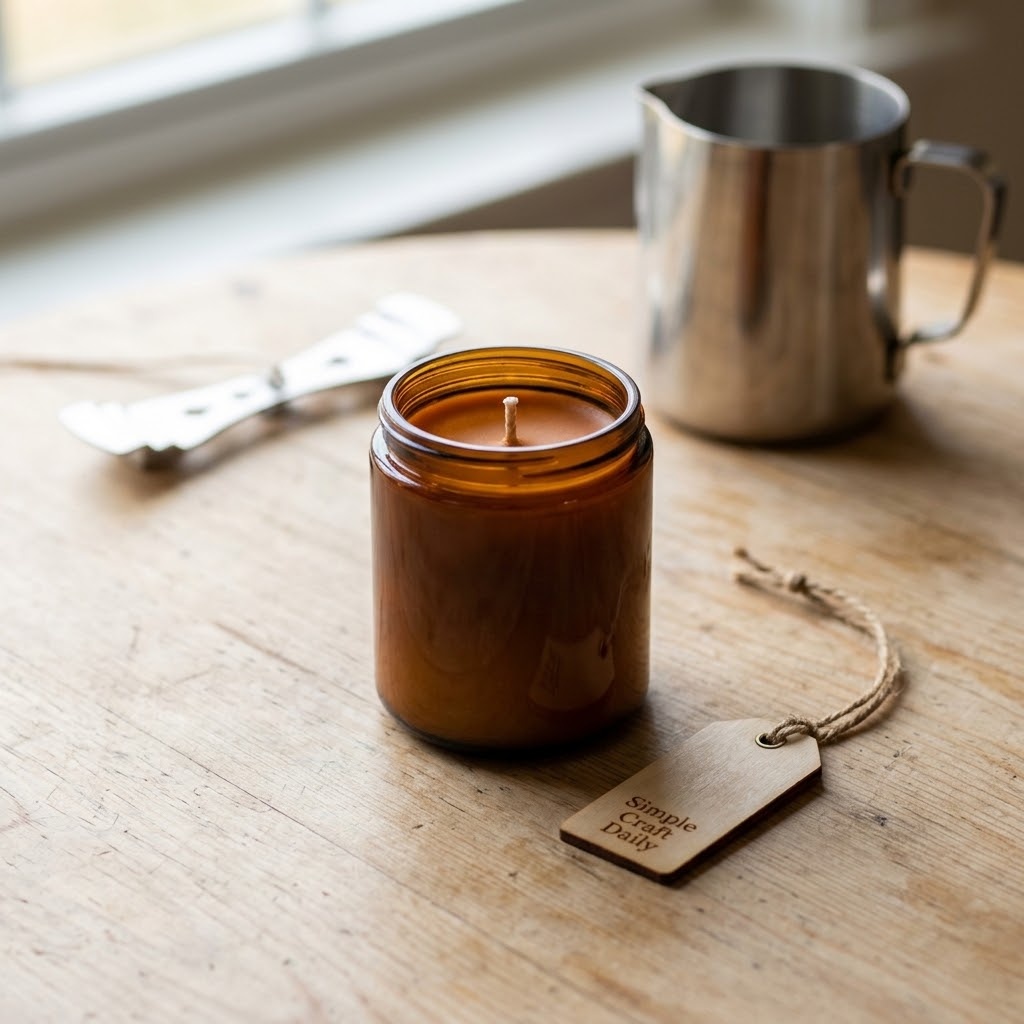
Supplies Needed: 100 g soy wax flakes, 6 g candle-safe fragrance oil, 120 ml heat-safe candle jar, matched cotton wick, wick sticker, centering bar, digital gram scale, thermometer, pouring pitcher, warning label.
- Secure the wick in the clean jar with a wick sticker and center it with the bar.
- Weigh 100 g wax and 6 g fragrance oil on the digital gram scale.
- Melt the wax in the pouring pitcher following the manufacturer’s temperature guidance.
- Add fragrance within the stated temperature window and stir for 2 minutes.
- Pour, cool undisturbed, cure for at least 7 days, and apply a warning label.
Use the wax manufacturer’s fragrance-load limit and calculate the fragrance by wax weight. For example, a 100 g wax batch uses 6 g fragrance oil at a 6% load. Keep the wick centered while the candle cools for at least 24 hours.
Finally, allow the candle to cure for 7 days before a test burn. Trim the wick to 6 mm, burn the test candle for 2 to 3 hours, and check that the jar remains stable and the melt pool behaves normally. Gift only candles that pass your test burn, and include the finished warning label. The National Fire Protection Association’s candle safety guidance is also useful for recipient care cards.
4. Painted Wood Family Ornaments: DIY Christmas Gifts with Heart
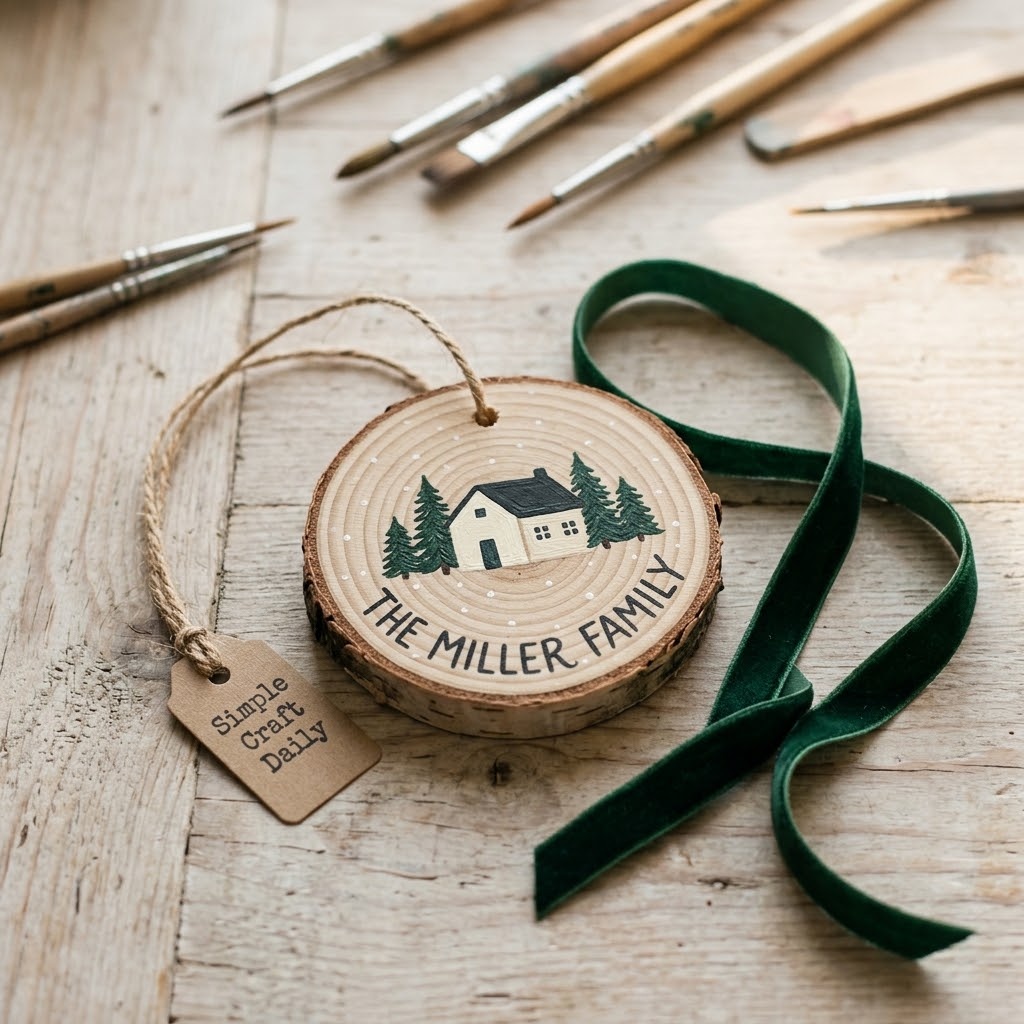
Supplies Needed: Unfinished wood ornament blank, 220-grit sandpaper, acrylic paint, detail brush, clear water-based acrylic varnish, 20 cm ribbon, lint-free cloth.
- Sand the wood edges with 220-grit sandpaper.
- Remove dust with the lint-free cloth and paint the base color.
- Dry the base for 1 hour and paint names or a small house.
- Allow the final paint layer to dry for 2 hours.
- Varnish the dry surface and thread ribbon through the pre-drilled hole.
Sand only enough to soften rough edges, then wipe dust away with a dry lint-free cloth. A small round detail brush gives better control over family names than a wide brush.
Subsequently, apply varnish after every painted detail is dry, then leave the ornament flat for the varnish label’s full cure time. This project also pairs beautifully with our DIY wooden sign projects for a coordinated handmade home gift.
5. DIY Christmas Gifts: Crochet Cotton Dishcloth Gift Set
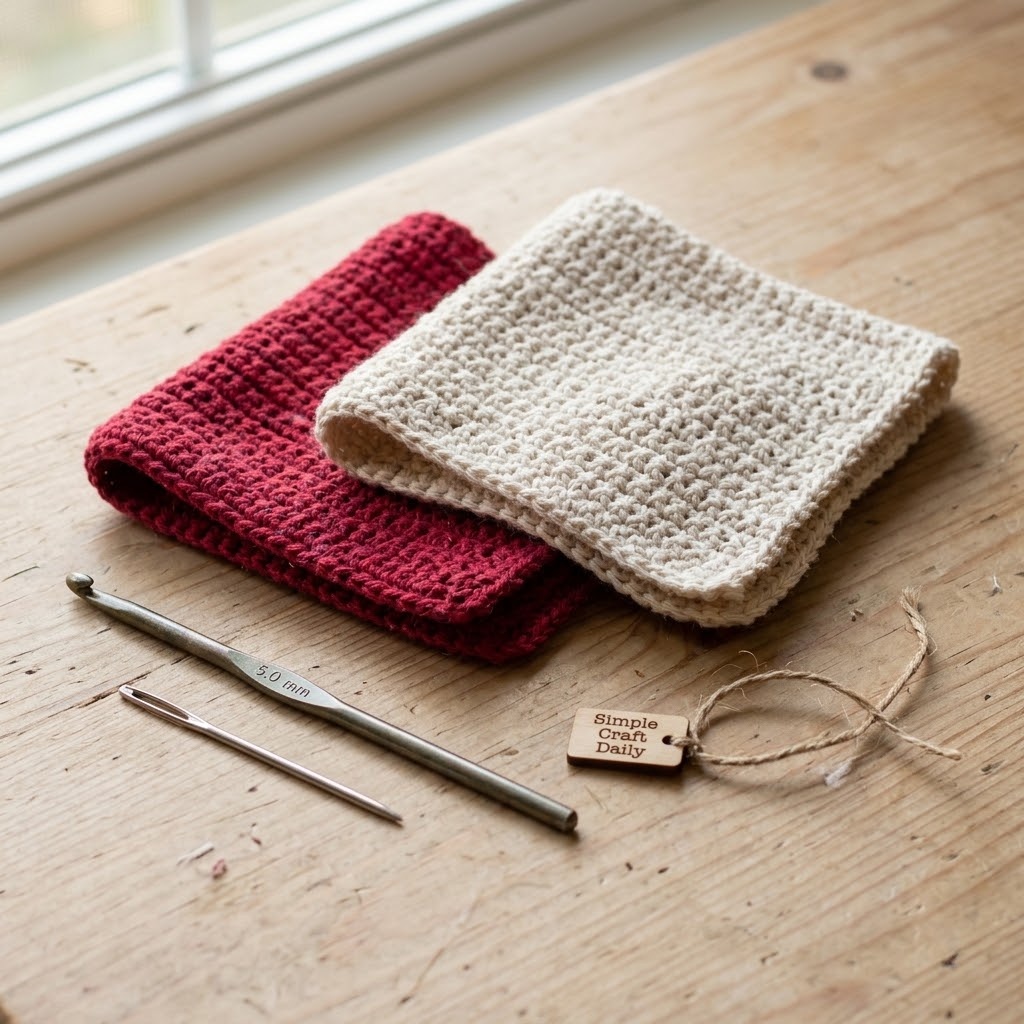
Supplies Needed: 100 g worsted-weight cotton yarn, 5.0 mm crochet hook, locking stitch marker, large-eye blunt yarn needle, fabric gift band.
- Chain 31 stitches with the cotton yarn and 5.0 mm hook.
- Single crochet 30 stitches across each row.
- Repeat for 28 rows, using the stitch marker to mark the first stitch.
- Fasten off and weave in both yarn tails with the blunt needle.
- Wash and dry the cloth once, then secure the pair with a fabric gift band.
Keep the same stitch count and yarn tension for both cloths so the pair matches closely. Cotton tightens and softens after its first wash, therefore pre-washing gives the recipient a clean, ready-to-use gift.
Next, choose two coordinating colors for host gifts, teachers, or grandparents. These washable DIY Christmas gifts feel generous because they solve an everyday kitchen task without adding clutter.
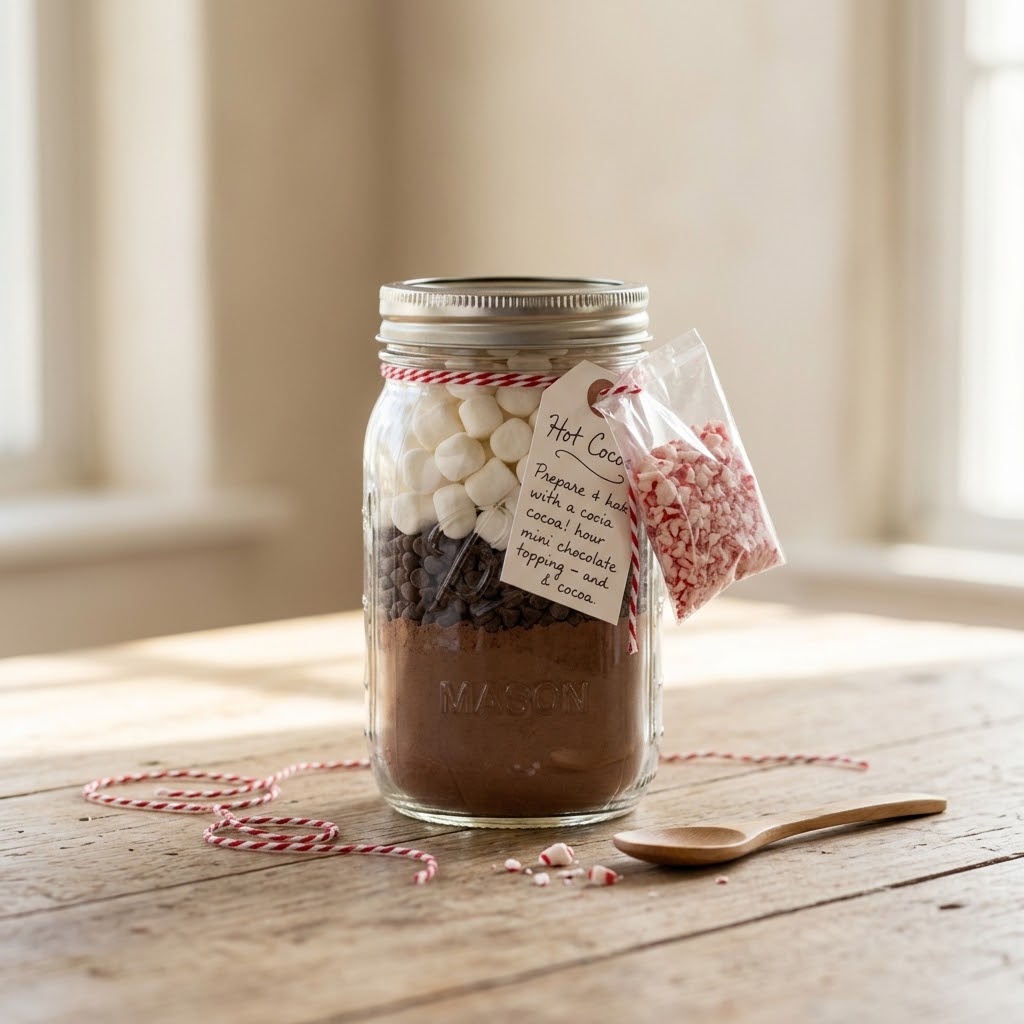
6. DIY Christmas Gifts: Layered Hot Cocoa Jars
Supplies Needed: 240 ml food-safe glass jar with lid, 30 g hot cocoa mix, 12 mini marshmallows, 15 g crushed peppermint candy, food-safe treat bag, paper label, 30 cm baker’s twine.
- Wash the food-safe jar and dry it completely.
- Add 30 g measured hot cocoa mix to the jar.
- Place 12 mini marshmallows and 15 g peppermint candy in a separate food-safe treat bag.
- Close the jar and secure the topping bag with 30 cm baker’s twine.
- Write the storage date, allergens, and preparation directions on the paper label.
Use a label that states the exact amount of hot water or milk needed for the cocoa mix you selected. Keep peppermint and marshmallows bagged separately so moisture does not soften them inside the jar.
In addition, list milk, soy, tree nut, or other relevant allergens from every packaged ingredient. Keep food ingredients away from paint, clay, varnish, and craft-only tools throughout assembly.
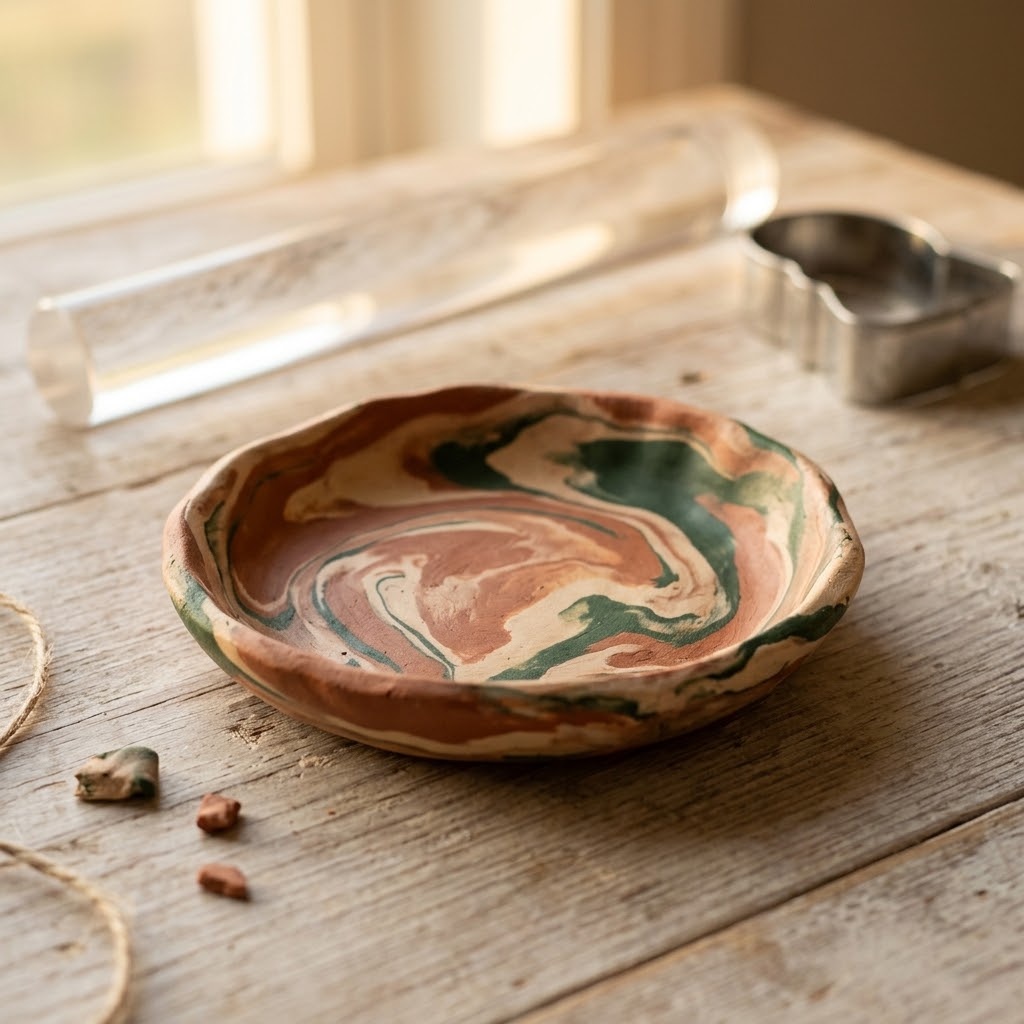
7. Marbled Clay Ring Dishes: DIY Christmas Gifts for Jewelry Lovers
Supplies Needed: 120 g white air-dry clay, acrylic paint, acrylic roller, 10 cm round cutter, small bowl used as a mold, clear water-based acrylic varnish.
- Roll the white clay to 5 mm thick.
- Add tiny acrylic paint streaks, fold the clay twice, and roll once.
- Cut one 10 cm circle.
- Drape the circle over the upside-down bowl.
- Dry for 24 to 48 hours, remove it from the bowl, and varnish the fully dry dish.
Use only a few narrow paint streaks because too much wet paint can soften the clay. Then drape the clay gently over the bowl without pressing the center thin, and leave it untouched until the underside dries.
After drying, lift the dish away from the mold and inspect the rim for cracks before varnishing. These DIY Christmas gifts are decorative jewelry catchalls, not food-safe dishes unless every product used is specifically certified for food contact.
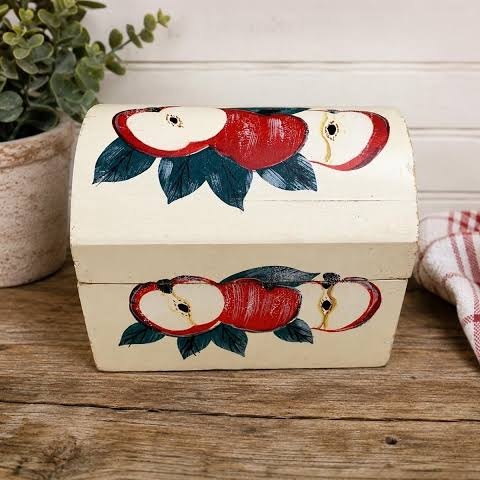
8. Personalized Recipe Card Box
Supplies Needed: Unfinished wooden recipe box, 220-grit sandpaper, acrylic paint, paint marker, clear water-based acrylic varnish, blank recipe cards, lint-free cloth.
- Sand the recipe box with 220-grit sandpaper and remove dust with the lint-free cloth.
- Paint two thin acrylic coats, allowing 1 hour of drying between coats.
- Letter the dry lid with the paint marker.
- Allow lettering to dry for 2 hours and apply clear varnish.
- Add copied family recipes to the blank recipe cards after the varnish cures.
Paint thin coats instead of one heavy coat so corners and lid edges do not stick. A daylight magnifying lamp helps you check paint-marker lettering before sealing, especially on small lids.
Then add one tested family recipe with a handwritten note about who made it or when it was served. For another sentimental occasion, see our handmade Mother’s Day gift ideas.
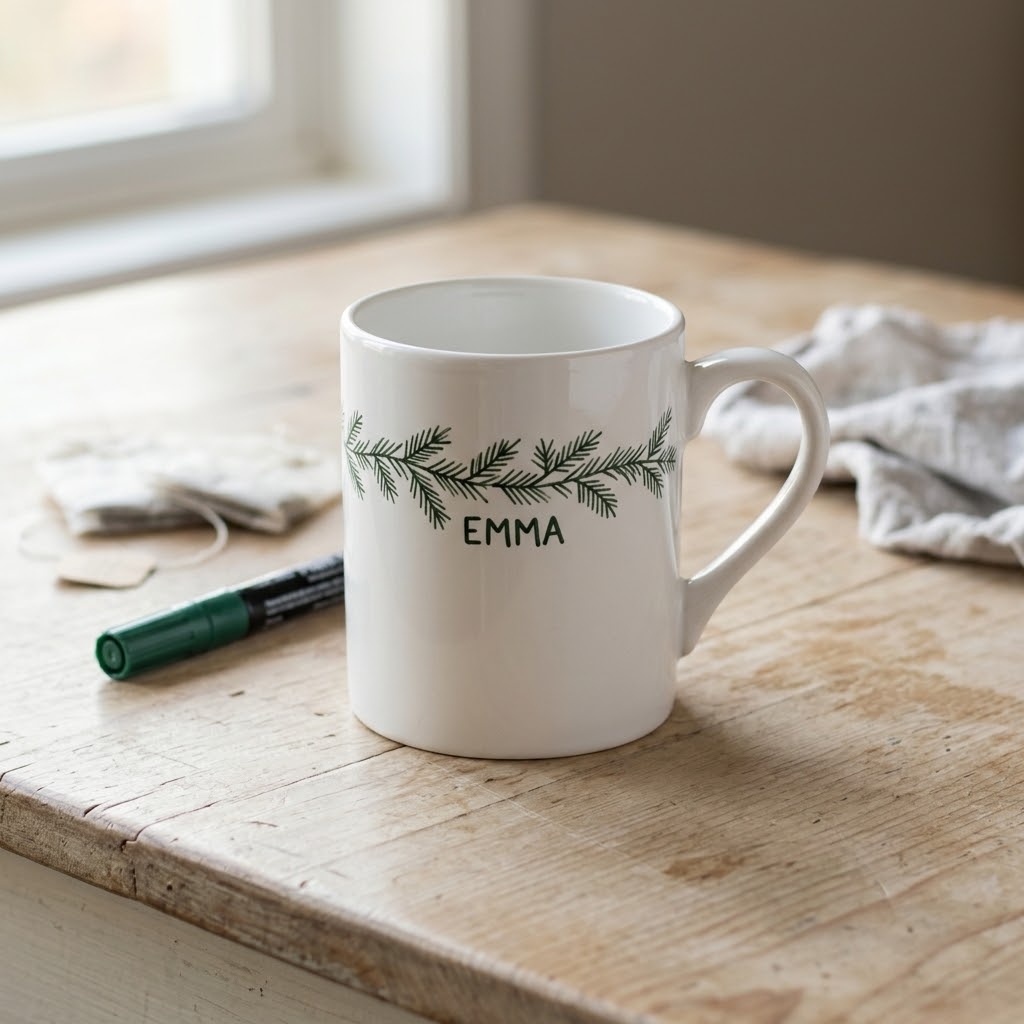
9. Hand-Painted Mug Gift Set
Supplies Needed: Plain ceramic mug, oil-based paint markers labeled for ceramics, rubbing alcohol, lint-free cloth, oven-safe tray, gift tea sachets.
- Clean the mug with rubbing alcohol and a lint-free cloth.
- Let the mug dry for 10 minutes.
- Draw the design with ceramic-labeled paint markers.
- Air-dry or bake only as directed on the marker label.
- Cool the mug in the closed oven if baking is directed, then package it with tea sachets.
Keep designs on the outer wall, away from the rim and interior unless the marker label explicitly approves food contact. Ordinary acrylic paint does not automatically become dishwasher-safe or food-safe on ceramic.
However, follow the marker manufacturer’s instructions for cure time, baking temperature, dishwasher use, and hand-washing. A simple name, tiny snowflakes, or a favorite phrase gives this gift a clean finish.
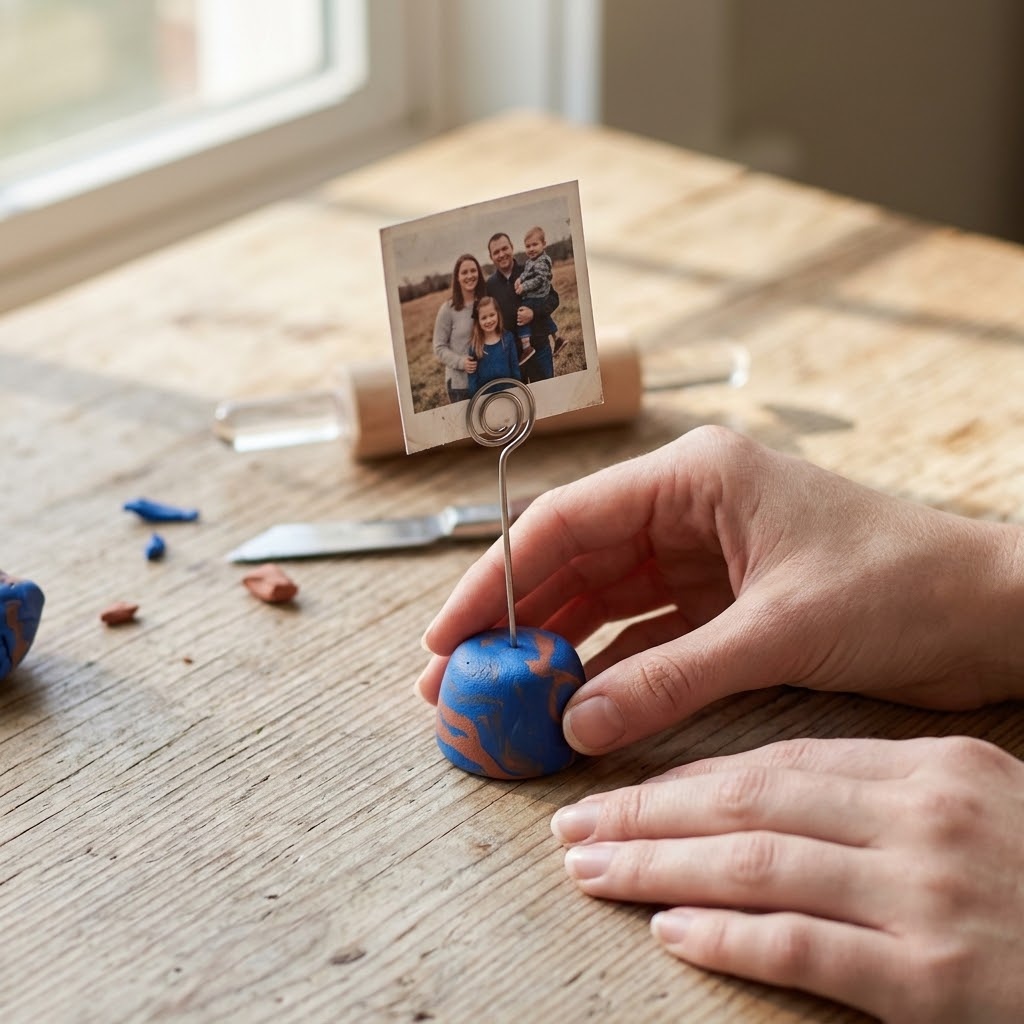
10. Mini Photo Clip Stands: DIY Christmas Gifts for Desks
Supplies Needed: 60 g polymer clay, 8 cm metal photo clip, clay roller, craft blade, parchment-lined baking tray, printed 10 x 15 cm photo.
- Roll a 7 cm oval polymer clay base with the clay roller.
- Press the photo clip 1.5 cm into the clay to mark its position.
- Remove the clip before baking if its coating is not oven-safe.
- Bake the clay base on the parchment-lined tray as labeled.
- Cool completely, reinstall the clip, and add the printed photo.
Make the oval broad enough that the photo clip cannot tip forward under the weight of a 10 x 15 cm photo. Use the craft blade to straighten the base edge before baking.
After the cured base cools, press the clip back into its original channel. If the fit loosens, remake the base rather than forcing adhesive into a narrow unstable slot.
11. Reusable Fabric Gift Wrap Furoshiki
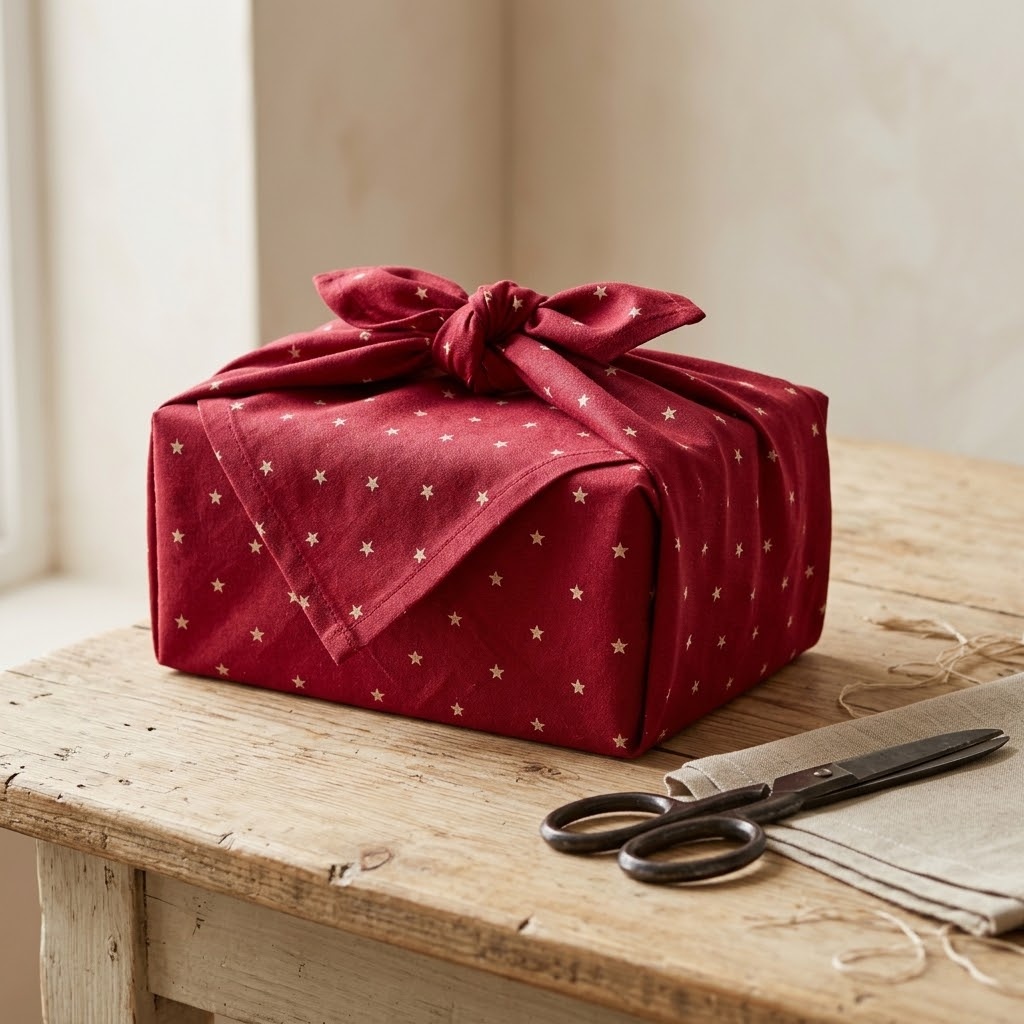
Supplies Needed: 50 cm cotton fabric square, fabric scissors, sewing machine or needle and cotton thread, iron, fabric label, boxed gift.
- Cut a 50 cm cotton fabric square with fabric scissors.
- Fold each edge 1 cm twice and press with an iron.
- Stitch all four hems with a sewing machine or needle and cotton thread.
- Press the finished square flat and add the fabric label.
- Wrap the boxed gift with opposing corners and tie a square knot.
Choose a fabric square about three times the width of the gift box for easy knotting. Pressing the double-fold hem before stitching keeps the raw fabric edge enclosed and reduces fraying.
Meanwhile, a rolling craft cart keeps fabric, thread, scissors, and wrapped gifts separated from wet paint and clay projects. These reusable wraps become part of the present and can return each holiday season.
12. Custom Coupon Book for Time Together
Supplies Needed: Twelve sheets of heavyweight cardstock, paper trimmer, hole punch, 25 cm ribbon, fine-tip pen, optional rubber stamp.
- Cut twelve 7.5 x 12.5 cm heavyweight cardstock cards with the paper trimmer.
- Write one specific redeemable activity on each cardstock card with the fine-tip pen.
- Stamp the cardstock cover if using the optional rubber stamp.
- Punch two holes through the stacked cardstock cards.
- Thread the 25 cm ribbon, tie it securely, then date and sign the cover.
Write promises you can realistically keep, such as one home-cooked dinner, one dog-walking shift, or one museum afternoon. Add an expiration date only if it gives both people enough time to use the coupon.
Finally, a holiday craft starter kit can provide simple paper accents for makers who want an organized first project. The best coupon books offer time, help, and a clear plan for being together.

DIY Christmas Gifts FAQ
How far ahead should I make DIY Christmas gifts?
Make candles at least 7 days before gifting, and make air-dry clay pieces 2 to 3 days ahead for drying and sealing. Crochet, paper, wood, and cocoa gifts can usually be completed closer to the holiday.
First, schedule projects with cure time. Then use the final days for wrapping, labeling, and adding recipient names.
Which DIY Christmas gifts are fastest for beginners?
Hot cocoa jars, coupon books, and fabric wraps are the fastest beginner projects because they require little drying or technical equipment. Painted ornaments also work quickly when you use pre-cut blanks.
Therefore, choose one repeatable design for several recipients so you can work in an efficient batch without losing the handmade feel.
Can I gift a candle immediately after pouring it?
No. A soy candle should cool for at least 24 hours and cure for at least 7 days before gifting or burning. The cure period helps the wax and fragrance settle properly.
Next, complete a test burn before giving the candle away, and include a safety label with wick-trimming and burn-time directions.
How do I make personalized Christmas gifts DIY without expensive equipment?
Use names, initials, handwritten notes, favorite colors, or a printed photograph to personalize a gift without specialty machines. Letter stamps, paint markers, and a fine-tip pen are enough for many projects.
In particular, start with one personal detail that has meaning for the recipient, such as a family recipe, pet photo, or favorite tea.
Quick Reference: All Supplies for DIY Christmas Gifts
For your convenience, here is a quick summary of the materials and tools featured in this post:
🎨 Clay, Paint & Finish
- White Air-Dry Clay | Check Price on Amazon
- Polymer Clay Color Pack | See Polymer Clay Color Pack on Amazon
- Acrylic Paint Set | View Acrylic Paint Set on Amazon
- Clear Water-Based Acrylic Varnish | Find Clear Acrylic Varnish on Amazon
- Clay Sculpting Tool Set | Check Clay Sculpting Tool Set on Amazon
🕯 Candle Supplies
- Natural Soy Wax Flakes | See Price on Amazon
- Candle-Safe Fragrance Oil | View Candle-Safe Fragrance Oil on Amazon
- Digital Gram Scale | Check Digital Gram Scale on Amazon
🧶 Yarn, Wood & Hardware
- Cotton Yarn Skeins | Find Cotton Yarn Skeins on Amazon
- Unfinished Wood Ornament Blanks | Check Wood Ornament Blanks on Amazon
- Split Key Rings with Jump Rings | View Split Key Rings on Amazon
- Clear Cellophane Treat Bags | See Clear Treat Bags on Amazon
🏆 Studio Upgrades & Starter Kits
- Electric Wax Melter with Spout | View Electric Wax Melter on Amazon
- Daylight LED Magnifying Craft Lamp | Find Daylight Craft Lamp on Amazon
- Heavy-Duty Rolling Craft Cart | Check Price on Amazon
- Holiday Craft Starter Kit | See Holiday Craft Starter Kit on Amazon
Important Crafting Safety Notes
Crafting is a rewarding creative activity, but maintaining a safe workshop environment is essential for yourself, your family, and your pets. Please review these safety precautions before starting:
• Personal Protective Equipment (PPE) & Safe Handling: Wear safety glasses when cutting wire, trimming eye pins, or using craft blades. Use heat protection around hot wax, heated jars, irons, and candle tools. Wear nitrile gloves and a particle mask when sanding wood or working with varnish, fragrance oil, clay dust, and chemical craft supplies.
• Room Ventilation & Fume Safety: Work with varnish, paint markers, fragrance oil, adhesives, and heat-curing materials in a well-ventilated room with open windows or active airflow. Allow finished pieces to off-gas and cure completely in an airy location away from living areas.
• Child & Pet Safety (Choking & Swallowing Prevention): Small components including eye pins, split rings, jump rings, clay scraps, beads, candy, and loose fiber materials create choking and ingestion hazards. Keep raw materials, hot candles, and edible gifts out of reach of children and pets. For gifts handled by young children, use stitched or drawn details instead of detachable hardware.
• Sharp Tool Storage & Clean Work Area: Store craft knives, rotary cutters, scissors, snips, needles, and pliers in secure latching cases or high cabinets after use. Subsequently, sweep or vacuum the floor and work area to collect dropped pins, wire clippings, clay pieces, and other small hazards.
• Certified, Quality & Non-Toxic Supplies: Choose ACMI AP-certified non-toxic supplies where appropriate, lead-free and nickel-free hardware, and products labeled for their intended craft use. Follow manufacturer cure times and temperatures exactly. Never reuse kitchen utensils for wax, clay, fragrance oil, varnish, or other craft chemicals.
For more detailed guidance on safe crafting practices, liability disclosures, and website usage, please review our Terms and Conditions.
“Which of these DIY Christmas gifts will you make first? Drop a comment below with your favorite idea or a handmade tradition your family loves!”