

Generic giveaway bags feel disposable. These diy personalized tote bags use washable color, crisp lettering, and sturdy canvas details to create carryalls you will actually reach for at the library, market, classroom, or grocery store.
Begin every design with a prewashed, fully pressed cotton canvas blank, and slide a flat cardboard insert inside the bag before paint or ink work to prevent bleed-through. If you enjoy handmade carryalls, browse our adorable cat-themed bags you will love to make and these DIY macrame tote bag ideas for summer fashion for more thoughtful bag-making inspiration.
Affiliate Disclosure: This post contains affiliate links. As an Amazon Associate, I earn from qualifying purchases. If you buy through these links, I may earn a commission at no additional cost to you.
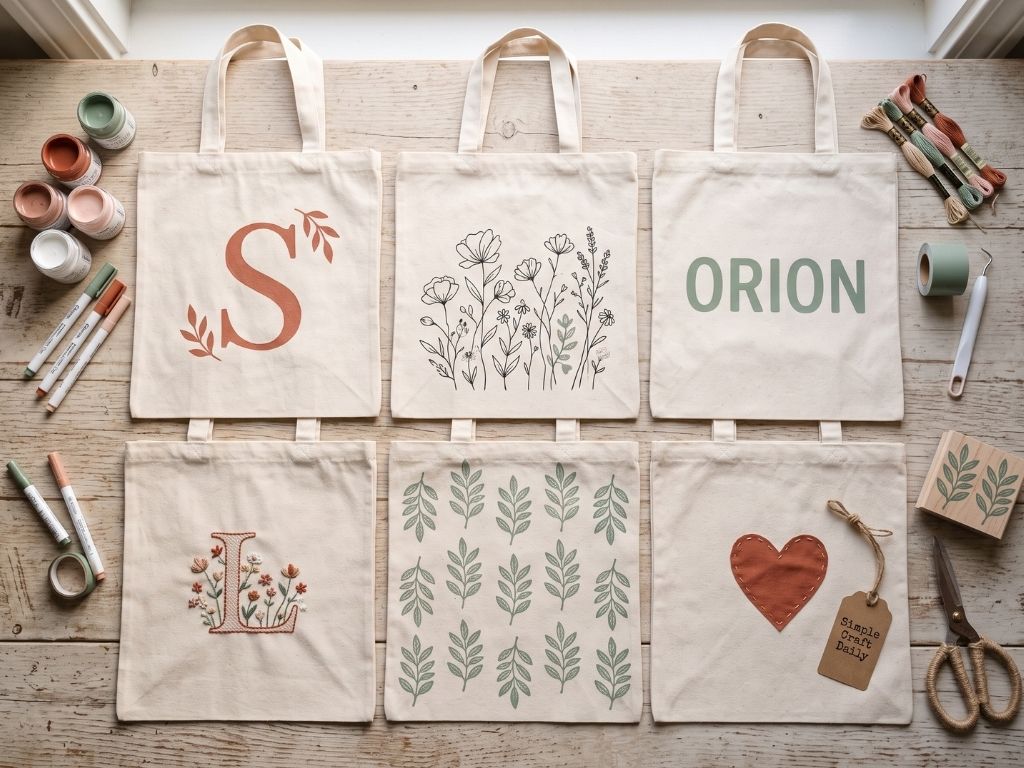
Essential Materials & Tools
wp:paragraphChoose your method before gathering supplies. Textile paint and fabric markers suit painted names and illustrations, while heat-transfer vinyl gives typography clean edges. Embroidery and applique add texture, and patches work well when you want a quicker decorative finish.
/wp:paragraph wp:paragraphFirst, test paint, ink, and vinyl on a prewashed cotton scrap. This small trial shows how the color sinks into the weave, how sharply a stencil holds, and which heat-setting instructions apply to your chosen material.
/wp:paragraph✨ Consumable Raw Materials
- Natural Cotton Canvas Tote Blanks with Reinforced Handles — A firm natural-fiber surface accepts textile paint, ink, stitching, and heat-applied designs while reinforced handles support regular errands | Check Natural Cotton Canvas Tote Blanks with Reinforced Handles on Amazon
- Permanent Textile Paint Set for Natural Fabric — Flexible fabric paint bonds with cotton canvas and is suited to monograms, broad color blocks, floral accents, and stamped motifs | Check Price on Amazon
- Dual-Tip Fabric Marker Set — Fine and broad tips make it easier to letter names, draw line art, and add controlled facial details without using ordinary paper markers | View Dual-Tip Fabric Marker Set on Amazon
- Water-Based Block Printing Ink — Textile-specific ink gives repeated motifs a more even transfer than paint (design 5) | Check Water-Based Block Printing Ink on Amazon
- Freezer Paper Sheets for Fabric Stencils — The shiny side irons temporarily onto cotton canvas, helping paint stay within silhouette edges | See Price on Amazon
- Heat Transfer Vinyl Sheets for Cotton Fabric — Thin garment-grade vinyl creates sharp names, dates, and graphic initials when pressed according to the manufacturer label | Explore Heat Transfer Vinyl Sheets for Cotton Fabric on Amazon
- Embroidery Floss — Colorfast floss for the embroidered initial and hand-finished applique edges | Check Embroidery Floss on Amazon
- Cotton Applique Fabric — Heart applique, faux patchwork pocket panels, and embroidery backing Cut a prewashed test scrap from it first to test paint, ink, and vinyl. | Check Cotton Applique Fabric on Amazon
- All-Purpose Sewing Thread — Machine thread for the zigzag applique edging and topstitching (designs 7 and 11) | Check All-Purpose Sewing Thread on Amazon
🧰 Core Crafting Tools & Equipment
- Wooden Block Printing Stamps — Reusable stamps for the repeated motifs in design 5 | Check Wooden Block Printing Stamps on Amazon
- Cardboard Sheet Insert — Slides inside the tote so paint cannot bleed through (multiple designs) | Check Cardboard Sheet Insert on Amazon
- Reusable Letter Stencils — Keeps painted initials and baselines neat (optional for the painted-initial design) | Check Reusable Letter Stencils on Amazon
- Washable Fabric-Marking Pencil — Marks layouts and baselines before painting or stitching | Check Washable Fabric-Marking Pencil on Amazon
- Embroidery Needles — Required for the embroidered tote and any hand-stitched finishing | Check Embroidery Needles on Amazon
- Fabric Scissors — Cuts applique fabric, freezer paper, and vinyl-related materials | Check Fabric Scissors on Amazon
- Detail Paintbrushes — Flower accents, quote embellishments, and pet portrait details | Check Detail Paintbrushes on Amazon
- Foam Pouncers — Stenciling and broad paint shapes | Check Foam Pouncers on Amazon
- Self-Healing Work Mat — Protects the table and keeps cutting lines straight | Check Self-Healing Work Mat on Amazon
- Heat-Resistant Pressing Sheet — Reusable alternative to parchment for protecting the canvas during pressing (designs 3, 6, and 12) | Check Heat-Resistant Pressing Sheet on Amazon
- Parchment Paper — Protective layer for heat-setting, fusing, and vinyl pressing — use it or the pressing sheet interchangeably | Check Parchment Paper on Amazon
- Tailor’s Awl — Weeds away excess HTV after cutting and lifts stencil corners without snagging (designs 3 and 10) | Check Tailor’s Awl on Amazon
- Household Iron — Adheres freezer paper, fuses applique and patches, and heat-sets products | Check Household Iron on Amazon
- 12-Inch Clear Quilting Ruler — Keeps lettering baselines and centered design zones accurate | Check 12-Inch Clear Quilting Ruler on Amazon
- Painter’s Tape — Masks clean color-block edges | Check Painter’s Tape on Amazon
- Wide Flat Paintbrush — Wide flat brush for even color-block coats (design 6) | Check Wide Flat Paintbrush on Amazon
- Canvas Sewing Machine Needles — Machine needles sized for canvas topper stitching — jeans or denim needles of the same size work the same way (designs 7 and 11) | Check Canvas Sewing Machine Needles on Amazon
💎 Hardware, Fasteners & Finishing
- Fusible Web Adhesive for Fabric Applique — This sewable adhesive holds applique shapes flat before edge stitching secures them permanently | Find on Amazon
- Iron-On Woven Patches — Ready-made texture for the patch cluster and patchwork designs | Check Iron-On Woven Patches on Amazon
- Nickel-Free Metal D-Rings — Hardware for the optional charm tab in design 11 | Check Nickel-Free Metal D-Rings on Amazon
These optional tools are useful for makers who plan to create several diy personalized tote bags. They are not required for every design, but they can make repeated cutting, pressing, and canvas stitching more consistent.
/wp:paragraphOptional Studio Upgrades
Never required to finish the projects above — convenience upgrades for makers who want them.
📦 Beginner Project Kits & Coordinated Bundles
For beginners or makers starting from scratch, these coordinated bundles and all-in-one project packs bring together the core supplies in one convenient order.
- Canvas Tote Decorating Starter Kit — A coordinated first-project option that can reduce supply hunting when you want blanks, paint, and basic decorating tools together | See Price on Amazon
⚡ Studio Tools & Workshop Equipment
Optional studio upgrades — every project above can be completed without these.
- Electronic Cutting Machine with Fine-Point Blade — Cuts mirrored vinyl lettering and repeat stencil shapes with measured, consistent edges | See Electronic Cutting Machine with Fine-Point Blade on Amazon
- Digital Heat Press with Pressure Adjustment — Optional upgrade: controlled temperature and pressure give HTV an even press — the household iron handles the same names | Explore Digital Heat Press with Pressure Adjustment on Amazon
- Heavy-Duty Sewing Machine — A canvas-capable machine supports neat topstitching, reinforced tabs, and applique edges without skipped stitches | Check Heavy-Duty Sewing Machine on Amazon
12 DIY Personalized Tote Bags to Make
Supplies Needed: Natural Cotton Canvas Tote Blanks with Reinforced Handles, Iron-On Woven Patches and Nickel-Free Metal D-Rings, Cardboard Inserts, Reusable Letter Stencils, and Removable Fabric-Marking Pencils, Heat-Resistant Pressing Sheet, Parchment Paper, Tailor’s Awl, and Household Iron
For each design, slide a clean cardboard insert into the tote, smooth the front panel, and measure the decoration zone before applying color or fabric. Next, let paint, ink, adhesive, or vinyl complete its full label-directed dry or cure period. Remove the insert only after the surface is stable, then inspect the handle seams and inside panel before carrying weight.
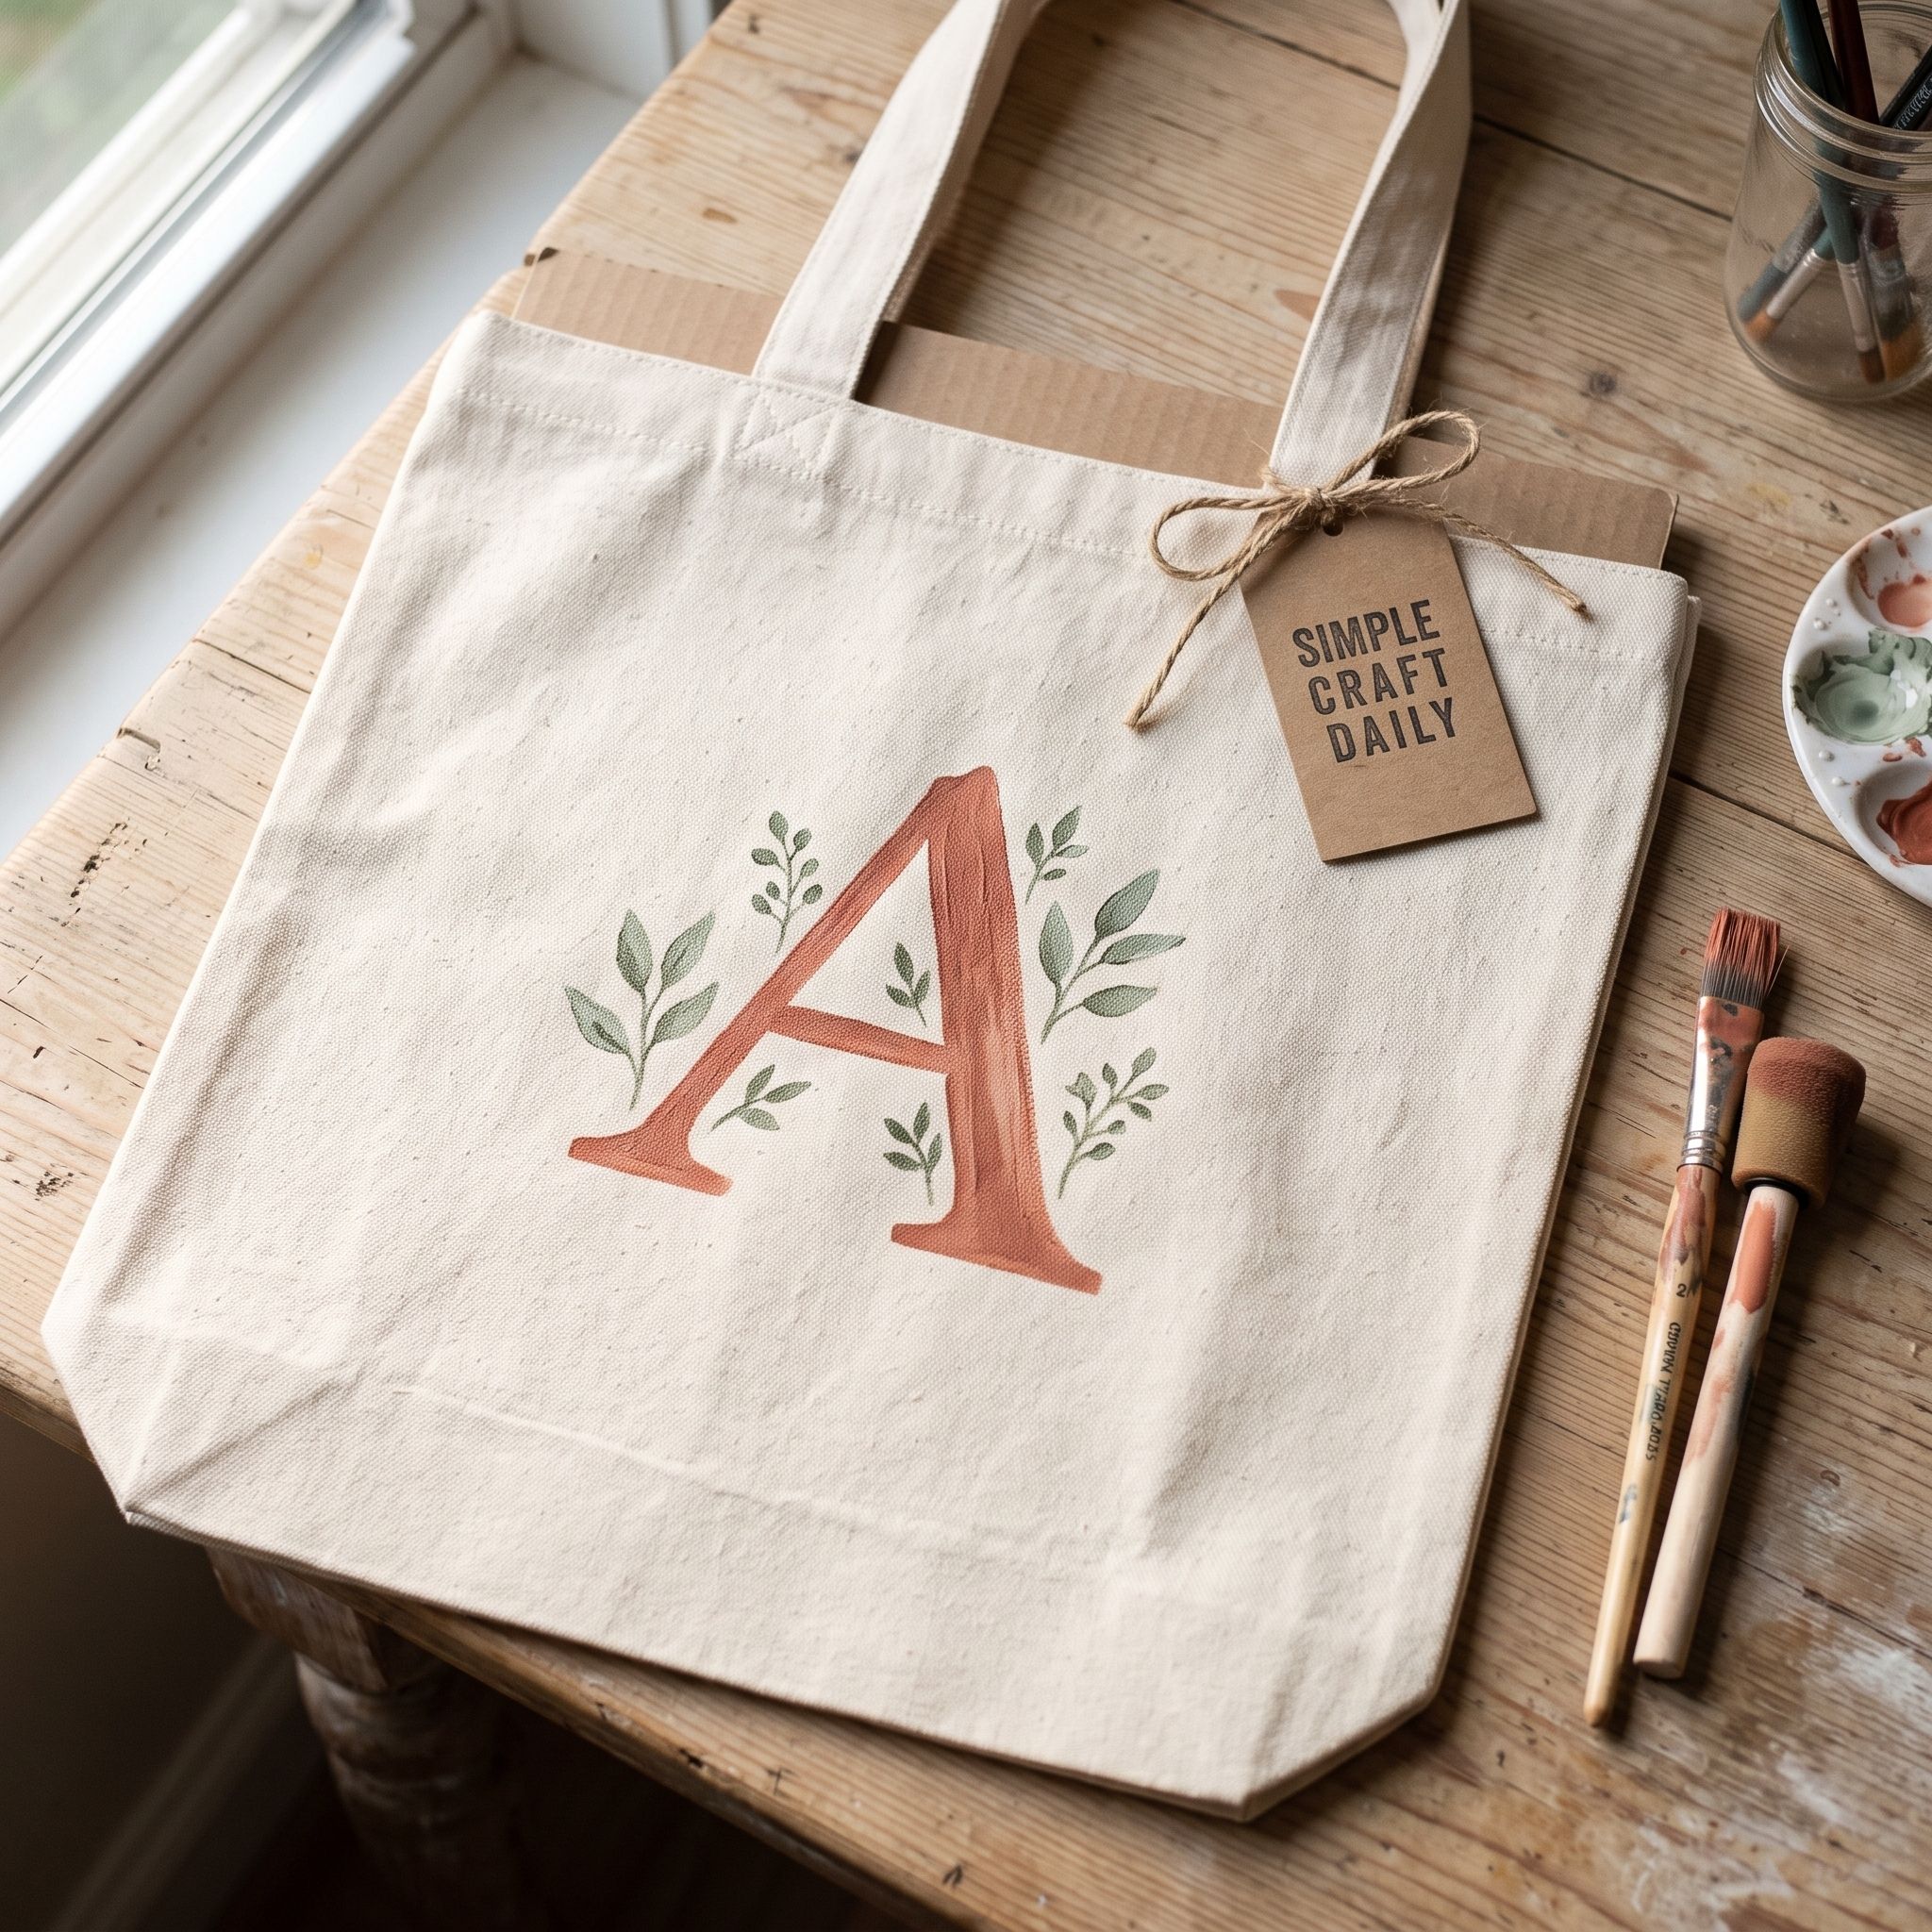
1. DIY Personalized Tote Bags With a Painted Initial
Supplies Needed: Natural Cotton Canvas Tote Blanks with Reinforced Handles, Permanent Textile Paint Set for Natural Fabric, Cardboard Inserts, Reusable Letter Stencils, and Removable Fabric-Marking Pencils, Fabric Scissors, Detail Brush Set, Foam Pouncers, and Self-Healing Work Mat, Parchment Paper or a Heat-Resistant Pressing Sheet, Tailor’s Awl, and Household Iron.
Measure and lightly mark a 6 by 6 inch design zone in the center of the tote front. Place a reusable letter stencil inside that square, then use a foam pouncer to apply a thin textile-paint coat from the stencil edge toward the center.
Allow the first coat to dry for the period stated on the paint label. Next, apply a second thin coat rather than flooding the canvas weave. When the paint is fully dry, protect the initial with parchment or a pressing sheet and heat-set it exactly as directed by the paint manufacturer. Use the tailor’s awl to lift any stencil corner without scratching the paint.
2. Birth-Flower Line Art Bag
Supplies Needed: Natural Cotton Canvas Tote Blanks with Reinforced Handles, Dual-Tip Fabric Marker Set, Permanent Textile Paint Set for Natural Fabric, Cardboard Inserts and Removable Fabric-Marking Pencils, 12-Inch Clear Quilting Ruler and Painter’s Tape, Detail Brush Set, Foam Pouncers, and Self-Healing Work Mat.
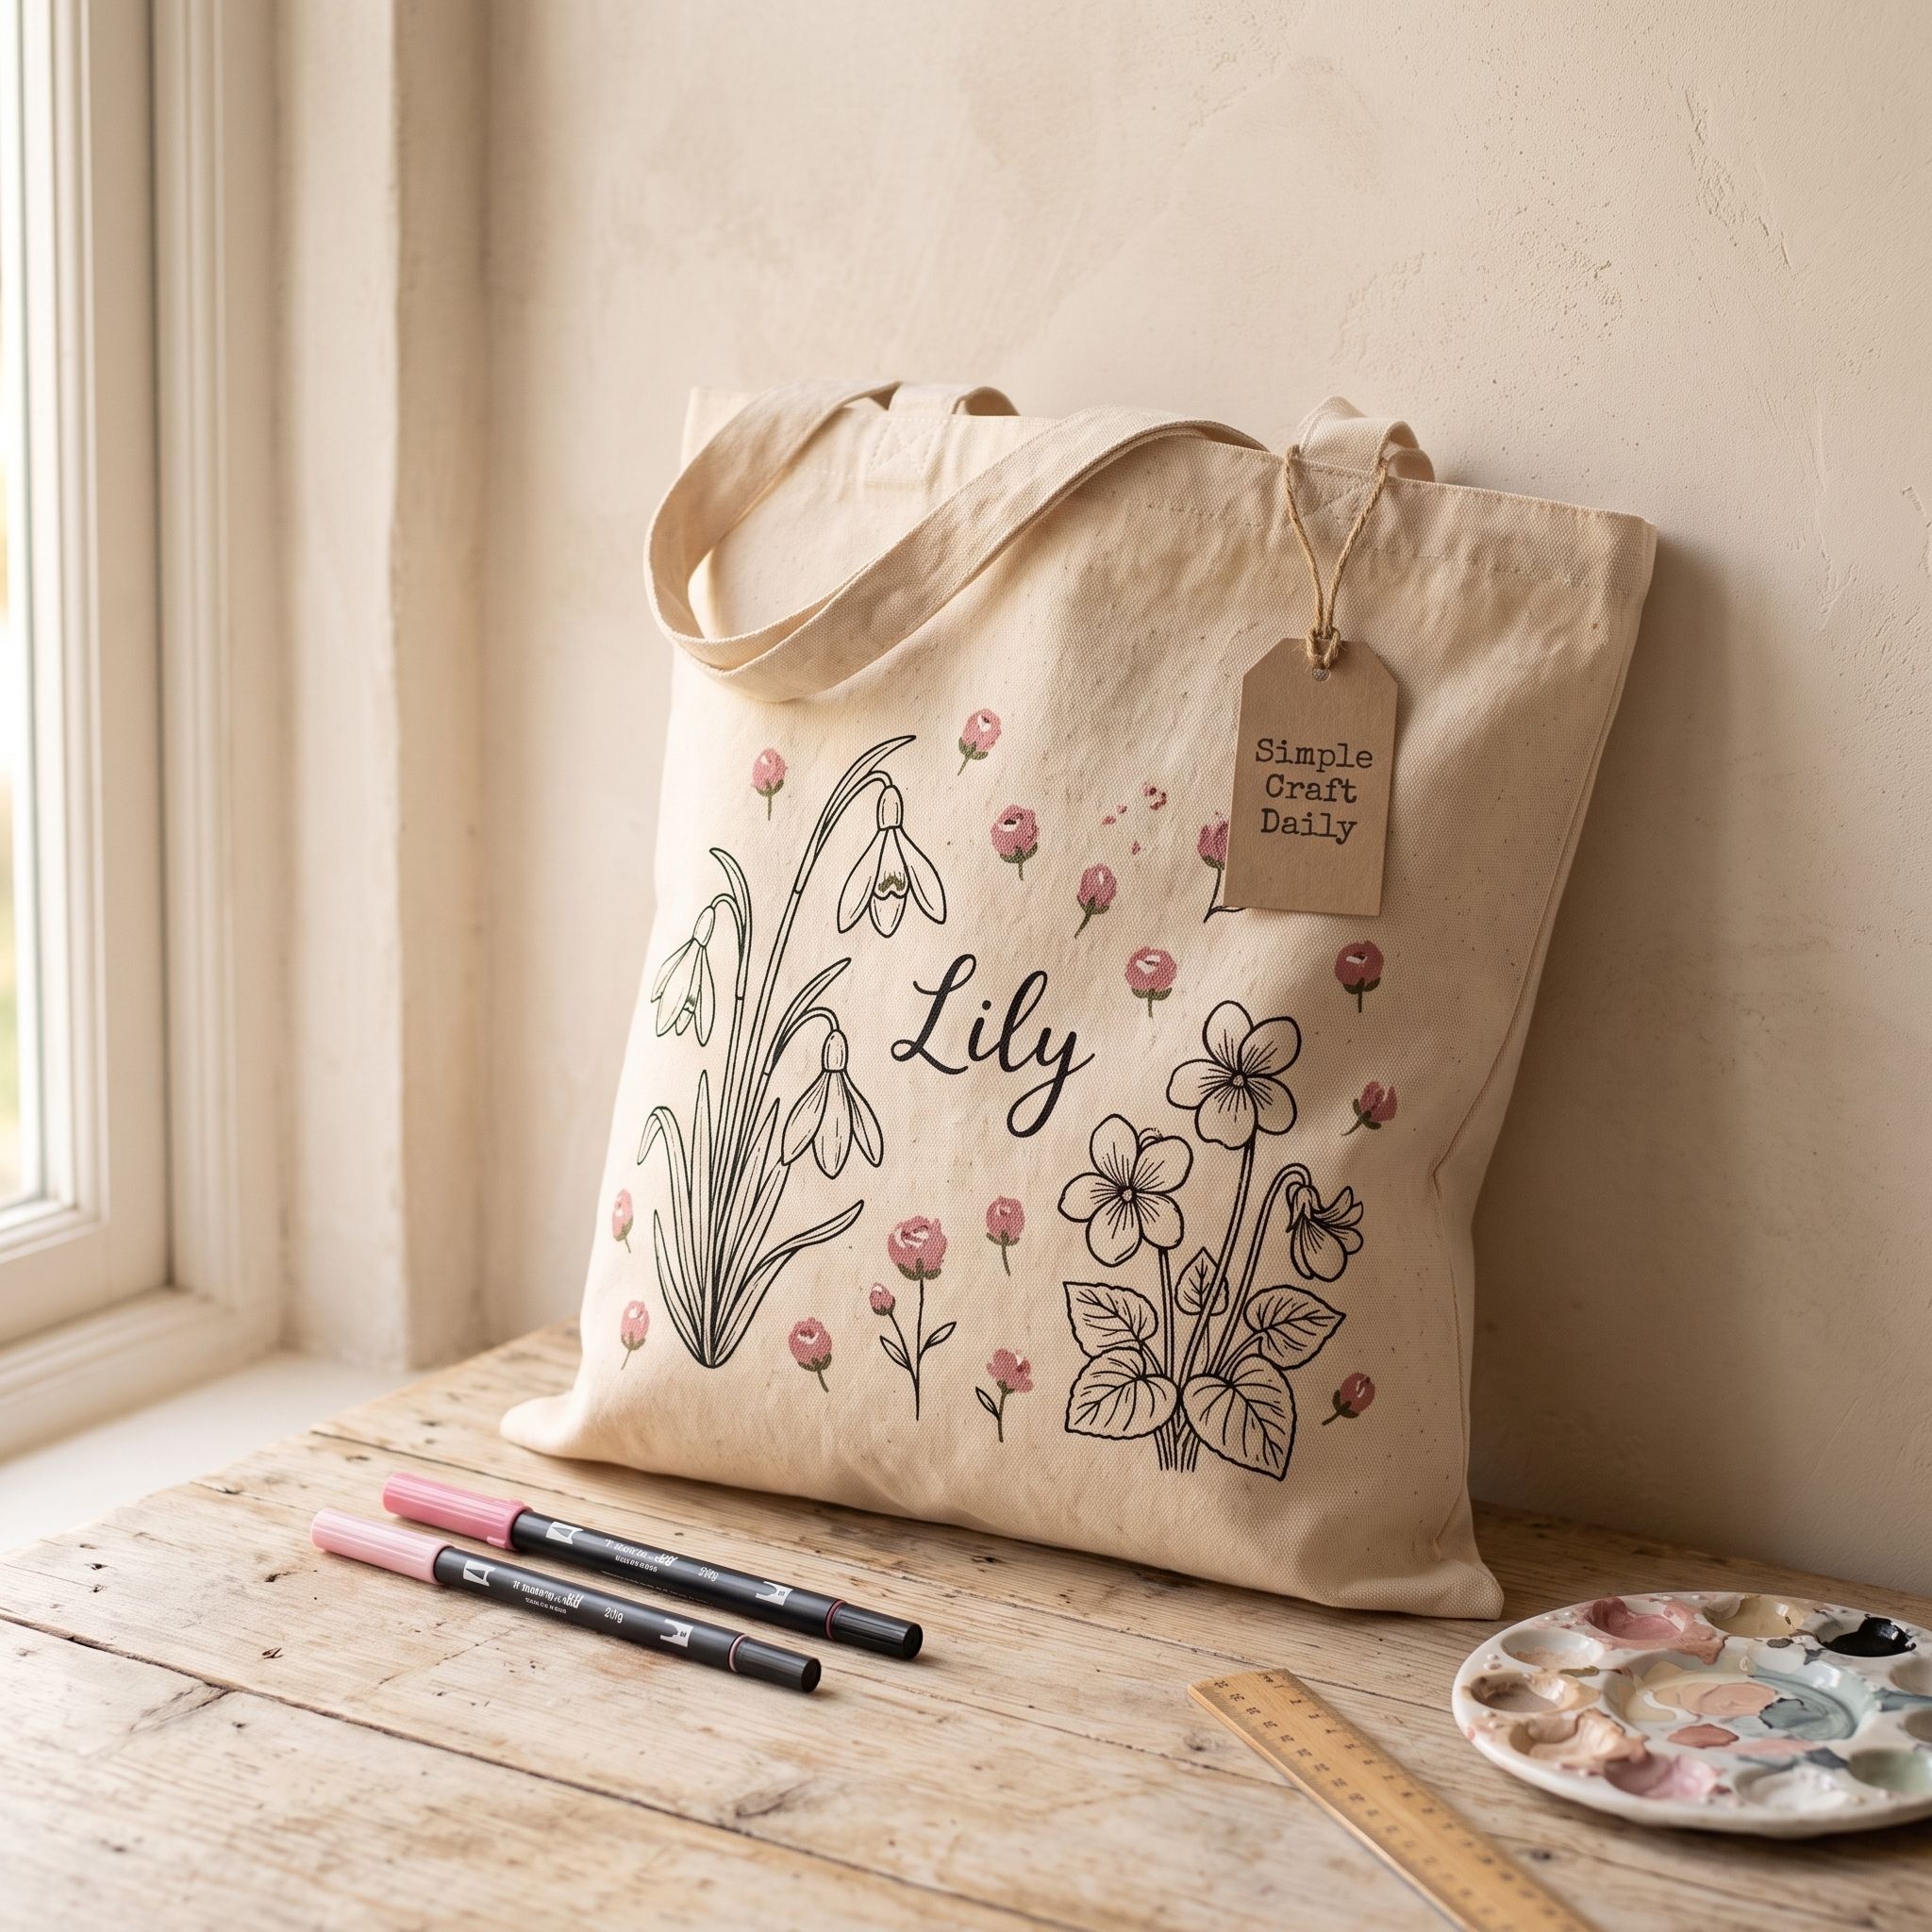
Mark the flower placement lightly with a removable fabric-marking pencil. Keep the recipient’s name at least 1 inch below the tote opening seam so the lettering stays visible when the bag is filled.
Use the fine end of a fabric marker to draw a simple stem, leaves, and petals in one steady line. Then add the name beneath the flower using the 12-inch clear quilting ruler as a baseline. After the marker ink dries according to its label, use a detail brush to place sparse textile-paint accents at petal centers and leaf tips. Keep the accents thin so the line art remains clean.
3. DIY Personalized Tote Bags With Iron-On Names
Supplies Needed: Natural Cotton Canvas Tote Blanks with Reinforced Handles, Heat Transfer Vinyl Sheets for Cotton Fabric, Parchment Paper or a Heat-Resistant Pressing Sheet, Tailor’s Awl, and Household Iron, Electronic Cutting Machine with Fine-Point Blade.
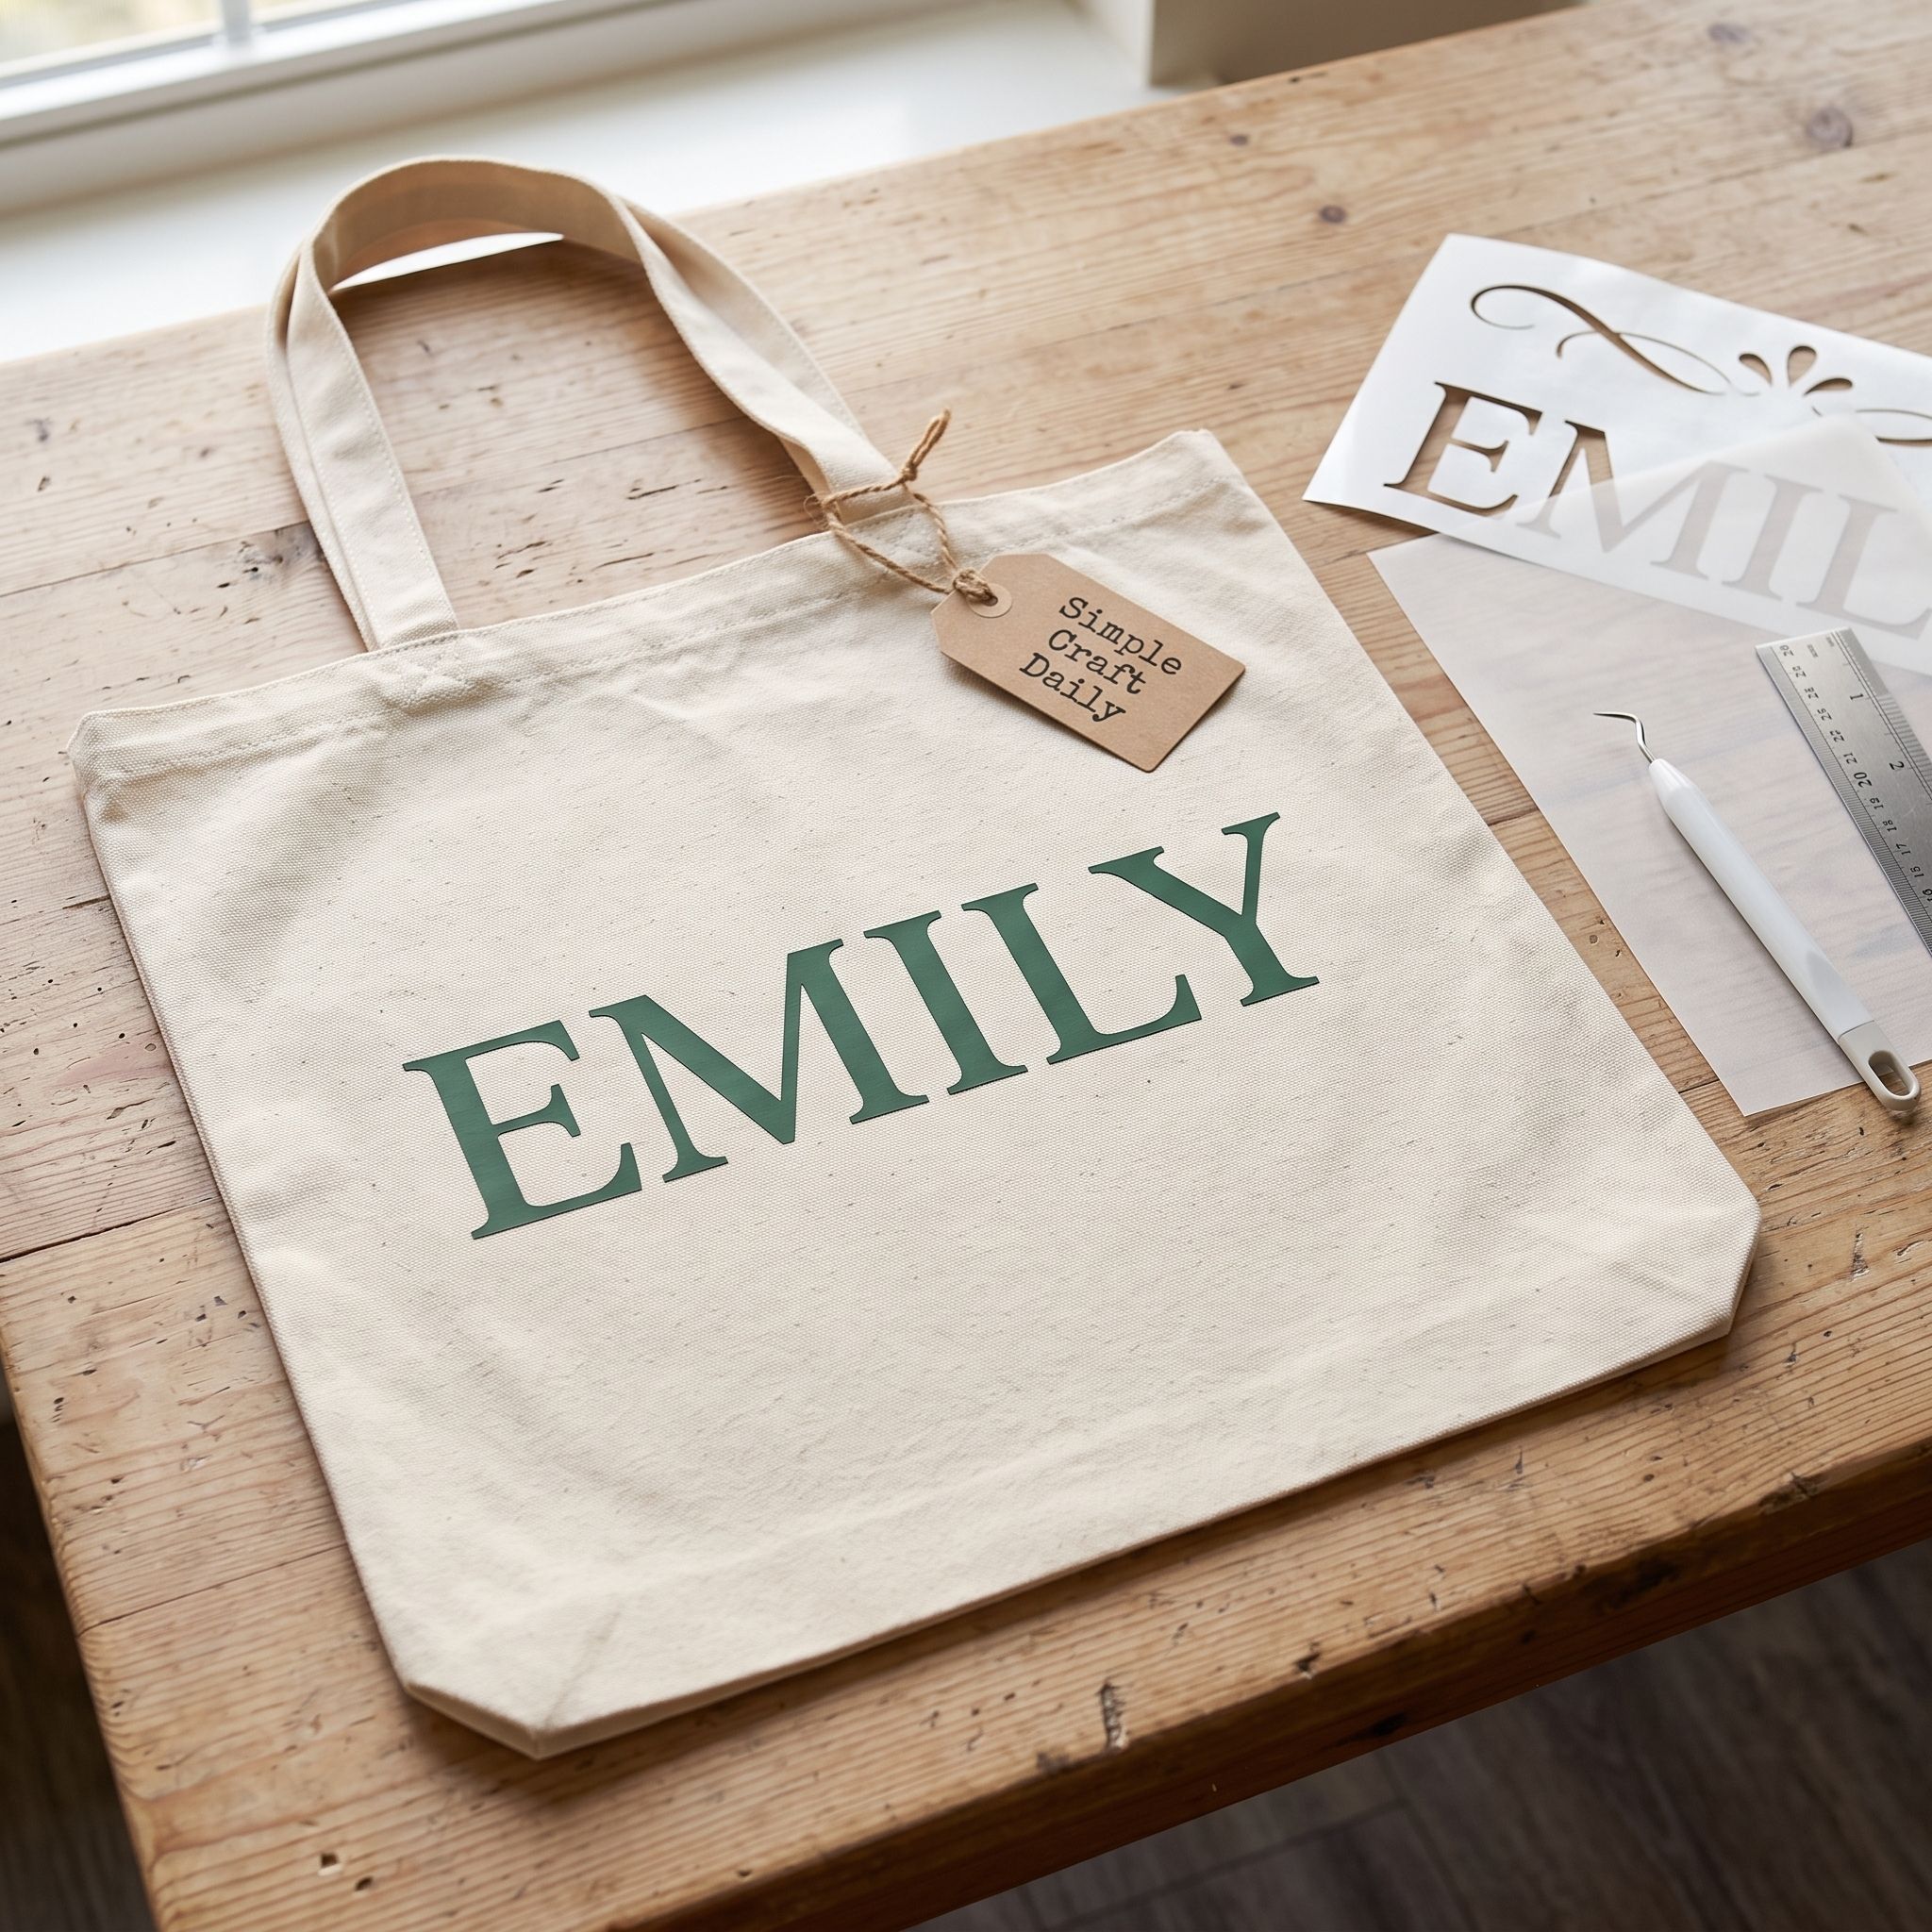
For crisp diy personalized tote bags, set the name in a bold, readable font and measure its width against the front panel. Mirror all lettering before cutting heat-transfer vinyl. Cut the design with an electronic cutting machine — or use pre-cut lettering or hand-cut simple shapes instead — then weed away the excess vinyl carefully with the tailor’s awl.
Preheat the canvas briefly only if the vinyl label directs it. Position the design, cover it with parchment or a heat-resistant pressing sheet, and press at the temperature, pressure, and duration printed by the vinyl manufacturer. Allow the carrier sheet to cool or peel warm according to those directions. Finally, after the vinyl has cooled, test one edge gently with your fingernail; re-press only if the label permits it.
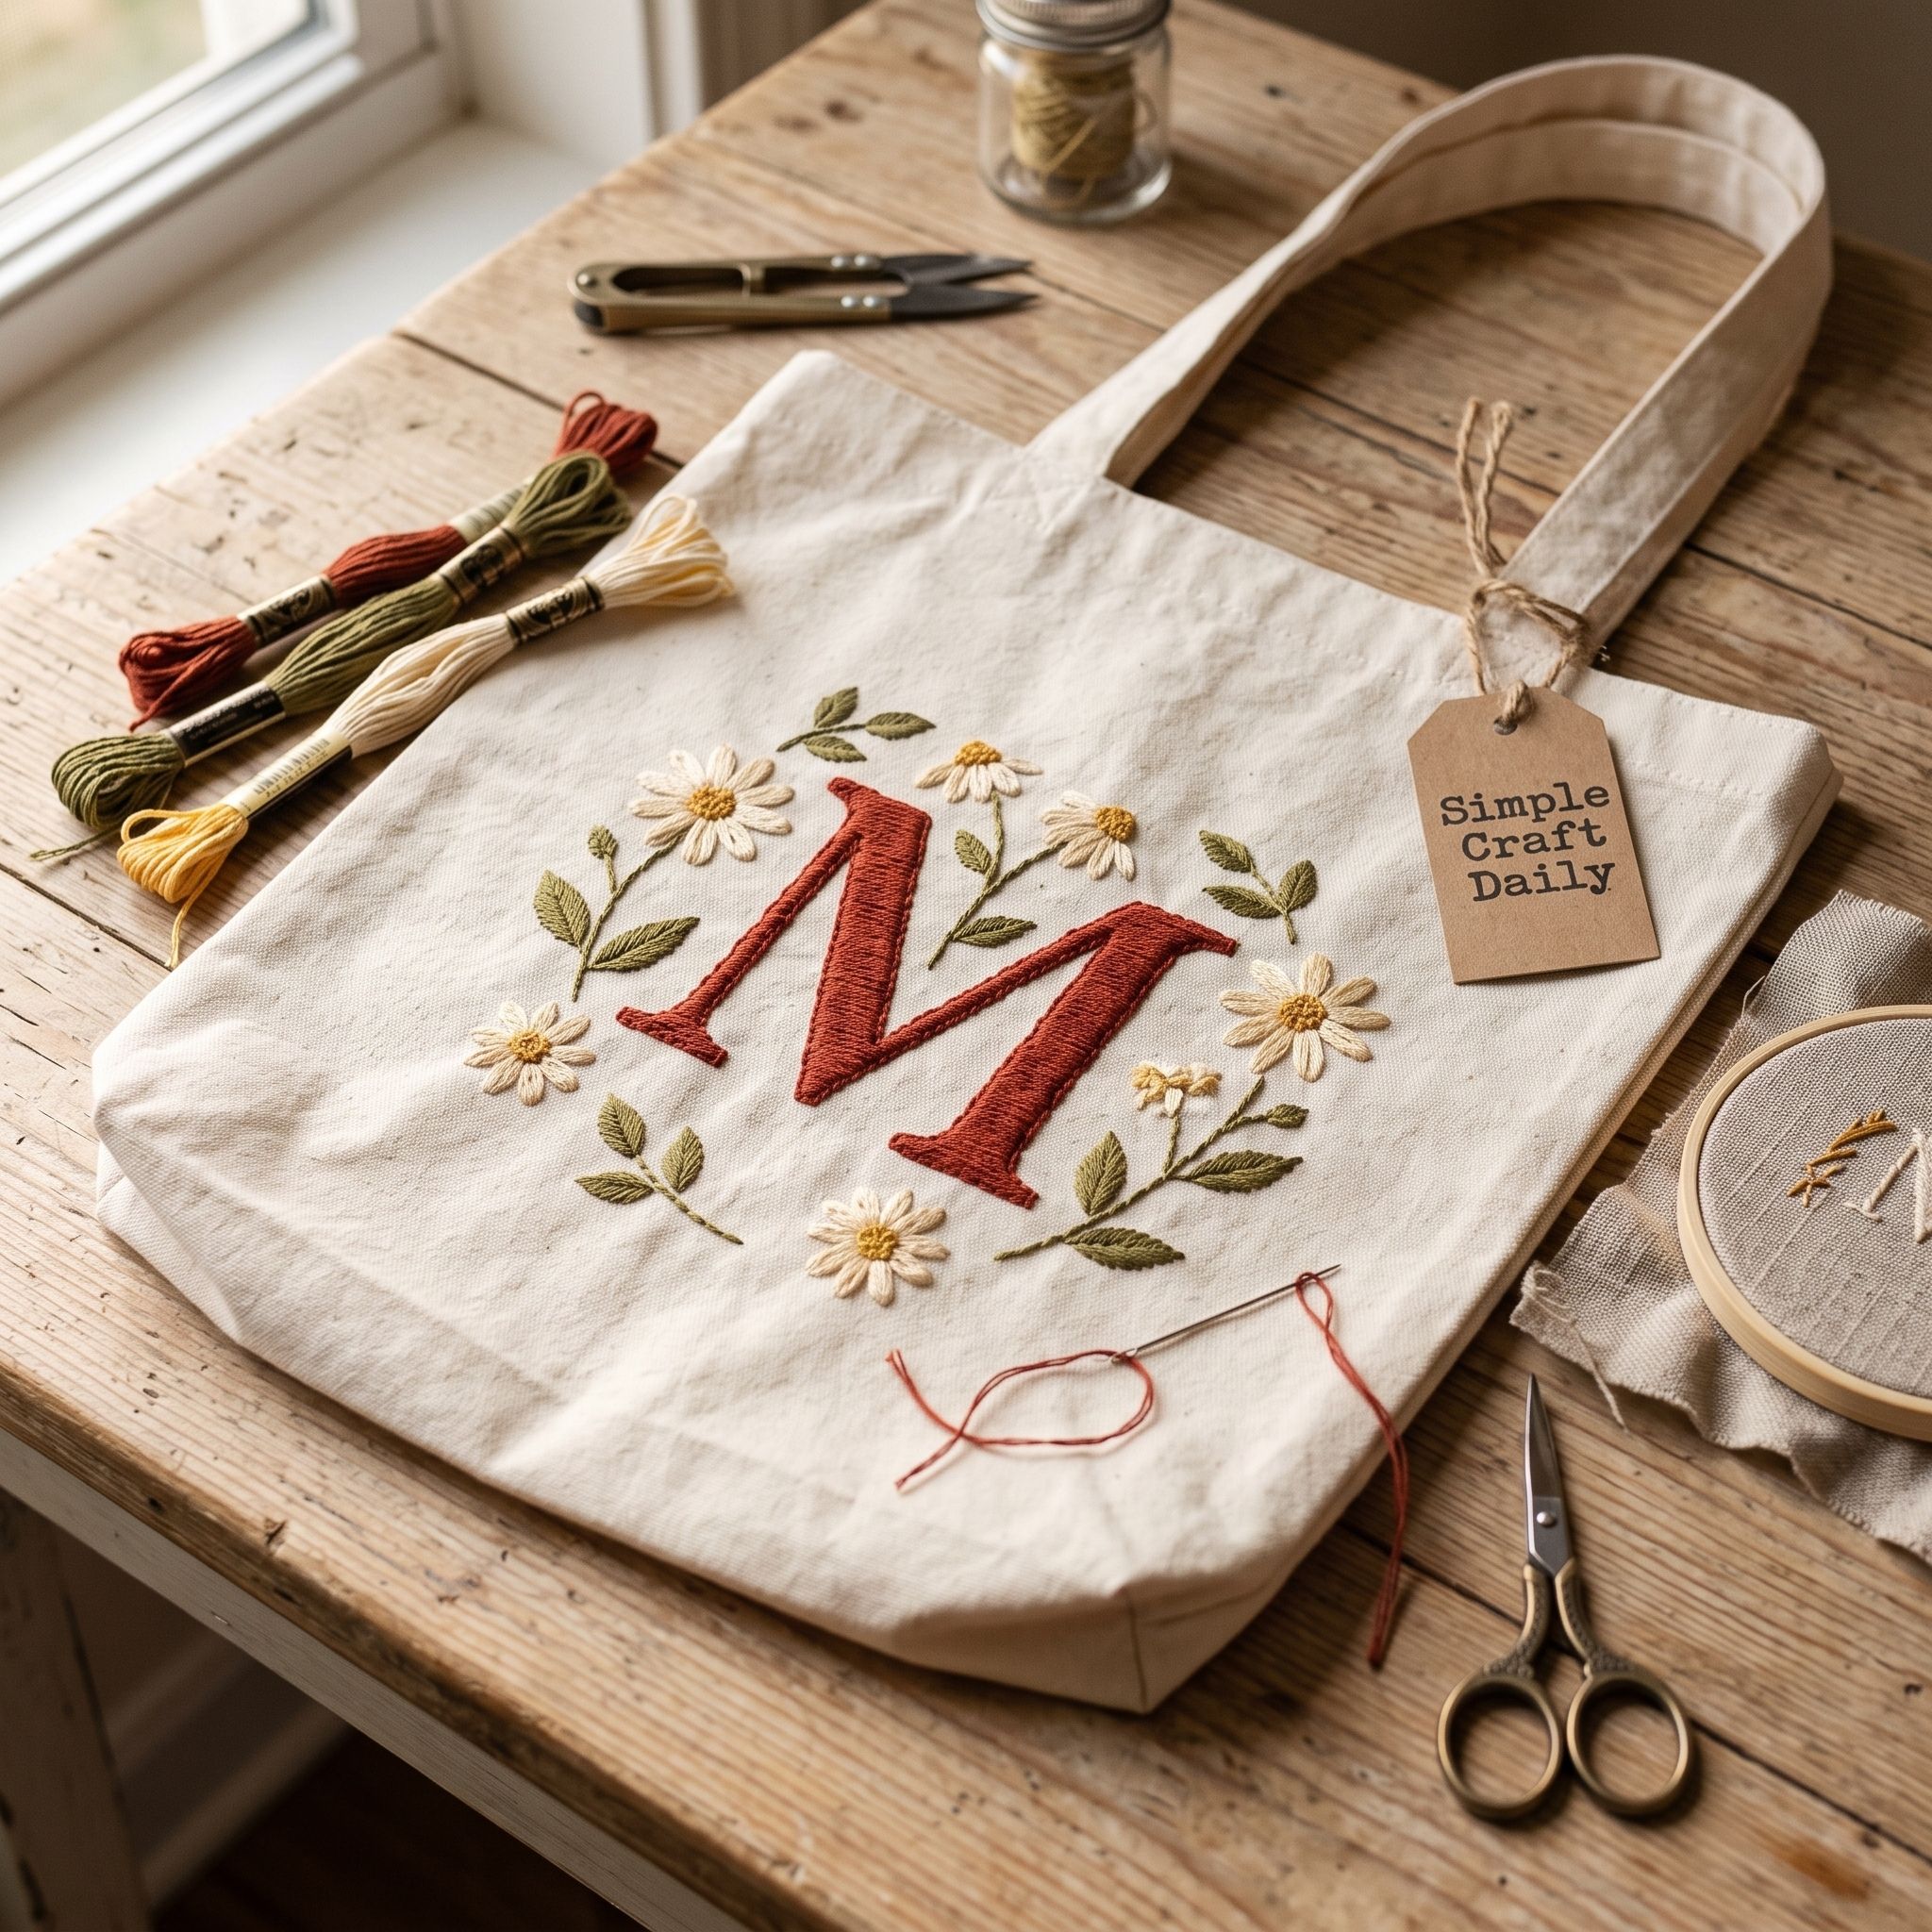
4. Embroidered Initial and Wildflower Tote
Supplies Needed: Natural Cotton Canvas Tote Blanks with Reinforced Handles, Embroidery Floss, Cotton Applique Fabric, and Embroidery Needles, Cardboard Inserts, Reusable Letter Stencils, and Removable Fabric-Marking Pencils, Parchment Paper or a Heat-Resistant Pressing Sheet, Tailor’s Awl, and Household Iron.
Place a cotton applique-fabric scrap behind the embroidery zone as a firm fabric backing. Mark a 3 to 4 inch initial on the tote front, then work the letter with backstitch using short 18-inch floss lengths to reduce tangles.
Next, add small lazy-daisy flowers around the initial with two or three floss colors. Pass the embroidery needle through both the canvas and backing scrap so the stitches do not pull against the tote weave alone. Secure thread tails with small knots inside the bag, keeping them below the opening seam. Place parchment between the embroidery and iron if a light press is needed to flatten the surrounding canvas.
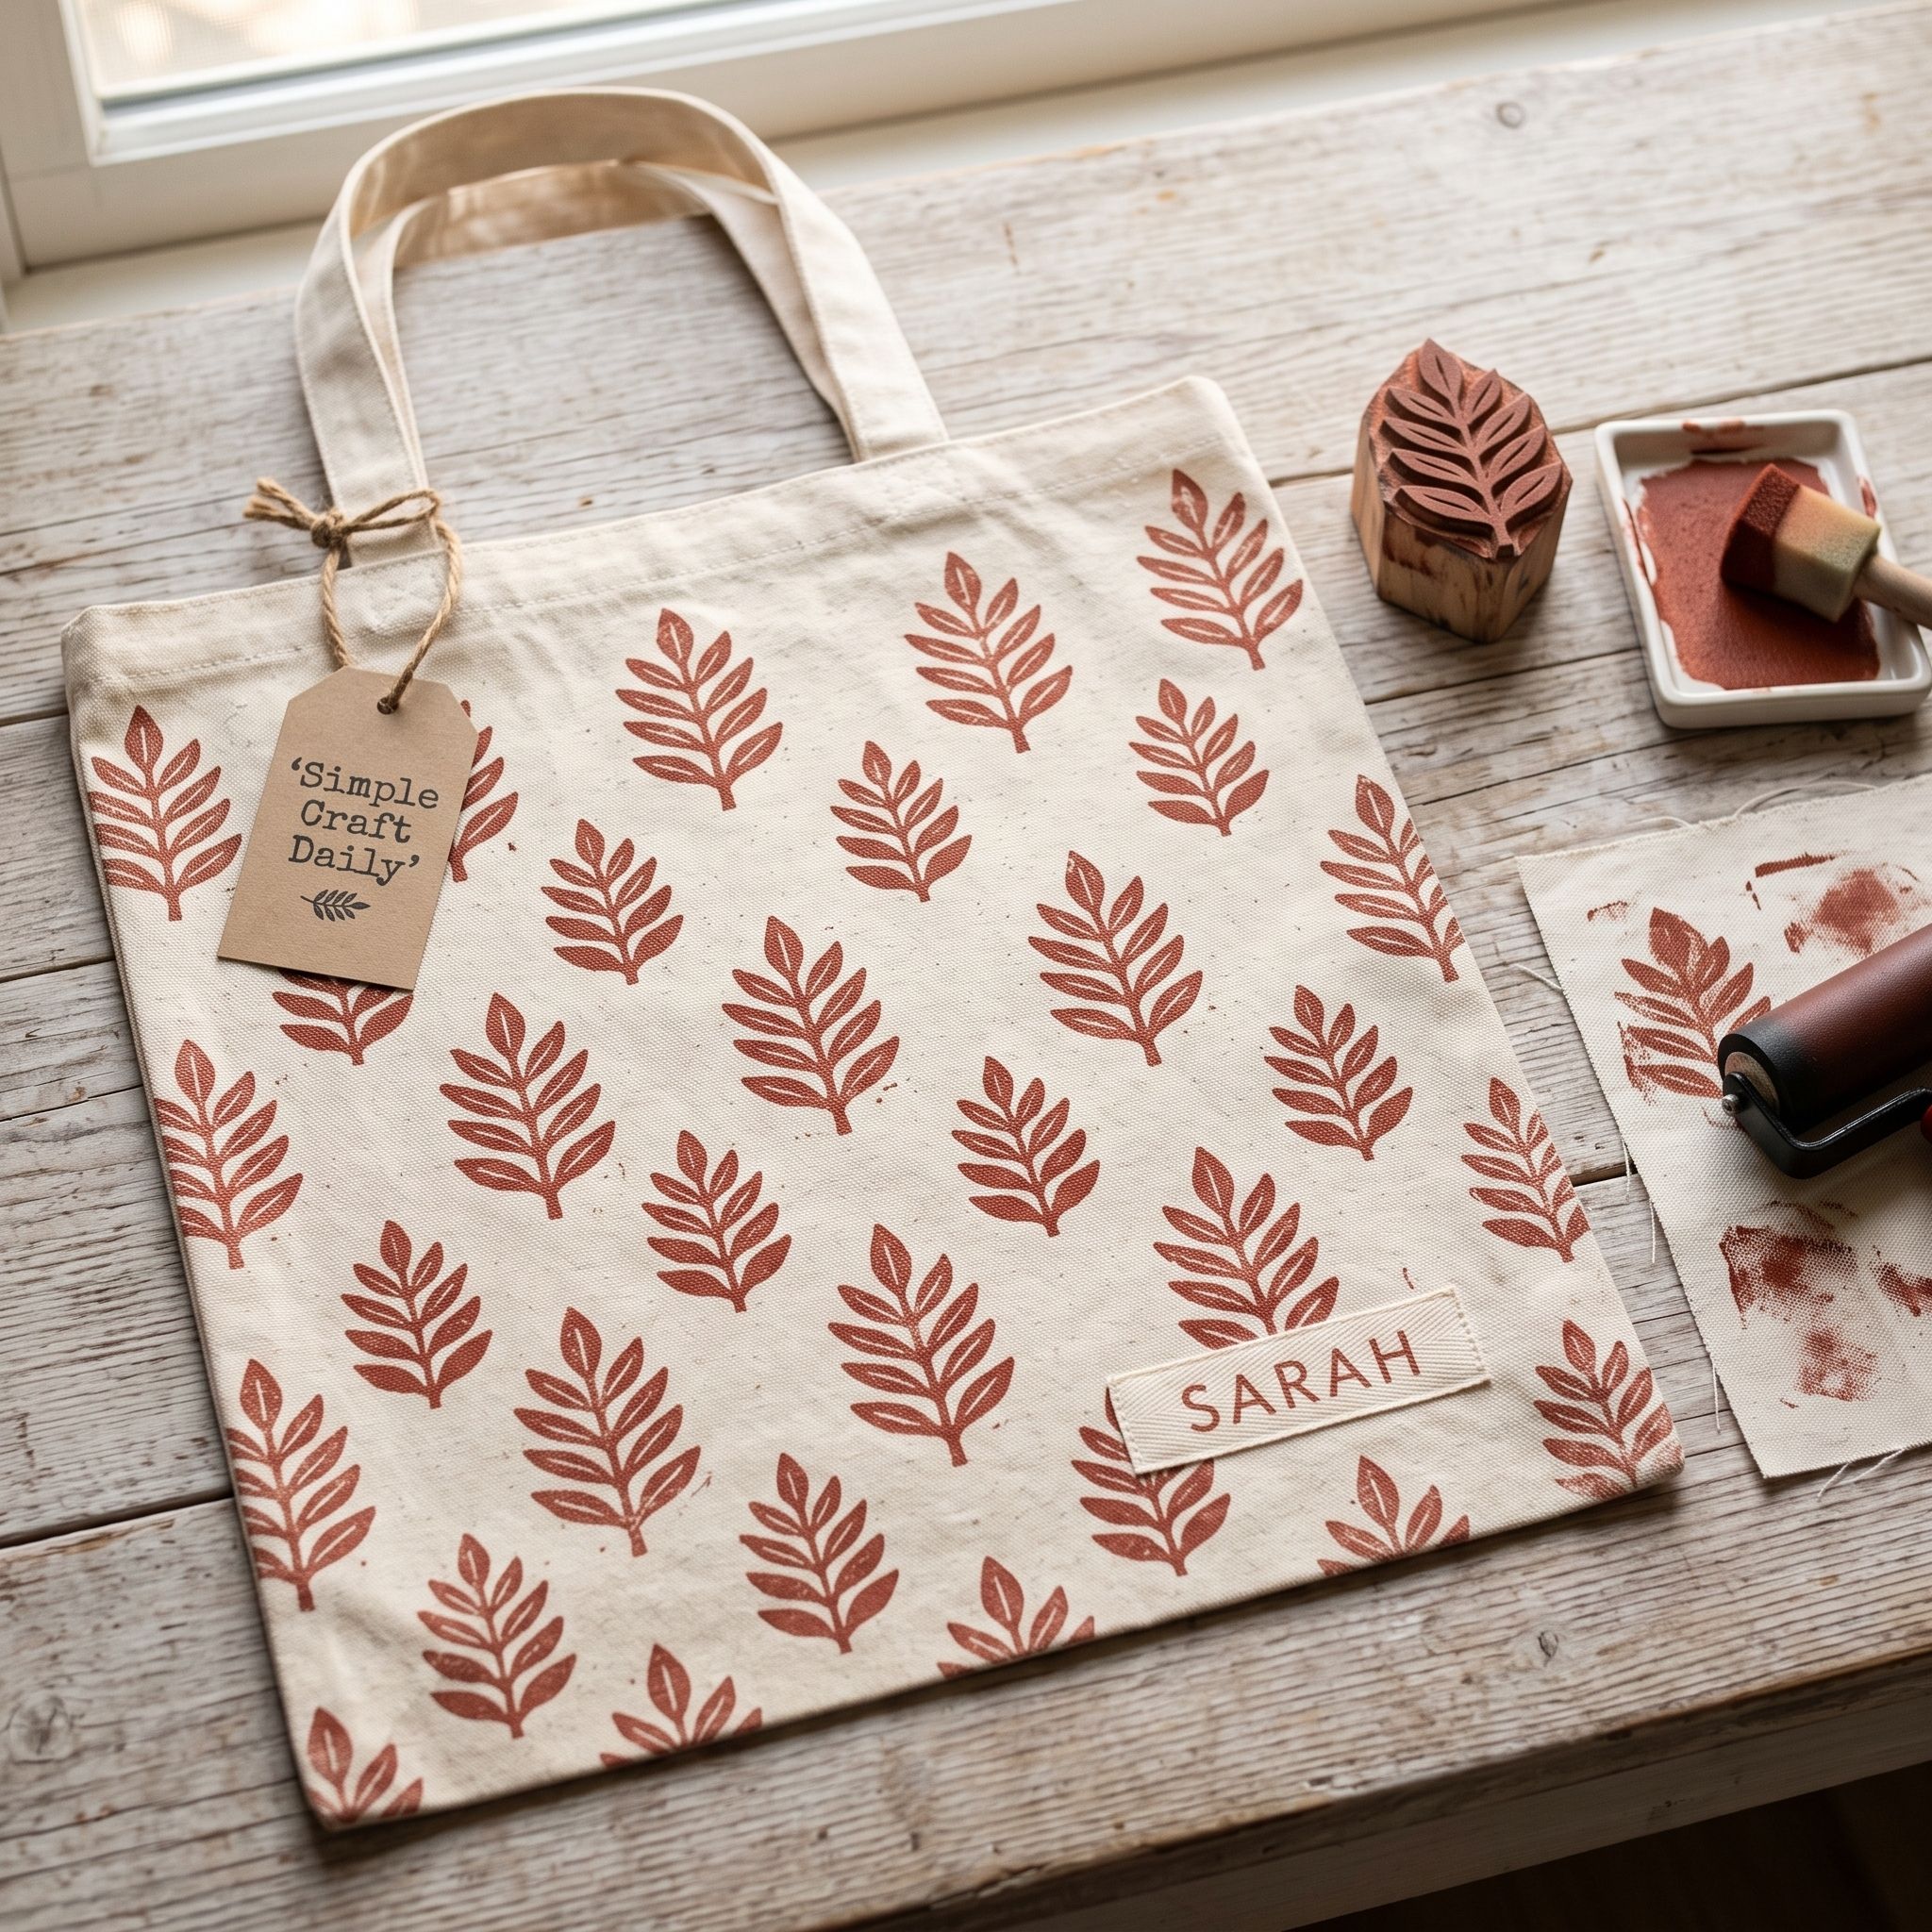
5. DIY Personalized Tote Bags With Block Prints
Supplies Needed: Natural Cotton Canvas Tote Blanks with Reinforced Handles, Cardboard Sheet Insert, Wooden Block Printing Stamps and Water-Based Textile Ink, Embroidery Floss, Cotton Applique Fabric, and Embroidery Needles, Parchment Paper or a Heat-Resistant Pressing Sheet, Tailor’s Awl, and Household Iron.
Plan a print field that leaves 1 inch of clear canvas around its outer edge. Load textile ink onto the wooden block in a thin, even layer, then make several test impressions on a cotton applique-fabric scrap before touching the tote.
Stamp from the center outward, pressing straight down and lifting straight up so the motif does not smear. Reload the block lightly between impressions; overloaded stamps blur into the canvas weave. Let the textile ink dry fully, then cover the print with parchment and heat-set it according to the ink manufacturer’s directions. This method gives diy personalized tote bags a hand-printed finish that still feels orderly.
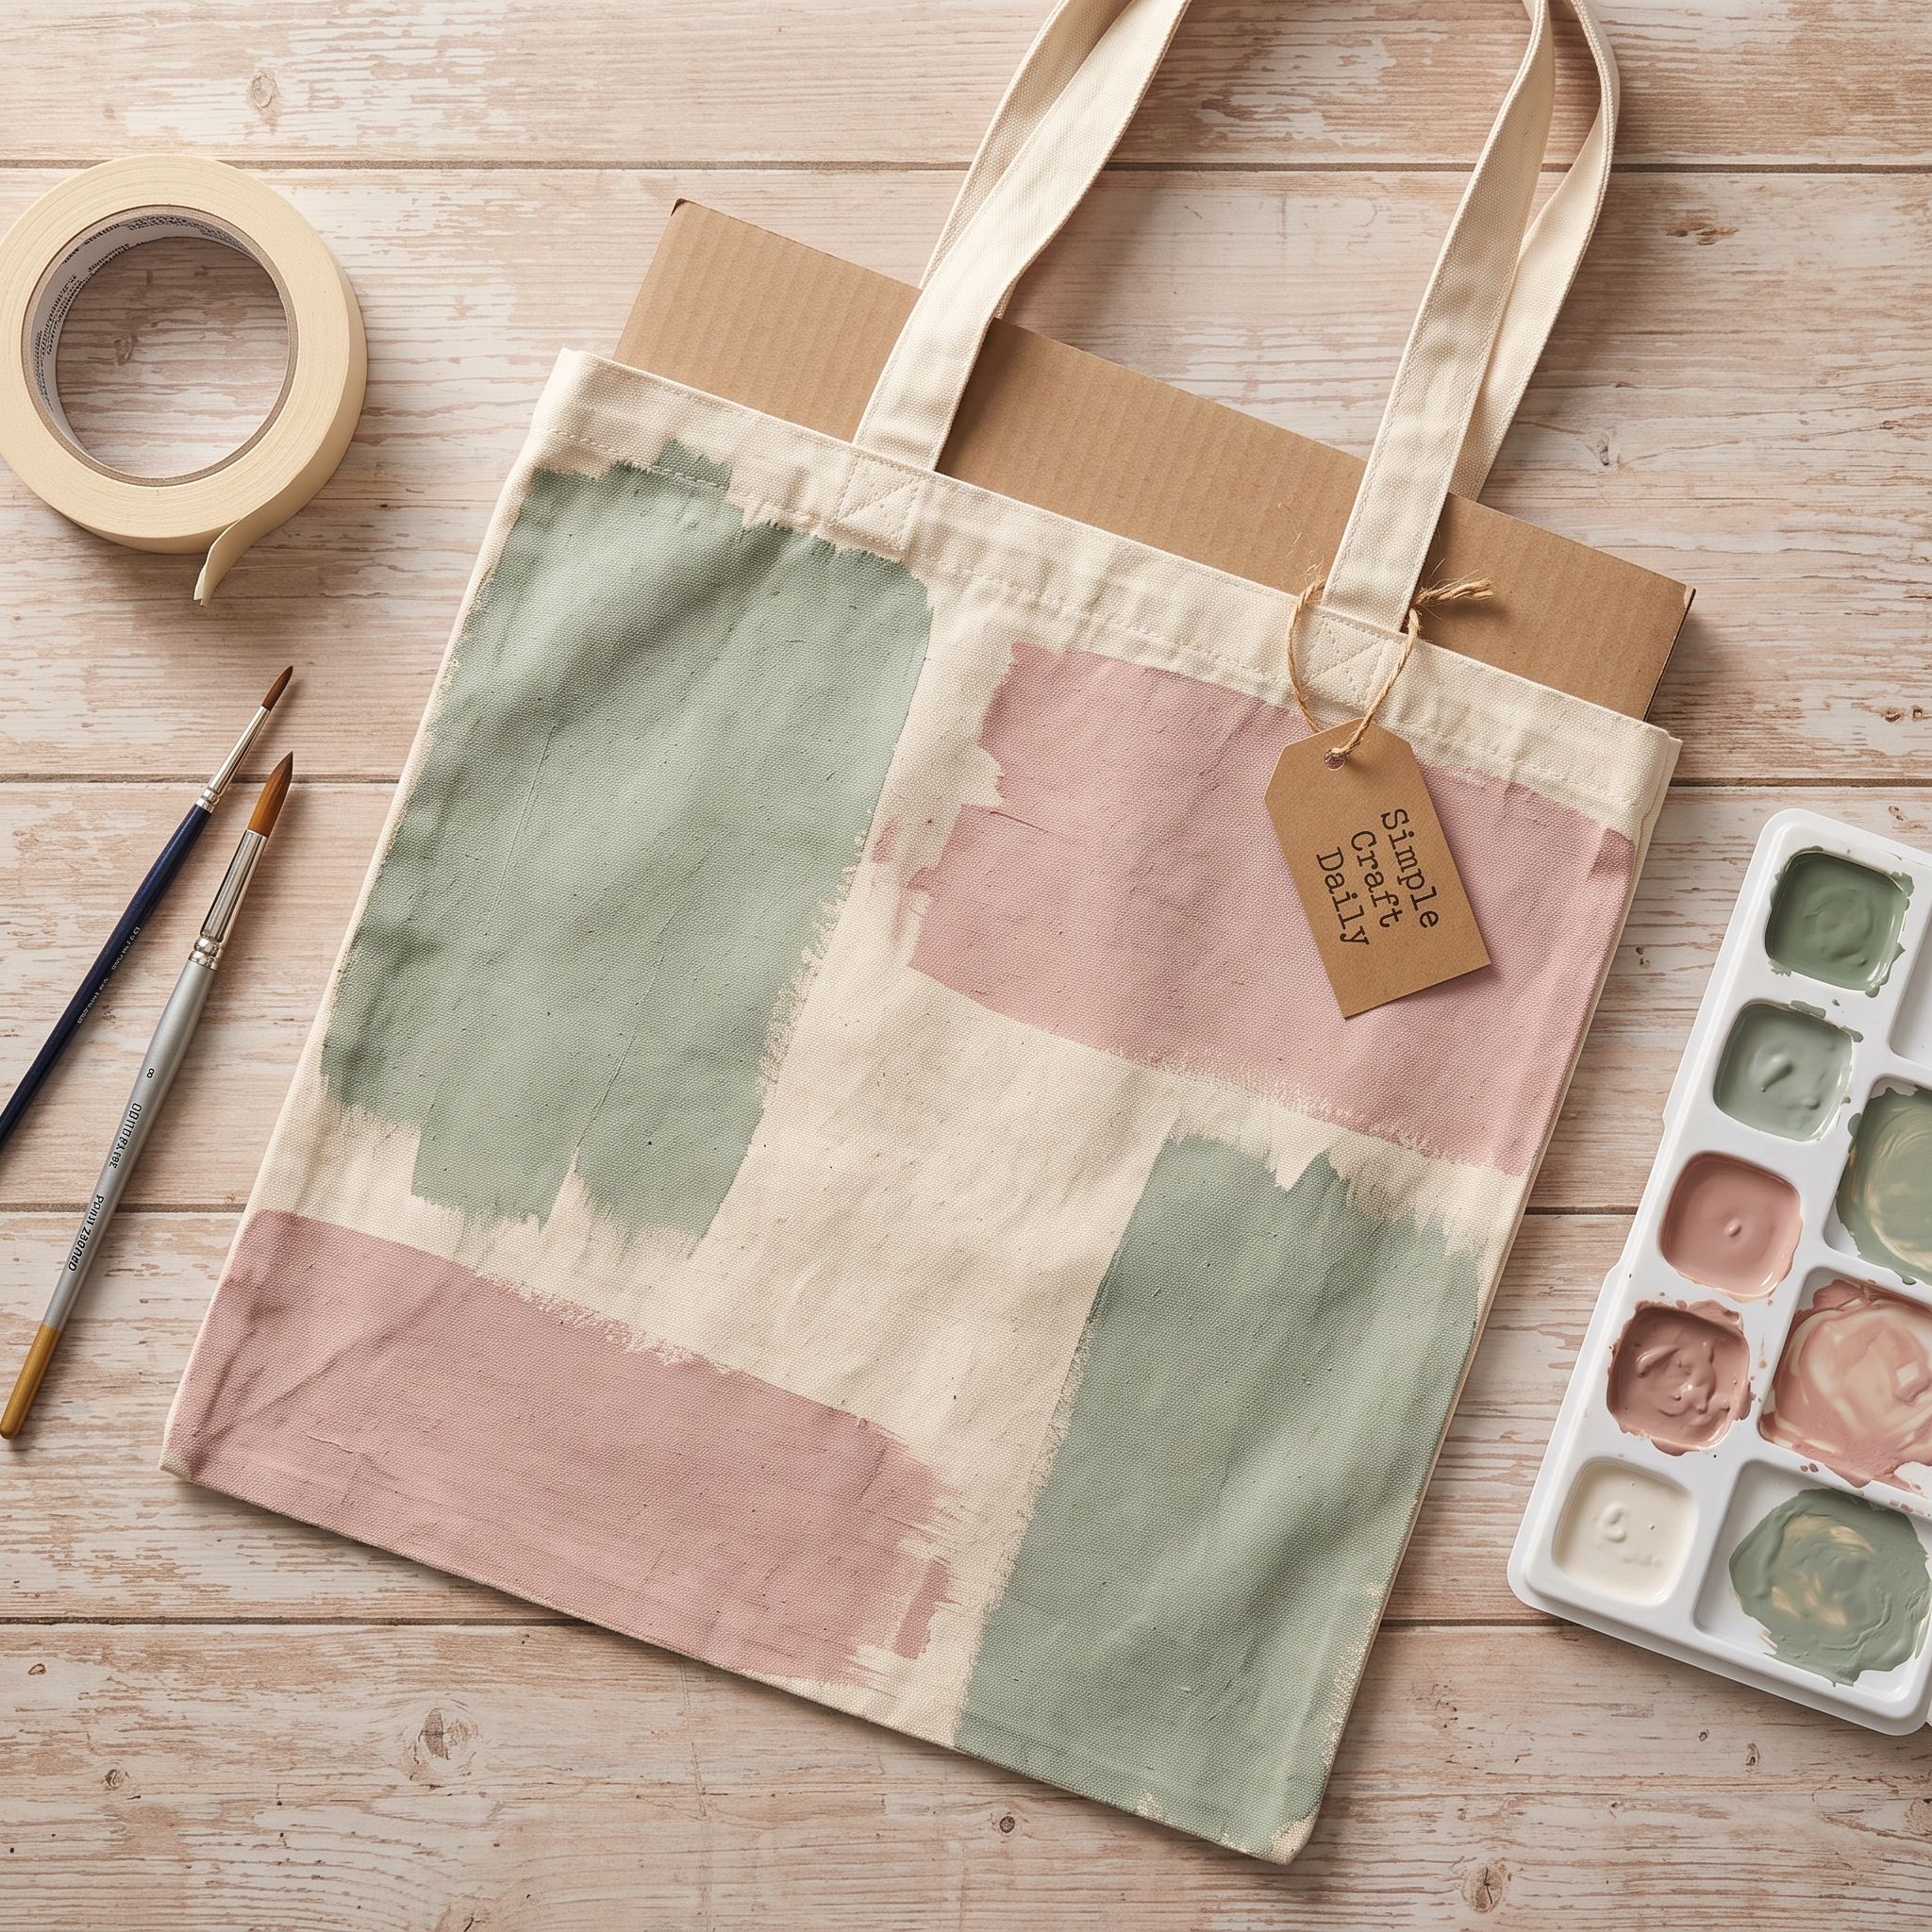
6. Color-Blocked Market Bag
Supplies Needed: Natural Cotton Canvas Tote Blanks with Reinforced Handles, Permanent Textile Paint Set for Natural Fabric, Cardboard Inserts and Removable Fabric-Marking Pencils, 12-Inch Clear Quilting Ruler and Painter’s Tape, Fabric Scissors, Detail Brush Set, Wide Flat Paintbrush, Foam Pouncers, and Self-Healing Work Mat, Parchment Paper or a Heat-Resistant Pressing Sheet, Tailor’s Awl, and Household Iron.
Lay the tote flat on the self-healing work mat with cardboard inside. Use painter’s tape to mask two broad panels, keeping tape away from load-bearing handle stitching. Apply textile paint in thin coats with a wide brush or foam pouncer.
Allow each coat to dry as directed before adding another. When the final coat is slightly tacky rather than wet, peel the tape slowly back over itself for a cleaner line. Let the paint dry completely, then heat-set it under parchment or a pressing sheet according to the label. The cardboard insert keeps color from transferring to the rear tote panel.
Electronic Cutting Machine with Fine-Point Blade
Cuts mirrored vinyl lettering and repeat stencil shapes with measured, consistent edges
I earn a commission if you make a purchase, at no additional cost to you.
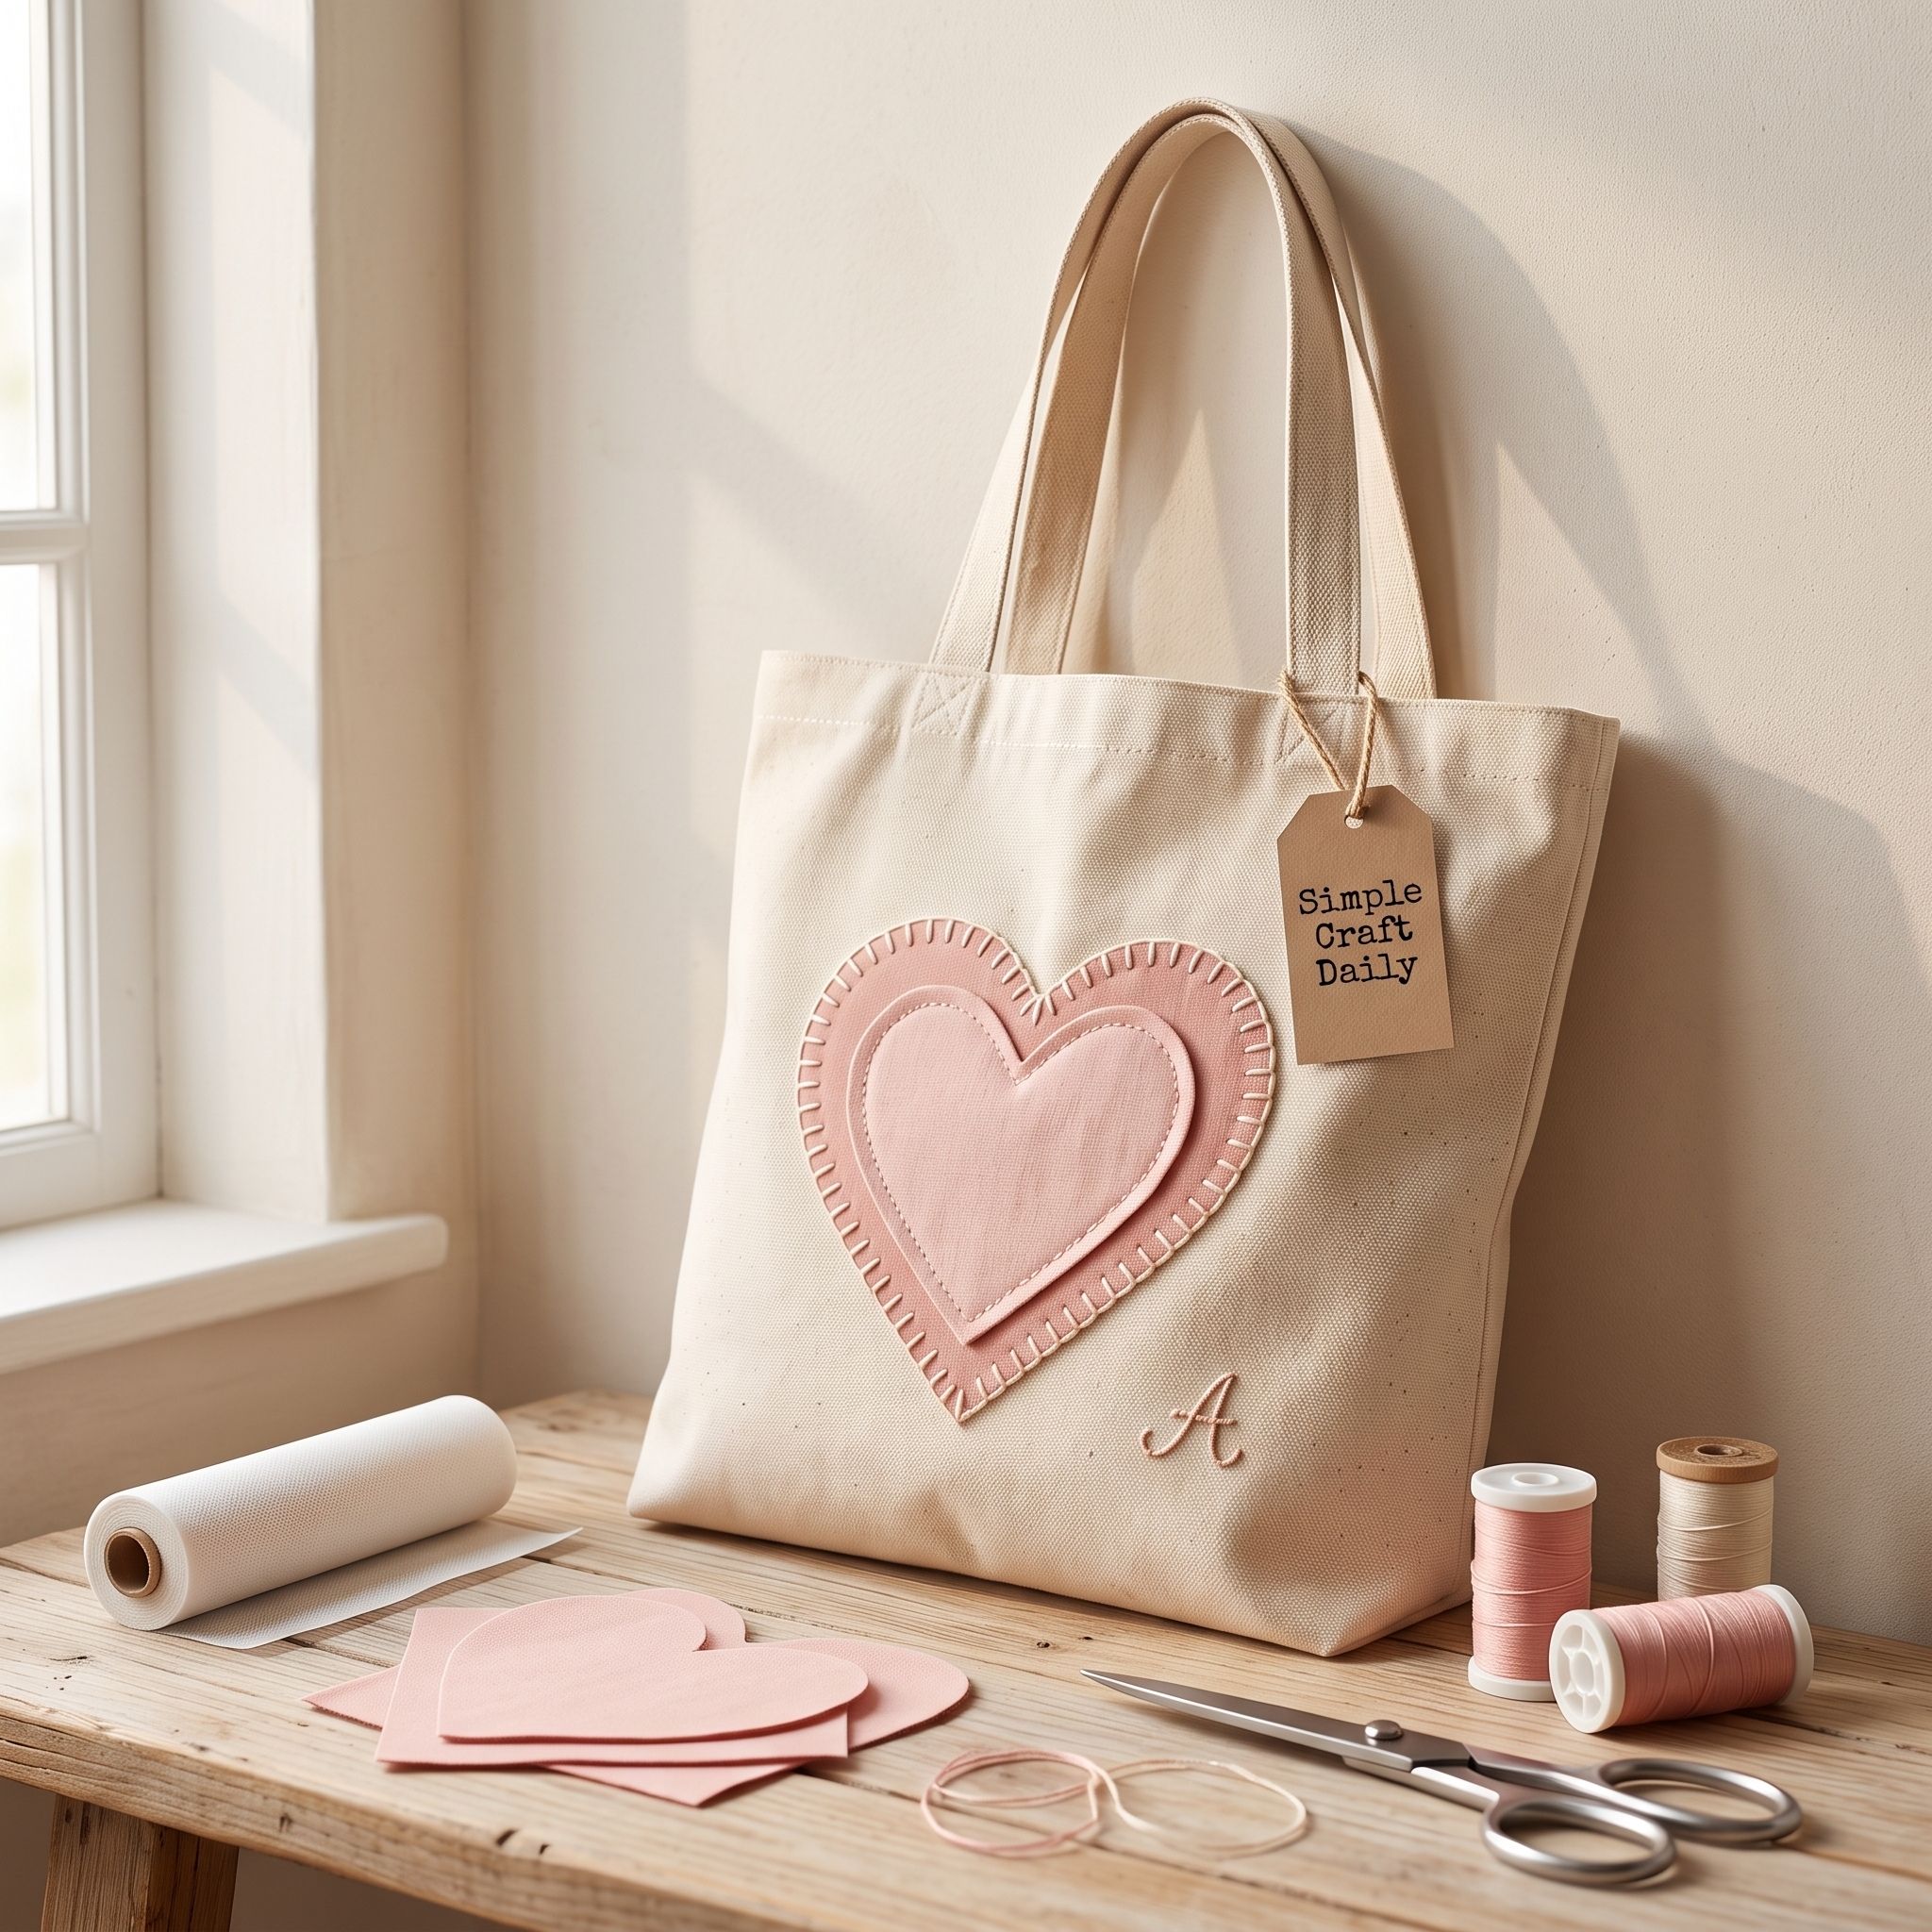
7. DIY Personalized Tote Bags With Heart Applique
Supplies Needed: Natural Cotton Canvas Tote Blanks with Reinforced Handles, Embroidery Floss, Cotton Applique Fabric, and Embroidery Needles, Fusible Web Adhesive for Fabric Applique, Parchment Paper or a Heat-Resistant Pressing Sheet, Tailor’s Awl, and Household Iron, All-Purpose Sewing Thread, Heavy-Duty Sewing Machine with Canvas Needle Set.
Draw a heart or initial template, then cut the cotton applique fabric along the desired finished edge. Fuse the web adhesive to the wrong side of the fabric according to its label, peel the backing, and place the shape on the tote front.
Cover the shape with a pressing sheet and fuse it flat. Let the tote cool undisturbed before sewing; warm adhesive can shift under the presser foot. Next, stitch around the edge with a short zigzag on a heavy-duty machine fitted with a canvas needle, or work a close hand blanket stitch with embroidery floss. The fused web holds the heart in place while stitching gives the edge lasting strength.
8. Book Lover Library Quote Tote
Supplies Needed: Natural Cotton Canvas Tote Blanks with Reinforced Handles, Dual-Tip Fabric Marker Set, Permanent Textile Paint Set for Natural Fabric, Cardboard Inserts and Removable Fabric-Marking Pencils, 12-Inch Clear Quilting Ruler and Painter’s Tape, Detail Brush Set, Foam Pouncers, and Self-Healing Work Mat.
Choose a short quote that remains readable from normal standing distance. Mark a centered rectangle on the tote front, then draw faint horizontal baselines with a removable fabric-marking pencil and the 12-inch clear quilting ruler.
Letter the quote slowly with the fine end of a fabric marker, leaving at least 1/4 inch between lines. After the ink dries, add small painted stars or dots around the text with a detail brush. Keep the decorative marks sparse so the words remain the focus. These diy personalized tote bags make especially useful teacher, librarian, and book-club gifts.

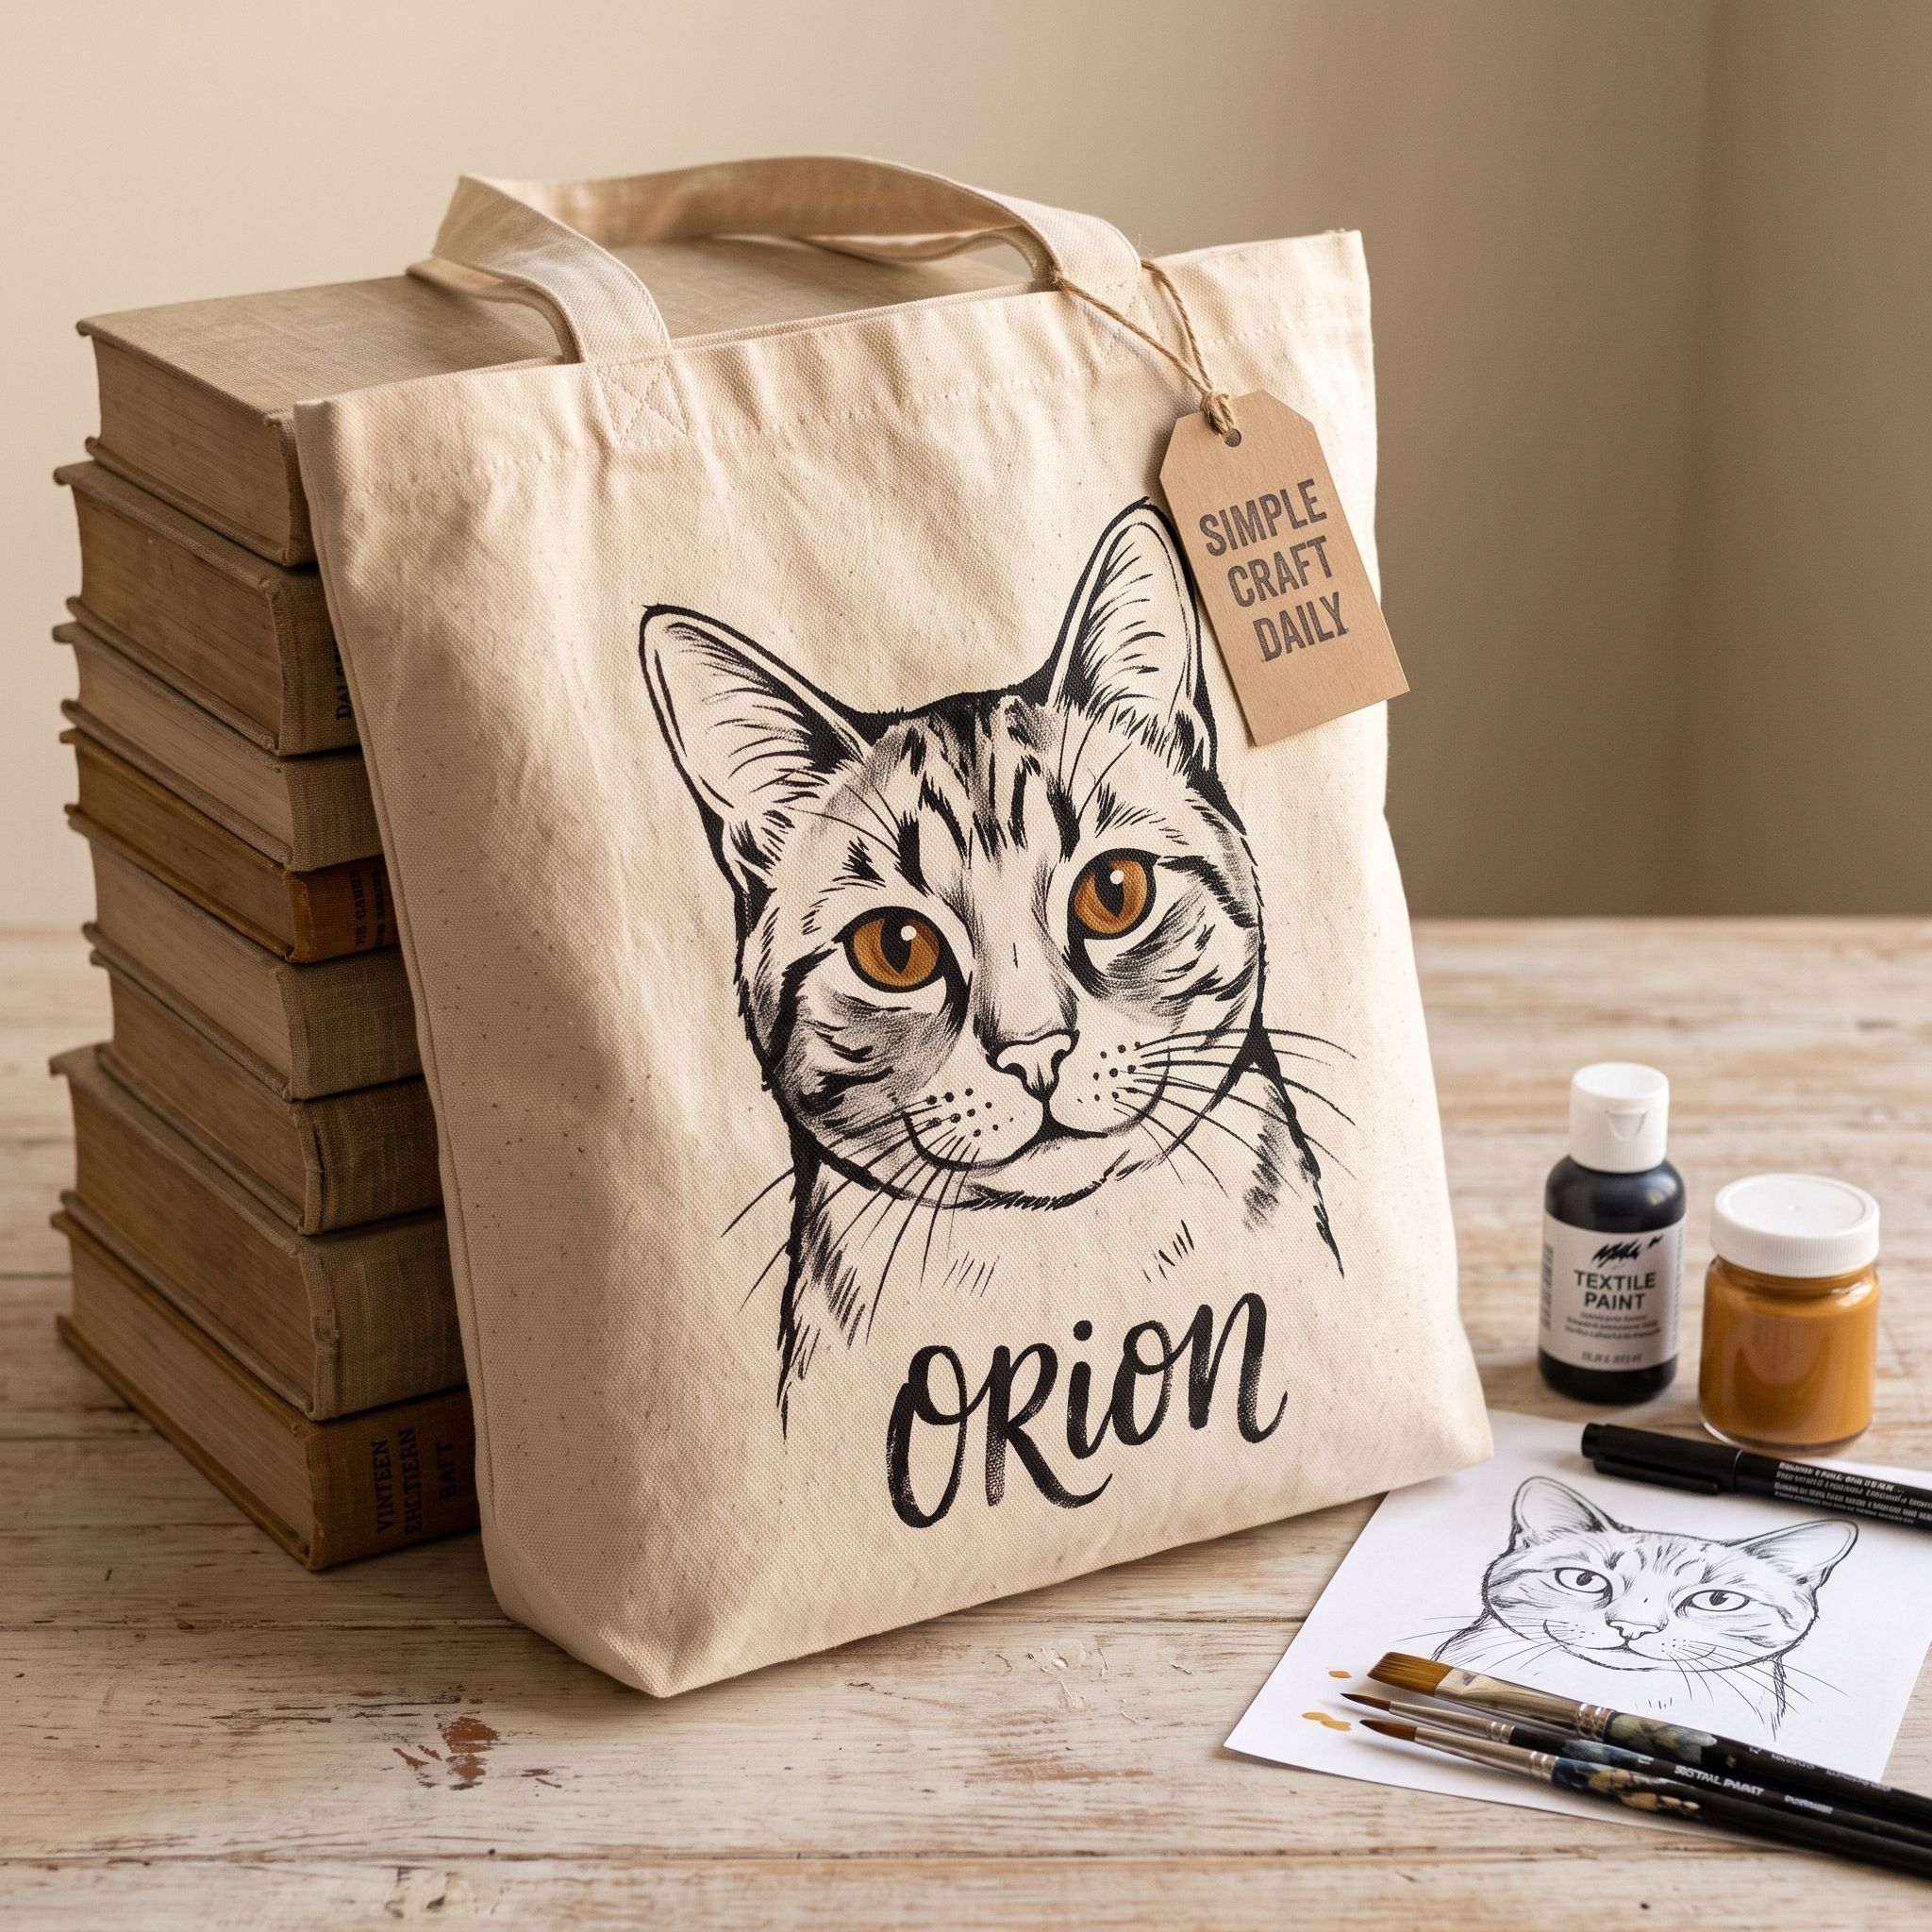
9. DIY Personalized Tote Bags With Pet Portraits
Supplies Needed: Natural Cotton Canvas Tote Blanks with Reinforced Handles, Permanent Textile Paint Set for Natural Fabric, Dual-Tip Fabric Marker Set, Cardboard Inserts and Removable Fabric-Marking Pencils, Detail Brush Set, Foam Pouncers, and Self-Healing Work Mat.
Use a favorite pet photograph as a reference, but simplify it into two or three bold color shapes. Paint the largest silhouette first with a foam pouncer or detail brush, leaving facial features until the paint has dried fully.
Next, add ears, nose, whiskers, collar marks, or eye lines with the fine fabric marker. Avoid tiny fur strokes that disappear into the canvas weave after drying. For more playful reference ideas, revisit our adorable cat-themed bags you will love to make. Let paint and marker ink cure according to their individual labels before using the bag.
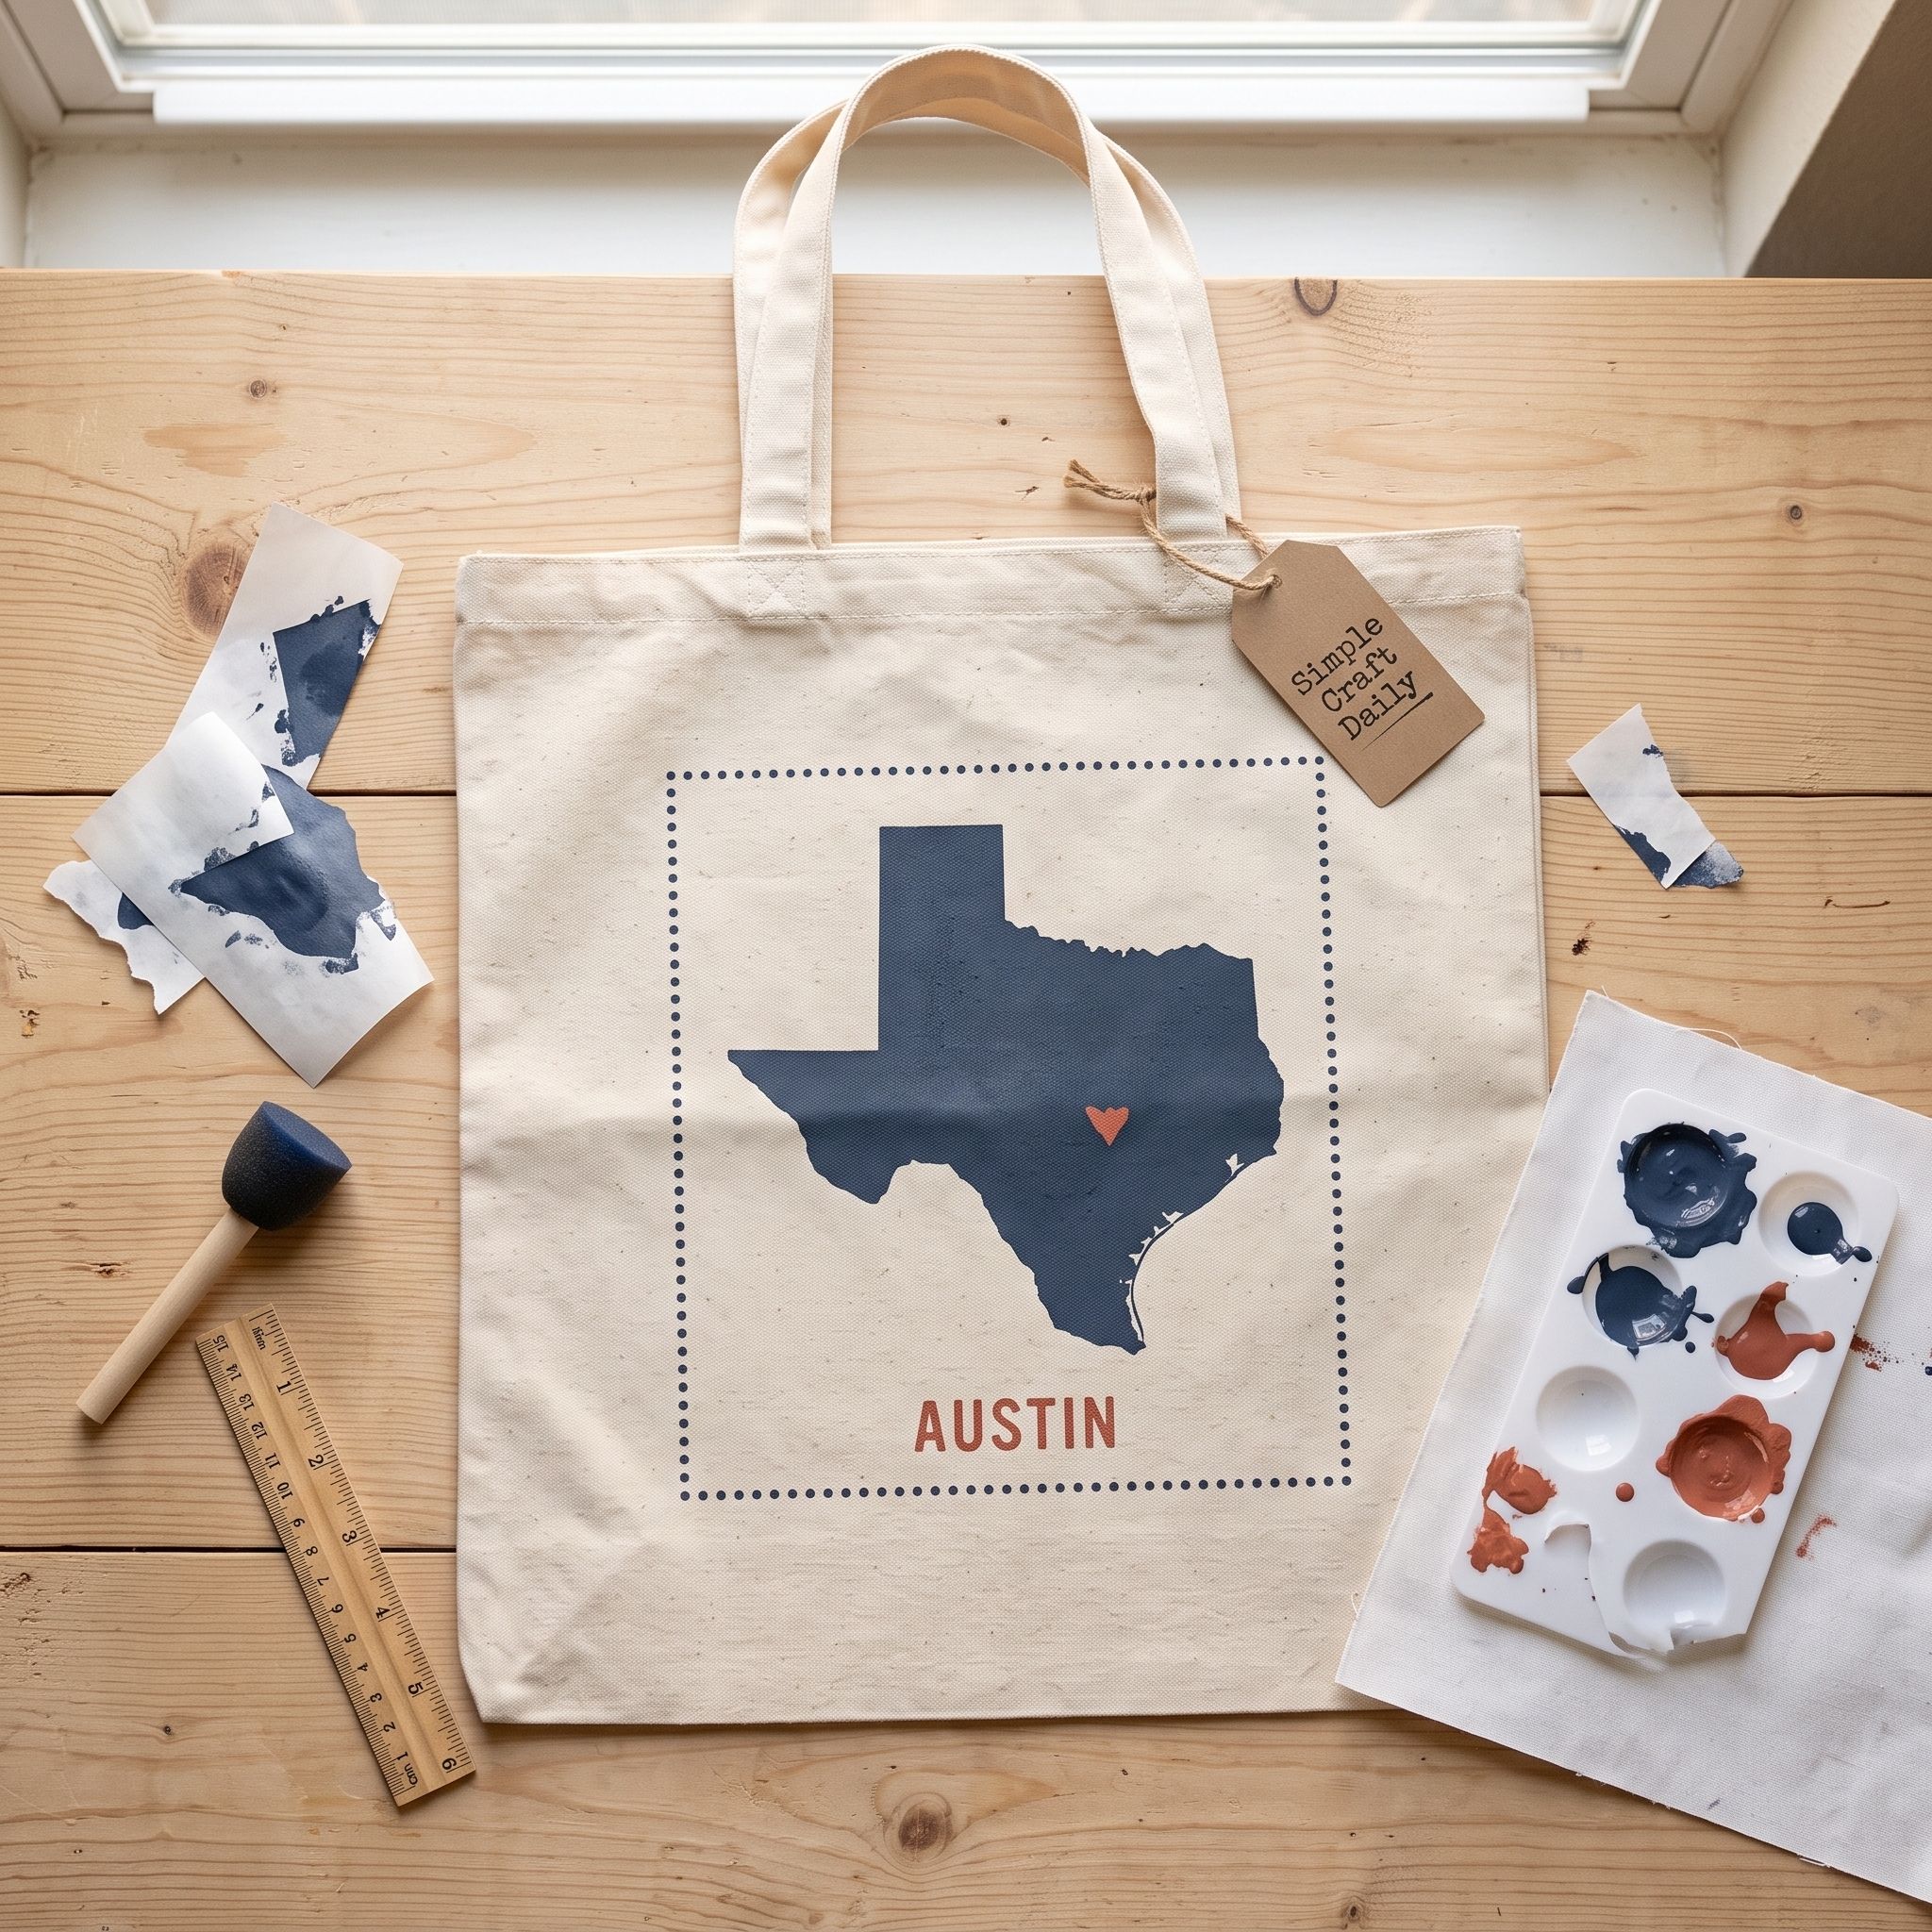
10. Travel Map Stencil Carryall
Supplies Needed: Natural Cotton Canvas Tote Blanks with Reinforced Handles, Cardboard Sheet Insert, Freezer Paper Sheets for Fabric Stencils, Permanent Textile Paint Set for Natural Fabric, Dual-Tip Fabric Marker Set, Fabric Scissors, Detail Brush Set, Foam Pouncers, and Self-Healing Work Mat, Parchment Paper or a Heat-Resistant Pressing Sheet, Tailor’s Awl, and Household Iron.
Cut a state, country, or neighborhood silhouette from freezer paper. Place the shiny side down on the tote front and iron it with a heat-resistant pressing sheet until every edge lies flat.
Pounce textile paint lightly across the opening instead of brushing toward stencil edges. This motion reduces seepage beneath the paper. Let the paint reach the removal stage specified by its manufacturer, then peel the freezer paper away slowly. After the painted map dries, add a destination or date beneath it with a fabric marker. Heat-set the finished design under parchment according to the paint label.
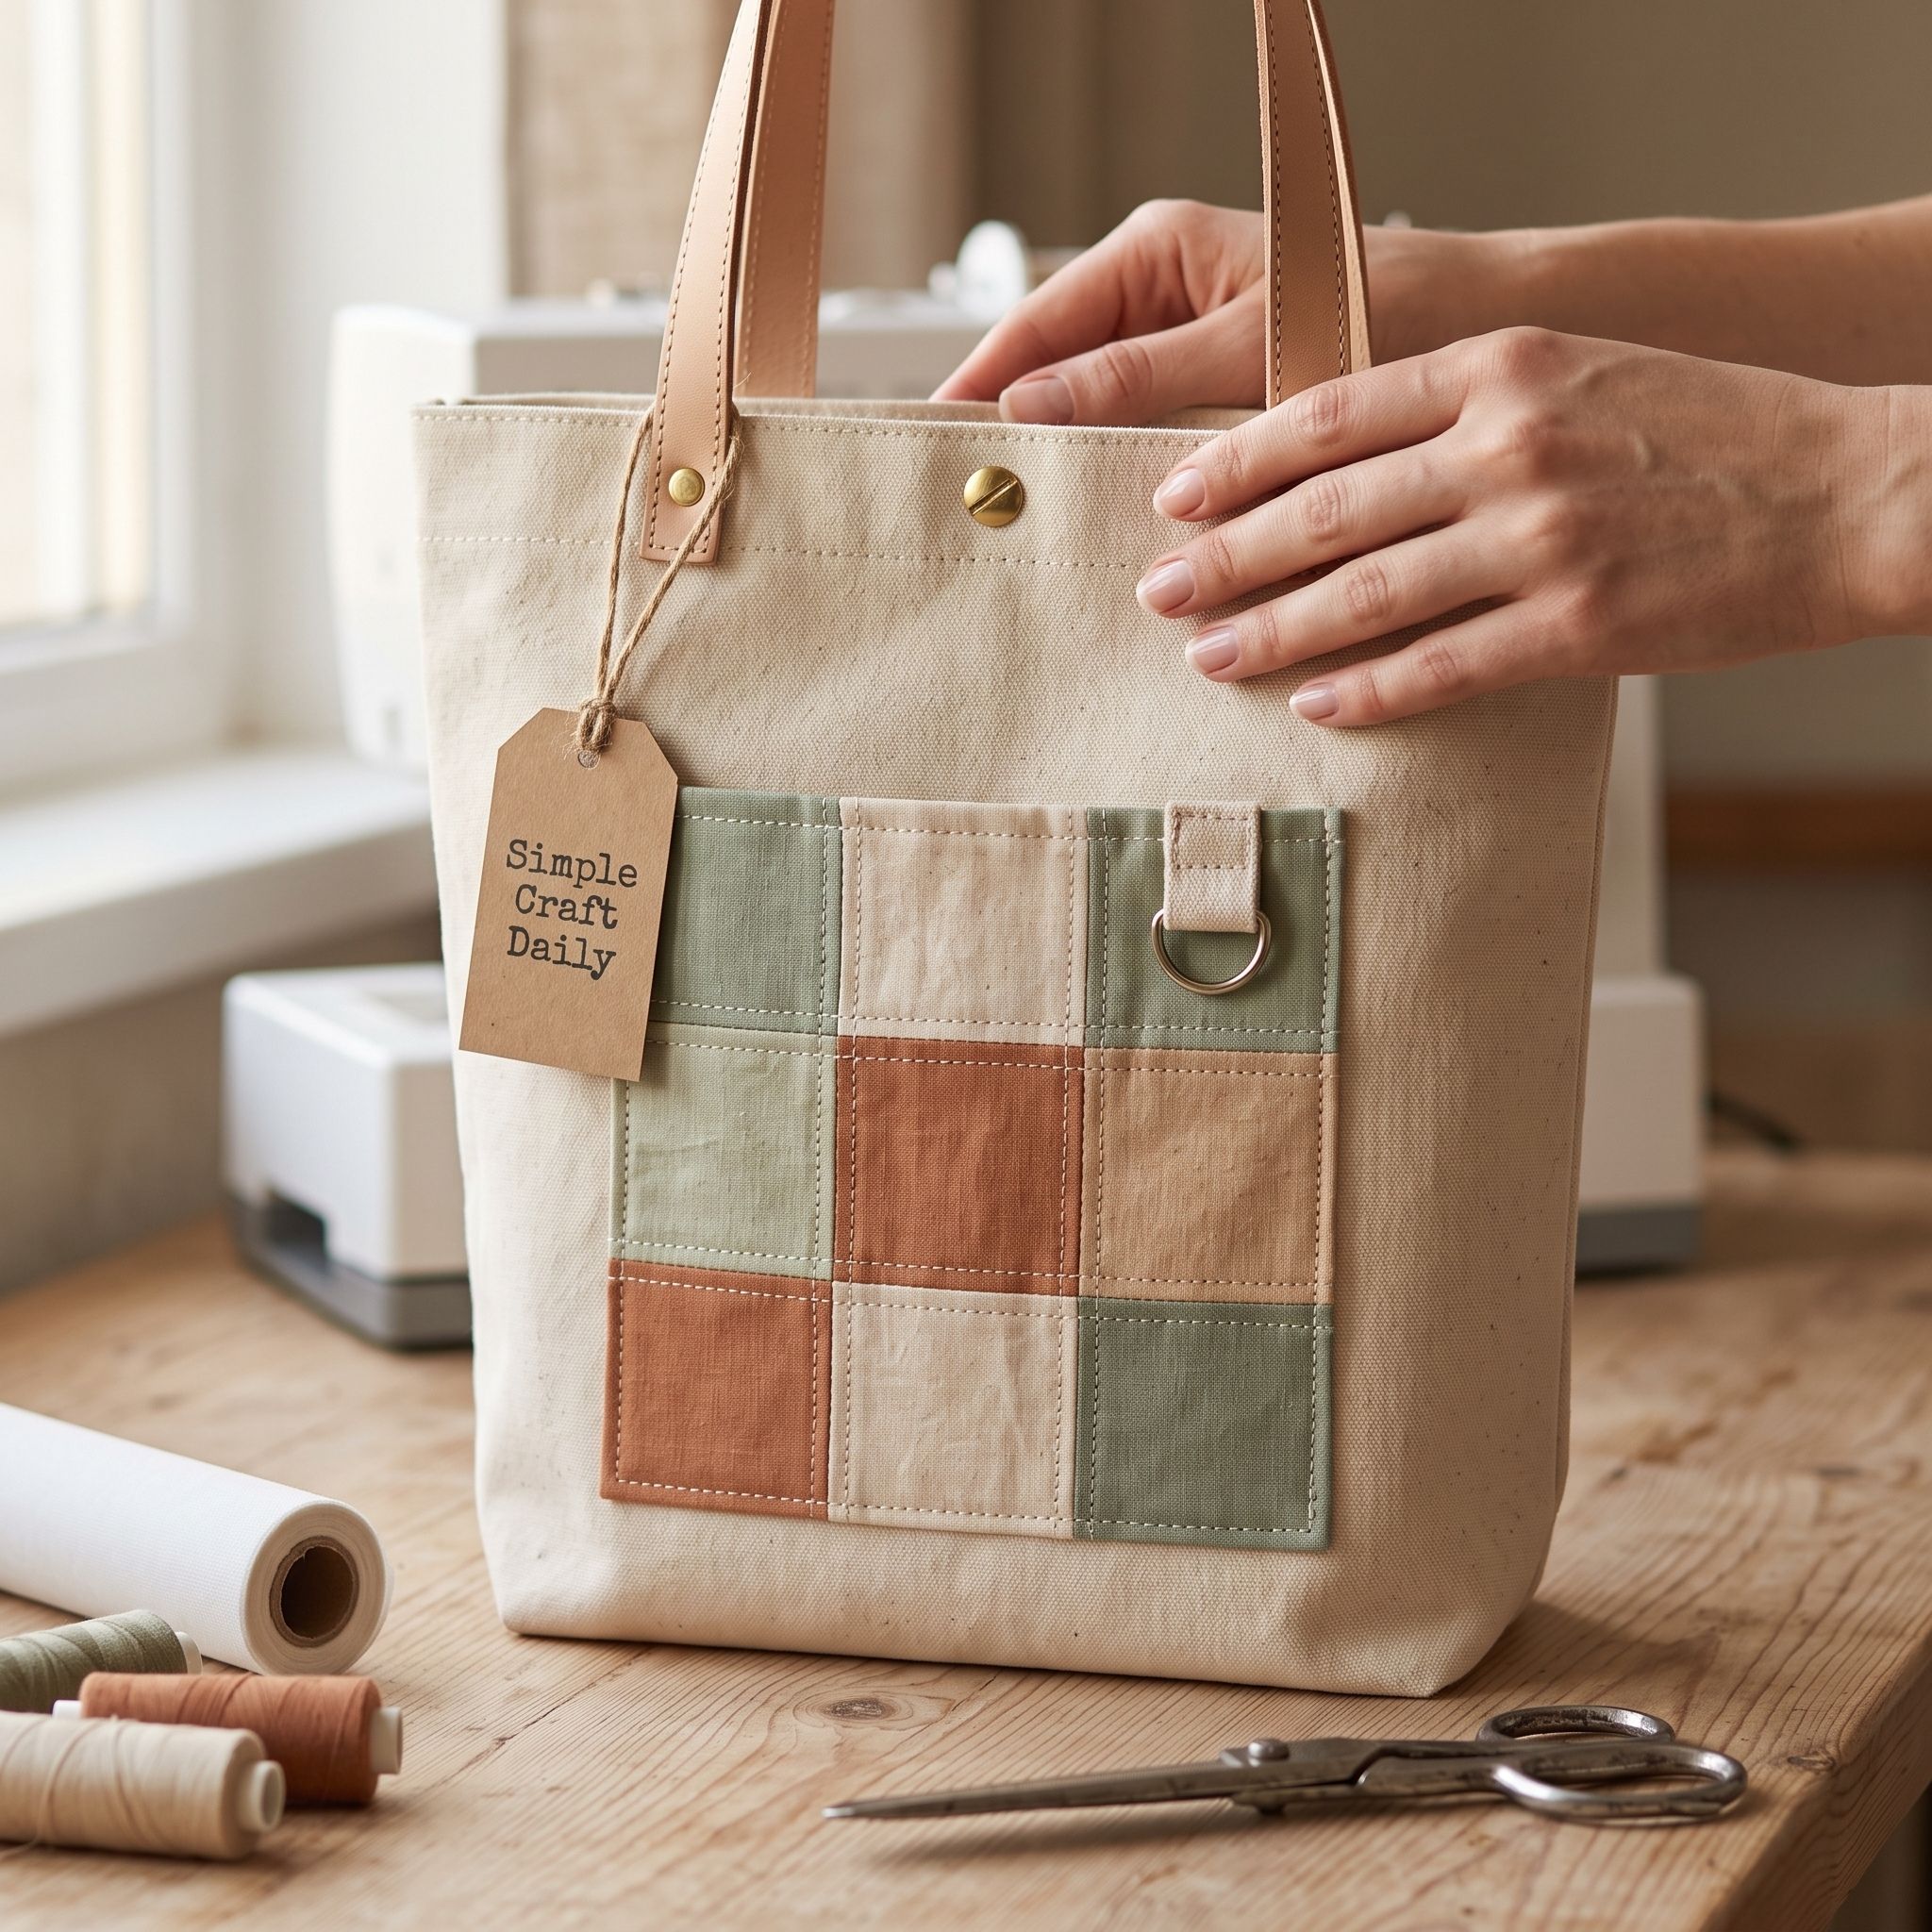
11. Patchwork Pocket and Charm Tab
Supplies Needed: Natural Cotton Canvas Tote Blanks with Reinforced Handles, Embroidery Floss, Cotton Applique Fabric, and Embroidery Needles, Fusible Web Adhesive for Fabric Applique, Nickel-Free Metal D-Rings, All-Purpose Sewing Thread, Heavy-Duty Sewing Machine with Canvas Needle Set, Parchment Paper or a Heat-Resistant Pressing Sheet, Tailor’s Awl, and Household Iron.
Cut several cotton applique rectangles and arrange them as a faux pocket on the tote front. Fuse each rectangle with fusible web according to the label, then topstitch around the outer edge and across selected joins using a heavy-duty sewing machine and canvas needle, or work the same stitches by hand with a simple running stitch for a reinforced finish.
Do not cut the original tote seams unless you can reconstruct them securely with the machine. If the bag construction allows access to a side seam area, fold a short fabric tab around a nickel-free D-ring, stitch a reinforced rectangle through the tab and the side seam layer beneath it, and keep the stitching clear of the handle attachment. Add a detachable accent only after the tab is secure. Our mini leather bag charm ideas offer optional inspiration for that finishing touch.
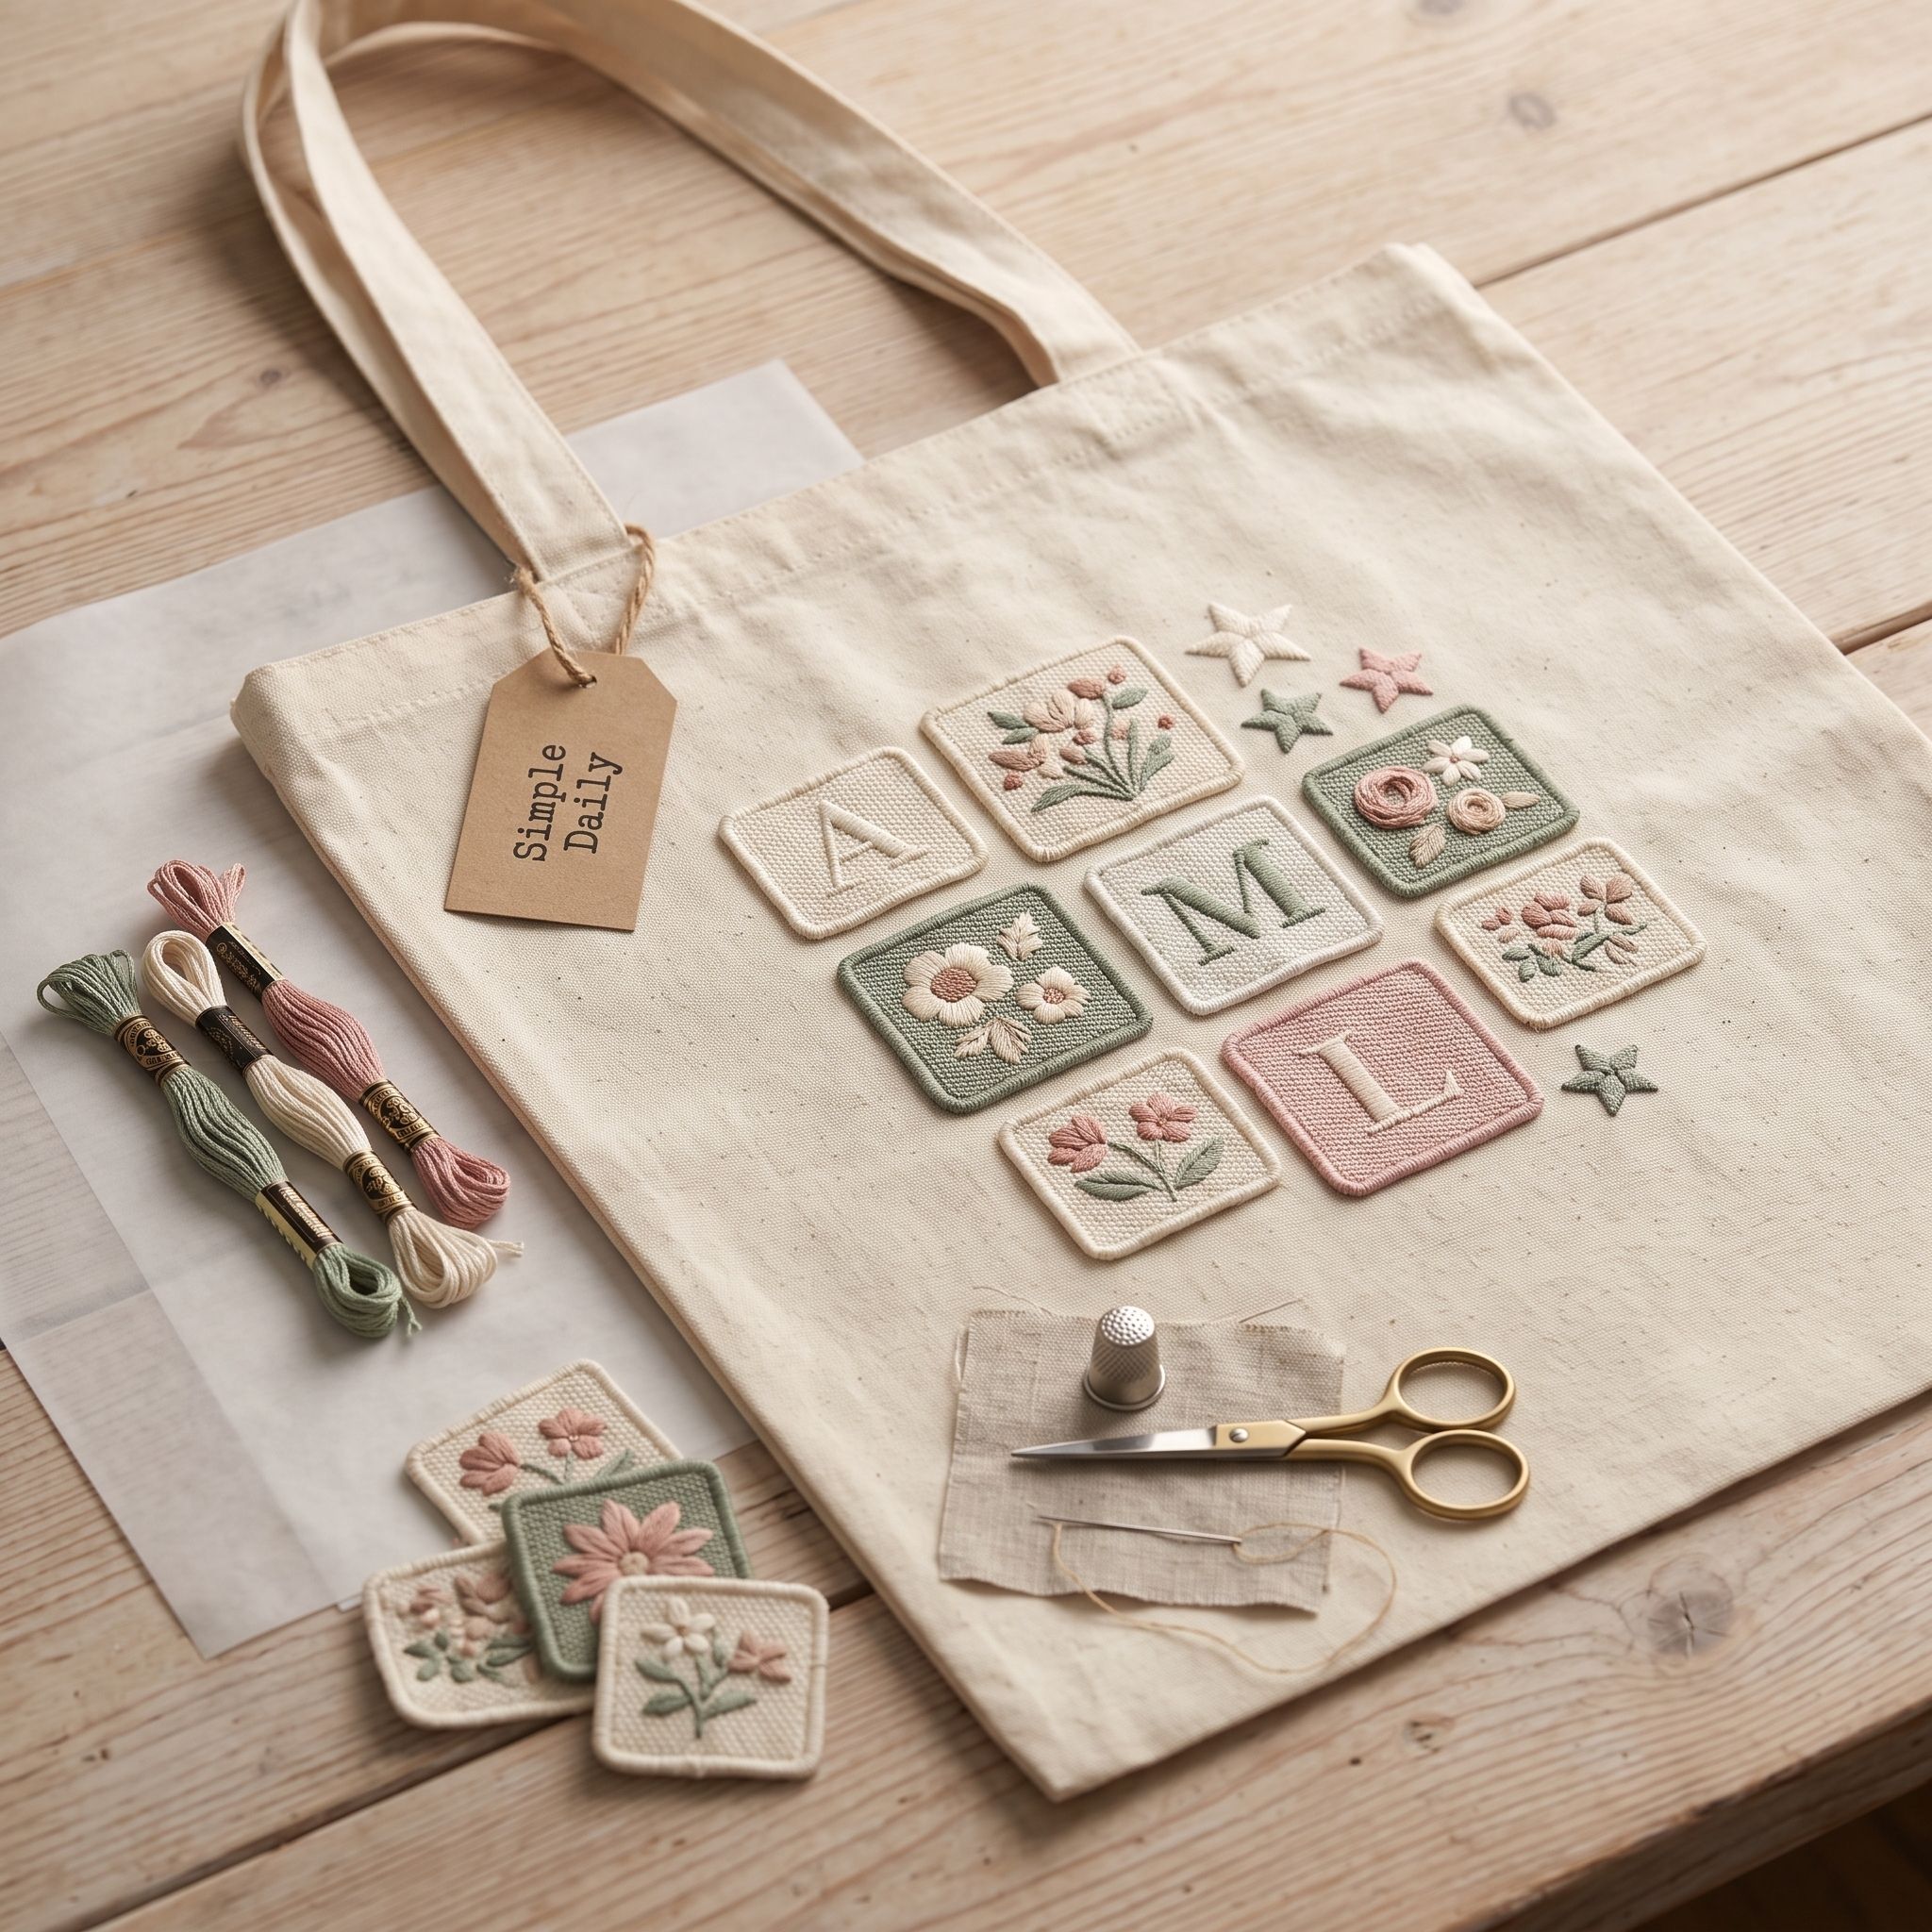
12. DIY Personalized Tote Bags With a Patch Cluster
Supplies Needed: Natural Cotton Canvas Tote Blanks with Reinforced Handles, Iron-On Woven Patches, Embroidery Floss, Cotton Applique Fabric, and Embroidery Needles, Parchment Paper or a Heat-Resistant Pressing Sheet, Tailor’s Awl, and Household Iron.
Arrange three to five woven patches in a loose triangle on the tote front. Keep each patch clear of handle attachment points and leave at least 1 inch between the cluster and the top opening seam.
Fuse each patch with parchment and a pressing sheet, following the patch manufacturer’s temperature and time instructions. Let the adhesive cool undisturbed before flexing the bag. If the tote will carry books, groceries, or heavier supplies, hand-stitch the patch corners with embroidery floss after the adhesive has cooled. Use the tailor’s awl only to guide placement through dense patch edges; do not force it through your fingers or the tote seam.
How to Wash DIY Personalized Tote Bags
Allow paint, ink, vinyl, fusible web, and patch adhesive to complete the full manufacturer-stated cure period before washing. Product formulas differ, so there is no universal wash schedule for every decorated tote.
First, spot clean a small area with cool water and mild soap when possible. If the blank tote and each decoration product permit machine washing, turn the bag inside out and wash it in cool water on a gentle cycle. Air drying is the cautious default unless the material instructions specifically allow tumble drying.
Vinyl edges and iron-on patch adhesion depend on proper pressing temperature, pressure, and cure time. Therefore, avoid laundering a newly finished tote early, even if the surface feels dry to the touch.
DIY Personalized Tote Bags FAQ
These quick answers solve the surface-prep and finishing problems that come up most often when making diy personalized tote bags.
Should I Wash Canvas Before Decorating?
Prewashing is sensible for washable cotton blanks because it removes finishing residue and allows any early shrinkage to happen before you measure a design. However, follow the care directions supplied with the blank bag first.
Dry the tote completely and press the front panel smooth before applying paint, markers, vinyl, patches, or applique. Moisture trapped in the canvas can interfere with crisp stencil edges and heat-applied materials.
Why Does Fabric Paint Bleed Under My Stencil?
Bleeding usually comes from an overloaded brush, a stencil that is not pressed flat, or paint transferring through the bag because no cardboard insert was used. Use a foam pouncer with very little paint and build color through thin layers.
Also, pounce straight down rather than sweeping paint toward the stencil edge. For freezer-paper stencils, re-press any lifted edge before adding another paint layer.
Can DIY Personalized Tote Bags Go in the Washer?
Some can, but the answer depends on the specific paint, ink, vinyl, adhesive, patch, and tote blank used. Wait through the complete cure period printed on every product label before the first wash.
Turn the bag inside out, use cool water if washing is approved, and air dry unless all material instructions allow another method. This gentler routine reduces friction on painted areas, vinyl edges, embroidery, and patches.
Quick Reference: All Supplies at a Glance
For your convenience, here is a quick summary of all materials and tools used in this tutorial:
✨ Consumable Raw Materials
- Natural Cotton Canvas Tote Blanks with Reinforced Handles | Check Natural Cotton Canvas Tote Blanks with Reinforced Handles on Amazon
- Permanent Textile Paint Set for Natural Fabric | Check Price on Amazon
- Dual-Tip Fabric Marker Set | View Dual-Tip Fabric Marker Set on Amazon
- Water-Based Block Printing Ink | Check Water-Based Block Printing Ink on Amazon
- Freezer Paper Sheets for Fabric Stencils | See Price on Amazon
- Heat Transfer Vinyl Sheets for Cotton Fabric | Explore Heat Transfer Vinyl Sheets for Cotton Fabric on Amazon
- Embroidery Floss | Check Embroidery Floss on Amazon
- Cotton Applique Fabric | Check Cotton Applique Fabric on Amazon
- All-Purpose Sewing Thread | Check All-Purpose Sewing Thread on Amazon
🧰 Core Crafting Tools & Equipment
- Wooden Block Printing Stamps | Check Wooden Block Printing Stamps on Amazon
- Cardboard Sheet Insert | Check Cardboard Sheet Insert on Amazon
- Reusable Letter Stencils | Check Reusable Letter Stencils on Amazon
- Washable Fabric-Marking Pencil | Check Washable Fabric-Marking Pencil on Amazon
- Embroidery Needles | Check Embroidery Needles on Amazon
- Fabric Scissors | Check Fabric Scissors on Amazon
- Detail Paintbrushes | Check Detail Paintbrushes on Amazon
- Foam Pouncers | Check Foam Pouncers on Amazon
- Self-Healing Work Mat | Check Self-Healing Work Mat on Amazon
- Heat-Resistant Pressing Sheet | Check Heat-Resistant Pressing Sheet on Amazon
- Parchment Paper | Check Parchment Paper on Amazon
- Tailor’s Awl | Check Tailor’s Awl on Amazon
- Household Iron | Check Household Iron on Amazon
- 12-Inch Clear Quilting Ruler | Check 12-Inch Clear Quilting Ruler on Amazon
- Painter’s Tape | Check Painter’s Tape on Amazon
- Wide Flat Paintbrush | Check Wide Flat Paintbrush on Amazon
- Canvas Sewing Machine Needles | Check Canvas Sewing Machine Needles on Amazon
💎 Hardware, Fasteners & Finishing
- Fusible Web Adhesive for Fabric Applique | Find on Amazon
- Iron-On Woven Patches | Check Iron-On Woven Patches on Amazon
- Nickel-Free Metal D-Rings | Check Nickel-Free Metal D-Rings on Amazon
Important Crafting Safety Notes
Crafting is a rewarding creative activity, but maintaining a safe workshop environment is essential for yourself, your family, and your pets. Please review these vital safety precautions before starting:
• Personal Protective Equipment (PPE) & Safe Handling: Always wear safety glasses or protective eyewear when cutting metal wire, clipping jump rings, trimming hard findings, or using power tools to prevent flying shards. Use heat-resistant work mats and exercise caution around high-temperature glue guns, irons, or heating tools to avoid burns. Wear disposable nitrile gloves and a particle dust mask when sanding wood or working with clays, resins, and solvent-based sealants to protect your skin and lungs.
• Room Ventilation & Fume Safety: Always craft in a well-ventilated space with open windows, cross-ventilation, or active exhaust whenever using solvent-based adhesives, instant bonders, aerosol sprays, epoxy resins, or heat-curing materials. Never inhale chemical fumes directly, and allow finished pieces to off-gas and cure completely in an airy area away from everyday living spaces.
• Child & Pet Safety (Choking & Swallowing Prevention): Small craft components—including safety eyes, split rings, clasps, jump rings, beads, bells, small magnets, unbaked clay scraps, and loose polyester fiberfill—present severe choking, intestinal obstruction, and ingestion hazards for babies, toddlers, and pets. Keep all unattached hardware, yarn cutoffs, and stuffing strictly out of reach. For handmade gifts intended for infants or young children, omit plastic washer eyes and detachable findings entirely in favor of securely stitched, double-knotted embroidered details.
• Sharp Tool Storage & Clean Work Area: Store sharp tools—such as rotary cutters, craft knives, bent-tip yarn needles, snips, scissors, and jewelry pliers—in secure, latching cases or high cabinets immediately after use. Thoroughly inspect, sweep, or vacuum your craft area and floor after finishing to ensure no dropped needles, pins, wire clippings, or small findings remain where curious pets or bare feet could step on or swallow them.
• Certified, Quality & Non-Toxic Supplies: Always choose verified non-toxic craft supplies (such as ACMI AP-certified paints and adhesives, lead-free and nickel-free jewelry findings, and skin-safe materials). Follow manufacturer label guidelines for curing durations, safe operating temperatures, and proper product disposal. Never use food preparation utensils or kitchen cookware for craft chemicals.
For more detailed guidance on safe crafting practices, liability disclosures, and website usage, please review our Terms and Conditions.
“Which of these DIY Personalized Tote Bags: 12 Easy Charming Designs are you excited to try first, or do you have a creative tip of your own to share? Drop a comment below—I’d love to hear your thoughts and see what you create!”


