

Handmade plushies carry more heart than store-bought toys. These DIY Handmade Stuffed Animals use soft, manageable shapes, dependable 1/4-inch seam allowances, and stitched details that give every small creature warmth and character. You can sew all 15 designs at a home table with basic supplies and patient, steady stitches.
If you enjoy yarn crafts, our beautiful crochet cat toys make a sweet companion project. This collection shifts to fabric, felt applique, careful stuffing, and secure ladder-stitch closures for beginner-friendly plushies that feel polished enough to gift.
Affiliate Disclosure: This post contains affiliate links. As an Amazon Associate, I earn from qualifying purchases. If you buy through these links, I may earn a commission at no additional cost to you.
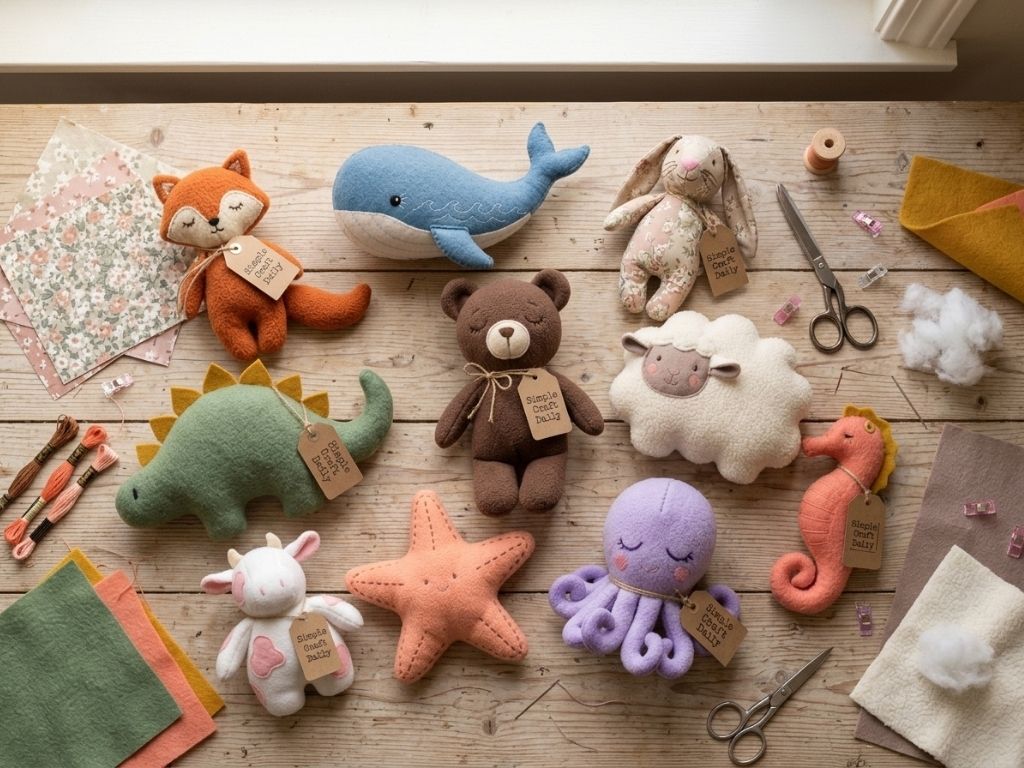
Essential Materials & Tools
wp:paragraphFabric changes how each toy turns, stretches, and holds its shape. Stable quilting cotton suits patchwork bodies and tails, while anti-pill fleece makes rounded animals soft without the difficult pile of faux fur. In addition, the measurements, stuffing level, and facial-detail guidance below are tailored to each animal so you can sew with confidence.
/wp:paragraph✨ Consumable Raw Materials
- Quilting Cotton Fabric Fat Quarter Bundle — Stable woven fabric holds a clean seam line and provides coordinated prints for patchwork bodies, tails, and ears | Check Quilting Cotton Fabric Fat Quarter Bundle on Amazon
- Anti-Pill Plush Fleece Fabric — Soft fleece turns easily and stays manageable around small curves without the shedding or bulk of long-pile fabric | Check Price on Amazon
- Wool Blend Craft Felt Sheets — Clean-cut felt does not fray, so it works well for muzzles, belly panels, spots, ears, fins, and applique details | View Wool Blend Craft Felt Sheets on Amazon
- Premium Polyester Fiberfill Stuffing — Springy washable filling stays soft when added in small tufts, which prevents dense lumps inside narrow limbs and tails | Find Premium Polyester Fiberfill Stuffing on Amazon
- All-Purpose Polyester Sewing Thread — Strong thread with slight give helps stuffed seams withstand gentle squeezing and regular handling | See Price on Amazon
- Six-Strand Cotton Embroidery Floss — Colorful floss makes secure embroidered eyes, noses, mouths, whiskers, and texture lines without detachable pieces | See Six-Strand Cotton Embroidery Floss on Amazon
🧰 Core Crafting Tools & Equipment
- Washable Fabric Marking Pens — Marks cutting lines, turning gaps, and placement guides — washable pens or tailor’s chalk both work | Check Washable Fabric Marking Pens on Amazon
- Tailor’s Chalk — Alternative to washable pens — choose one marking tool; brushes away before heat-setting | Check Tailor’s Chalk on Amazon
- Fabric Scissors — Fabric shears are required for every piece | Check Fabric Scissors on Amazon
- Hand-Sewing Needles — Sharp needles handle embroidery and ladder stitches | Check Hand-Sewing Needles on Amazon
- Fabric Clips — Clips hold fleece layers without leaving pinholes | Check Fabric Clips on Amazon
- Long-Handled Polyester Fiberfill Stuffing Tool — A blunt tool pushes small fiberfill tufts into tails, ears, points, and narrow curves without piercing the fabric | Check Long-Handled Polyester Fiberfill Stuffing Tool on Amazon
Store sharp shears, snips, and needles in a dedicated latching case after every sewing session. This simple habit keeps the cutting edge sharp and prevents a dropped needle from disappearing into fabric scraps or carpet.
/wp:paragraphOptional Studio Upgrades
Never required to finish the projects above — convenience upgrades for makers who want them.
⚡ Studio Tools & Workshop Equipment
Optional studio upgrades — every project above can be completed without these.
- Thread Snips — Optional extra — trim thread tails close to the knot after sewing | Check Thread Snips on Amazon
- Sewing Machine — An optional studio upgrade for quickly sewing the repeated short seams at the stated 1.8 to 2.2 mm stitch length. | View Sewing Machine on Amazon
- Thimble — Optional — protects fingertips when hand sewing gets sore, per the FAQ’s own tip | Check Thimble on Amazon
DIY Handmade Stuffed Animals: 15 Easy Plushie Sewing Patterns
Use the same dependable order for each project. First, mark the outline with a 1/4-inch seam allowance, cut paired fabric pieces, and clip the layers together. Sew with a 1.8 to 2.2 mm stitch length if using a machine, or use short back stitches by hand; leave the stated turning gap open.
Next, trim bulky seam corners and clip small notches into inward curves without reaching the stitch line. Turn the shape right-side out, add fiberfill in small tufts, close the gap with ladder stitches, and embroider facial features last. For child-handled DIY Handmade Stuffed Animals, stitch every eye, nose, and mouth with floss rather than adding plastic safety eyes.
1. Pocket Fox DIY Handmade Stuffed Animal
Supplies Needed: Orange anti-pill fleece, cream wool-blend felt, black embroidery floss, polyester thread, polyester fiberfill, hand-sewing needles and fabric clips, washable fabric marking pens or tailor’s chalk, fabric scissors, long-handled polyester fiberfill stuffing tool.
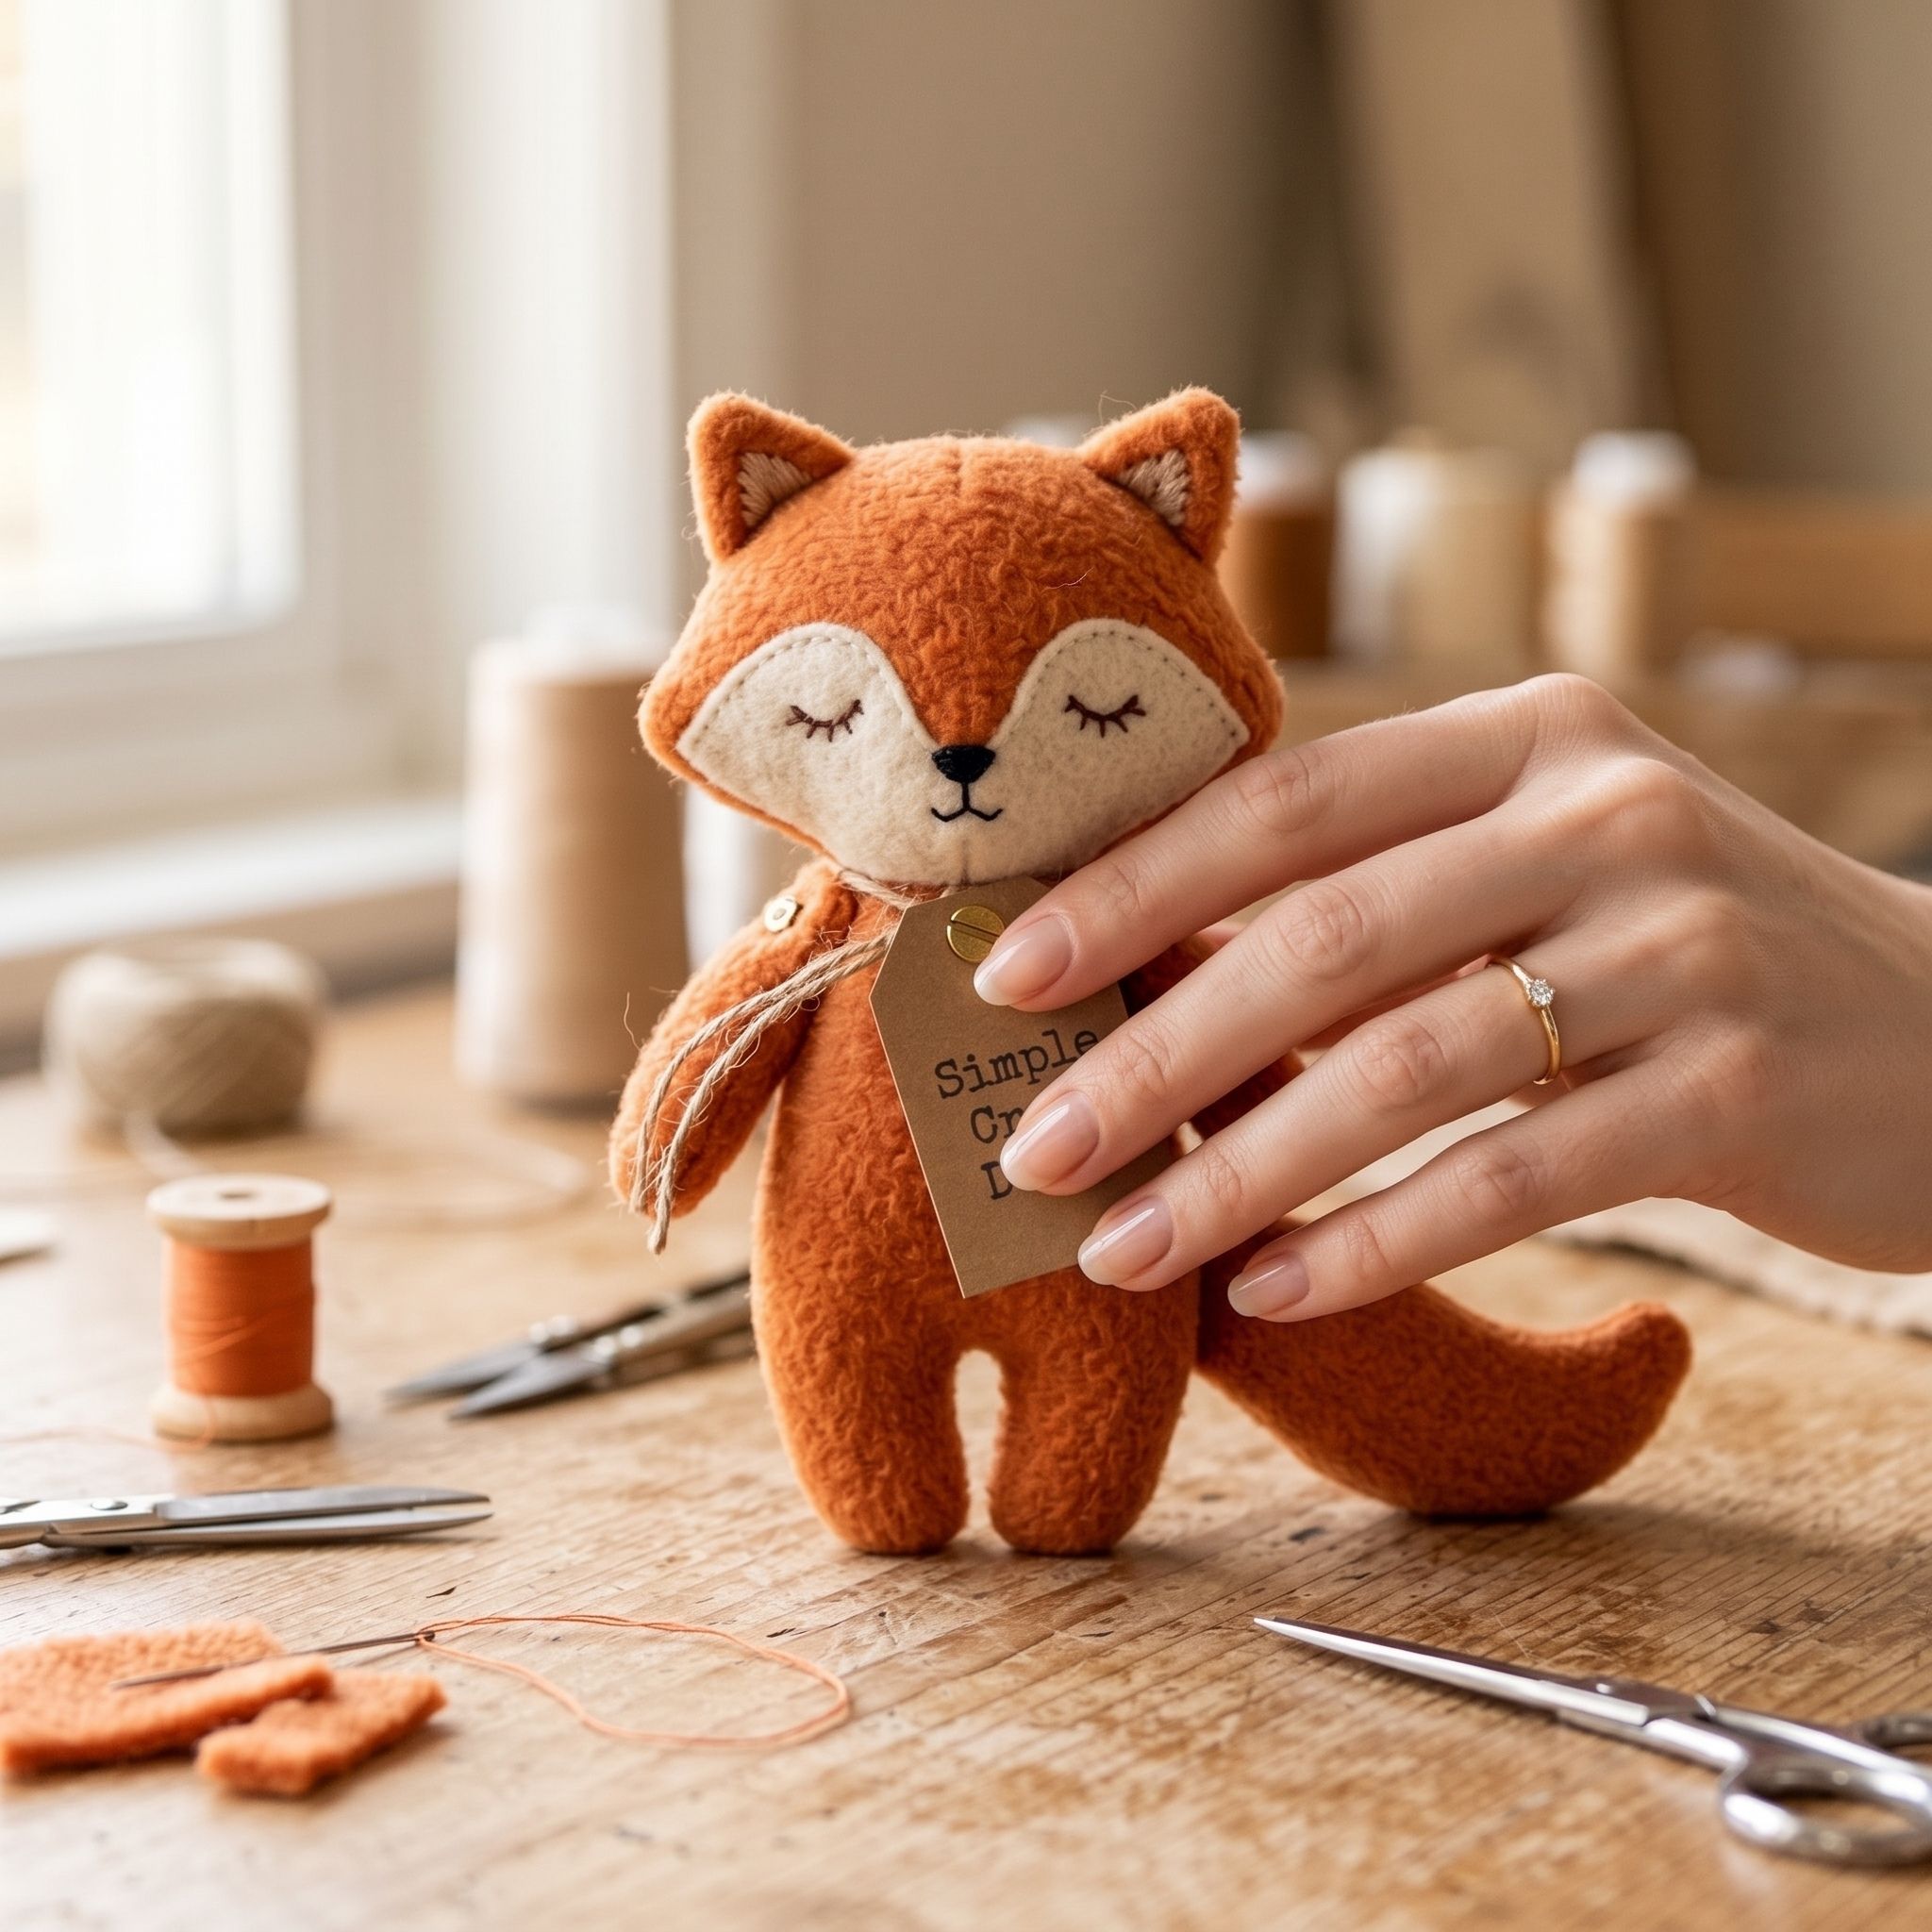
Mark two 6-inch fox body shapes on orange fleece with a 1 1/2-inch turning gap along the lower edge. Cut two cream felt muzzle ovals and stitch one onto the front panel before assembly. Fold two fleece ear triangles and one slim tail shape right sides together, sew their edges, then turn them with the stuffing tool.
Place the ears and tail between the body panels with their raw edges sitting inside the 1/4-inch seam allowance and their finished ends facing inward. Sew around the body, turn the fox, and add a small tuft of fiberfill to each ear and the tail. Then fill the body until softly rounded, ladder-stitch the opening closed with polyester thread, and embroider two curved closed eyes with black floss.
2. Felt Whale With Stitched Waves
Supplies Needed: Blue and white wool-blend felt, blue and black embroidery floss, polyester thread, polyester fiberfill, hand-sewing needles and fabric clips, washable fabric marking pens or tailor’s chalk, fabric scissors.
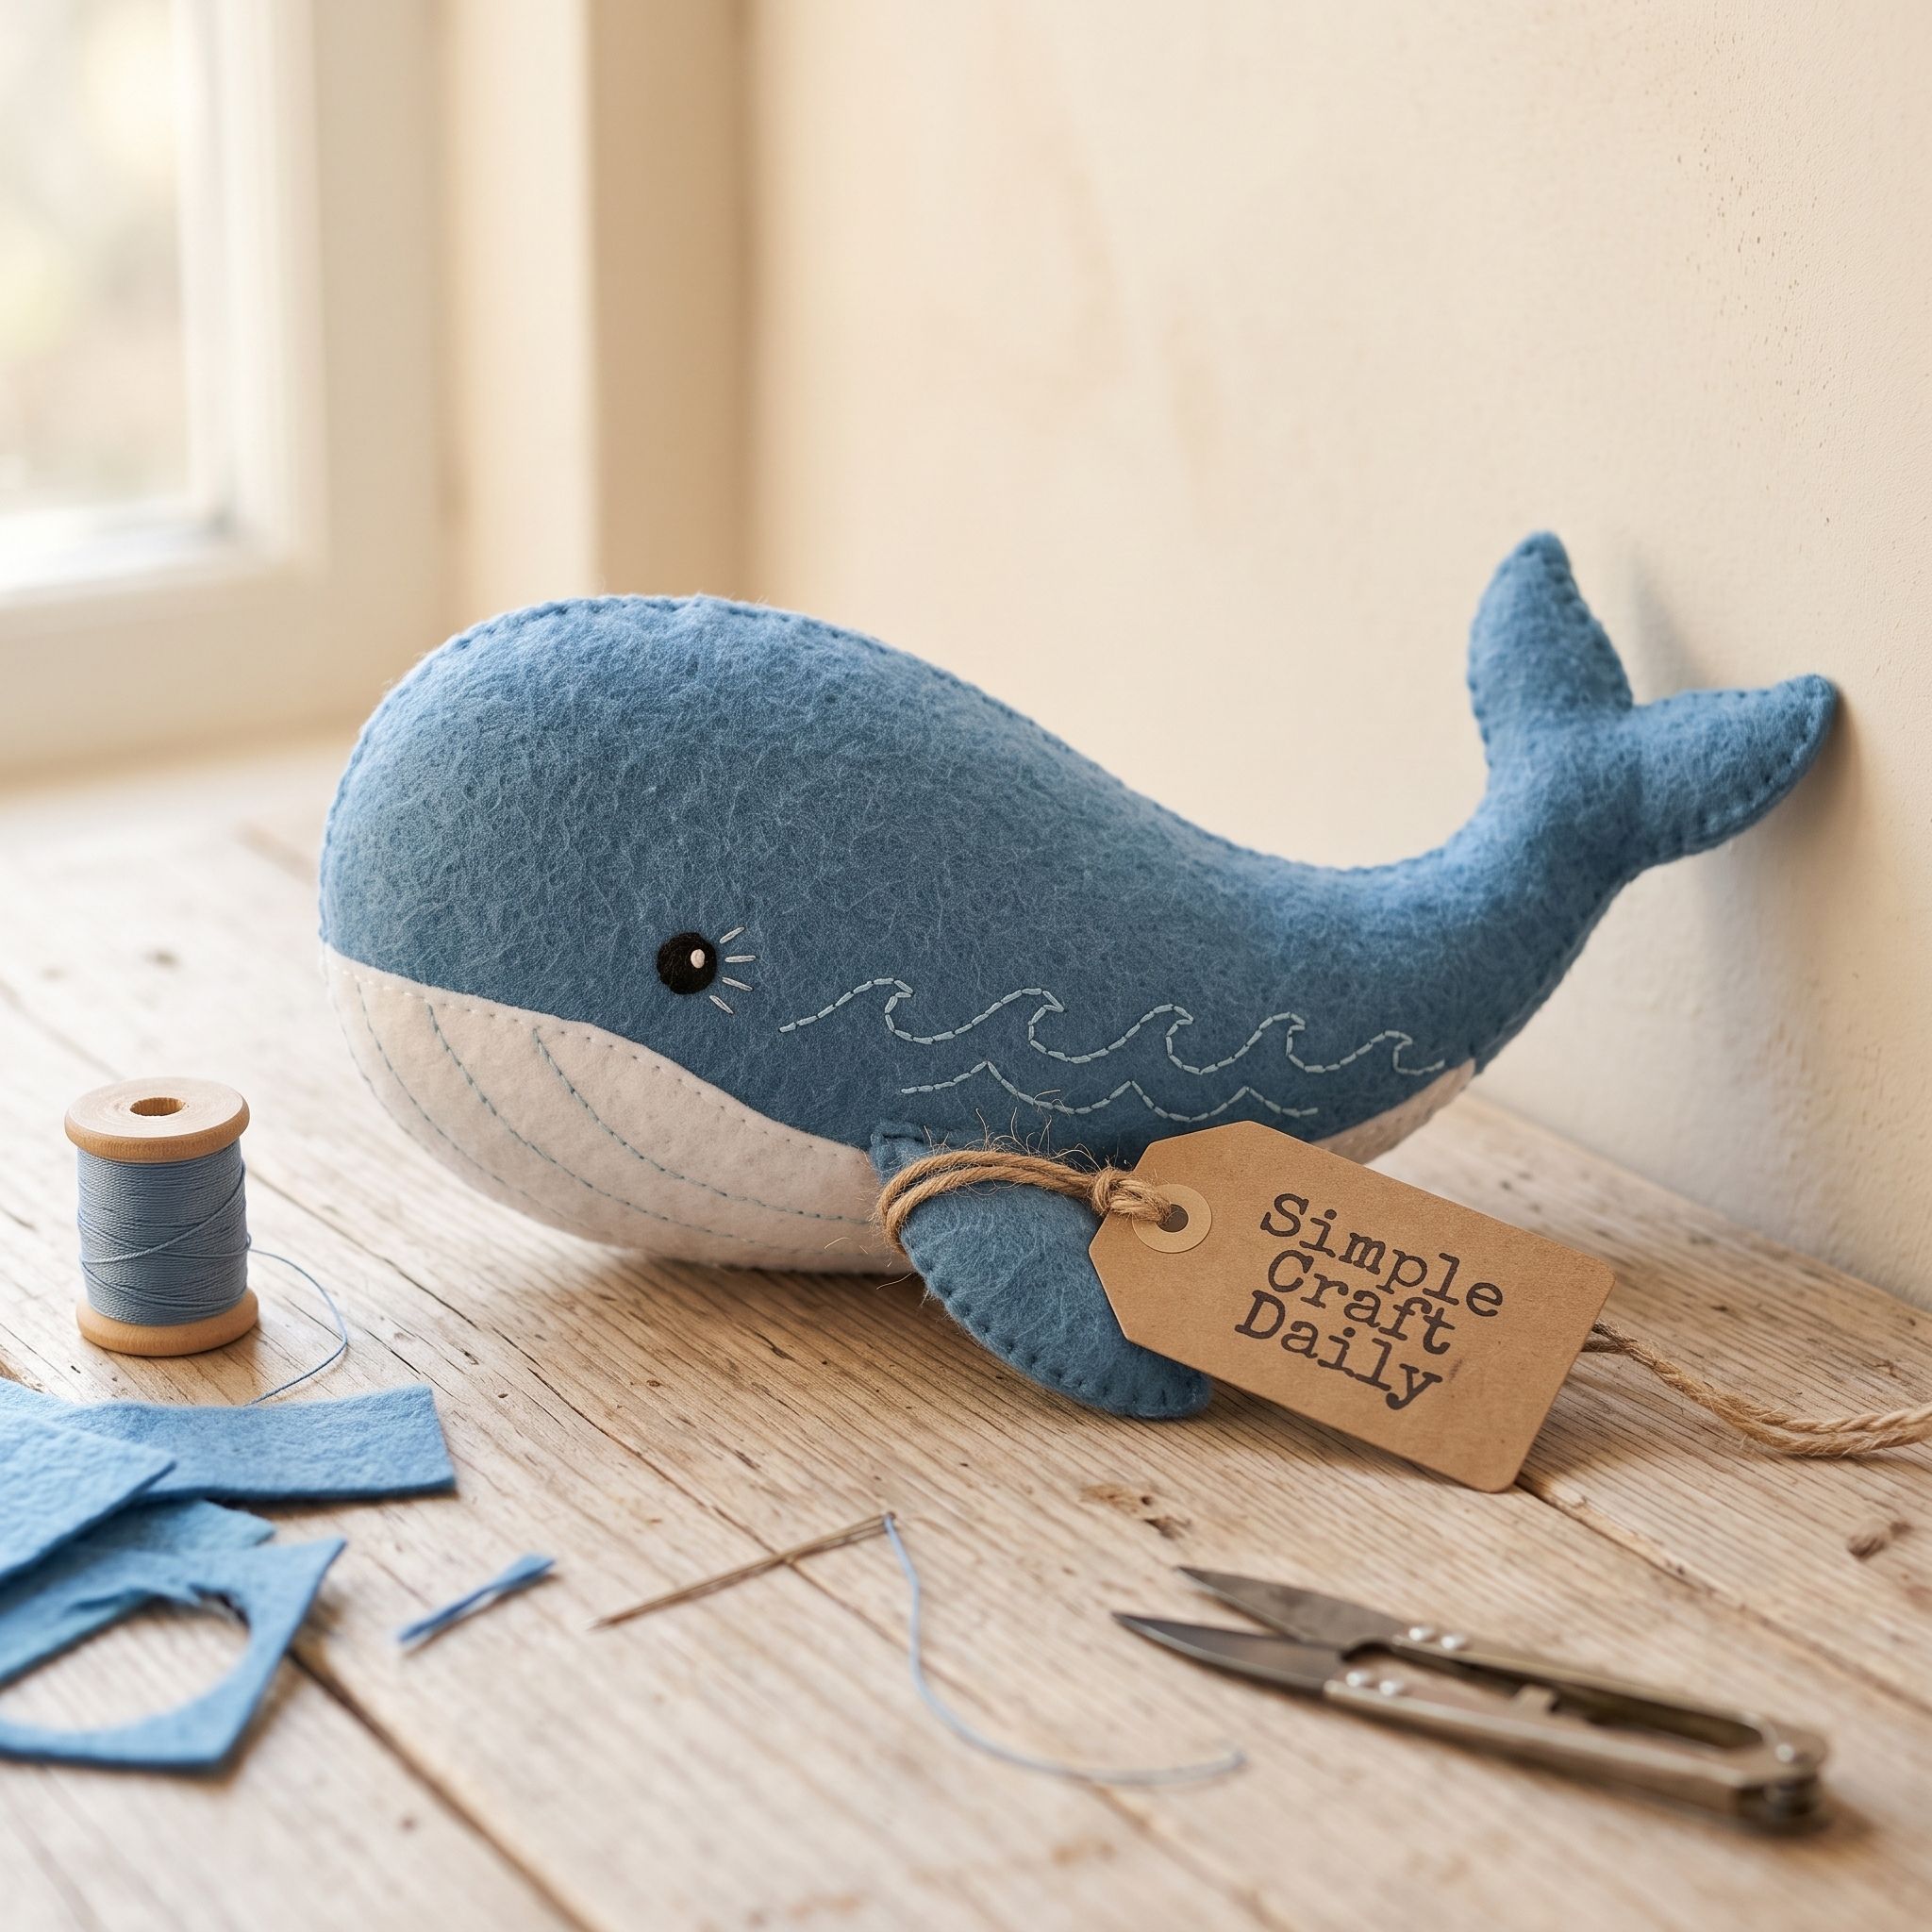
Mark two 7-inch whale silhouettes on blue felt and cut a white belly panel that sits inside the front outline. Stitch the belly panel to the front with tiny running stitches in blue floss. Add three loose blue wave lines beneath the belly, then embroider a small black eye above it.
Clip the two whale panels together and sew around the edge with a 1/4-inch seam allowance, leaving a 1 1/2-inch opening at the belly seam. Add sparse fiberfill so the whale has gentle volume but remains flat enough to rest neatly on a shelf. Finally, close the opening with small ladder stitches; embroidered eyes keep this soft whale appropriate for child-handled play.
3. Patchwork Bunny DIY Handmade Stuffed Animal
Supplies Needed: Quilting cotton fat quarters, pink wool-blend felt, black and pink embroidery floss, polyester thread, polyester fiberfill, hand-sewing needles and fabric clips, washable fabric marking pens or tailor’s chalk, fabric scissors, long-handled polyester fiberfill stuffing tool.
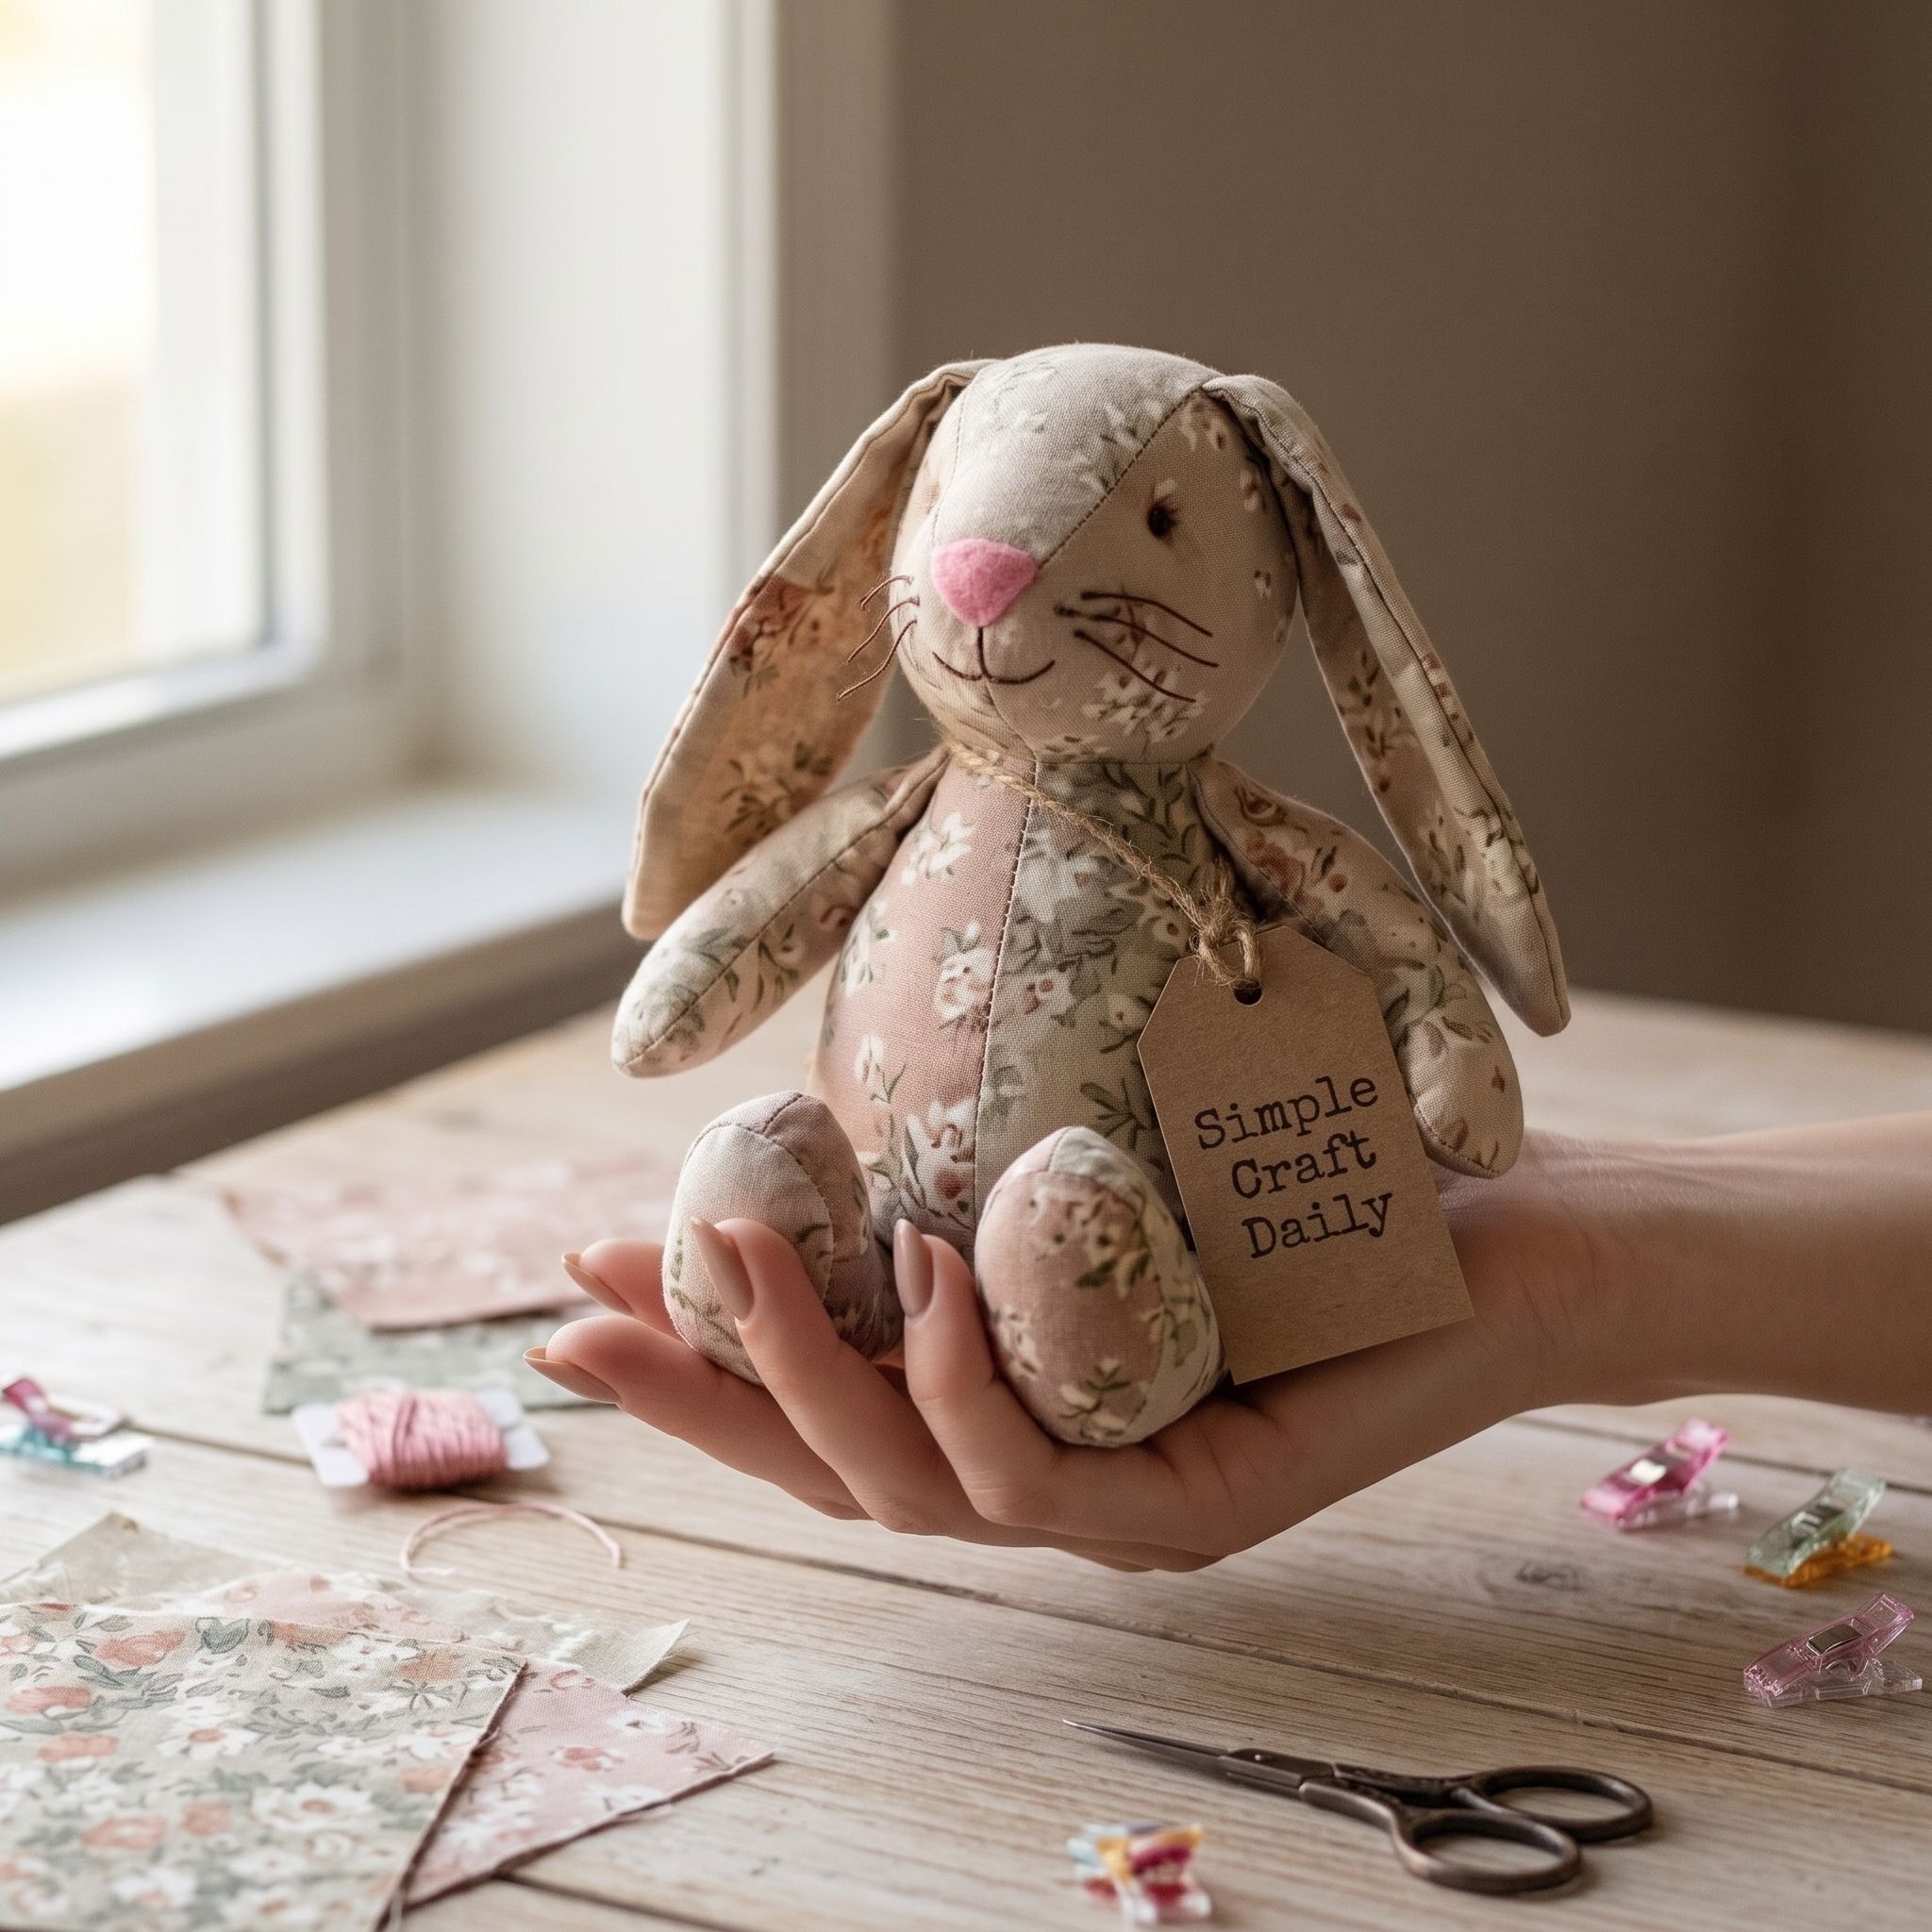
Cut twelve quilting-cotton rectangles measuring 2 by 3 inches. Sew them edge to edge with 1/4-inch seams to make a patchwork panel, then mark two 8-inch oval bunny bodies across the joined fabric. Cut two long ear pairs from the remaining cotton and two small pink felt inner-ear shapes.
Stitch the felt inner ears onto the front ear pieces, sew each ear pair, and turn them with the stuffing tool. Place the ears between the body layers, then sew the body perimeter while leaving a 2-inch lower opening. Turn the bunny, add only a thin layer of fiberfill to the ears, and fill the oval body to a moderately squeezable firmness. Close with ladder stitches, then embroider a pink nose and black whiskers with floss.
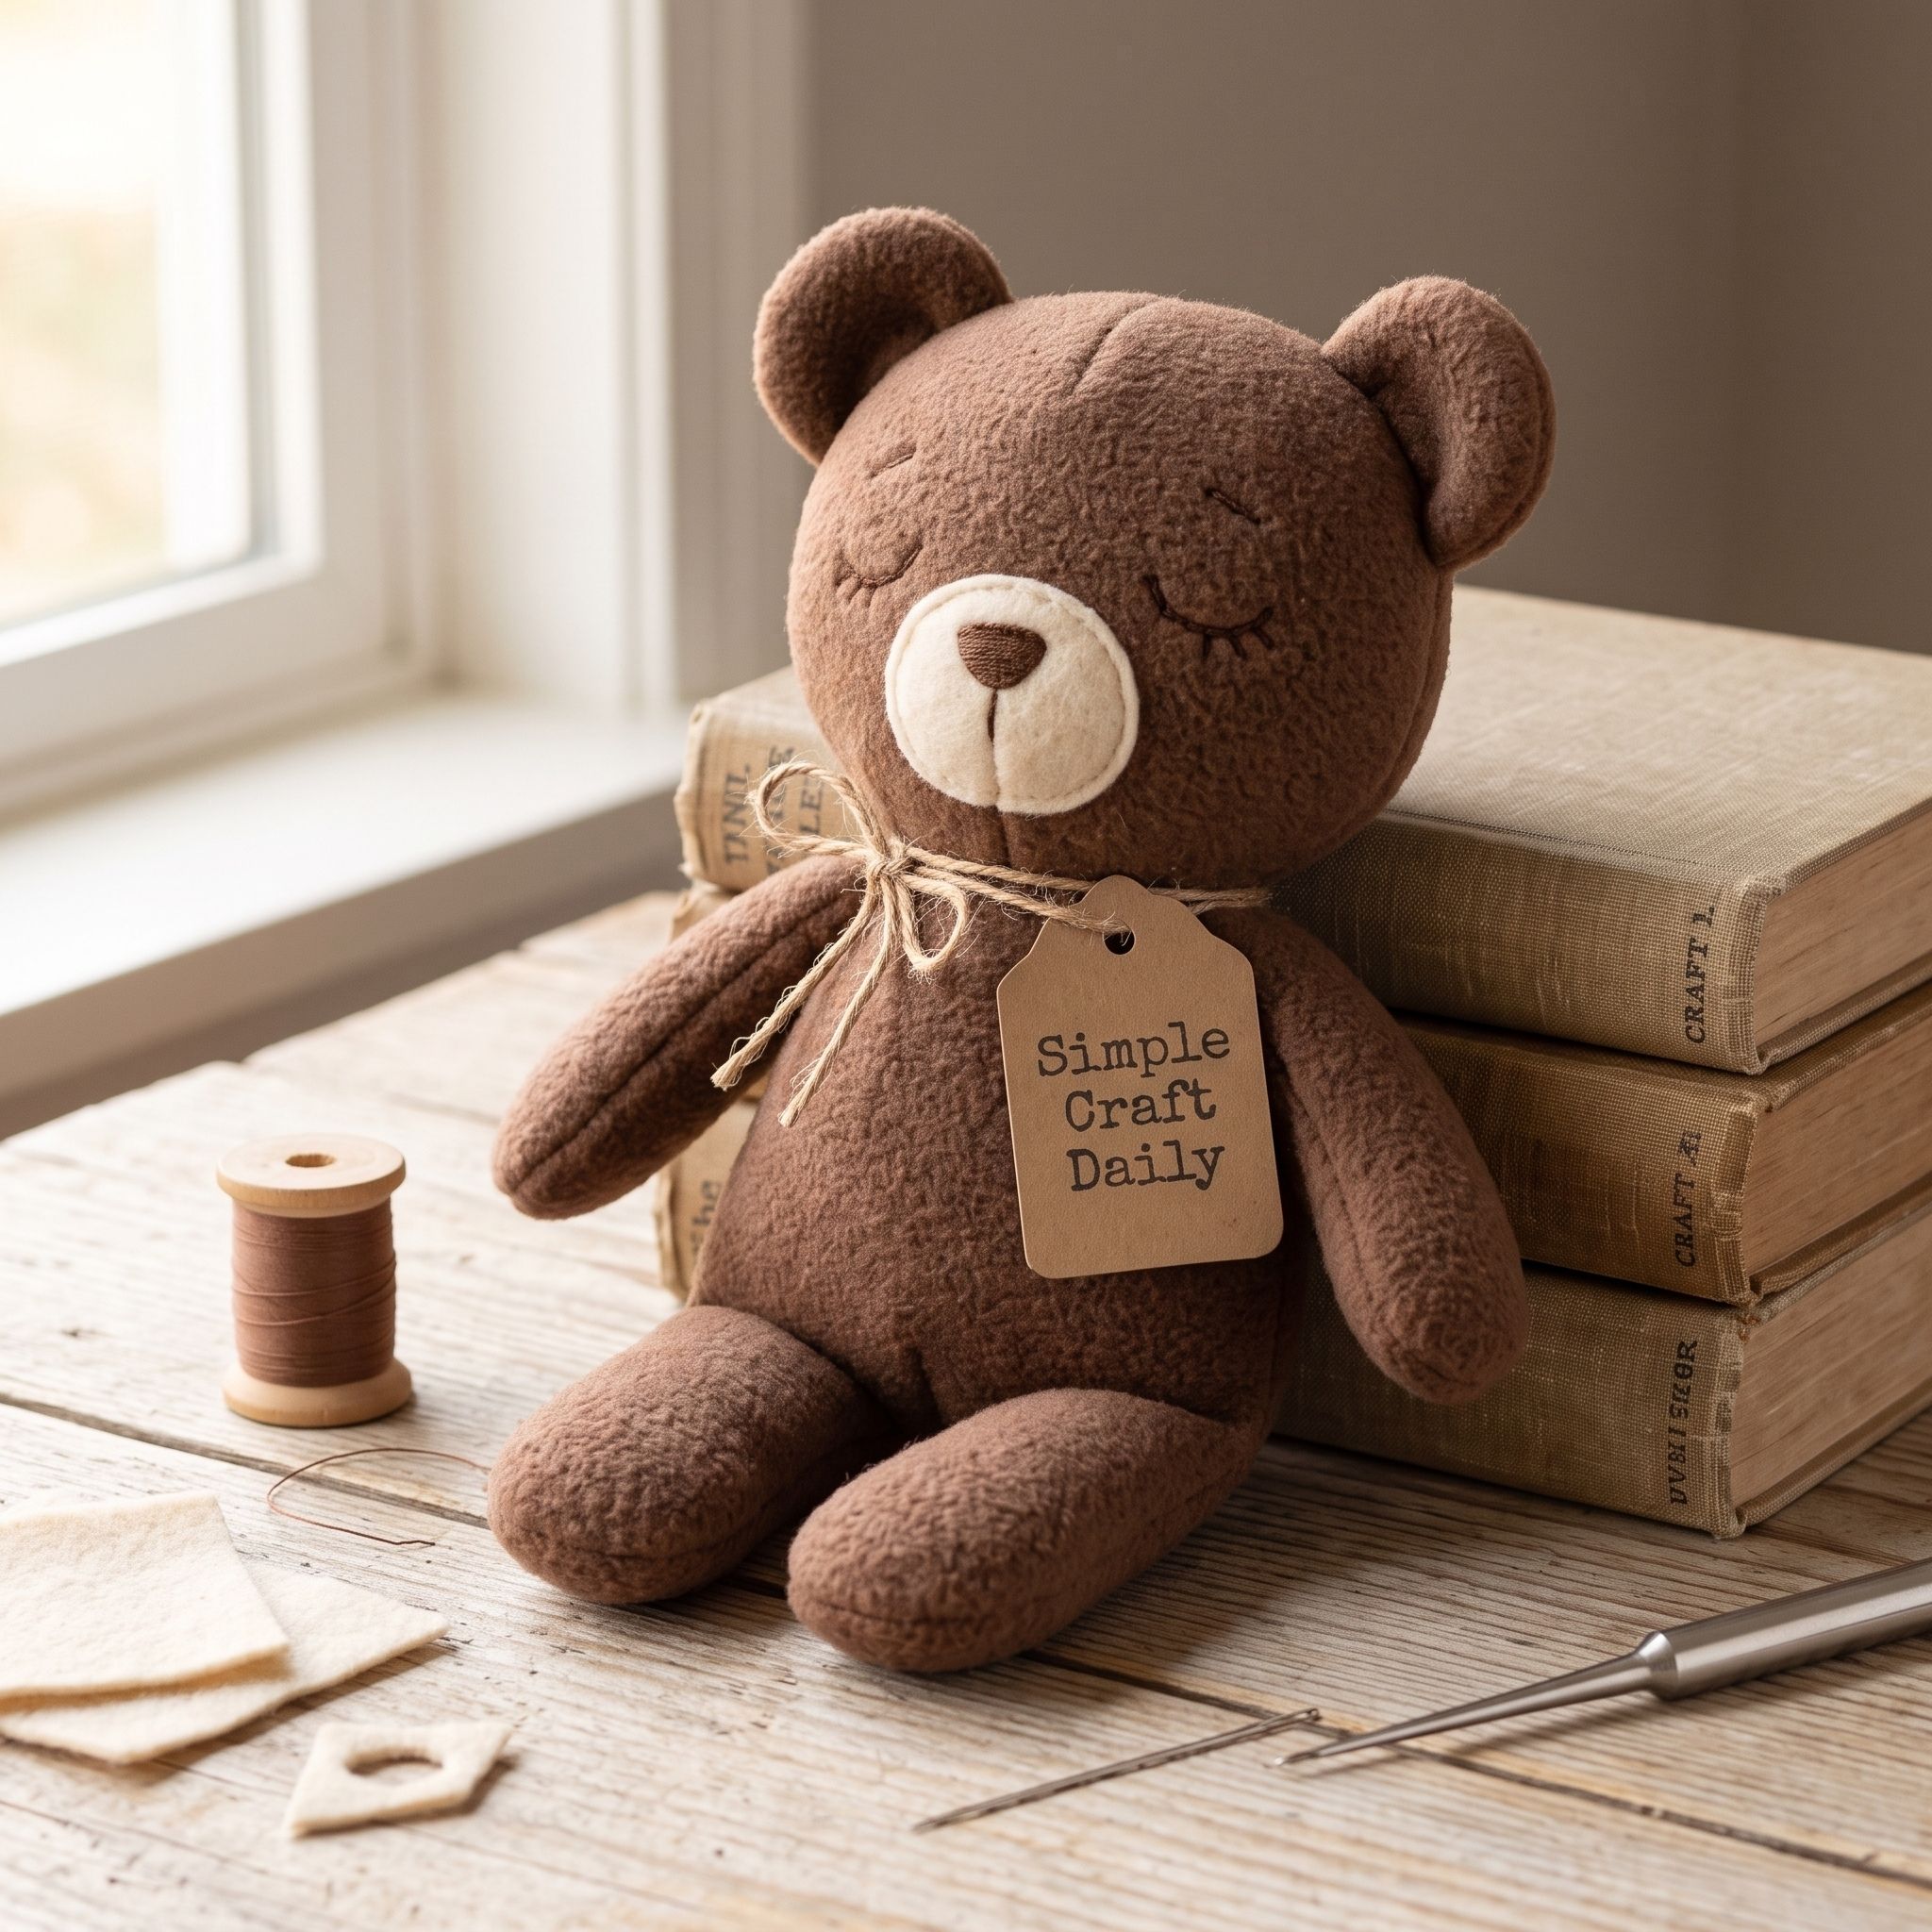
4. Sleepy Bear From Soft Fleece
Supplies Needed: Brown anti-pill fleece, cream wool-blend felt, brown and black embroidery floss, polyester thread, polyester fiberfill, hand-sewing needles and fabric clips, washable fabric marking pens or tailor’s chalk, fabric scissors, long-handled polyester fiberfill stuffing tool.
Mark two 7-inch bear body shapes with rounded ear bumps on brown fleece. Cut a cream felt muzzle oval and stitch it onto the front body panel with brown floss. Keep the fleece layers aligned while sewing around the outer edge of the body, following the ear curves.
Leave a 2-inch opening along the lower side seam. After sewing, cut small notches into every inward curve without cutting through the polyester thread, then turn the bear right-side out. Use the stuffing tool to firm the head first, add light filling to the limbs, and keep the belly soft. Ladder-stitch the opening closed and embroider sleepy curved eyes and a tiny nose with black floss.
5. DIY Handmade Stuffed Animals: Tiny Penguin
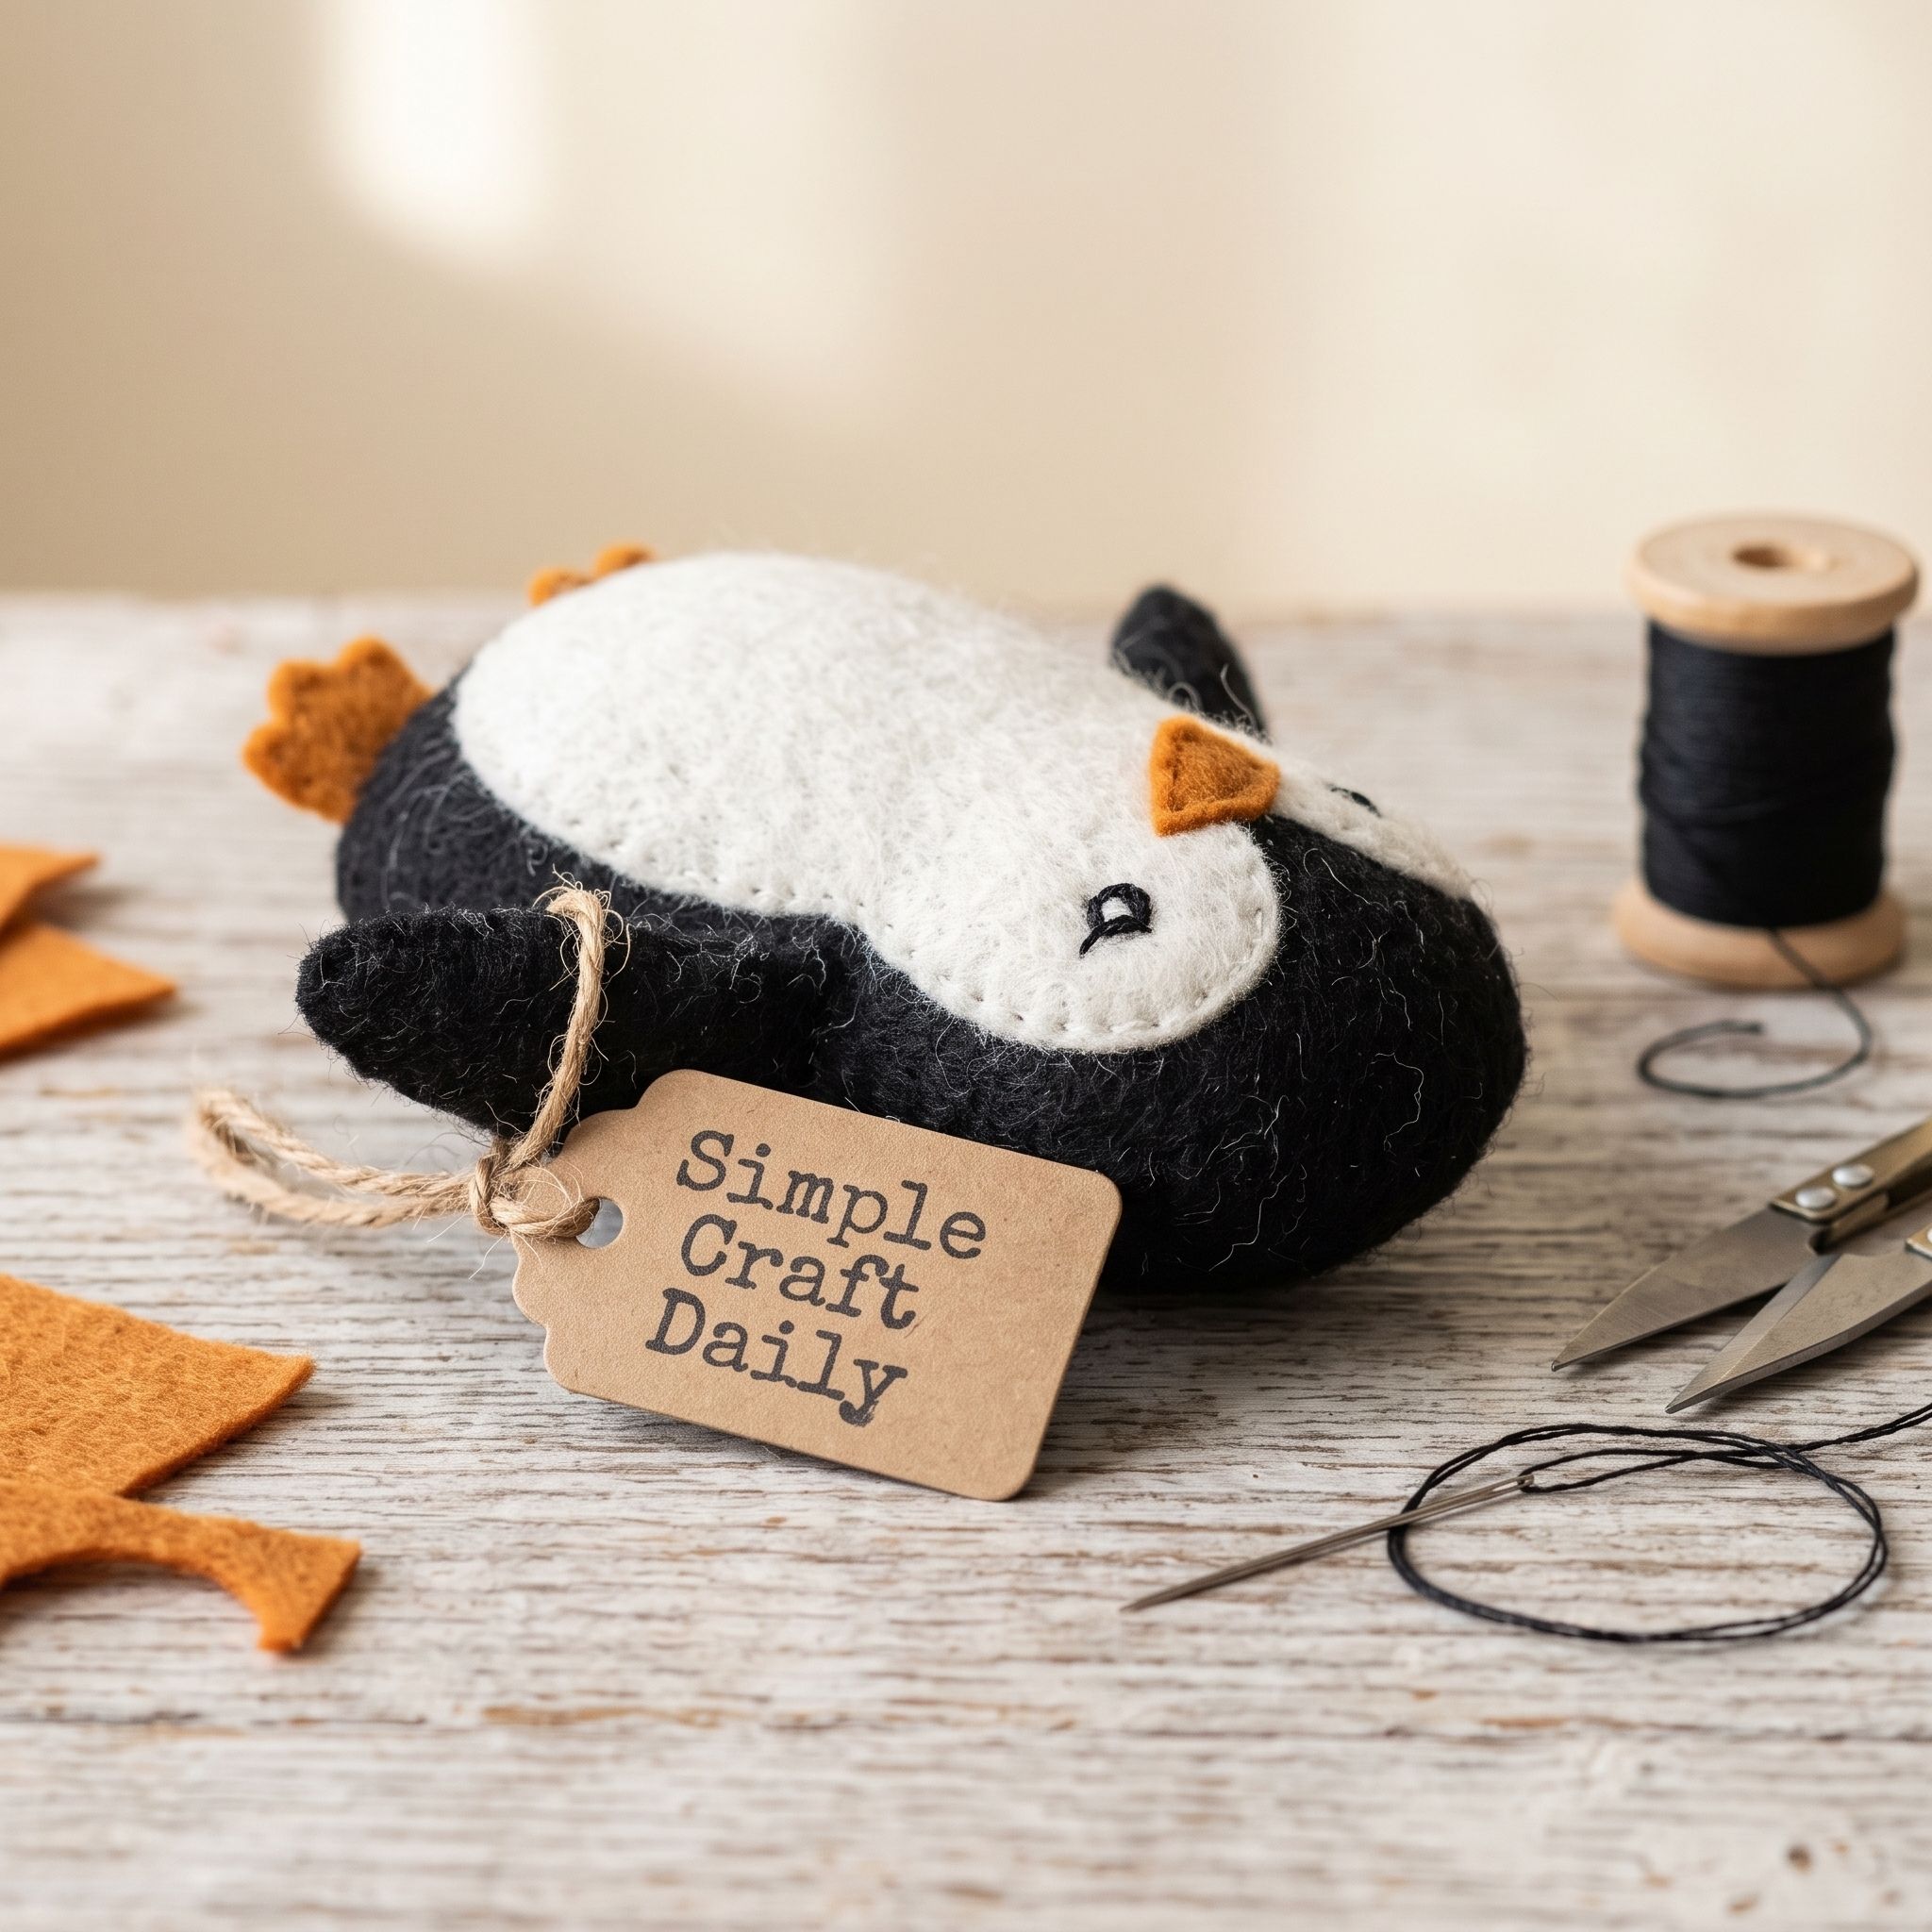
Supplies Needed: Black, white, and orange wool-blend felt, black embroidery floss, polyester thread, polyester fiberfill, hand-sewing needles and fabric clips, washable fabric marking pens or tailor’s chalk, fabric scissors.
Mark two 5-inch black felt penguin bodies with a slightly flattened base. Cut a white belly panel, one orange felt beak, and two orange feet. Stitch the belly panel and black floss eyes onto the front body before joining the layers.
Set the beak and feet between the body layers with the visible portions facing inward and the raw edges sitting inside the 1/4-inch seam allowance. Sew the perimeter, leaving a 1 1/2-inch opening at one side. Turn carefully, add only enough fiberfill to soften the shape, and close with ladder stitches. Sparse stuffing helps this small penguin sit naturally instead of becoming round and unstable.
6. Strawberry Cow With Felt Spots
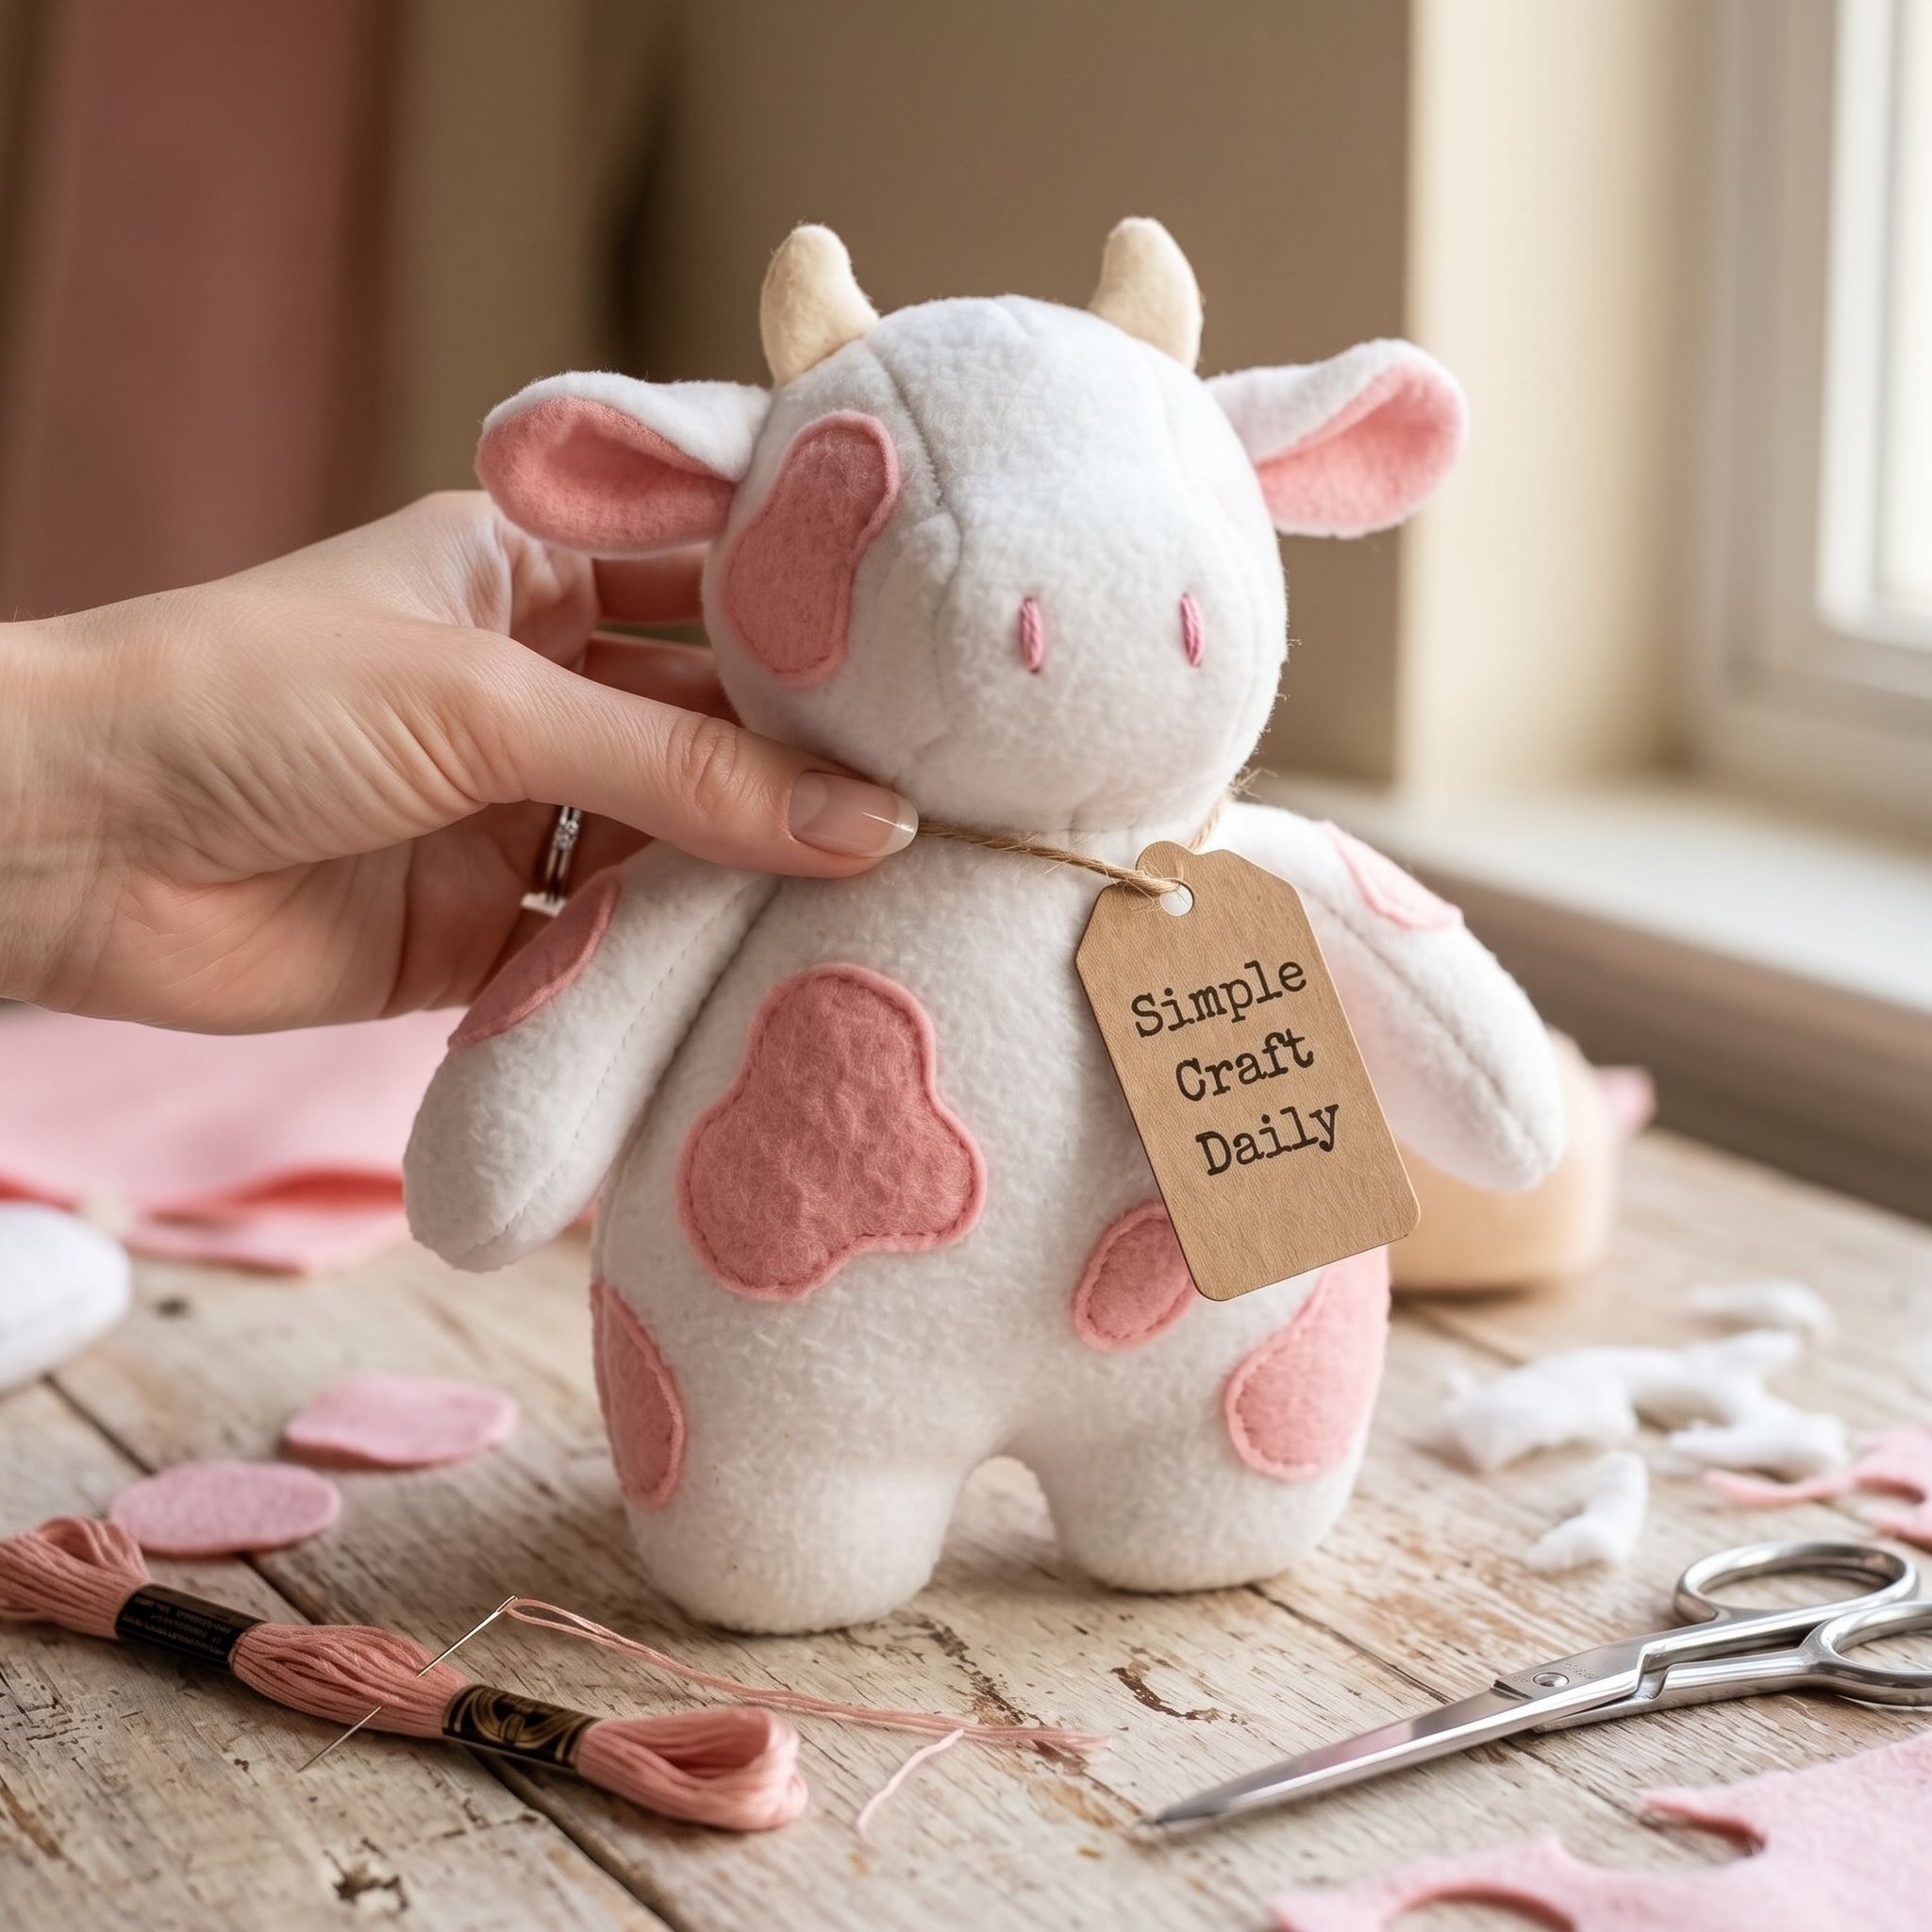
Supplies Needed: White anti-pill fleece, pink wool-blend felt, pink and black embroidery floss, polyester thread, polyester fiberfill, hand-sewing needles and fabric clips, washable fabric marking pens or tailor’s chalk, fabric scissors, long-handled polyester fiberfill stuffing tool.
Mark two 8-inch cow body shapes on white fleece, then cut four irregular pink felt spots, two small horns, and two floppy ears. Stitch the spots to the front panel with pink floss before construction. Sew the horn and ear pieces in pairs, turn them, and add a tiny amount of fiberfill to the horns only.
Clip the horns and ears into the head seam with their finished ends pointing inward. Sew the body perimeter with a 1/4-inch allowance, leaving a 2-inch opening along the lower body. Turn the cow, fill the head and torso with small fiberfill tufts, and keep the ears unstuffed so they flop. Close the opening with ladder stitches, then embroider nostrils and closed eyes with black floss.
Anti-Pill Plush Fleece Fabric
The main body fabric for most of these 15 animals: soft, stable and forgiving for beginners.
I earn a commission if you make a purchase, at no additional cost to you.
7. DIY Handmade Stuffed Animals: Starfish
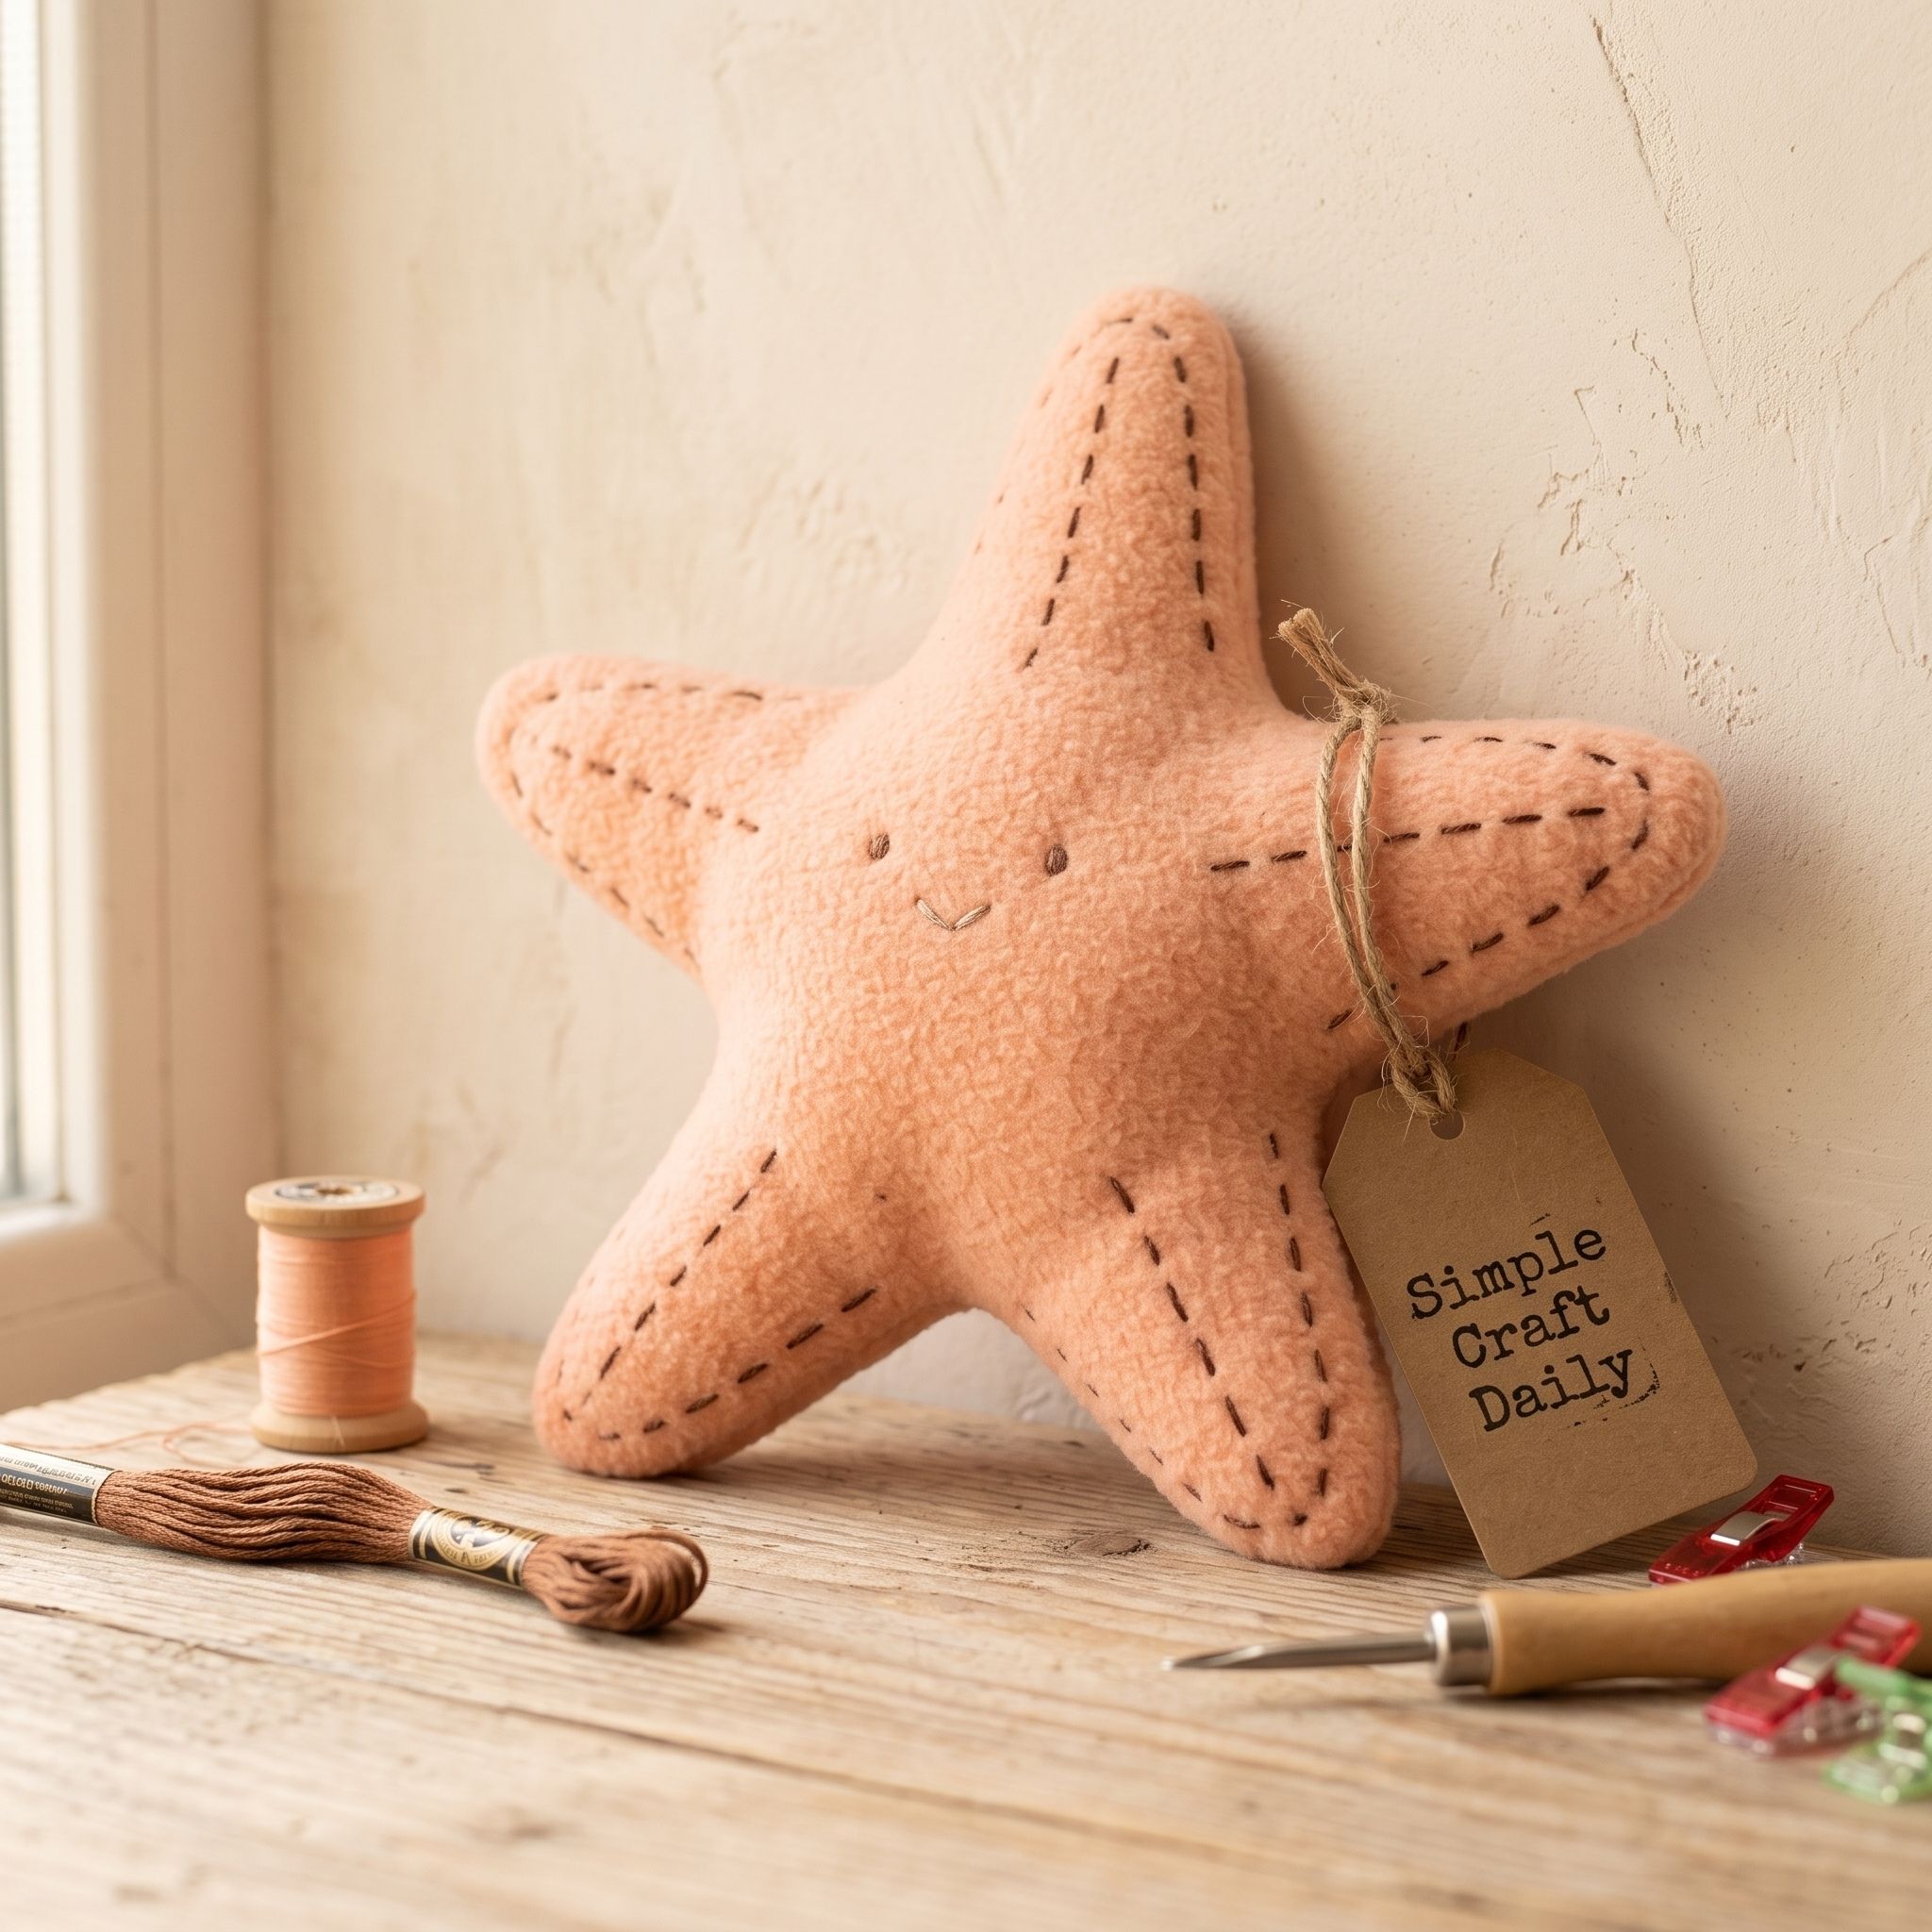
Supplies Needed: Peach anti-pill fleece, brown and black embroidery floss, polyester thread, polyester fiberfill, hand-sewing needles and fabric clips, washable fabric marking pens or tailor’s chalk, fabric scissors, long-handled polyester fiberfill stuffing tool.
Draw two matching five-point starfish shapes measuring 7 inches across on peach fleece. Mark a 2-inch turning opening between two arms, then clip the layers and sew around the outline with a 1/4-inch seam allowance. Trim the point tips close to the seam and clip shallow notches into each inward valley.
Turn the starfish slowly so the points do not strain. First, use the stuffing tool to add small tufts of fiberfill to each arm; next, fill the center lightly until the shape stays soft and flexible. Close the opening with ladder stitches. Embroider a small black smile and eyes, then add short brown running stitches across the body for simple textured markings.
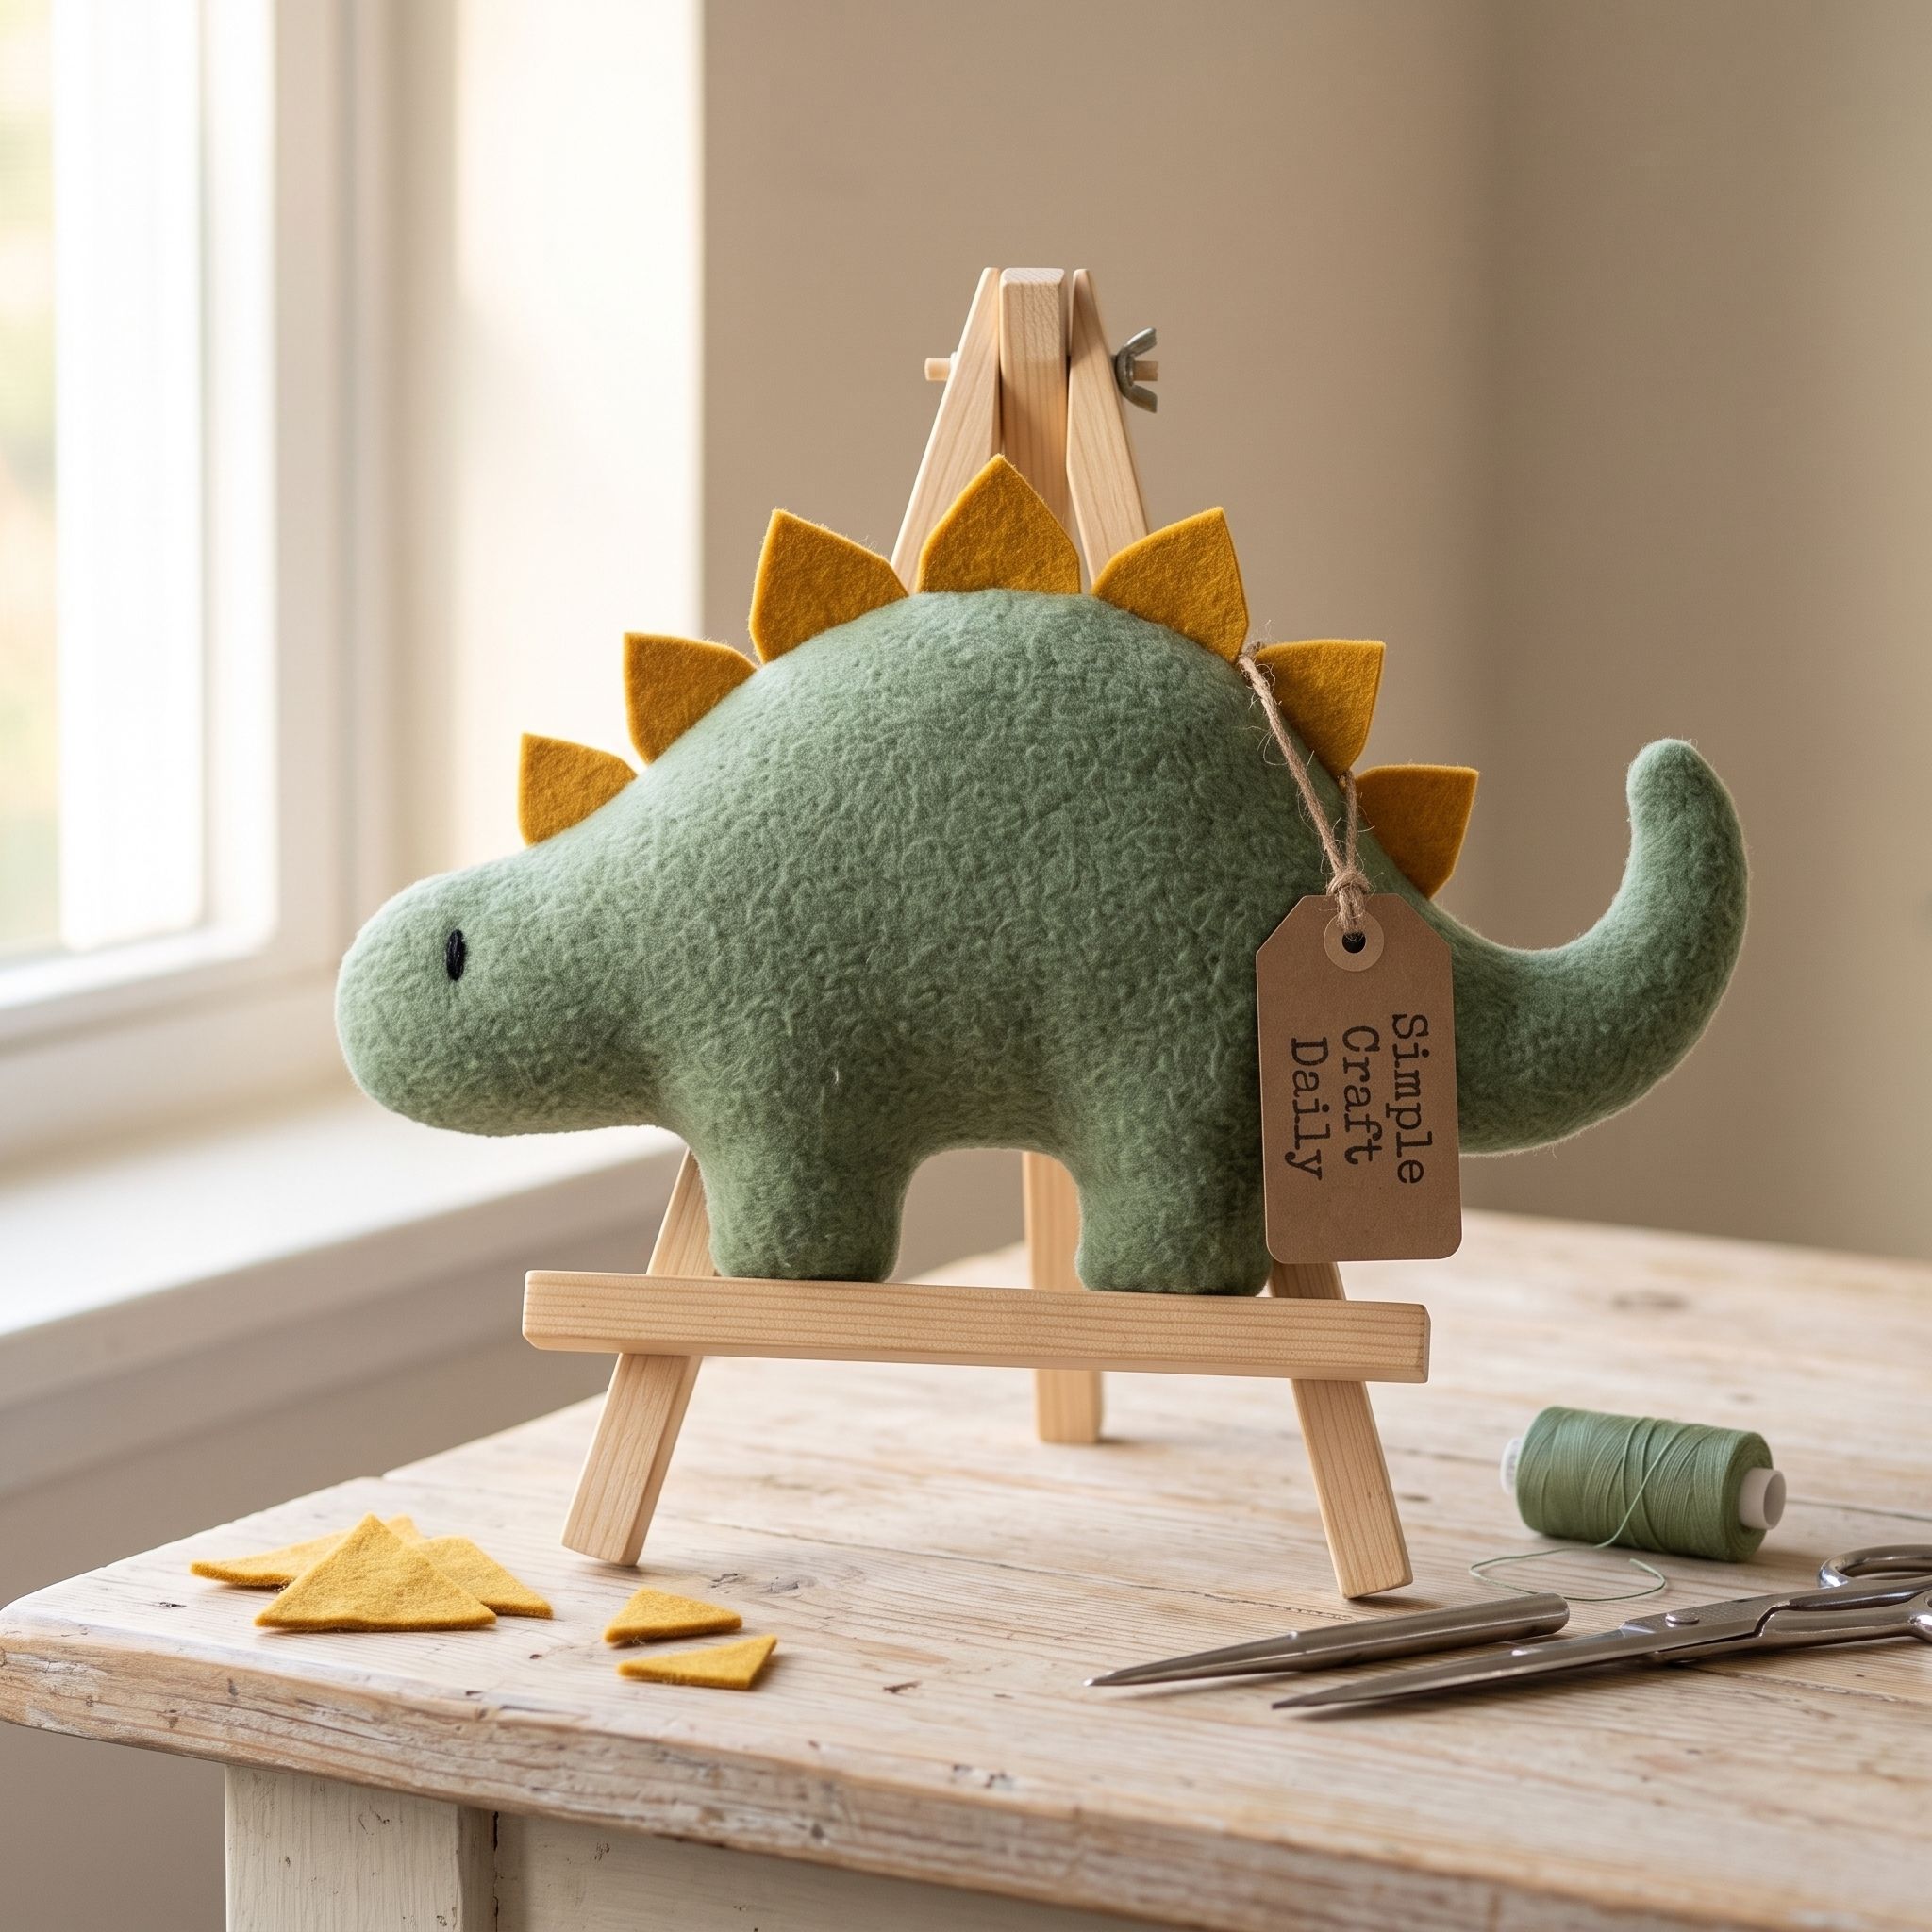
8. Little Dino With Felt Spikes
Supplies Needed: Green anti-pill fleece, mustard wool-blend felt, black embroidery floss, polyester thread, polyester fiberfill, hand-sewing needles and fabric clips, washable fabric marking pens or tailor’s chalk, fabric scissors, long-handled polyester fiberfill stuffing tool.
Mark two 9-inch dinosaur body profiles on green fleece with a rounded tail and neck. Cut seven mustard felt triangles, each 1 inch wide at the base and 1 1/4 inches tall. Arrange the spikes along the back curve with their tips facing inward between the fleece panels.
Clip the spikes in place, spacing their bases about 1/2 inch apart. Sew the body perimeter with a 1/4-inch seam allowance, leaving a 2-inch opening beneath the belly. Turn the dinosaur carefully so each felt spike stands free along the back. Use the stuffing tool to shape the tail and neck first, then add even fiberfill to the body. Close with ladder stitches and embroider two black eyes.
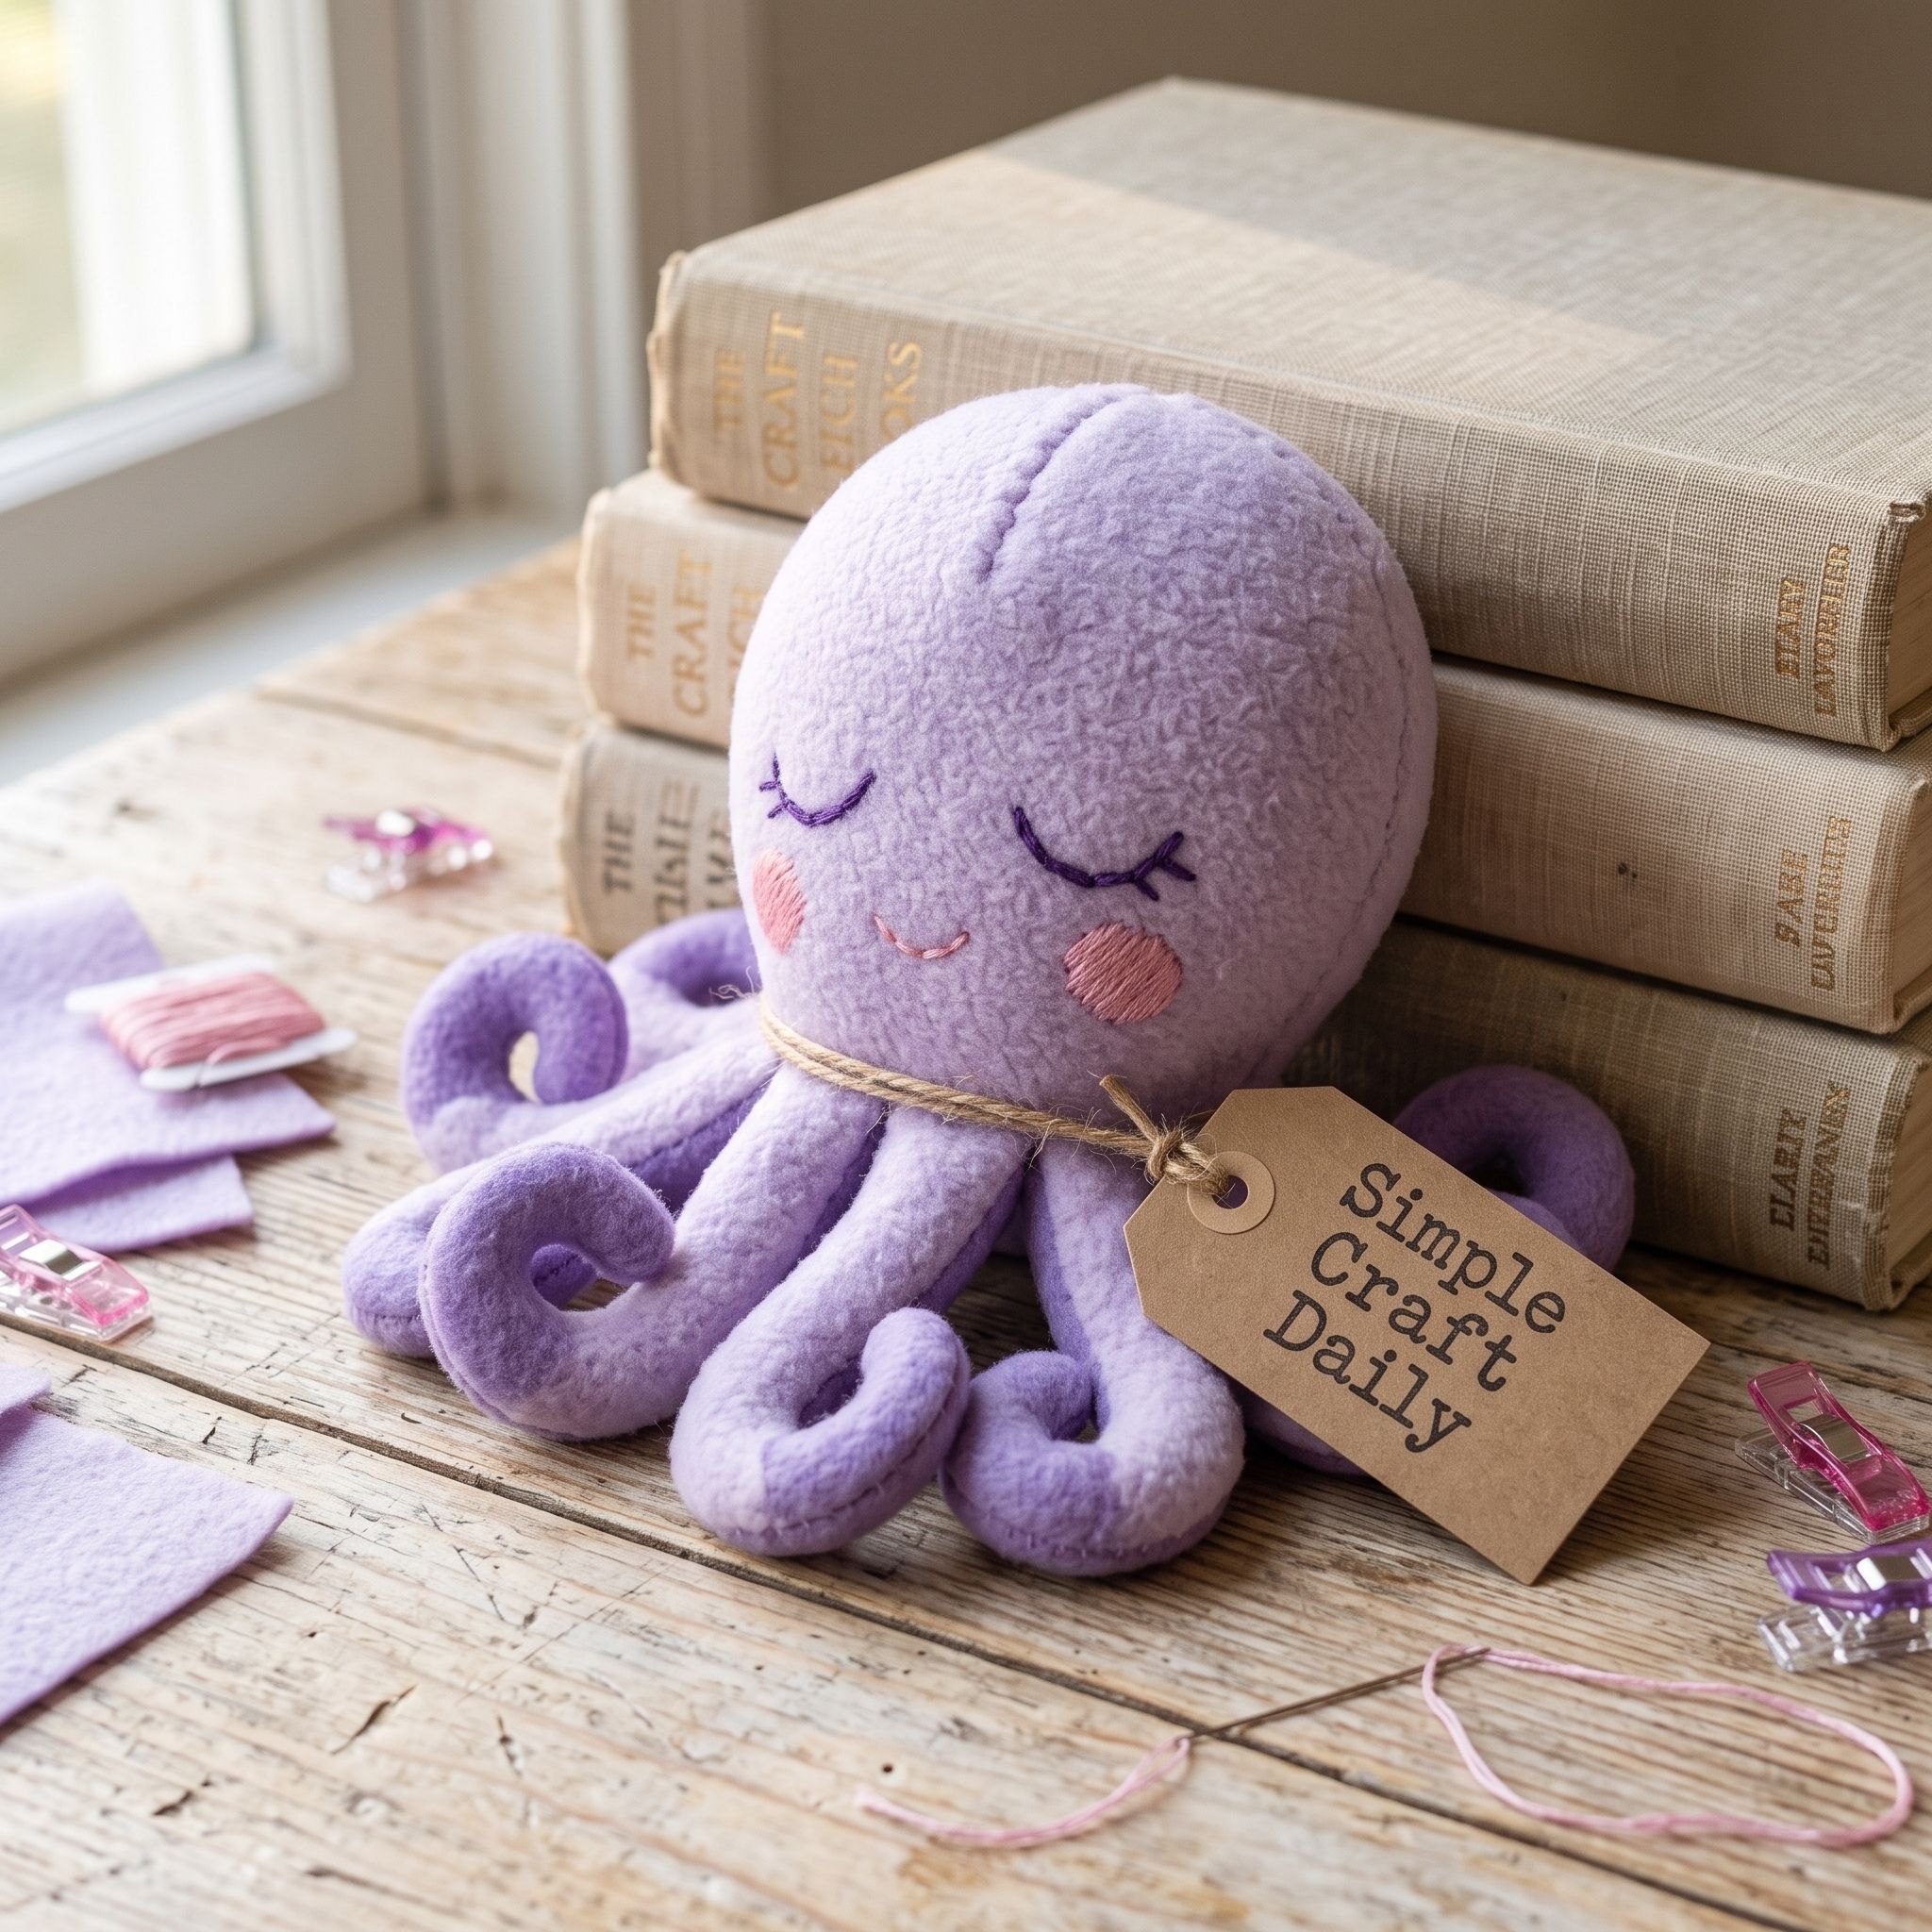
9. DIY Handmade Stuffed Animals: Lavender Octopus
Supplies Needed: Lavender anti-pill fleece, lavender wool-blend felt, black and pink embroidery floss, polyester thread, polyester fiberfill, hand-sewing needles and fabric clips, washable fabric marking pens or tailor’s chalk, fabric scissors, long-handled polyester fiberfill stuffing tool.
Mark two round lavender fleece octopus heads measuring 6 inches across. Cut eight curled felt tentacles, each about 2 inches long, and arrange them around the lower half of one fleece panel. Keep the tentacle ends inside the 1/4-inch seam allowance and their curls facing inward.
Clip the second body panel on top and sew around the circle, leaving a 1 1/2-inch gap near the lower edge. Turn the octopus, then add light and even fiberfill with the stuffing tool until the head is rounded without stretching the seam. Ladder-stitch the opening with polyester thread. Finish with black floss eyes and two small pink floss cheek marks for a gentle expression.
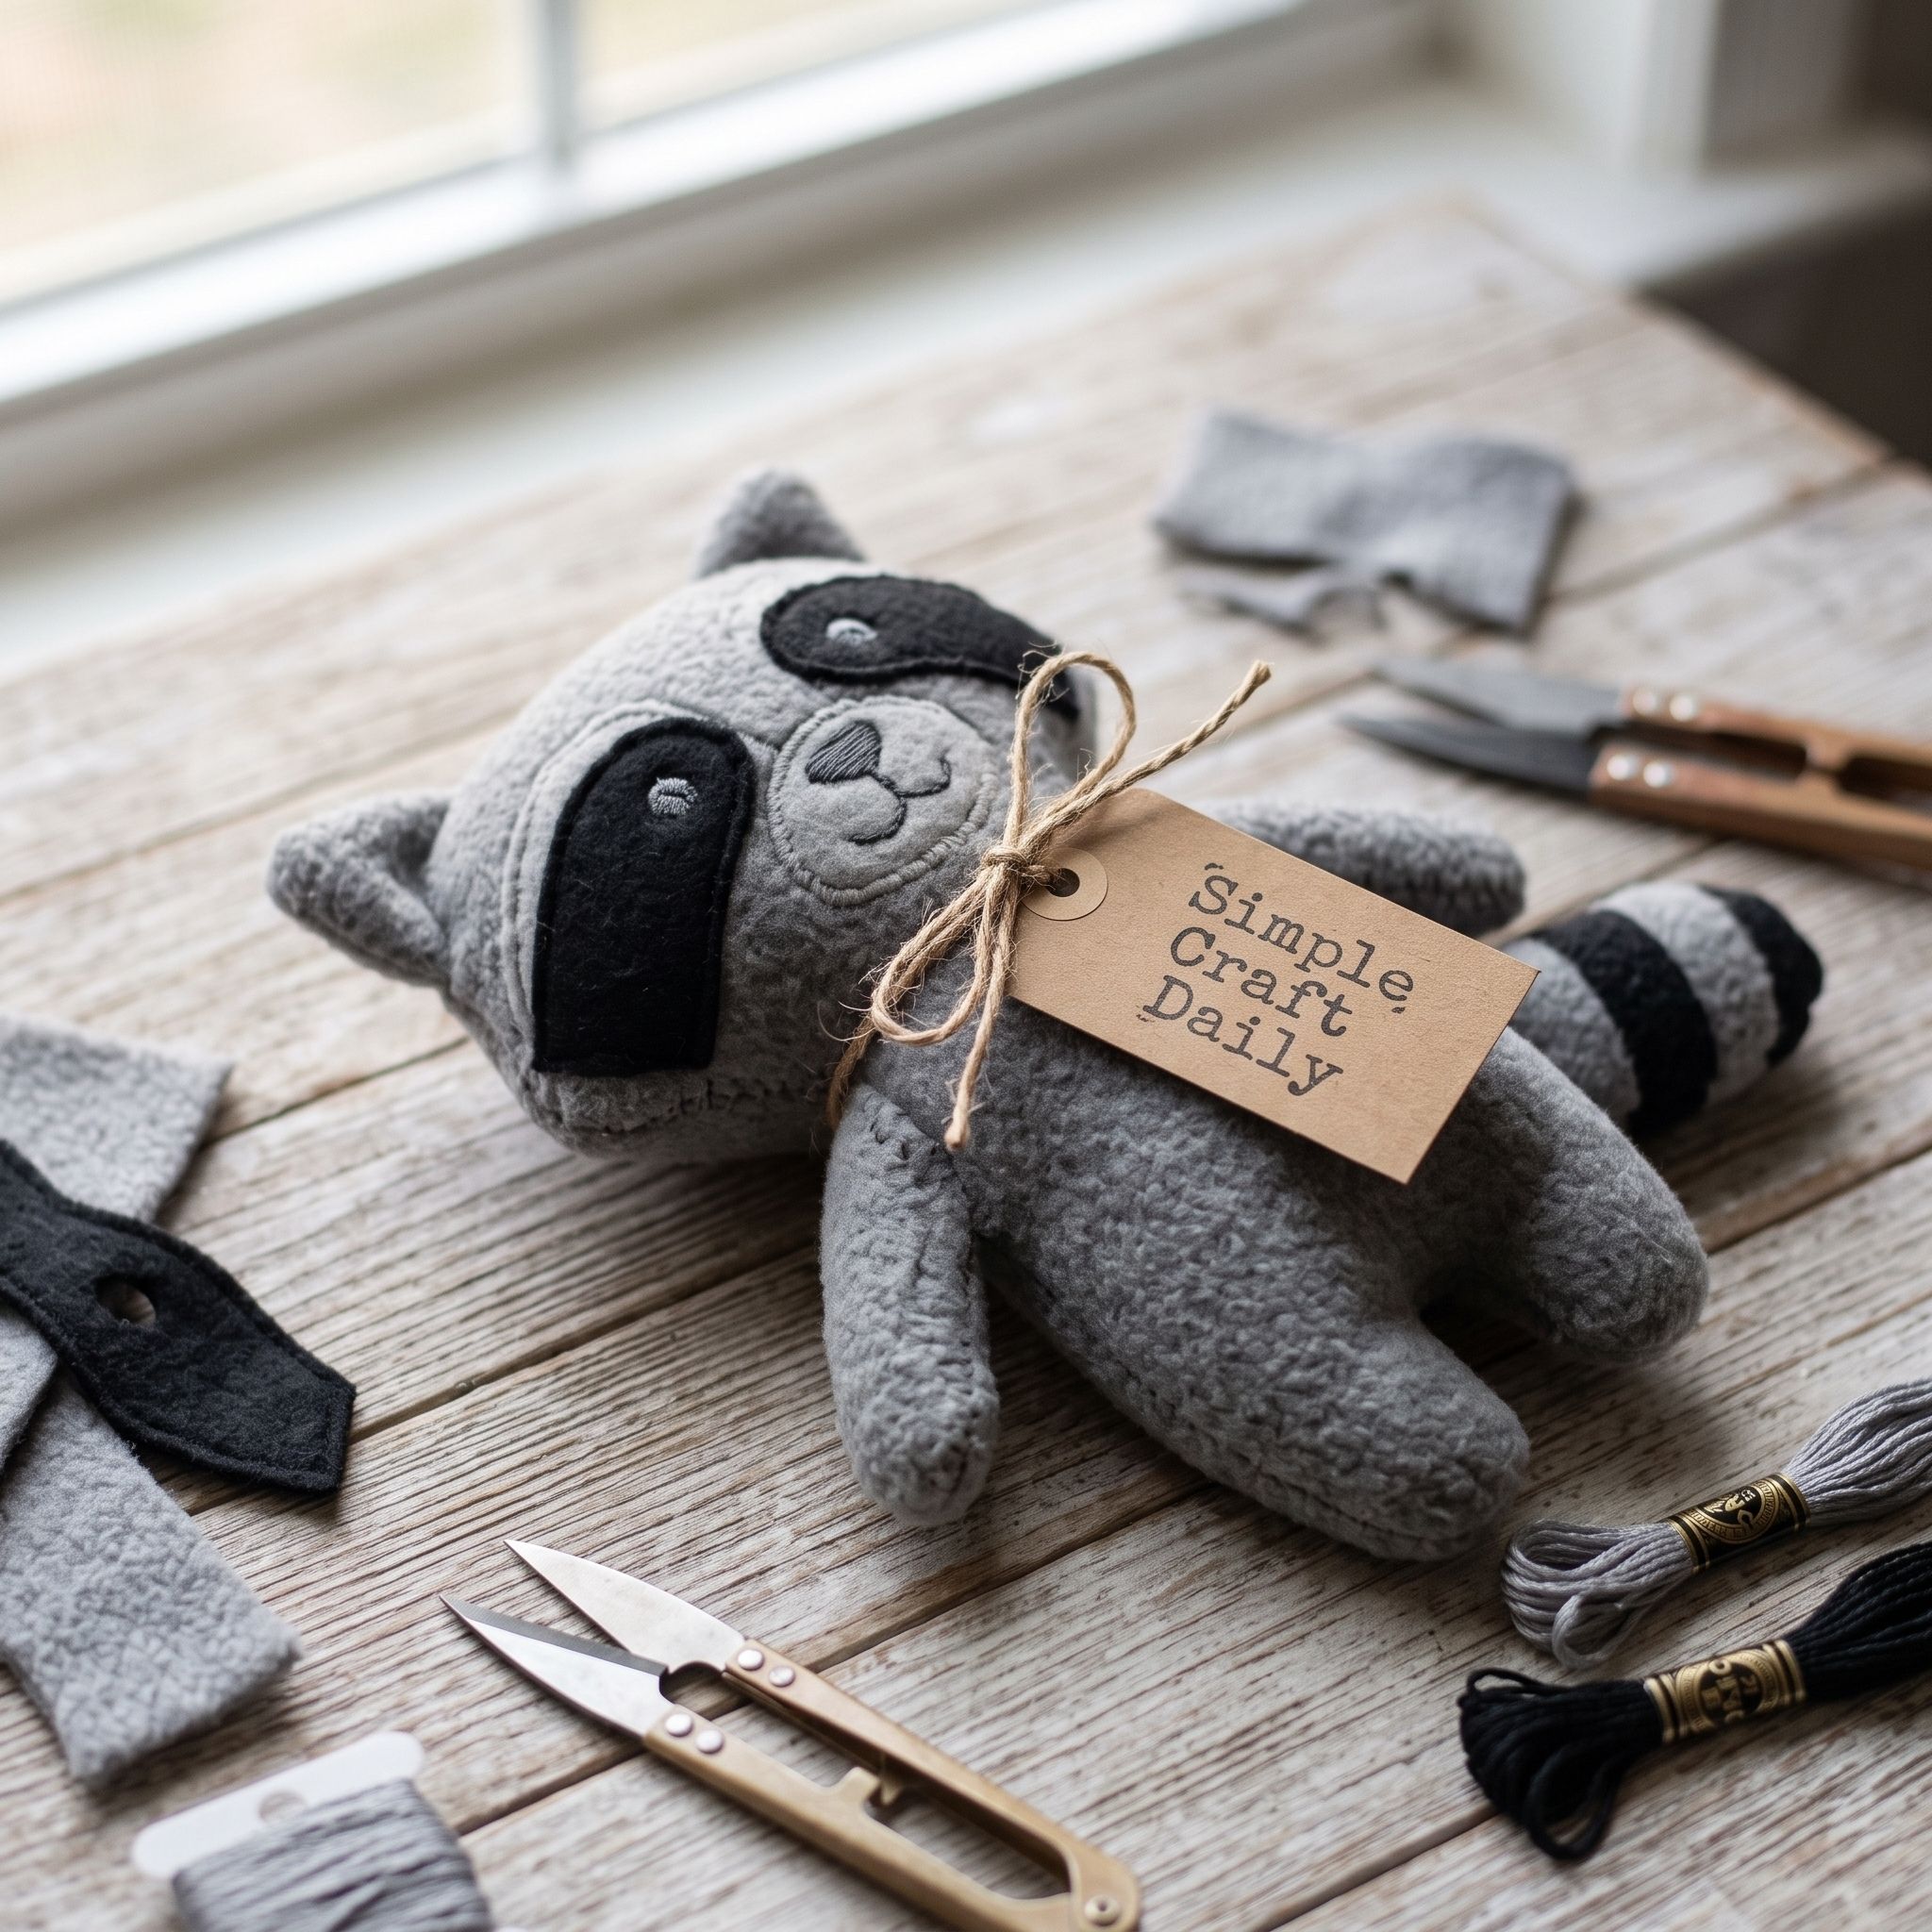
10. Woodland Raccoon With Mask Applique
Supplies Needed: Gray anti-pill fleece, black wool-blend felt, black embroidery floss, polyester thread, polyester fiberfill, hand-sewing needles and fabric clips, washable fabric marking pens or tailor’s chalk, fabric scissors, long-handled polyester fiberfill stuffing tool.
Mark two 8-inch gray fleece raccoon bodies and a separate narrow tail. Cut one black felt face mask and three black tail bands. Stitch the mask to the front body first, then embroider black eyes and a tiny nose through the applique. For more animal-face projects, pair this plushie with our DIY animal mask ideas.
Stitch the three black felt bands across the tail piece before sewing the tail edges together. Turn and lightly stuff the tail, then place it between the gray body panels. Sew the body with a 2-inch lower turning gap, turn it right-side out, and add fiberfill in small tufts. Finish the opening with ladder stitches; all facial elements remain stitched for safe handling.
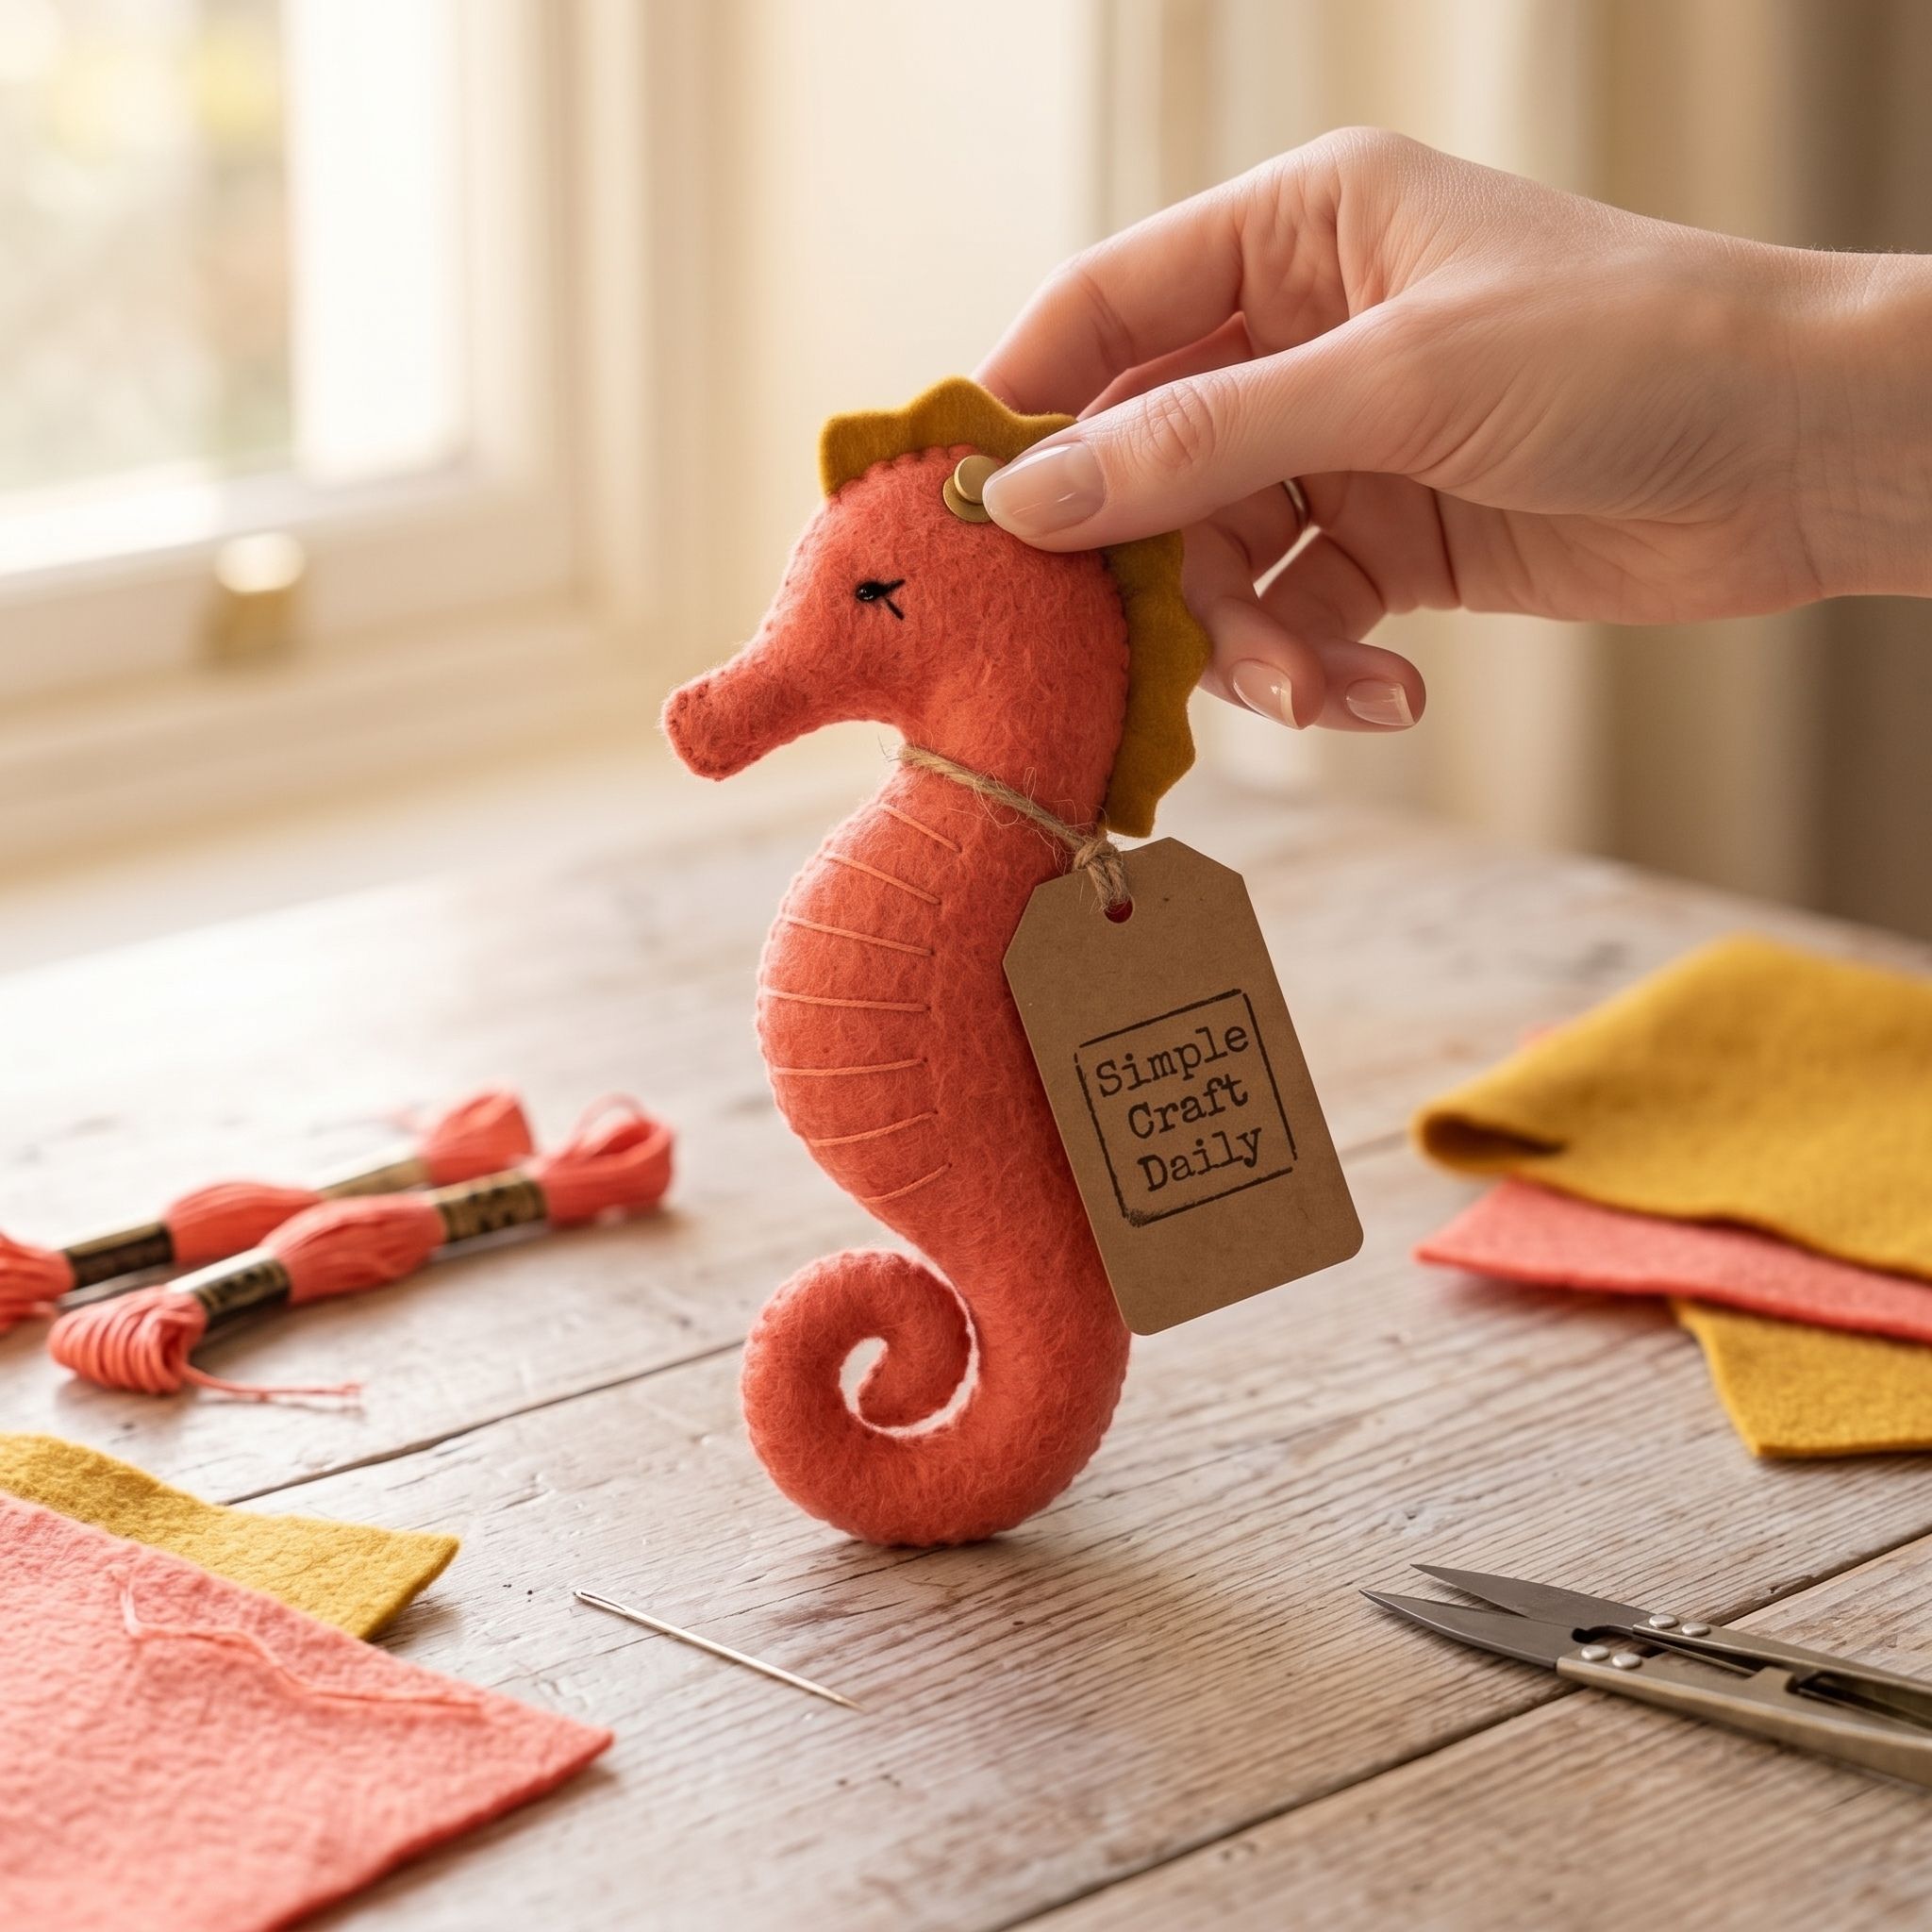
11. Felt Seahorse With Curled Tail
Supplies Needed: Coral and mustard wool-blend felt, coral and black embroidery floss, polyester thread, polyester fiberfill, hand-sewing needles and fabric clips, washable fabric marking pens or tailor’s chalk, fabric scissors.
Draw two 7-inch coral felt seahorse shapes, taking time to form a broad curled tail rather than a tight spiral that cannot turn cleanly. Cut a mustard felt mane that follows the back of the head and neck. Stitch horizontal belly lines and one black embroidered eye onto the front panel before assembly.
Place the mane between the coral panels with its visible edge facing inward, then clip and sew around the outer edge with a 1/4-inch seam allowance. Leave a 1 1/2-inch opening at the lower belly, clip shallow notches around the curves, and turn the seahorse. Add only a thin fiberfill layer, then ladder-stitch the gap. Continue the ocean theme with our DIY marine animal crafts.
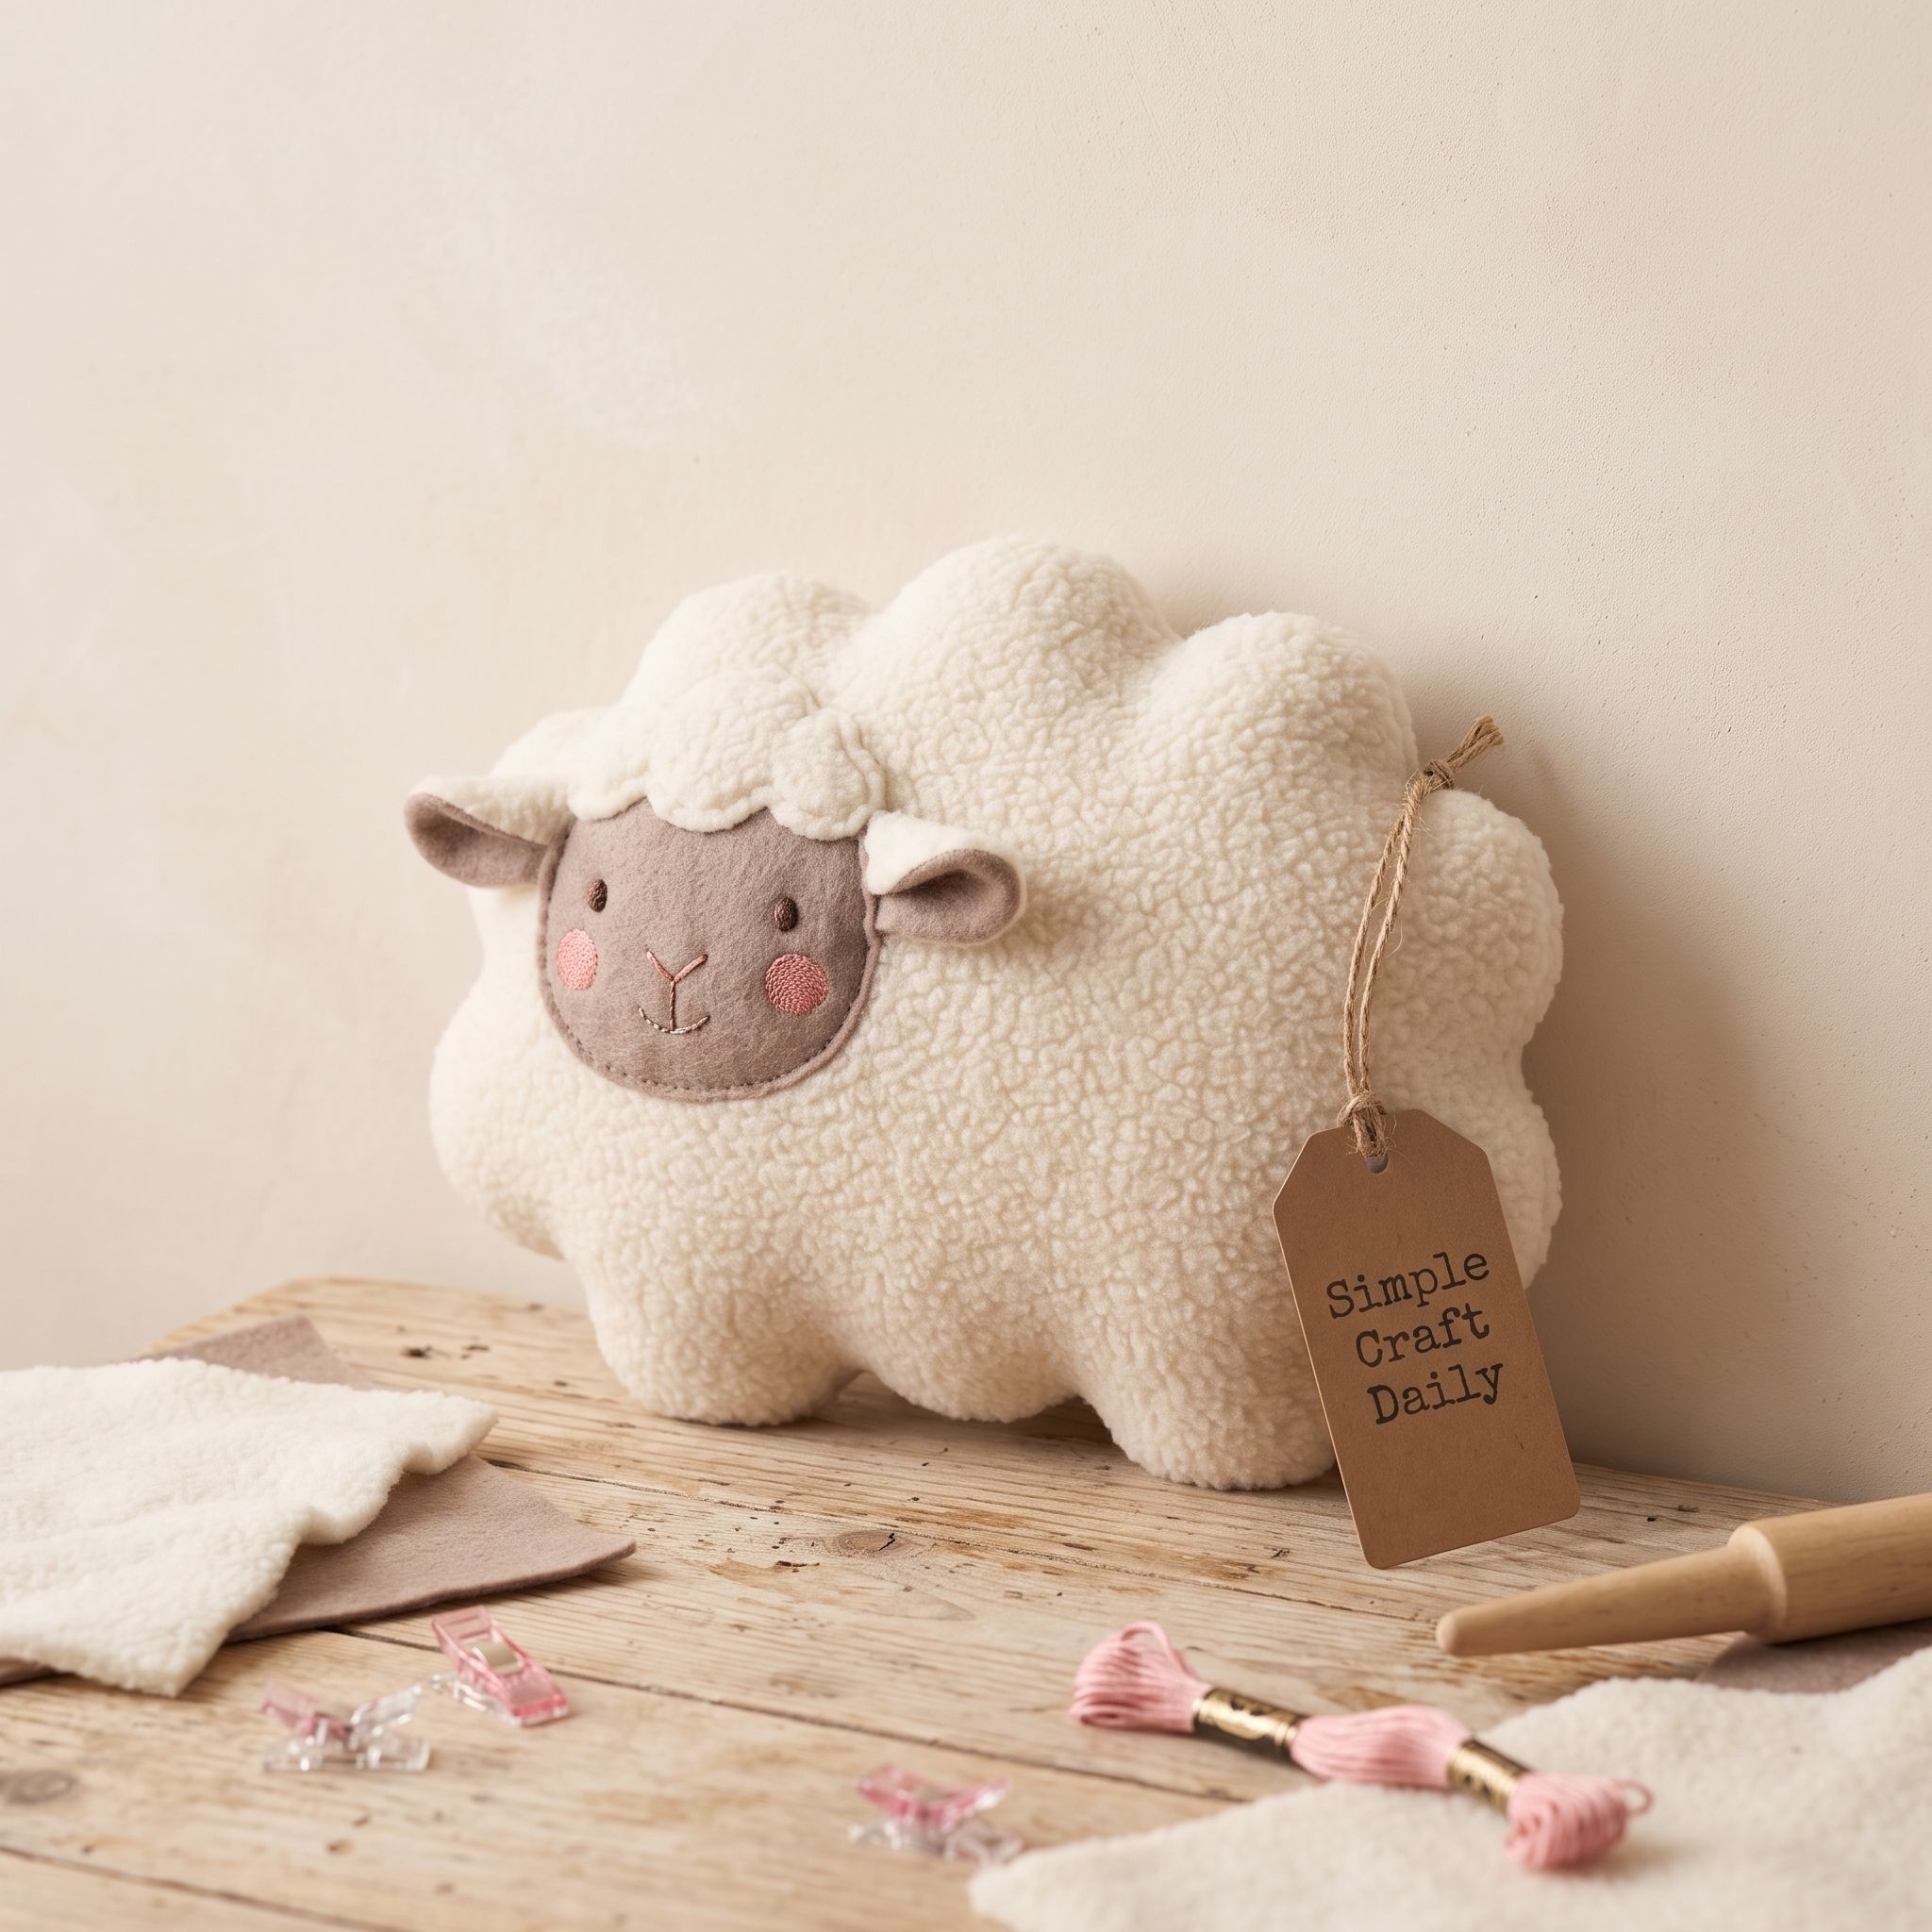
12. DIY Handmade Stuffed Animals: Cloud Lamb
Supplies Needed: Cream anti-pill fleece, taupe and pink wool-blend felt, black and pink embroidery floss, polyester thread, polyester fiberfill, hand-sewing needles and fabric clips, washable fabric marking pens or tailor’s chalk, fabric scissors, long-handled polyester fiberfill stuffing tool.
Mark two cream fleece cloud shapes measuring 7 inches wide with five rounded scallops. Cut a taupe felt face and two taupe ears, then stitch the face to the front fleece panel before assembly. Embroider black eyes and small pink cheek marks onto the felt face while the panel lies flat.
Place the ears between the fleece layers at the upper side seams, clip securely, and sew around the cloud outline with a 1/4-inch seam allowance. Leave a 2-inch lower opening. After sewing, clip shallow notches around every scallop, turn the lamb, and fill each curve evenly with small fiberfill tufts. Close the gap with ladder stitches and gently massage the filling so the cloud outline stays balanced.
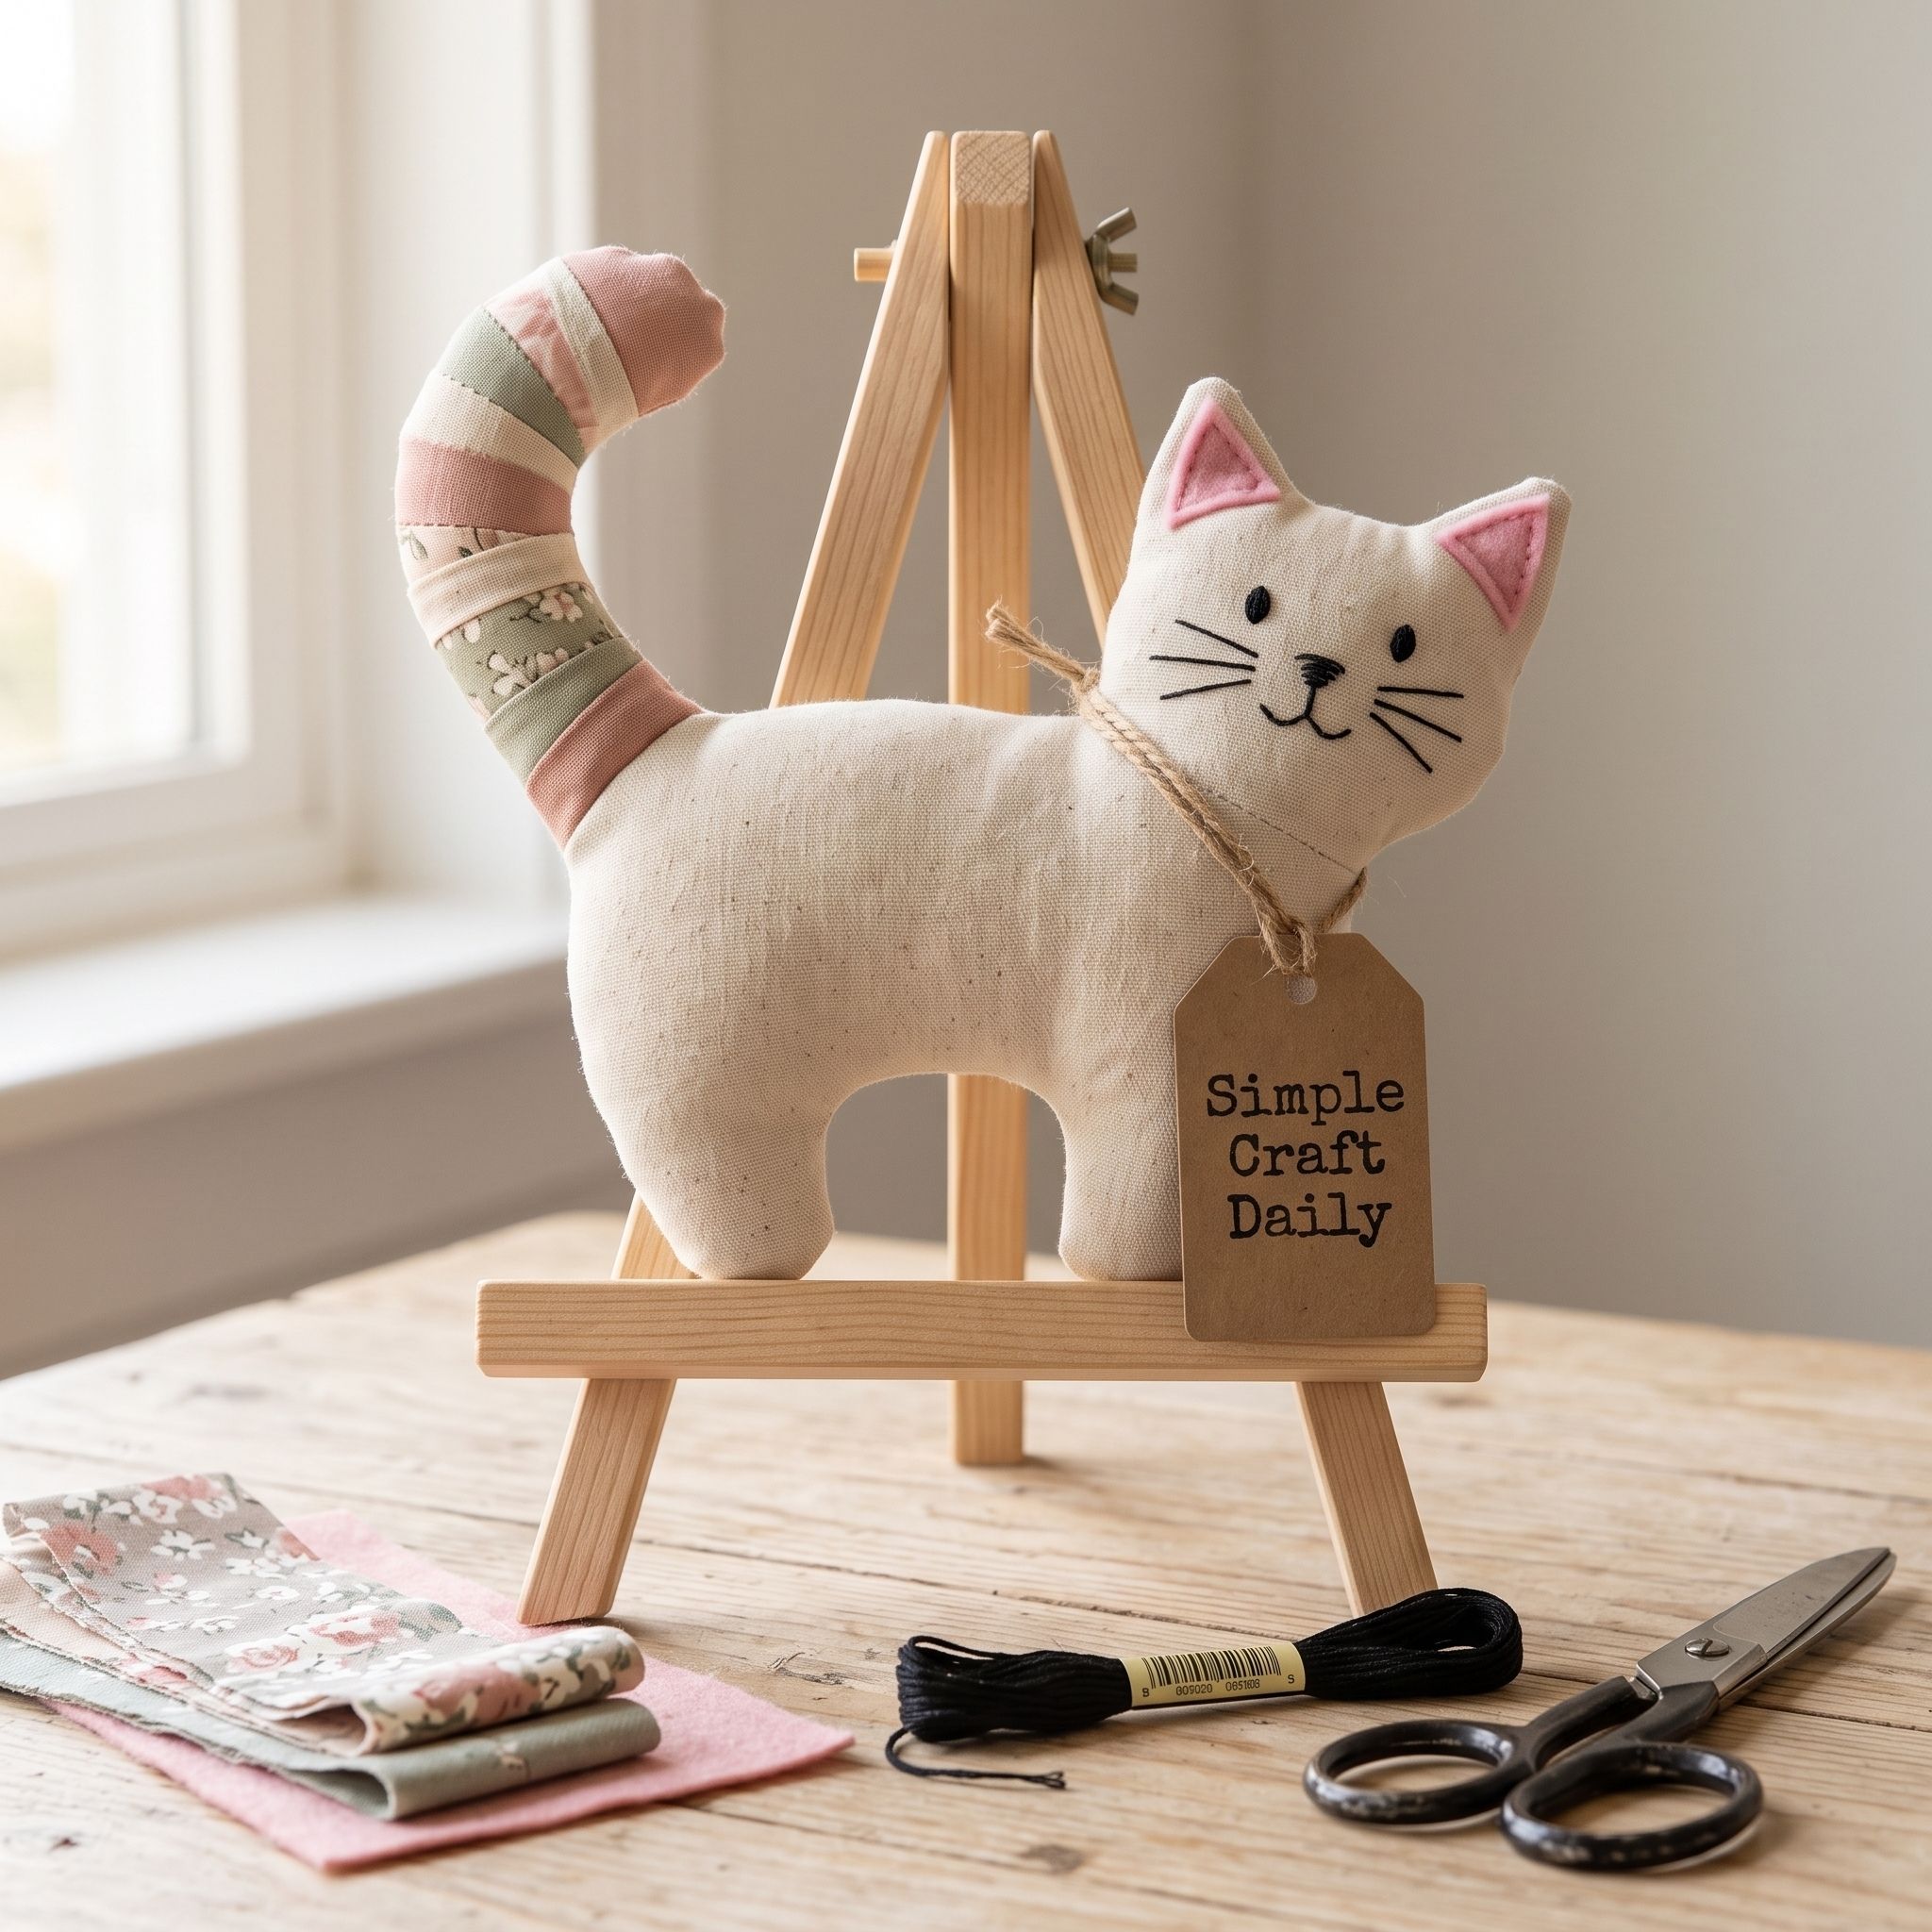
13. Mini Cat With Striped Cotton Tail
Supplies Needed: Quilting cotton fat quarters, pink wool-blend felt, black and pink embroidery floss, polyester thread, polyester fiberfill, hand-sewing needles and fabric clips, washable fabric marking pens or tailor’s chalk, fabric scissors, long-handled polyester fiberfill stuffing tool.
Cut three quilting-cotton strips measuring 1 by 4 inches and sew them end to end to create a striped tail panel. Mark two 6-inch cat bodies on coordinating cotton, then cut two pink felt inner-ear triangles. Stitch the felt triangles to the front ears before joining the body.
Sew the tail panel into a narrow tube, turn it with the stuffing tool, and add a light amount of fiberfill. Place the tail and ears between the body panels, sew around the perimeter, and leave a 1 1/2-inch lower opening. Turn, fill the body until gently rounded, and close with ladder stitches. Use black back stitches for the facial outline and whiskers, then pair the cat with one of our adorable cat-themed bags for a handmade gift set.
Sewing Machine
An optional studio upgrade for quickly sewing the repeated short seams at the stated 1.8 to 2.2 mm stitch length.
I earn a commission if you make a purchase, at no additional cost to you.
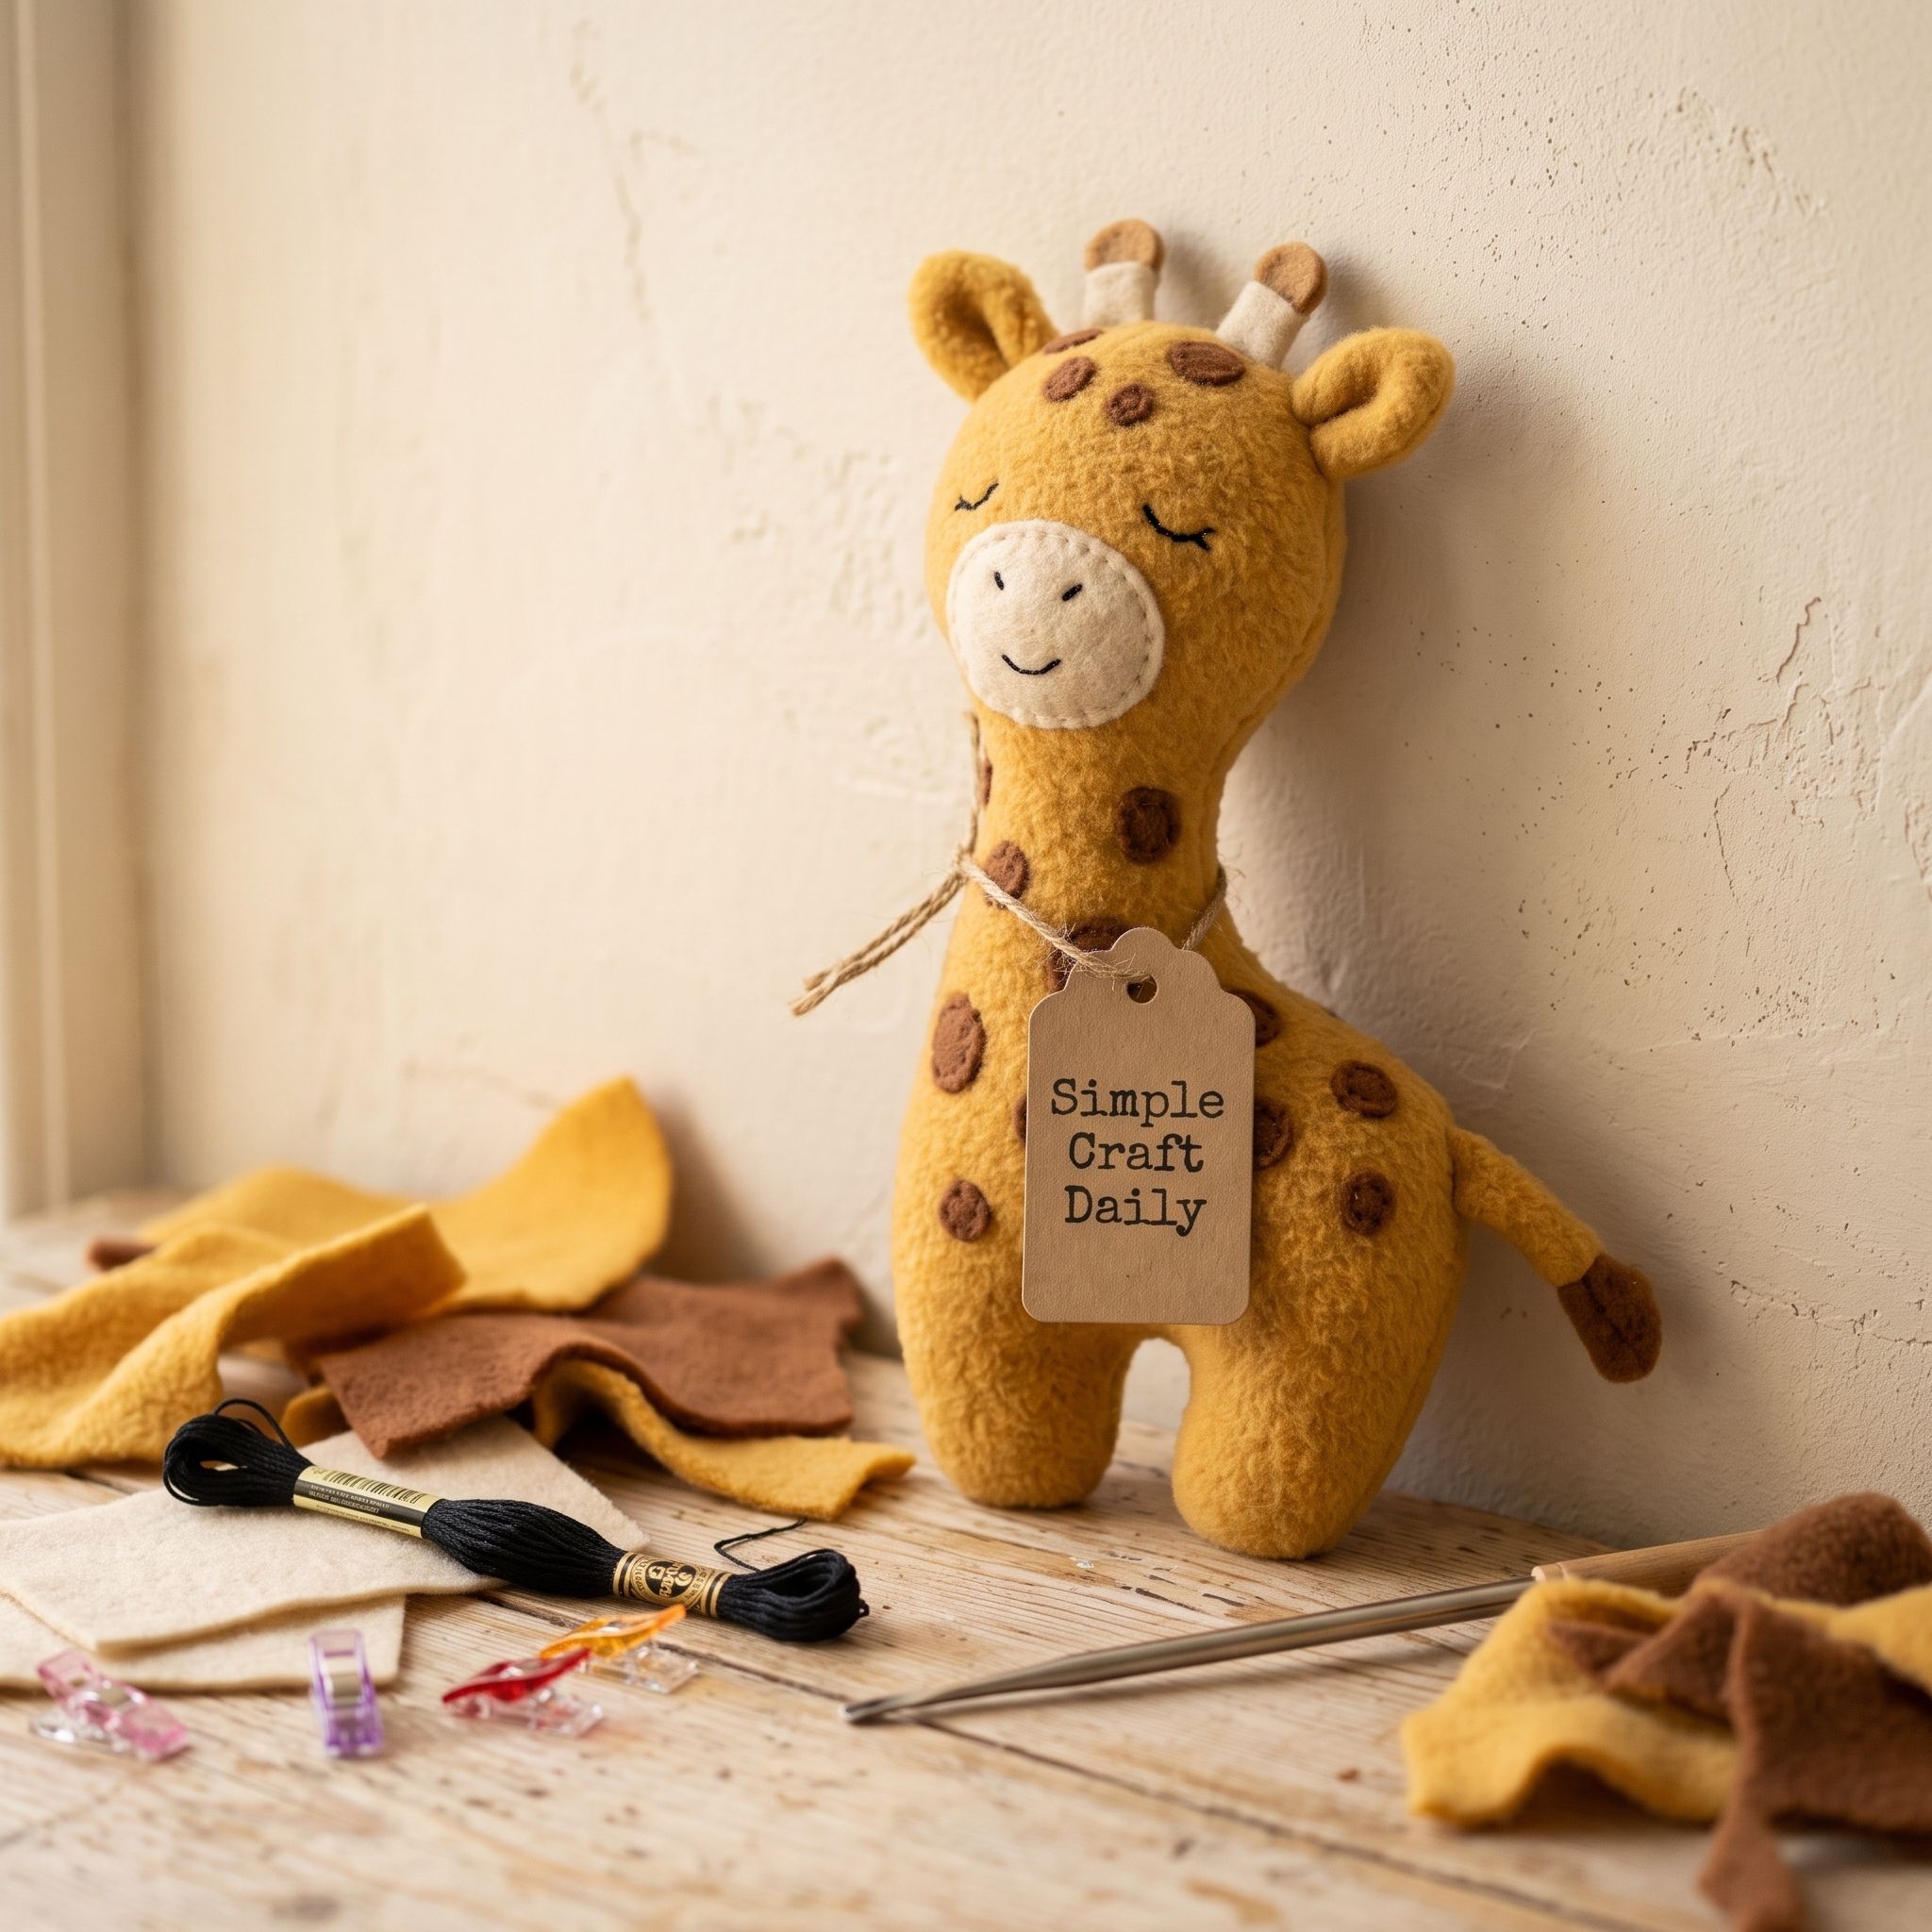
14. Sweet Little Fleece Giraffe
Supplies Needed: Golden-yellow and brown anti-pill fleece, cream wool-blend felt, black embroidery floss, polyester thread, polyester fiberfill, hand-sewing needles and fabric clips, washable fabric marking pens or tailor’s chalk, fabric scissors, long-handled polyester fiberfill stuffing tool.
Mark two golden-yellow fleece body panels and a head piece (cut twice for two layers) for a finished height of 7 inches. Cut several small brown fleece spots and a cream muzzle shape. Stitch the spots onto the outer sides of the body panels before sewing the main pieces together.
Sew the body panels together and the two head layers together, each leaving a 1 1/2-inch opening, turn them, and add enough fiberfill to create a soft, squeezable shape. Cut tiny ears and small horns, then stitch them securely to the top of the head. Close all openings with clean ladder stitches. Finally, use polyester thread to attach the head to the body, and embroider sleepy black eyes and a gentle smile on the face.
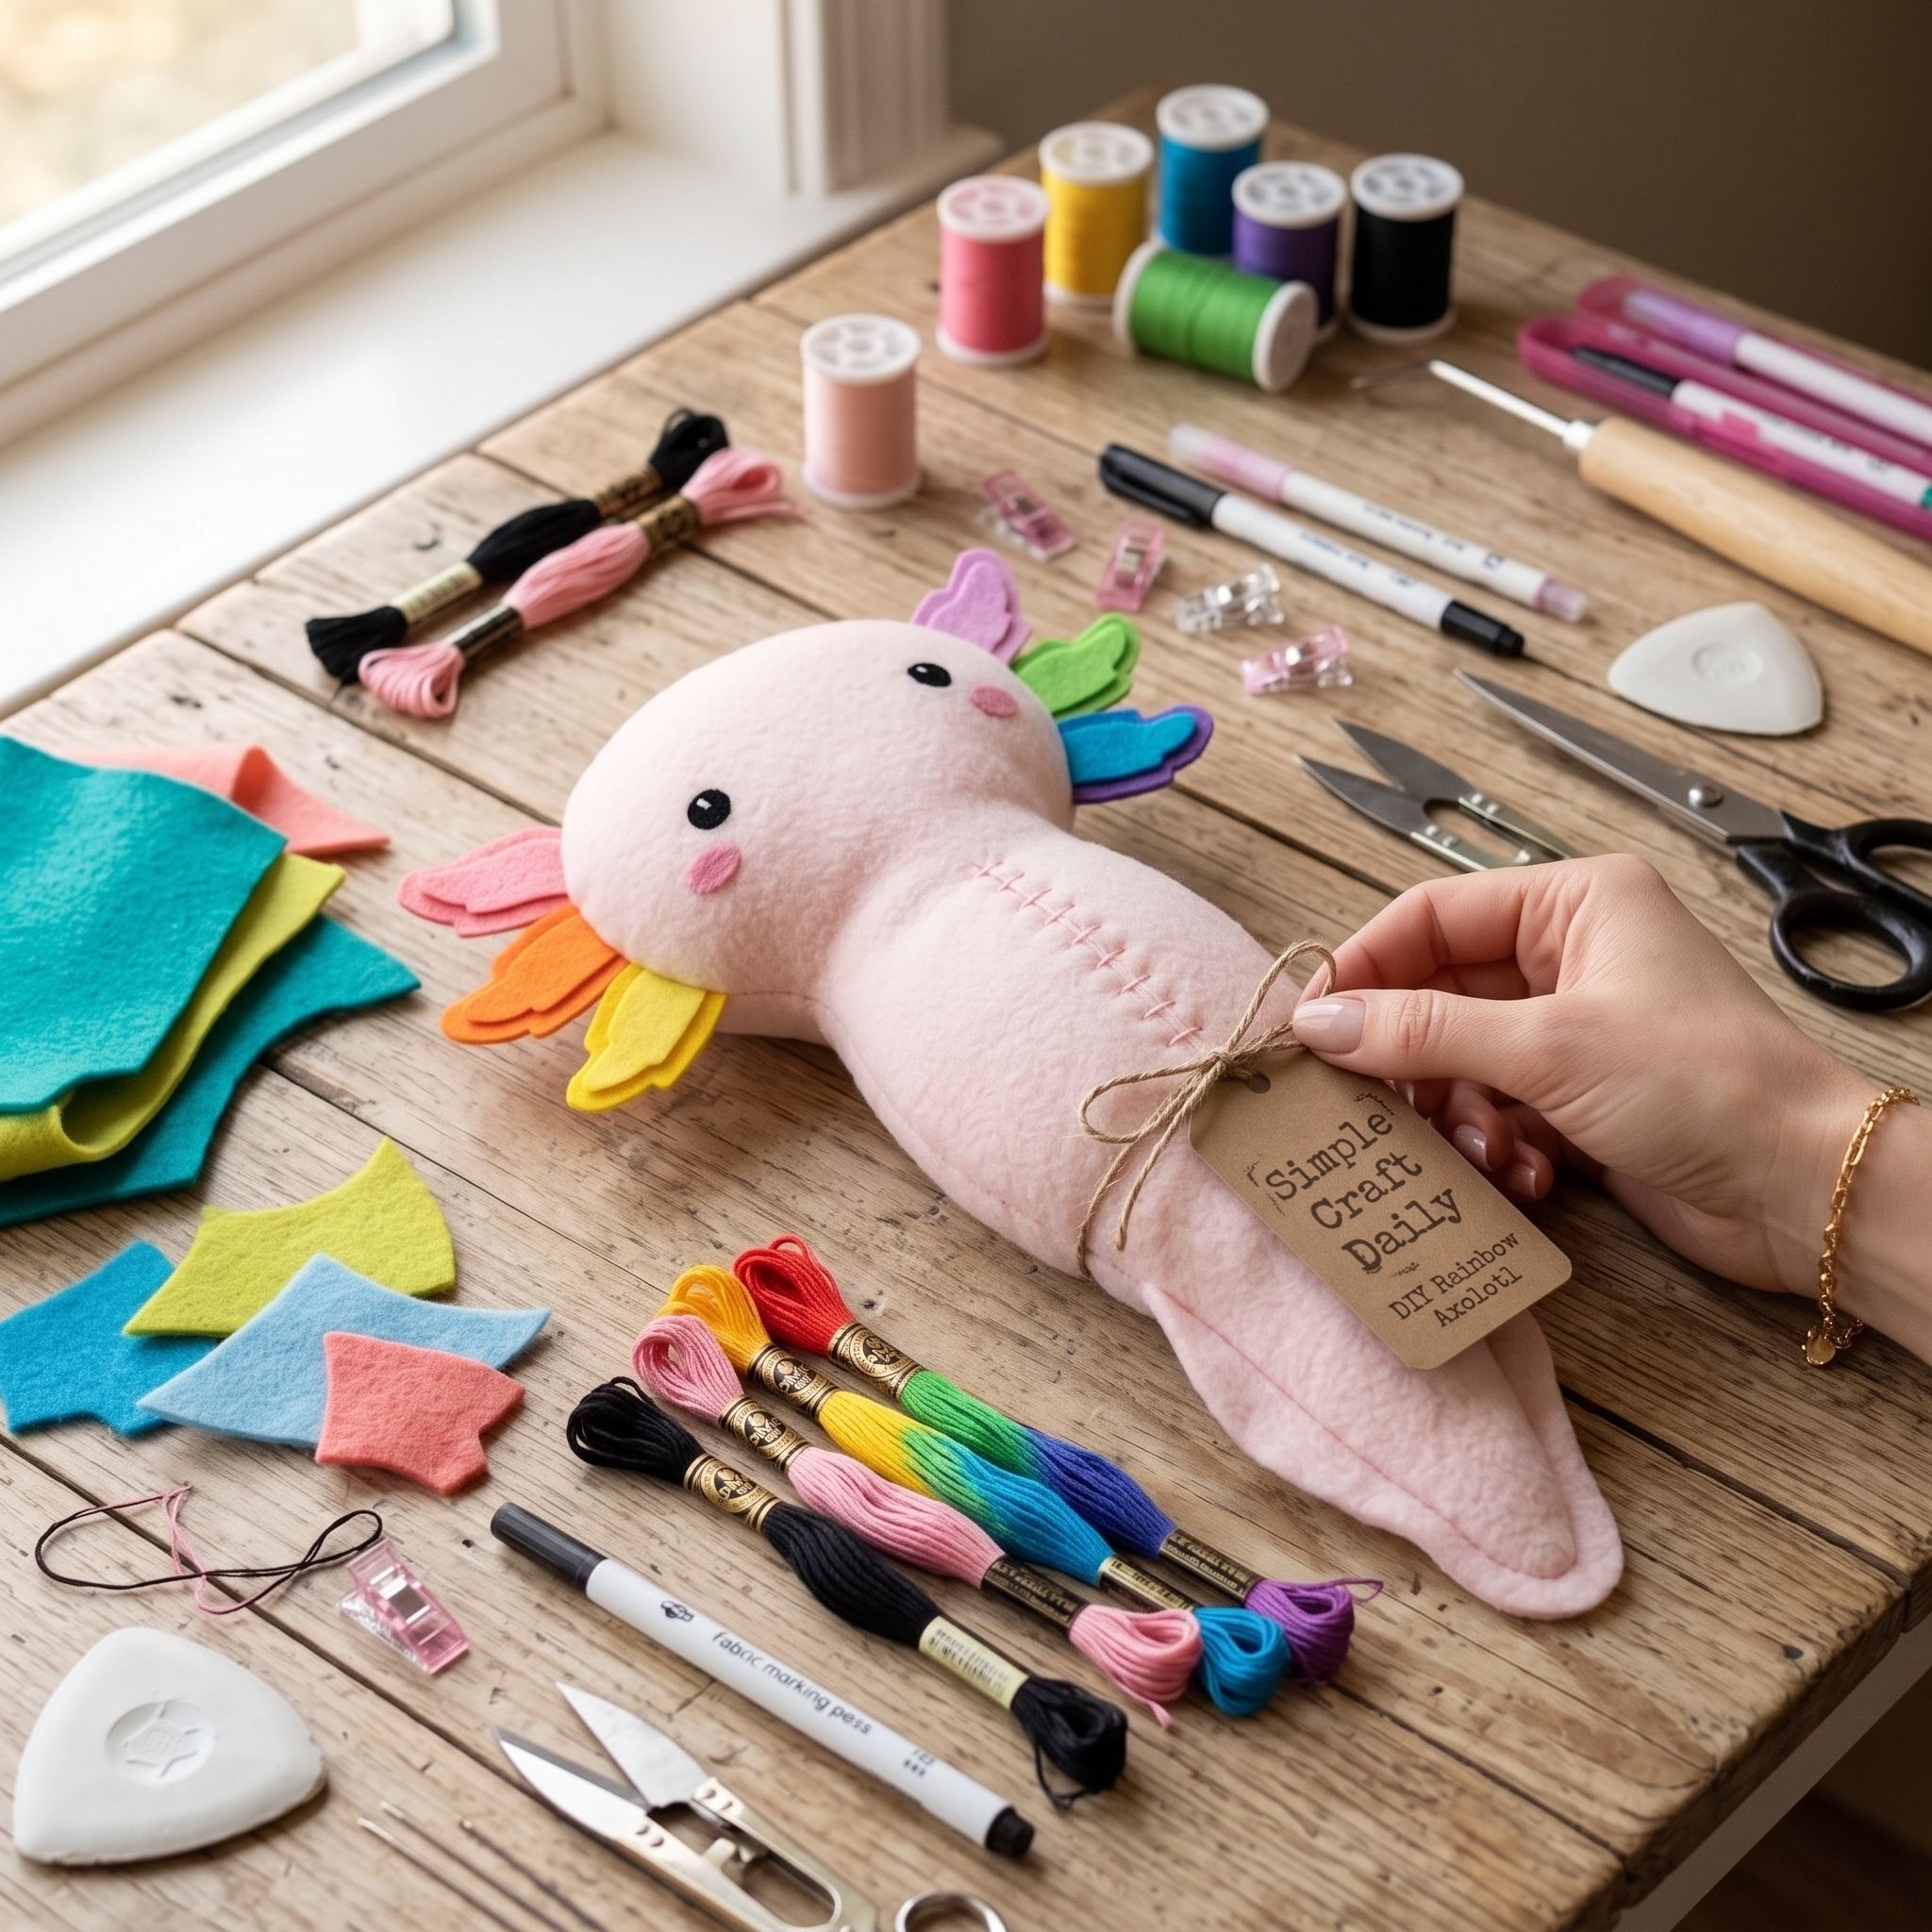
15. DIY Handmade Stuffed Animals: Rainbow Axolotl
Supplies Needed: Pale pink anti-pill fleece, coral wool-blend felt, black and pink embroidery floss, polyester thread, polyester fiberfill, hand-sewing needles and fabric clips, washable fabric marking pens or tailor’s chalk, fabric scissors, long-handled polyester fiberfill stuffing tool.
Mark two pale pink fleece axolotl profiles measuring 9 inches long, including a broad head and tapering tail. Cut six coral felt gills, each 1 inch long, with softly pointed outer ends. Arrange three gills along each side of the head, keeping their raw ends inside the 1/4-inch seam allowance and their finished ends facing inward.
Clip the body layers together and sew around the outline, leaving a 2-inch opening along the belly. Turn the axolotl slowly, then use the stuffing tool to shape the tail before filling the head and body with small tufts. Stop when the plushie feels resilient but still squeezable. Ladder-stitch the opening closed, embroider black eyes and pink cheeks, and inspect every seam and floss knot before gifting.
Finishing DIY Handmade Stuffed Animals So They Last
Supplies Needed: All-purpose polyester sewing thread, six-strand cotton embroidery floss, hand-sewing needle assortment and fabric clips, fabric scissors.
Inspect each finished plushie under bright light before wrapping it as a gift. Check the ladder-stitch closure for gaps, trim thread tails close to the knot, and gently press each seam between your fingers to find weak spots. If a seam opens, re-stitch the area with short back stitches using polyester thread before the toy is handled.
Next, look at the stuffing from every angle. Move fiberfill away from a lumpy shoulder or thin tail by working it through the fabric with clean fingers. Spot-clean by default with a lightly damp cloth, because washing performance depends on the fabric, filling, and security of stitched details. For another texture-led project, explore our tufting art pattern ideas.
DIY Handmade Stuffed Animals FAQ
These quick answers solve the most common fabric, stuffing, and safety questions that come up while sewing DIY Handmade Stuffed Animals.
What fabric is easiest for DIY Handmade Stuffed Animals?
Anti-pill fleece and quilting cotton are the most forgiving choices for beginners. Fleece has a soft finish and hides minor seam wobble, while quilting cotton stays stable and makes it easier to hold a 1/4-inch seam allowance. Test your stitch spacing on a scrap first, especially when sewing tight curves.
Slippery satin, very stretchy knits, and long-pile faux fur require more control. They can shift under the needle, distort around curves, or trap fibers inside the seam, so save them for later projects.
How firmly should I stuff a plushie?
Use small fiberfill tufts and shape narrow parts first. A moderately stuffed plushie should spring back after a gentle squeeze while the seam lines remain relaxed. Fill tails, ears, arms, and points before the larger body area.
Stop when the fabric begins to feel tight across a seam. Overstuffing can make the toy stiff, pull stitches apart, and create a lumpy outline that is difficult to correct after closure.
Are DIY Handmade Stuffed Animals safe for young children?
For child-handled DIY Handmade Stuffed Animals, use securely embroidered eyes, noses, and mouths. Plastic safety eyes, locking washers, buttons, beads, and detachable findings can loosen through chewing, heavy pulling, seam failure, or repeated washing, which creates a choking and swallowing hazard.
If you sell handmade plush toys, follow the toy-safety regulations that apply where you live. Keep records of materials, construction methods, and age recommendations for every design you offer.
Can I sew these easy plushie sewing patterns by hand?
Yes. Use short back stitches for construction seams and ladder stitches to close turning gaps. Keep hand stitches about 1/8 inch apart around curves so the seam follows the outline smoothly and holds the stuffing inside.
A sewing machine speeds up repeated projects, but it is not required. If hand sewing makes your fingers sore, use a thimble and take breaks before your stitch tension becomes uneven.
Quick Reference: All Supplies at a Glance
For your convenience, here is a quick summary of all materials and tools used in this tutorial:
✨ Consumable Raw Materials
- Quilting Cotton Fabric Fat Quarter Bundle | Check Quilting Cotton Fabric Fat Quarter Bundle on Amazon
- Anti-Pill Plush Fleece Fabric | Check Price on Amazon
- Wool Blend Craft Felt Sheets | View Wool Blend Craft Felt Sheets on Amazon
- Premium Polyester Fiberfill Stuffing | Find Premium Polyester Fiberfill Stuffing on Amazon
- All-Purpose Polyester Sewing Thread | See Price on Amazon
- Six-Strand Cotton Embroidery Floss | See Six-Strand Cotton Embroidery Floss on Amazon
🧰 Core Crafting Tools & Equipment
- Washable Fabric Marking Pens | Check Washable Fabric Marking Pens on Amazon
- Tailor’s Chalk | Check Tailor’s Chalk on Amazon
- Fabric Scissors | Check Fabric Scissors on Amazon
- Hand-Sewing Needles | Check Hand-Sewing Needles on Amazon
- Fabric Clips | Check Fabric Clips on Amazon
- Long-Handled Polyester Fiberfill Stuffing Tool | Check Long-Handled Polyester Fiberfill Stuffing Tool on Amazon
Important Crafting Safety Notes
Crafting is a rewarding creative activity, but maintaining a safe workshop environment is essential for yourself, your family, and your pets. Please review these vital safety precautions before starting:
• Personal Protective Equipment (PPE) & Safe Handling: Always wear safety glasses or protective eyewear when cutting metal wire, clipping jump rings, trimming hard findings, or using power tools to prevent flying shards. Use heat-resistant work mats and exercise caution around high-temperature glue guns, irons, or heating tools to avoid burns. Wear disposable nitrile gloves and a particle dust mask when sanding wood or working with clays, resins, and solvent-based sealants to protect your skin and lungs.
• Room Ventilation & Fume Safety: Always craft in a well-ventilated space with open windows, cross-ventilation, or active exhaust whenever using solvent-based adhesives, instant bonders, aerosol sprays, epoxy resins, or heat-curing materials. Never inhale chemical fumes directly, and allow finished pieces to off-gas and cure completely in an airy area away from everyday living spaces.
• Child & Pet Safety (Choking & Swallowing Prevention): Small craft components—including safety eyes, split rings, clasps, jump rings, beads, bells, small magnets, unbaked clay scraps, and loose polyester fiberfill—present severe choking, intestinal obstruction, and ingestion hazards for babies, toddlers, and pets. Keep all unattached hardware, yarn cutoffs, and stuffing strictly out of reach. For handmade gifts intended for infants or young children, omit plastic washer eyes and detachable findings entirely in favor of securely stitched, double-knotted embroidered details.
• Sharp Tool Storage & Clean Work Area: Store sharp tools—such as rotary cutters, craft knives, bent-tip yarn needles, snips, scissors, and jewelry pliers—in secure, latching cases or high cabinets immediately after use. Thoroughly inspect, sweep, or vacuum your craft area and floor after finishing to ensure no dropped needles, pins, wire clippings, or small findings remain where curious pets or bare feet could step on or swallow them.
• Certified, Quality & Non-Toxic Supplies: Always choose verified non-toxic craft supplies (such as ACMI AP-certified paints and adhesives, lead-free and nickel-free jewelry findings, and skin-safe materials). Follow manufacturer label guidelines for curing durations, safe operating temperatures, and proper product disposal. Never use food preparation utensils or kitchen cookware for craft chemicals.
For more detailed guidance on safe crafting practices, liability disclosures, and website usage, please review our Terms and Conditions.
“Which of these DIY Handmade Stuffed Animals That Look Charming ideas are you excited to try first, or do you have a creative tip of your own to share? Drop a comment below—I’d love to hear your thoughts and see what you create!”


