

Dusty castings do not earn premium handmade prices. These cement crafts to sell use clean molds, measured batches, smooth finishing, and protective details that make a market table feel ready for retail.
Each design is small enough for a focused production session, then easy to photograph, package, and price with your labor included. If you enjoyed our DIY cement crafts for home decor, this collection applies the same casting skills to practical small-batch inventory.
Affiliate Disclosure: This post contains affiliate links. As an Amazon Associate, I earn from qualifying purchases. If you buy through these links, I may earn a commission at no additional cost to you.
Key Facts:
- Total production time: About 7 to 10 days, including 24 to 48 hours before demolding, a typical 5 to 7 days of curing for small castings, and 24 hours of sealer cure.
- Difficulty: Beginner to intermediate.
- Yield: 10 repeatable cement product designs for small-batch inventory.
- Core technique: Weighed cement-and-sand casting, vibration, wet sanding, sealing, and felt finishing.
- Best production method: Make 1 approved sample, then cast matching batches of 4 to 12 pieces.
Essential Materials for Cement Crafts to Sell
A reliable supply system keeps your margins visible and your repeat batches consistent. First, cast one sample, weigh every ingredient, record the mold yield, and log the actual finishing minutes before making inventory for sale.
| Supply | Spec / Size | Used For |
|---|---|---|
| White Portland cement | Fine white powder | Primary casting binder |
| Fine silica sand | Washed, fine grade | Smooth decorative mix |
| Concrete pigment | Powder colorants | Coordinated collections |
| Digital gram scale | 0.1 g resolution | Repeatable batch logs |
| Wet/dry sandpaper | 400- and 800-grit sheets | Wet finishing cured castings |
| Water-based sealer | Matte concrete formula | Stain resistance and finish |
🧱 Cement Crafts to Sell Casting Materials
- White Portland Cement — Produces a clean pale base that accepts pigment clearly in small decorative castings | [Check Price on Amazon]
- Fine Silica Sand — Fine washed sand creates dense, smooth cement goods without coarse aggregate marks | [See Price on Amazon]
- Concrete Acrylic Fortifier — Replaces part of the mix water according to the label and supports tougher thin edges | [Check Concrete Acrylic Fortifier on Amazon]
- Concrete Pigment Powder Set — Colors the cement body for coordinated product collections | [View Concrete Pigment Powder Set on Amazon]
- Clean Mixing Water — Supplies the measured liquid needed for workable small casting batches
🎨 Color and Finish
- Water-Based Concrete Sealer — Helps reduce staining after a casting is fully cured, dry, sanded, and dust-free | [Find Water-Based Concrete Sealer on Amazon]
- Self-Adhesive Felt Pads — Protect customer furniture and give trays, holders, and bookends a finished underside | [Check Felt Pads on Amazon]
🧰 Measuring, Molds, and Cement Craft Hardware
- Silicone Cement Mold Set — Flexible mold walls release cured pieces without forcing fragile rims or corners | [View Silicone Cement Mold Set on Amazon]
- Digital Gram Scale — Weight-based batching makes it possible to repeat a profitable recipe and calculate unit cost | [See Digital Gram Scale on Amazon]
- Silicone Mixing Cups and Stir Sticks — Reusable cups and sticks keep dry blending and liquid additions controlled | [View Mixing Cups on Amazon]
- Wet Dry Sandpaper Sheets — Use 400- and 800-grit sheets with water to smooth seams while reducing airborne dust | [Find Wet Dry Sandpaper on Amazon]
- Removable Nursery Pot and Cup Liners — Create clean planter and desk-cup interiors that customers can remove for cleanup | [Check Liners on Amazon]
- 3 mm Oiled Metal Rods — Form clean incense-stick openings while the cement mixture remains workable | [View Metal Rods on Amazon]
- Standard Metal-Cup LED Tea Lights — Test molded recesses and offer a lower-heat styling option | [Find LED Tea Lights on Amazon]
- Threaded Inserts, Rated Hooks, and Test Fasteners — Provide mechanical hardware for lightweight wall-hook plaque testing | [Check Hook Hardware on Amazon]
🛡 Personal Protection and Cleanup
- Safety Glasses — Shield eyes from dry powder, wet-sanding splash, metal fragments, and rotary-tool debris.
- Disposable Nitrile Gloves — Protect skin from wet cement, pigments, acrylic fortifier, and sealer.
- Fine-Dust Respirator — Use a properly fitted particulate respirator when handling dry cement, silica sand, or cured sanding dust.
⚙ Studio Upgrades
- Cement Craft Starter Kit — A contained option for testing molds and accessories before expanding a production setup | [Check Cement Craft Starter Kit on Amazon]
- Heavy Duty Concrete Vibrating Table — Releases trapped air from frequent production batches for fewer pinholes and more consistent surfaces | [See Price on Amazon]
- Variable Speed Rotary Tool Kit — Refines fully cured edges and small casting flaws with controlled sanding attachments | [View Rotary Tool Kit on Amazon]
- Daylight LED Magnifying Craft Lamp — Makes pinholes, sanding scratches, and missed sealer coverage easier to inspect before packaging | [Find Craft Lamp on Amazon]
Batch Formula for Cement Crafts to Sell
Supplies Needed: White Portland Cement, Fine Silica Sand, Concrete Acrylic Fortifier, Clean Mixing Water, Digital Gram Scale, Silicone Mixing Cups and Stir Sticks, Heavy Duty Concrete Vibrating Table, Cement Craft Starter Kit, Variable Speed Rotary Tool Kit, Daylight LED Magnifying Craft Lamp.
- Place a silicone mixing cup on the digital gram scale and tare it to zero.
- Weigh 200 g of White Portland Cement and 100 g of Fine Silica Sand into the cup.
- Stir the dry blend for 60 seconds with a silicone stir stick.
- Mix 35 ml of Concrete Acrylic Fortifier with 35 ml of Clean Mixing Water, then add it gradually until the batch resembles thick yogurt.
- Pour into a test cavity, vibrate for 20 seconds, inspect the cured sample under the craft lamp, and record the yield before using the rotary tool on any fully cured rough edge.
This 2:1 dry formula starts with about 370 g of ingredients before mixing losses and residue left in the cup. Depending on residue left in the mixing cup and mold absorption, it may yield about 350 g of usable wet mix, enough for three shallow 3-inch coasters at roughly 115 g each or one small shallow tray. First, change only one variable at a time when testing pigment, liquid, or vibration. A mix that pours like thin soup may release bubbles quickly; however, it can leave weak edges and a porous surface.
Next, tap filled molds on a protected table or run the vibrating table in 10-second bursts. Cover molds loosely and demold only when the cement is firm. Follow both the cement and sealer manufacturers’ schedules; for small castings, that typically means waiting 5 to 7 days before wet sanding or sealing, although the correct cure window varies by cement, additive, casting thickness, humidity, and sealer. Portland cement continues gaining strength well beyond that typical window. For cement crafts to sell, track direct materials, packaging, booth or platform fees, paid labor, and your planned profit margin.
Search language matters alongside batch notes. Research profitable Etsy keywords that describe each shape, use, and style, then use Etsy shop growth tools to organize listing research. Subsequently, validate final prices against local material costs, shipping weight, protective packaging, and comparable handmade listings.
10 Cement Crafts to Sell in Small Batches
Make one approved sample of every design before pouring inventory. Record dry mix weight, liquid amount, cure time, sanding minutes, sealer coats, felt-pad count, and packed shipping weight; then make matching pieces while the formula is fresh in your notebook.
1. Terrazzo Catchall Trays for Cement Crafts to Sell
Supplies Needed: White Portland Cement, Fine Silica Sand, Concrete Pigment Powder Set, Clean Mixing Water, Silicone Cement Mold Set, Water-Based Concrete Sealer, Self-Adhesive Felt Pads, Digital Gram Scale, Silicone Mixing Cups and Stir Sticks.
- Weigh 160 g of White Portland Cement, 80 g of Fine Silica Sand, 55 ml of Clean Mixing Water, and 3 g of Concrete Pigment Powder Set into silicone mixing cups.
- For the 30 g contrasting chip batch, weigh 20 g of White Portland Cement, 10 g of Fine Silica Sand, 1 g of Concrete Pigment Powder Set, and 7 ml of Clean Mixing Water; this keeps the same 2:1 cement-to-sand base while using pigment at 5% of cement weight.
- Let the contrasting batch firm for 30 minutes, then break it into 3 mm to 6 mm terrazzo chips.
- Fill one oval silicone mold cavity with the base mix, scatter 12 g of chips, and tap the mold for 60 seconds.
- Demold the tray after 24 hours and cure it for 5 additional days.
- Wet-sand the cured tray, apply 2 thin sealer coats 2 hours apart, cure for 24 hours, and attach 4 felt pads.
Terrazzo trays make strong cement crafts to sell because one mold can produce several colorways without changing the product shape. Press pigment chips just below the surface so they do not snag during sanding. After the sealer cures, use the tray for jewelry, keys, or desk accessories only; do not describe it as food-contact safe.
Price each tray from its logged unit cost, finishing time, protective wrap, selling fees, and planned profit. In addition, photograph the underside because four evenly placed felt pads show careful finishing.

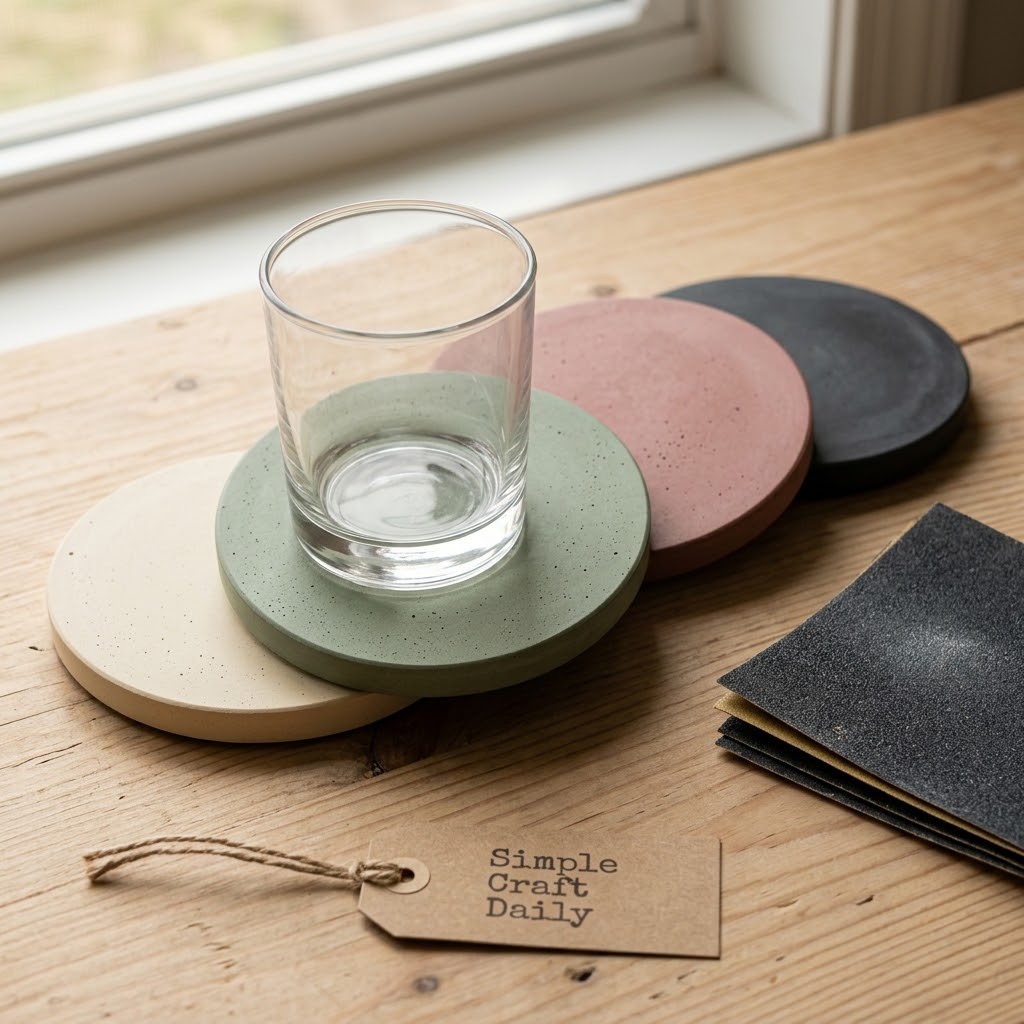
2. Minimal Round Coaster Sets for Cement Crafts to Sell
Supplies Needed: White Portland Cement, Fine Silica Sand, Concrete Pigment Powder Set, Clean Mixing Water, Silicone Cement Mold Set, Wet Dry Sandpaper Sheets, Water-Based Concrete Sealer, Self-Adhesive Felt Pads, Digital Gram Scale, Silicone Mixing Cups and Stir Sticks.
- Prepare 4 round cavities in the silicone cement mold set on a level surface.
- Weigh 240 g of White Portland Cement, 120 g of Fine Silica Sand, 6 g of Concrete Pigment Powder Set, and 105 ml of Clean Mixing Water into a silicone mixing cup.
- Stir the entire batch thoroughly, scraping the cup sides and bottom for 60 seconds so the pigment tone remains uniform across all 4 coasters.
- Divide the single batch evenly among the 4 shallow 3-inch coaster cavities, using about 115 g of wet mixture per cavity, then tap the mold for 60 seconds and cover it loosely.
- Demold after 24 hours and cure the coasters for 5 additional days.
- Wet-sand both faces with 400- then 800-grit sheets, seal both faces, cure for 24 hours, and apply 4 felt pads per coaster.
Color-matched coaster sets improve average order value because buyers receive a complete table-ready grouping. This approximately 470 g batch is sized for all four 115 g cavities, so every coaster comes from the same pigment blend. Then test one fully cured, sealed sample beneath a cold glass for 4 hours before listing the set.
For cement crafts to sell at markets, stack each set with a paper band that states the quantity, color name, and care note. Consequently, customers can understand the set without unwrapping every piece.
3. Ribbed Planters With Drainage Inserts
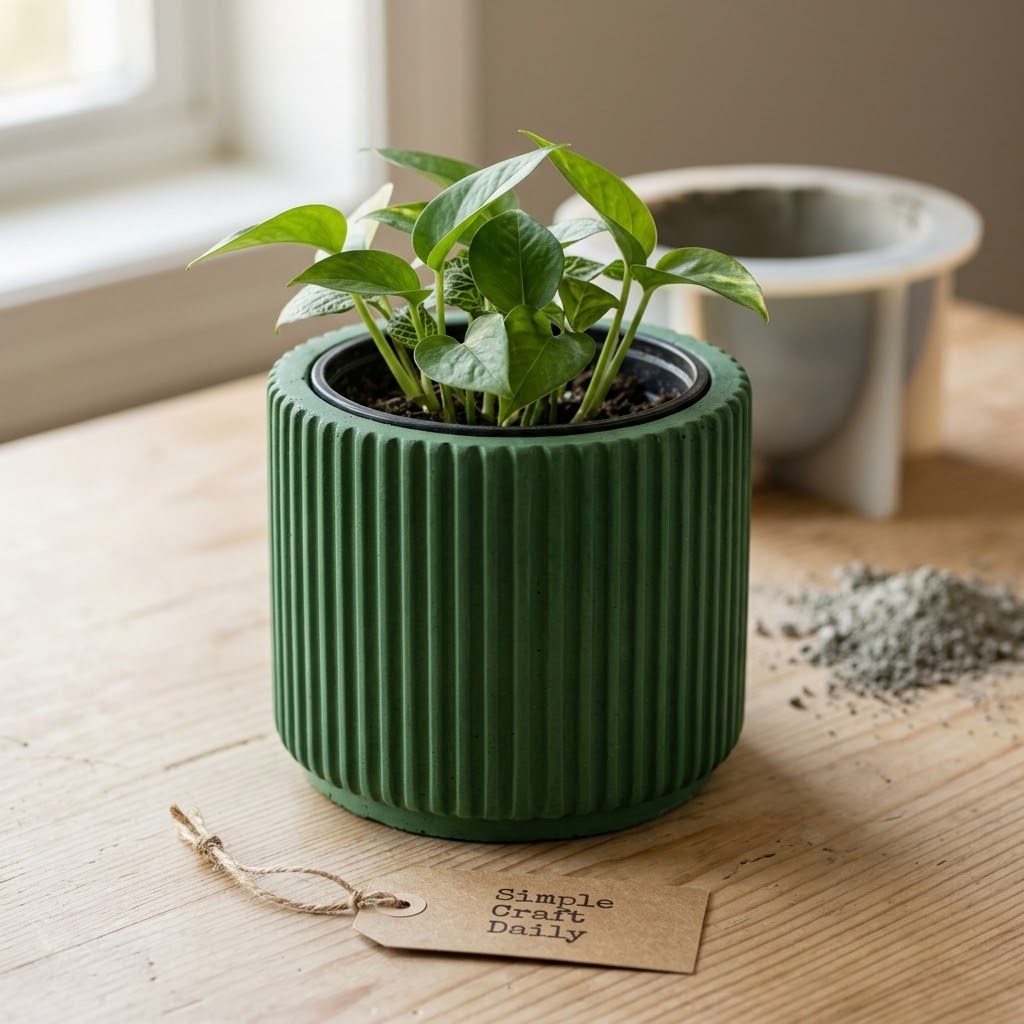
Supplies Needed: White Portland Cement, Fine Silica Sand, Concrete Acrylic Fortifier, Clean Mixing Water, Silicone Cement Mold Set, Wet Dry Sandpaper Sheets, Water-Based Concrete Sealer, Digital Gram Scale, Silicone Mixing Cups and Stir Sticks, Removable Nursery Pot and Cup Liners.
- Choose one nested planter mold and center a 3-inch removable nursery pot liner inside the outer cavity.
- Weigh 300 g of White Portland Cement and 150 g of Fine Silica Sand into a silicone mixing cup.
- Mix 55 ml of Concrete Acrylic Fortifier with 55 ml of Clean Mixing Water, then stir it into the dry blend.
- Pack the mixture around the liner in an even 3/8-inch wall, tap for 60 seconds, and demold after 24 hours.
- Cure for 6 additional days, wet-sand the rim, seal the exterior with 2 coats, cure for 24 hours, and replace the liner.
Ribbed planters bring texture to a market table, while the removable liner makes plant changes and cleanup simpler. Follow the mold maker’s directions if a release agent is required; many flexible silicone molds do not need one. A sealed cement vessel still needs testing before you describe it as water-resistant or watertight.
Calculate shipping before offering this design online. The planter, liner, corner protection, box size, and breakage allowance all belong in the final price for these cement crafts to sell.
4. Cement Crafts to Sell as Incense Holder Gift Sets
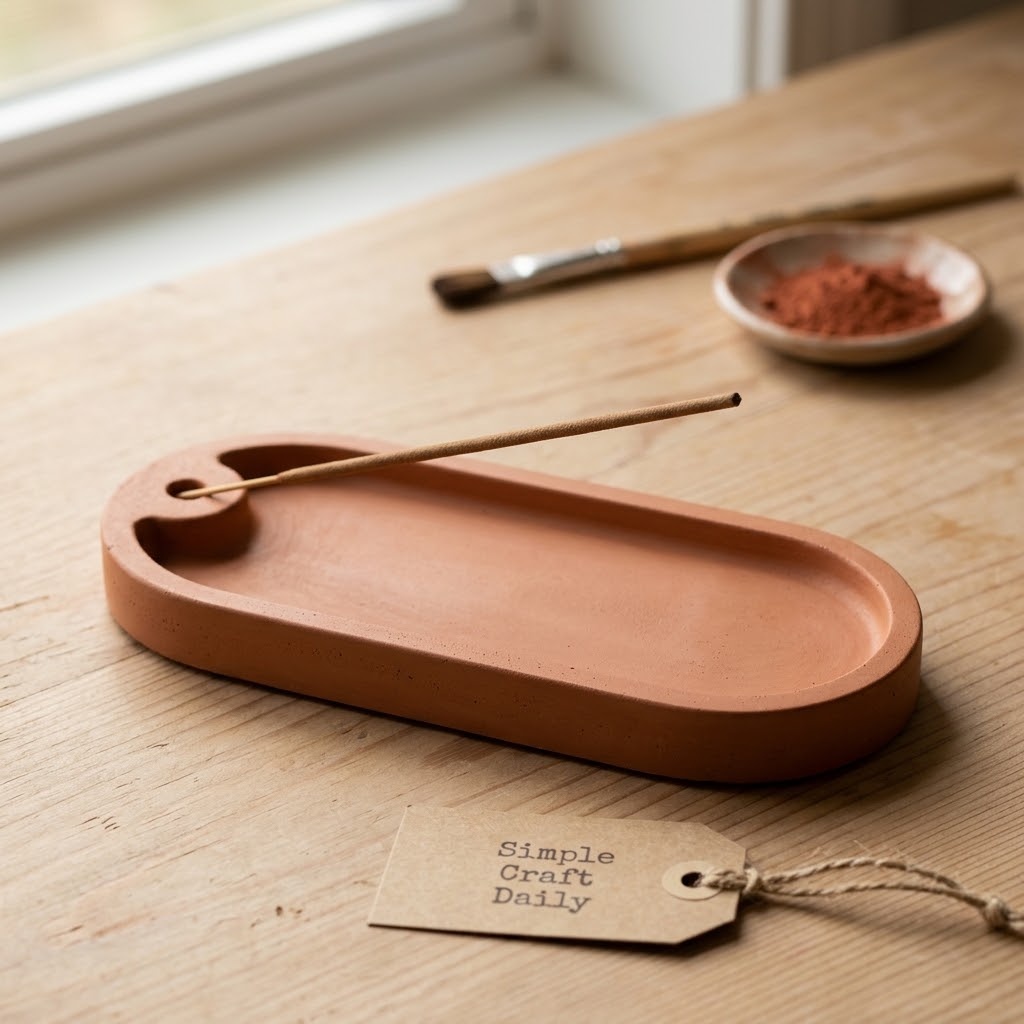
Supplies Needed: White Portland Cement, Fine Silica Sand, Concrete Pigment Powder Set, Clean Mixing Water, Silicone Cement Mold Set, Water-Based Concrete Sealer, Self-Adhesive Felt Pads, Digital Gram Scale, Silicone Mixing Cups and Stir Sticks, 3 mm Oiled Metal Rods.
- Weigh 130 g of White Portland Cement, 65 g of Fine Silica Sand, 3 g of pigment, and 45 ml of Clean Mixing Water.
- Fill one shallow channel cavity in the silicone cement mold set and tap the mold for 45 seconds.
- Insert one lightly oiled 3 mm metal rod 1/2 inch deep while the mix remains workable, then hold it upright for 2 minutes.
- Demold after 24 hours, remove the rod, and cure the holder for 5 additional days.
- Apply 2 sealer coats, cure for 24 hours, and add 4 felt pads to the base.
A shallow ash-catching channel gives this small casting a clear purpose at gift markets. Match the rod to the incense-stick diameter so the opening supports the stick without forcing it. Offer several pigment colors together to make choosing a gift easier.
Include a product-card warning that incense must burn only on a heat-resistant surface and never remain unattended. Before packaging, inspect every holder for a flat, stable base.
5. Geometric Tea Light Holders
Supplies Needed: White Portland Cement, Fine Silica Sand, Concrete Pigment Powder Set, Clean Mixing Water, Silicone Cement Mold Set, Wet Dry Sandpaper Sheets, Water-Based Concrete Sealer, Self-Adhesive Felt Pads, Digital Gram Scale, Silicone Mixing Cups and Stir Sticks, Standard Metal-Cup LED Tea Lights.
- Choose 3 geometric cavities with recesses sized for standard metal-cup LED tea lights.
- Weigh 210 g of White Portland Cement, 105 g of Fine Silica Sand, 5 g of pigment, and 90 ml of Clean Mixing Water.
- Fill the 3 cavities evenly, tap for 60 seconds, and cover loosely.
- Demold after 24 hours, cure for 5 additional days, and test each recess with an LED tea light.
- Wet-sand exterior edges, seal exterior surfaces, cure for 24 hours, and apply 4 felt pads per holder.
Make tea light holders in sets of two or three for a more substantial market display. Inspect every recess with the LED tea light before packing, and reject pieces with cracked walls, chipped cups, or unstable bases. Therefore, include inspection minutes in your labor record rather than treating quality control as free time.
These cement crafts to sell work especially well in a limited palette, such as warm white, charcoal, and muted terracotta. For safer everyday styling, LED tea lights avoid an open flame.

6. Sculptural Cement Bookends for Sale
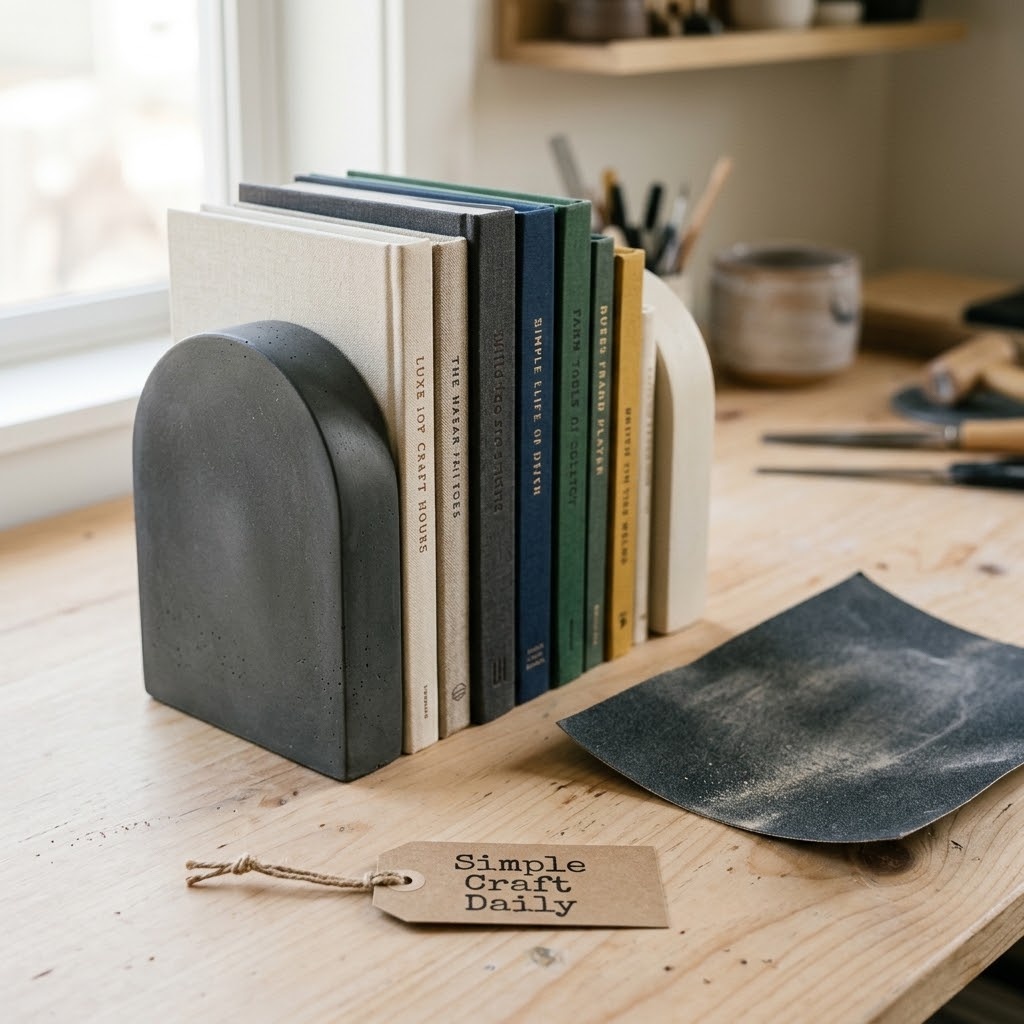
Supplies Needed: White Portland Cement, Fine Silica Sand, Concrete Acrylic Fortifier, Clean Mixing Water, Silicone Cement Mold Set, Wet Dry Sandpaper Sheets, Water-Based Concrete Sealer, Self-Adhesive Felt Pads, Digital Gram Scale, Silicone Mixing Cups and Stir Sticks, Hardcover Books for Load Testing.
- Select 2 matching wide-based bookend molds from the silicone cement mold set.
- Weigh 700 g of White Portland Cement and 350 g of Fine Silica Sand into silicone mixing cups.
- Mix 125 ml of Concrete Acrylic Fortifier with 125 ml of Clean Mixing Water, then make a stiff pourable batch.
- Pack 650 g of mixture into each mold, tap for 90 seconds, demold after 48 hours, and cure for 7 additional days.
- Wet-sand, seal with 2 coats, cure for 24 hours, add 4 large felt pads per bookend, and test with 10 hardcover books.
Bookends need more mass and a broader footprint than trays or ring cones. A stiff mix helps the casting hold sharp mold geometry, while careful packing reduces voids at the corners. Next, test the finished pair on a shelf before it becomes inventory. This specific schedule requires about 10 days from pour to fully cured sealer, including the 48-hour demold period, 7 additional curing days, and 24-hour sealer cure.
Sell this product as a pair and weigh the fully packed parcel before publishing shipping settings. Padding, box strength, and carrier costs can change margins quickly for heavier cement crafts to sell.
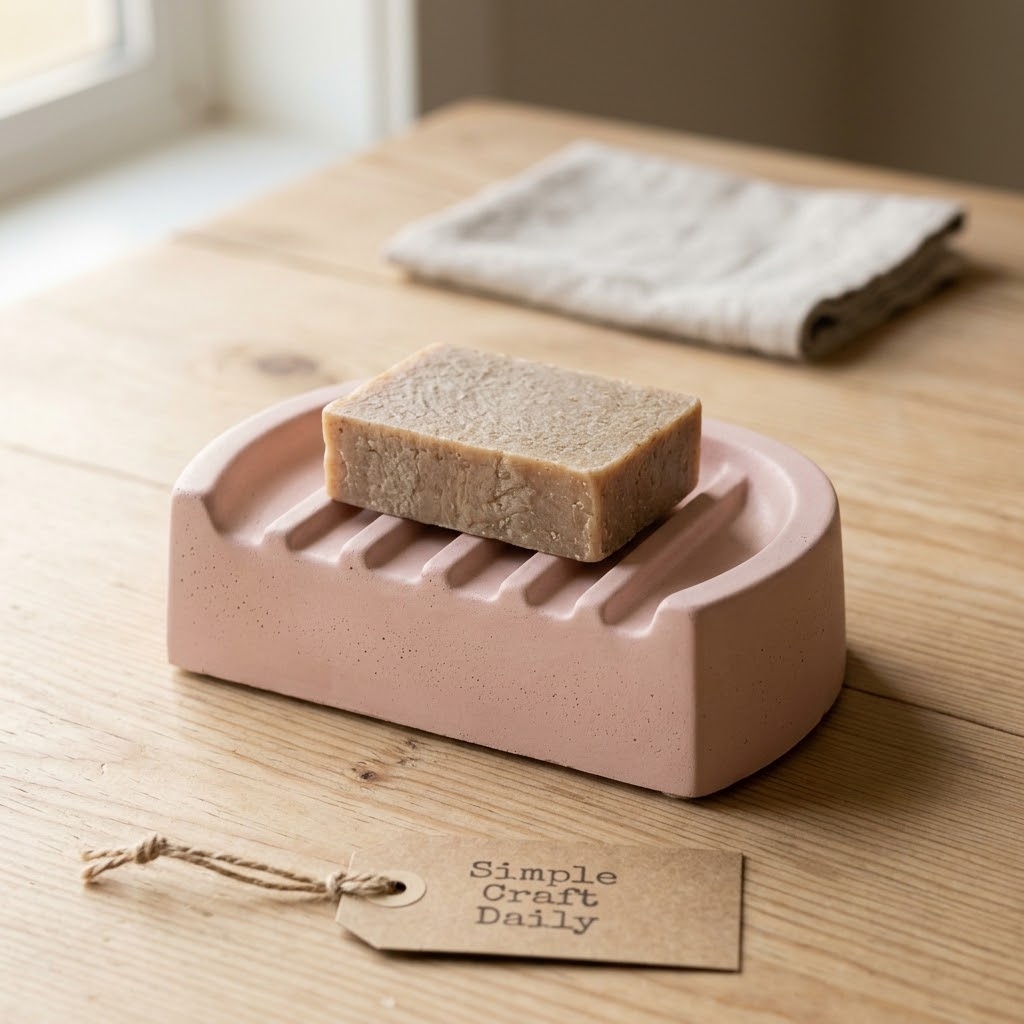
7. Arch-Shaped Soap Dishes for Cement Crafts to Sell
Supplies Needed: White Portland Cement, Fine Silica Sand, Concrete Pigment Powder Set, Clean Mixing Water, Silicone Cement Mold Set, Wet Dry Sandpaper Sheets, Water-Based Concrete Sealer, Self-Adhesive Felt Pads, Digital Gram Scale, Silicone Mixing Cups and Stir Sticks.
- Choose one ribbed soap-dish cavity from the silicone cement mold set.
- Weigh 150 g of White Portland Cement, 75 g of Fine Silica Sand, 3 g of pigment, and 52 ml of Clean Mixing Water.
- Fill the mold and tap for 60 seconds until bubbles rise from the drainage-rib details.
- Demold after 24 hours and cure for 5 additional days.
- Wet-sand the base with 400-grit paper, seal with 2 coats, cure for 24 hours, and apply 4 felt pads.
Raised ribs help a bar soap dry between uses, which makes this a practical bathroom accessory. Describe it as a decorative soap-resting dish and advise customers to wipe away standing water. Photograph it with a dry handmade soap bar, then package the cement piece separately unless both products have been tested together.
For cement crafts to sell in coordinated collections, pair the dish with a matching tray or ring cone in the same pigment blend. Meanwhile, keep the care card simple and specific.
8. Desktop Pen and Brush Cups
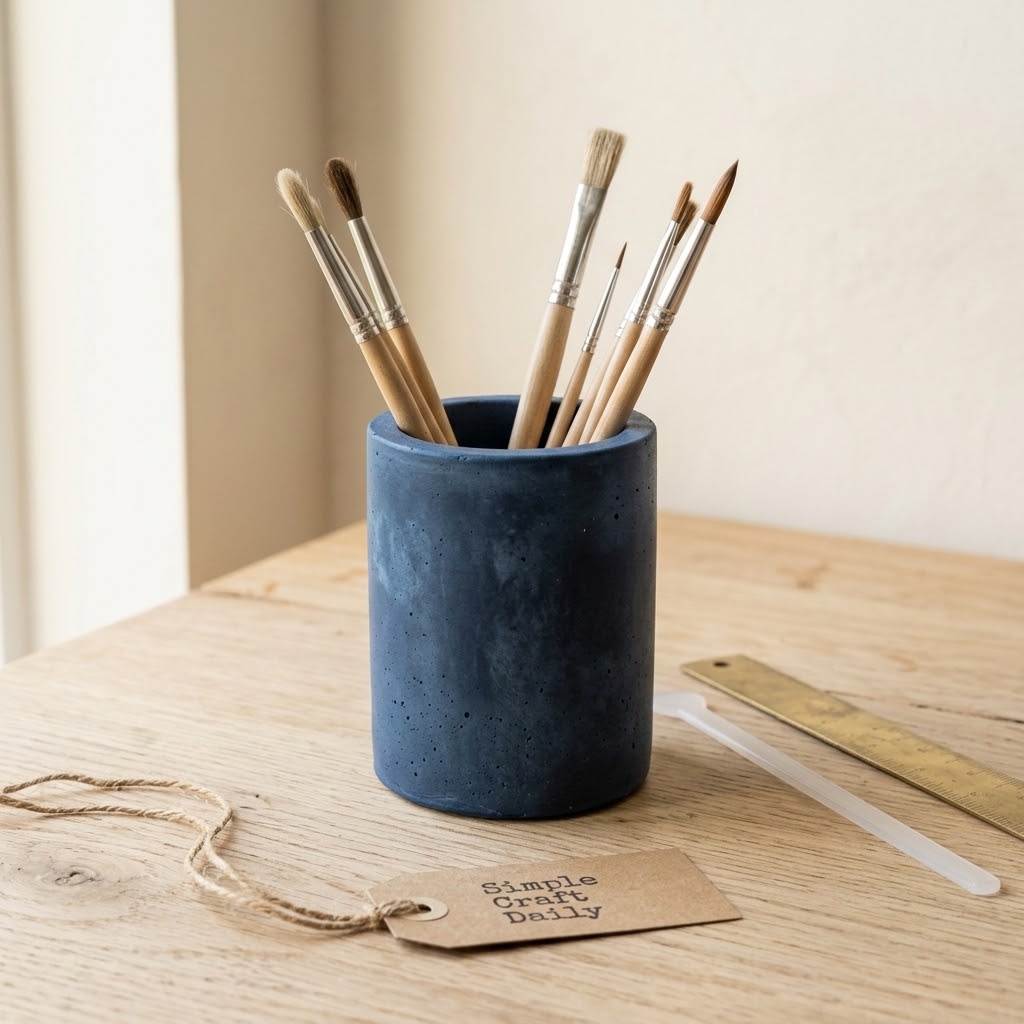
Supplies Needed: White Portland Cement, Fine Silica Sand, Concrete Acrylic Fortifier, Clean Mixing Water, Silicone Cement Mold Set, Wet Dry Sandpaper Sheets, Water-Based Concrete Sealer, Self-Adhesive Felt Pads, Digital Gram Scale, Silicone Mixing Cups and Stir Sticks, Removable Nursery Pot and Cup Liners.
- Prepare one nested cylindrical mold and center a 3-inch removable cup liner as the inner core.
- Weigh 280 g of White Portland Cement and 140 g of Fine Silica Sand into silicone mixing cups.
- Mix 50 ml of Concrete Acrylic Fortifier with 50 ml of Clean Mixing Water, then stir it into the dry blend.
- Pour around the centered liner, tap for 60 seconds, demold after 24 hours, and cure for 6 additional days.
- Wet-sand the rim, seal the exterior with 2 coats, cure for 24 hours, fit the liner, and add 4 felt pads.
A chunky pen or brush cup anchors a desk collection and works well beside trays and coasters. Keep the liner removable so buyers can clean pencil debris or replace it later. Do not market an untested cement cup as watertight.
Bundle matching desk pieces under one color collection for cement crafts to sell. Subsequently, photograph the cup with dry pens and brushes rather than wet paint tools.
9. Cement Crafts to Sell as Ring Cone Trios
Supplies Needed: White Portland Cement, Fine Silica Sand, Concrete Pigment Powder Set, Clean Mixing Water, Silicone Cement Mold Set, Wet Dry Sandpaper Sheets, Water-Based Concrete Sealer, Self-Adhesive Felt Pads, Digital Gram Scale, Silicone Mixing Cups and Stir Sticks.
- Select 3 cone molds with broad, stable bases from the silicone cement mold set.
- Weigh 180 g of White Portland Cement, 90 g of Fine Silica Sand, 4 g of pigment, and 62 ml of Clean Mixing Water.
- Fill each cone in thin layers and tap after each layer to release bubbles.
- Demold after 24 hours and cure for 5 additional days.
- Wet-sand the bases flat, seal with 2 coats, cure for 24 hours, and attach 1 felt circle or pad to each cone.
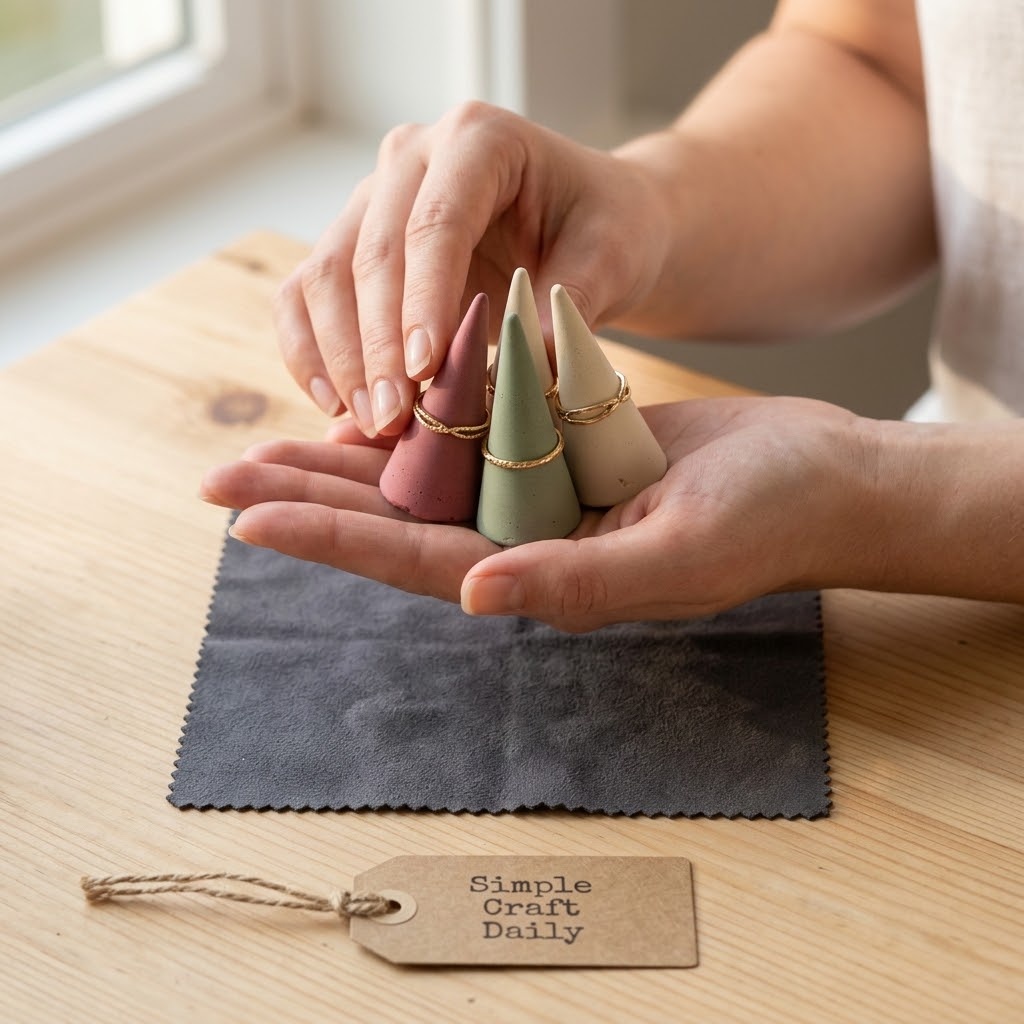
Ring cones are compact additions to a jewelry display and ship more easily than large trays. A broad base reduces tipping when shoppers slide rings on and off at a market table. Sell them in trios with complementary pigments so buyers can organize several ring styles.
Use a satin or matte sealer finish consistently across the collection. Small visual details, especially a level base and clean underside, help cement crafts to sell feel intentional and fully finished.
10. Wall-Mounted Cement Hook Plaques
Supplies Needed: White Portland Cement, Fine Silica Sand, Concrete Acrylic Fortifier, Clean Mixing Water, Silicone Cement Mold Set, Wet Dry Sandpaper Sheets, Water-Based Concrete Sealer, Digital Gram Scale, Silicone Mixing Cups and Stir Sticks, Threaded Inserts, Rated Hooks, and Test Fasteners.
- Place one M4 threaded insert with a 10 mm embedment depth in the plaque cavity, keeping it 1/2 inch from each casting edge.
- Weigh 240 g of White Portland Cement and 120 g of Fine Silica Sand into silicone mixing cups.
- Mix 45 ml of Concrete Acrylic Fortifier with 45 ml of Clean Mixing Water and stir it into the dry blend.
- Pour around the insert, tap for 60 seconds, demold after 48 hours, and cure for 6 additional days.
- Wet-sand, apply 2 sealer coats, cure for 24 hours, and tighten an M4-threaded rated hook that matches the insert thread.
- Mount the plaque with the intended wall fastener and conduct a basic 2 lb sanity check for 24 hours; this check is not a load rating and does not replace testing for the customer’s wall construction, fastener, hook, or intended use.
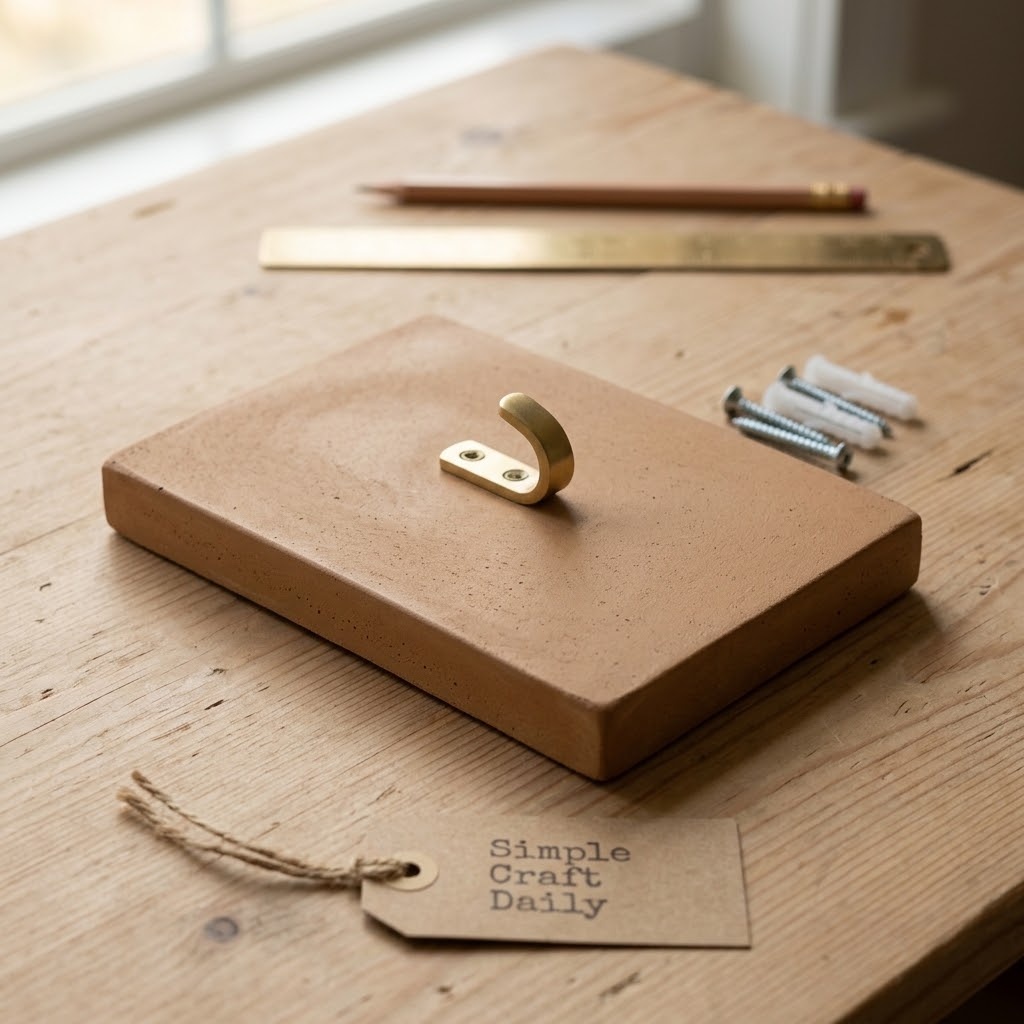
Use a mechanical threaded insert for this design instead of adhesive-only load-bearing hardware. The plaque, matching M4-threaded hook, fastener, wall type, and intended load must be tested together because each part affects holding strength. A cement casting can be sound while an unsuitable wall fastener still fails.
Add a product-card warning that installation hardware and weight limits depend on the customer’s wall construction. These cement crafts to sell need a clearly stated intended use, such as lightweight keys, jewelry, or a small towel. Before offering this plaque for sale, build and mount a prototype at home, then validate the insert size, 10 mm embedment depth, matching hook thread, and intended wall hardware under your own realistic conditions.
Cement Crafts to Sell FAQ
How long should cement crafts to sell cure before sealing?
Follow the cement and sealer manufacturers’ schedules; for small cement castings, a 5 to 7 day wait before wet sanding or sealing is typical. That window is not universal: cement type, acrylic additives, casting thickness, ambient humidity, and the selected sealer can require a different schedule, and the casting must be dry, firm, and free of sanding slurry before sealer touches the surface.
Demolding after 24 to 48 hours only means the shape can usually support itself; it does not mean the cement has developed its full working strength. Therefore, plan production around cure racks instead of trying to pour, finish, and sell the same piece in one day.
What makes cement crafts to sell look professional?
Professional-looking cement crafts have consistent color, smooth bases, clean edges, cured sealer, and neatly placed felt pads. Weighed ingredients, level molds, controlled vibration, and inspection before packaging create repeatable results.
Next, reject pieces with sharp chips, visible cracks, loose hardware, or unstable bases. Photograph each collection in even light and include a concise care card so customers understand the intended use.
How do I price concrete crafts to make and sell?
Price each concrete product by adding direct materials, packaging, selling fees, paid labor, and a profit margin. Use the completed sample to measure the actual batch yield and finishing time before setting the listing price.
Also weigh packed online orders instead of estimating from the casting alone. Heavy products need stronger boxes and more padding, so shipping can change the margin more than pigment or cement costs.
Can I use cement crafts for food or drinking water?
Do not market decorative cement castings for food contact or drinking water unless every material and finish has documentation for that exact use. Standard craft cement, pigments, and sealers are better reserved for non-food decorative goods.
Use clear product language such as “decorative catchall tray,” “soap dish,” or “desk organizer.” For safety background on cement exposure, review the Occupational Safety and Health Administration guidance on crystalline silica before handling dry powders.
Quick Reference: Cement Crafts to Sell Supplies
For your convenience, here is a quick summary of the materials and tools featured in this post:
🧱 Casting Materials
- White Portland Cement | [Check Price on Amazon]
- Fine Silica Sand | [See Price on Amazon]
- Concrete Acrylic Fortifier | [Check Concrete Acrylic Fortifier on Amazon]
- Concrete Pigment Powder Set | [View Concrete Pigment Powder Set on Amazon]
- Clean Mixing Water
🎨 Color and Finish
- Water-Based Concrete Sealer | [Find Water-Based Concrete Sealer on Amazon]
- Self-Adhesive Felt Pads | [Check Felt Pads on Amazon]
🧰 Measuring, Molds, and Hardware
- Silicone Cement Mold Set | [View Silicone Cement Mold Set on Amazon]
- Digital Gram Scale | [See Digital Gram Scale on Amazon]
- Silicone Mixing Cups and Stir Sticks | [View Mixing Cups on Amazon]
- Wet Dry Sandpaper Sheets | [Find Wet Dry Sandpaper on Amazon]
- Removable Nursery Pot and Cup Liners | [Check Liners on Amazon]
- 3 mm Oiled Metal Rods | [View Metal Rods on Amazon]
- Standard Metal-Cup LED Tea Lights | [Find LED Tea Lights on Amazon]
- Threaded Inserts, Rated Hooks, and Test Fasteners | [Check Hook Hardware on Amazon]
🛡 Personal Protection and Cleanup
- Safety Glasses
- Disposable Nitrile Gloves
- Fine-Dust Respirator
⚙ Studio Upgrades
- Cement Craft Starter Kit | [Check Cement Craft Starter Kit on Amazon]
- Heavy Duty Concrete Vibrating Table | [See Price on Amazon]
- Variable Speed Rotary Tool Kit | [View Rotary Tool Kit on Amazon]
- Daylight LED Magnifying Craft Lamp | [Find Craft Lamp on Amazon]
Important Crafting Safety Notes
Cement casting is rewarding work, but dry powder, sanding residue, sealers, and small hardware require a controlled workspace. Review these precautions before mixing a batch or preparing items for sale.
• Personal Protective Equipment (PPE) & Safe Handling: Wear safety glasses when trimming hardware, cutting metal rods, or using a rotary tool. Use disposable nitrile gloves when mixing wet cement, acrylic fortifier, pigments, and sealers. Wear a properly fitted fine-dust particulate respirator when handling dry cement, silica sand, or sanding cured pieces, and use heat protection around hot tools.
• Room Ventilation & Fume Safety: Mix dry materials and apply sealers in a well-ventilated area with open windows, cross-ventilation, or active exhaust. Do not breathe dust or sealer fumes directly. Allow sealed pieces to dry and off-gas completely in an airy work area away from bedrooms, kitchens, children, and pets.
• Child & Pet Safety (Choking & Swallowing Prevention): Dry cement, pigment powder, loose felt pads, threaded inserts, hooks, tea lights, and small hardware can harm children and pets if swallowed. Keep raw materials and unfinished goods out of reach, clean spills immediately, and do not leave loose components on low tables or floors.
• Sharp Tool Storage & Clean Work Area: Store craft knives, sanding attachments, snips, drill bits, pliers, metal rods, and rotary-tool accessories in secure latching cases after use. Subsequently, clean cement dust with a HEPA vacuum or damp cloth and wet-clean the surrounding floor. Avoid dry sweeping because it can re-aerosolize silica-containing dust; collect dropped fasteners and sharp fragments before children or pets enter the area.
• Certified, Quality & Non-Toxic Supplies: Choose quality supplies and follow every manufacturer instruction for mix ratios, cure windows, operating temperatures, and disposal. Use ACMI AP-certified products where applicable, select lead-free and nickel-free hardware, and never reuse kitchen utensils or food containers for cement, pigments, sealers, or other craft chemicals. Decorative cement pieces should not be represented as food-safe or drinking-water-safe without documentation for every component.
For more detailed guidance on safe crafting practices, liability disclosures, and website usage, please review our Terms and Conditions.
“Which cement product would you batch first for your next market table? Drop a comment below with your color plan, product idea, or selling tip—I’d love to hear what you create!”