
Sticky paint and cracked foam ruin a cute collection fast. A DIY squishy collection made from cut upholstery foam, thin flexible paint layers, and soft felt details stays cleaner than poured or heavily coated projects when each product is tested first.
These are decorative squeeze crafts, never food, and they are not suitable for children under 3 because small foam and felt pieces can become choking hazards. If your family enjoyed our easy DIY squishy projects, this themed set gives everyone a simple way to make, sort, and display favorite characters.
Affiliate Disclosure: This post contains affiliate links. As an Amazon Associate, I earn from qualifying purchases. If you buy through these links, I may earn a commission at no additional cost to you.
Key Facts:
- Total time: About 45 minutes of active work per squishy, excluding multi-coat drying time and label-directed cure time
- Difficulty: Beginner-friendly with adult cutting support
- Makes: 10 themed decorative squishies
- Core technique: Cut foam, thin flexible paint layers, felt accents, and flexible adhesive
- Recommended participation: Ages 6+ with close adult supervision; these are decorative items and not tested toys
Essential Materials for a DIY Squishy Collection
This shared supply system keeps the whole DIY squishy collection consistent without messy chemical mixing. Flexible fabric paint and a compatible water-based sealer may move with squeezed foam more comfortably than rigid coatings, depending on the formula; first, test paint, sealer, and fine-tip paint markers on a foam off-cut, let each product dry and cure as directed, then squeeze the sample before using it on a full piece. An adult must complete every craft-knife cut on a protected mat.
| Supply | Spec / Size | Used For |
|---|---|---|
| Upholstery foam sheet | 1 in thick | Soft character bases |
| Water-based fabric paint | Multi-color set | Flexible color layers |
| Craft felt | Thin sheets, including self-adhesive felt tested on painted foam | Ears, petals, fins, leaves |
| Flexible fabric adhesive | Clear-drying | Felt attachment points and layered cube base |
| Detail craft knife | Replaceable blades | Adult-only foam shaping |
| Clear storage case | Snap-lid organizer | Dust-protected display |
🎨 Foam, Paint and Color Planning
- Slow-Recovery Upholstery Foam Sheet, 1 in Thick — Cuts into sturdy, lightweight squeeze forms without pouring liquids; layer two pieces with flexible adhesive for the 2 in color-block cube | [Check Price on Amazon]
- Water-Based Fabric Paint Set — Thin coats may flex better on foam than thick, rigid paint layers; test a foam off-cut before painting a finished piece | [See Price on Amazon]
- Self-Adhesive Craft Felt Sheets — Provides clean petals, ears, fins, and leaves; use flexible adhesive where the sheet adhesive has not been tested on painted foam | [Check Craft Felt Sheets on Amazon]
- Fine-Tip Permanent Paint Markers — Draws controlled smiles, seed dots, stars, and collection numbers; test marker ink on a foam off-cut and squeeze it after the label-directed dry and cure time | [View Paint Markers on Amazon]
- Clear Flexible Fabric Adhesive — Secures felt accents and layered foam while allowing the finished form to compress | [Find Flexible Fabric Adhesive on Amazon]
- Water-Based Clear Flexible Sealer, Optional — Use only for projects that call for sealer and only after a foam off-cut passes a squeeze test | [Check Flexible Sealer on Amazon]
🧰 Cutting, Painting and Storage Tools
Keep the craft knife and cutting mats at the adult workstation. Young makers can choose colors, position dry felt pieces, and paint faces; then an adult can handle blade work and return sharp tools to a latched case.
- Snap-Lid Clear Craft Storage Case — Separates finished squishies without dust or compression | [View Storage Case on Amazon]
- Detail Craft Knife with Replaceable Blades — Allows adults to cut smooth foam silhouettes with less tearing | [See Detail Craft Knife on Amazon]
- Self-Healing Cutting Mat, A4 Size — Protects the table and supports controlled adult-only cuts | [Check Cutting Mat on Amazon]
- Soft Bristle Detail Paintbrush Set — Spreads light, even paint coats over absorbent foam | [View Detail Paintbrush Set on Amazon]
- Foam Craft Starter Kit — Gives first-time makers a compact bundle for testing shapes and colors | [Find Foam Craft Starter Kit on Amazon]
🏆 Workshop Upgrades for Repeat Makers
- Daylight LED Magnifying Craft Lamp with Desk Clamp — Keeps small facial details visible during careful marker work | [See Craft Lamp on Amazon]
- Large Self-Healing Cutting Mat Set with Rotary Cutter — Gives an adult a broad protected surface for planning several shapes | [Check Cutting Mat Set on Amazon]
- Heavy-Duty Three-Tier Rolling Craft Cart — Keeps paint, dry pieces, and tools organized away from food-prep areas | [View Rolling Craft Cart on Amazon]
10 DIY Squishy Collection Themes and Simple Methods
Use the same calm workflow for every theme. First, an adult cuts the foam on a mat; next, dry-fit felt details before any adhesive touches the piece. Then paint thin coats and allow each coat to dry for about 2 hours only as an estimate, never as a substitute for the paint label’s own drying or cure time; use a touch test before continuing, attach felt only to dry paint, and use optional sealer only where a project specifically calls for it after the adhesive has cured for the exact label-directed time.
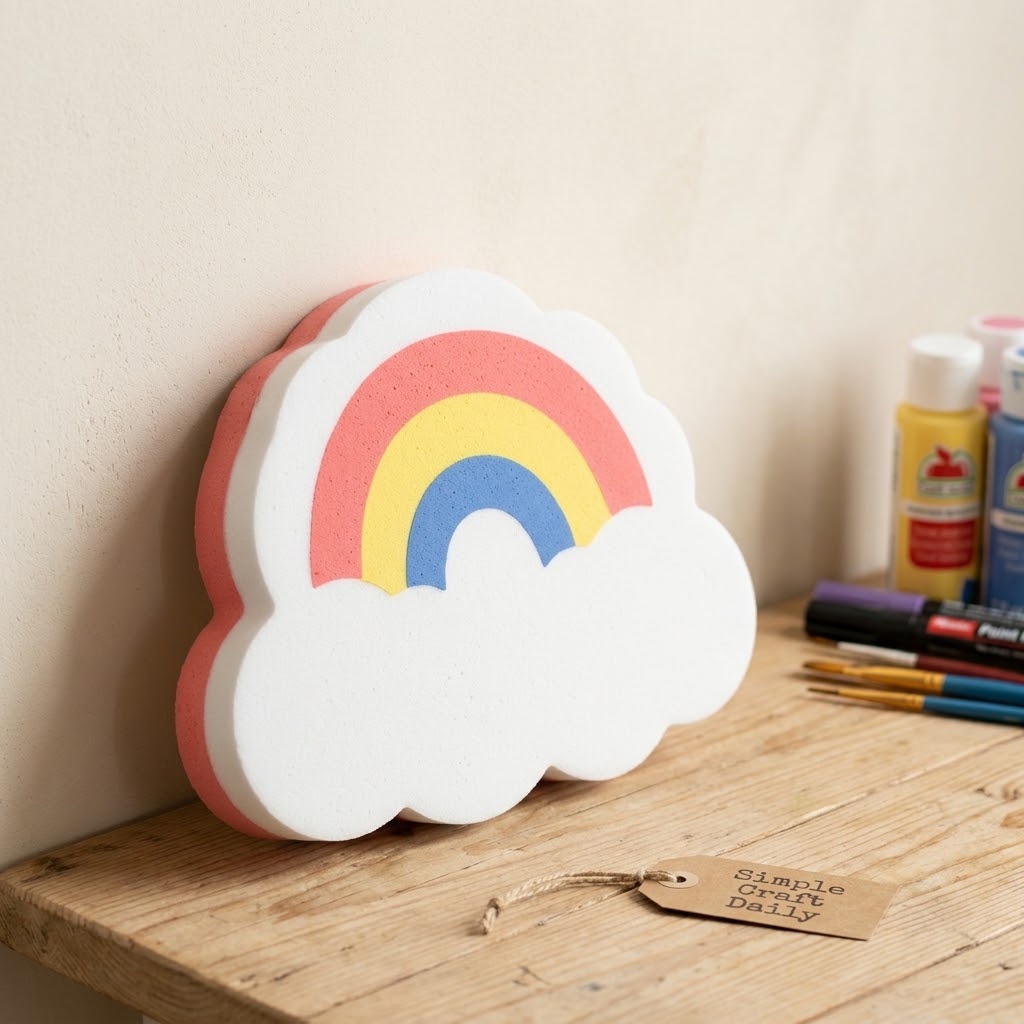
1. Rainbow Cloud DIY Squishy Collection Charm
Supplies Needed: Slow-Recovery Upholstery Foam Sheet, 1 in Thick; Water-Based Fabric Paint Set; Fine-Tip Permanent Paint Markers; Soft Bristle Detail Paintbrush Set; Detail Craft Knife with Replaceable Blades; Self-Healing Cutting Mat, A4 Size.
- First, have an adult cut a 4 in wide cloud from the foam sheet on the cutting mat.
- Next, brush on a thin white base coat with the detail paintbrush.
- Then paint pink, yellow, and blue rainbow arcs, drying each layer for about 2 hours as an estimate and following the paint label’s own dry and cure time.
- After the surface is dry, draw a small face with paint markers that have passed the foam off-cut squeeze test.
- Finally, allow the finished paint and marker details to dry and cure according to their labels before squeezing.
Round the cloud bumps instead of cutting narrow points, since thick rounded foam withstands repeated handling better. For this DIY squishy collection piece, keep the rainbow arcs on the lower third of the cloud so the smiling face has clear space above them. Use the brush tip with very little paint; otherwise, a heavy coat can fill foam pores and feel stiff.
2. Strawberry Slice DIY Squishy Collection Theme
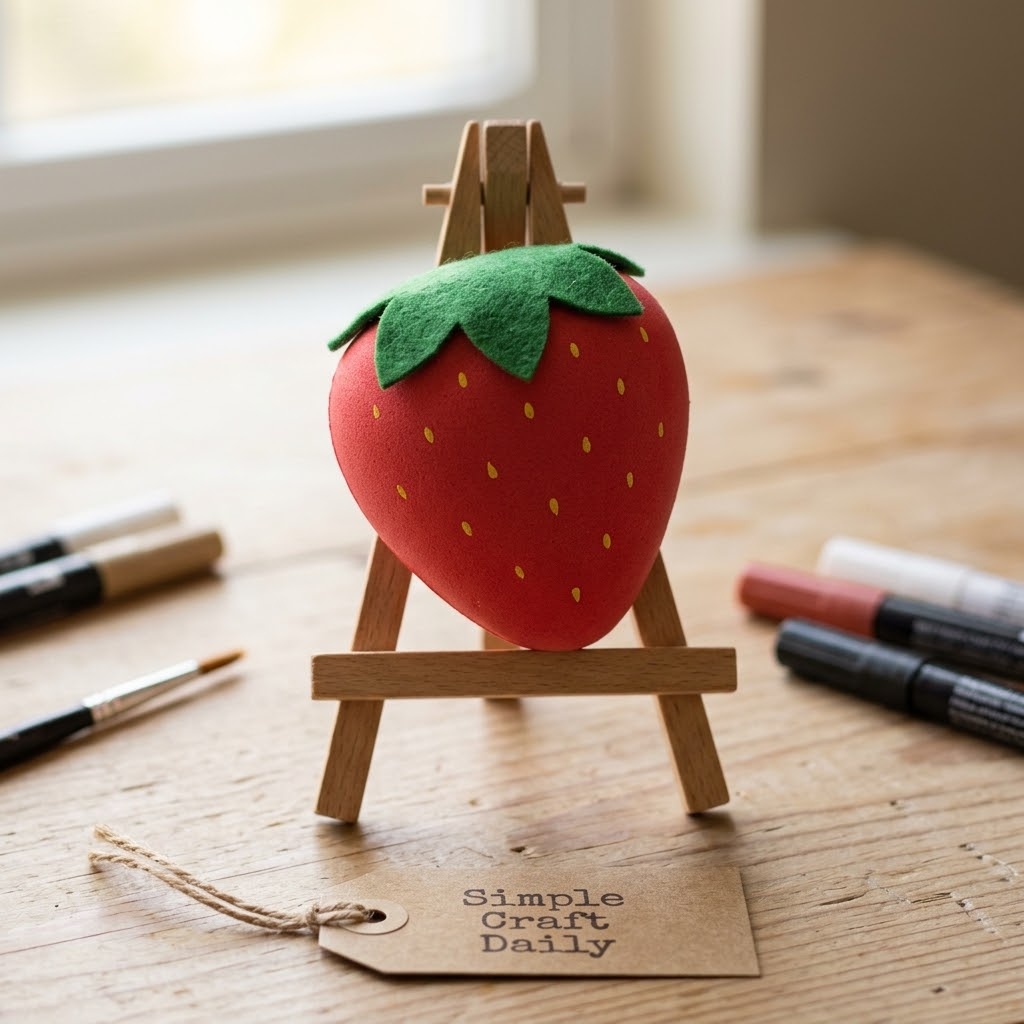
Supplies Needed: Slow-Recovery Upholstery Foam Sheet, 1 in Thick; Water-Based Fabric Paint Set; Self-Adhesive Craft Felt Sheets; Clear Flexible Fabric Adhesive; Fine-Tip Permanent Paint Markers; Detail Craft Knife with Replaceable Blades; Self-Healing Cutting Mat, A4 Size.
- First, have an adult cut a rounded triangular foam wedge about 4 in long on the cutting mat.
- Next, paint two thin red coats, drying each coat for about 2 hours as an estimate and following the paint label’s own dry and cure time.
- Then draw small yellow seed dots with paint markers that have passed the foam off-cut squeeze test after the red paint is dry.
- Cut a green felt leaf cap and dry-fit it at the wide end.
- Finally, apply flexible adhesive under the leaf cap and cure it flat for the label-directed time.
Keep the wedge thick at the top and softly rounded at the tip. Next, place the green felt cap so it overlaps the foam by about 1/4 in; this gives the strawberry a tidy finish without covering the painted seeds. Use only a thin adhesive line under the felt, because excess glue can soak through and leave a firm patch. Although the felt sheet has an adhesive backing, use flexible fabric adhesive unless that backing has already been tested on painted foam.
3. Sleepy Cat DIY Squishy Collection Figure
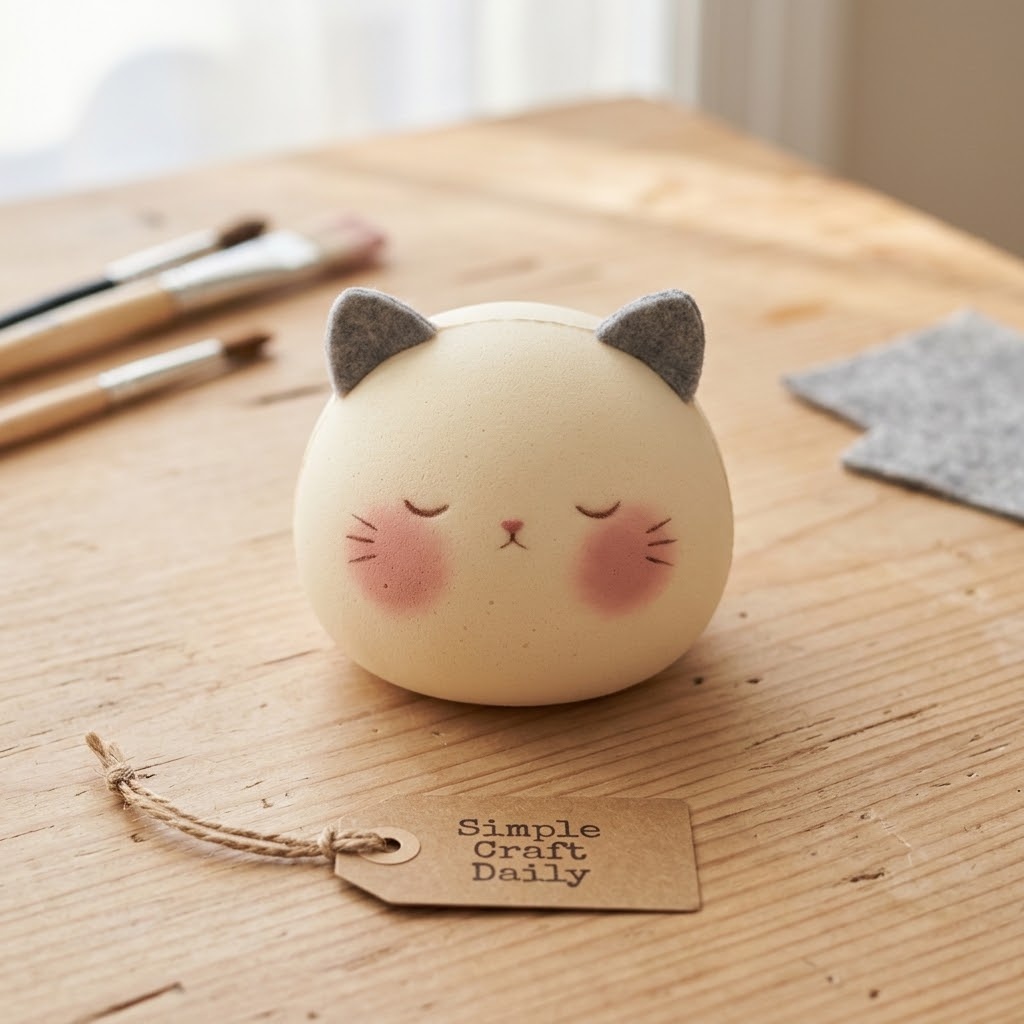
Supplies Needed: Slow-Recovery Upholstery Foam Sheet, 1 in Thick; Water-Based Fabric Paint Set; Self-Adhesive Craft Felt Sheets; Clear Flexible Fabric Adhesive; Fine-Tip Permanent Paint Markers; Soft Bristle Detail Paintbrush Set; Detail Craft Knife with Replaceable Blades; Self-Healing Cutting Mat, A4 Size.
- First, have an adult cut a 3 1/2 in round foam head on the cutting mat and cut two felt ear triangles.
- Next, brush on one thin base coat and dry the head flat for about 2 hours as an estimate, while following the paint label’s own dry and cure time.
- Then draw closed eyes, whiskers, and blush cheeks with paint markers that have passed the foam off-cut squeeze test.
- Dry-fit the felt ears at the top edge.
- Finally, secure each ear with flexible adhesive and leave the figure flat until the label cure time ends.
A pale gray, cream, or soft peach base makes the sleepy face easy to read. Position each ear so only about 1/2 in touches the foam, which leaves most of the ear soft and visible. This DIY squishy collection figure works especially well in a tray because the round head rests flat without rolling into other pieces. Apply flexible adhesive beneath the felt unless the self-adhesive backing has been patch-tested on the same painted foam.
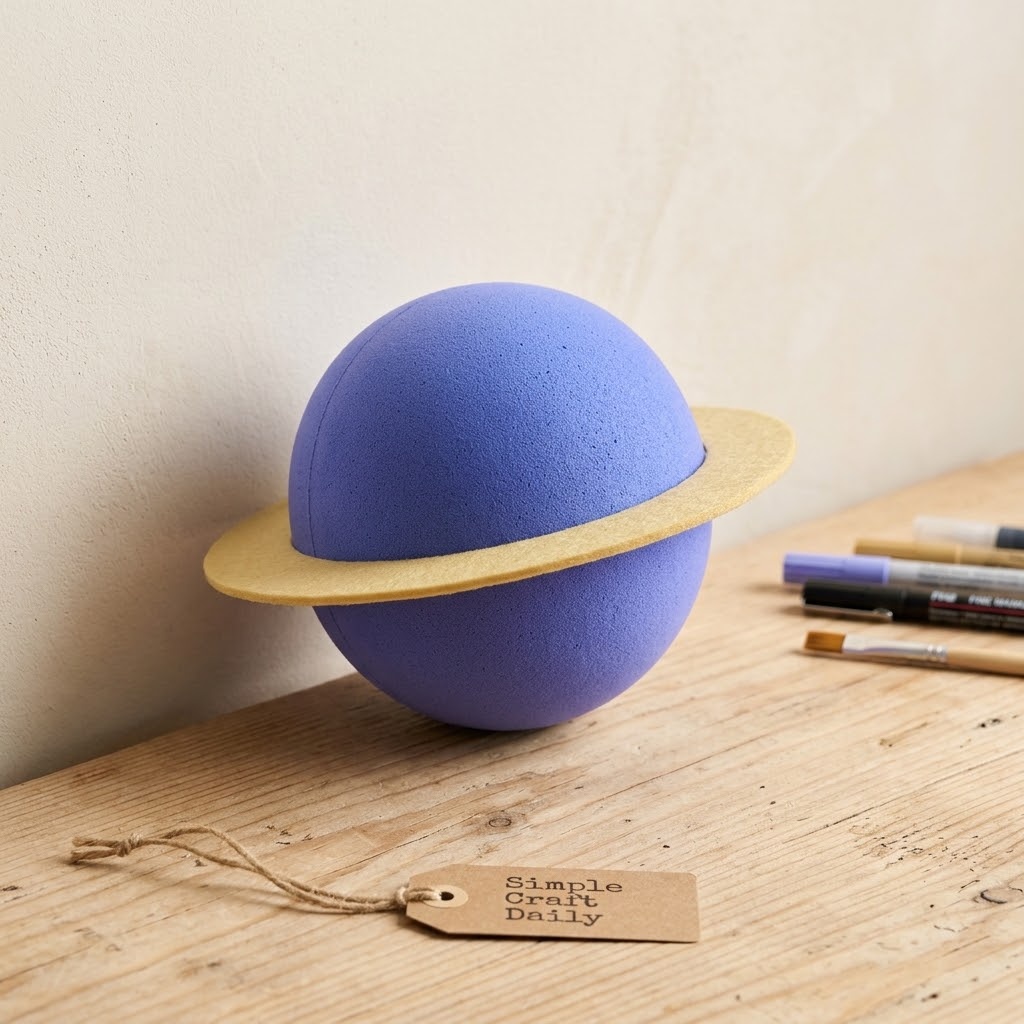
4. Planet Ring DIY Squishy Collection Display Piece
Supplies Needed: Slow-Recovery Upholstery Foam Sheet, 1 in Thick; Water-Based Fabric Paint Set; Self-Adhesive Craft Felt Sheets; Clear Flexible Fabric Adhesive; Fine-Tip Permanent Paint Markers; Detail Craft Knife with Replaceable Blades; Self-Healing Cutting Mat, A4 Size.
- First, have an adult cut a 3 1/2 in foam circle on the cutting mat.
- Next, paint thin blue-violet layers and dry each layer for about 2 hours as an estimate, while following the paint label’s own dry and cure time.
- Then draw small white star dots with paint markers that have passed the foam off-cut squeeze test after the base is dry.
- Cut a 12 in by 1/2 in felt strip, slit it once, and trim the overlapped ends to fit around the planet.
- Finally, use adhesive at two ring contact points and cure the piece flat for the label-directed time.
The felt ring should cross behind the foam at one side and pass across the front at the other, like a simple Saturn shape. A 12 in strip gives enough length to travel around the roughly 11 in circumference of a 3 1/2 in circle, with a small overlap for trimming. Keep adhesive at the two contact points only, rather than gluing the whole ring around the planet. Consequently, the ring remains visible while the center can still be gently squeezed. Use flexible adhesive for those contact points unless the self-adhesive felt backing has been tested on painted foam.
5. Daisy Face DIY Squishy Collection Idea
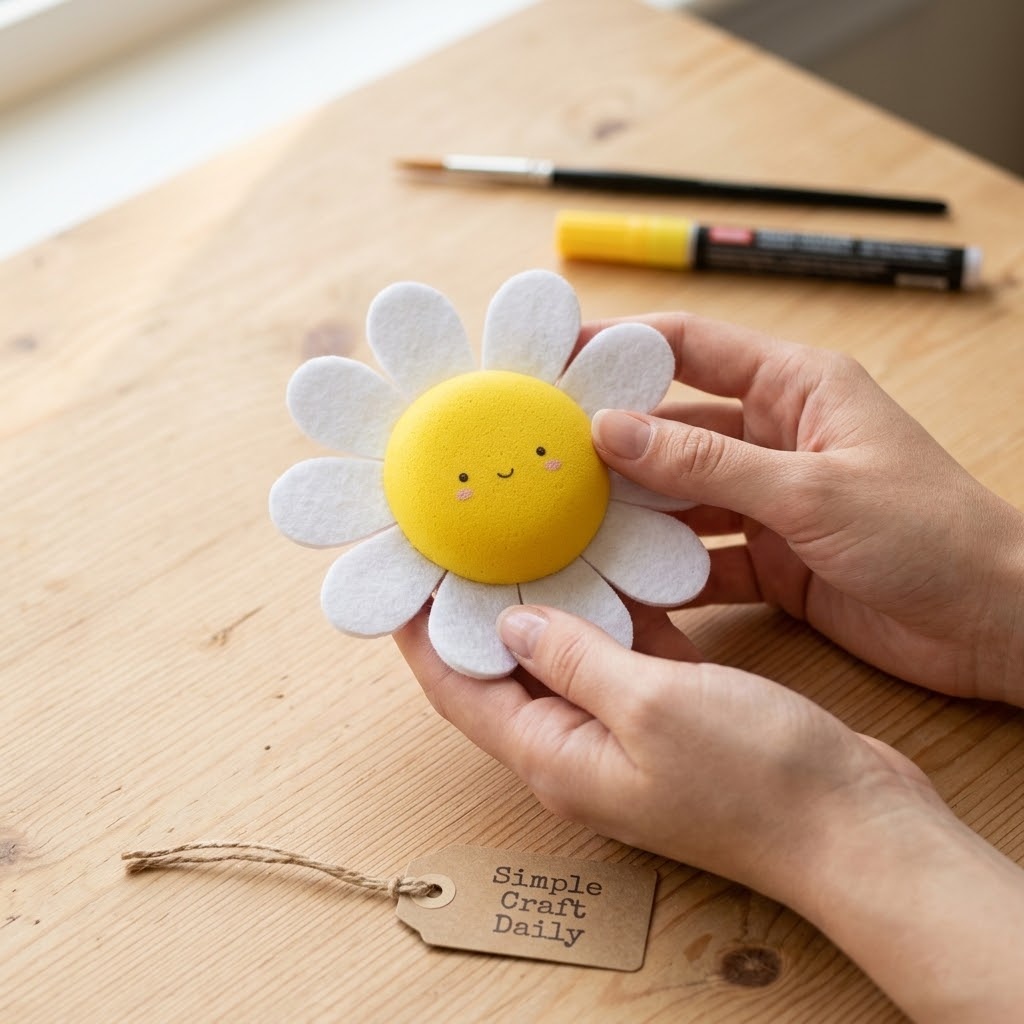
Supplies Needed: Slow-Recovery Upholstery Foam Sheet, 1 in Thick; Water-Based Fabric Paint Set; Self-Adhesive Craft Felt Sheets; Clear Flexible Fabric Adhesive; Fine-Tip Permanent Paint Markers; Soft Bristle Detail Paintbrush Set; Detail Craft Knife with Replaceable Blades; Self-Healing Cutting Mat, A4 Size.
- First, have an adult cut a 3 in circular foam center on the cutting mat.
- Next, paint the center yellow with a thin coat and dry it for about 2 hours as an estimate, while following the paint label’s own dry and cure time.
- Then cut eight matching felt petals and arrange them around the center without adhesive.
- Glue the petals one at a time after spacing them evenly.
- Finally, draw a small face with paint markers that have passed the foam off-cut squeeze test and cure the adhesive according to its label.
Arrange the petals on the table first, with their narrow ends pointing toward the foam center. Then glue only the inner 1/4 in of each petal so the outer edges stay soft. A tiny curved smile and two dot eyes keep this flower cheerful without crowding the yellow center. Flexible adhesive gives the most dependable hold on painted foam unless the self-adhesive felt backing has already passed a patch test.
6. Cosmic Star DIY Squishy Collection Theme
Supplies Needed: Slow-Recovery Upholstery Foam Sheet, 1 in Thick; Water-Based Fabric Paint Set; Fine-Tip Permanent Paint Markers; Soft Bristle Detail Paintbrush Set; Detail Craft Knife with Replaceable Blades; Self-Healing Cutting Mat, A4 Size.
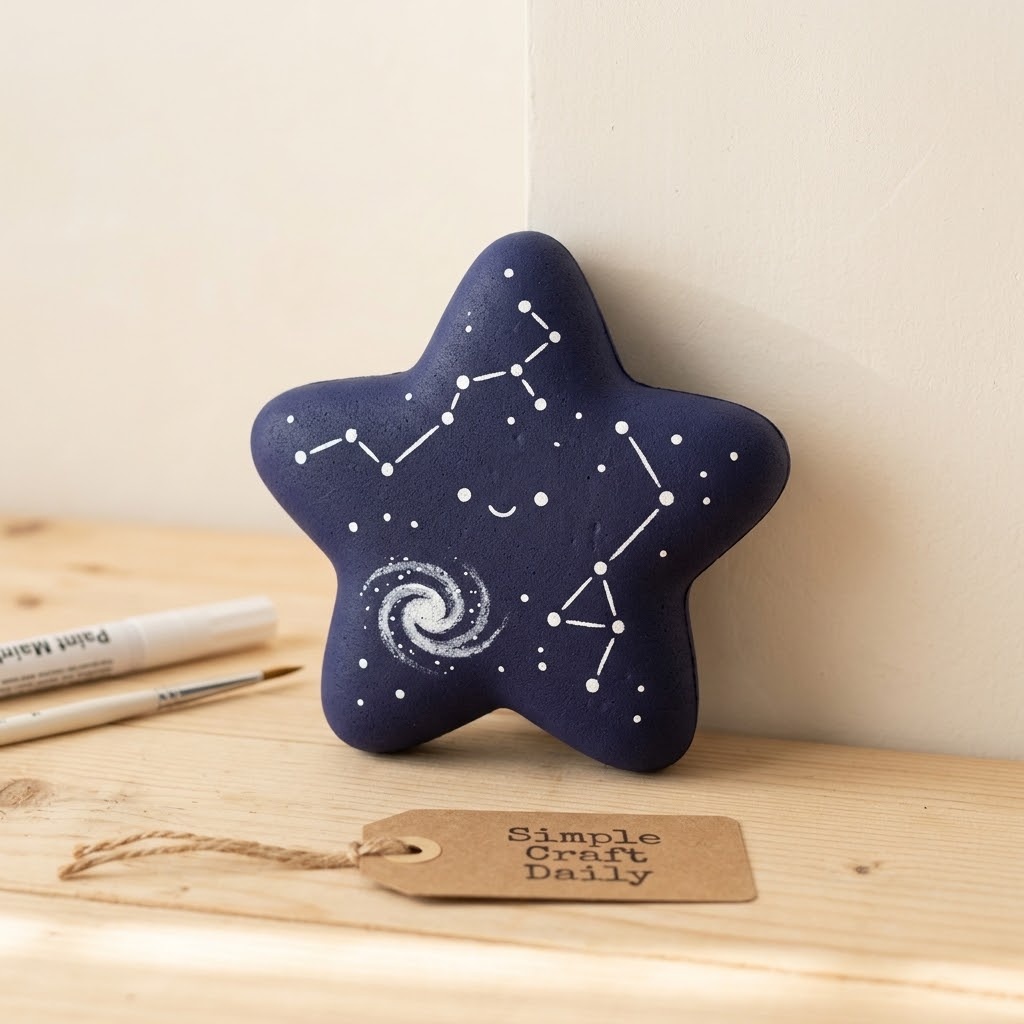
- First, have an adult cut a 4 in point-to-point star with rounded point tips on the cutting mat.
- Next, brush on one thin dark-blue coat and dry it for about 2 hours as an estimate, while following the paint label’s own dry and cure time.
- Then apply a second thin dark-blue coat and dry it for about 2 hours as an estimate, while following the paint label’s own dry and cure time.
- Afterward, add white constellation dots and fine lines with paint markers that have passed the foam off-cut squeeze test.
- Finally, draw a small smiling face after the marker details are dry and label-cured.
Rounded tips are stronger than sharp, narrow points and feel nicer in a supervised young maker’s hand. For a tiny constellation, use three to five dots and connect only two or three of them with short lines. This DIY squishy collection theme looks especially bright beside the violet planet, even with a limited paint palette.
7. Mini Taco DIY Squishy Collection Character
Supplies Needed: Slow-Recovery Upholstery Foam Sheet, 1 in Thick; Water-Based Fabric Paint Set; Self-Adhesive Craft Felt Sheets; Clear Flexible Fabric Adhesive; Fine-Tip Permanent Paint Markers; Detail Craft Knife with Replaceable Blades; Self-Healing Cutting Mat, A4 Size.
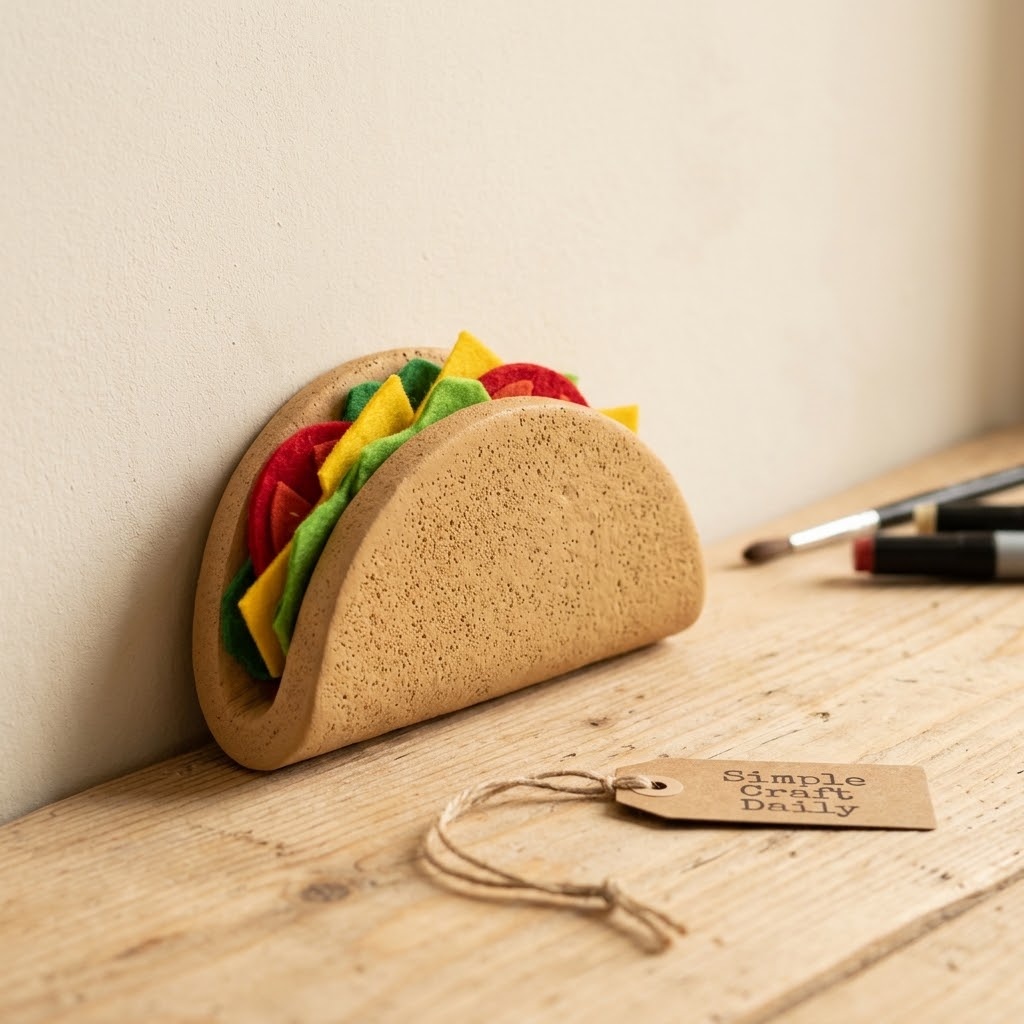
- First, have an adult cut a 5 in foam circle on the cutting mat, then cut it in half to form a semicircle shell.
- Next, cut a shallow score line on the inside of the straight edge, stopping about halfway through the 1 in foam thickness.
- Then paint the shell tan with a thin coat and dry it flat for about 2 hours as an estimate, while following the paint label’s own dry and cure time.
- Cut short red, green, and yellow felt filling strips, then glue the strips at the inside fold only.
- Finally, bend along the scored fold, add a small dab of flexible adhesive inside the fold to hold the taco curve, and cure it upright in its display position for the label-directed time before drawing the face with paint markers that have passed the foam off-cut squeeze test.
Do not fold the foam sharply; instead, gently bend along the shallow inside score so the shell settles into a soft taco curve. The small adhesive dab at the fold holds that curve while the taco rests upright in the display. Place each filling strip about 1/2 in apart so the colors show from the front. The loose felt edges add playful texture while the glued inner edge keeps the filling from dropping out; use flexible adhesive unless the felt backing has been tested on painted foam.
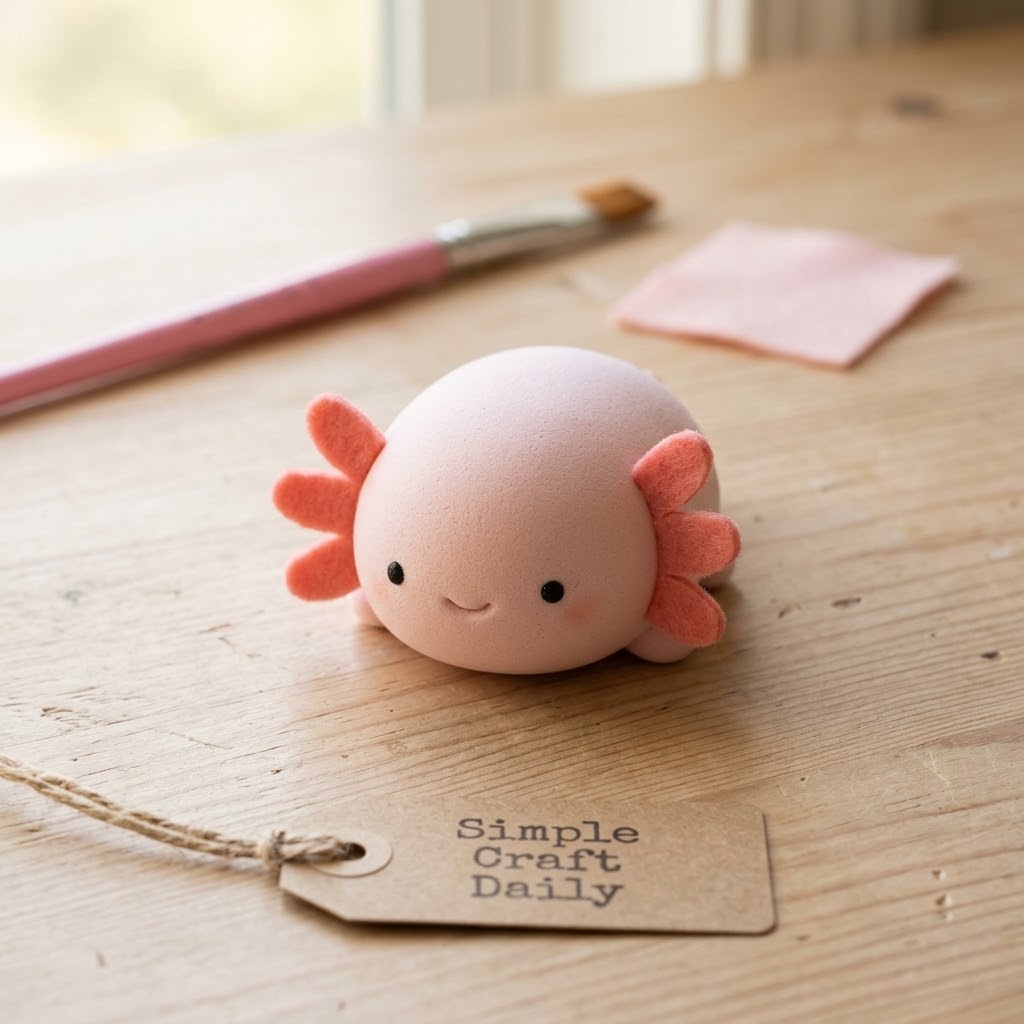
8. Little Axolotl DIY Squishy Collection Figure
Supplies Needed: Slow-Recovery Upholstery Foam Sheet, 1 in Thick; Water-Based Fabric Paint Set; Self-Adhesive Craft Felt Sheets; Clear Flexible Fabric Adhesive; Fine-Tip Permanent Paint Markers; Soft Bristle Detail Paintbrush Set; Detail Craft Knife with Replaceable Blades; Self-Healing Cutting Mat, A4 Size.
- First, have an adult cut one rounded body form about 4 in long on the cutting mat with no detached foam parts.
- Next, paint a pale pink base with a thin coat and dry it for about 2 hours as an estimate, while following the paint label’s own dry and cure time.
- Then draw the face and painted gill marks with paint markers that have passed the foam off-cut squeeze test.
- Cut six small felt frills.
- Finally, attach three frills on each side with flexible adhesive and cure the axolotl flat for the label-directed time.
Make the body wider at the head and slightly narrower near the tail, with all edges rounded. Next, space three felt frills along each side of the head so the silhouette stays balanced. The six frills should remain small, about 3/8 in wide, because oversized pieces can pull away when the foam is squeezed. Apply flexible adhesive beneath each frill unless the self-adhesive felt has been tested on the painted foam.
9. Color-Block Cube DIY Squishy Collection Display
Supplies Needed: Slow-Recovery Upholstery Foam Sheet, 1 in Thick; Water-Based Fabric Paint Set; Clear Flexible Fabric Adhesive; Fine-Tip Permanent Paint Markers; Soft Bristle Detail Paintbrush Set; Detail Craft Knife with Replaceable Blades; Self-Healing Cutting Mat, A4 Size.
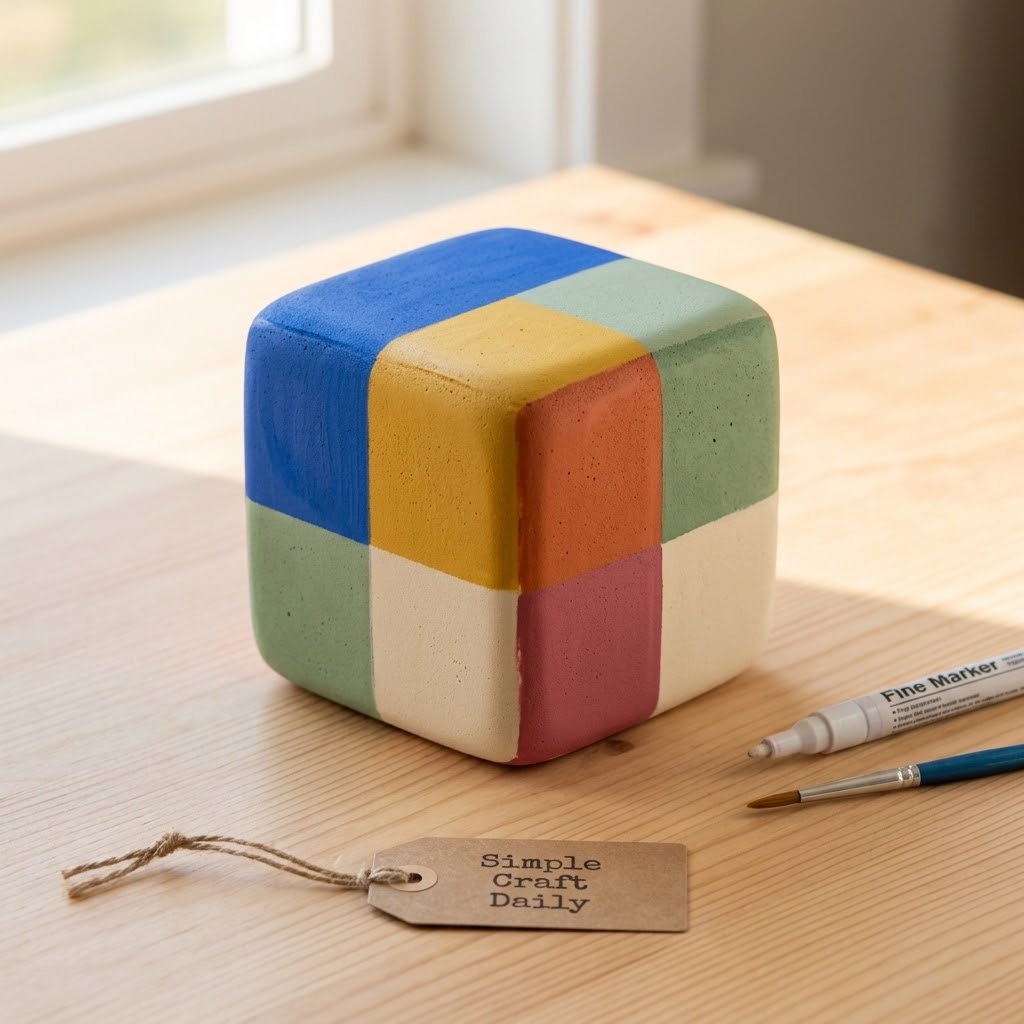
- First, have an adult cut two 2 in by 2 in foam squares from the 1 in foam sheet on the cutting mat.
- Next, apply a thin, even layer of flexible adhesive between the two cut faces, align the edges, and cure the layered 2 in block flat for the exact label-directed time.
- Then round the block edges lightly with the craft knife and paint one face with a thin color coat, drying it for about 2 hours as an estimate while following the paint label’s own dry and cure time.
- Continue by turning the cube only after that face is dry, then paint the remaining five faces with coordinated colors.
- Finally, write a small collection number on the fully dry bottom face with a paint marker that has passed the foam off-cut squeeze test.
Use a different color on each face, such as blue, pink, yellow, green, violet, and orange. Joining two 1 in foam layers creates the required 2 in cube thickness without stretching or compressing the material. Drying one face at a time prevents finger dents and paint transfer at the edges. This piece gives a DIY squishy collection a neat geometric break between animals, food shapes, and fantasy characters.
10. Tiny Whale DIY Squishy Collection Idea
Supplies Needed: Slow-Recovery Upholstery Foam Sheet, 1 in Thick; Water-Based Fabric Paint Set; Self-Adhesive Craft Felt Sheets; Clear Flexible Fabric Adhesive; Water-Based Clear Flexible Sealer; Fine-Tip Permanent Paint Markers; Soft Bristle Detail Paintbrush Set; Detail Craft Knife with Replaceable Blades; Self-Healing Cutting Mat, A4 Size.
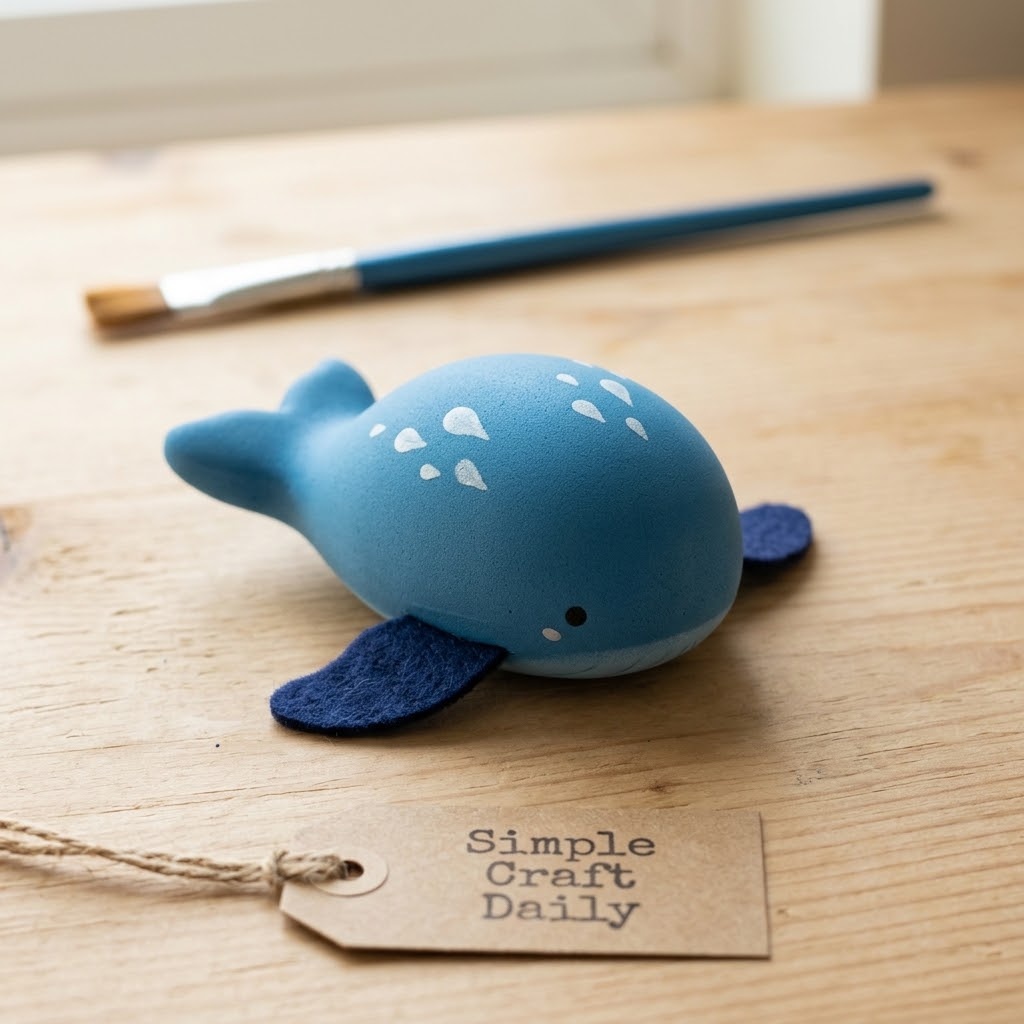
- First, have an adult cut a 4 in oval foam body with a shallow tail notch on the cutting mat.
- Next, brush on thin blue layers and dry each layer flat for about 2 hours as an estimate, while following the paint label’s own dry and cure time.
- Then cut two small felt fins and attach them after the paint is dry.
- Allow the adhesive to cure for the exact label-directed time.
- Finally, draw the face and water-drop marks with paint markers that have passed the foam off-cut squeeze test, then brush on one thin compatible sealer coat only after every detail is dry and a foam off-cut has passed a squeeze test.
A shallow tail notch gives the whale shape without creating thin foam extensions that tear easily. Place the fins low on each side and use a small adhesive dot at each contact point. Use flexible adhesive unless the self-adhesive felt backing has been tested on painted foam. Finally, use the optional sealer sparingly and let it cure for the manufacturer’s stated period before placing the whale into storage.
DIY Squishy Collection Display Ideas for a Finished Set
Store only fully dry, cured squishies in a snap-lid case, shallow tray, or separated color groups. Paint, glue, and optional sealer that still feel cool or tacky can transfer onto nearby pieces, so leave every squishy on a flat protected surface until its product label confirms the cure window has passed.
First, line wide compartments with felt and leave a small gap between shapes so foam can return to its normal form after a squeeze. Removable labels belong on the case lid or outside edge, never on the squeeze surface. Pair the project with our fun kids’ craft ideas, or organize finished pieces by color like a painted rock collecting hobby.
DIY Squishy Collection Care and Troubleshooting
- Peeling paint: First, remove only loose flakes with clean fingers, then repaint the spot with one thin compatible fabric-paint layer. Allow about 2 hours of drying only as an estimate, follow the paint label’s own drying and cure time, and use a touch test before deciding whether another coat is needed.
- Tacky surface: Leave the squishy uncovered in a ventilated area and follow the exact paint, adhesive, marker, or optional sealer cure window on its label. Do not cover tackiness with resin, solvents, or a heavy coating.
- Flattened foam: Remove the piece from crowded storage and leave it uncompressed for several hours. Recovery speed depends on the foam’s formulation and cell structure: the slow-recovery upholstery foam in the supplies list may gradually recover if it has not been permanently compressed, while standard upholstery foam can bounce back faster — or keep a dent if it stayed compressed too long.
- Loose felt accent: Lift only the loose edge, add a small amount of flexible adhesive beneath it, and cure the squishy flat for the label-directed time.
Thin compatible layers keep a DIY squishy collection softer and more dependable than thick paint or sealer. Avoid resin, expanding foam, food ingredients, and household solvents; these materials do not belong in this simple foam-and-felt method.
For family projects, review the U.S. Consumer Product Safety Commission guidance on small parts before leaving finished squishies where babies, toddlers, or pets can reach them.
DIY Squishy Collection FAQ
Can I make a DIY squishy collection without chemical mixing?
Yes. Cut upholstery foam, water-based flexible paint, felt, and compatible adhesive create soft decorative squeeze crafts without mixing homemade liquids or chemical pours. Still follow every coating and adhesive safety direction on its label, and keep all knife cutting under adult supervision.
Choose thin paint layers and modest felt accents so the foam can compress. In addition, this approach makes cleanup easier because there is no poured mixture to measure, cure, or dispose of.
How long should DIY squishy collection paint dry?
Thin water-based paint layers may need about 2 hours between coats as an estimate, followed by a touch test to confirm the surface no longer feels cool or tacky. The paint label’s own drying and cure instructions always control, and final adhesive, marker, and optional sealer cure times must follow their manufacturers’ labels.
Humidity, thick paint, and poor airflow can extend drying. Therefore, never seal over wet paint or glue; trapped moisture can cause sticking, dull patches, or peeling later.
How can I clean a foam squishy safely?
Clean a fully cured foam squishy with a dry microfiber cloth or a barely damp cloth, then let it air-dry completely. Do not soak the foam or scrub felt edges with soap, alcohol, or solvents.
Next, wipe dust from the storage case at the same time. A lidded organizer reduces how often the finished pieces need cleaning.
What are the best DIY squishy collection display ideas for kids?
A shallow lidded organizer with separated compartments is a practical display for decorative squishies made by children ages 6+ with close adult supervision. Keep the case out of direct sun, avoid stacking heavy items on top, and place labels on the case rather than on the squishies.
Store the case beyond the reach of children who mouth objects. Small felt pieces, foam scraps, and loose details can create choking or swallowing hazards, and these crafts are not tested toys or infant items.
Quick Reference: All Supplies at a Glance
For your convenience, here is a quick summary of the materials and tools featured in this post:
🎨 Foam, Paint and Color Planning
- Slow-Recovery Upholstery Foam Sheet, 1 in Thick | [Check Price on Amazon]
- Water-Based Fabric Paint Set | [See Price on Amazon]
- Self-Adhesive Craft Felt Sheets | [Check Craft Felt Sheets on Amazon]
- Fine-Tip Permanent Paint Markers | [View Paint Markers on Amazon]
- Clear Flexible Fabric Adhesive | [Find Flexible Fabric Adhesive on Amazon]
- Water-Based Clear Flexible Sealer, Optional | [Check Flexible Sealer on Amazon]
🧰 Cutting, Painting and Storage Tools
- Snap-Lid Clear Craft Storage Case | [View Storage Case on Amazon]
- Detail Craft Knife with Replaceable Blades | [See Detail Craft Knife on Amazon]
- Self-Healing Cutting Mat, A4 Size | [Check Cutting Mat on Amazon]
- Soft Bristle Detail Paintbrush Set | [View Detail Paintbrush Set on Amazon]
- Foam Craft Starter Kit | [Find Foam Craft Starter Kit on Amazon]
🏆 Workshop Upgrades for Repeat Makers
- Daylight LED Magnifying Craft Lamp with Desk Clamp | [See Craft Lamp on Amazon]
- Large Self-Healing Cutting Mat Set with Rotary Cutter | [Check Cutting Mat Set on Amazon]
- Heavy-Duty Three-Tier Rolling Craft Cart | [View Rolling Craft Cart on Amazon]
Important Crafting Safety Notes
Crafting is a rewarding creative activity, but a safe workspace protects you, your family, and your pets. Review these precautions before starting.
• Personal Protective Equipment (PPE) & Safe Handling: Adults should wear safety glasses when cutting upholstery foam with a craft knife. Craft knives are adult-only tools, so cut away from your body on a self-healing mat and keep your free hand clear of the blade path. Wear disposable gloves if a paint, adhesive, or sealer label directs skin protection, and wash hands after handling supplies.
• Room Ventilation & Fume Safety: Use water-based paint, flexible adhesive, paint markers, and optional sealer in a well-ventilated room with open windows, cross-ventilation, or active airflow. Never inhale product vapors directly, and allow painted or glued pieces to dry and cure in an airy area away from food-prep surfaces and everyday living spaces.
• Child & Pet Safety (Choking & Swallowing Prevention): Small felt pieces, foam scraps, marker caps, and loose decorative details can cause choking, swallowing, or intestinal-obstruction hazards. Keep raw materials out of reach of babies, toddlers, and pets. These decorative squishies are not food, teething toys, or tested infant toys, and children ages 6+ need close adult supervision while making or handling them.
• Sharp Tool Storage & Clean Work Area: Store craft knives and replacement blades in a secure latching case or high cabinet immediately after use. Subsequently, inspect and sweep the table and floor for dropped foam scraps, felt off-cuts, marker caps, and any blade fragments before children or pets return to the area.
• Certified, Quality & Non-Toxic Supplies: Choose ACMI AP-certified non-toxic water-based paints and adhesives where available, and follow every manufacturer instruction for dry time, cure time, temperature, ventilation, and disposal. Test paint, fine-tip paint markers, and optional sealer on a foam off-cut before coating a finished squishy, then squeeze the fully dry and label-cured sample to check flexibility. Never reuse kitchen utensils, cookware, or food containers for craft supplies.
For detailed guidance on safe crafting practices, liability disclosures, and website usage, please review our Terms and Conditions.
“Which squishy theme will you make first? Share your favorite color combination or display idea in the comments below—I’d love to see what your collection becomes!”